How to Create a Drunken Tic Tac Toe (Cricut)
by ICreateCrafts in Design > Art
3219 Views, 2 Favorites, 0 Comments
How to Create a Drunken Tic Tac Toe (Cricut)
![How To Create A Drunken Tic Tac Toe Board [With a Cricut] [Dollar Tree]](/proxy/?url=https://content.instructables.com/FRE/YVVQ/KFL46WI5/FREYVVQKFL46WI5.jpg&filename=How To Create A Drunken Tic Tac Toe Board [With a Cricut] [Dollar Tree])
.png)
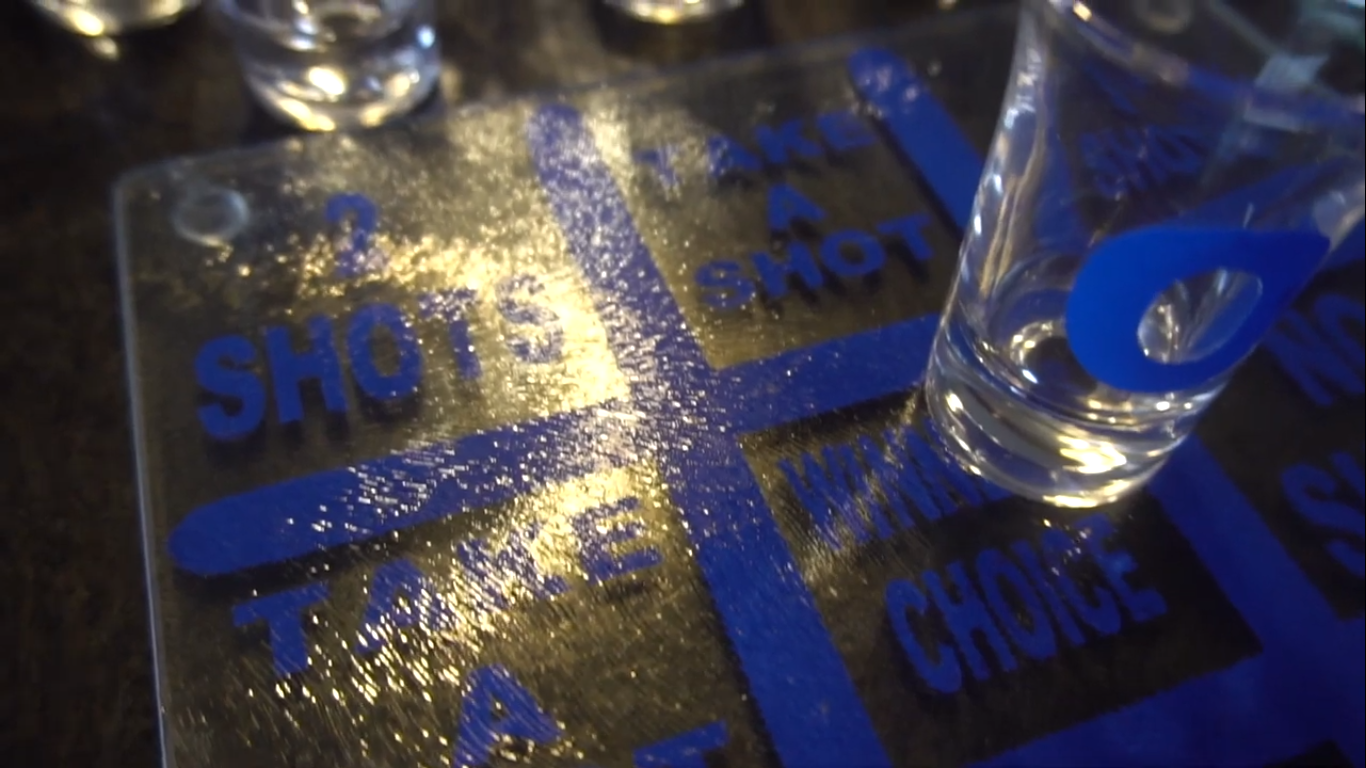
I had a ton of fun creating these drunken tic tac toe boards. They are so simple and easy to make and only cost a few dollars. You can watch the video here.
Supplies
Some of the supplies I used you can purchase on Amazon:
*1.2 Ounce Heavy Base Shot Glass Set,QAPPDA Whisky Shot Glasses
*Oracal 631 Roll of Matte White Vinyl for Cricut
*Light Pad Drawing A4 Tracing Light Table
*Con-Tact Brand Shelf Liner and Privacy Film, Clear Cover Self-Adhesive Semi-Transparent Liner
*Cricut Standard Grip Mat, 12"x12", 2 Mats
*Cutting Board from Dollar Tree
Get Your Design Ready
.png)
.png)
There are two ways of doing this:
1. Make the board yourself.
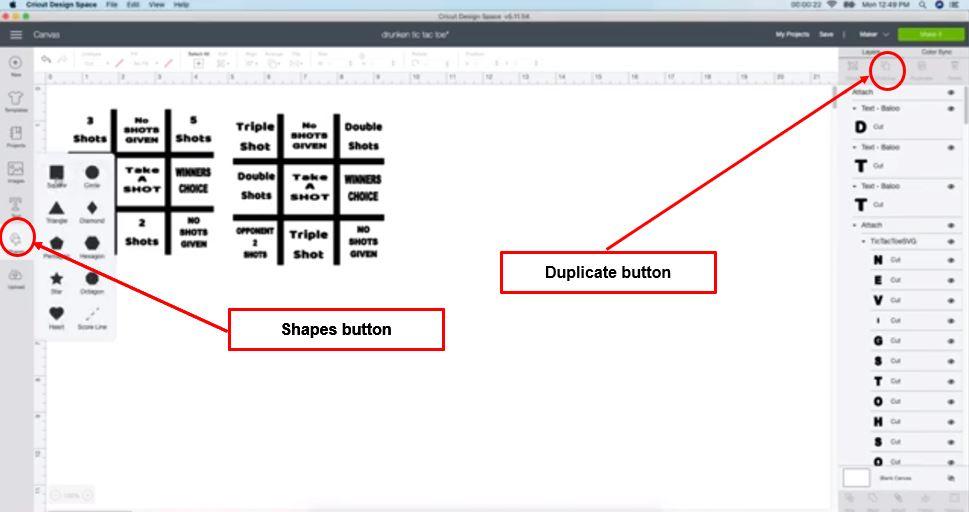
Click on the 'Shapes' button on the left in Design Space. Then click on 'Square'. Make the square smaller to represent a line. Select the line and click on 'Duplicate' 3 times, to create 4 of these lines. Click on one line. A circle will appear at the top of the line. Click on it and rotate the line to arrange it as per your desired size of the board.
2. Get it online.
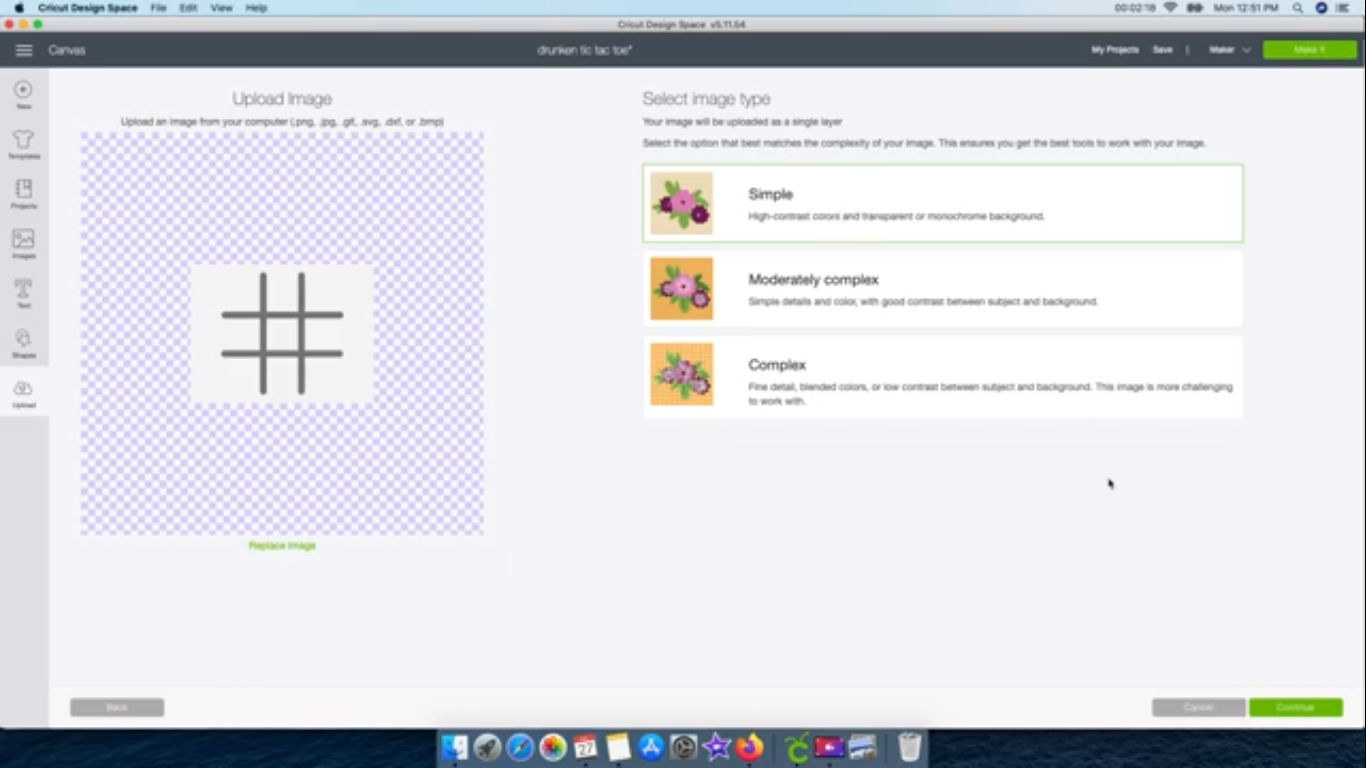
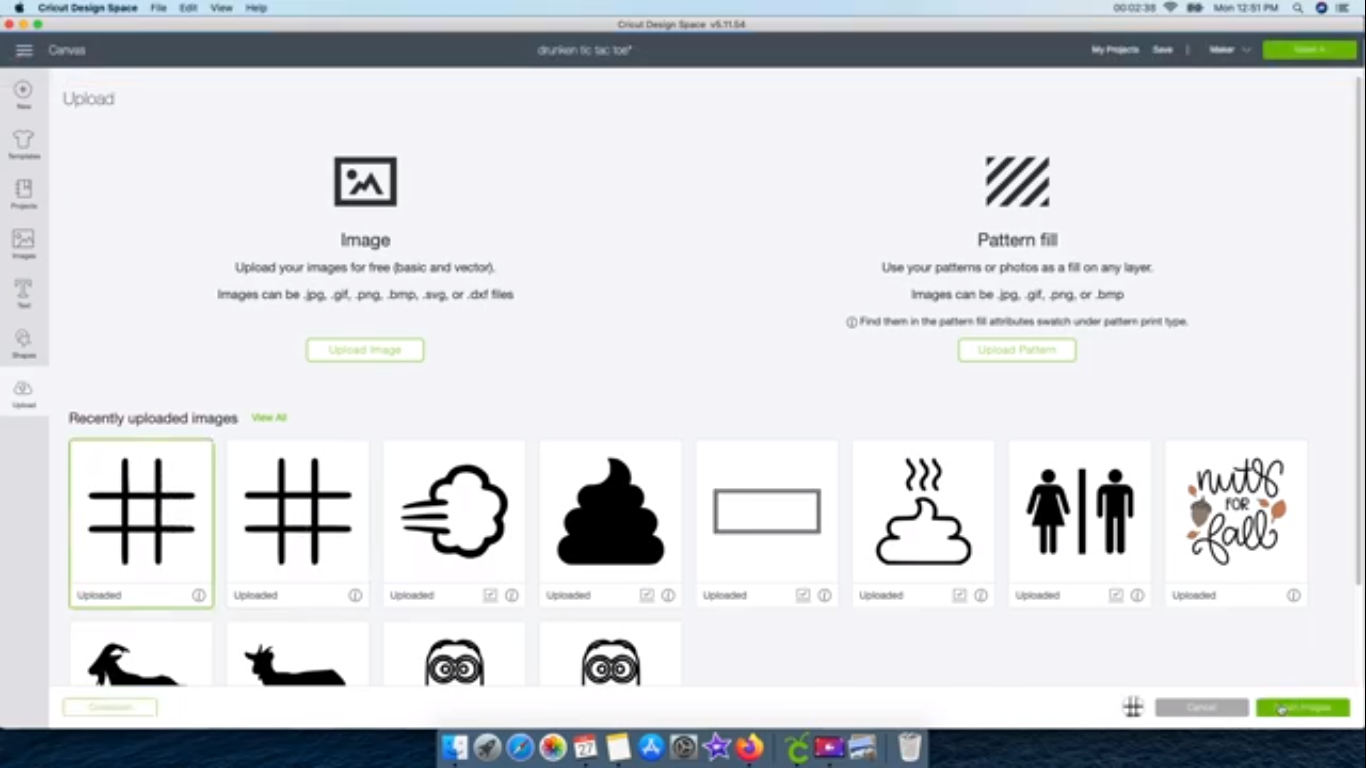
Type 'Tic tac toe svg' in your web browser. Select an image that has no watermark or any designs on it and save it. Go back to Design Space, select 'Upload image' and select this image. Now click on 'Simple'. Click on the box again so that the little boxes go in the background. Click 'Continue' and then 'Save' image. Next select the image again on the screen and click 'Import image'.
Start Adding Text to the Board
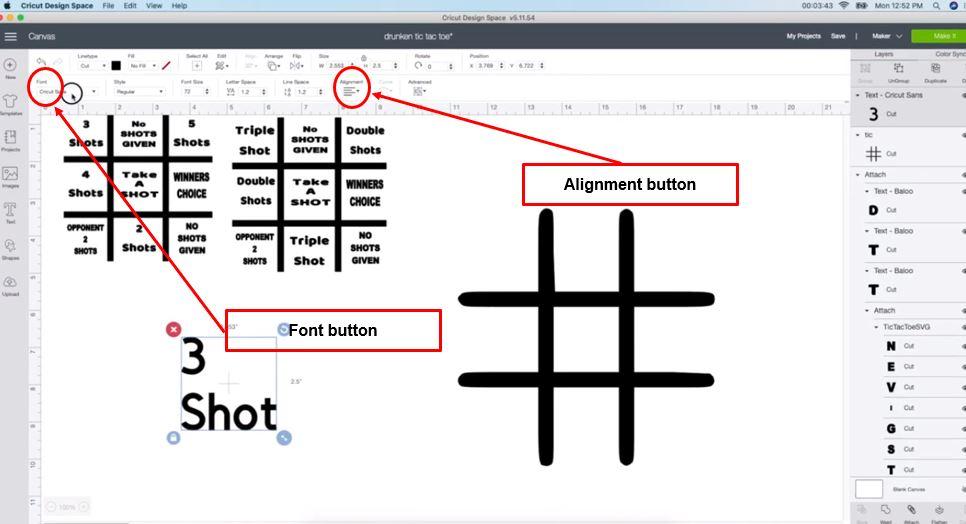
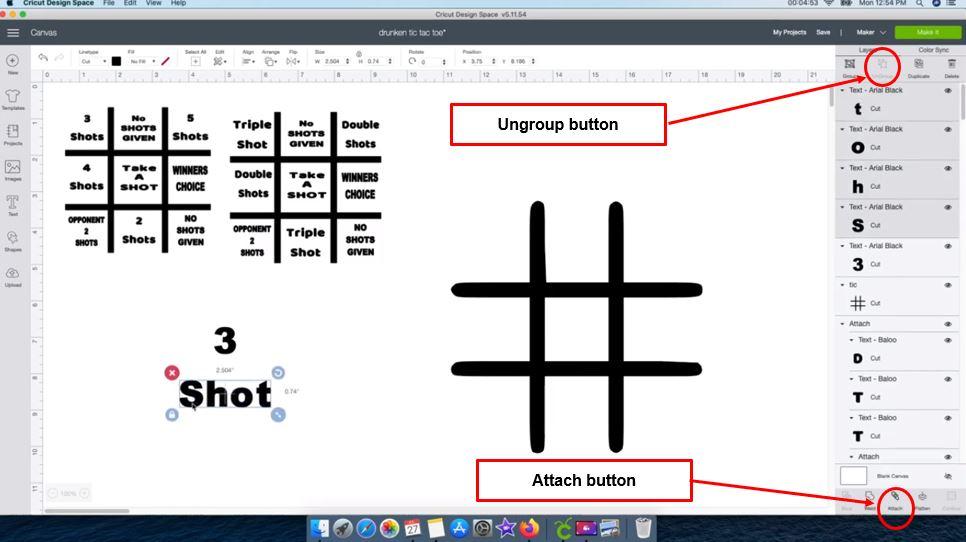
Select the box and increase the size by dragging the ends. (This is for clarity more than anything else.)
To enter text, click on the 'Text' box in the left column. Type '3 Shots' in the box and click on it.
To change font, go to 'Font' and then click on 'Systems'. Select a font you like. I like the Arial Black font.
To center align the text, select 'Alignment' from the top and click on 'Center'.
To decrease line spacing,(between '3' and 'Shot'), go to 'Line Spacing' on top and click the down button. Another way to decrease the spacing is to select '3 Shot' and then click the 'Ungroup' button on the right hand side corner. This will separate all the pieces for you to move them around. However, you don't want to mess up the way 'Shot' is written, so select 'Shot' and then click 'Attach'. Press the up arrow a few times and its going to bring 'Shot' closer to '3'. Now select both the words again, go to 'Attach' and make the size a little bit smaller to fit the box.
Add Text to the Other Boxes
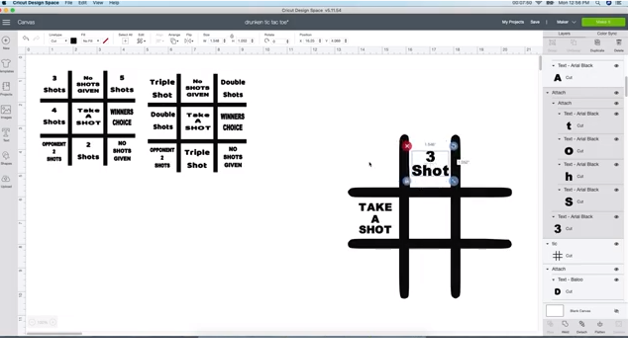
The steps remain the same as in the first case:
To enter text, 'Click' on the text box in left column. Type 'Take a Shot' in the box and click on it. Since you have selected Arial earlier, the font remains the same. Now, select 'Alignment' from the top and click on 'Center'. Then go to 'Line Spacing' and click the down button. Click the 'Ungroup' button on the right hand side corner. Select 'Take' and then click 'Attach'. Press the down arrow a few times and its going to bring it up closer to 'A'. Then select 'Shot' and press the up arrow a few times and its going to bring it up closer to 'A'. Now select all the words again, click on 'Alignment' and then 'Center'. Select all the words again, go to 'Attach'. Adjust the size of the text to fit the box.
Adjust the Size of the Boards
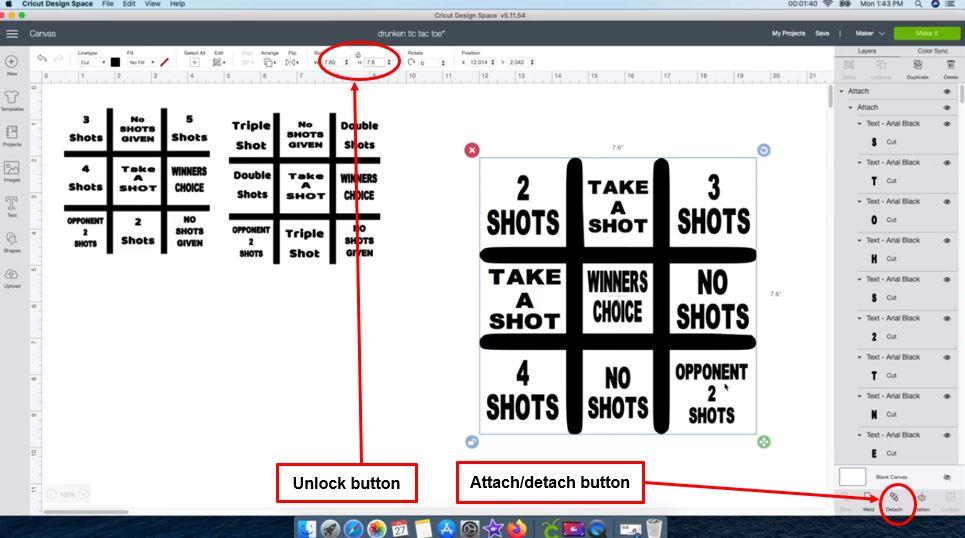
(I am doing 3 boards at a time. I plan to have boards of different colors on sale. You can do only one, if you want to.) Once all your three boards are ready, select one board image and click 'Attach'. The cutting boards that I bought from Dollar Tree will need a size of 7.60 x 7.60. Go to the 'Unlock' button and then put in the size. Similarly change the size of the other two board images. Make sure your images don’t overlap over each other. Just drag them aside.
Make 6 'O's and 6 'X's Per Board
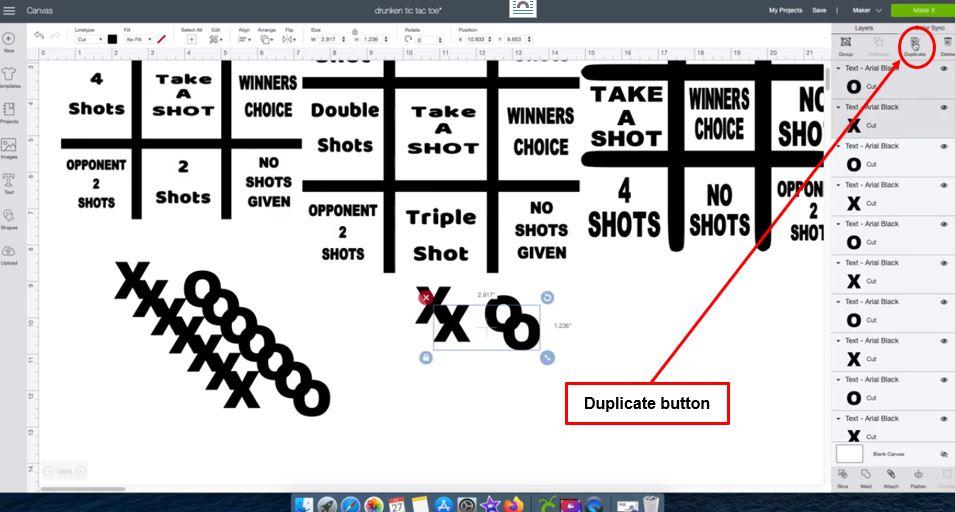
Click on 'Text' box, type 'X' and change the size to 1x1. Click on the 'Text' again, type 'O' and change the size to 1 x 1. Select both 'X' and 'O' and click on the 'Duplicate' button 5 times. Select the 'O' in the last line and press CTRL and then select 'X'. Click 'Duplicate' and move the letters next to the 2nd board. Duplicate it 5 more times. Similarly duplicate it for the 3rd board.
Customize the Color
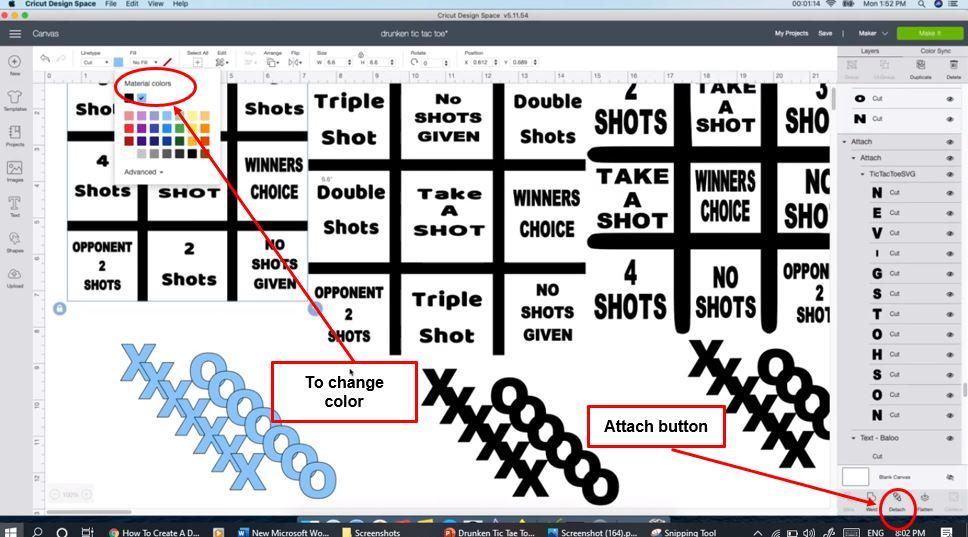
Select 'X' and 'O' below the first board, go to 'Color' and change the color to whatever you please. I like a light blue. Similarly, select the first board and change the color. Do the same for the other boards too.
Mirror, Cut and Weed Out the Designs
.png)
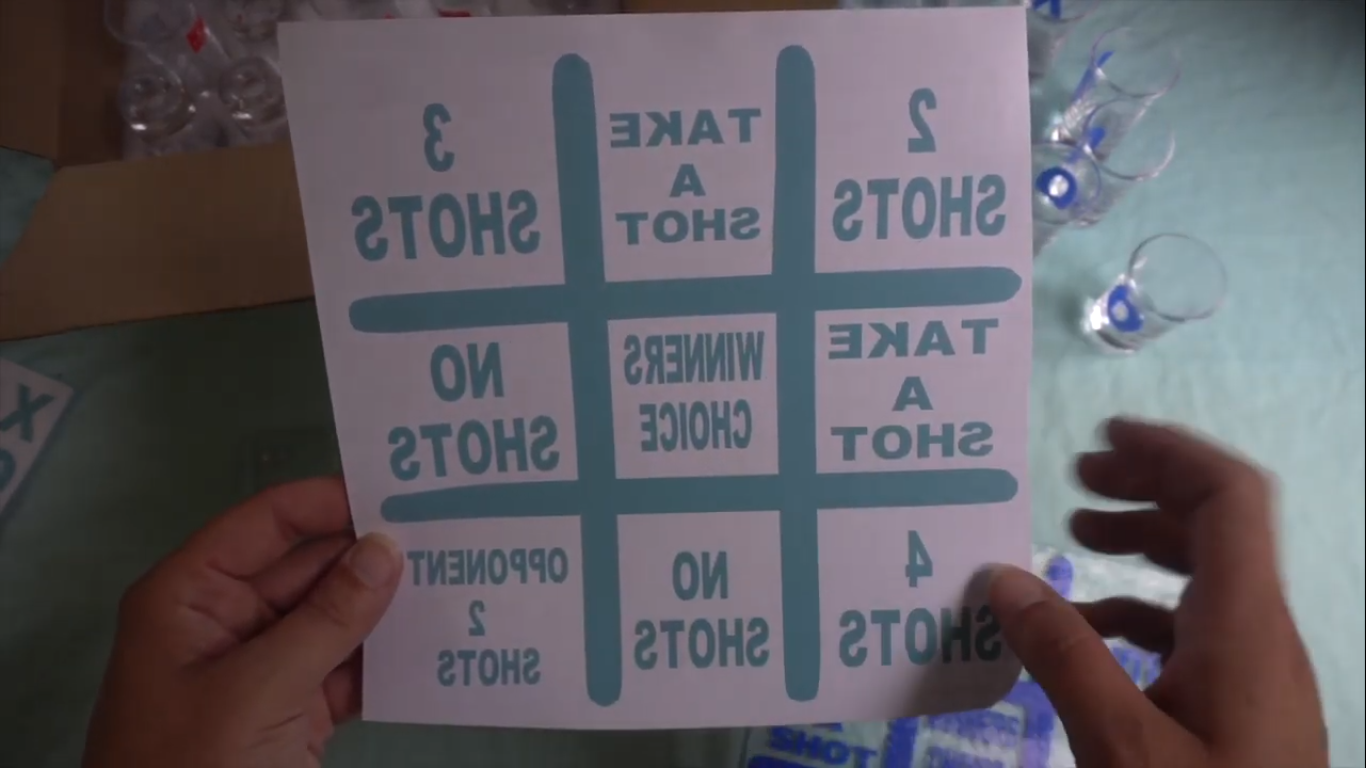
Before you cut the designs, make sure you 'Mirror' them so that you can later stick the vinyl onto the underside of the cutting board. It will remain safe on that side and will not be scratched by glasses put on it.
Get the Design Onto the Cutting Board
.png)
.png)
.png)
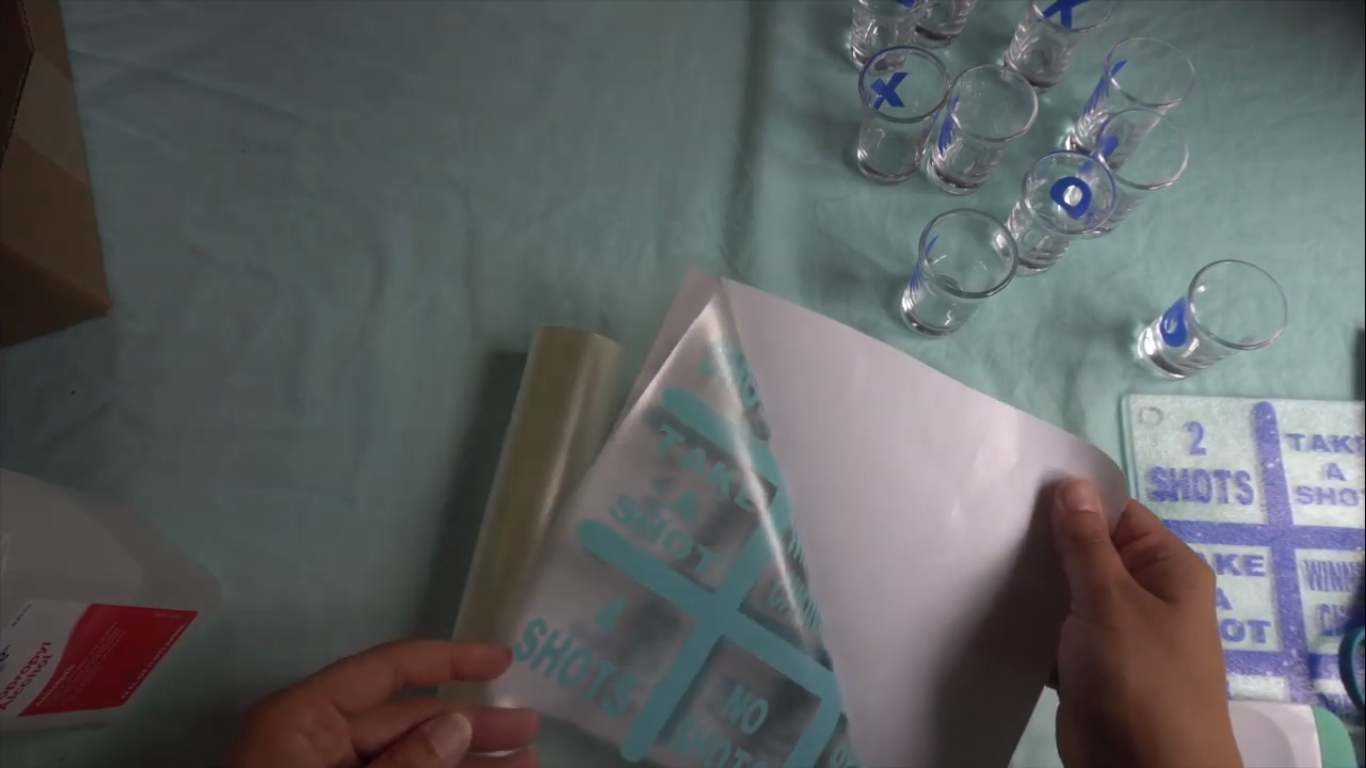
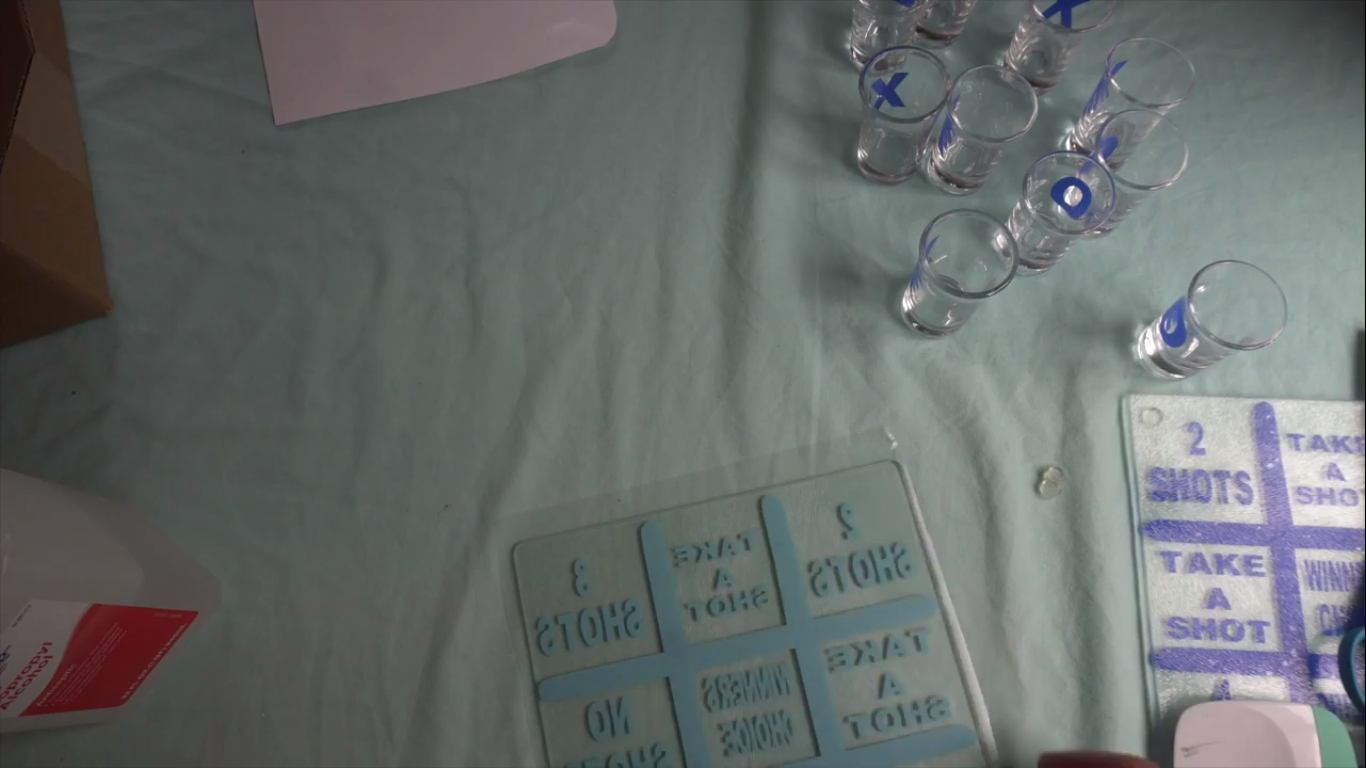
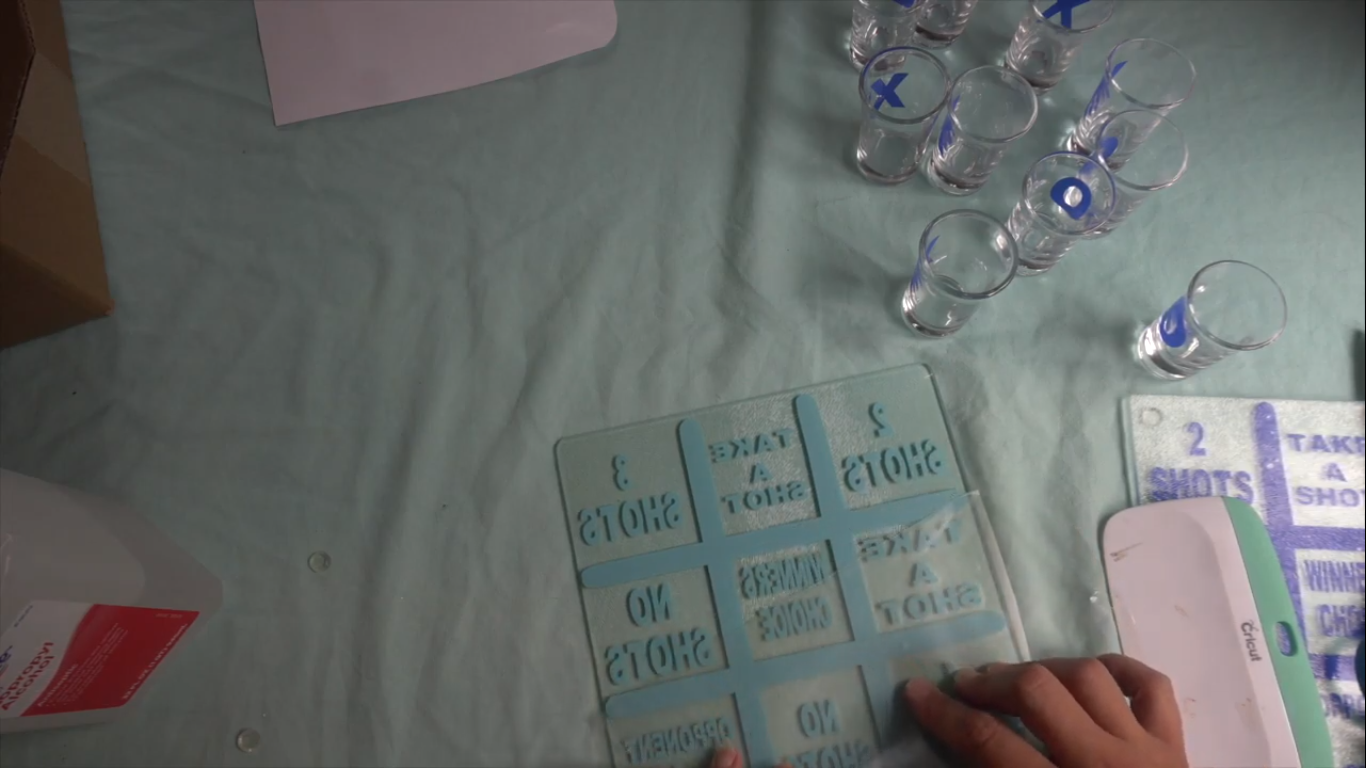
Take the transfer tape and lay it out on your printout. Cut the tape to the size of the print. Take a scraper and scrape it a little bit. Take a little alcohol on a paper towel and clean the cutting board. Let it dry. Similarly, clean the shot glasses and let them dry. Peel off the transfer tape and put the design on the board. Make sure it is in the center and using a scraper, put pressure on it. Next, peel off the tape slowly.
Make Your Shot Glasses
.png)
.png)
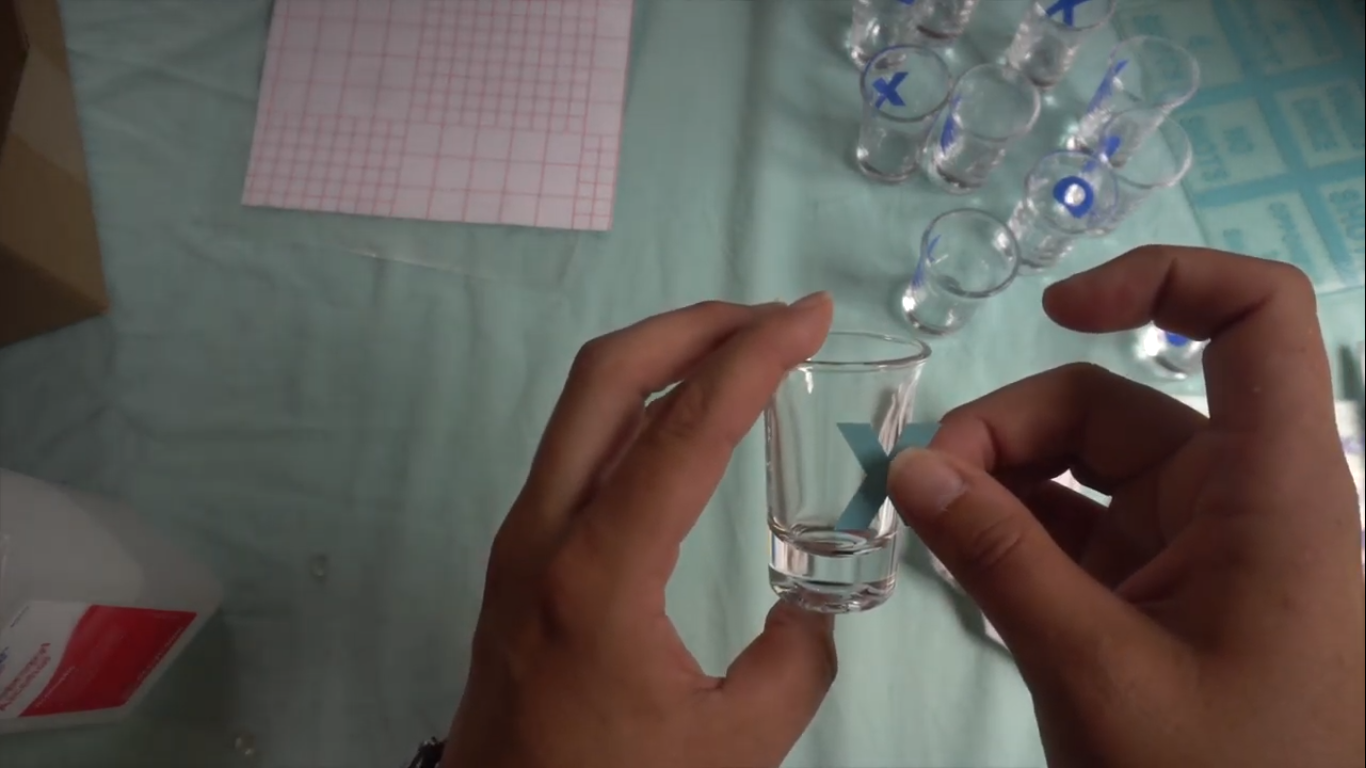
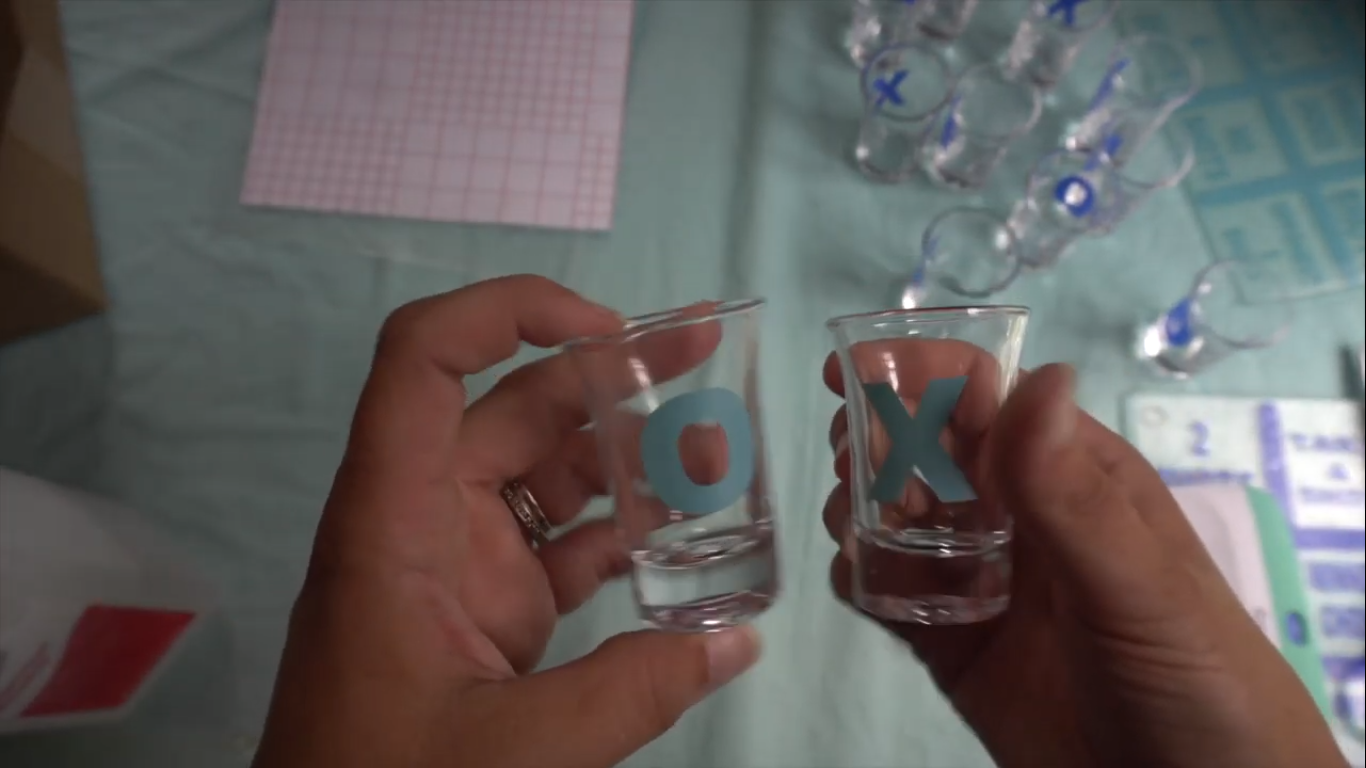
Peel off the 'X' from the print out and stick it on the glass as best as you can, right in the middle. Similarly, peel off the 'O' and stick it on the glass as best as you can, in the middle. Follow this process on all the glasses. You really don't need to use transfer tape here.
The Final Look
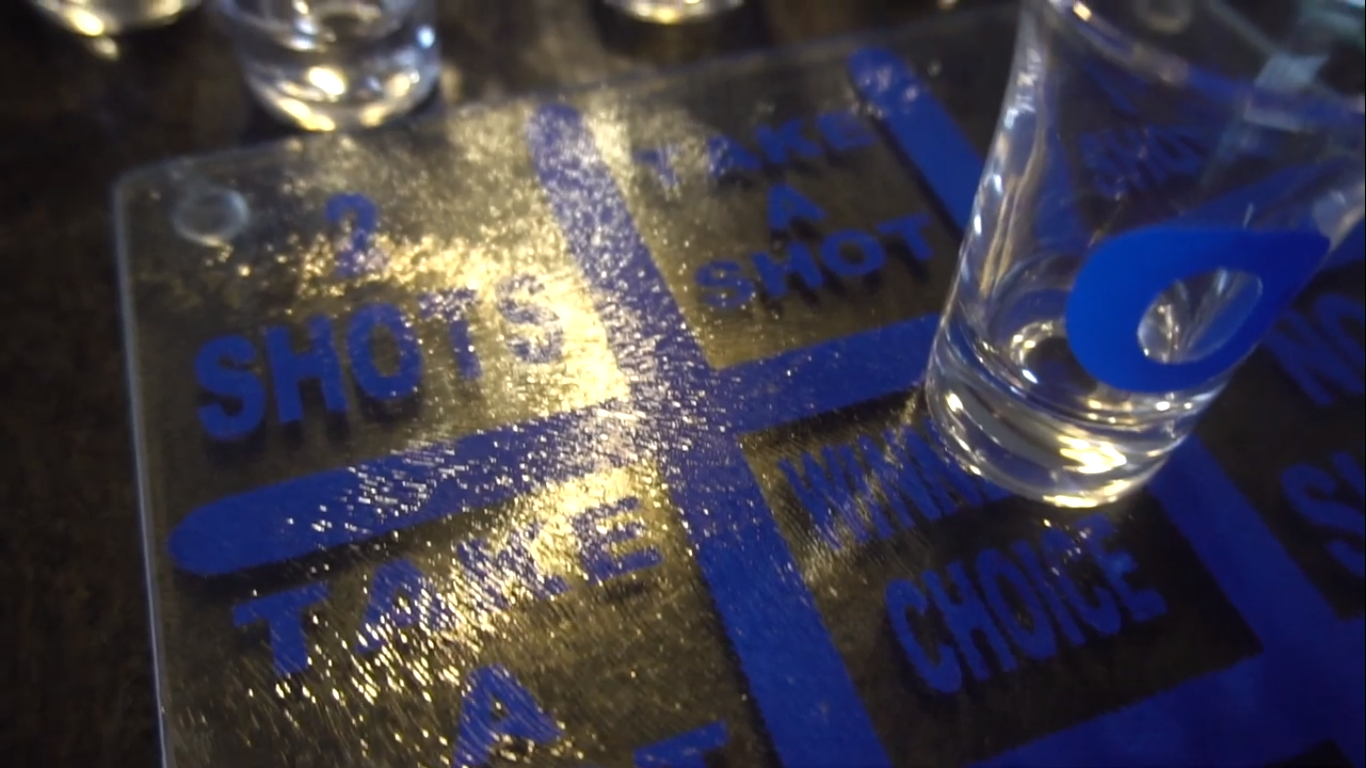.png)
Here's how they turned out.
And yes, the first one that I did, (before this tutorial), sold for a cool $25!
Try your hand at it and let me know how it went.
Have fun crafting!