How to Create Your Own 3D Printed Handle (Simple and Easy!)
by uncu138338 in Design > 3D Design
98 Views, 2 Favorites, 0 Comments
How to Create Your Own 3D Printed Handle (Simple and Easy!)
The following is a step by step guide as to how you can 3D print your own handle which you can glew to whatever you want. This is just a simple tool I have created and would like to demonstrate to you all.
Supplies
In terms of supplies, you would need nothing except a functioning 3D printer and plastic filament for the printer. You should also have any form of mobile device that can use a 3d printing software.
For this tutorial it is recommended you use a laptop as well as the softwares; Flashprint 5 and Shapr3D.
Log in to Shapr3D and Open a New Project
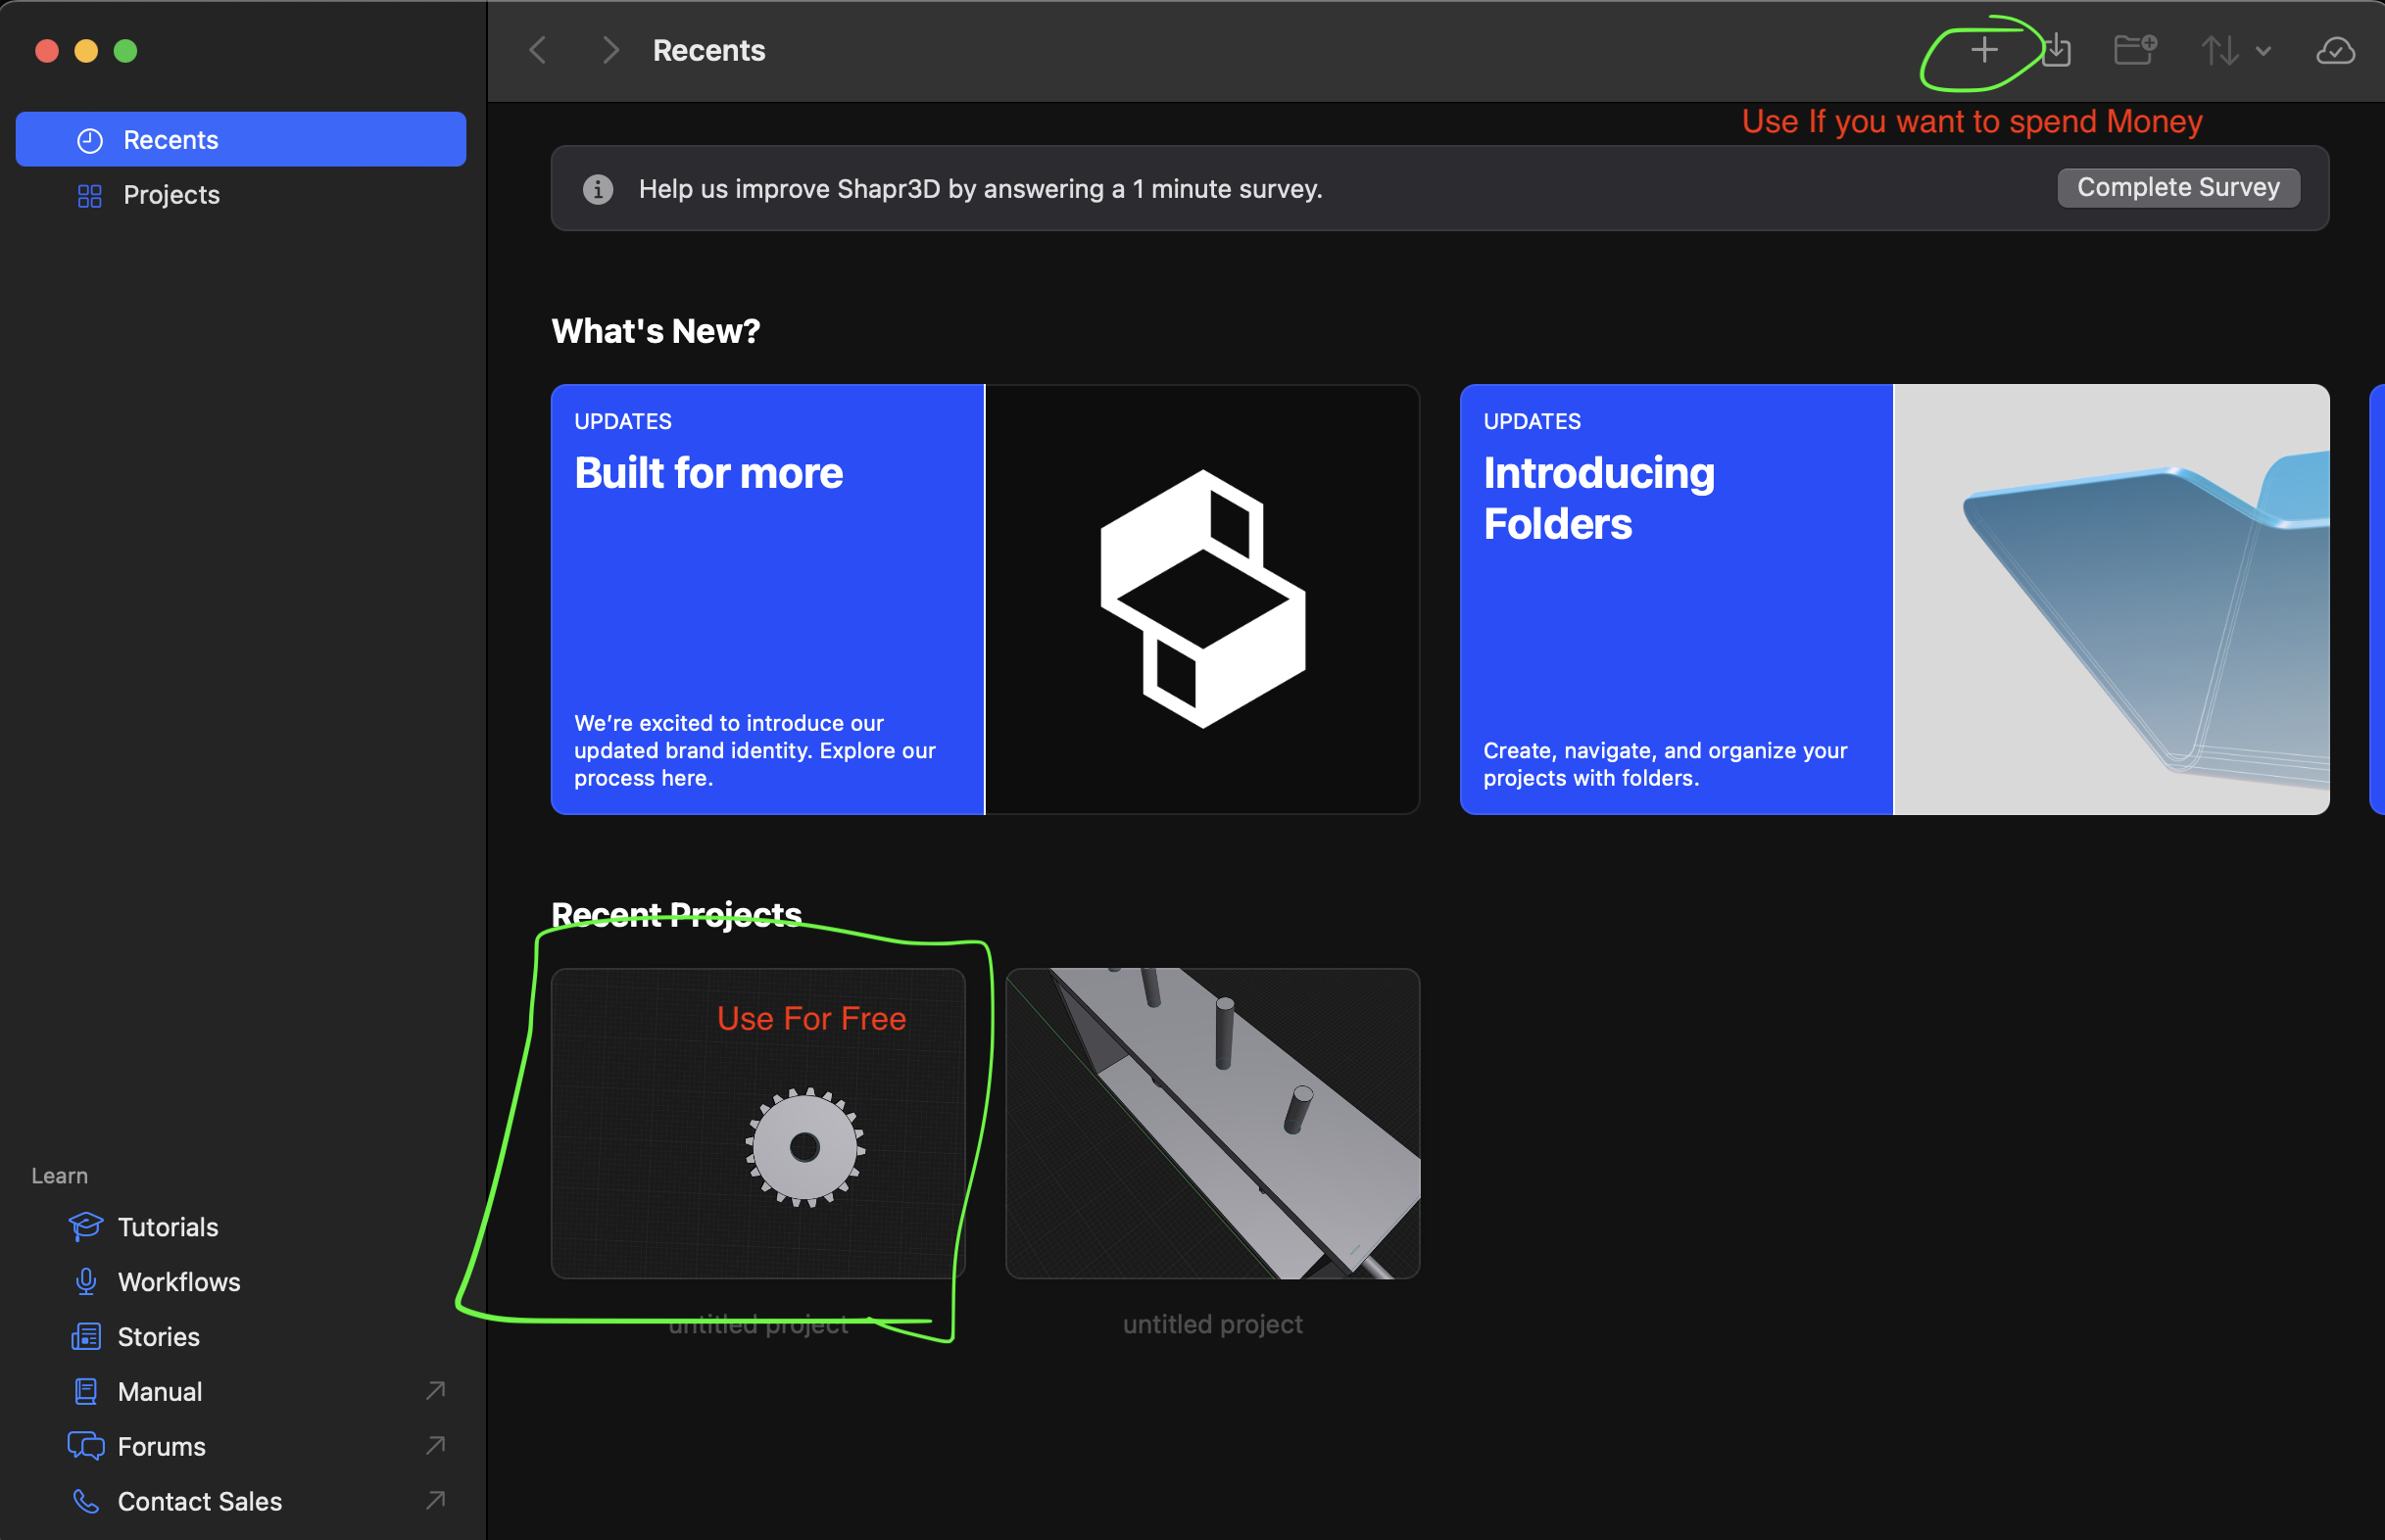
As you can see, you can either create a new project at the top right corner of the screen(the price for this is $299 USD a year or $38 USD a month. I would recommend purchasing the yearly option as you can save 38% and have access to more features), or you can click on one of the free slots below.
However, if the latter is chosen note that you might have to delete what is already in the project (I will show you how to do that in the next steps).
Start Building 1 (If You Have Chosen to Use a Paid Project, Go to Step 3)
I have selected the shape that was previously on the template (you can do this by clicking the left mouse button, then holding and moving your courser until the shape you would like to delete is fully encompassed by the light blue square), then i have clicked the right mouse button, and selected delete.
Downloads
Start Building 2 (If You Have Chosen to Pay for a Project, Skip to Here)
In order to build the shape i have built in the video below, you must do the following:
- Click on the right mouse button to rotate the camera to an angle of your liking.
- Next, click the sketch tool in the left of the screen (its the first selectable tool).
- After selecting the sketch tool, you must hover your mouse over circle or press the C key on your keyboard.
- Drag your mouse in any direction to grow the radius/ diameter of the circle. next to your mouse, there will be a number showing how much units of measurement (of your choice) is the diameter/radius of such mentioned circle. This can be seen as mm, cm, inch, ft, meter, etc...
- you can drag your mouse until you have reached a measurement of your liking. In this tutorial I have just chosen 160 mm.
- Next, unselect the sketch tool (done by clicking the tool again) and select the circles inside shape (it will glow light blue when you hover your mouse over it).
- When you do this, 2 arrows will appear. One facing up, and one facing down. Click on the arrow facing up, and drag up until you again reach the measurement of your liking. For this tutorial, I have chosen 33 mm.
Downloads
Bulding
In order to build the shape that I have built here you must do the following:
- Orbit your camera angle until you can see the previous shape in a birds eye view.
- Click the sketch tool in the left of the screen.
- Next, click the circle tool again, and place your cursor in the center (marked by a purple dot) and drag until you have reached the measurement of your preference. In this tutorial it is recommended to drag until 80mm.
- After, unselect the sketch tool (done by clicking the tool again) and select the circles inside shape (it will glow light blue when you hover your mouse over it).\
- I recommend you move your camera angle to face the horizon instead of birds eye view.
- When you do this, 2 arrows will appear. One facing up, and one facing down. Click on the arrow facing up, and drag up until you again reach the measurement of your liking. For this tutorial, I have chosen 270mm.
Building Final Step
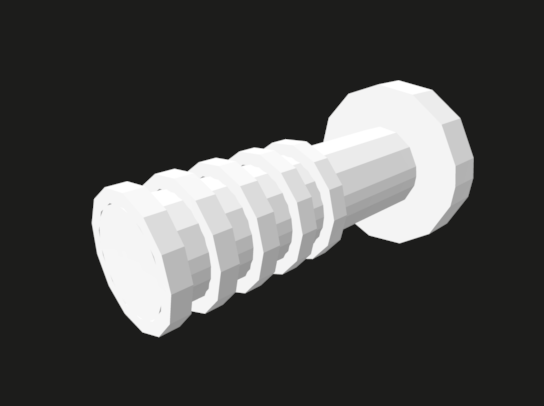
As you can see here, I sketched a circle 100mm in diameter, in the center of the cylinder we built previously, and raised its height to around -15mm. After this, I double clicked the ring, and clicked the copy button. Note that until you press it again, every time you move an object, it will duplicate.
Feel free to arrange and duplicate the rings however much you like.
Downloads
Uploading to Printing Software
- First click share then export project twice.
- Next select the 3D print option under the usage tab. It is recommended that you do not change the format options as the 3D print usage option converts the project into the best fit file type for your mobile device.
- After this, click STL instead of 3MF.
- Drag the resolution to the lowest unless you would like to pay for higher quality.
- Select Include mesh bodies.
- Finally name your project and let it download into your desktop.
Downloads
3D Print
- Click Command/Control and S to upload the STL file from Shapr3D.
- Next, select the scale tool (On the right of the screen) and select the handle we've created.
- After this, begin playing with the increments until you the handle fits into the zones.
- Finally, press slice and configure your device with your printer.
Downloads
Thank You!
Thank you for reading/ watching this tutorial, I hope you have enjoyed!