How to Create Brass Inlay in Walnut Using Fusion 360
19958 Views, 188 Favorites, 0 Comments
How to Create Brass Inlay in Walnut Using Fusion 360

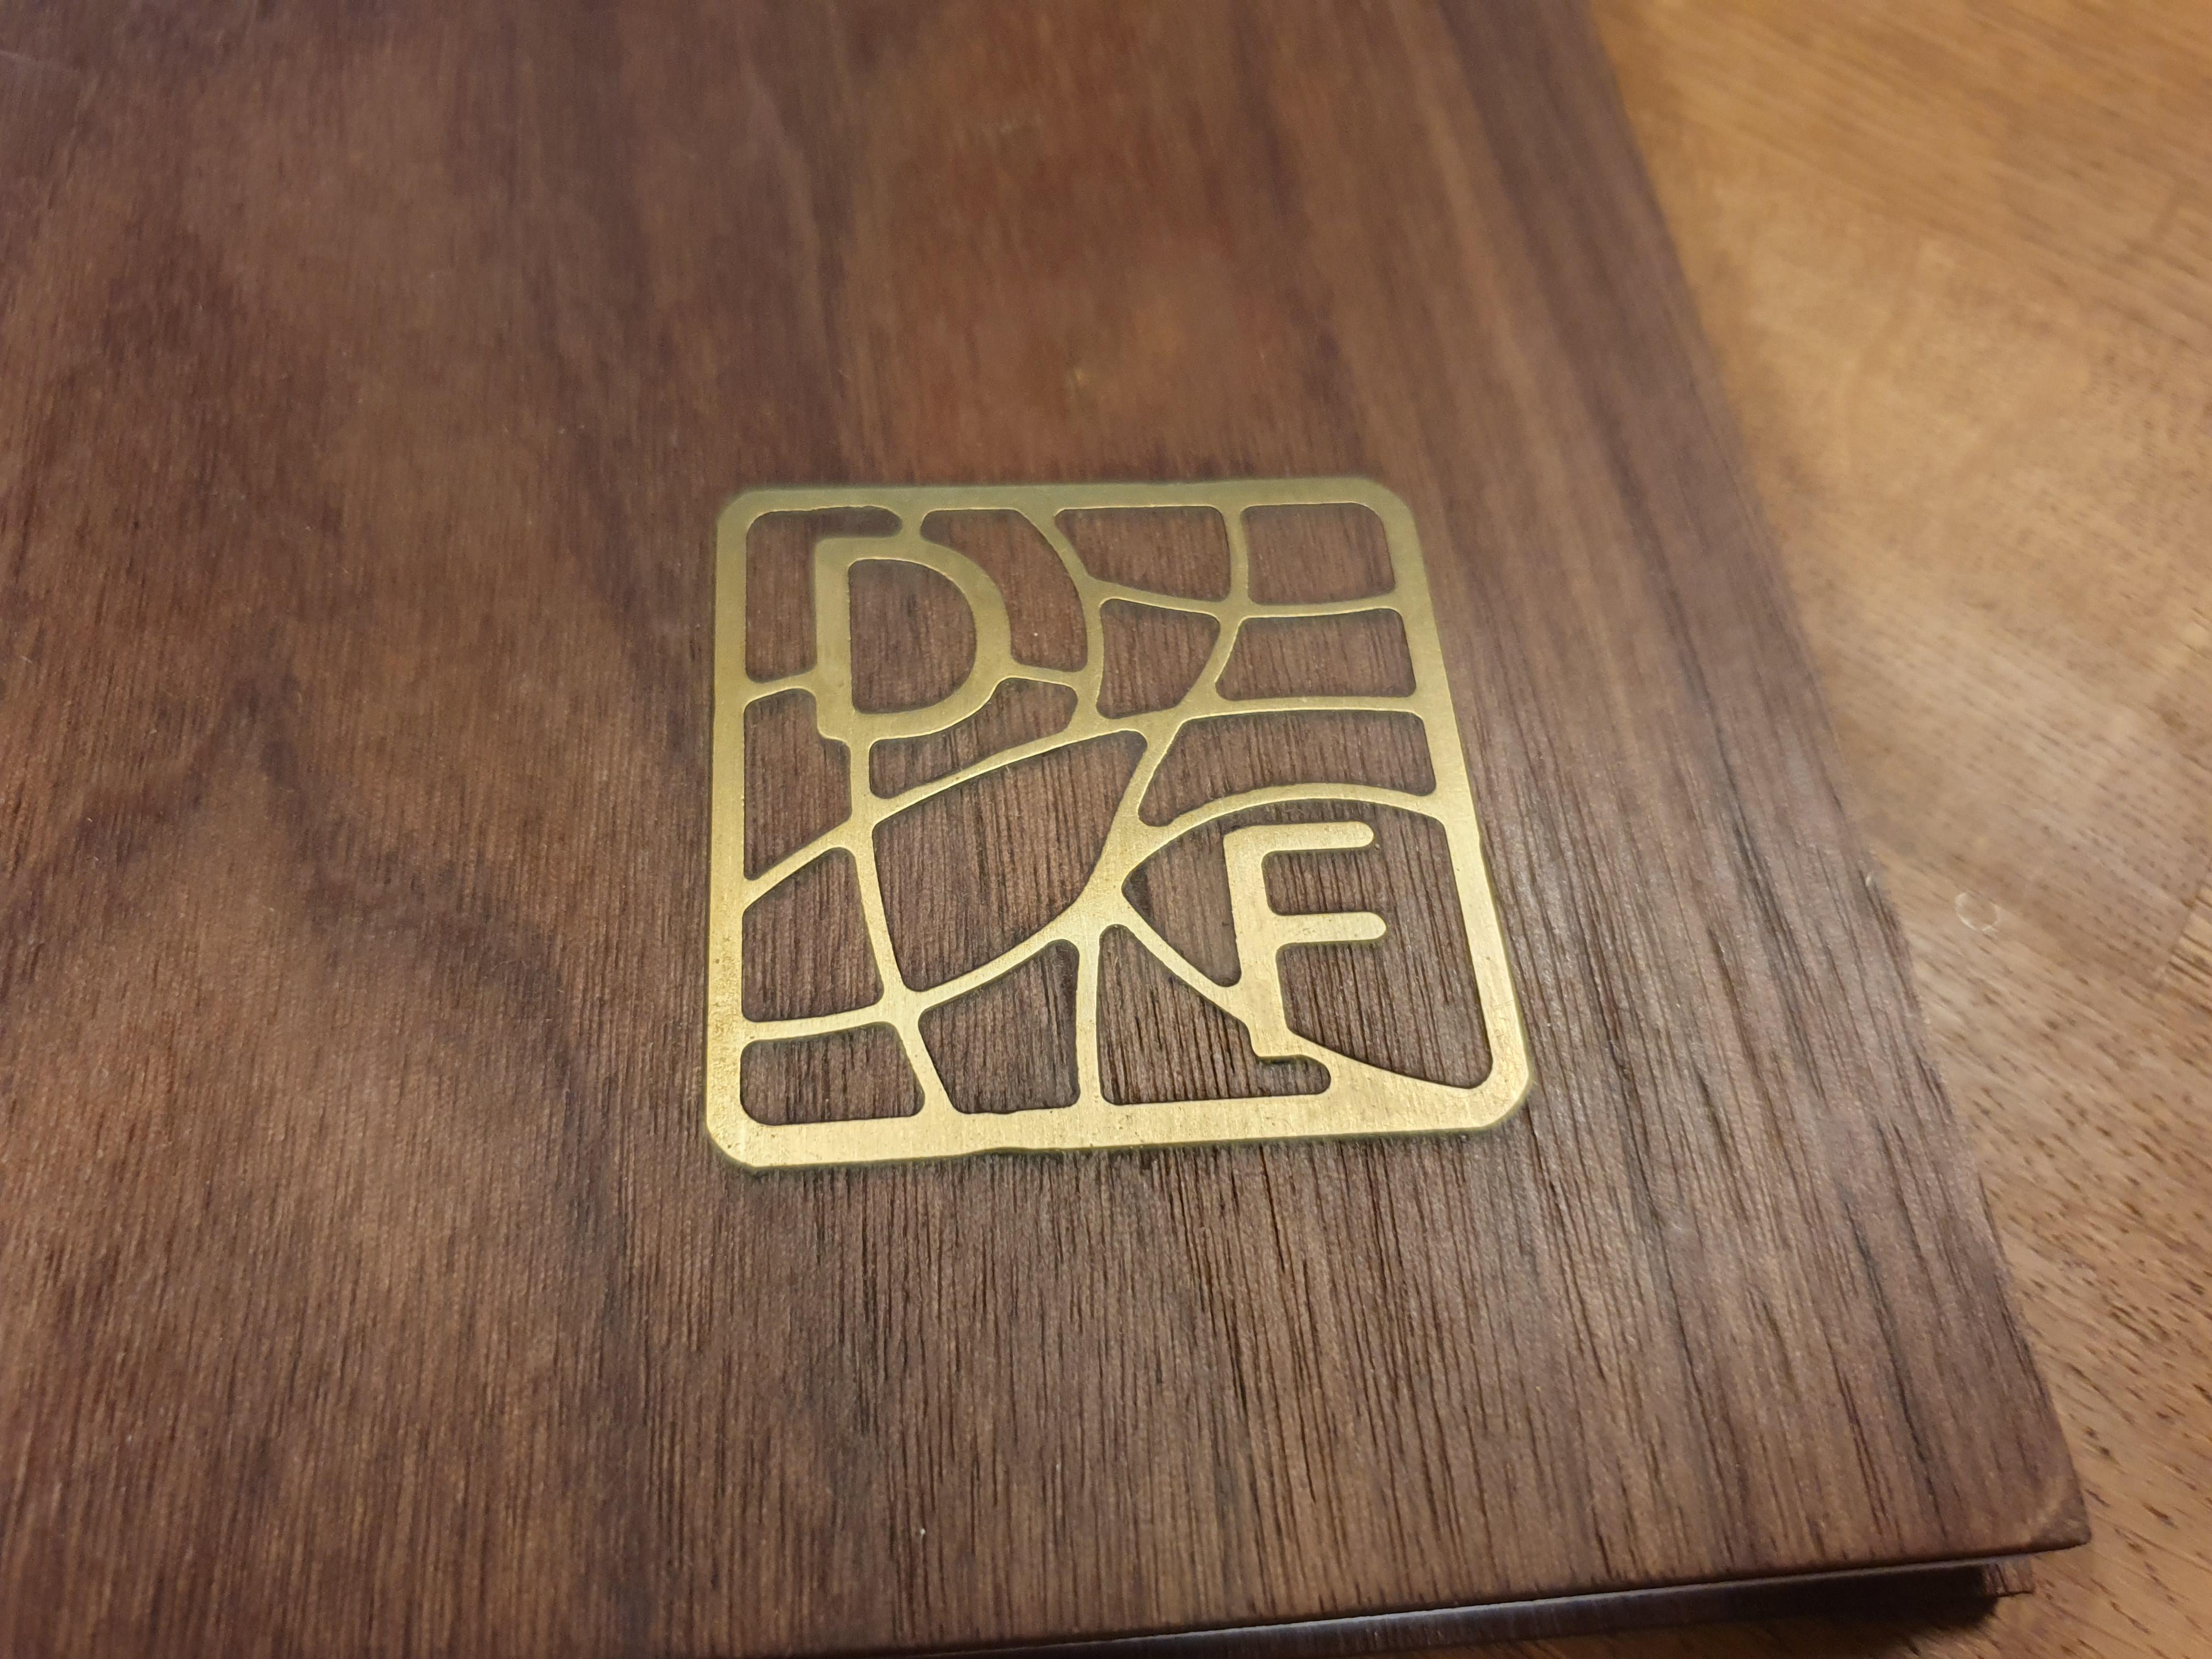
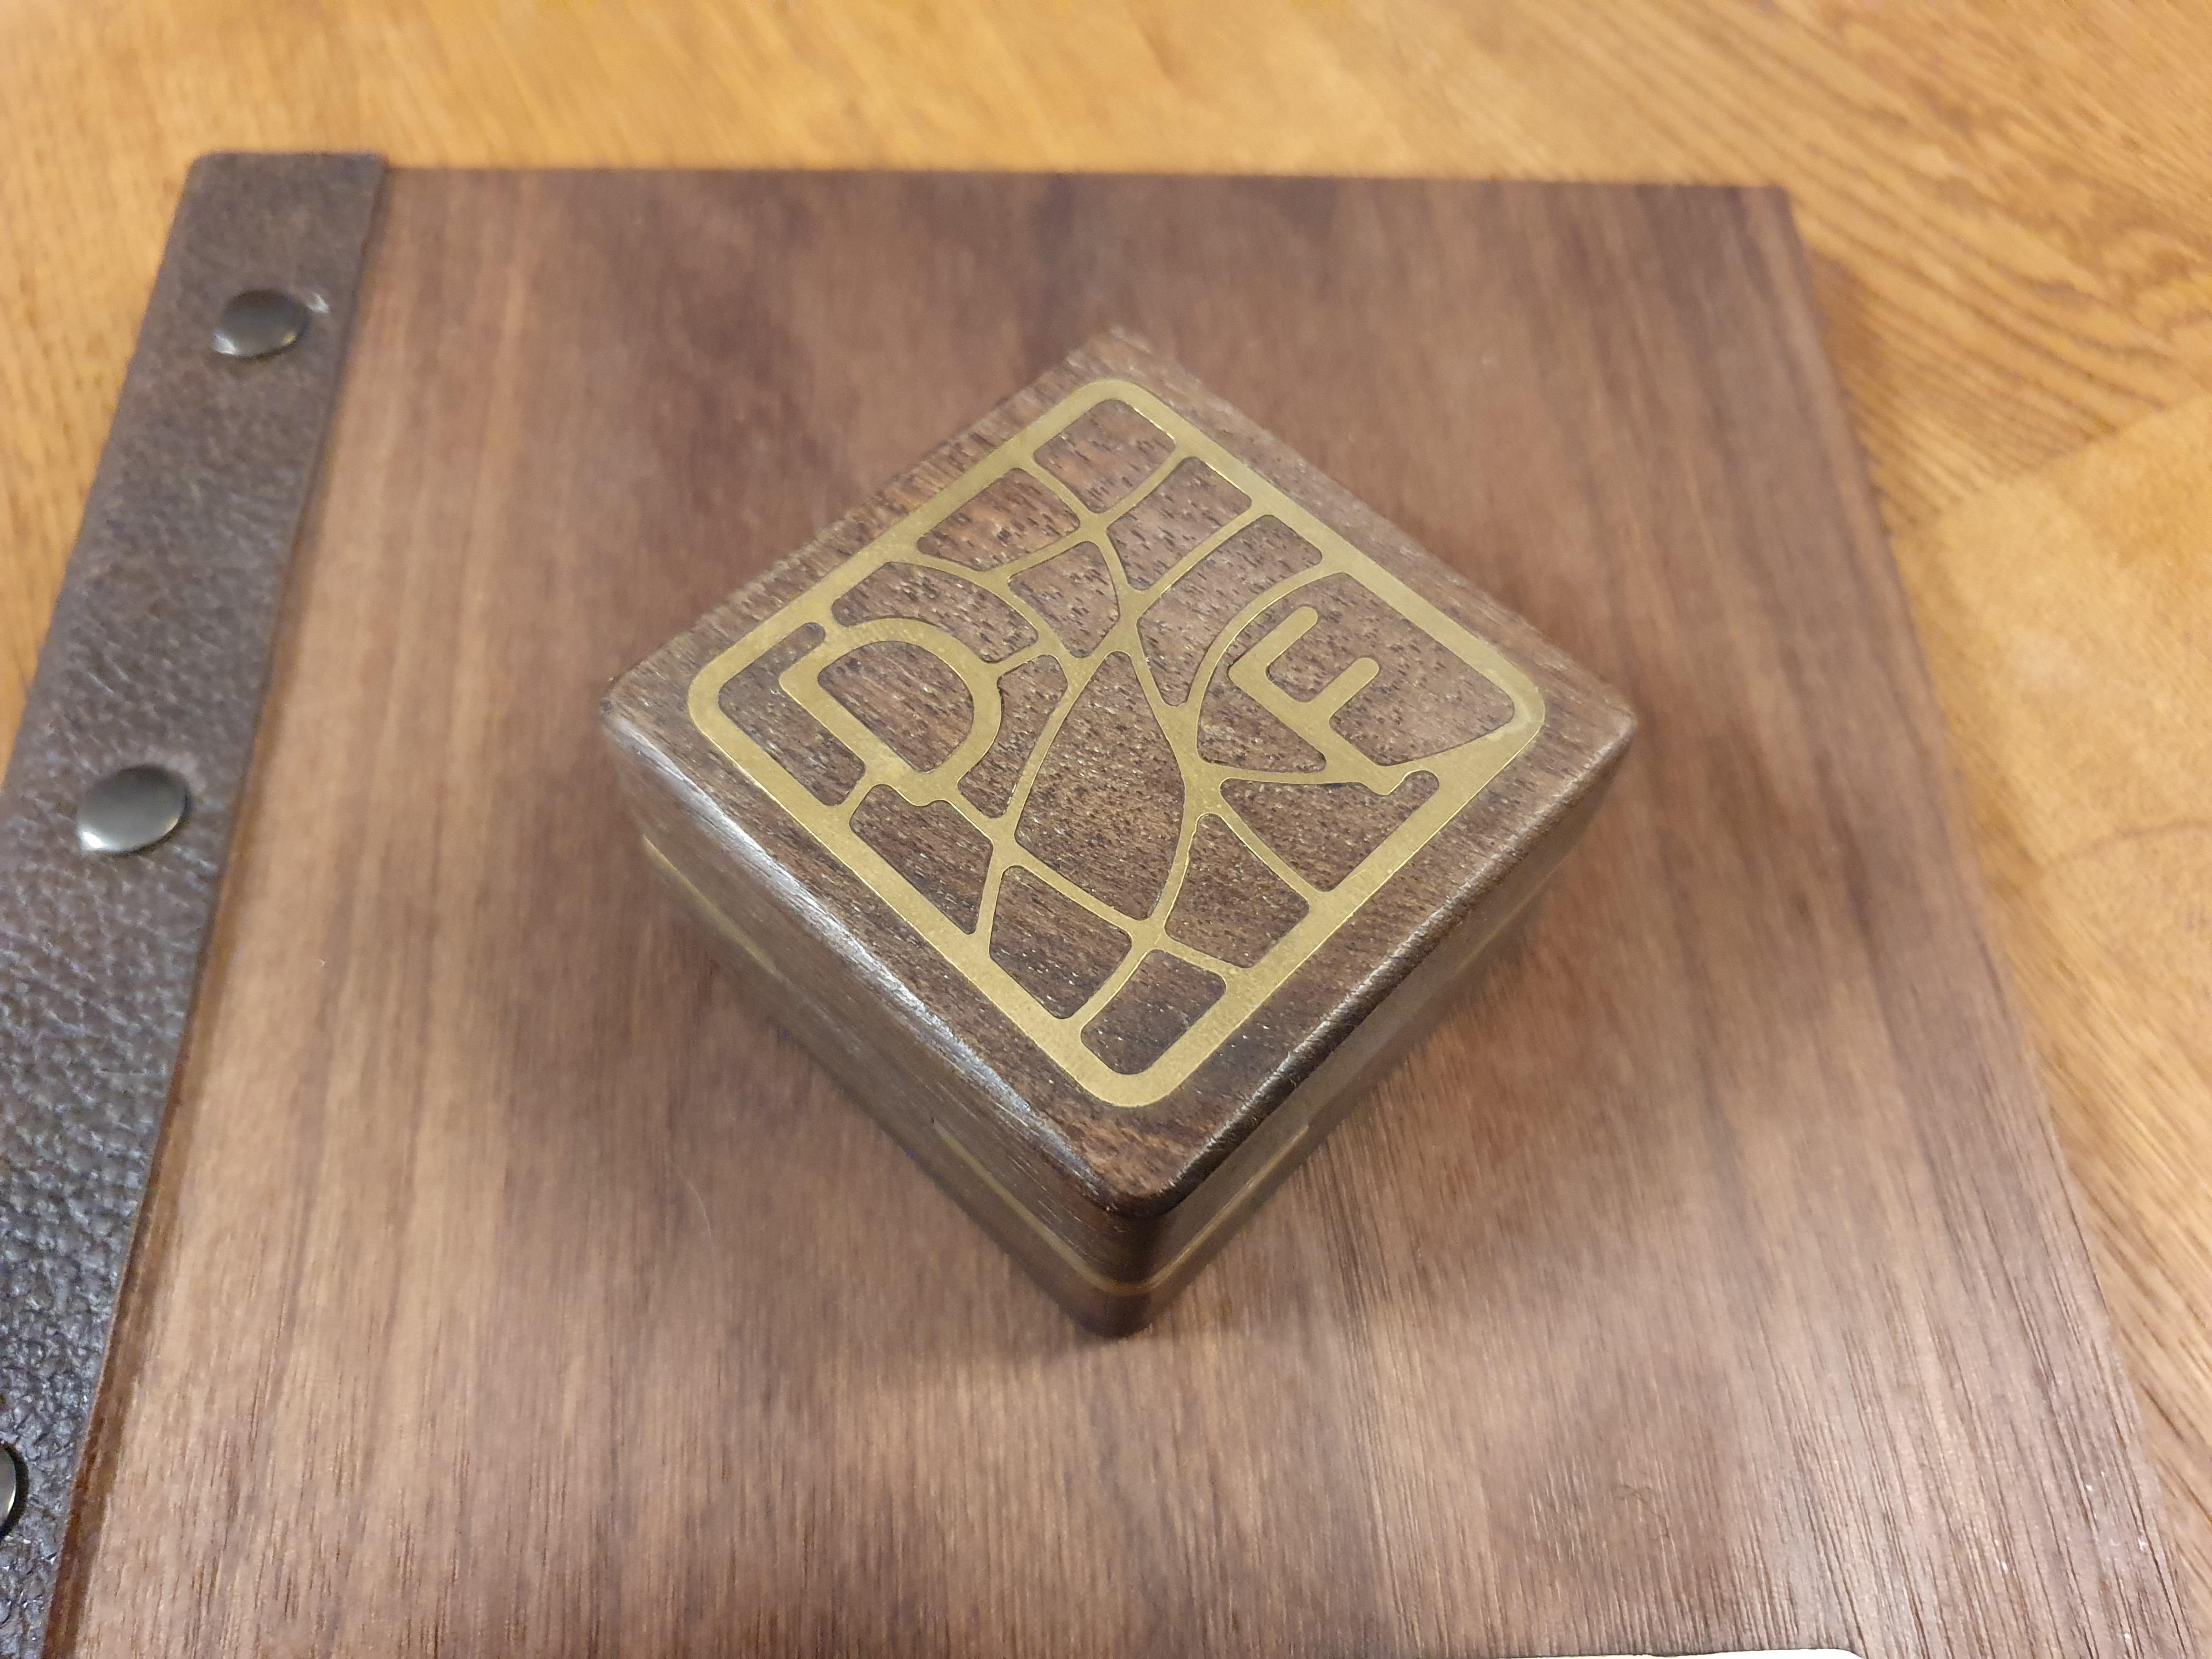
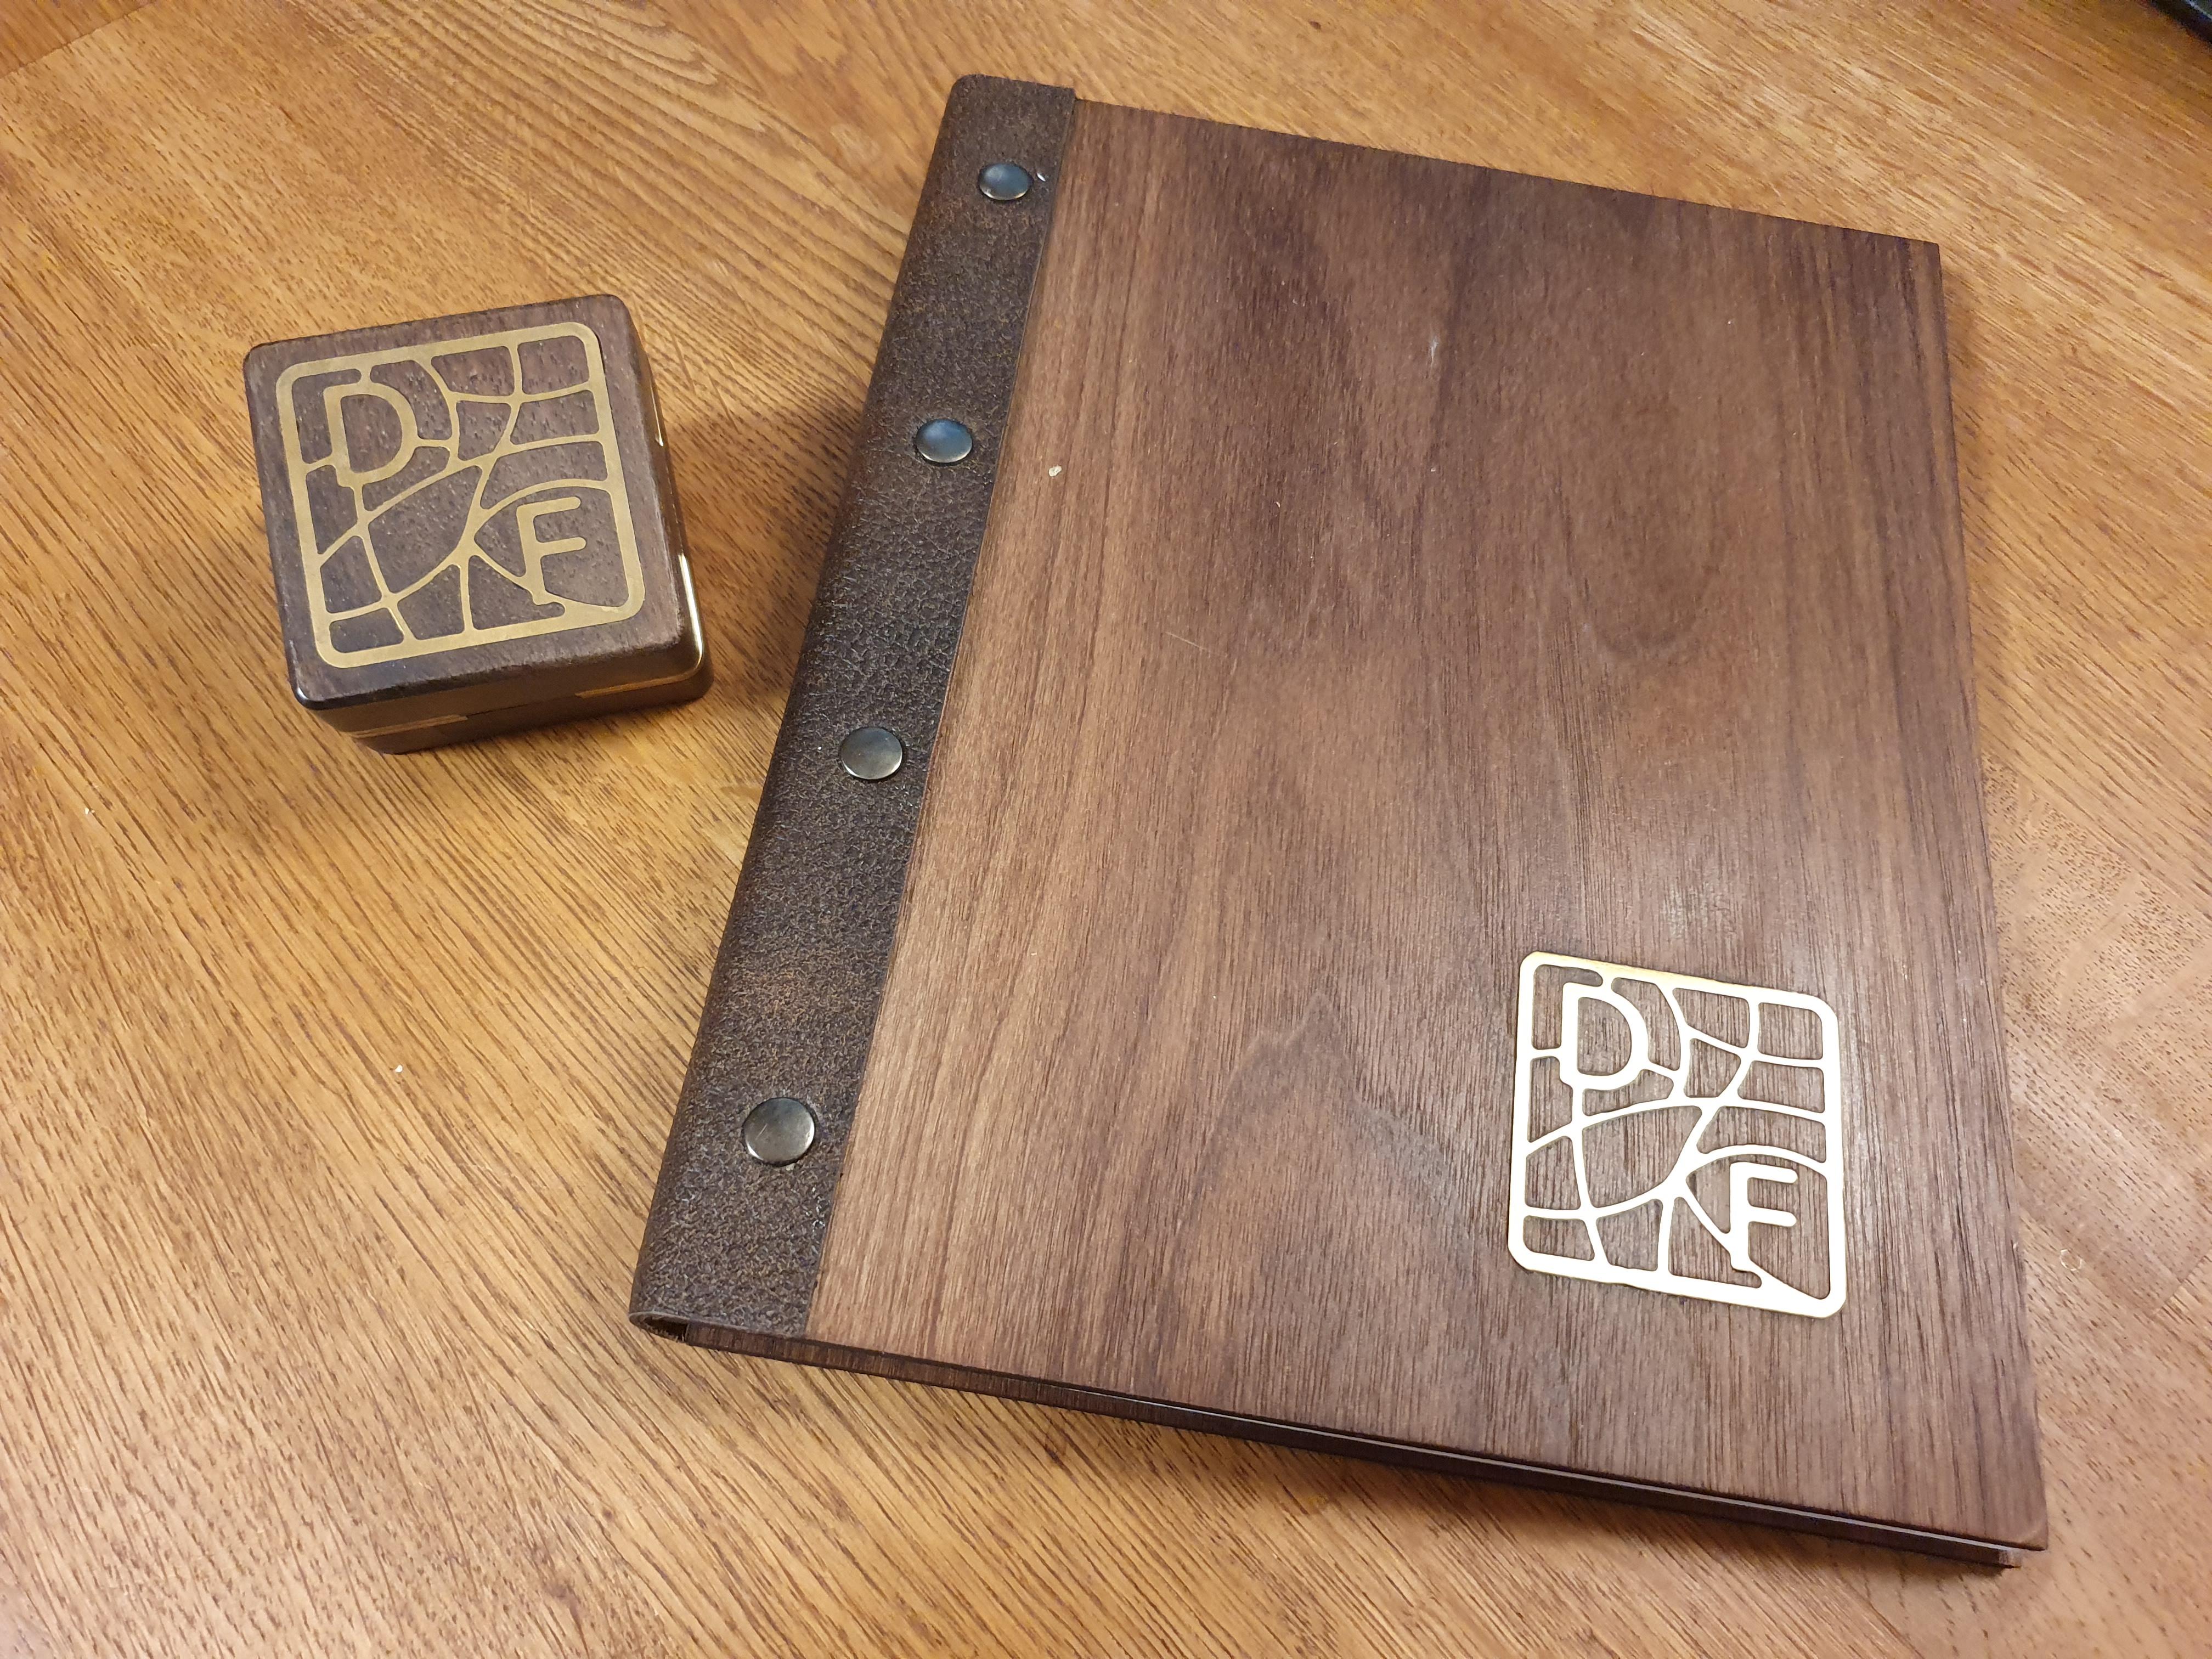
Adding text to wood in a graceful way is always challenging. Trying to use a pencil or pen will create a faded text, not necessarily directly, but for sure after some time. The same applies for using stickers, which will eventually lose it adhesive ability. So, what´s the best method? Laser engraving? Even laser engraving got its limits. Because the text itself can only be displayed as “burned wood”, which is difficult with dark wood types. Right now, my favorite method is to create a brass inlay in some noble wood like walnut. I prefer the design with the golden appearing brass in combination with the dark brown walnut. Because the brass inlay is quieter labor intensive, keep in mind to use it sparingly.
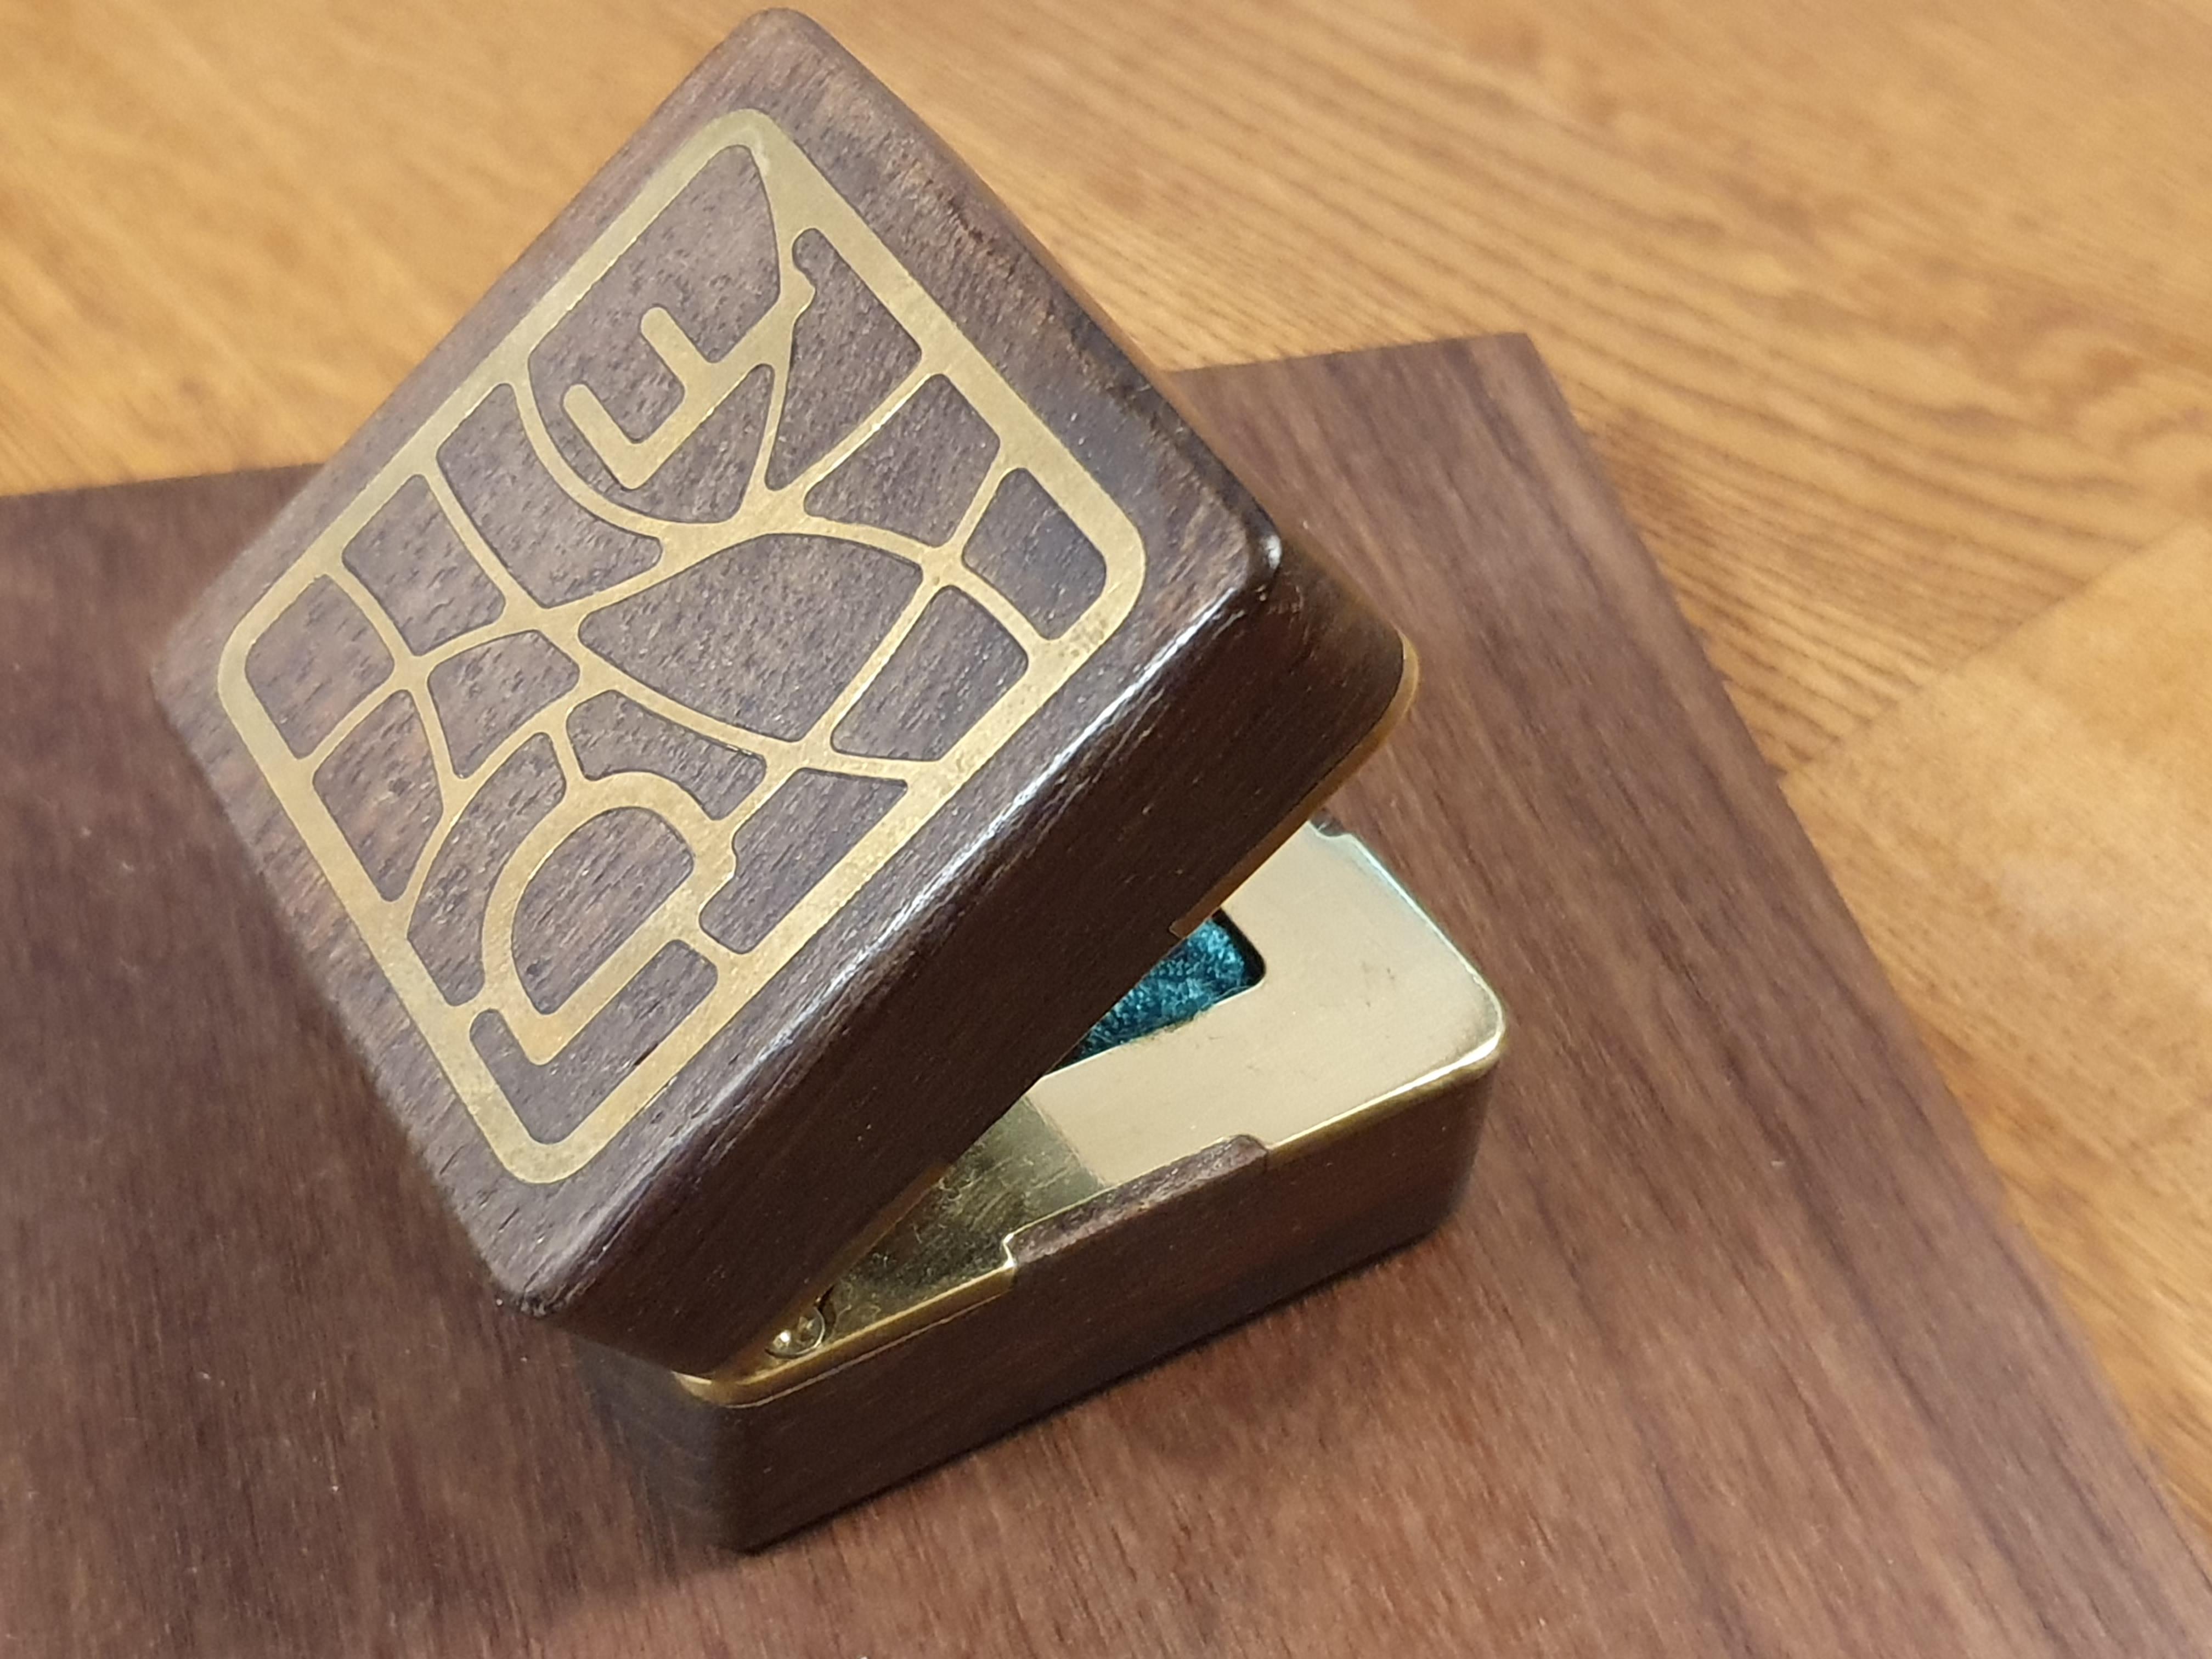
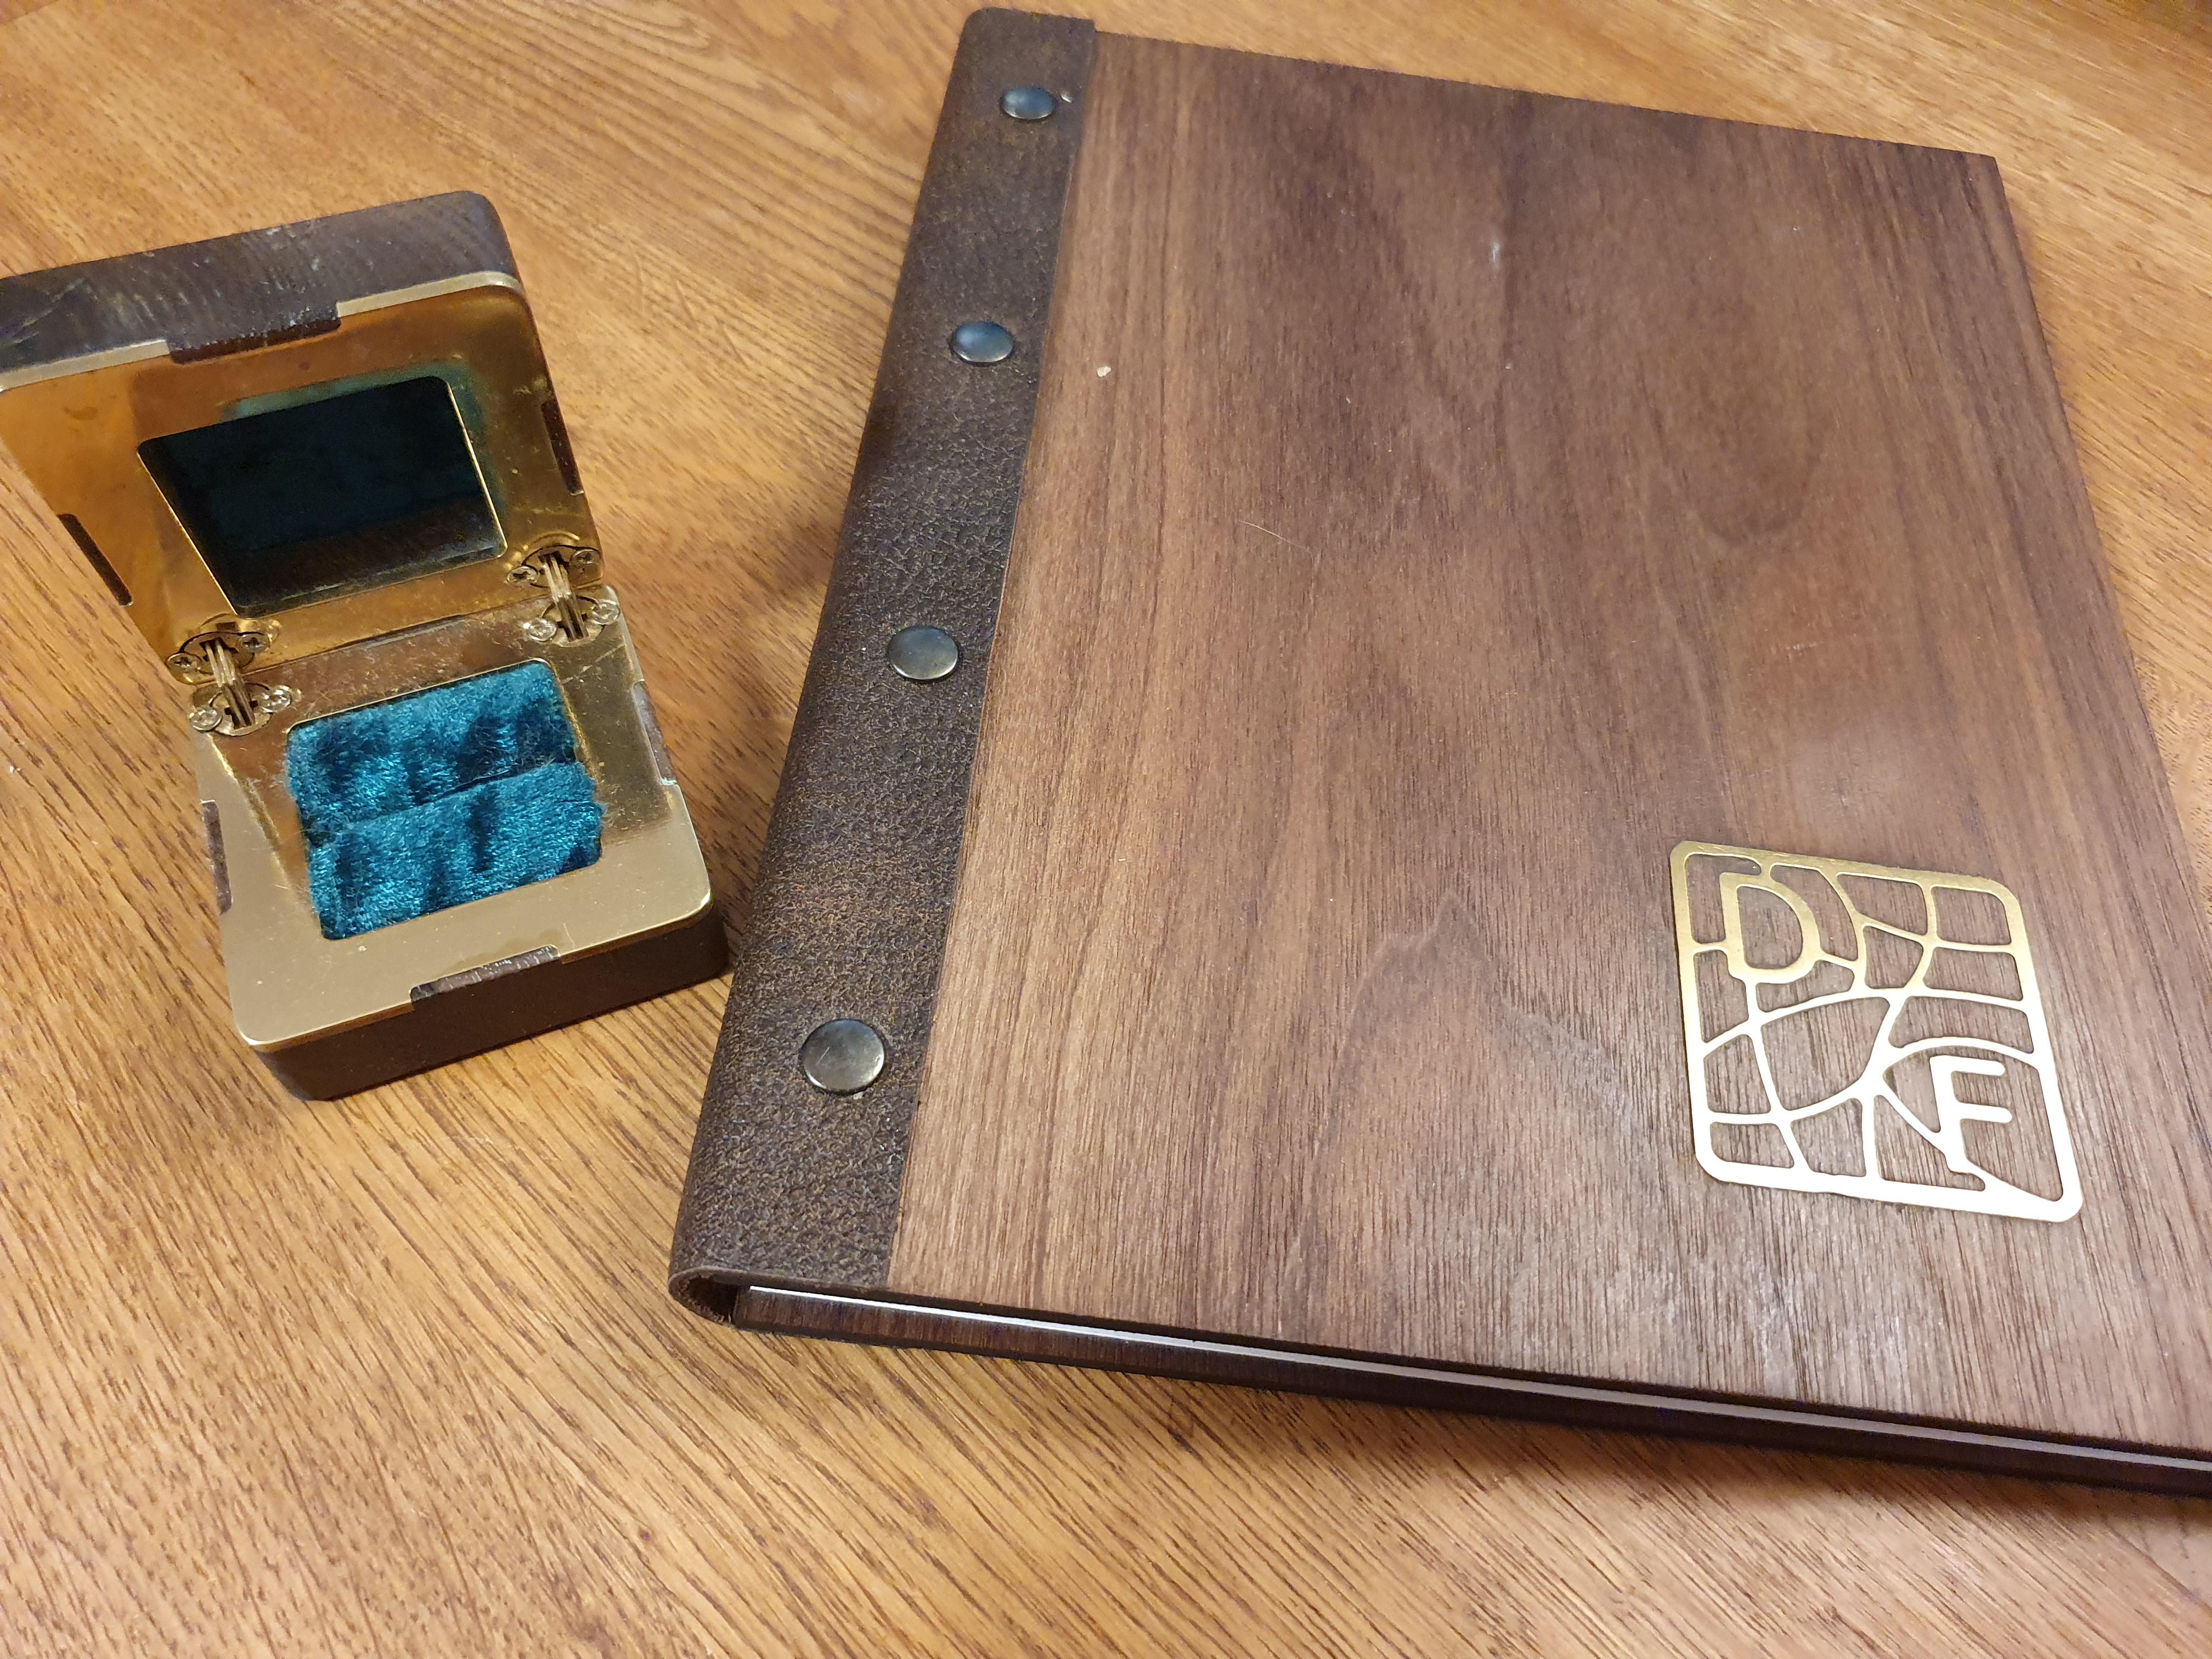
In the following Instructable I want to show you the most important steps for creating a brass inlay in walnut. I already did this once and created a ring box, which I used to propose to my fiancée. After I heard the three magical letters, this will be the instruction for a family album for our wedding.
Supplies
The list for the materials is small, the list of the machines or the types of machines is not. You will need a sheet of brass with around 2 mm thickness and some walnut, which is at least 1 mm thicker than the brass. Additional you need super glue to hold the inlay in place. The most important machine for this project in a cnc machine. I think it is not possible without, correct me if I am wrong. Additional you will need sandpaper or a sanding machine.
Creating the Design
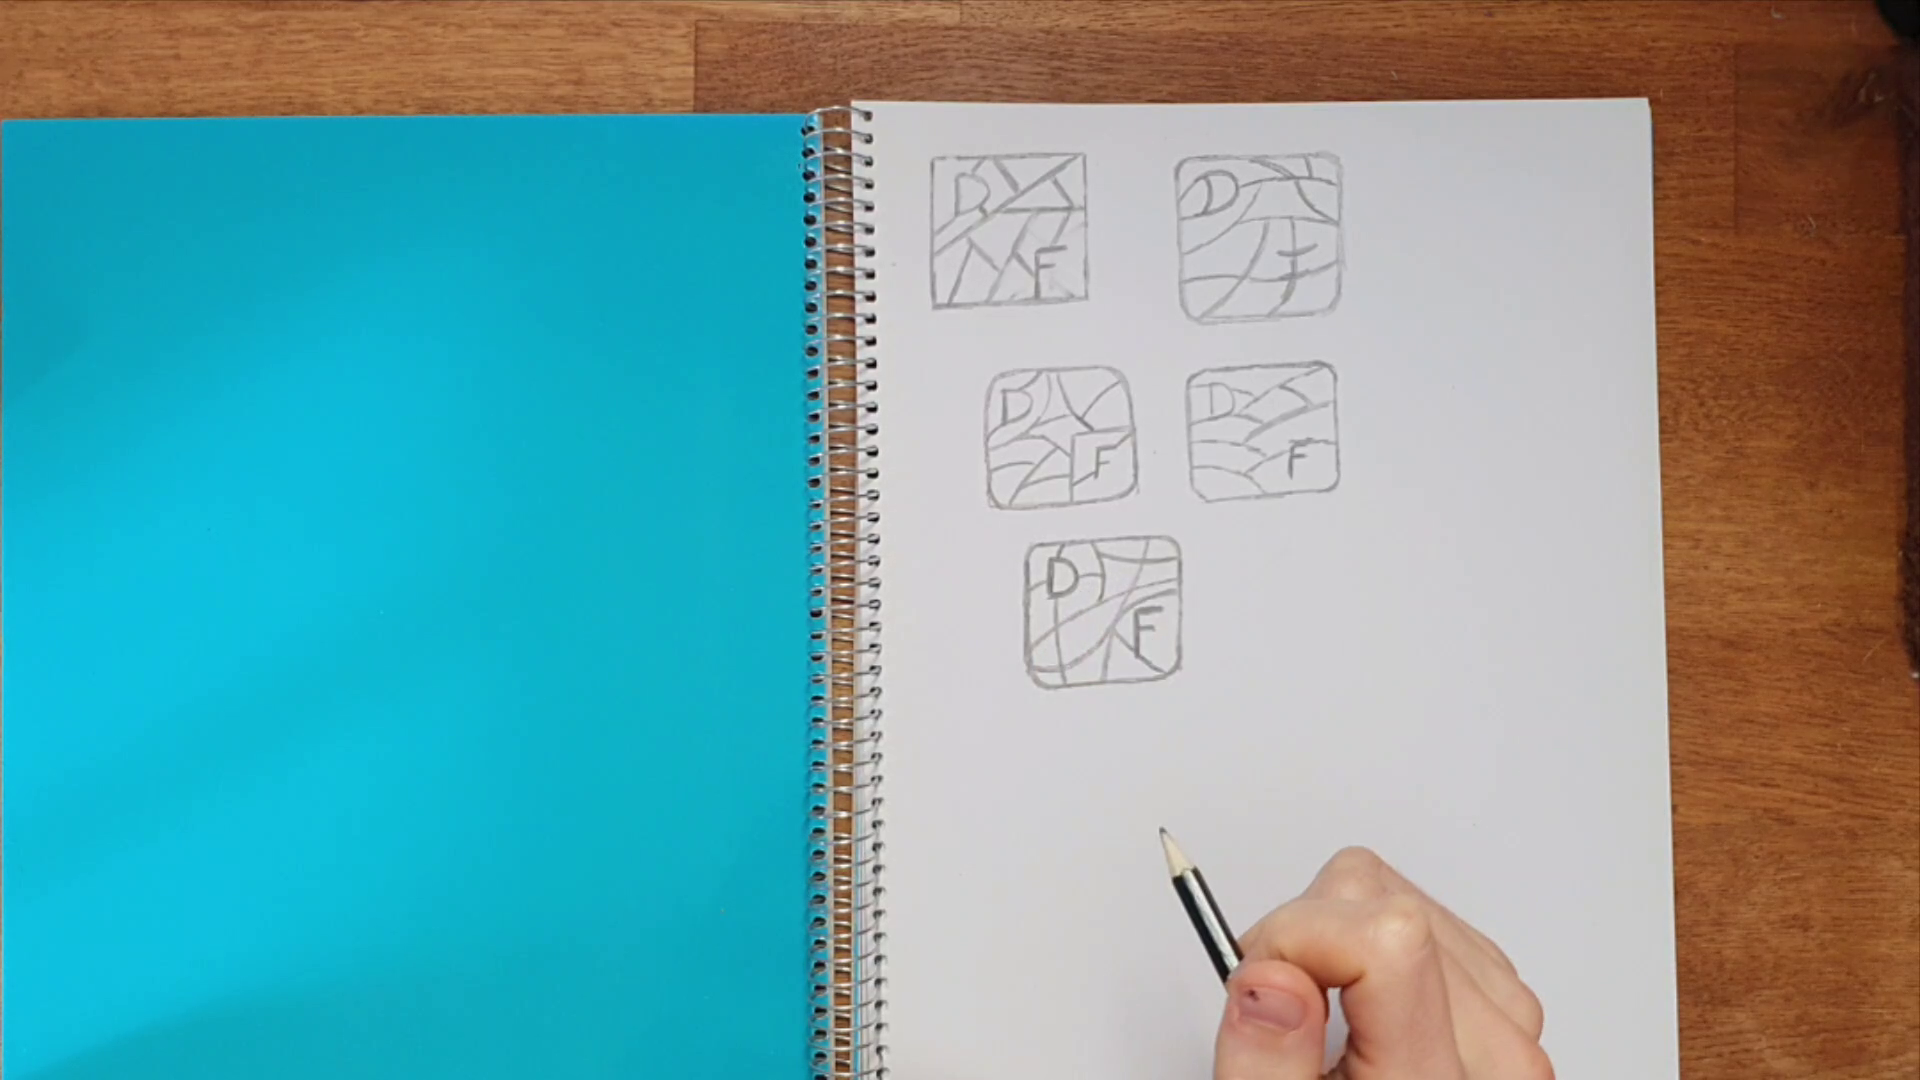
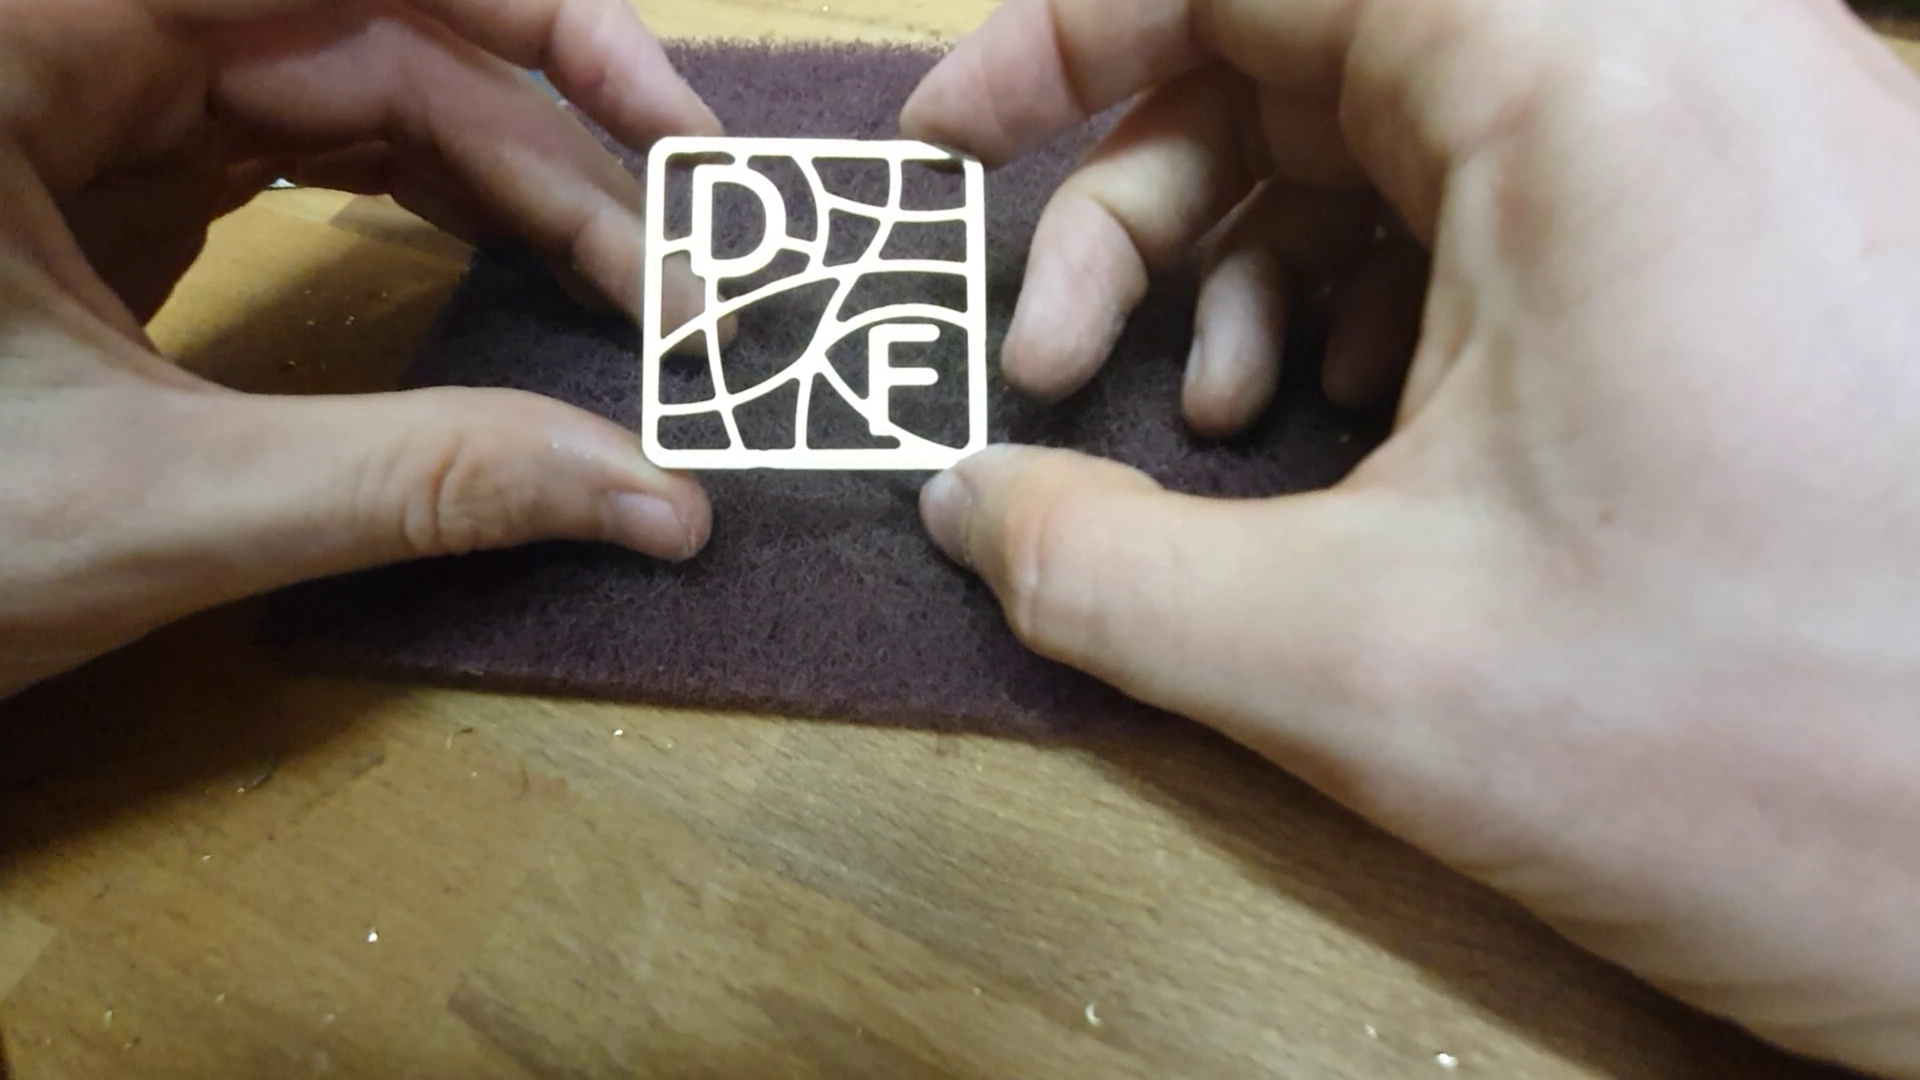
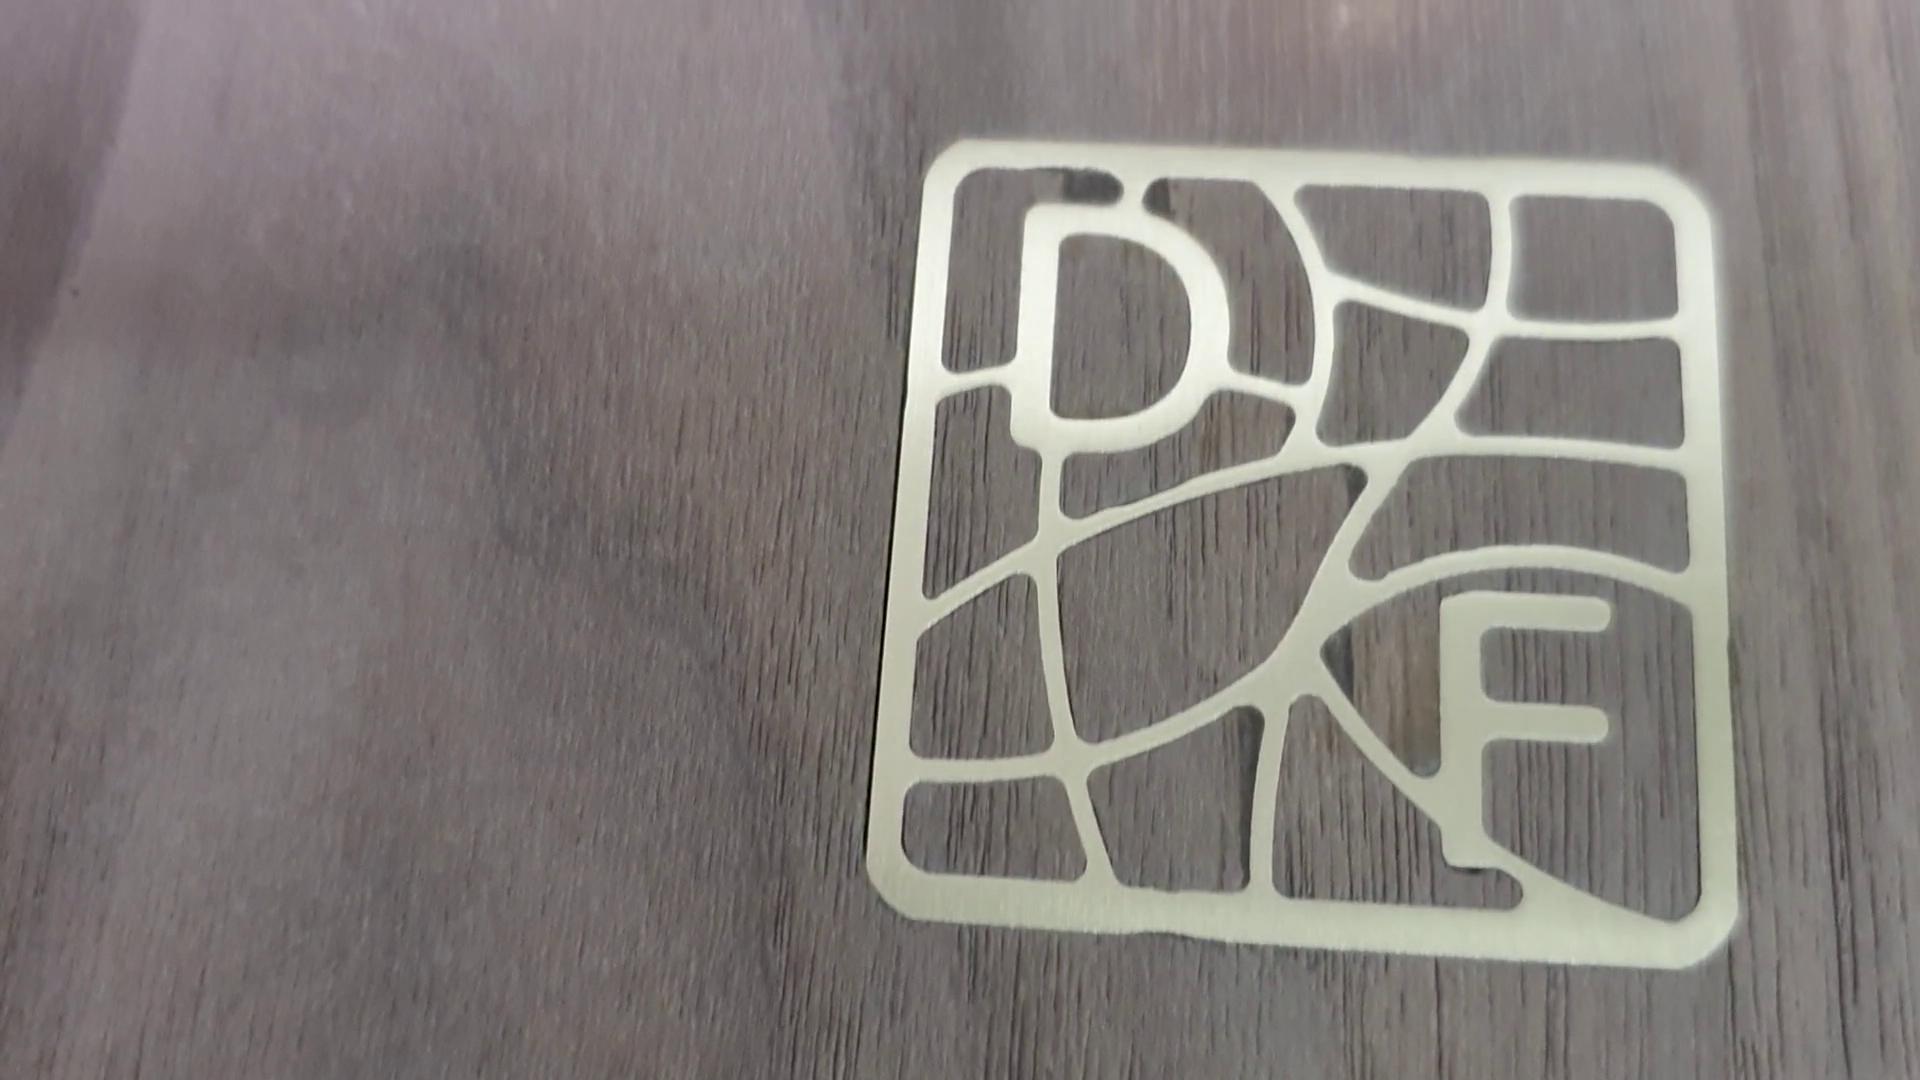
Keep in mind, that I am not a designer. Nevertheless, I am still proud of my design. First, I used pen and paper to create different designs until I was finally satisfied with the Logo. Consider that you can make a design the consist of one single part like in my case or you can use multiple parts, which needs to be glued one by one. For my design I chose two different types of lines, so the inner lines are thinner, and the outer lines are thicker. Use your creativity to create your favorite design. Keep in mind that your lines need a minimum thickness which equals the diameter your smallest end mill. Also design the corners with a minimum radius of your smallest end mill. In my opinion curved lines appears better than strait lines, which you can also see in my design progress.
Digitalization of the Design
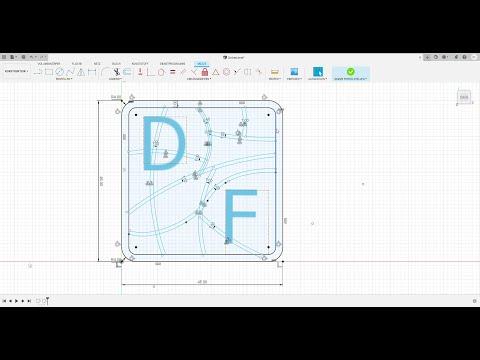

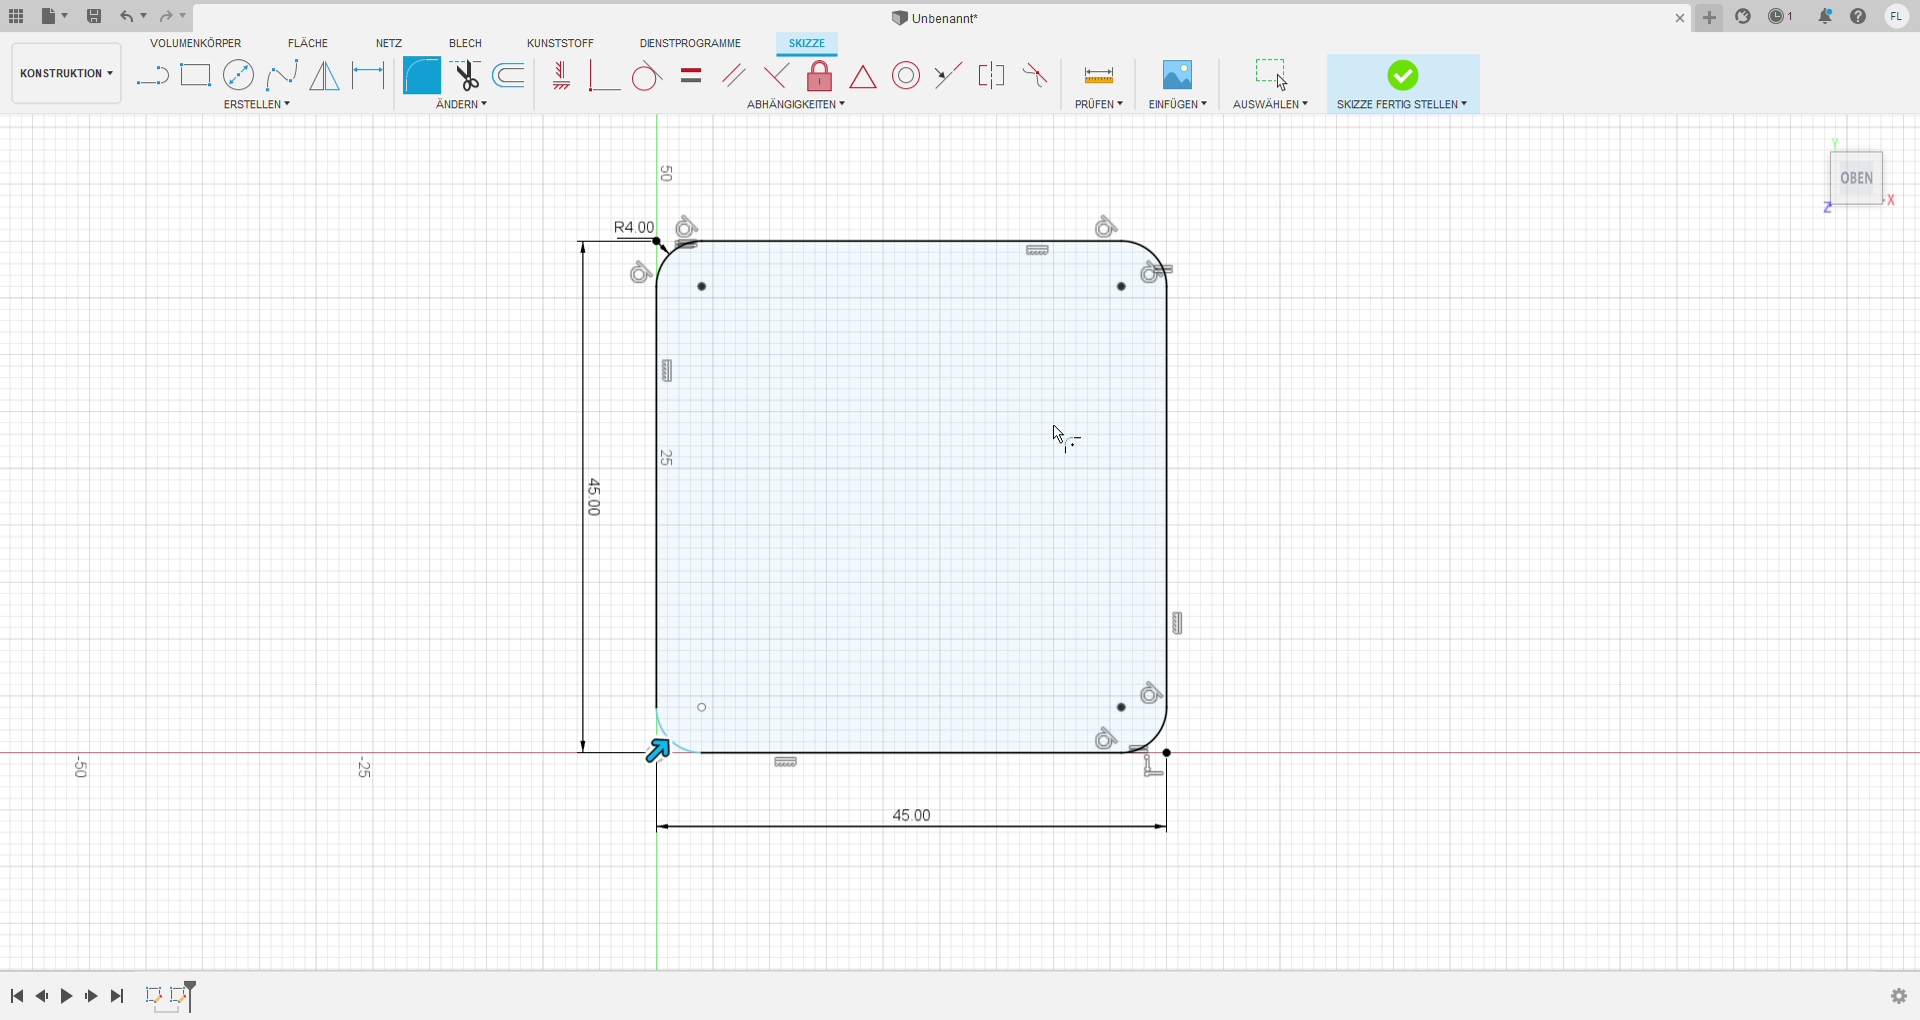
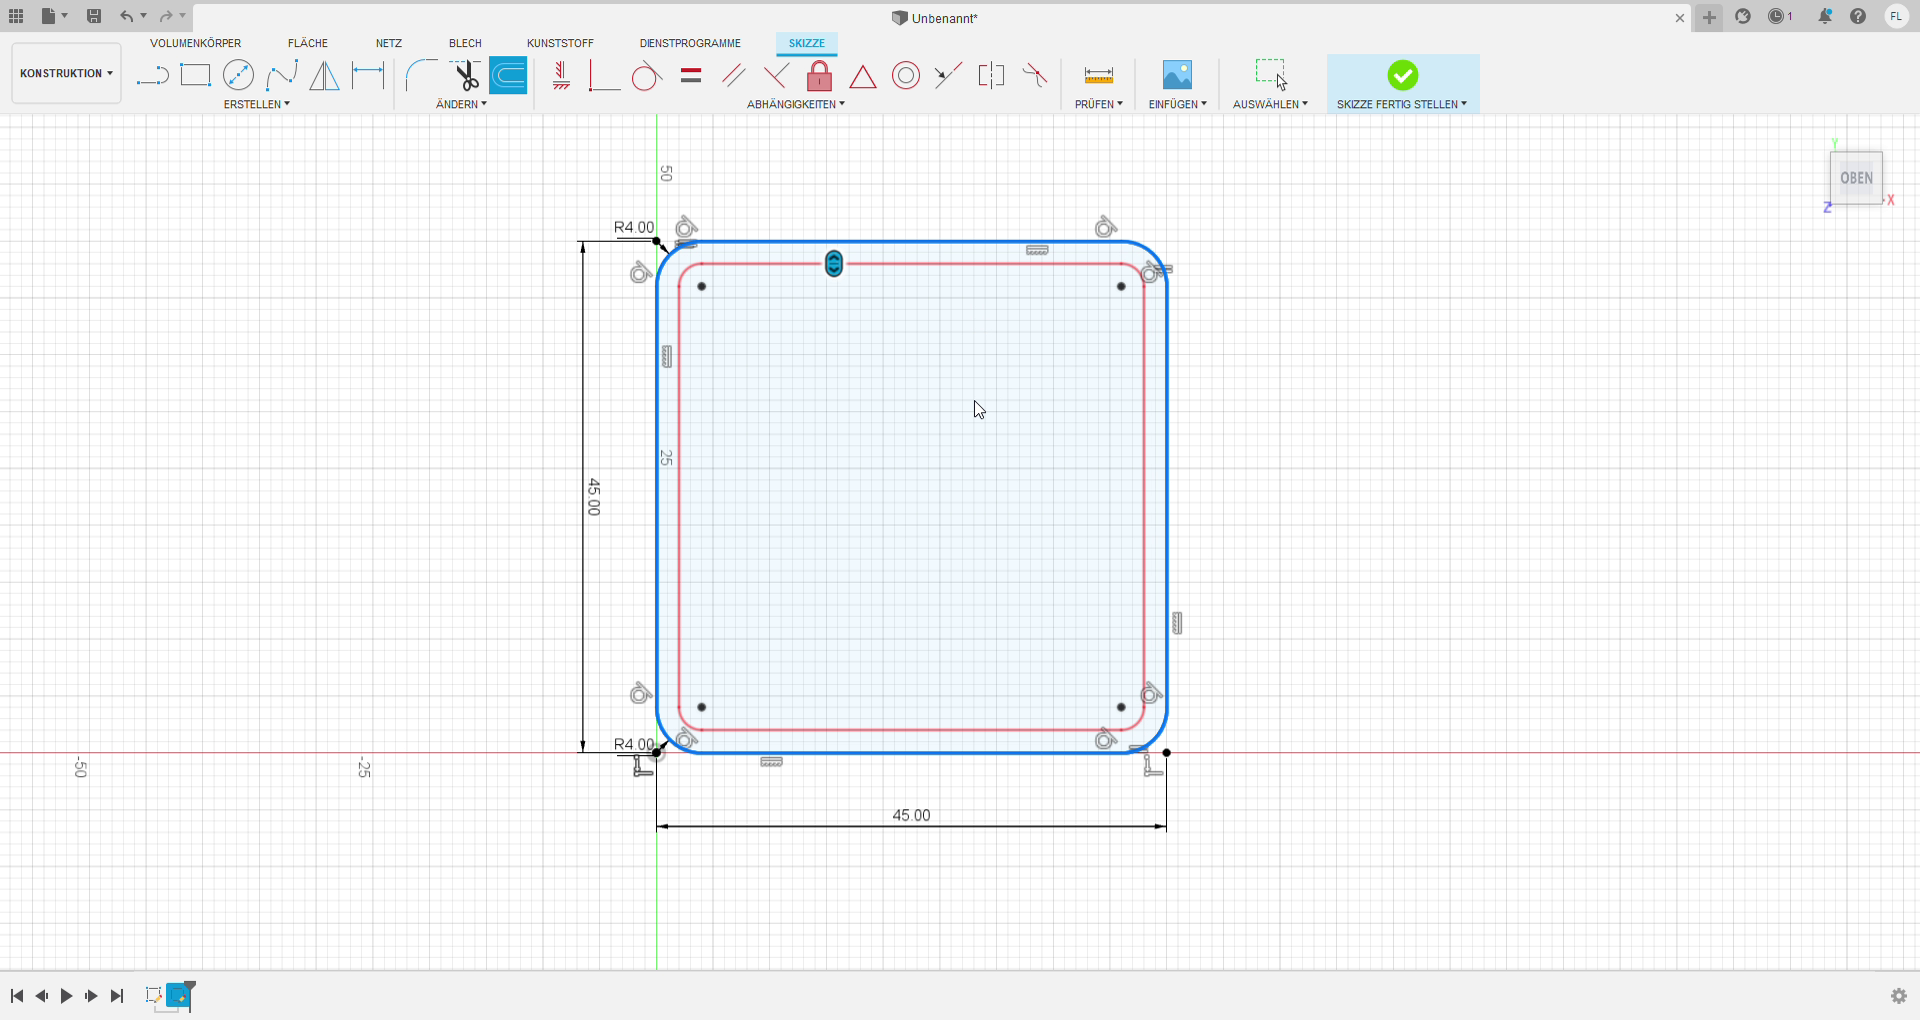
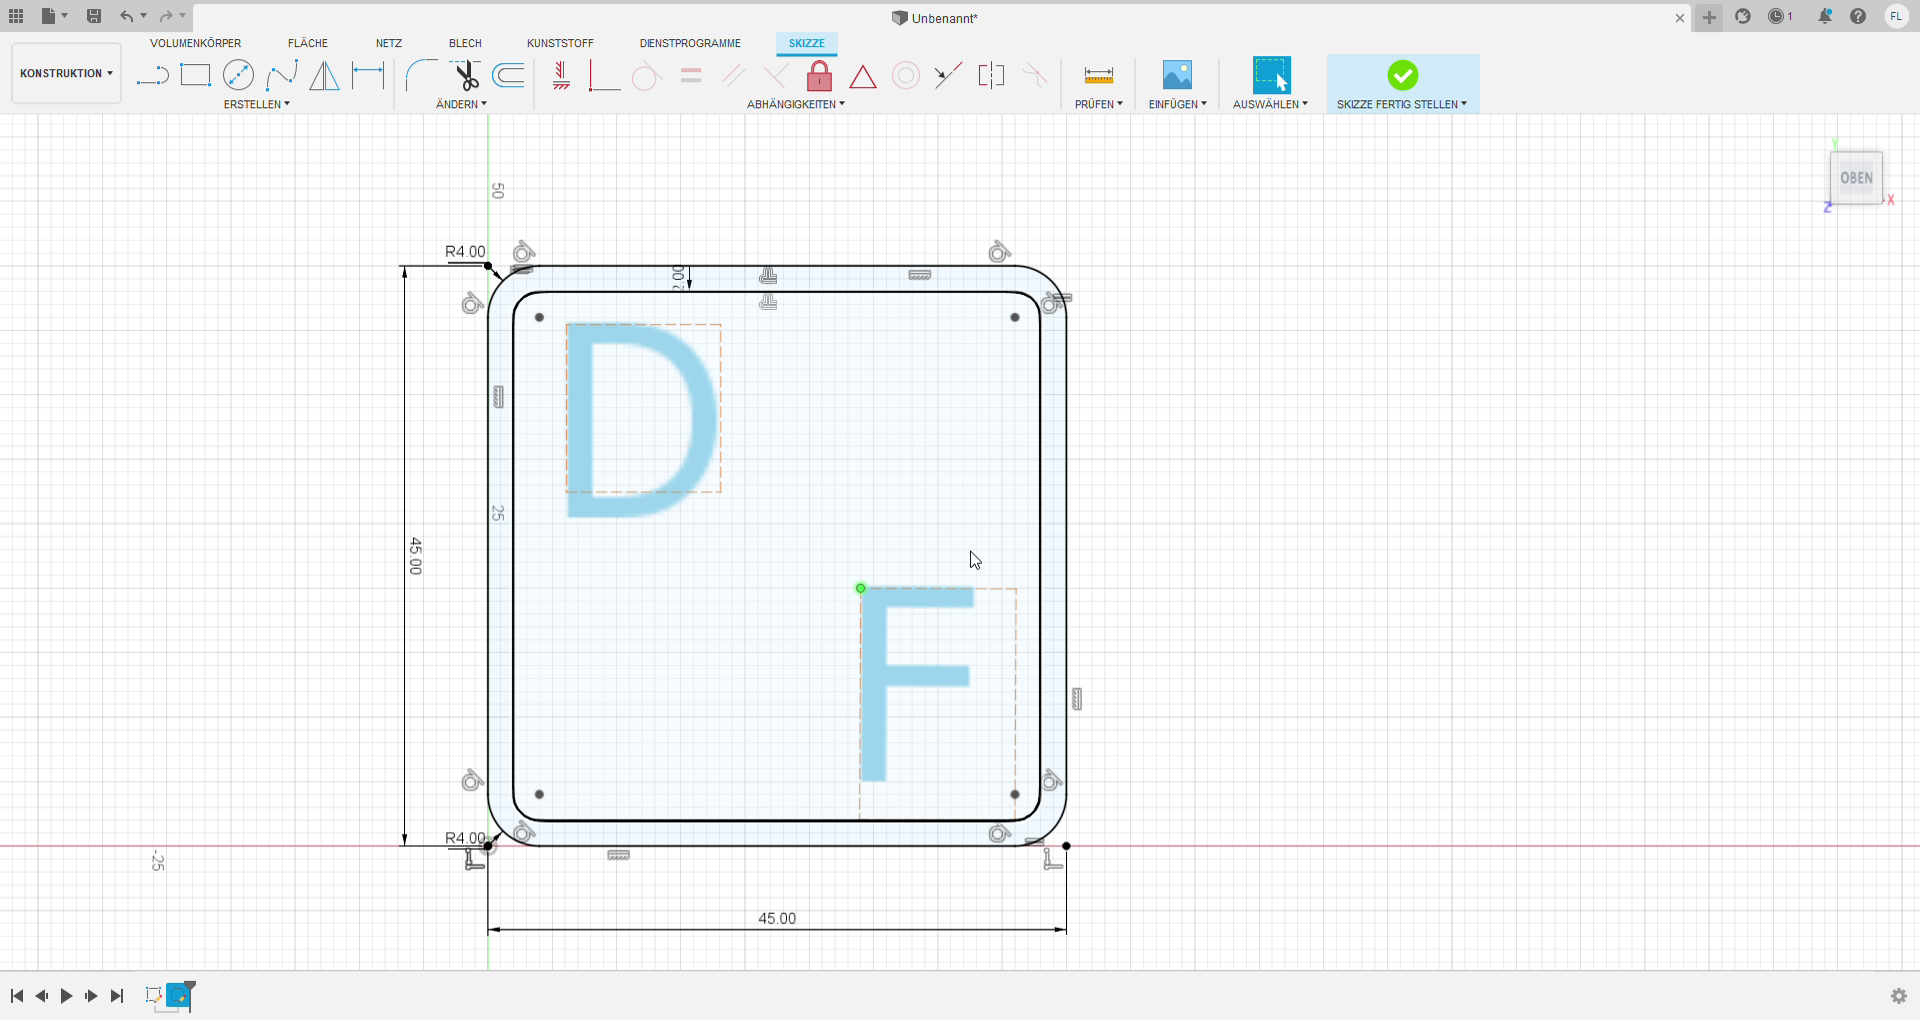
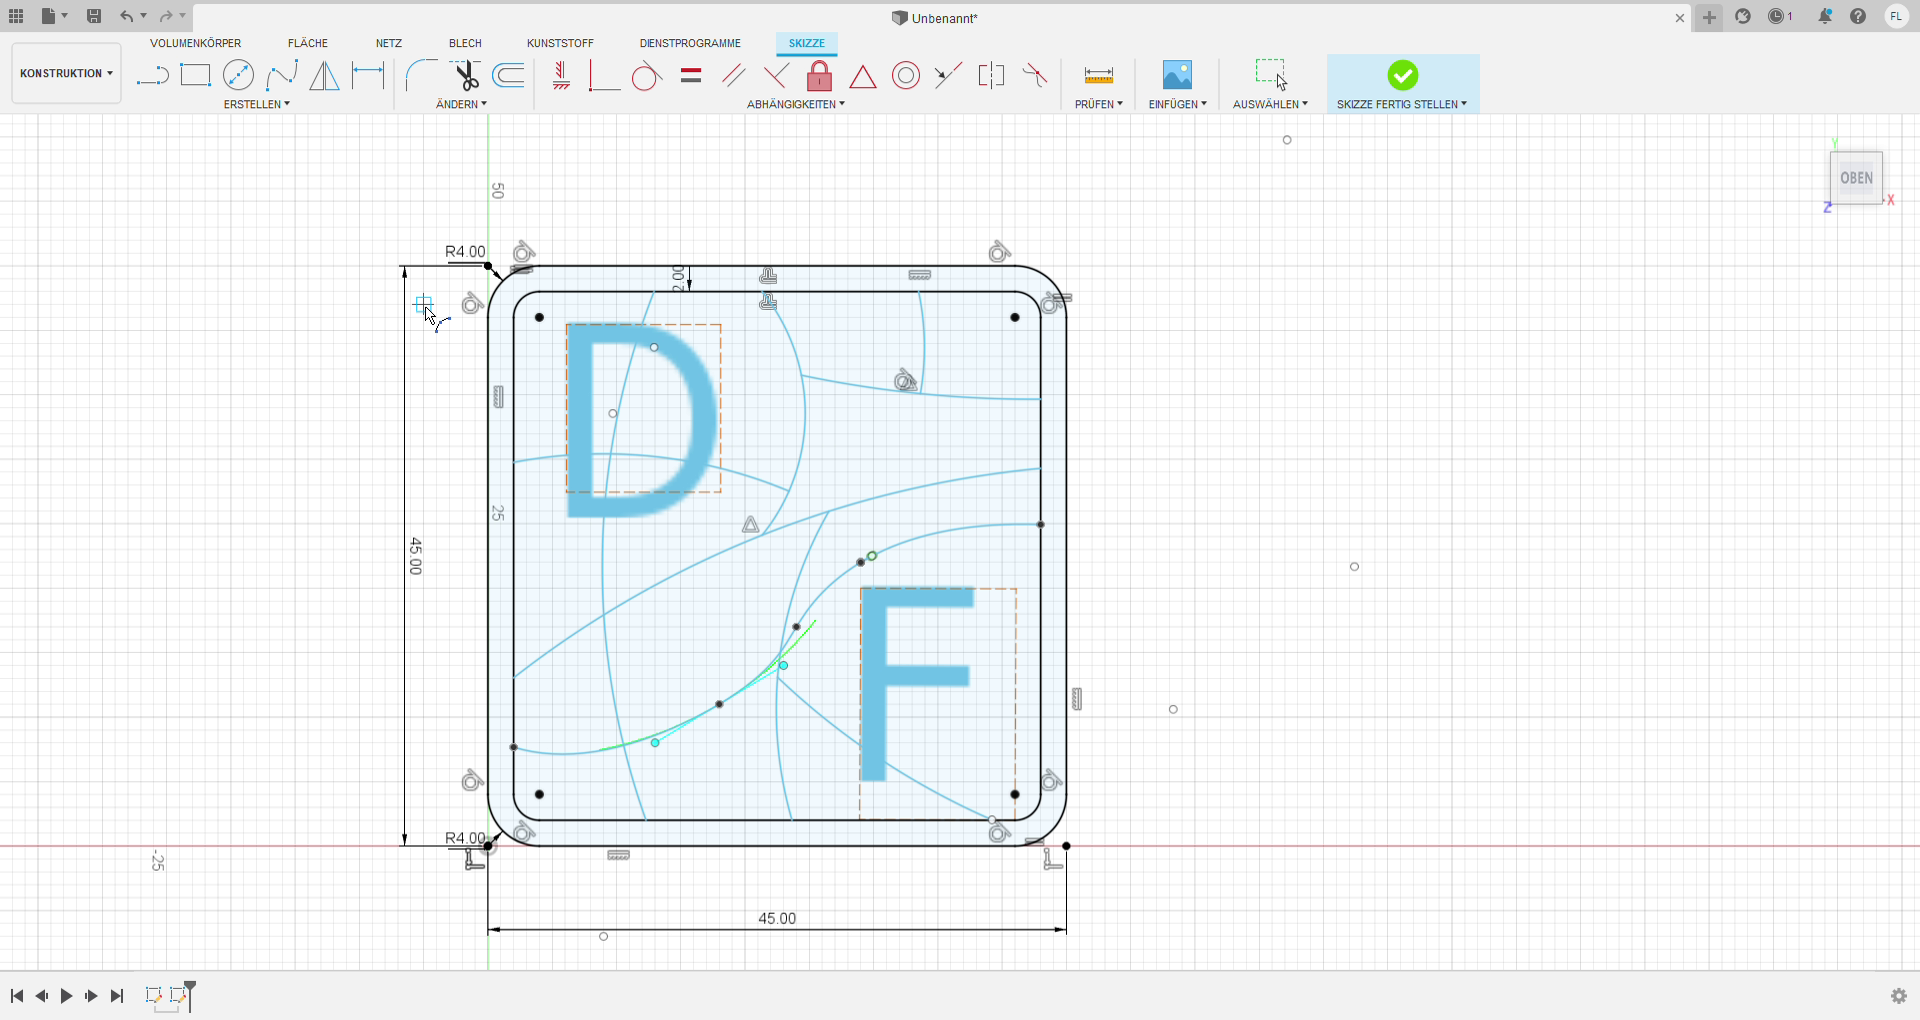
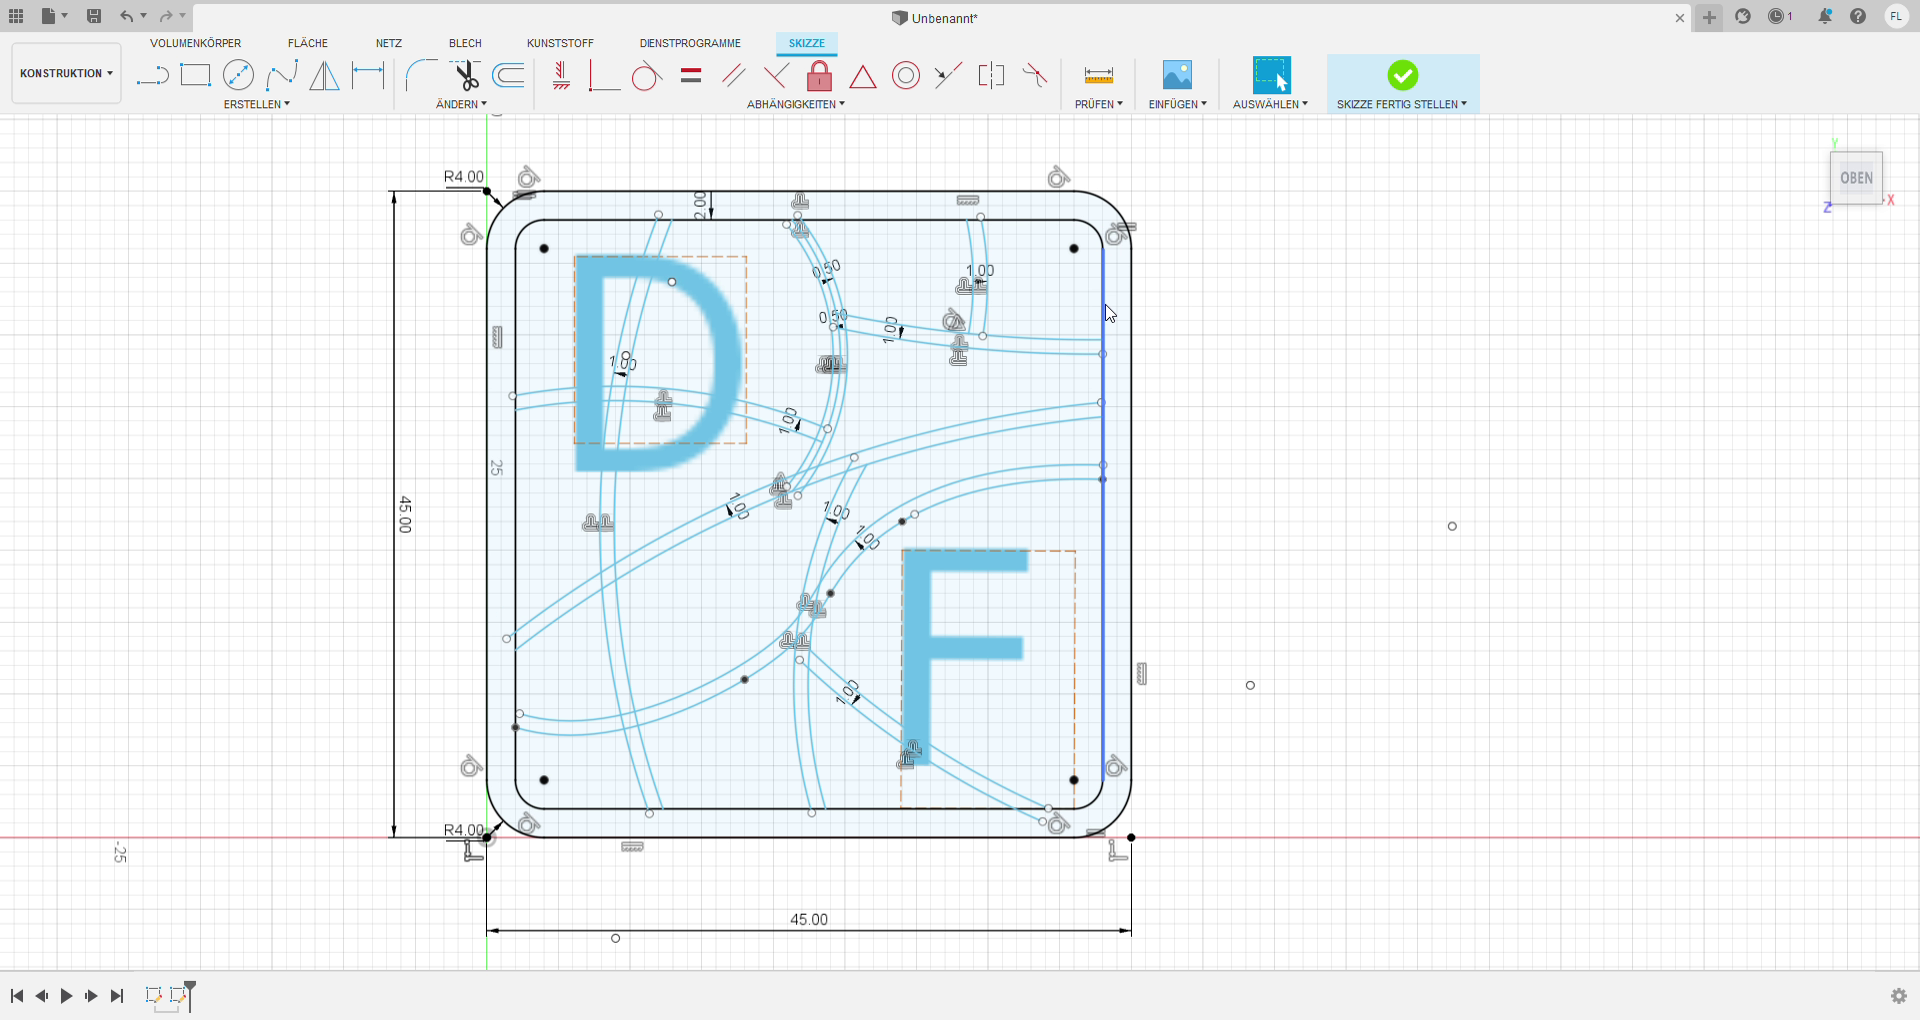
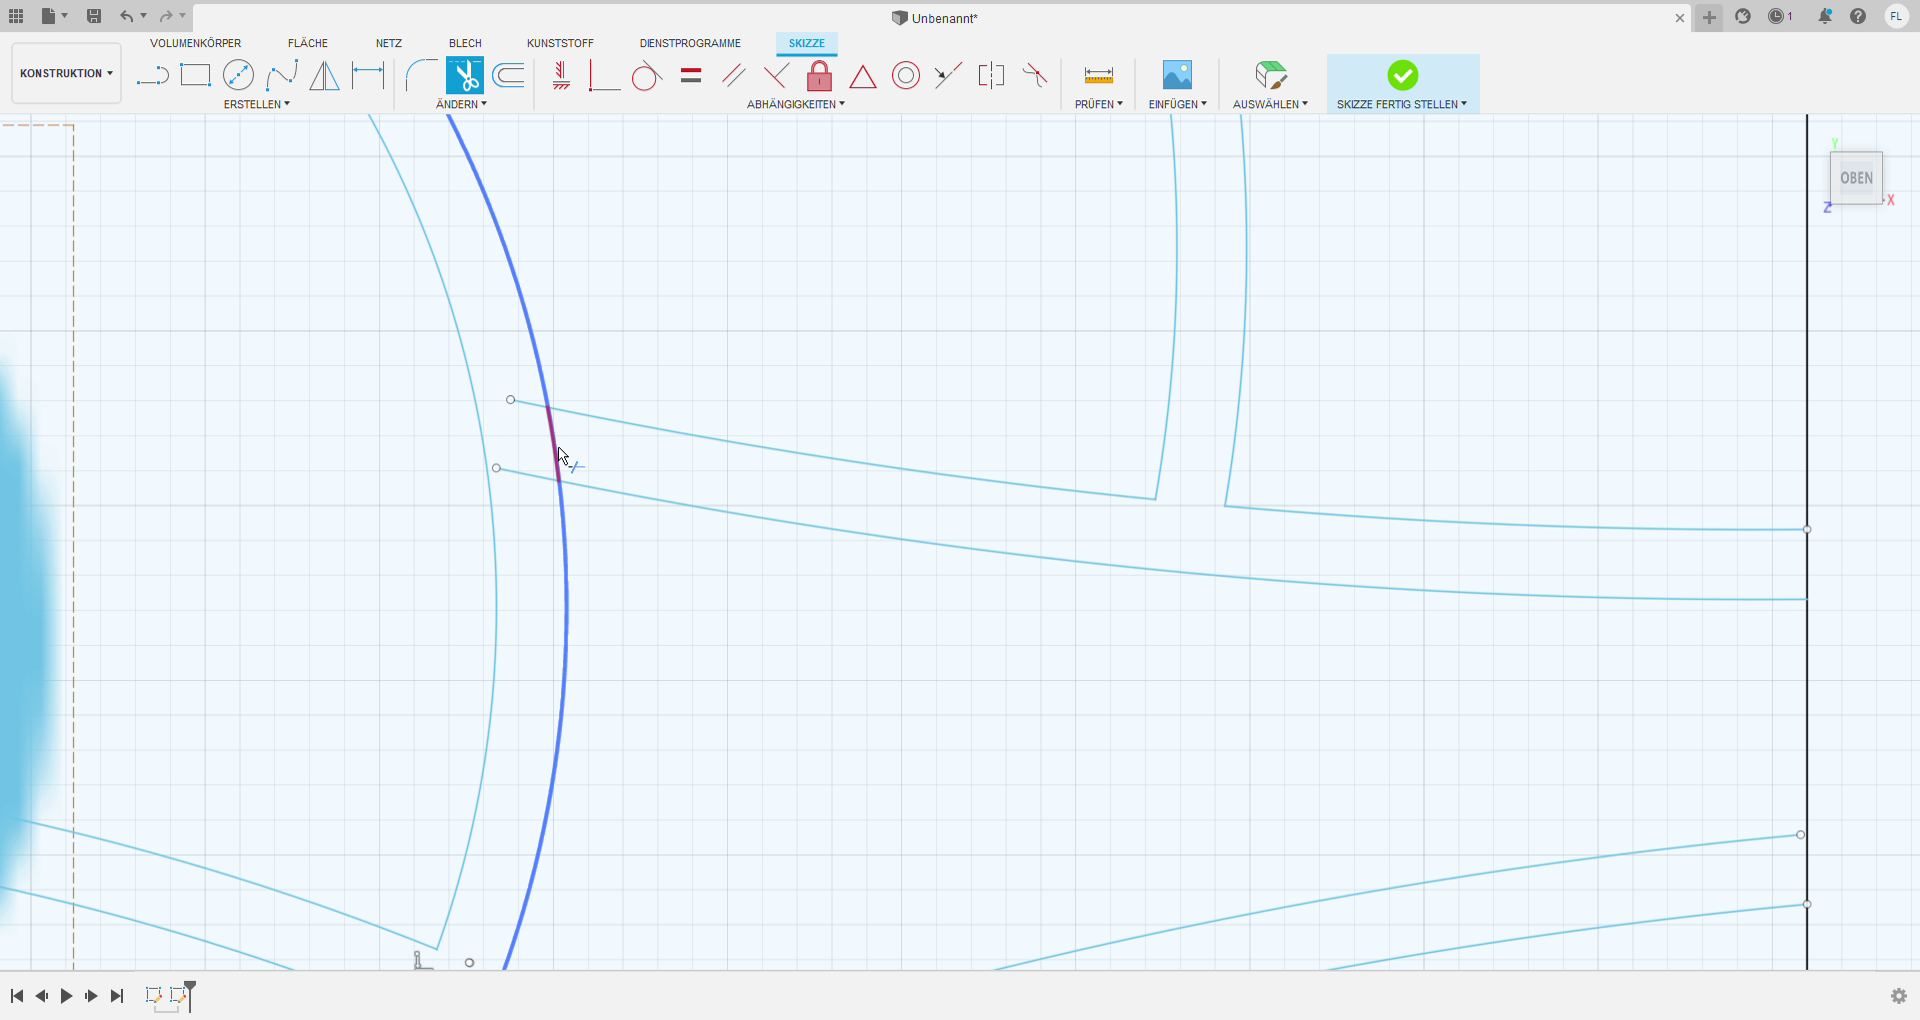

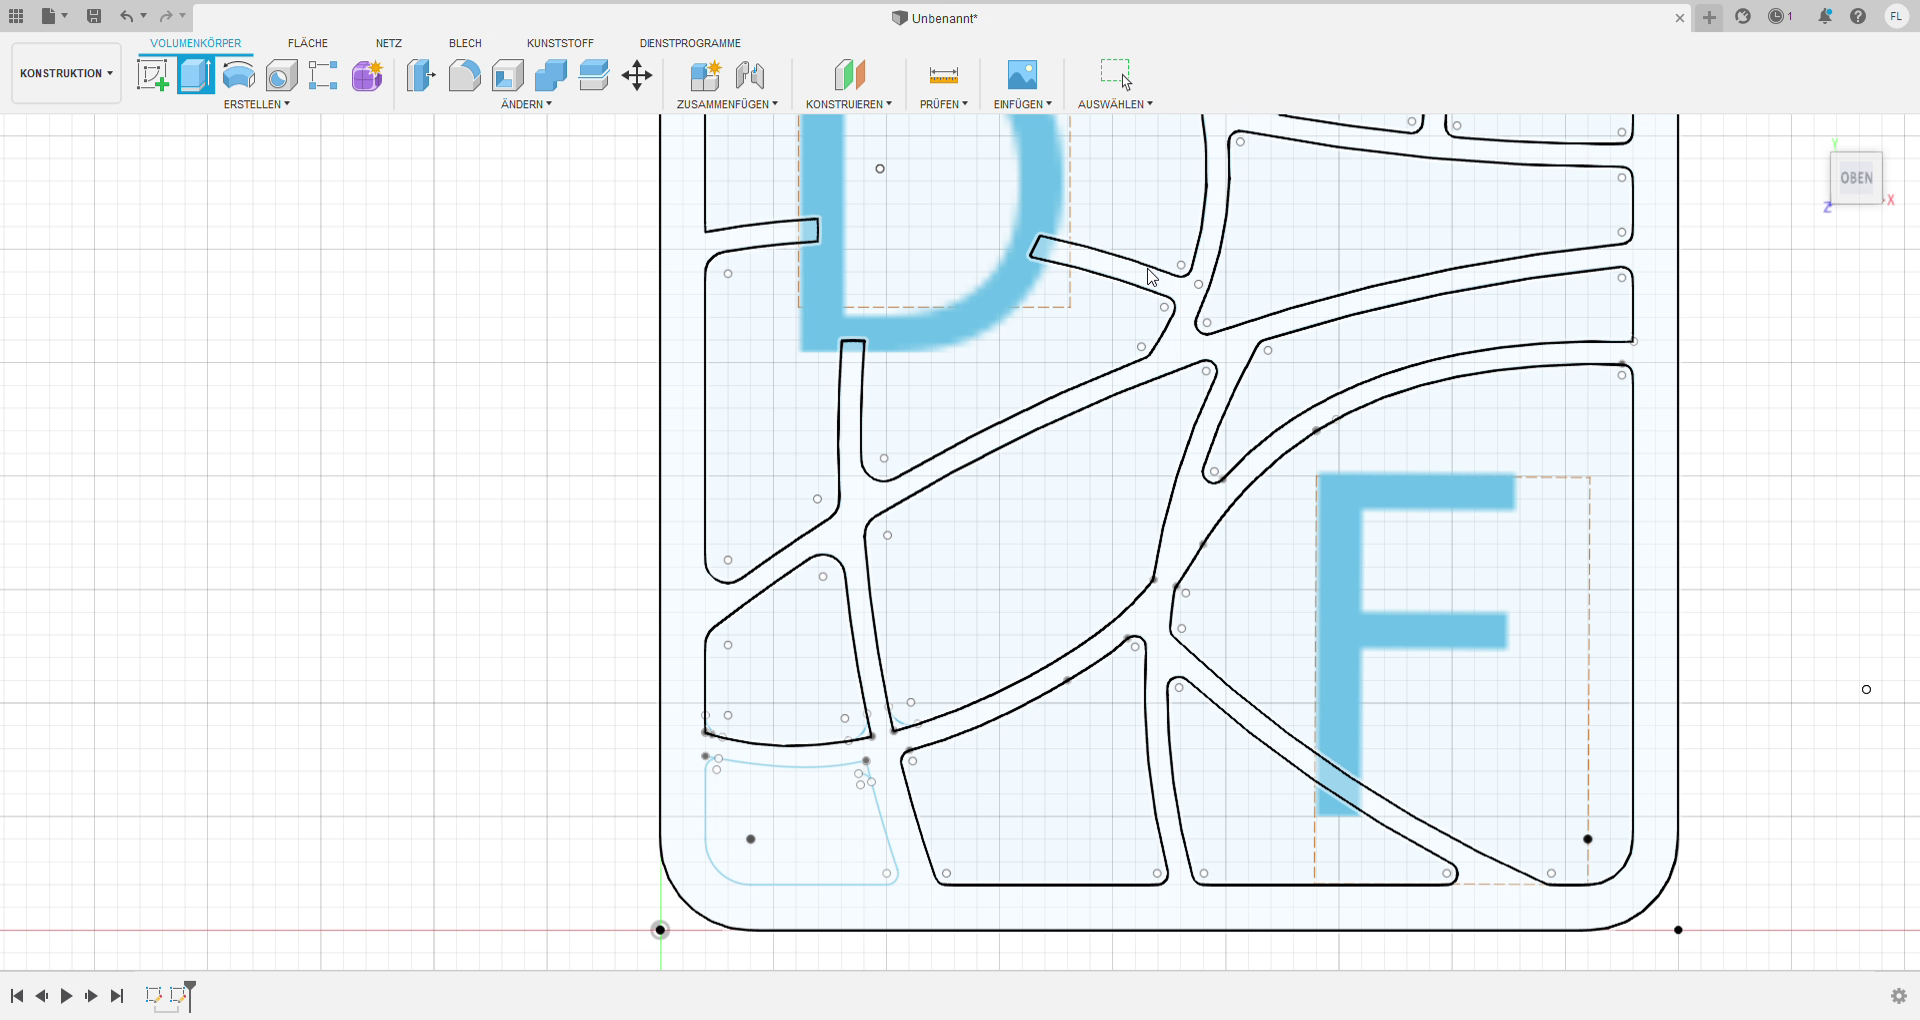
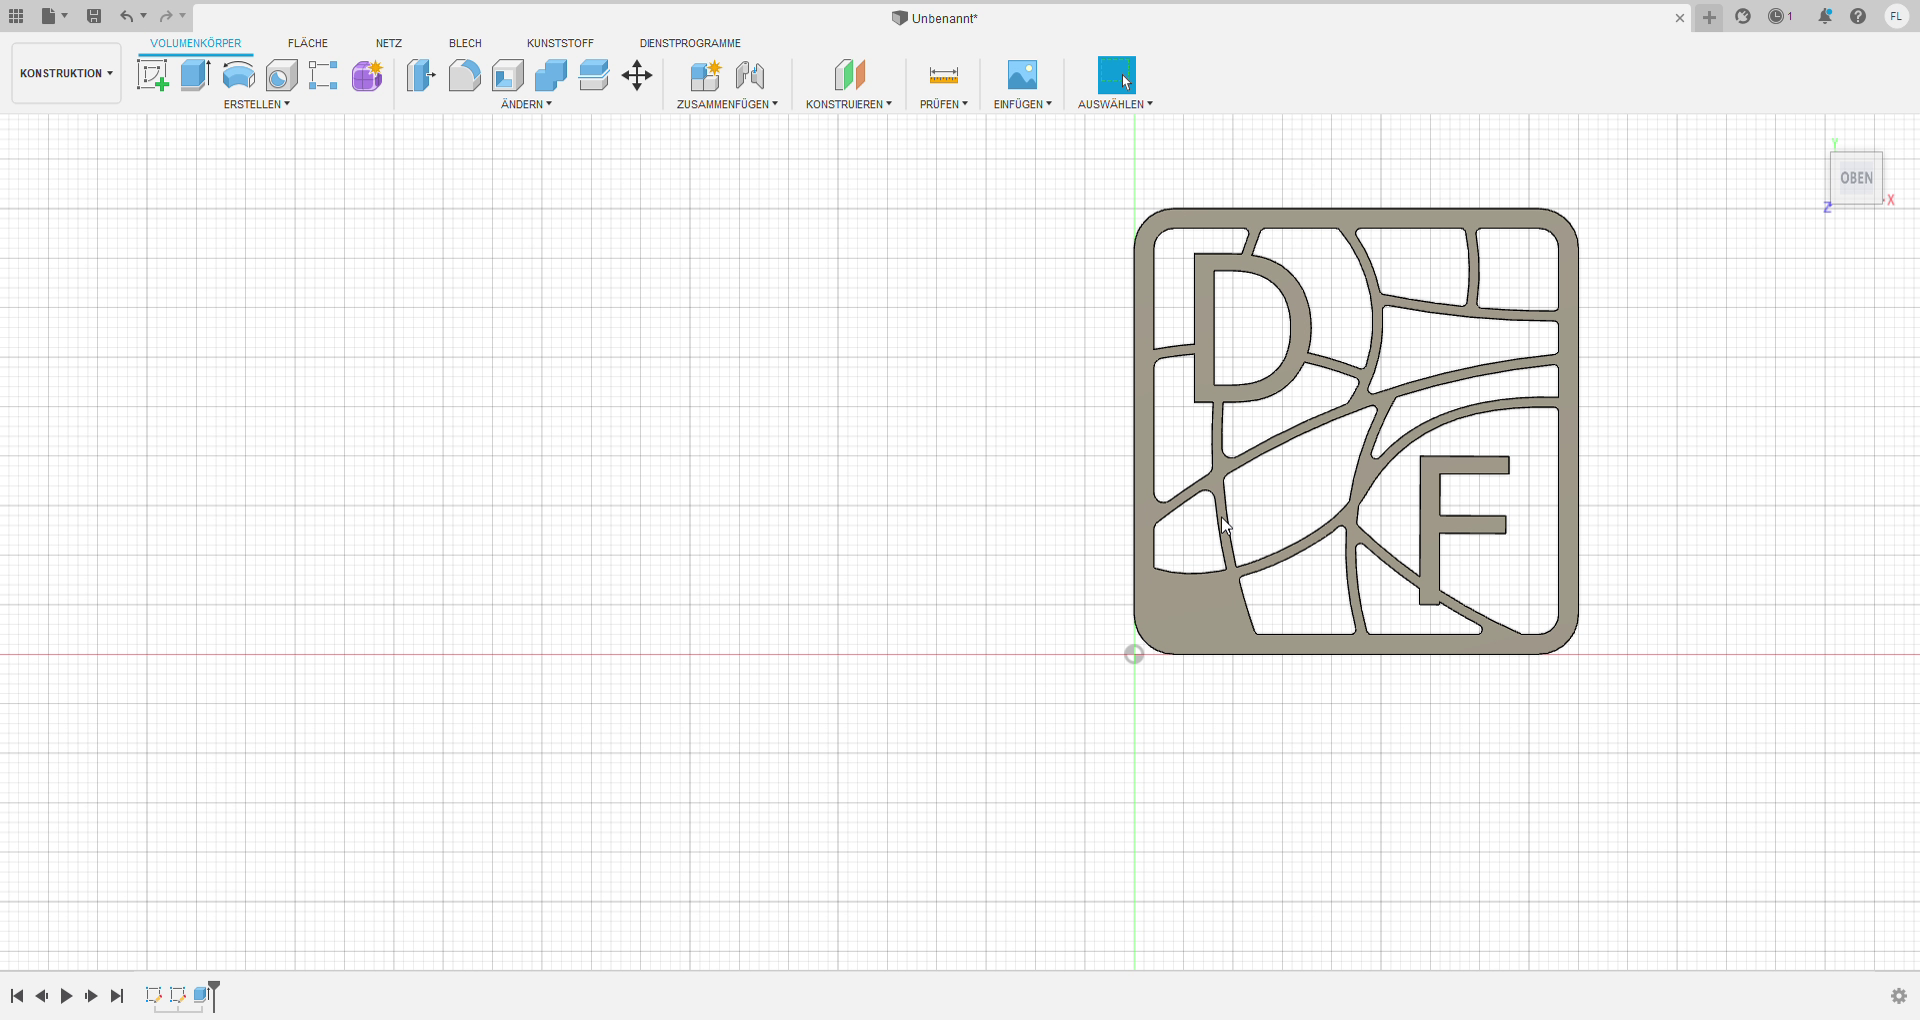
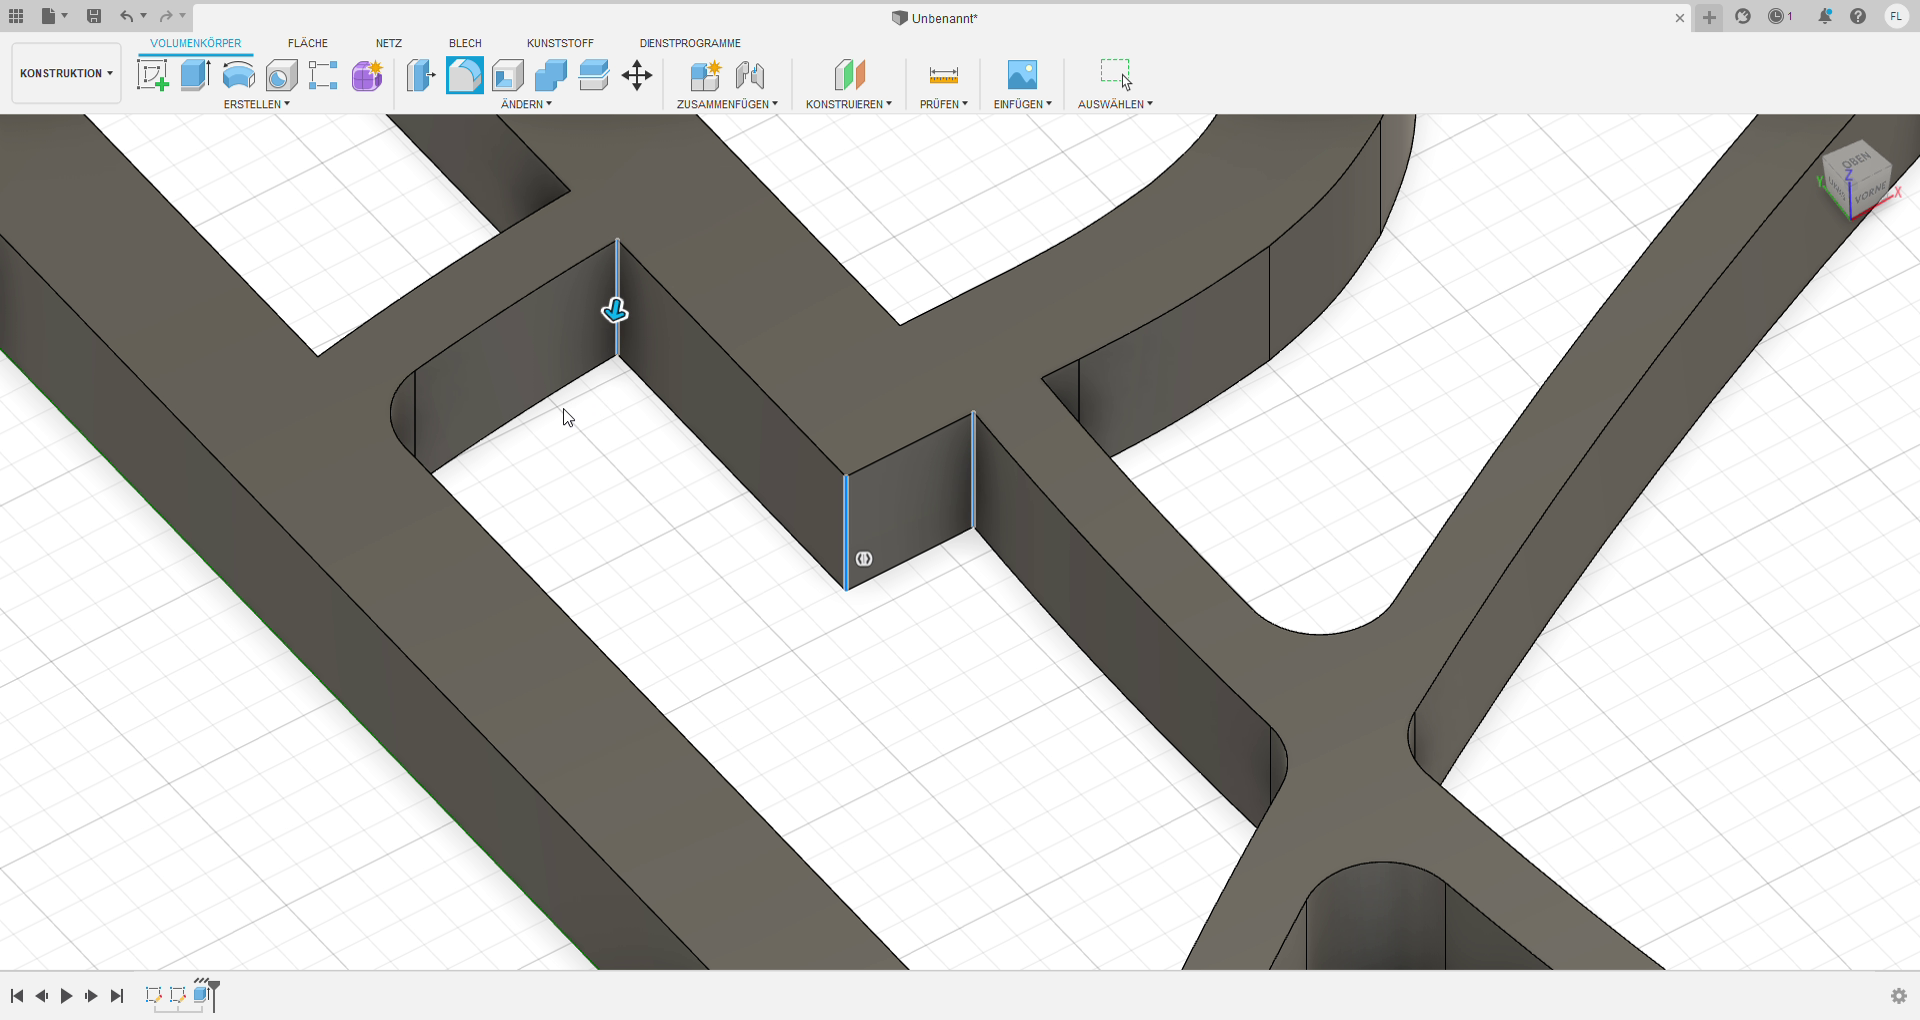
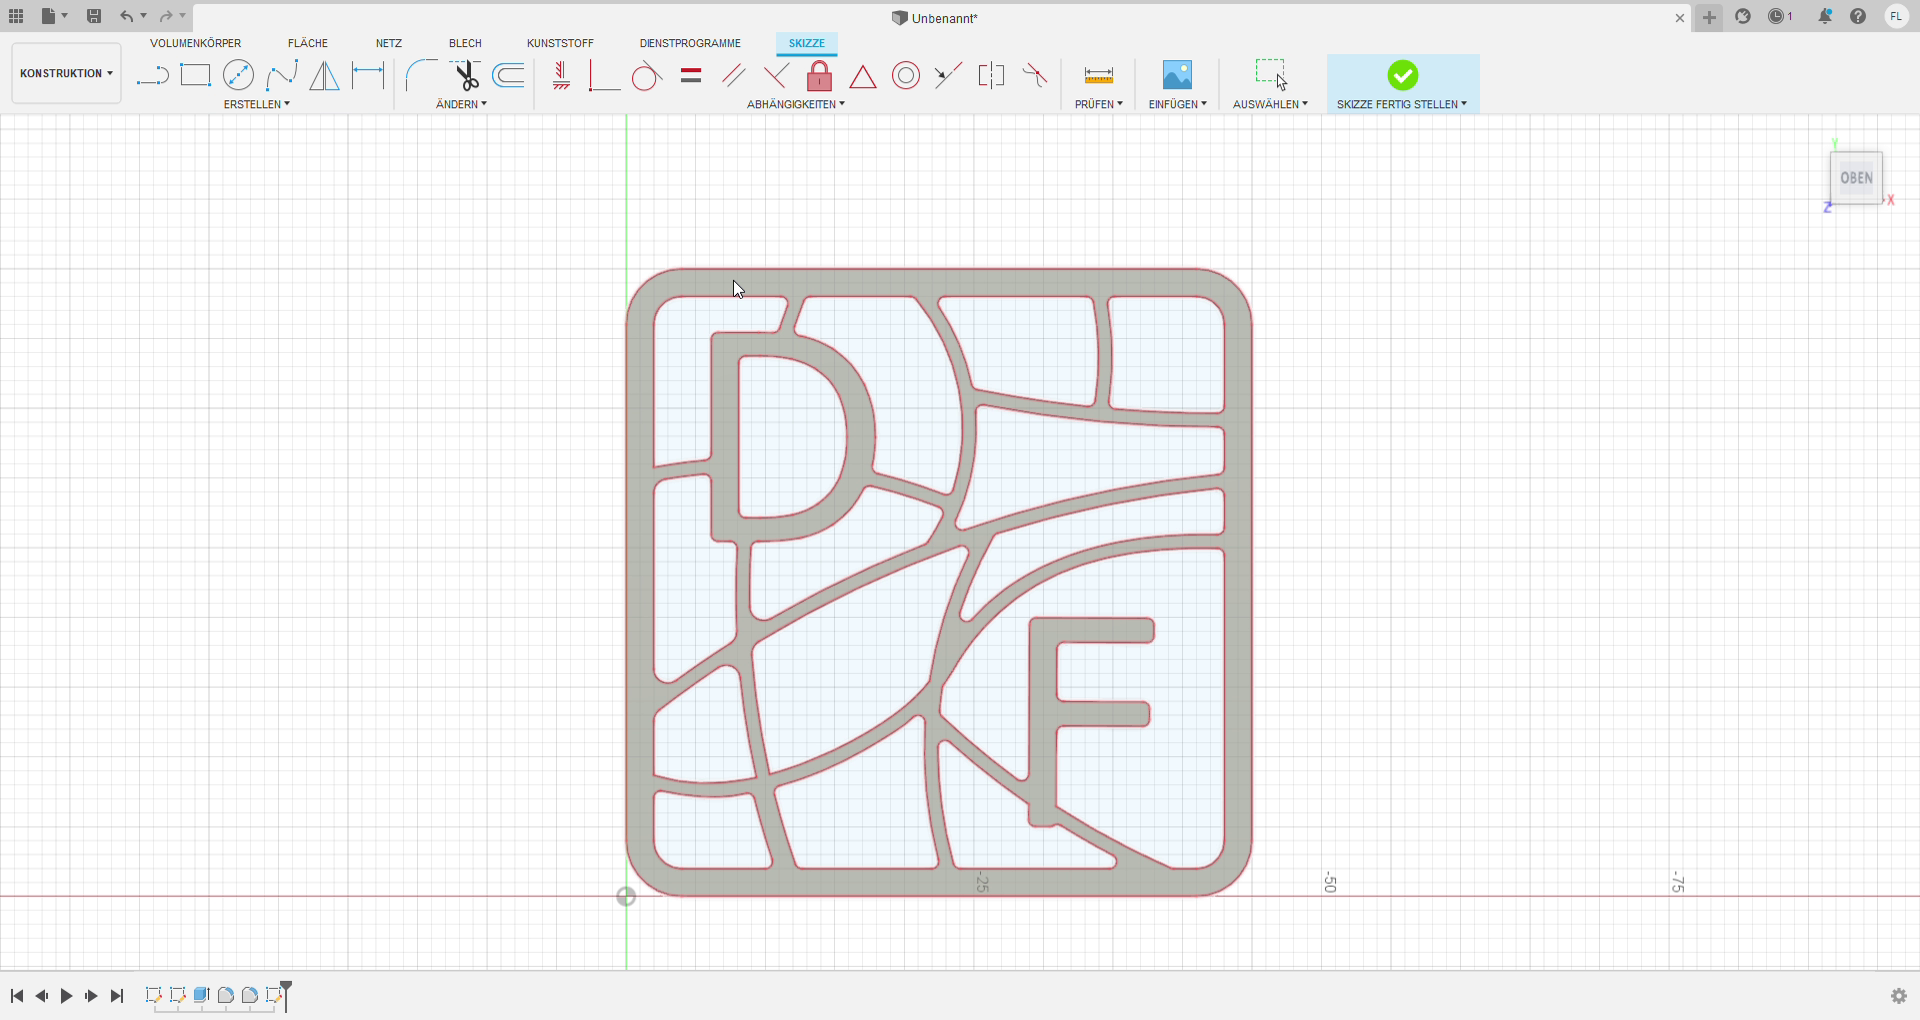
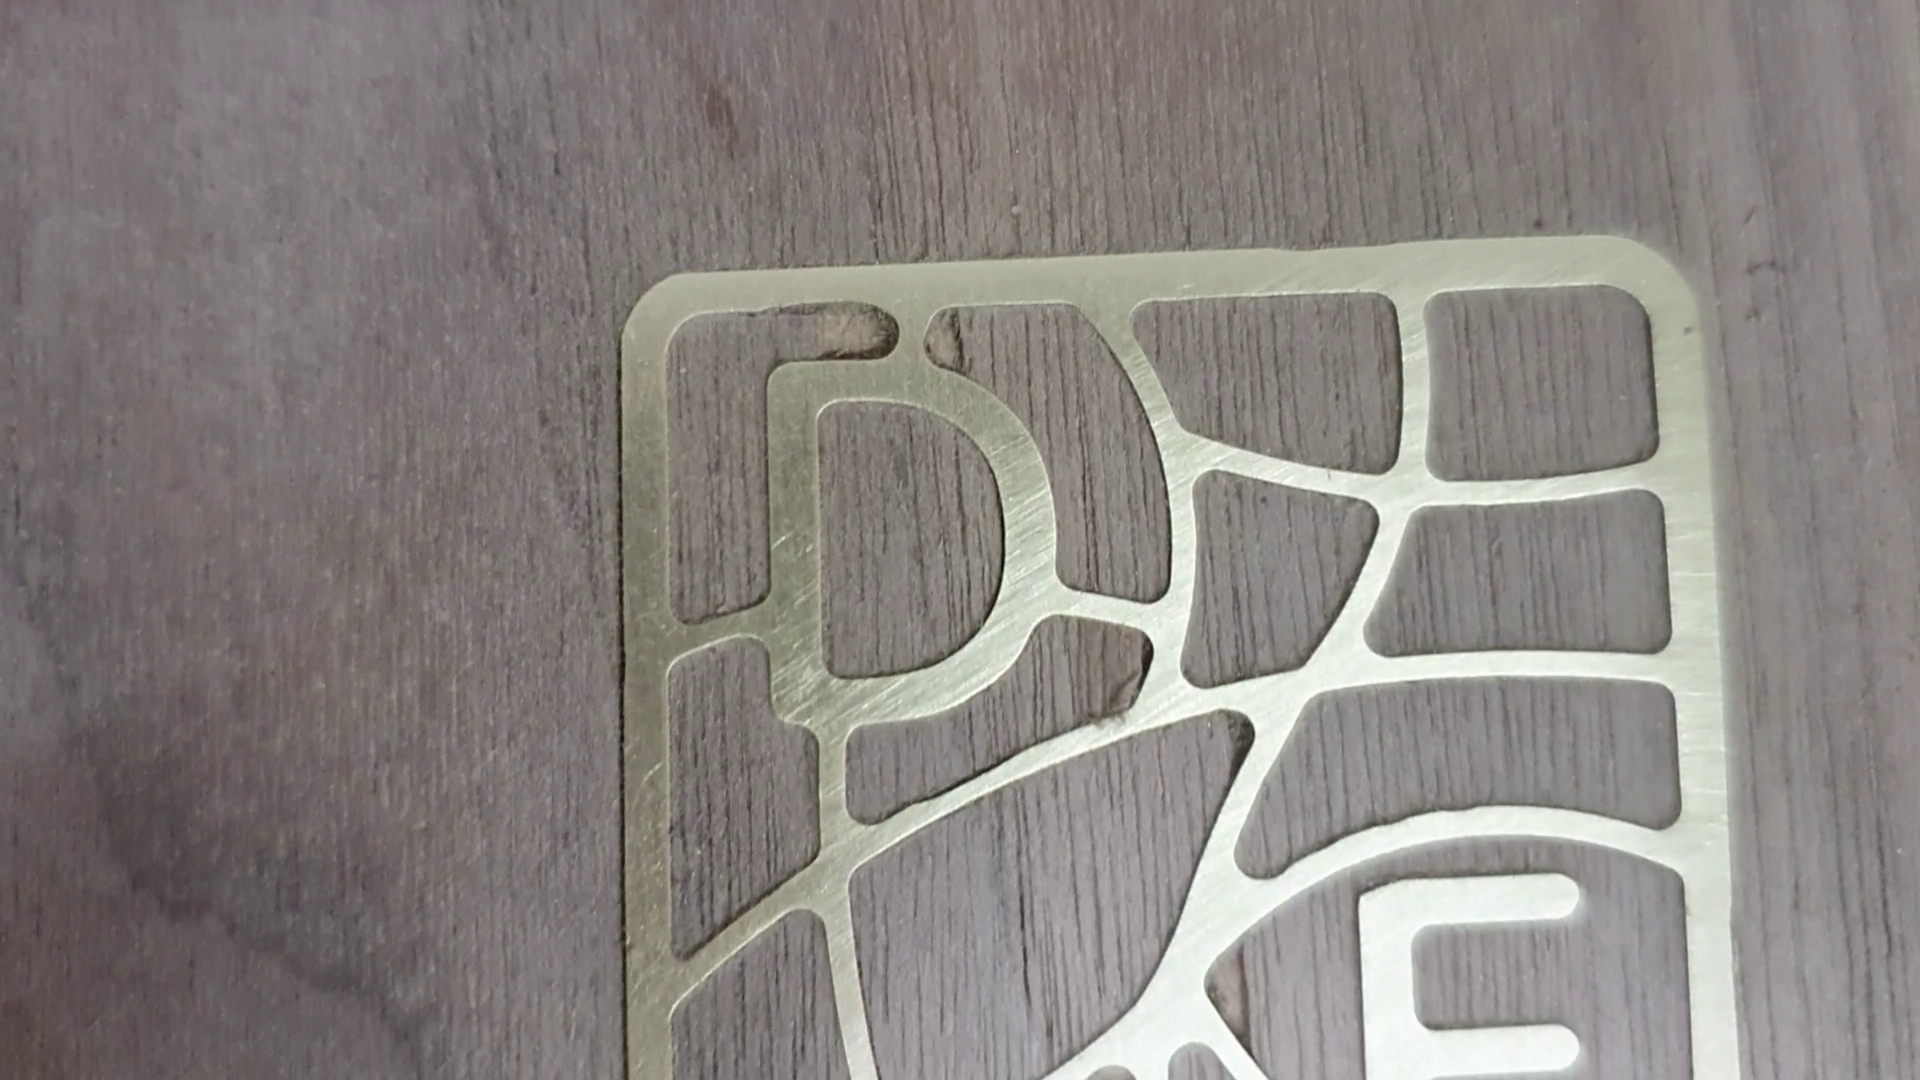
In the case you designed the logo on paper, like I did, you need to digitize the logo. I used the CAD program Fusion 360 for this process, but you can use any program, which can create a dxf-file. In Fusion 360, I first create a new part and create a new sketch. First off, I created the outline of the logo and defined the scale of my inlay, which is 45 mm * 45 mm. Therefore, I created a square and rounded the edges with a radius of 4 mm. Then I draw an outline of 2 mm. I used the text option to design the letters and placed them in the right spots. The letter size I used is 3.5 mm and the font is called Tahoma which is a very basic letter design. The curved design in the inside of the logo is made with the spline option, which can be used to create curves based on support points. Then I used again the outline function to create bars with a wide of 1 mm. The following step is based on countless uses of the trim function to create a closed contour. Keep in mind to round all sharp edges with a minimal radius as your smallest end bit. The transition from the lines to the letters is a little more challenging. Therefore, I first extrude the letters and the lines to create an object. Following I rounded the sharp corners using the filet tool. The final sketch is made by first creating a new sketch and using the project option to track the contour. Export the sketch as dxf-file for the following steps at the cnc.
Preparing the Cam Program
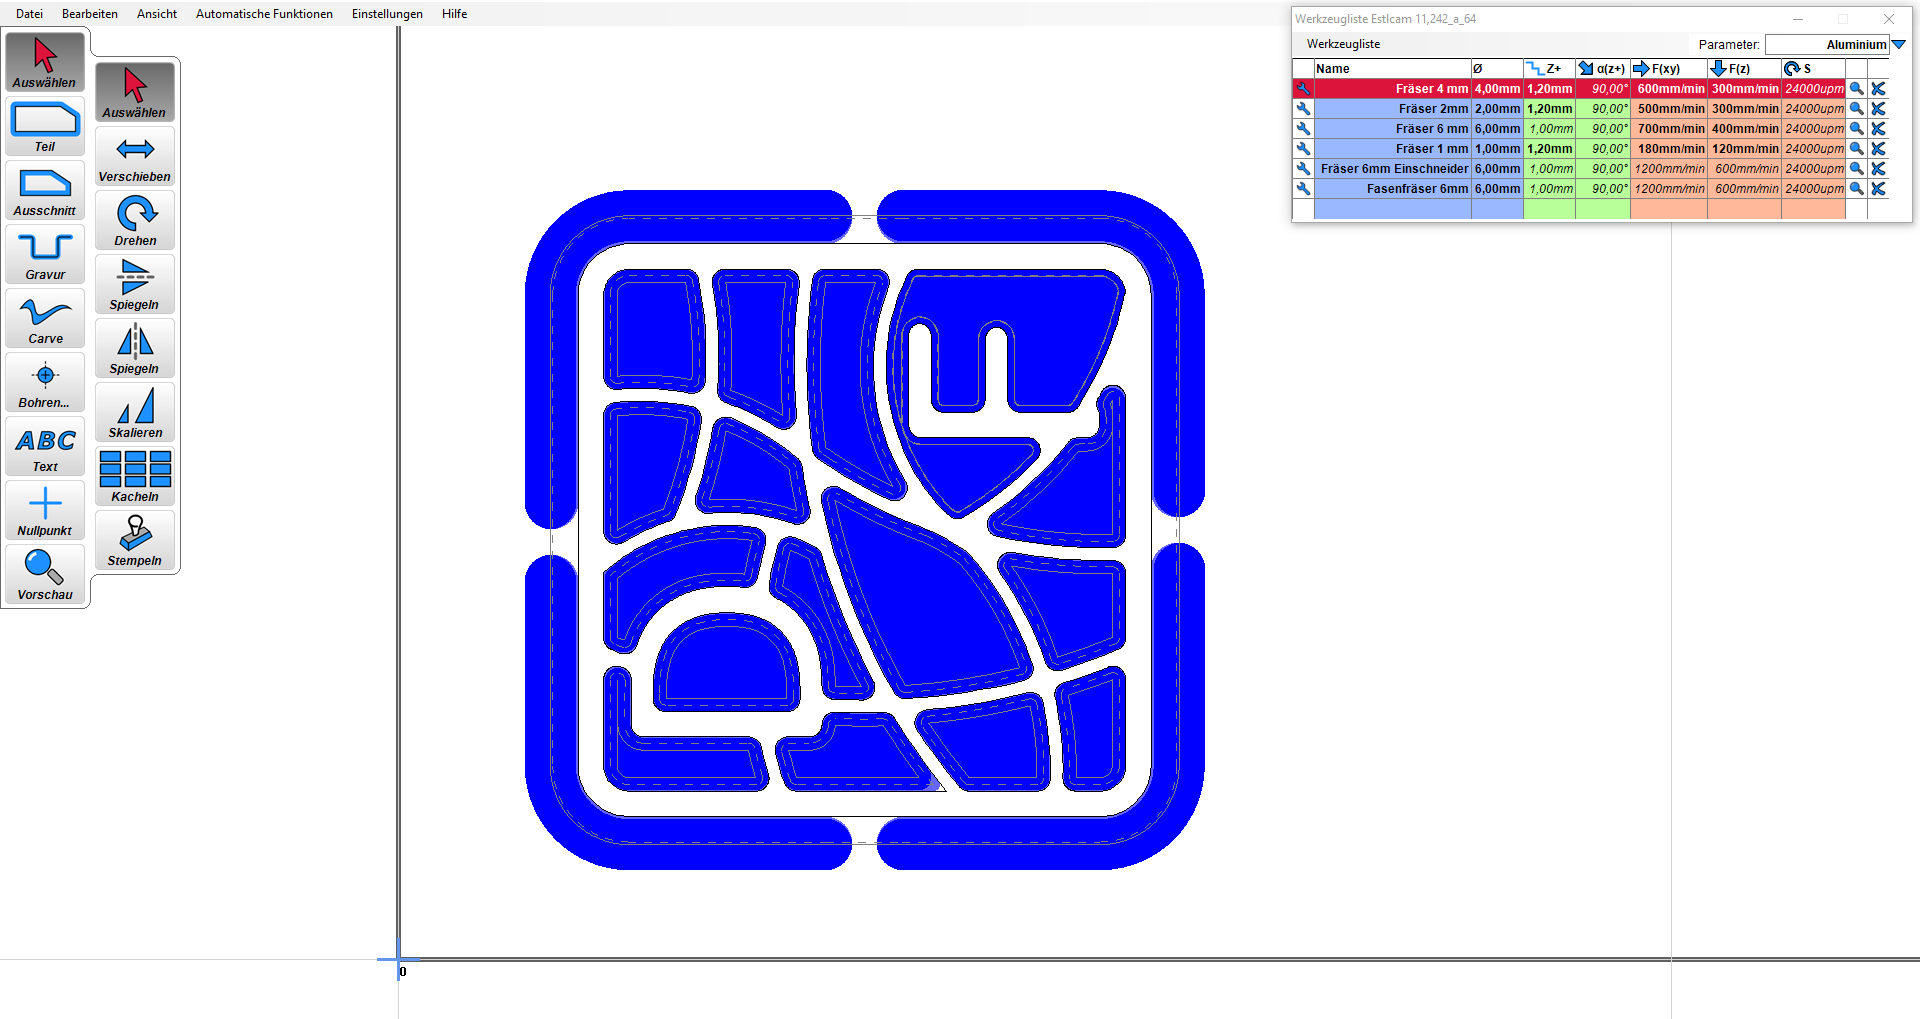
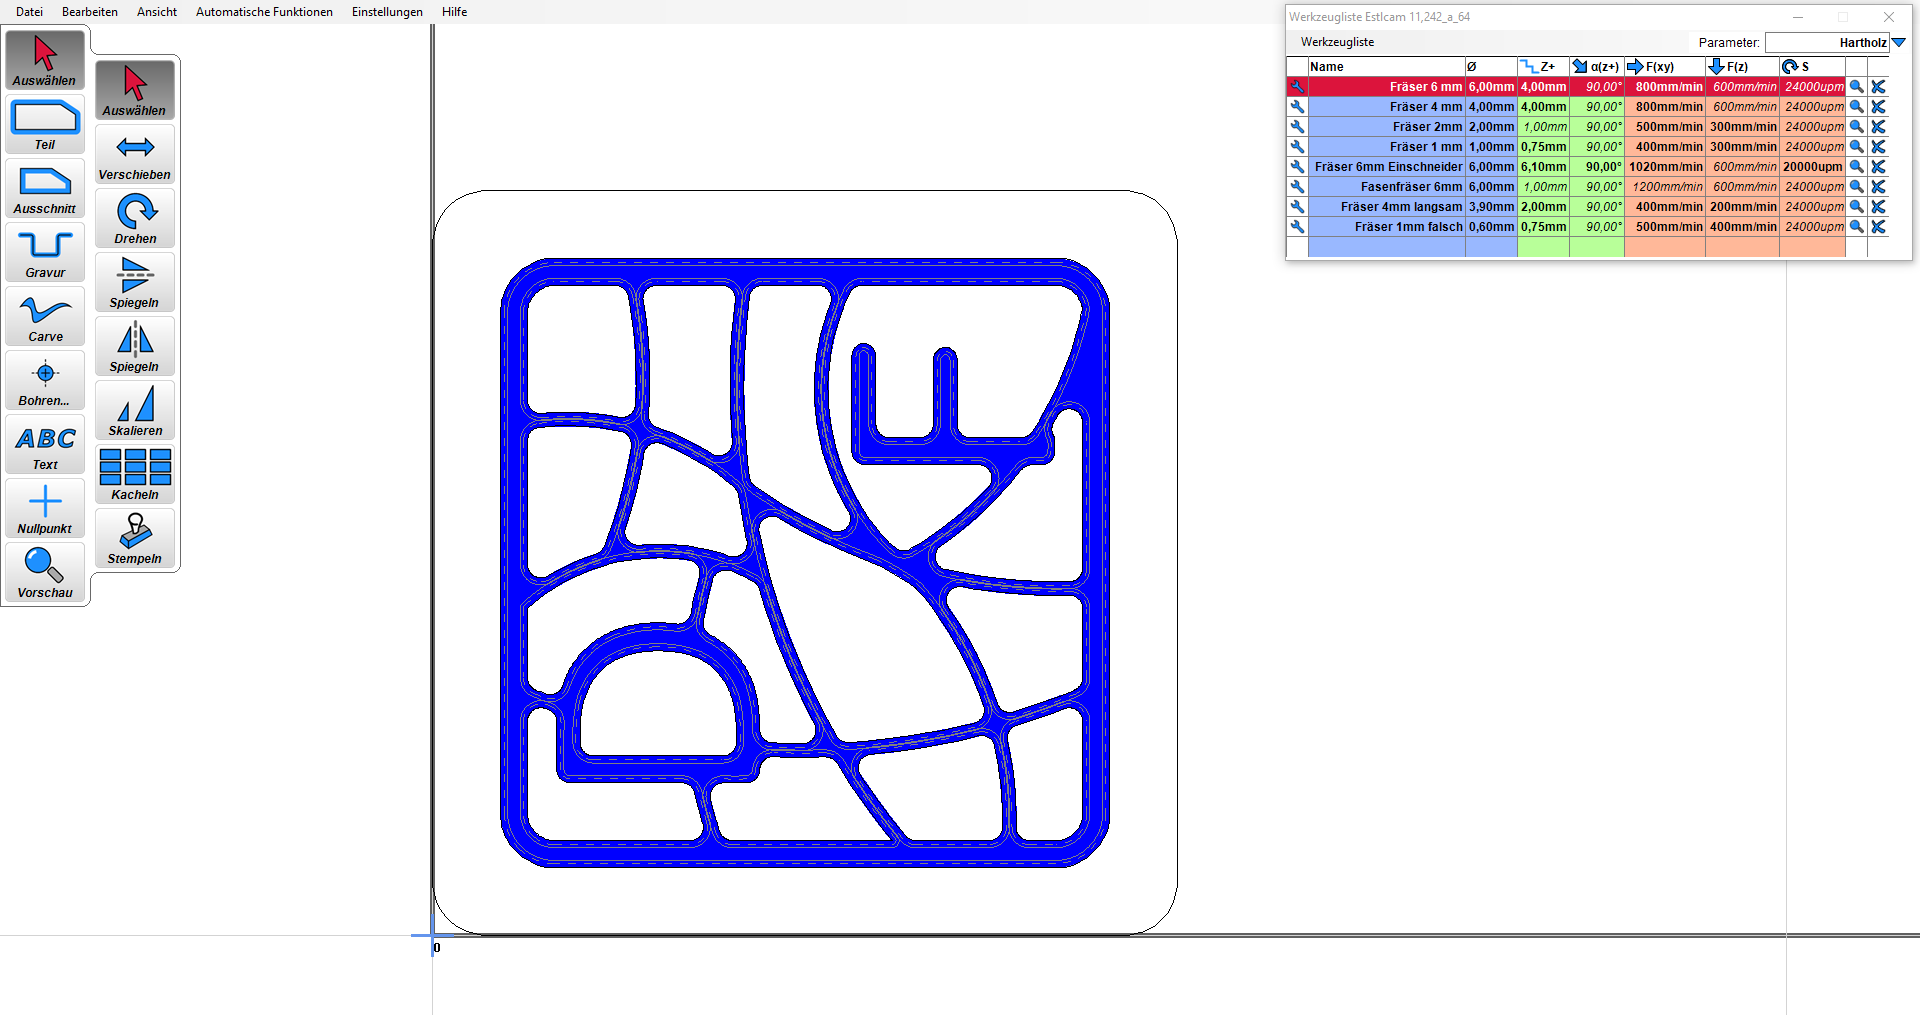
Depending on your cam program, the following step might be different. I am using the cam program Estlcam, but you can also use fusion 360 itself. I am using the 4mm end mill for the broaching. For the contour and the smaller inner parts, I am using the 1 mm end mill. To create a perfect fit, I set a different diameter for the 1 mm in the cam software. This creates an offset for the tool path and creates also different tolerances. The value of the offset depends on the machine. Because my cnc is self-made, I can´t give you recommendations for the tolerances.
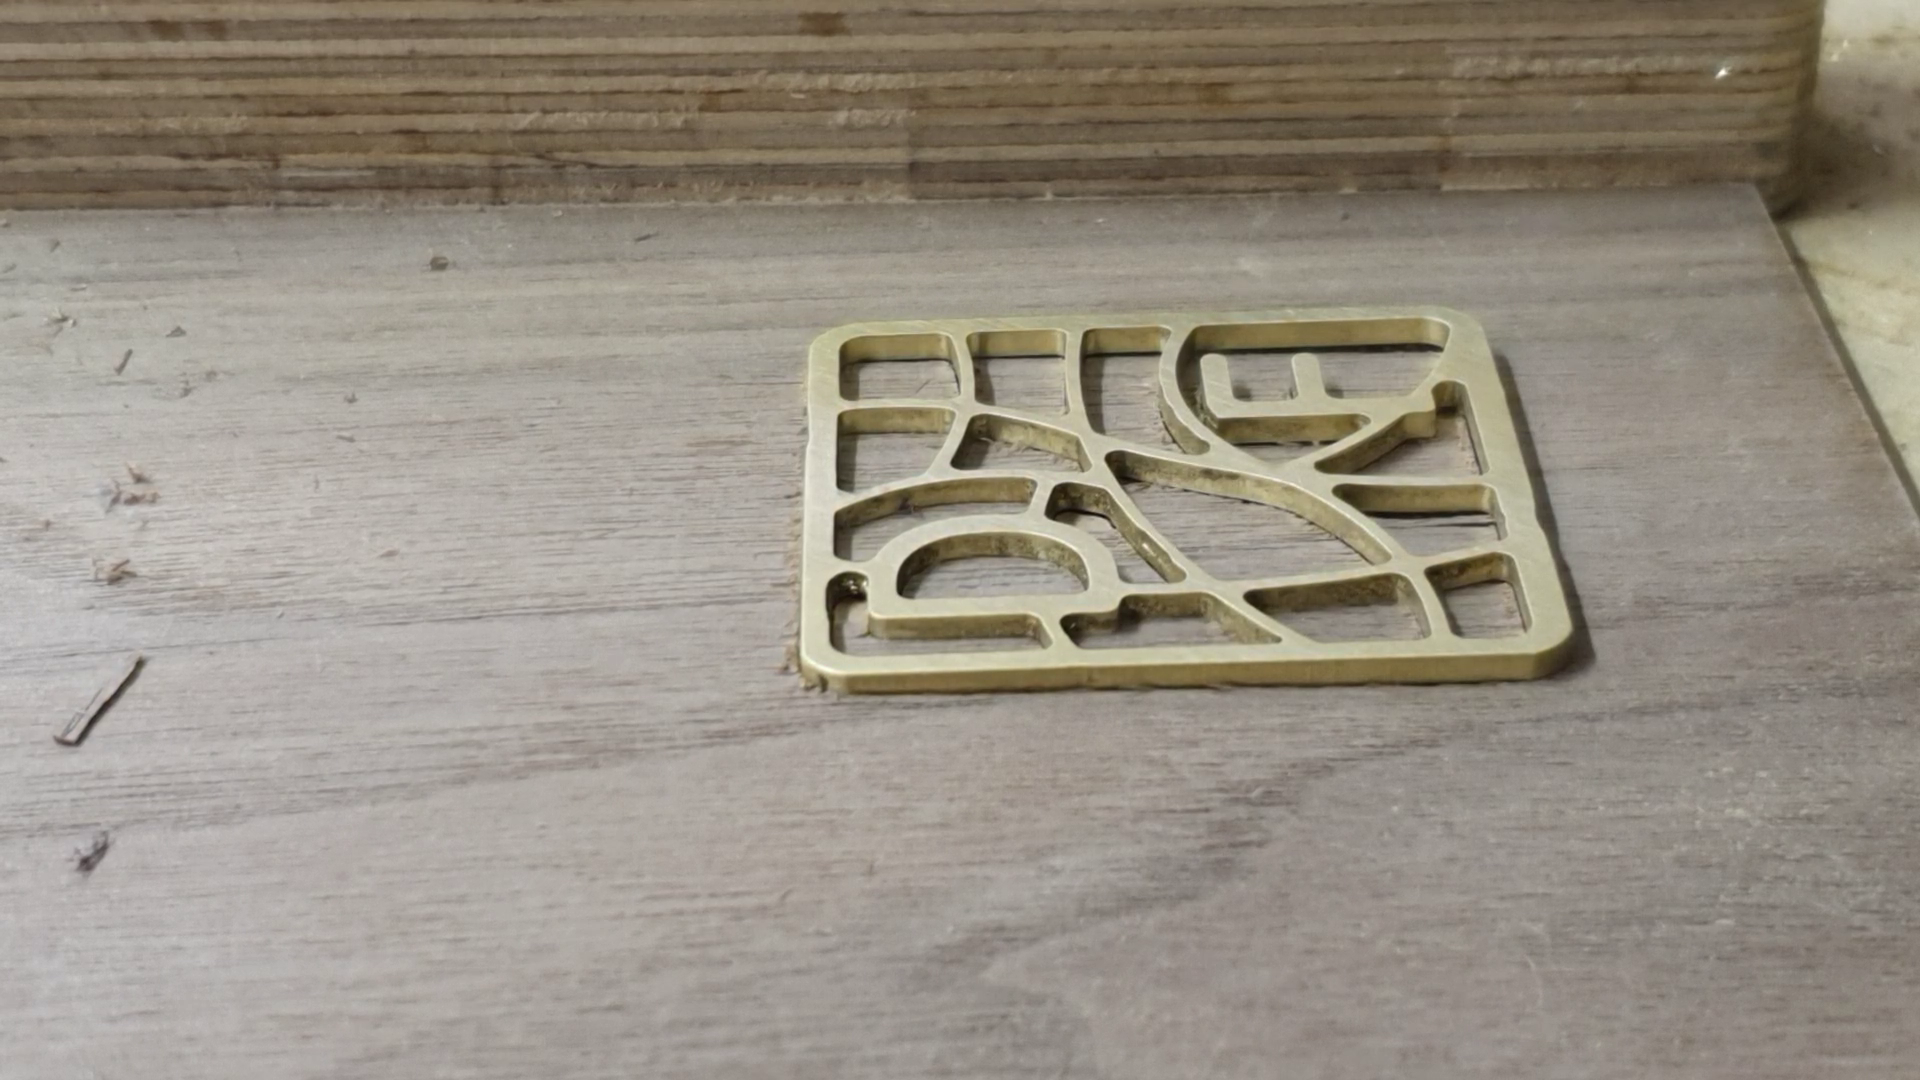
Machining the Brass Plate
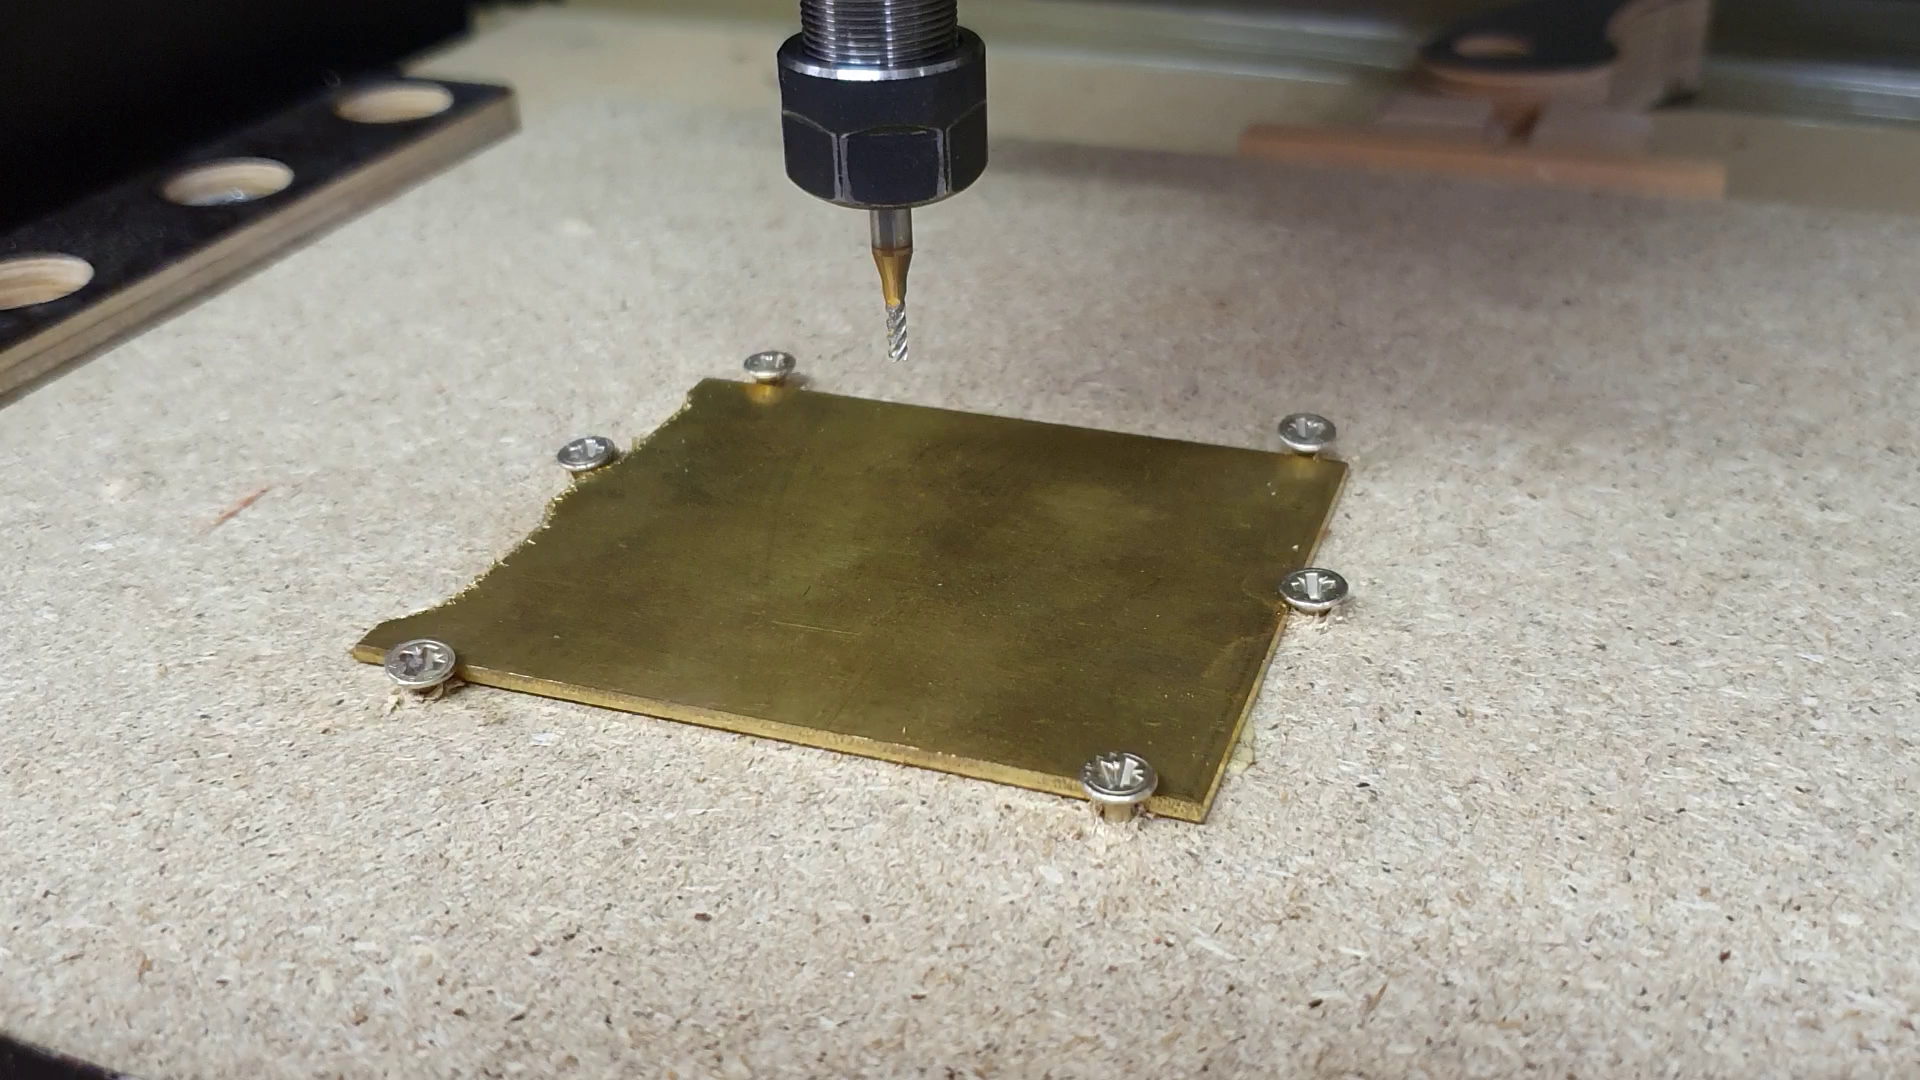
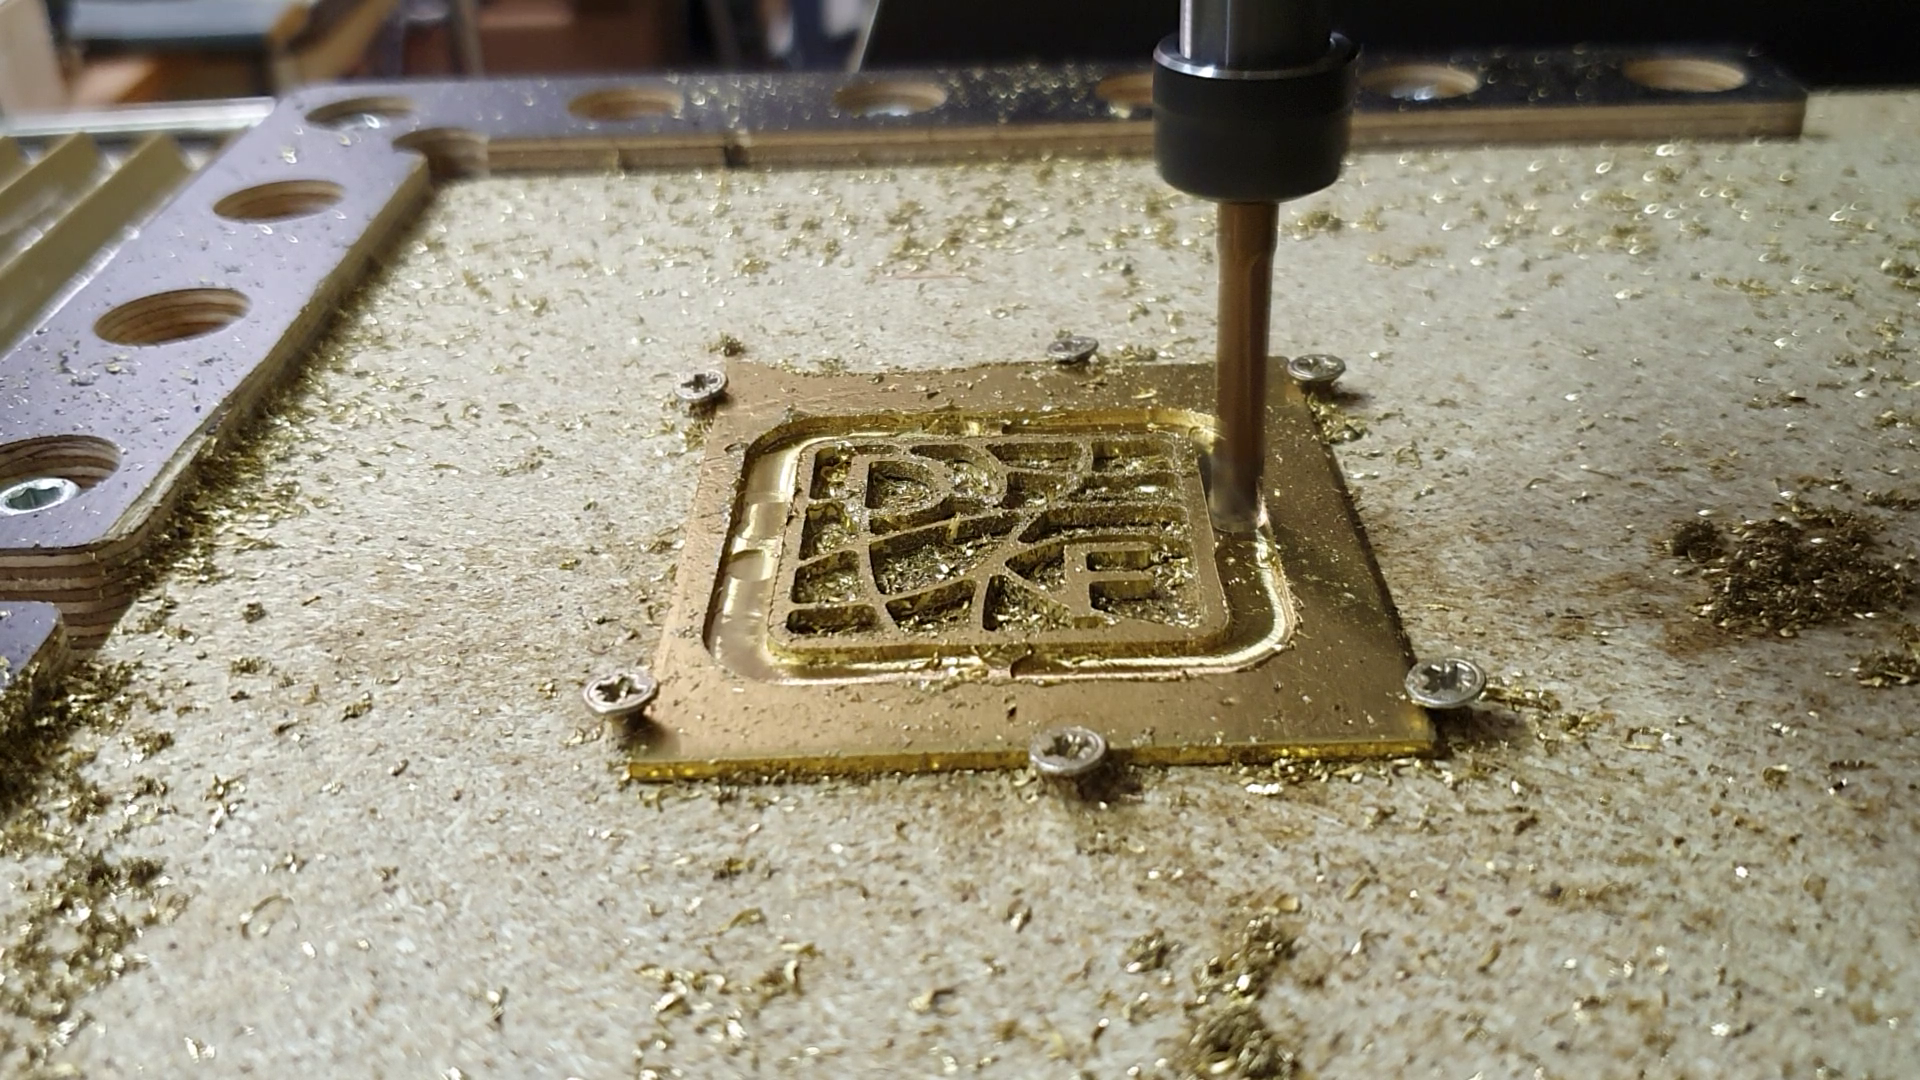
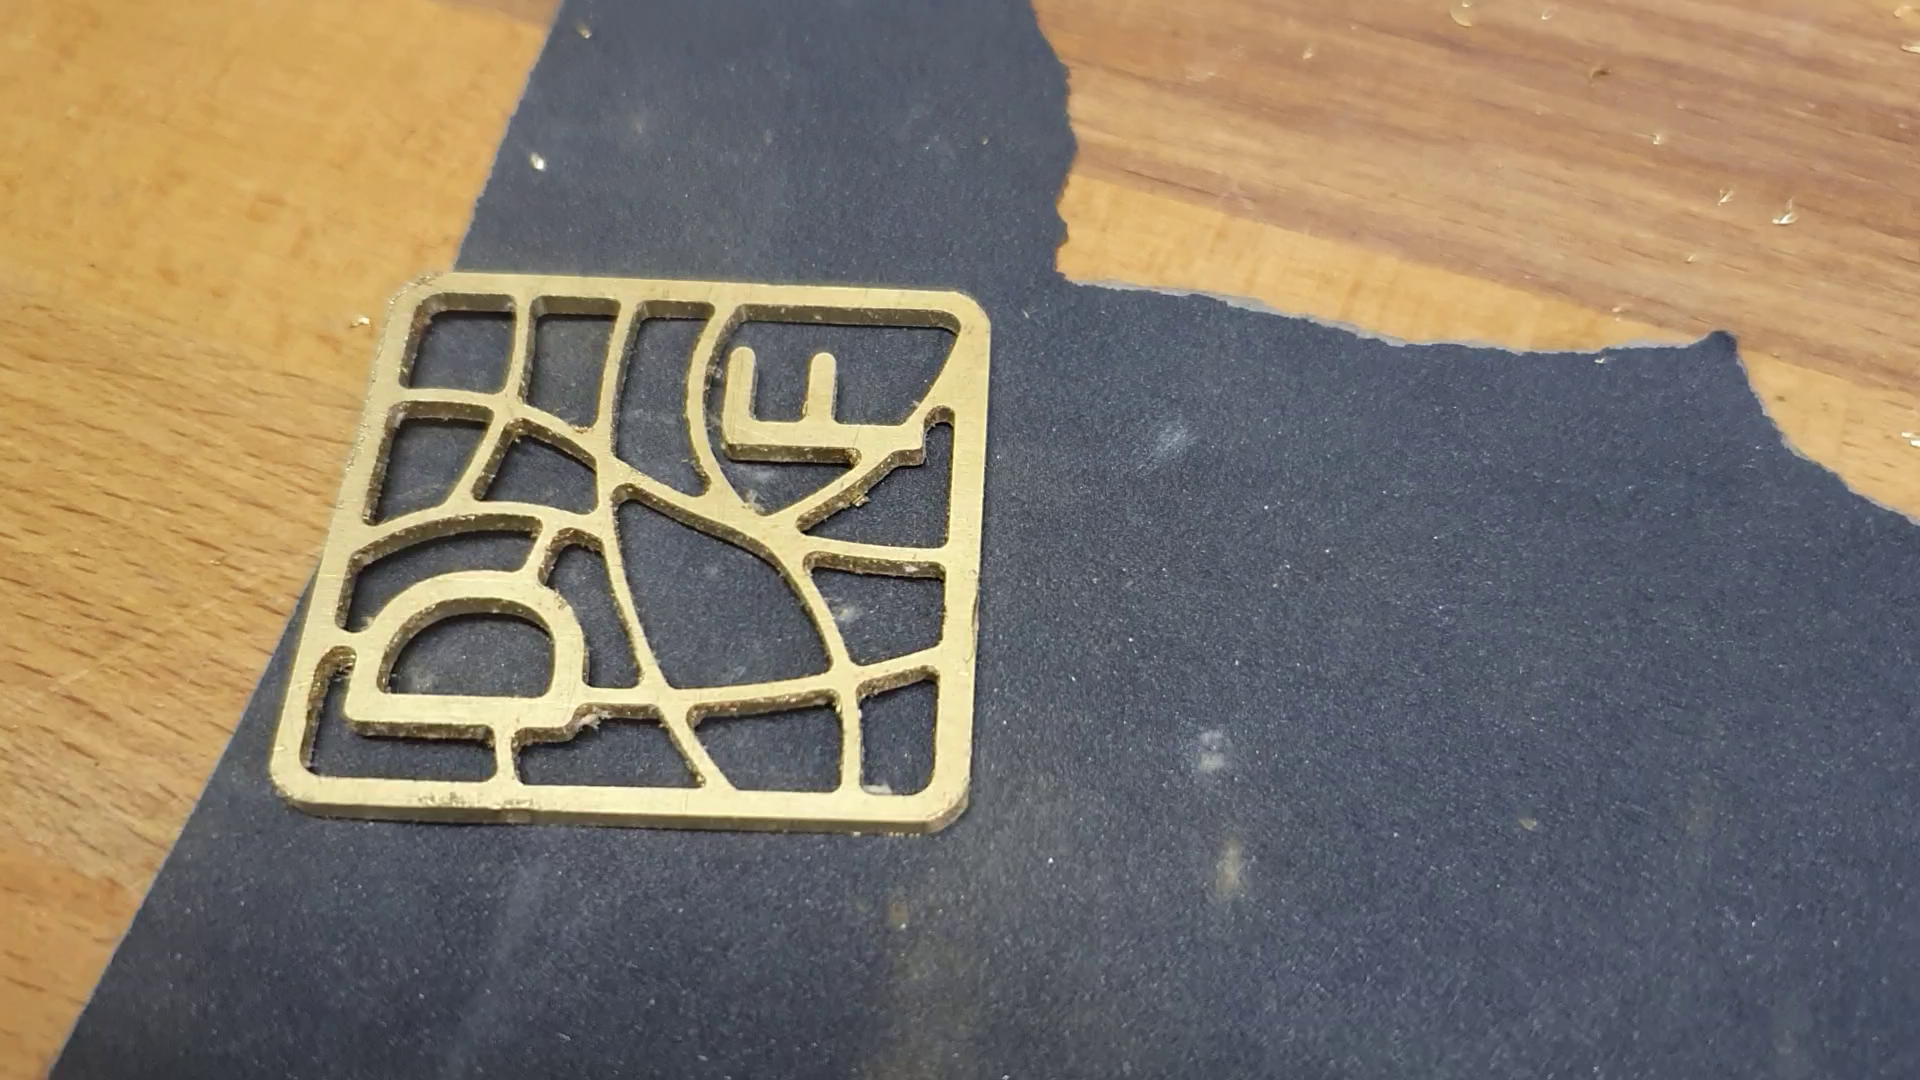
Secure the brass plate safely on your cnc waste board. You can use tape or clamps for this purpose, depending on your milling speed, size of the brass plate itself etc. I am pretty sure you know your machine better than I does. For a better cooling use some isopropanol alcohol or other lubricant. Use some unmachined part to set the end mill position to zero, to get a reference for the second end mill. After machining the part sand of the sharp edges.
Machining the Walnut Wood
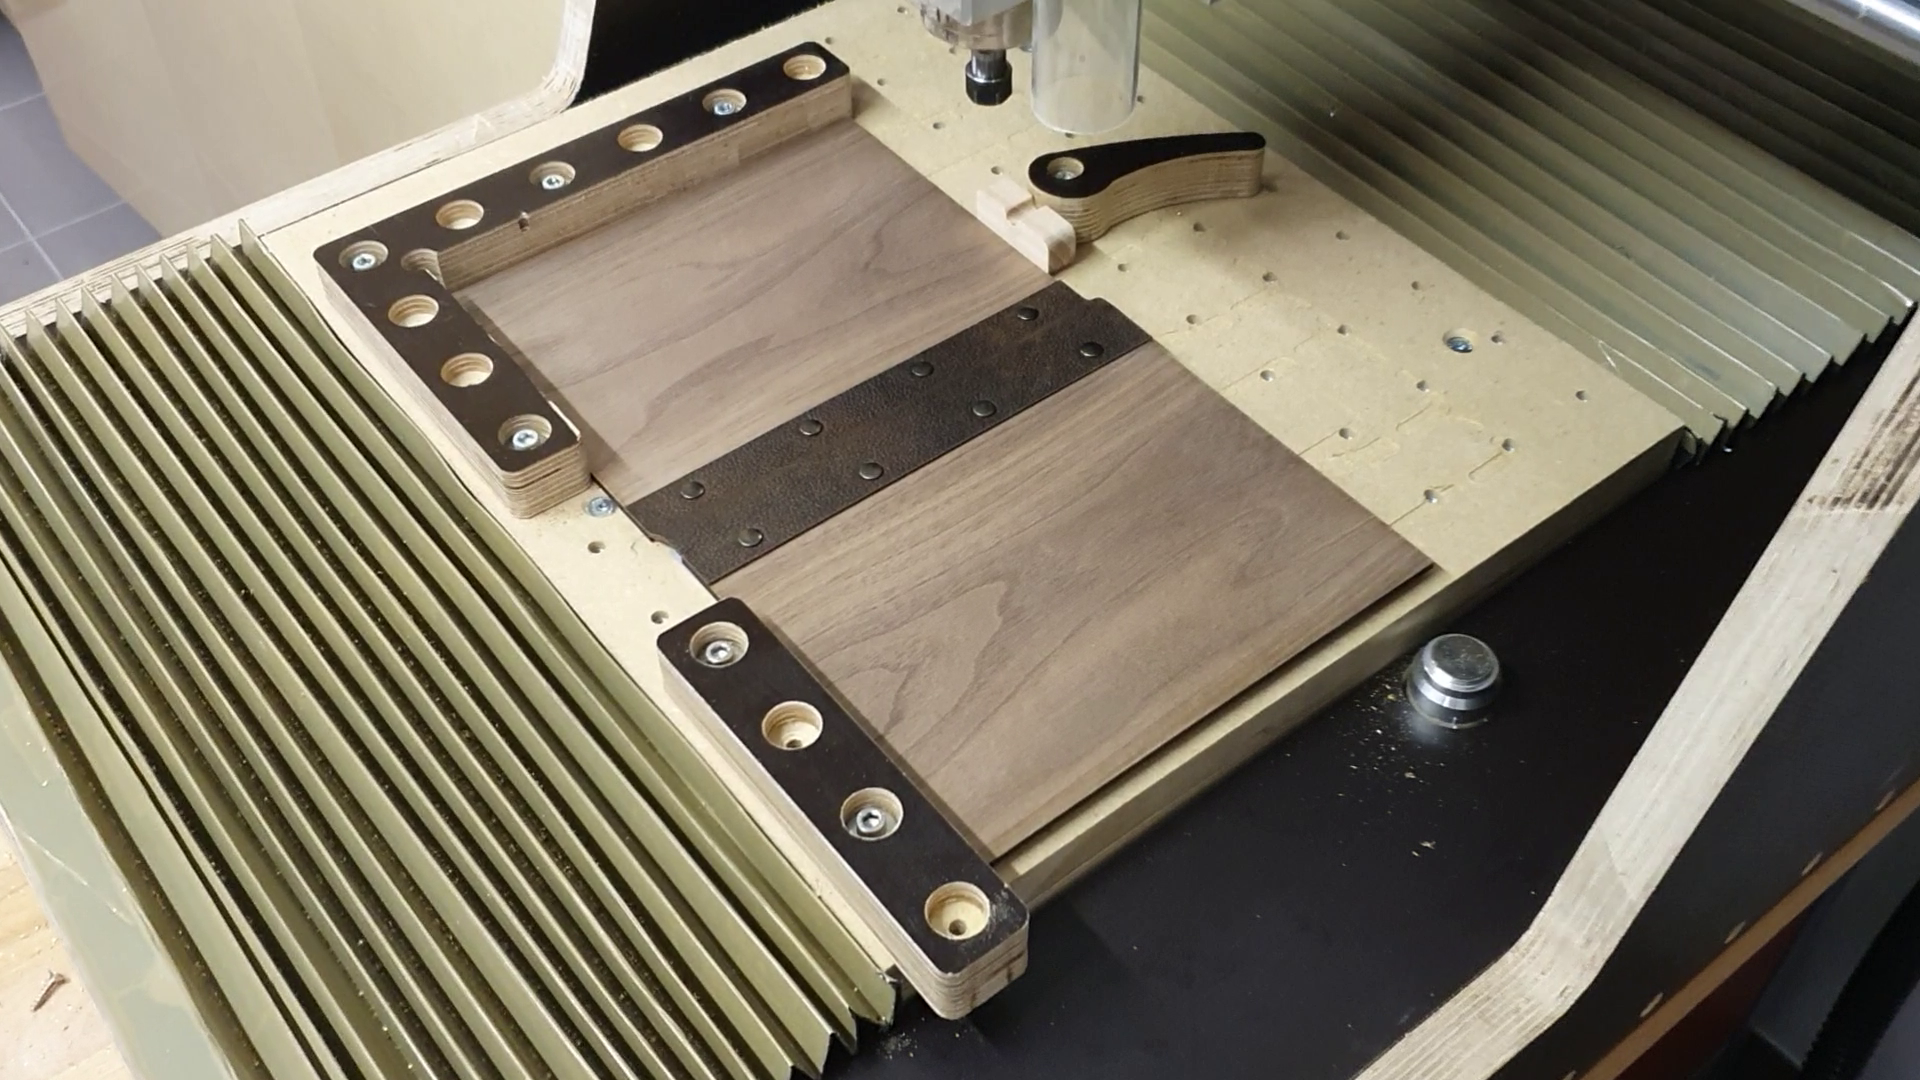
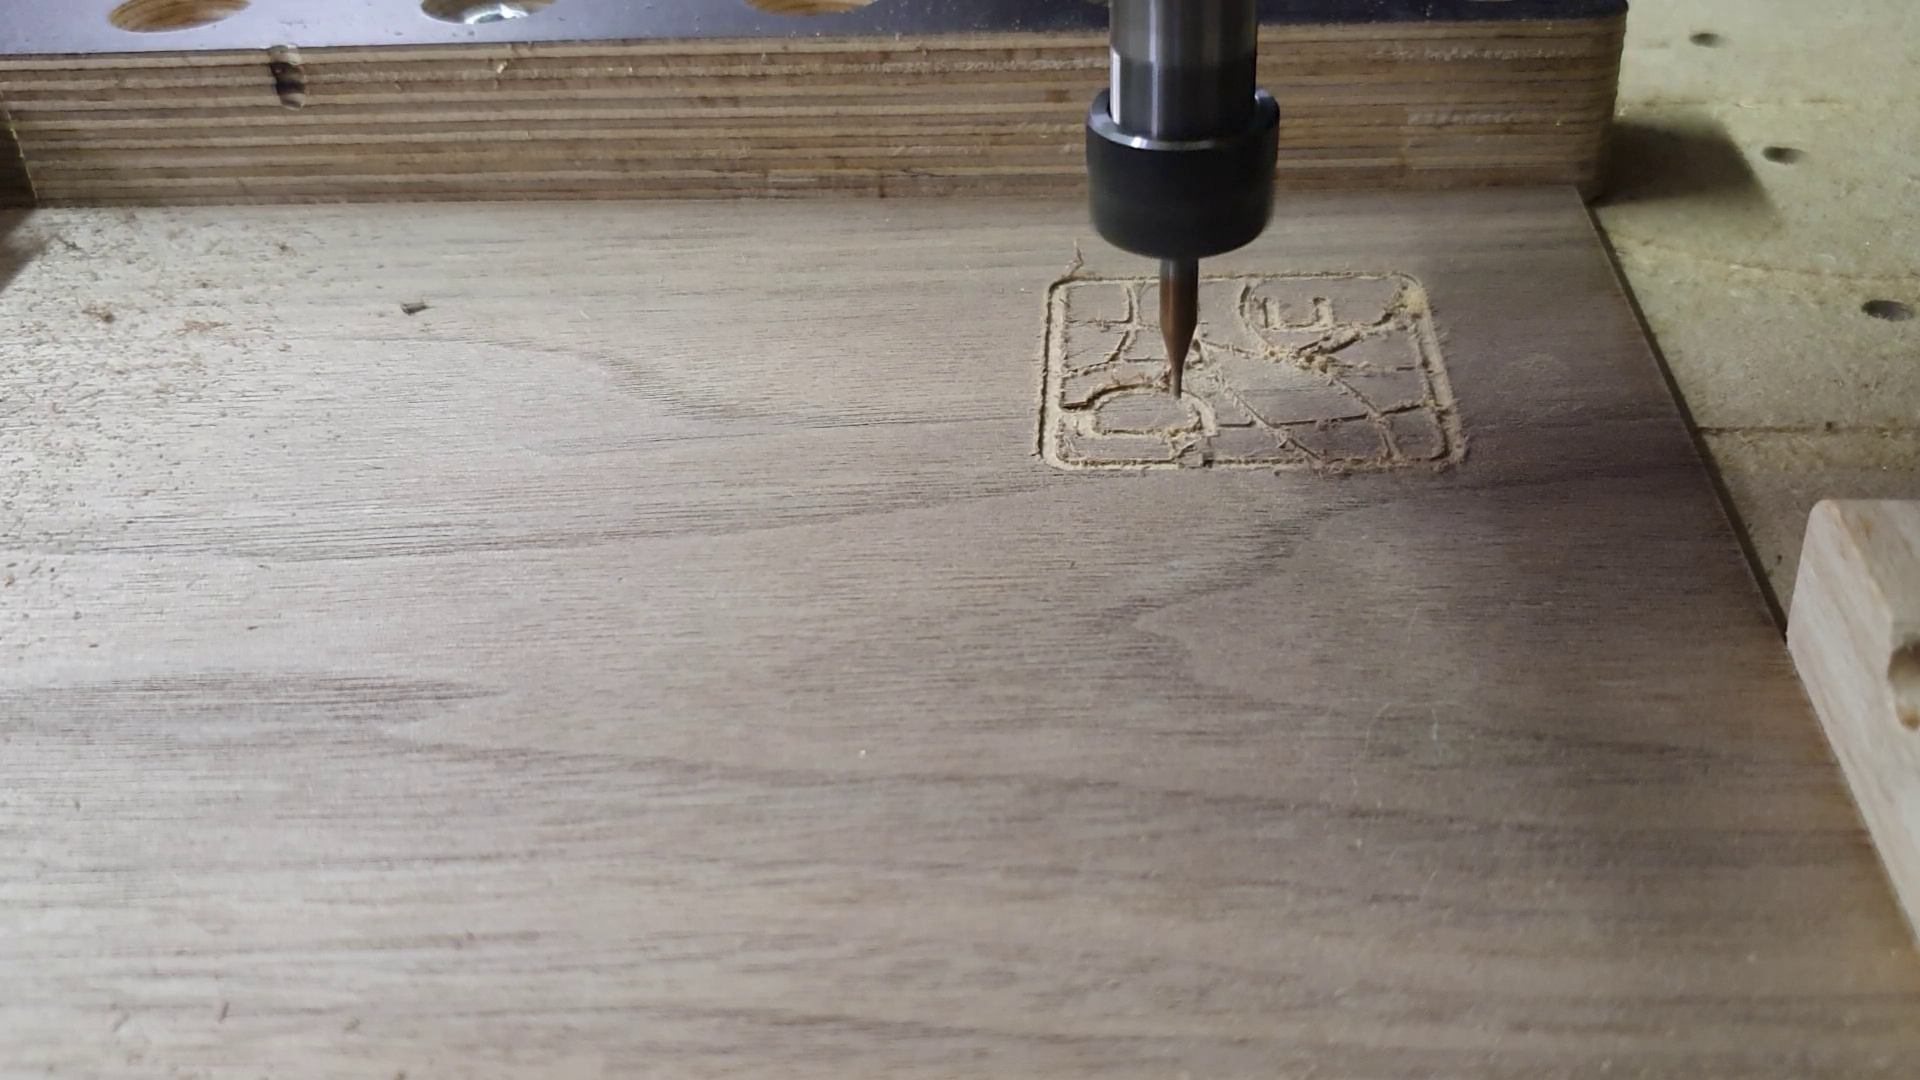
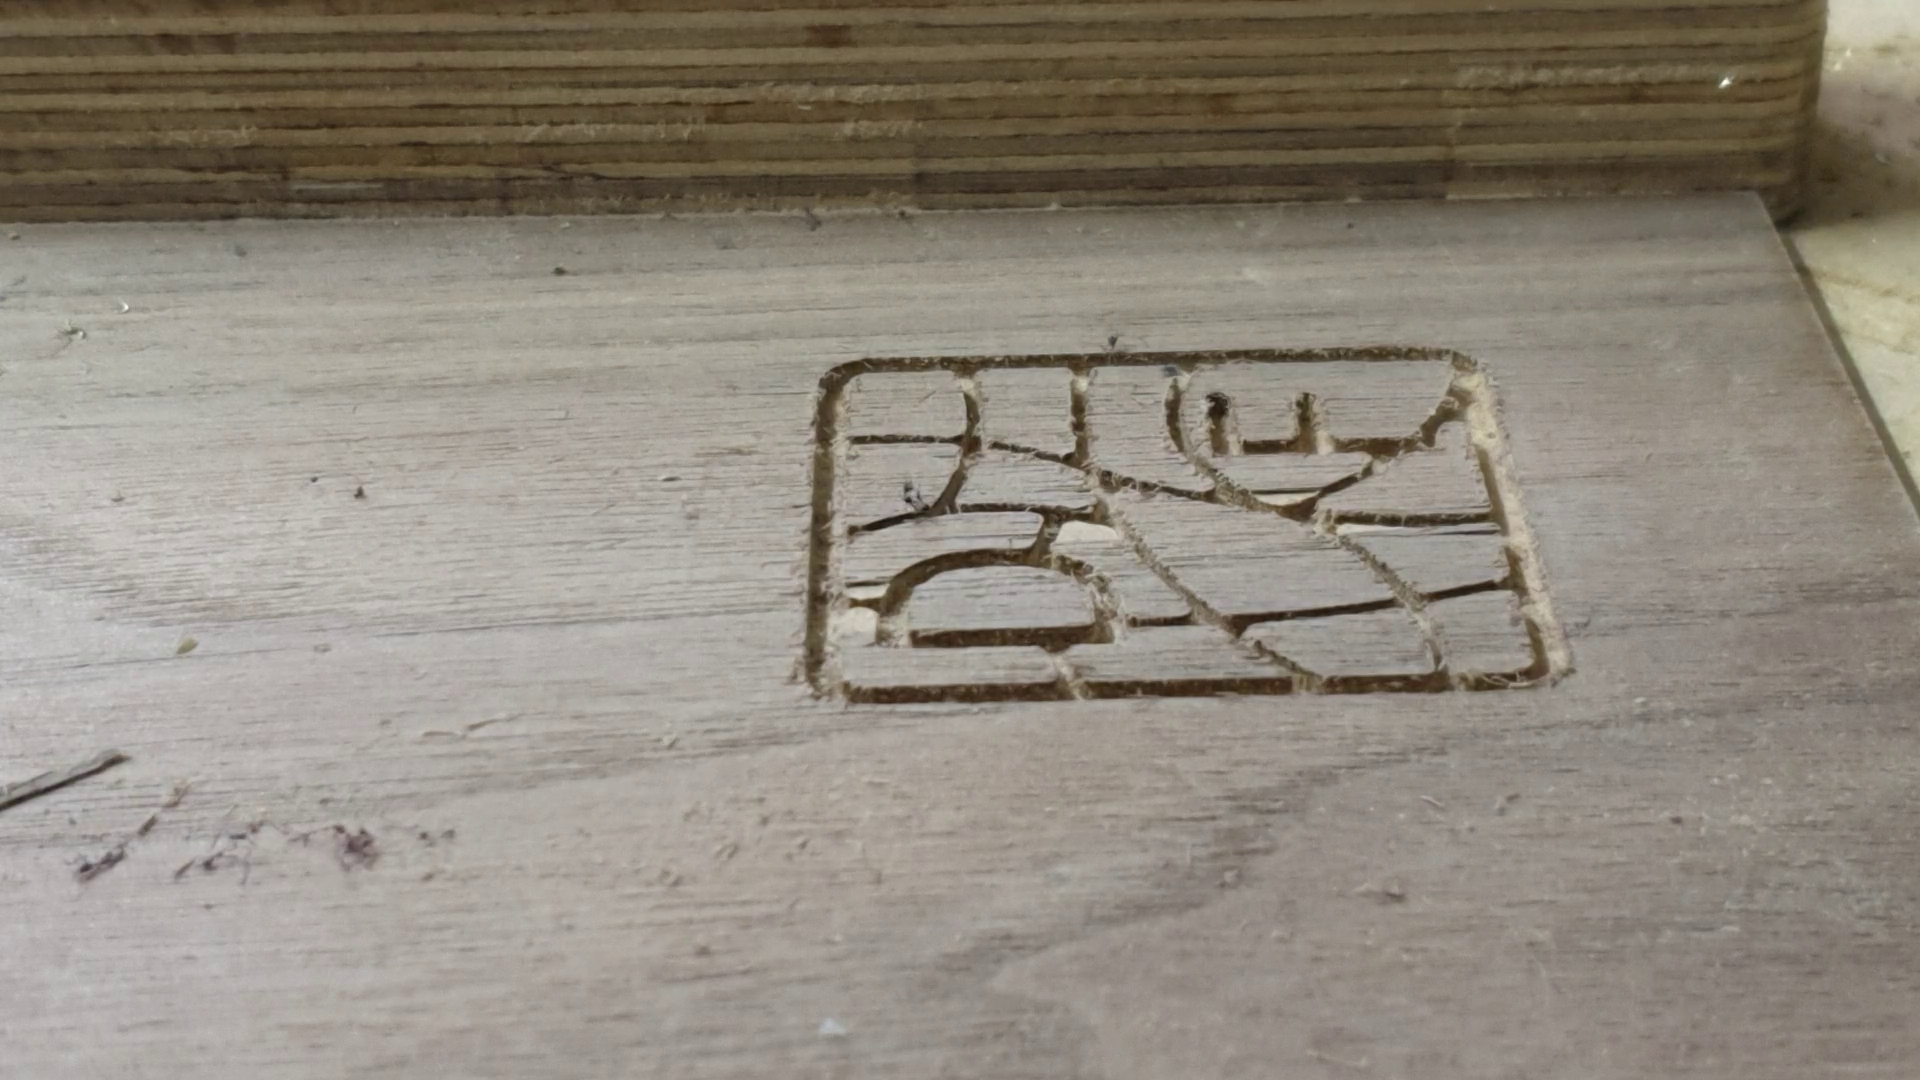
Screw the piece of walnut on the waste board or use some double-sided tape, in case you need the whole piece, like I did. Use some clamps to secure the piece additionally, because the least thing you want is movement while machining. Set the milling depth to 2 mm or according to the thickness of your messing piece. After the first pass try to fit the messing piece in. If there is a good fit, you are done with machining. Otherwise, set a bigger offset of the toolpath. Sand the edges of the wood with a light pressure and make sure not to round the edges.
Fusion of the Two Pieces
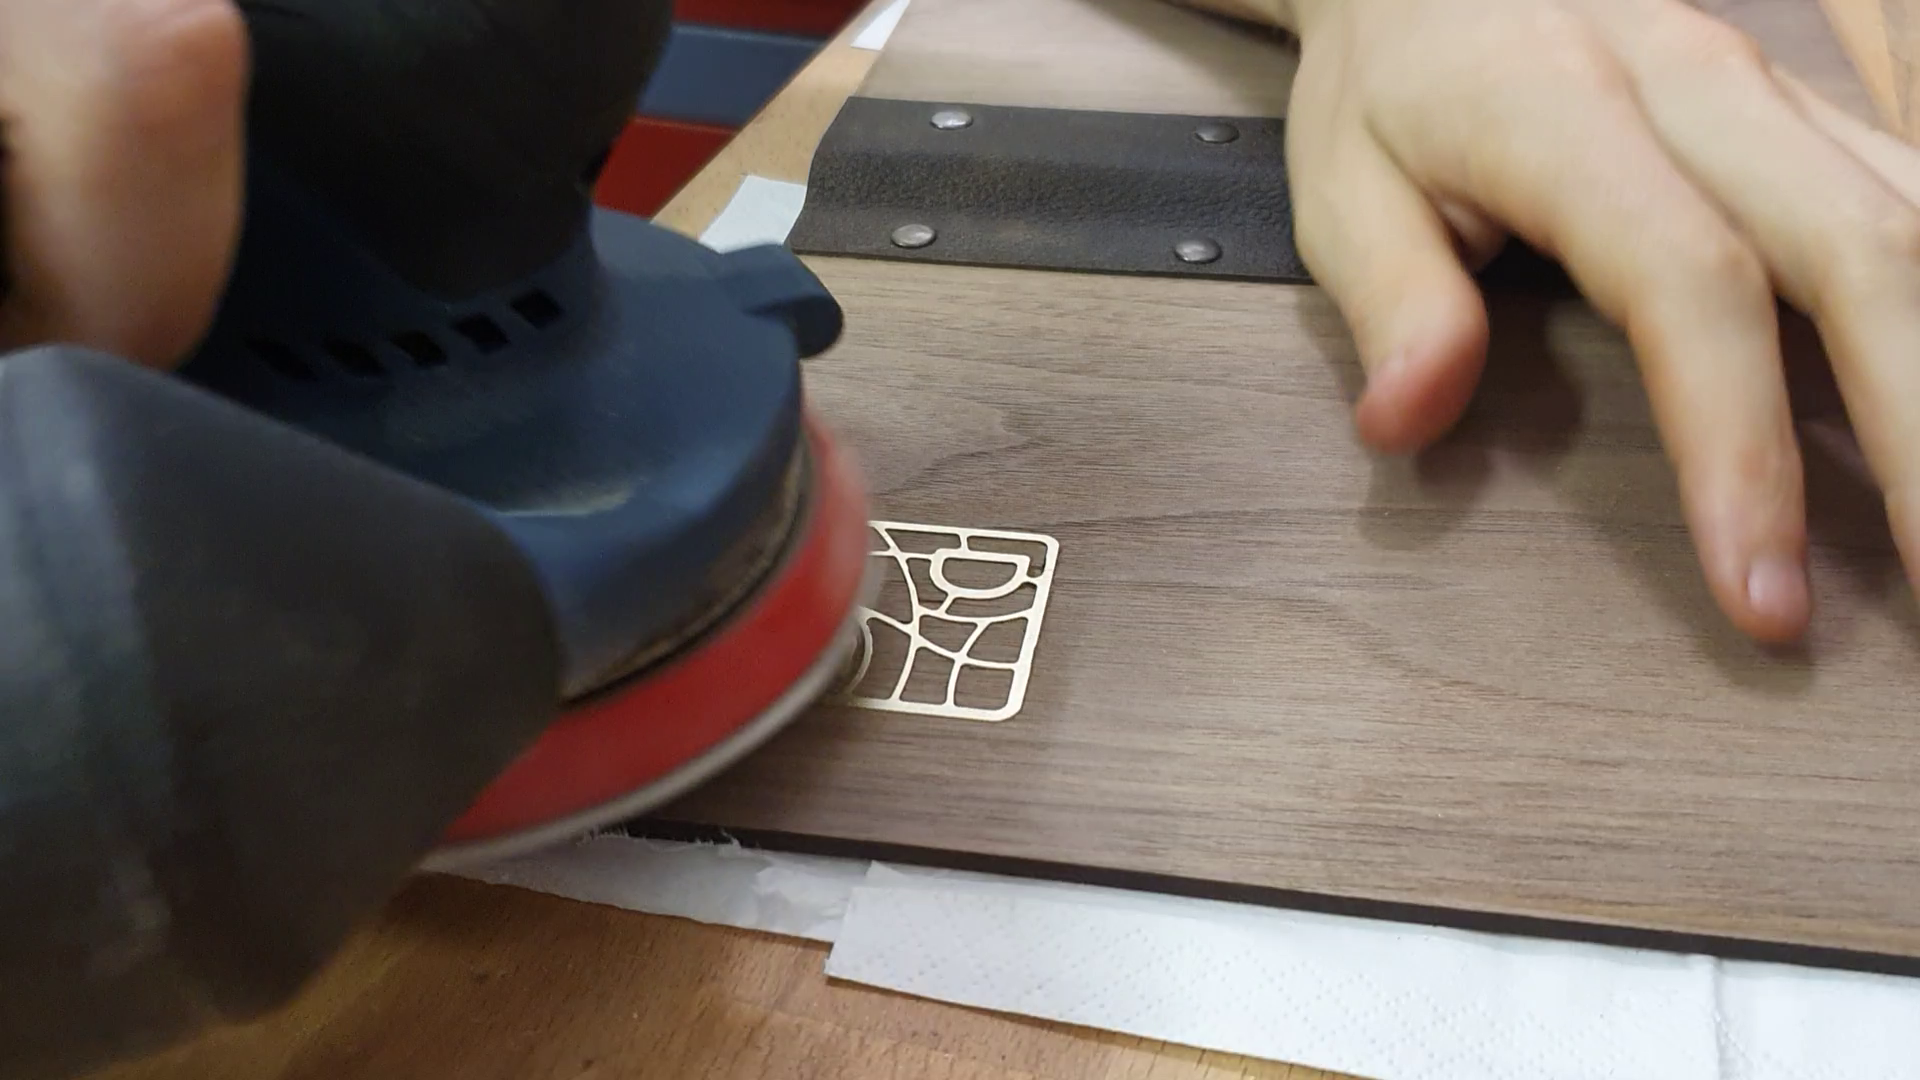
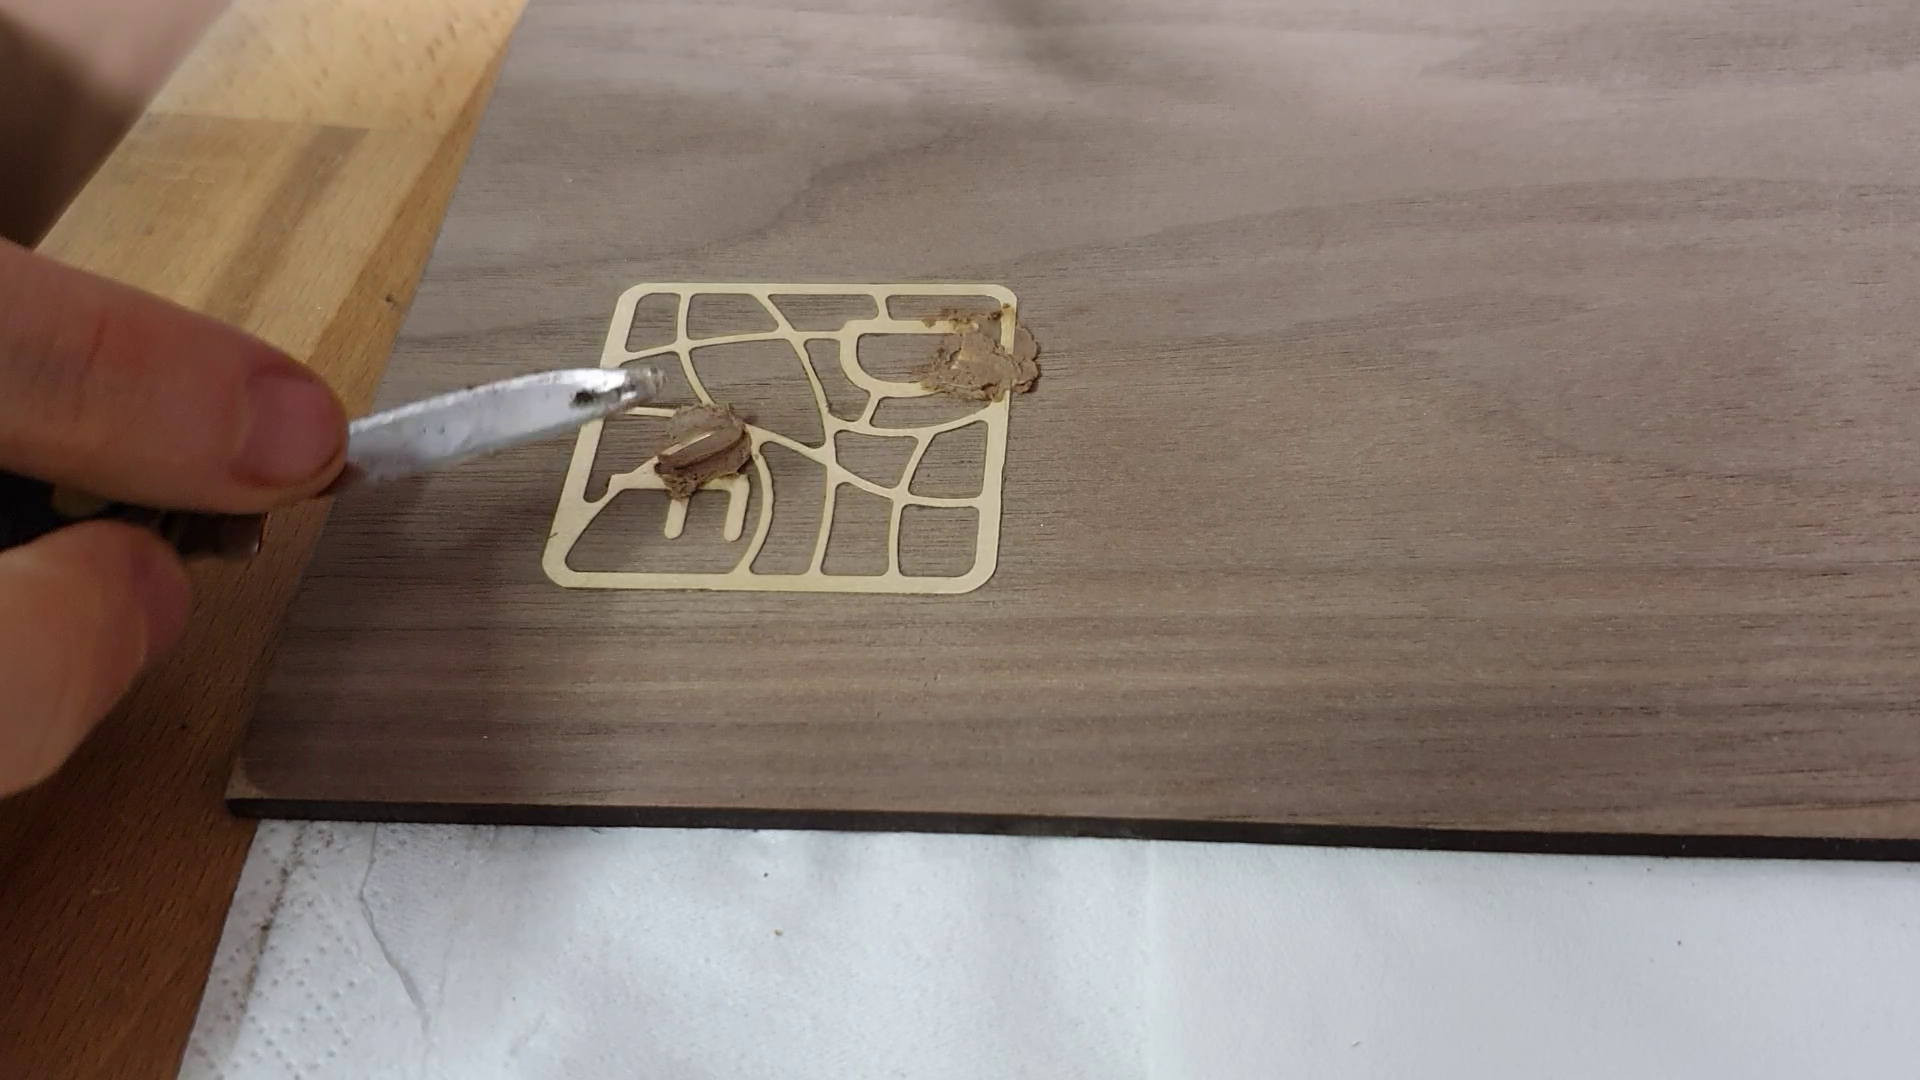
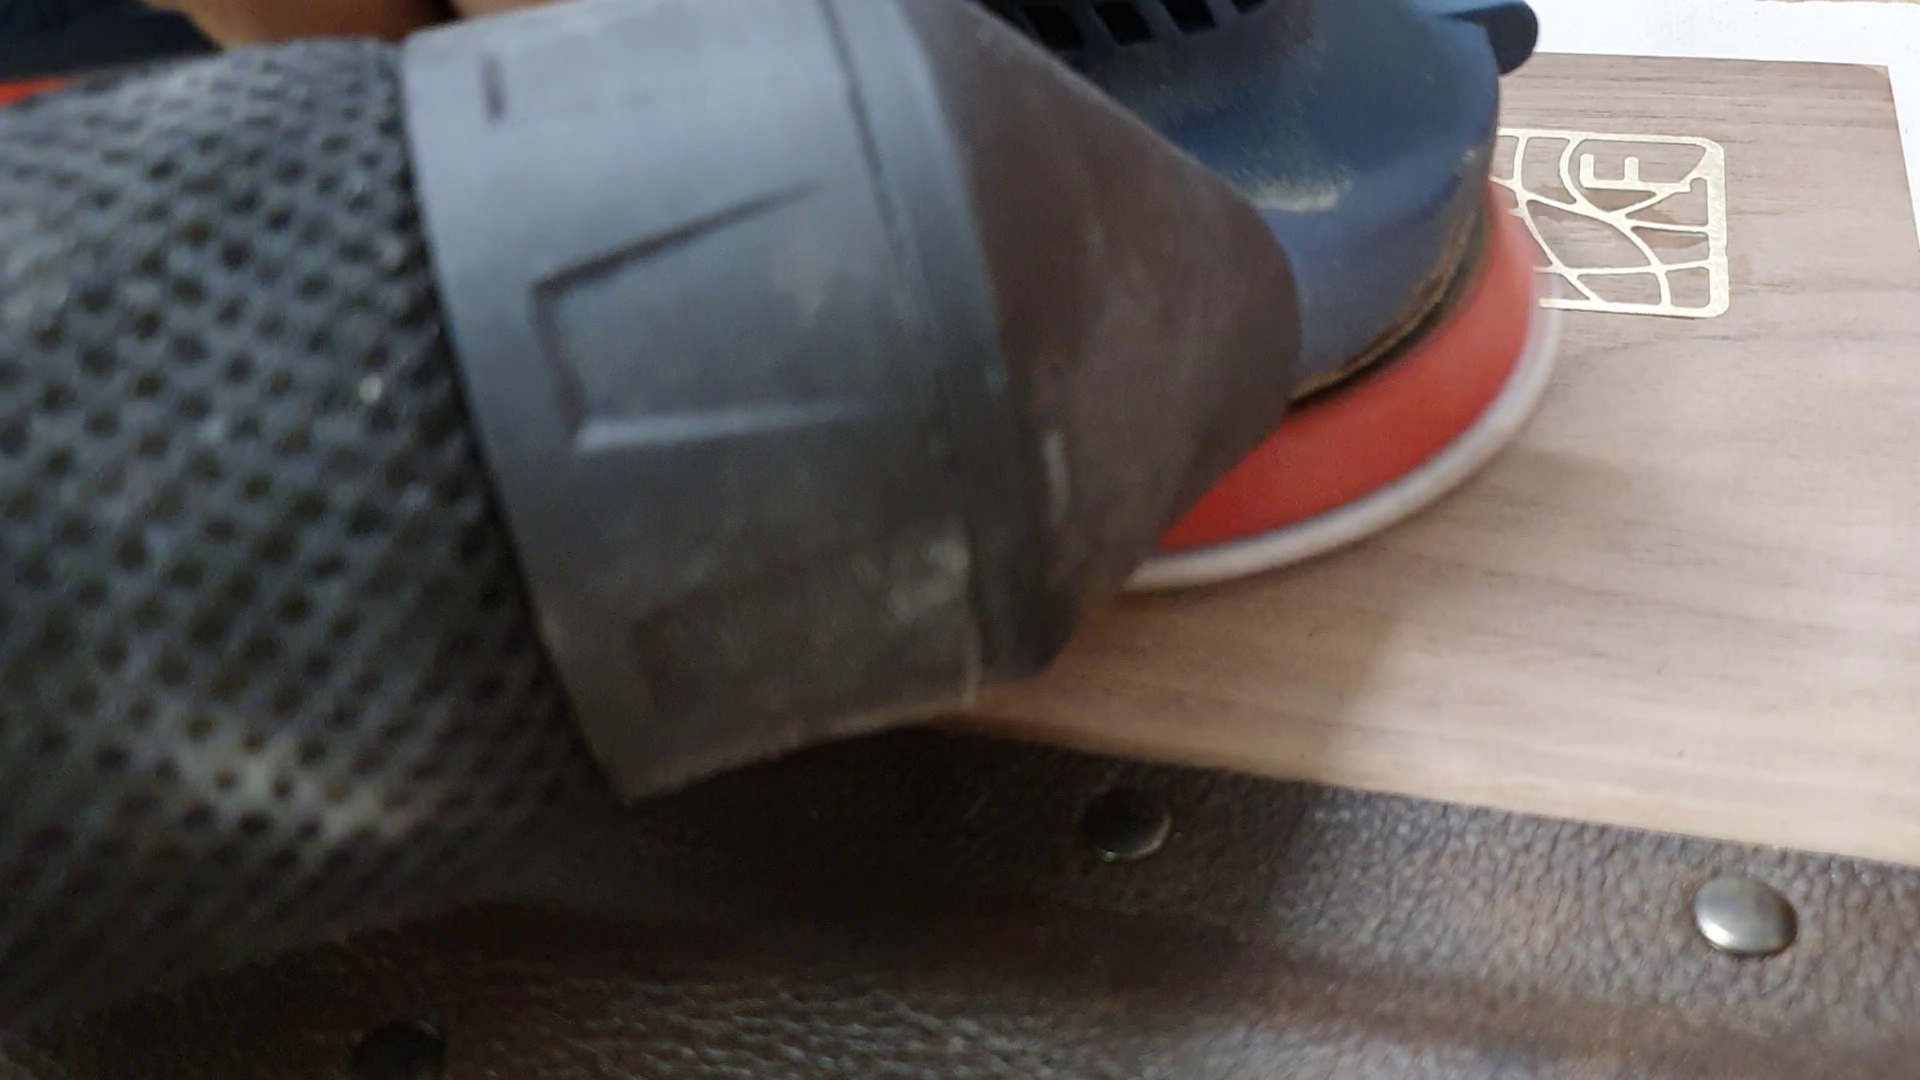
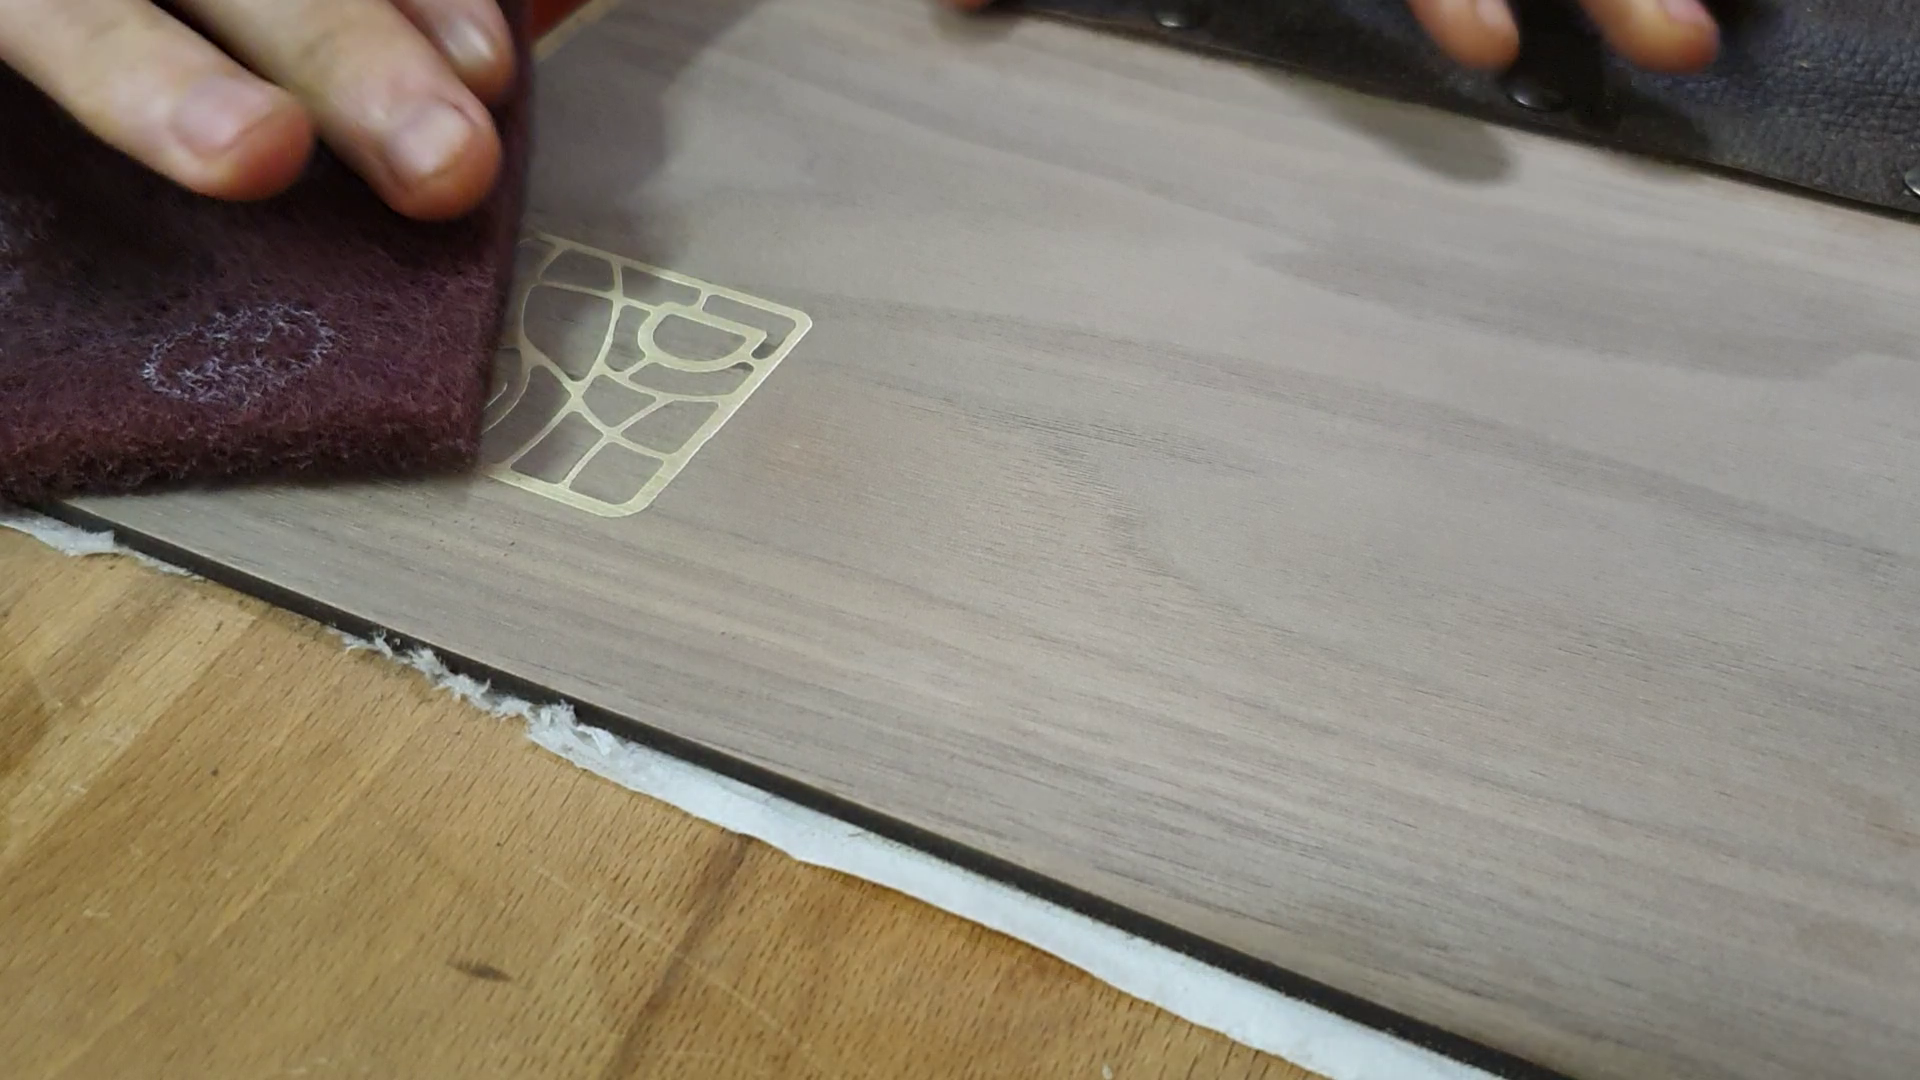
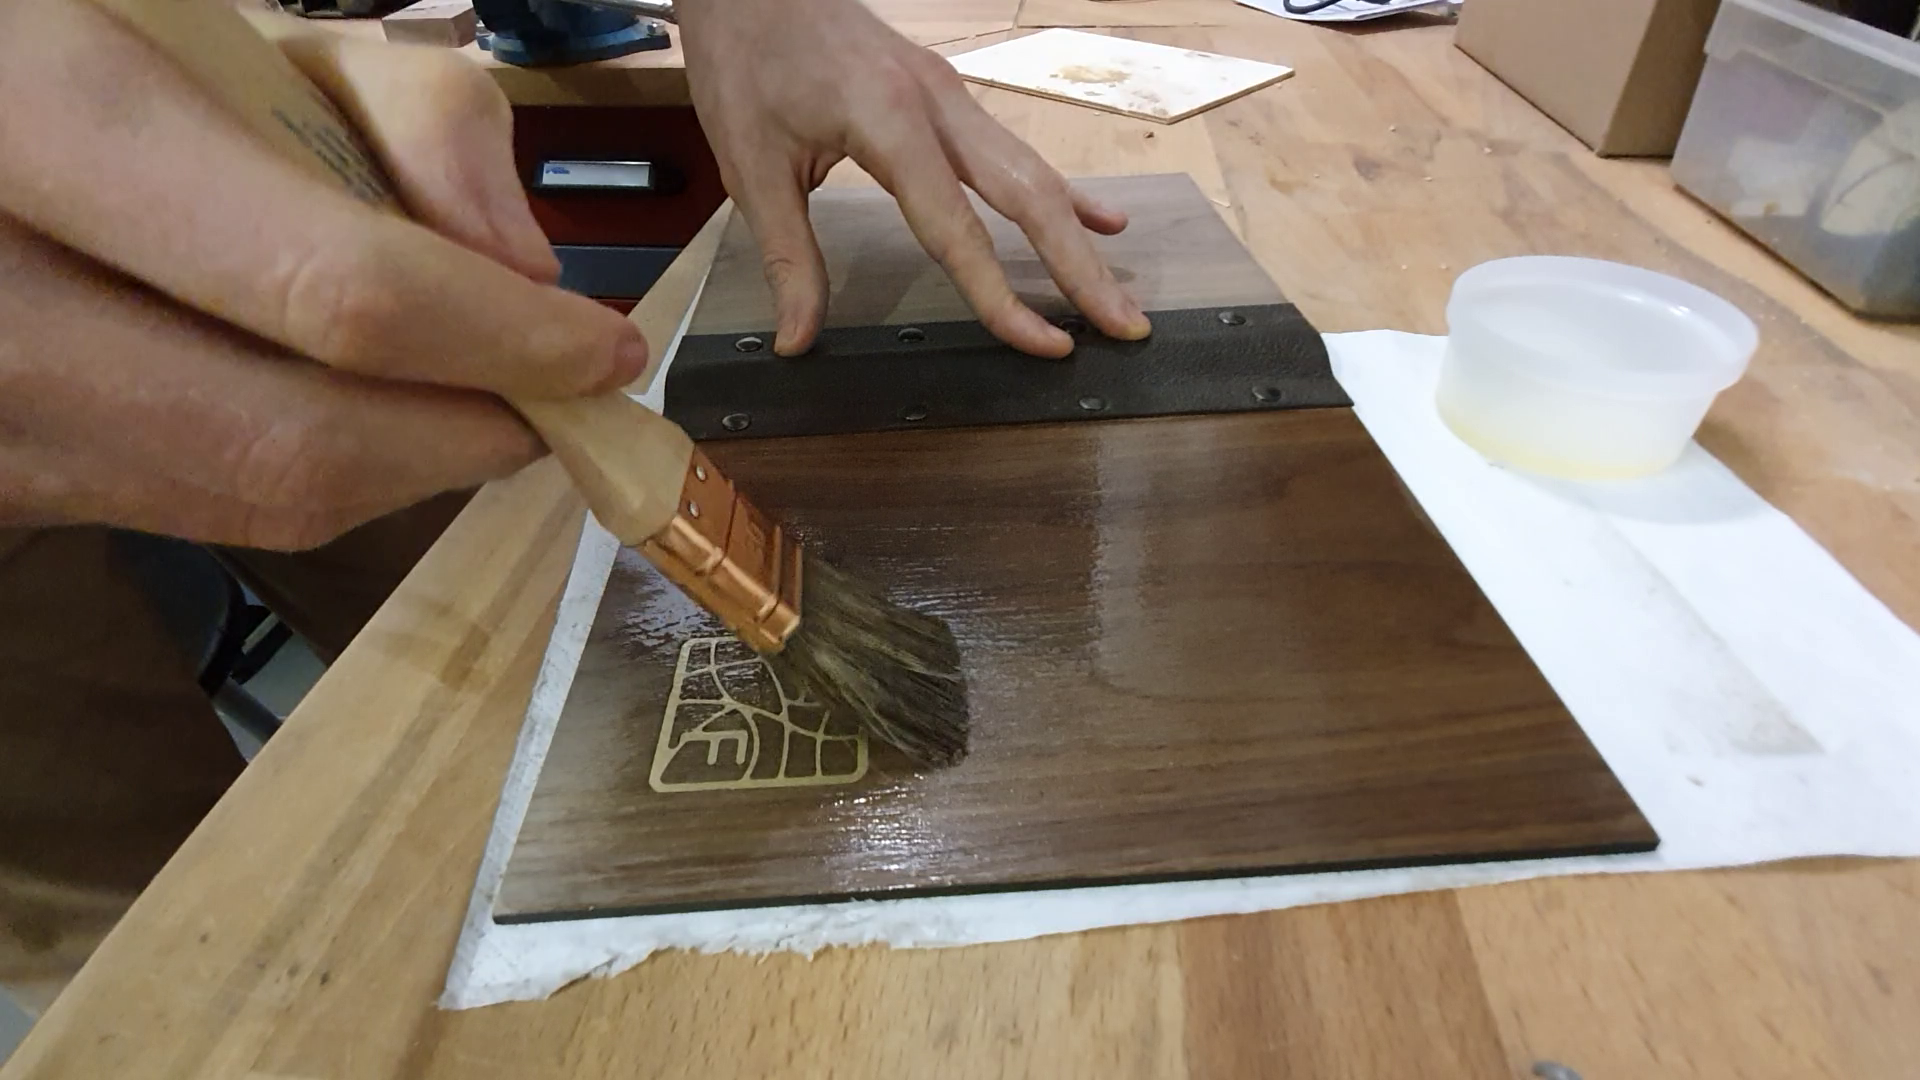
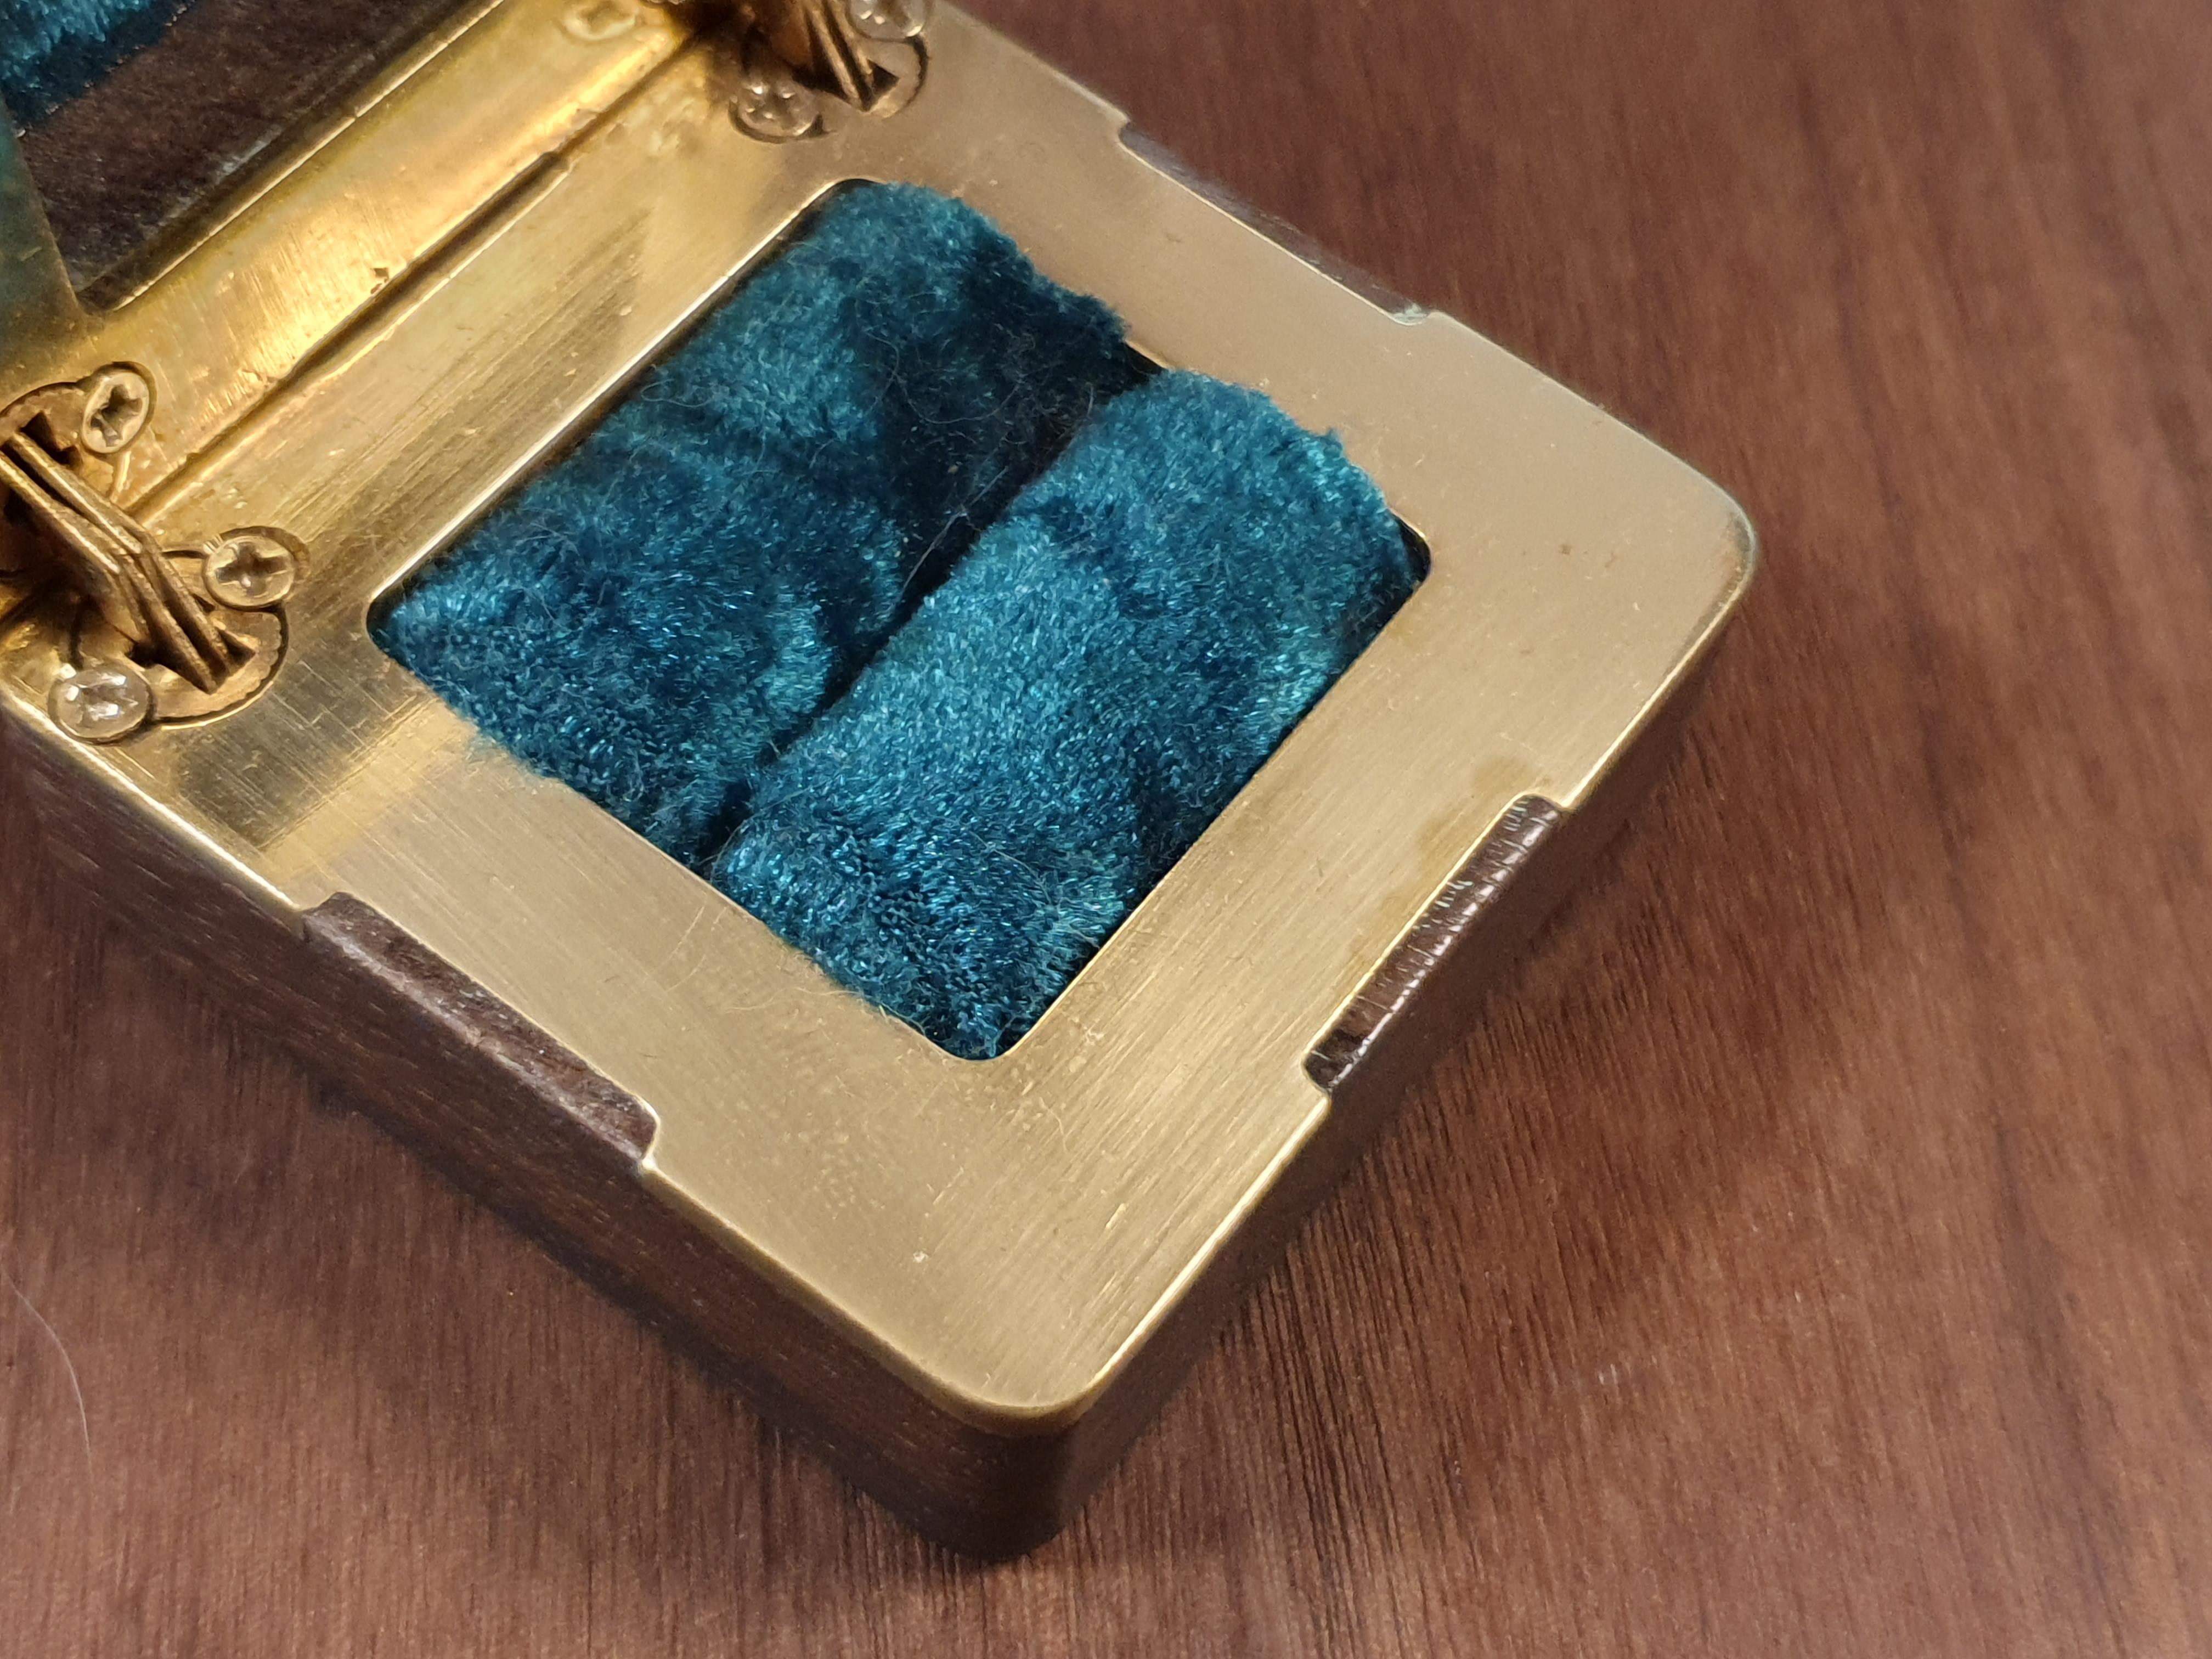
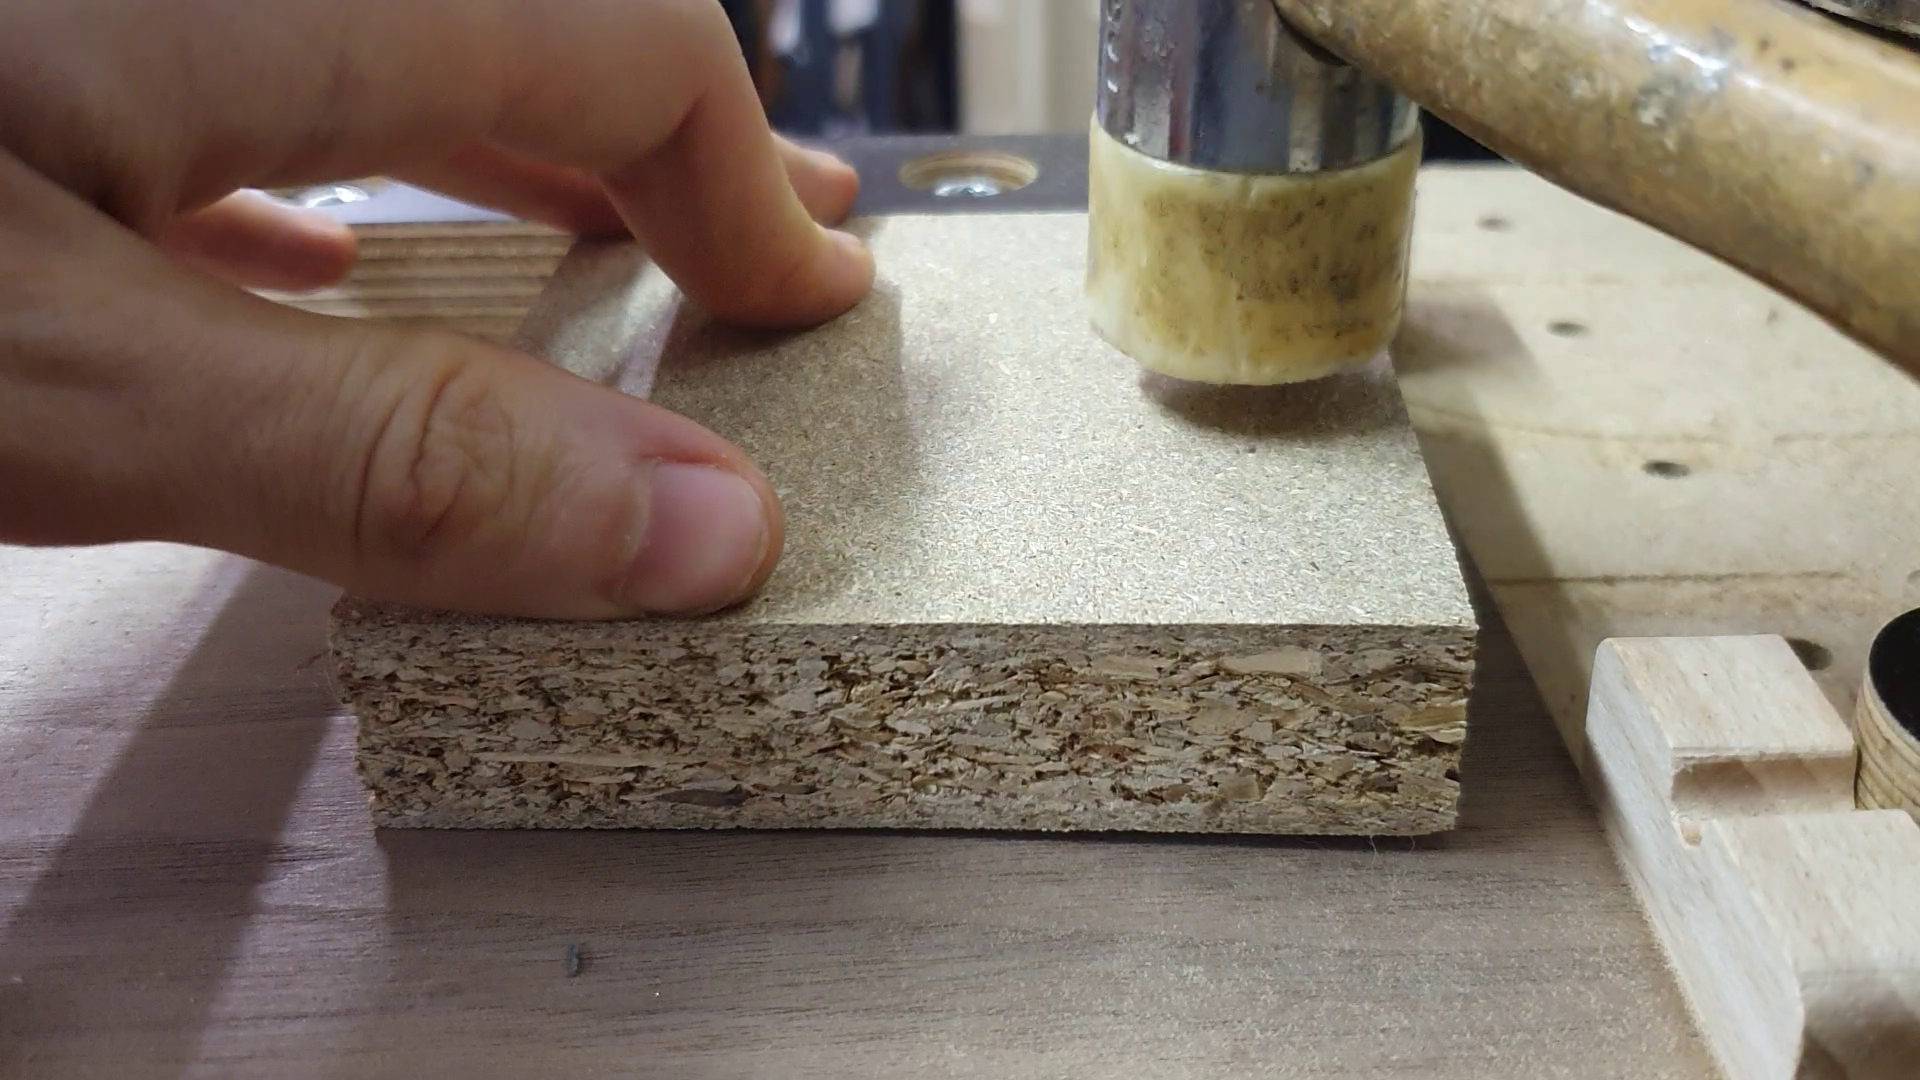
Depending on the tolerances you can just use a rubber hammer and press the brass into the walnut. Otherwise, or additionally, you can use super glue. It is nearly impossible to create a zero-tolerance fit with a self-made cnc machine, so there will be a small difference in the height between the messing and the wood. You can use sandpaper or a sanding machine. In my case I used veneer walnut, which only has a thickness of 0.5 mm. So, I tried only sanding the part by hand and don’t use a machine. But because of a bigger difference as expected, I nevertheless used a machine. Some parts of the veneer become lose, so I had to repair them. Therefore, I used some fine sawdust and mixed it with wood glue. I then applied the compound with a putty knife. The For the final sanding use some fine sandpaper. And another hint: don’t use polishing paste at all. I made this mistake on my first brass inlay and couldn’t remove it completely after polishing. To keep the messing shinny and bright, I used clear varnish to prevent oxidation. It is also a good option to get rid of fingerprints on the messing.
Thank You for Your Interest
I hope you will try to create a brass inlay or any other inlay in the future. I my opinion it is worth the effort. If you have questions or suggestions of improvements let me know. And share you designs and progress with me in the comments.