How to Create Homepage Images
by T3h_Muffinator in Design > Websites
10689 Views, 31 Favorites, 0 Comments
How to Create Homepage Images
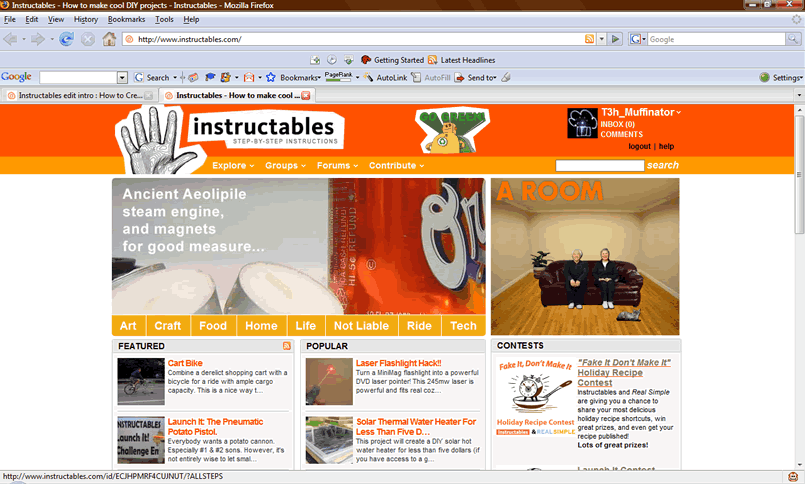
As you may have noticed, Instructables has a new homepage!
So, Instructables is giving you the power to create new Images.
That's right, we want you to contribute to Instructables' new homepage!
Just make sure to put some decent effort into it, because we're only going to use the images that we like.
So, Instructables is giving you the power to create new Images.
That's right, we want you to contribute to Instructables' new homepage!
Just make sure to put some decent effort into it, because we're only going to use the images that we like.
Download the Template
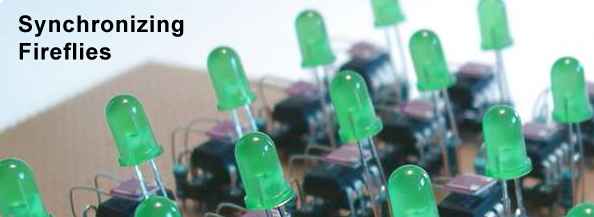
First, you're going to need to download the Homepage Template.
There are two templates, one is for Adobe Photoshop, the other is for The GIMP.
There are two templates, one is for Adobe Photoshop, the other is for The GIMP.
Get a Picture
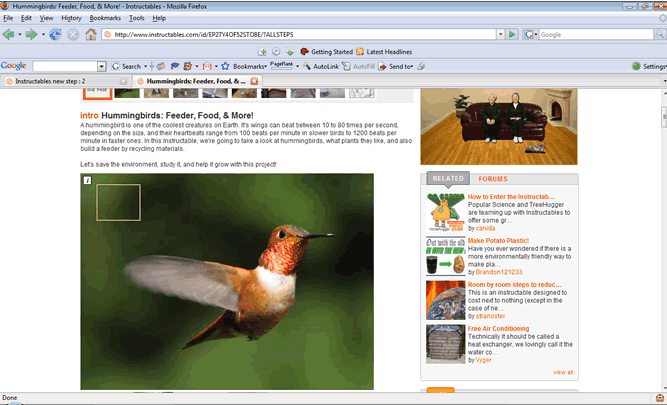
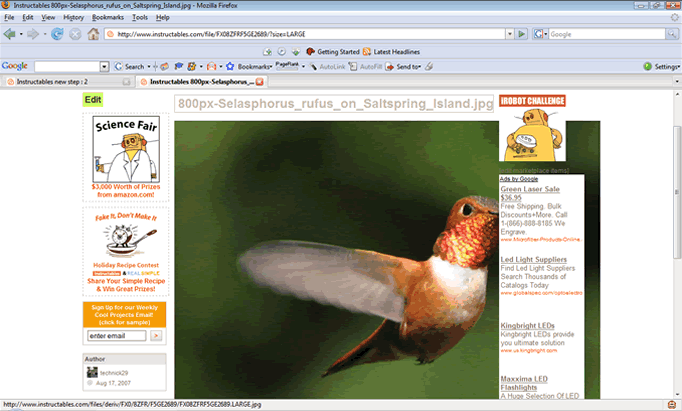
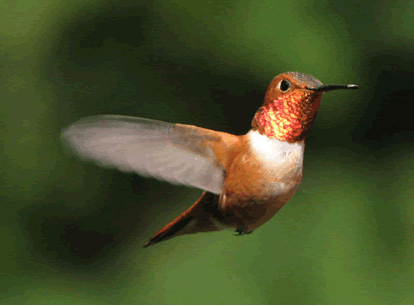
Find a picture that you'd like to make a homepage image out of.
The picture should be:
Part of an Instructable
Visually Attractive
A good representation of the Instructable
Large (>700x300 pixels)
Now, you have to check to see how big the image is, and get the larger, higher resolution image.
To do that, click on the "I" in the upper left-hand corner of the image that you want.
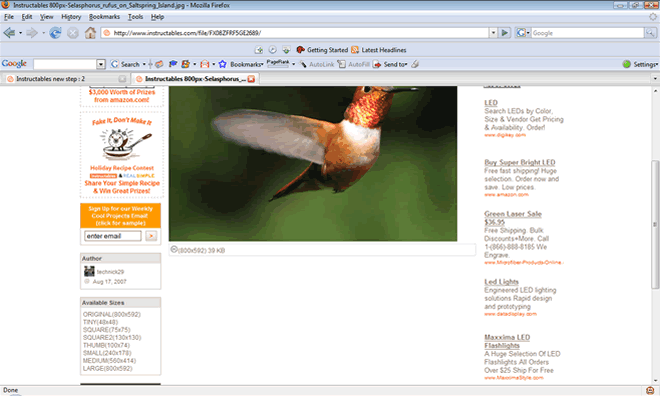
This image is 800x592, which is sufficient for making a homepage image.
To get the actual 800x592 image, just click on the link on the bottom-left hand corner (see picture).
Now, just right click on the large image, copy it, and continue onto the next step.
Edit the Template
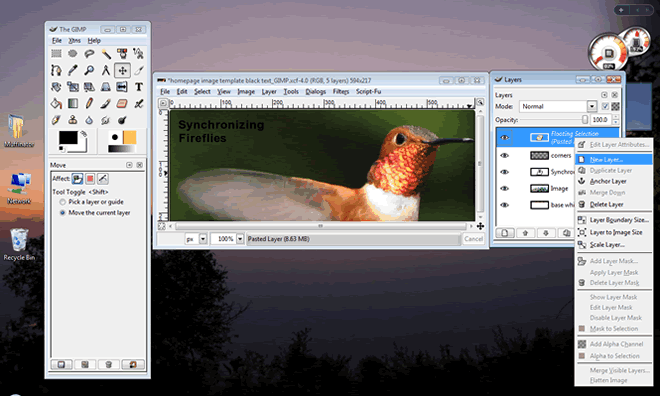
Now that you have the larger image, you can open up the template that is included in this Instructable and paste the image into a new layer.
In GIMP, you are going to have to right click on the "pasted layer" and make it a new layer.
Move this layer just above the original image layer, then move the image around until you are satisfied.
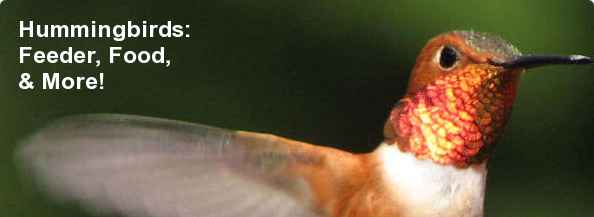
Make the focus toward the right of the image, so that the text will not be overlapping anything important.
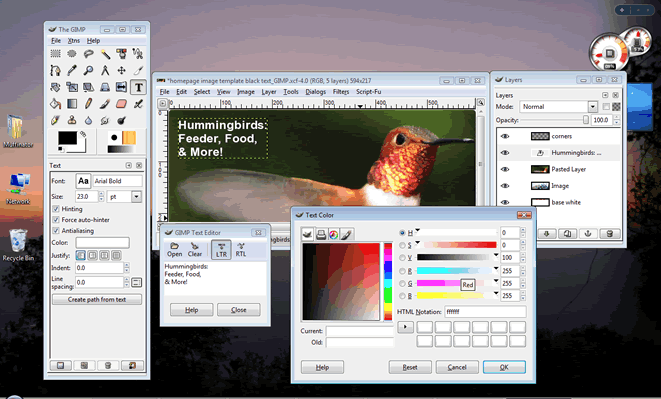
Now, Edit the text.
In this case, I'd modify the template's default "Synchronizing Fireflies" to "Hummingbirds: Feeder, Food, & More!" and change the text to white.
The only two text colors that you can use are black and white.
Do not move the text out of place. The Text must be in its original spot to be accepted as a homepage image.
Also, make sure that the "corners" layer is on top of everything.
Proper Saving/Exporting
In order to keep the image size down and easily organize the homepage images, we are asking you to stick to the following saving procedure.
For GIMP:
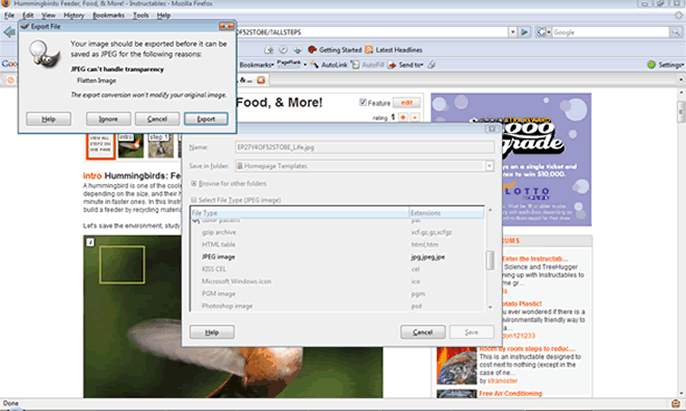
Go to Save As
Change the file extension to JPEG
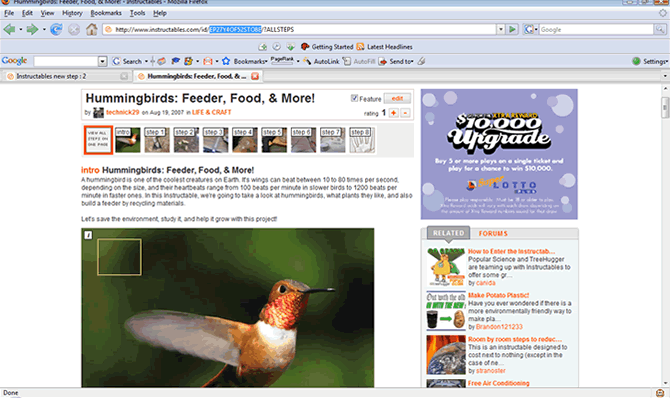
Copy the Instructables ID from the Instructable in the URL
Get the category that the Instructable was saved in (if there is more than one, just pick one)
The file name should be "InstructablesID_Category.Jpg" In this case, EP27Y4OF52STO8E_Life.jpg
Click Save, then Export
GIMP will then prompt you for the quality. Set the quality to 40, then click on save
For Adobe Photoshop:
Go to Save For Web
Set the Quality to 40
Copy the Instructables ID from the Instructable in the URL
Get the category that the Instructable was saved in (if there is more than one, just pick one)
The file name should be "InstructablesID_Category.Jpg" In this case, EP27Y4OF52STO8E_Life.jpg
Make sure the file extension is .jpg
Click Save
Giving the Homepage Image to Instructables

If you are making your own picture from one of your Instructables a homepage image, simply include it in the pictures on the introduction page to said Instructable.
If you are making a picture from someone else's Instructable a homepage image, for now, just post it in a comment on said Instructable.
We'll take care of the rest!
If you are making a picture from someone else's Instructable a homepage image, for now, just post it in a comment on said Instructable.
We'll take care of the rest!