How to Control the SG90 Servo Motor With the Arduino UNO
by TechSensor in Circuits > Arduino
12337 Views, 3 Favorites, 0 Comments
How to Control the SG90 Servo Motor With the Arduino UNO

In this tutorial you will learn how to control the SG90 Servo Motor with the Arduino UNO R3.
Supplies
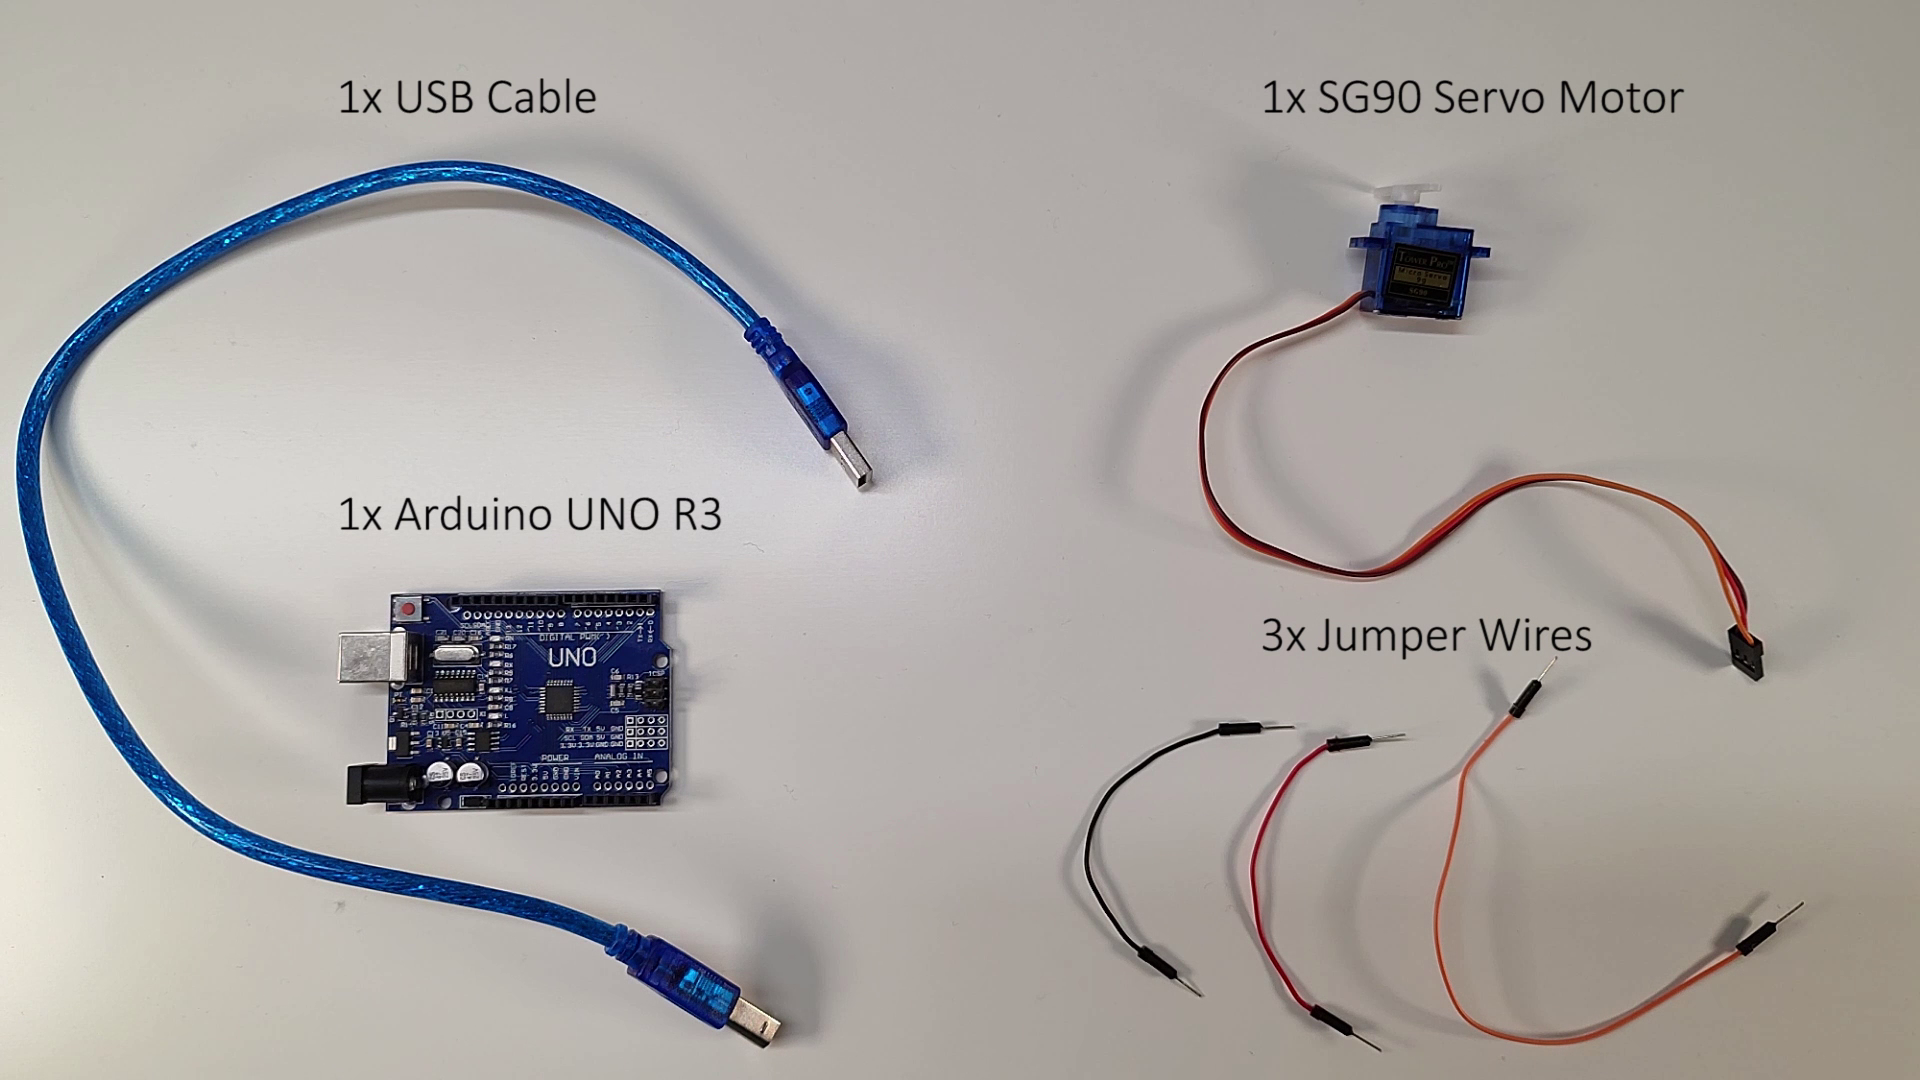
You will need:
- 1x Computer with Arduino IDE installed
- 1x Arduino UNO R3 or clone
- 1x USB Cable
- 1x SG90 Servo Motor
- 3x M-M Jumper Wires
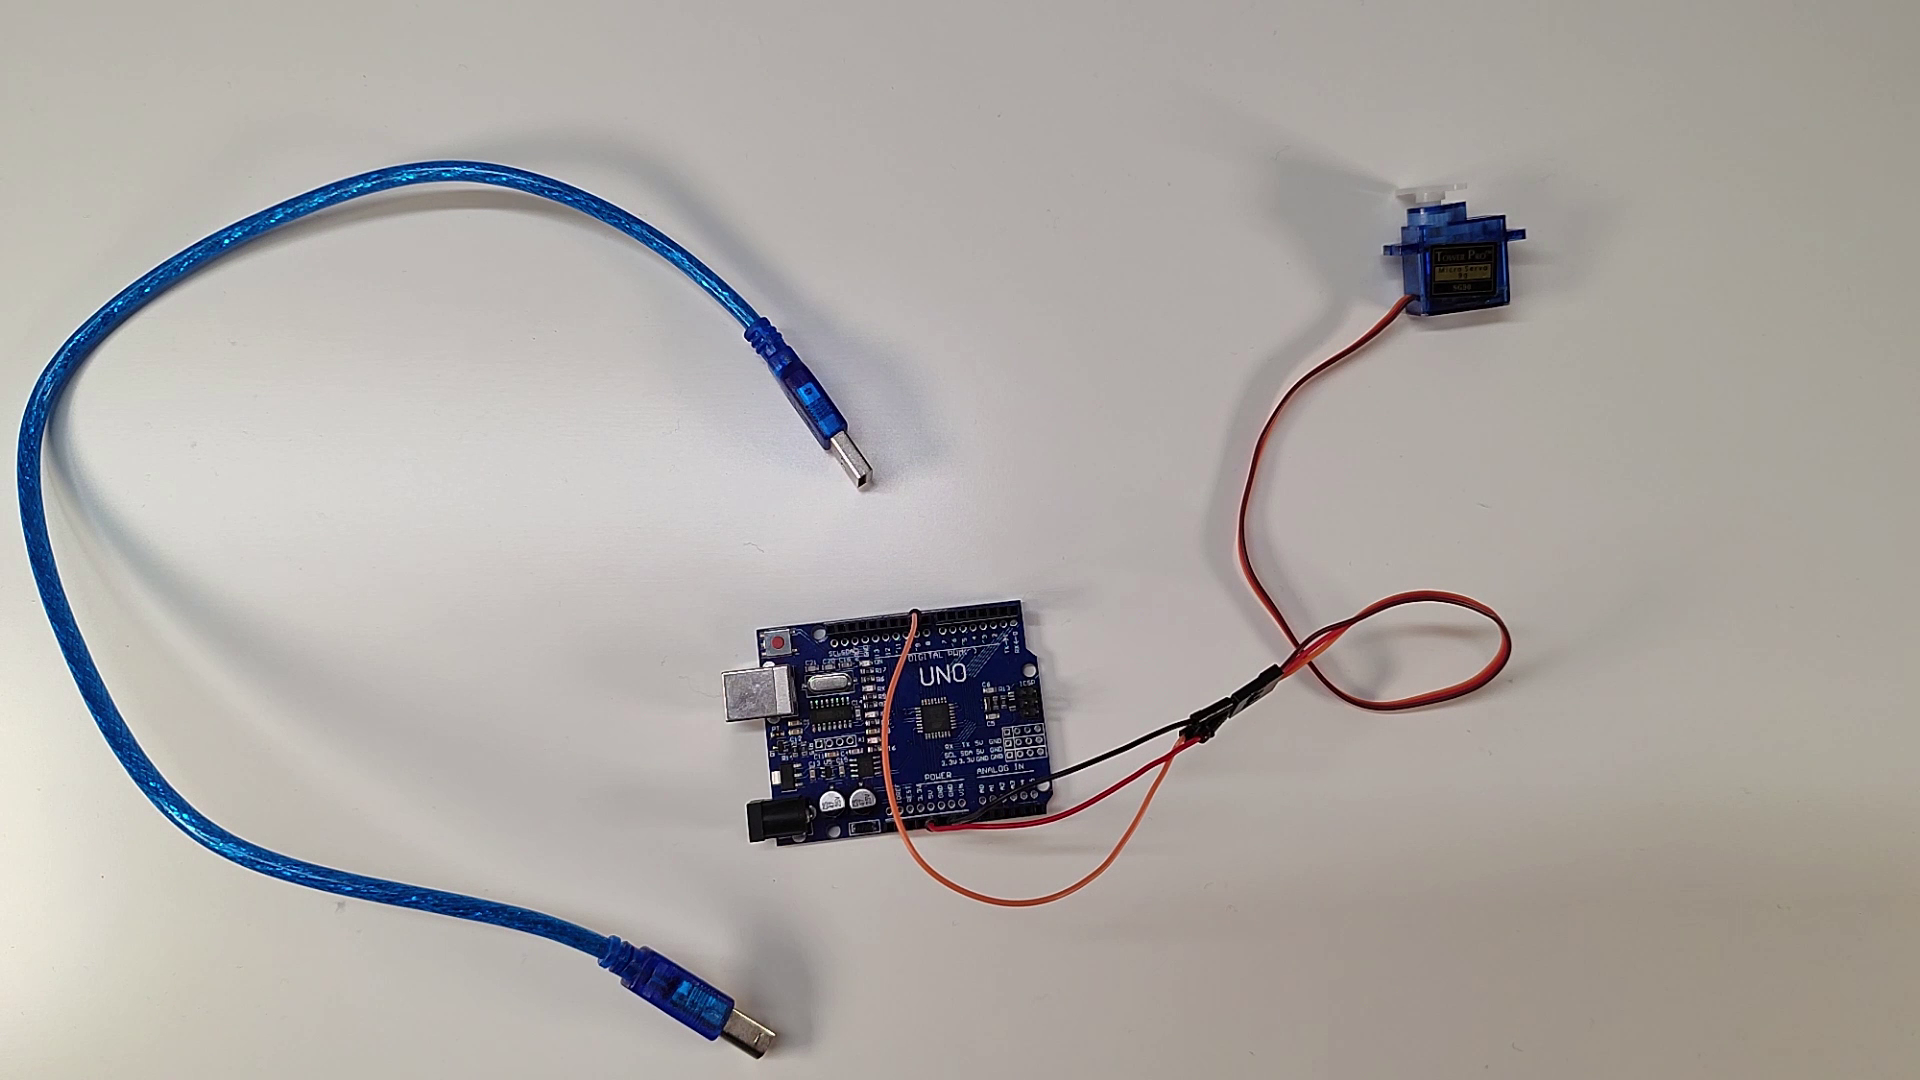
Connect Jumper Wires to Servo Connector
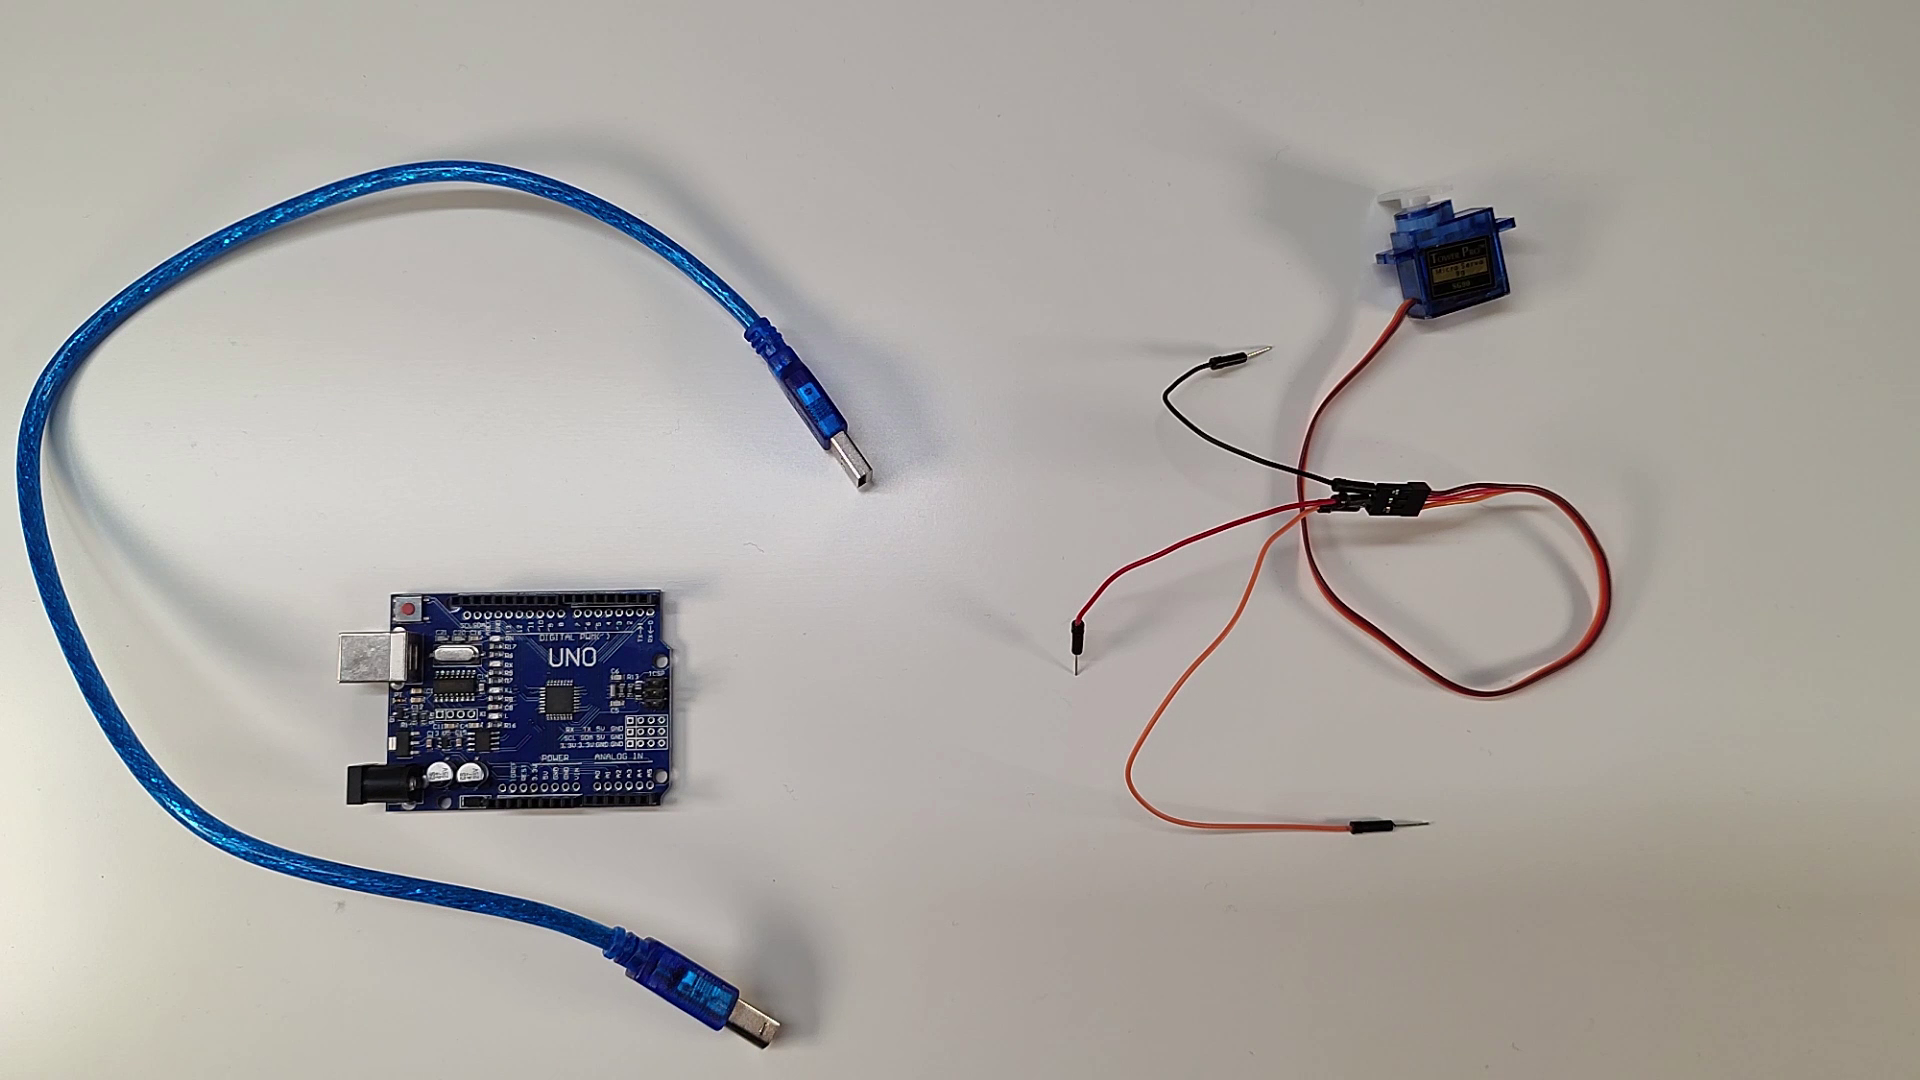
Connect the jumper wires to the connector of the servo motor.
It is recommended to use the same color to avoid confusion.
Connect Black Jumper Wire to Ground on Arduino
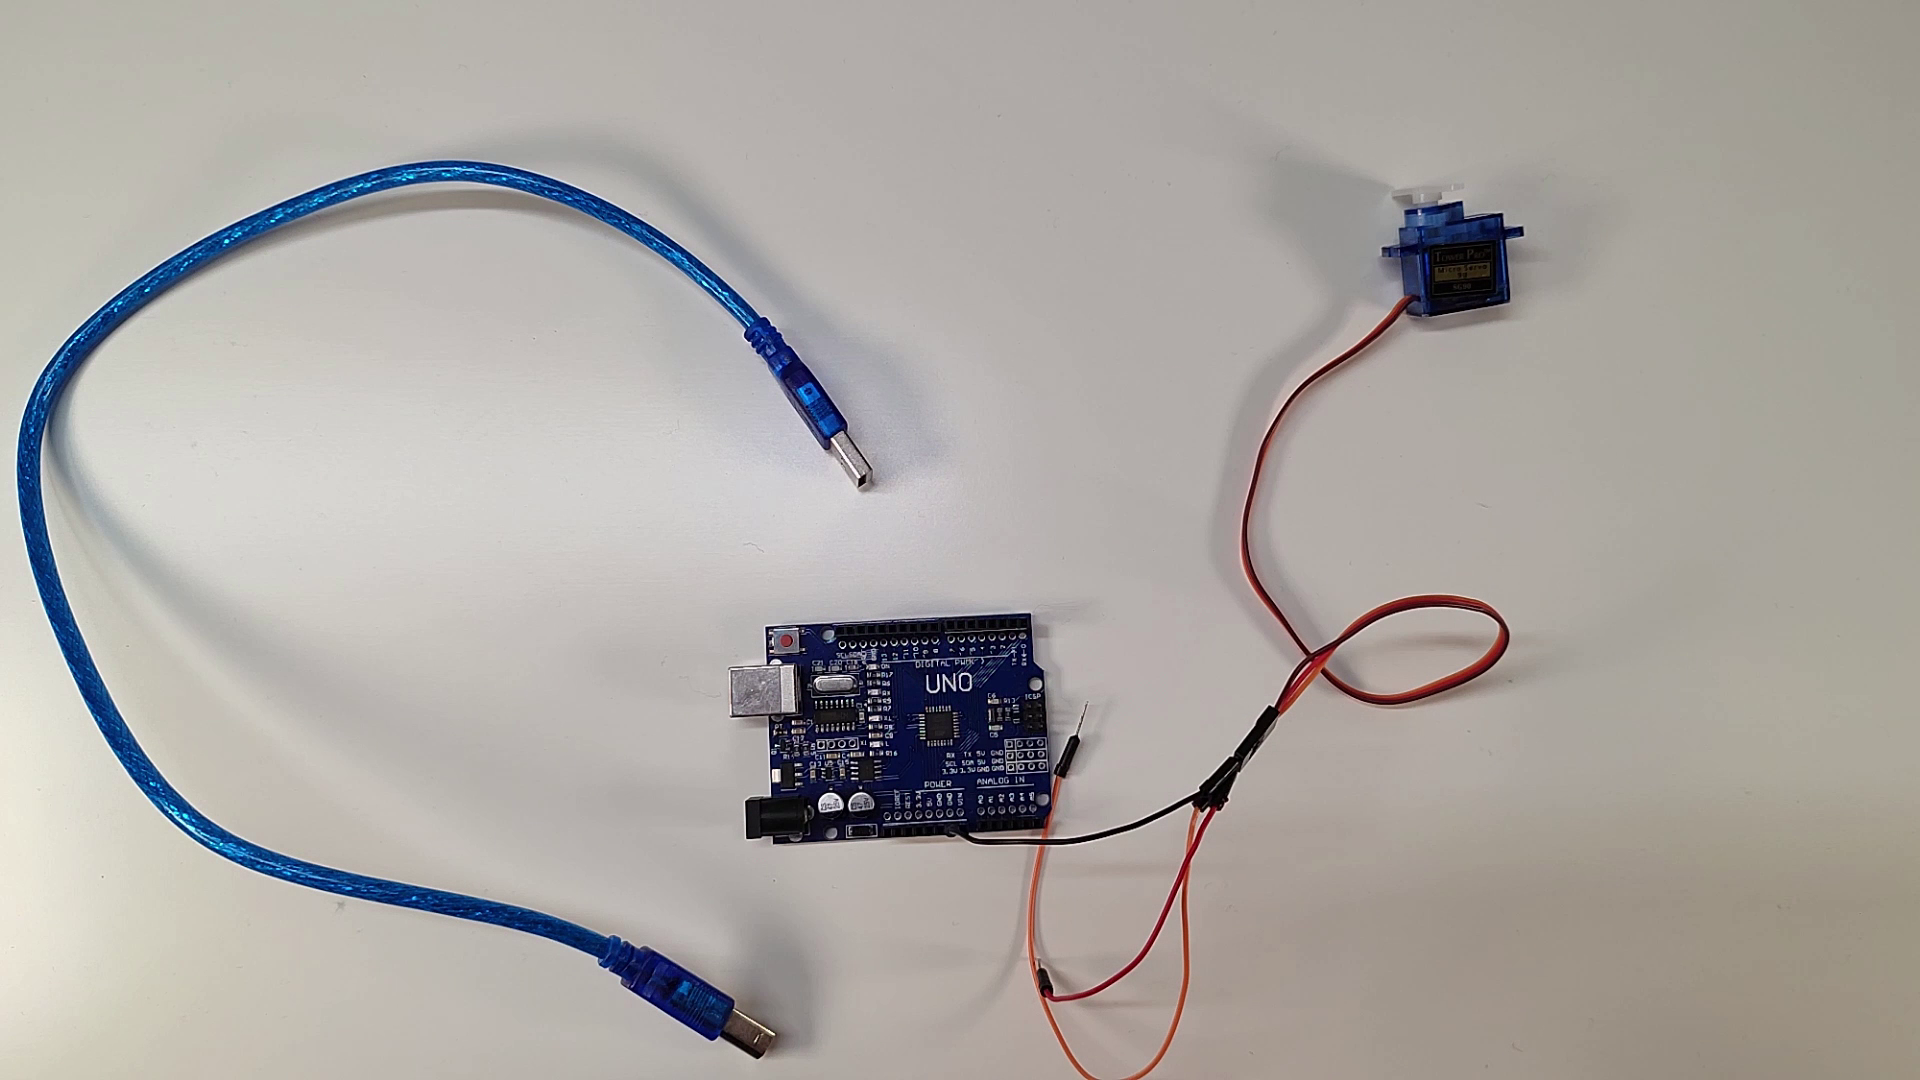
Connect the black jumper wire to the ground (GND) on the Arduino.
Connect Red Jumper Wire to 5V on Arduino
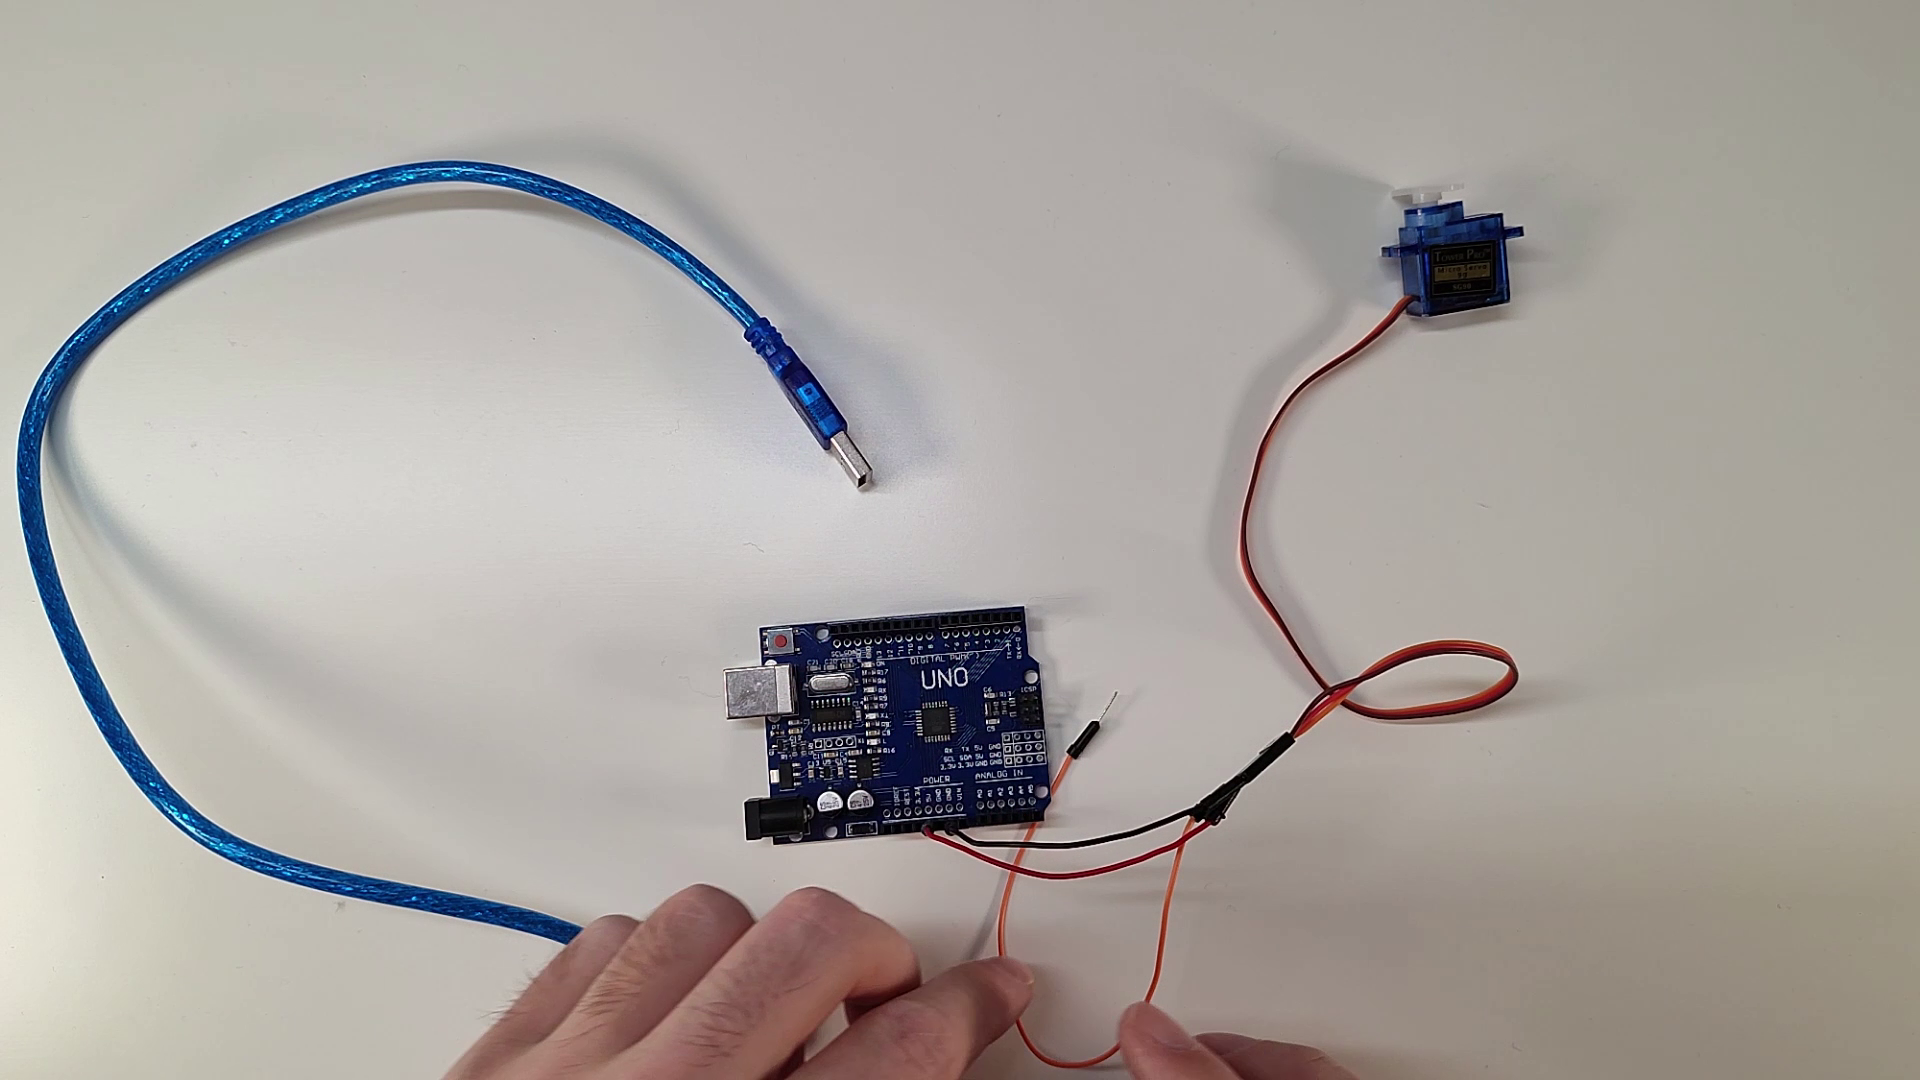
Connect the red jumper wire to the 5V pin of the Arduino.
Connect Orange Jumper Wire to Pin 9 on Arduino
Connect the orange jumper wire to pin number 9 on the Arduino, since the code uses pin number 9.
Connect Usb Cable From Arduino to Computer
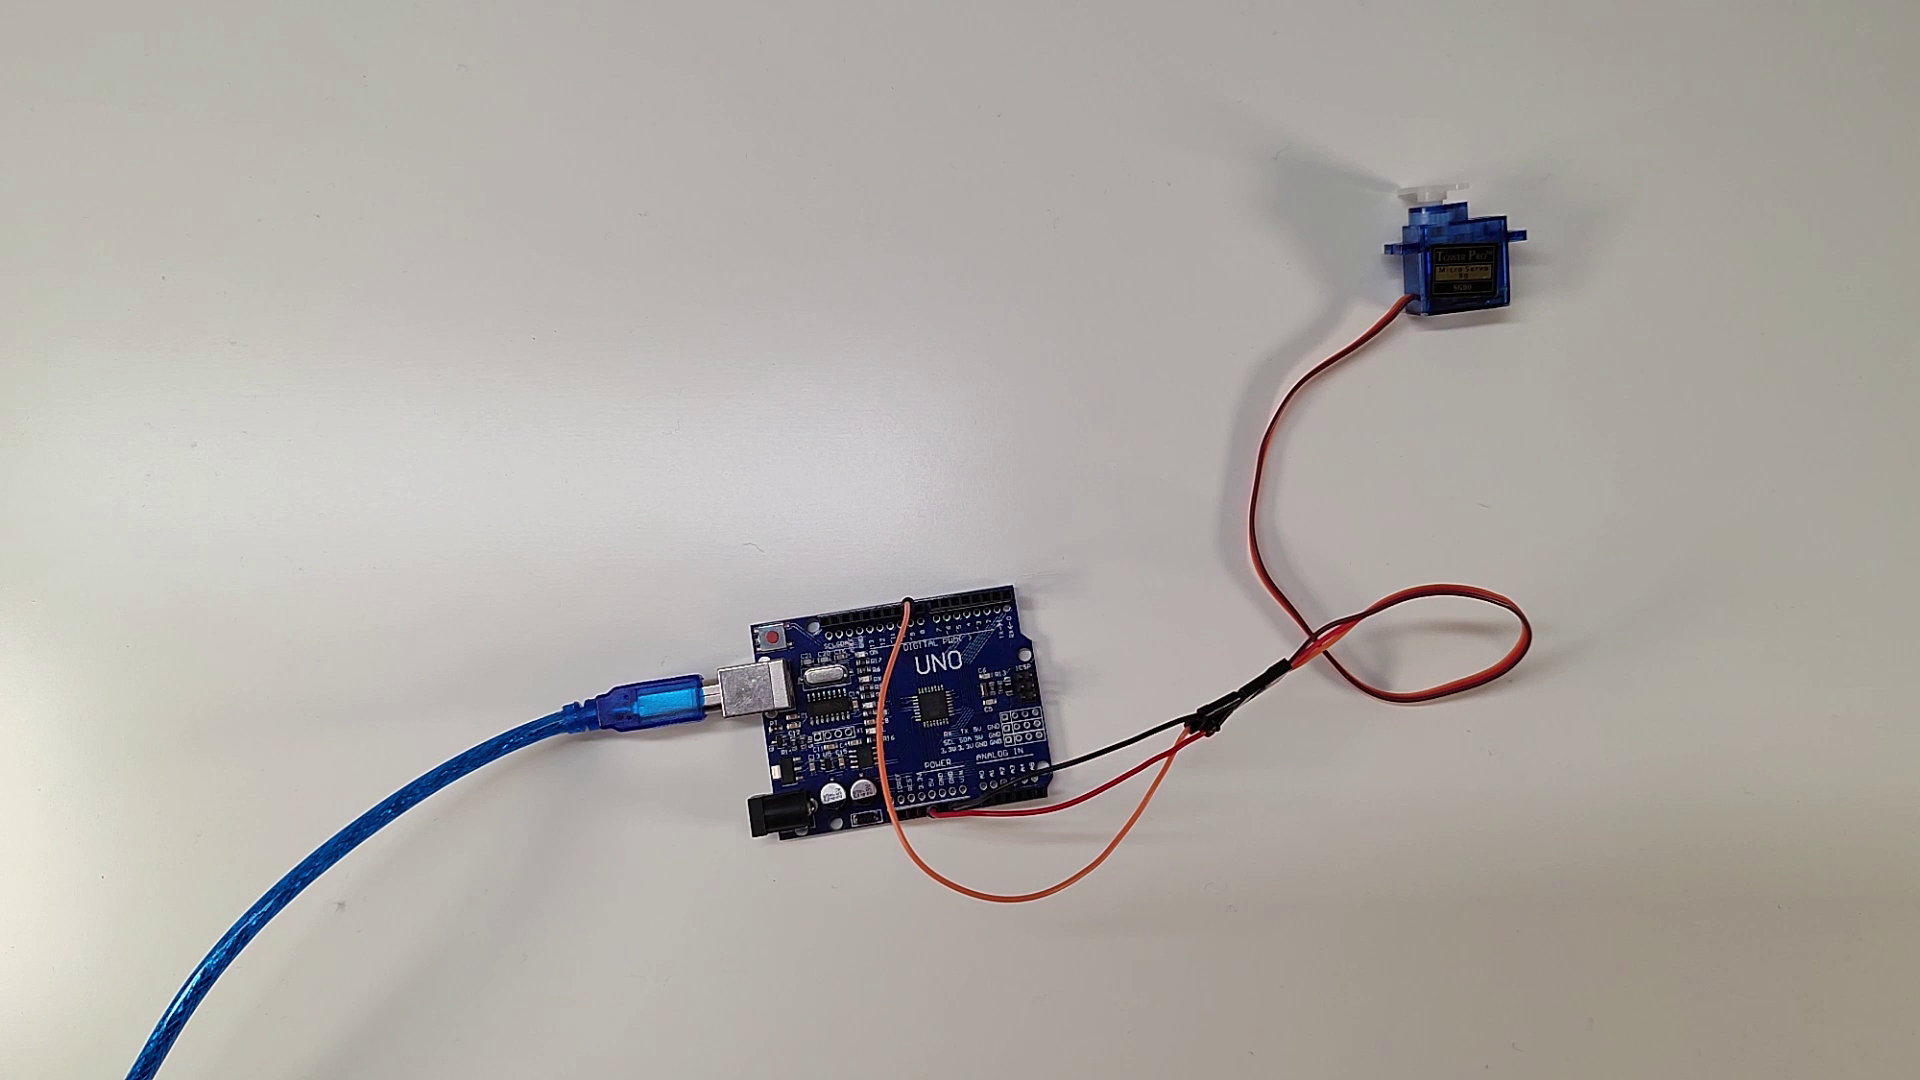
Plug in the USB cable into the arduino and with the other end into the USB port of the computer.
Open Arduino IDE and Select the Sweep Sketch
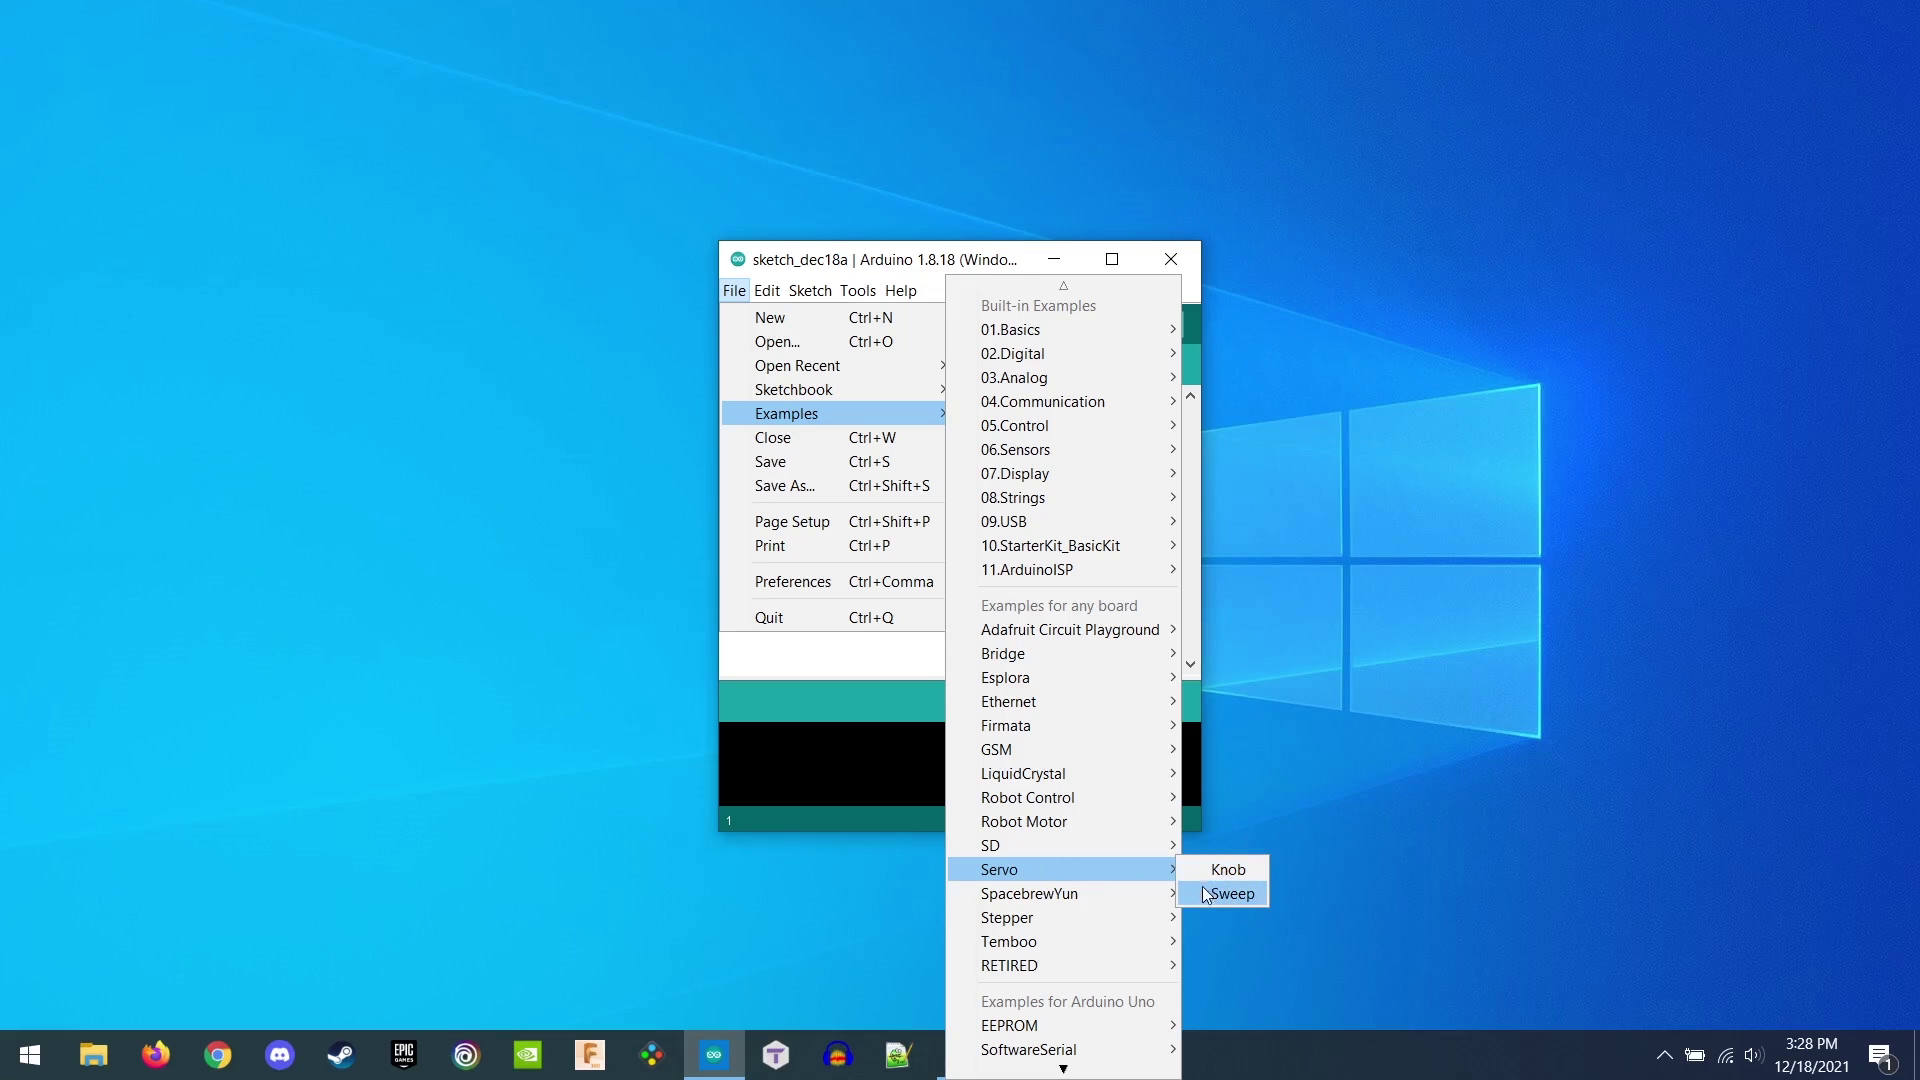
Launch the Arduino IDE software on the computer and go to "File - Examples - Servo - Sweep" to select the sweep sketch.
Upload Code to Arduino
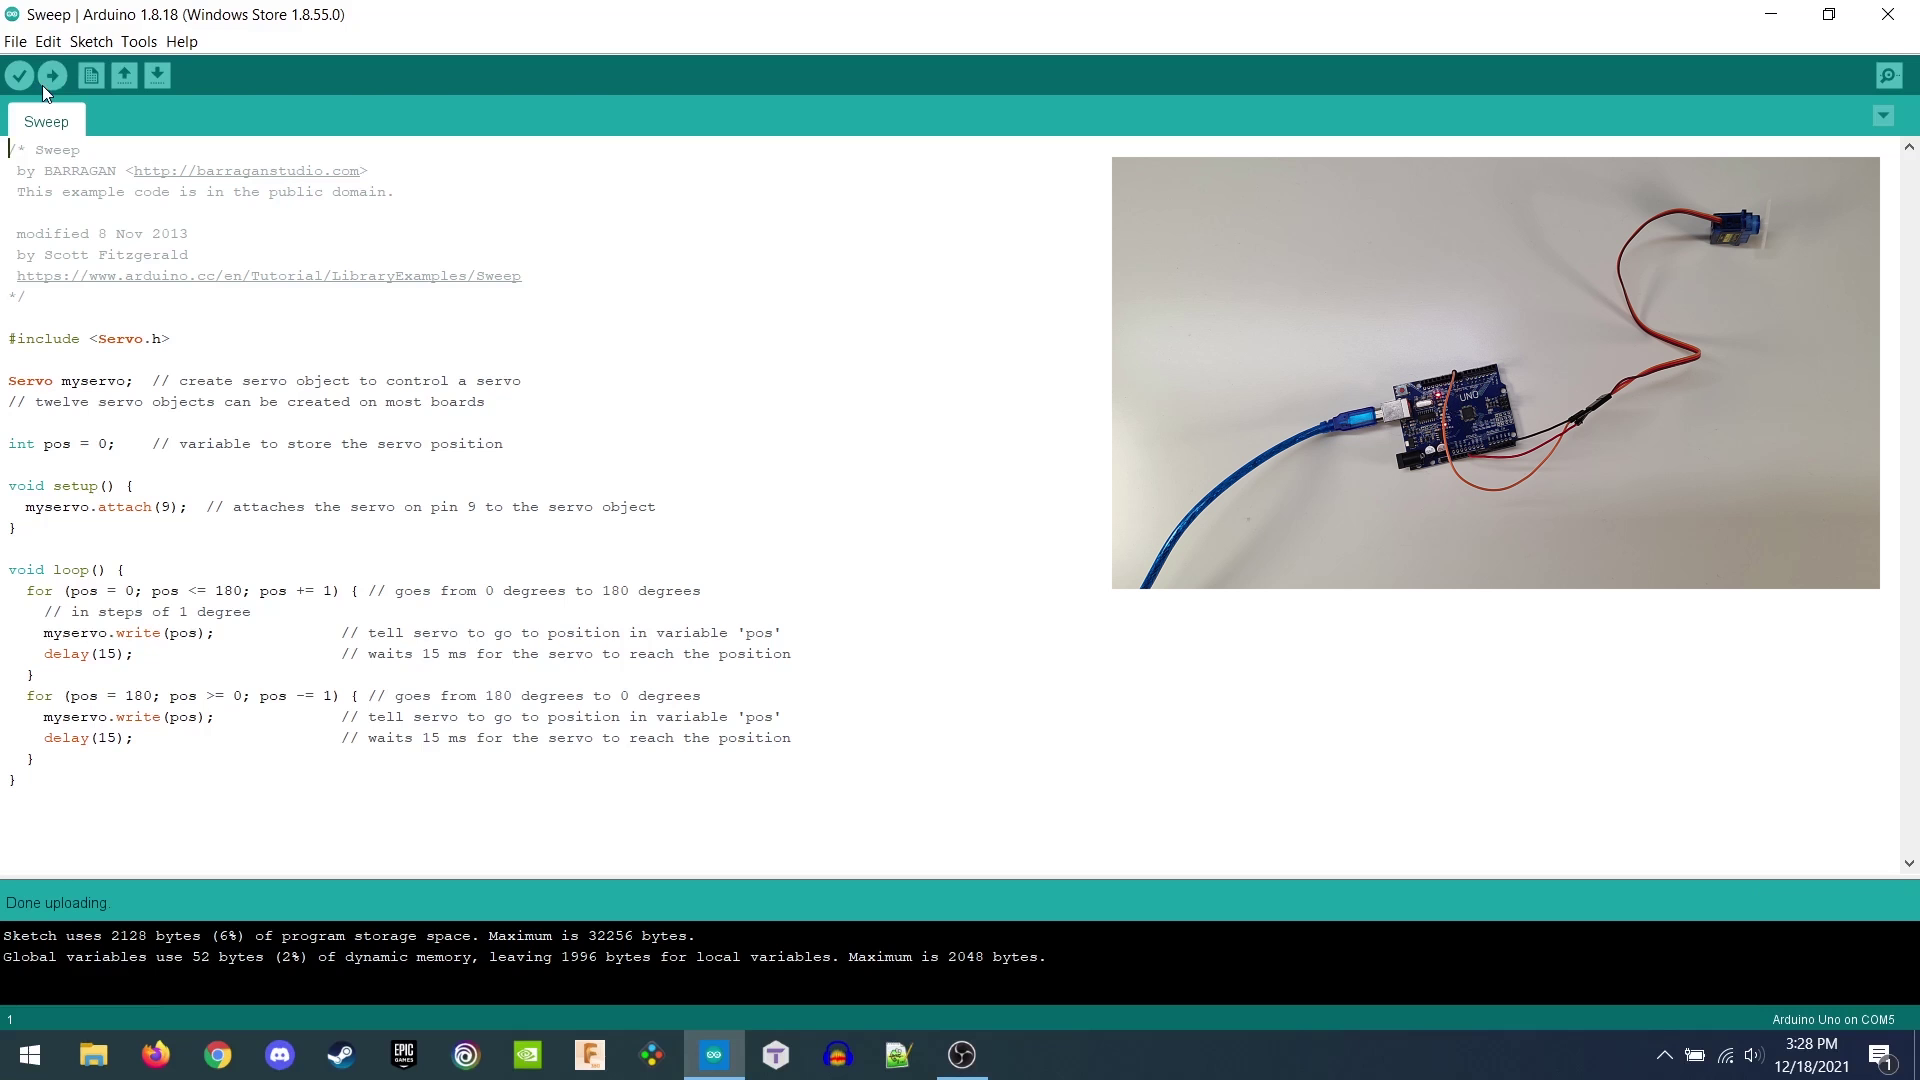
Click the upload button to upload the sketch to the Arduino, the servo motor should be moving now.
Congratulations on completing this tutorial!