How to Control LEDs With Arduino
by chanidu1214 in Circuits > Arduino
1254 Views, 1 Favorites, 0 Comments
How to Control LEDs With Arduino
So in this tutorial I am going to light some leds with arduino uno board.
Things You Need
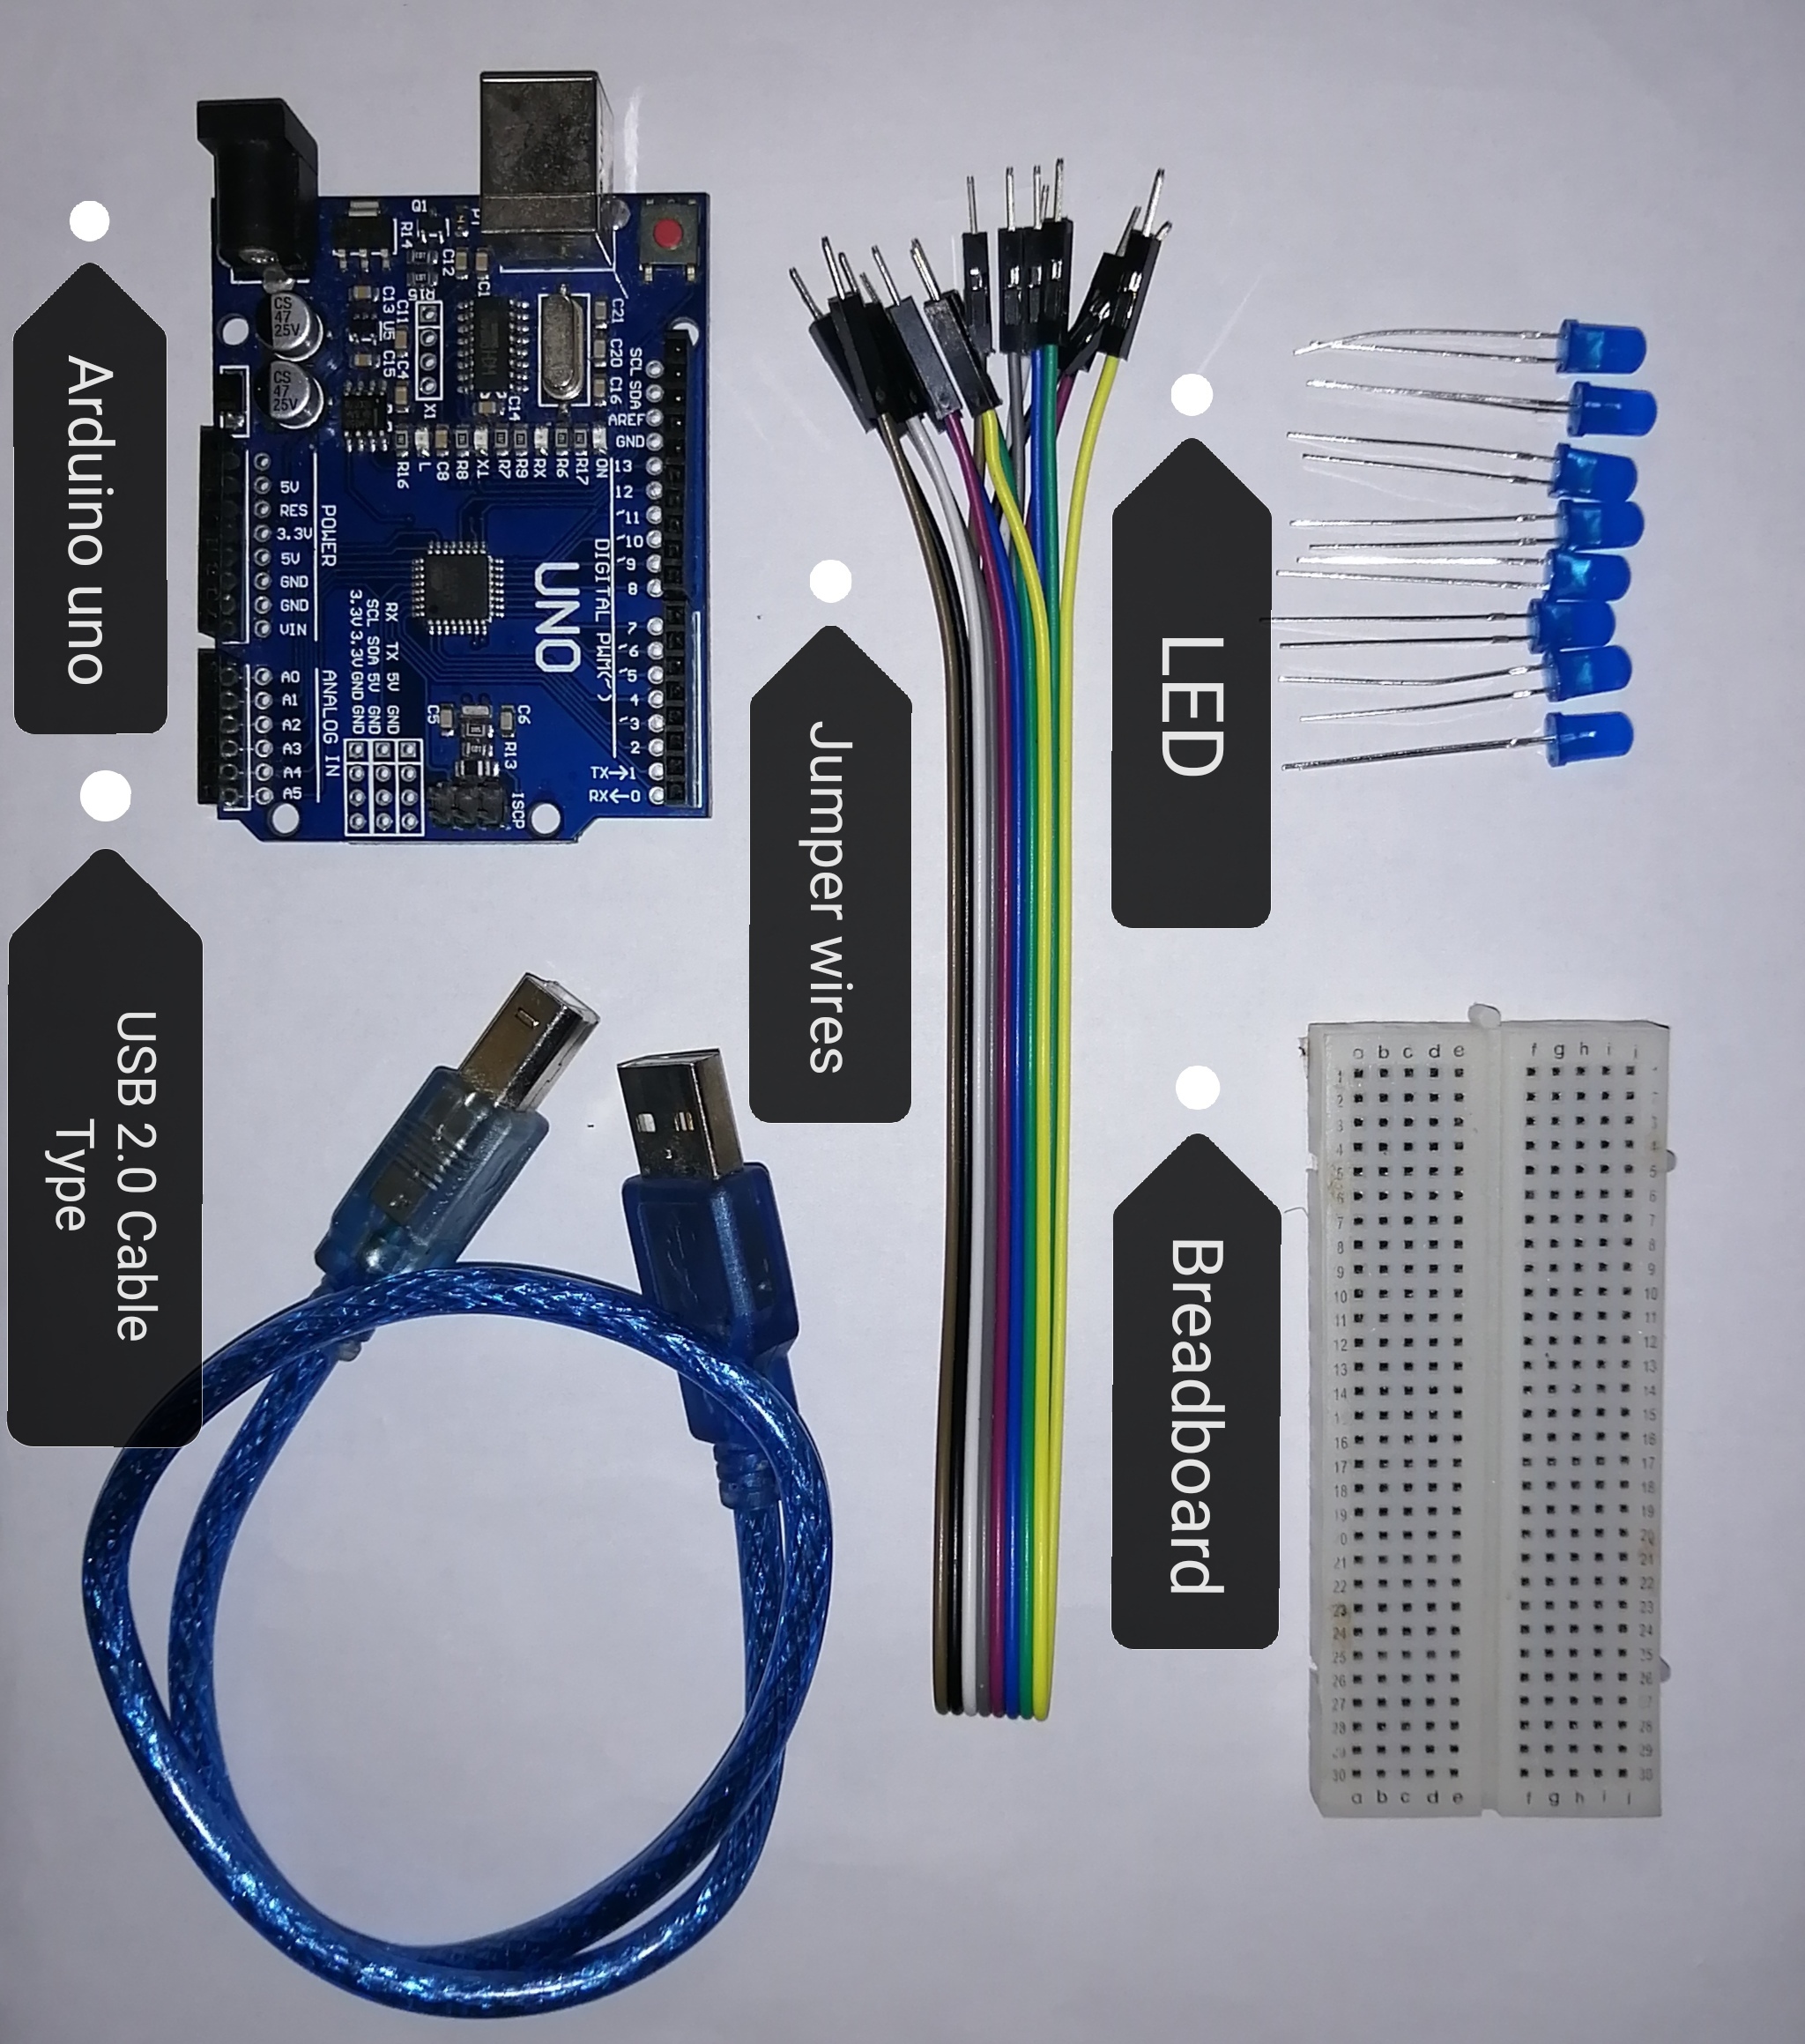
Arduino uno
USB 2.0 Cable type
Male to male jumper wires
LEDs
Breadboard
USB 2.0 Cable type
Male to male jumper wires
LEDs
Breadboard
Led Explanation
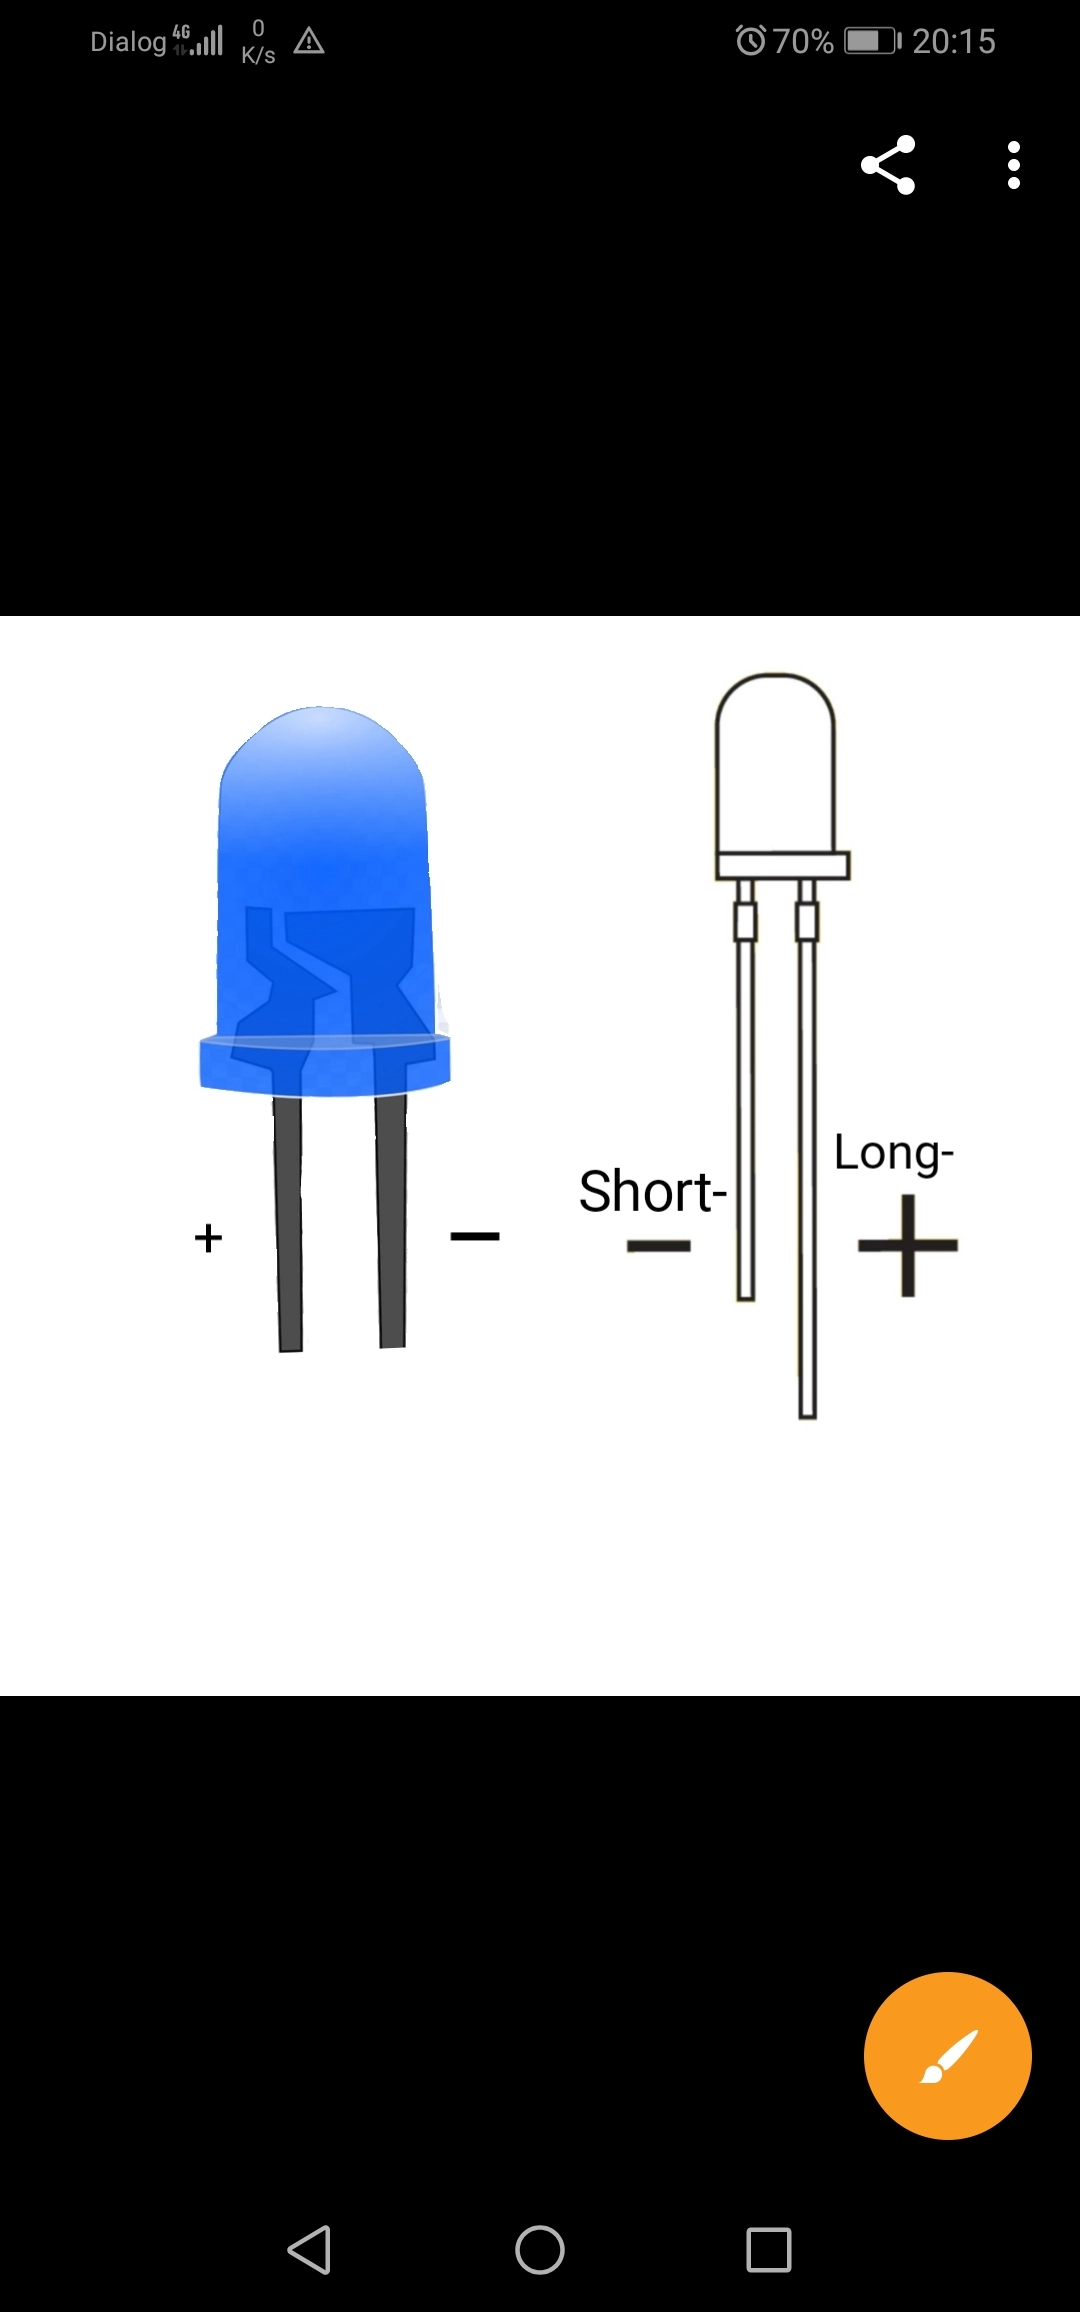
a light-emitting diode (a semiconductor diode which glows when a voltage is applied).
The long side of the led is positive or plus(+) whereas the short side is negative or minus(-).
The long side of the led is positive or plus(+) whereas the short side is negative or minus(-).
Setting Things
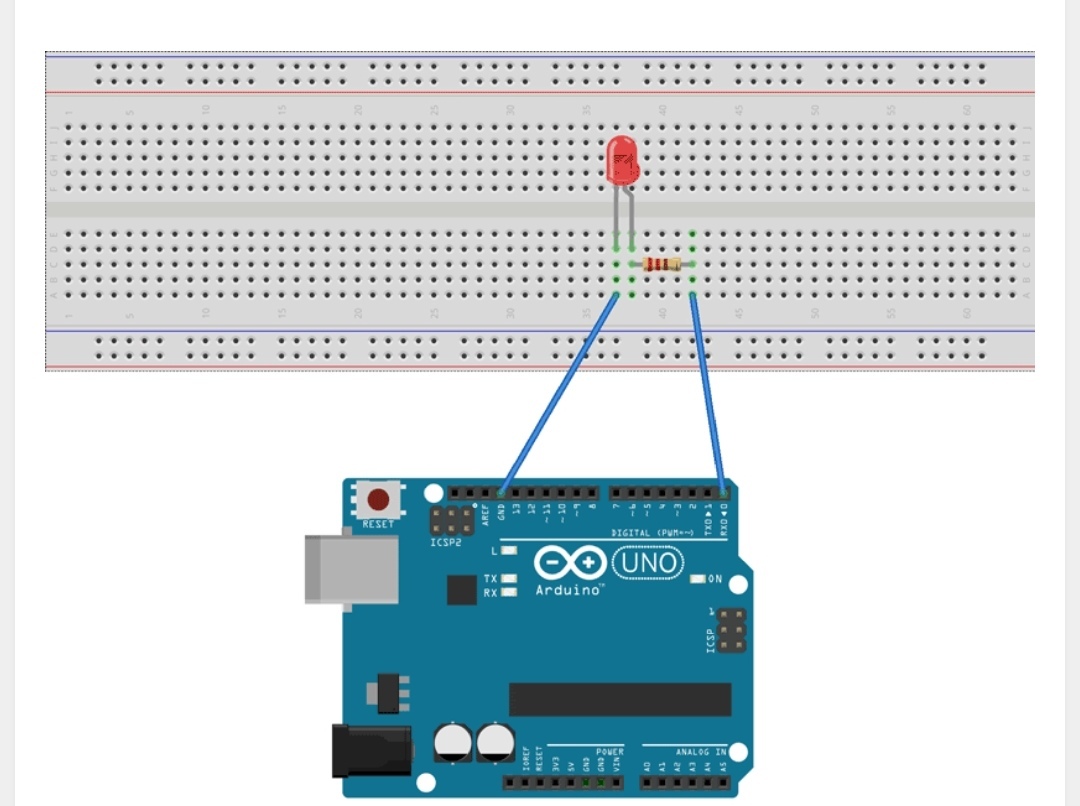
This is the setup of the project.
Connect the ground(GND) pin of the arduino board to the minus(-) side of the led.
Then connect the plus(+) side of the led to 0 pin of the arduino board(if 0 pin does not work use pin 2).
Connect the arduino board to your computer with USB 2.0 Cable.
(you don't need a resistor as shown in the photo).
The Code
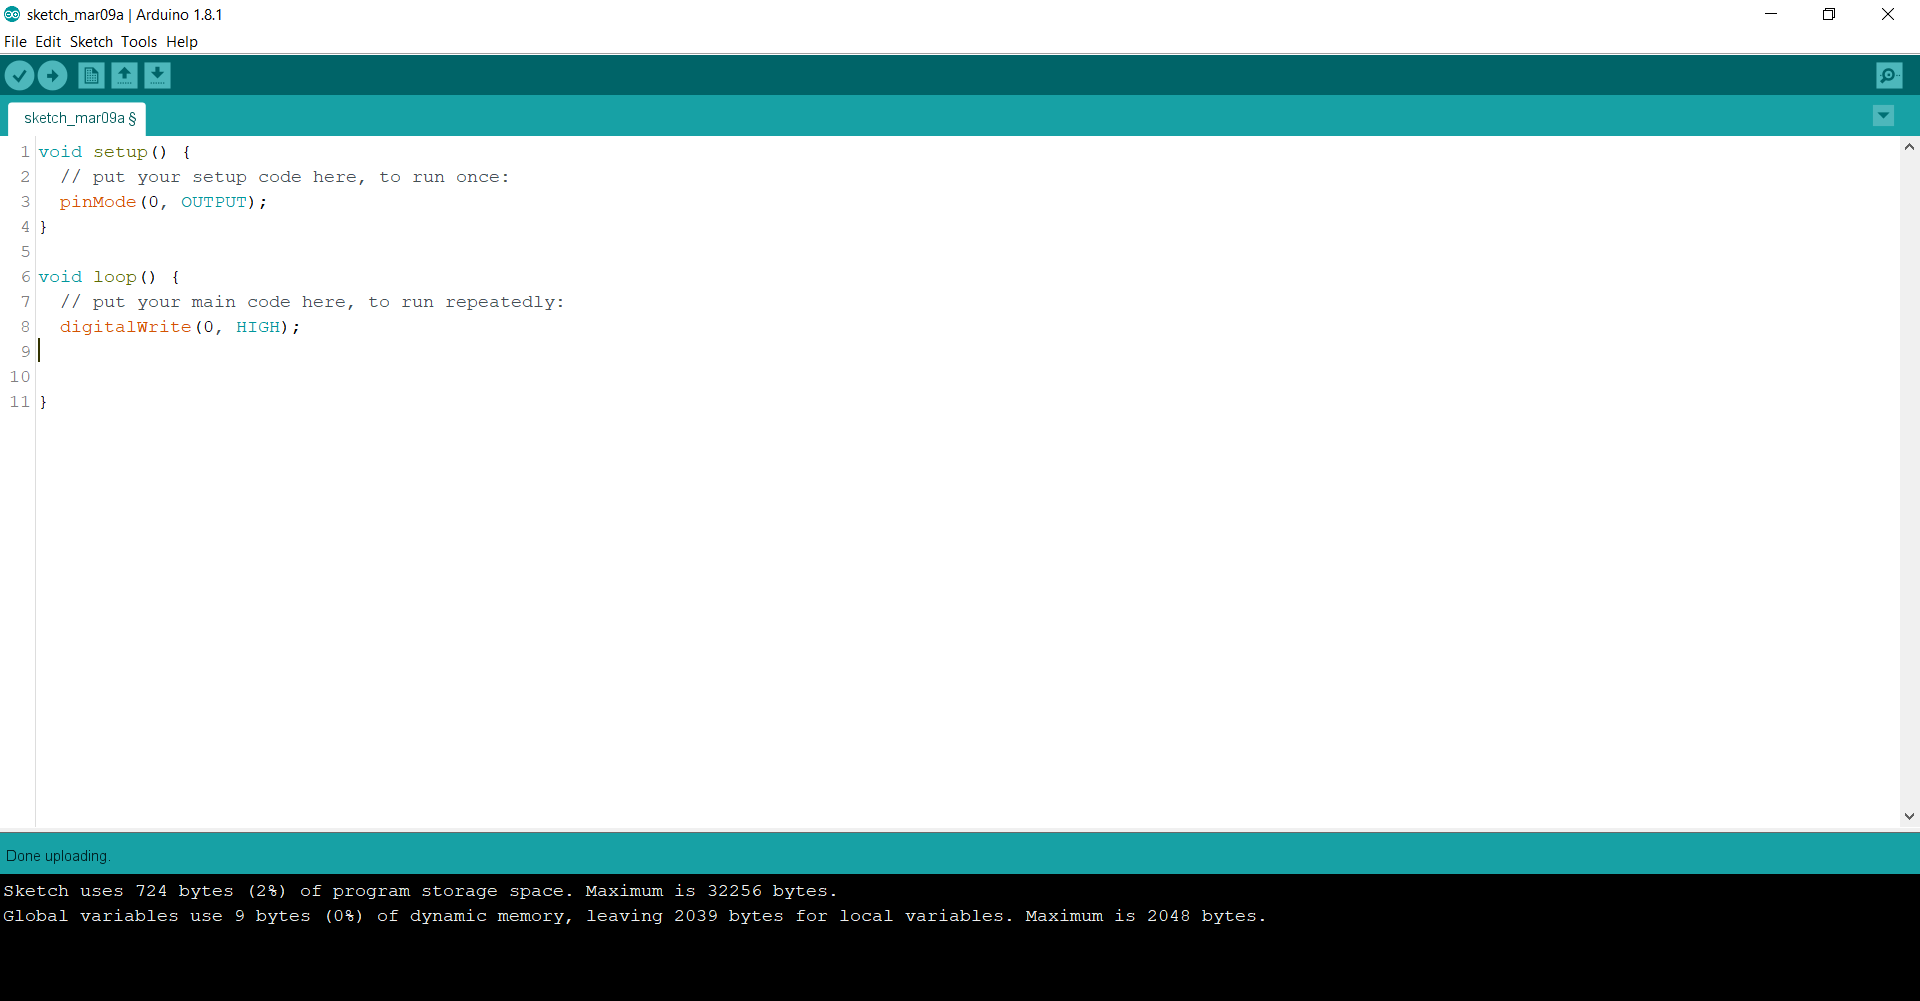
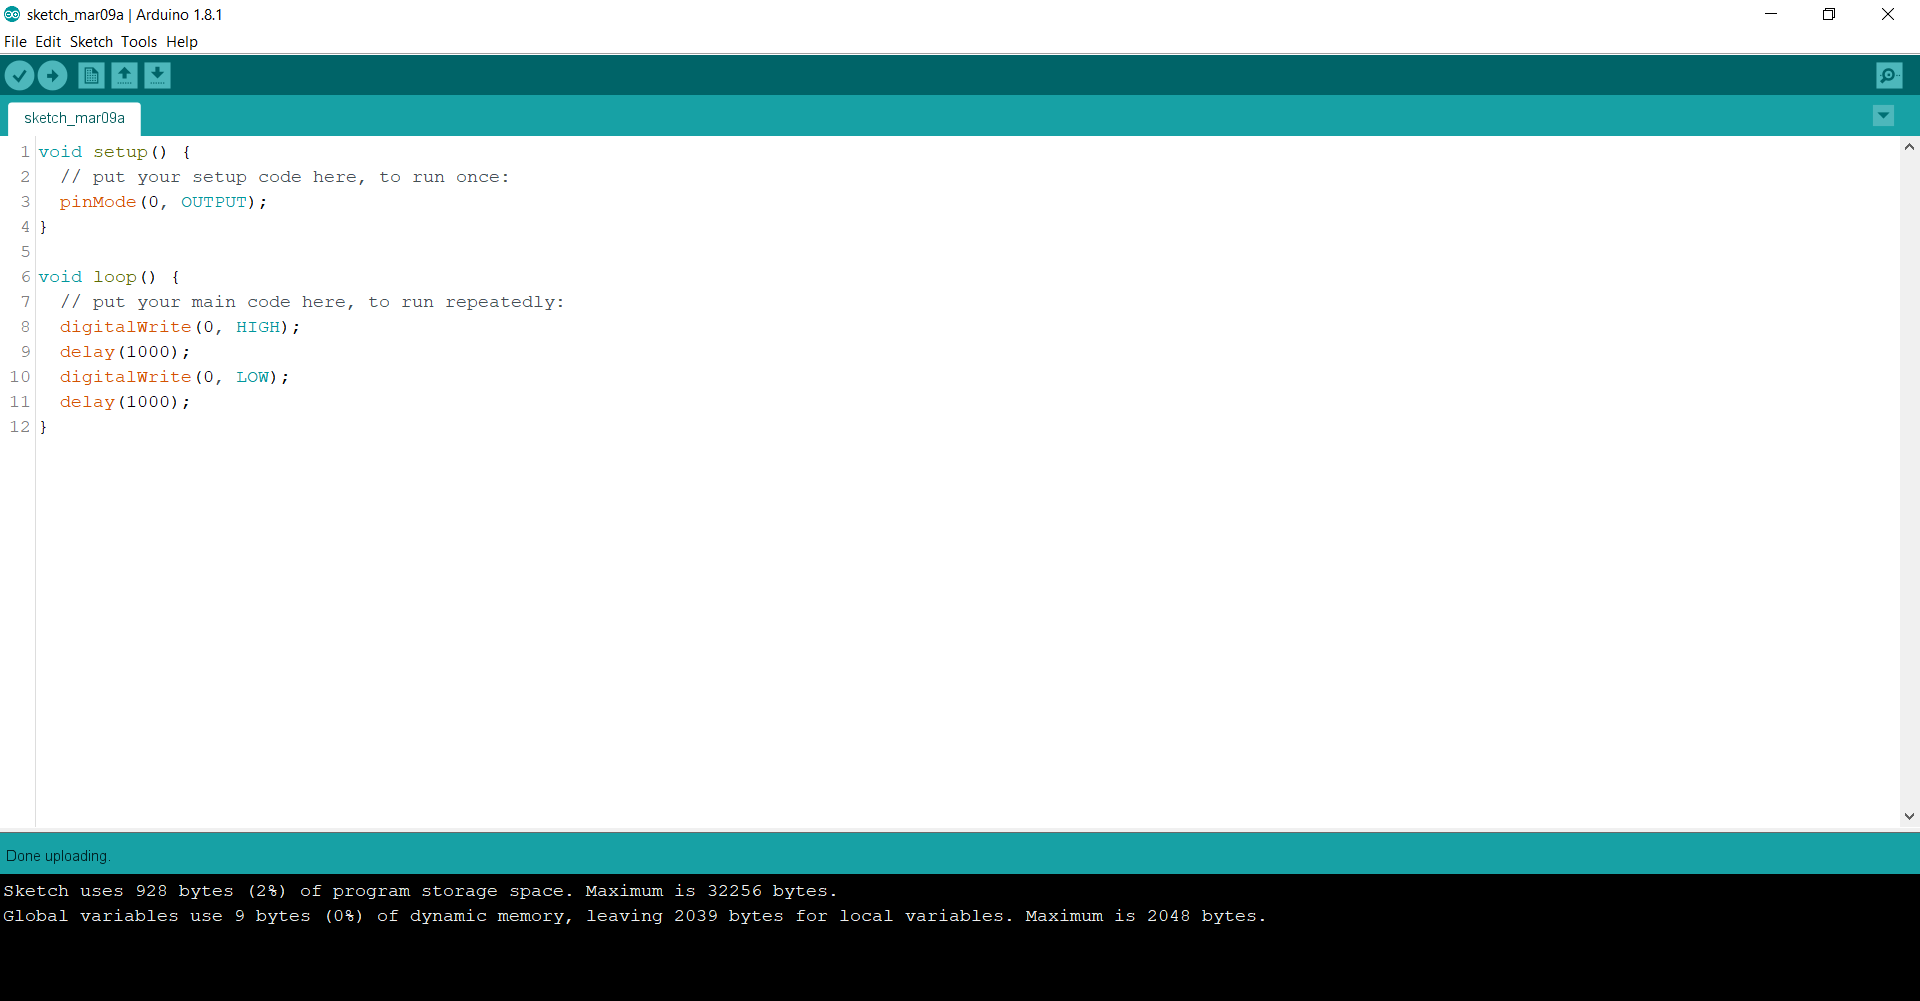
Go to arduino IDE and name your project as led and save it.
Then write the following code.
If you use pin 2 for the (+) side of the led, then just change the number 0 of the code to 2.(pinMode 2 and digitalWrite 2).
Then write the following code.
If you use pin 2 for the (+) side of the led, then just change the number 0 of the code to 2.(pinMode 2 and digitalWrite 2).
Final Result
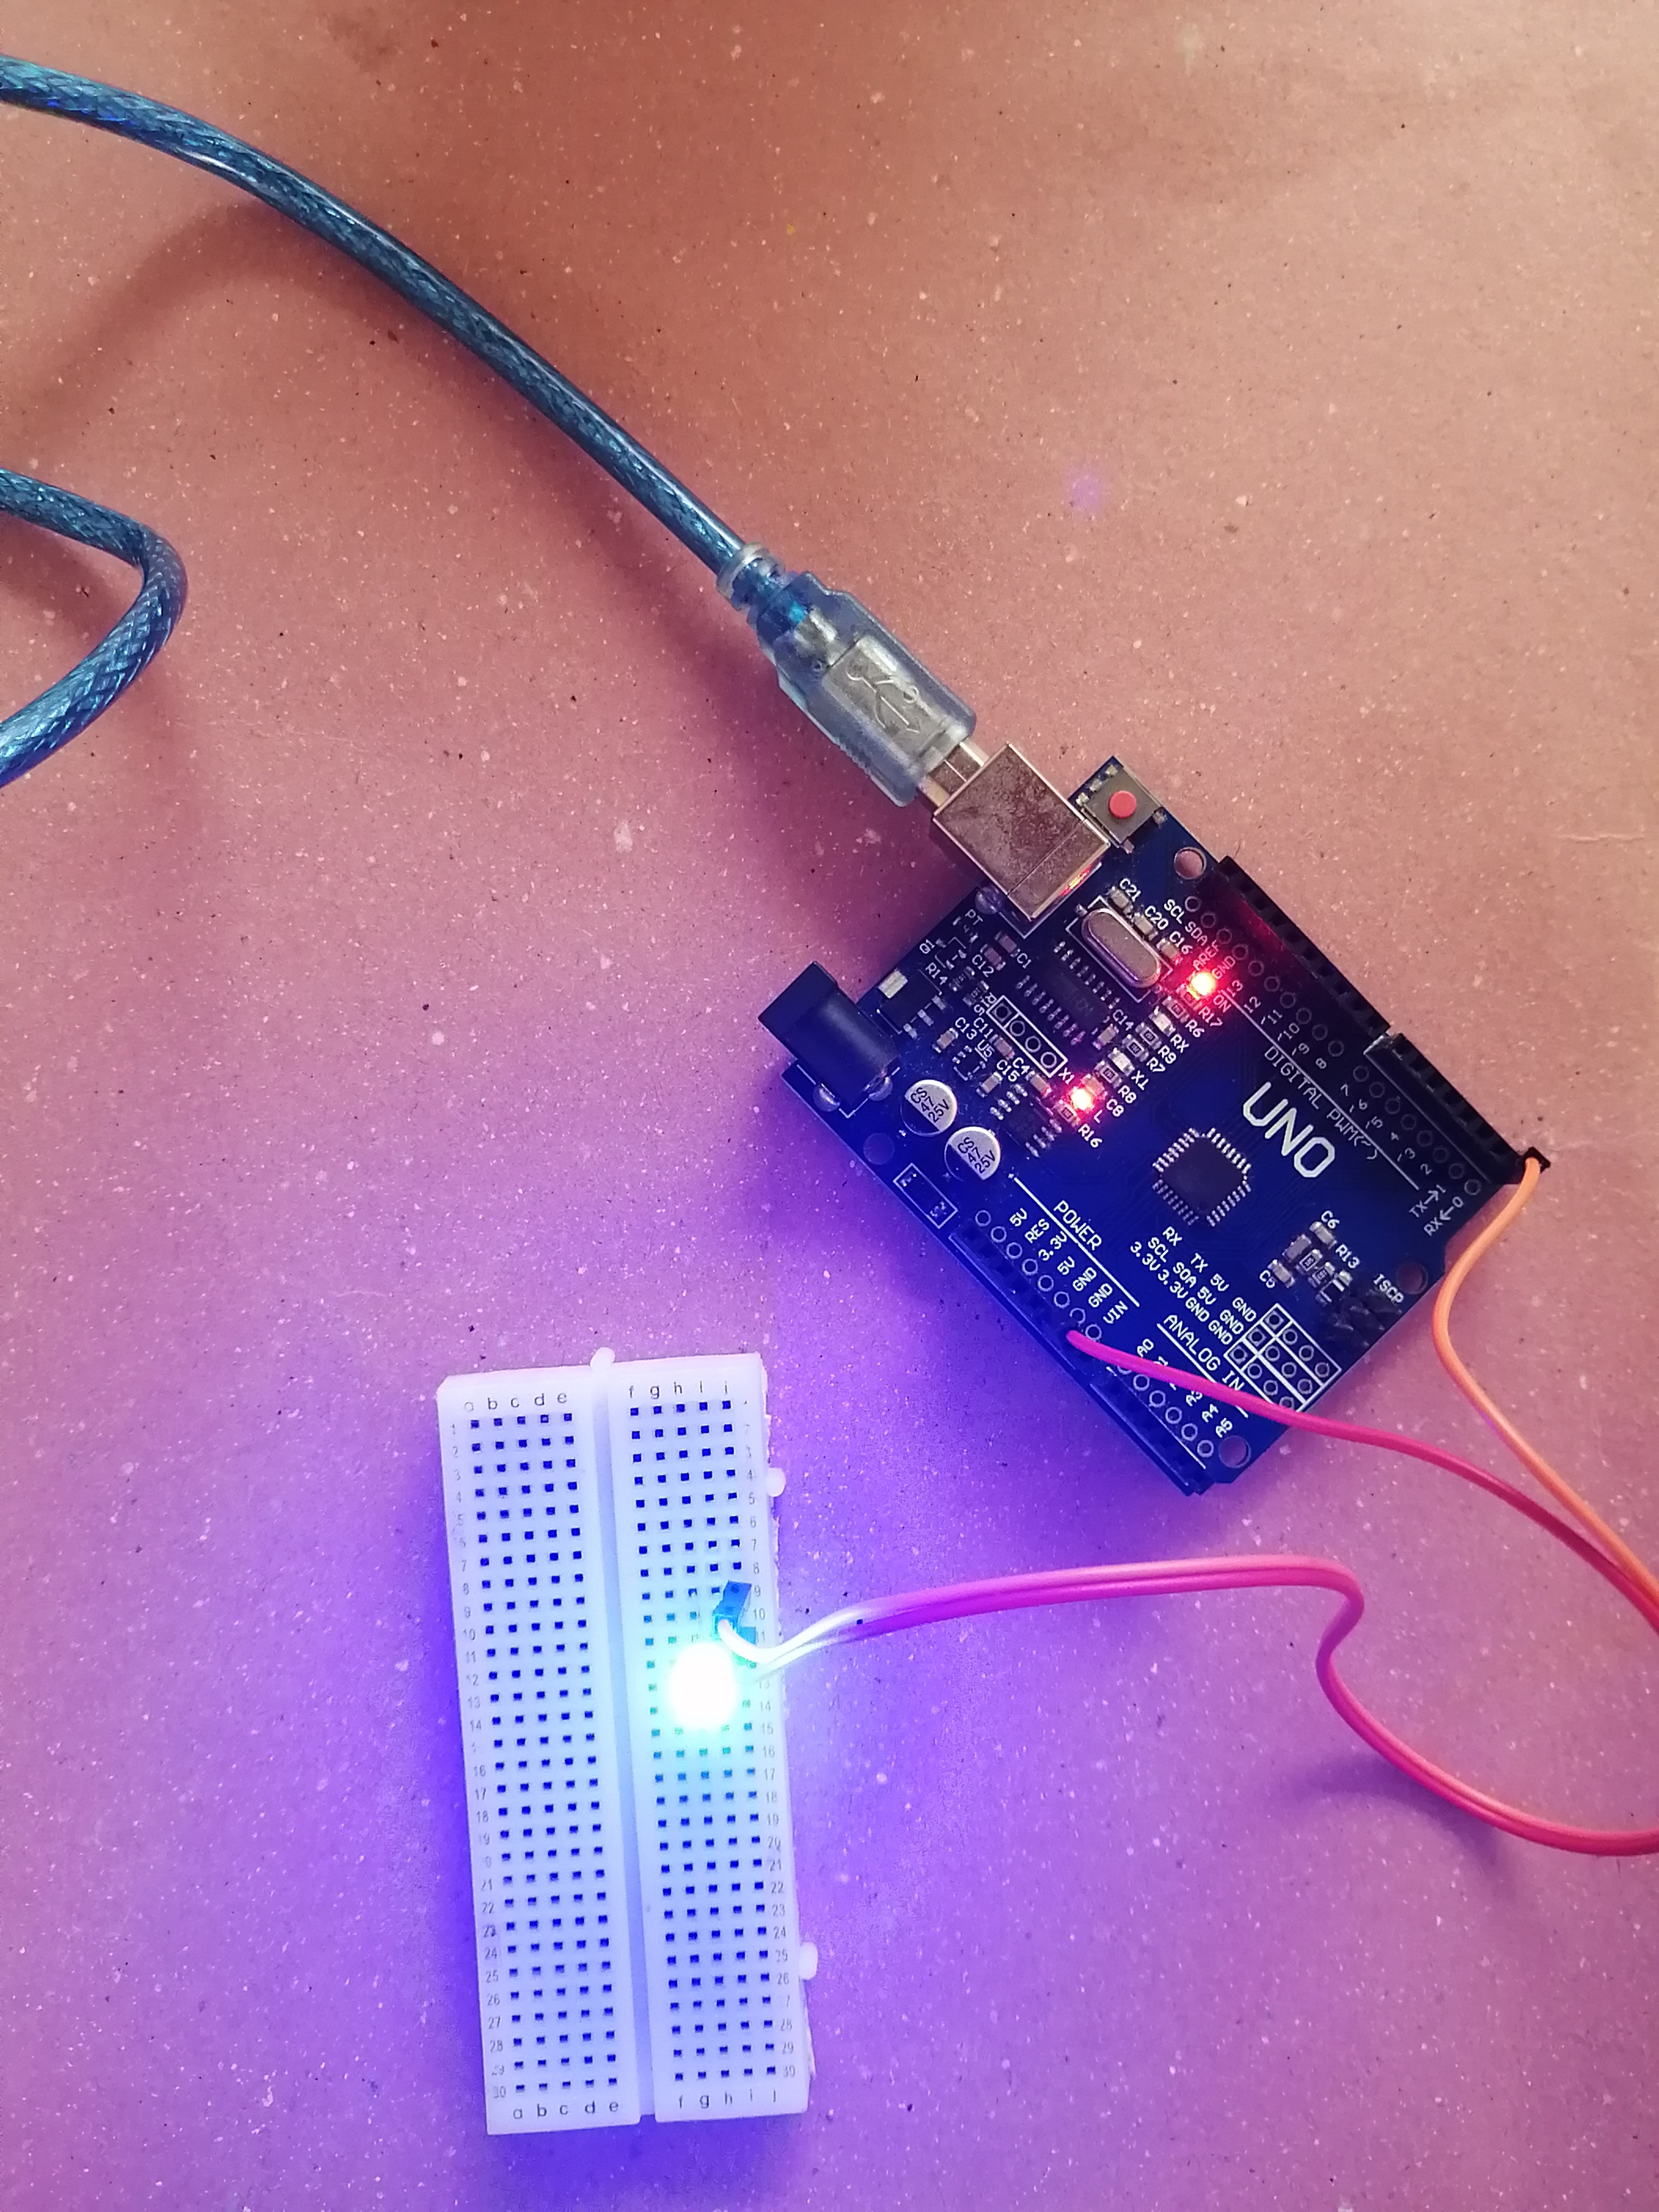
Now the led will light up if you have used the first code.
If you use the second code the light will blink.
If you use the second code the light will blink.