How to Connect to USB Console by Using PuTTY?
by samcullin in Teachers > University+
21703 Views, 1 Favorites, 0 Comments
How to Connect to USB Console by Using PuTTY?

Using PuTTY for USB console adapters allows you to easily establish a serial connection between your computer and networking devices such as routers and switches. Through a USB console connection, you can set up and manage these devices using PuTTY, a powerful terminal emulator.
This method eliminates the requirement for typical serial ports, providing greater flexibility and ease of use. By installing PuTTY and connecting via USB, you acquire a strong tool for troubleshooting, configuring, and maintaining network enhancing overall network management experience.
Also explore how to use Tor as a Proxy in PuTTY.
Supplies
Install PuTTY:
Download and install PuTTY software according to your operating system.
USB to Serial Adapter Driver:
If you are using a USB console cord with a USB-to-Serial adapter, make sure you have the necessary drivers installed for the adapter.
Connect the USB Console Cable:
Connect your USB console cable, which includes the USB to Serial adapter, to an USB port on your computer system.
Identify COM Port:
Once connected, identify the COM port that connect to your USB to Serial adapter. On Windows, you can find the port name in the Device Manager.
Launch PuTTY

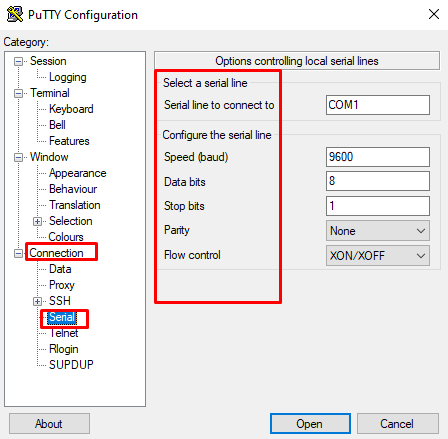
In the PuTTY configuration window on left panel, go to Connection>Serial.
On the Serial line connect to section enter the name of the port that you can see on the Device manager Windows and other basic settings baud rate, data bits, stop bits according to your device specifications.
Establish a Connection

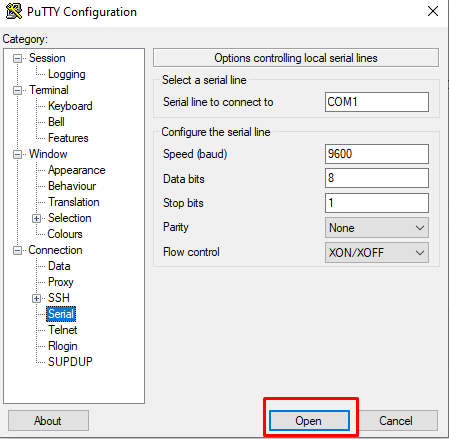
Click the "Open" button to connect to your device via serial using the USB console cable.
By Following these steps will allow you to use PuTTY with a USB console cord to connect to networking equipment, routers, switches, or other devices that use a serial console.