How to Connect Raspberry Pi to Laptop Display (Windows OS)
by Sushant_Shetty in Circuits > Raspberry Pi
7575 Views, 12 Favorites, 0 Comments
How to Connect Raspberry Pi to Laptop Display (Windows OS)

In this Instructable we'll be learning how to use a laptop screen as a display for your Raspberry Pi 2 Model B. Raspberry Pi displays are widely available in the market but are pretty expensive. So instead of buying a separate monitor you could use your laptop screen as a display for your Raspberry Pi.
Beginners can find a lot of information about the basics and know how of using a Raspberry Pi. However most of this information is not available on a single webpage or is either segmented into different modules which can be quite time consuming and overwhelming for the user.
So here in this Instructable I've tried to include all the minute details that are required for this project. However if you find that something is wrong or does not work as intended please feel free to point it out in the comments section and I'll make sure that it is corrected.
Steps 1-4 include how to connect your Raspberry Pi to the laptop screen.
Steps 5 includes troubleshooting some basic issues.
Step 6 is the ending credits.
Enough talking.
Lets get started.
Components and Softwares List
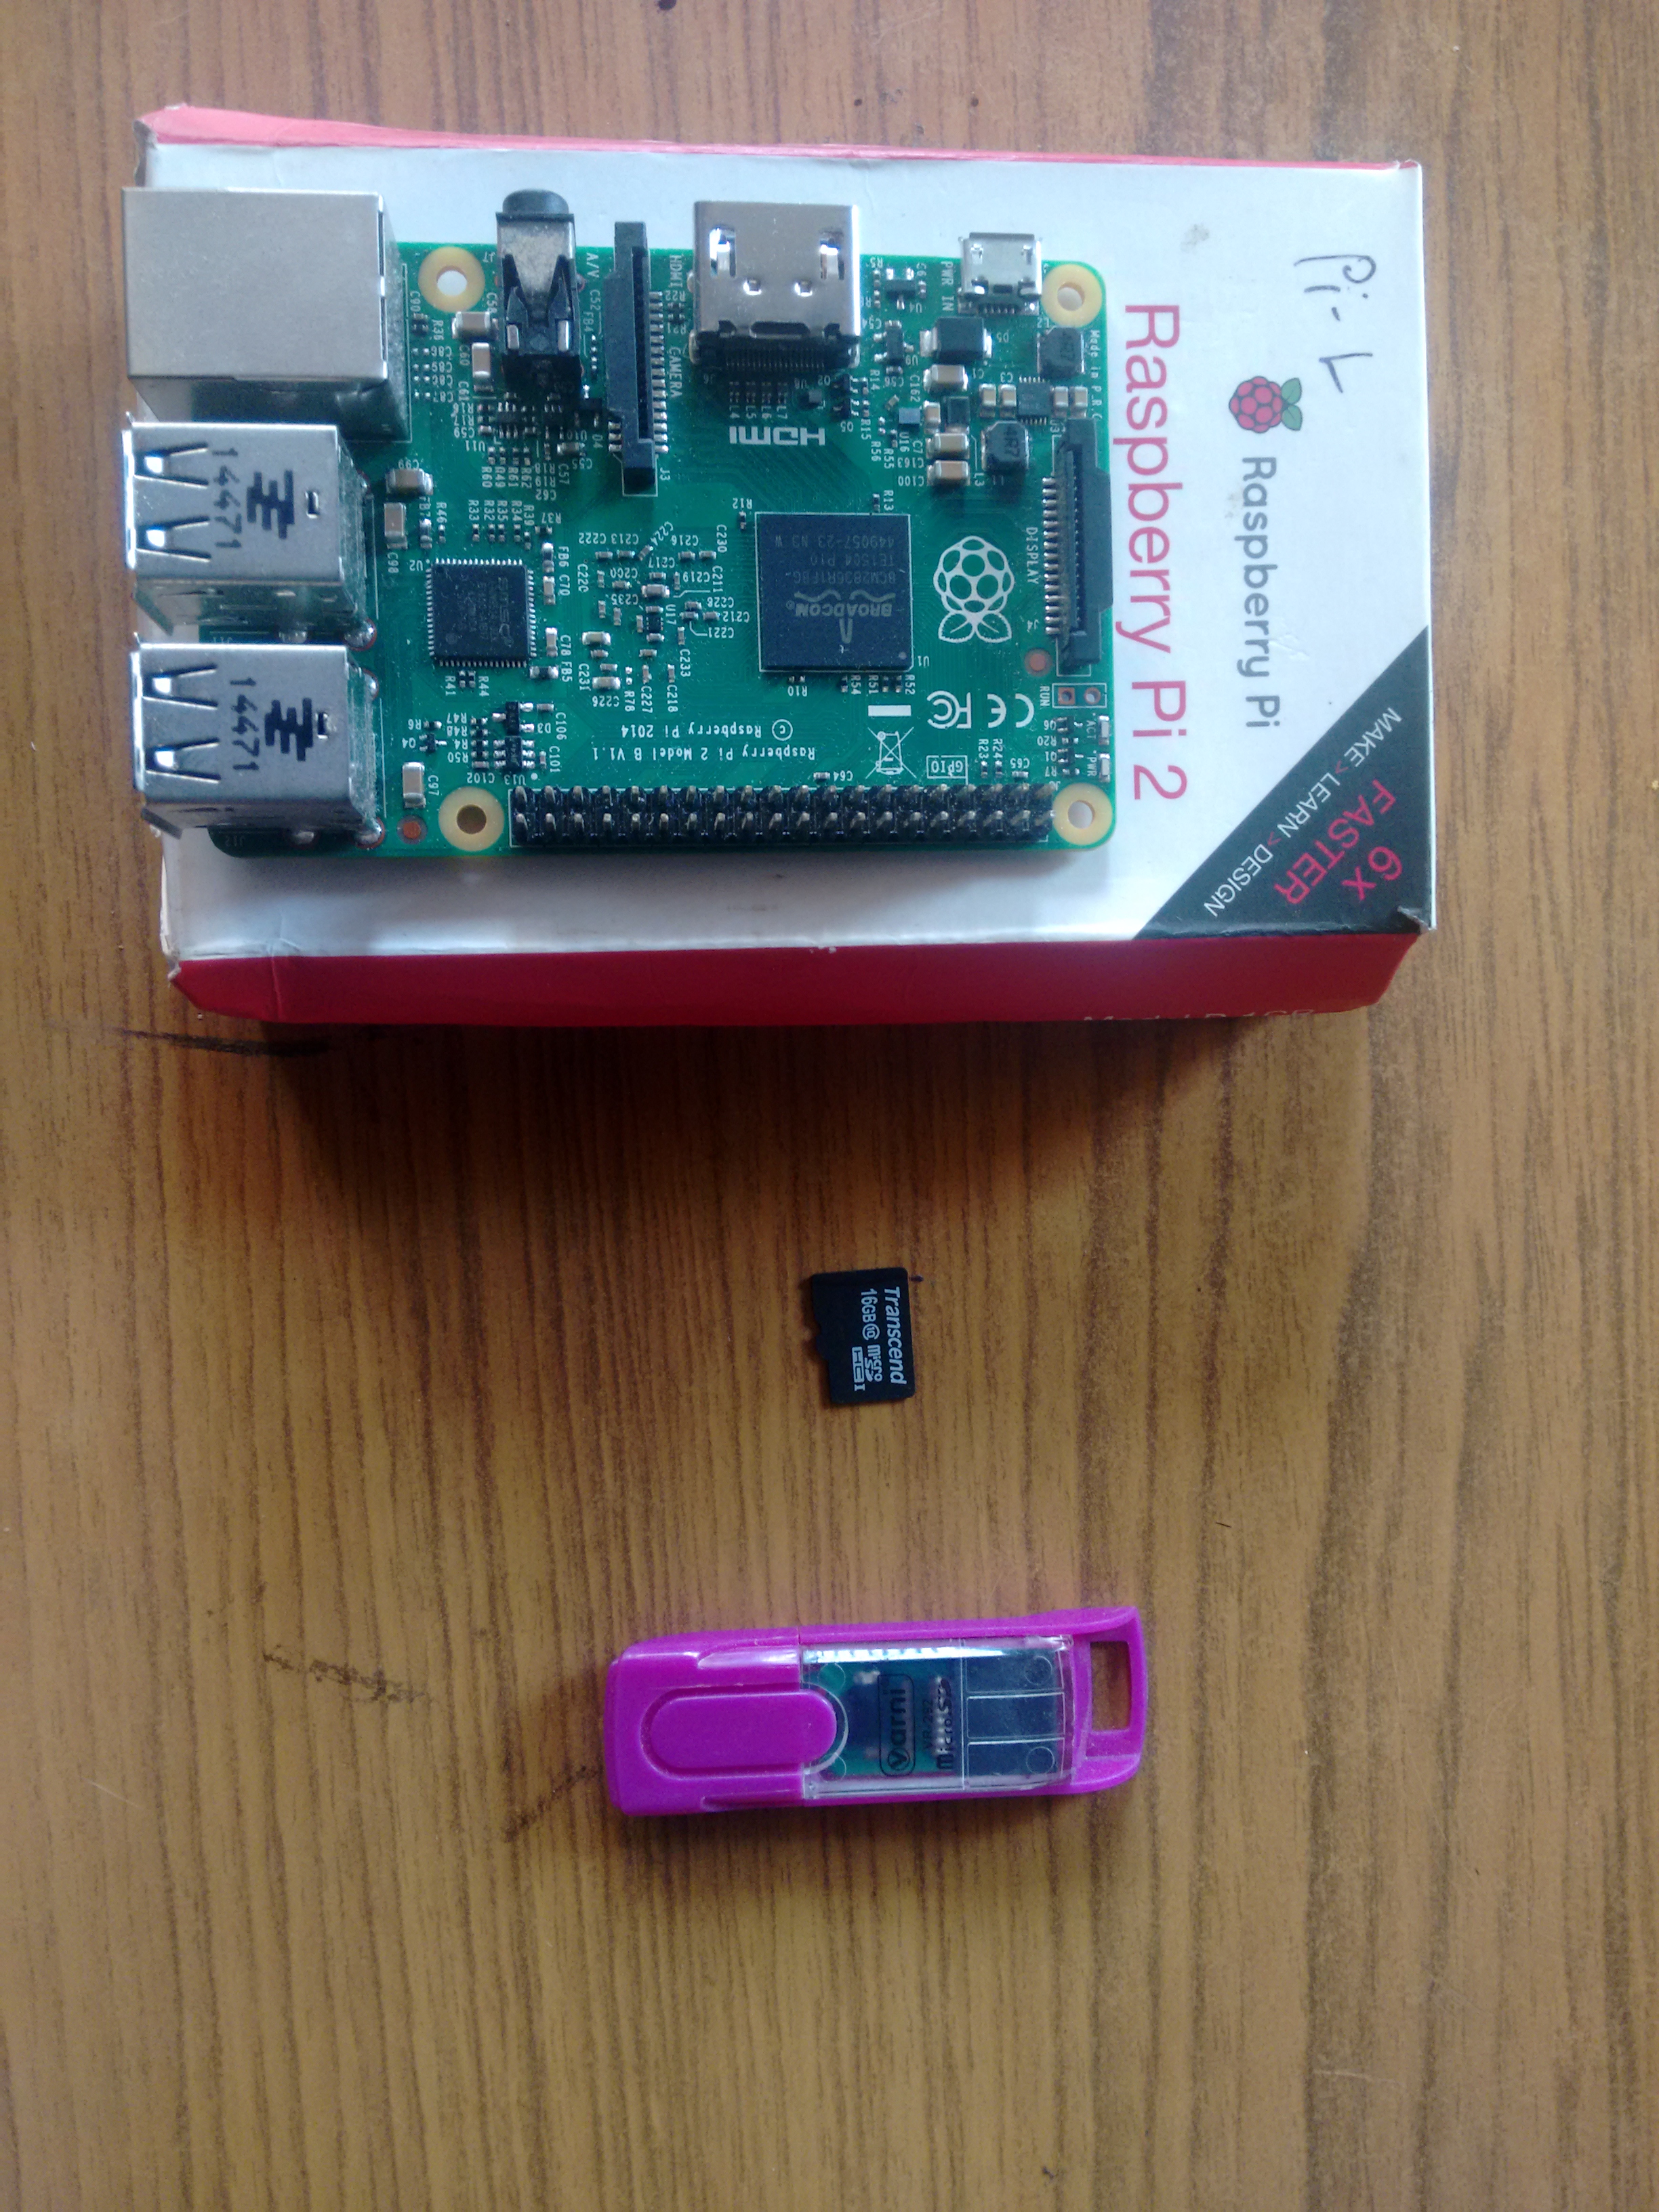
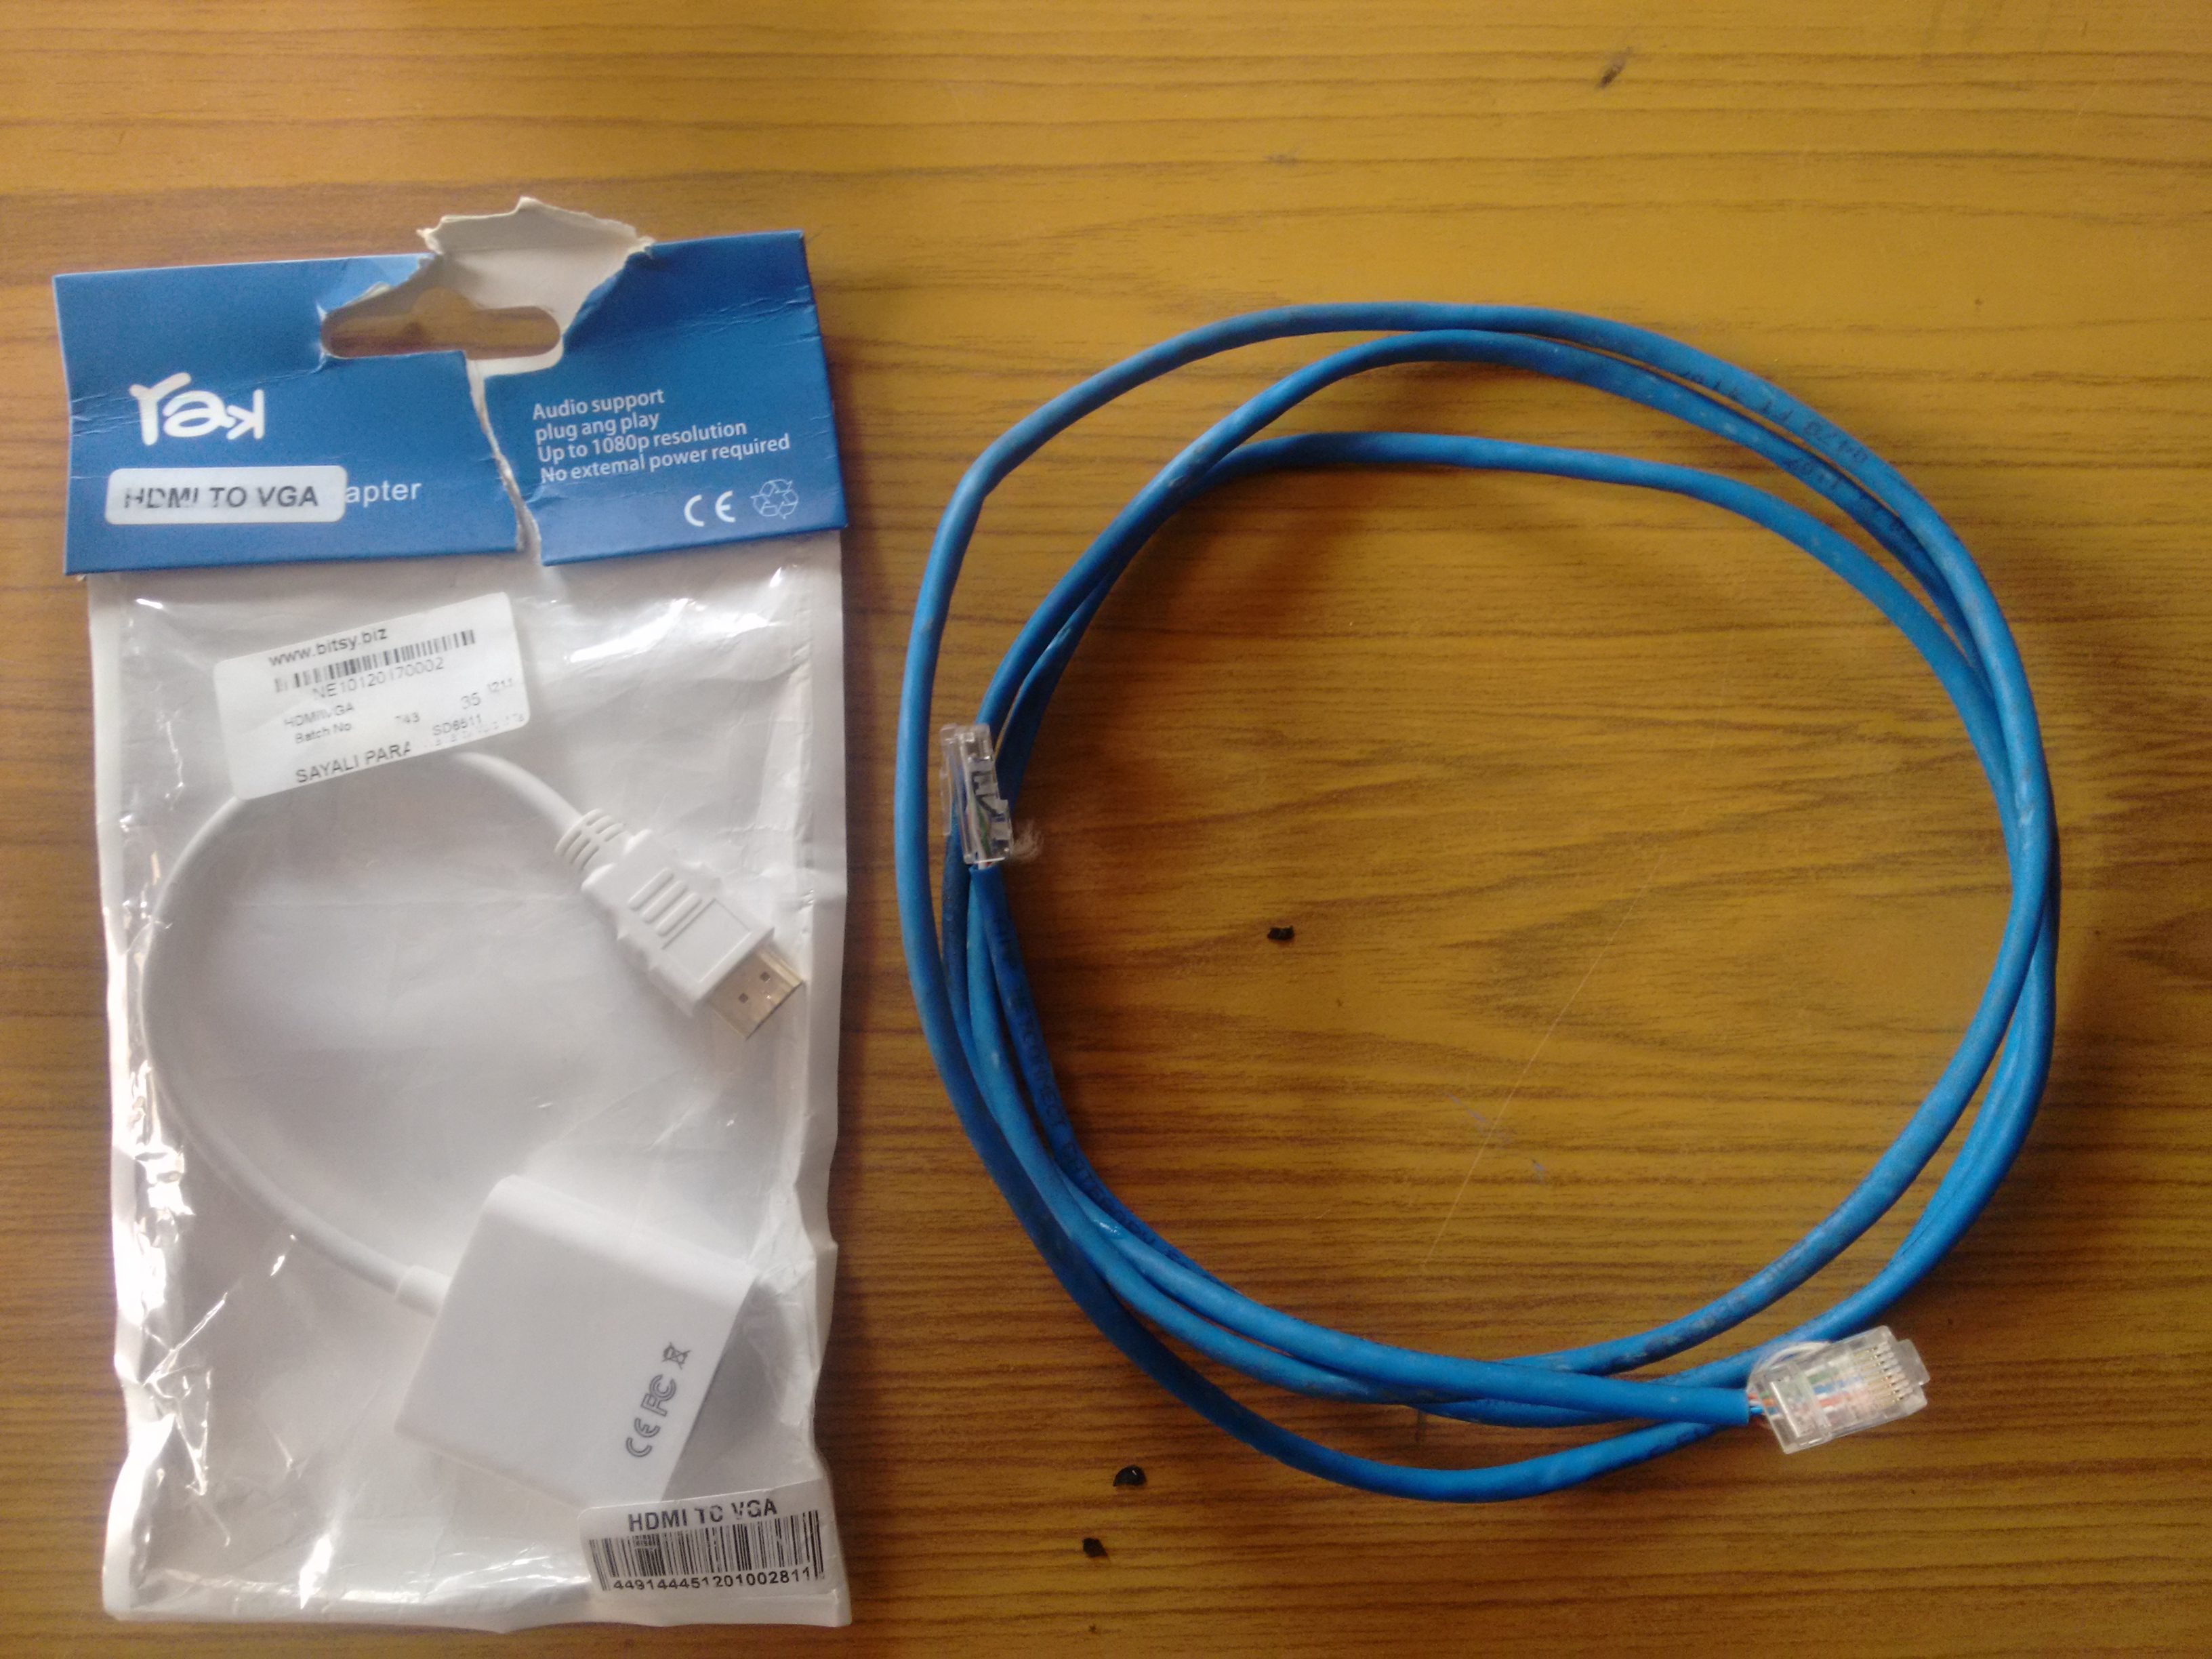
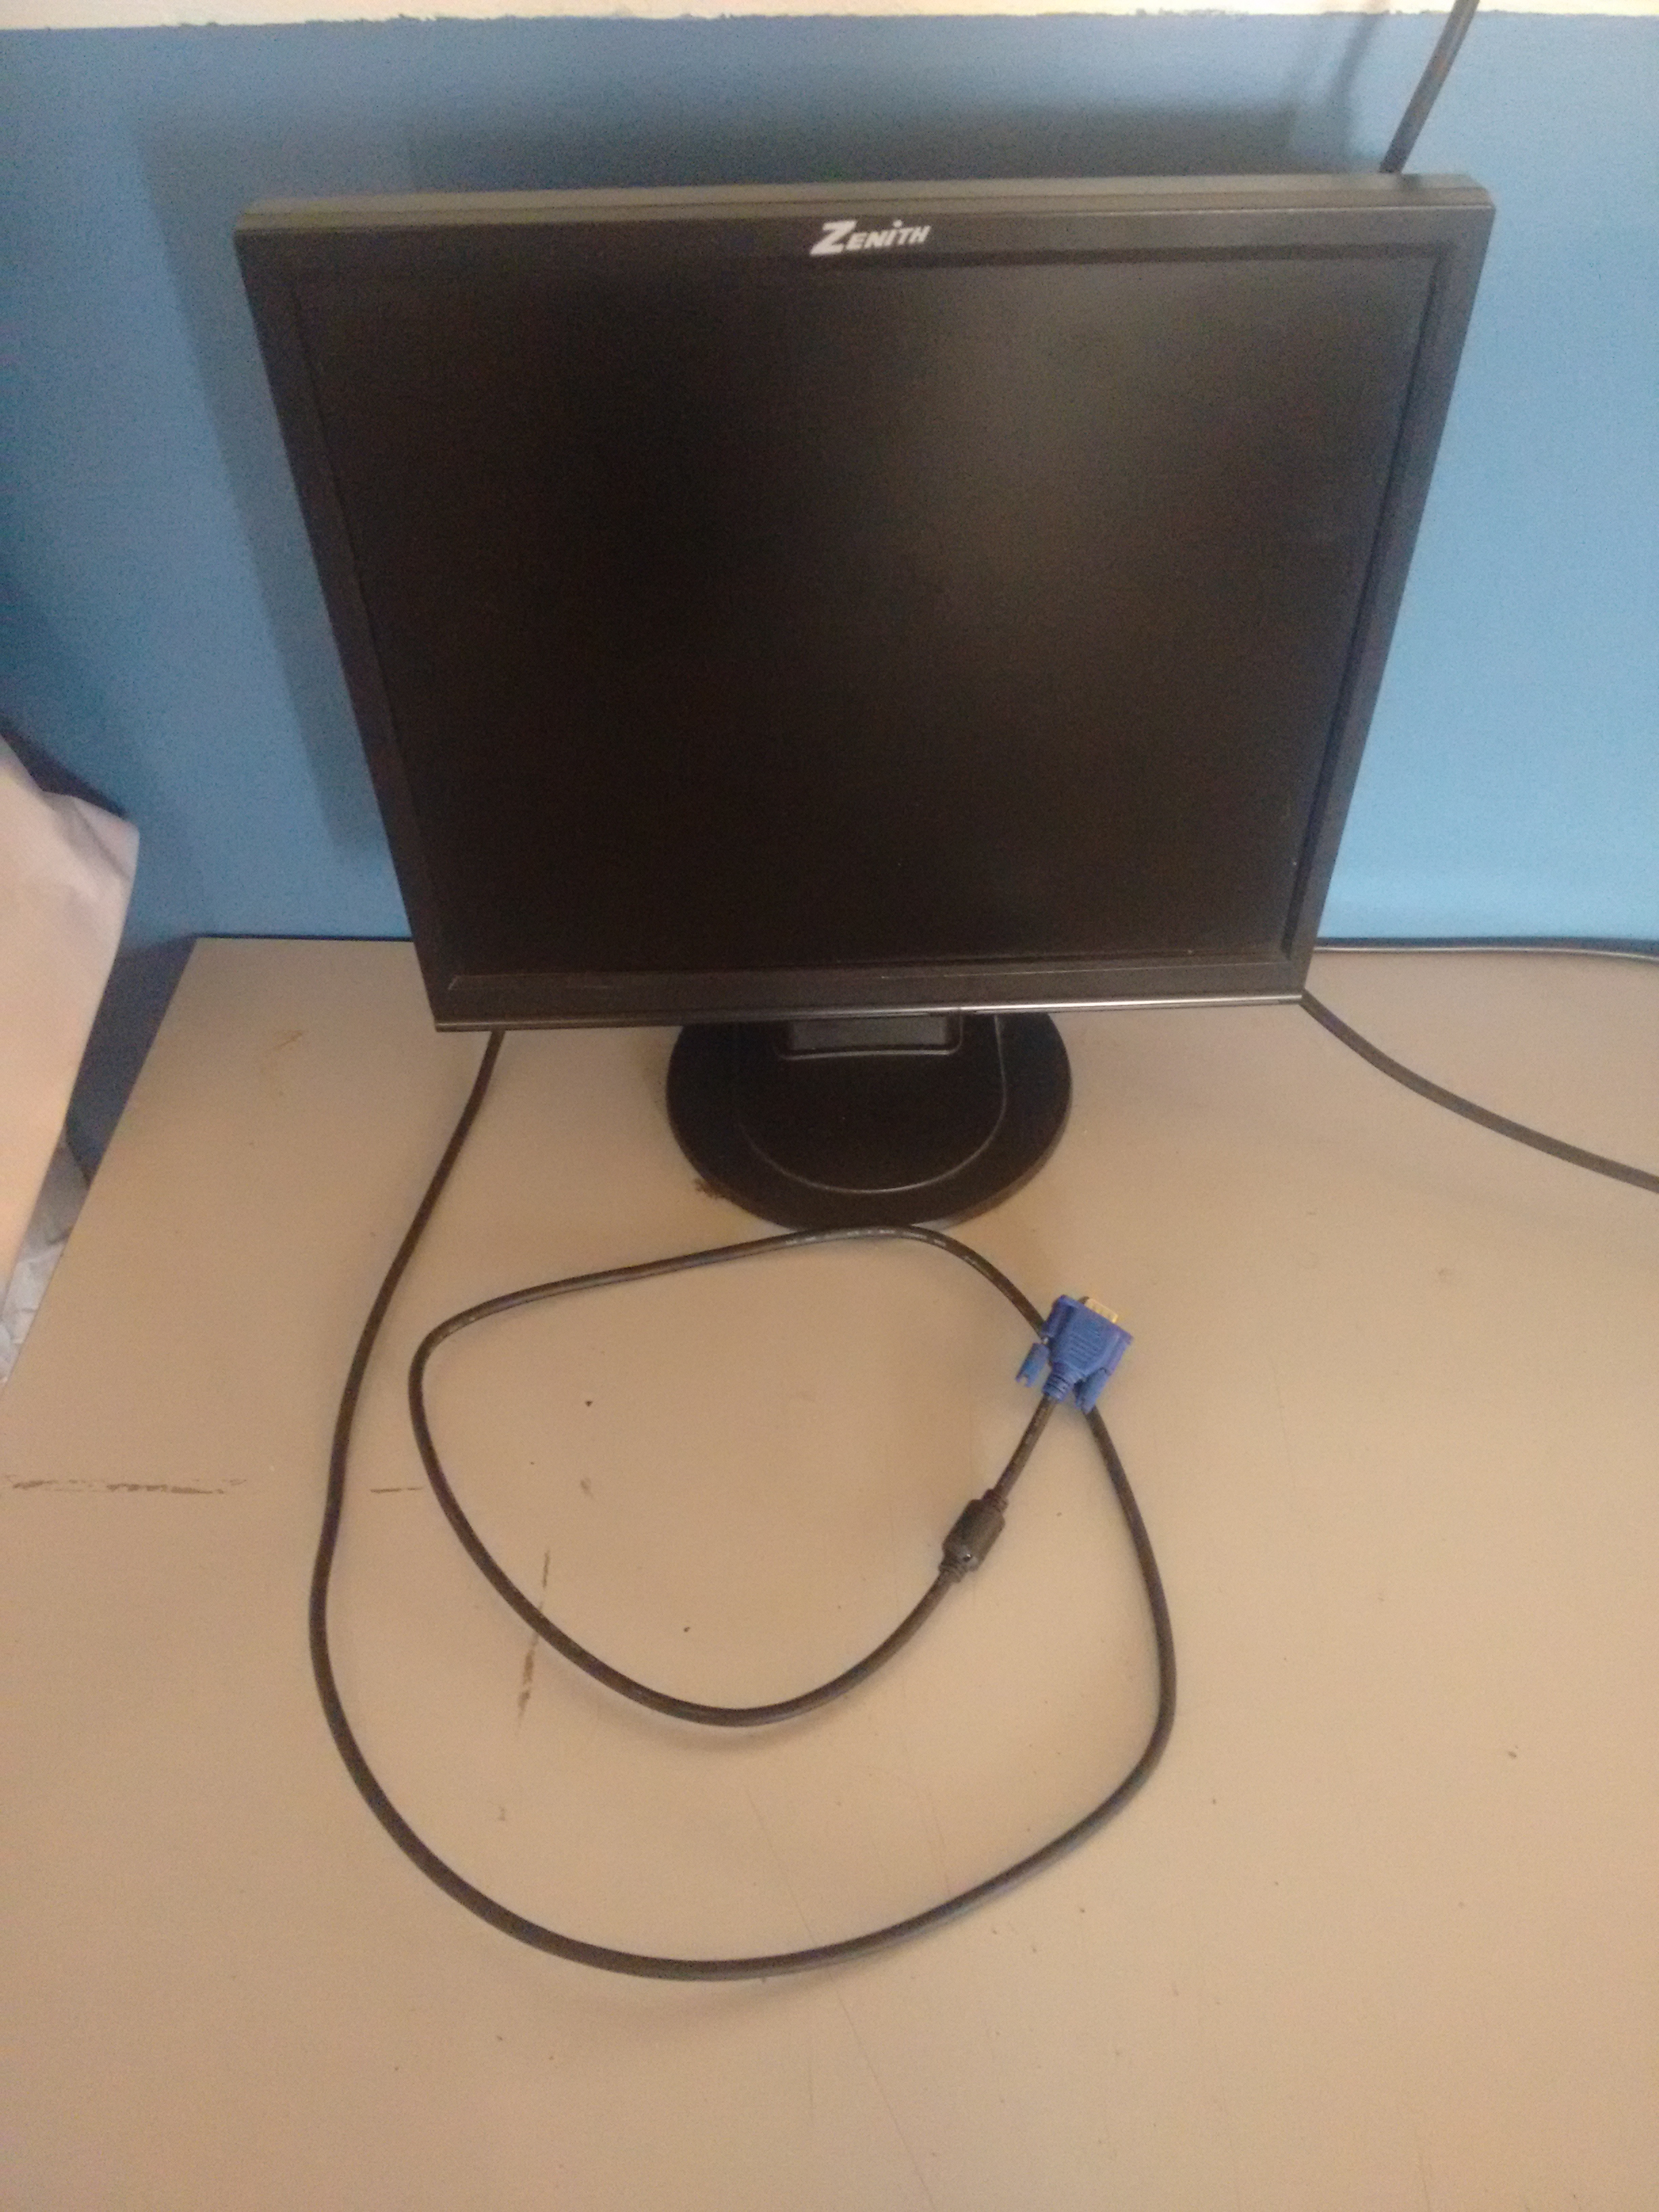
Components required:
- Raspberry Pi 2
- MicroSD card (greater than 4GB)
- SD card reader
- HDMI to VGA adapter
- Ethernet cable
Components required for setting it up the first time:
- HDMI Display or PC Monitor with VGA cable
- Keyboard and Mouse
Software required:
Installing OS on SD Card for Your Raspberry Pi
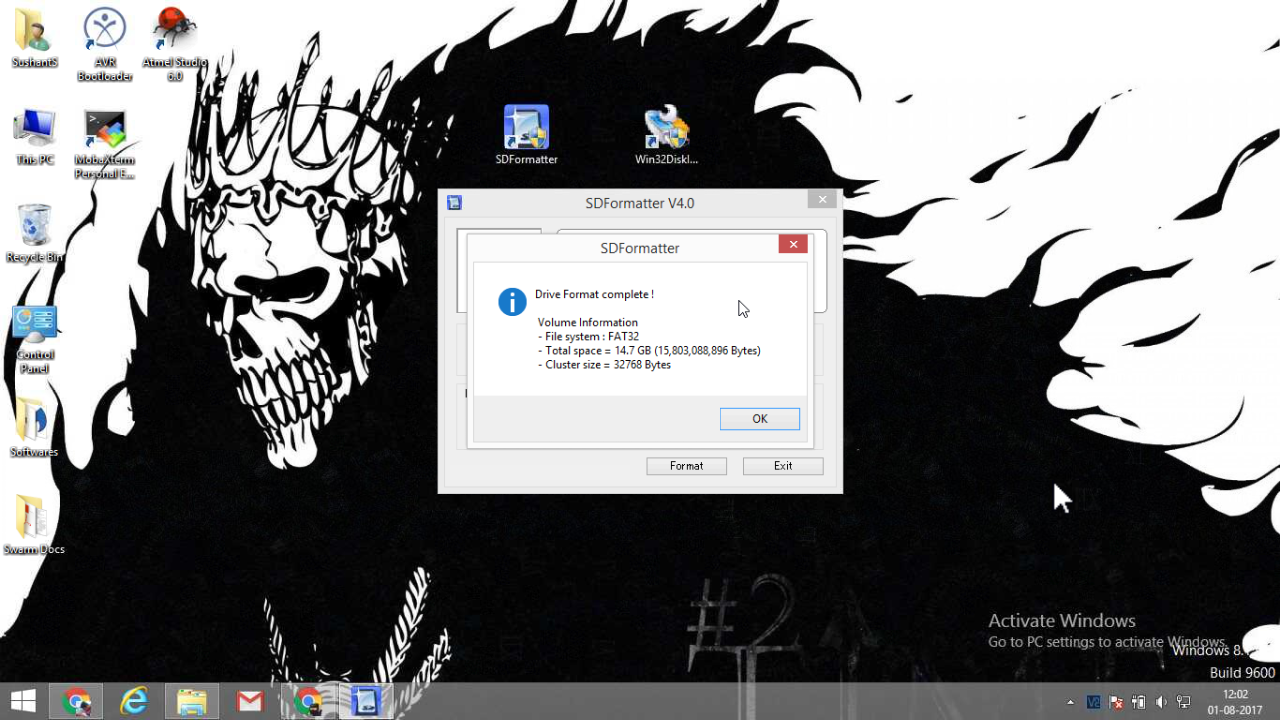
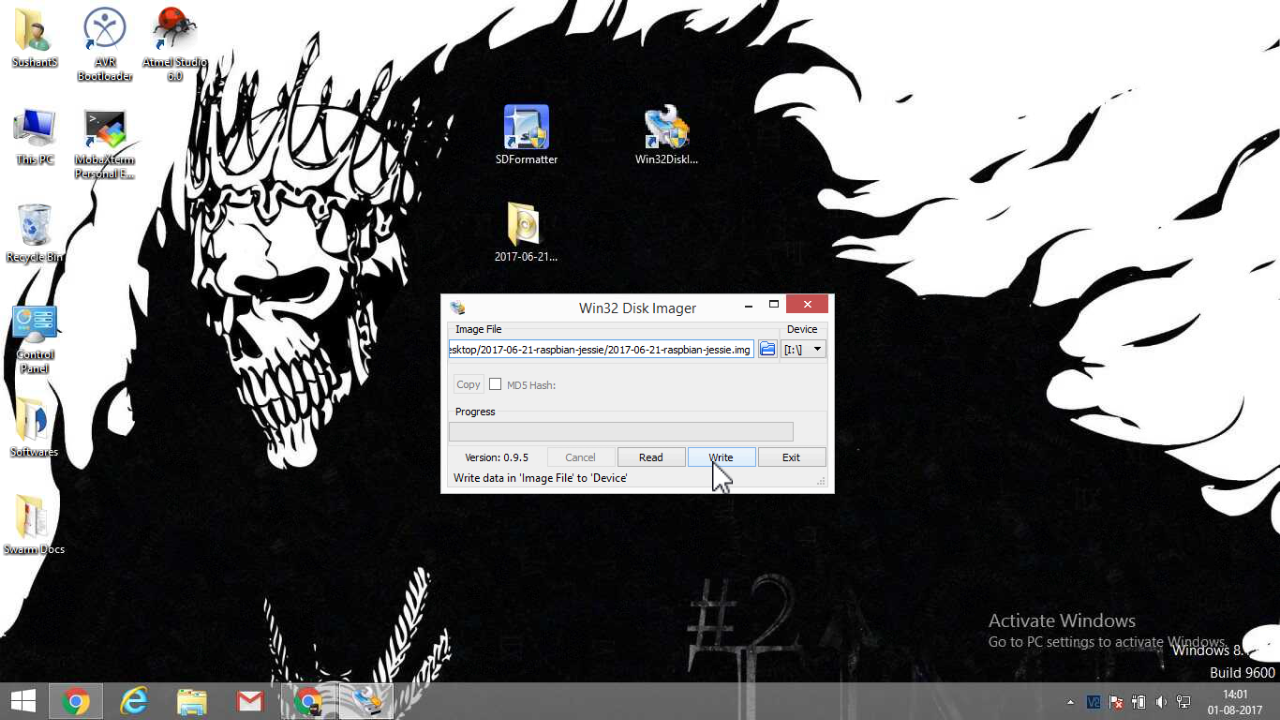
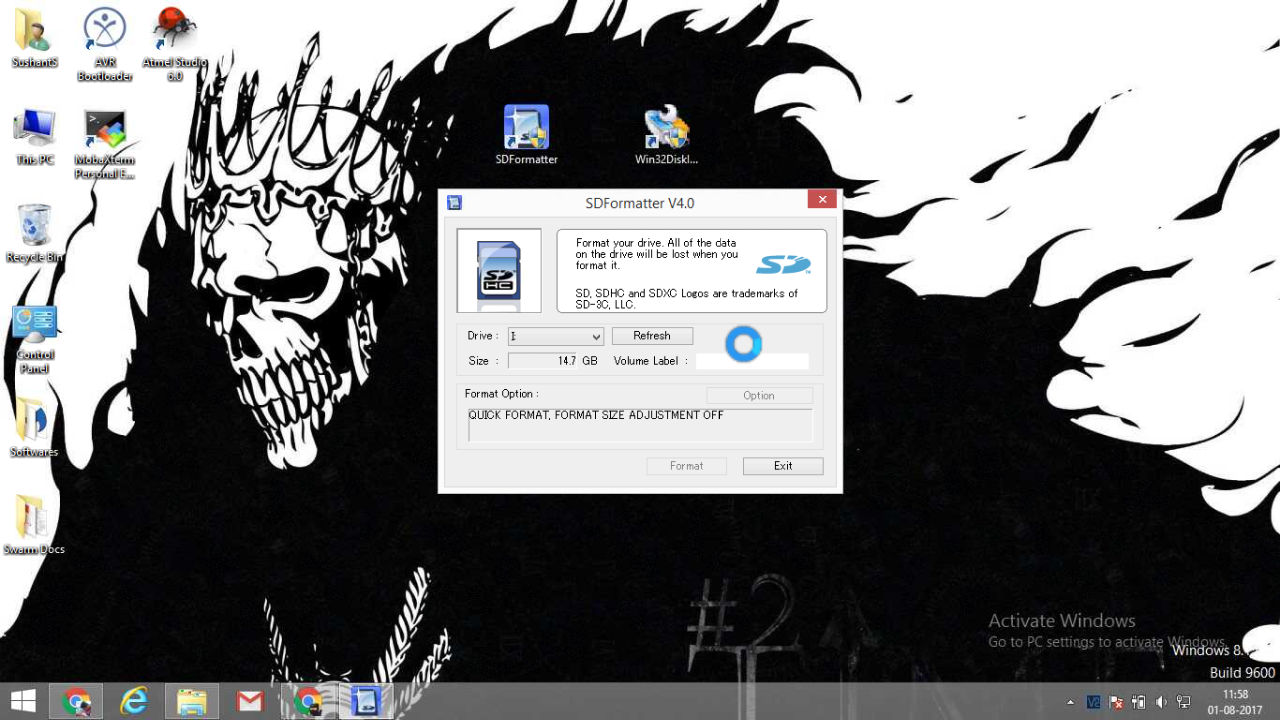
The first 2 softwares mentioned i.e. SDFormatter and Win32DiskImager are used for installing OS in the SD card.
SDFormatter is used to format the MicroSD card whereas Win32DiskImager is used (in our case) to write boot images(Raspbian Jessie OS IMG file) to a SD Flash device, making it bootable.
You can even use the official NOOBS OS installer for your SD card. NOOBS is an easy operating system installer which contains Raspbian Jessie. Raspbian comes pre-installed with plenty of software for education, programming and general use. It has Python, Scratch, Sonic Pi, Java, Mathematica and more. You can download Raspbian Jessie from here.
Download Raspbian Jessie from the link provided above and unzip the contents. Make sure you have the Raspbian Jessie IMG file in the unzipped folder.
However for this project we'll go with Win32DiskImager instead of the NOOBS installer.
Steps for OS installation:
- Insert the MicroSD card into the card reader and plug the device into your laptop or PC.
- Open SDFormatter software. Select the correct drive. Chose Quick Format. Click on Format.
- Once the format is complete open Win32DiskImager for installing the OS onto your SD card.
- In Win32DiskImager navigate and select the Raspbian Jessie IMG file from the unzipped folder and then select the proper device location onto which the OS has to be installed (your SD card's location).
- Once this is done click on Write.
Your SD card is now ready with Raspbian OS.
Setting Up Raspberry Pi for the First Time
.jpg)
Once the OS has been installed onto your SD card insert the card into your Raspberry Pi.
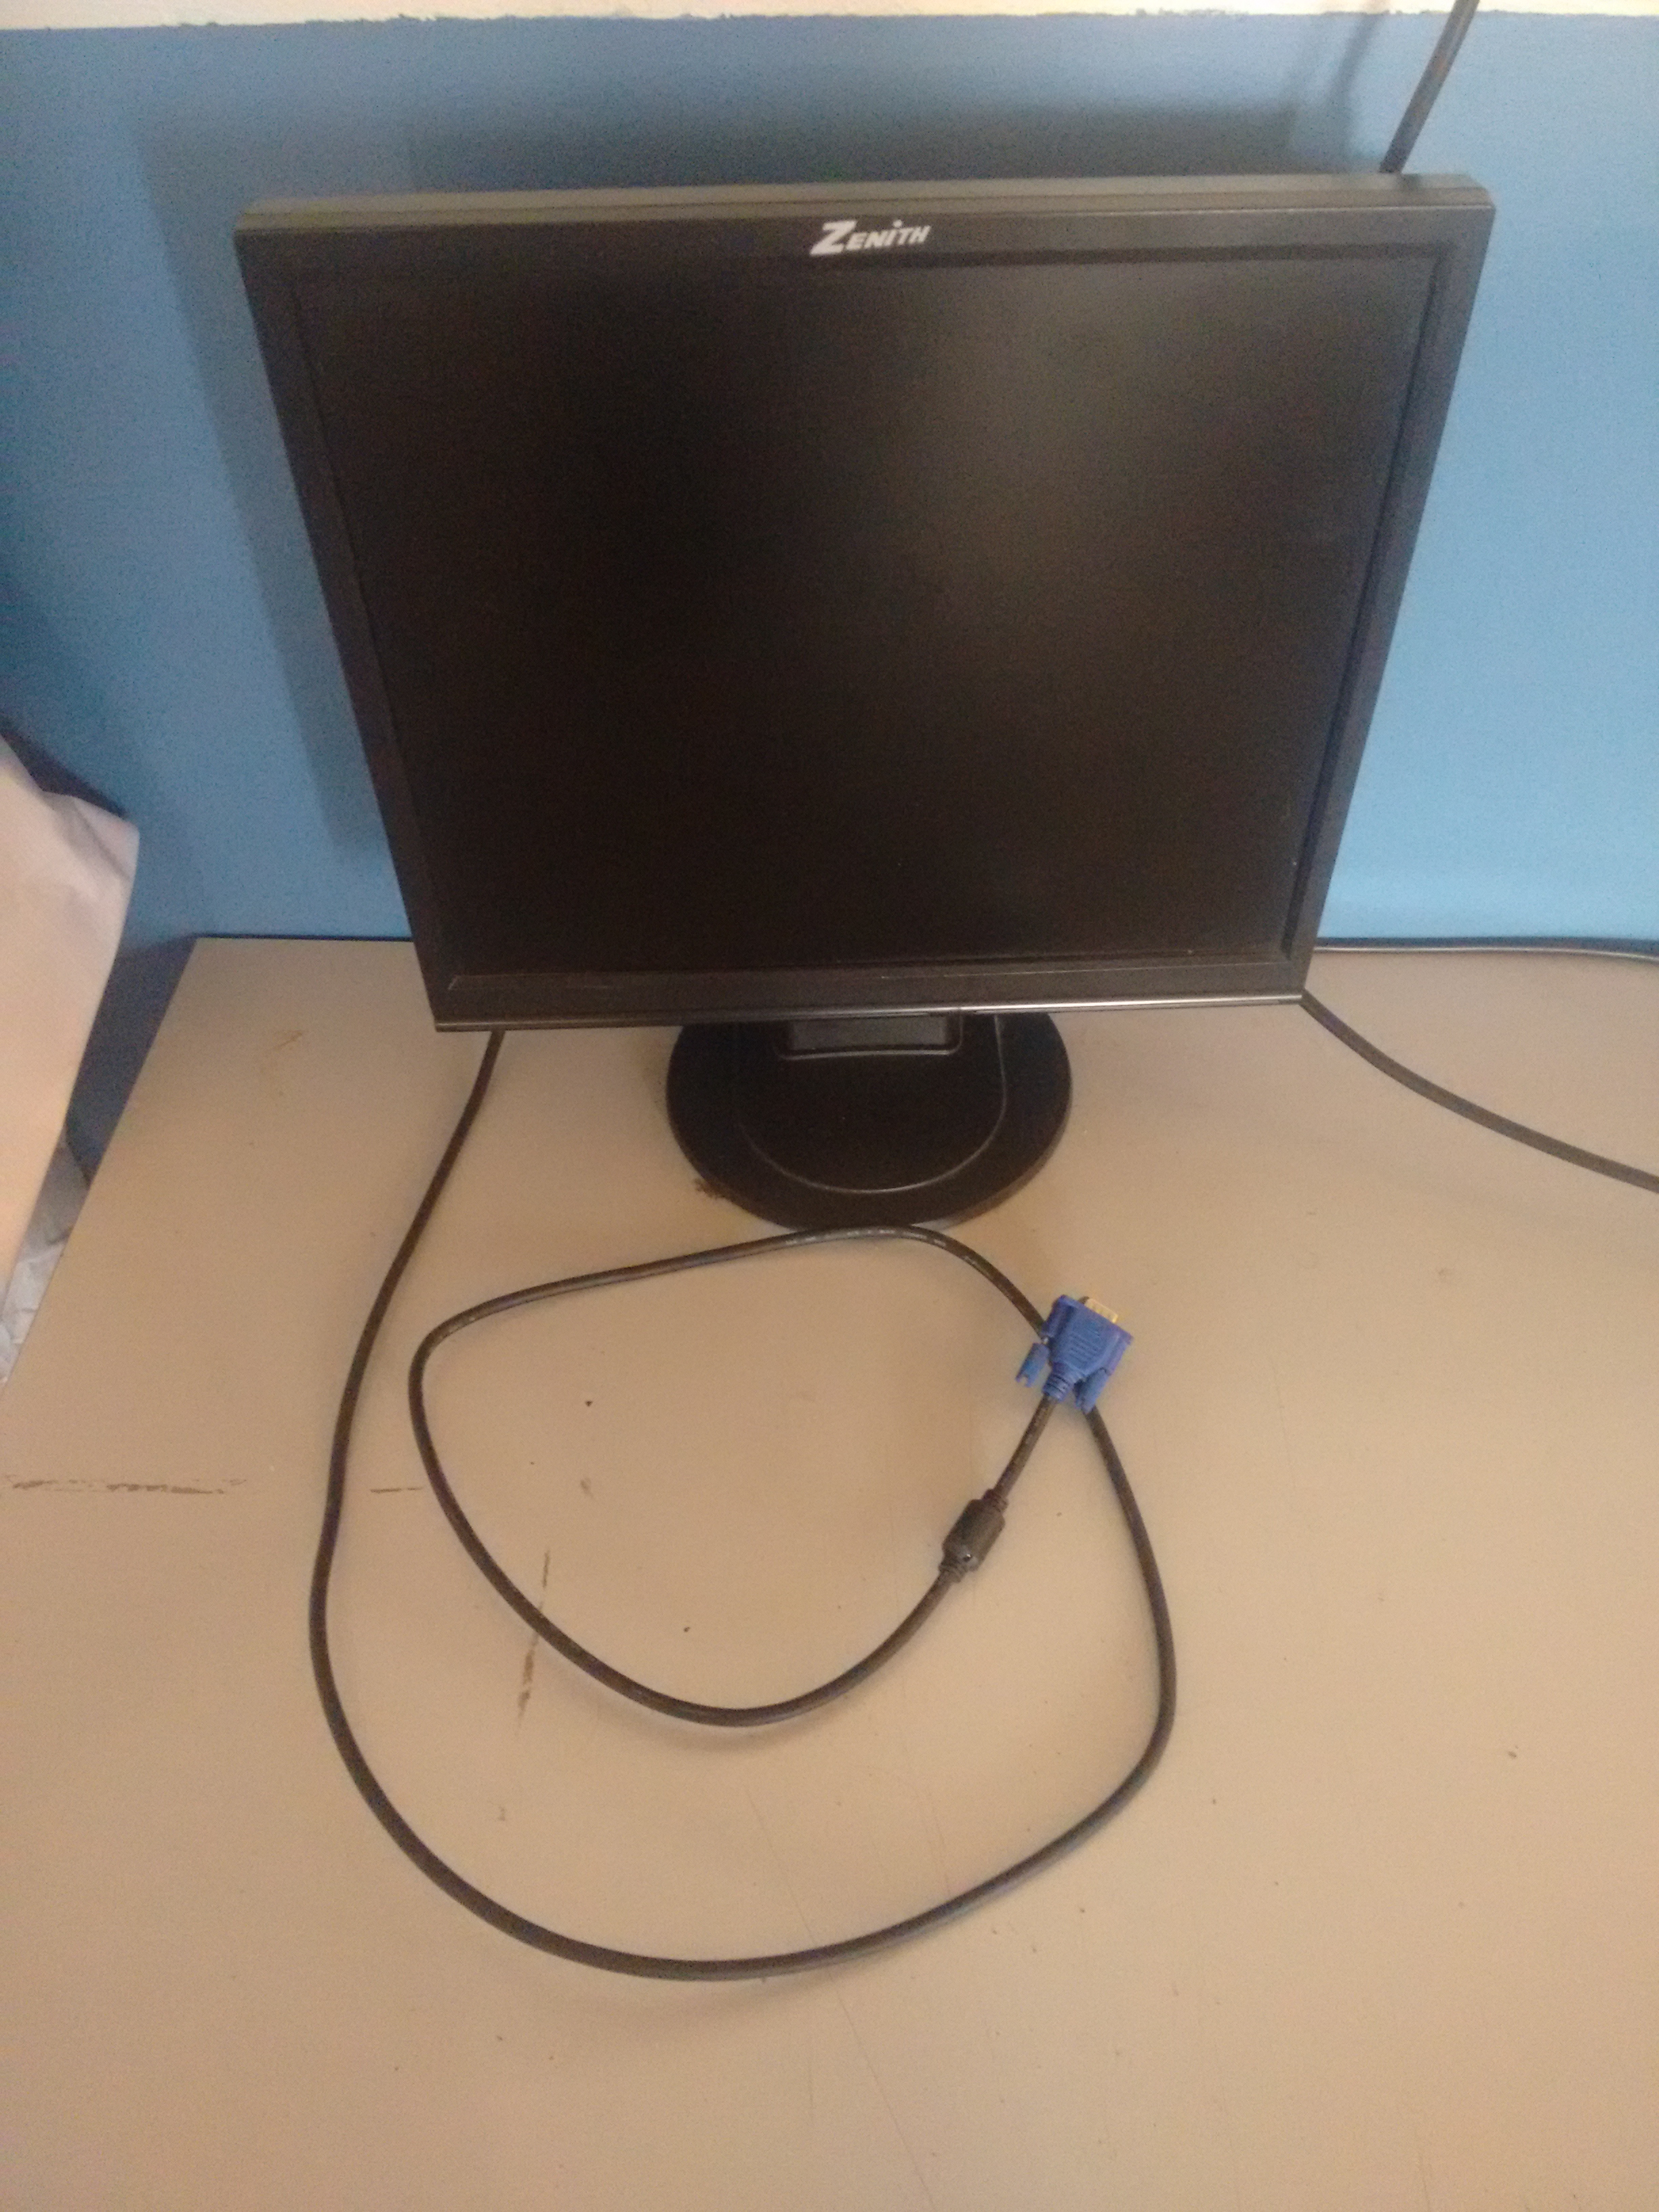
Next thing you need is a HDMI display or a PC Monitor with a VGA cable (picture 1).
I have used a PC monitor with a VGA cable. Raspberry Pi has a HDMI port and hence you will require a HDMI to VGA adapter to connect your Raspberry Pi to the PC Monitor. Also connect a keyboard and a mouse to your Raspberry for the initial setup.
Once this is done power on your Raspberry Pi.
Note: Do not power on the Raspberry Pi from your laptop as the USB ports do not provide enough current when you have a display, keyboard and mouse connected to it. Instead use a 2 Ampere mobile charger.
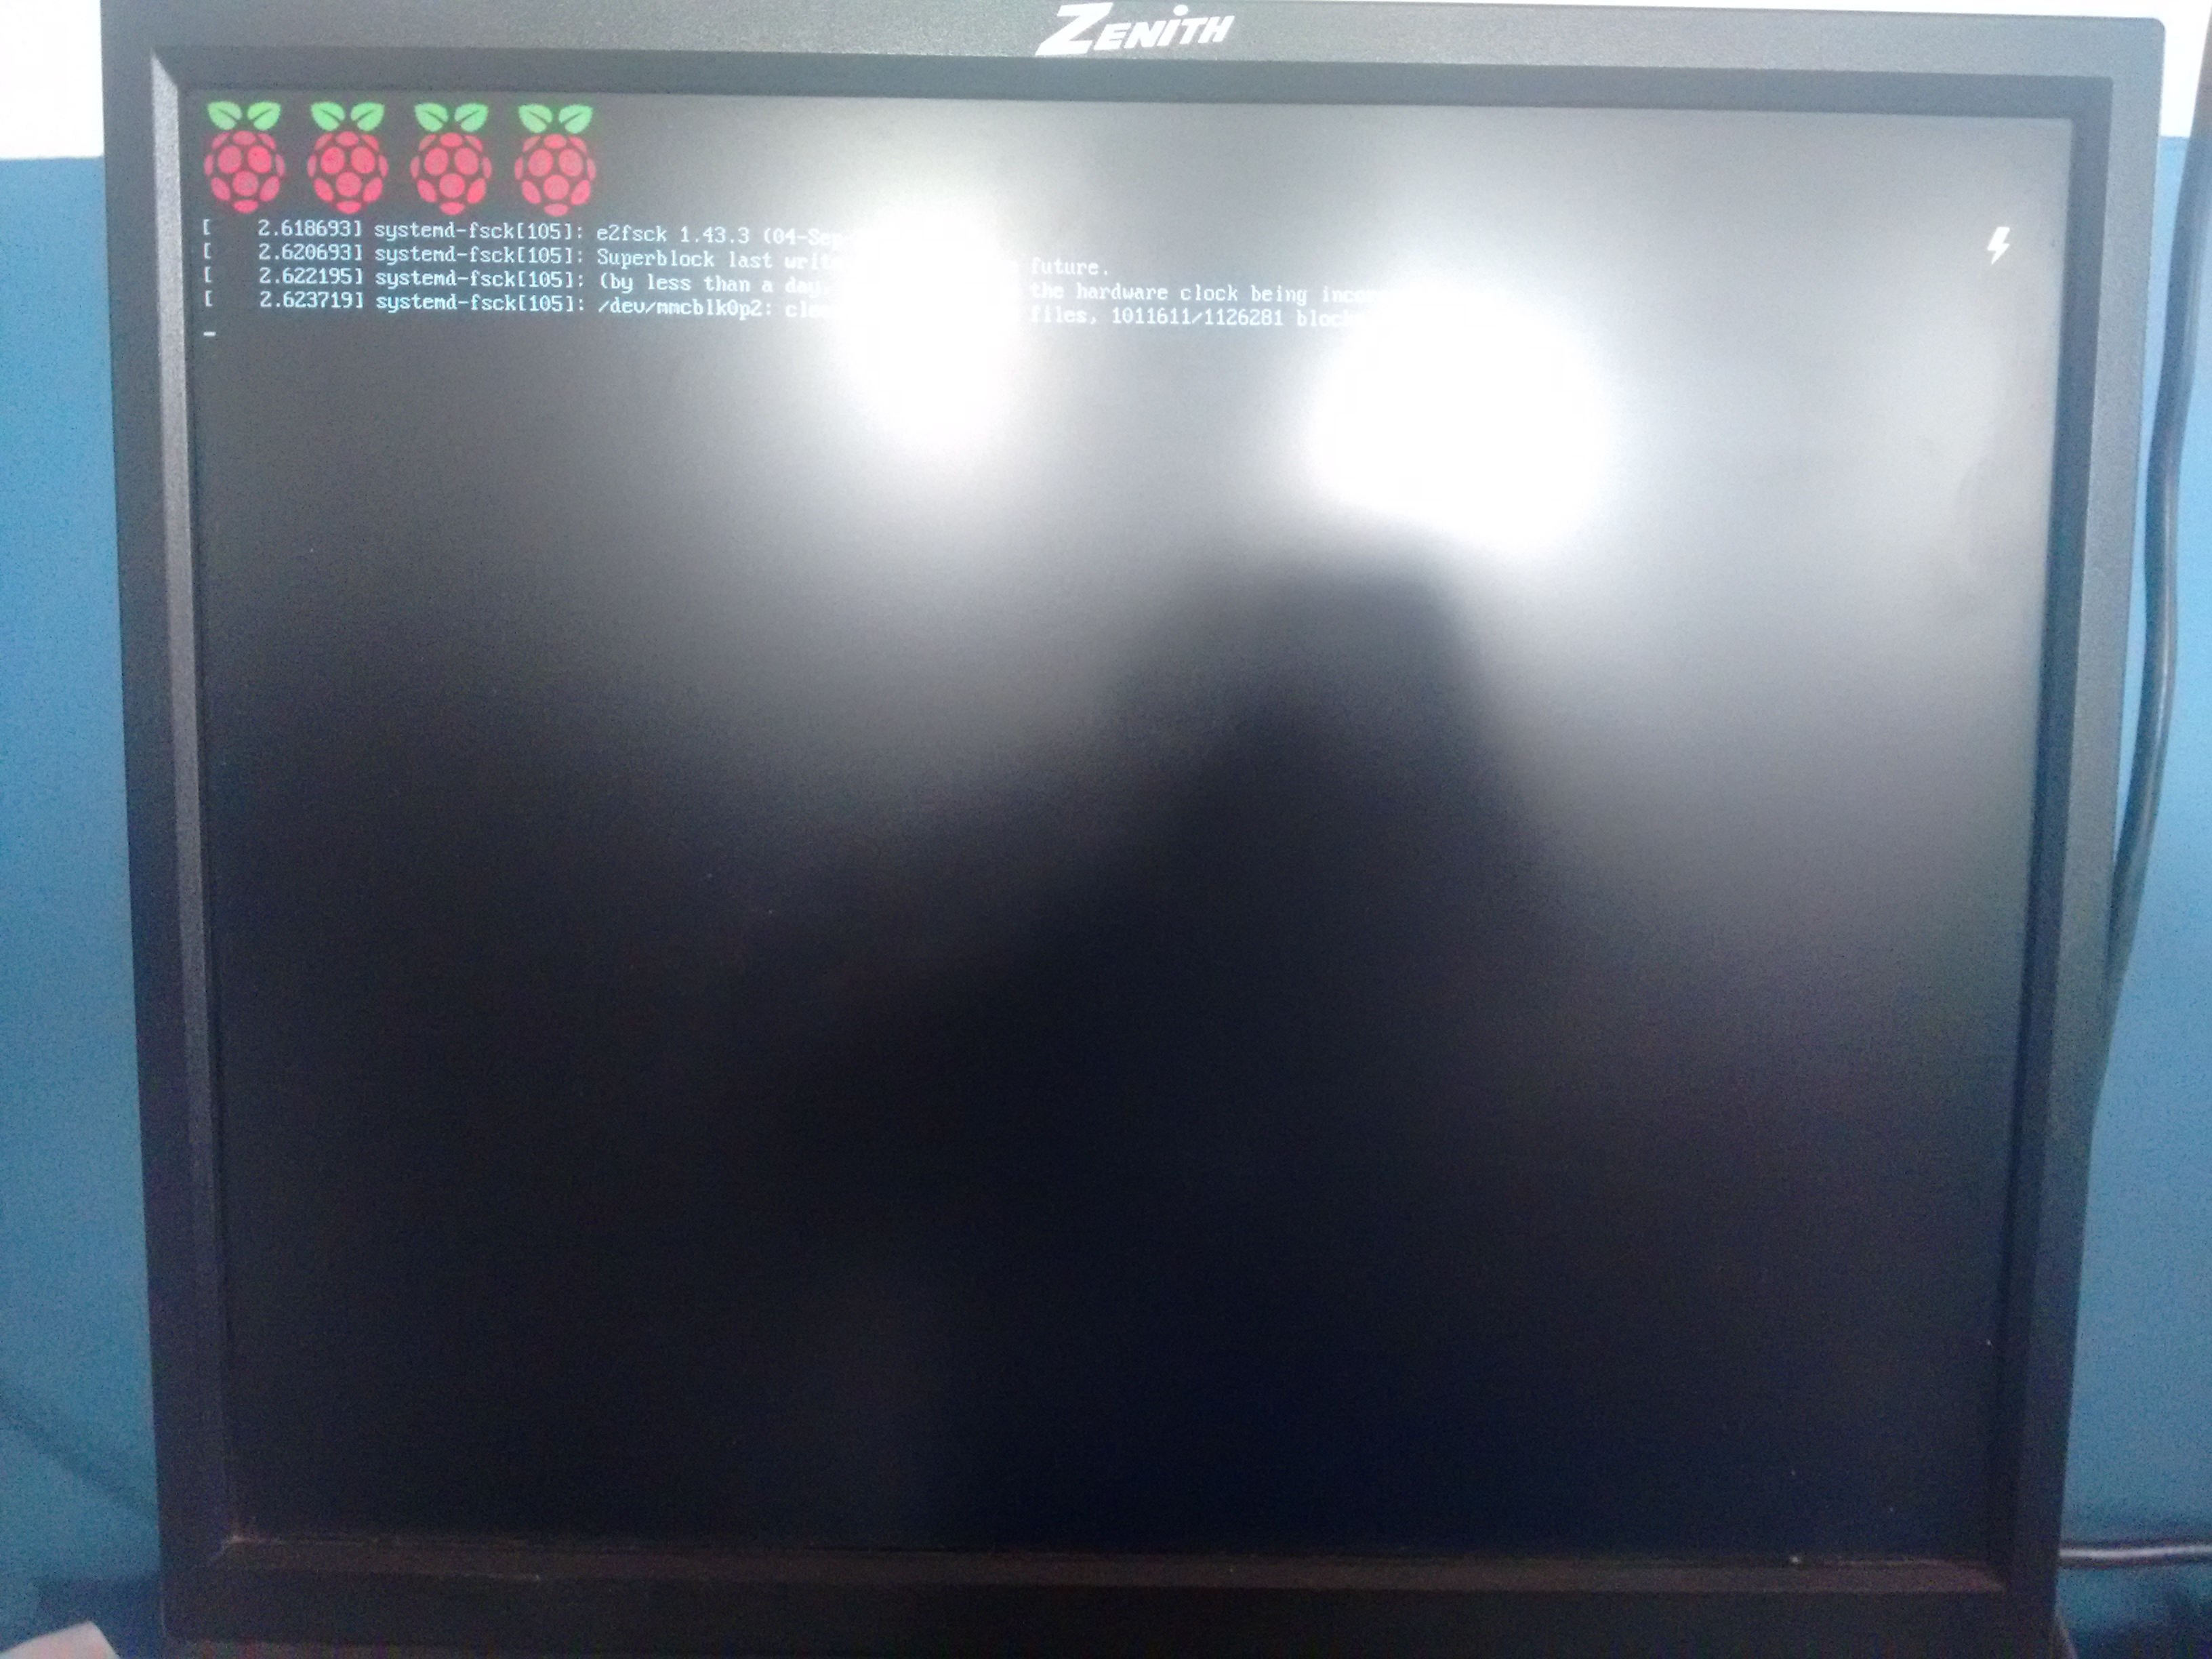
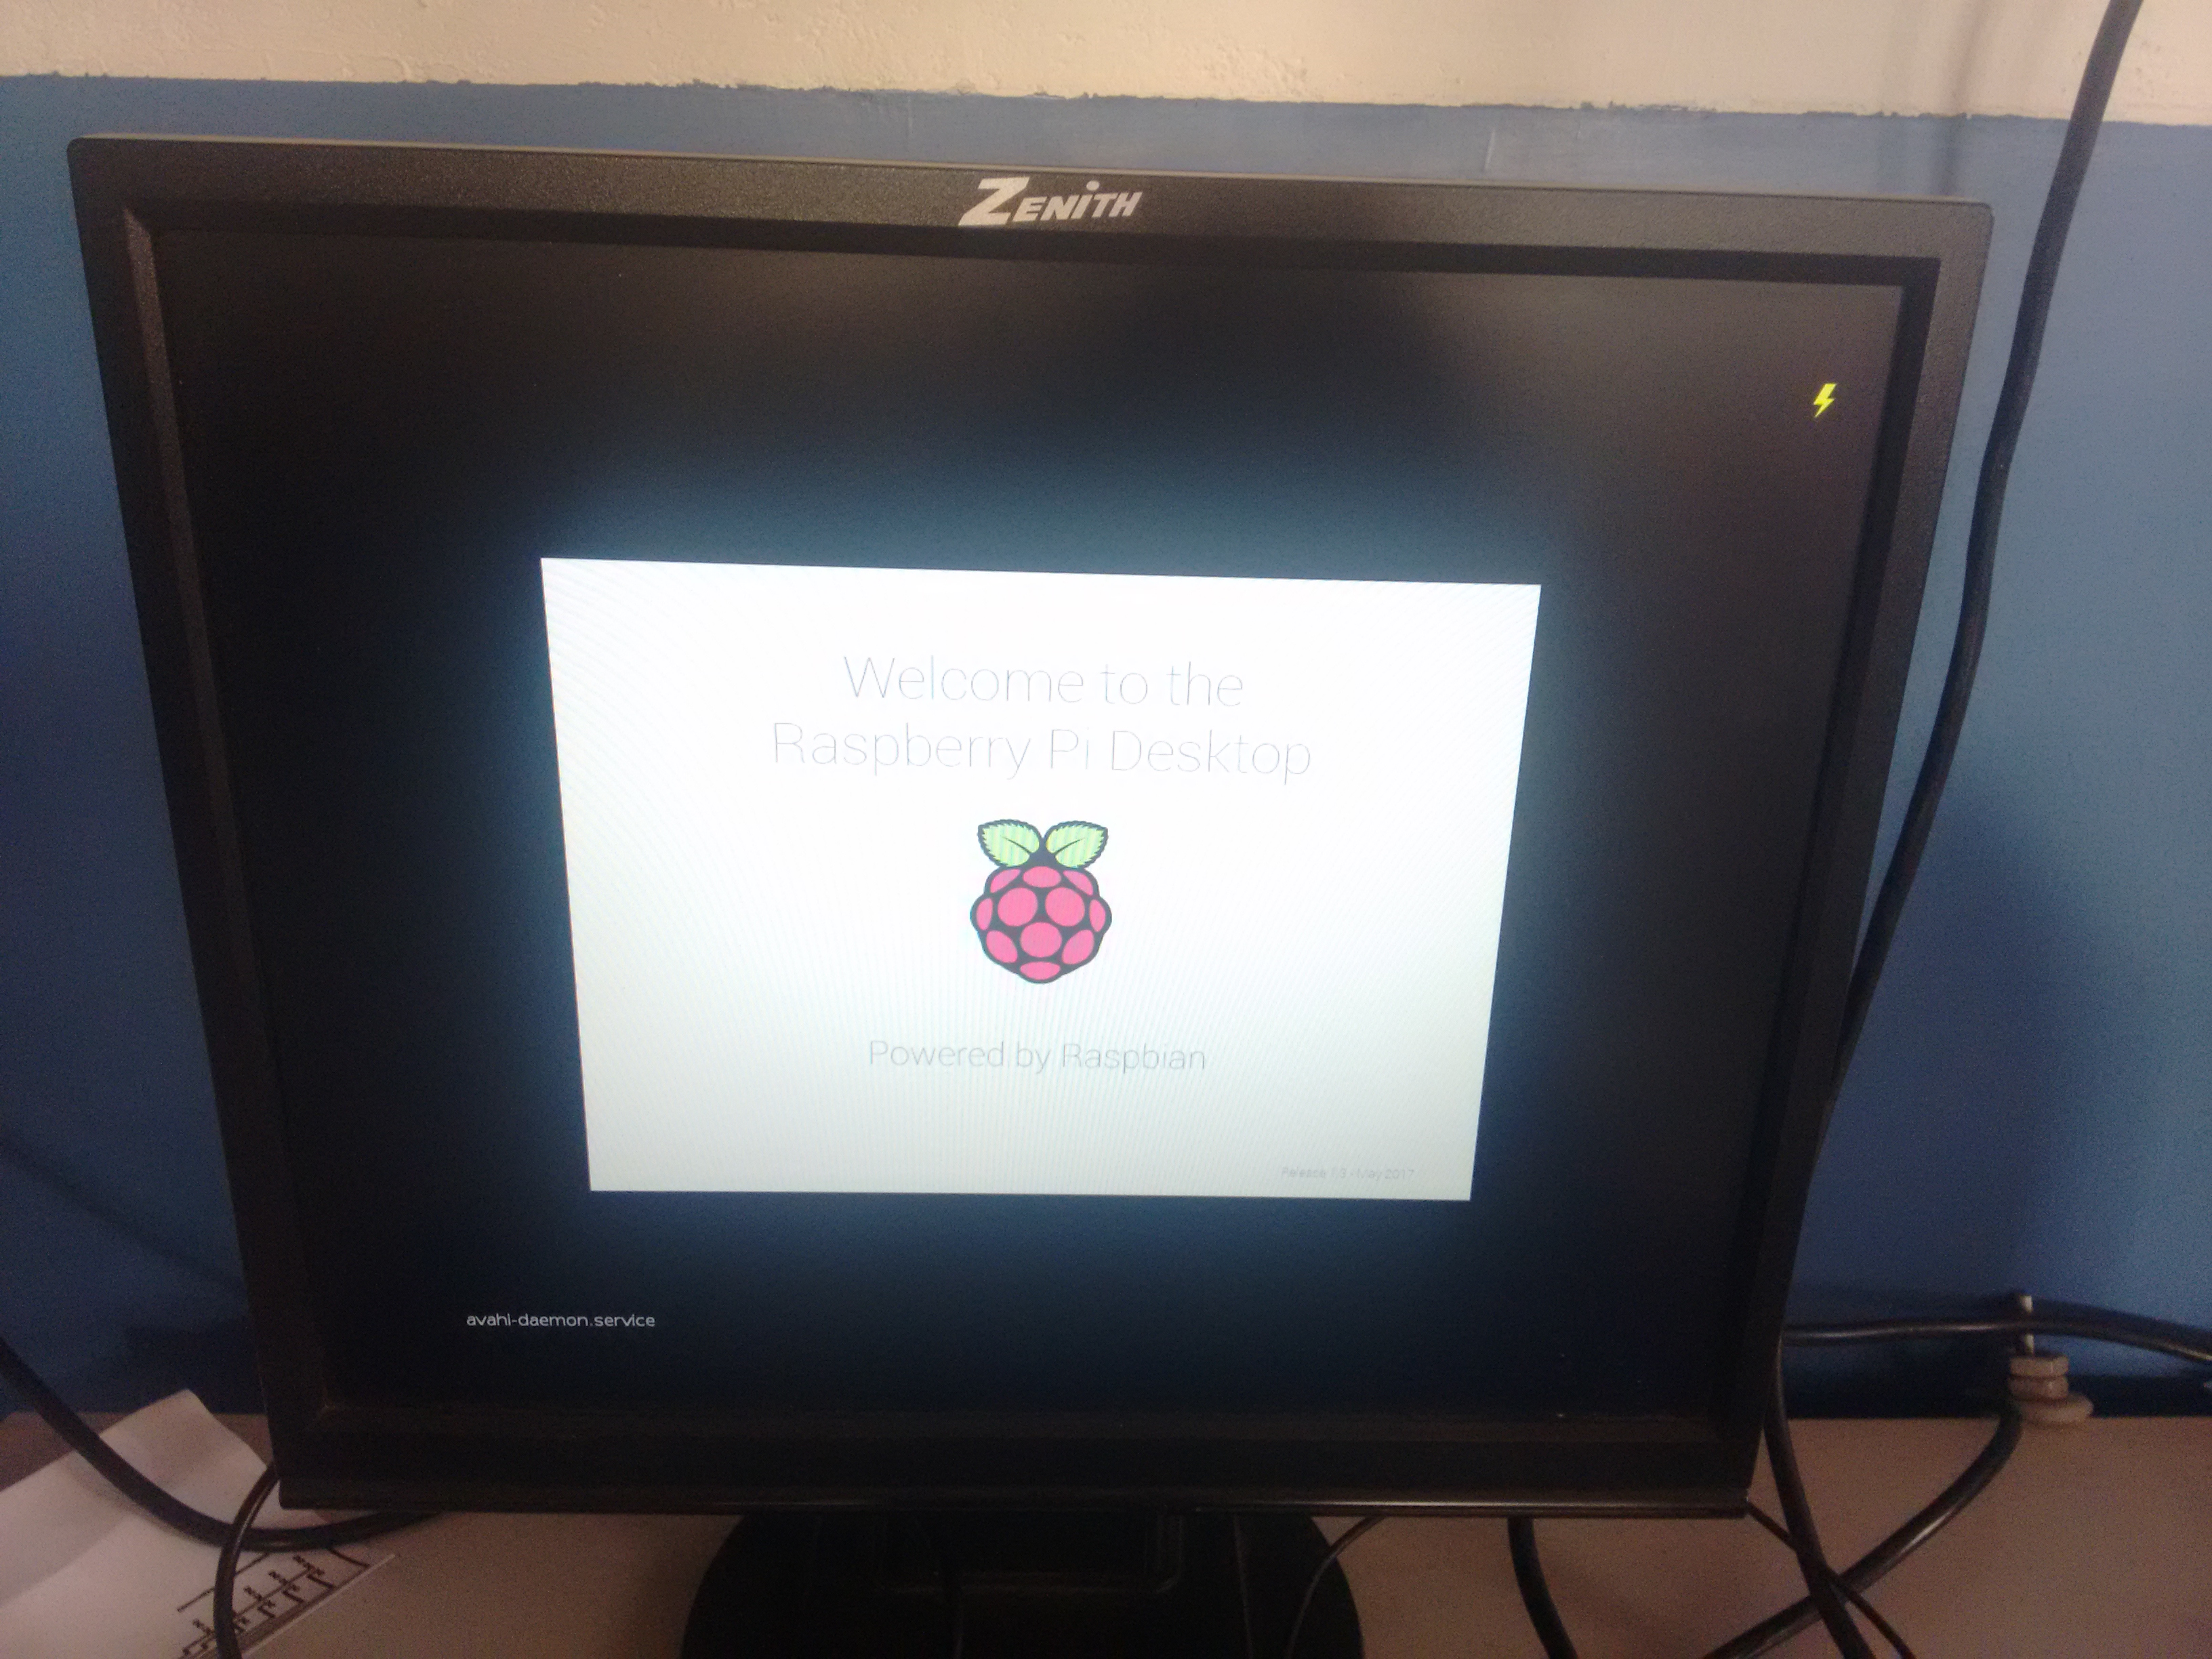
Once powered on the Raspberry Pi should load the OS graphical screen as shown in picture 2 and 3.
The first and foremost thing to do after this is to enable SSH and VNC server on your Raspberry Pi.
Learn more about SSH and VNC here.
There are 2 ways to do this:
- From the start menu.
- From the Raspberry Pi terminal.
Steps to enable SSH and VNC:
- From the start menu.
- Click on the start button.
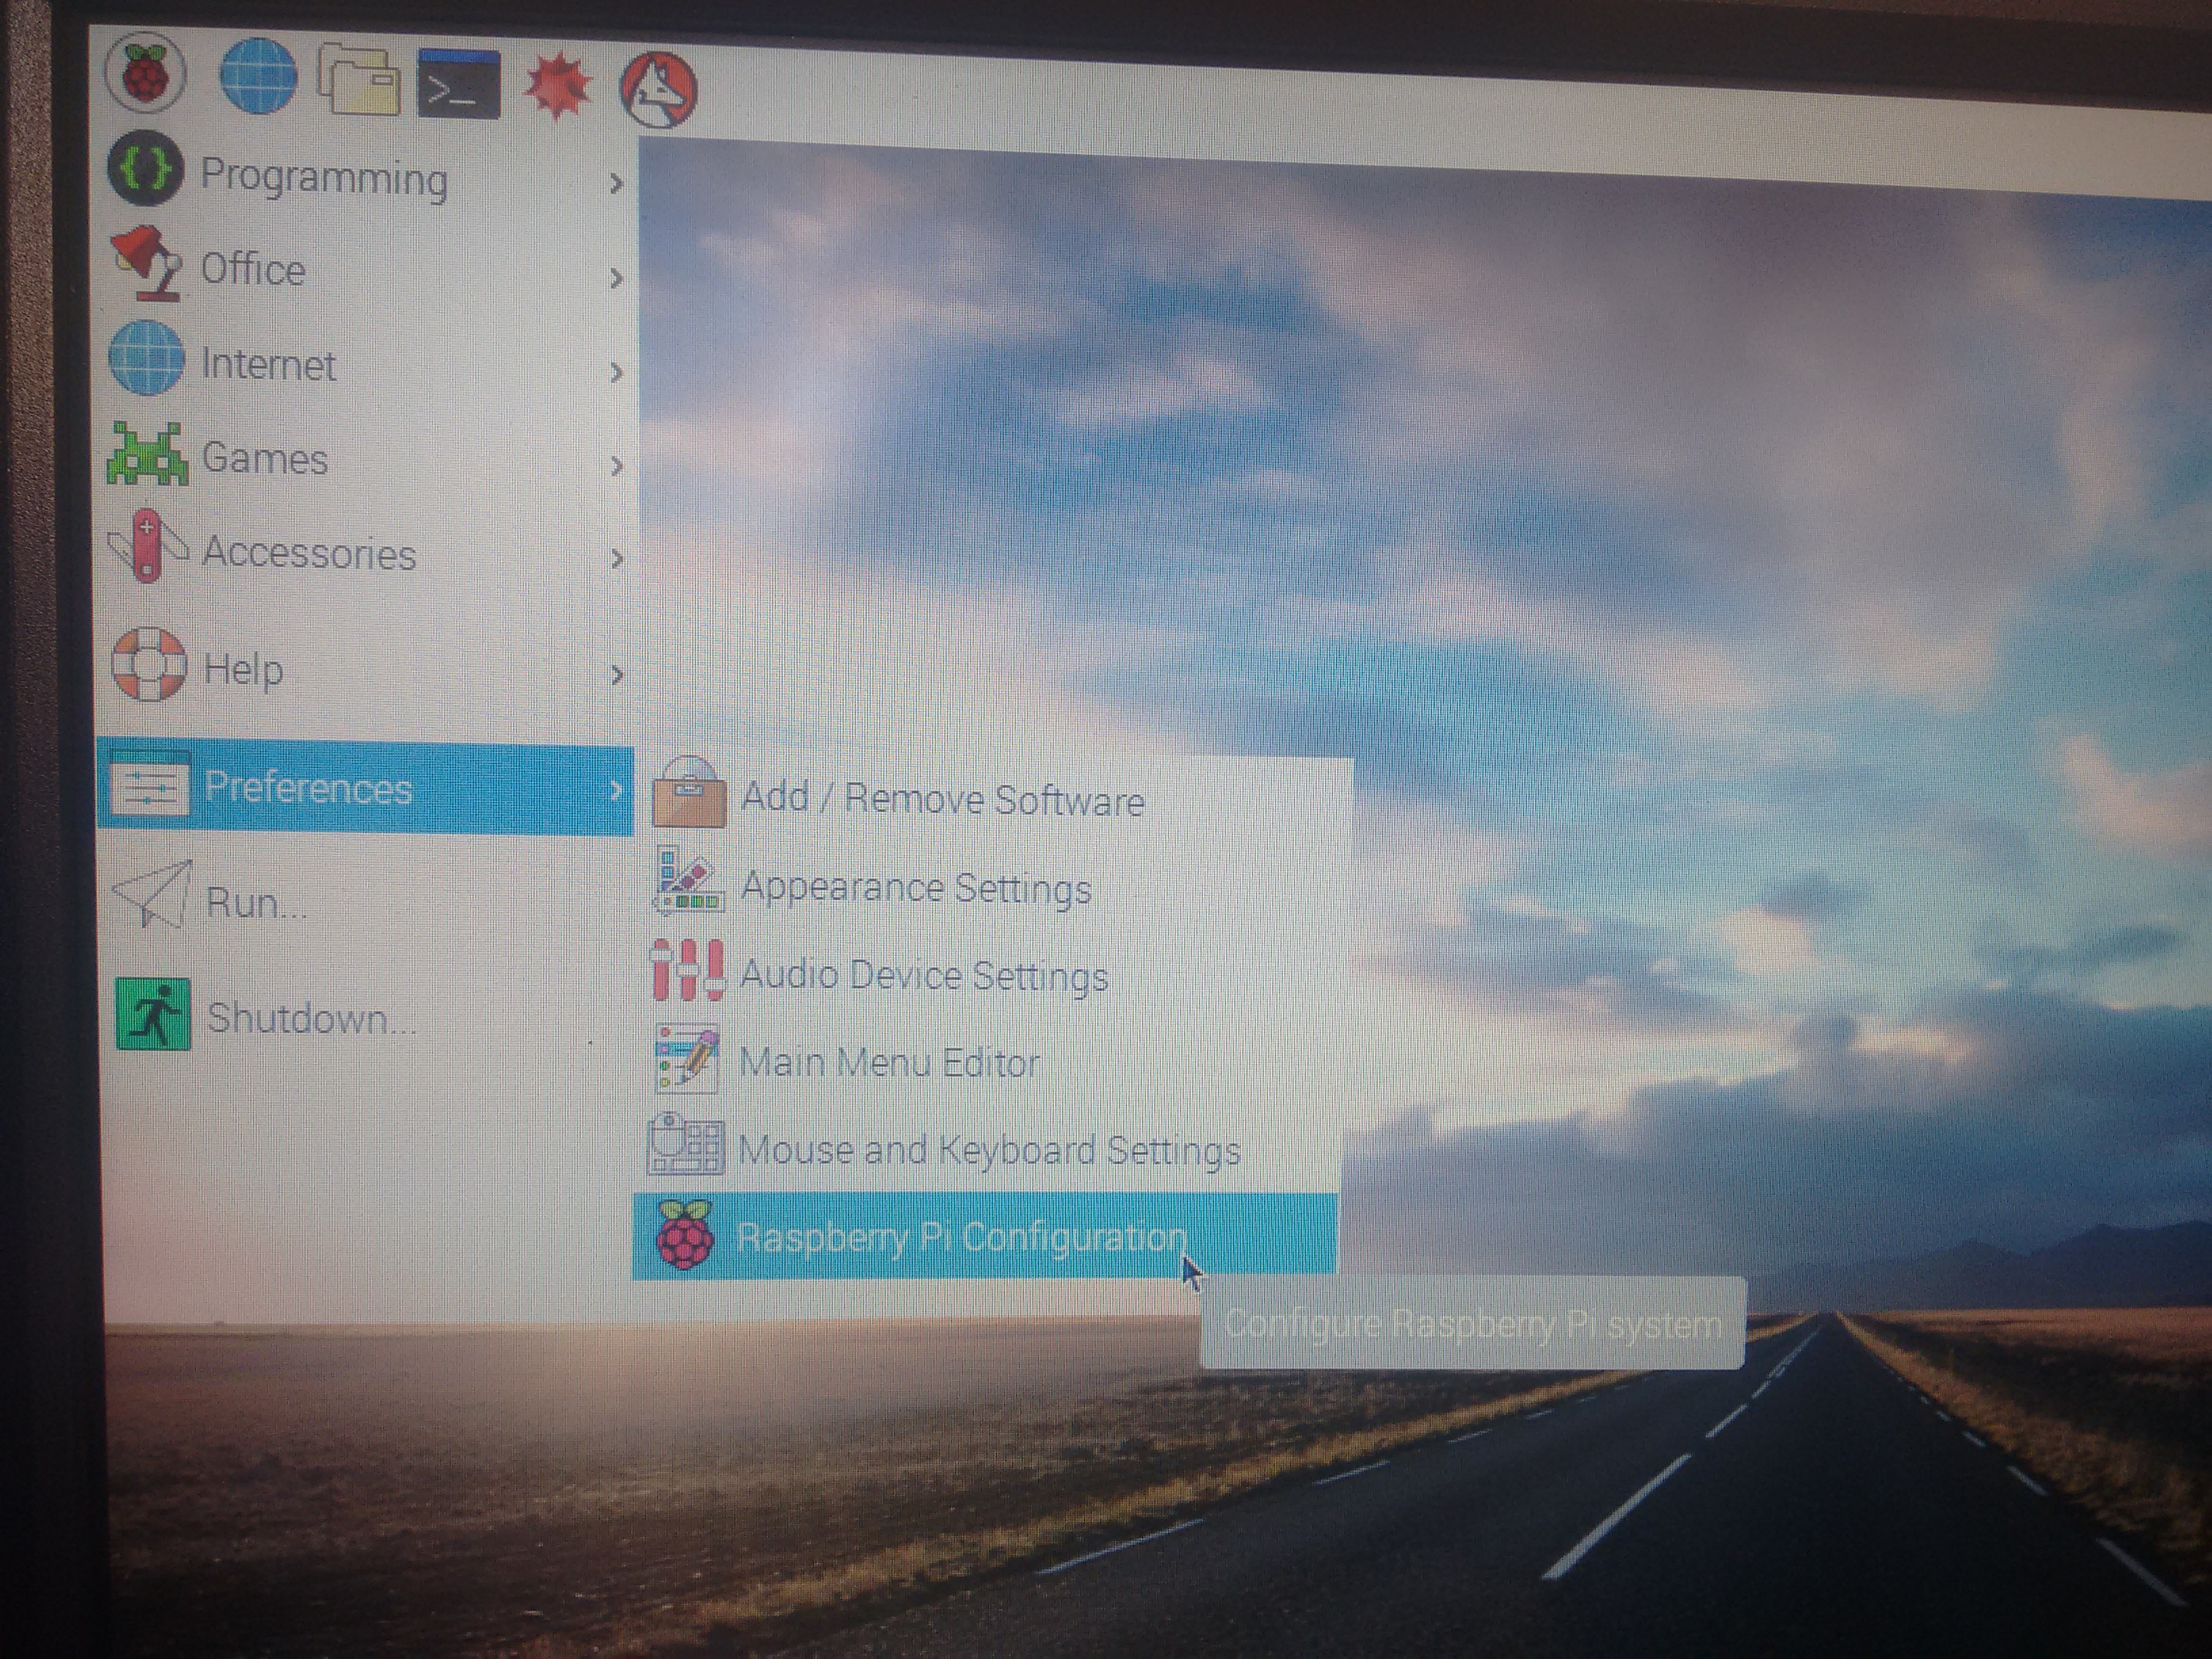
- Go to Preferences--> Raspberry Pi Configuration (picture 4).
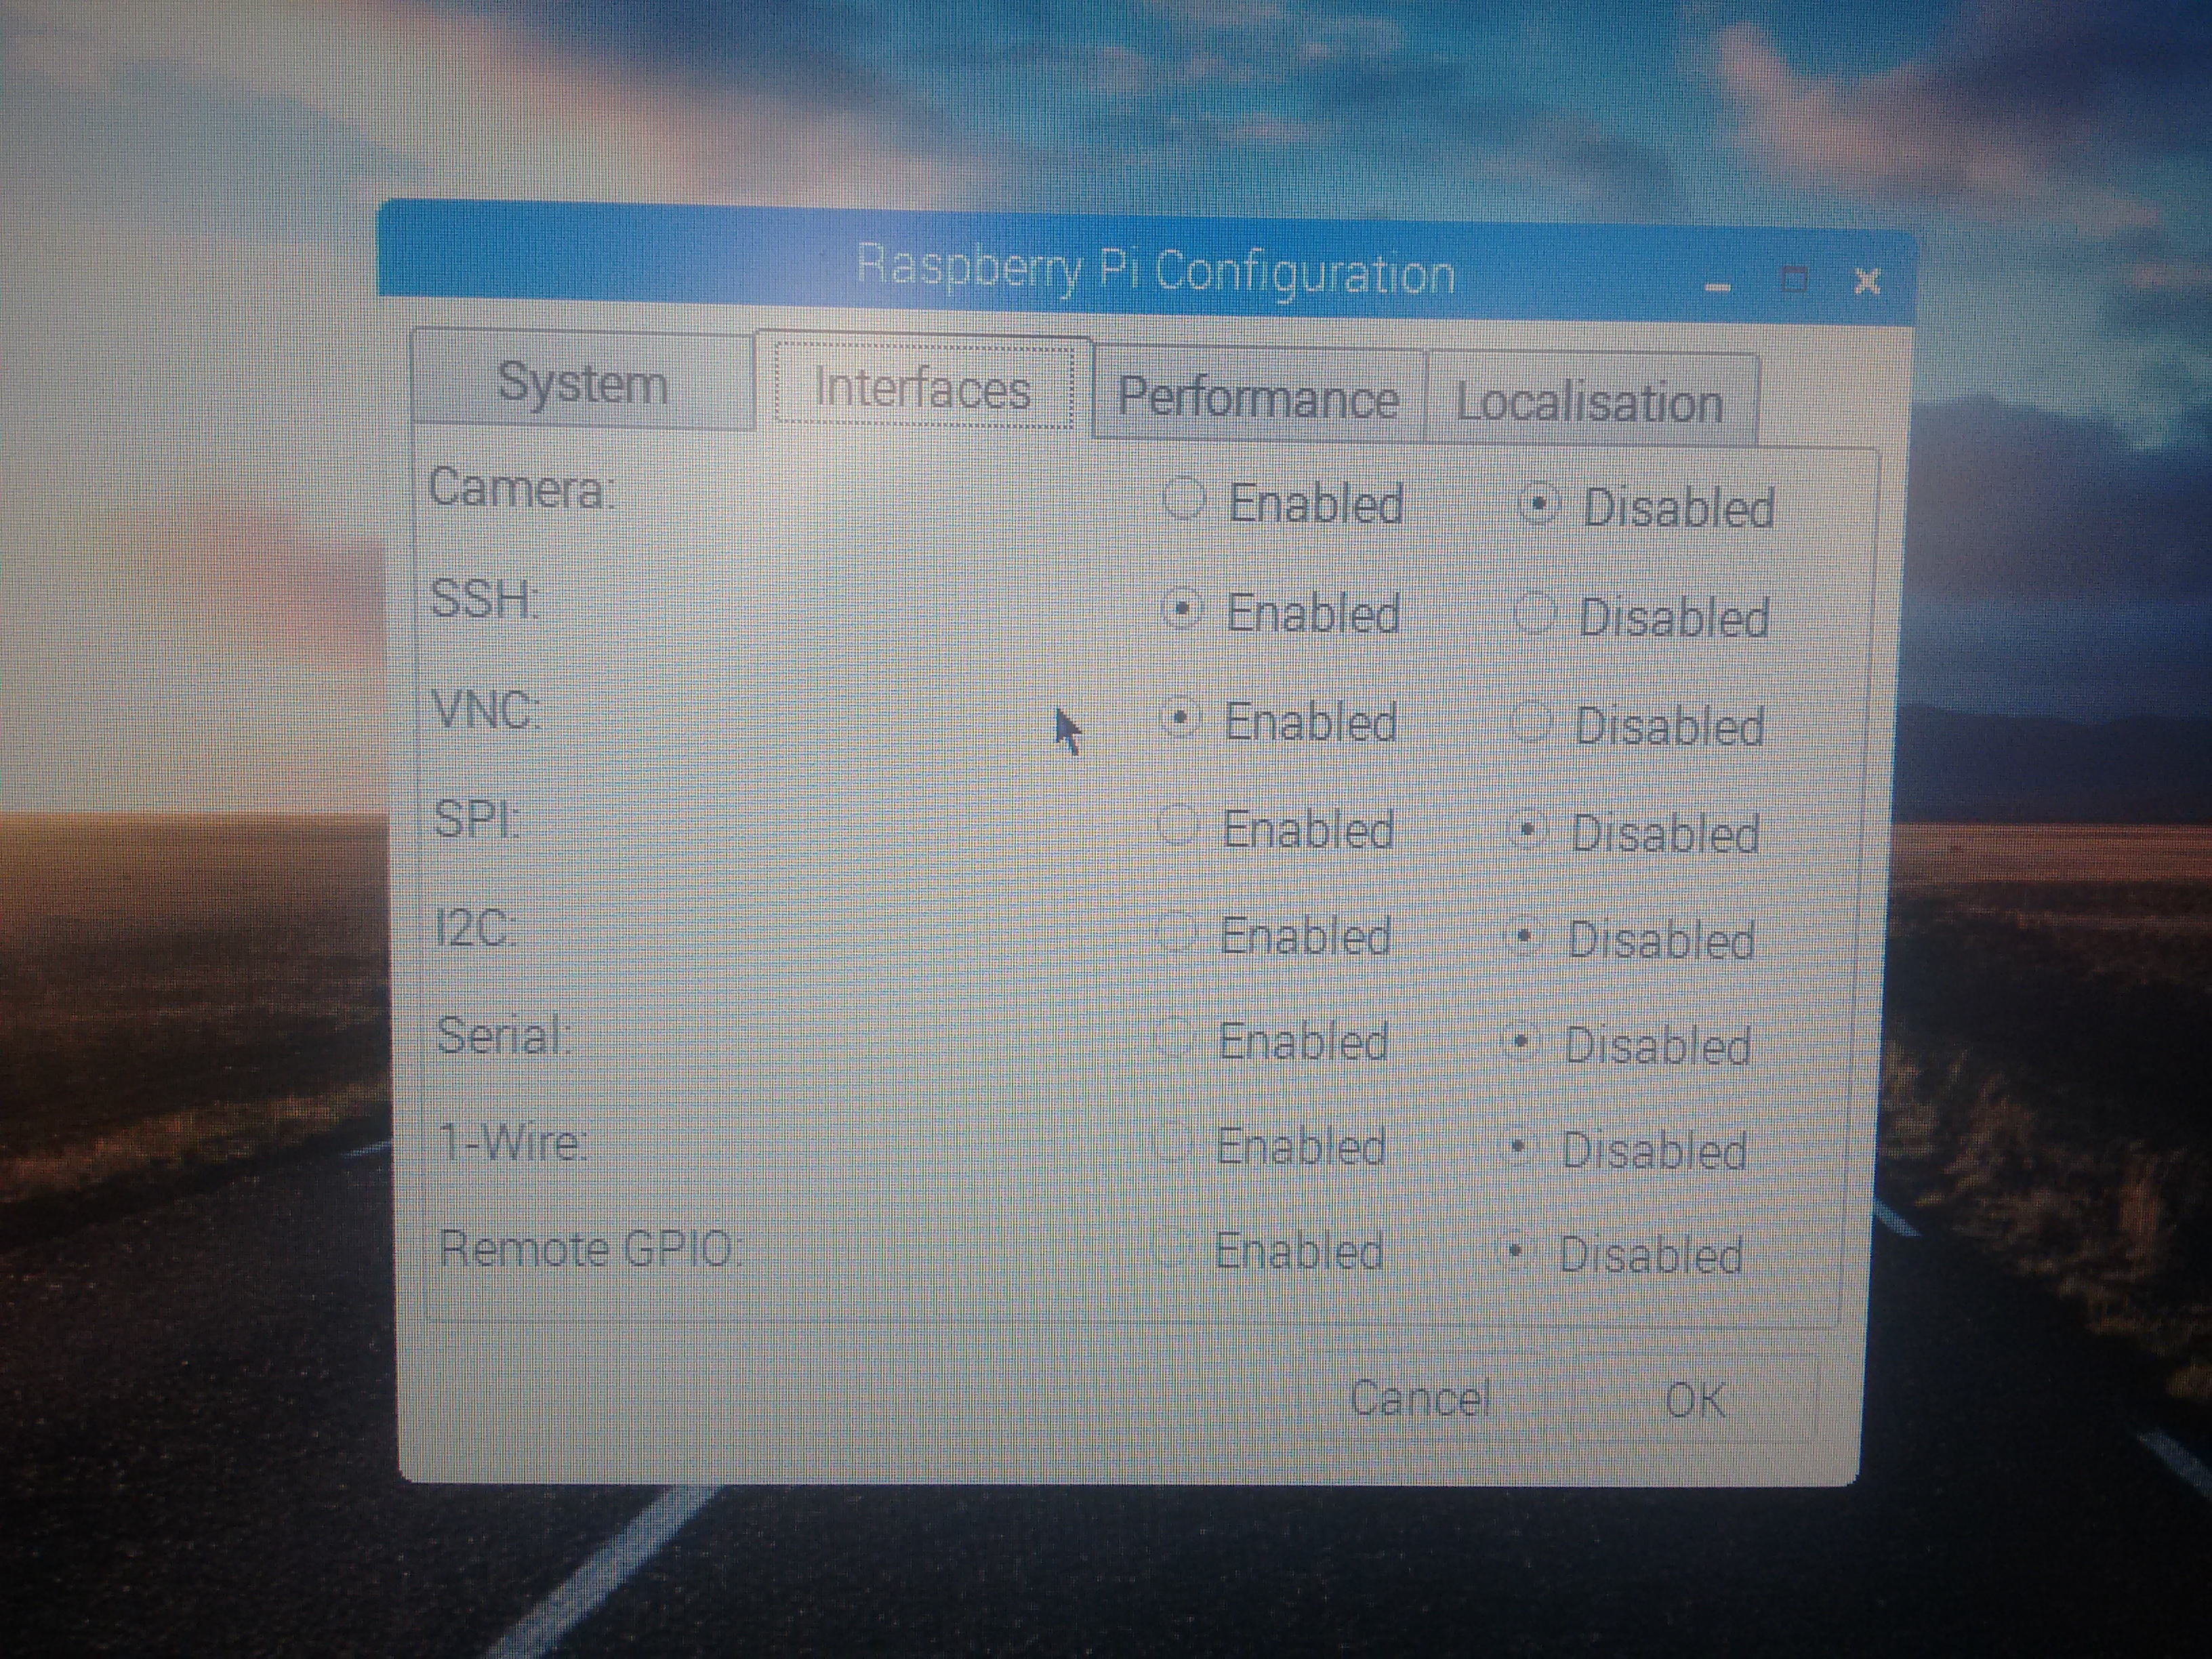
- A dialog box will open. Go to Interfaces (picture 5).
- Enable SSH and VNC (You can check out other options too but for this project we require only these 2)
- From the Raspberry Pi terminal.
- Go to Terminal from the toolbar (Icon with "<_" symbol).
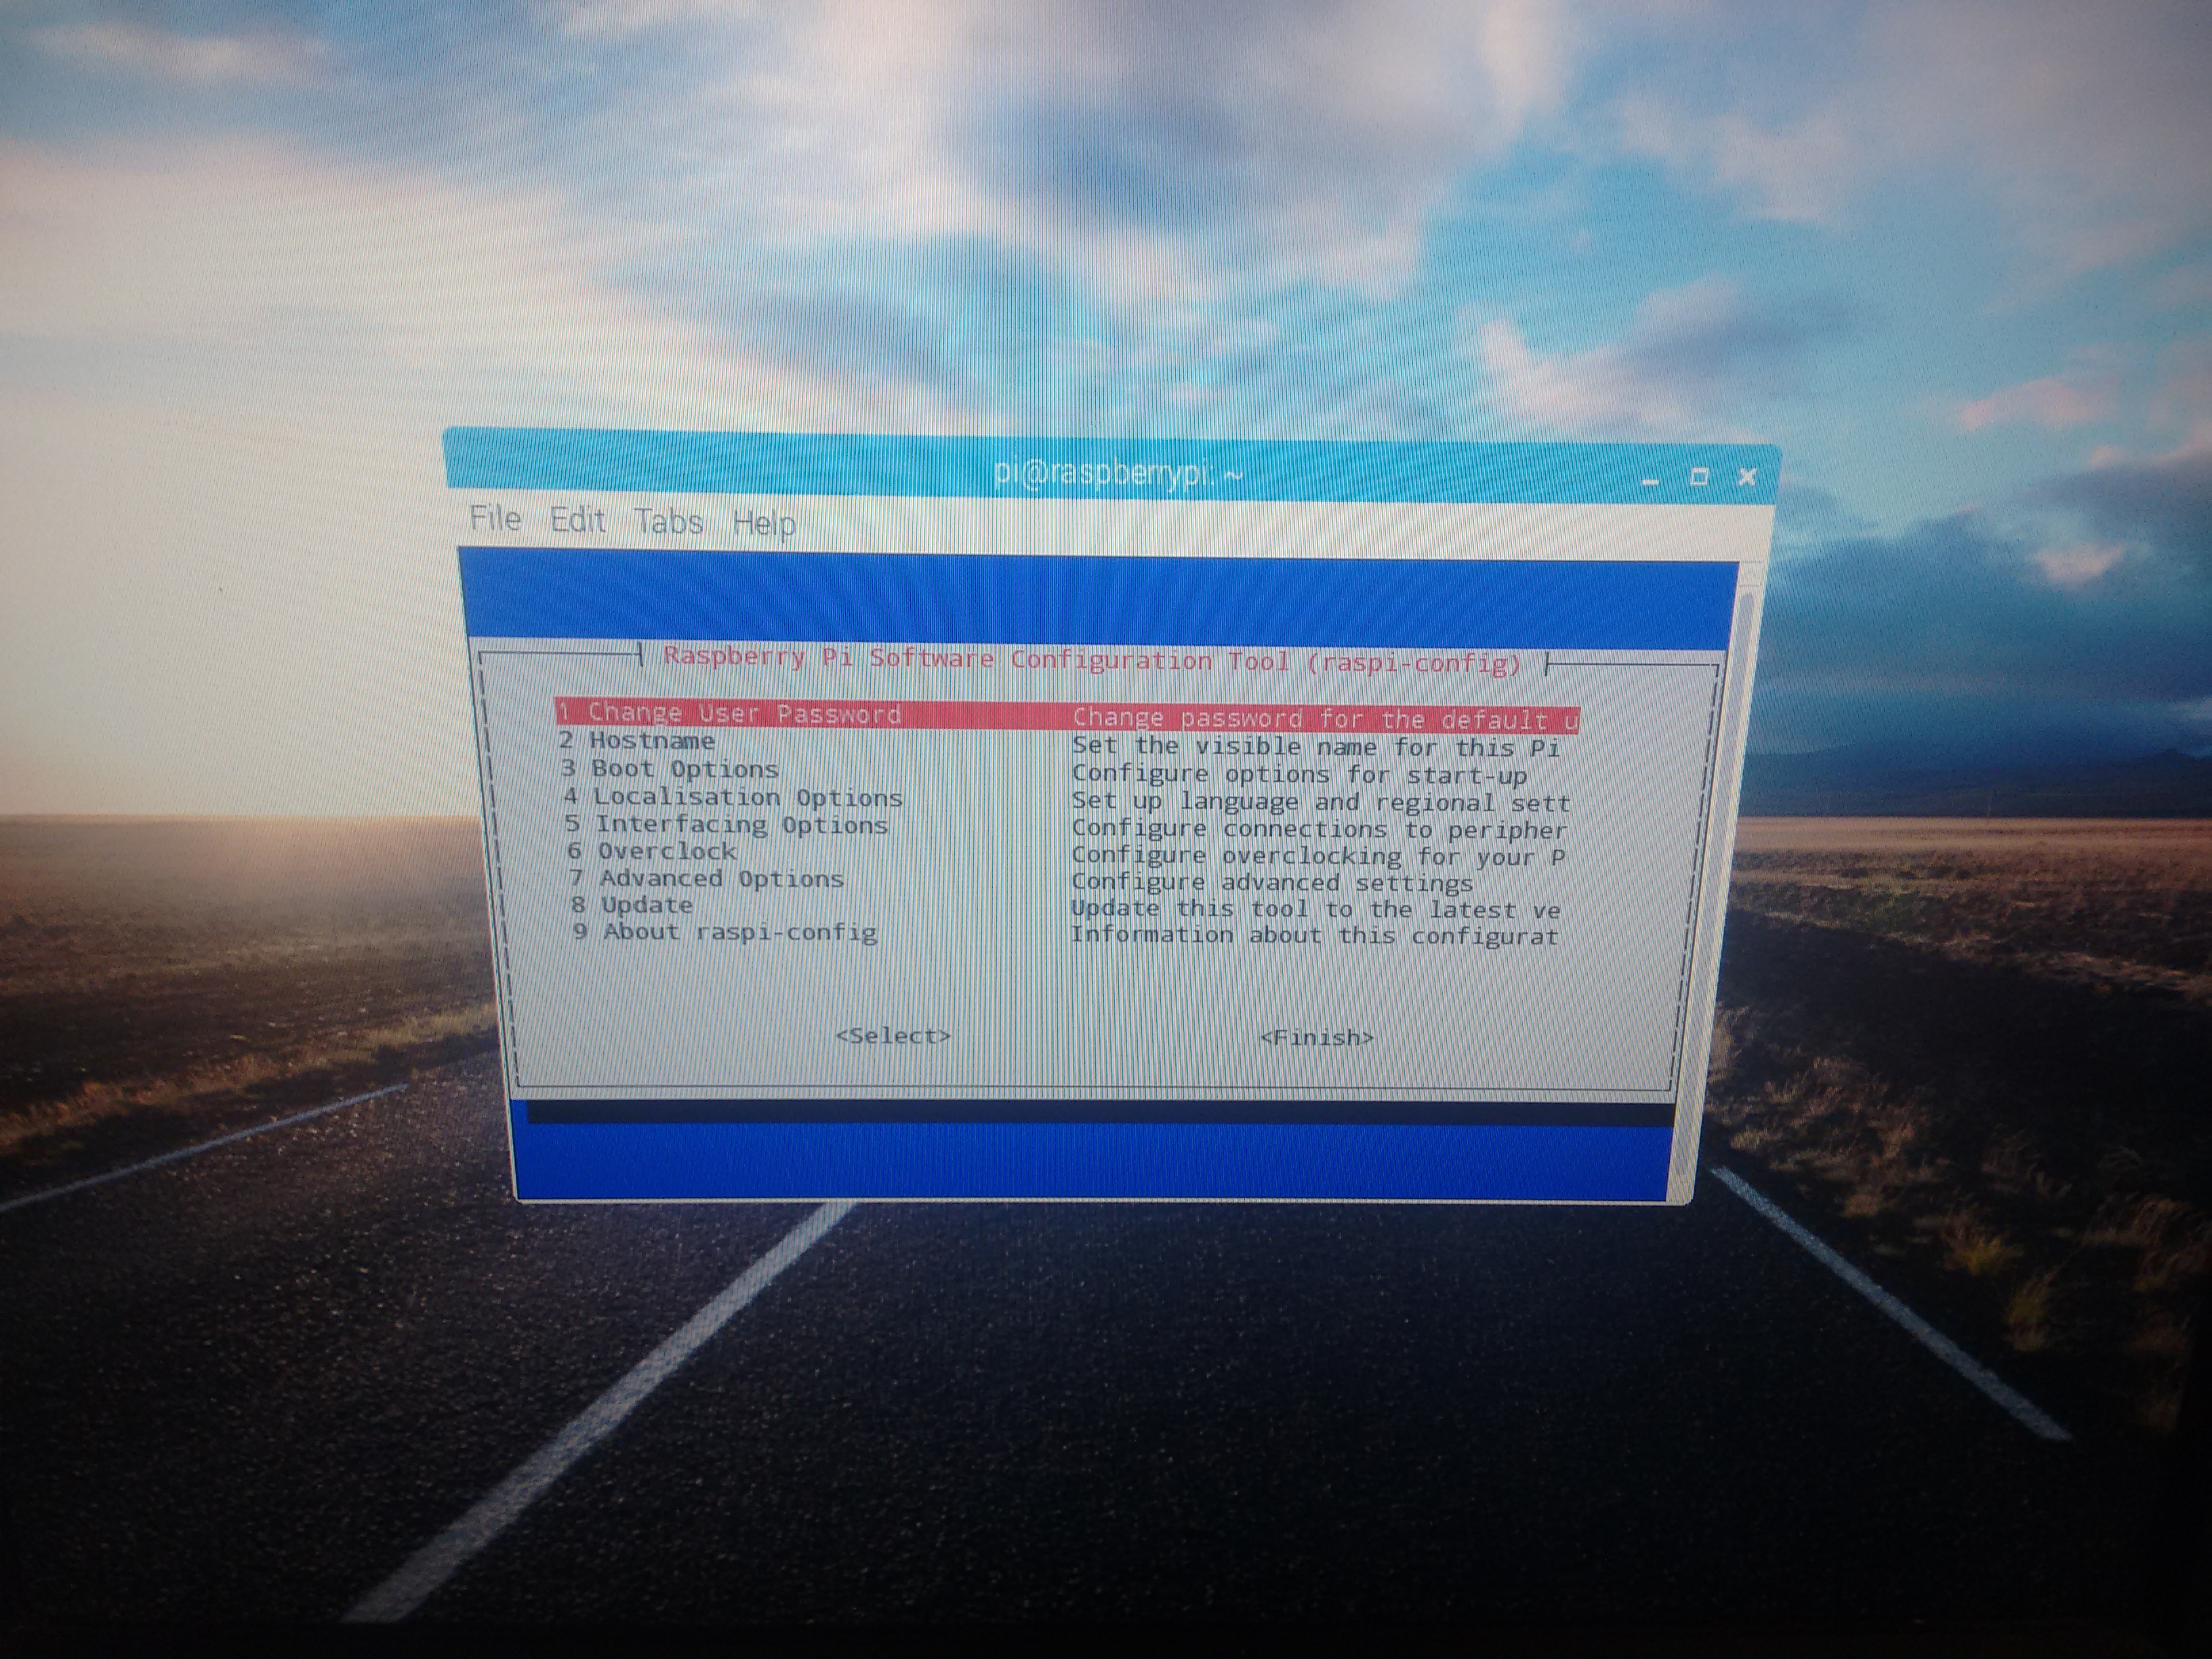
- Type "sudo raspi-config".
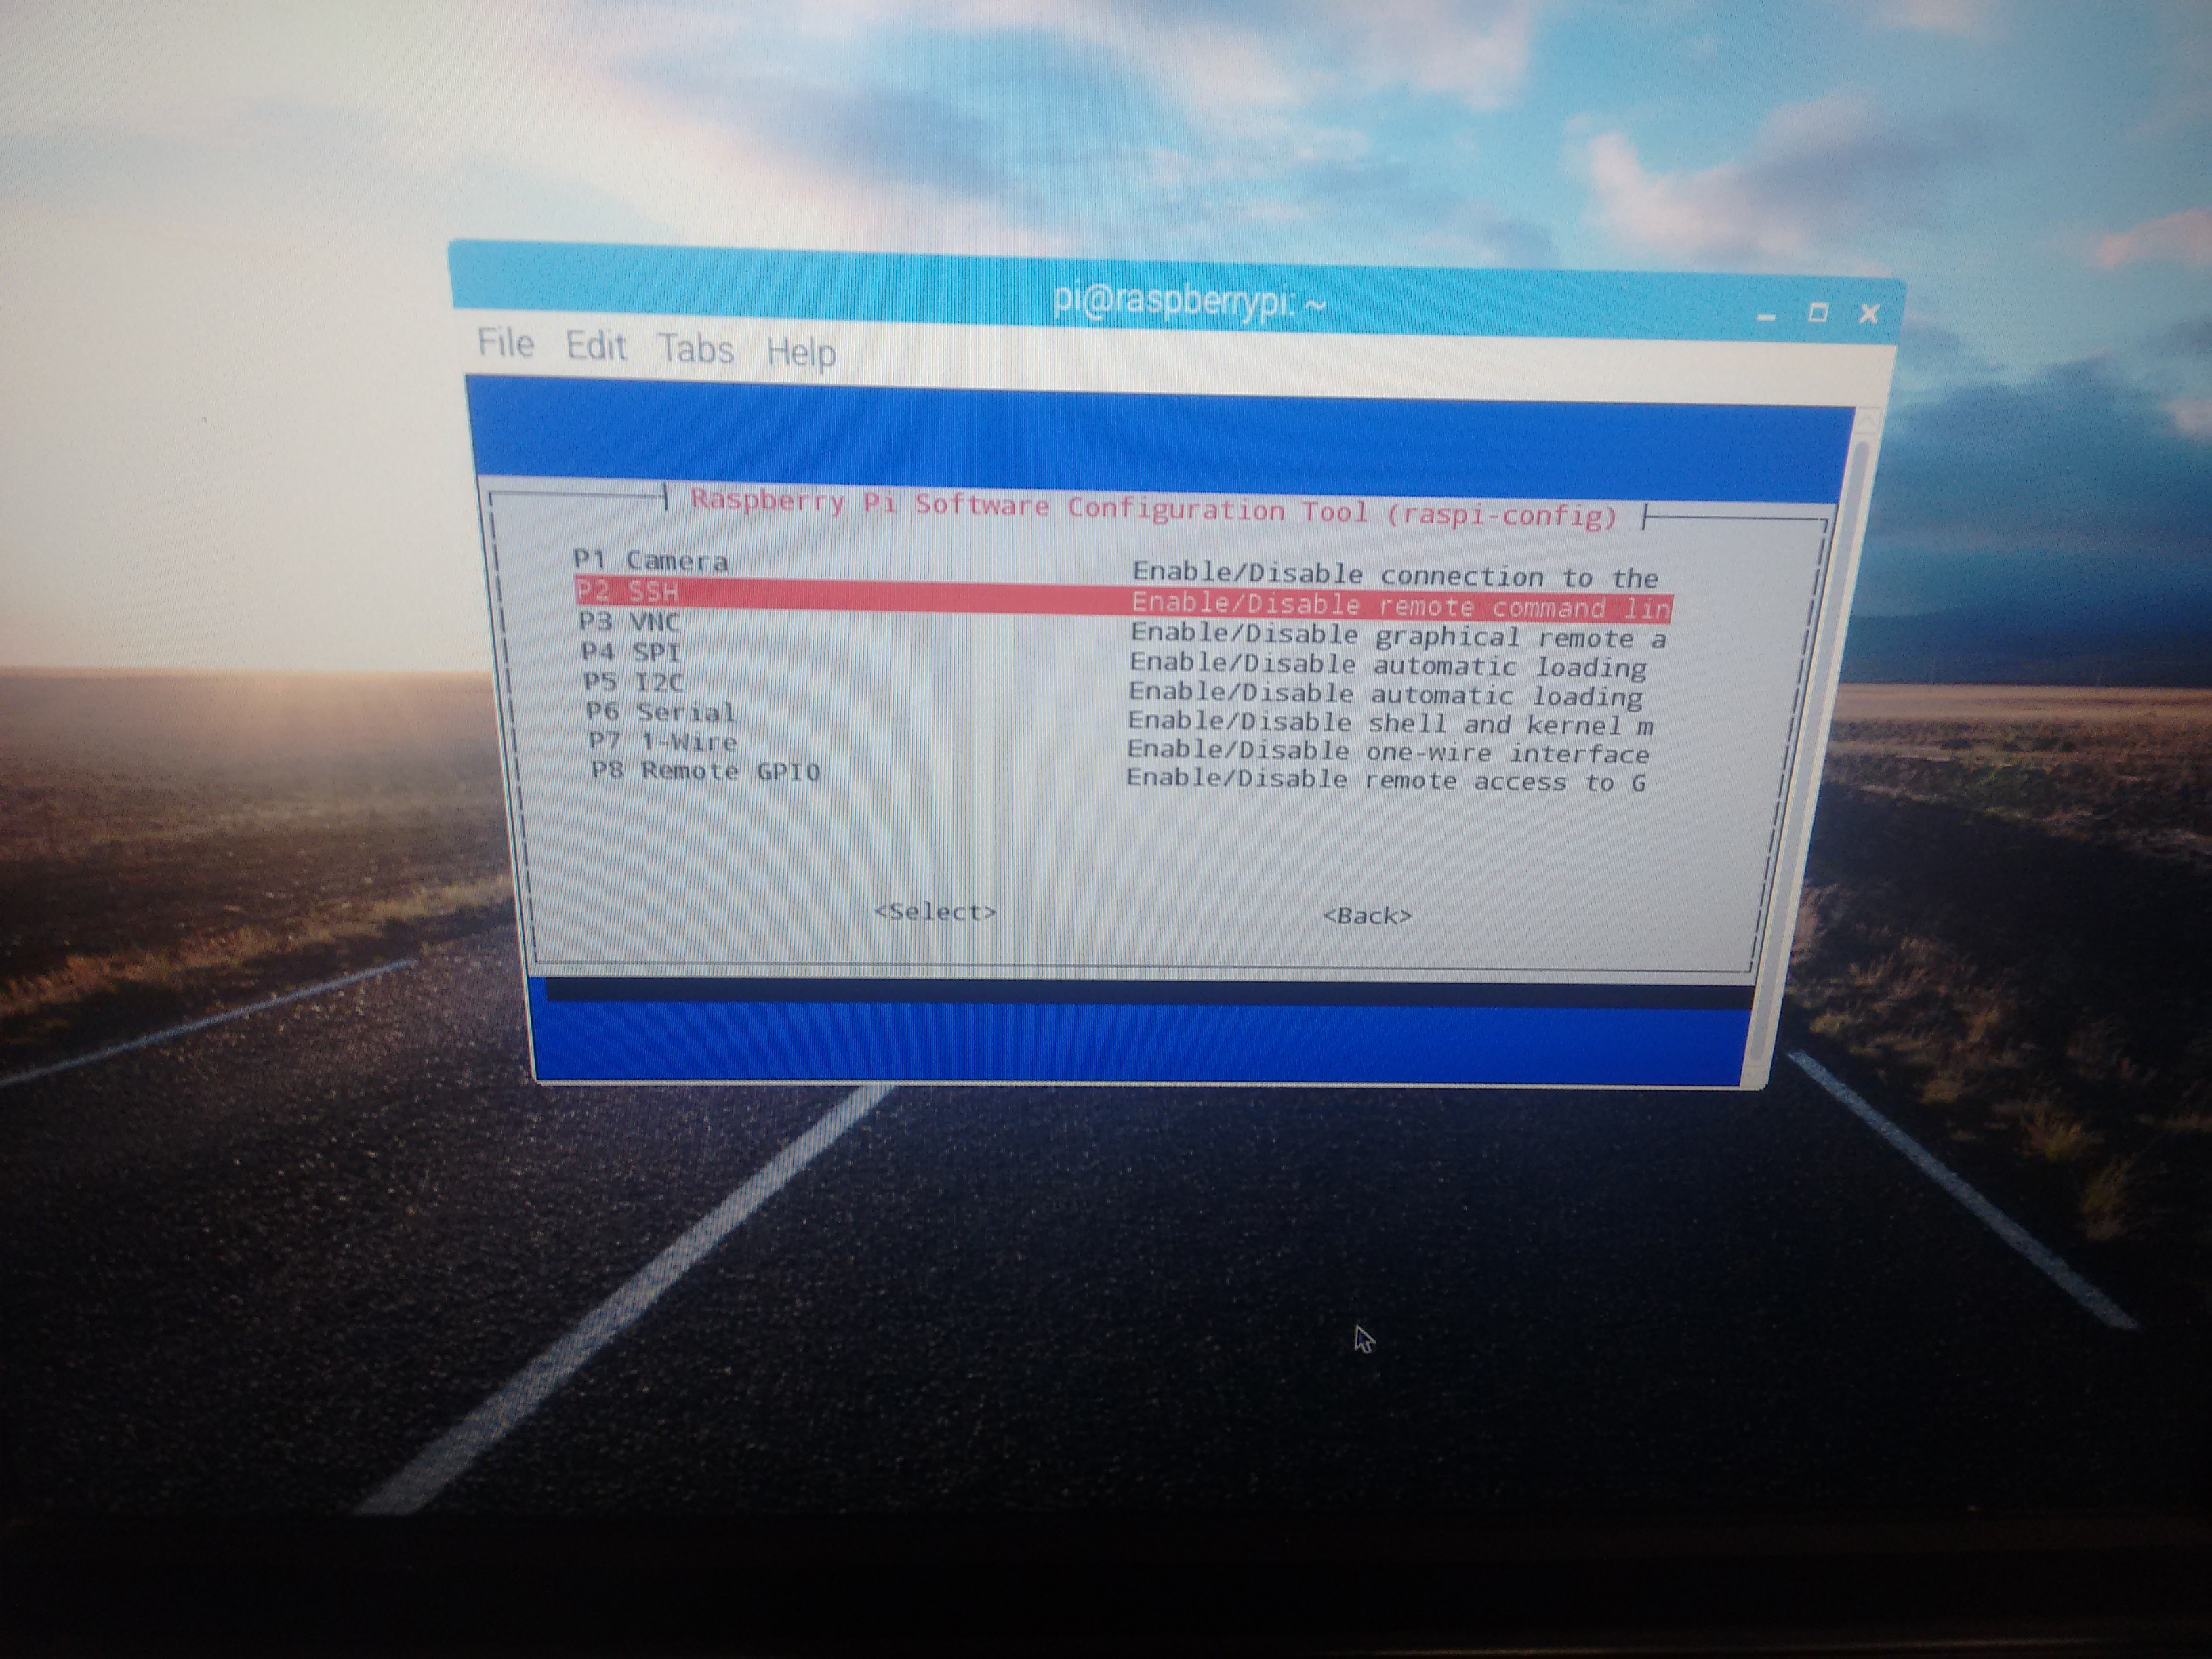
- You will get a dialog box as shown in picture 6 (use keyboard to navigate the options).
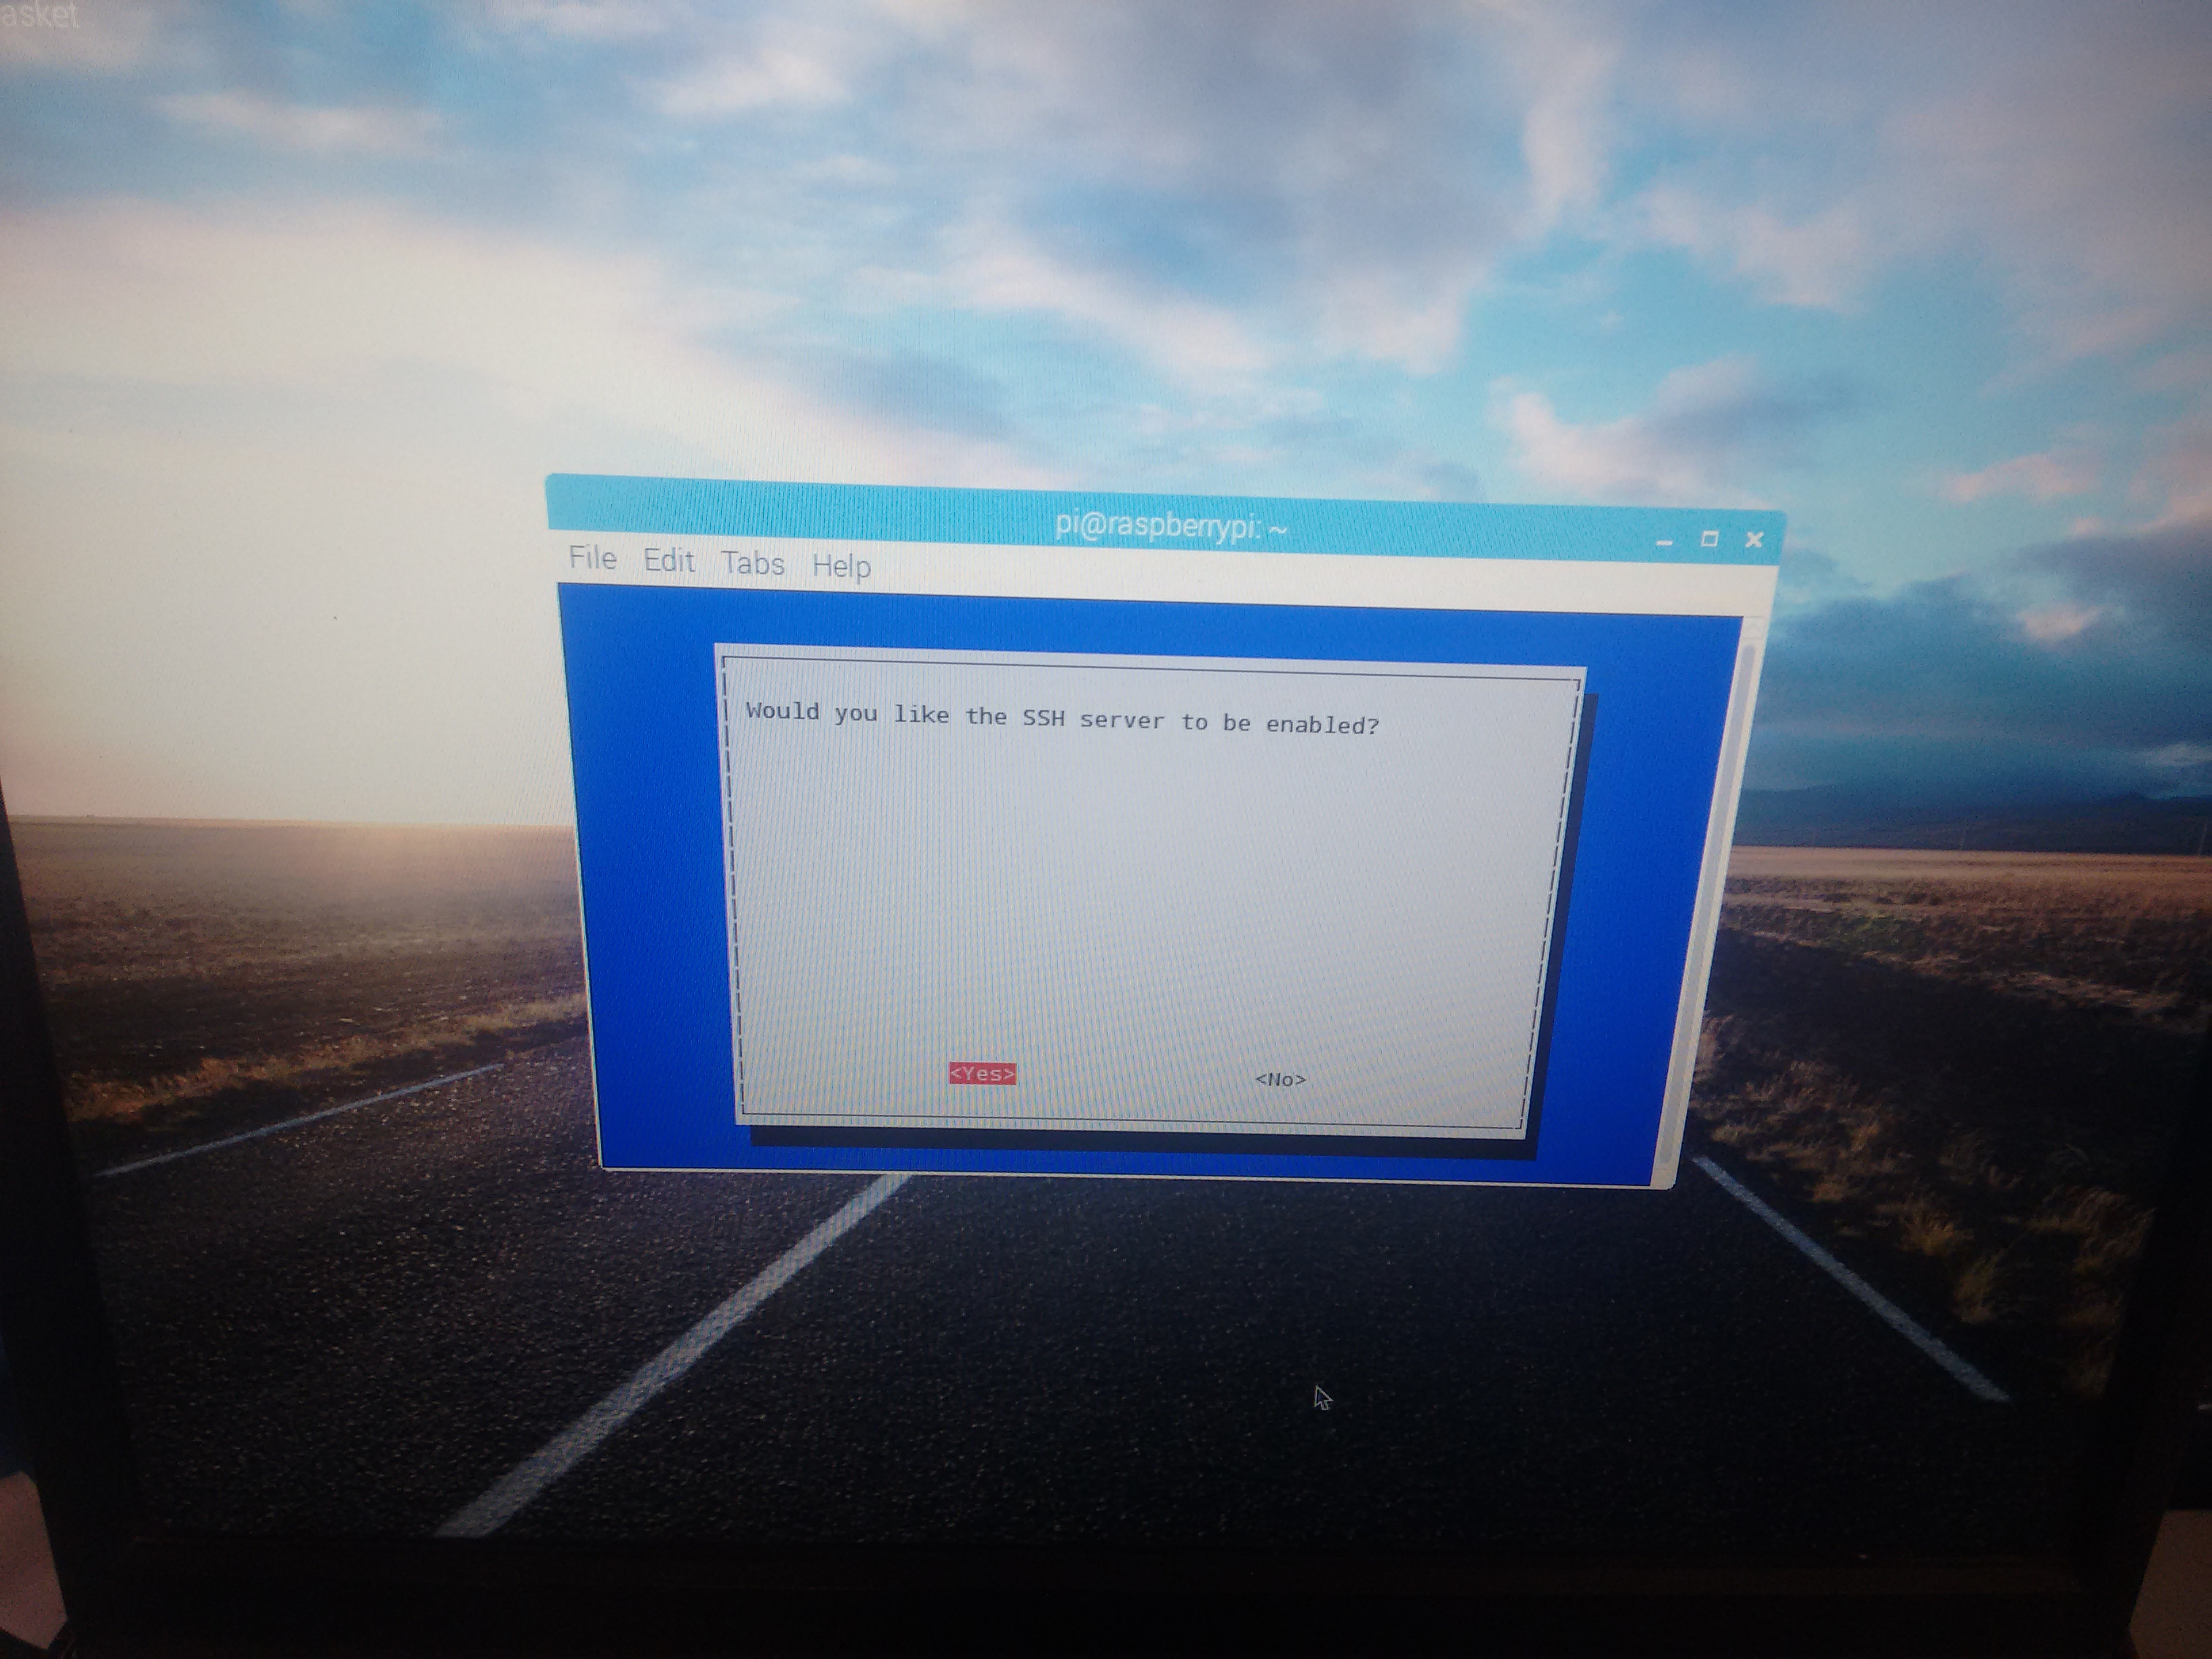
- Go to Interfacing options and enable SSH (picture 7 and 8).
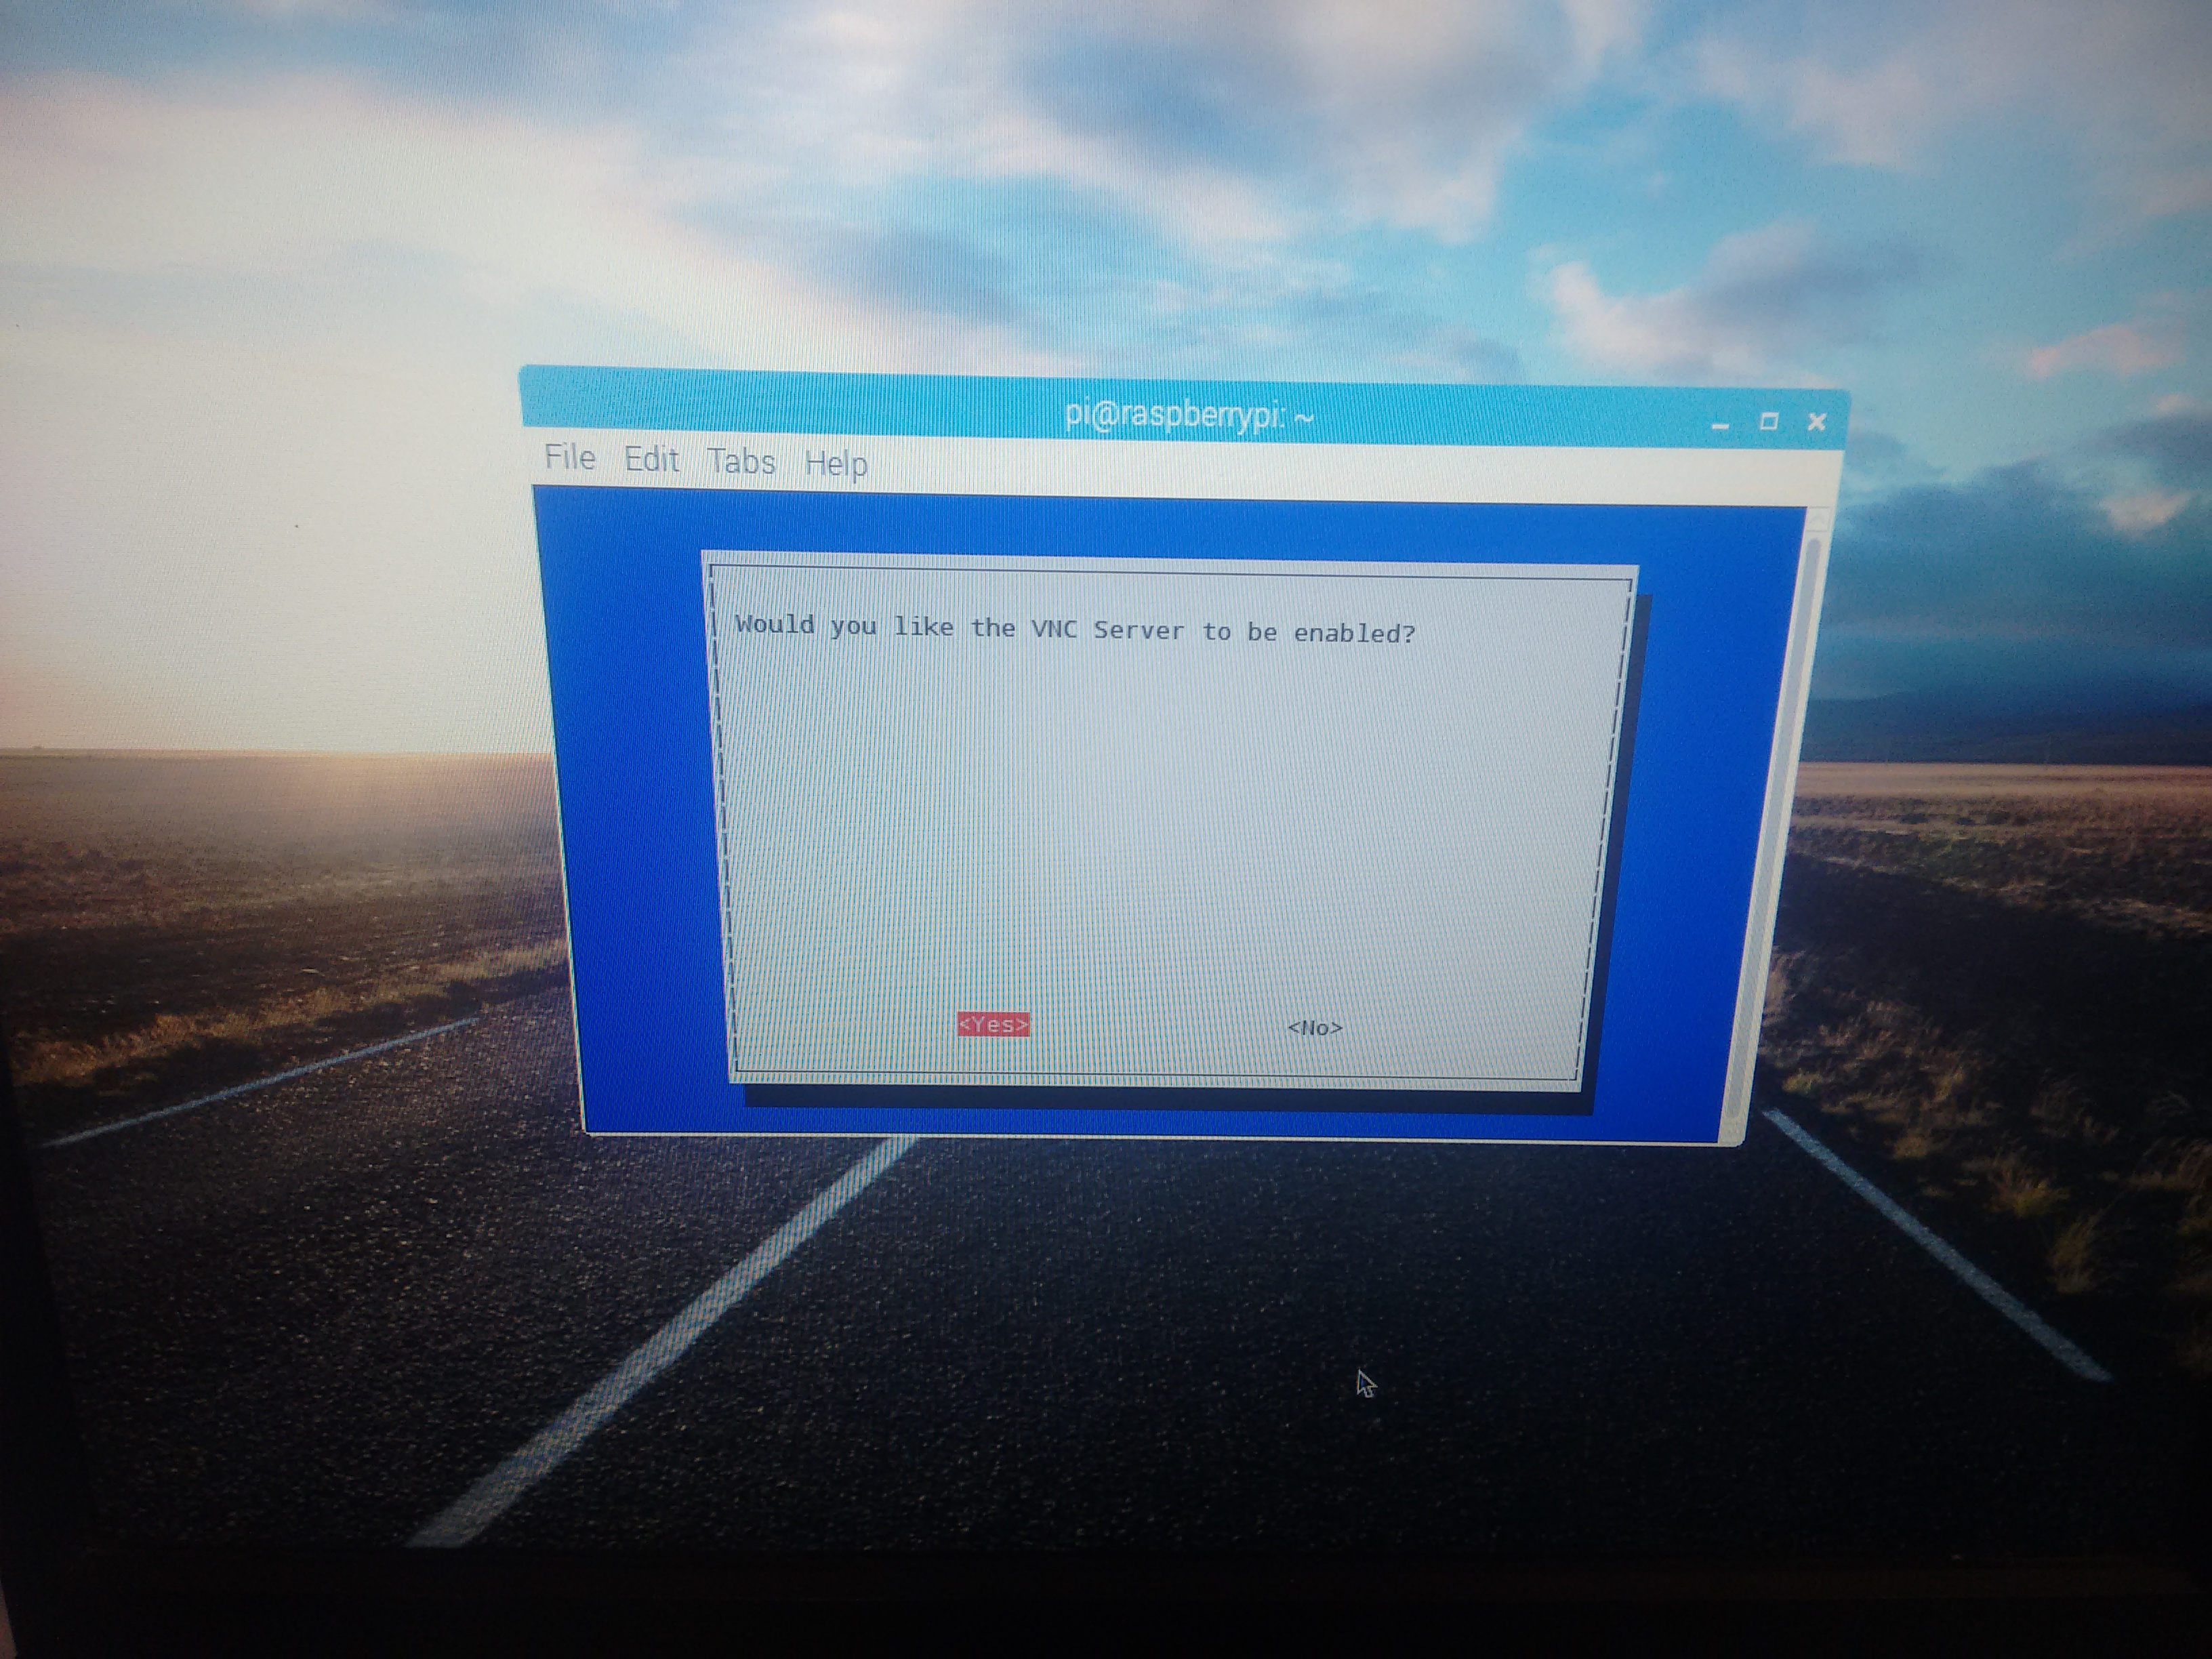
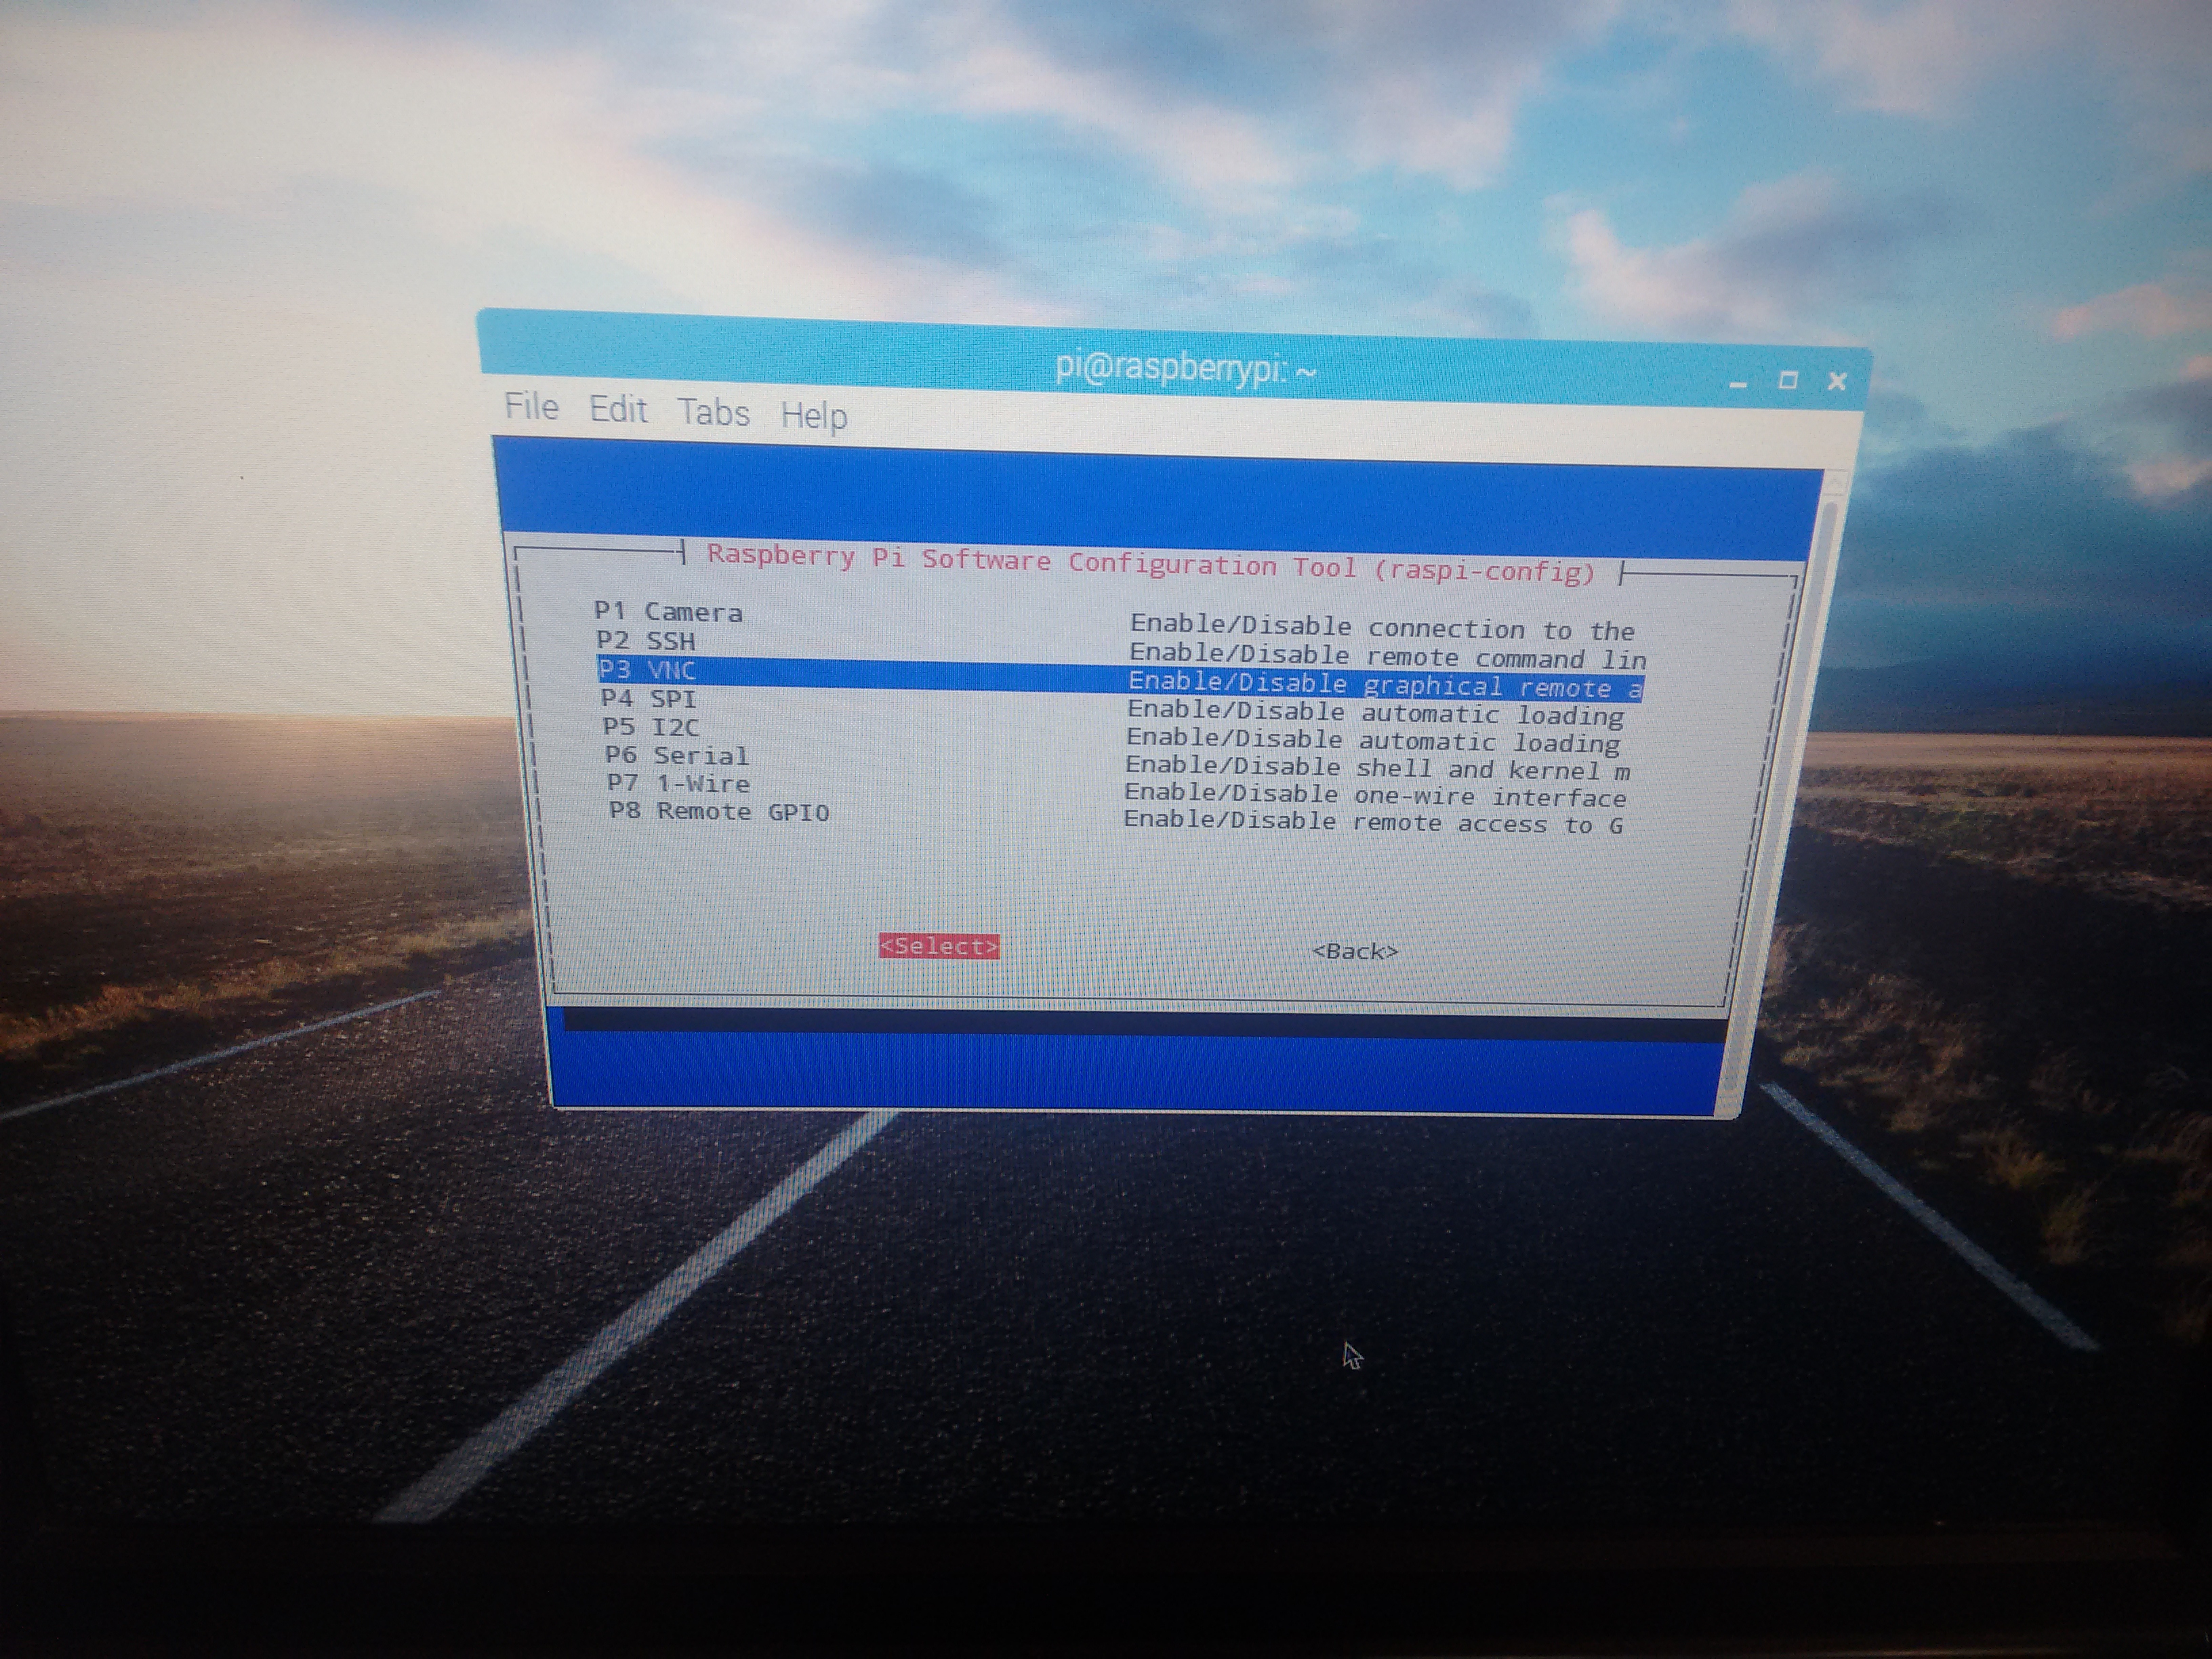
- Similarly enable VNC (picture 9 and 10).
Done!!!!!
Your laptop can now be used to connect to your Raspberry Pi via SSH or VNC.
Connecting Raspberry Pi to Laptop Via SSH Using Ethernet Cable
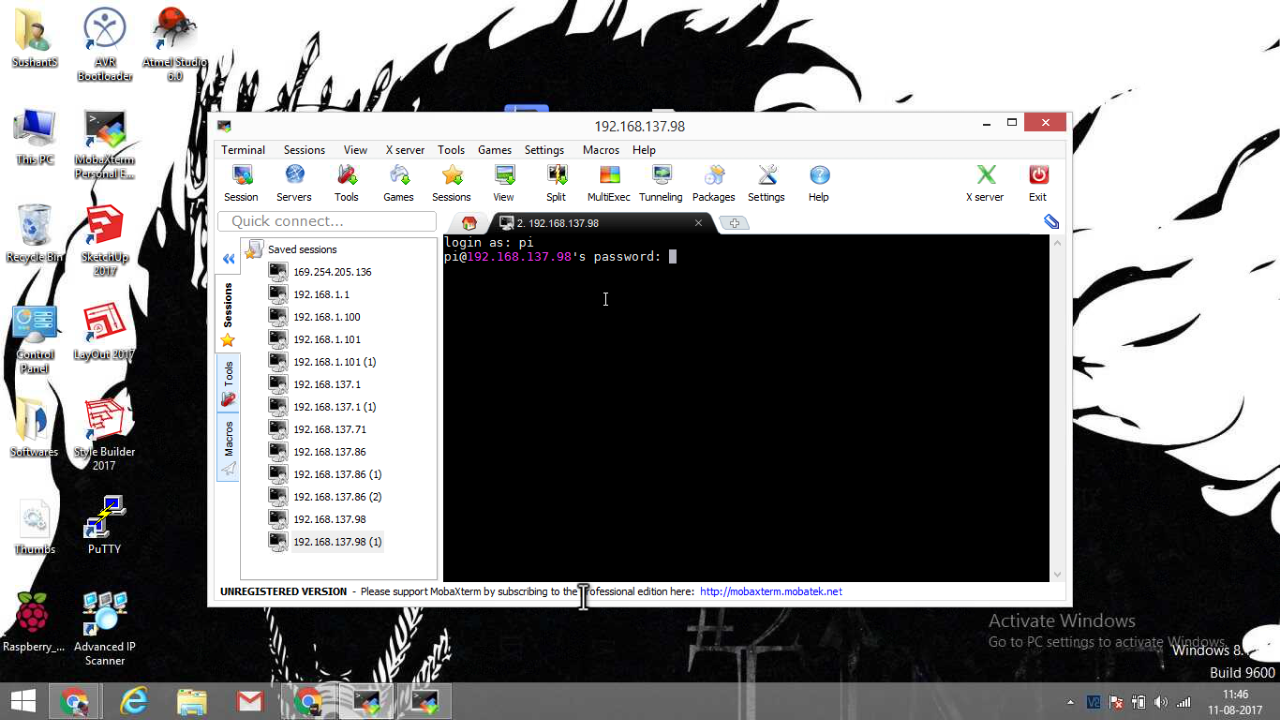
After you are done with your initial setup, you can connect the Raspberry Pi to your laptop with the help of an Ethernet cable. You can power on the Raspberry Pi using one of the USB port's from the laptop (picture 1).
Next thing is to enable Internet Sharing on your laptop and then connect your Raspberry Pi using MobaXterm software.
Steps to be followed:
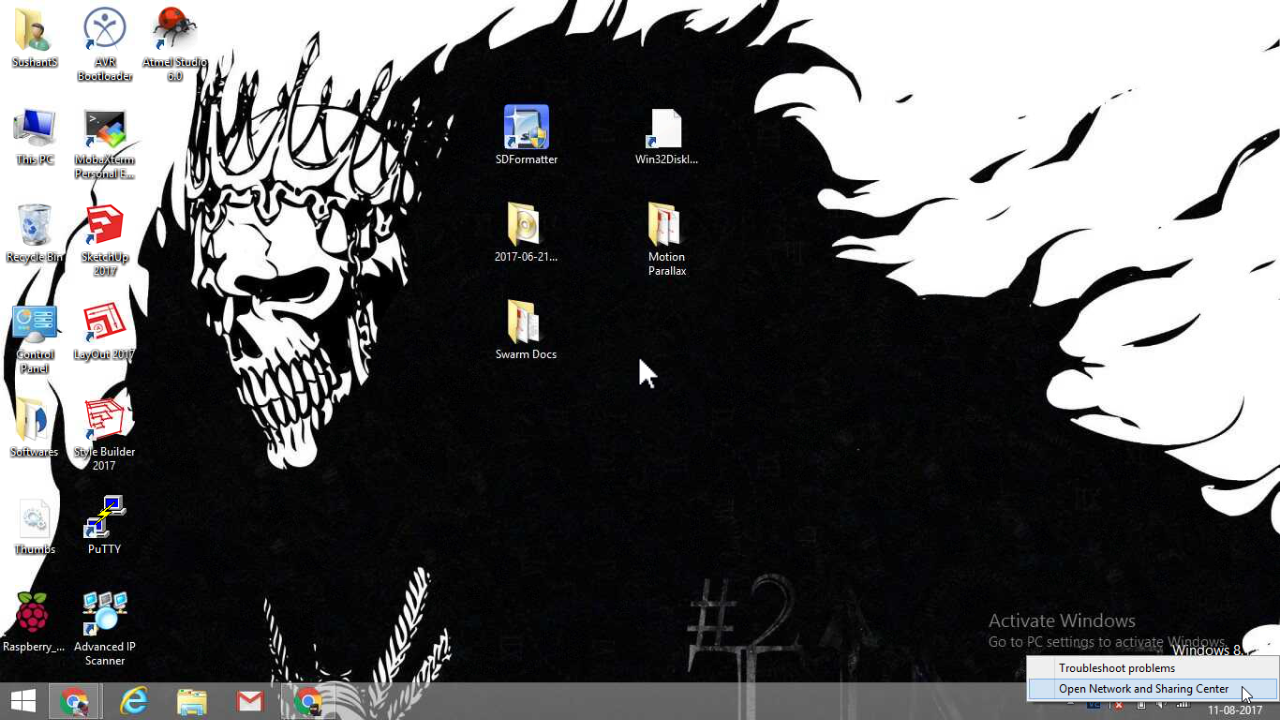
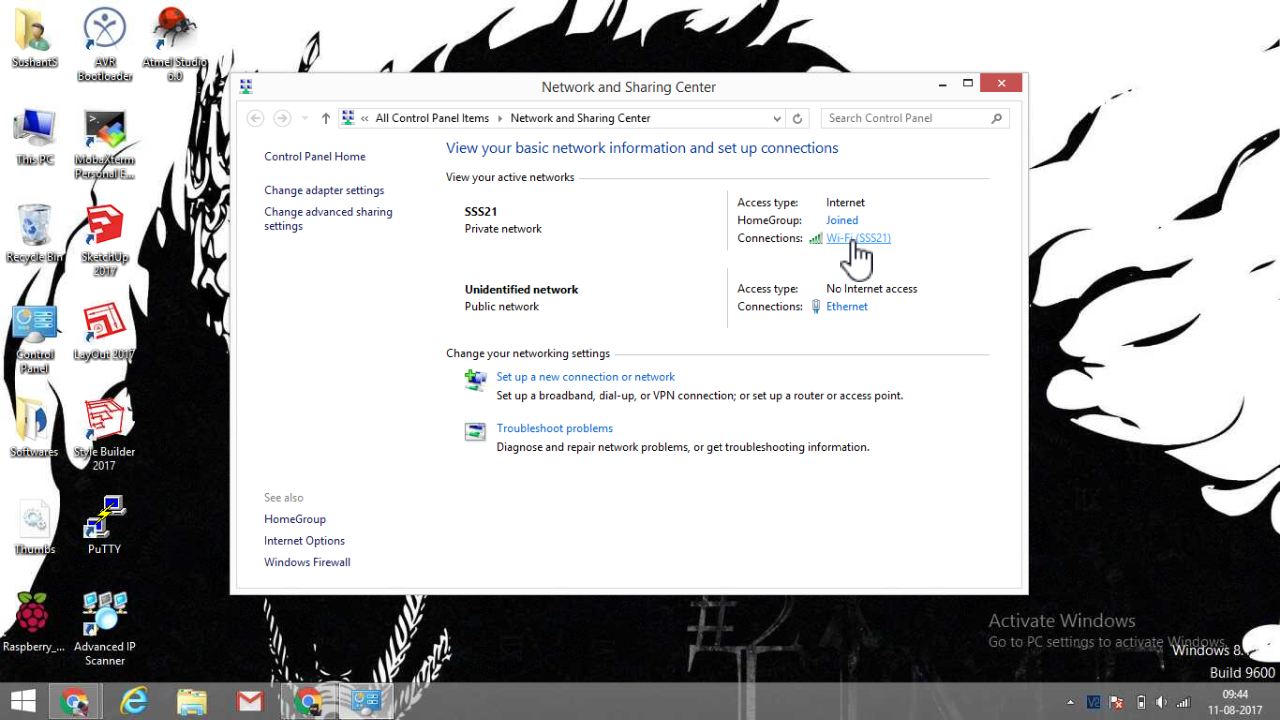
- Right click on the Network icon in your toolbar and click on Open Network and Sharing center.
- You will see 2 networks. One is the network that the laptop is connected to and the other one is the Ethernet or LAN connection that you just created.
- Select the network or WiFi that you are connected to.
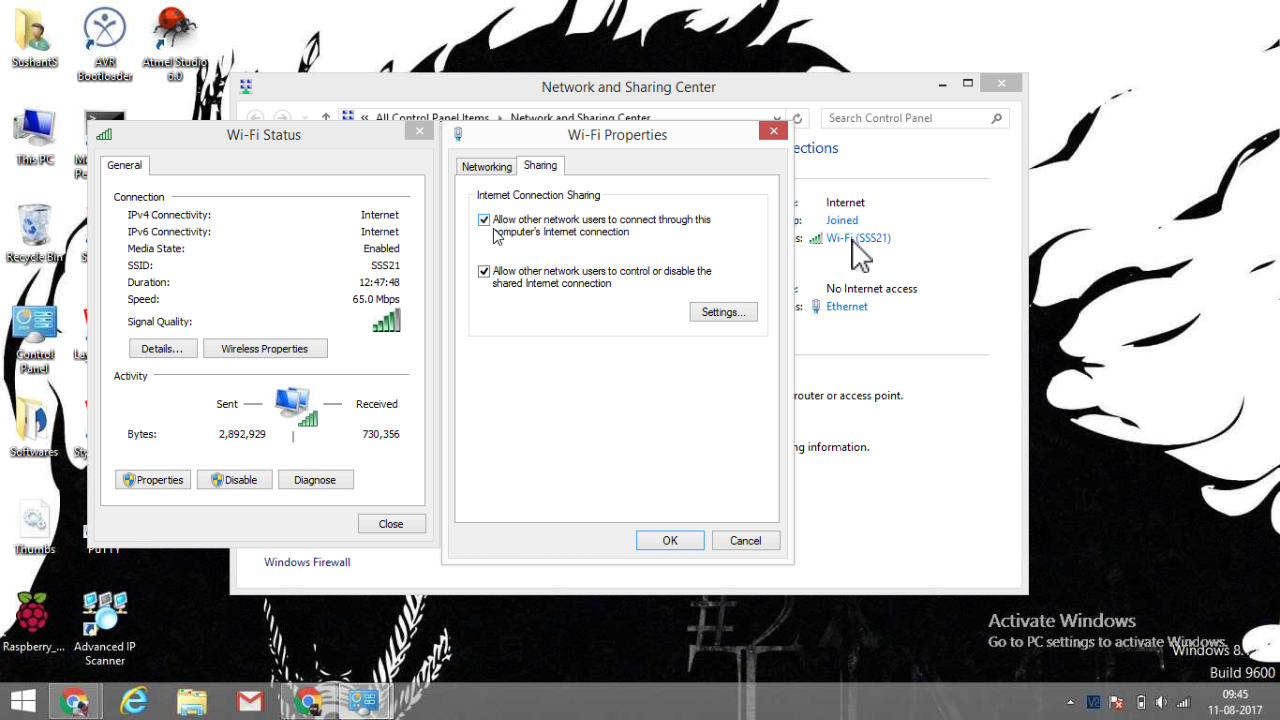
- Select Properties. Go to Sharing and tick both the options which allow other computers to connect through the computers internet connection. If a drop down box appears select the name of the connection that you created (either LAN or Ethernet). Click OK.
- Go back to Network and Sharing Center and select Ethernet or Local Area Connection.
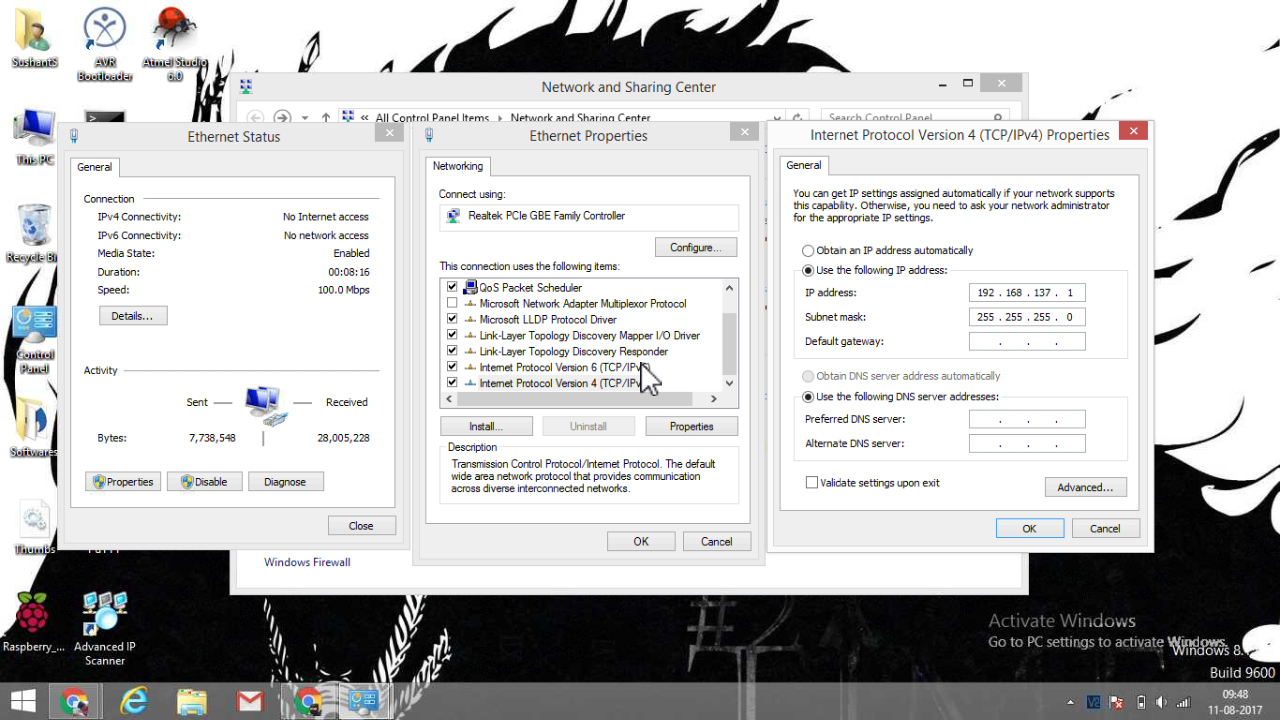
- Select Properties. Go to Sharing and click on Internet Protocol Version 4 (TCP/IPv4).
- You will see the address which is assigned to your LAN adapter (in my case 192.168.137.1). Make a note of this address.
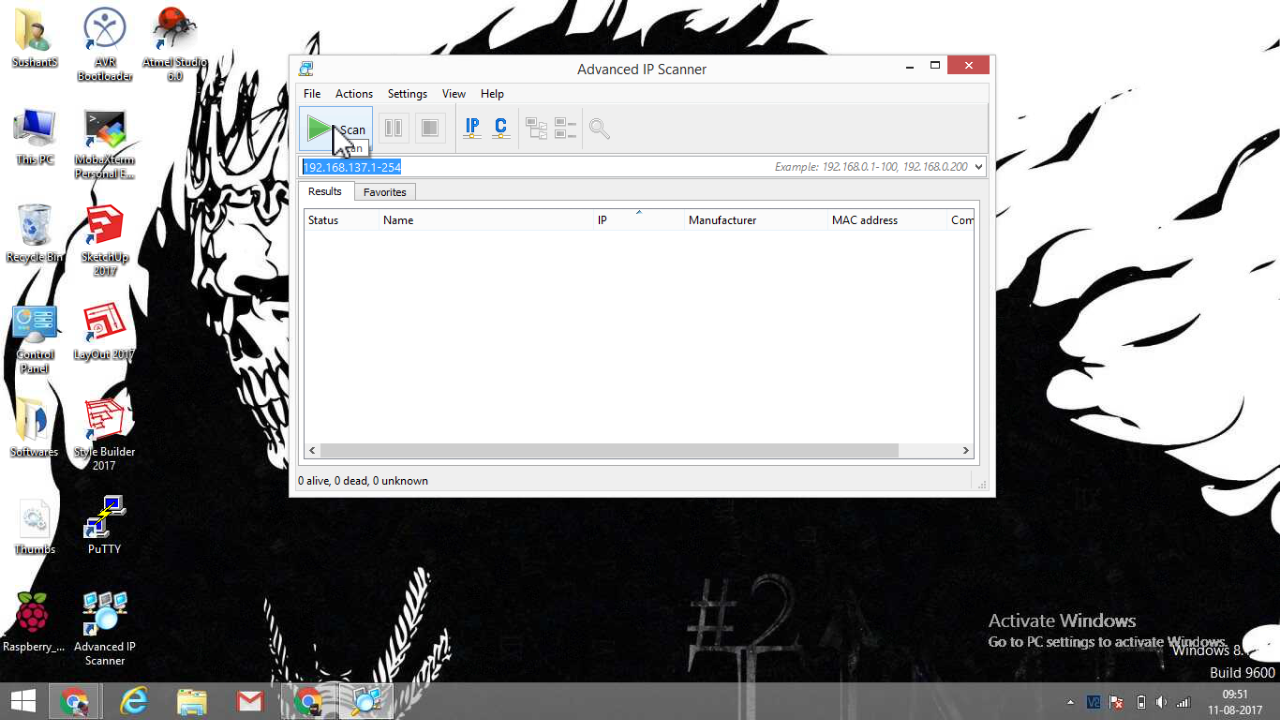
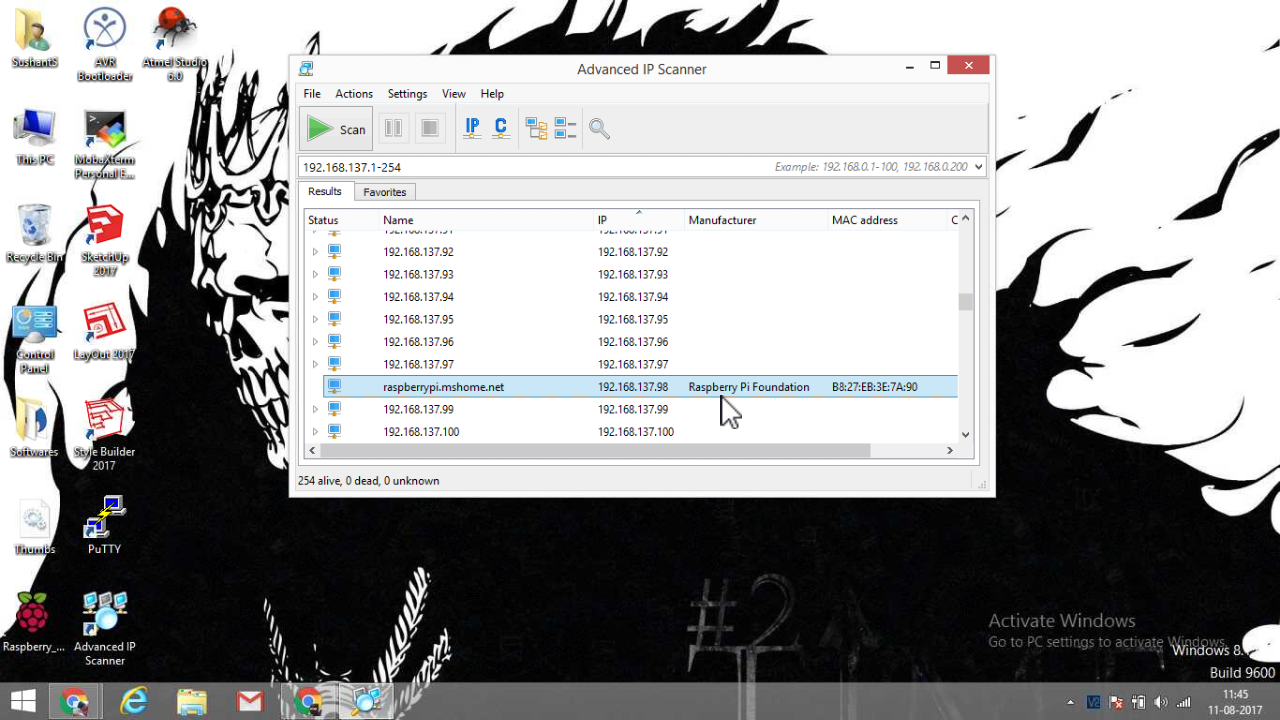
- Next open Advanced IP Scanner. This is to check the IP address that has been assigned to your Raspberry Pi from the Ethernet/LAN port. Type the range of the address that you want to search from. Typically the range starts from the LAN adapters address (192.168.137.1-254).
- A random IP address will be assigned to the Raspberry Pi every time you connect it to your laptop. Look for the address with name "raspberrypi.mshome.net", manufacturer "Raspberry Pi" and a MAC address. If you connect and disconnect your Pi multiple times to your laptop you will find IP addresses with name "raspberrypi.mshome.net". These IP addresses were previously given to Raspberry Pi and then released. You can ignore these IP addresses and look for addresses with a manufacturer name and a MAC address.
- Note down the IP address of your Raspberry Pi.
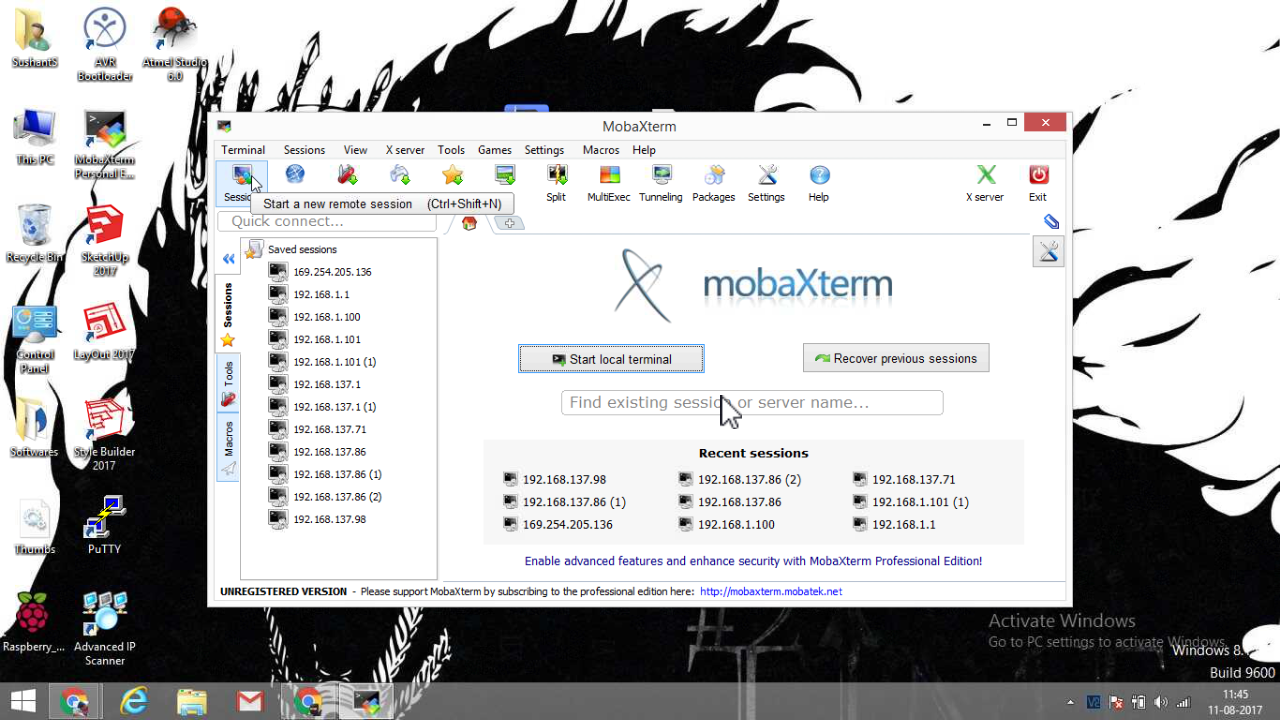
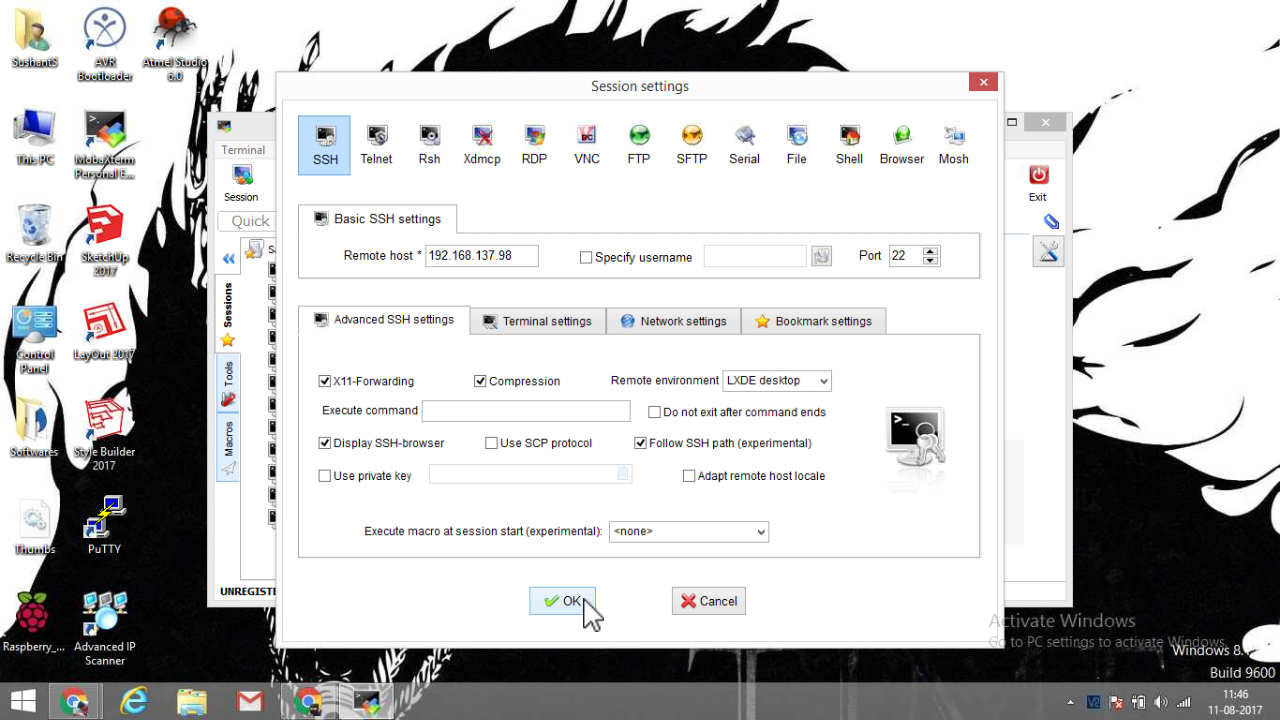
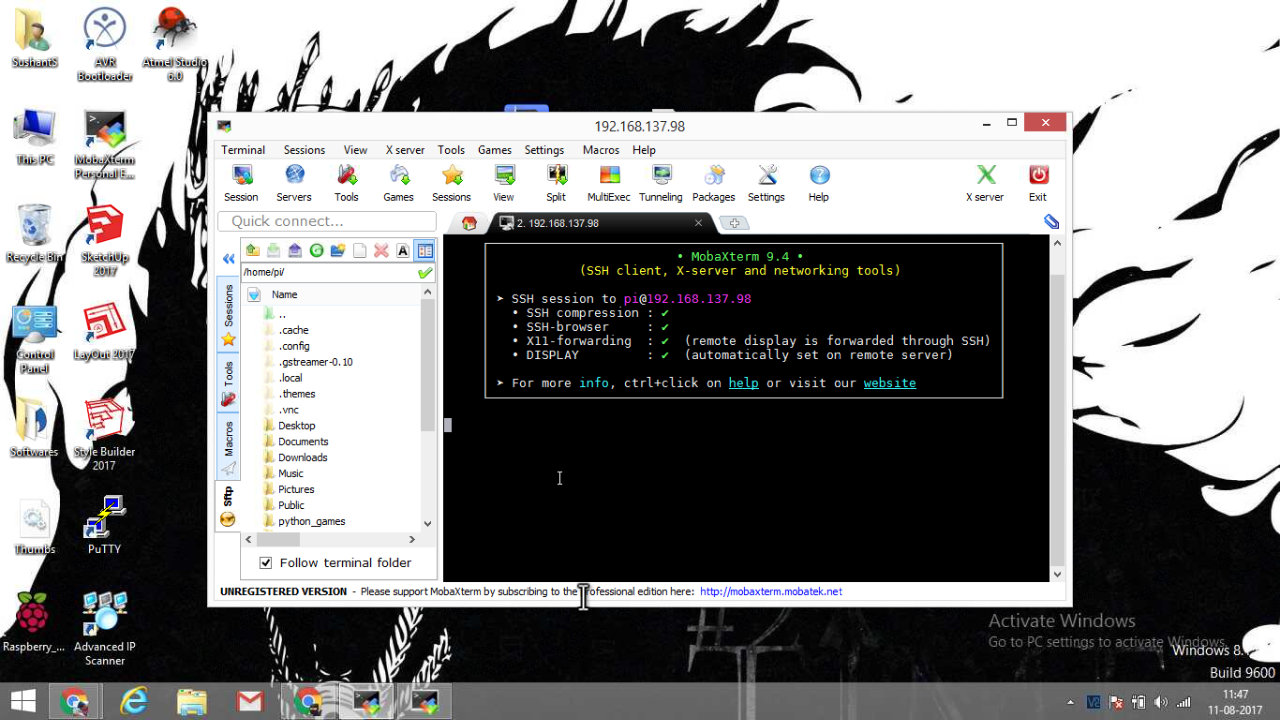
- Next open MobaXterm. Go to Session. Select SSH. Then under Advanced SSH settings change the Remote environment to LXDE desktop. Also enable X11 forwarding and Follow SSH path. Click OK.
- In the new window that appears login as "pi" and enter the password as "raspberry". This is the default username and password to login to your Pi. You might not see the password while typing but it is being entered. Don't worry about it and continue.
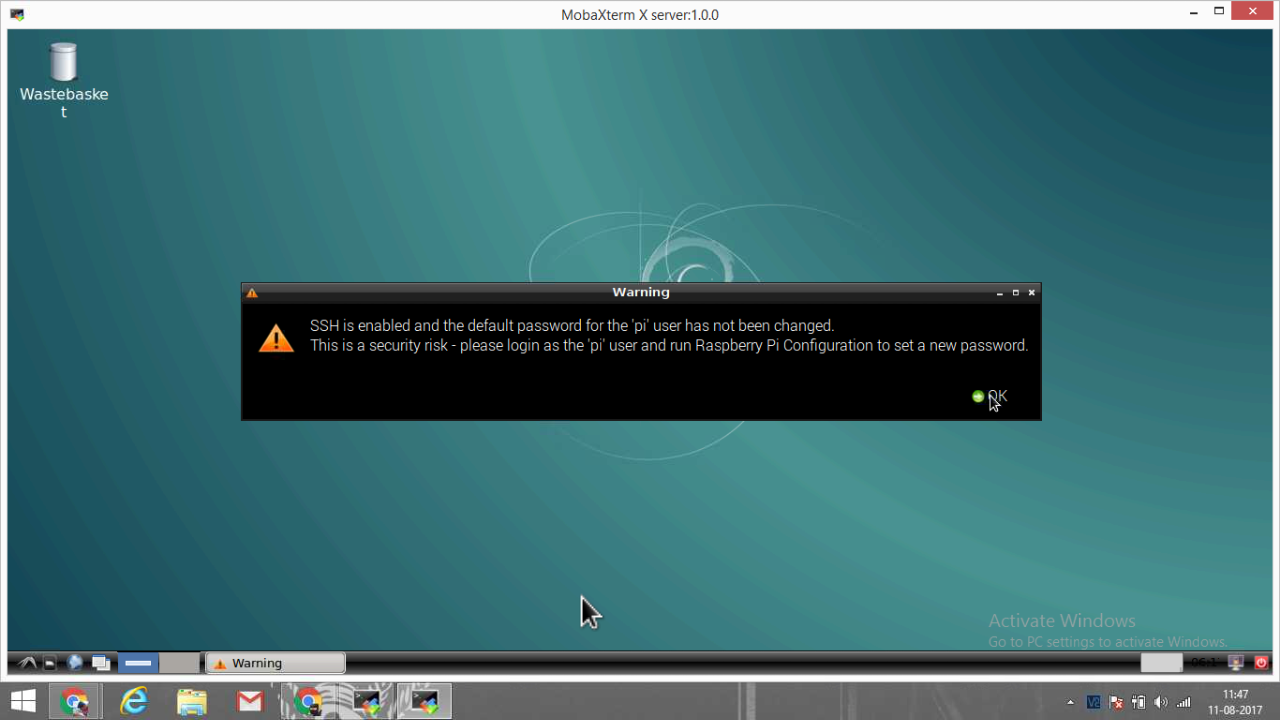
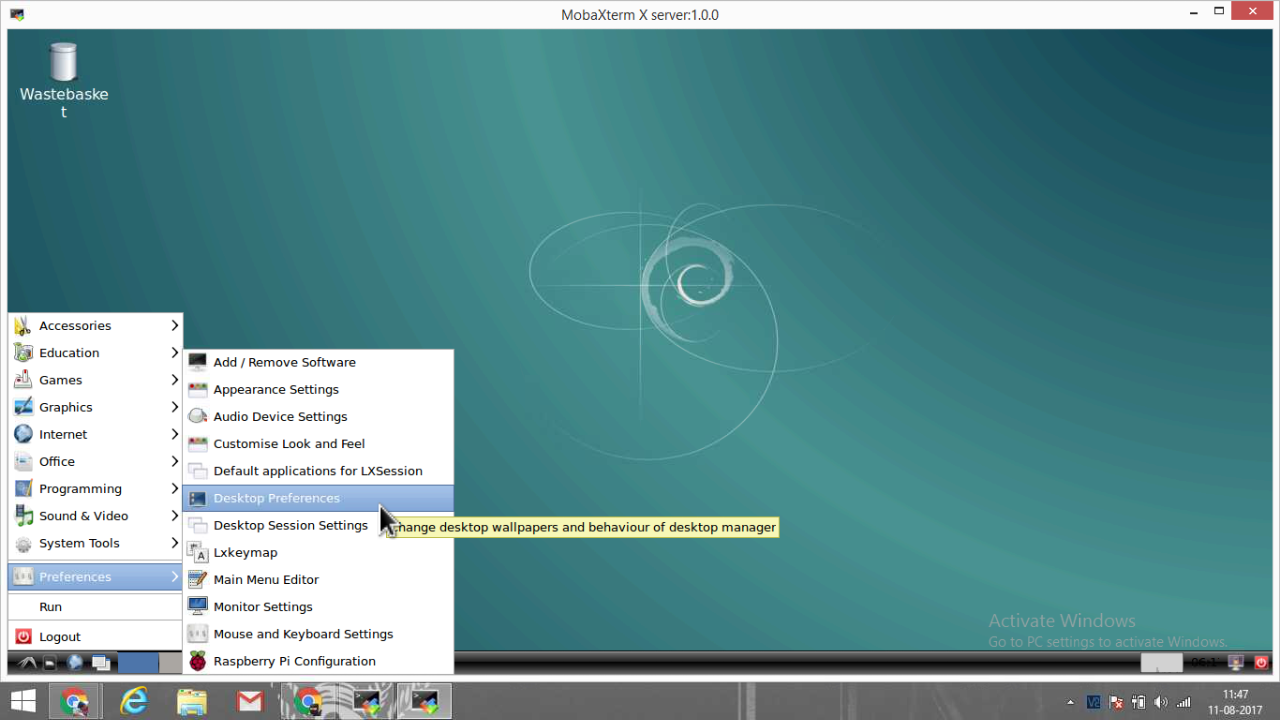
- If everything is entered correctly you will have a screen as shown in picture 10. Type "startlxde" in there.
VOILA!!!!
You will now have your Raspberry Pi's graphical Desktop environment in a new tab. Finally you can use your Raspberry Pi on your laptop screen without the need for an extra monitor, keyboard and mouse.
Troubleshooting Network (Internet Connection) Sharing Issues
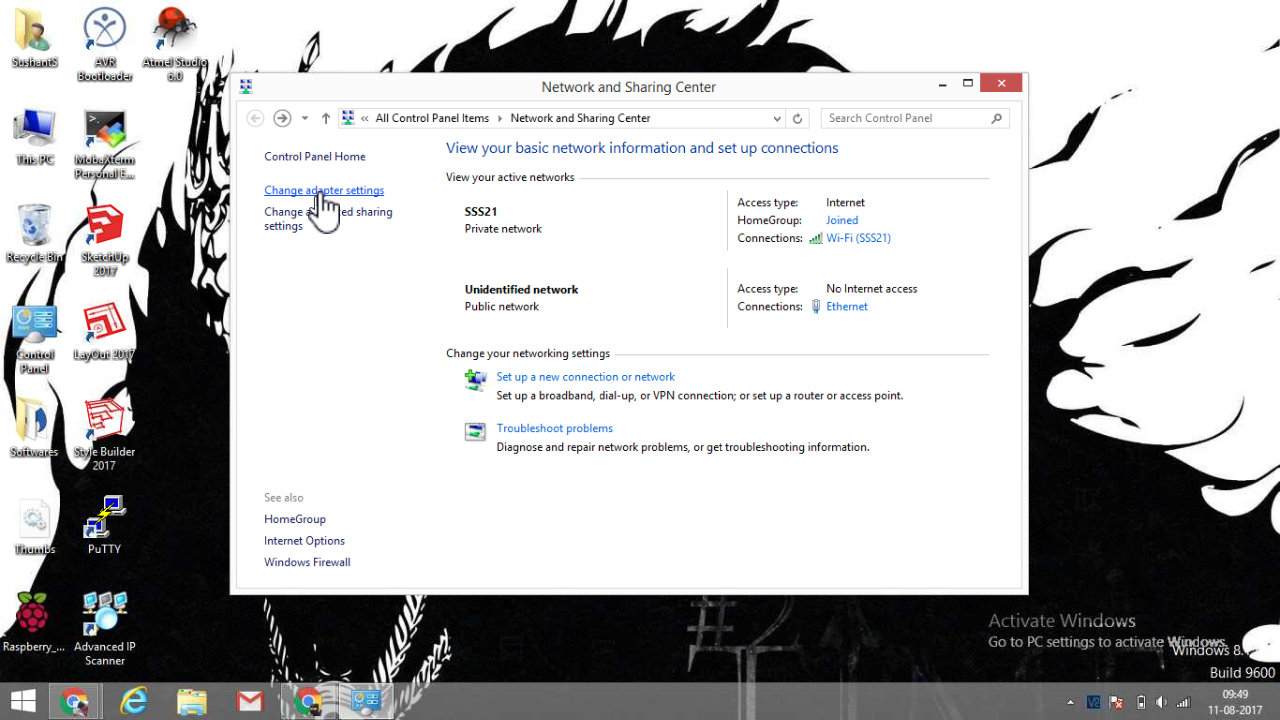
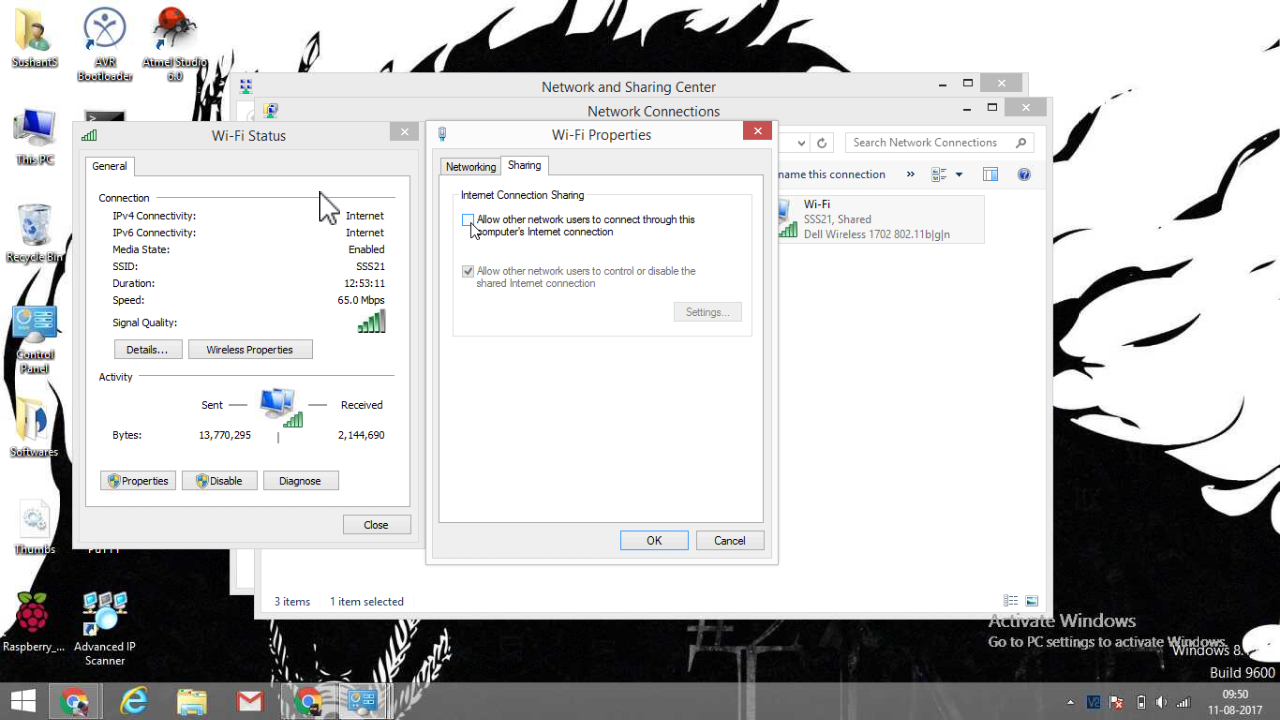
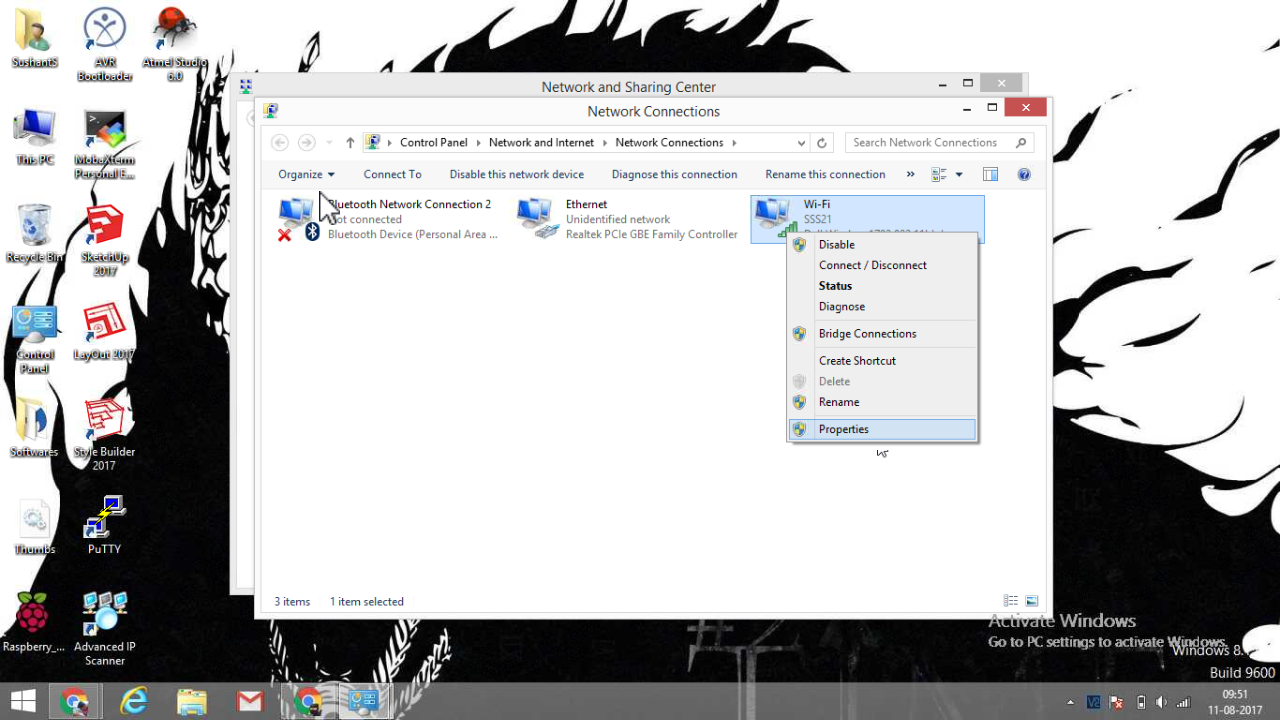
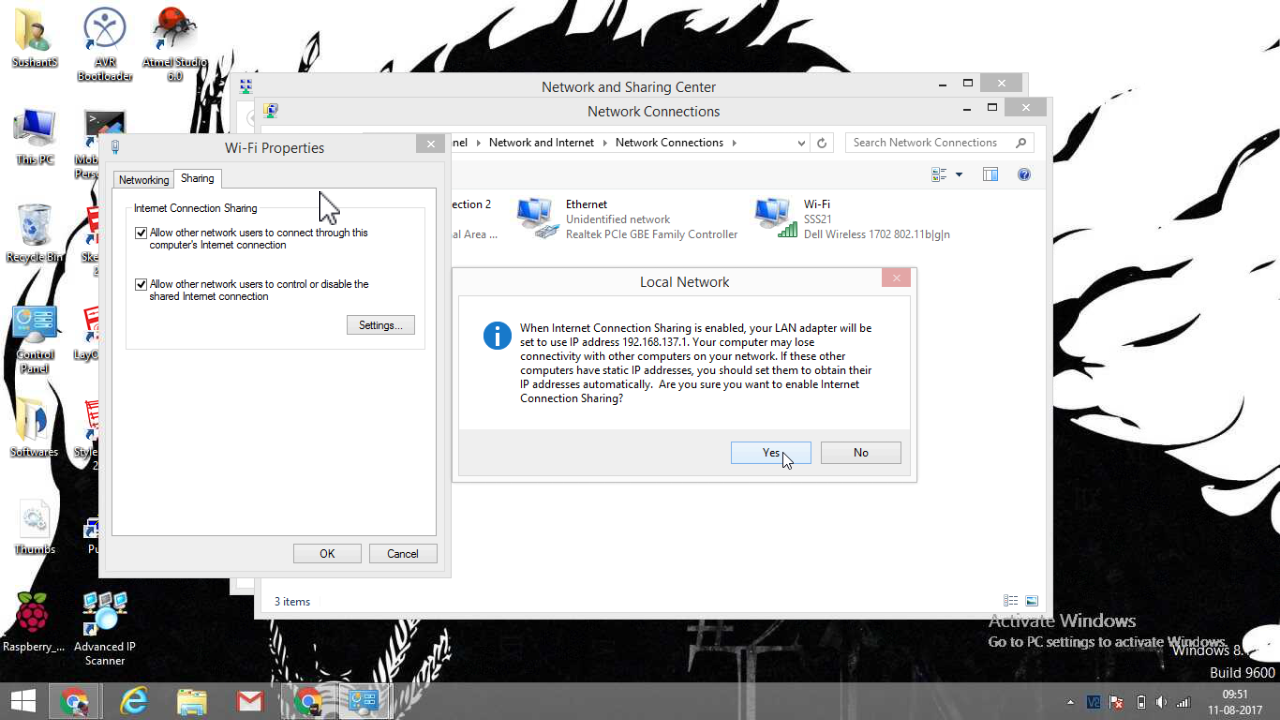
Although we have WiFi almost everywhere but still sometimes people have to use an Ethernet cable on their laptop for internet access. Use of an Ethernet for accessing Internet via a switch or a router can sometimes cause problems while creating a localized LAN for your Raspberry Pi as done in the previous steps. In such situations you find that Raspberry Pi is not being detected in Advanced IP scanner.
1. If you find yourself facing a similar problem follow these steps to troubleshoot the issues:
- Go to Network and Sharing Center. Select Change adapter settings. (picture 1)
- Select WiFi and right click on it. Go to Properties.
- Select Sharing and untick the box thereby disabling Internet sharing (picture 2).
- Now Go back and again select the WiFi adapter. Right click and select Properties (picture 3).
- Go to Sharing and tick the Sharing button. A dialog box will appear stating that the LAN adapter will be set to an IP address 192.168.137.1 . Select Yes (picture 4).
This will set your LAN adapter with an IP address of 192.168.137.1 and you can now create a localized LAN to connect your Pi.
The problem is the DHCP server. When you use the Ethernet port for Internet access, your laptop is assigned an IP address automatically from the network's DHCP server. However when you connect to a WiFi network and create a localized LAN (basically you configure your laptop to act as a DHCP server), the LAN adapter is still configured to obtain an IP address from the previous Ethernet network and hence it is not able to give an IP address to your Raspberry Pi. So basically the your Laptop is not enabled as a DHCP server.
To configure your laptop as a DHCP server for the localized LAN you need to disable Internet Sharing of your WiFi once and enable it again (this is same as following the above steps). After doing this your laptop will now act as a DHCP server (via the LAN port), assigning IP addresses in the range of 192.168.137.x (NOTE: 192.168.137.1 is the LAN adapter's address) to the peripherals connected to the localized LAN.
After you are finished working with Pi and disconnect your local LAN and use an Ethernet for Internet connection you might face problems connecting to the Internet again because the LAN adapter has been configured to use 192.168.137.1 as its address. You can simply resolve this by right clicking on the Network icon in the toolbar and troubleshooting the issue. DHCP will then be enabled for your Ethernet.
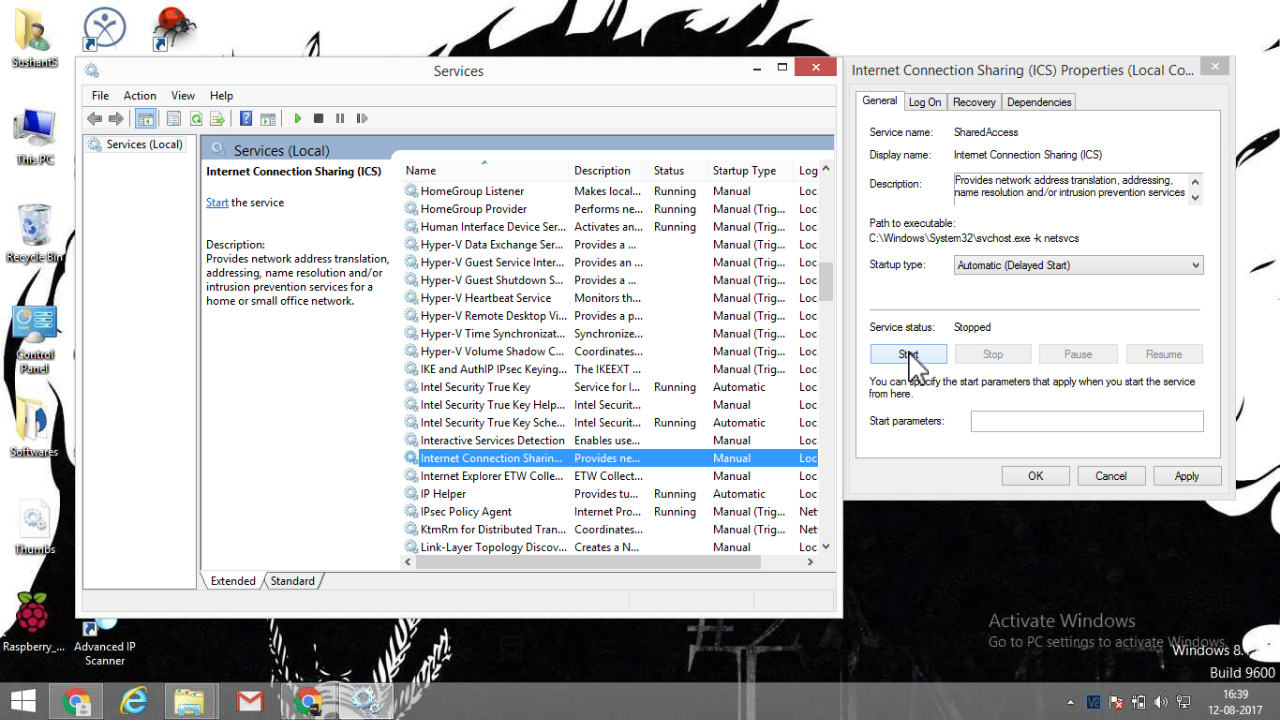
2. Even after following the above steps if the issue persists you could try this:
- Run --> services.msc --> Internet Connection Sharing.
- Set the Startup type as Automatic (Delayed Start).
- Stop the service and Restart it again.
- Restart your laptop and wait for sometime because the Internet Connection Sharing startup has been delayed.
- Repeat the first solution and try Internet Sharing with the WiFi again.
Ending Credits
I know that this has been a very long post and I'm really sorry for that. Thanks a lot for bearing some typo and grammatical errors (though I've tried a lot to minimize them) and also for reading this far. The reason this post is so long is because it is targeted towards BEGINNERS. When I was starting with Raspberry Pi I had a lot of trouble gathering learning resources even for basic operations. I hope this post of mine will eliminate that issue and help others with faster learning of such a great resource.