How to Connect FlySky Transmitter to Any PC Simulator (ClearView RC Simulator) || Without a Cable
by ThiệnT8 in Circuits > Remote Control
13133 Views, 9 Favorites, 0 Comments
How to Connect FlySky Transmitter to Any PC Simulator (ClearView RC Simulator) || Without a Cable

Guide to connect FlySky I6 with a computer to simulate flight for beginners of wing aircraft.
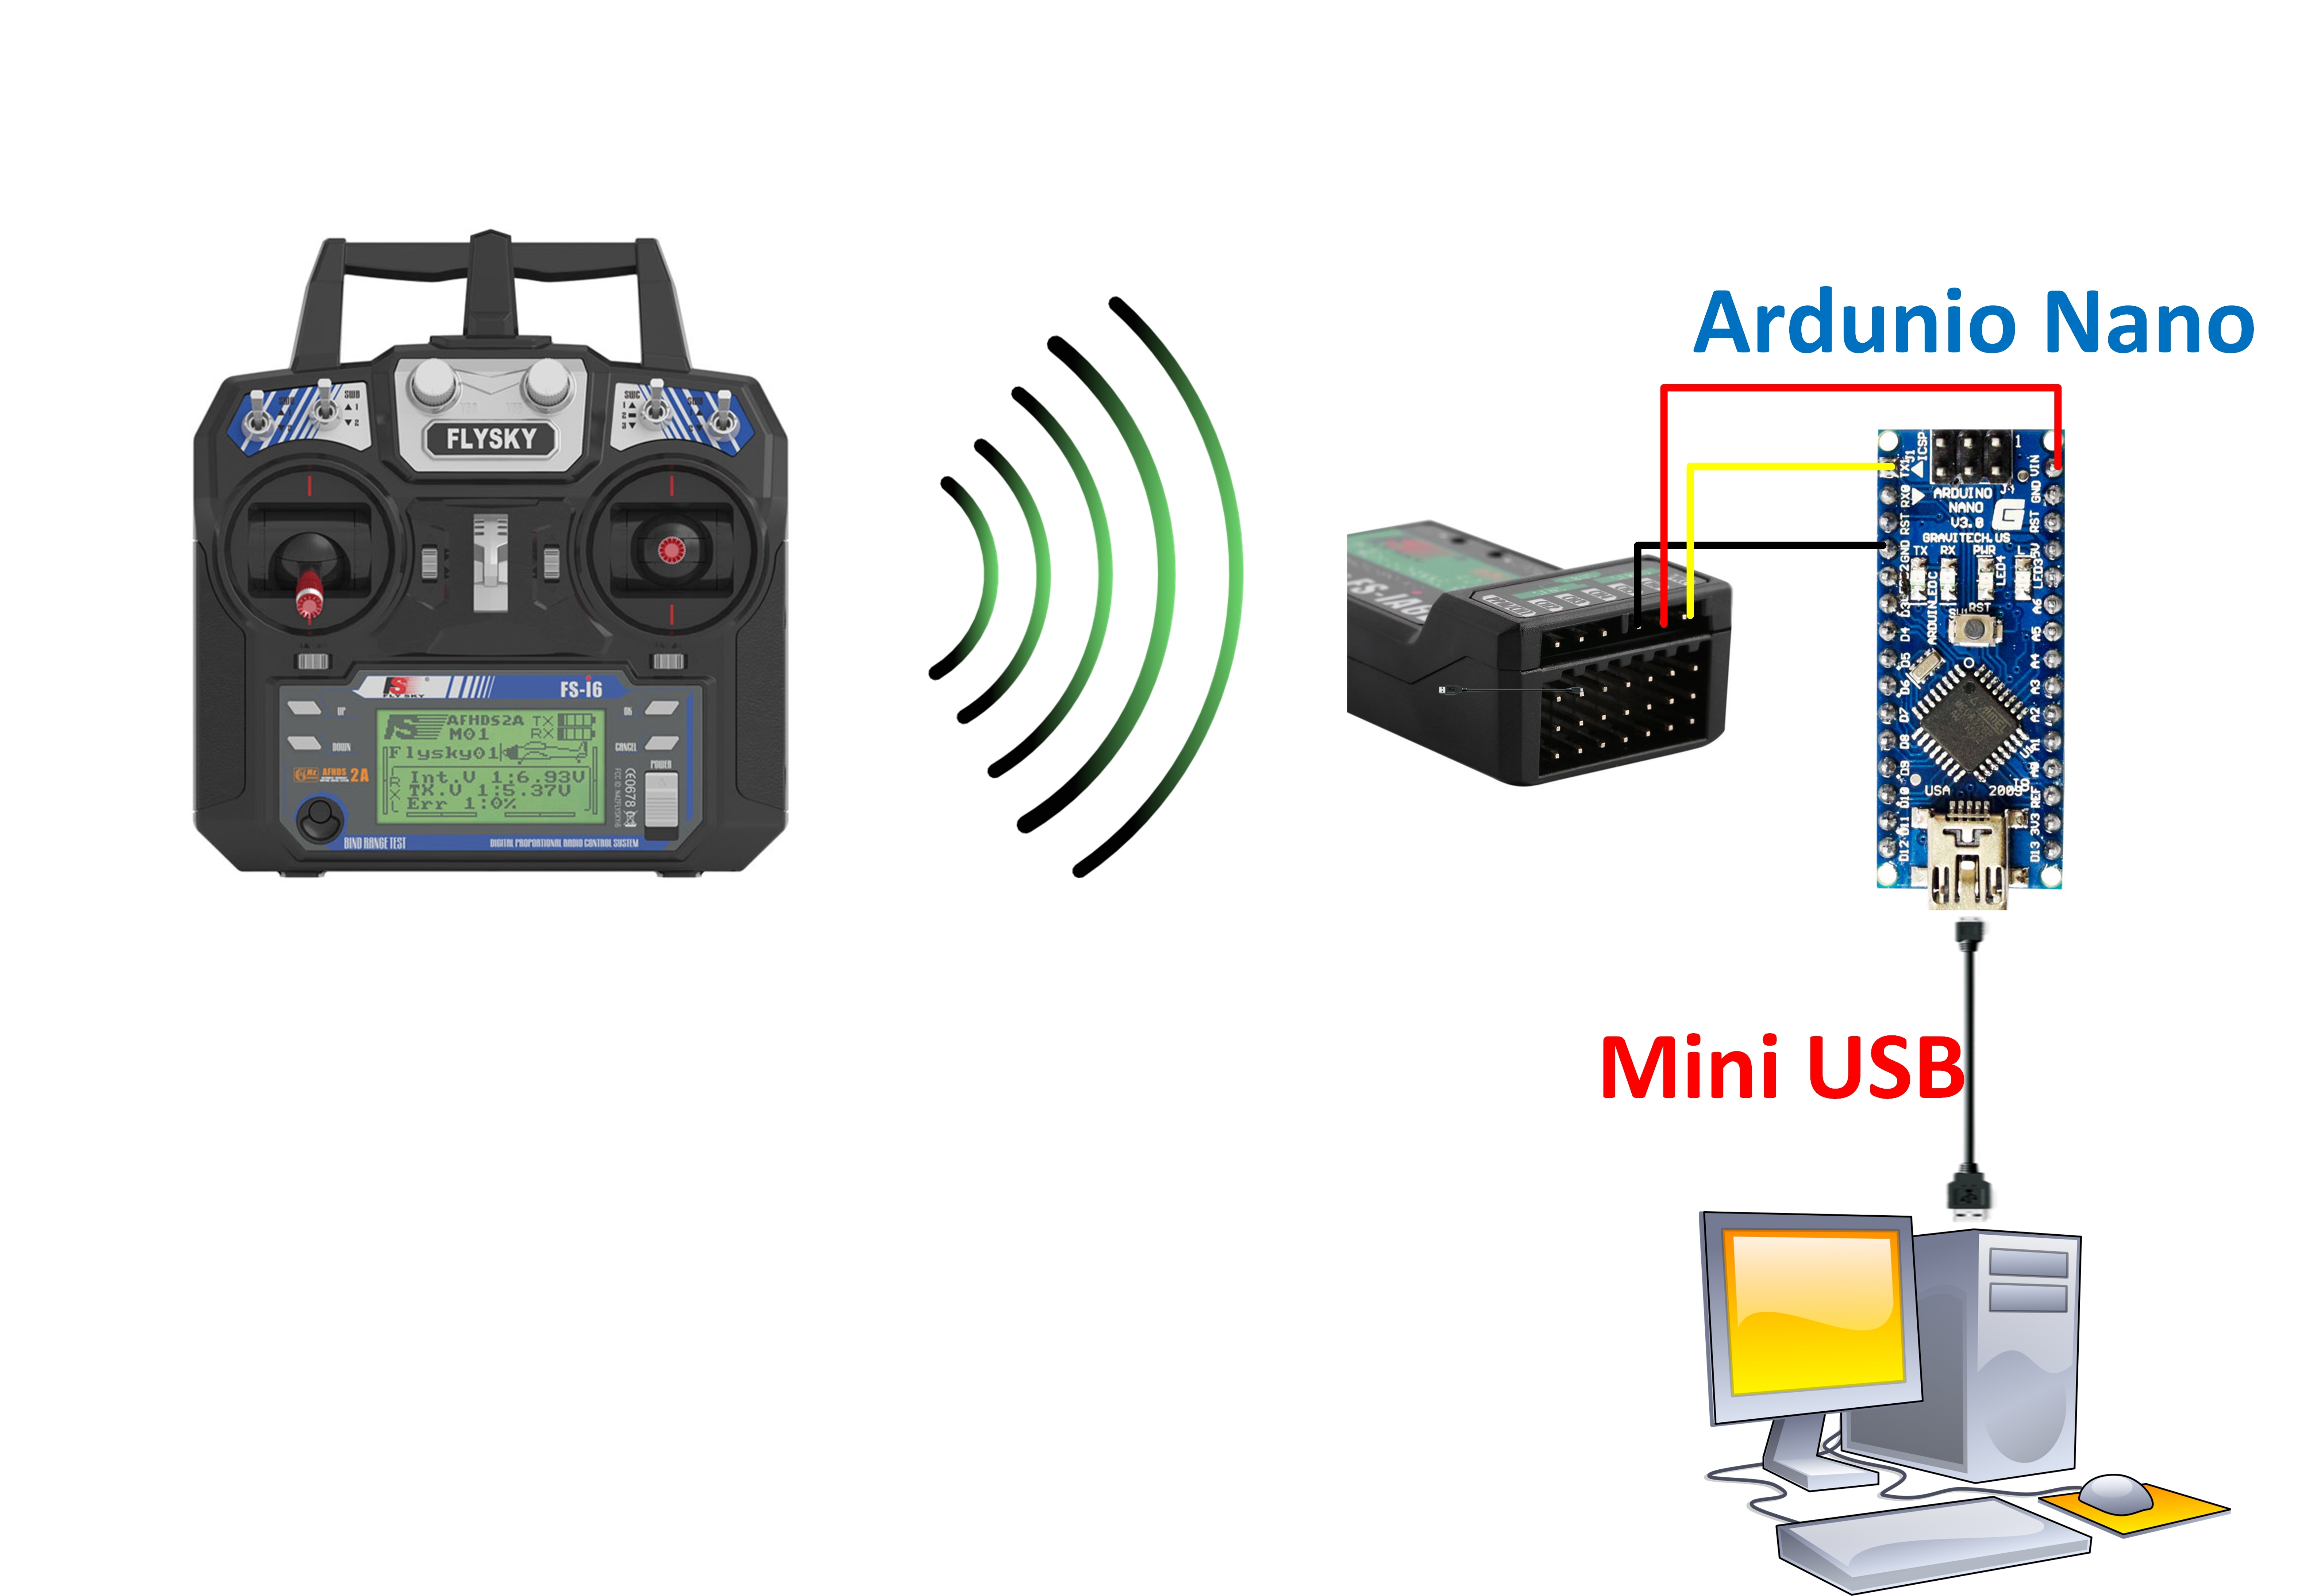
Flight simulation connection using Flysky I6 and Arduino does not require the use of simulation cables.
Materials


Components used:
- FlySky I6 TX
- FSIA6B RX
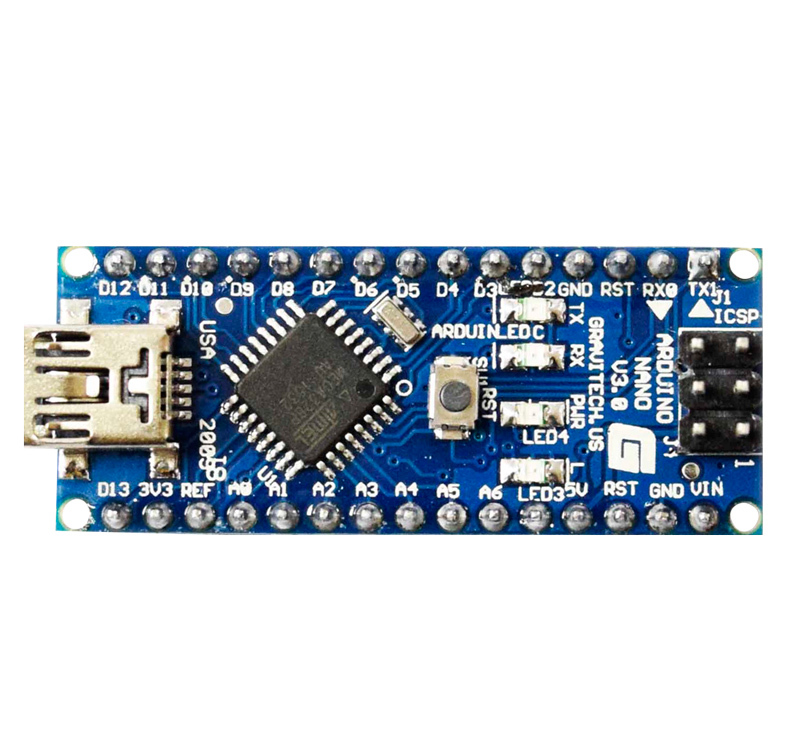
- Arduino Nano
Wire Connection

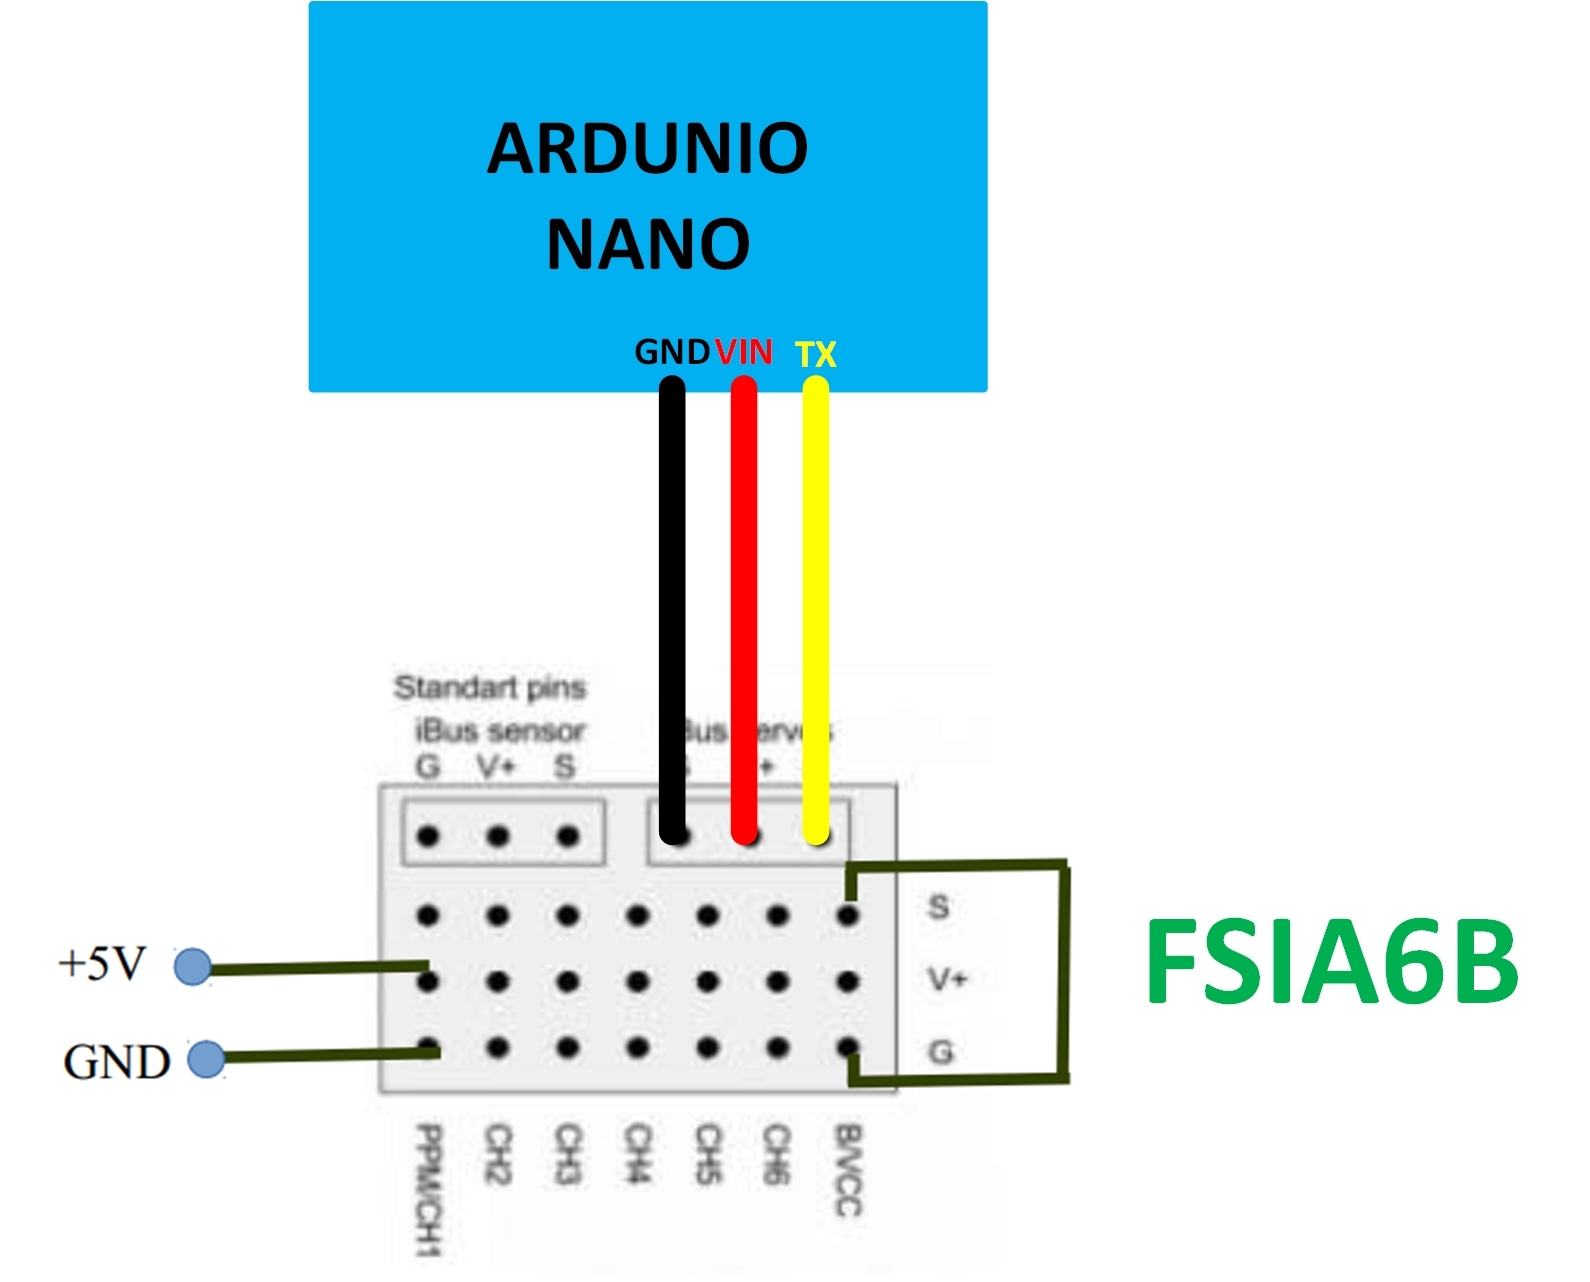
Proceed with wiring between FS IA6 and Arduino Nano:
FSIA6B | Arduino
- VCC -> VIN
- GND -> GND
- Signal -> TX
Load Firmware to Arduino
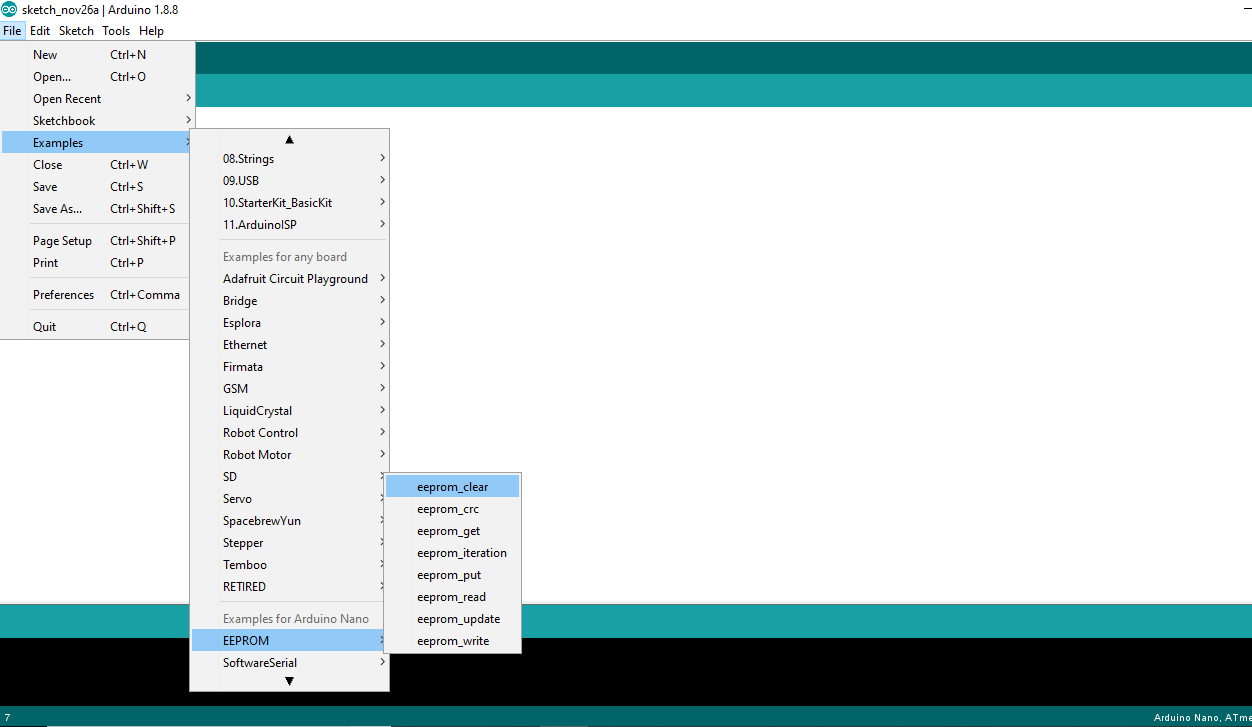
- Open Arduino Compiler
- Load to: File -> Examples -> EEPROM -> eeprom_clear
- Download Firmware to Arduino
Download and Setup Software


Download and setup some Software
Software link:
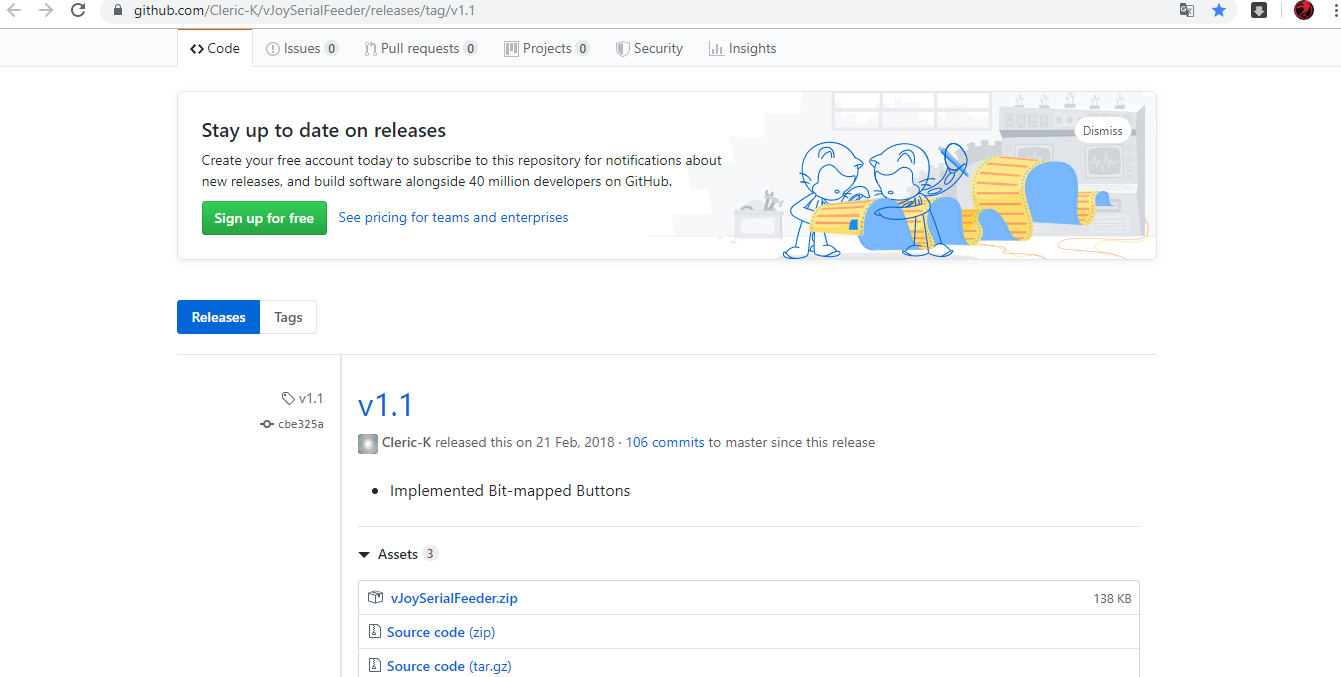
- vJoySerialFeeder V1.1: https://github.com/Cleric-K/vJoySeria...
- vJoy software: http://vjoystick.sourceforge.net/site...
- ClearView RC Flight Simulator (simulation software): http://vjoystick.sourceforge.net/site...
Connect Arduino to VJoy and Setup Channels

- Open vJoySerialFeeder V1.1 and connect to Arduino through COM Port
- Adding 4 channels in vJoySerialFeeder is equivalent to 4 channels of transmitter(FSI6)
- Open ClearView RC Flight Simulator and setup vJoy
Let Flight!!!


Choose plane and fly!!!