Carve a Portrait Pumpkin
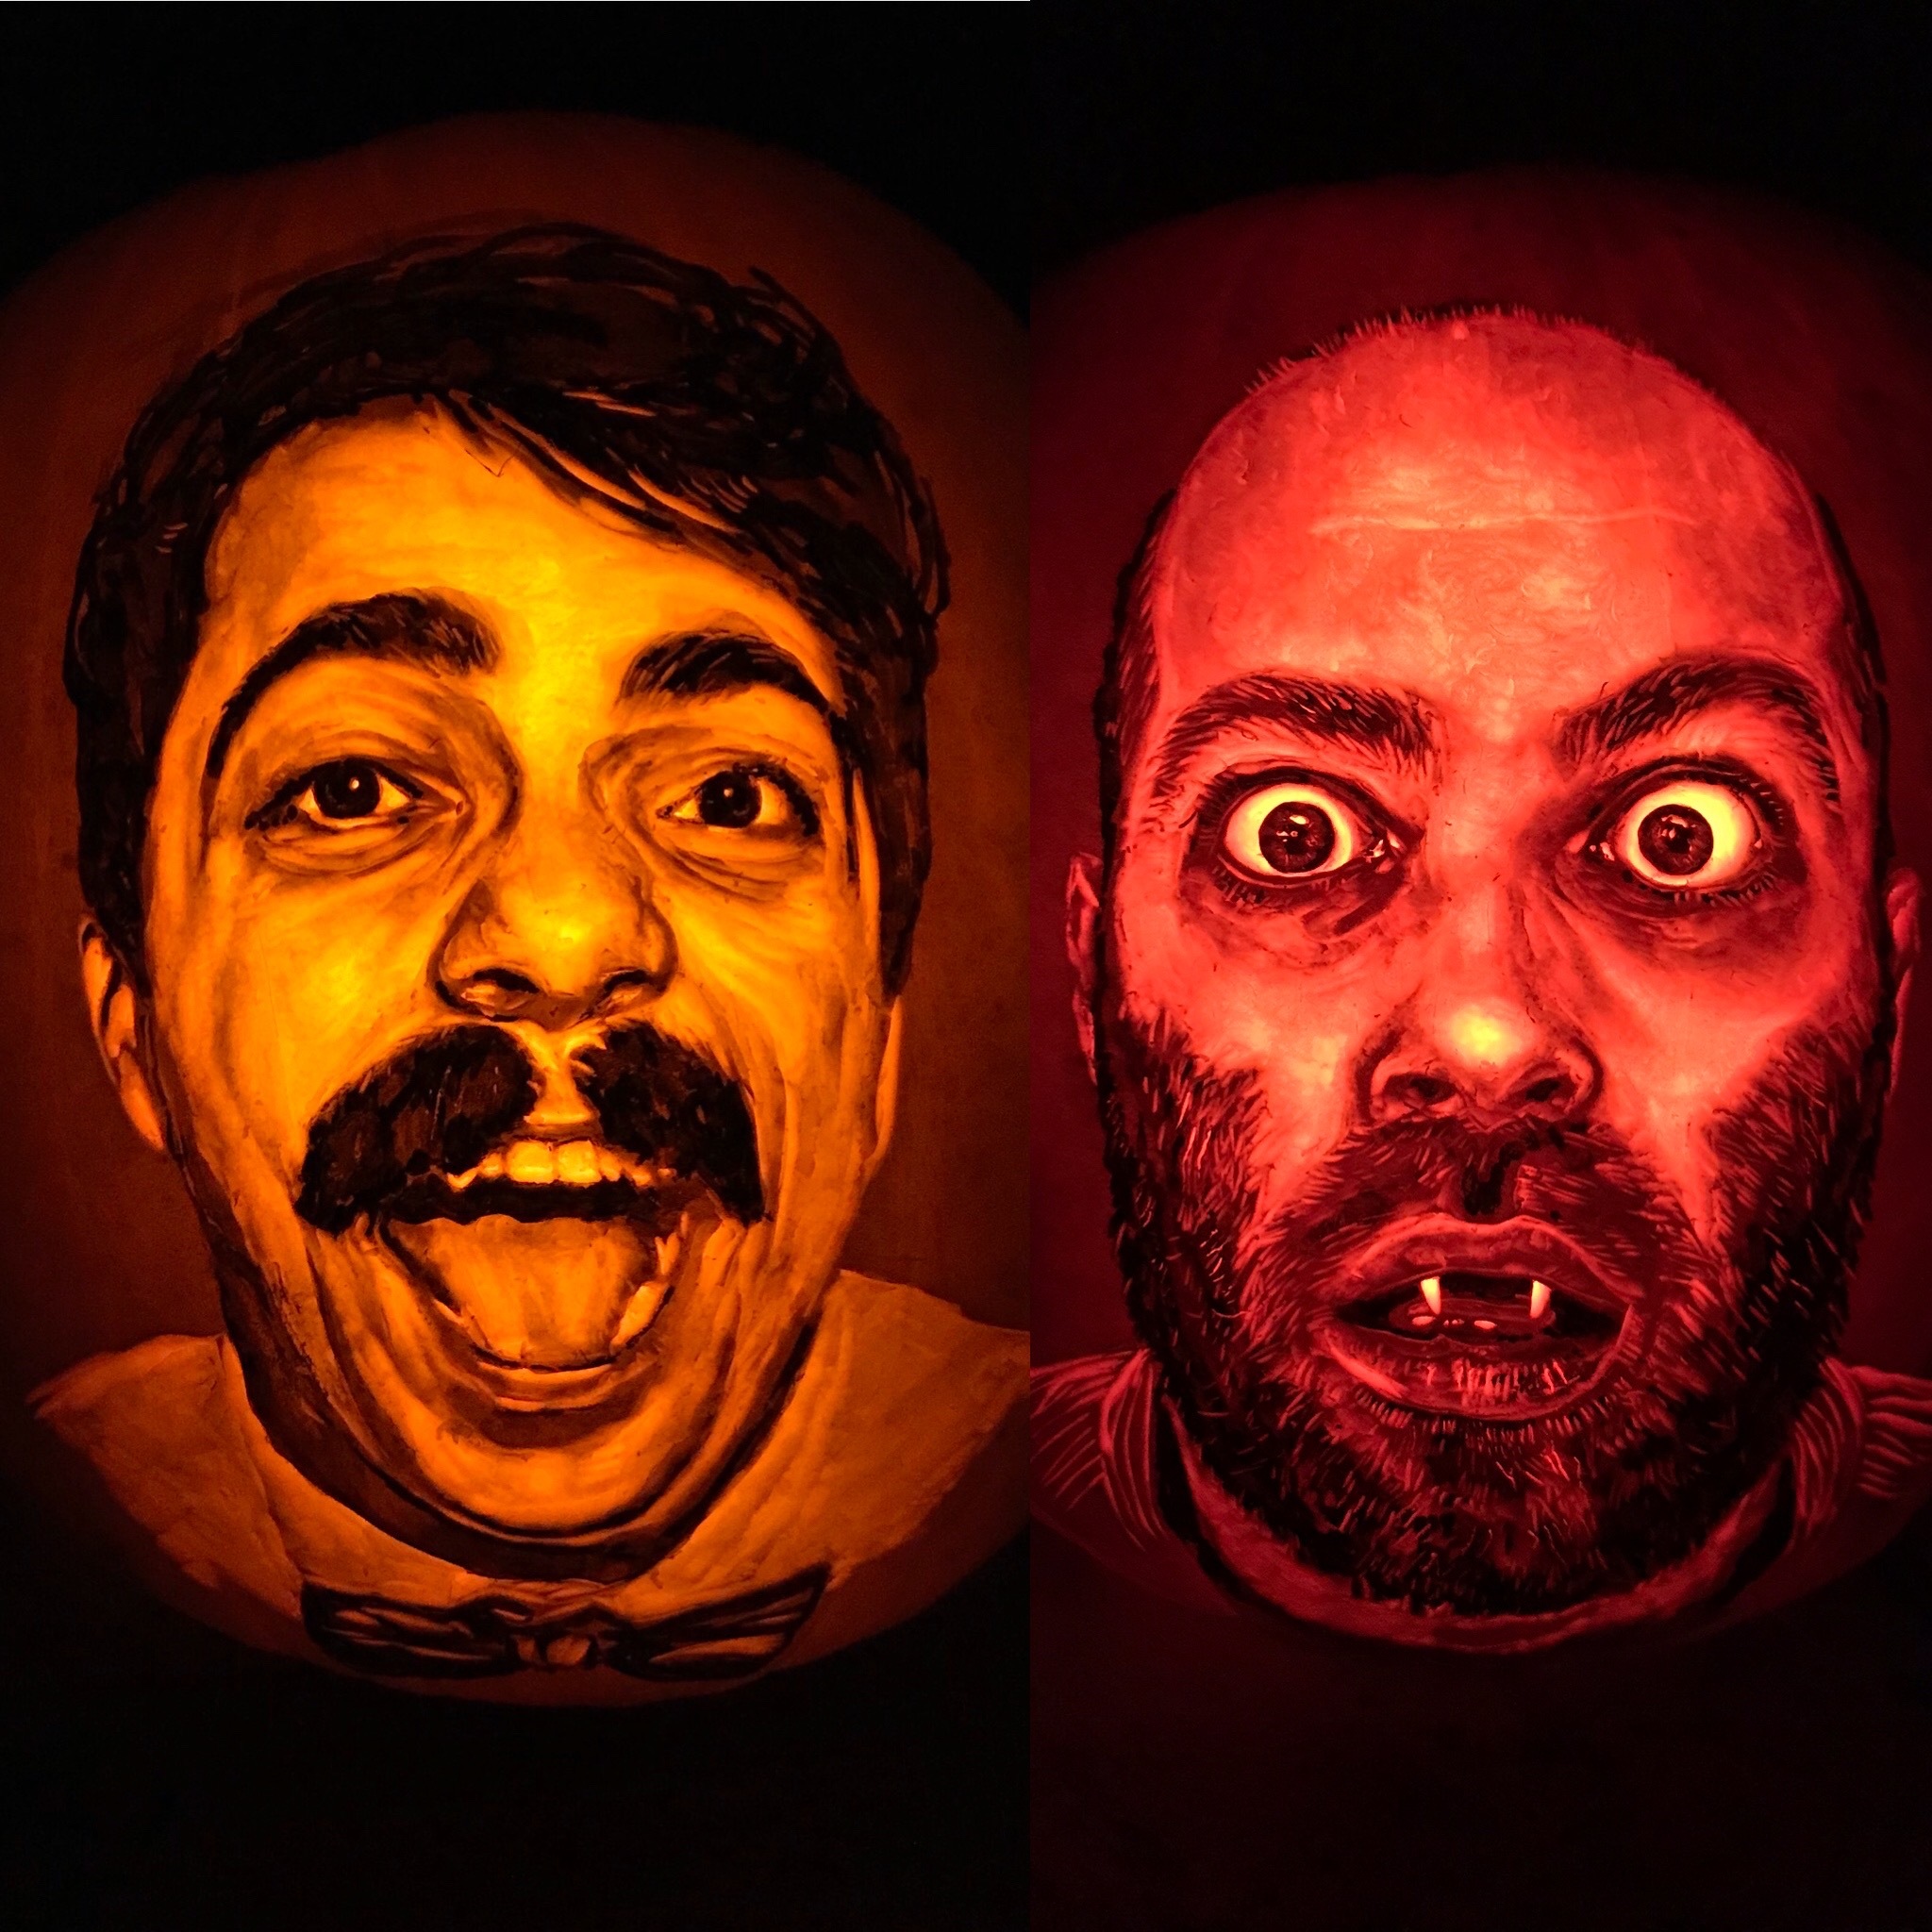
Classic jack o'lanterns are fun, but you can take it up a notch by carving a portrait into a pumpkin! I did two this year, but will be using mostly photos of one of them to illustrate this Instructable.
Supplies
I use a variety of tools to carve pumpkins. I've linked out a few more specialized items below, in case you're interested in getting your own (they're all pretty cheap and available at most art supply and craft stores)
- Pumpkins
- Stencil
- Saral transfer paper
- Tape
- Pen
- Linoleum cutter
- Pottery tools, large and small
- X-acto knife
- Permanent marker
- Lantern, flashlight, or phone - some kind of light source
- Optional: Fixatif spray, latex gloves
Create a Stencil

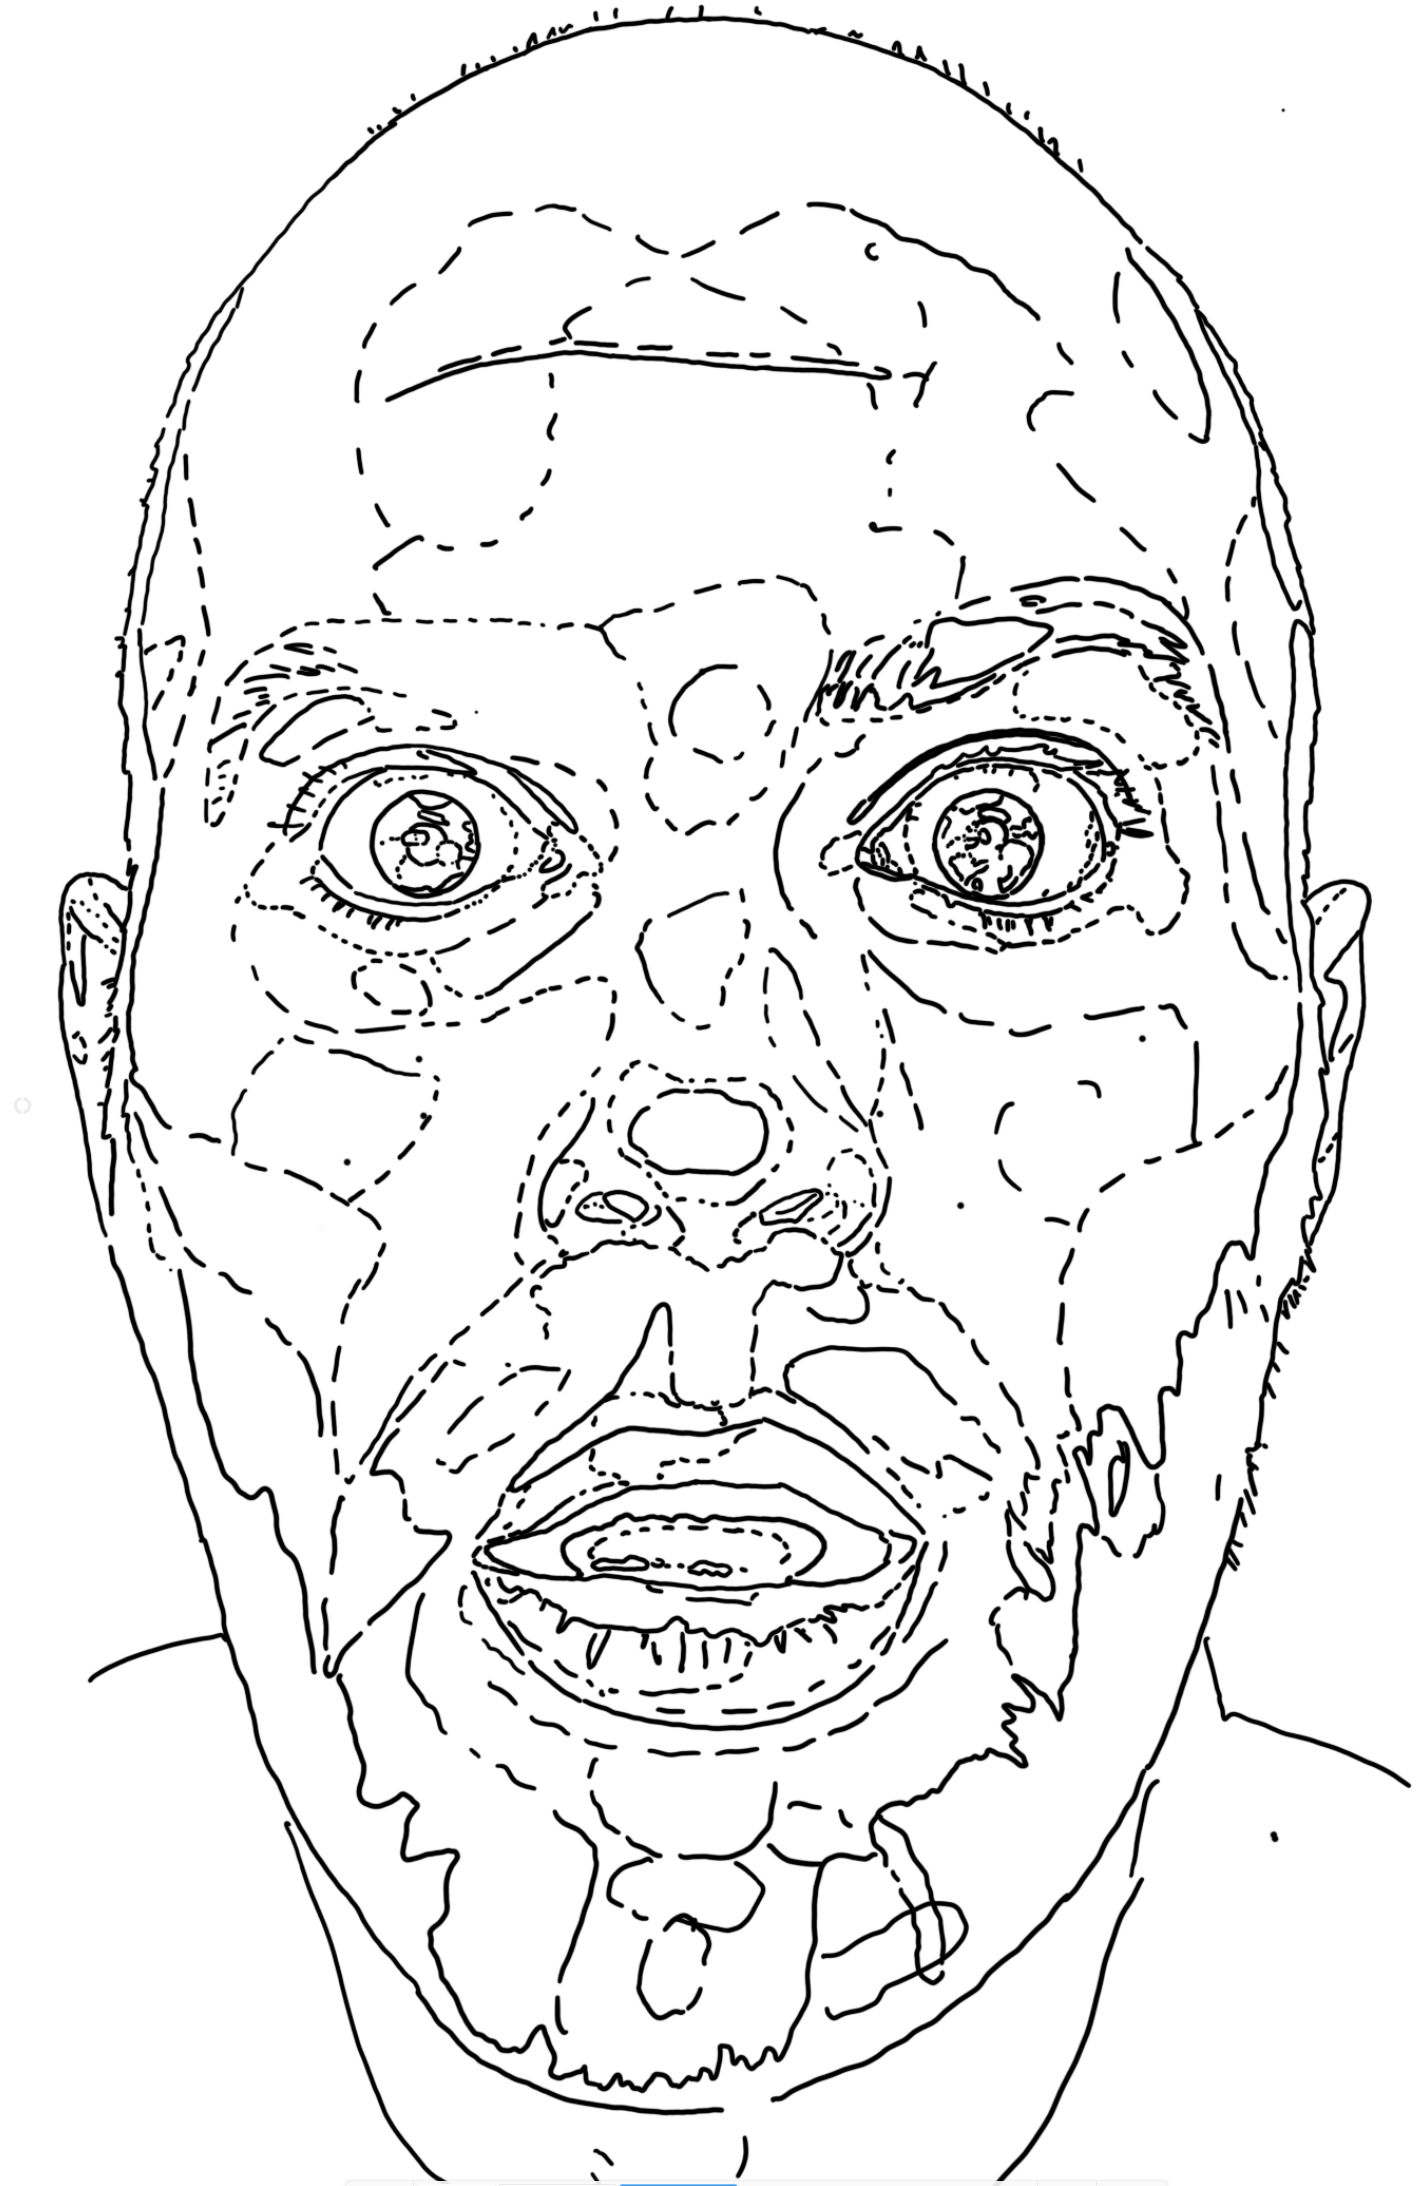

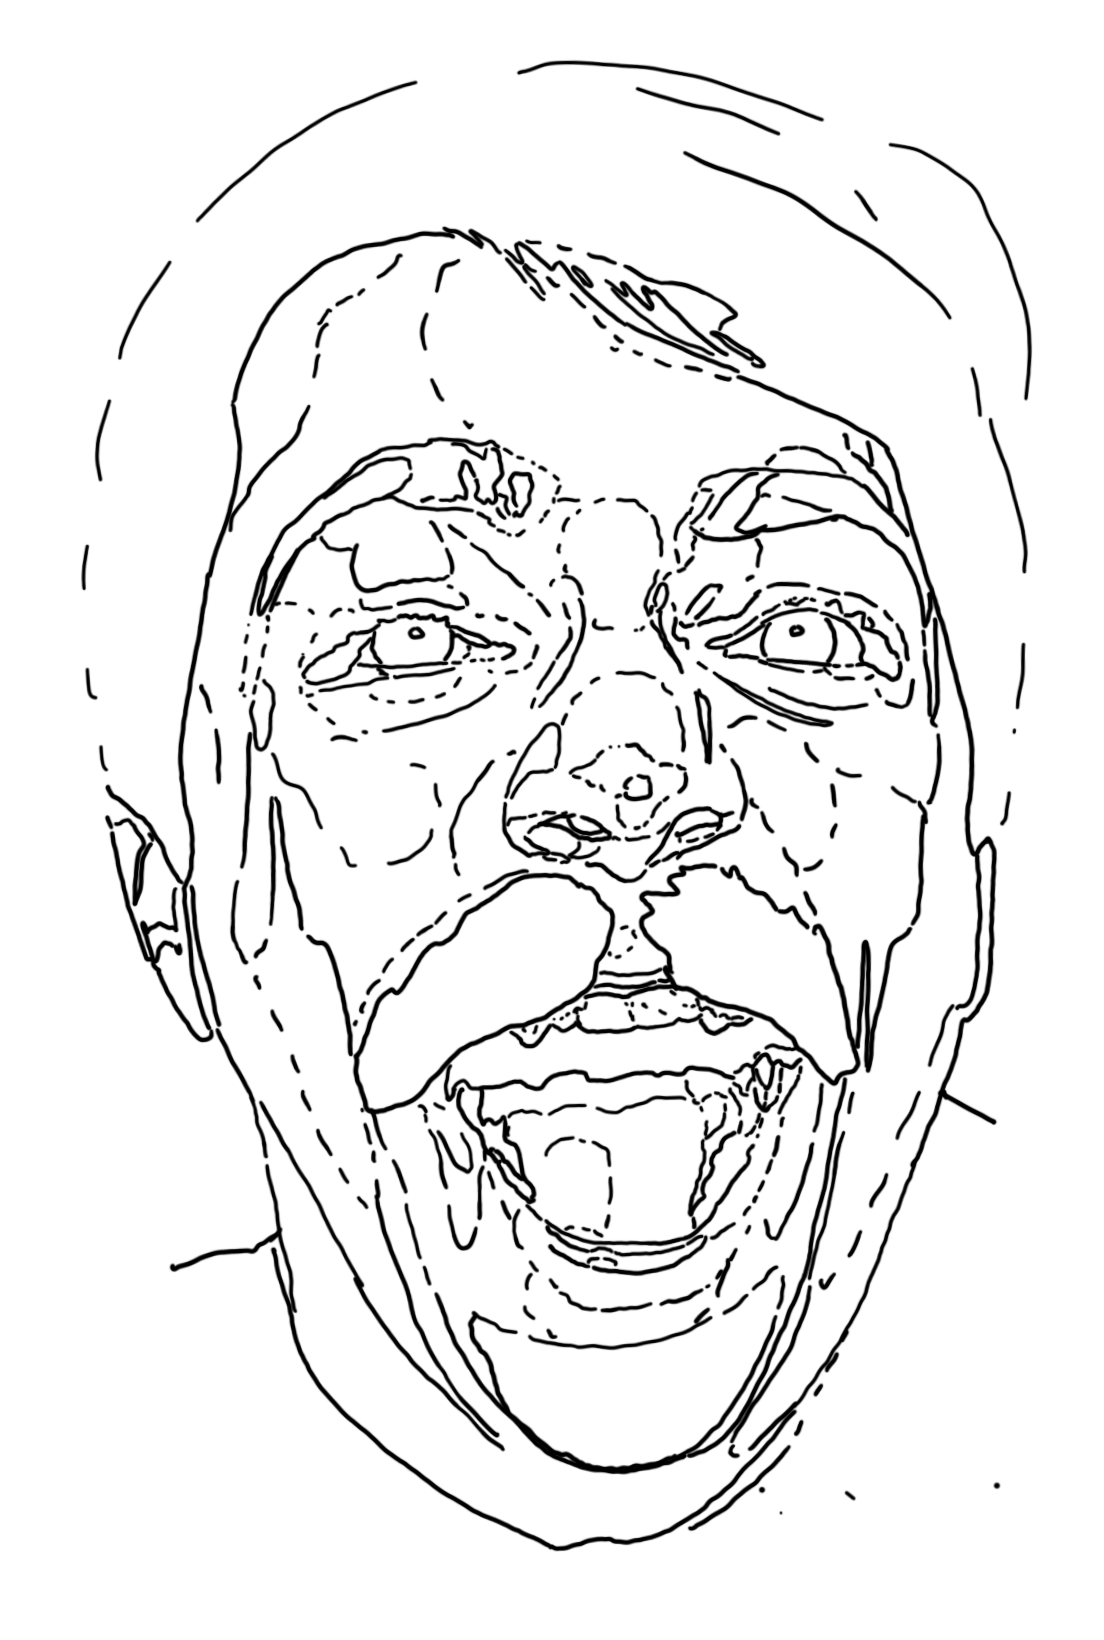
Choose a source photo, and make a stencil. I used to do this by physically tracing out areas of light and dark over a printed photo in sharpie, and then tracing the sharpie lines onto tracing paper. More recently, I've started using a photo app on my tablet and tracing the lines onto the photo digitally (I use Autodesk Sketchbook, but most photo editing apps will work).
I find it can be helpful to increase the contrast of the photo to create stronger areas of lights and darks, but it depends on the photo. I like to draw solid lines over areas where light and dark are distinct (like where the hair meets the face, the irises and pupils, etc) and dotted lines over more gradual light-dark shifts. But play around with it and do what works for you!
Choose & Prepare Your Pumpkin
.jpeg)
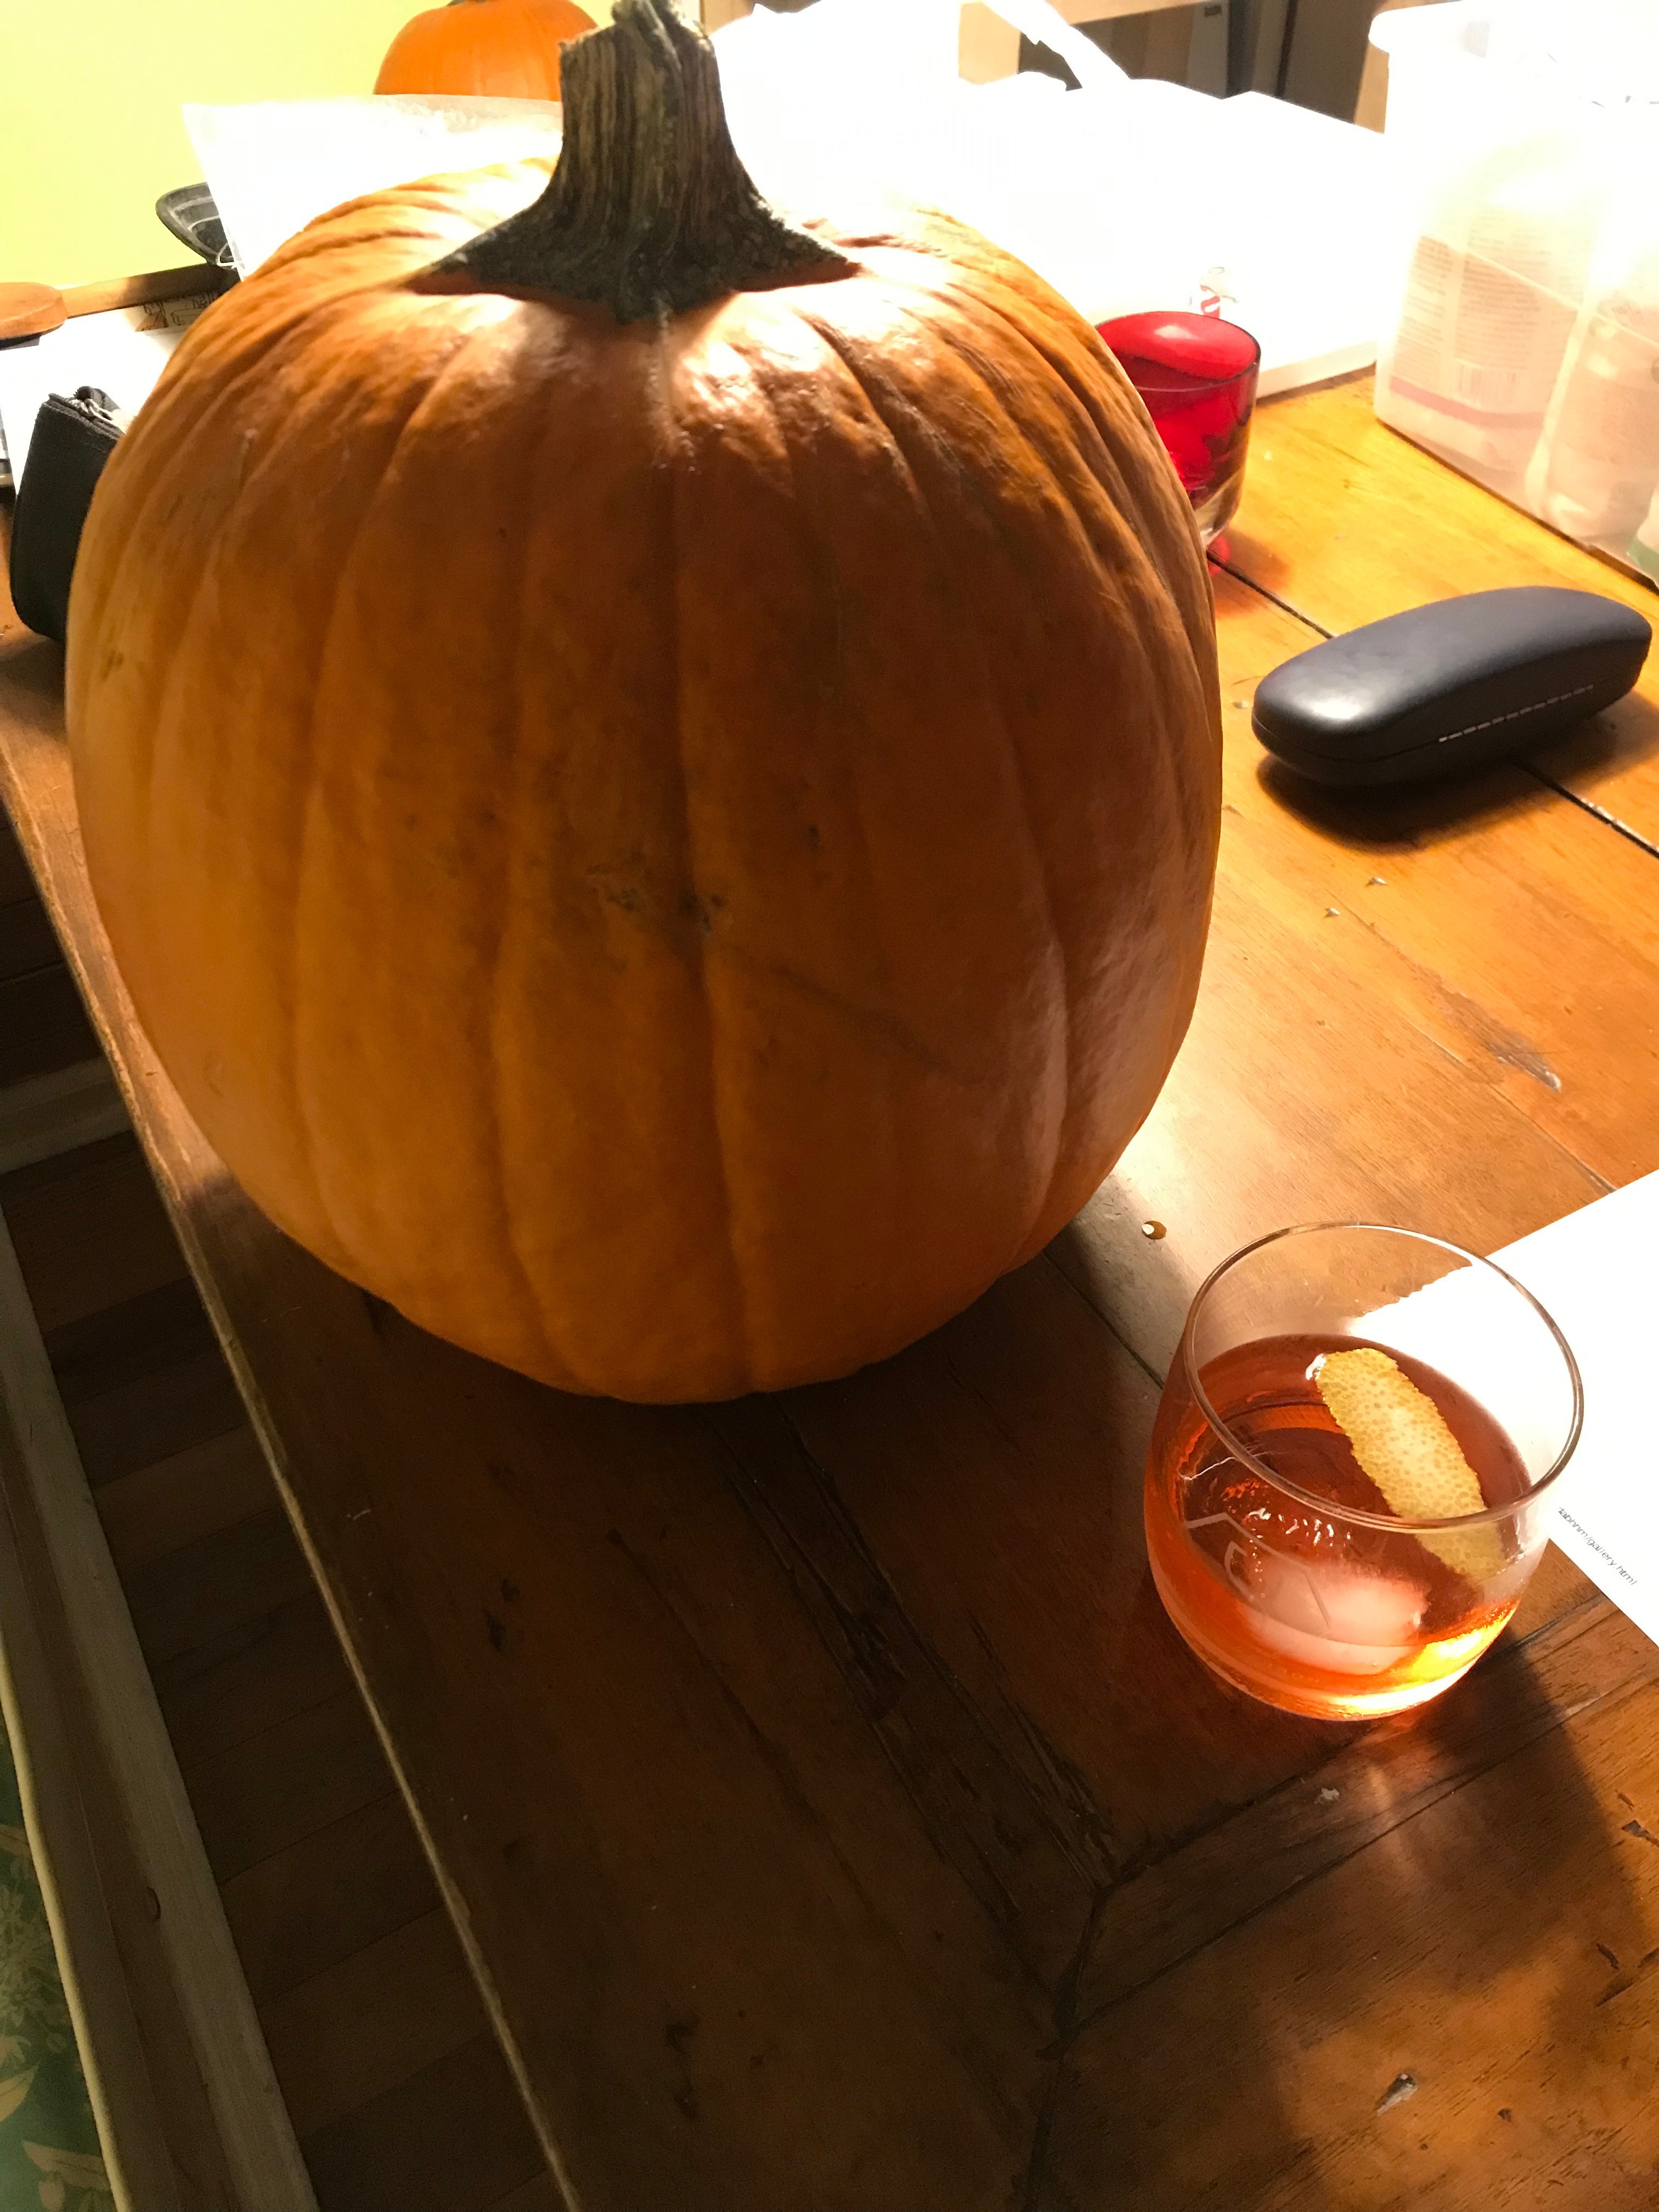
When you're choosing your pumpkin from the supermarket or pumpkin patch or wherever you get your pumpkins, look for one that's big enough for your design, and as smooth as possible. All pumpkins have ridges, but some have deep ones and some are relatively flat - go for the flattest, smoothest one you can find. It will make applying the stencil and carving the pumpkin much easier.
When you've chosen a pumpkin, wipe it down with a damp paper towel to get the pumpkin patch dirt off of it, and then dry it off. You're now ready to apply your stencil - I recommend doing this while drinking a cocktail, as pictured!
Apply the Stencil
Tools:
- Stencil
- Saral transfer paper
- Tape
- Pen
- Fixatif spray (optional)
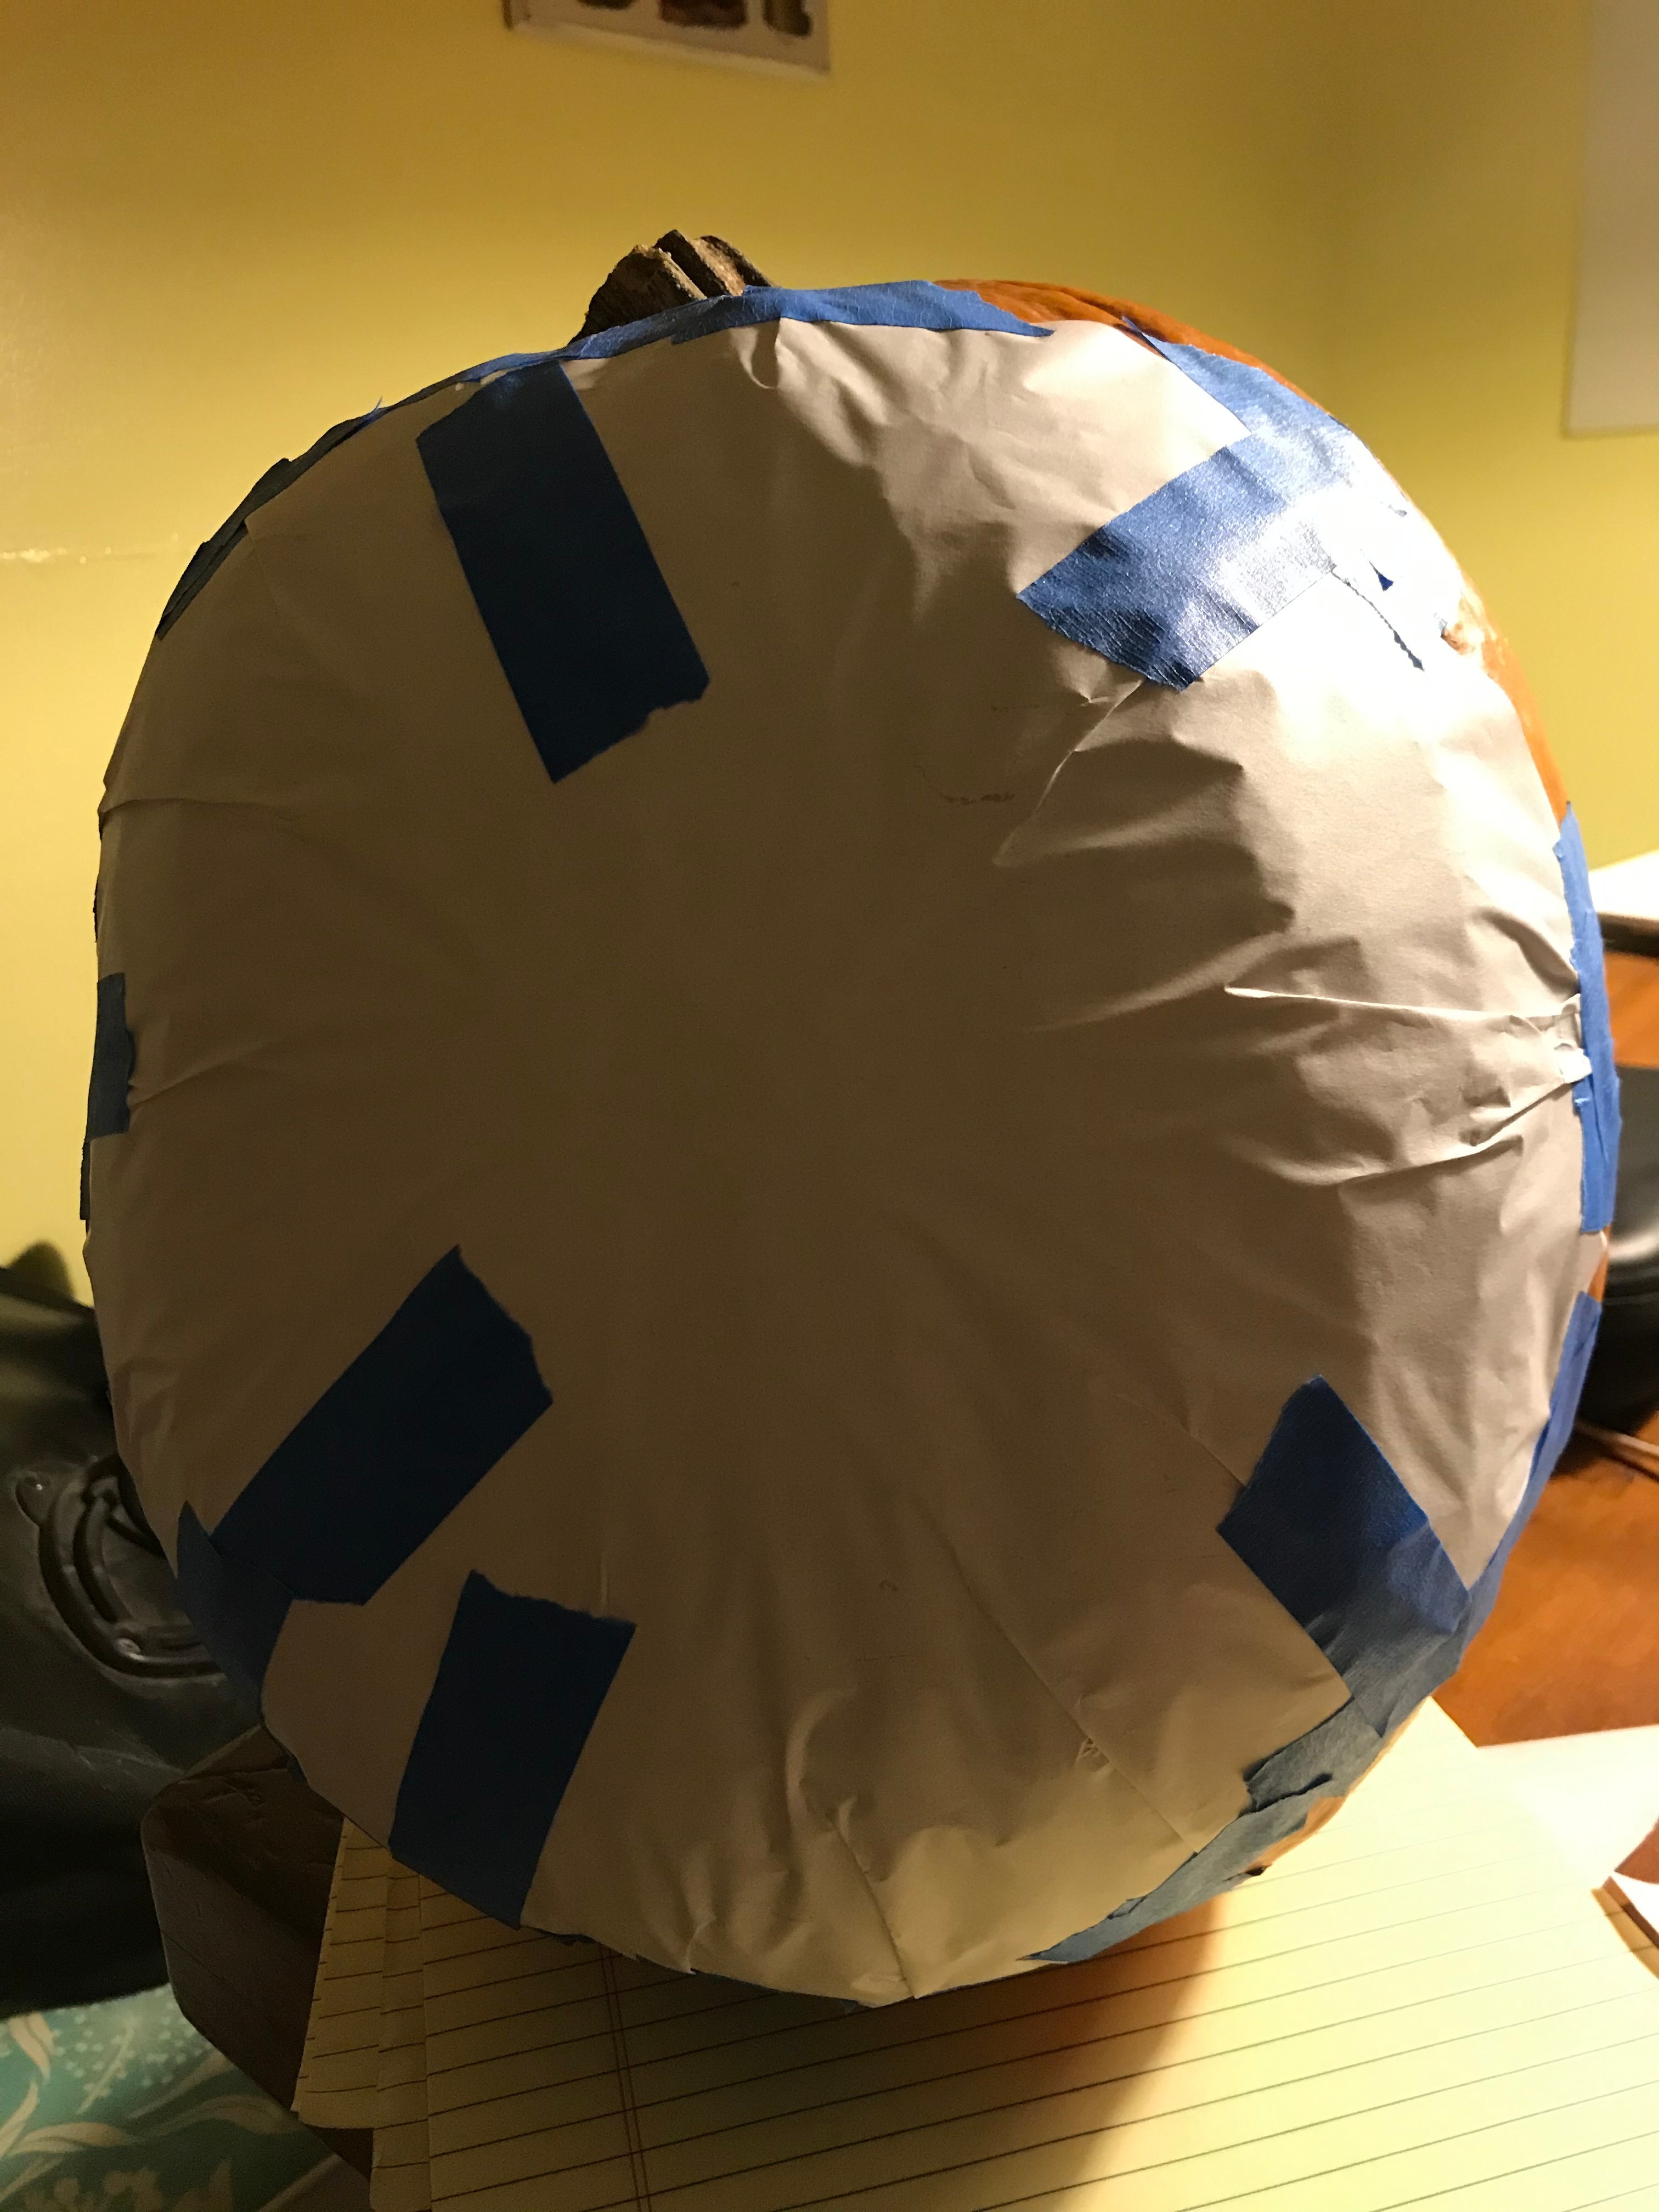
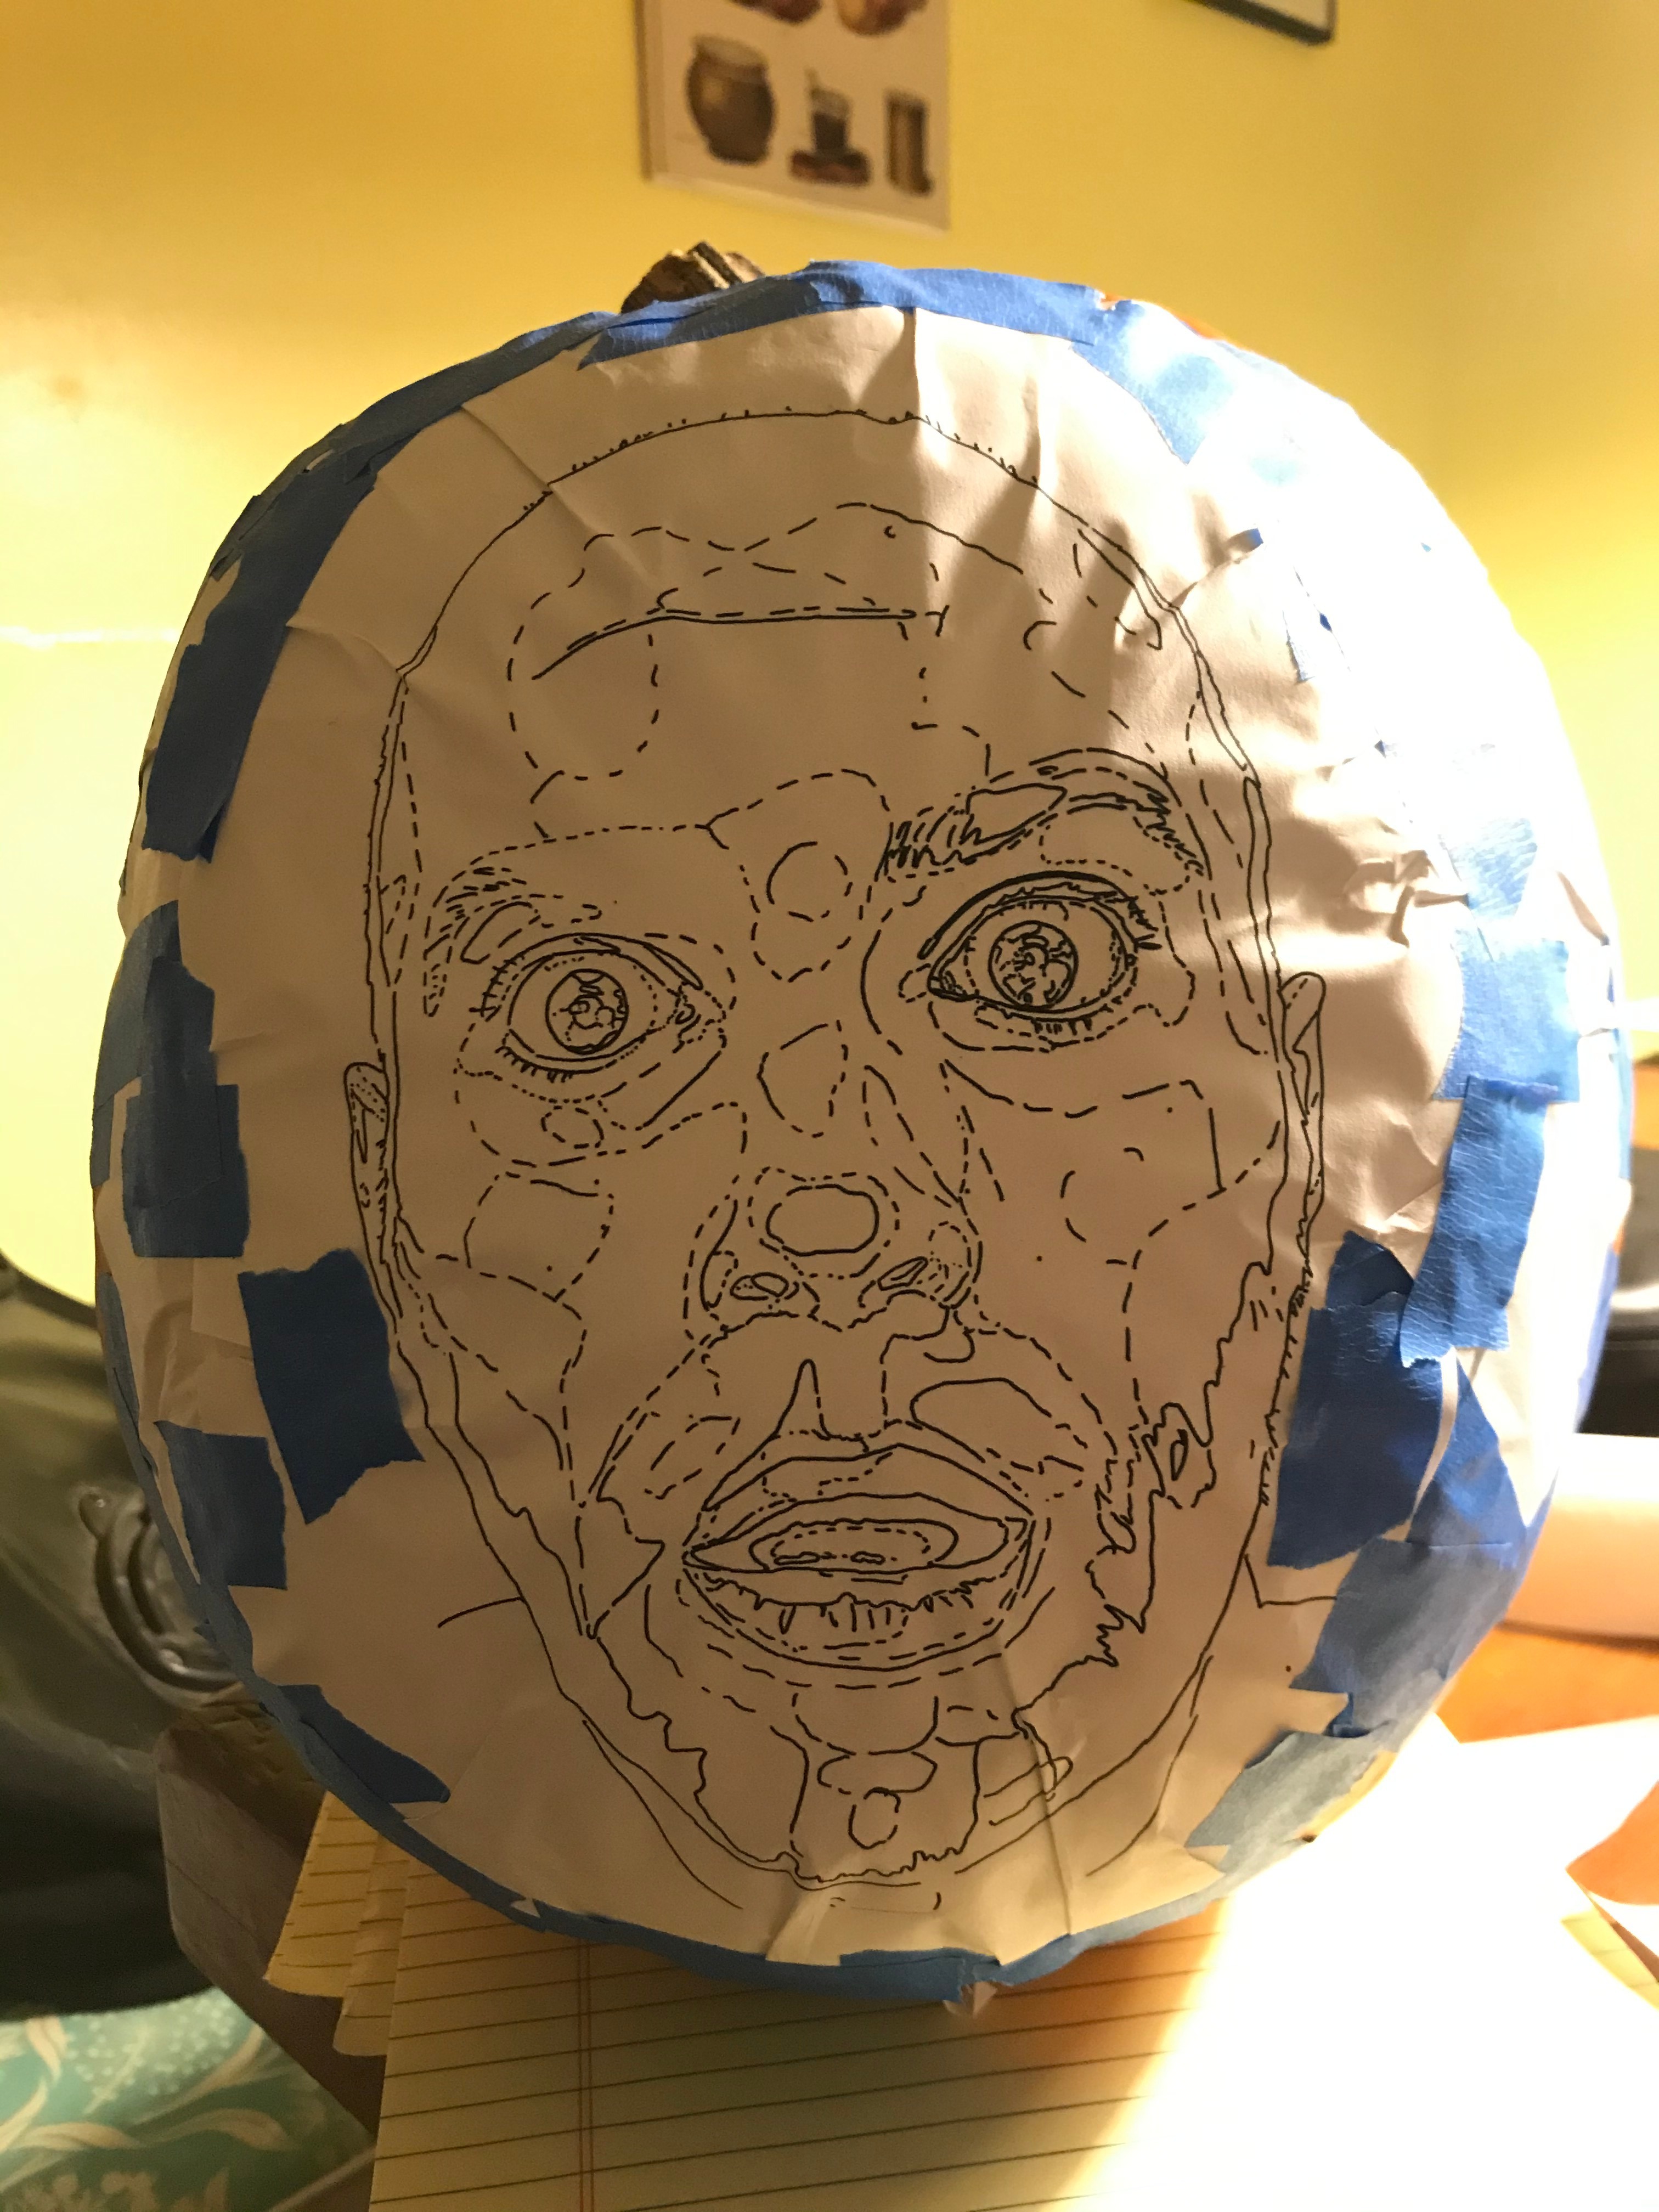
Take a piece of Saral paper and tape it onto your pumpkin. It's tough to put a flat sheet on a round surface, so just do your best, folding creases into the sheet as necessary. Once the Saral is on, do the same with your stencil, taping it down flat on top of the transfer paper. When you make creases, try to do it in areas without tons of detail - in this photo, for example, it was much easier to crease the stencil along the top edge of the head, than near the eyes.
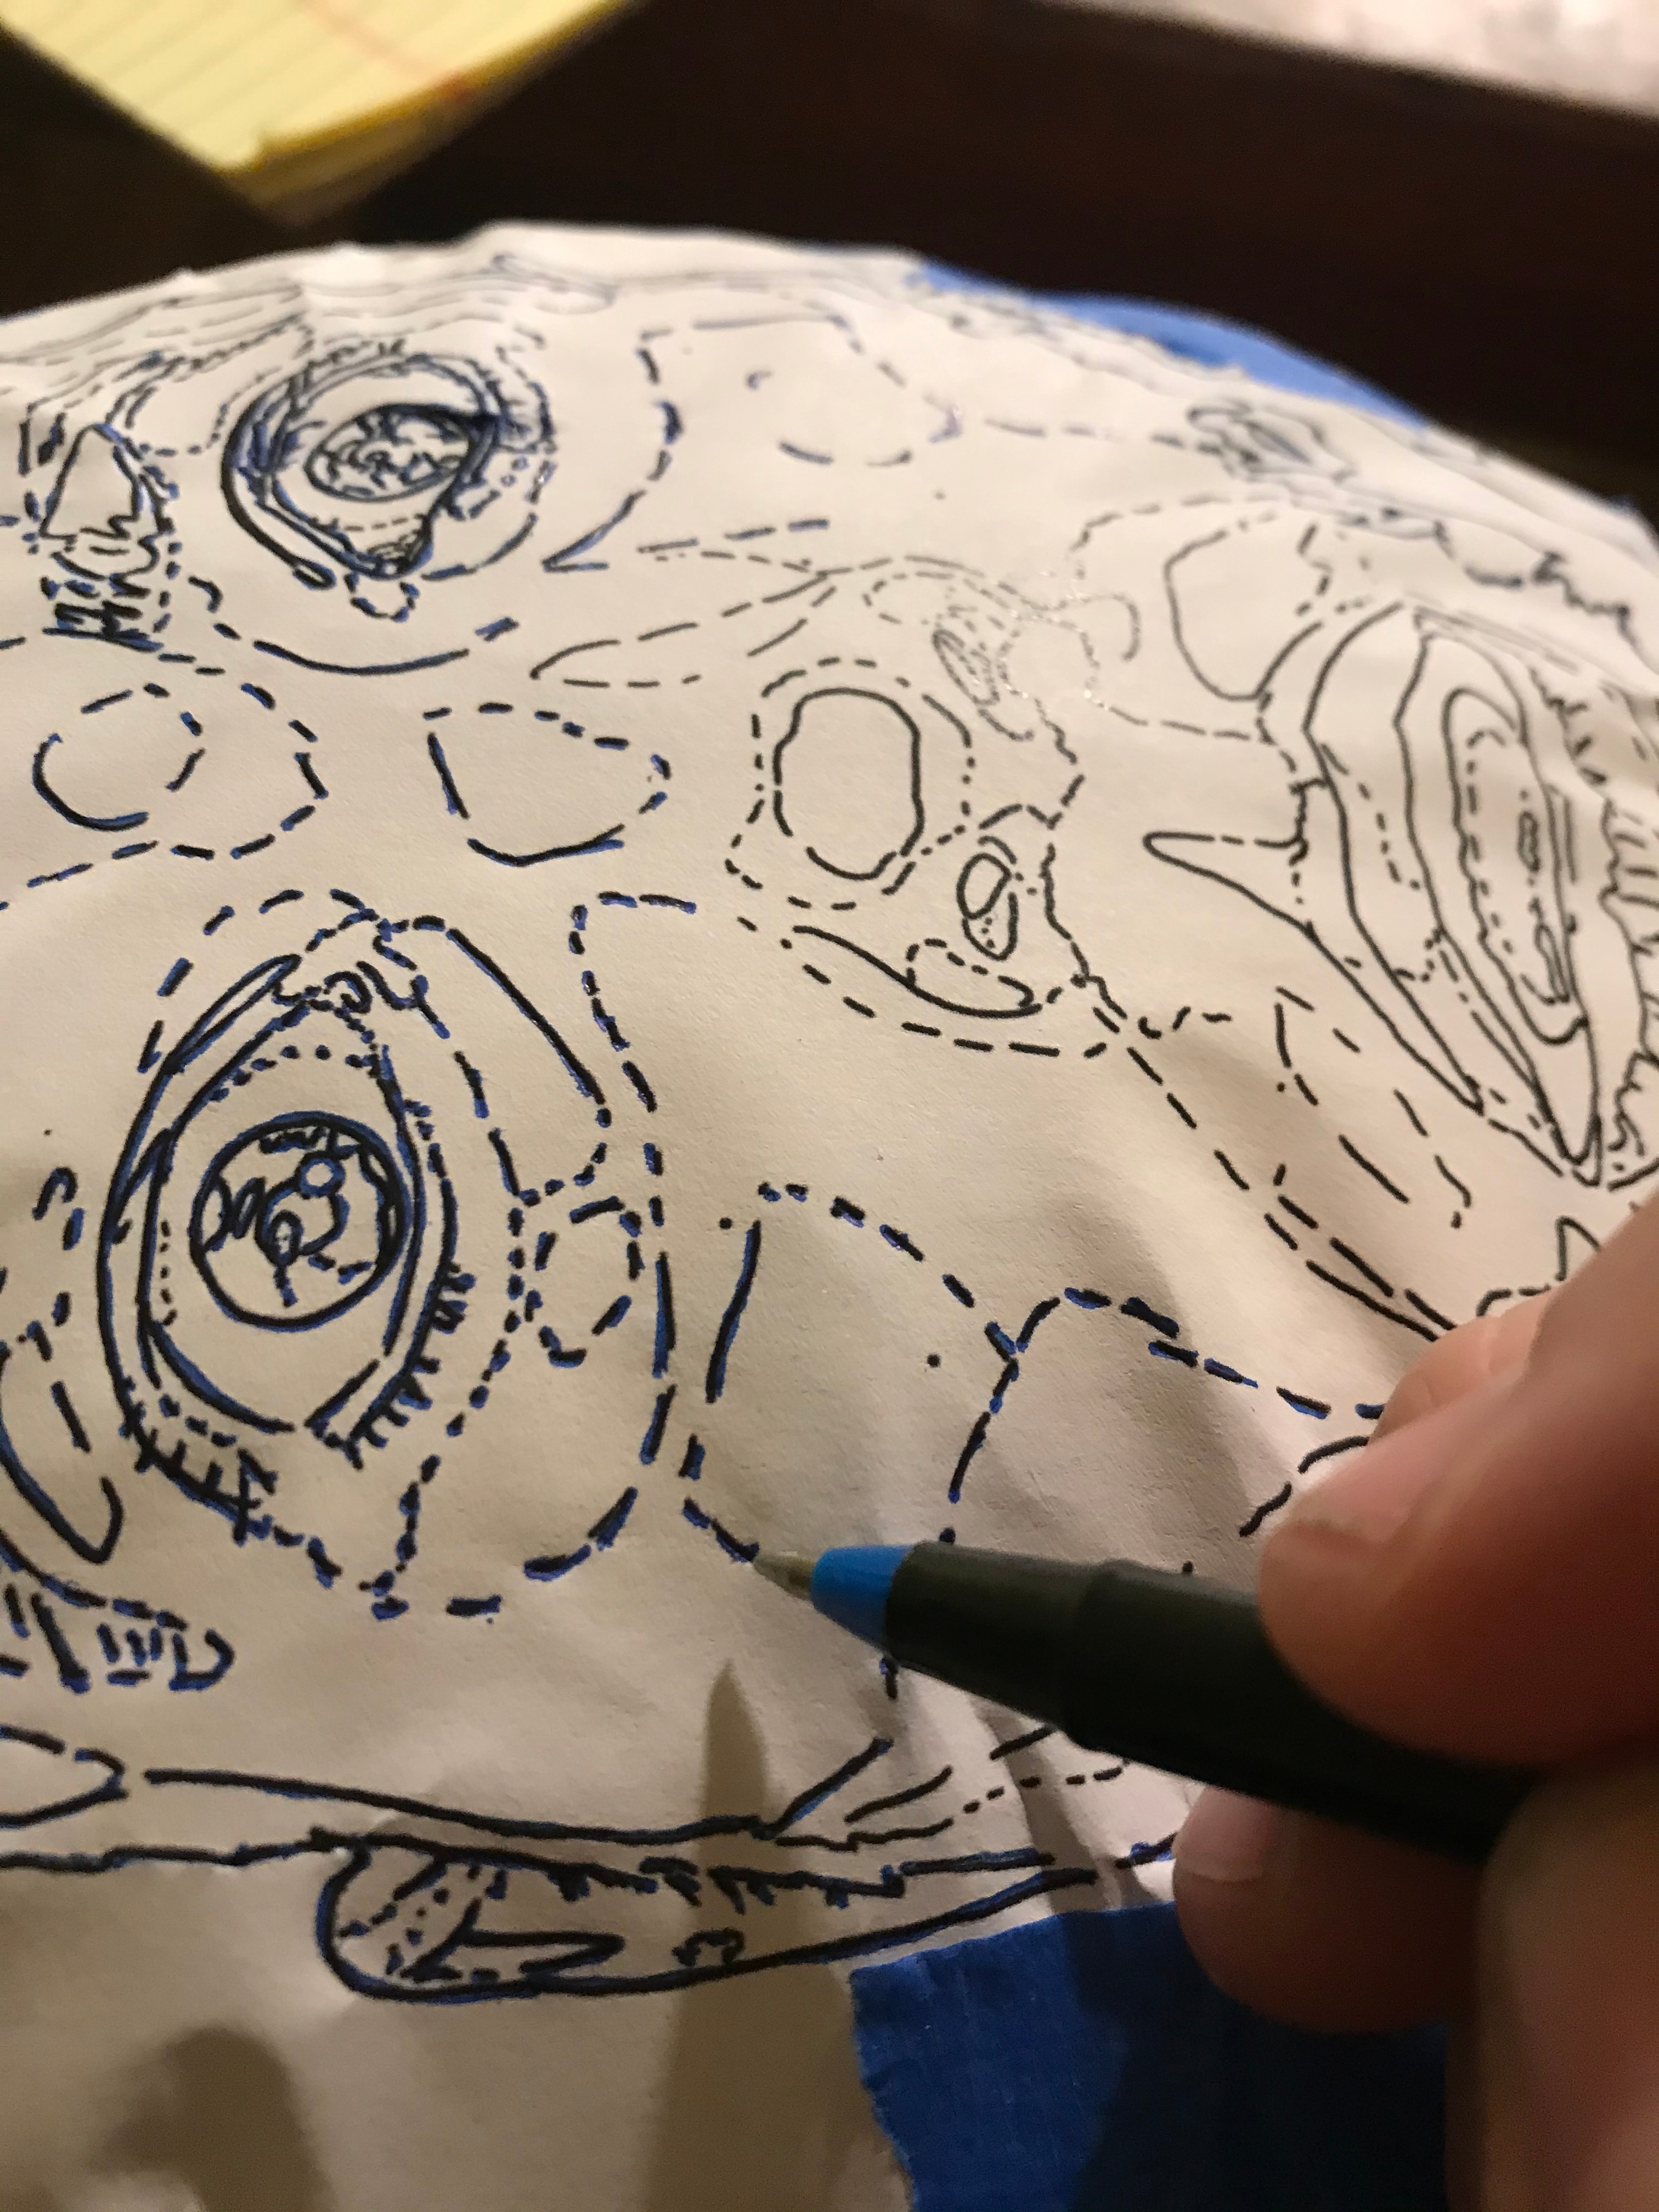
Now, take a pen and trace over the stencil. You don't need to apply a ton of pressure to get the image to transfer, just use the pen as though you were drawing. I like to use a blue pen over the black stencil, it makes it easier to see where you've already traced the image.
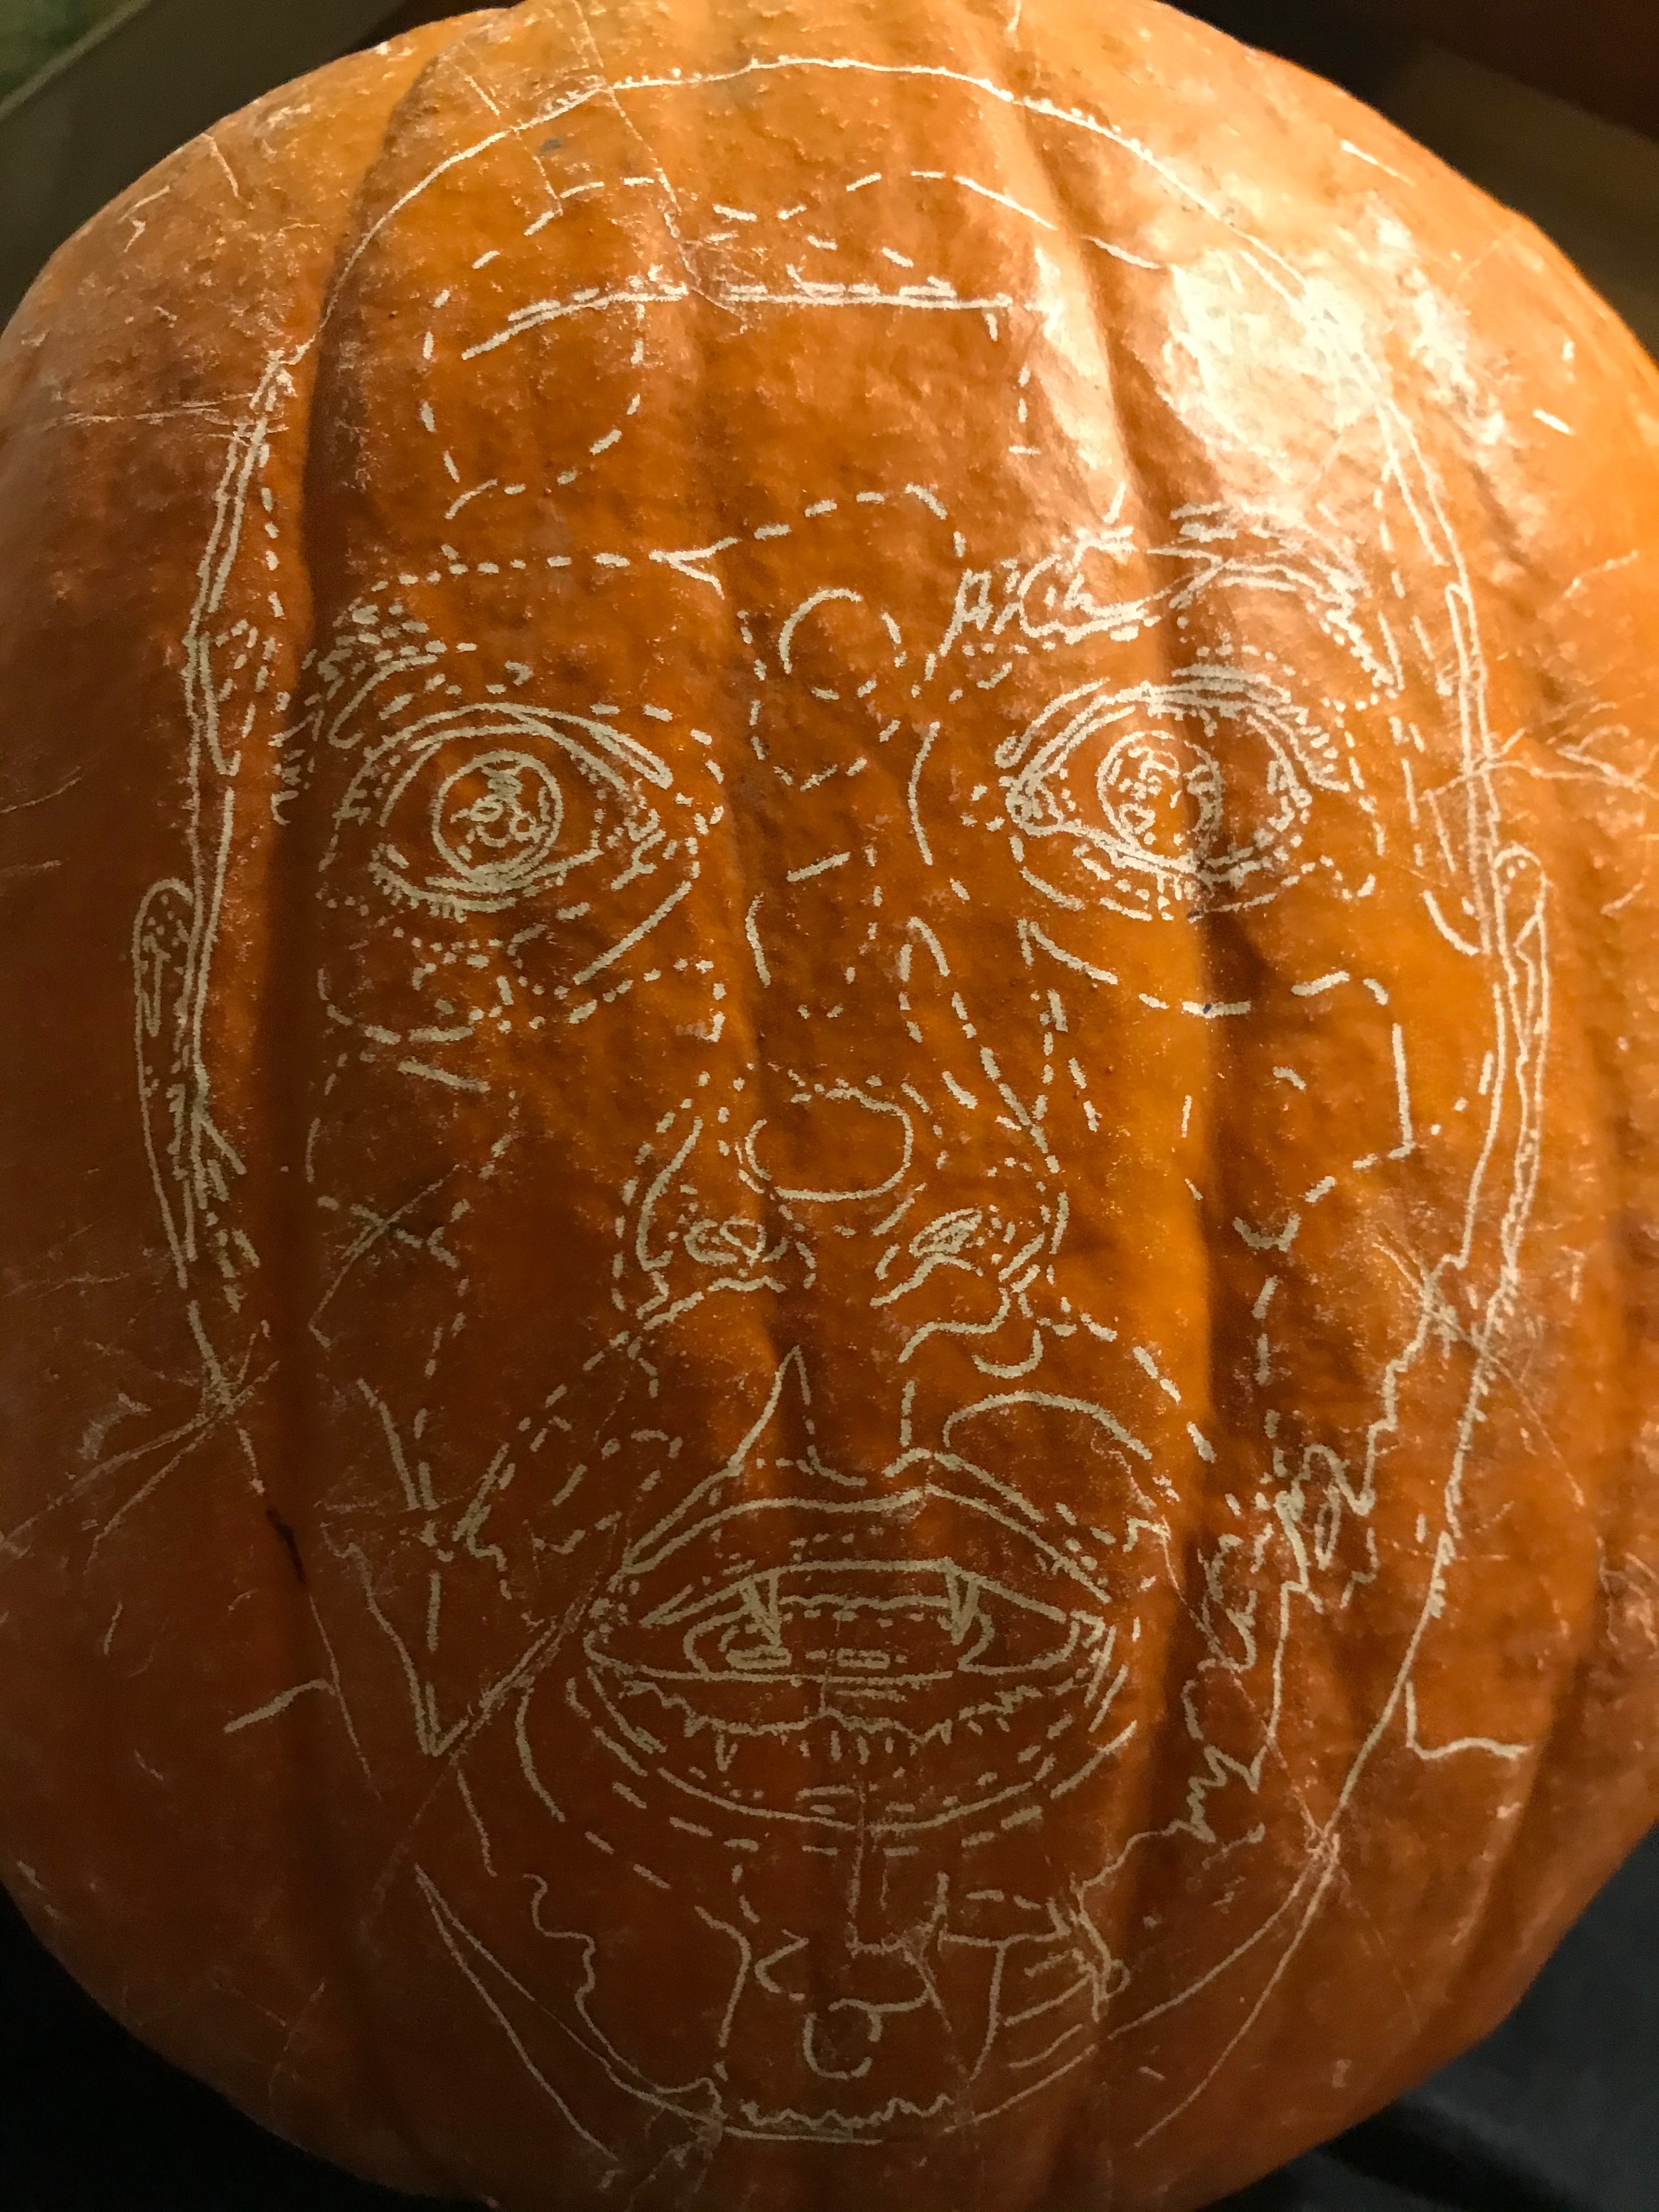
When you've traced over the entire stencil, carefully remove the tape and paper. As an optional step, you can spray the pumpkin with fixatif spray; this will keep the image from rubbing off as you carve. If you're going to do this, do it outside! The fumes are toxic. Spray the pumpkin from about a foot away, one light coat will do the trick. I highly recommend leaving the pumpkin outside for a while after you spray it, to let the fixatif settle and stop smelling. You don't want to stink up your house with fumes.
Lay in the Darks
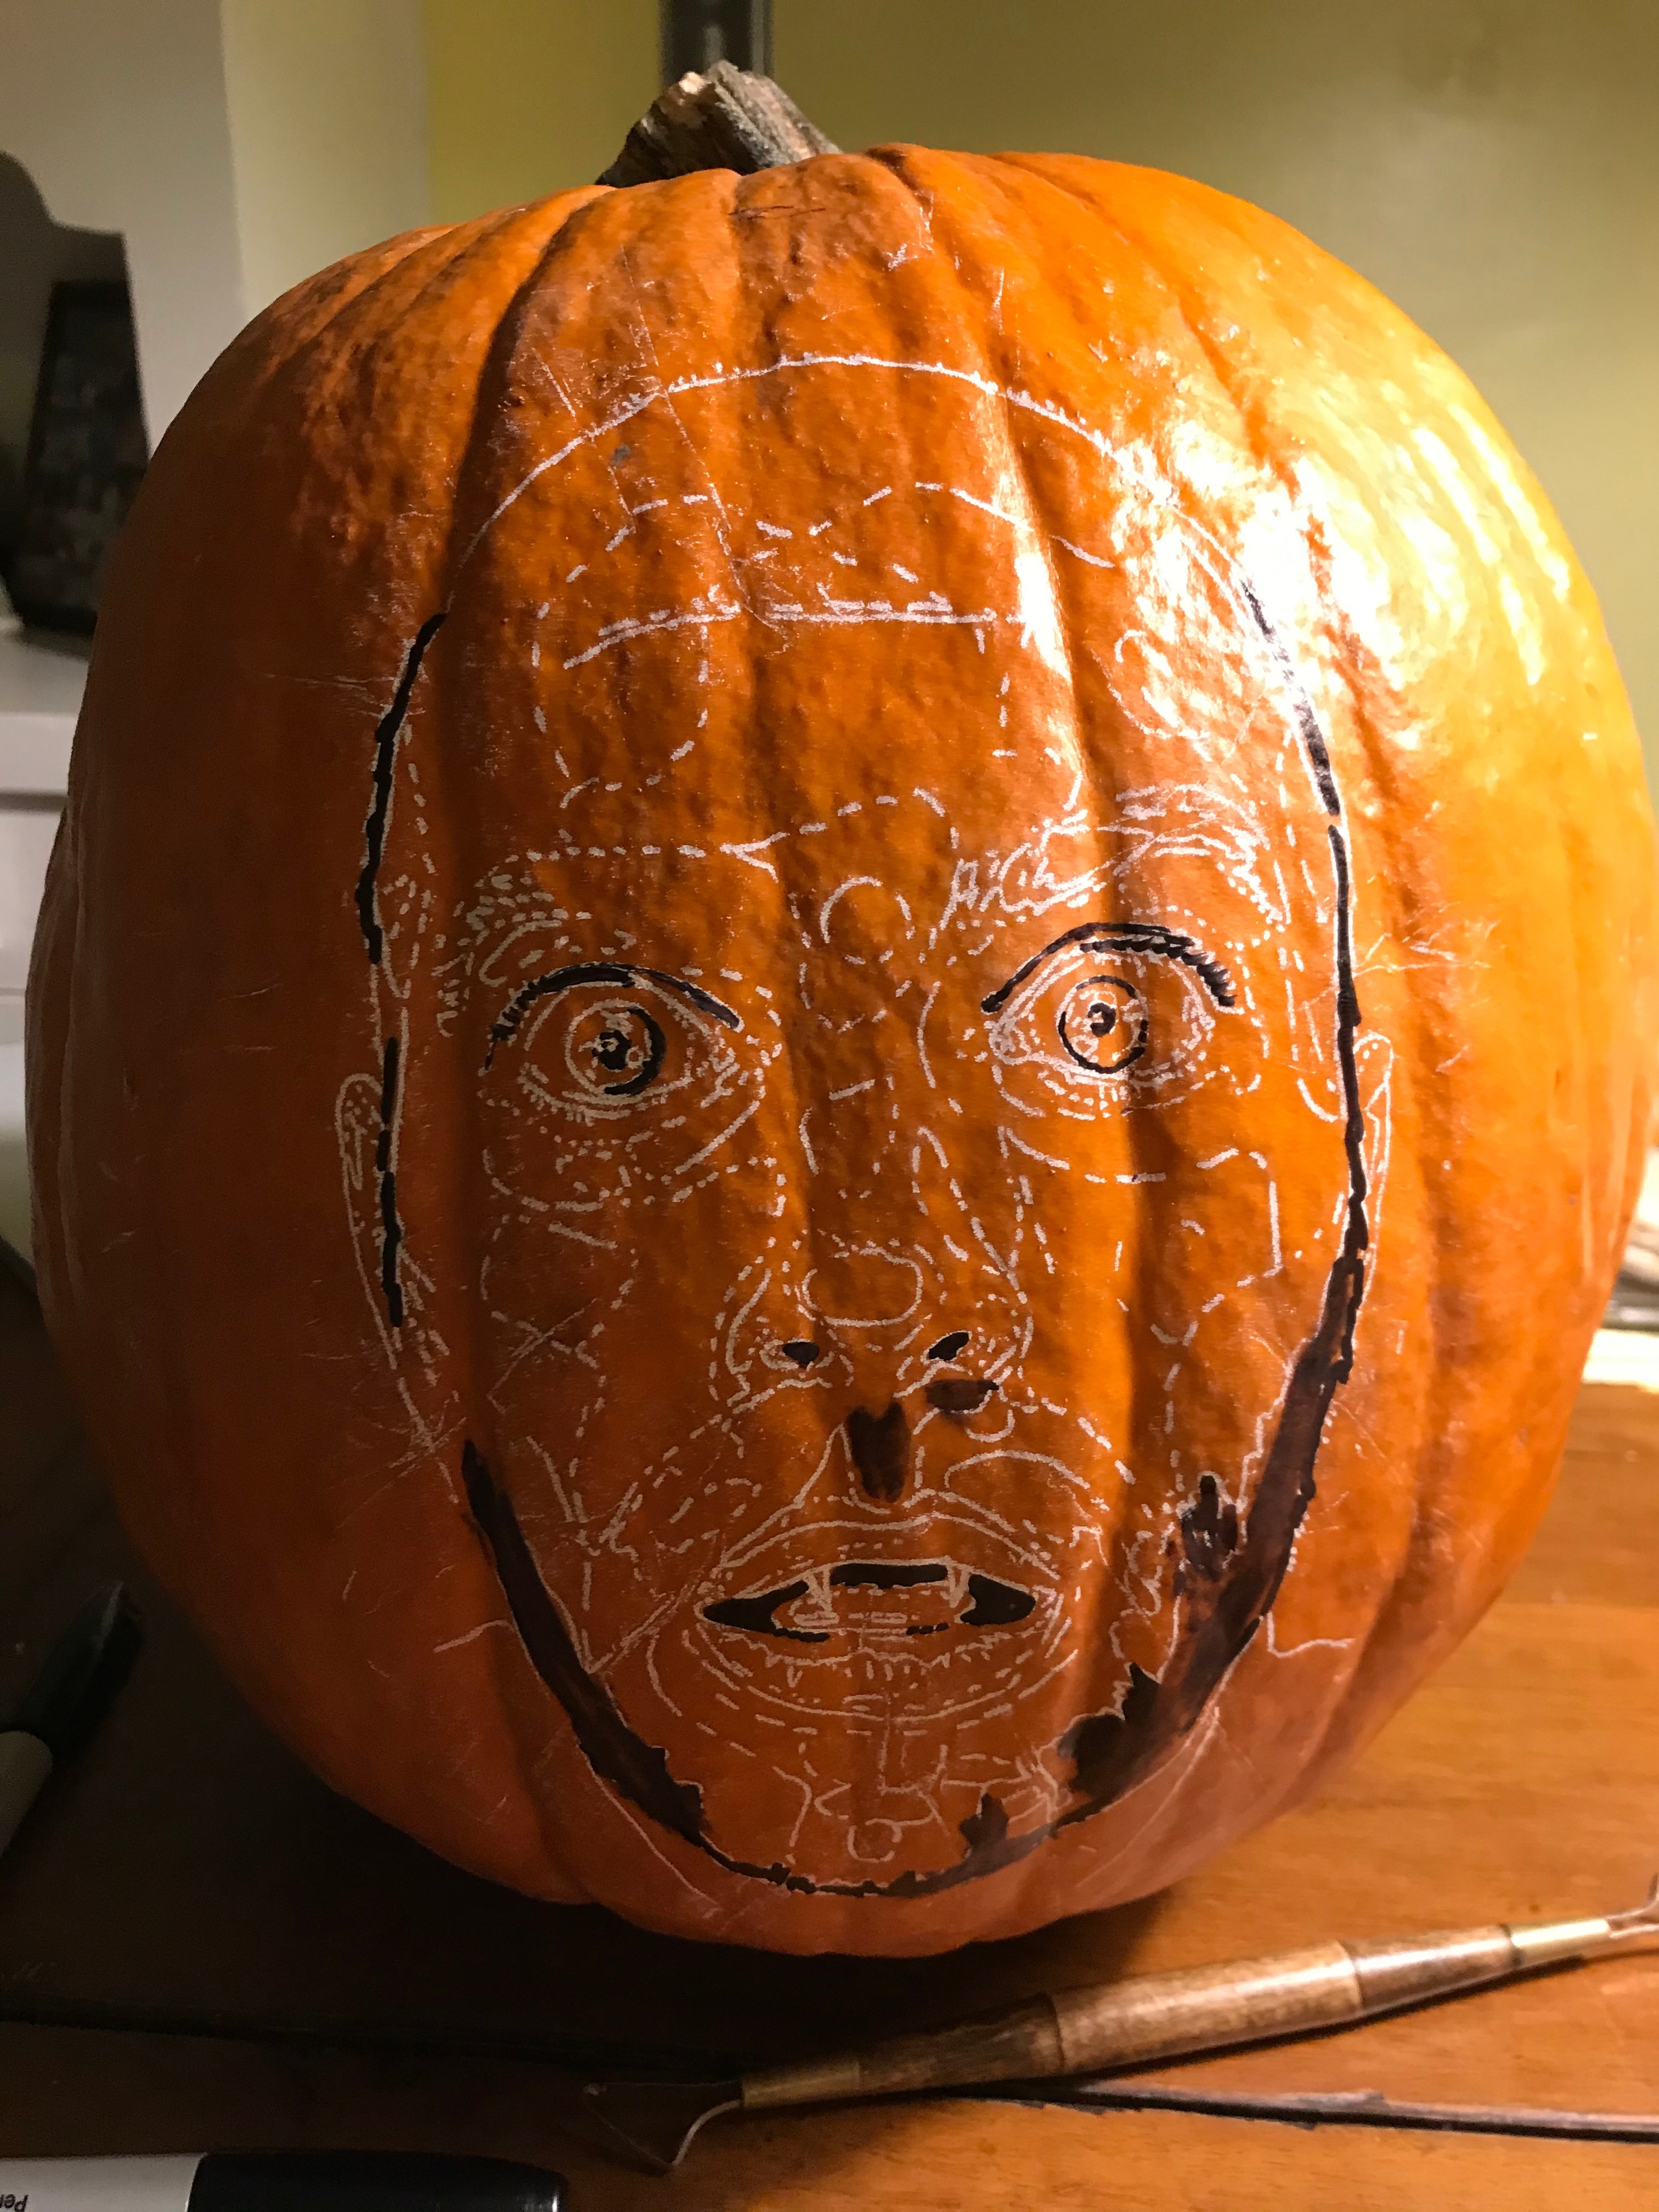
Tools:
- Permanent marker
Looking at your reference image, determine where the darkest areas are, and cover them with a permanent marker on the pumpkin.
Carve Away the Light Areas
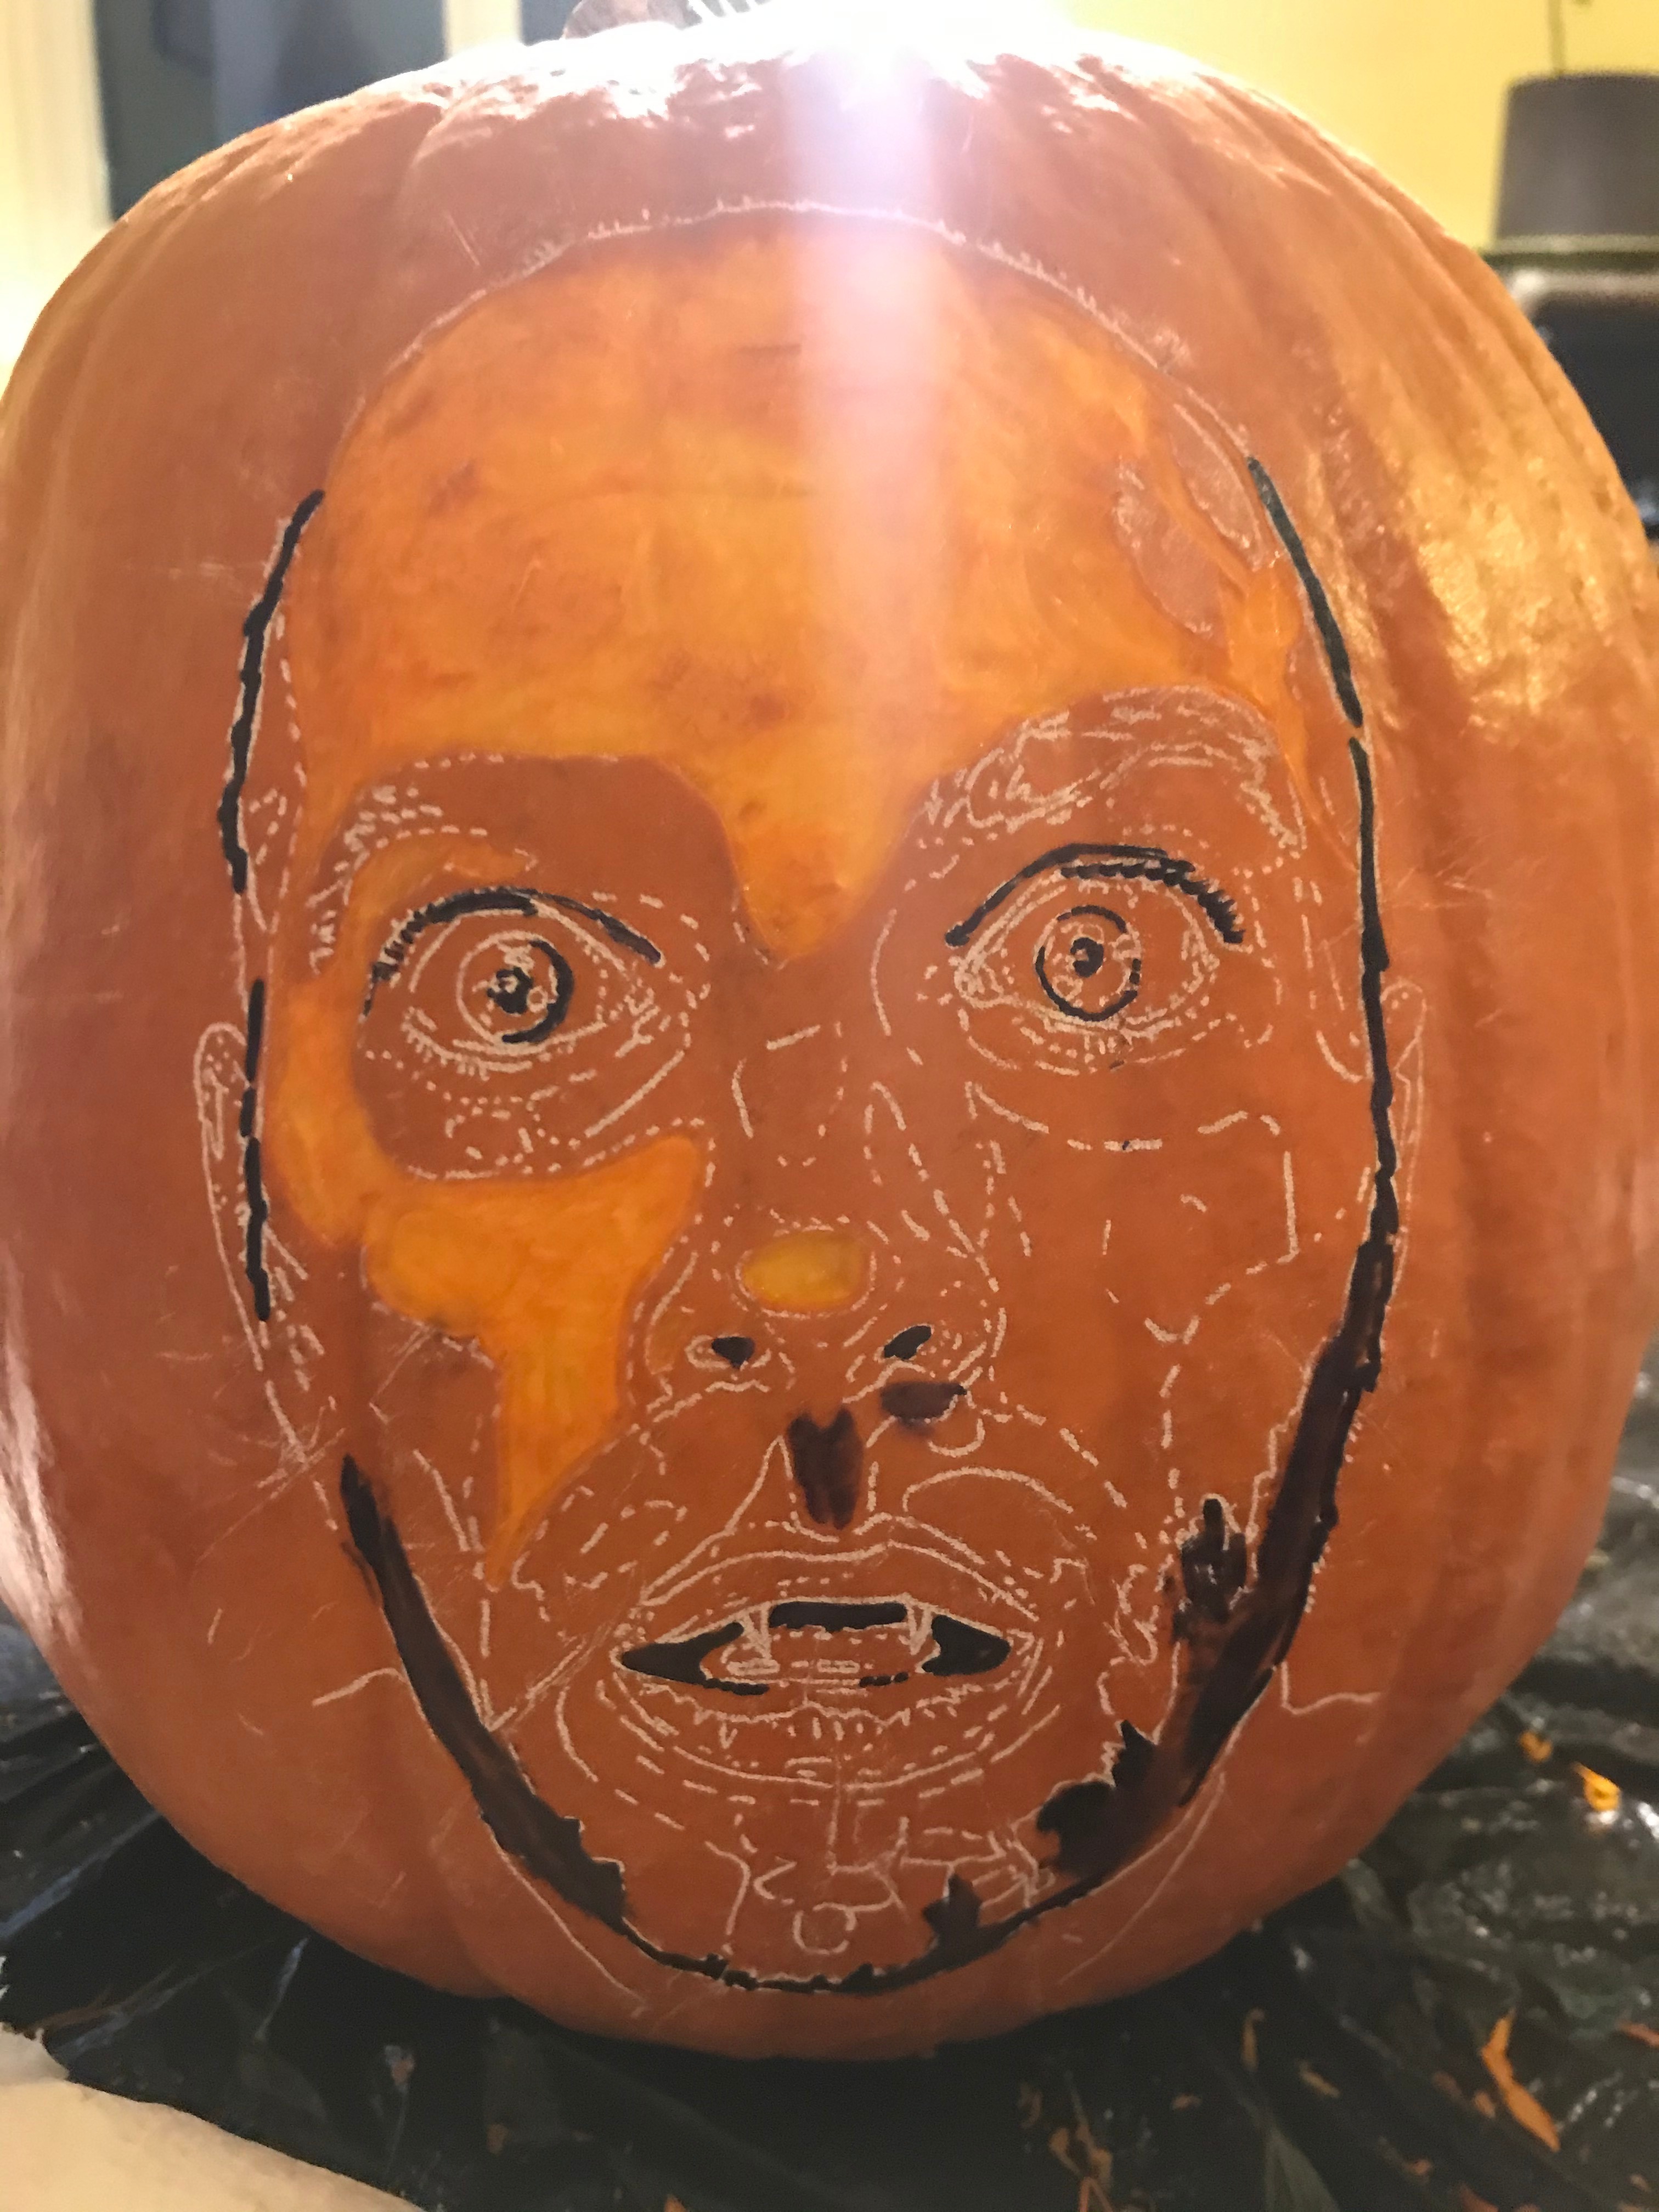
Tools:
- Linoleum cutter
- Pottery tools
- X-acto knife
Now, start to carve away the lightest areas of the image. I like to start with the V-shaped nib on my linoleum cutter to start, and then scrape away large areas of skin with the pottery tool. You can also use the x-acto knife for the detailed areas, like whites of the eyes.
Gut the Pumpkin
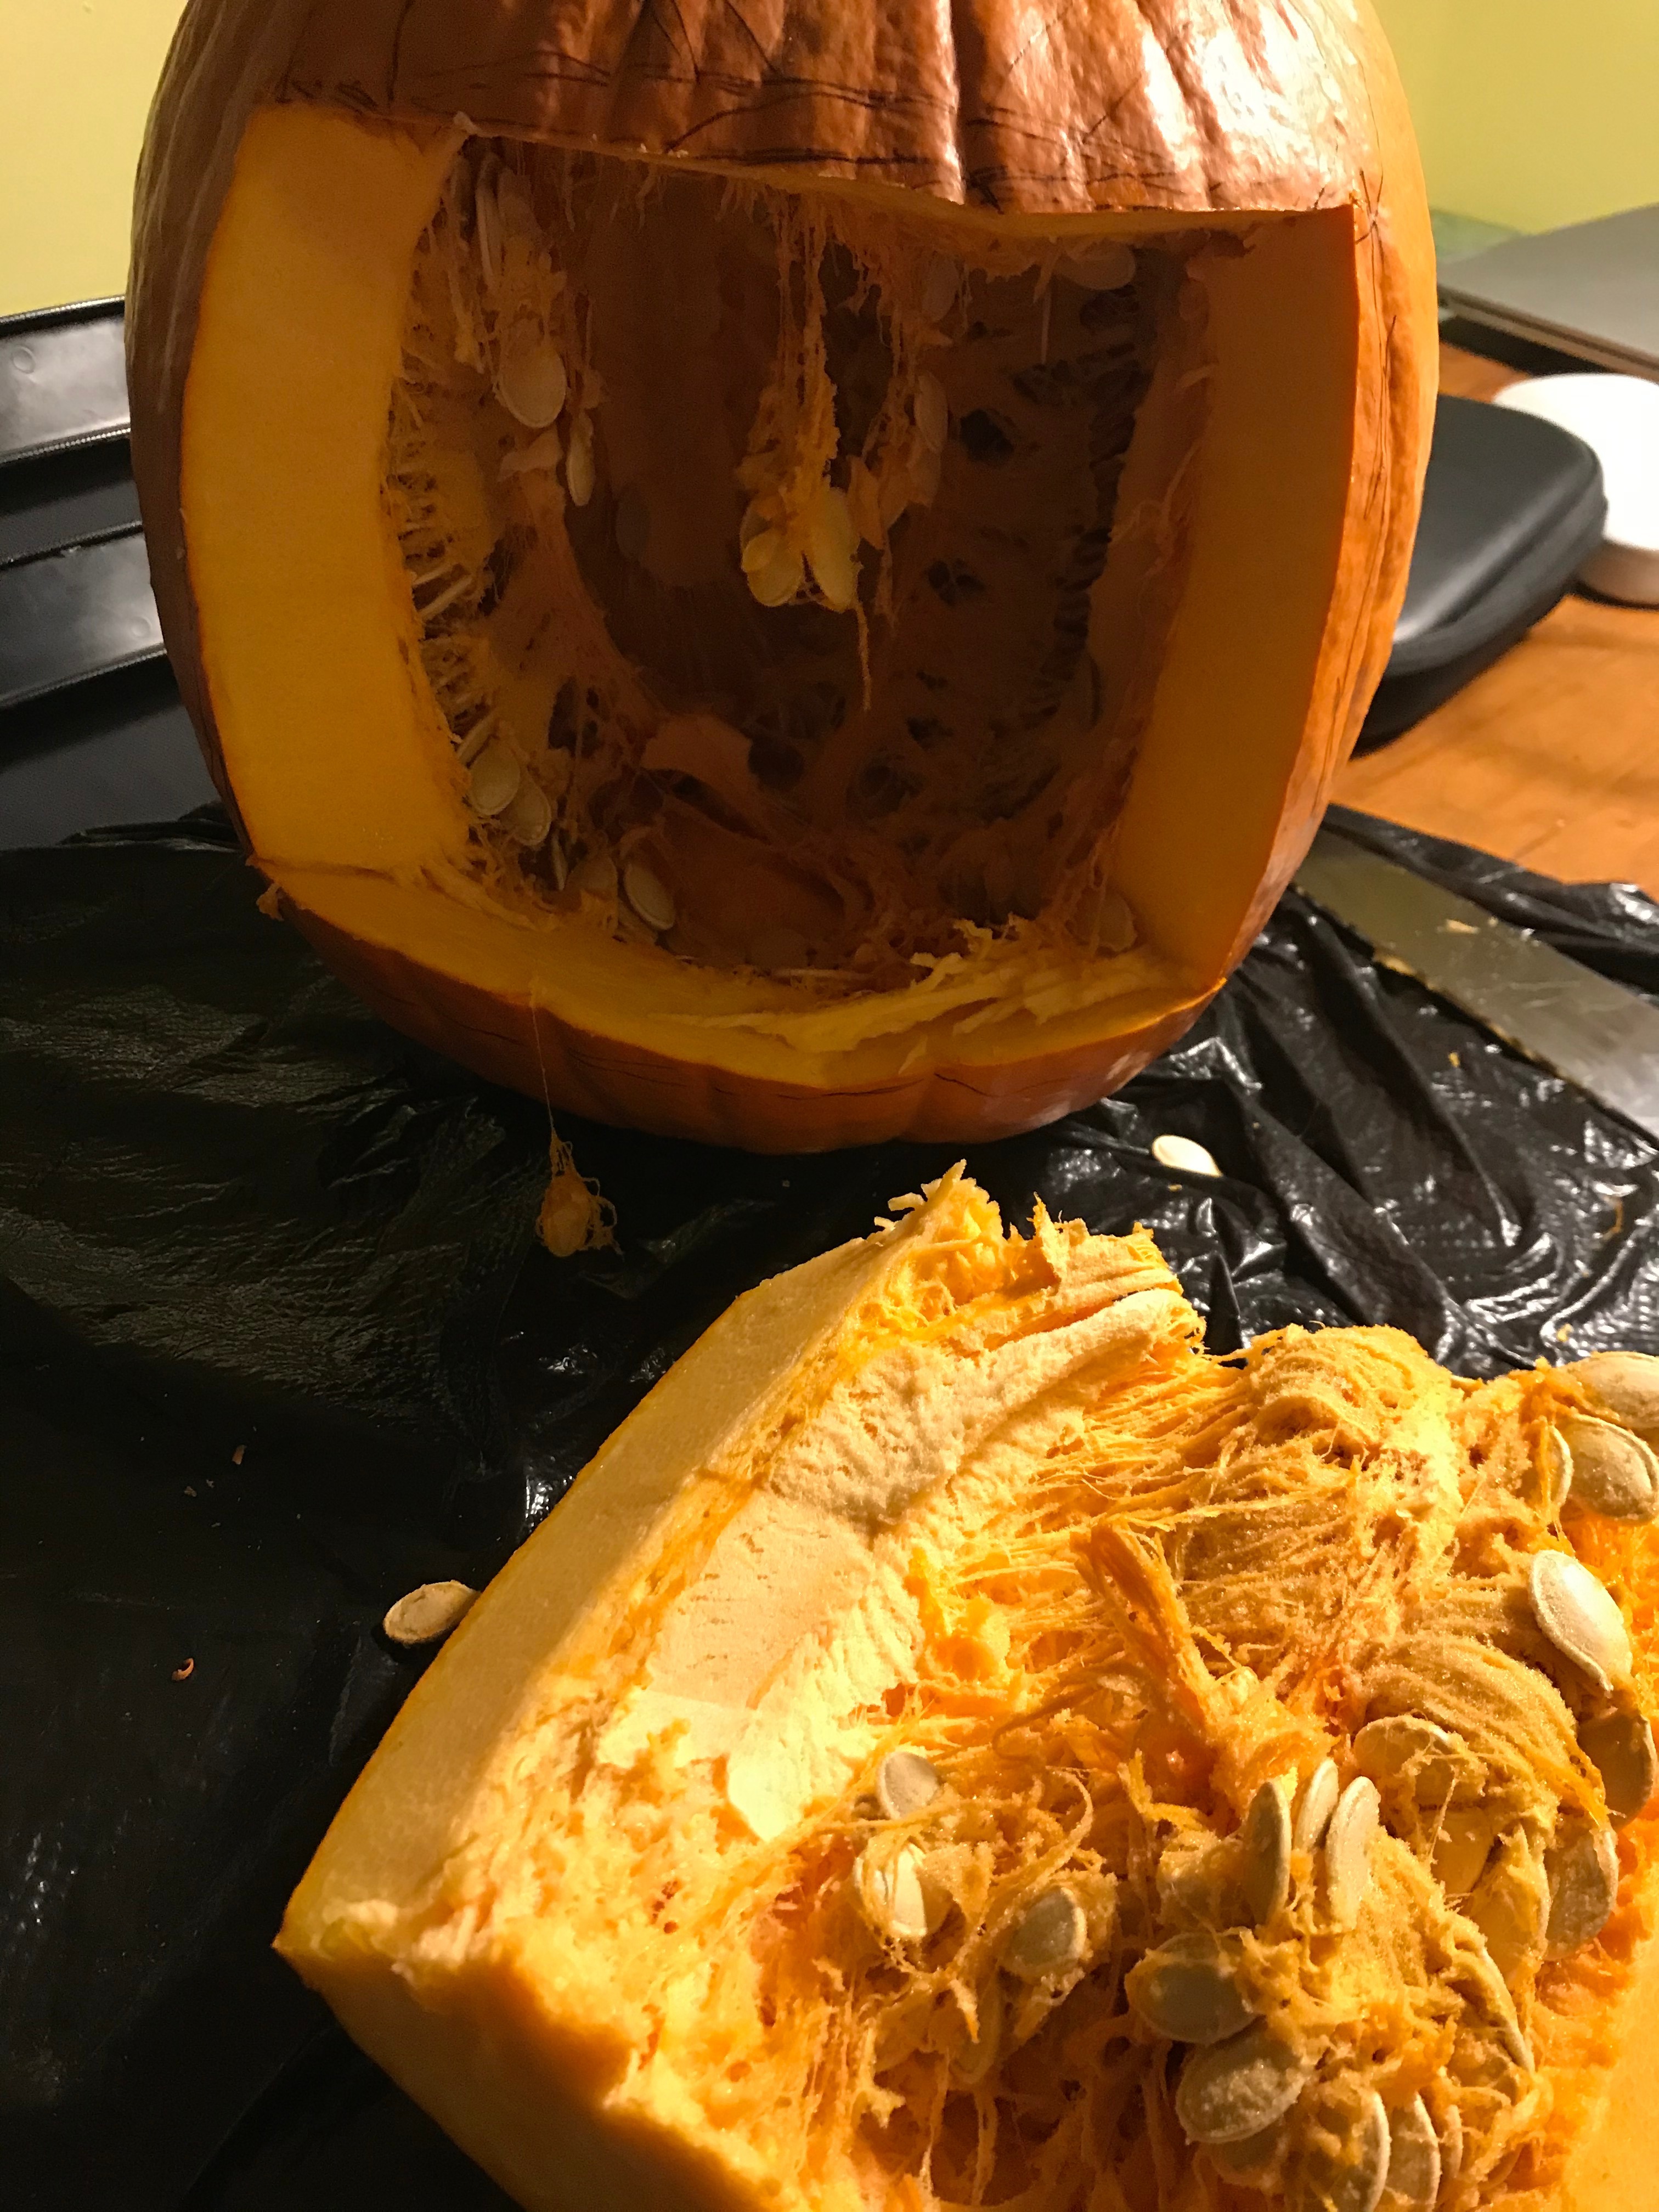
Tools:
- Knife
- Large pottery loop tool
- Optional: latex gloves
Once you have your preliminary lights and darks mapped out, it's time to gut your pumpkin. I recommend carving a rectangular opening in the back of the pumpkin, as opposed to cutting out the top; I've read that the pumpkin stem contains nutrients, and that leaving the top intact will prolong the life of the pumpkin. Opening the back of the pumpkin also makes it easier to carve out the inside.
First, remove the stringy insides and seeds - if you don't want to get your hands sticky, you can wear latex gloves. Then, use the pottery tool to essentially scrape away the wall of the pumpkin behind where your design is. The more you remove from the inside, the less deep you'll have to carve on the outside, giving you much more control when you're working on the small details. I like to scrape away the pumpkin until there's only about 1/4 to 1/2 inch remaining.
Light It Up & Keep Carving
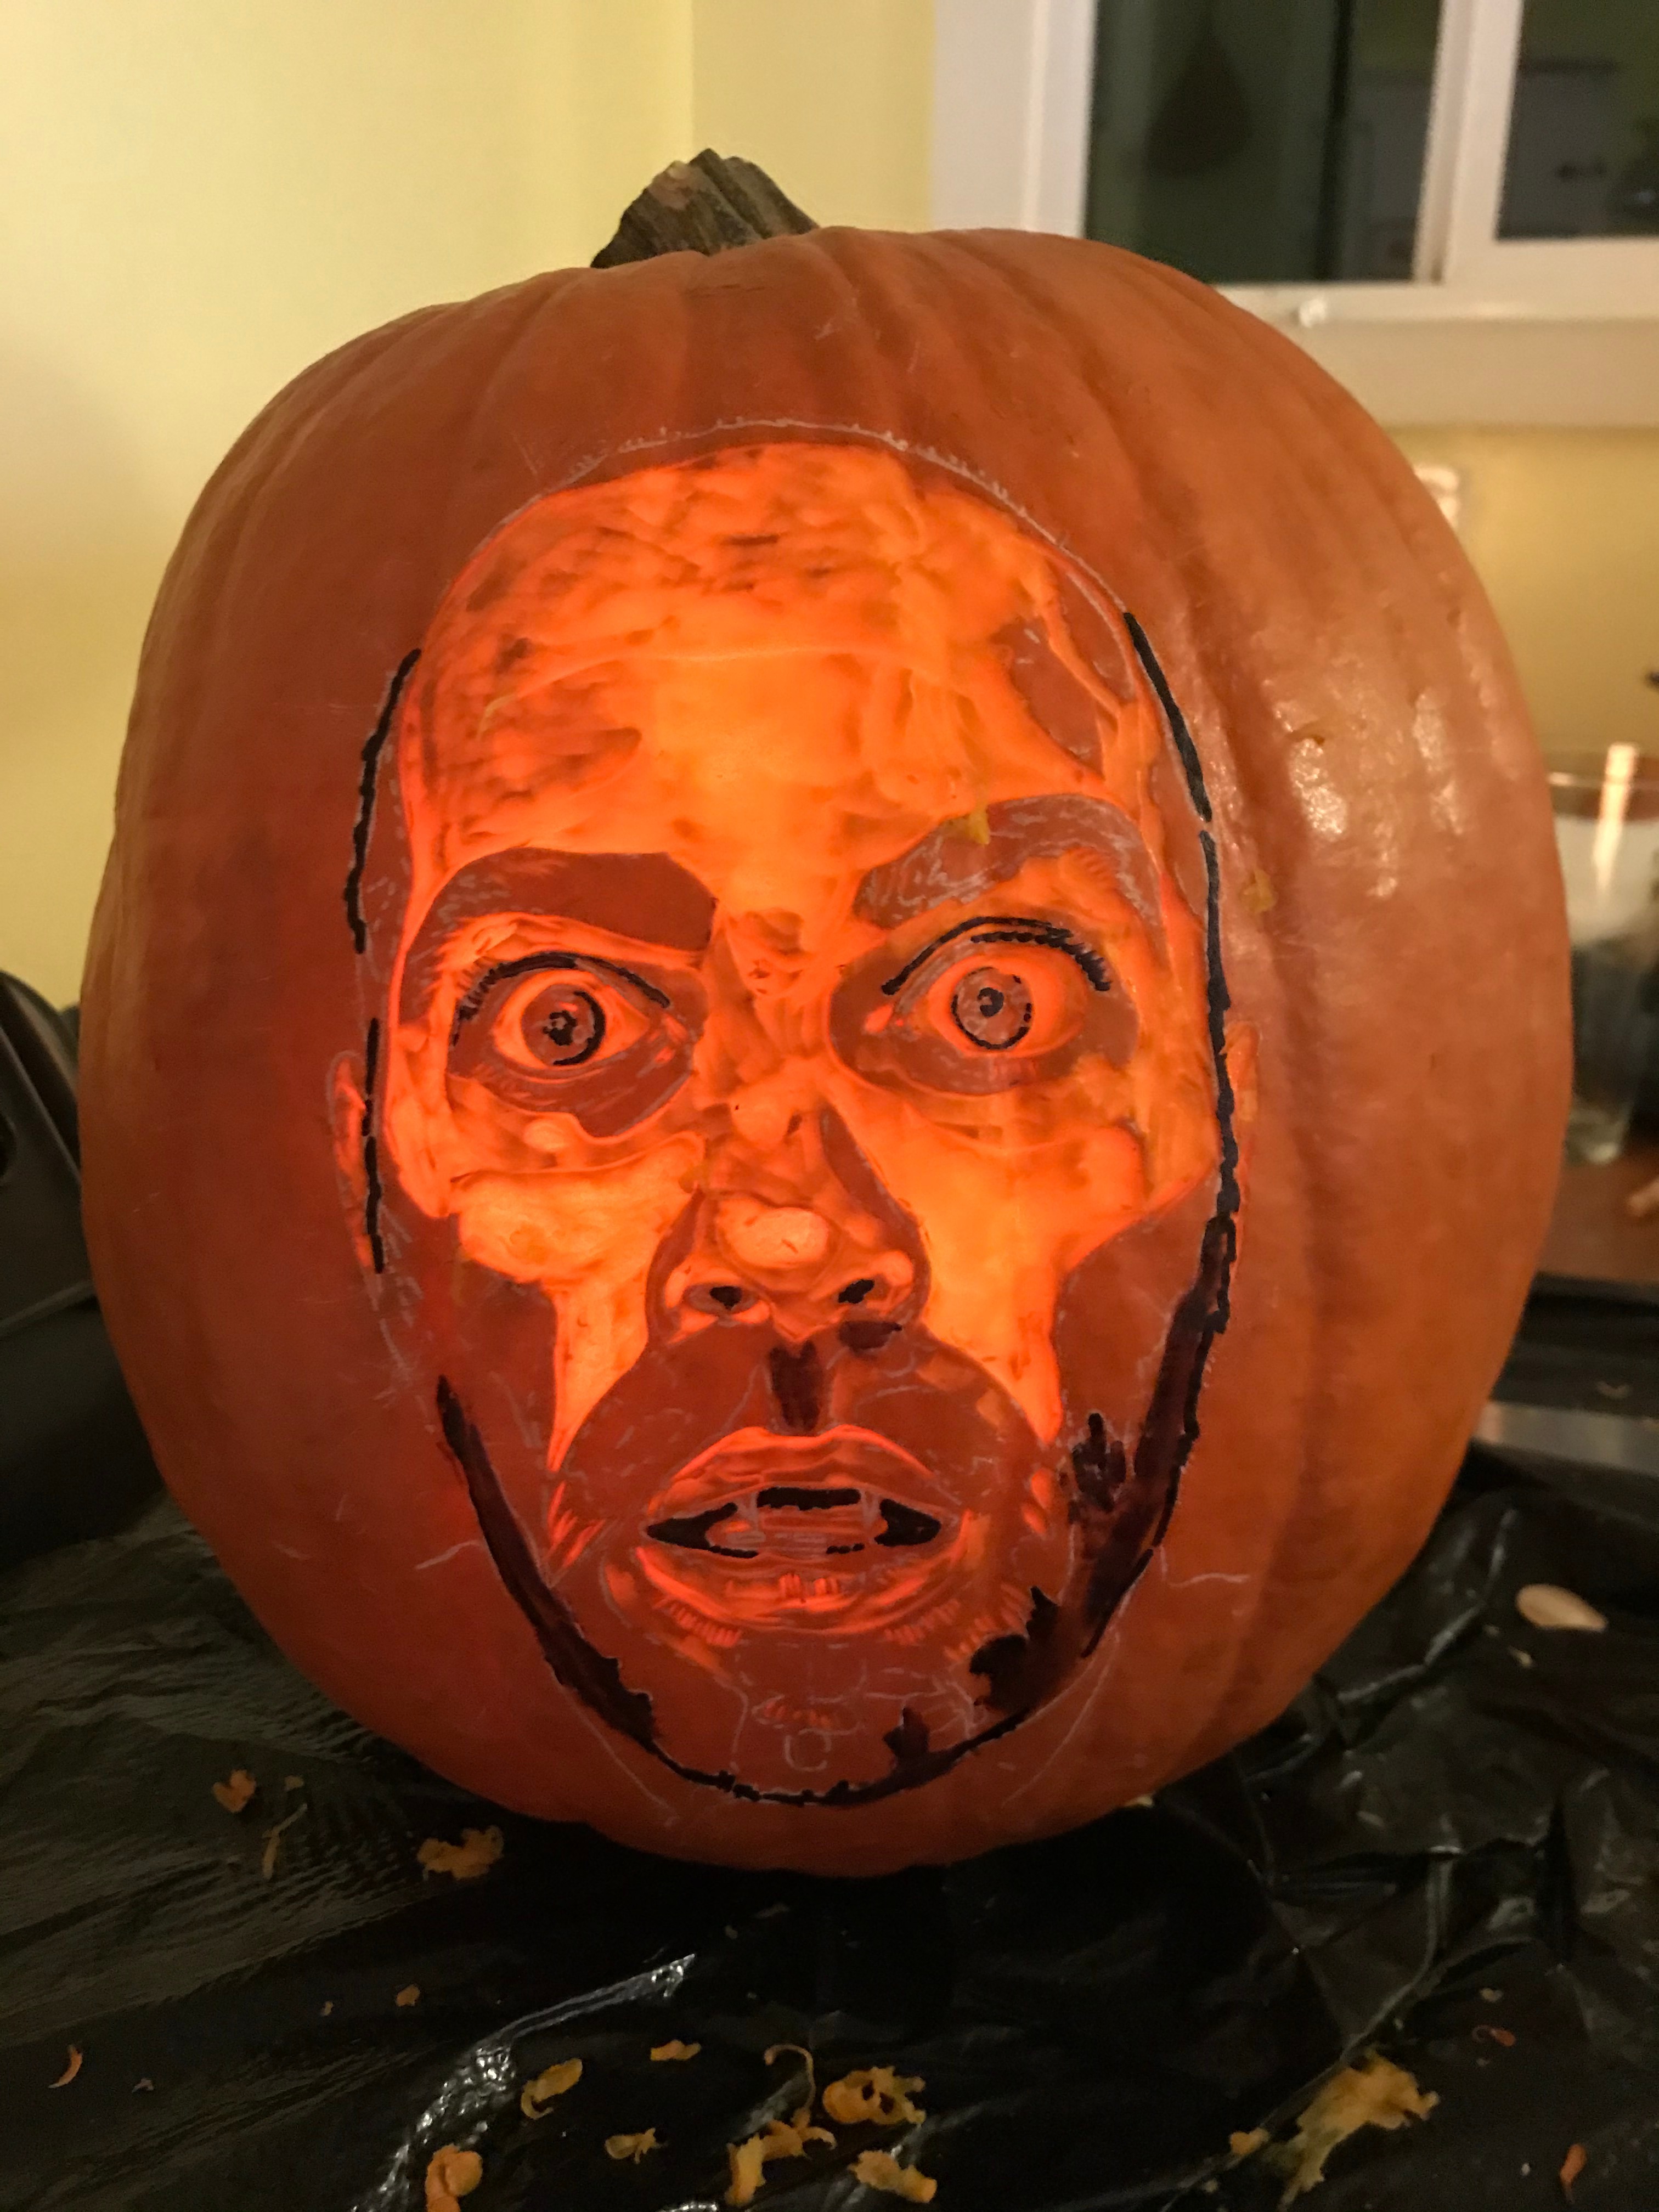
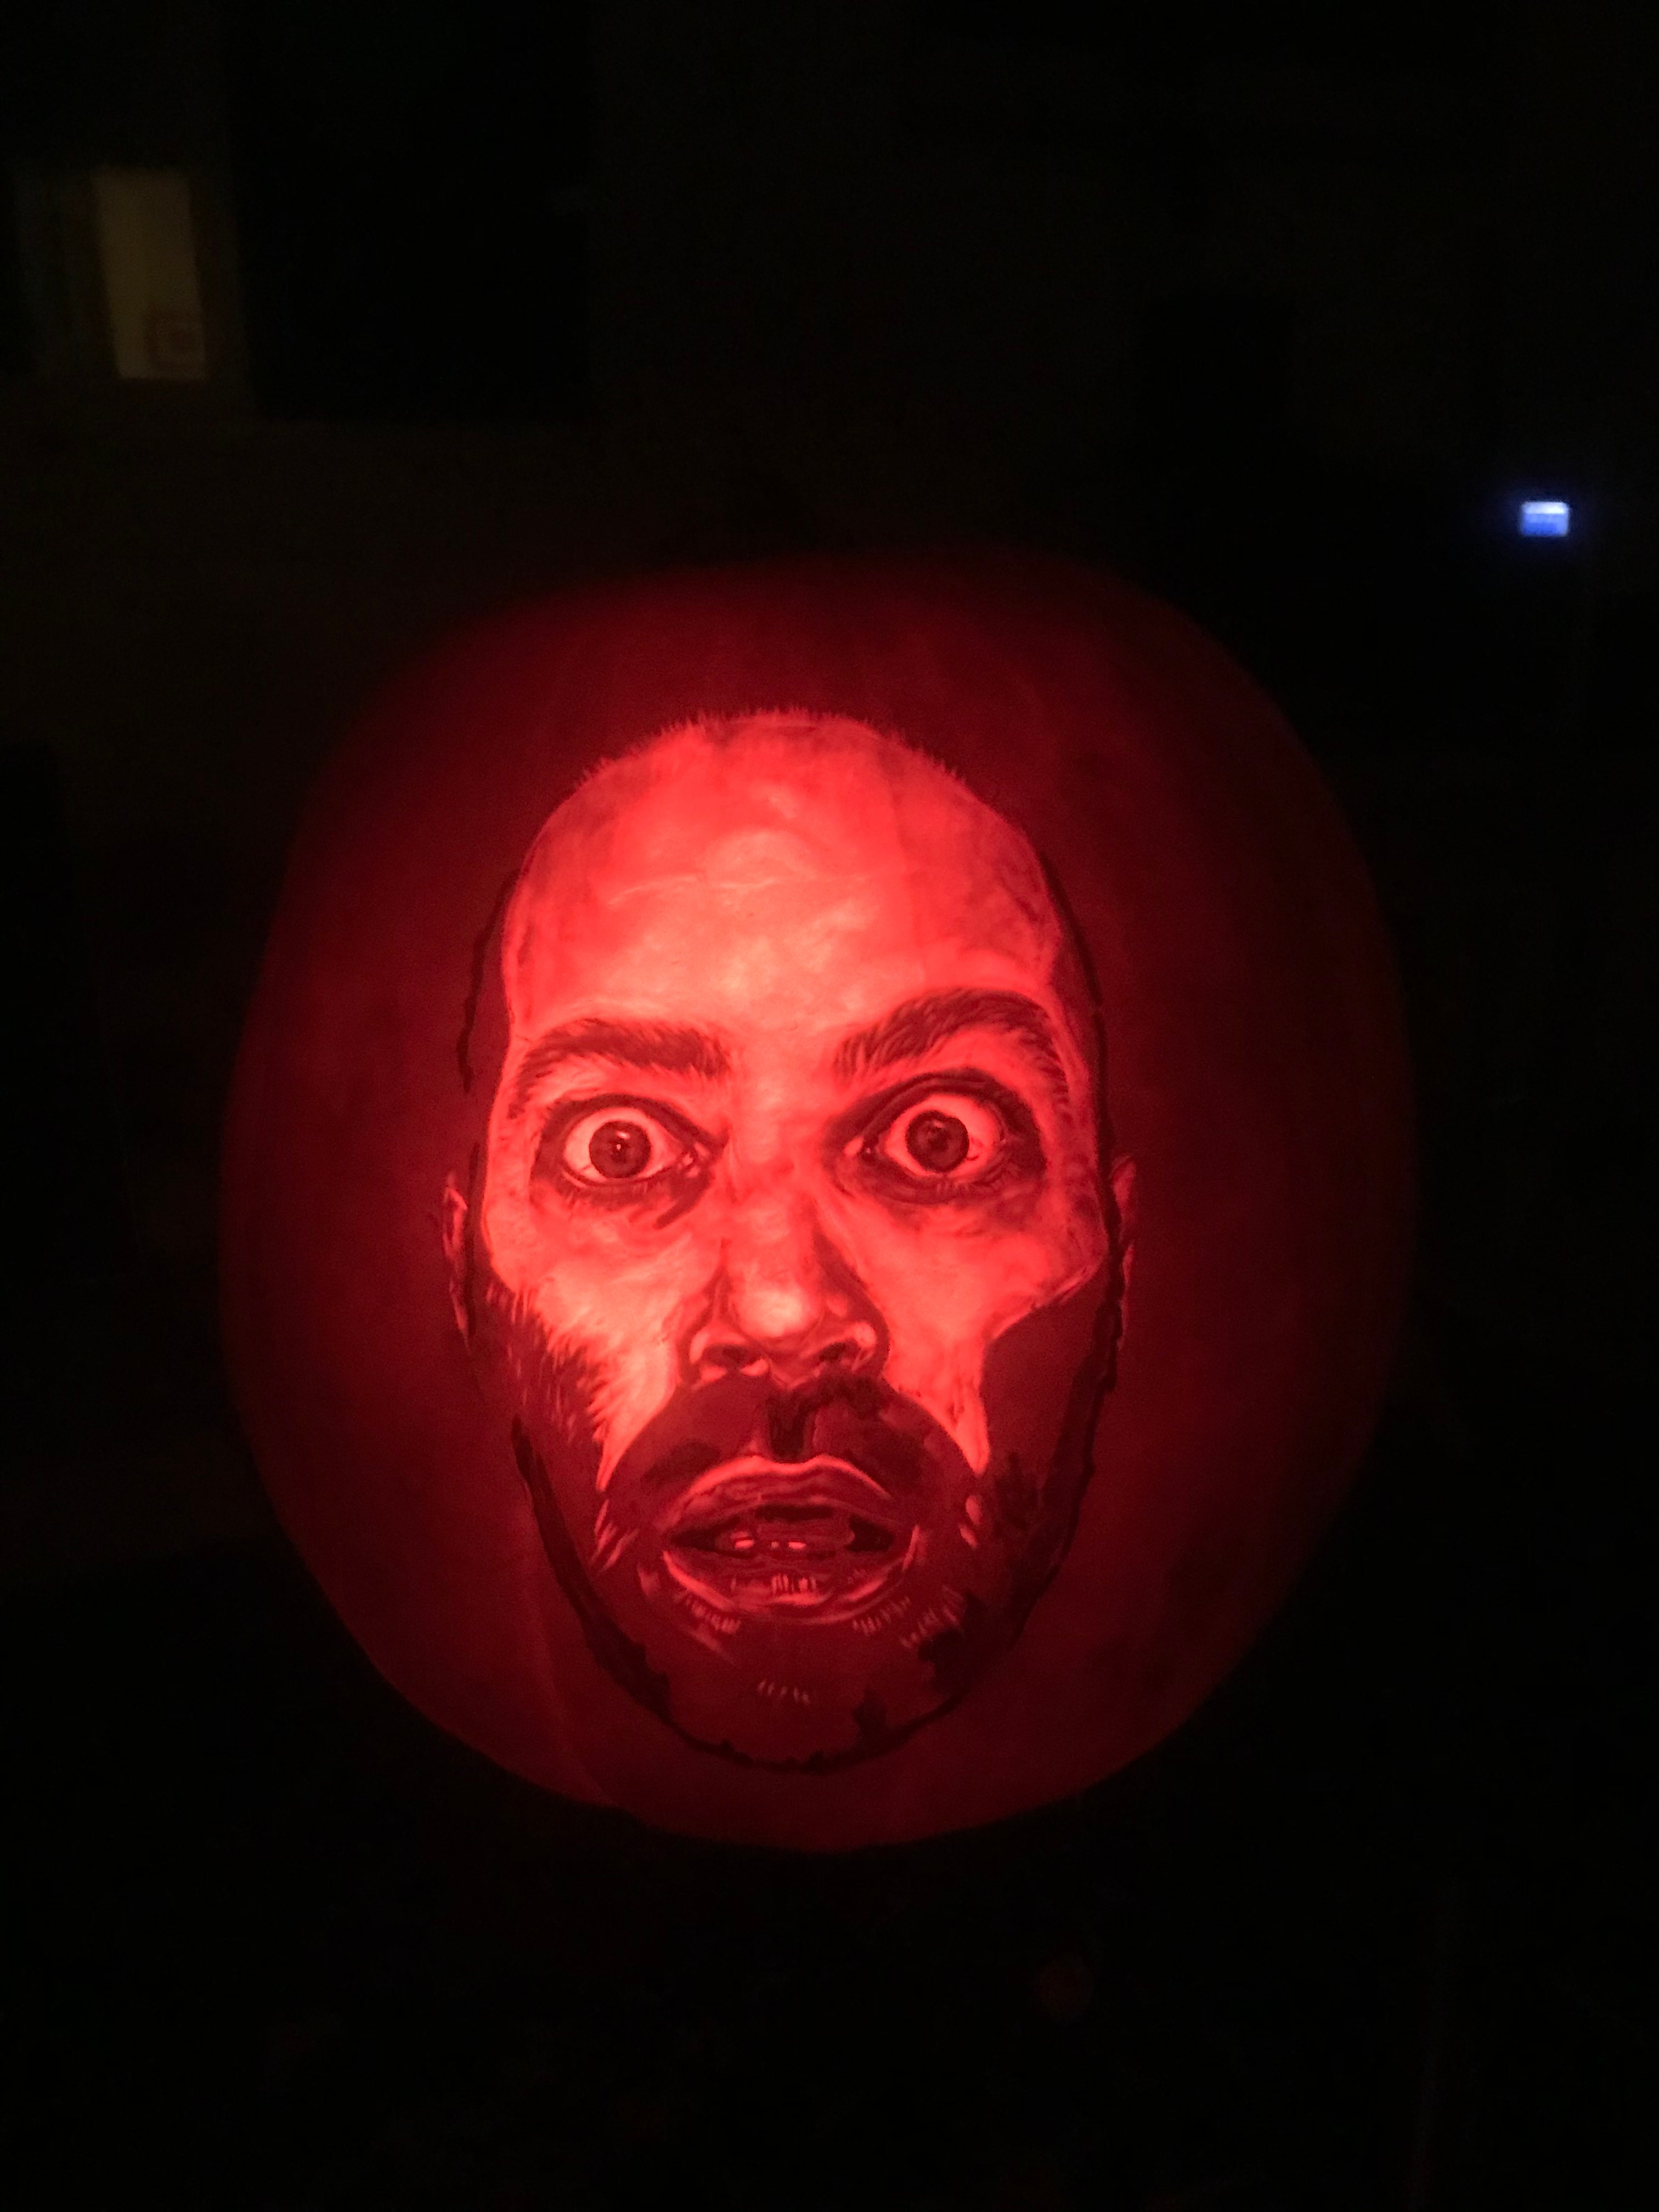
Tools:
- Carving tools, as before
- Light
Now that your pumpkin is cleaned out inside, put a light inside and keep carving - of course, it's much easier to do this at night, or else in a dark room. I do almost all of my pumpkin carving at night, for this reason. The light I use is a small camping lantern I picked up for $20 at REI, but any flashlight, bike light, or even cell phone flashlight will work (if you use your phone, I recommend putting it in a plastic bag first!). Don't use a candle or open flame, it won't give consistent light and it will burn the inside of the pumpkin.
As you continue to finesse the carving, the most useful tools will be your pottery tools. You can use them to scrape away any depth of the pumpkin, giving smooth tonal transitions and a lot of control over darks and lights. In the areas of detail, like the eyes and facial hair in this case, you'll rely more on your linoleum cutter and x-acto knife. Moisture from the pumpkin will leak out as you carve and may remove the permanent marker, so keep a paper towel handy for blotting, and then reapply the marker.
If there are areas that you need to make lighter, you can also scrape away more of the inside of the pumpkin, in addition to carving the outside. For this portrait, I needed the whites of the eyes to pop more, so I scraped more out of the inside right behind the spots where the eyes were located.
Finish Up & Take a Picture!
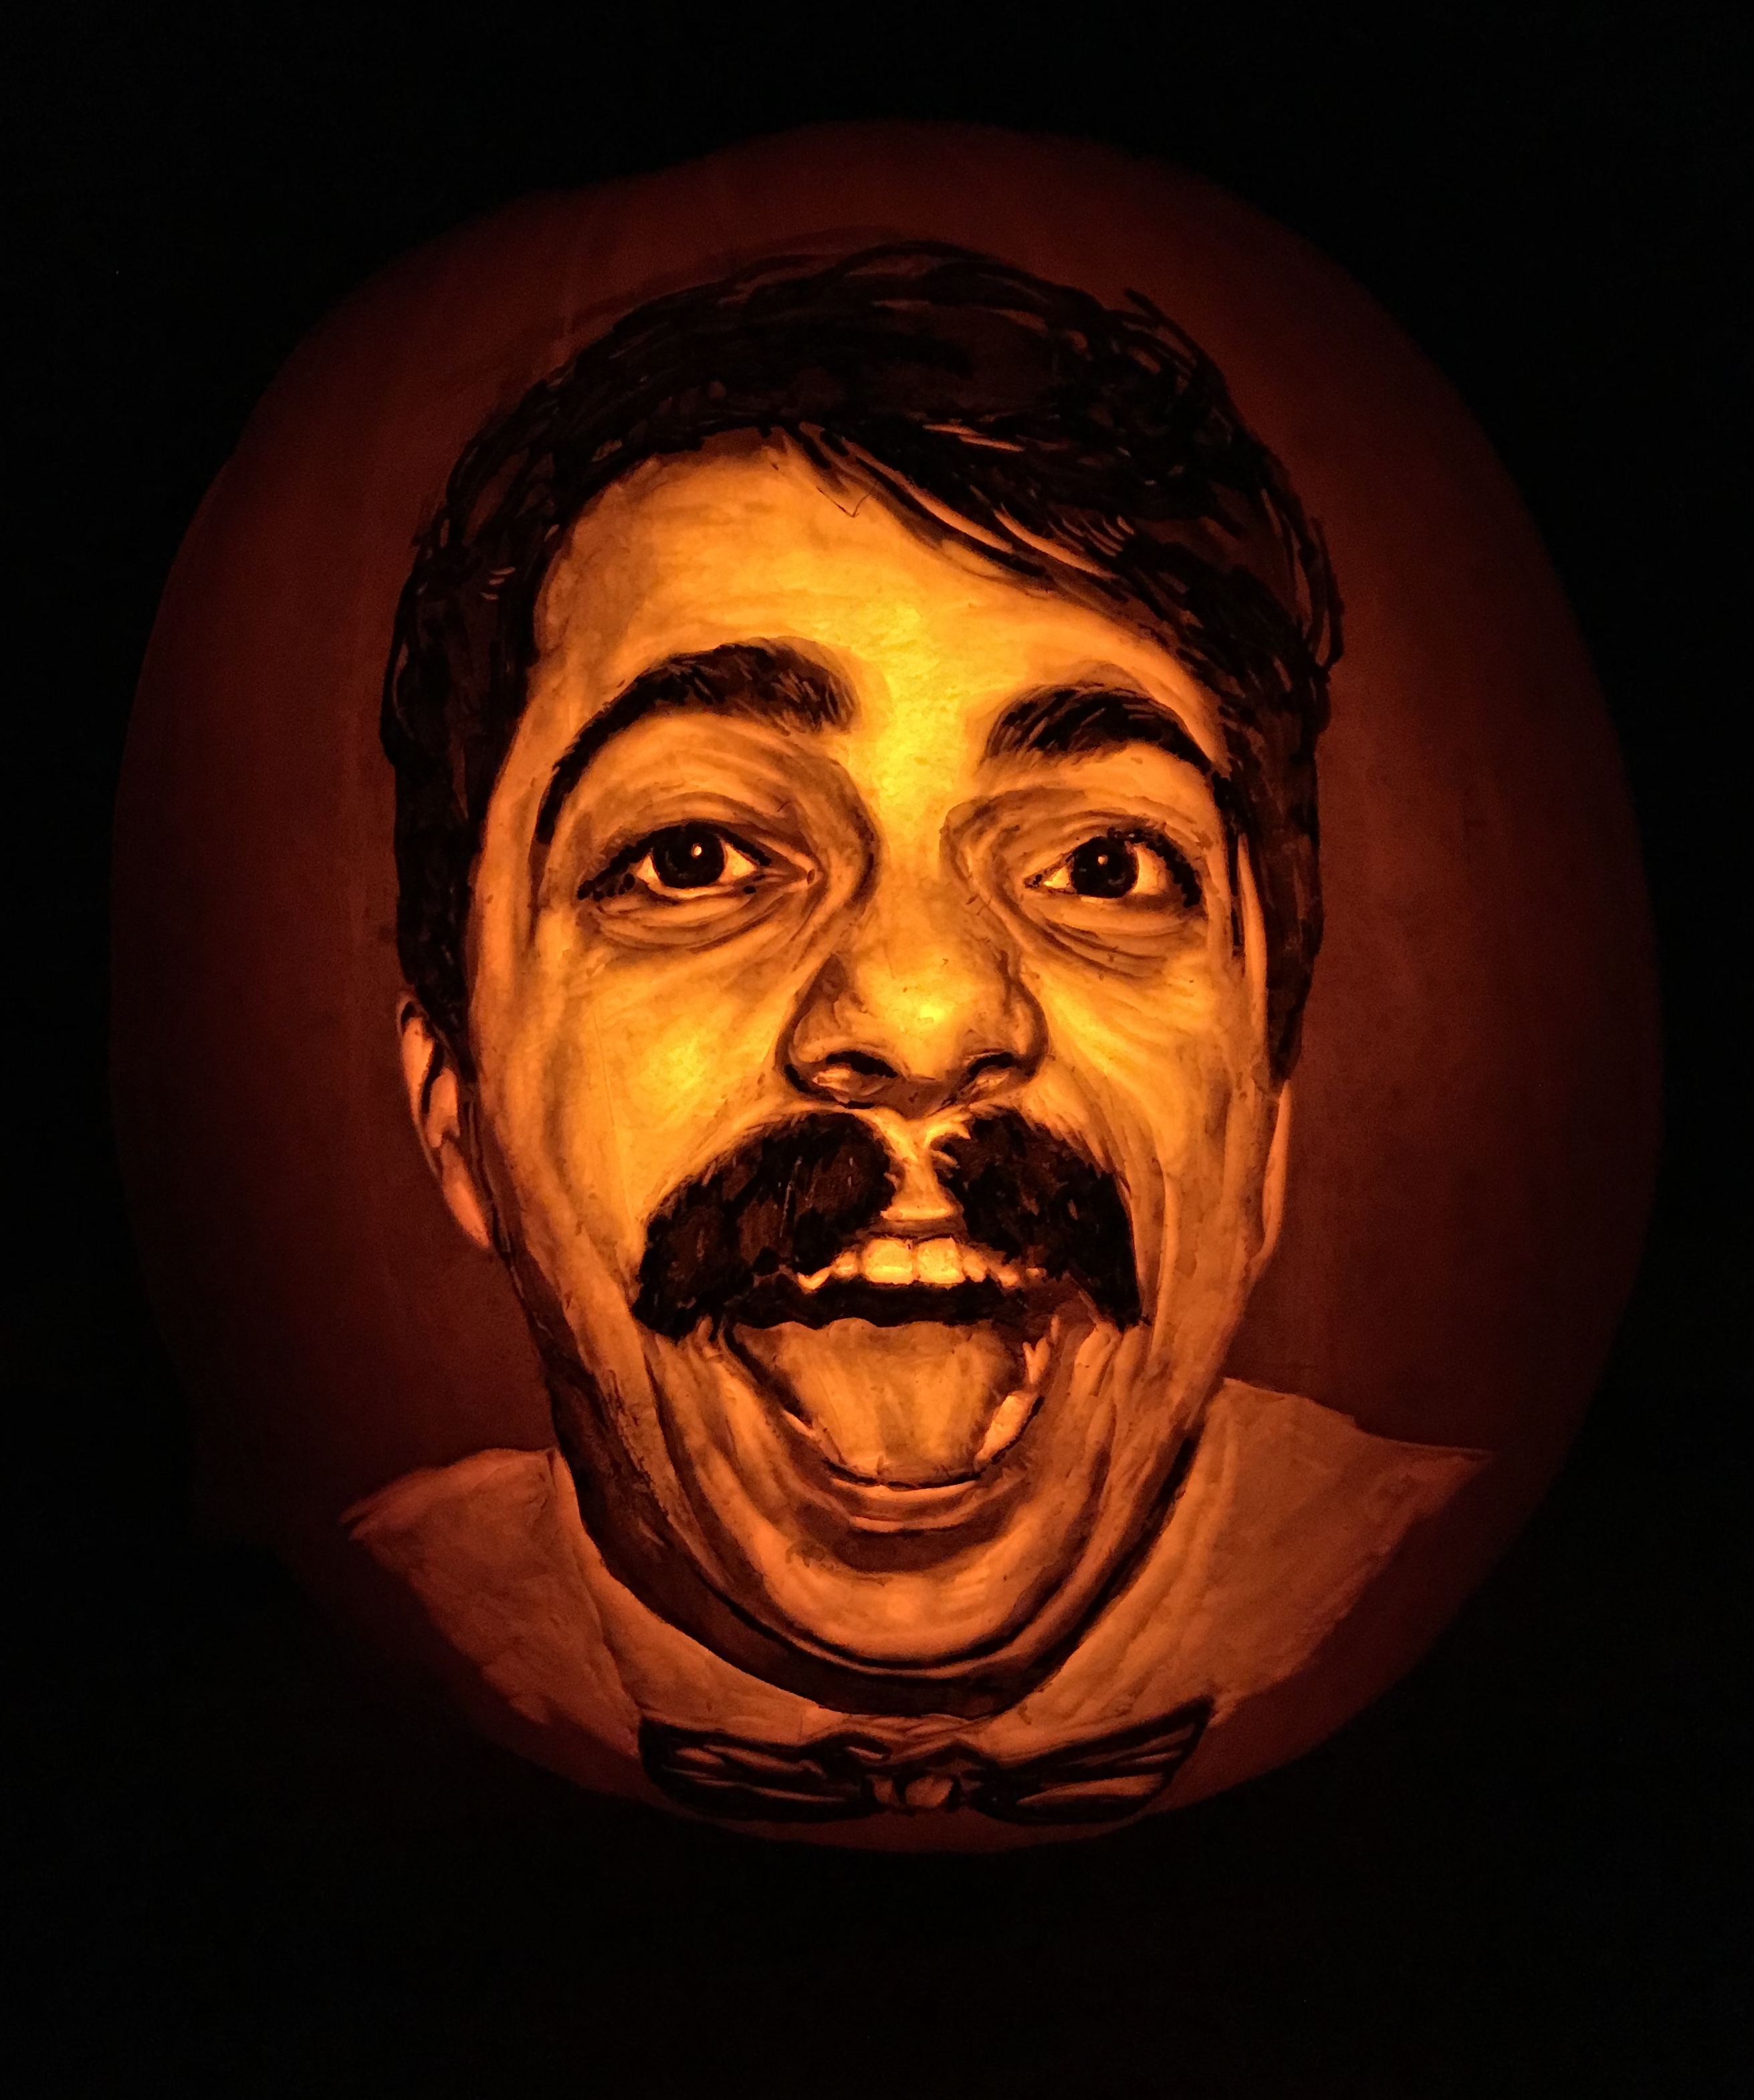
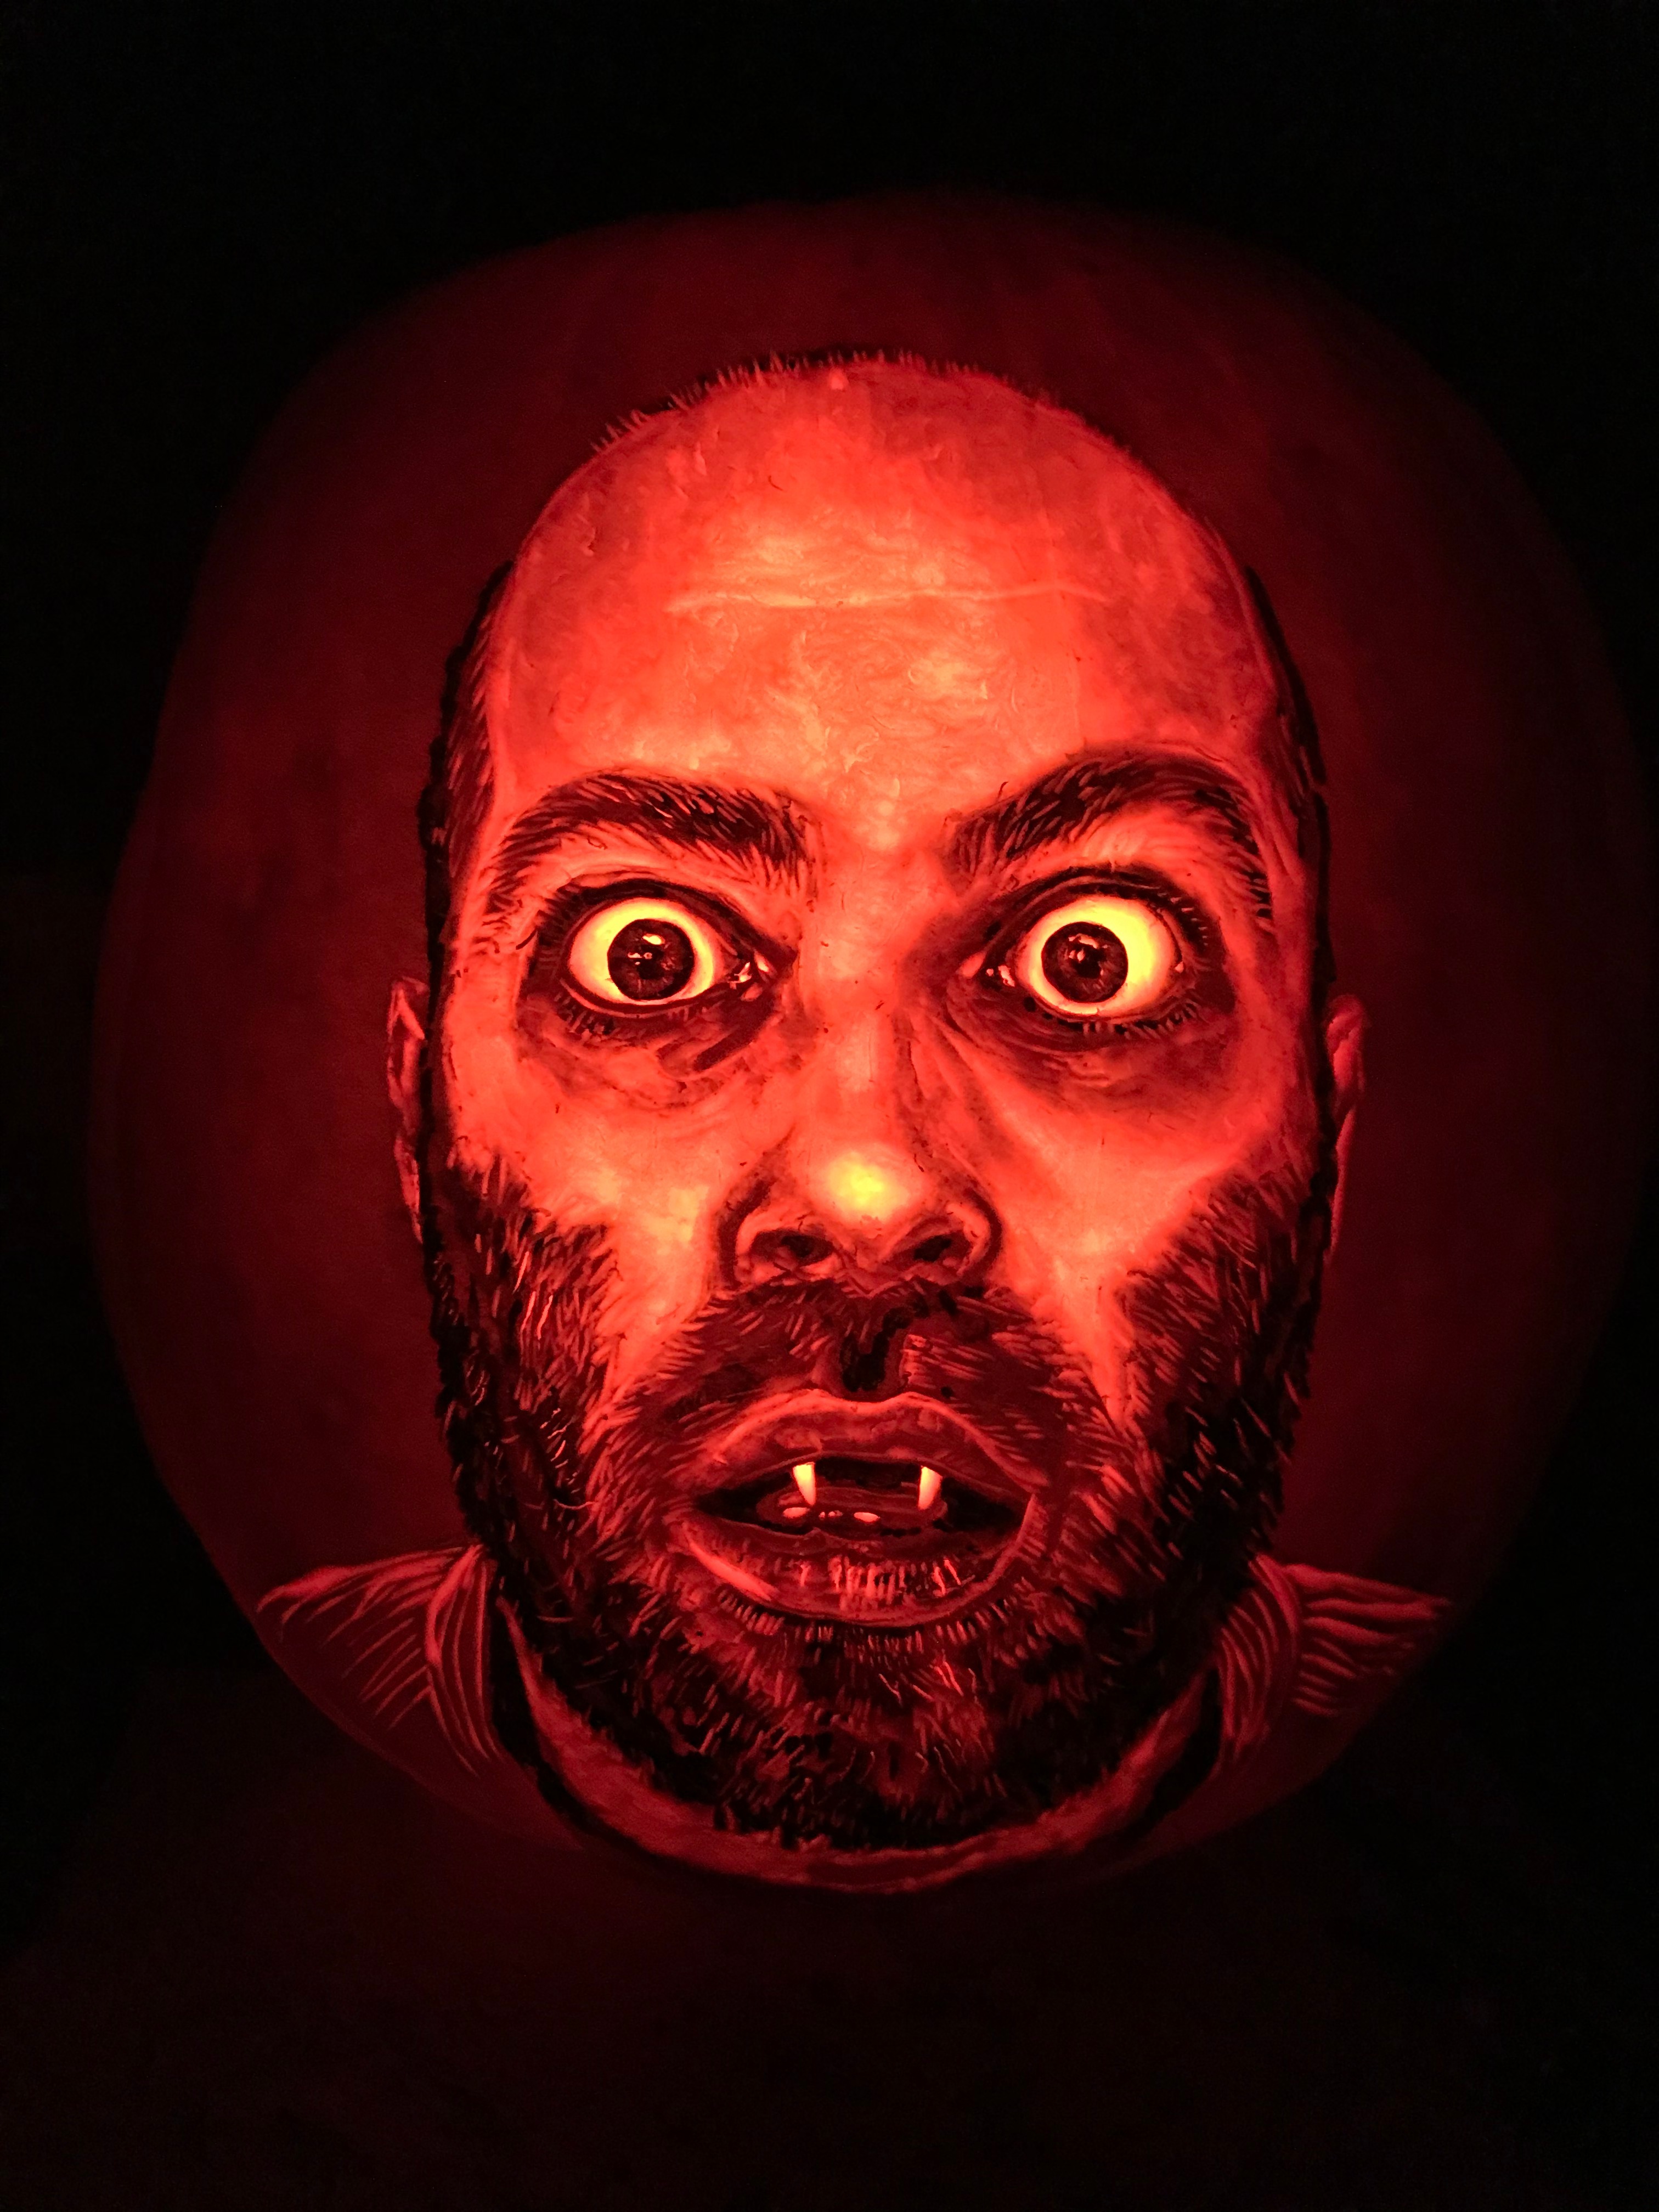
Carve until the portrait looks good, or until you're too tired to keep going. Take a picture - it'll last longer than the pumpkin! I think photos actually often come out better the day after you carve the pumpkin, once a thin skin has formed over the areas you've carved out. Give it a try and see what you think! The pumpkin should last for about a week, maybe longer if you keep it in the fridge.
Enjoy & have a happy Halloween!
As a side note, I carved the vampire portrait for a friend to use as the cover art of a Halloween single he released - check it out here if you're interested, it's pretty great! If you want to see these and many more pumpkins I've carved, check out @jbpumpkins on Instagram.