How to Cartoon Yourself | GIMP | Photoshop Alternative
by paasadani in Design > Digital Graphics
51339 Views, 49 Favorites, 0 Comments
How to Cartoon Yourself | GIMP | Photoshop Alternative
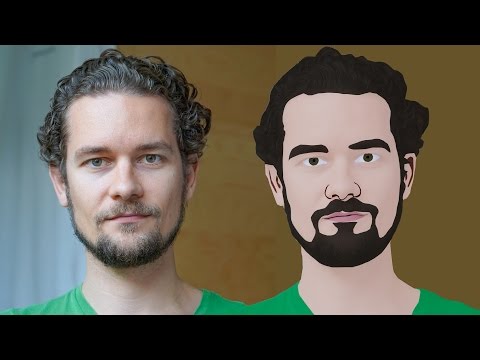
Hi Everyone, Here I'm gonna show you How to create a Cartoon Version of Yourself or Someone using the Open Source Software called GNU Image Manipulation Program. I already posted a Video about this topic on YouTube
If you don't know about GIMP? GIMP is the Alternative for Adobe Photoshop which is also free of cost.
Let's Jump into this trick!!
Open an Image in GIMP
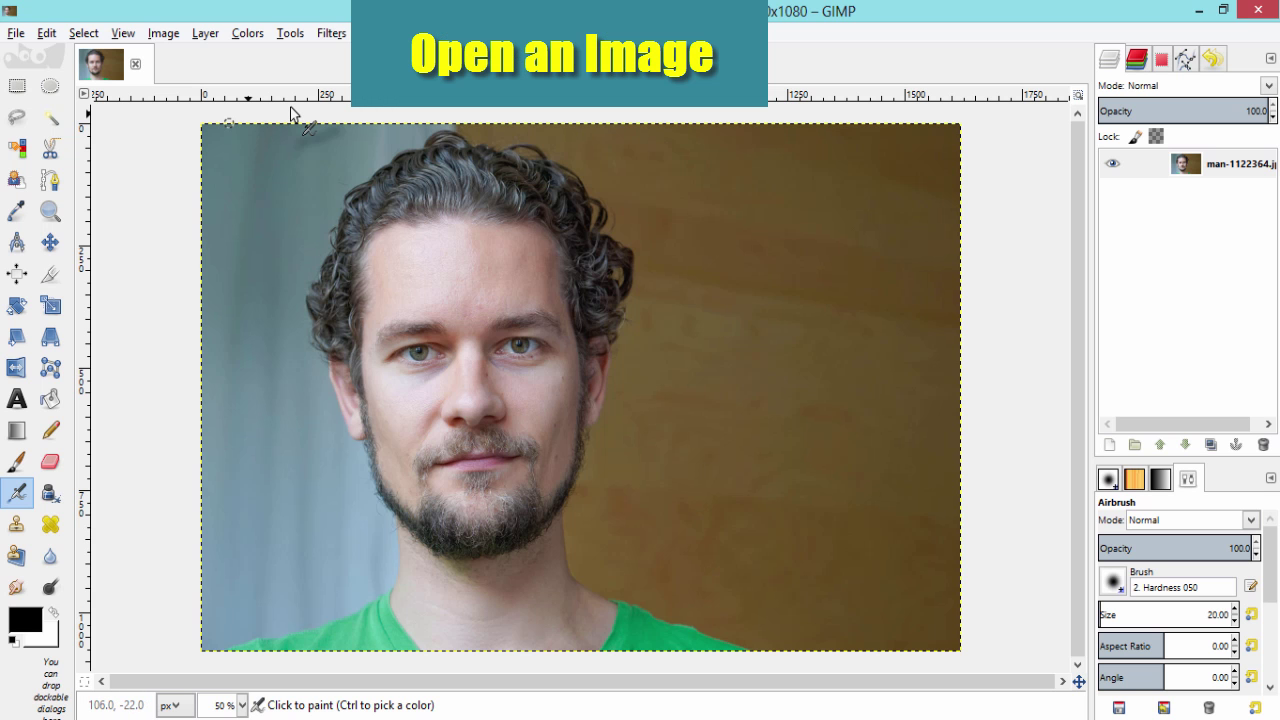
- Download GIMP.
- Open it and Drag and Drop the Image into it
Select the Path Tool
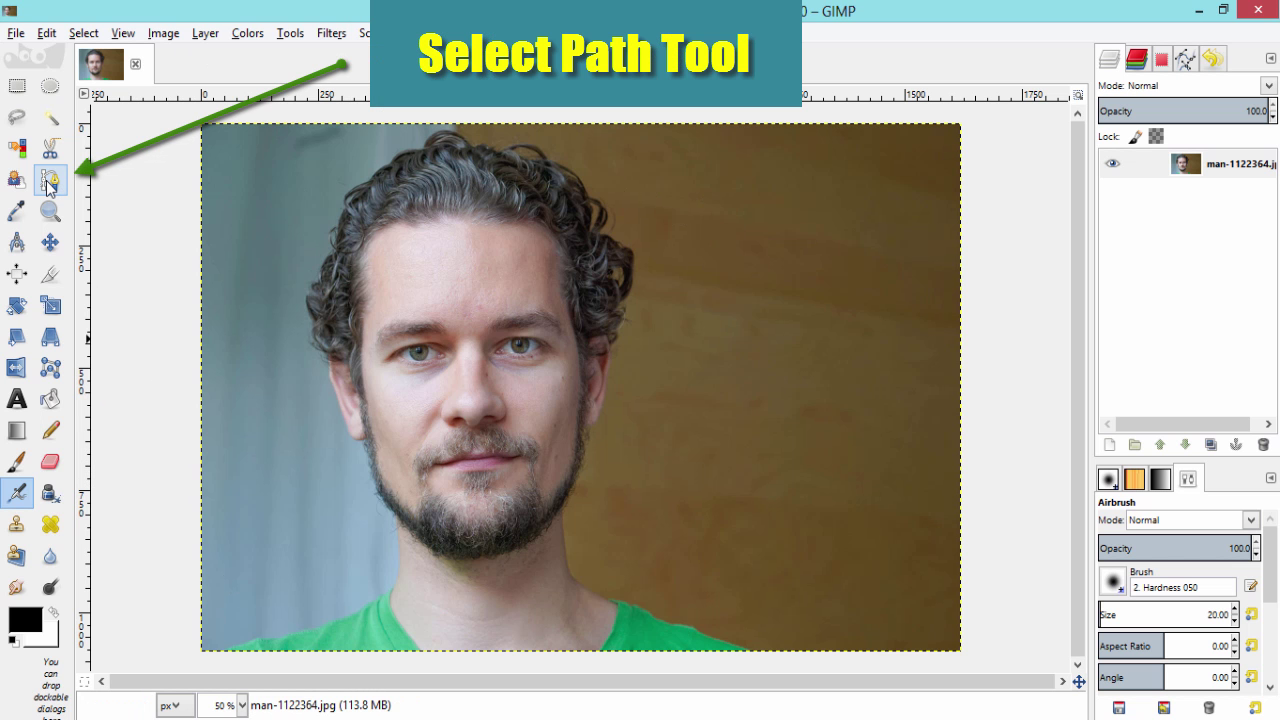
- Select Path Tool by either clicking the icon in the tool bar or by pressing B on your keyboard
Create a New Transparent Layer
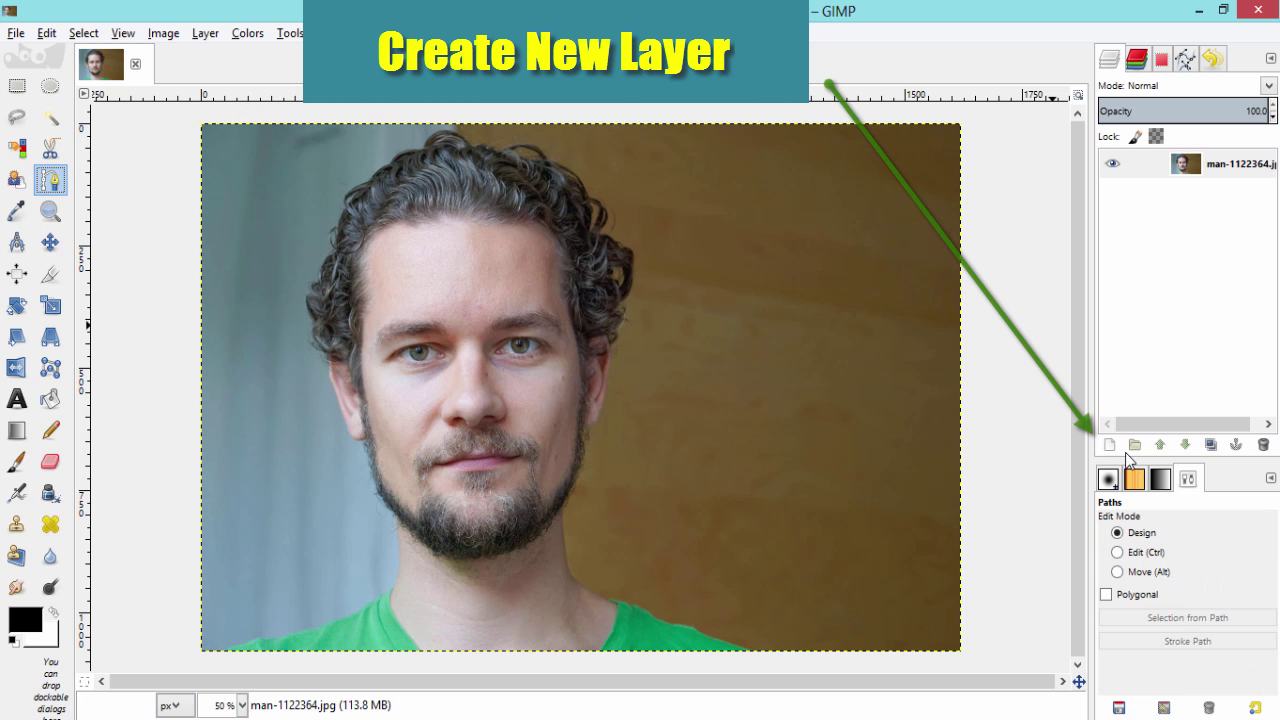
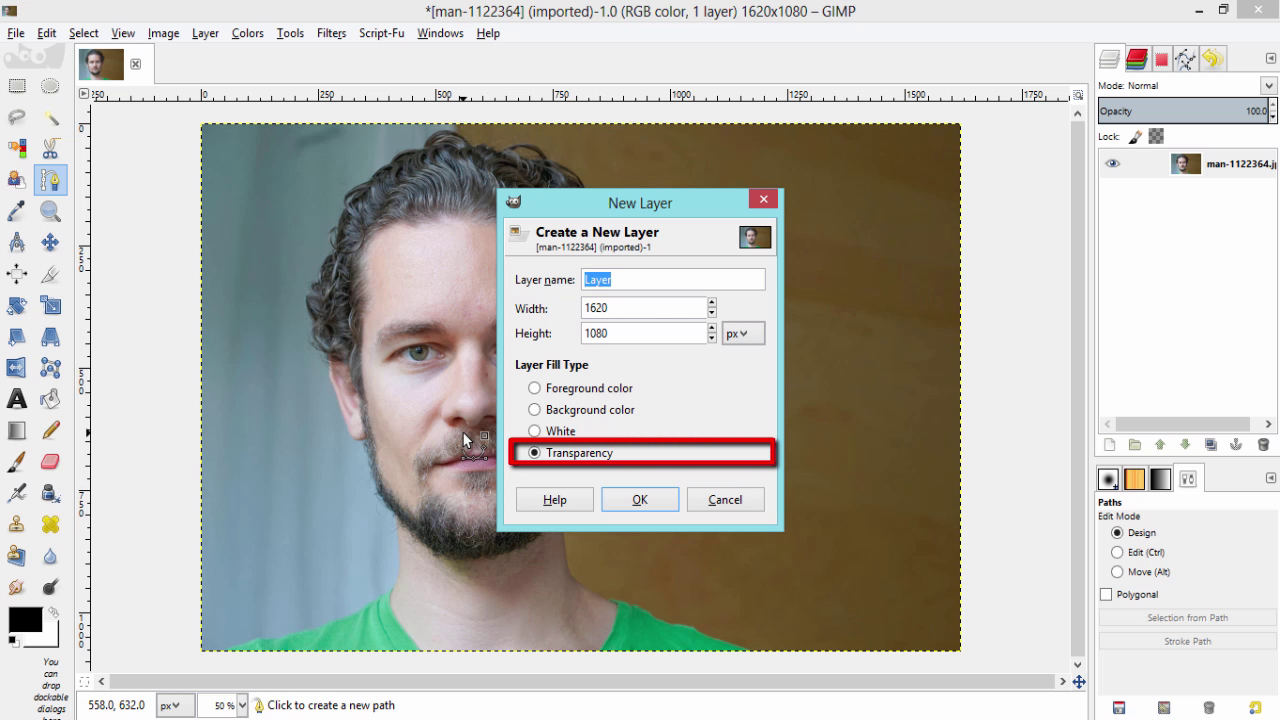
- Create a New Transparent by going to Layer - New Layer
- Select Transparency and Click OK
- Change the Layer Name to Cartoon Layer
Draw the Path Around the Subject
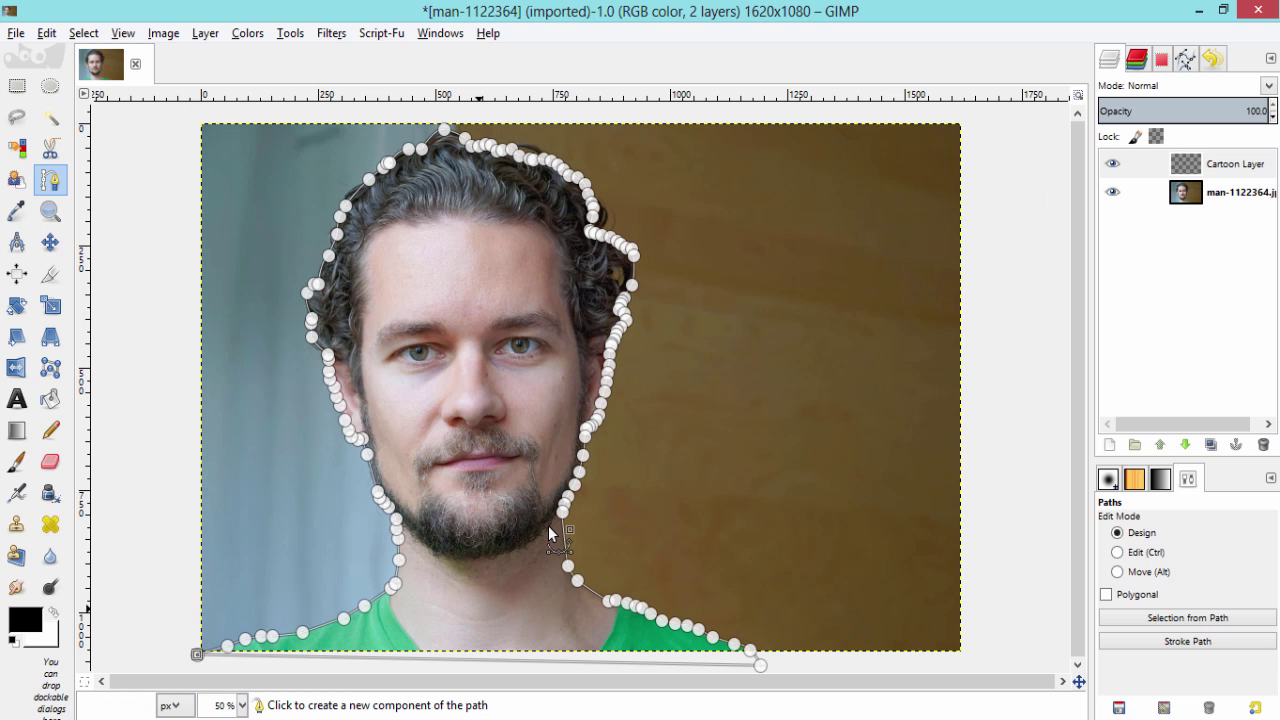
- Make sure the Cartoon Layer is Active
- Then draw the path around the Subject
Make Path Into Selection
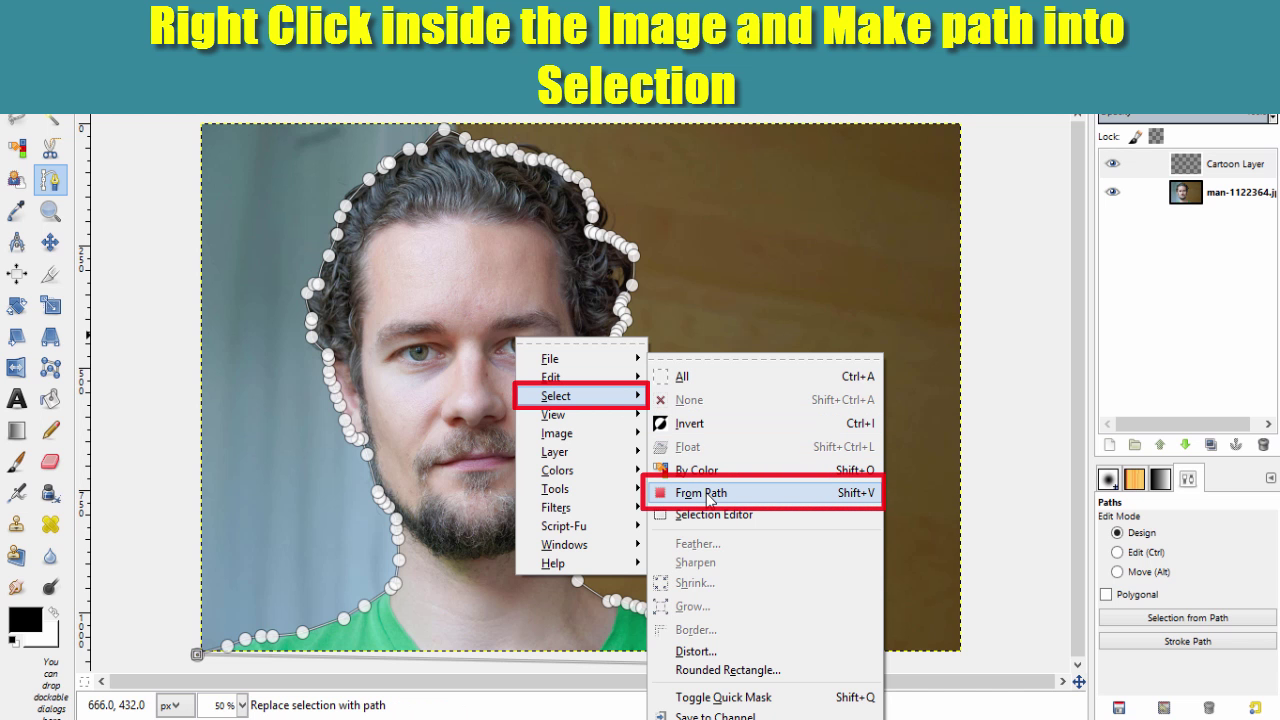
- Right Click inside the Image
- Go to Select - from path
Fill the Selection With Subject's Skin Tone Color
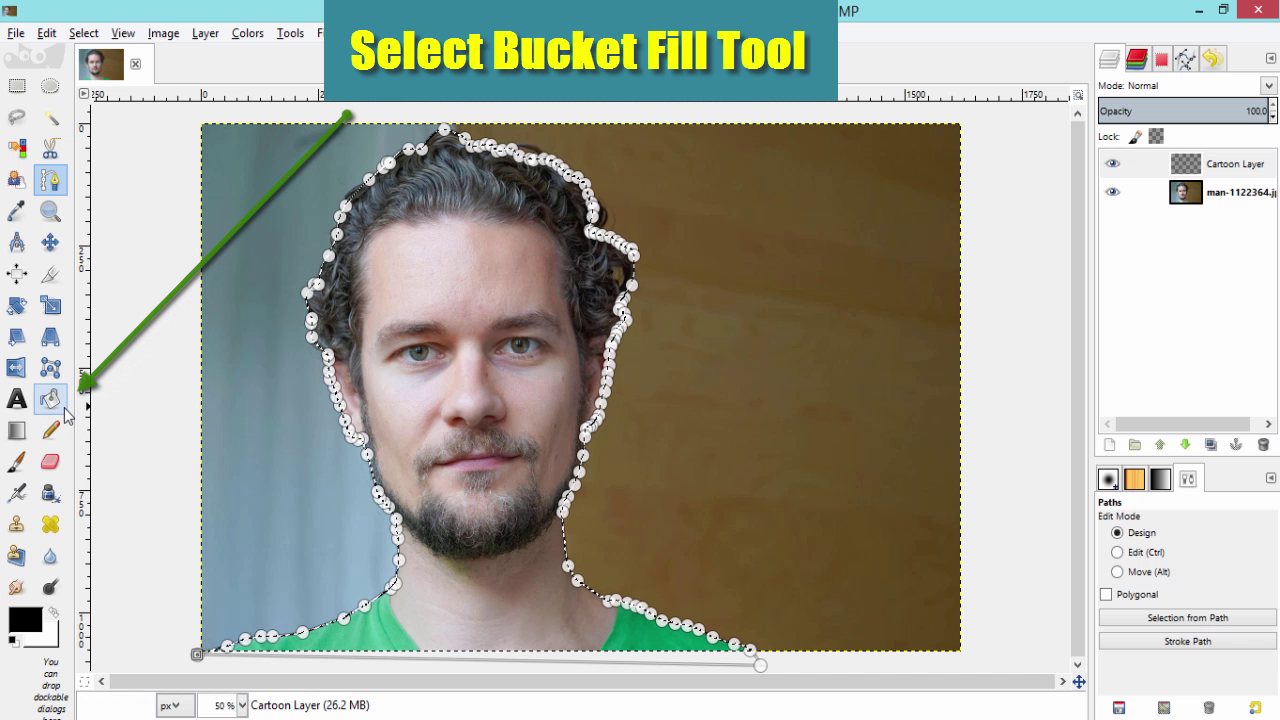
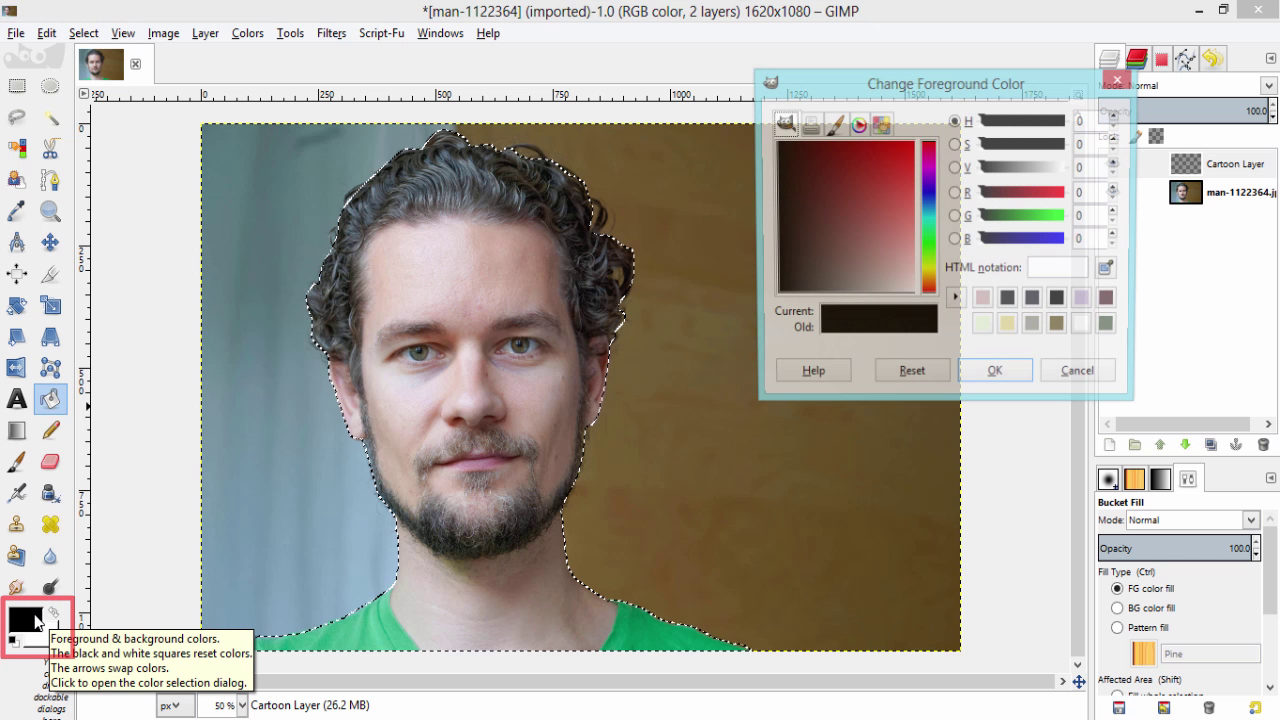
- Select Bucket Fill Tool
- Click on Foreground Color to change its Color
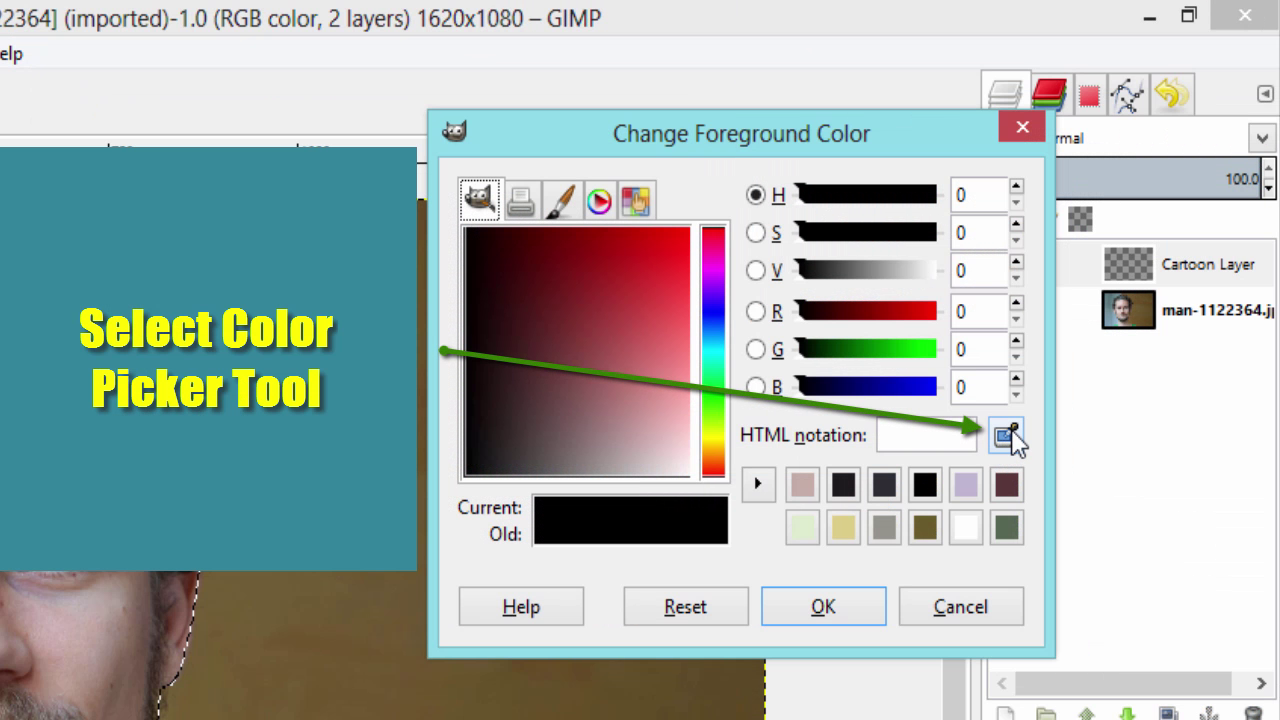
- Select Color Picker Tool
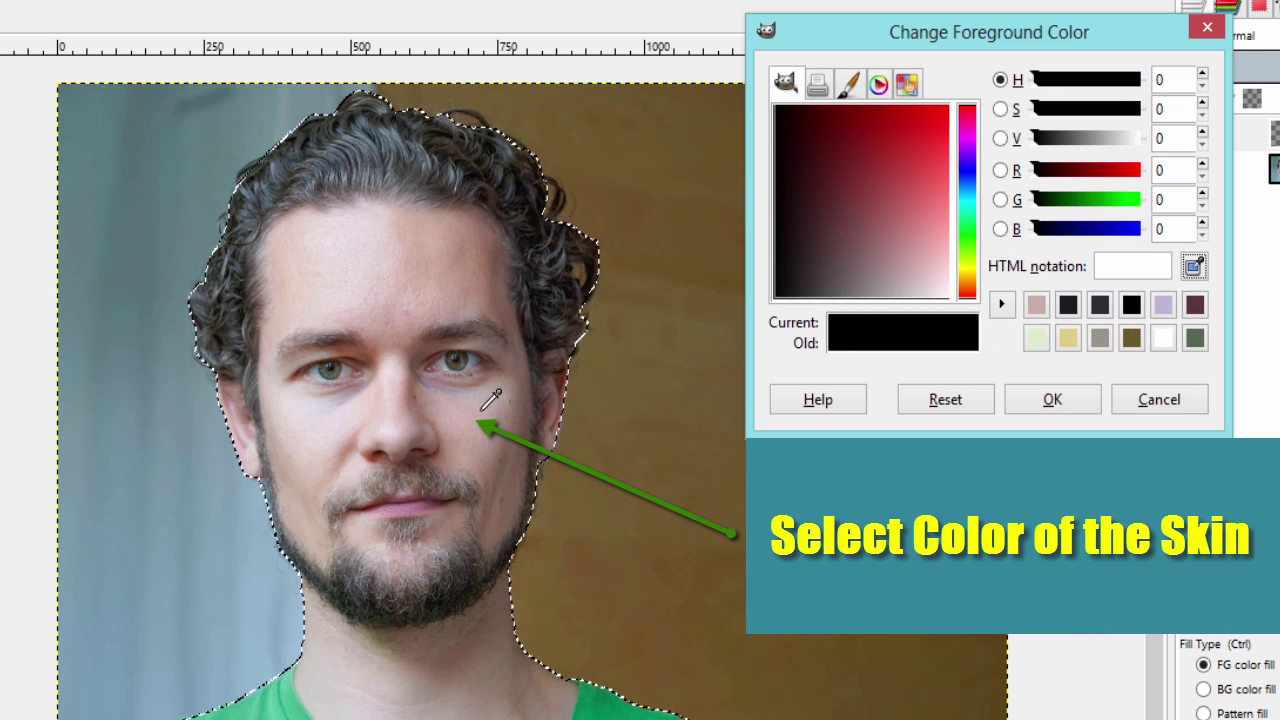
- Pick the Color from the Skin using this Color Picker Tool
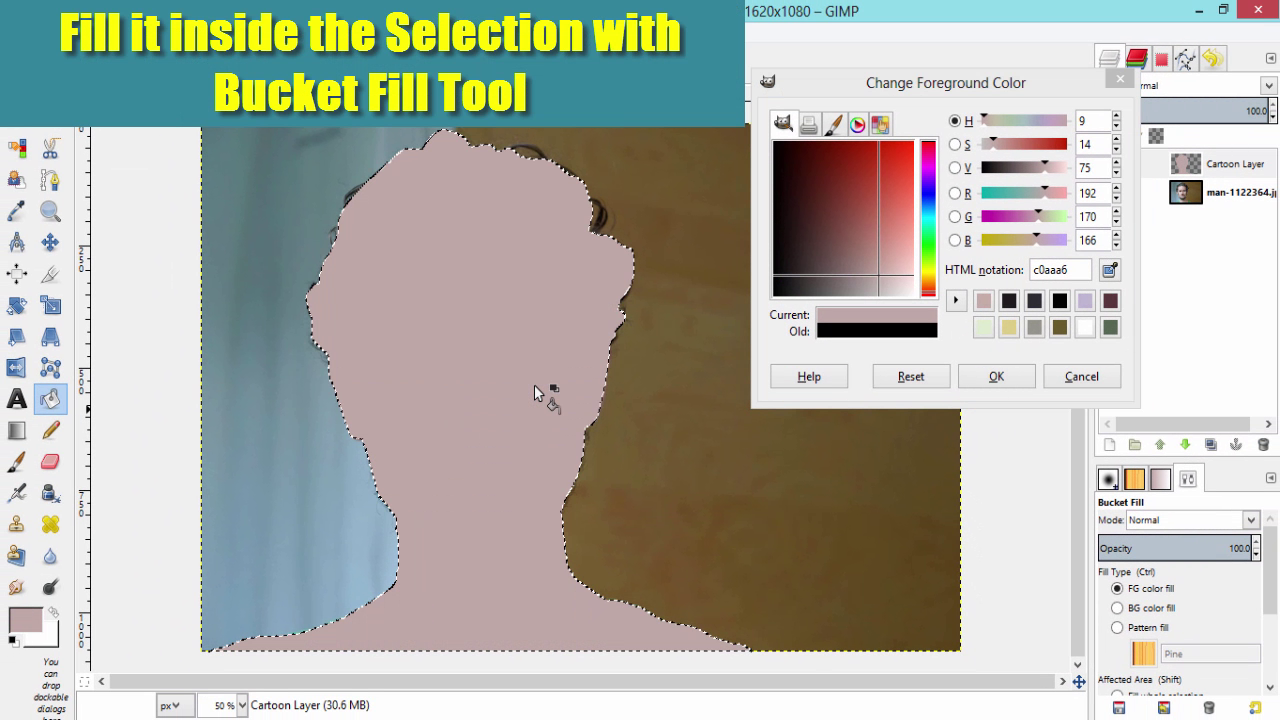
- Fill it inside the Selection using Bucket Fill Tool
Then Select the Facial Features and Shirts and Fill It With Their Respective Colors Using Bucket Fill Tool
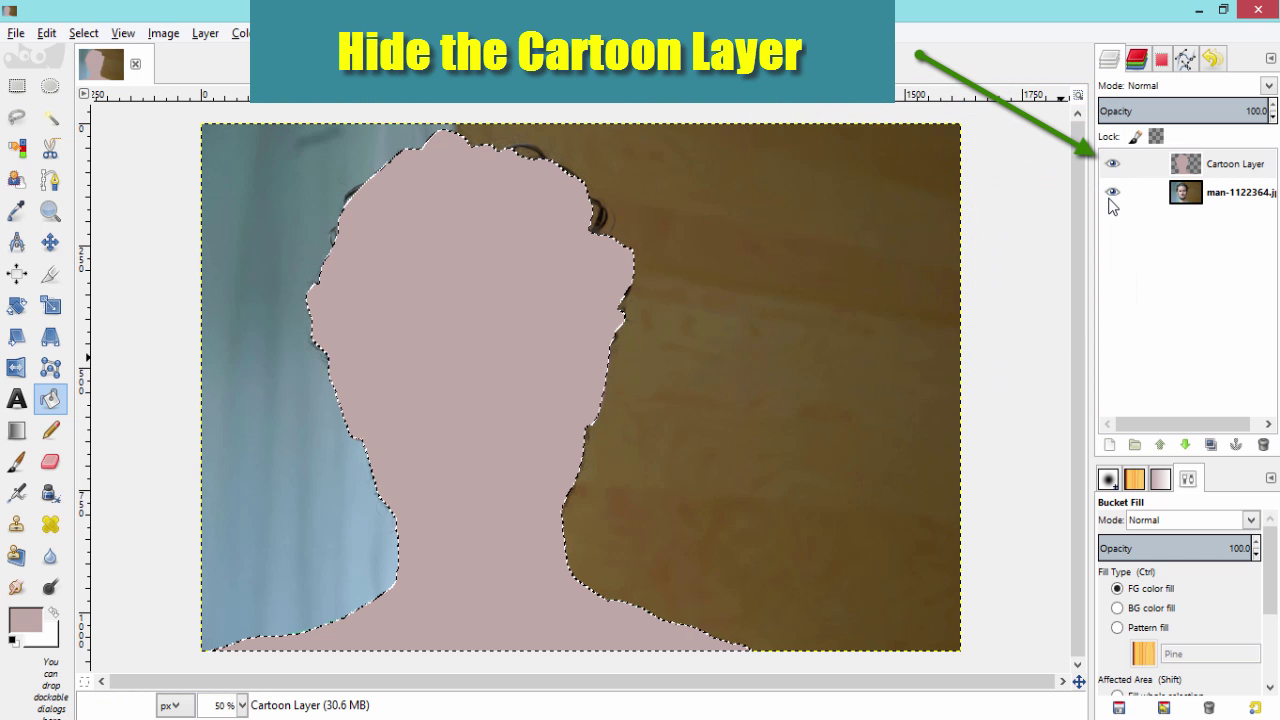
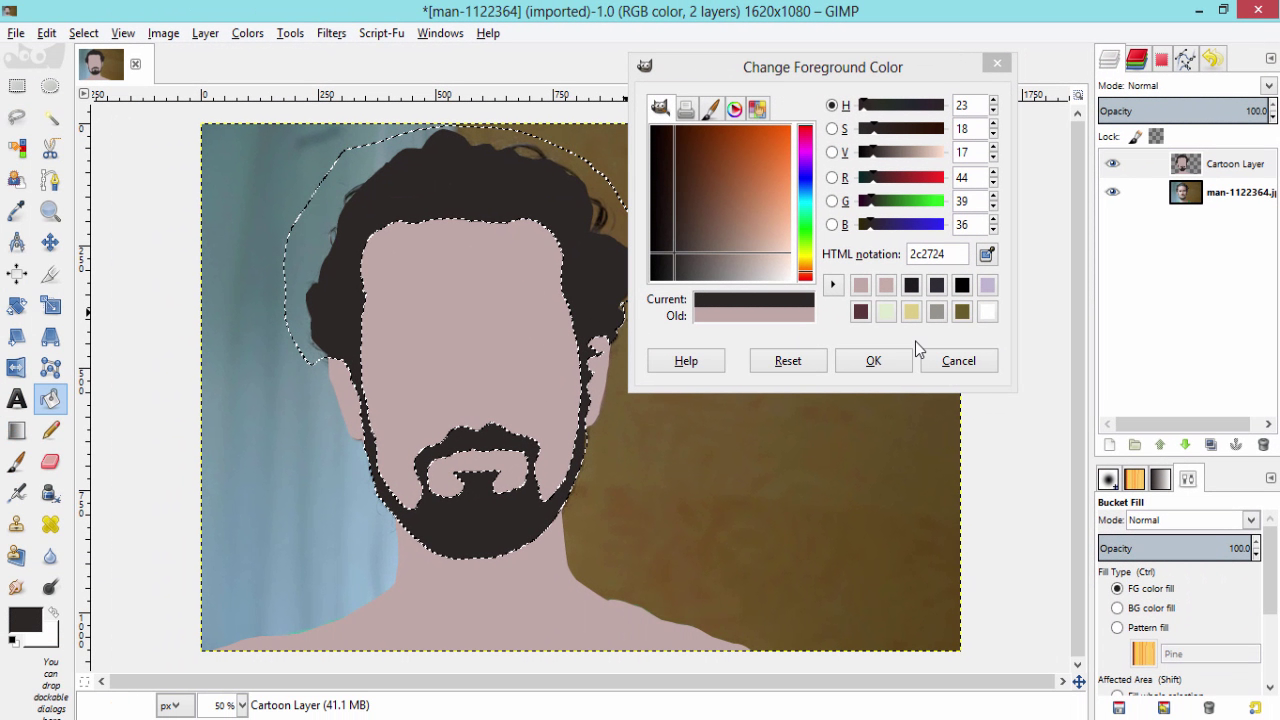
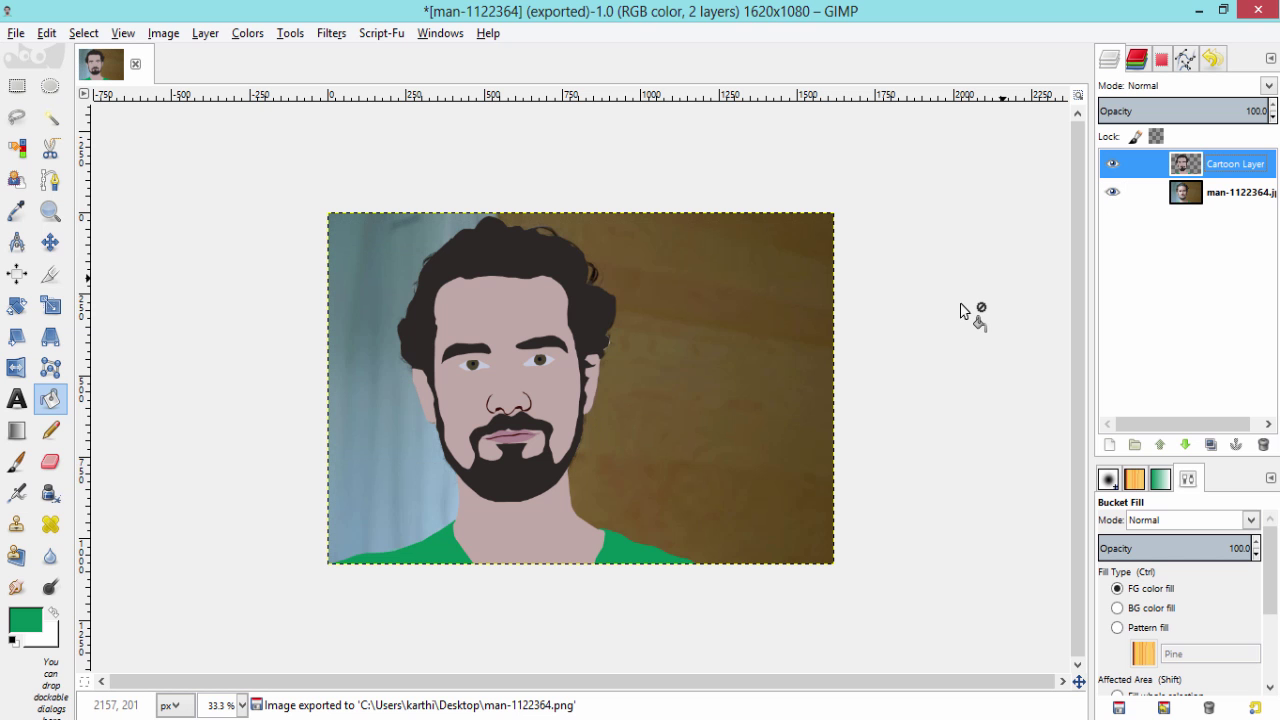
- Hide the Cartoon Layer to get the Source Layer Visible
- Then Draw the Path for the Hair and Fill it with the Hair Color
- Do the same steps for Eyes, Eyebrows, Nose, Ears and Mouth
- Also do the Same for the Shirt
Move the Source Layer to the Top of the Cartoon Layer
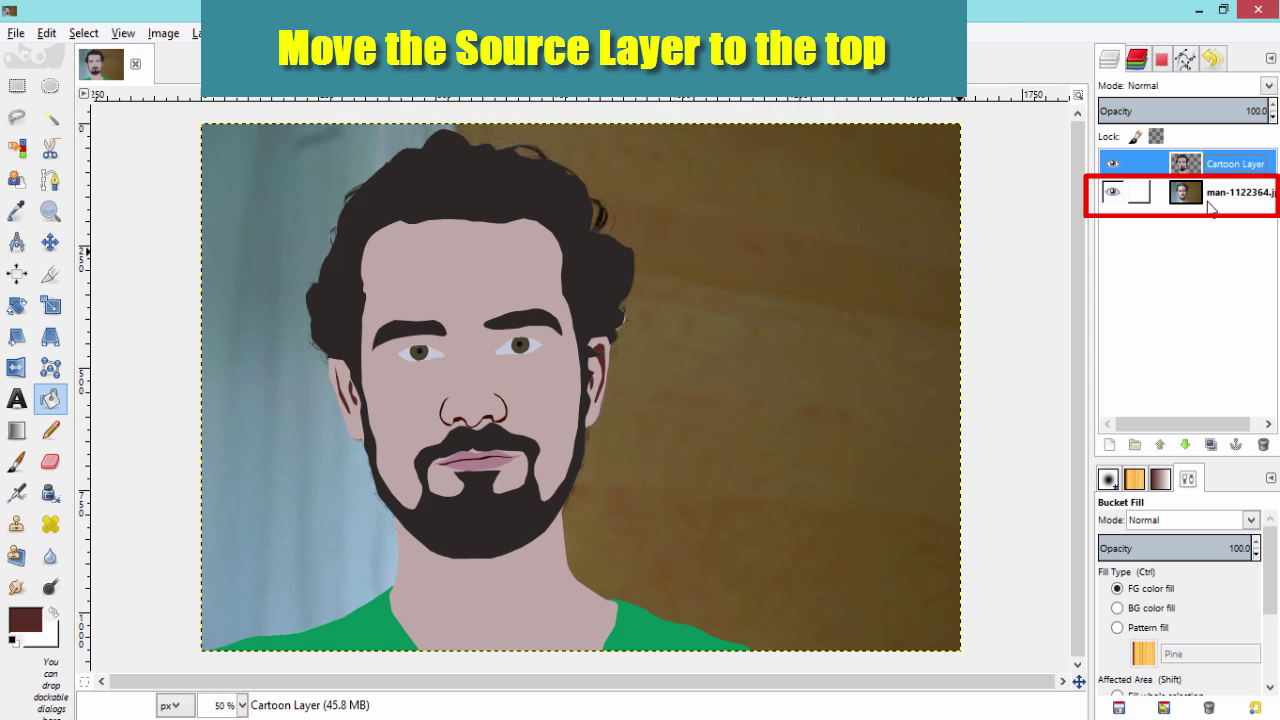
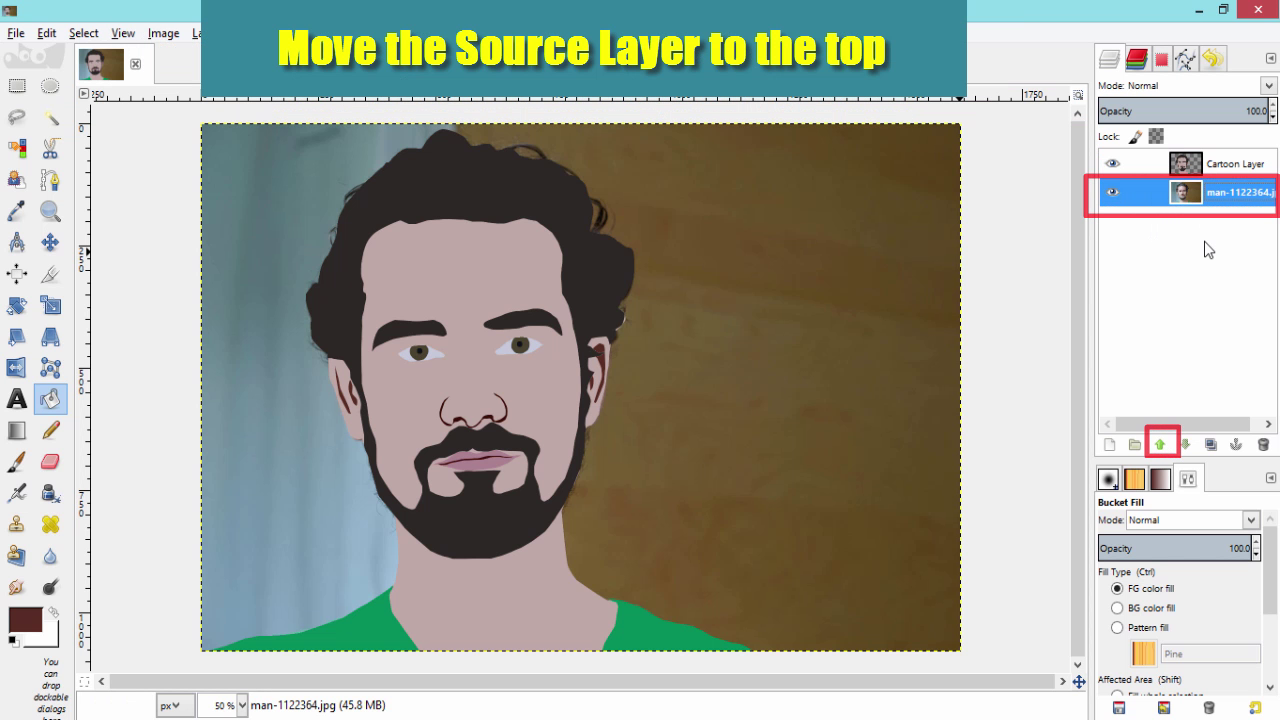
- Make the Source Layer Active
- And click on the Upper Arrow
Add Alpha Channel to the Source Layer
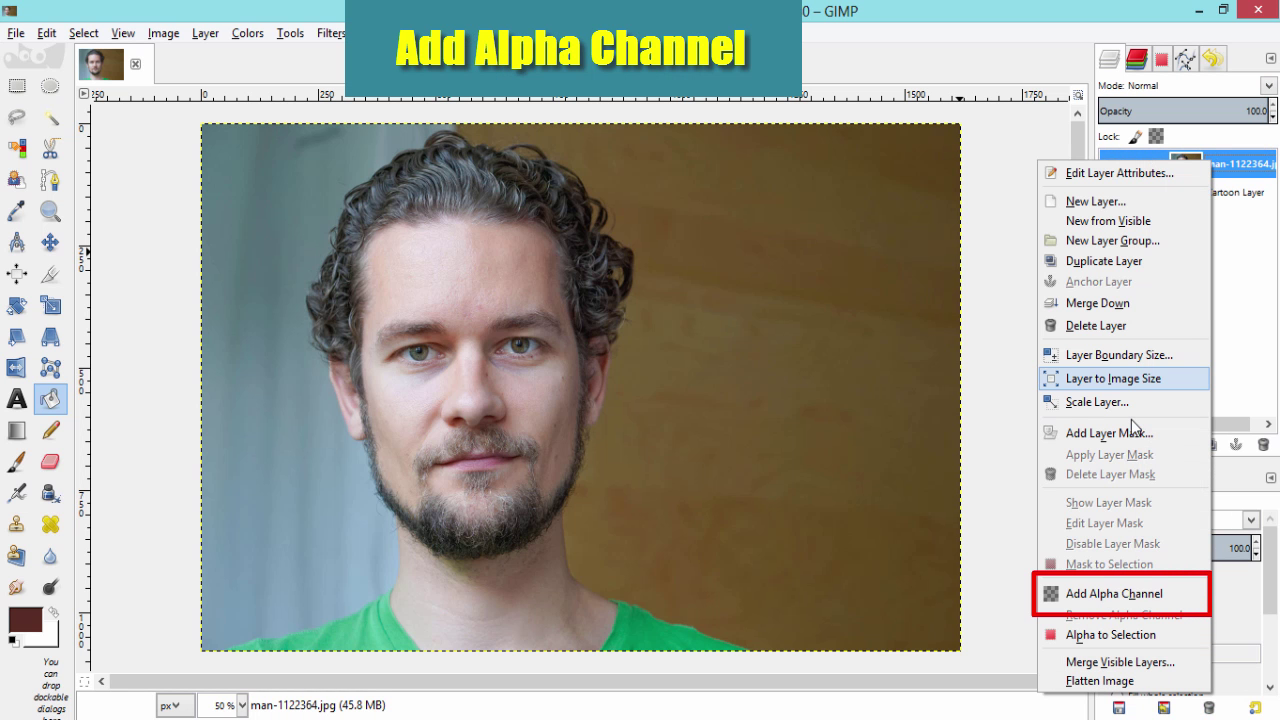
- Right Click on the Source Layer
- Add Alpha Channel
Make Its Mode to Overlay
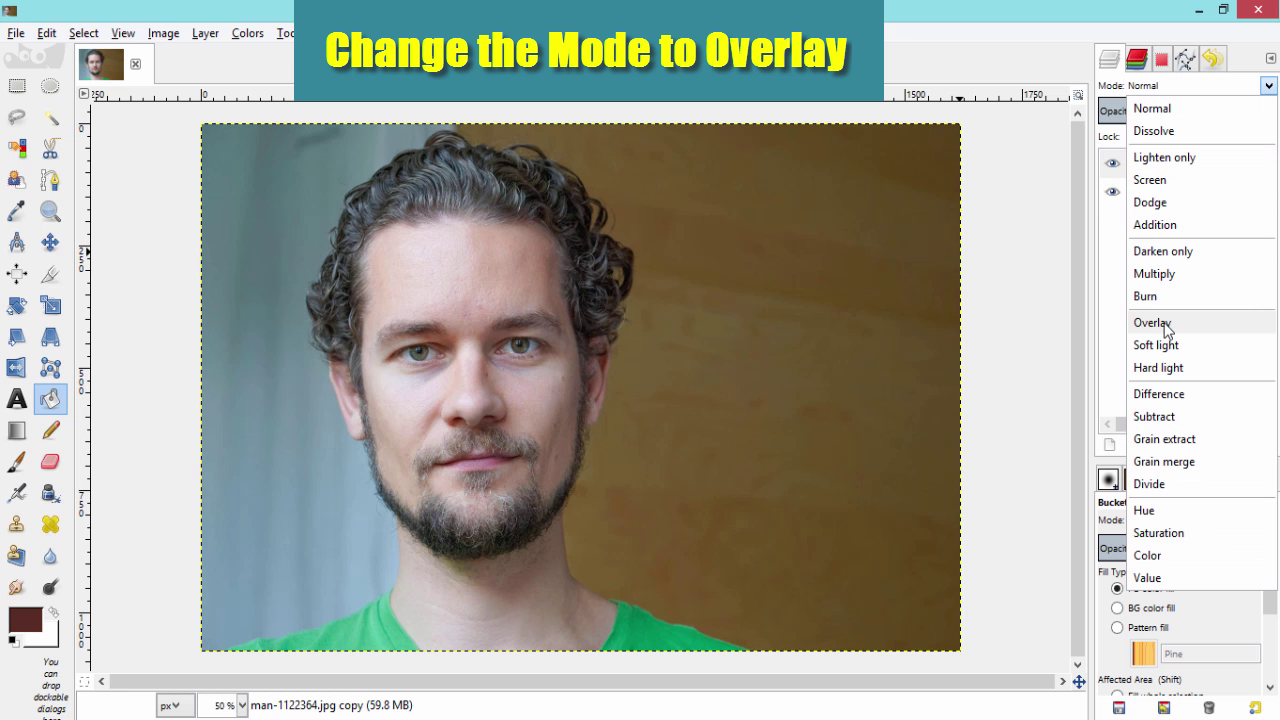
- Make the Source Layer active
- Click on Mode
- Select Overlay
Reduce Its Opacity to 50
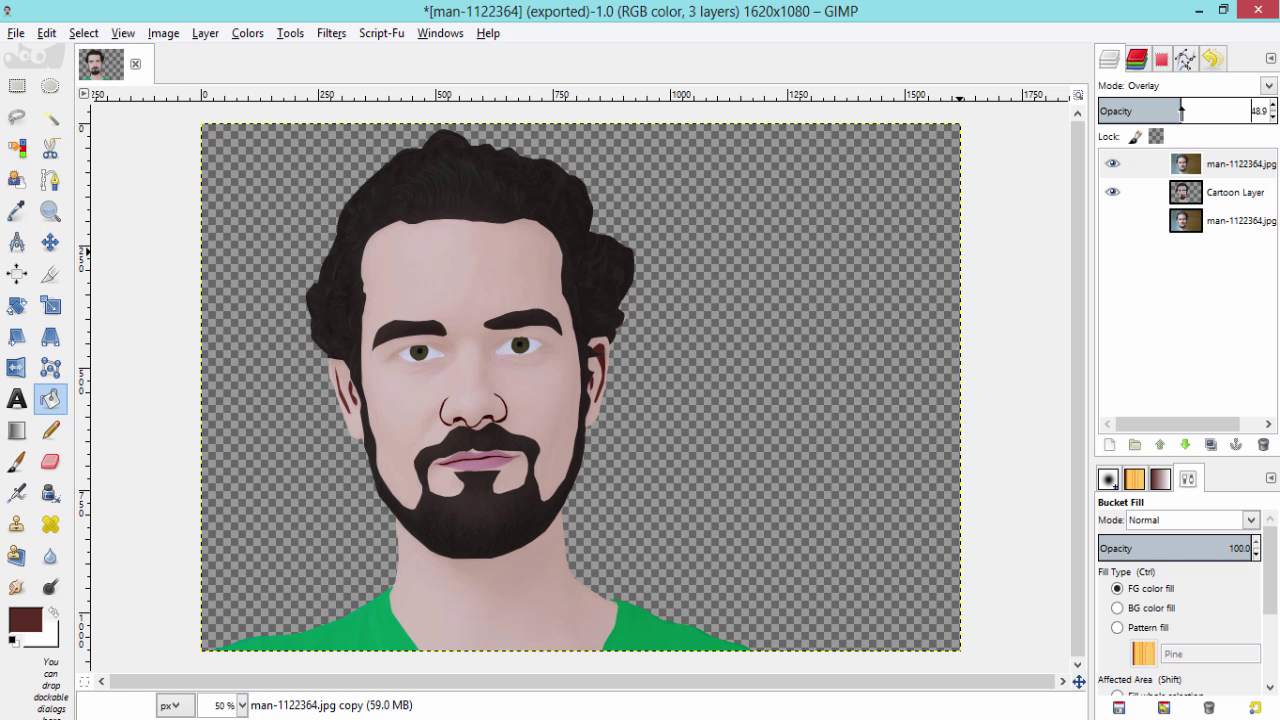
- Change its Opacity nearly to 50%
- Last two steps will helps you to create the Shadows and Highlights for your Cartoon Character
Create a Background
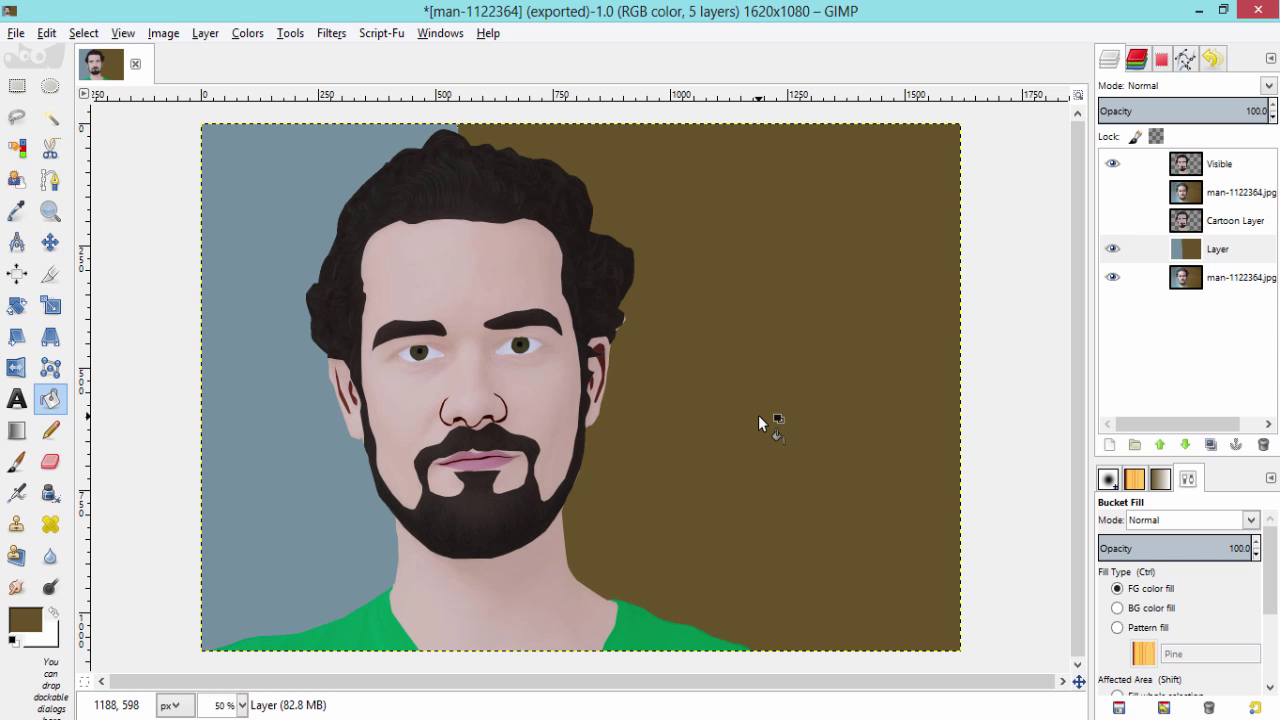
- Add a Layer below the Cartoon Layer
- Create a Background the Image
Conclusion
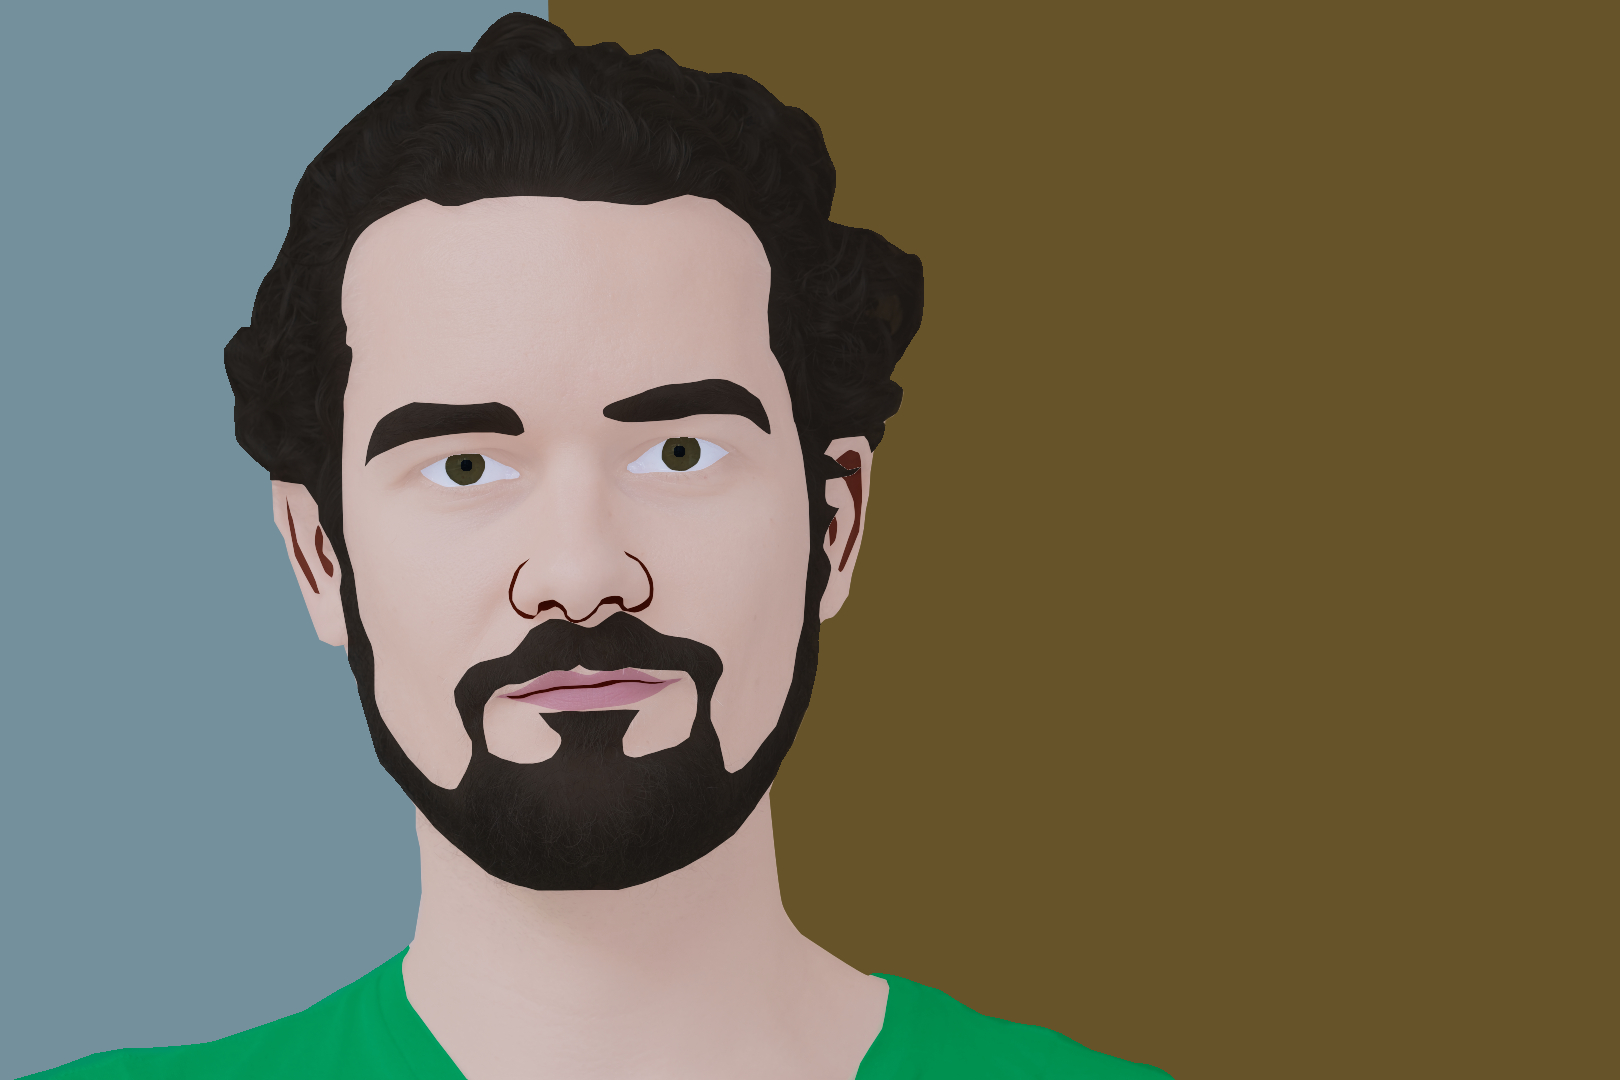
This is the Final Output.
If you have any doubts watch my Video on my YouTube Channel. You can get more ideas while watching the Video.
Hope you can create your own Cartoon Character now.