How to CAM Your Bike Seat Clamp!
by llamasnfishes in Workshop > Metalworking
1598 Views, 7 Favorites, 0 Comments
How to CAM Your Bike Seat Clamp!
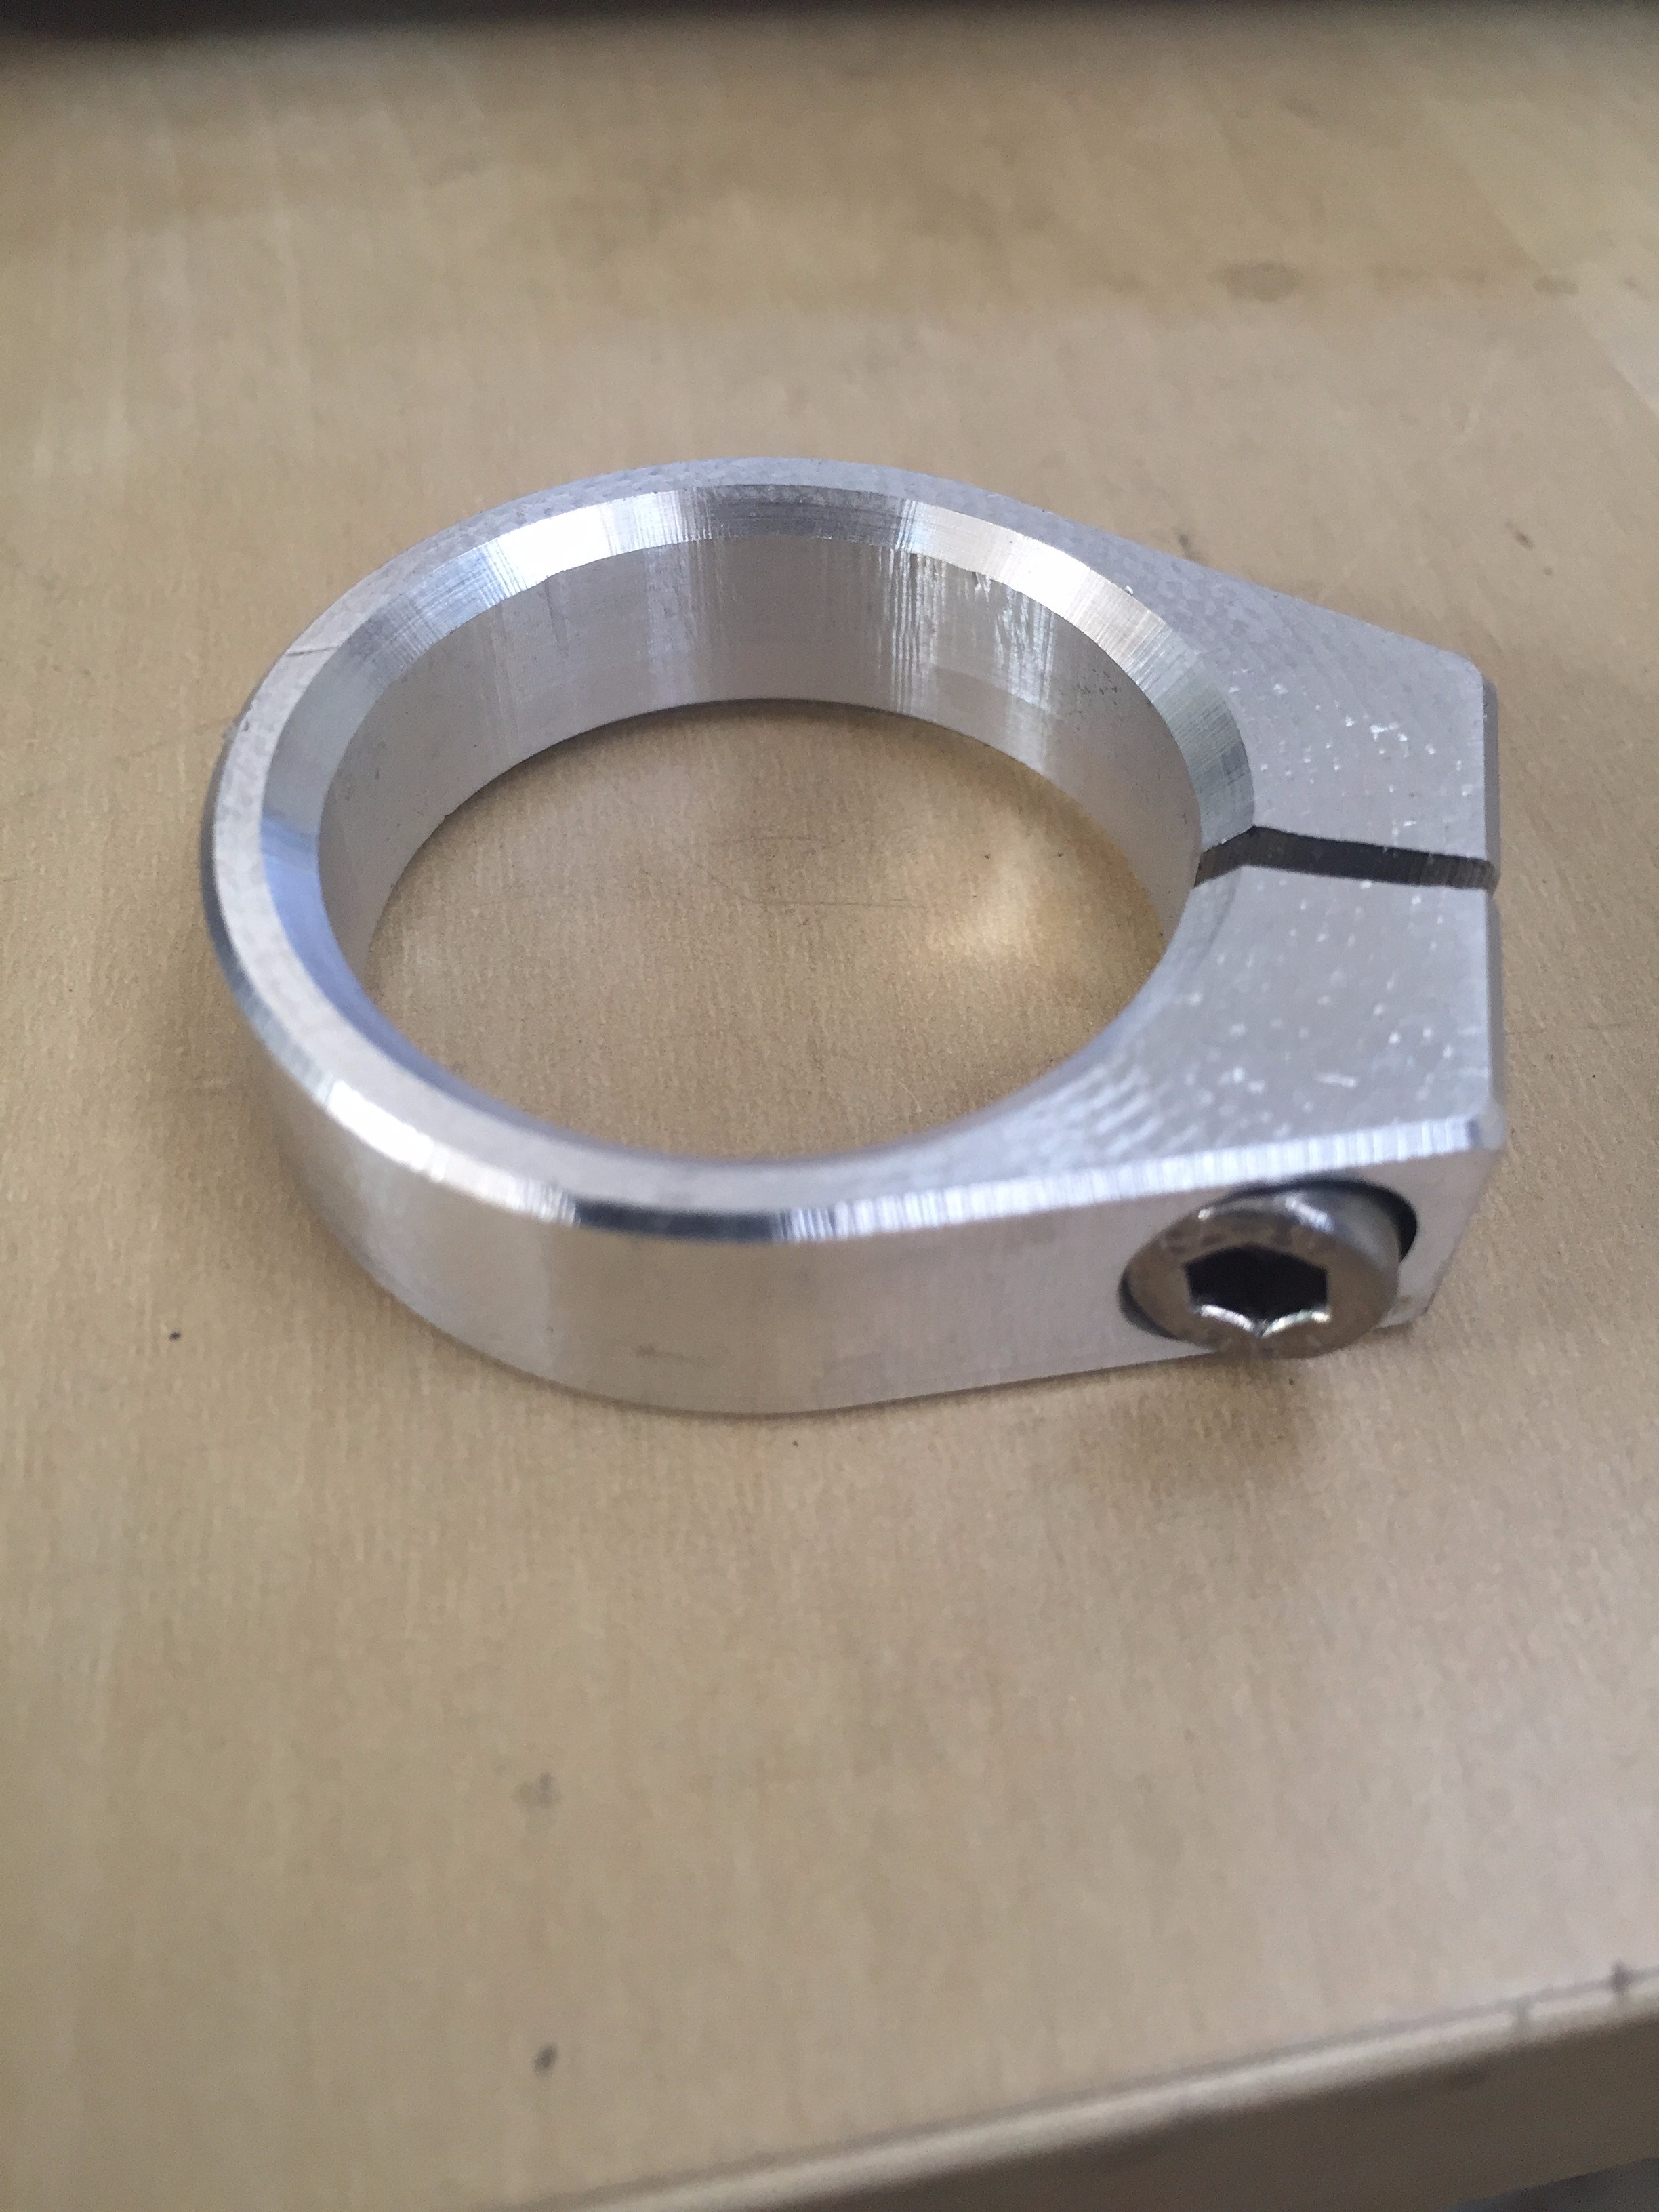.JPG)
This is a second post to another Instructable where we desinged a bike clamp step by step. In this one, I plan on showing you how to CAM the part!
Tools
Autodesk Inventor with HSM or Fusion
A Brief Overview
A couple notes about the CAMing process.
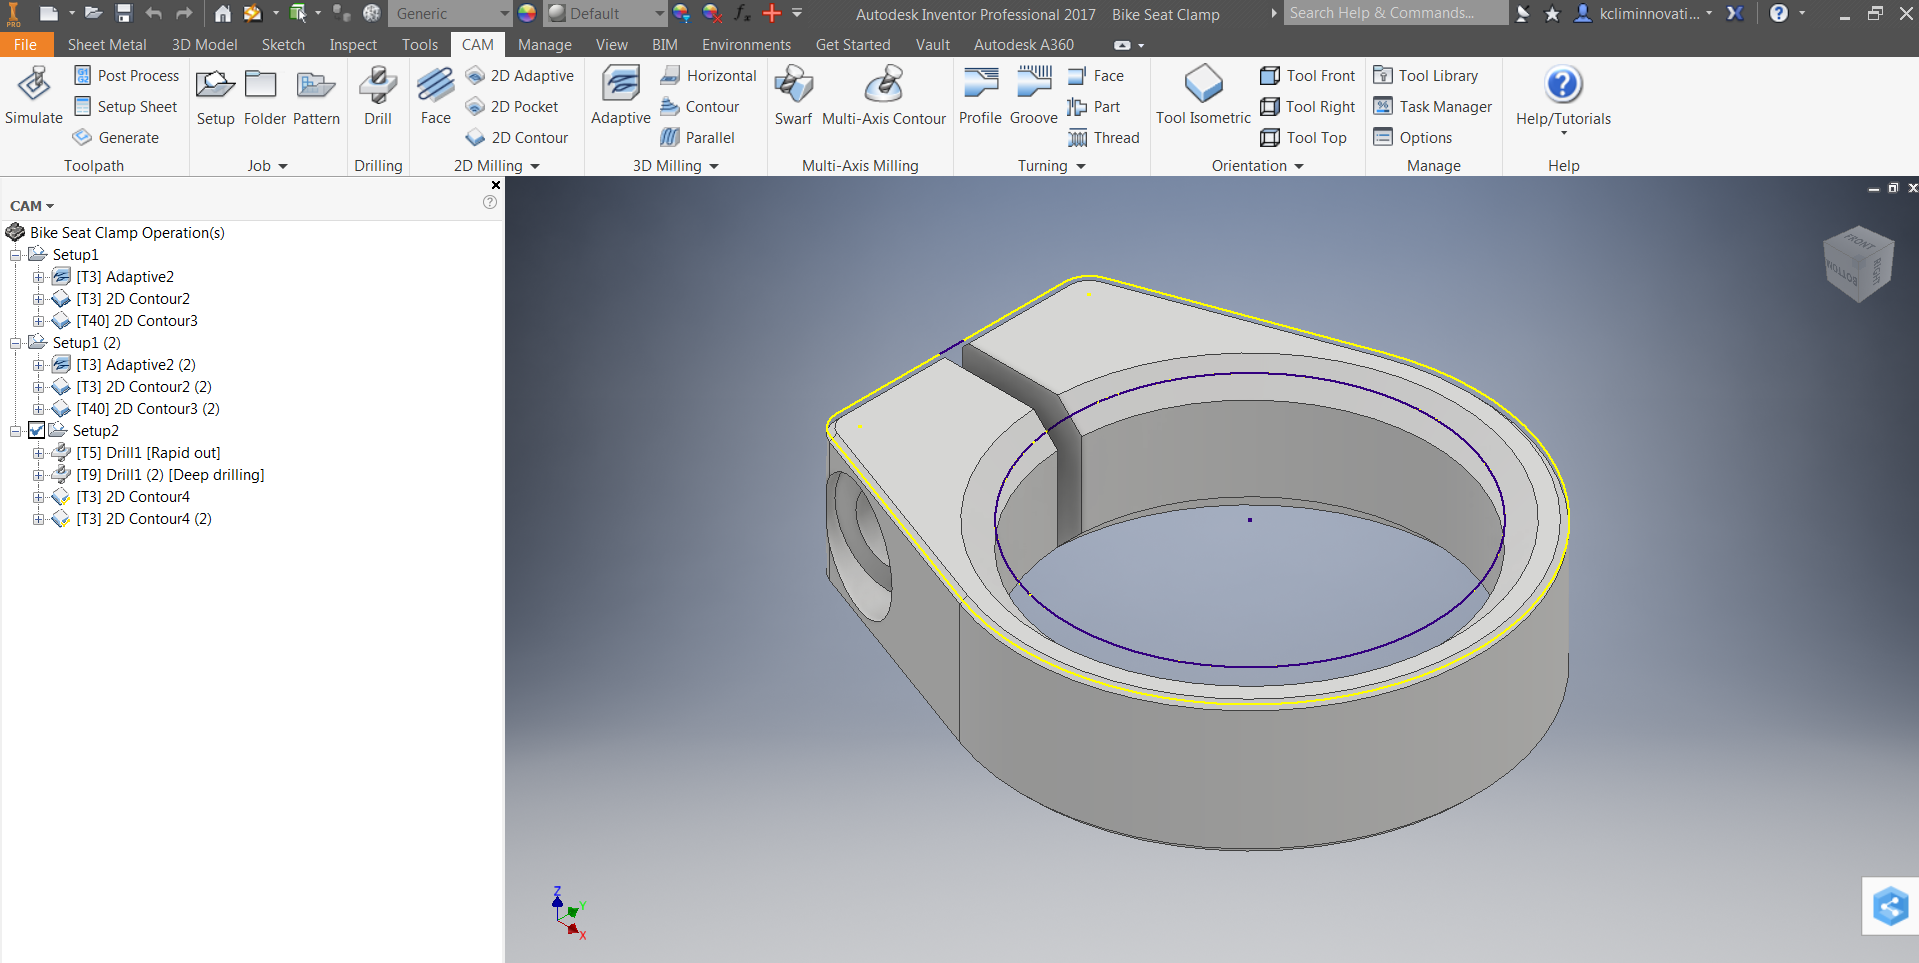
It begins by importing or making a 3D model which we did in the last step. Enter the CAM section via the tab in Inventor or Fusion. There is a hierarchy to the process.
- Orient the machine with Setups in the directory.
- Make different operations under each setup.
- Generate code from operations to run CNC machine.
Set Up Coordinate System
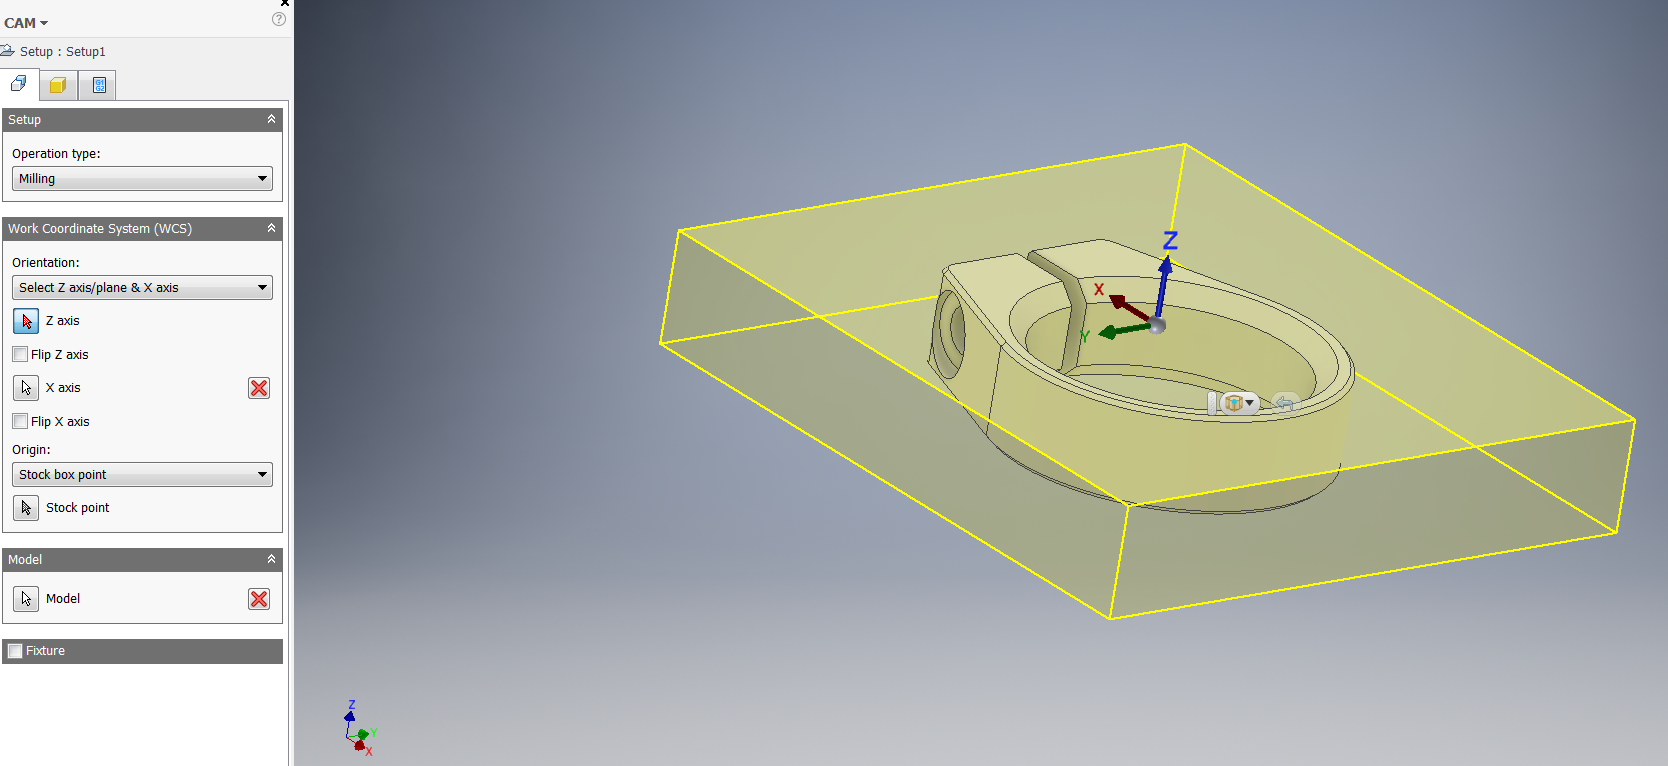
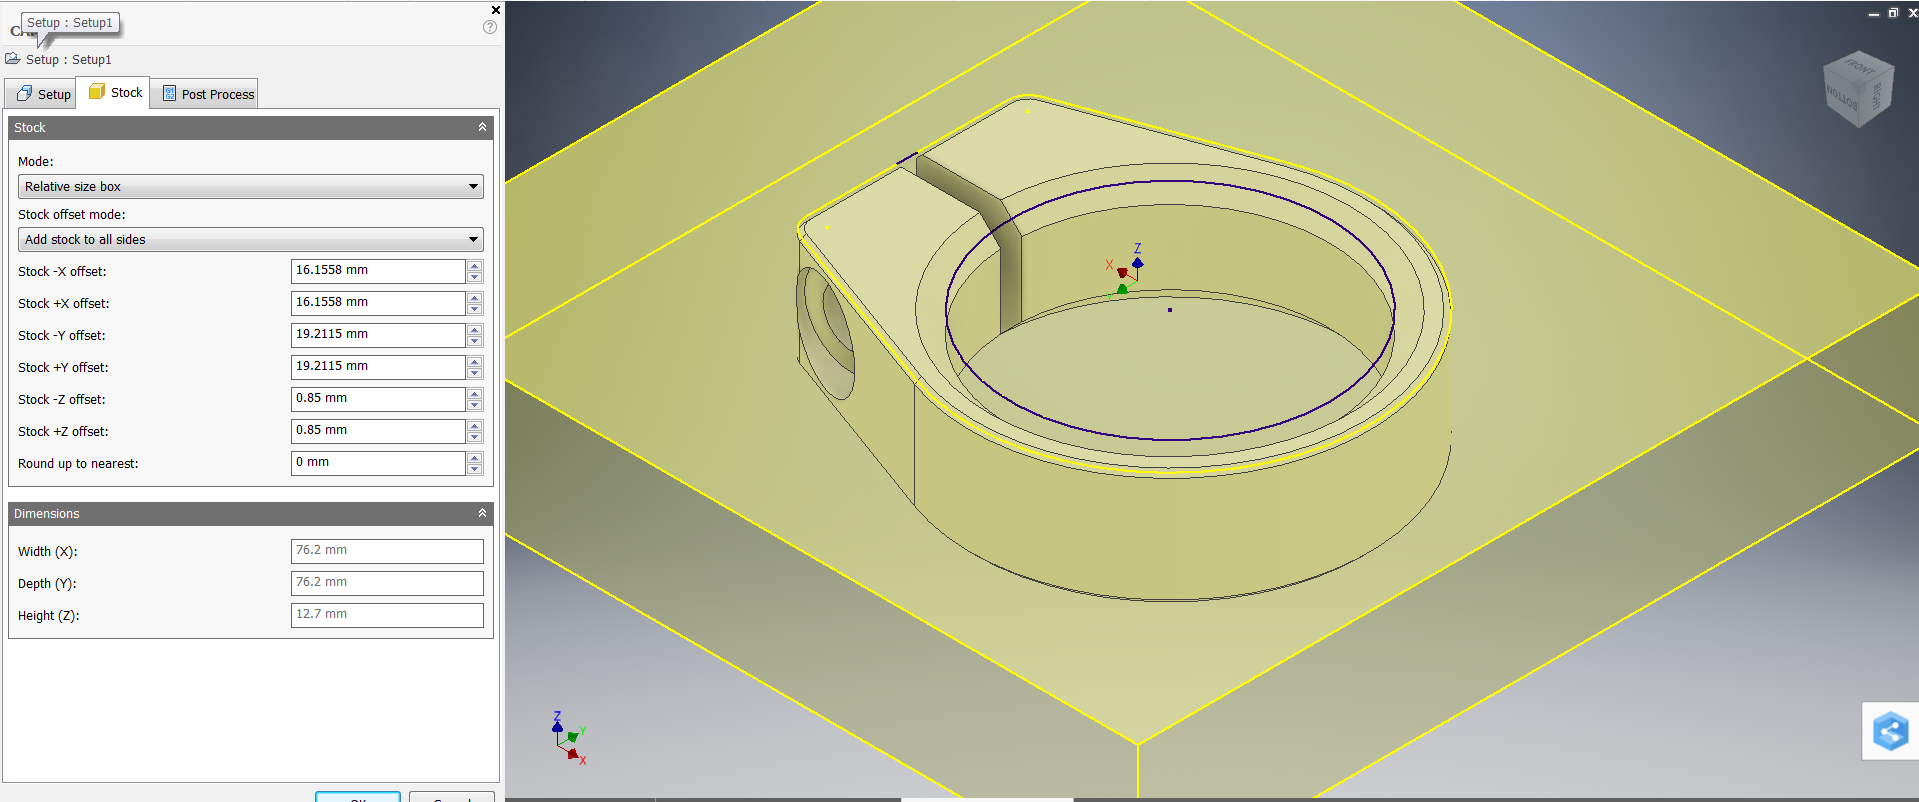
First, set up your coordinate system and stock material. Go to the Job Box and select Setup.
The first tab chooses the type of machining you plan to do. We are doing milling. Select your coordinates by choosing points on your part and align planes or axes. This aligns the part with the axis of the machine. I like choosing the center of the material because I find it easier to work with when having to machine both sides of a part. It may not be entirely visible in the image I took but, both sides of the clamp need to machined.
The second tab (Stock) alters the stock material box that contains the part. I usually add or subtract to the sides, top and bottom, to reflect the physical dimensions of the material in hand. This allows my machining to be as accurate from the computer to real life as possible. The Dimensions box shows the sum of addition made. My piece is 3"x3"x0.5" (76.2mm x 76.2mm x 12.7mm.) Changing this may affect your coordinate system so double check tab 1. The third tab (Post Process) has to do with coordinate offsets and program names. These features aren't used for this part.
Operations
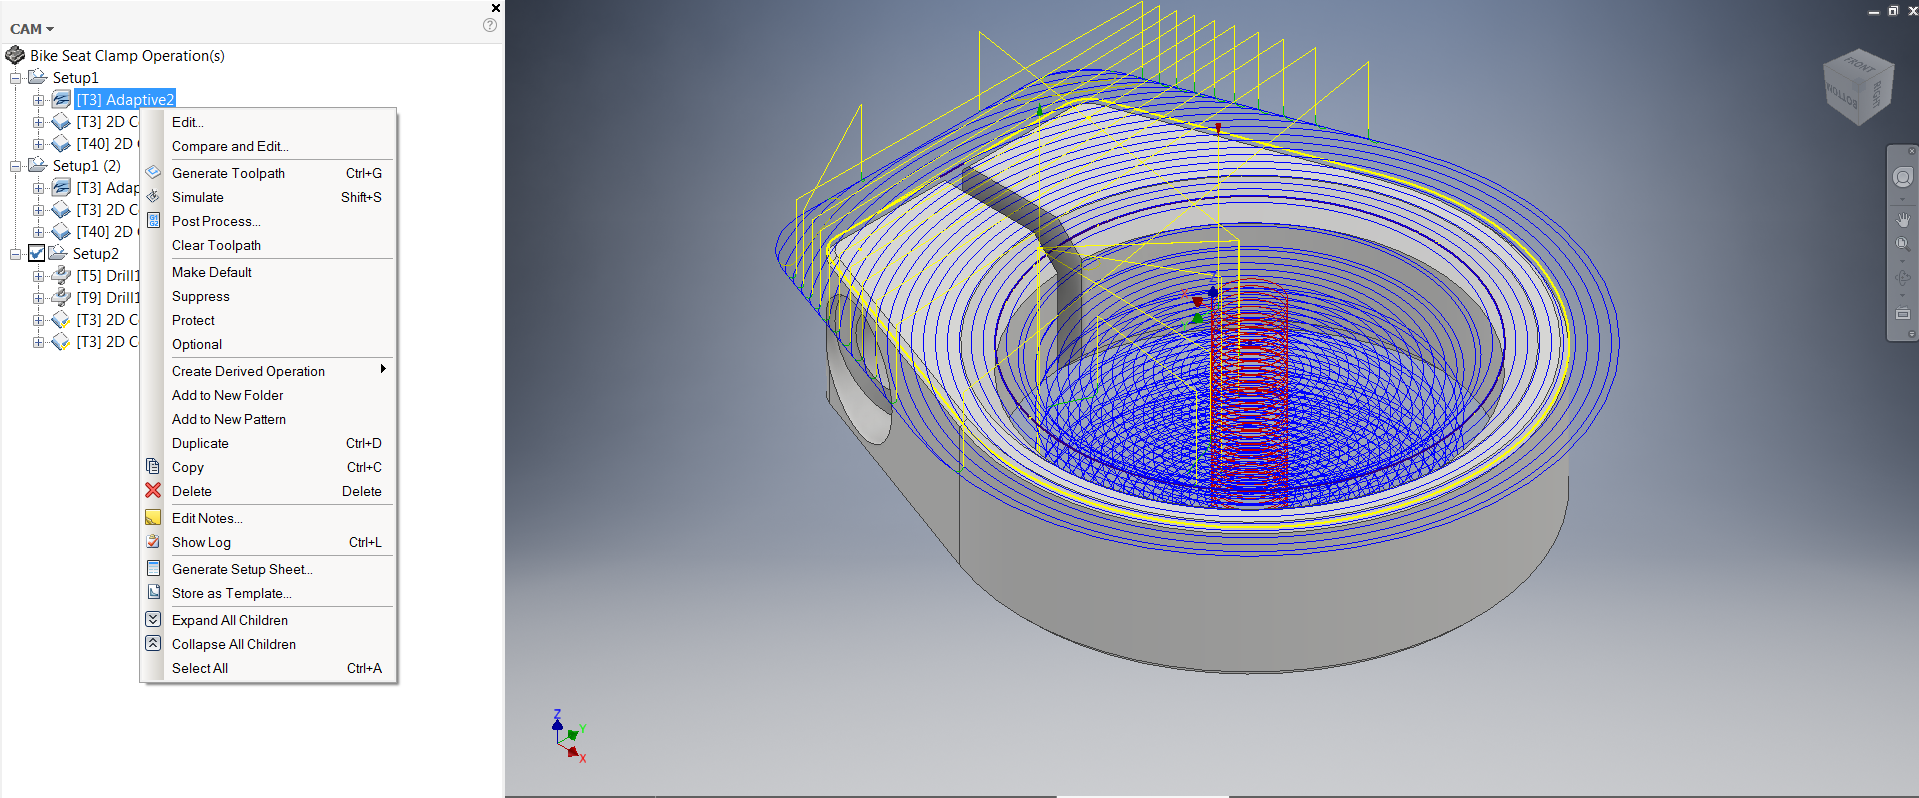
All of the available operations have the same layout order (Tools, Path, Heights, Depth of Cuts, and Lead In/Outs.) The best way to go about it without being confused or overwhelmed is to complete each tab from left to right. For this first operation, I'll go through each of the tabs. However, it’s a little time consuming so I’ll only highlight changes from the defaults.
Each time you create an operation it is added under a Setup in the CAM directory. From here you can edit, move, or simulate each of the cuts. A good way to visualize each or all of the tool path is to right click and select simulation. This will run through each operation and highlight possible problem areas!
3D Milling: Adaptive
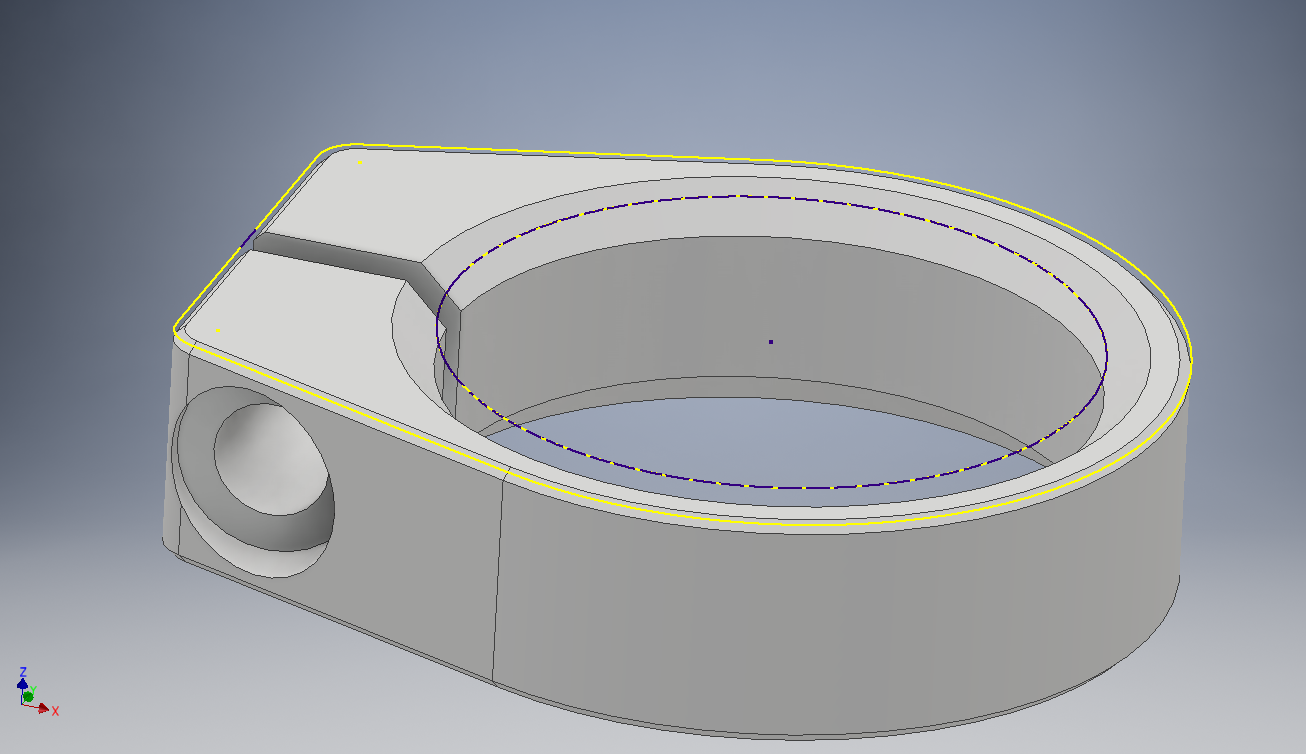
To prepare for CAM-ing, make a sketch of the external and internal profile. In this example, the clamp is not a "closed" feature. The slot can be problematic for the program to understand. To get around this, I make a sketch that highlights the profile and the hole in the center. This allows us to select paths quite easily.
To remove most of the material in one fell swoop, the 3D adaptive machining operation is the best. This can be found in the 3D milling box called Adaptive.
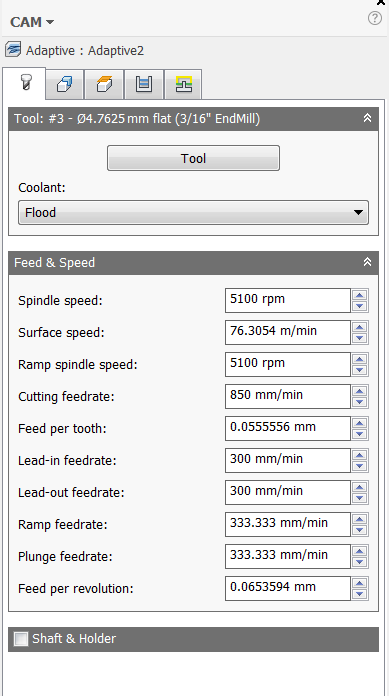
Tab 1: This tab is used for entering in the type of tool, feed rate, and cutting rates the machine plans to use. I used a 3/16” endmill. A good calculator for materials and cutters is FSWizard. Feed and speed for CNC machines can get pretty in depth, but the calculator simplifies a lot of it. Image 2 shows the numbers I used, which are pretty slow.
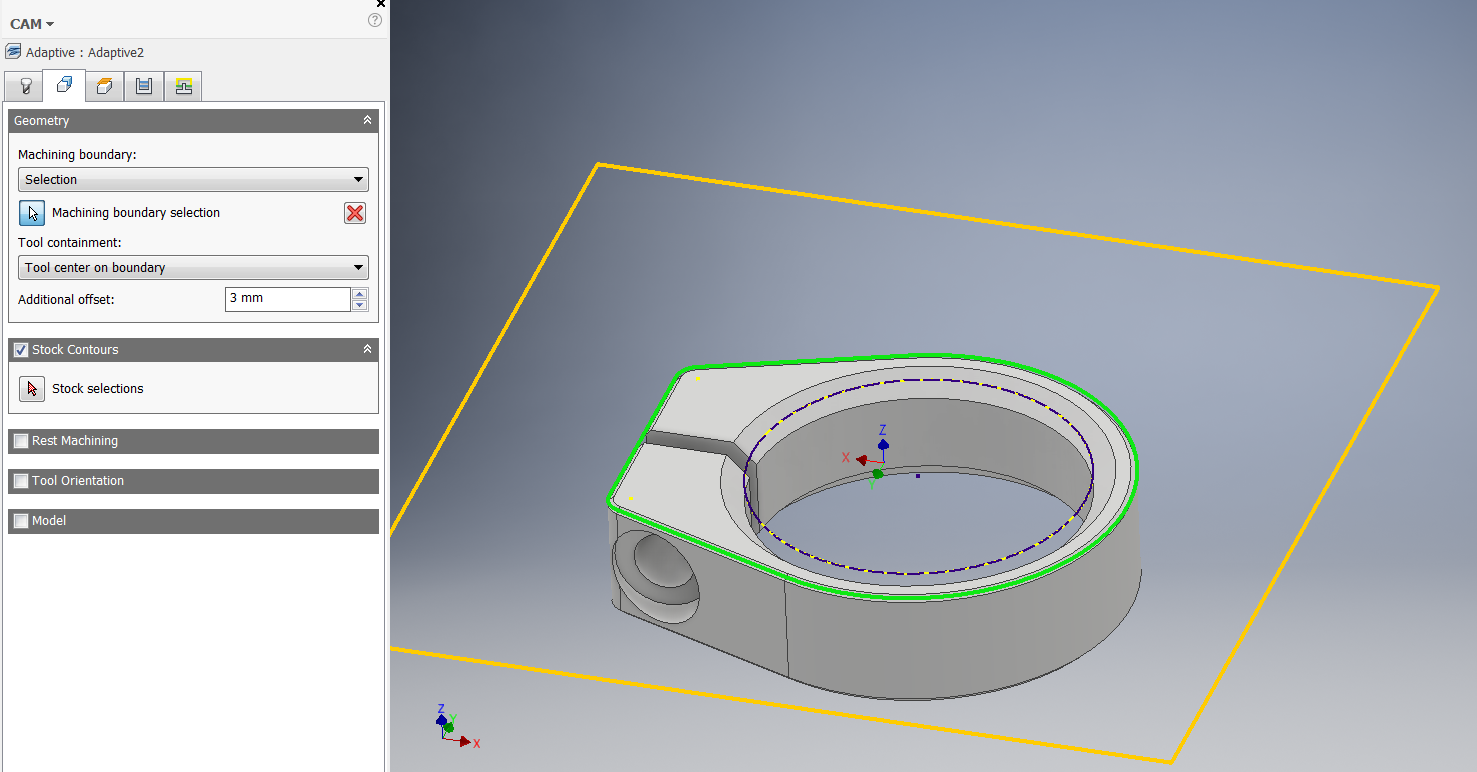
Tab 2: This tab highlights the area to machine. Select Machining boundary selection and pick the profile of the recent sketch. In this instance, Tool containment corales the cutting tool inside the green profile. The offset allows 3mm extra over this boundary to completely separate the part from the stock material. Under the Geometry box, check the Stock Contours box. We are telling the CNC to machine all the empty space and on the surface of our part.
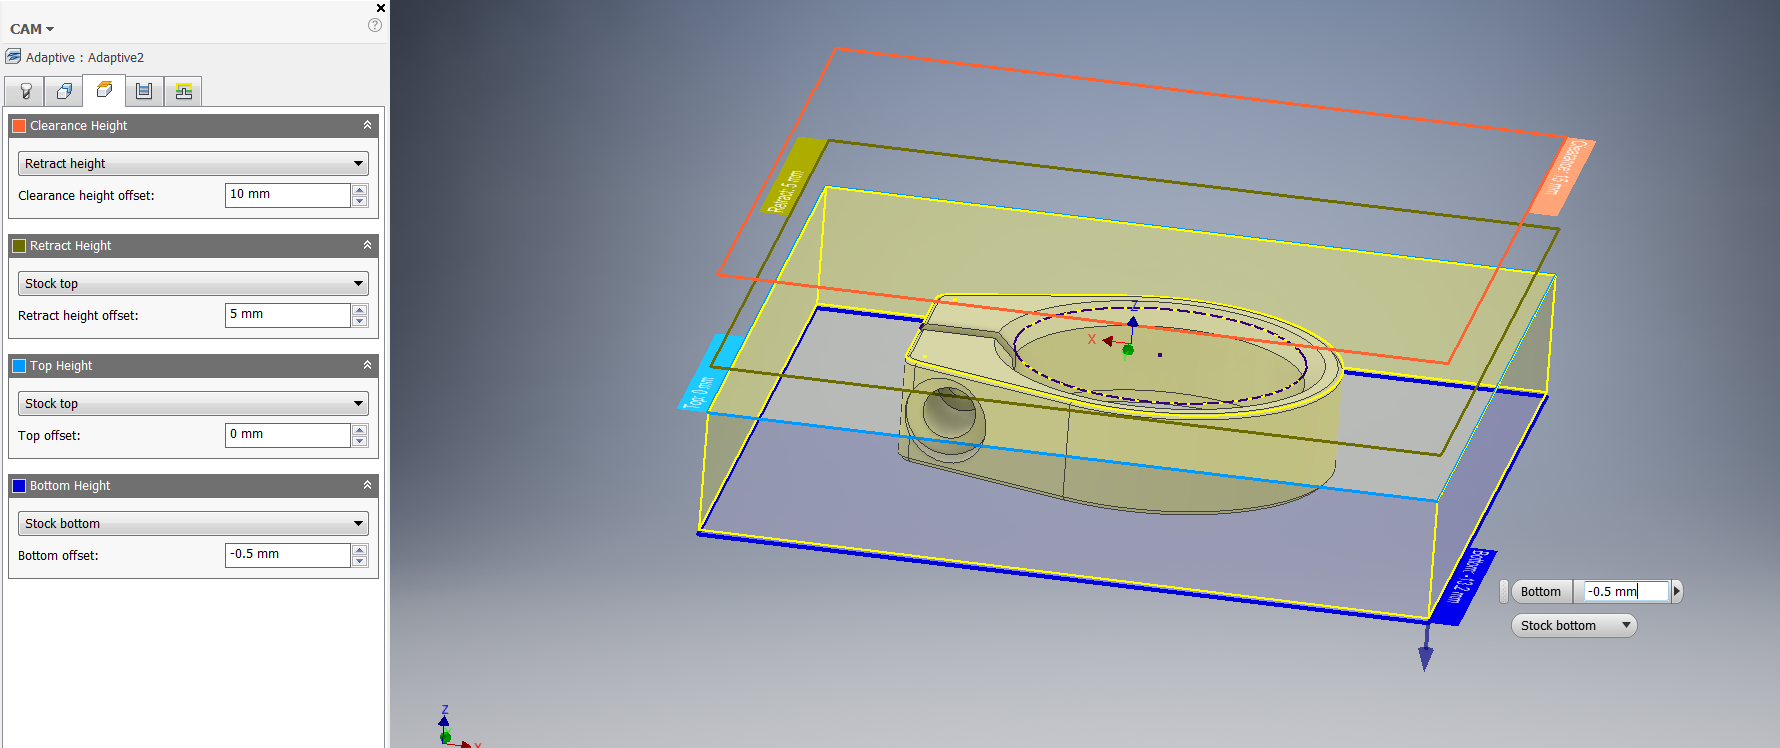
Tab 3: This tab selects total depth of cuts. Usually, I like picking stock top in Top Height and stock bottom in Bottom Height. This allows the CAM file to update if there is any CAD/CAM change with my part. I add a little bit of offset to Bottom height to ensure the end mill cuts all the way through. This tab also allows for clearance height for tools and retract heights for rapids movements. The defaults are good for clearance and retract heights.
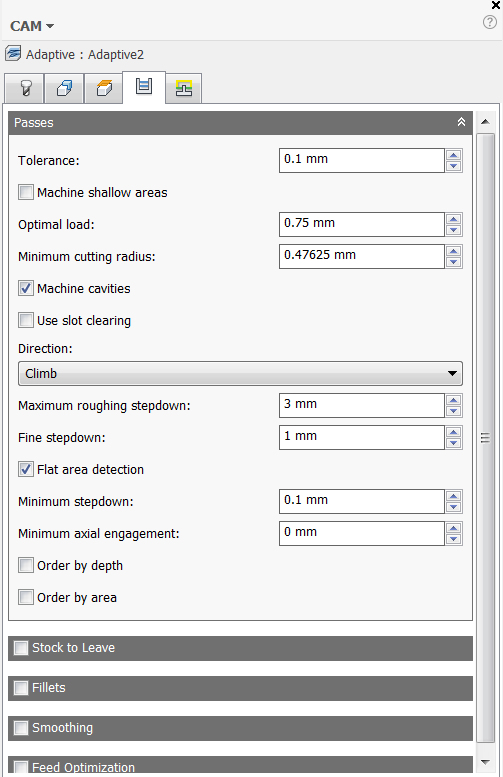
Tab 4: I like thinking of this tab as the Meat and Potatoes. This tab determines overlap of your tool and the depth of cuts per pass. The optimal load for adaptive tool paths is about 15% of the tool diameter, which is about 0.75-1mm in this case because I am using a 3/16” endmill. For the depth of cut (stepdown), I choose to go 3mm per pass However, with proper feeds and speeds you can do the entire cutting of length of the tool. This is one of the advantages of an adaptive milling operation.
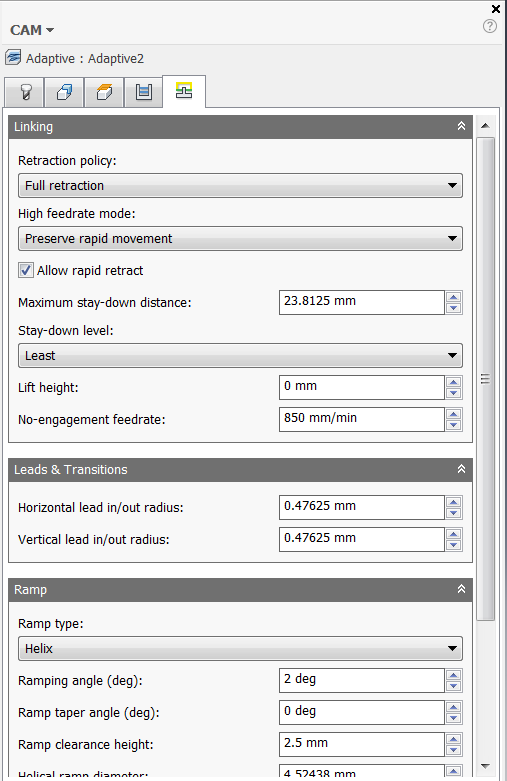
Tab 5: This tab determines linking between tool paths. I rarely change these numbers. However, I makes some changes to this in the following operation.
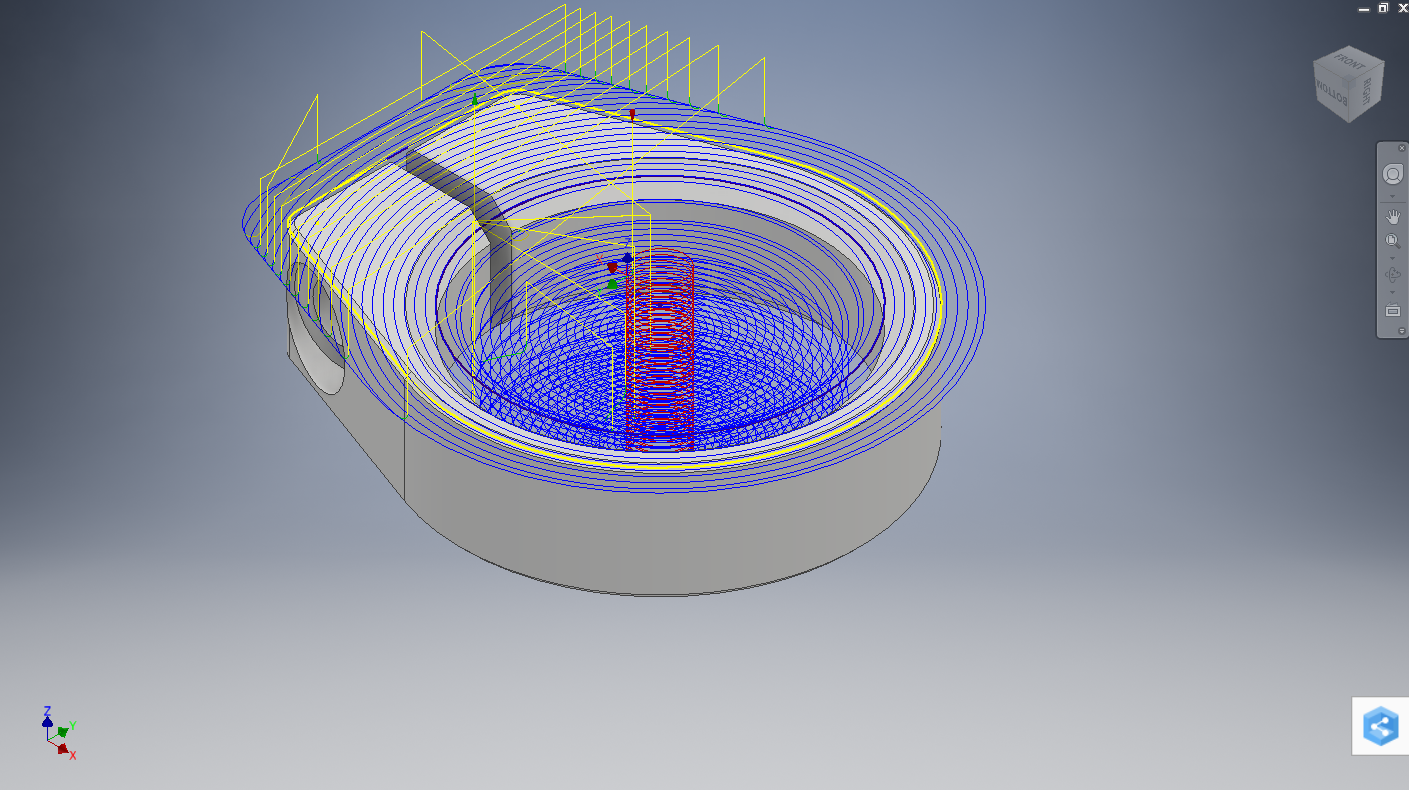
When all is said and done, the tool path looks like Image 7. Side to side lines refer to over lap and lines below other lines refer to depth of cut.
2D Milling: 2D Contour
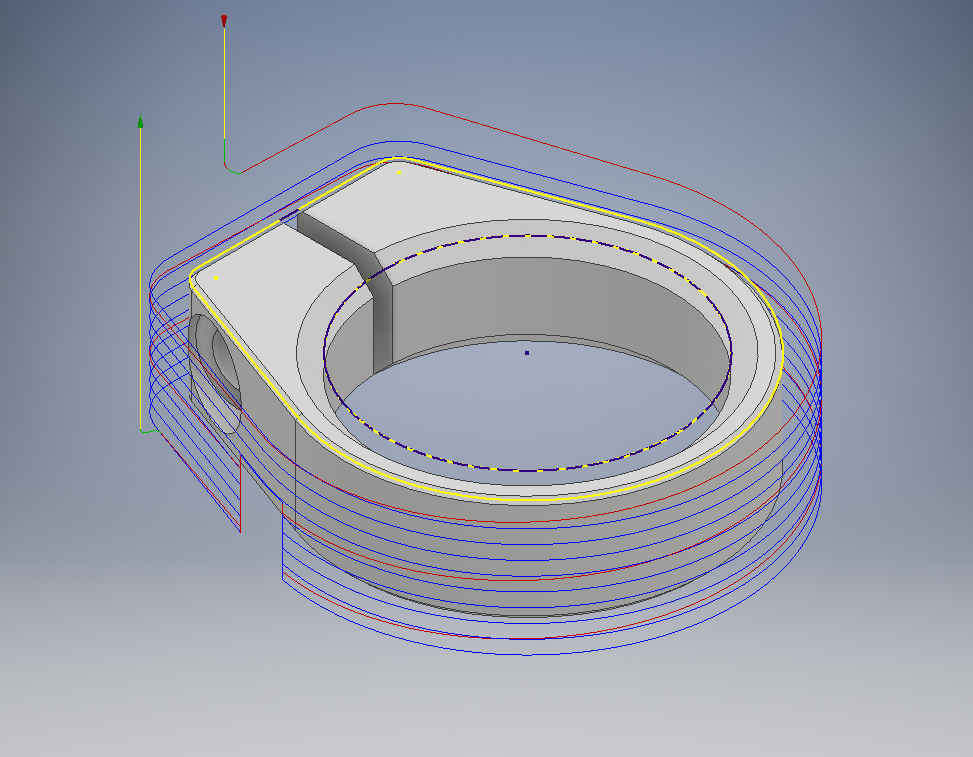
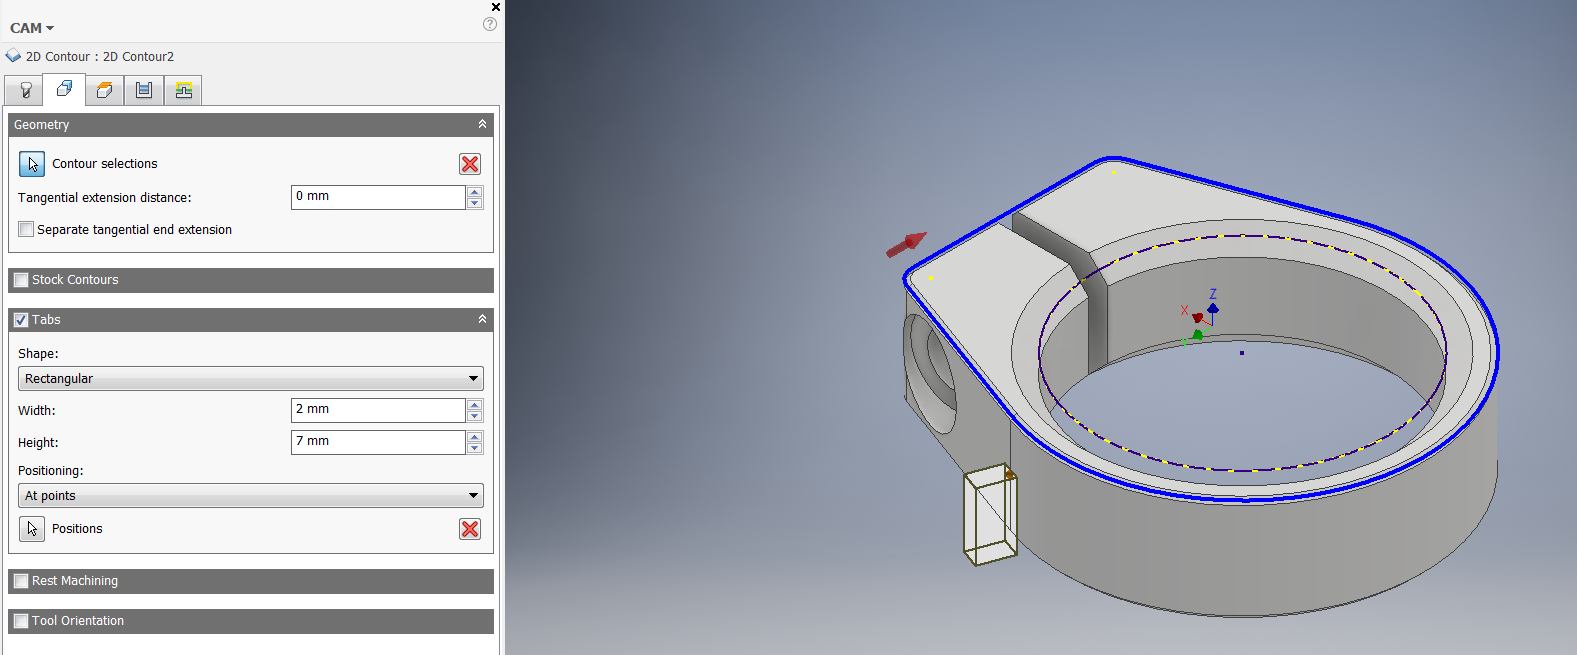
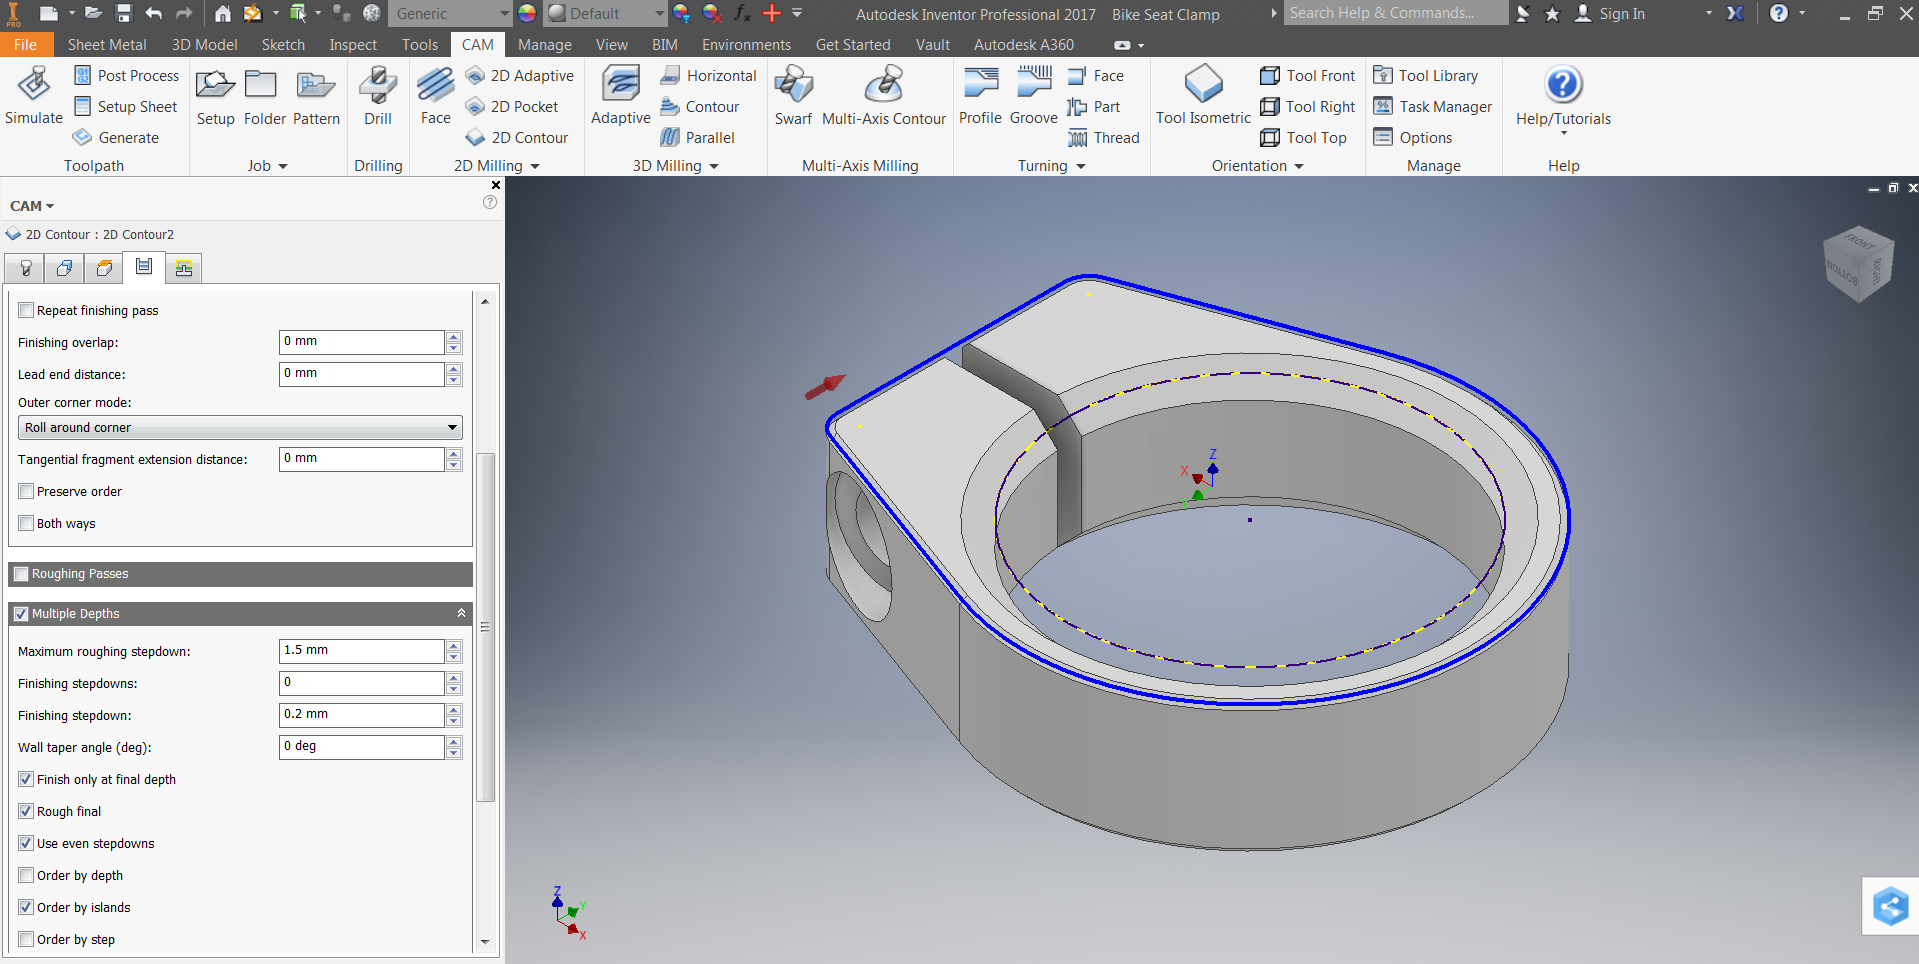
This operation cuts out the profile of the part. I do this to free from the stock and allow space for the chamfer tool.
Tab 1: I used the same setting and tool as the previous operation. Just a note, the tool is now cutting 100% of its width rather than the 15% in the previous path, which would normally change the speed of the cut. Since it was so conservative, I didn't change the settings.
Tab 2: I selected the outside profile. I checked tab box and added 2 tabs to the operation. Tabs secure the part in place while the rest of the material is removed. See image 2. Size of the tabs doesn’t really matter but there should be 2 or more to securely hold the piece in place.
Tab 3: In Bottom Height, choose model bottom with a small offset to cut all the way through.
Tab 4: Select multiple depths and use 1.5mm for each pass. When doing a full width pass, I don't go more than 1/3 of the tool width in depth of cut. The “Use even stepdowns” box helps minimize tool wear. It makes each tool stepdown equal vs. having uneven depths throughout the operation.
Tab 5: To prevent plunging of the tool, I selected the Ramps check box. The stock options are pretty reliable. This ramps tool path should follow the outline from the drawing and enter material at an angle before running a full-depth pass.
2D Millling: 2D Contour Chamfer
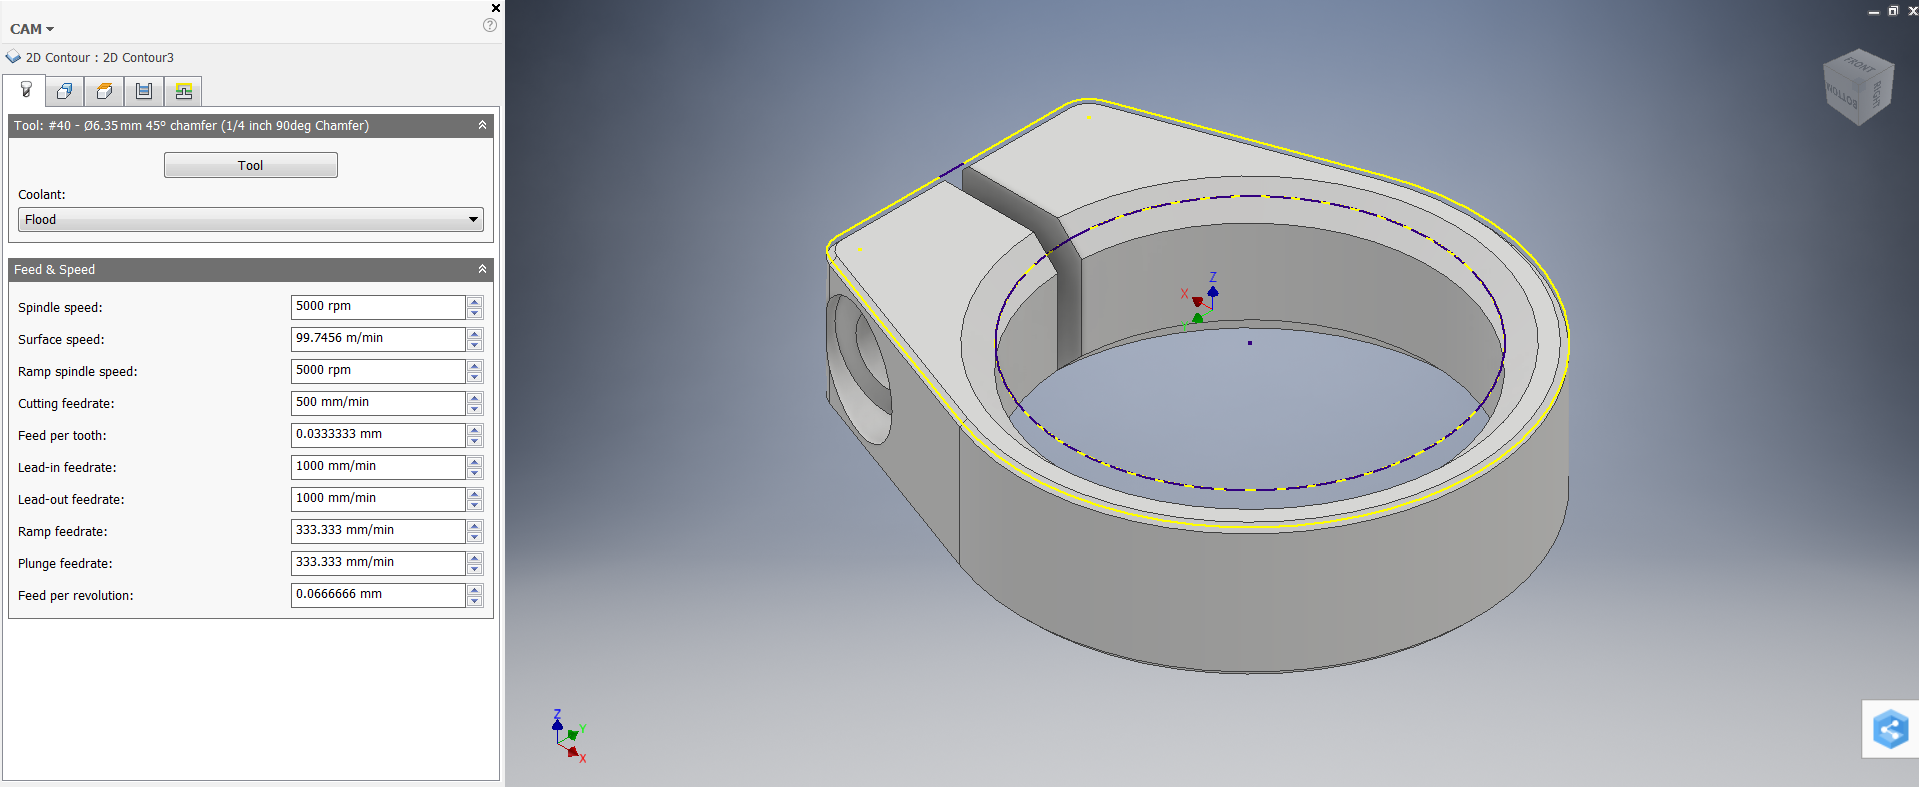
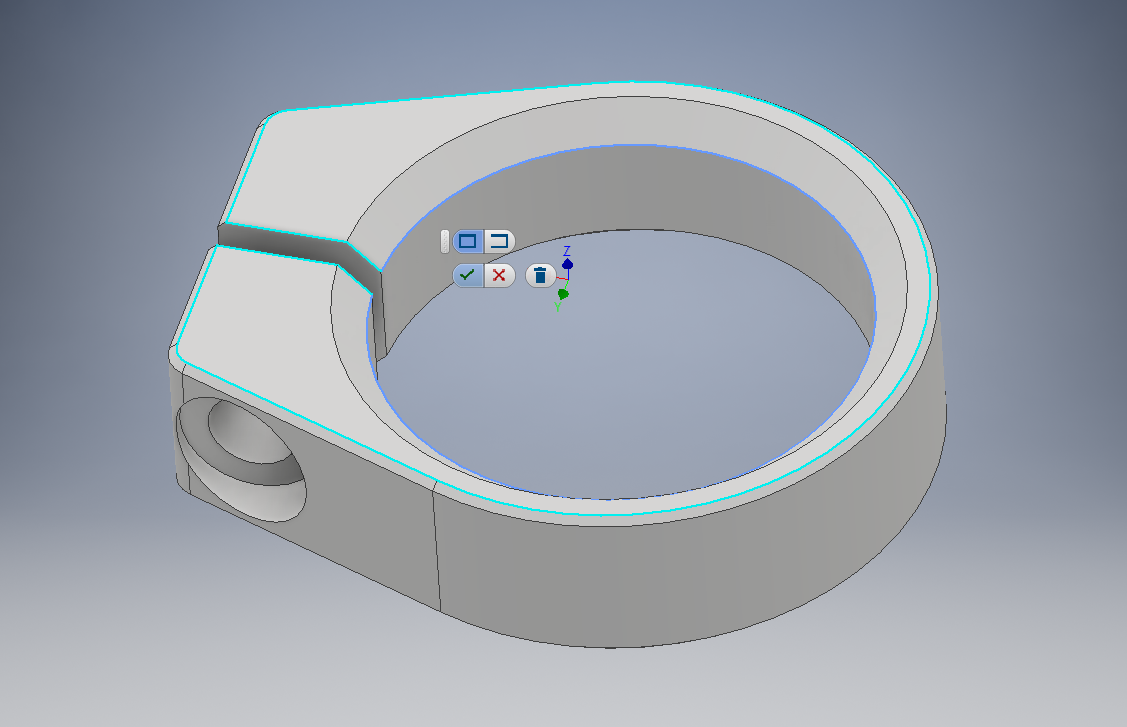
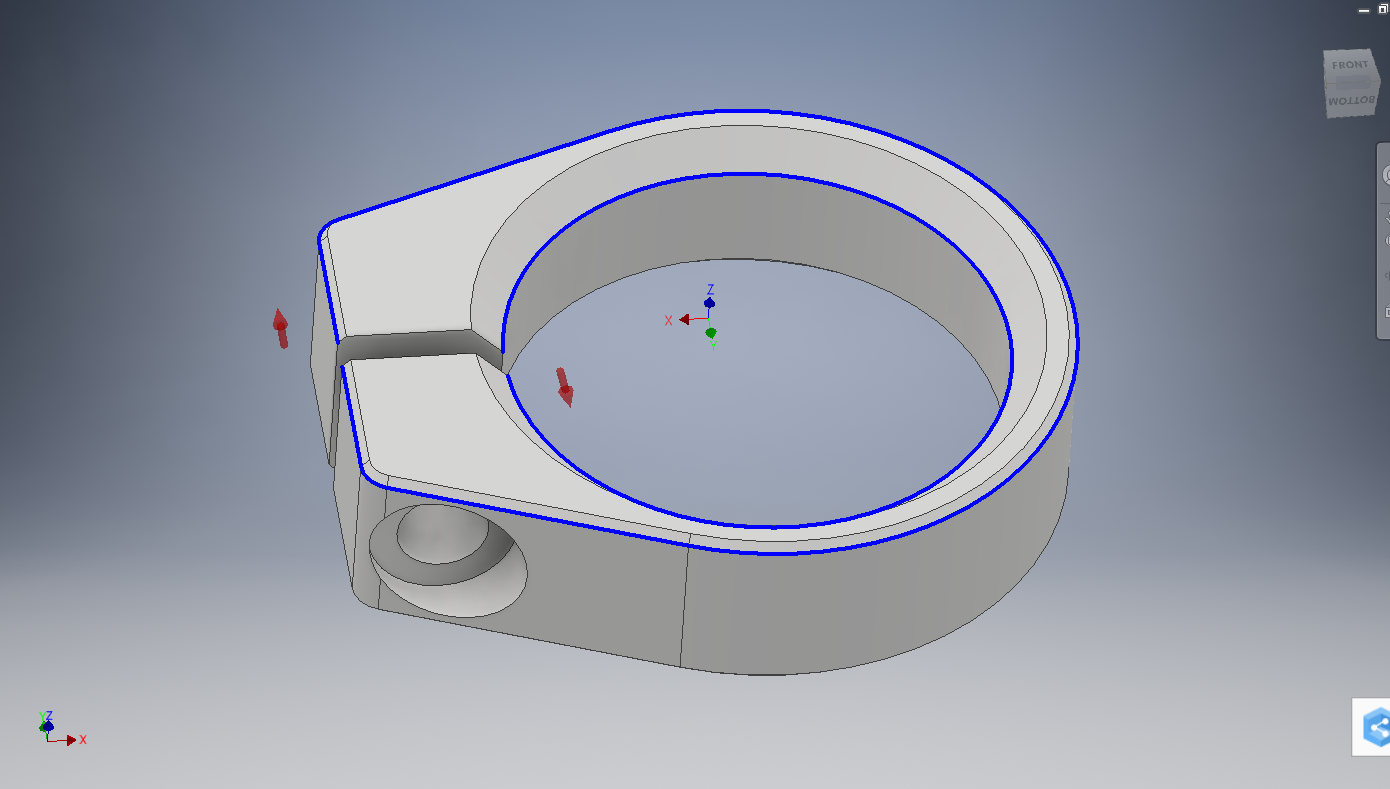

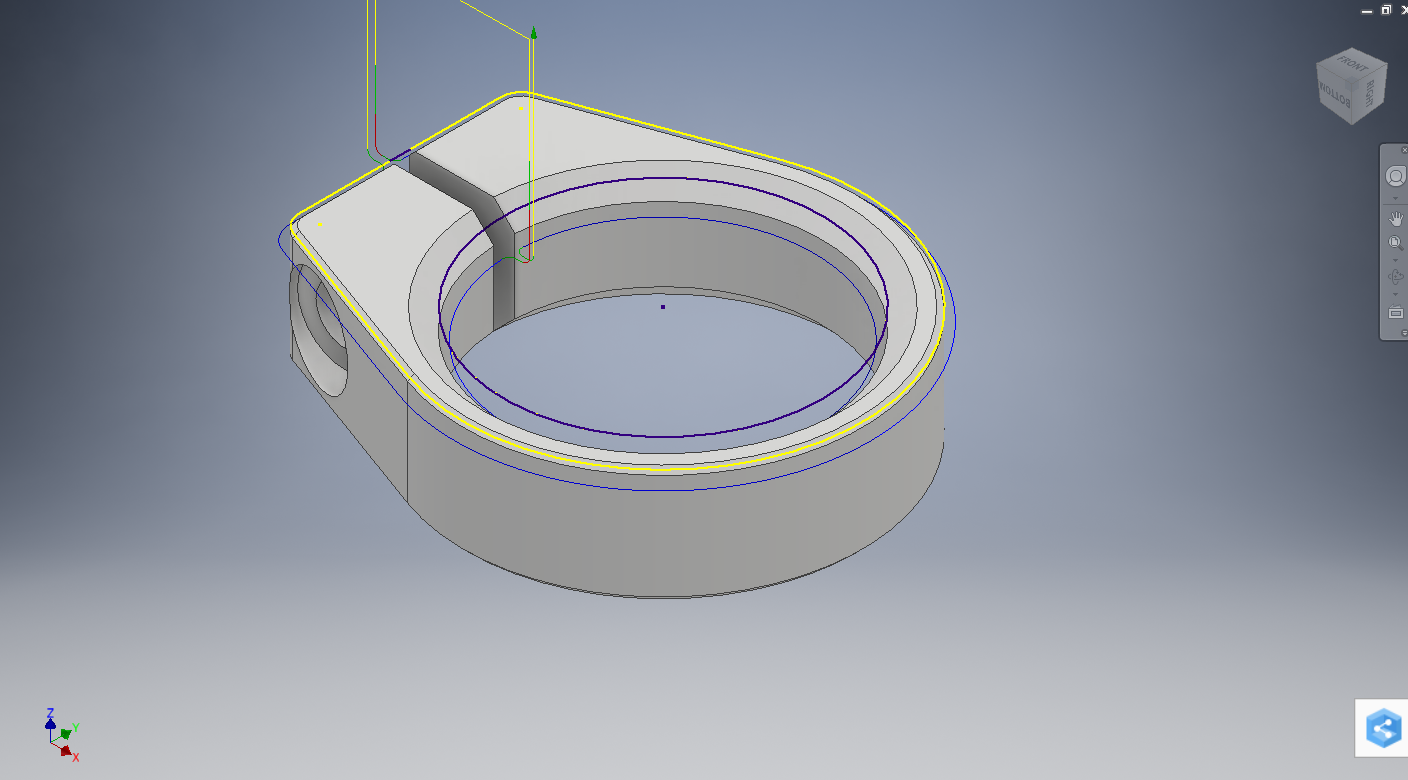
This operation is virtually the same as a profile cut however they are a couple changes that create the chamfer. Chamfer endmills are pointed like a naile and should never cut with the point. All of the tool path for this tool should be slightly offset. Our CAM program has a box to check for it too!
Tab 1: 1/4" Chamfer tool with correct feed and speeds. Check out Image 1.
Tab 2: Select the inner profile and outer profile. However, this is a little different than before. By default it will be a closed loop, but we want to make an open loop. To do that, select the contour and when it turns dark blue select again. It should become light blue. Click the unclosed square in the pop-up. See Image 2. This allows manual selection of paths. Once the inner chamfer is selected, check ok. Do the same for the outer chamfer profile. It should look like Image 3 when done.
Tab 3: Select "Selected Contour" for bottom height to allow multiple heights on this profile.
Tab 4: Once a chamfer tool is used, the chamfer box becomes available. Image 4. Chamfer offset is the distance the machine will offset the tip of the tool from the profile. I chose 0.75mm because I have gotten good results with this operation.
Coordinate System 2
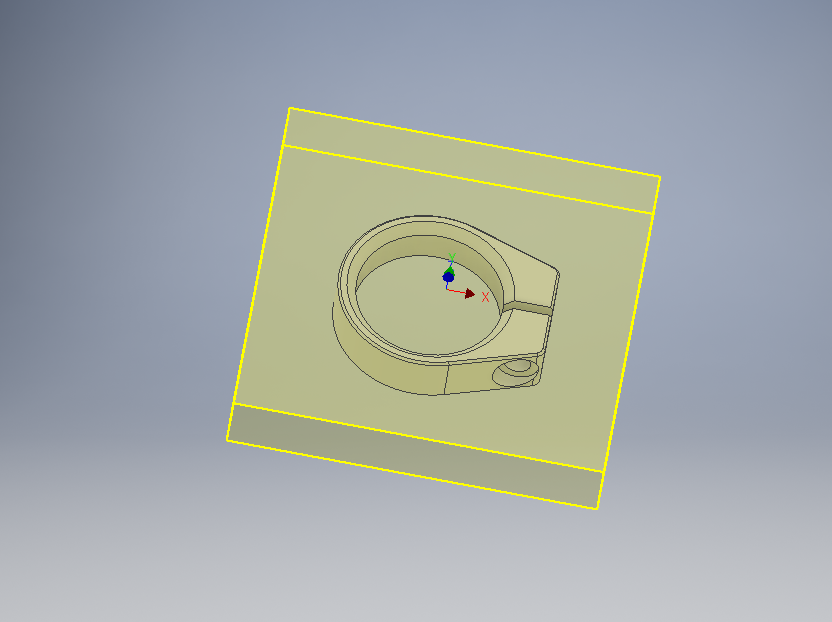
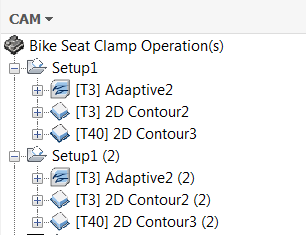
We finished side 1, now we can move on to the other side!
A quick and easy way to set up our next coordinate system and add tools is to duplicate our entire last coordinate system. Right click Setup and choose Duplicate. This should duplicate the setup and all the operations. This saves a lot of time vs. having to build each operation again!
Go into Setup (2) and change Work Coordinate system box and flip the z axis and select the new top of the material. All of the tool paths will have X's through them because of the change in coordinate system. Select them all and select Generate tool path. They should all update to the new coordinate system. Some of the tool paths may need minor changes to heights or profiles. I did the following:
- Adaptive Machining: I changed the Bottom Height to the model top to machine off the excess material.
- Contour Profile: Turned off tabs. I changed bottom height to model top and offset -2mm to allow room for the chamfer.
- Chamfer Profile: I re-selected the geometry to the top side.
Coordinate System 3!
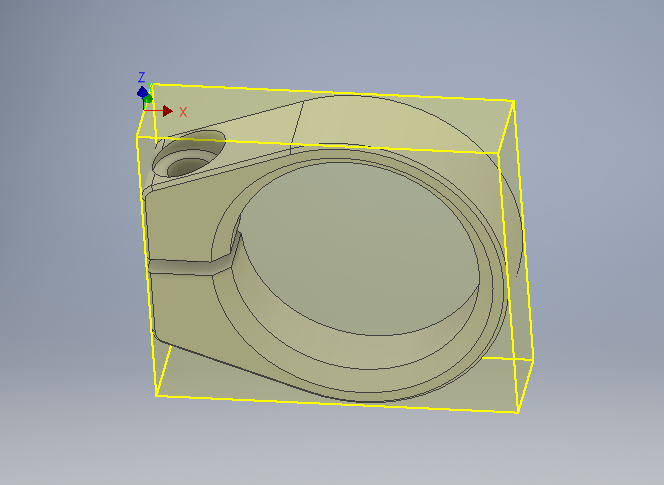
At this point, I'm planning on cutting the part out of the stock with a band saw and grinding the tabs off.
Then I set up the next coordinate and operations.
I made a brand new setup and I chose the stock to be exactly the same size as the piece. The coordinate is in the center and top left of the piece. See image.
Drilling: Spot Drilling and Through Hole
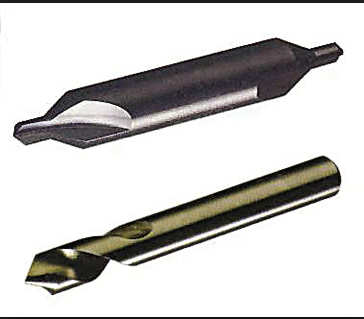
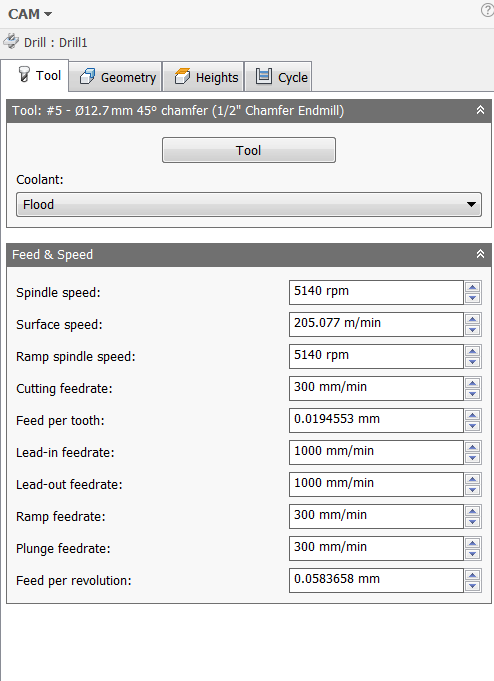
Drilling operations only have four tabs (Tool, Geometry, Heights, & Cycle) because they don't use passes. Since we plan on drilling on a ramped surface, it’s necessary to use a spot drill and make a guide for the actual drill size. A spot drill is a short chubby drill that doesn't deflect.
Tab 1: Select Spot Drill as tool.
Tab 2: Select hole face and select the drill hole.
Tab 3: I chose selection for my bottom heights and dragged the blue plane 2mm below the surface of the part . This doesn't have to be super accurate, however, we want a large enough divot that the #19 drill bit doesn't slip out.
Tab 4: Select Deep Drilling with a pecking depth of 4mm. Peck drilling cuts a little material and then evacuates out of the hole to allow material to clear. Every 4mm the drill will back out and allow pieces it has already cut to be removed.
I duplicated this path to make a through-hole operation. Change the tool to a #19 Drill to thread the hole with a 5M tap. Change the bottom height to below the hole.
2D Milling: 2D Contour and Through Hole
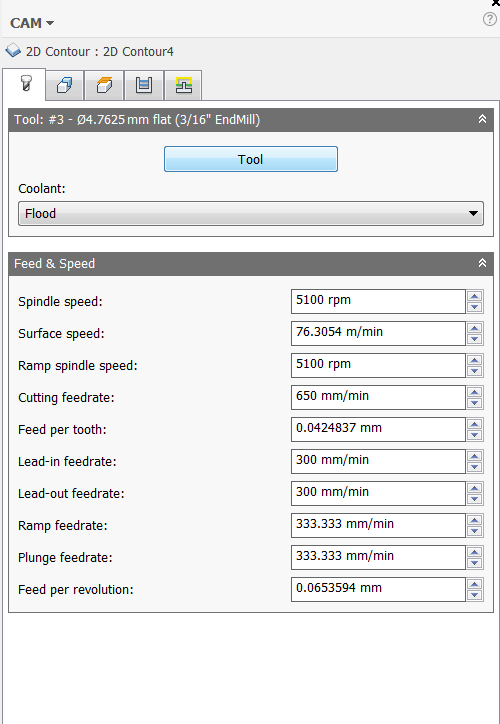
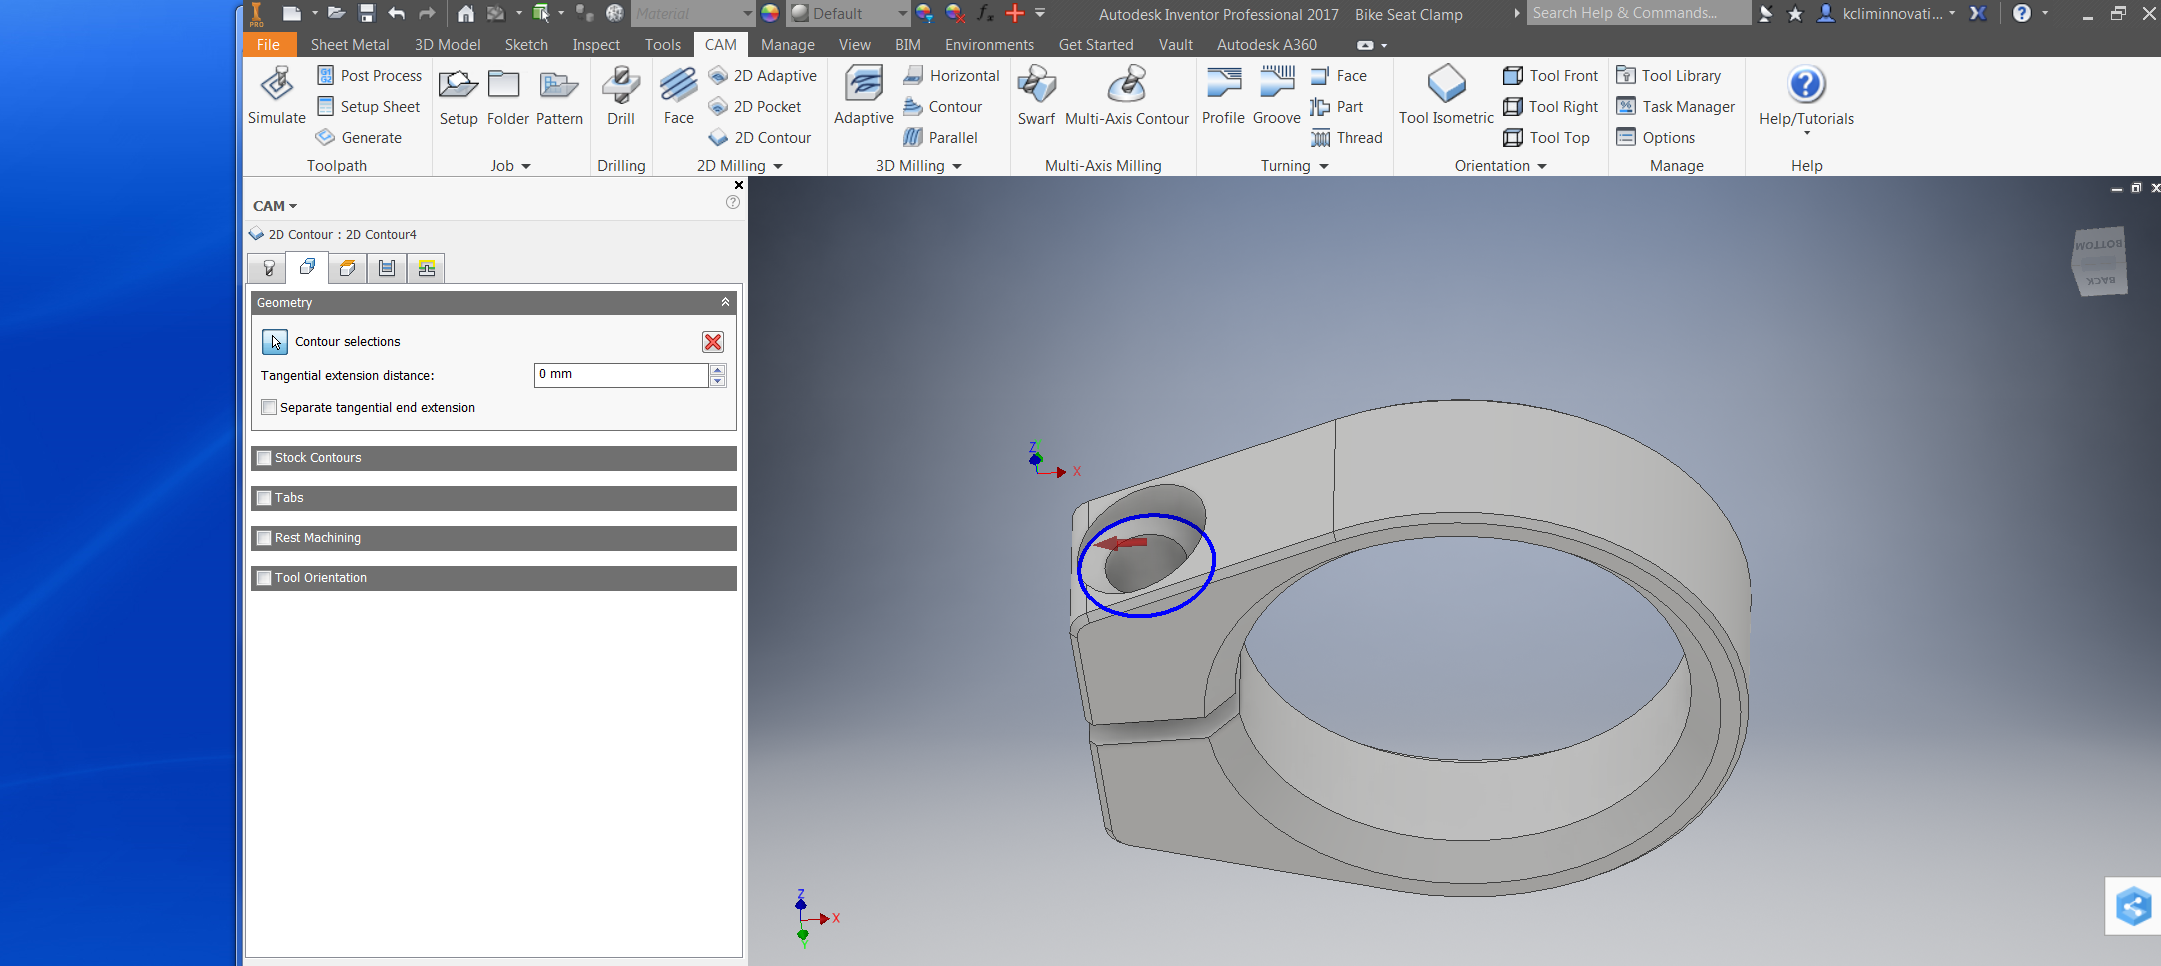
To make sure the bolt head had a flat area to sit, I machined a profile. I created a 2D milling contour operation using a 3/16" end mill. I used the same speeds for the 3/16” endmill from before and added a ramping profile (Tab 5). Check image 2 for my contour selection.
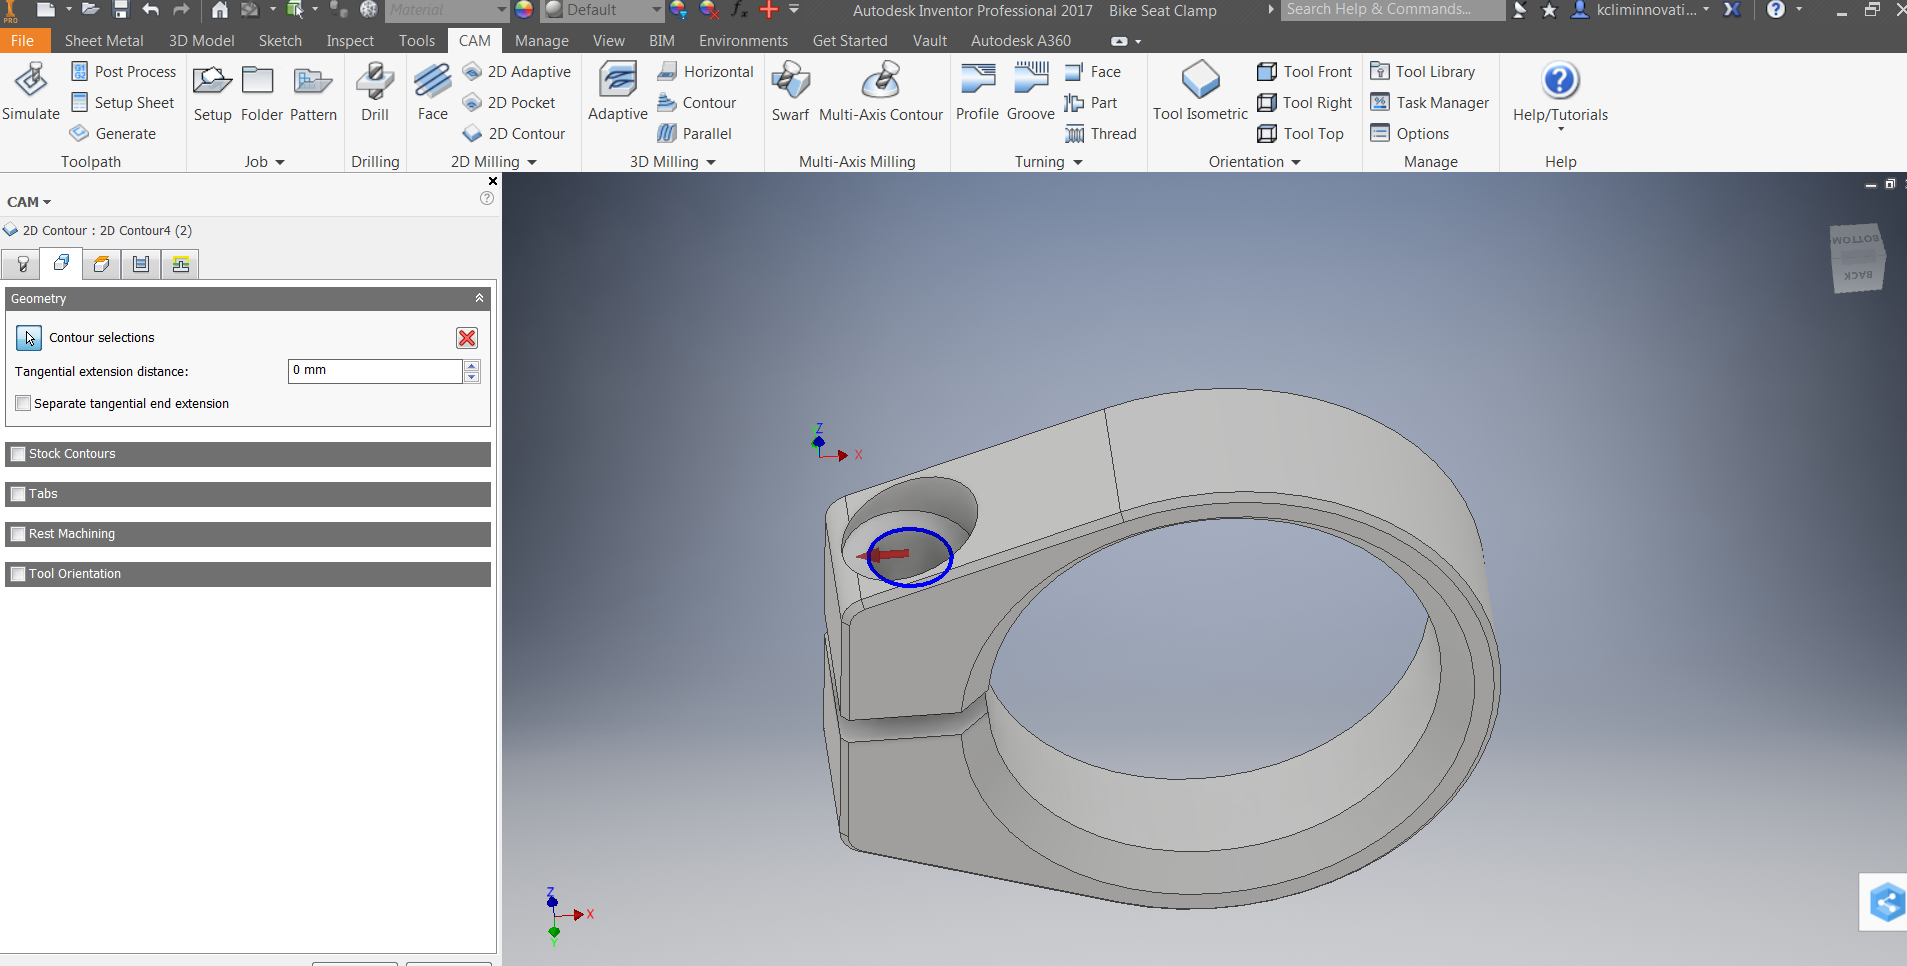
To make the through hole, I duplicated the same operation as the previous paragraph. However, I selected the inner hole and changed the bottom height to the notch and added a small, -0.5 mm, offset to make sure it went all the way through. Check out Image 3 for my contour selection.
Generating Code!
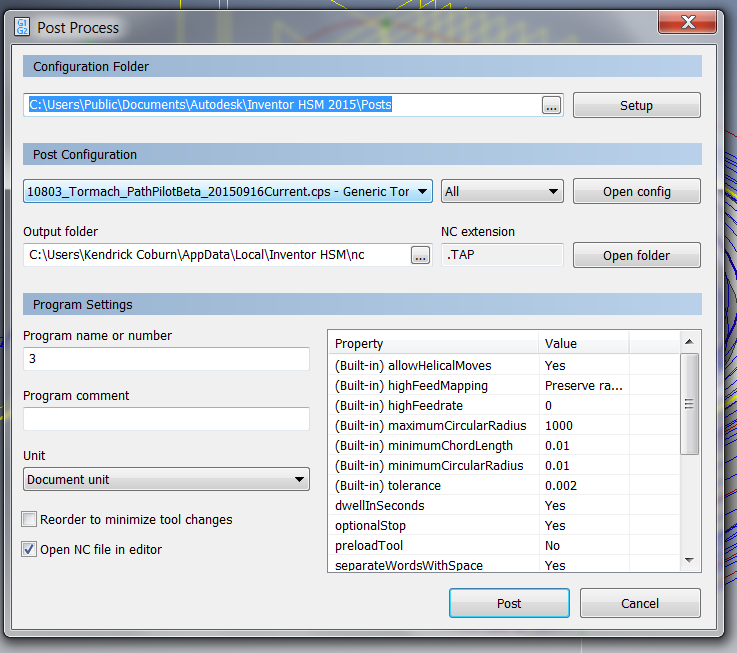
The final process is generating code for your machine.
Select then right click the group of operations with the same setup and tools and click Post Process. A window like Image 1 should pop up. The most important part is to ensure you have the correct post processor for the machine. Many different machines read code a little differently (ShopBot, Tormach, Haas).
Select the location where you wish to save it. Many CNC machines have USB access ports to upload files quickly.
That’s the whole process! Next we will set up a machine and cut out a bike clamp!