How to Build a Si5351 Clock Generator for Arduino Projects
by TeknoTrek in Circuits > Arduino
3412 Views, 5 Favorites, 0 Comments
How to Build a Si5351 Clock Generator for Arduino Projects

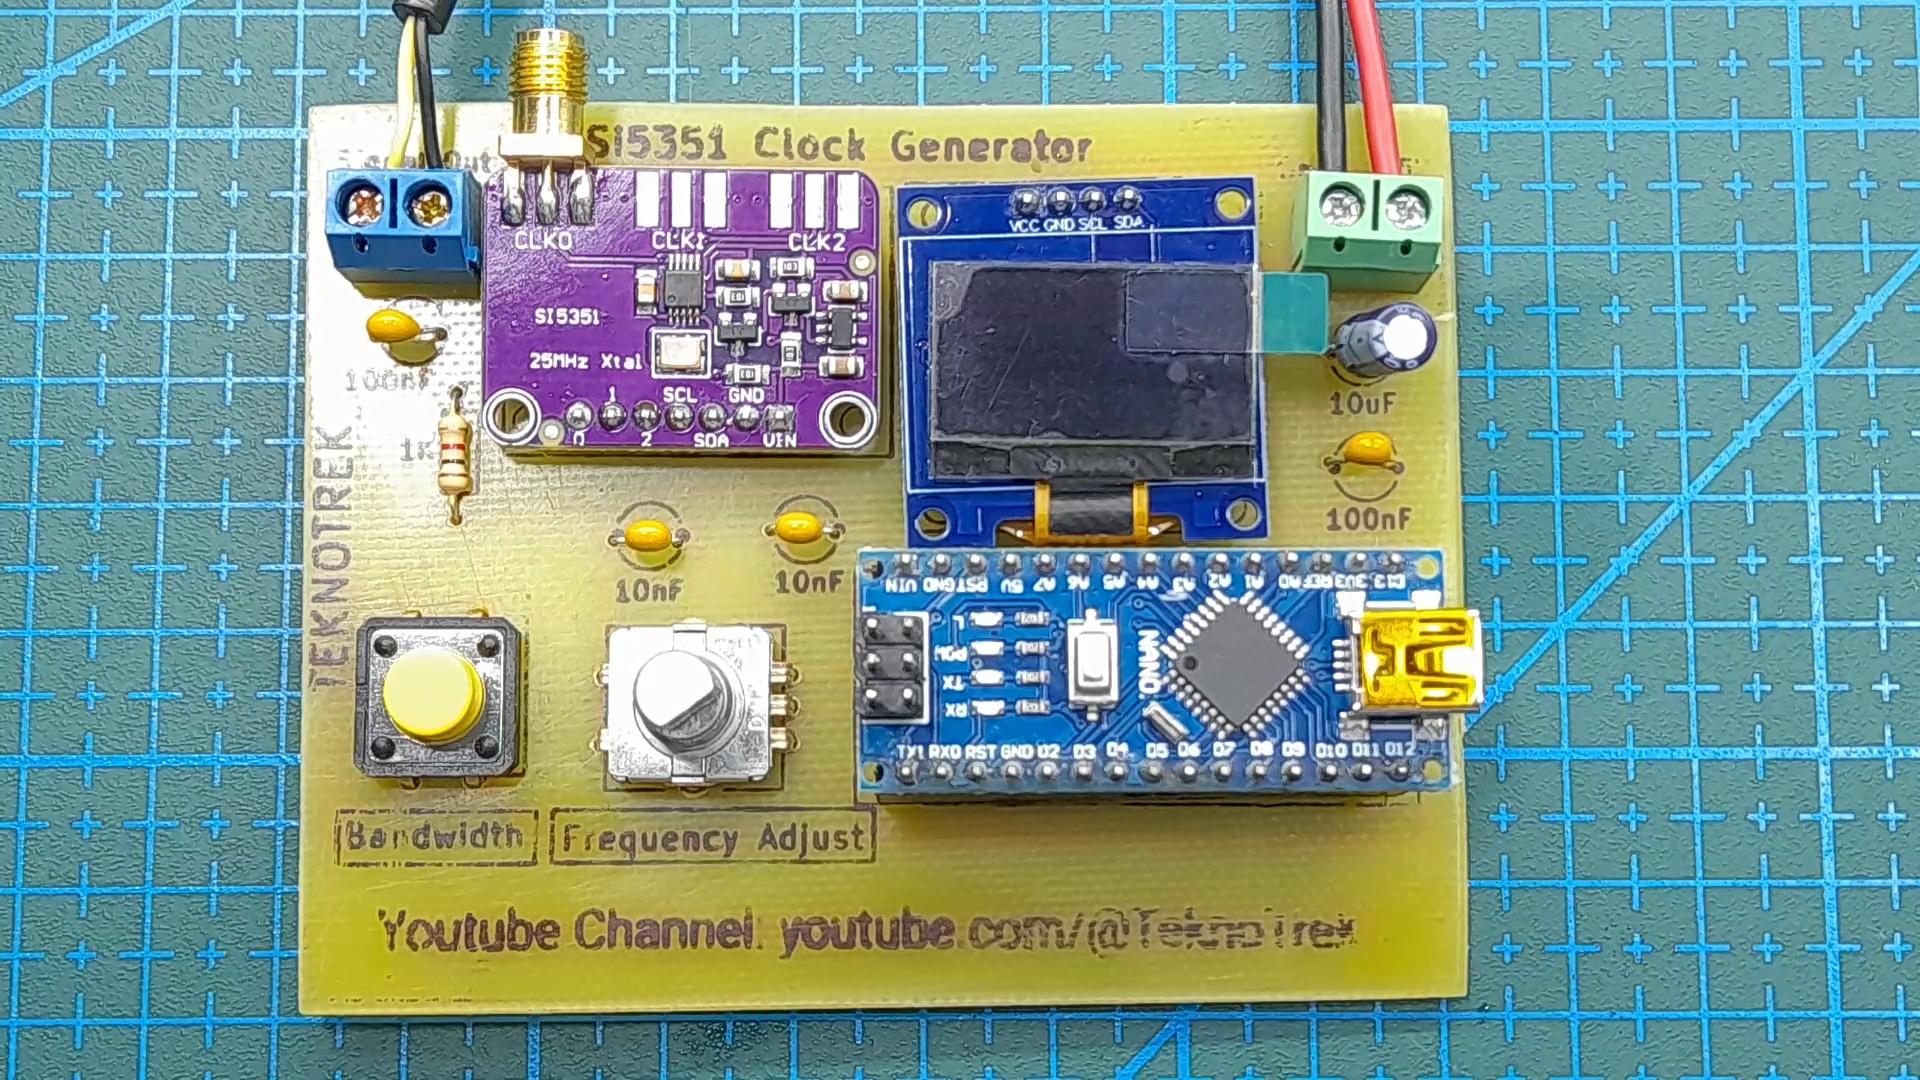
The Si5351 Clock Generator is a versatile module used in various electronics projects, especially in applications requiring precise frequency generation. This guide will walk you through the step-by-step process of creating your own Si5351-based clock generator with an Arduino Nano, assembling the PCB, and testing it.
Supplies
Materials Required
- Si5351 Clock Generator Module
- Arduino Nano
- 128x64 OLED Display
- Rotary Encoder with push button
- Capacitors:
- 10μF x 2
- 100nF x 2
- 10nF x 2
- Resistor:
- 1kΩ x 1
- DC Power Connector
- PCB (Printed Circuit Board)
- Soldering tools
- Wires and connectors
Circuit Design

Start by designing the circuit schematic. The Si5351 module connects to the Arduino Nano via I2C (SDA and SCL lines). A 128x64 OLED display is used to display the generated frequency. A rotary encoder allows frequency adjustment, and a single resistor and capacitor ensure clean signal output.
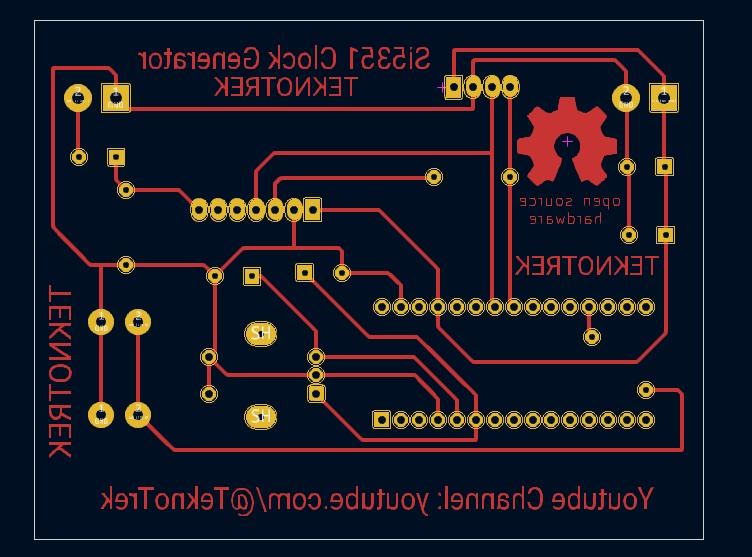
Refer to the circuit schematic provided
PCB Design

Using a PCB design tool like KiCad or EasyEDA, create the PCB layout based on the circuit schematic. Ensure that:
- The traces are appropriately routed to avoid interference.
- The components fit well on the board.
- Ground and power planes are properly connected.
Once the design is ready, export the Gerber files and send them to a PCB fabrication service. For DIY enthusiasts, you can also etch the PCB at home.
PCB Assembly

After receiving or fabricating the PCB, solder the components onto the board:
- Start with smaller components like resistors and capacitors.
- Move to larger components like the Si5351 module, Arduino Nano, and OLED display.
- Solder the rotary encoder and connectors last.
For a visual guide, refer to the PCB assembly video:
Programming the Arduino Nano
- Connect the Arduino Nano to your computer using a USB cable.
- Open the Arduino IDE.
- Install the required libraries:
- Adafruit_GFX
- Adafruit_SSD1306
- Si5351Arduino
- Upload the code to control the Si5351 module and OLED display. This code allows you to adjust the frequency using the rotary encoder and displays it on the OLED.
I was used libraries: GitHub
Testing the Circuit
- Power the circuit with a 5V DC supply.
- Use the rotary encoder to set different frequencies. Ensure the frequency is displayed correctly on the OLED.
- Verify the output signal using an oscilloscope or frequency counter.
Summary
Building a Si5351 Clock Generator is a rewarding project that combines circuit design, PCB assembly, and programming. This device is perfect for use in RF projects, signal generation, and other frequency-critical applications. By following this guide, you can create your own functional and reliable clock generator.
For more details and updates, check out the project documentation on Instructables. If you have any questions or need support, feel free to leave a comment or reach out through the Teknotrek YouTube channel!