How to Build a Simple Greenhouse Environmental Monitor With Arduino
by Fekry in Circuits > Arduino
302 Views, 5 Favorites, 0 Comments
How to Build a Simple Greenhouse Environmental Monitor With Arduino
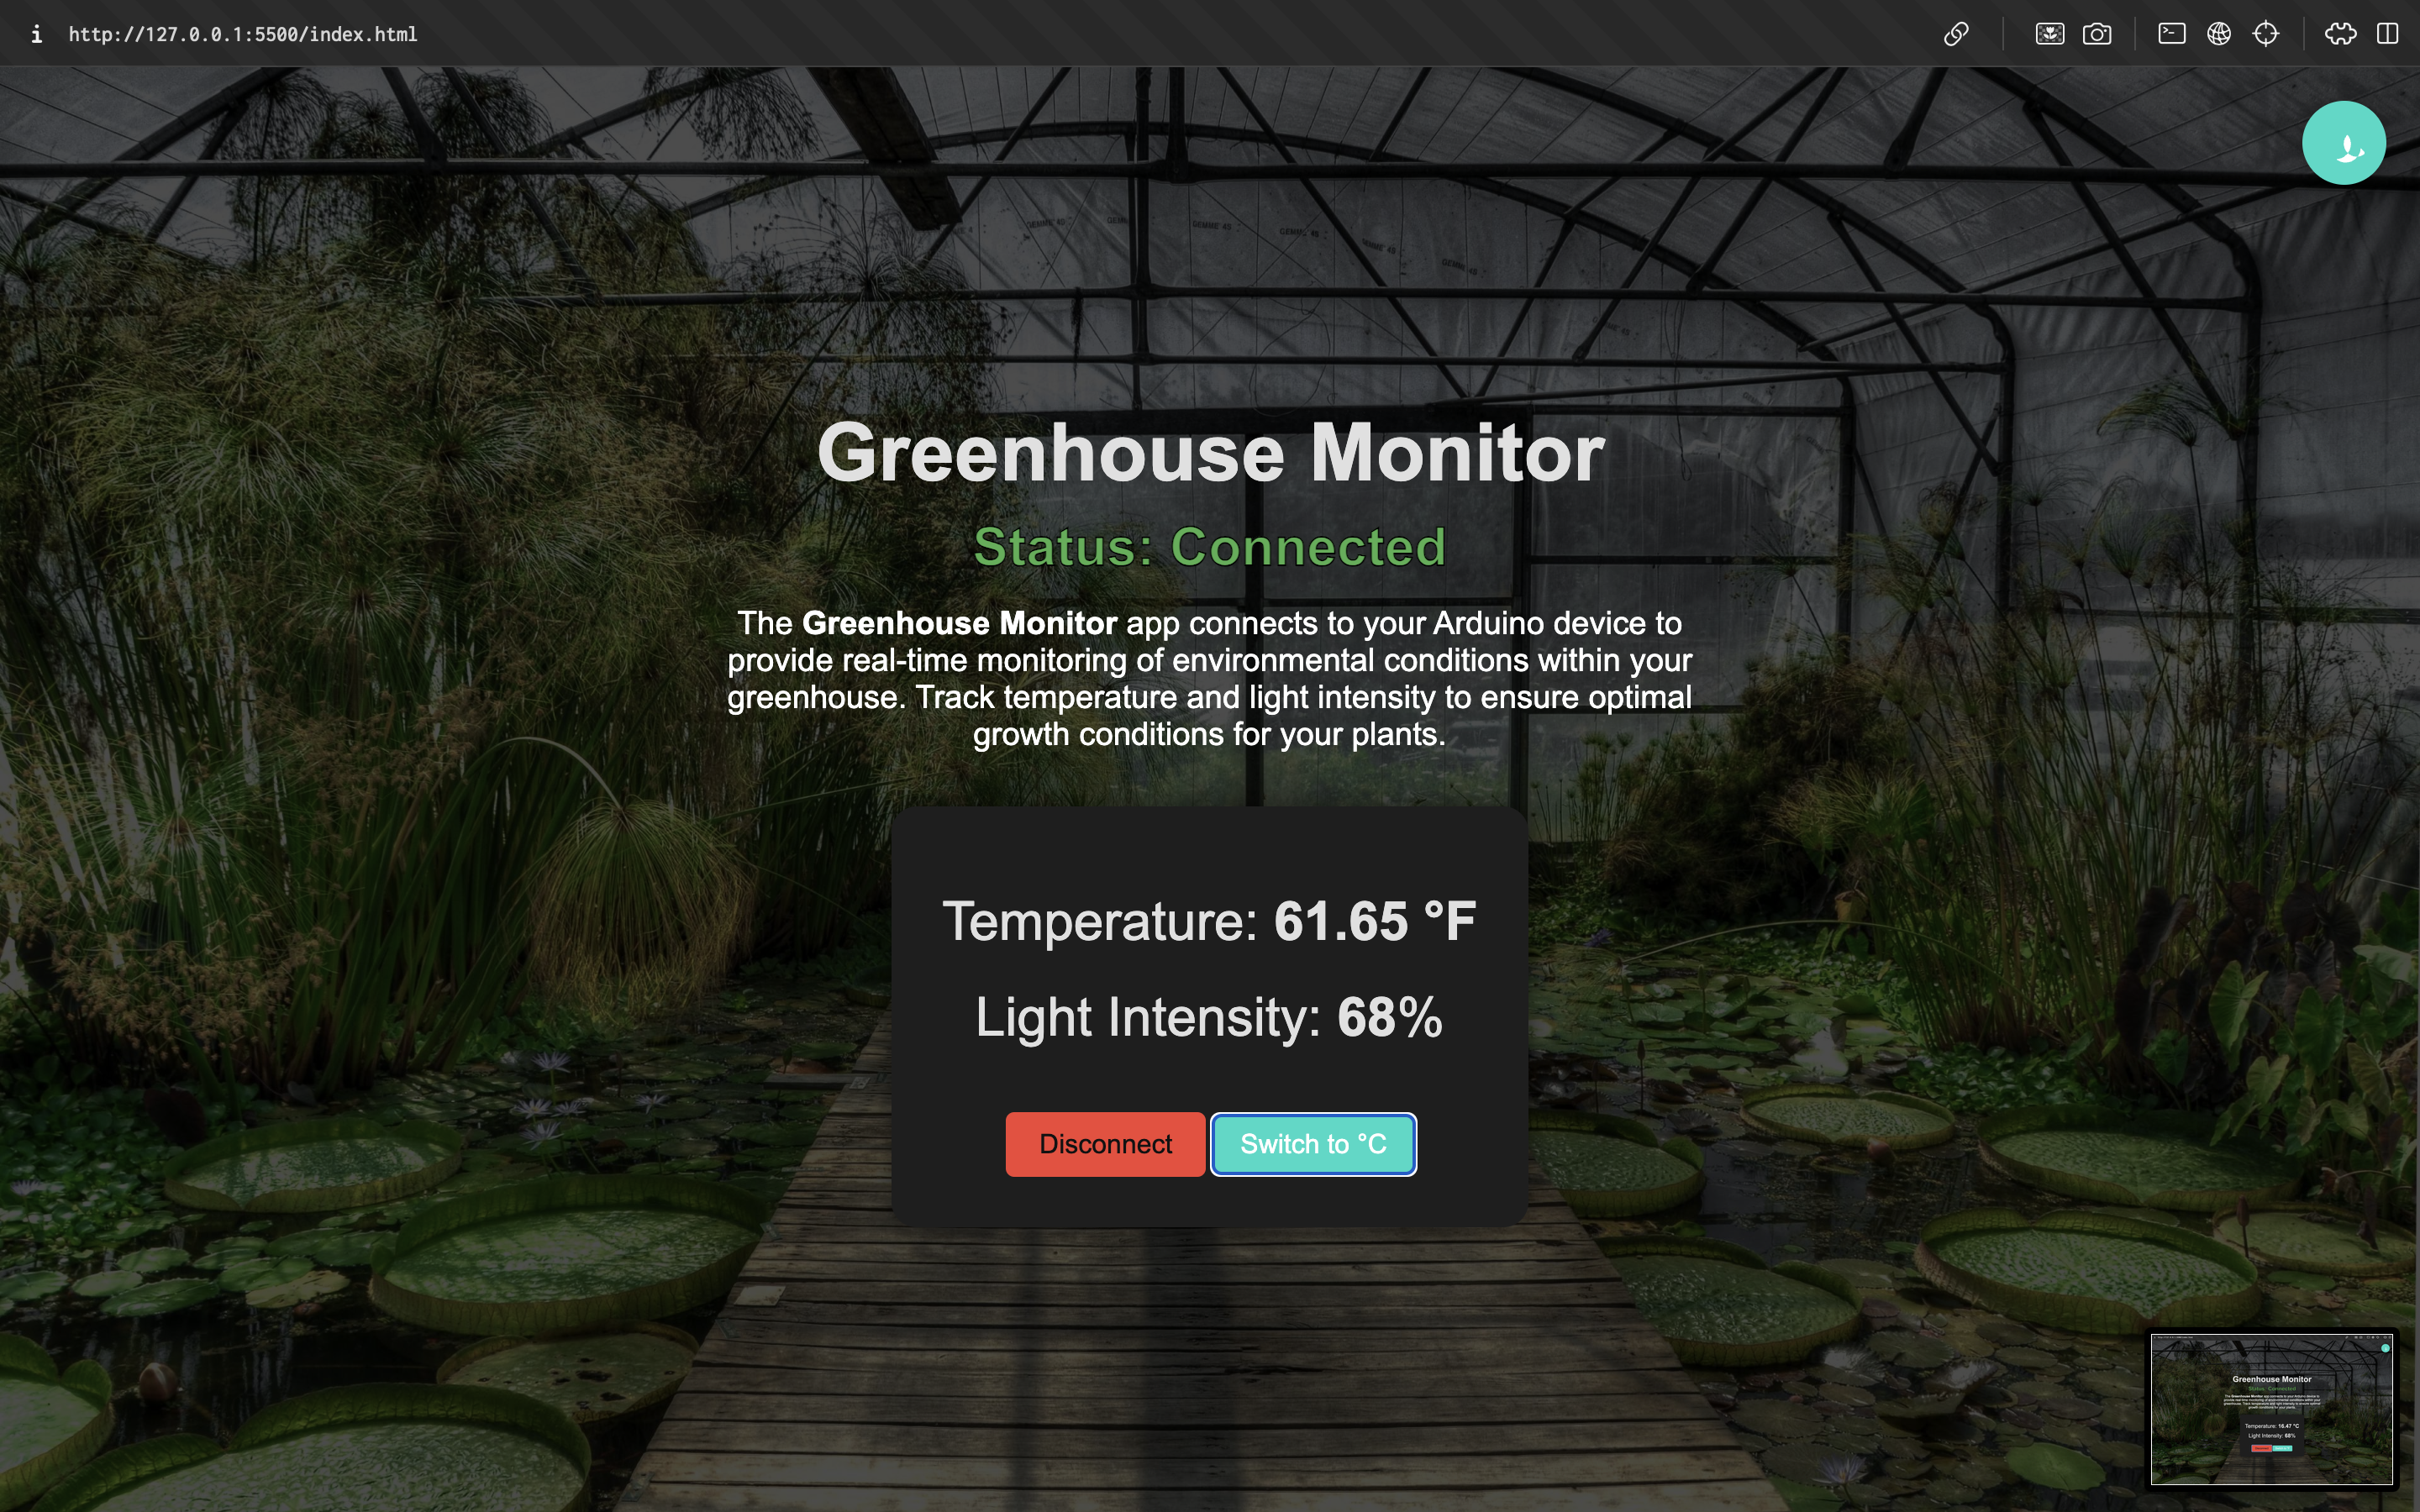
Maintaining optimal environmental conditions is crucial for healthy plant growth in a greenhouse. In this Instructable, I'll guide you through building a Greenhouse Monitor that connects to an Arduino device to provide real-time monitoring of temperature and light intensity using a TMP36 temperature sensor and a photoresistor. We'll also create a simple web application to display the data, allowing you to track conditions conveniently from your computer. All the code and resources are available on GitHub. If you find this project helpful, please consider favoriting this Instructable and starring the GitHub repository. Your support helps more makers discover this resource! Let's get started!
Supplies
Materials:
- Arduino Uno (or compatible board)
- Breadboard
- Jumper Wires
- TMP36 Temperature Sensor
- Photoresistor
- 10 kΩ Resistor (for the photoresistor voltage divider)
- USB Cable (for Arduino connection)
Tools:
- Computer with Arduino IDE installed
- Internet Browser (Google Chrome or Microsoft Edge recommended)
- Measuring Tools (optional, for precise assembly)
Understand the Circuit Diagram
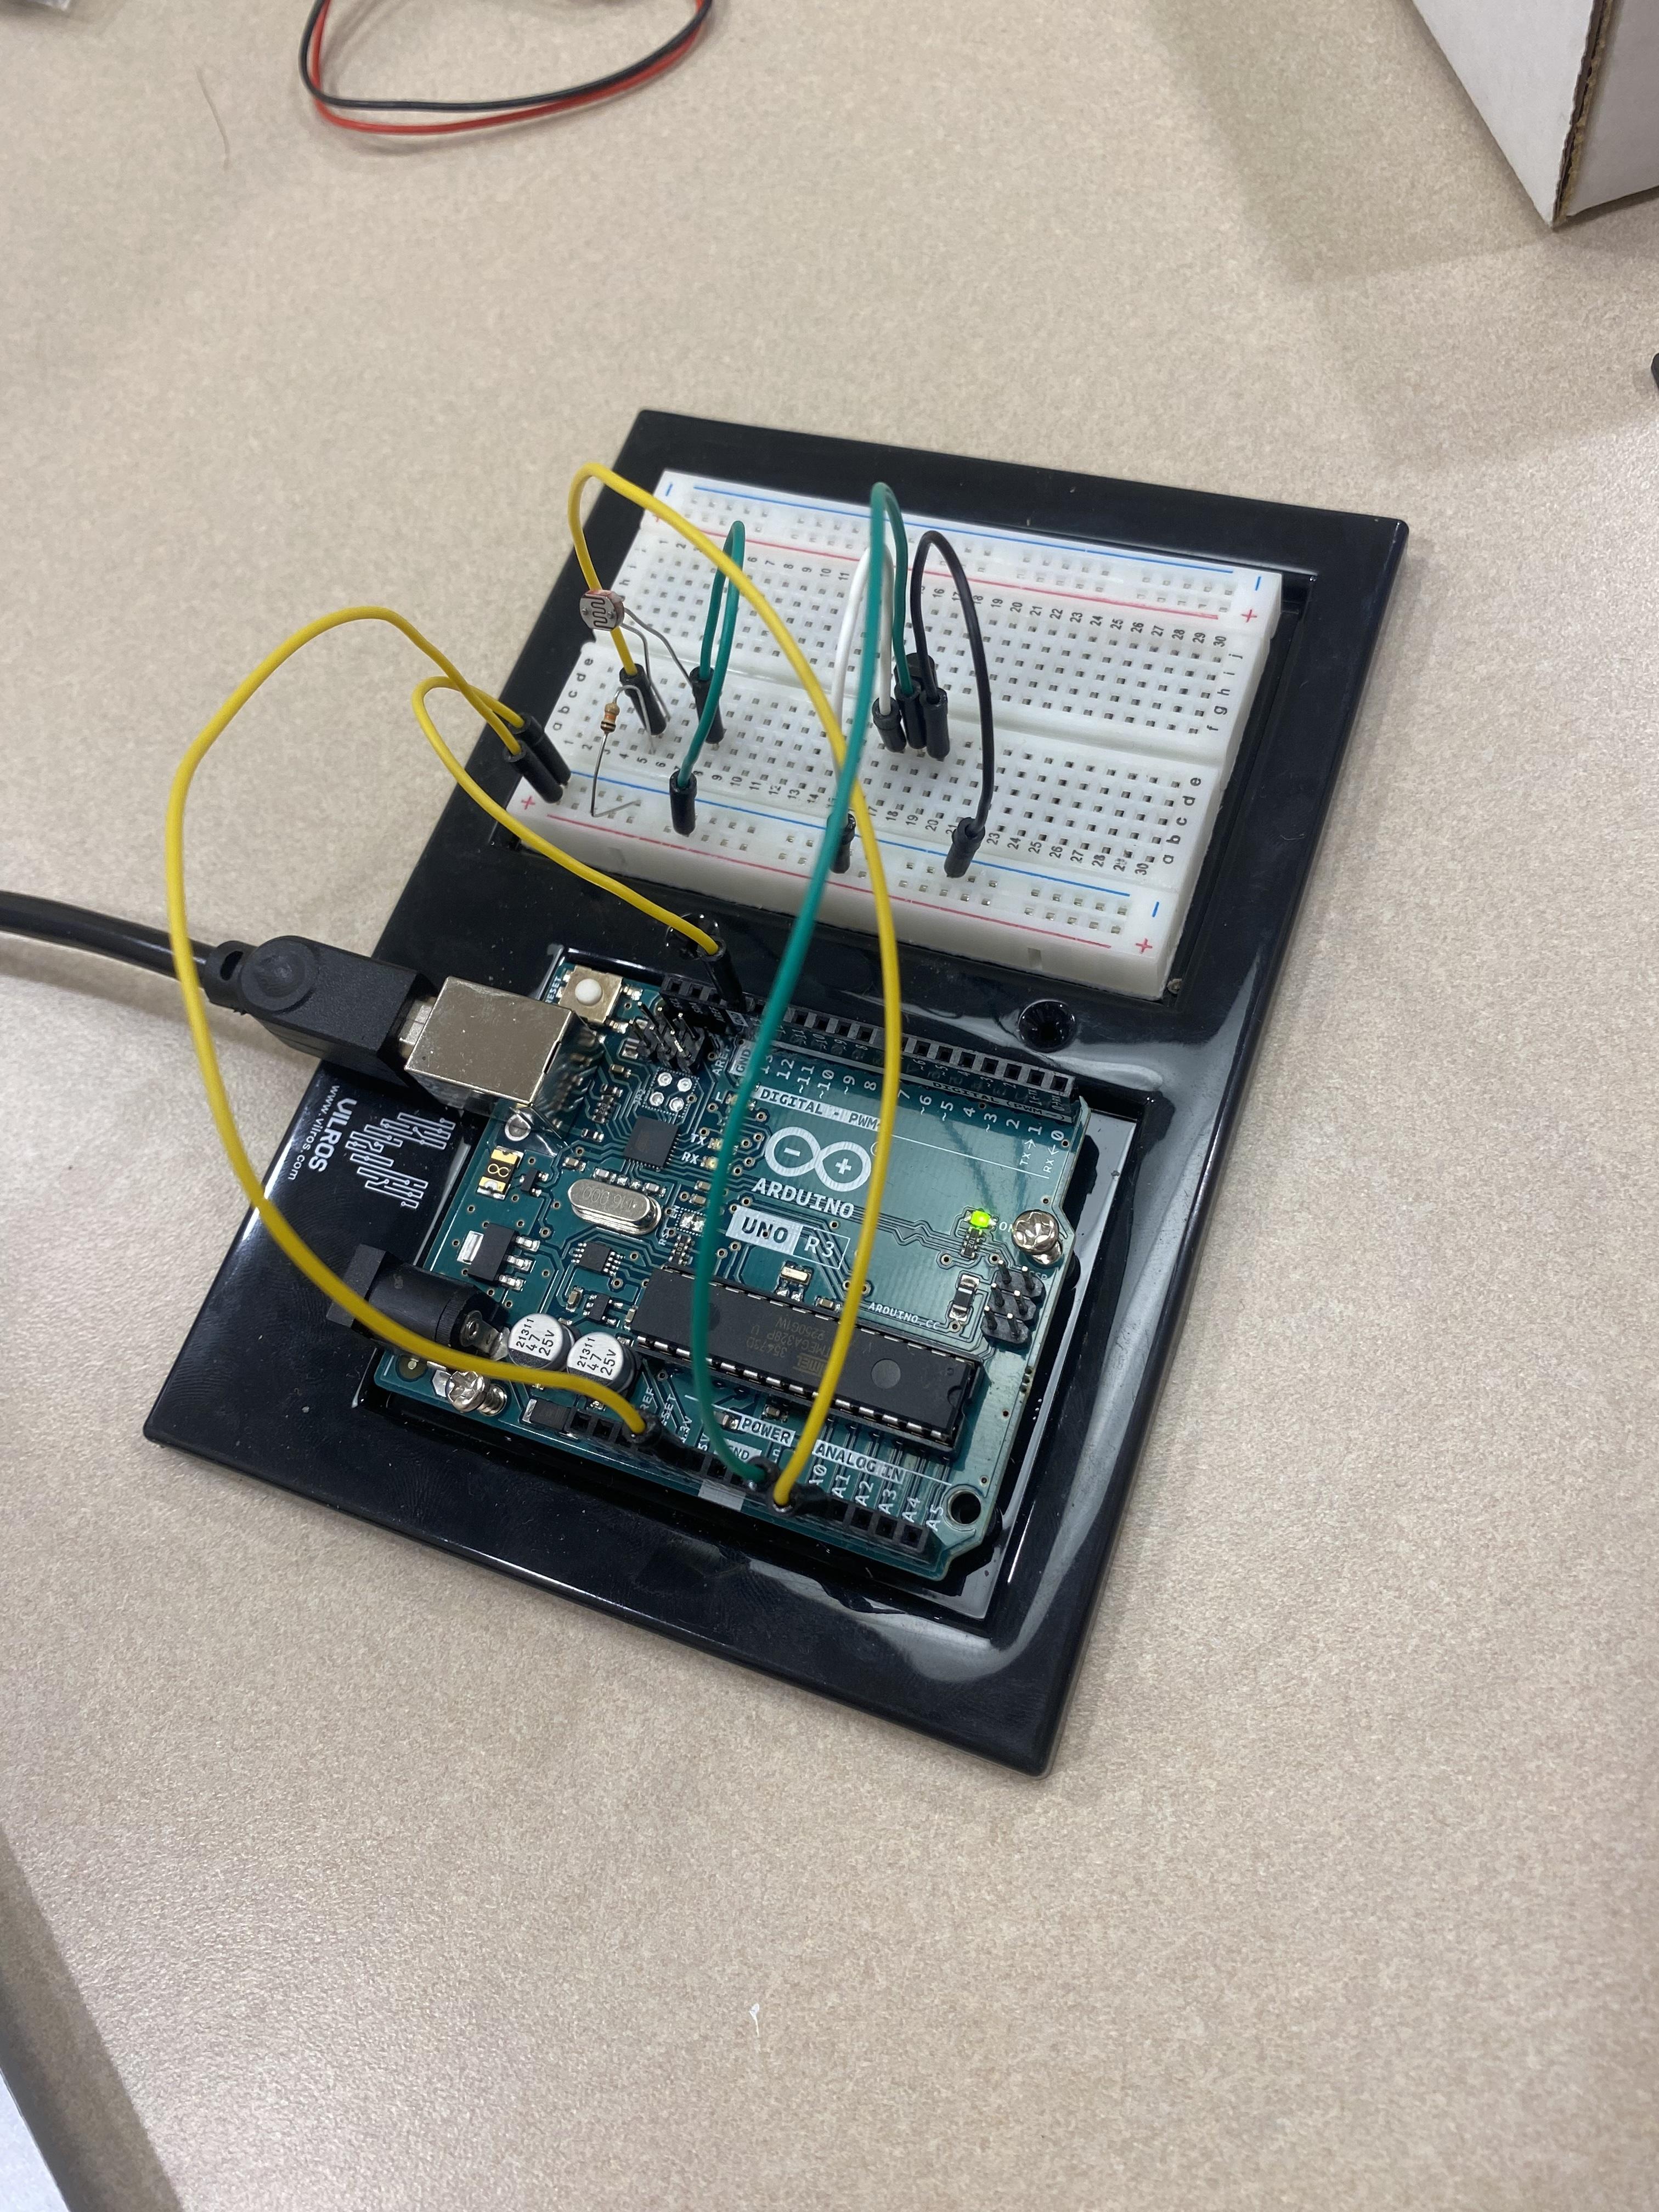
Before assembling the hardware, let's understand how the components are connected.
- TMP36 Temperature Sensor:
- Pin 1 (Vs): Connect to +5V on the Arduino.
- Pin 2 (Vout): Connect to Analog Pin A0 on the Arduino.
- Pin 3 (GND): Connect to Ground (GND) on the Arduino.
- Photoresistor with Voltage Divider:
- Connect one end of the photoresistor to +5V.
- Connect the other end of the photoresistor to Analog Pin A1 and one leg of the 10 kΩ resistor.
- Connect the other leg of the 10 kΩ resistor to Ground (GND).
Note: The voltage divider allows the Arduino to read varying voltage levels from the photoresistor based on light intensity.
Assemble the Circuit on the Breadboard
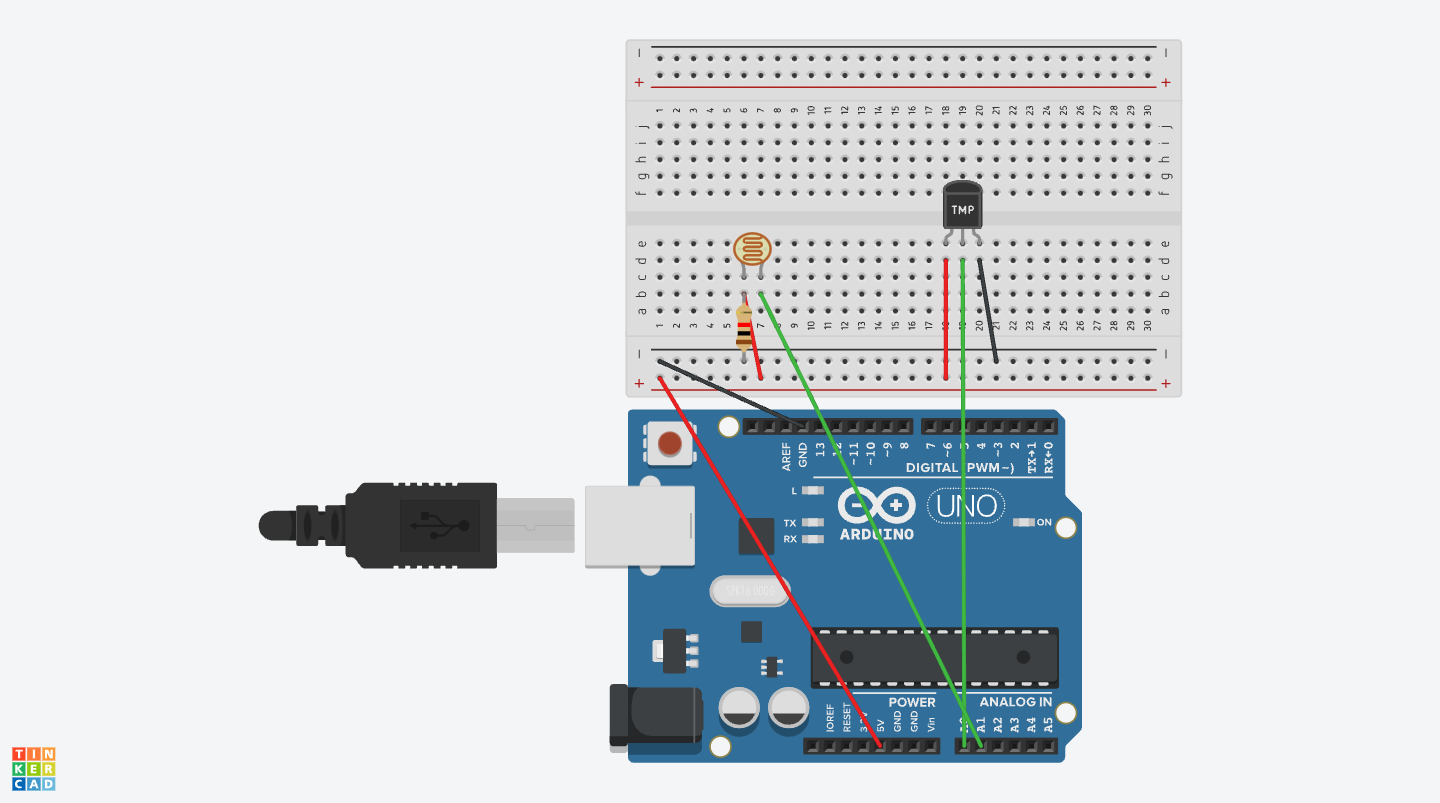
- Place the TMP36 Sensor:
- Insert the TMP36 sensor into the breadboard with the flat face forward.
- Left Pin (Vs): Connect to the +5V rail.
- Middle Pin (Vout): Connect to Analog Pin A0.
- Right Pin (GND): Connect to the Ground rail.
- Set Up the Photoresistor Circuit:
- Connect one end of the photoresistor to the +5V rail.
- Connect the other end to a point on the breadboard.
- From that point, connect a jumper wire to Analog Pin A1.
- Also from that point, connect the 10 kΩ resistor to the Ground rail.
- Connect Power Rails:
- Use jumper wires to connect the +5V and GND pins from the Arduino to the respective rails on the breadboard.
- Double-Check Connections:
- Ensure all components are connected correctly to prevent any short circuits.
Visual Aid: Refer to the circuit diagram to verify your setup.
Install the Arduino IDE and Connect the Arduino
- Download and Install Arduino IDE:
- Visit the Arduino Software page and download the IDE for your operating system.
- Follow the installation instructions provided.
- Connect the Arduino to Your Computer:
- Use the USB cable to connect the Arduino to your computer.
- The power LED on the Arduino should light up.
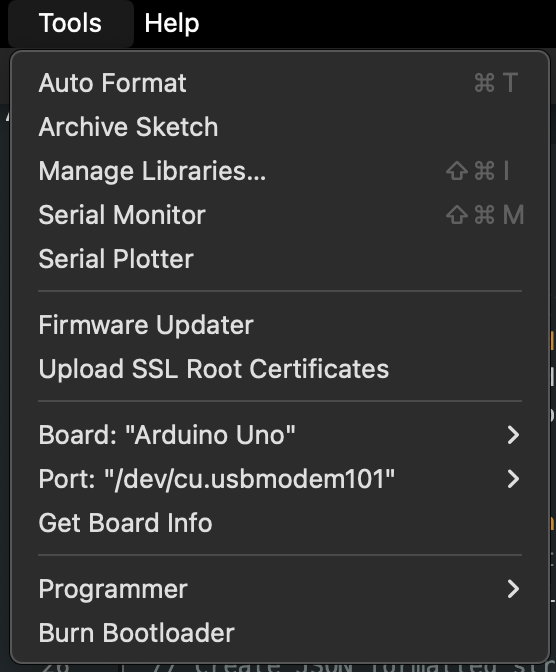
- Select the Correct Board and Port:
- Open the Arduino IDE.
- Go to Tools > Board and select your Arduino model.
- Go to Tools > Port and select the port corresponding to your Arduino (e.g., COM3 on Windows or /dev/cu.usbmodem on macOS).
Write and Upload the Arduino Code
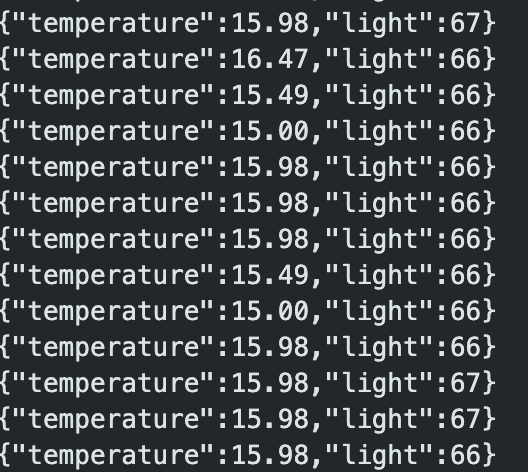
We'll write code to read data from the sensors and send it over serial communication.
Arduino Code:
- Enter the Code:
- Copy and paste the code into the Arduino IDE.
- Upload the Code:
- Click the Upload button (right arrow icon) to compile and upload the code to the Arduino.
- Ensure there are no error messages.
- Test Serial Output:
- Open the Serial Monitor from Tools > Serial Monitor.
- You should see temperature and light intensity readings in JSON format.
Set Up and Run the Web Application
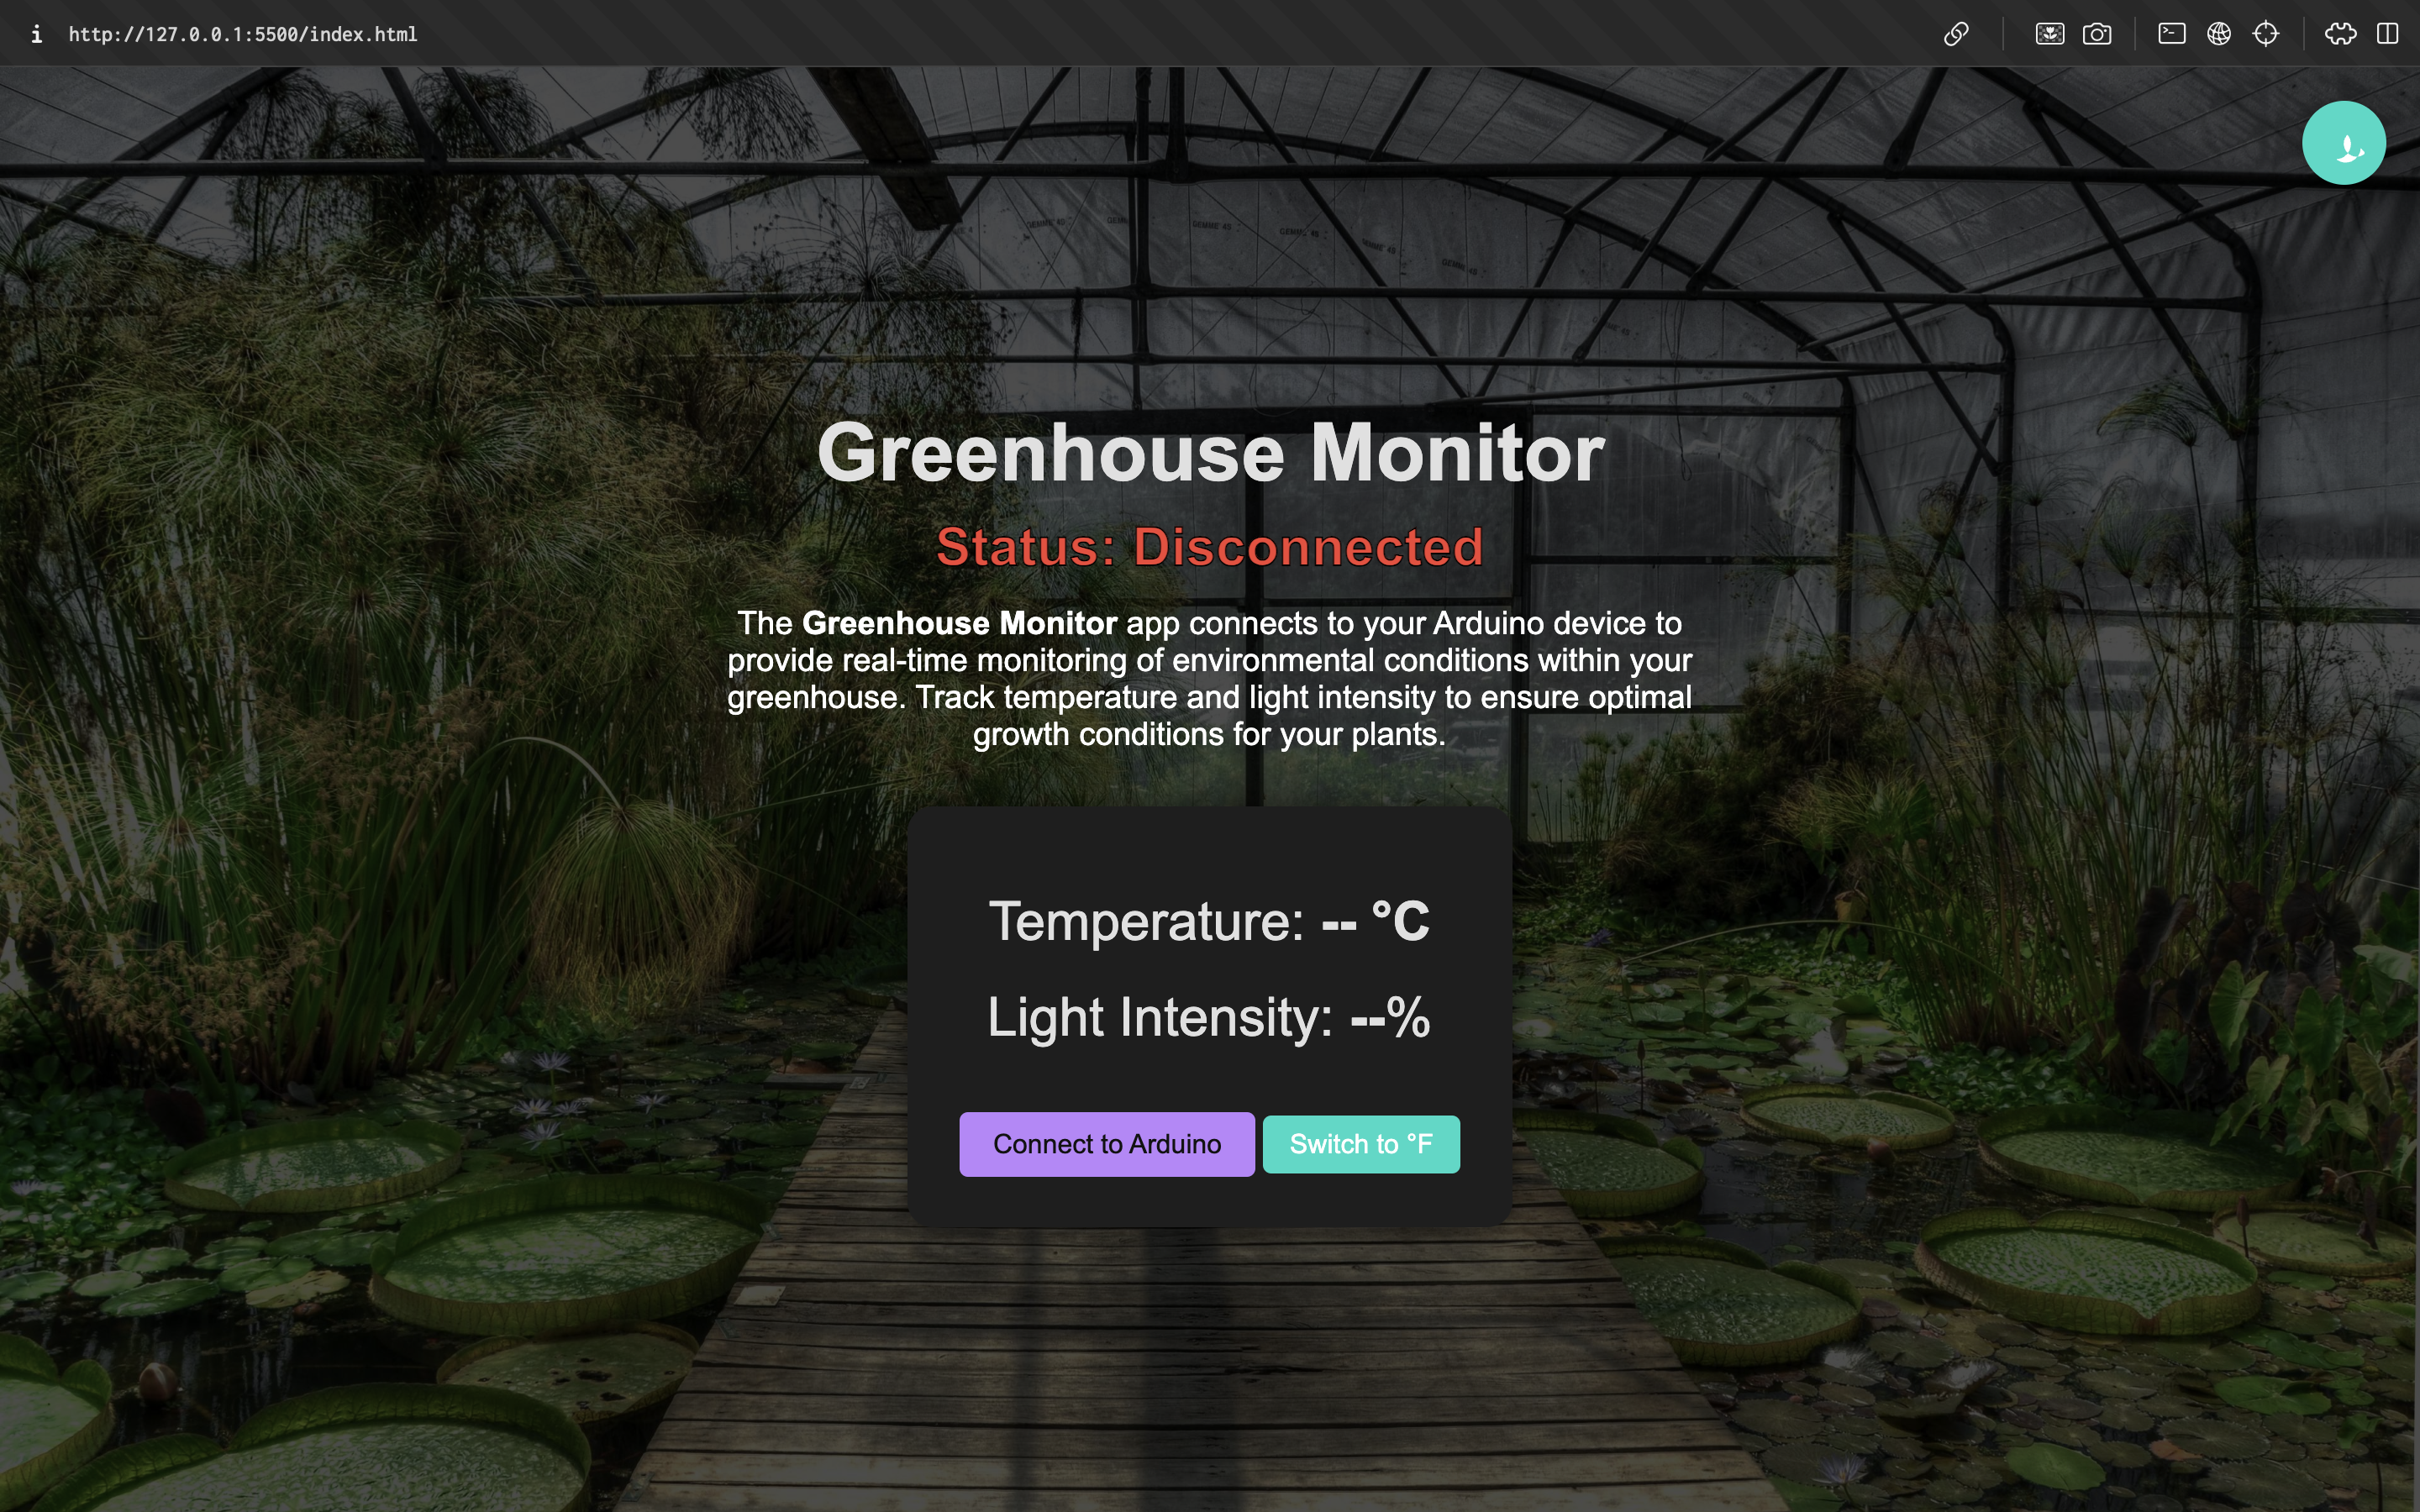
I've developed a simple web application to display the sensor data. All the necessary files are available on our GitHub repository.
- Download the Web App Files:
- Clone or download the repository:
- Alternatively, download the ZIP file and extract it to a folder on your computer.
- Navigate to the Project Folder:
- Open the folder containing index.html, app.js, and other resources.
- Open the HTML File:
- Locate index.html in your project folder.
- Right-click on the file and select "Open with" and choose Google Chrome or Microsoft Edge.
- Enable Serial Communication in Browser:
- Ensure you're using a browser that supports the Web Serial API (e.g., Chrome or Edge).
- Allow Access to Serial Ports:
- The first time you use the Web Serial API, your browser may prompt you to allow access to connected serial devices. Accept the prompt to proceed.
Connect the Web App to the Arduino
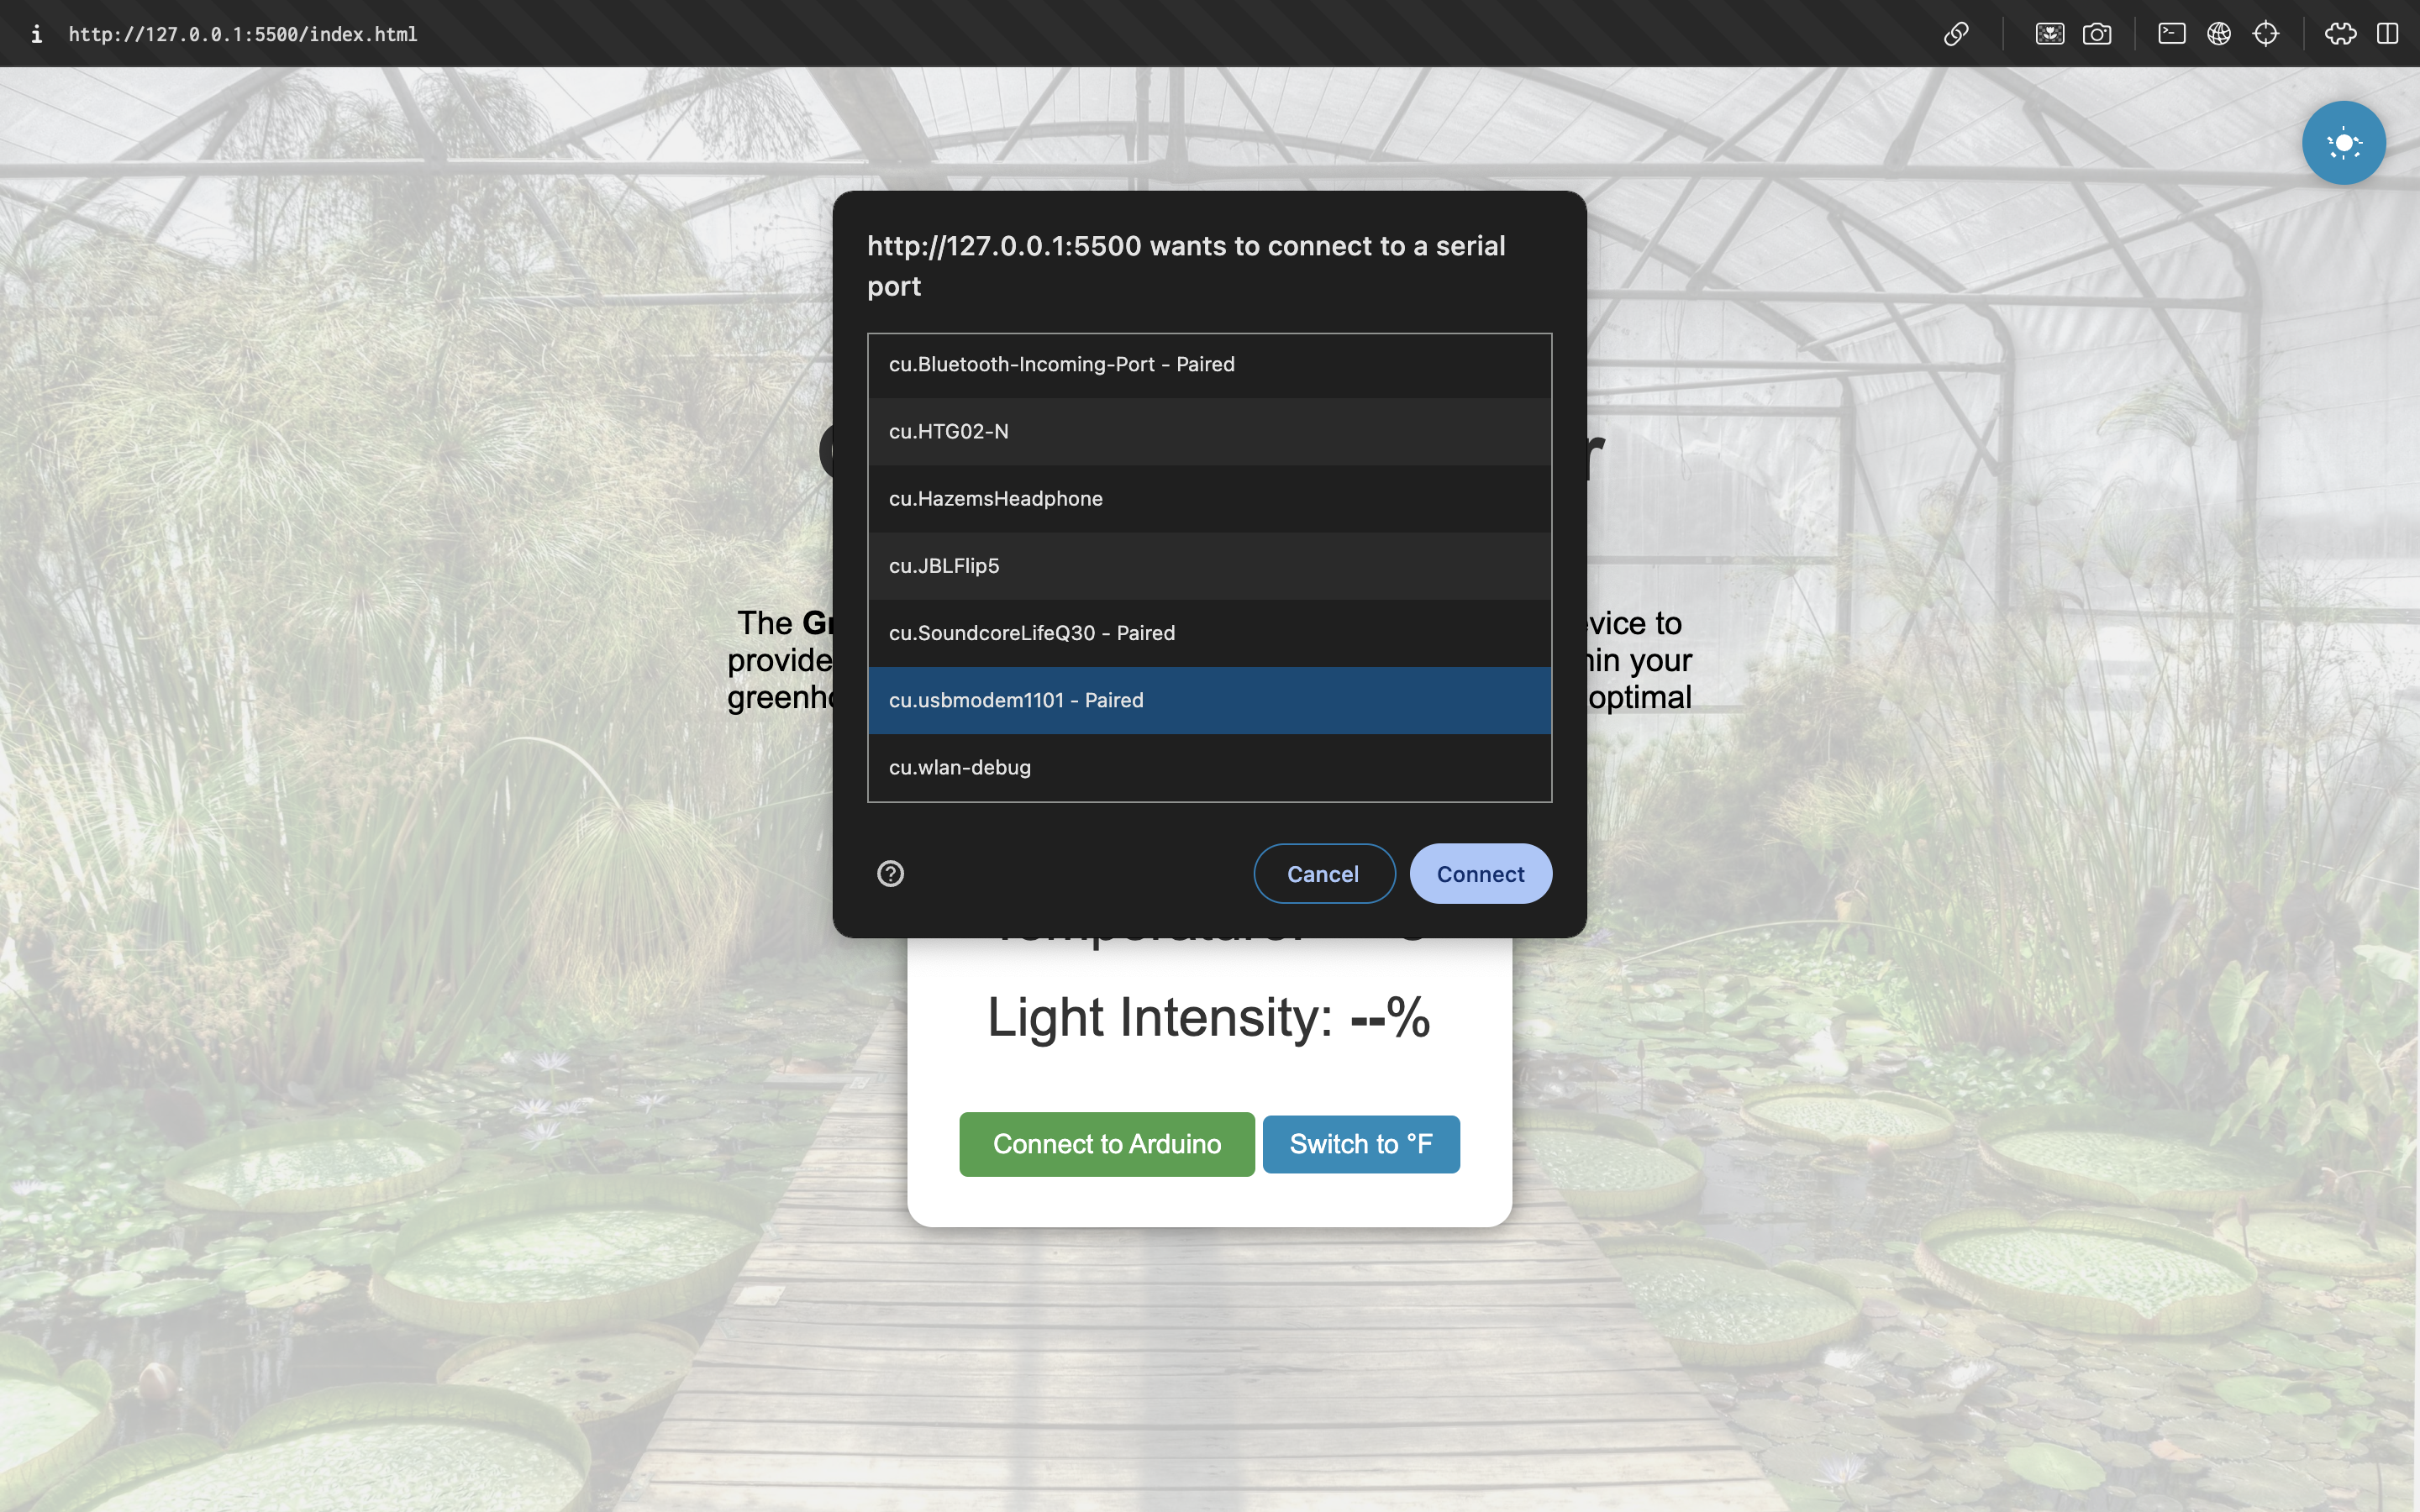
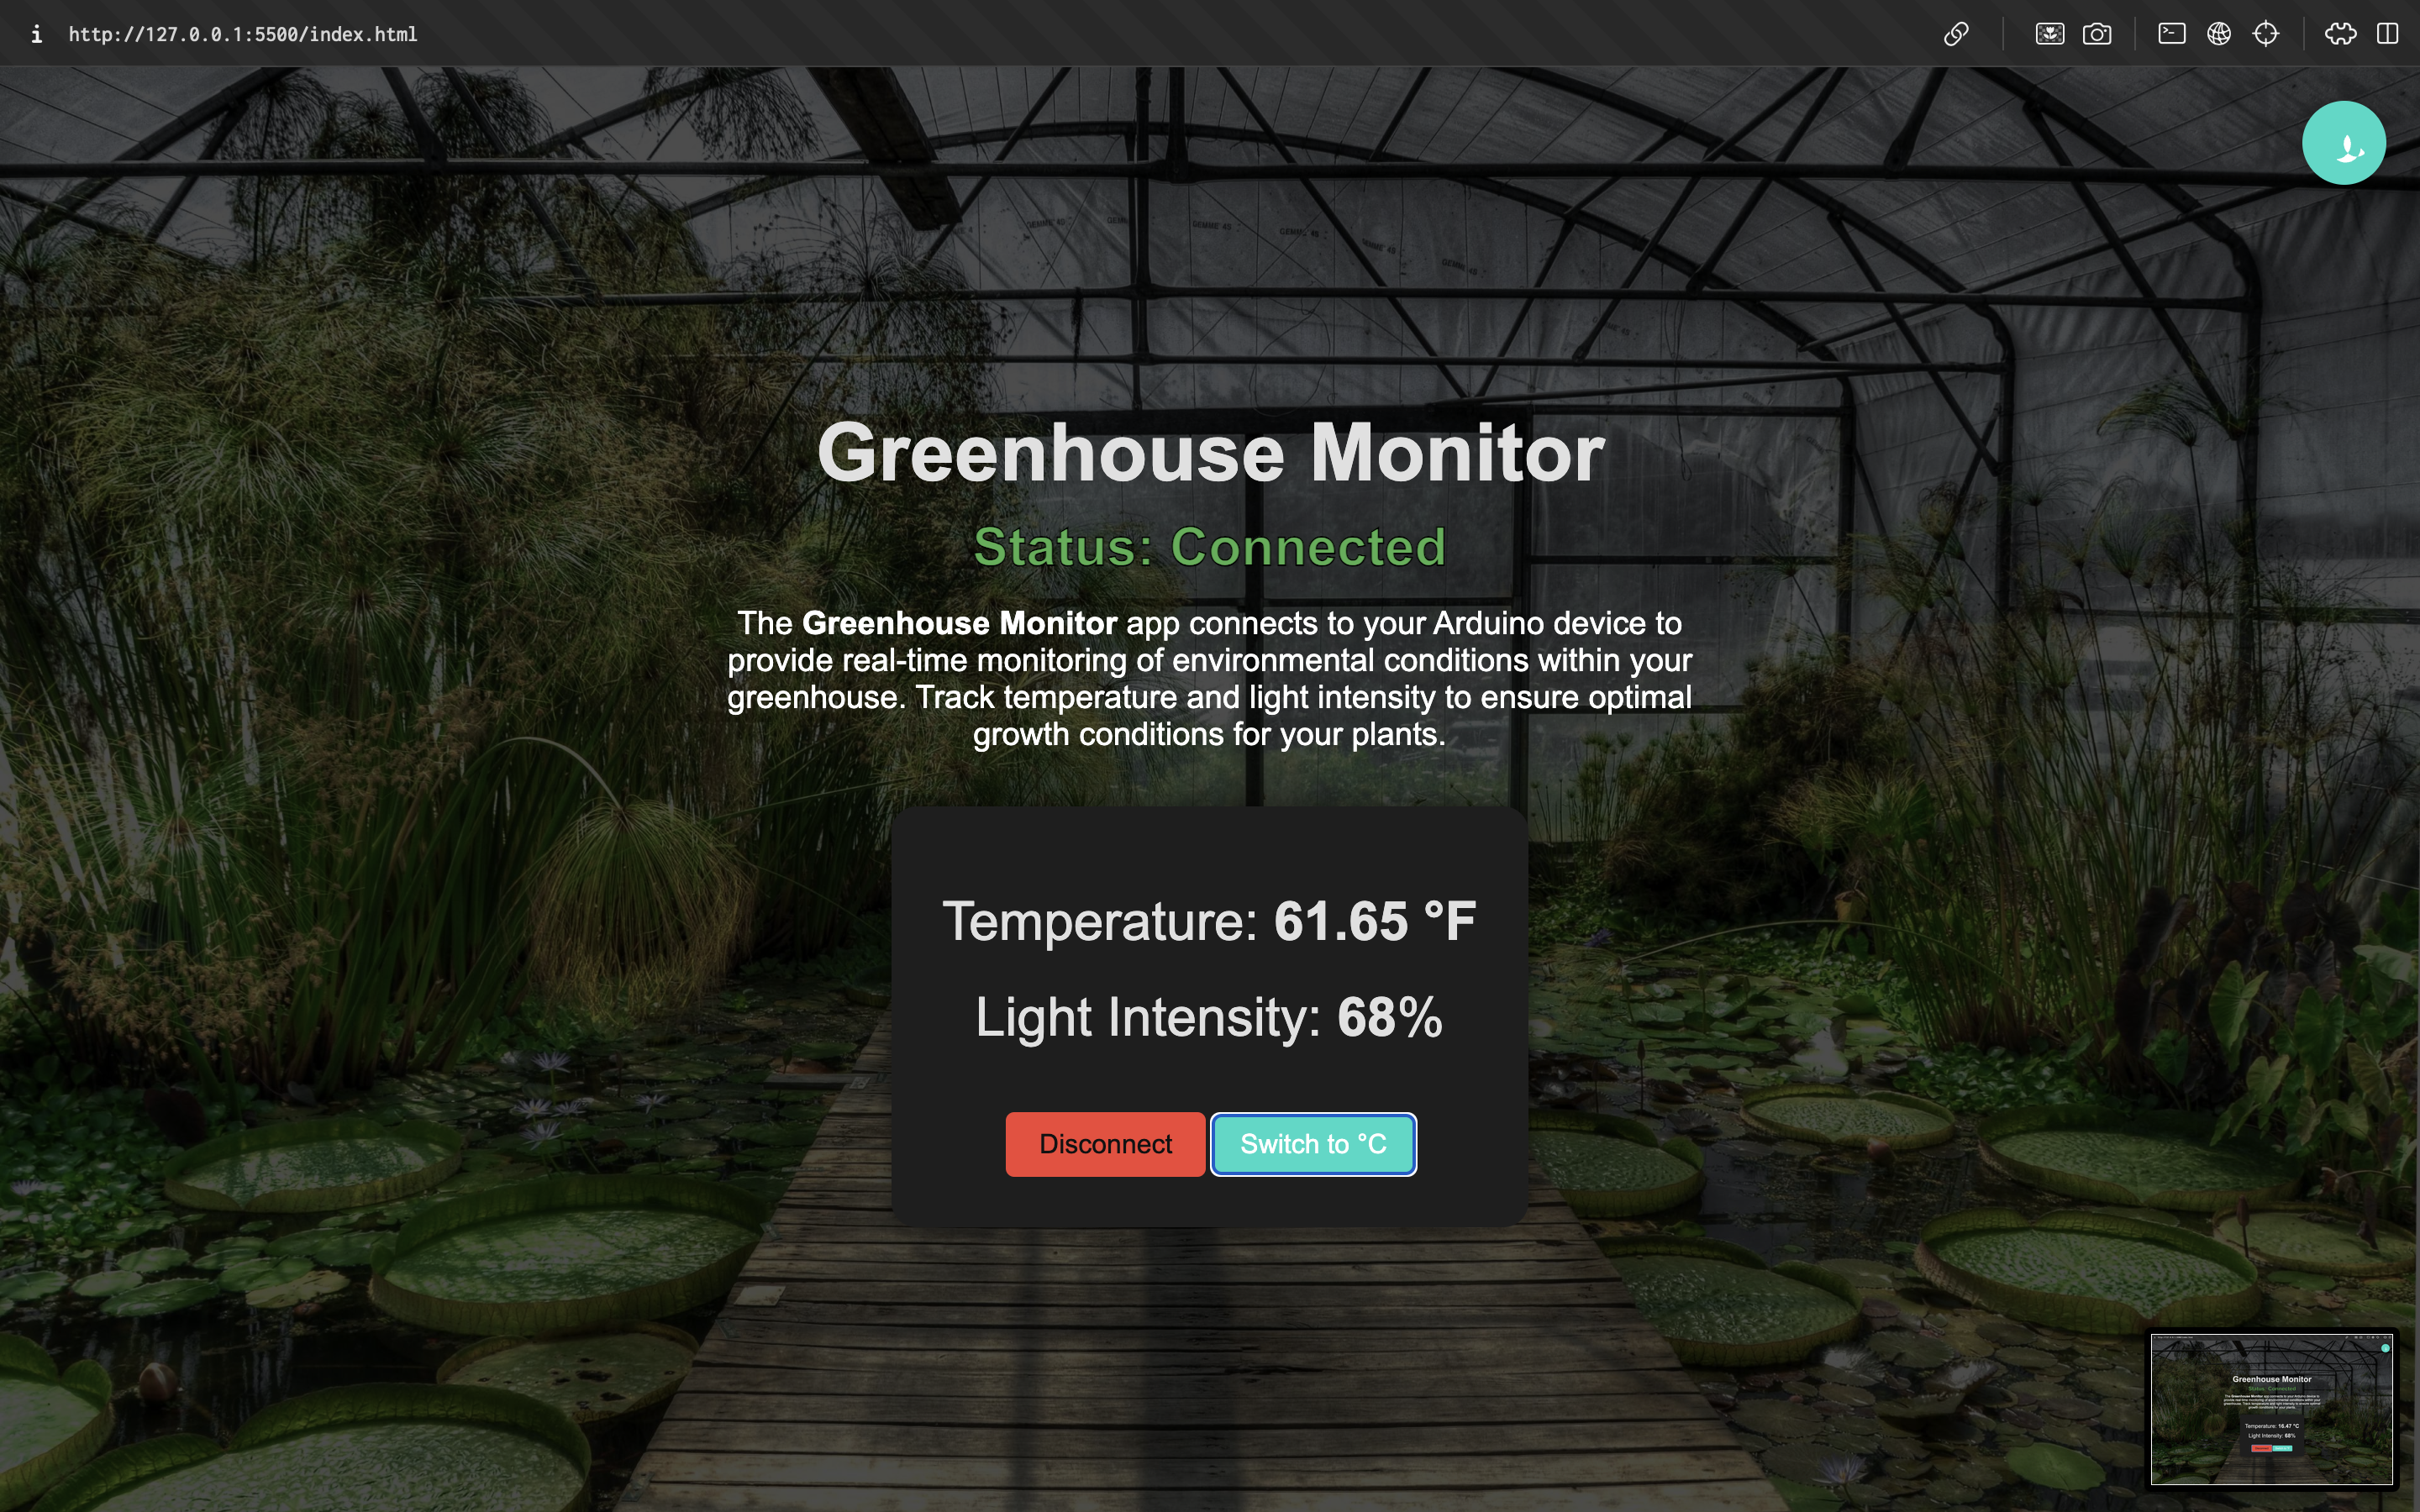
- Connect the Arduino:
- Ensure the Arduino is connected to your computer and running the uploaded code.
- Use the Web App:
- In the web app, click the "Connect to Arduino" button.
- A prompt will appear to select a serial port.
- Select the Correct Serial Port:
- On macOS, look for a port named something like /dev/cu.usbmodemXXXX.
- On Windows, it might be COM3, COM4, etc.
- Select the port and click Connect.
- View Real-Time Data:
- The web app should start displaying temperature and light intensity readings.
- Temperature will be shown in degrees Celsius with an option to switch to Fahrenheit.
- Light intensity is displayed as a percentage.
- Toggle Light/Dark Mode:
- Use the provided switch to change between light and dark themes for the web app.
Reflecting on the Project
Building the Greenhouse Monitor was an insightful experience that combined electronics, programming, and web development. Here's what I learned:
- Arduino Serial Communication: Understanding how to read sensor data and transmit it over serial communication is fundamental for IoT projects.
- Web Serial API: Using the Web Serial API allows direct communication between a web browser and hardware devices, opening up new possibilities for web-based interfaces.
- Sensor Integration: Working with the TMP36 temperature sensor and a photoresistor provided practical experience in analog sensor data acquisition and voltage dividers.
- Cross-Platform Compatibility: Recognizing differences in serial port naming between macOS and Windows is essential for user-friendly instructions.
- User Interface Design: Implementing light and dark modes and temperature unit toggling enhanced the usability of the web app.
This project not only serves as a functional tool for monitoring greenhouse conditions but also demonstrates how hardware and software can be integrated to create interactive applications.