Weather Station Connected to Amazon Alexa Echo Show
by TylerDDDD in Circuits > Arduino
368 Views, 0 Favorites, 0 Comments
Weather Station Connected to Amazon Alexa Echo Show

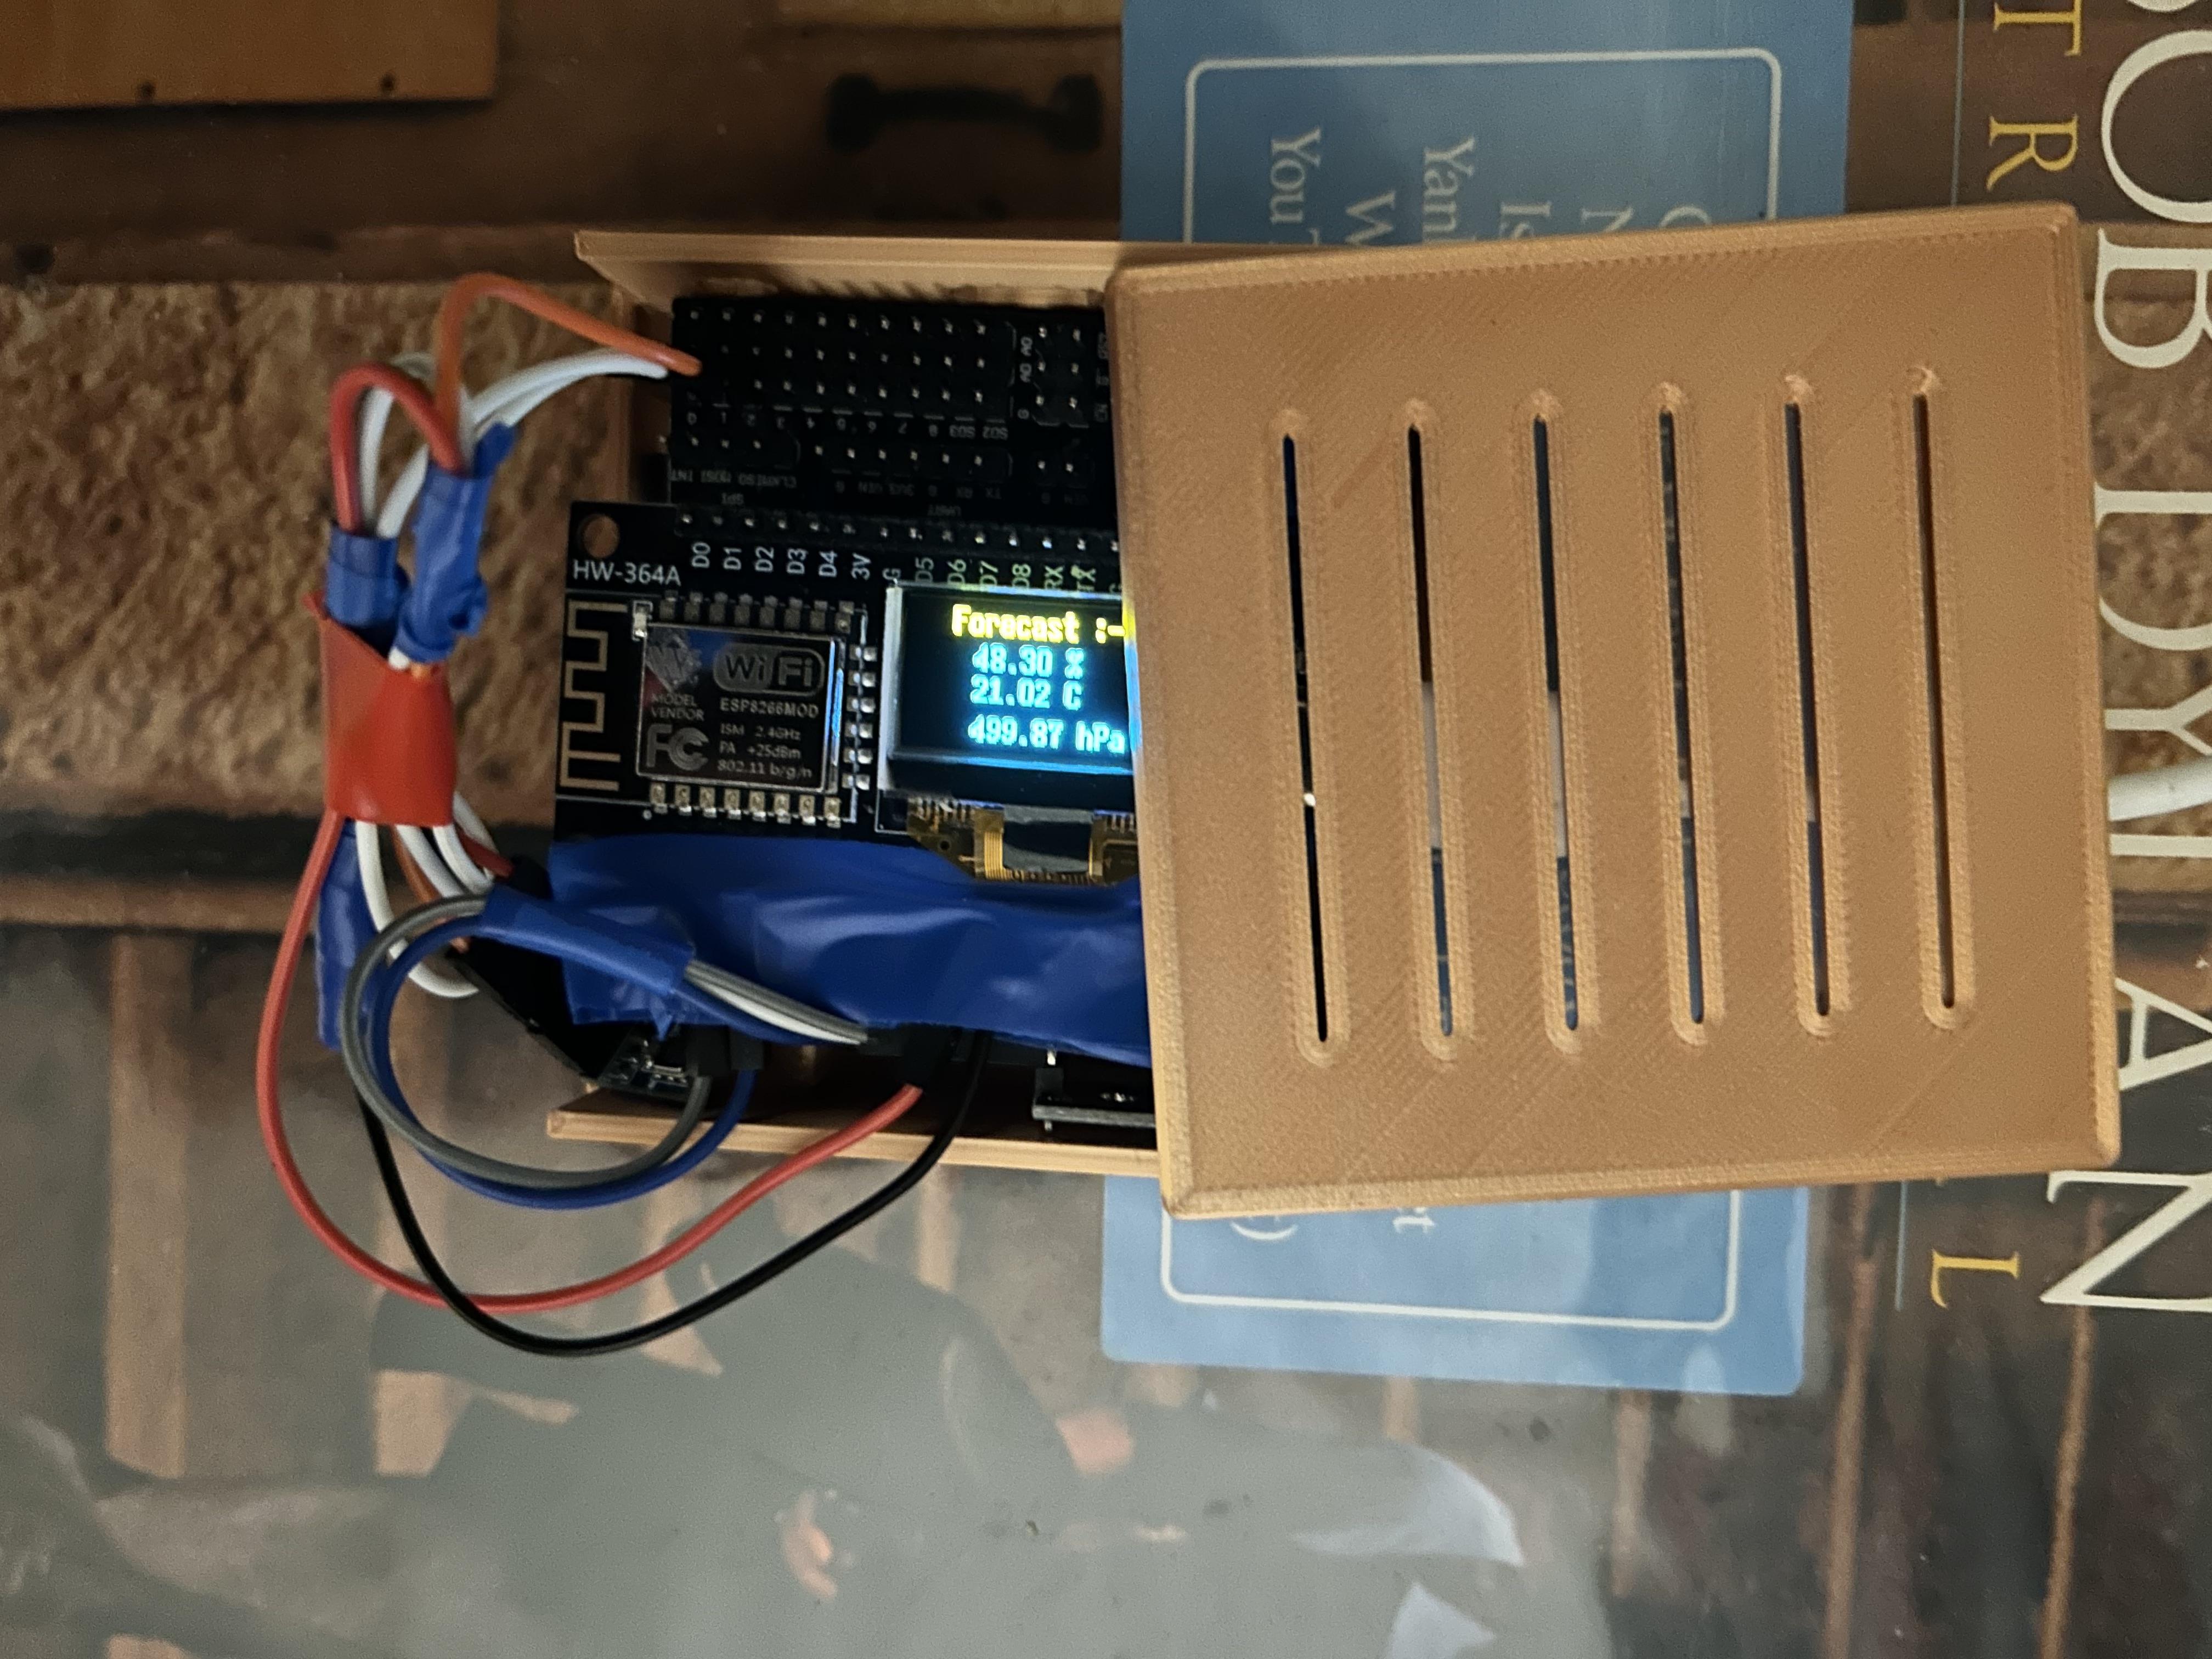
This project is a simple yet powerful DIY connected weather station using an Arduino ESP8266, an OLED display, and two sensors: the BMP180 for pressure and the DHT for temperature and humidity.
The weather station reads environmental data every 20 seconds, processes it, and sends it to two IoT platforms: Arduino Cloud (every 20 seconds) and ThingSpeak (every hour).
Using Amazon Alexa (Echo Show), you can retrieve live weather data by interacting with the Arduino Cloud.
Supplies

I used those supplies (please note that Amazon Associates links are used below) :
- ESP8266 with OLED display
- One breakout board for the ESP8266
- BMP180 sensor for pressure
- DHT sensor for temperature and humidity
- Cables : multicolor Dupont wires
- One small breadboard
- Optional, Amazon Alexa Echo Show
Explanations :
The ESP8266 is a low-cost Wi-Fi microchip that enables internet connectivity for IoT projects. The OLED display is a small, low-power screen that shows visual data, often used for displaying sensor readings in real-time.
The DHT sensor is a digital temperature and humidity sensor that provides reliable readings of both parameters.
The BMP180 is a barometric pressure sensor that measures atmospheric pressure, temperature, and altitude with high accuracy. Both sensors are widely used in weather stations and environmental monitoring projects.
Amazon Alexa Echo Show is a smart display that integrates with Alexa, providing voice-controlled interactions and the ability to show information, stream videos, and control smart devices.
Setup the Hardware

Connect the components :
- BMP180 pressure sensor :
- VIN to the 3,7 volt of the Arduino
- GND to the GND of the Arduino
- SDA to GPIO 4 (= pin D2)
- SCL to GPIO 5(= pin D2)
- DHT temperature and humidity sensor :
- VIN to the 3,7 volt of the Arduino
- GND to the GND of the Arduino
- SDA to GPIO 16 (= pin D0, on the schema is the green cable, is connected to D0 and not D3)
Connect the ESP8266 with an USB cable to your laptop.. cross your fingers ;)
Setting Up ThingSpeak for Capturing Weather Station Data


Steps :
- Create a ThingSpeak Account: Sign up at ThingSpeak and log in.
- Create a New Channel: Go to Channels > My Channels > New Channel. Add fields for temperature, pressure, and humidity, then save.
- Get API Key: Open the channel, navigate to the API Keys tab, and copy the Write API Key.
- Configure Data Sending: In your ESP8266 code, use the API key to send sensor data to the channel using HTTP requests. This part is done already in the .ino file. You only need to update the API Key value in the .ino.
- View Data: Check the Private View tab in your channel to see live updates from your weather station.
Configure Arduino Cloud for Receiving Data From the ESP8266

Steps :
- Create an account on Arduino Cloud and navigate to the Things section.
- Click Add Thing, name your project, and associate your ESP8266 device. Follow the prompts to generate the necessary device credentials.
- Add three variables: Temperature (float), Pressure (float), and Humidity (float). Make them Read & Write for bidirectional communication.
- Link your variables to your Thing and generate the code. This will auto-configure the MQTT connection and variable synchronization.
- Upload the generated code to your ESP8266, modify it to read sensor data, and send values to Arduino Cloud.
Alternative to last step : use the thingsProperties.h file from the step 4 below.
Load the Arduino Code

Steps :
- Download the files from GitHub : LINK
- Using the Arduino IDE, open the file thingsProperties.h. (note : or use the one generated from last step)
- Enter your own values for the constants :
- DEVICE_LOGIN_NAME : Arduino Cloud device login name
- SSID[] : WIFI network SSID
- PASS[] : WIFI network password
- DEVICE_KEY[] : Arduino Cloud Secret device password
- Open the file WeatherStation.ino :
- Enter your own values for the constants :
- THINGSPEAK_API_KEY : ThingsSpeak API key
Upload the code to the Arduino Board.
Refer to any existing documentation on internet if needed :)
Set Up Arduino Cloud and Alexa for a Temperature Skill
Steps :
- Check the Arduino Cloud Thing: Log in to Arduino Cloud and check that a Thing is created. At least you need to have added a variable for temperature (e.g., temperature, type: float, read-only).
- Link Your Device: Configure your ESP8266 or compatible device, ensuring it sends temperature data to Arduino Cloud.
- Enable the Alexa Integration: Go to the "Integrations" section of Arduino Cloud, enable Alexa, and link your Amazon account.
- Discover Devices in Alexa: Ask Alexa to "discover devices," and it will find the temperature variable as part of your Arduino Cloud Thing.
- Use the Alexa Skill: Ask, "Alexa, what's the temperature?" to retrieve the value from your Arduino Cloud setup.
This simple setup connects Arduino Cloud and Alexa seamlessly!