How to Breadboard Arduino Compatible.
by oomlout in Circuits > Electronics
29950 Views, 114 Favorites, 0 Comments
How to Breadboard Arduino Compatible.
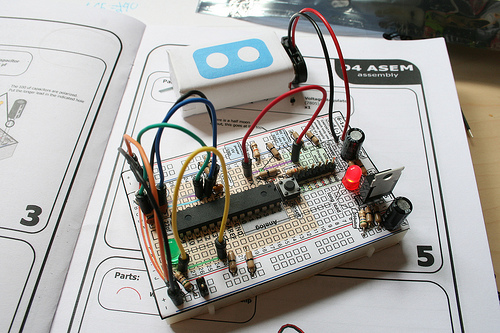
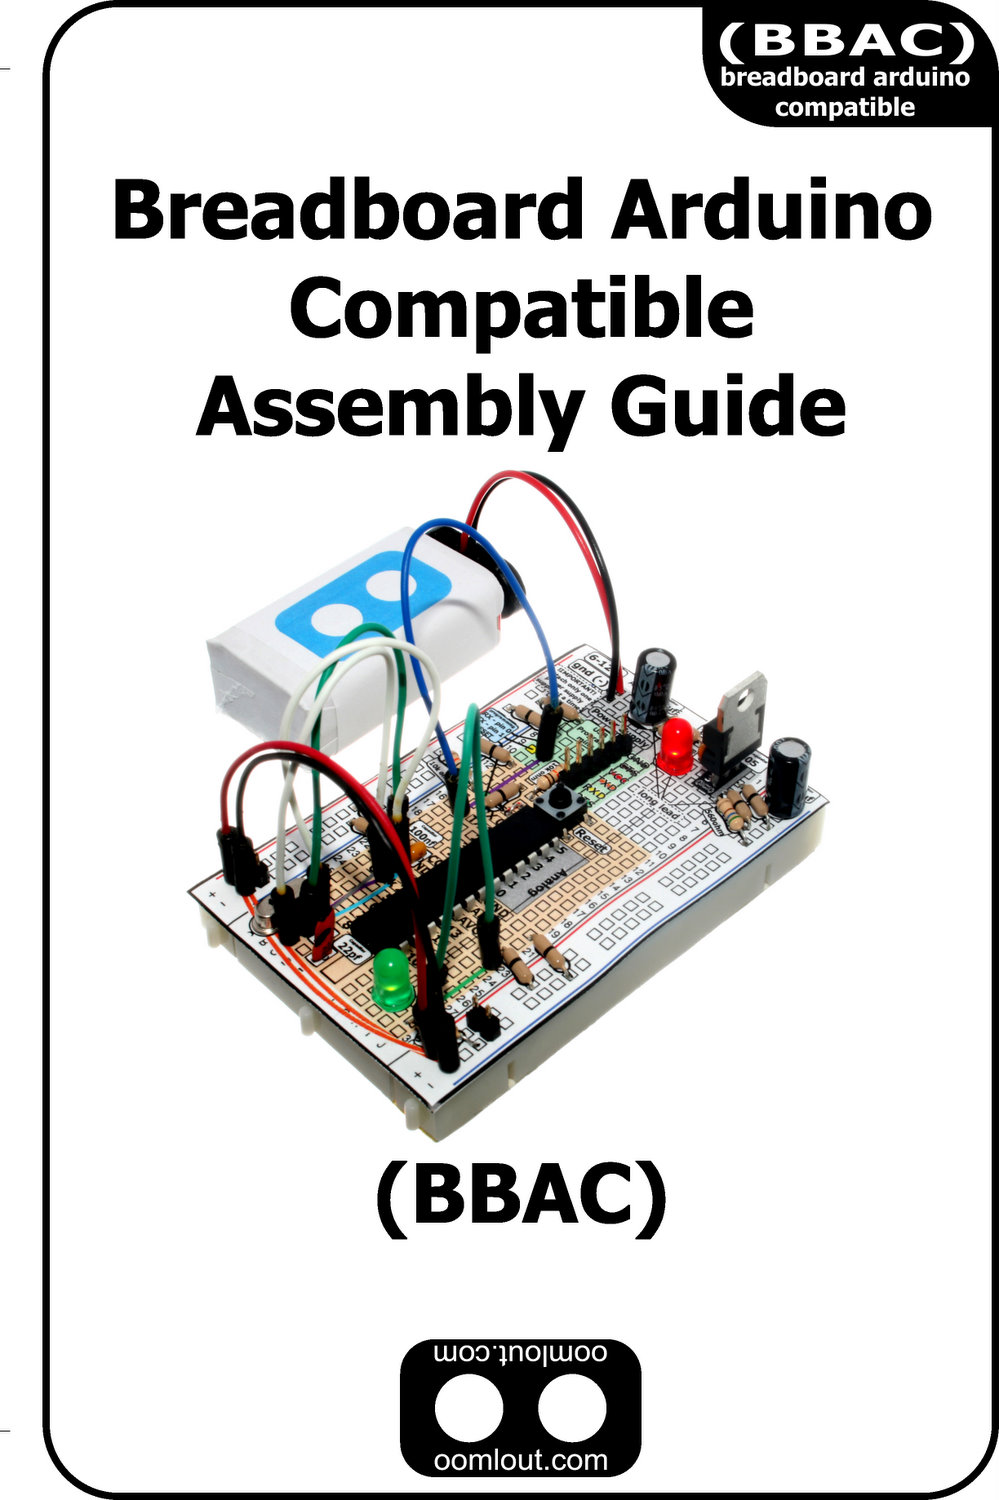
It's no secret that around oomlout HQ we're huge fans of the open source Arduino micro-controller. The pre-made Duemilanove board is an amazing prototyping platform, but sometimes its fun to make something for yourself. What follows is a guide on how to take a breadboard and pile of components and turn it into your very own Arduino compatible machine.
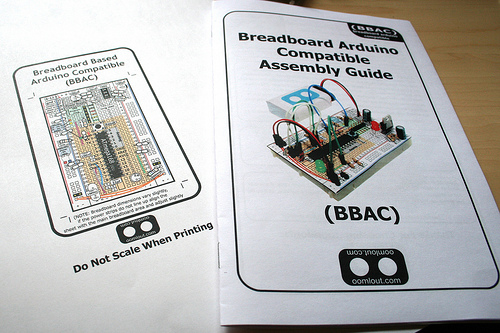
All the steps below are summarized in a fun printable guide down-loadable below (BBAC-Assembly-Guide.pdf).
The breadboard layout sheet is downloadable from step 2.
Lets get going...
(shameless plug)
We also sell a kit with all the parts (a breadboard, printed layout sheet, and printed guide) so you can get making right away.
(in the UK Breadboard Arduino Compatible Kit (BBAC))
(open source)
We like to be as open as we can be at oomlout, in keeping with this attitude all the design files (sketchup models, corel draw layouts, pdfs etc.) can be found at http://www.oomlout.com/BBAC/ (if you feel something is missing or would like a file in a different format drop as a message (info@oomlout.com) and we'll try and help you out.)
Downloads
The Parts
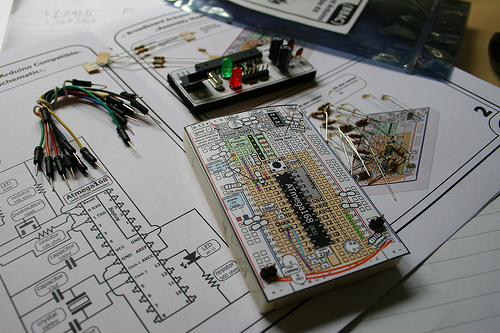
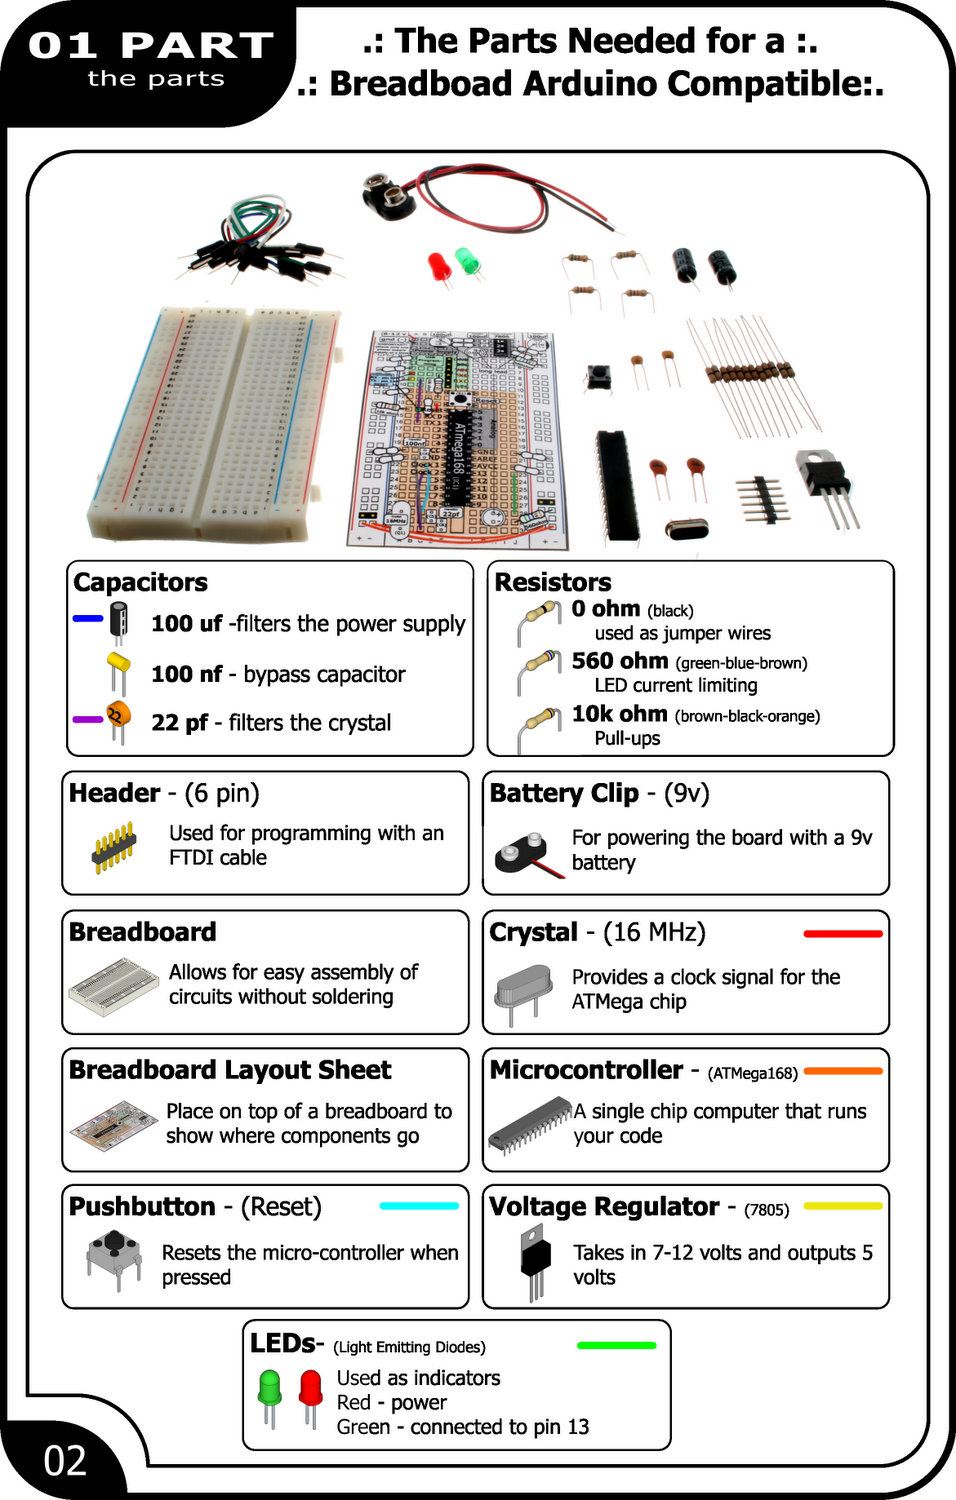
An Arduino compatible is super easy to make requiring just over a dozen different components
Required Parts:
Required Parts:
- 0 ohm Resistor (x12) (digikey)
- 560 Ohm Resistor (x2) (digikey)
- 10 k ohm Resistor (x2) (digikey)
- 100 micro Farad Capacitor (x2) (digikey)
- 100 nano farad capacitor (x2) (digikey)
- 22 Pico Farad capacitor (x2) (digikey)
- 16 MHz Crystal (x1) (digikey)
- 5mm Red LED (x1) (digikey)
- 5 mm Green LED (x1) (digikey)
- 50mm Jumper Wire (x8) (oomlout UK) (adafruit US)
- 6 Pin Header (Programming) (x1) (digikey)
- 7805 5Volt Regulator (x1) (digikey)
- 9 volt Battery clip (x1) (digikey)
- Pushbutton (x1) (digikey)
- Atmega 168 (with Arduino bootloader) (x1) (digikey) (you will need to burn the bootloader yourself)
- BBAC Sheet / Guide (x1) (downloadable on step 2)
- Breadboard (x1) (oomlout UK) (adafruit US)
The Layout Sheet and Putting Together
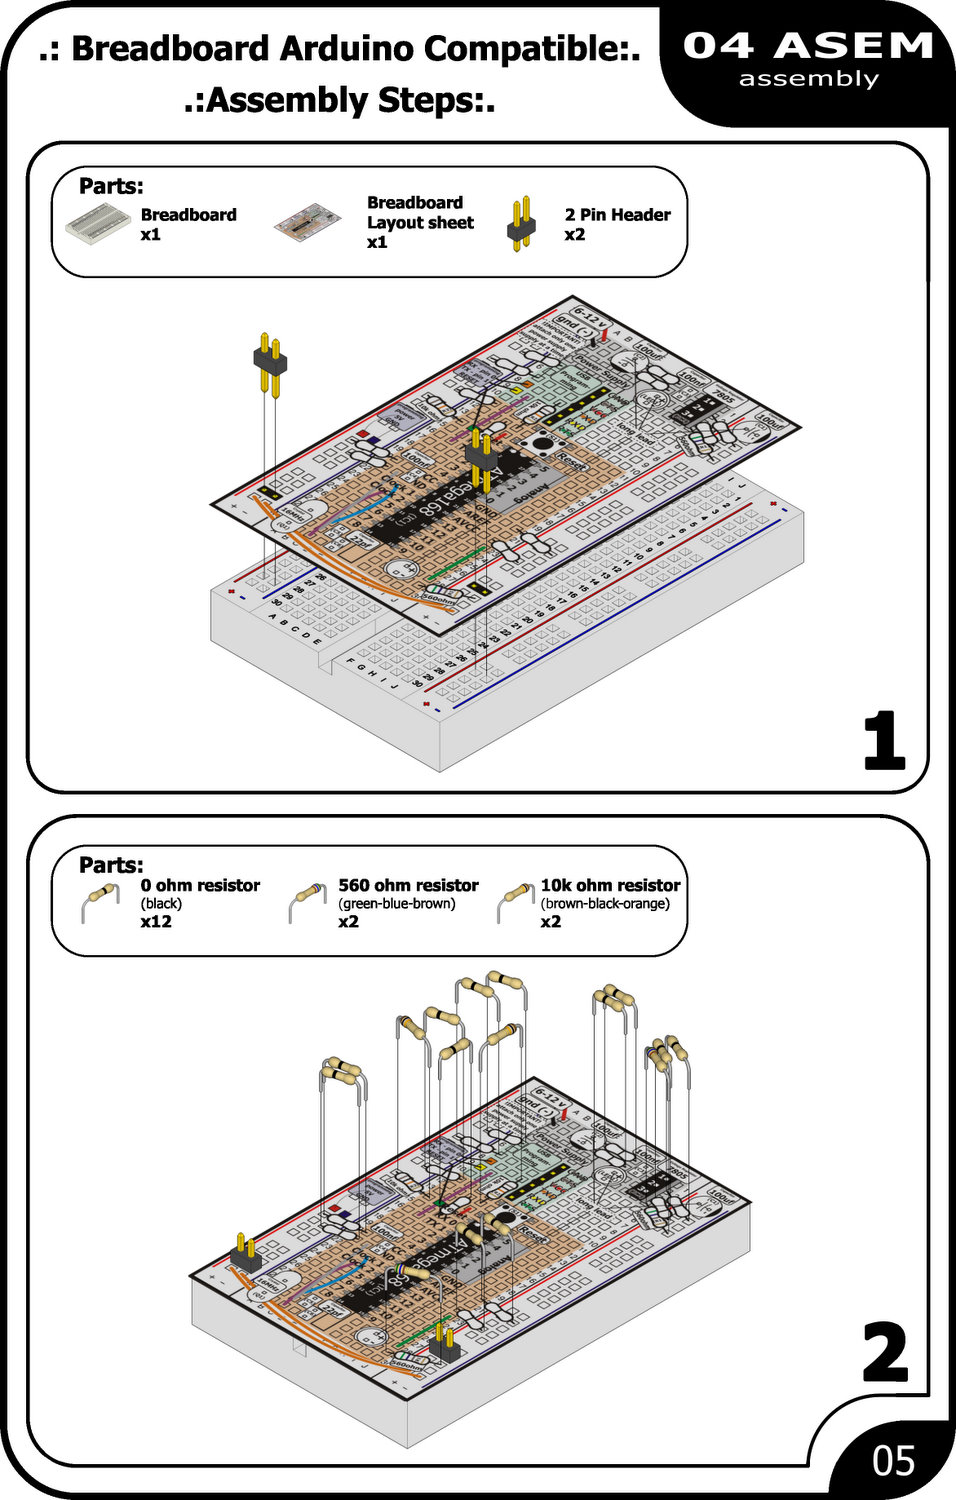
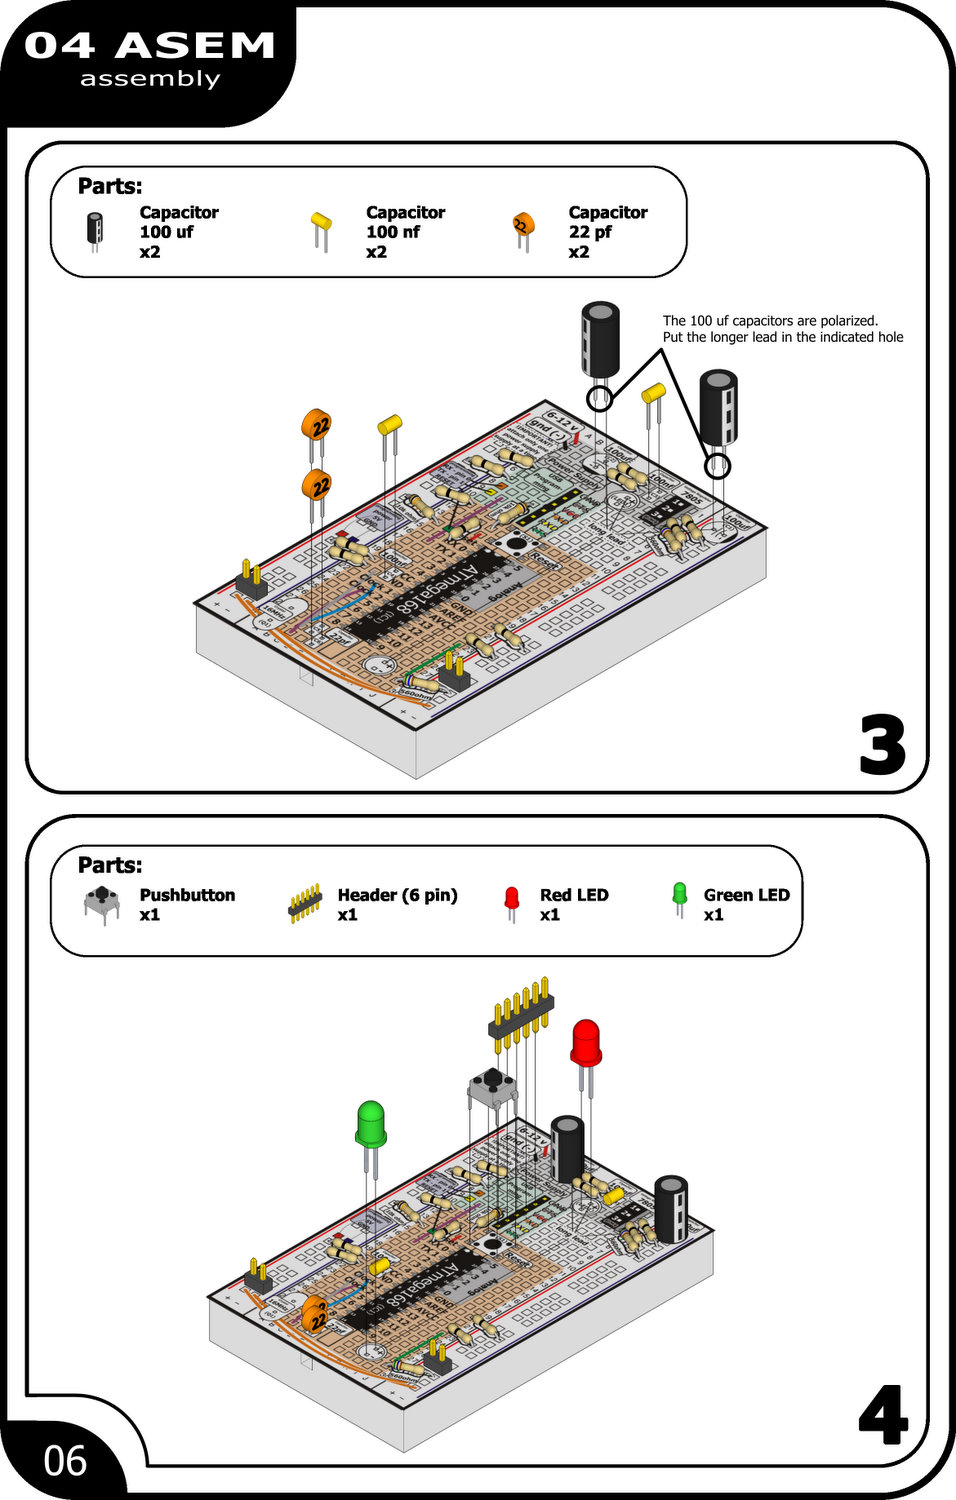
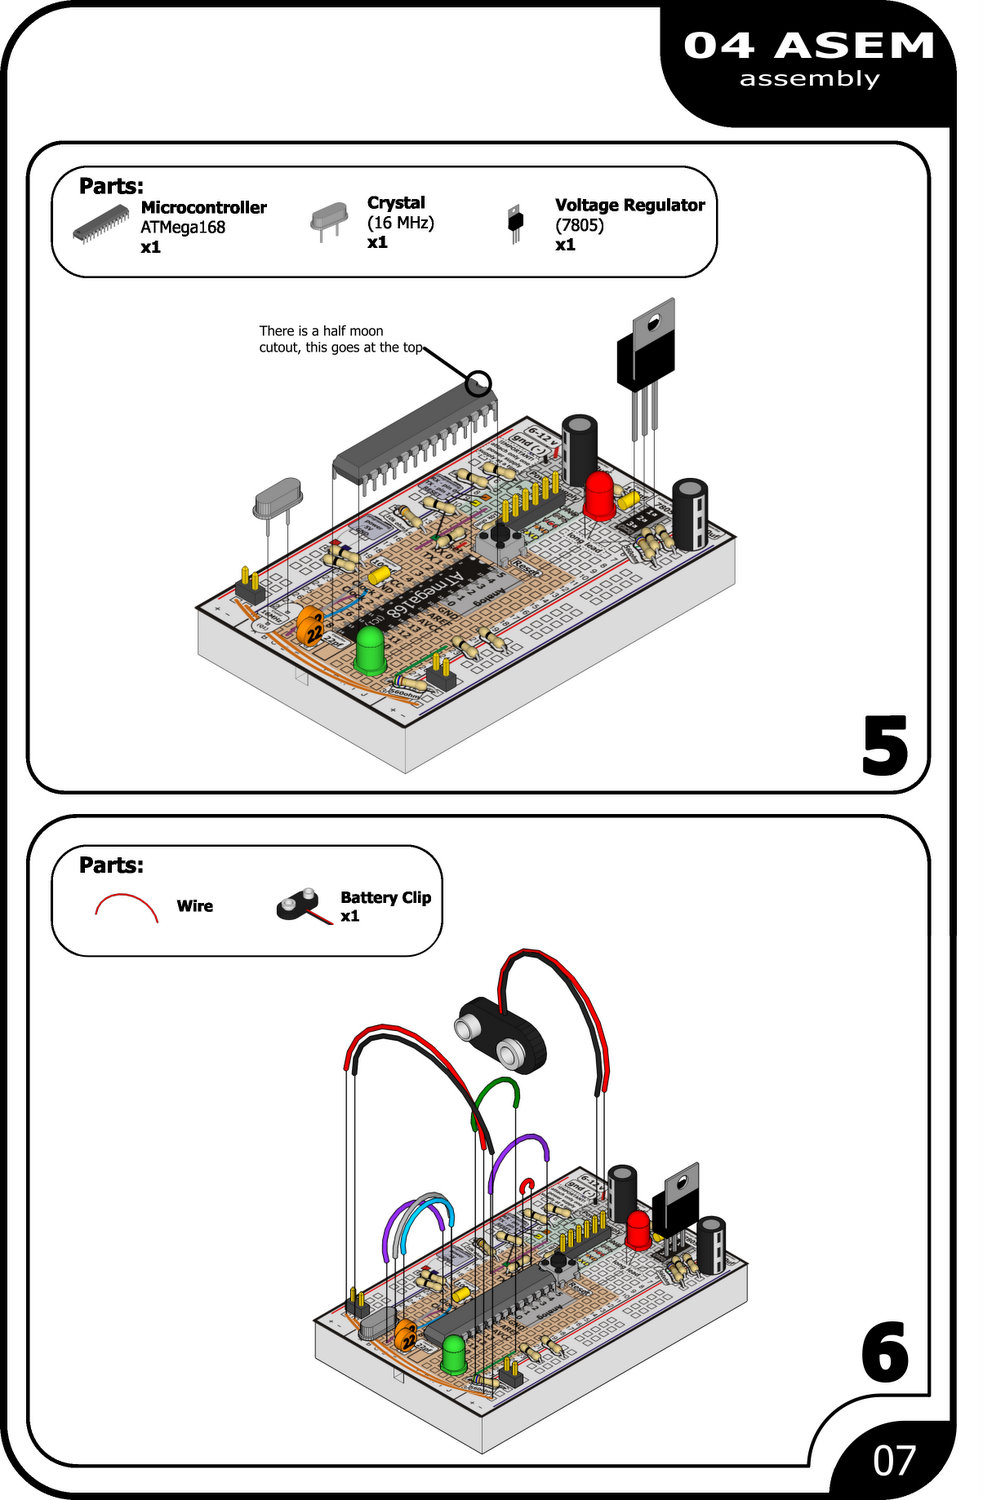
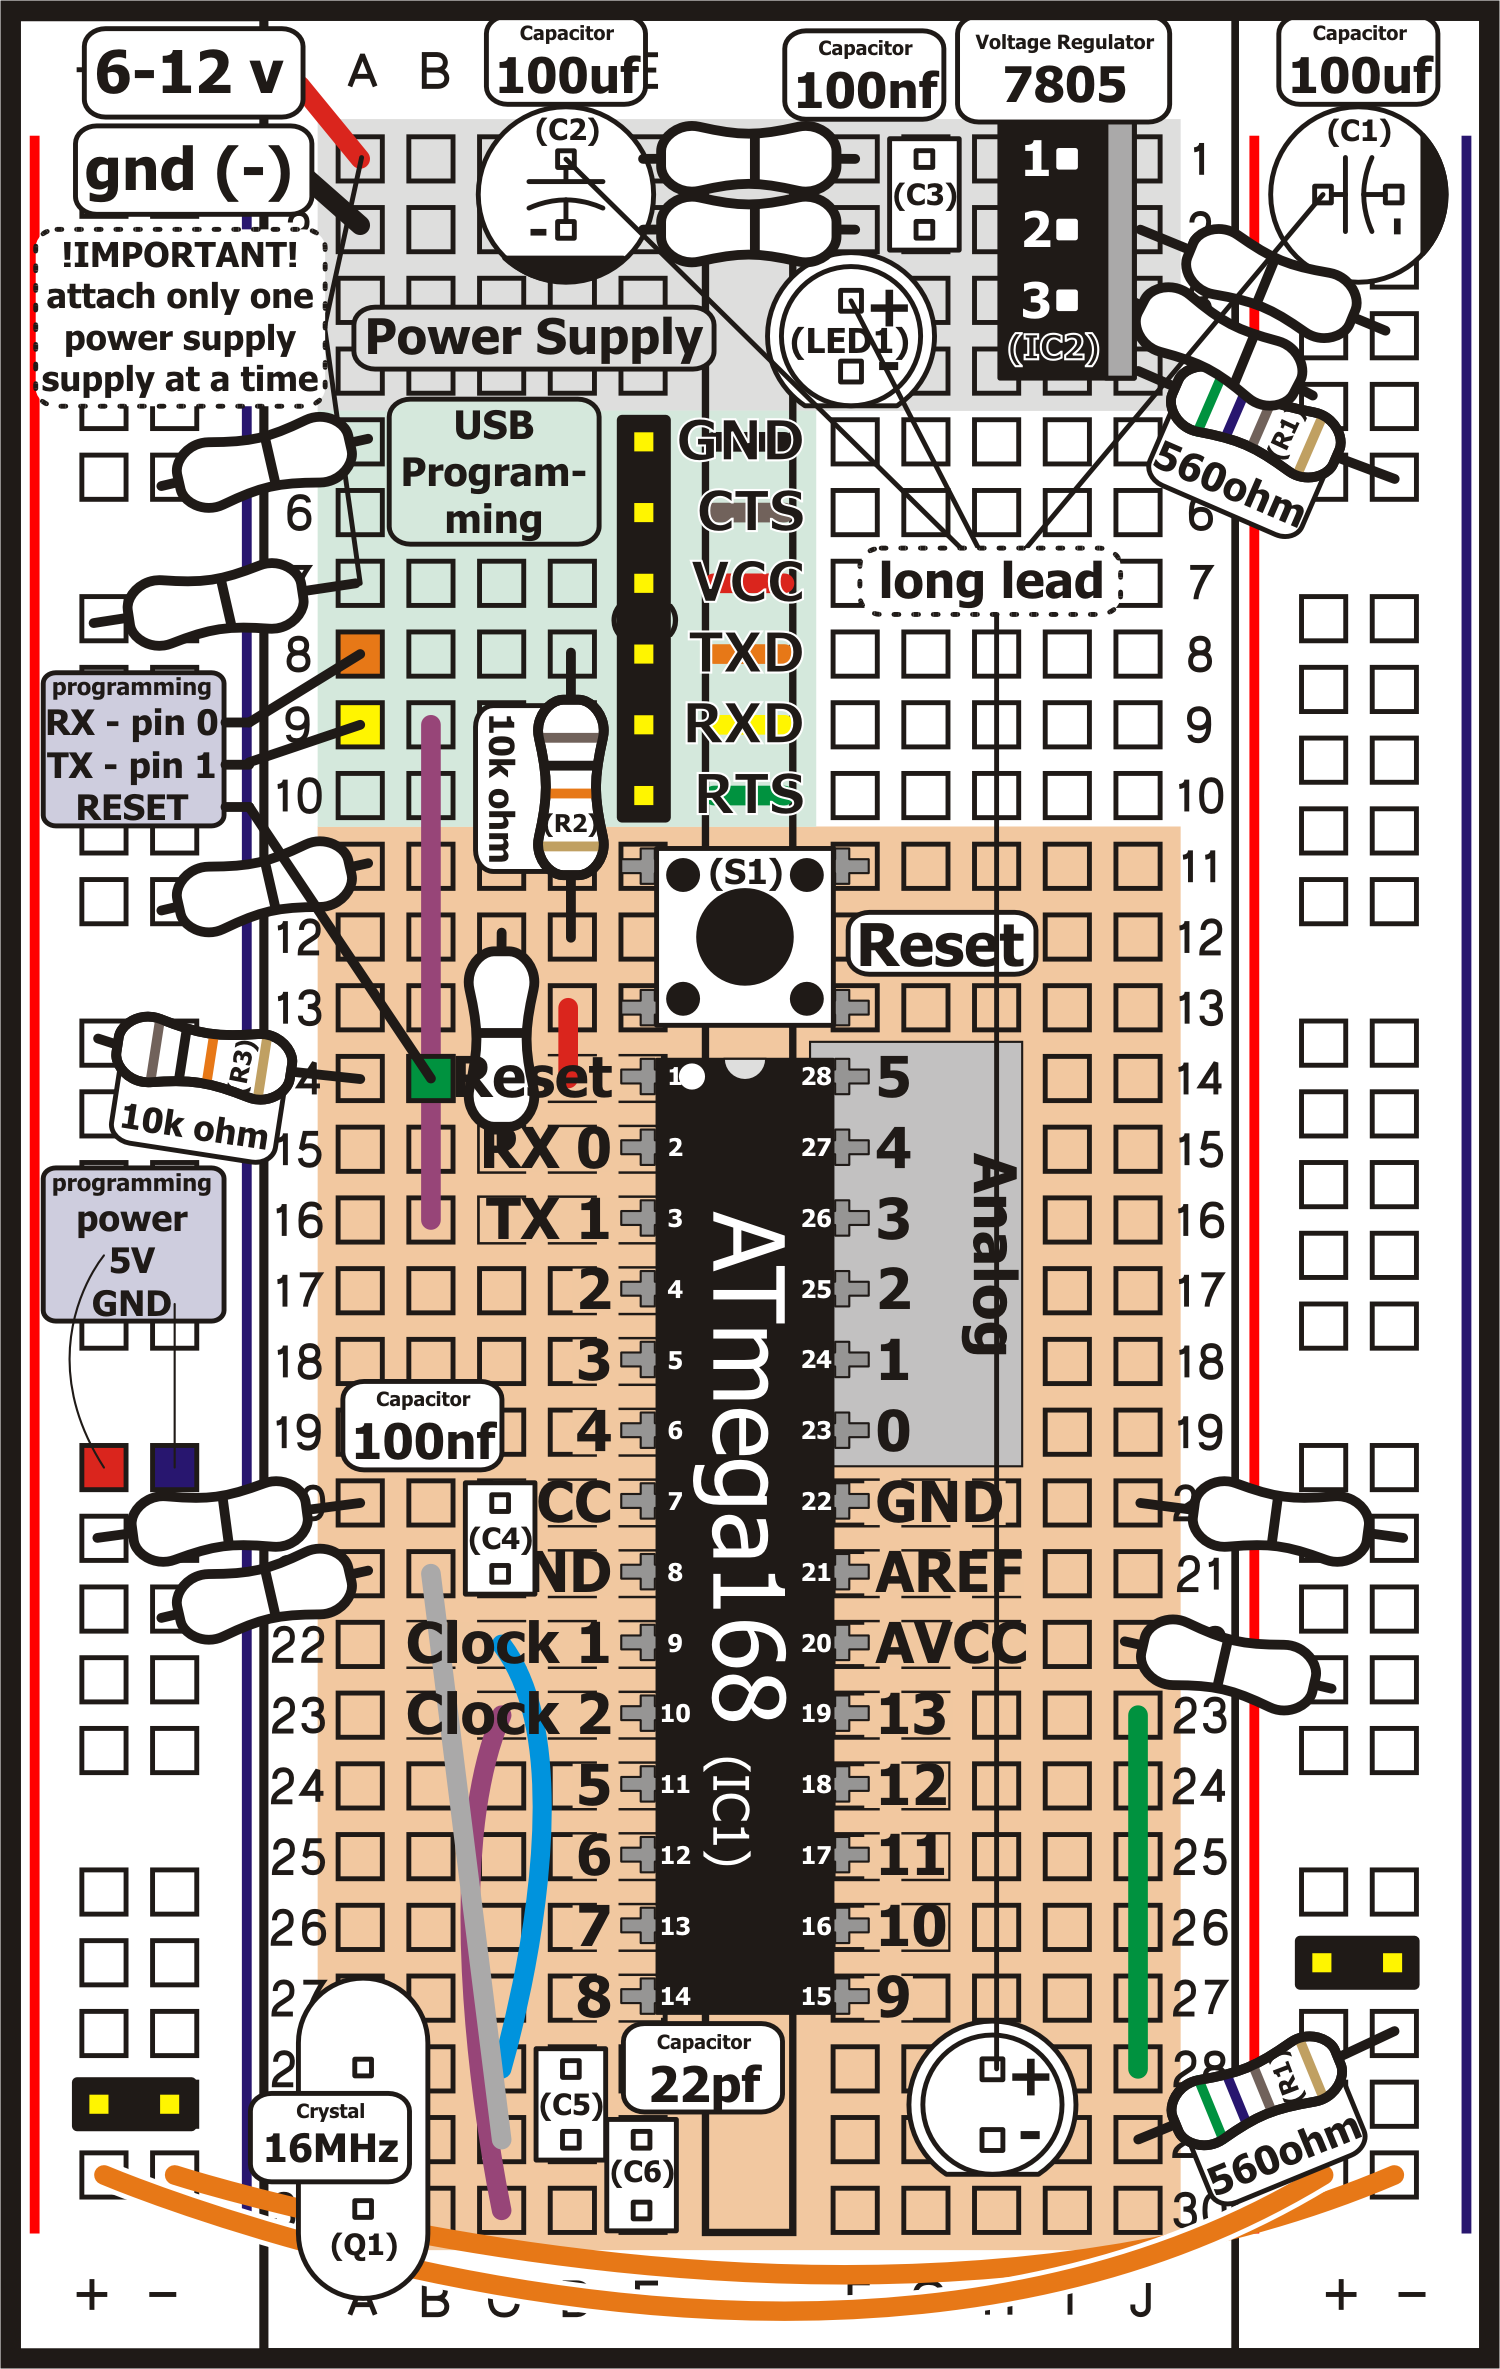
To make component placement easy we've drawn up a breadboard layout sheet.
Simply print it out, lay it over your breadboard, and start placing components, or follow the step by step Lego style instructions below.
Simply print it out, lay it over your breadboard, and start placing components, or follow the step by step Lego style instructions below.
Downloads
Programming
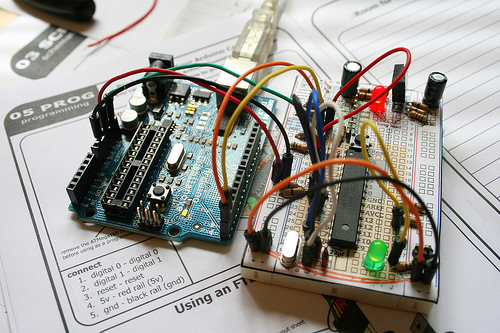
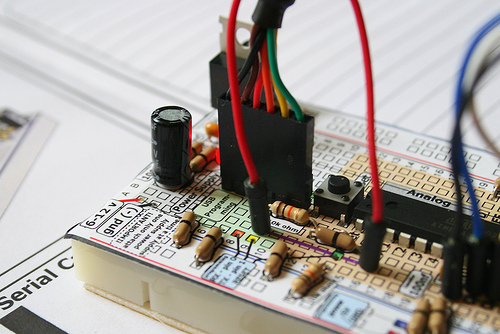
This is a slightly complicated step. Because we do not have any USB-serial circutry on our breadboard additional hardware is required.
But do not fret you have a choice of two options, either using a spare Arduino Duemilanove board, or an FTDI USB-Serial cable.
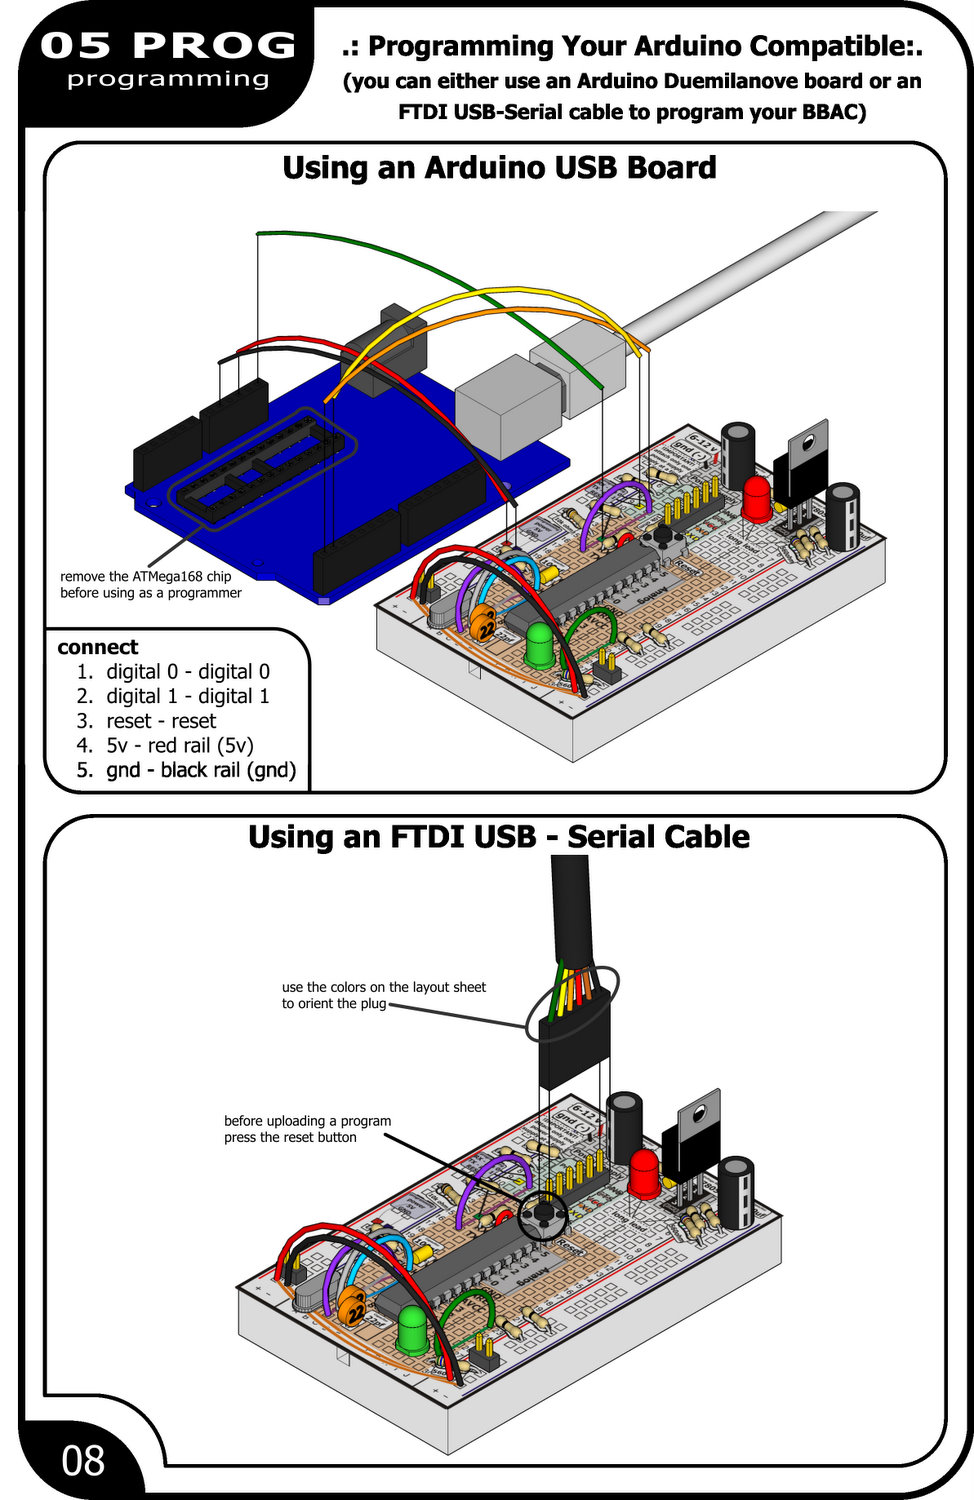
option 1 - Using an Arduino Duemilanove Board
For this option we will use the USB circuitry (and reset capacitor) present on every Duemilanove board.
Step 1 - Remove the ATMega168 Chip
Using jumper wires, (there are notes on the layout sheet)
But do not fret you have a choice of two options, either using a spare Arduino Duemilanove board, or an FTDI USB-Serial cable.
option 1 - Using an Arduino Duemilanove Board
For this option we will use the USB circuitry (and reset capacitor) present on every Duemilanove board.
Step 1 - Remove the ATMega168 Chip
- Delicately pop the large chip out of its socket.
Using jumper wires, (there are notes on the layout sheet)
- connect digital pin 0 to digital pin 0
- connect digital pin 1 to digital pin 1
- connect the reset pin to the reset pin
- connect 5V to the red rail (5V)
- connect gnd to the blue rail (gnd)
- You're done open up the Arduino IDE and program your BBAC the same way you did your Duemilanove board
- This option will use an FTDI USB-Serial cable (In the UK (farnell). In the US they can be found here(adafruit))
- Plug the 6 pin female header on the end of the FTDI cable onto the 6 pin header on your BBAC (match the colors of the wires to those of the markings on the sheet)
- Next open the Arduino IDE, and program your BBAC normally. Well almost normally, you'll need to press the reset button before uploading each sketch.
What's Next?

Congrats if all has gone well you have yourself a fully functioning Arduino compatible on a breadboard. (if it hasn't worked don't fret send an e-mail to help@oomlout.com and we'll try our very best to help you get it working).