How to Assemble a Wheel Using Inventor 2019
by Shawn Villahermosa in Design > Digital Graphics
744 Views, 0 Favorites, 0 Comments
How to Assemble a Wheel Using Inventor 2019
.png)
In this tutorial, I will be demonstrating how to assemble a wheel using Inventor 2019.
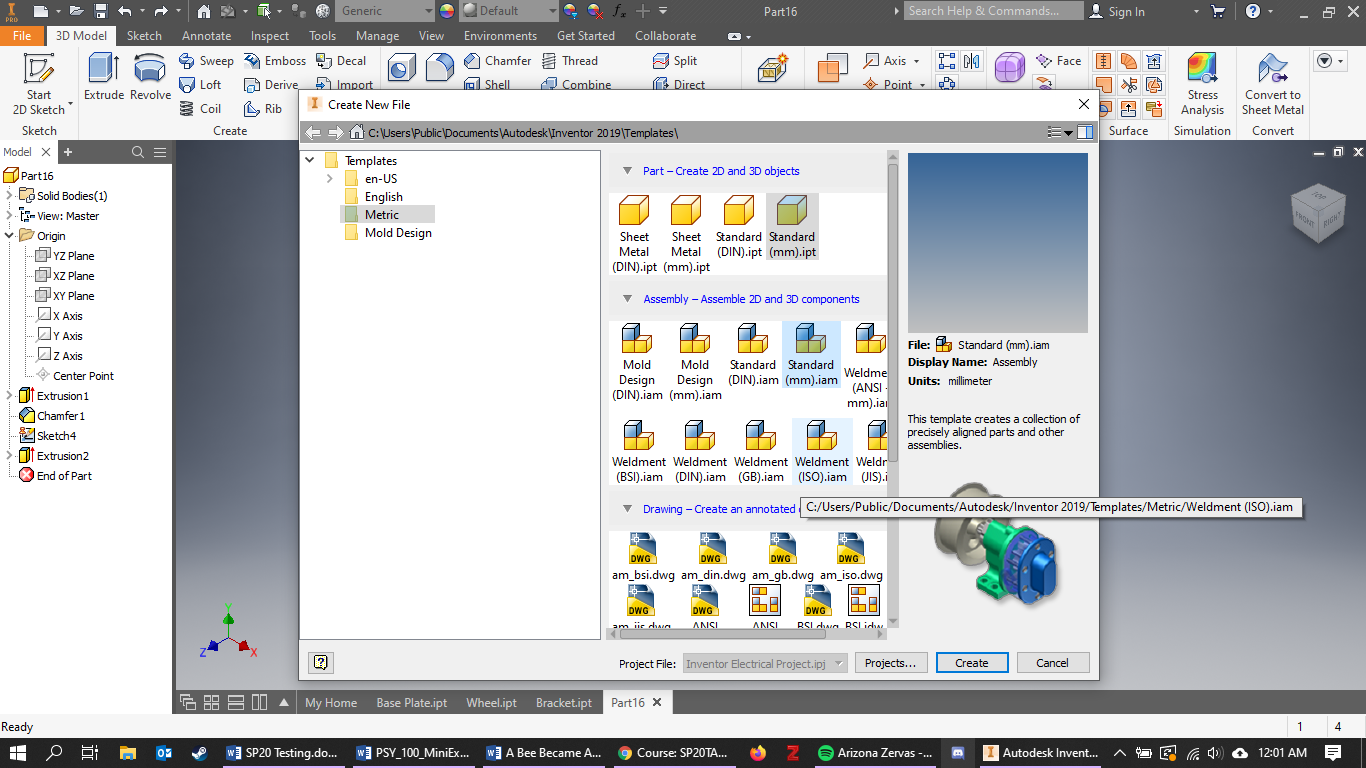
Create a New File
.png)
Create a new file and then click "Metric" under "Templates," since the parts are in millimeters. Then, click "Standard (mm).ipt" on the first row.
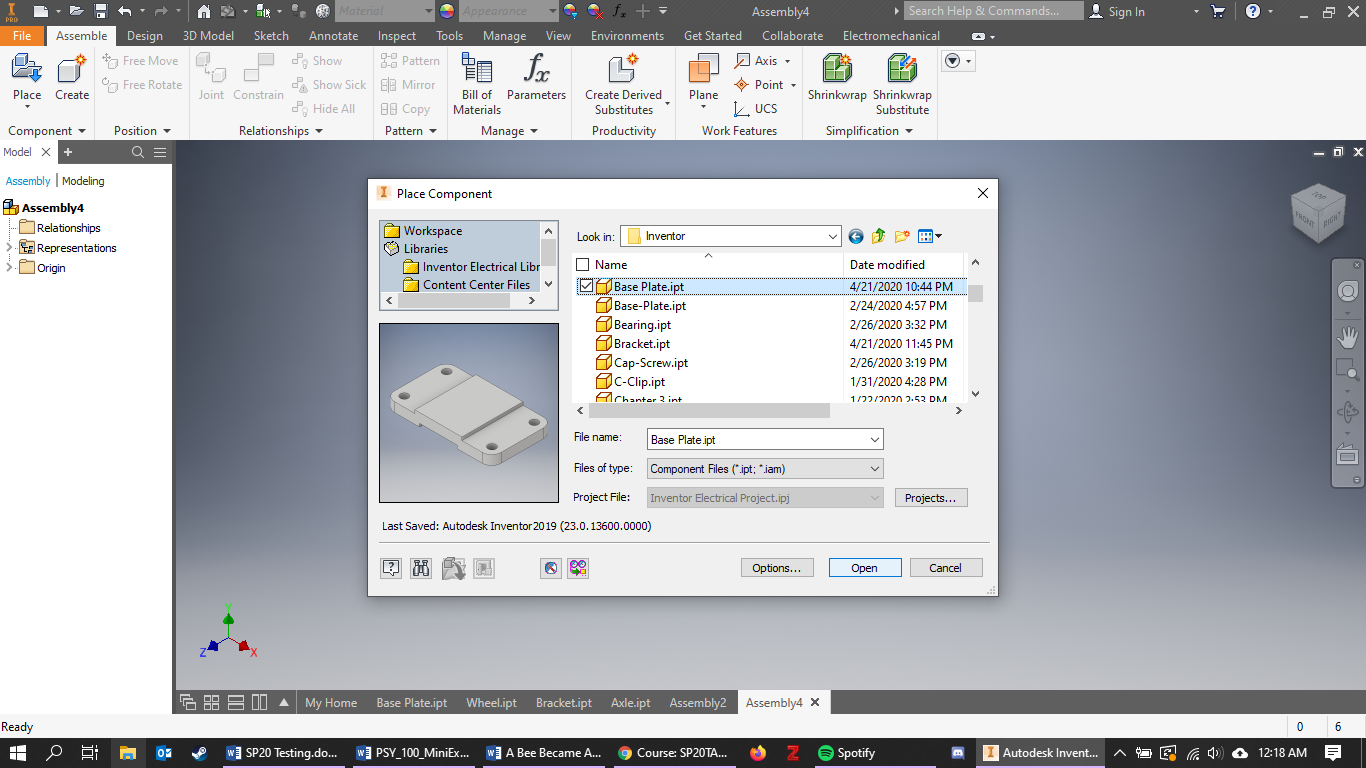
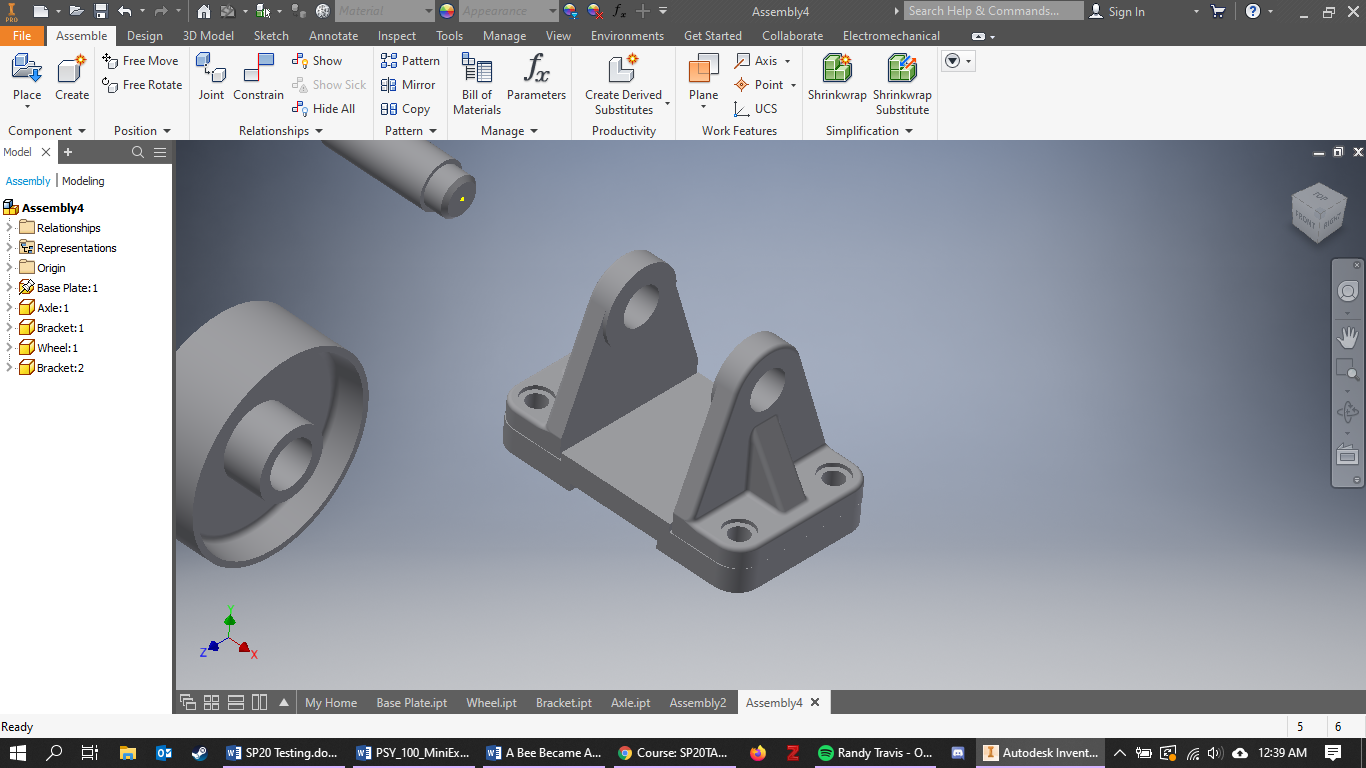
Select All of the Parts of the Wheel
.png)
Click "Place" on the top left of the screen. Then select all of the parts of the wheel (assuming you have already made it).
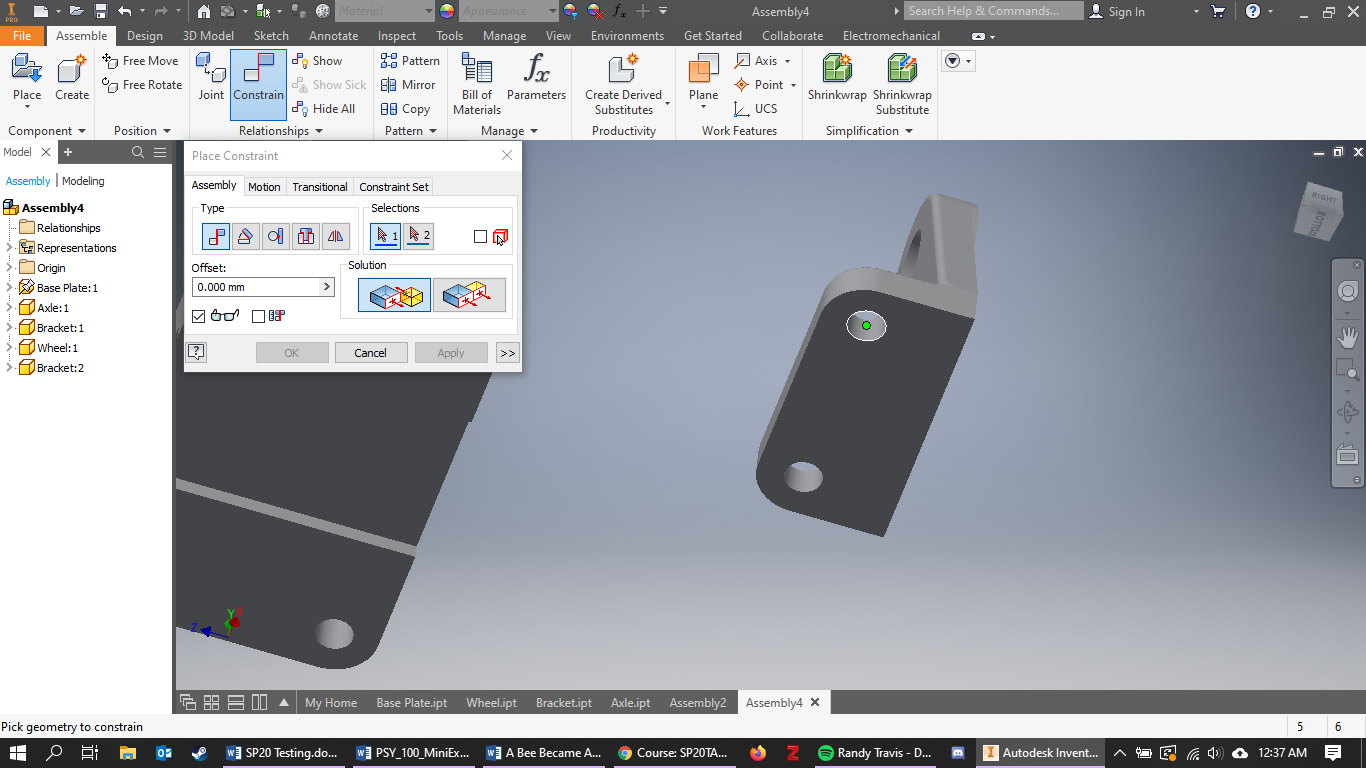
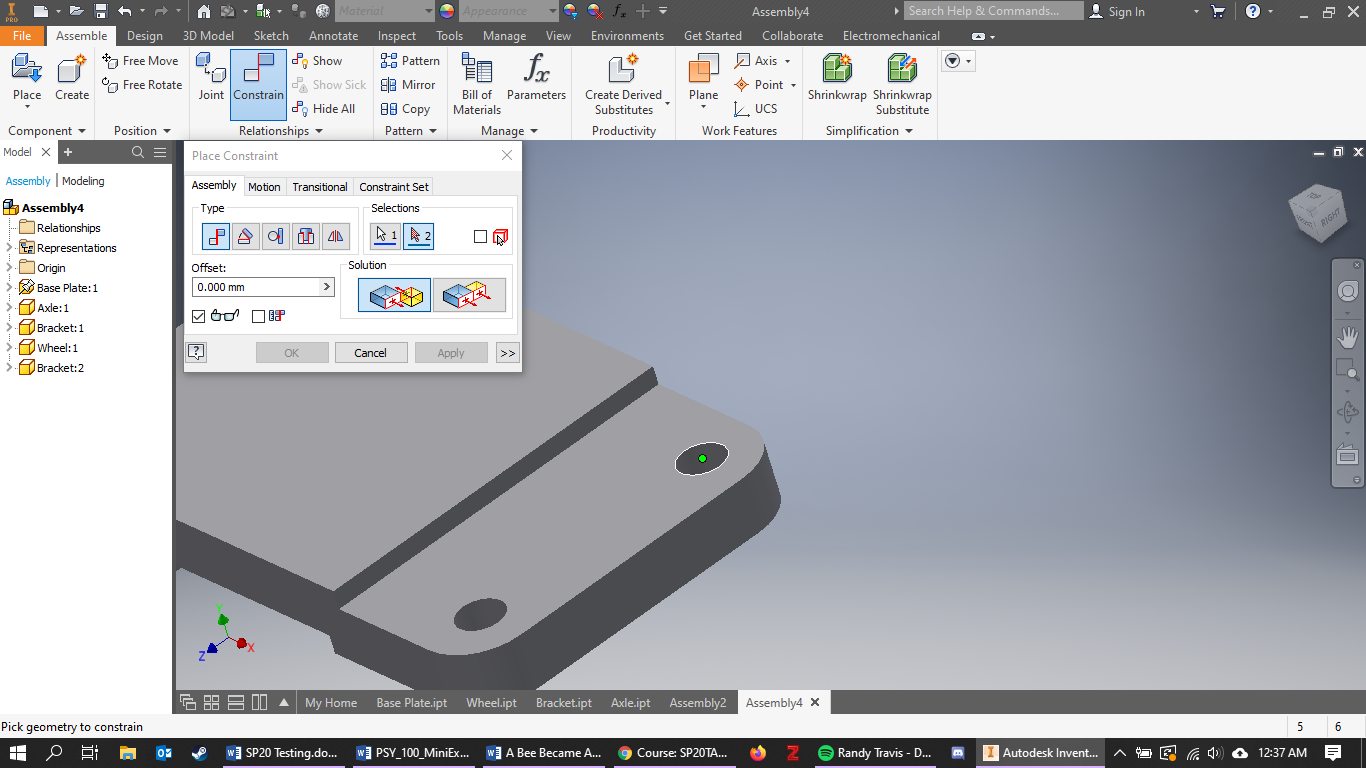
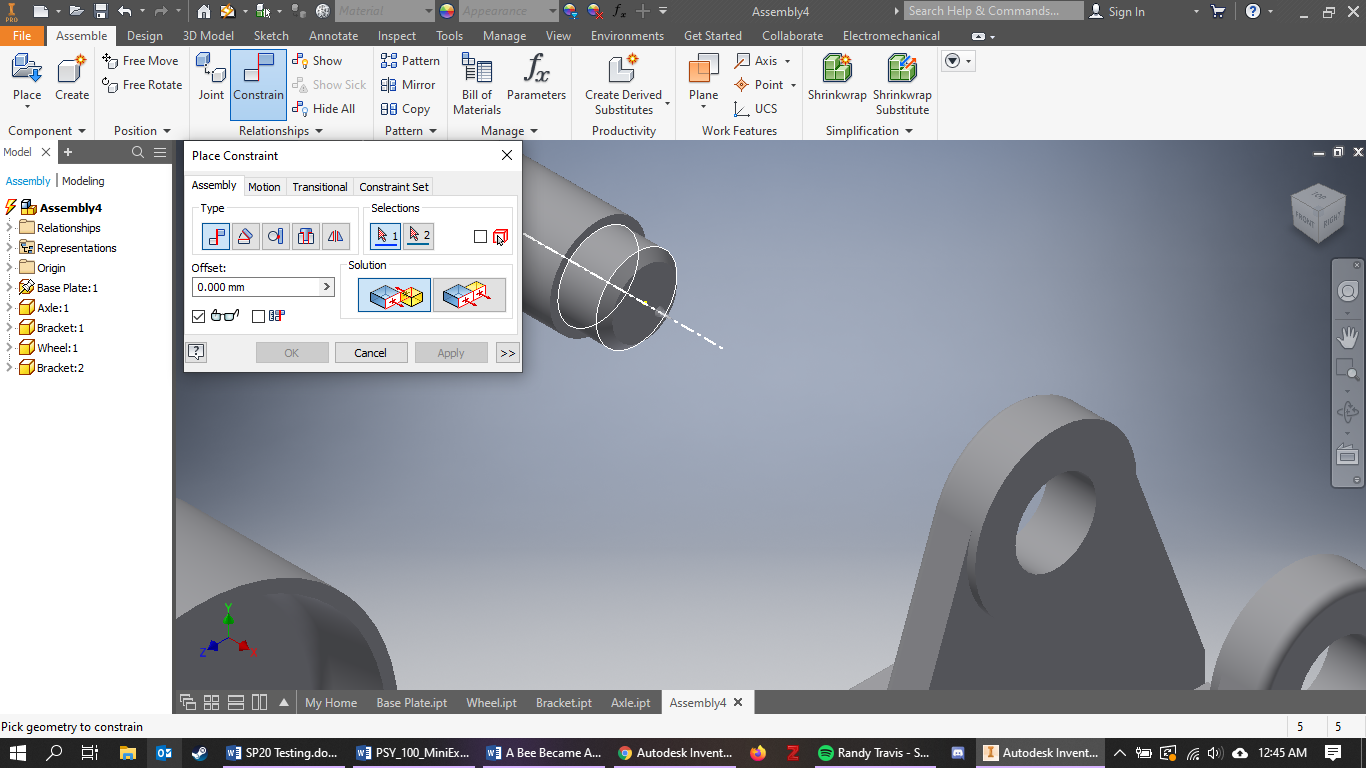
Constrain the Right Hole of the Bracket
.png)
Click "Constrain" and then click on the right hole of the bracket (the part that is shown on the picture). Once that's done, click "Apply" to make sure that it is constrained.
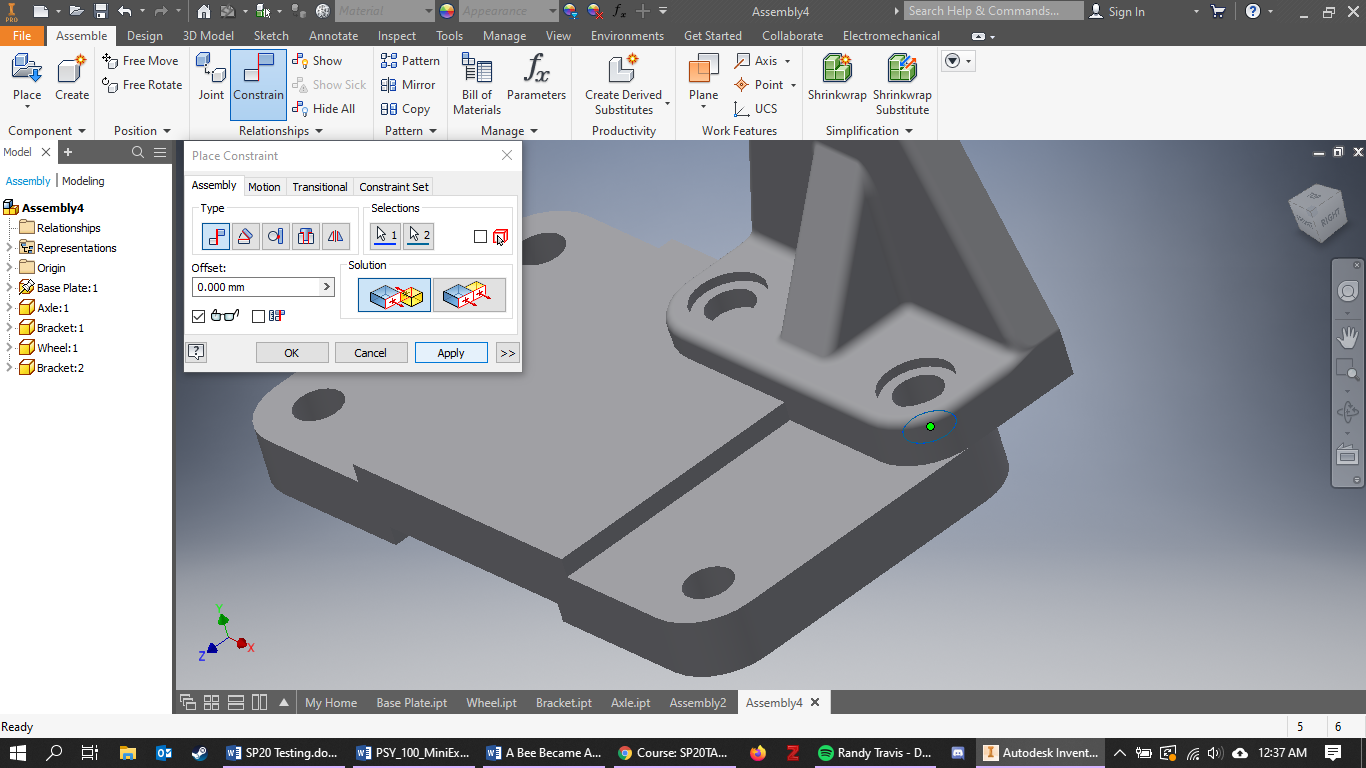
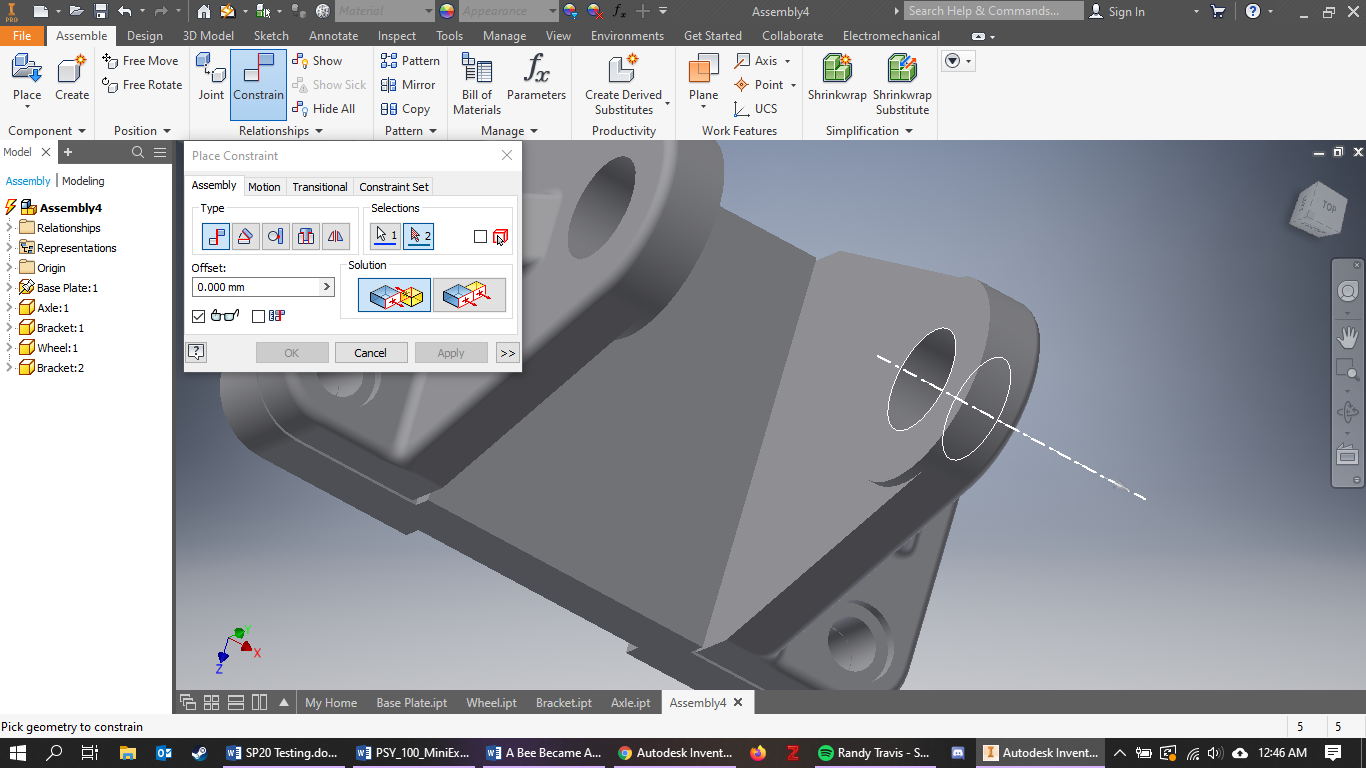
Constrain the Right Hole of the Base-Plate
.png)
Click the right hole of the base-plate to constrain the right hole of the bracket, and the right hole of the base-plate then hit "Apply" again.
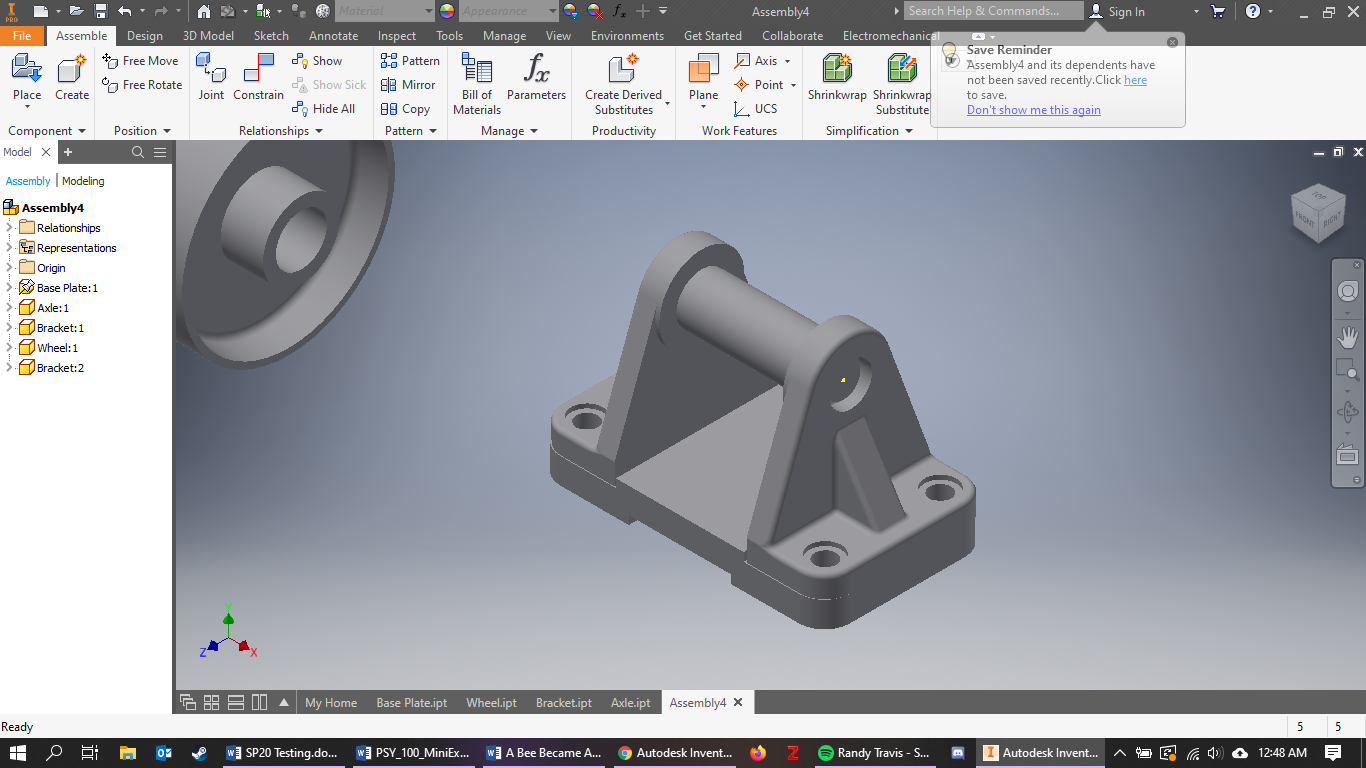
Holes Constrained
.png)
If done correctly, the parts should look somewhat like the picture.
Constrain the Other Holes
.png)
Repeat the same steps to constrain the other holes.
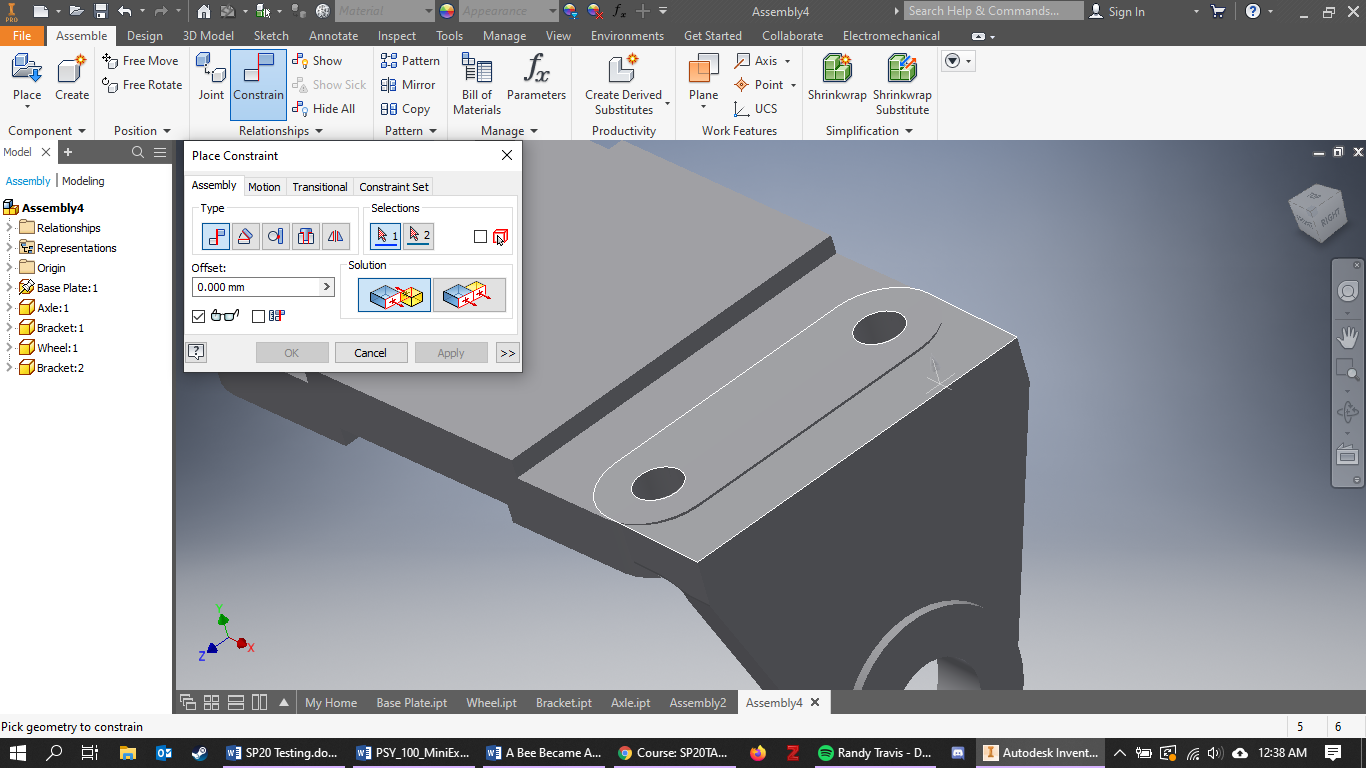
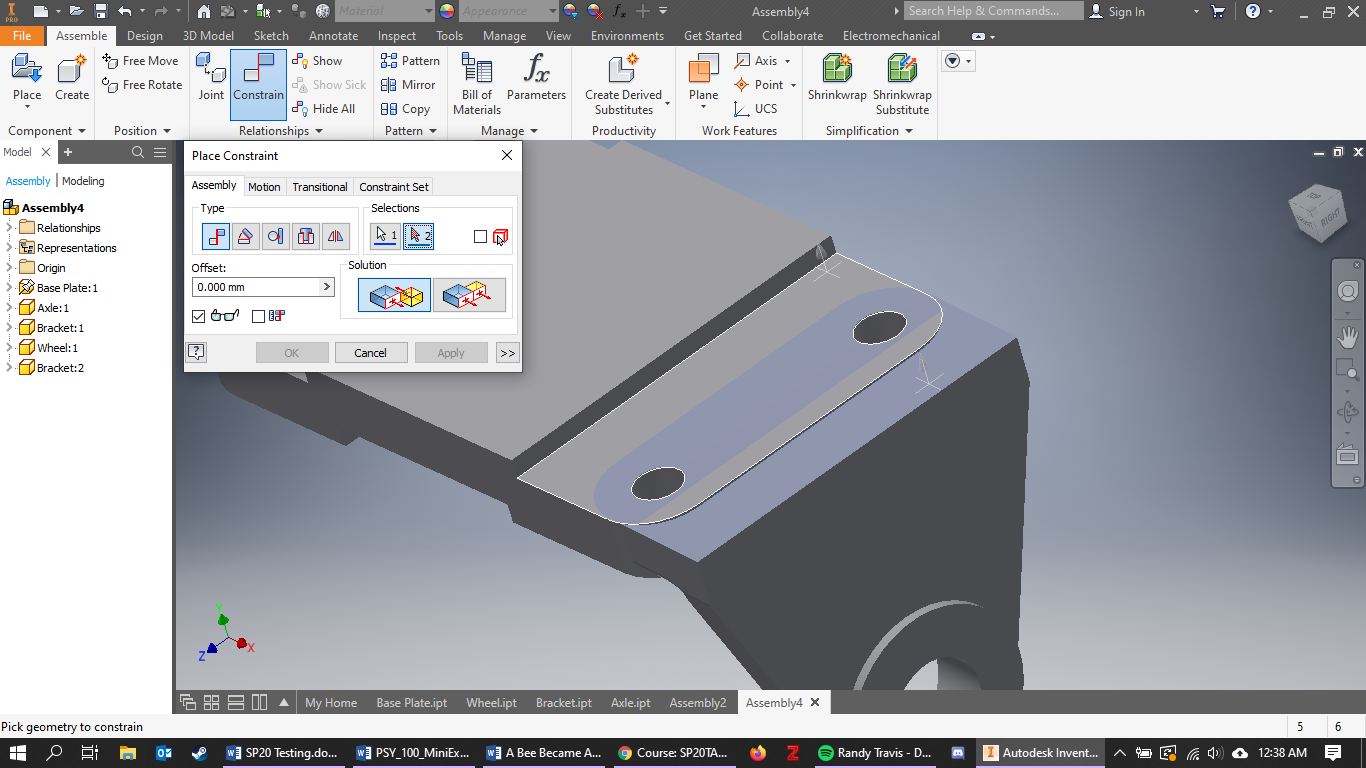
Constrain the Bracket Onto the Base-Plate
.png)
Click the bottom of the base of the Bracket and the lower-top base of the Base-Plate. This will constrain both of the parts together.
Constrain the Other Bracket Onto the Base-Plate
.png)
Repeat the same steps to constrain the other bracket onto the base-plate.
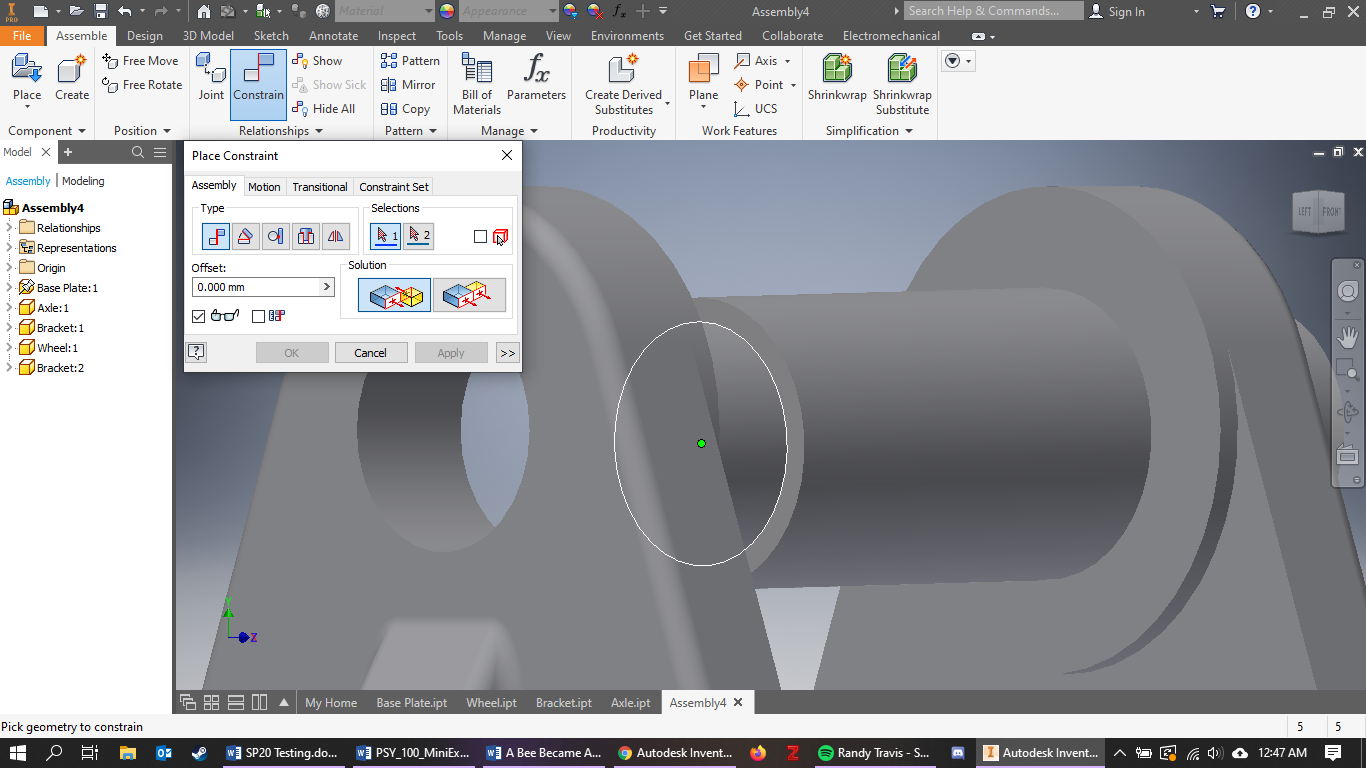
Constrain the Axle
.png)
Constrain the axle by clicking "Constrain" and clicking on the larger circle. If done correctly, it should highlight that in the picture.
Constrain the Top Hole of the Bracket
.png)
Constrain the top hole of the bracket by clicking "Constrain" and then clicking on the side of the circle on the bracket. The circle should highlight that in the picture.
Constrain the Other Side of the Axle
.png)
Constrain the other side of the axle by repeating the previous steps.
Constrain the Axle to the Other Bracket
.png)
Constrain the axle to the other bracket by repeating the previous steps.
Axle Constrained to Both Brackets
.png)
If done correctly, it should look that in the picture.
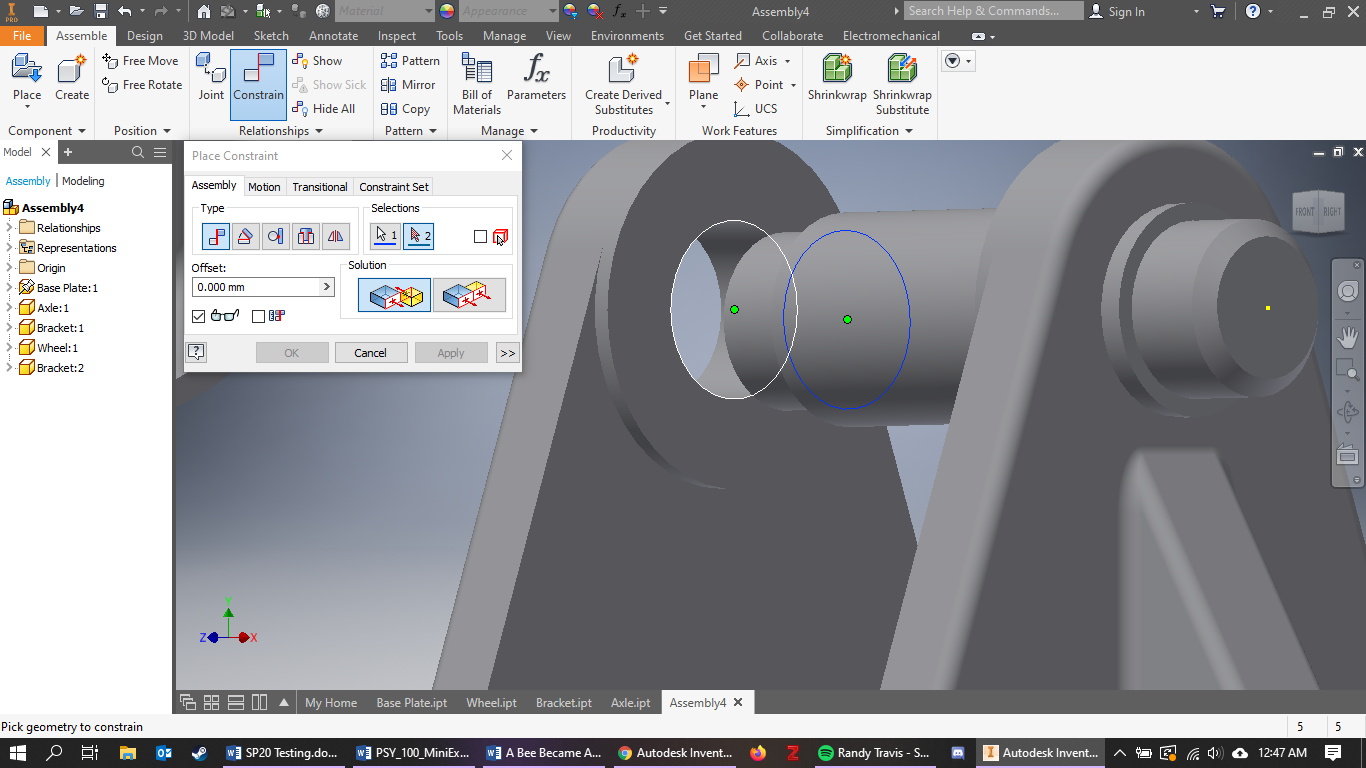
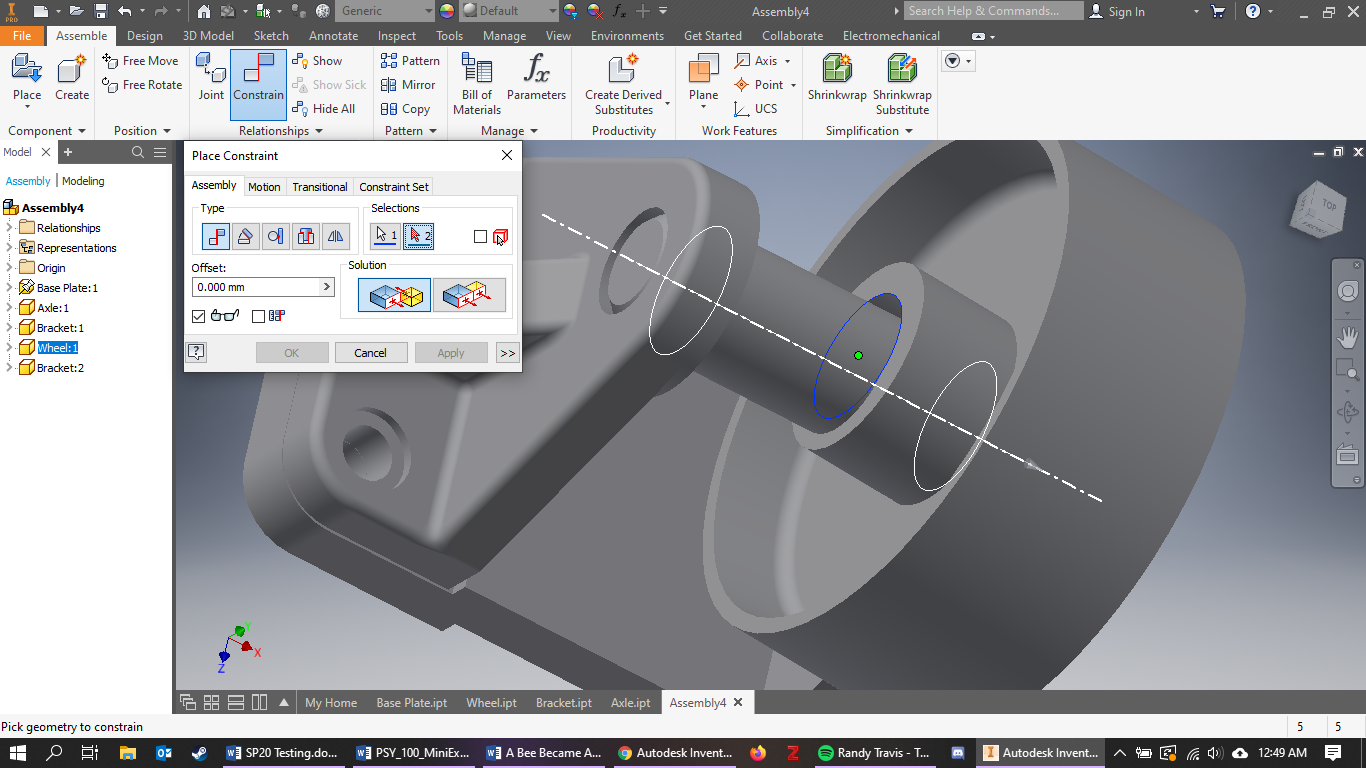
Constrain the Wheel
.png)
Constrain the wheel by clicking "Constrain" and clicking on the middle circle of the wheel.
Constrain the Axle
.png)
Constrain the axle by clicking on the top circle of the bracket. It should highlight that in the picture.
Constrain the Wheel to the Axle
.png)
Click "Constrain" and then click the inner circle of the wheel.
Constrain the Axle to the Wheel
.png)
Click the top circle of the bracket to constrain both parts to each other.
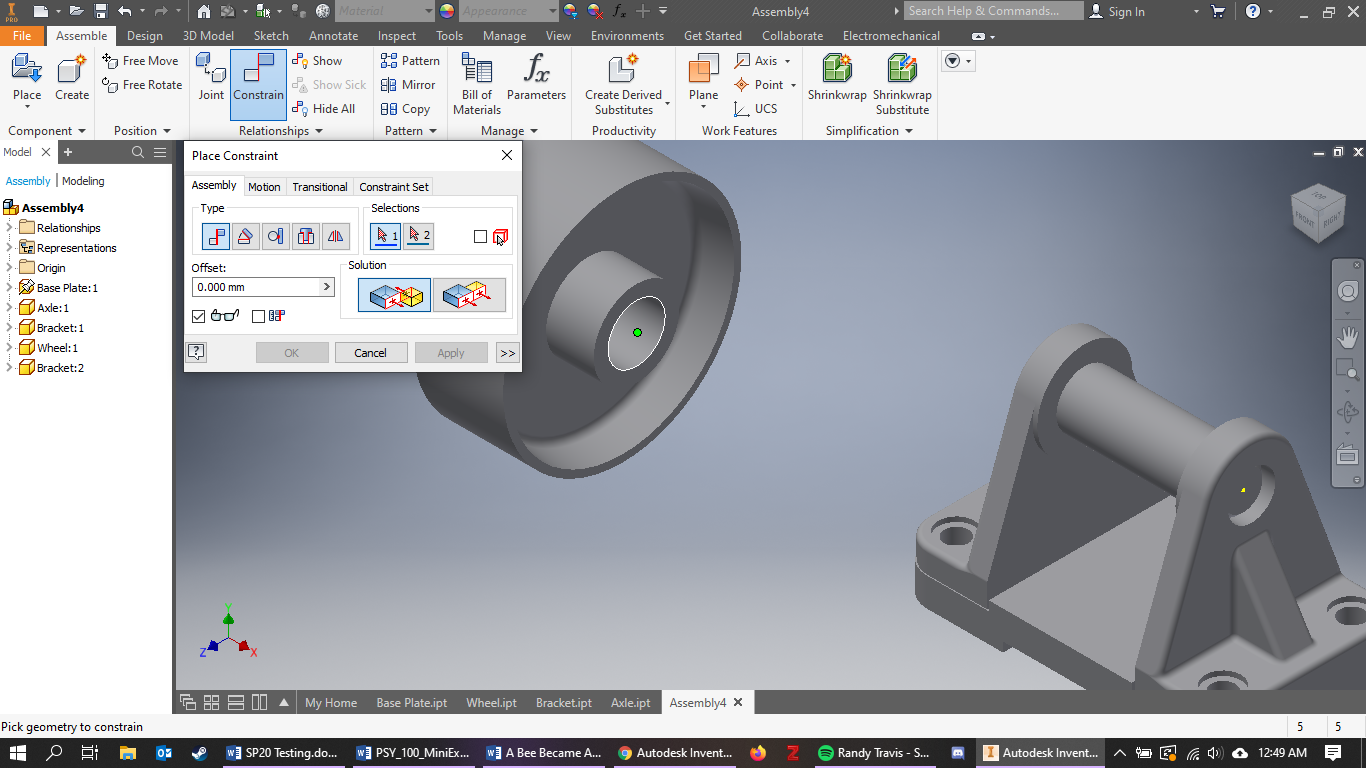
Constrain the Wheel to One of the Brackets
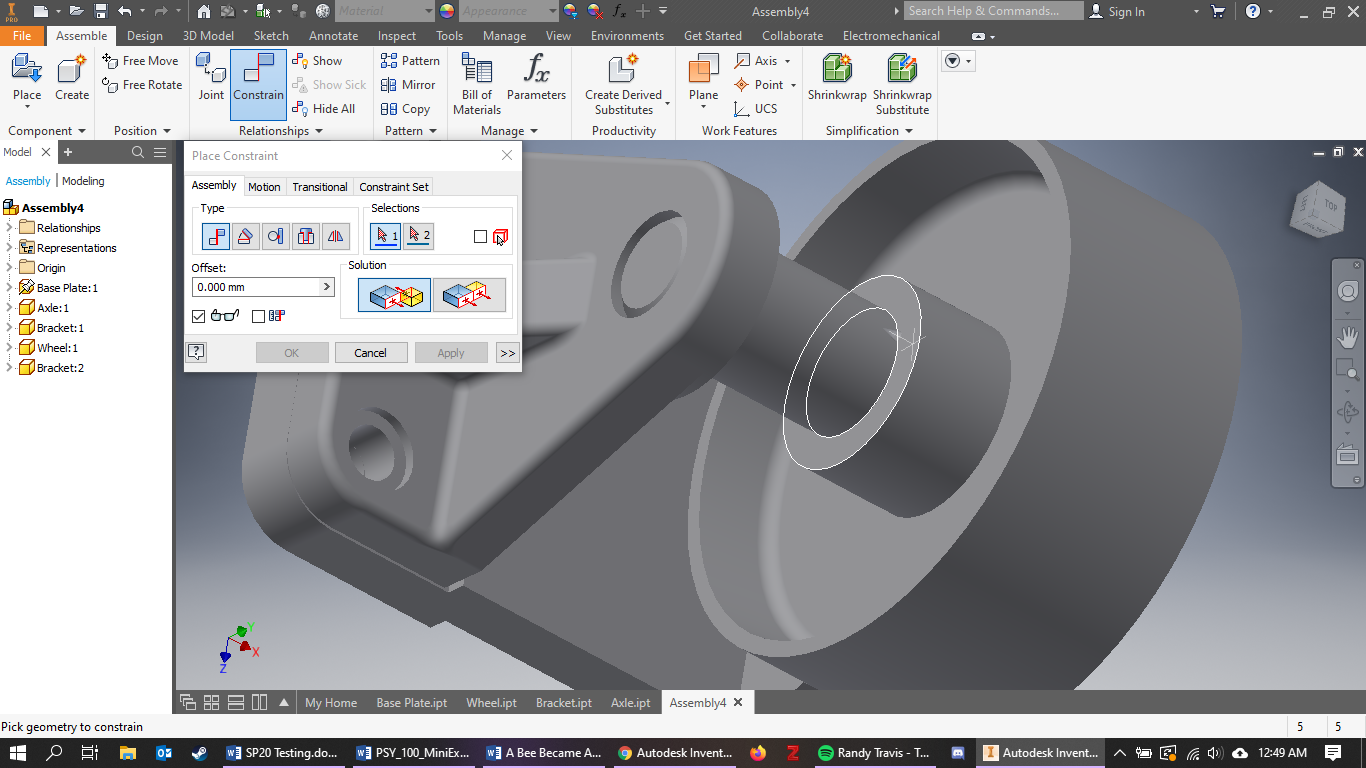.png)
Click "Constrain" and then pick a side of the wheel. In my case, I chose the left side. Then click the inner surface of the circle.
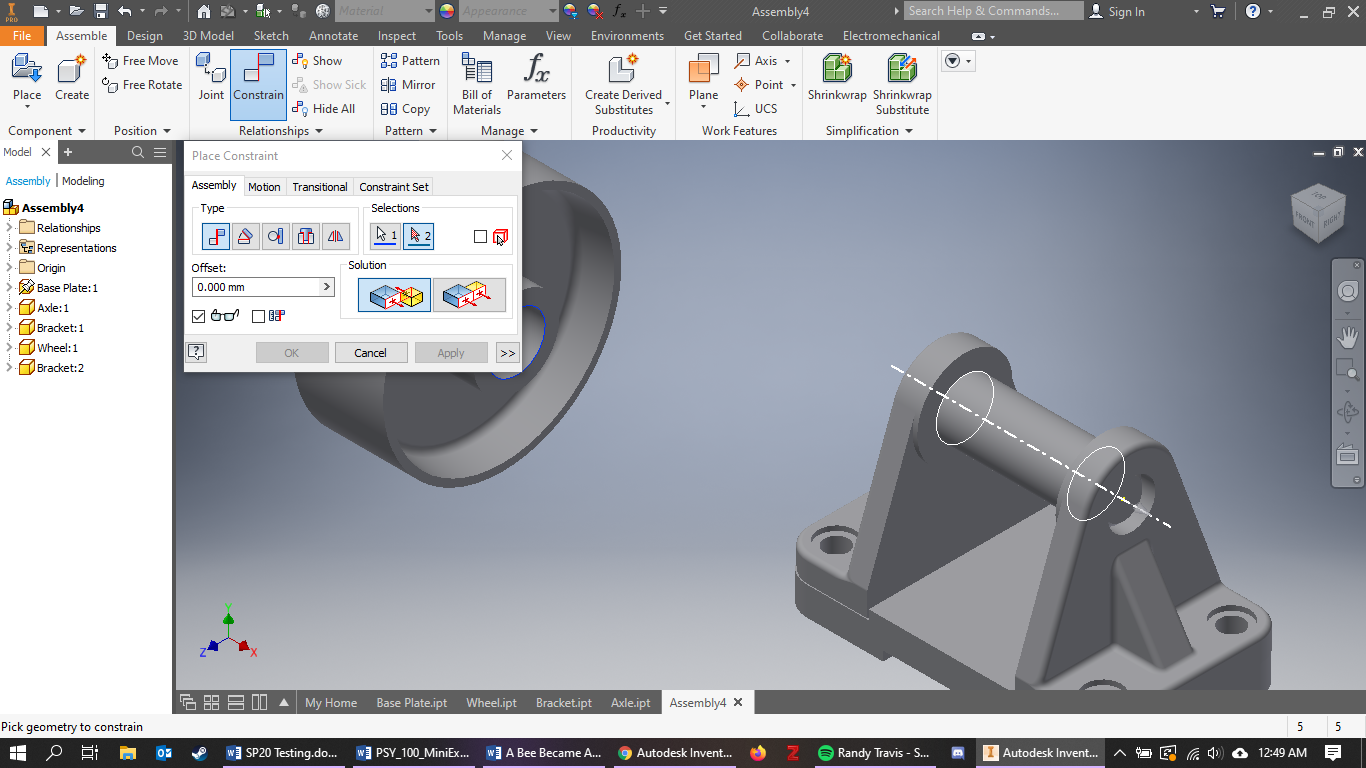
Constrain the Side of the Wheel to the Axle
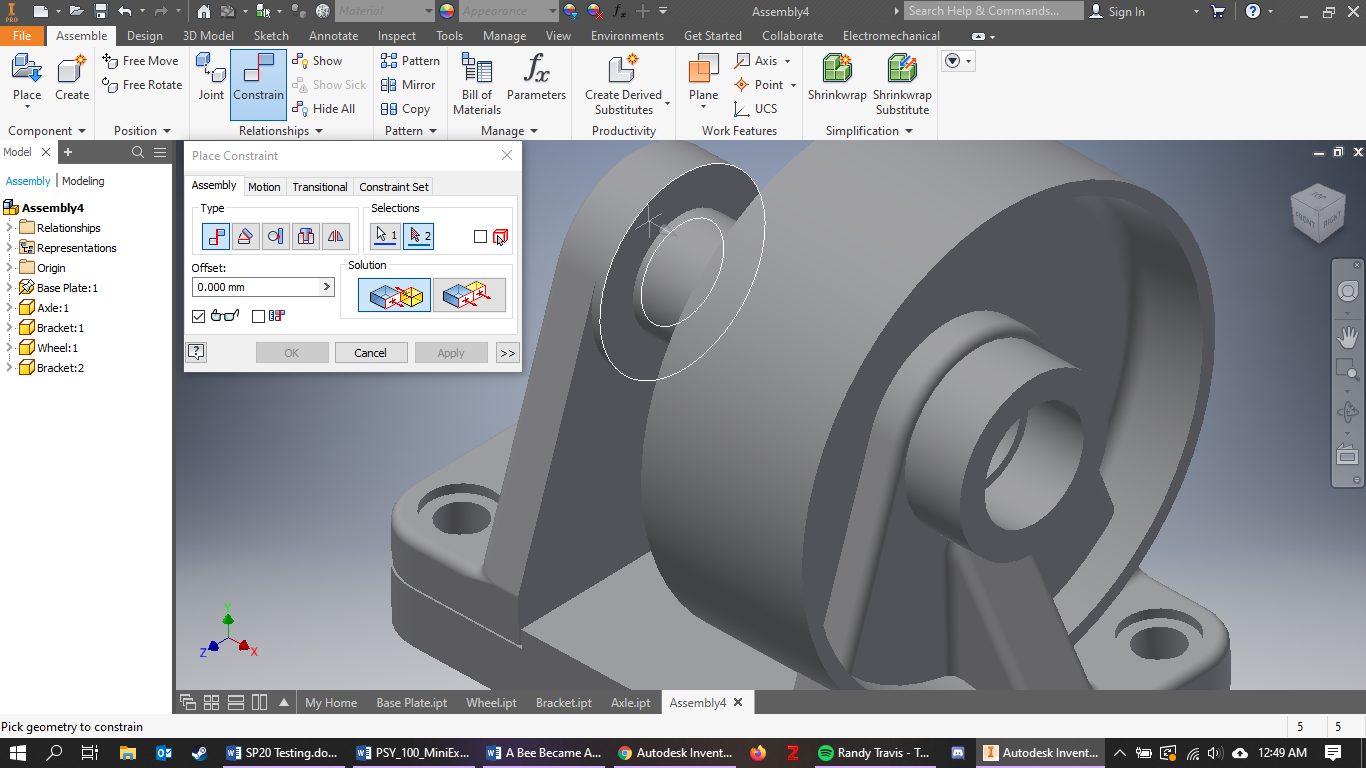.png)
Constrain the side of the wheel to the surface circle of the bracket. Make sure that the side of the wheel you chose is the same as the side of the bracket you are constraining.
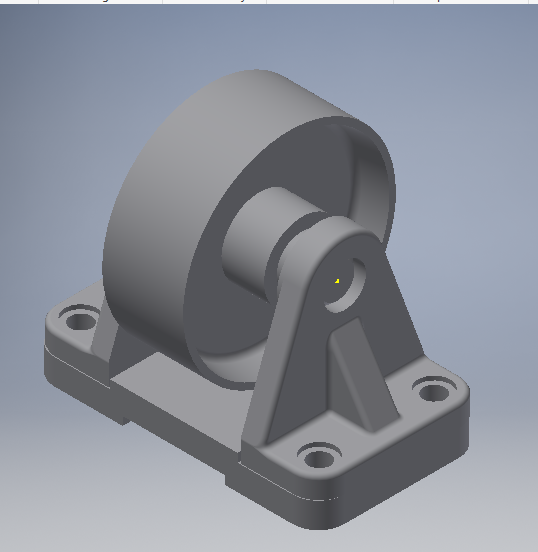
Enjoy Your Wheel
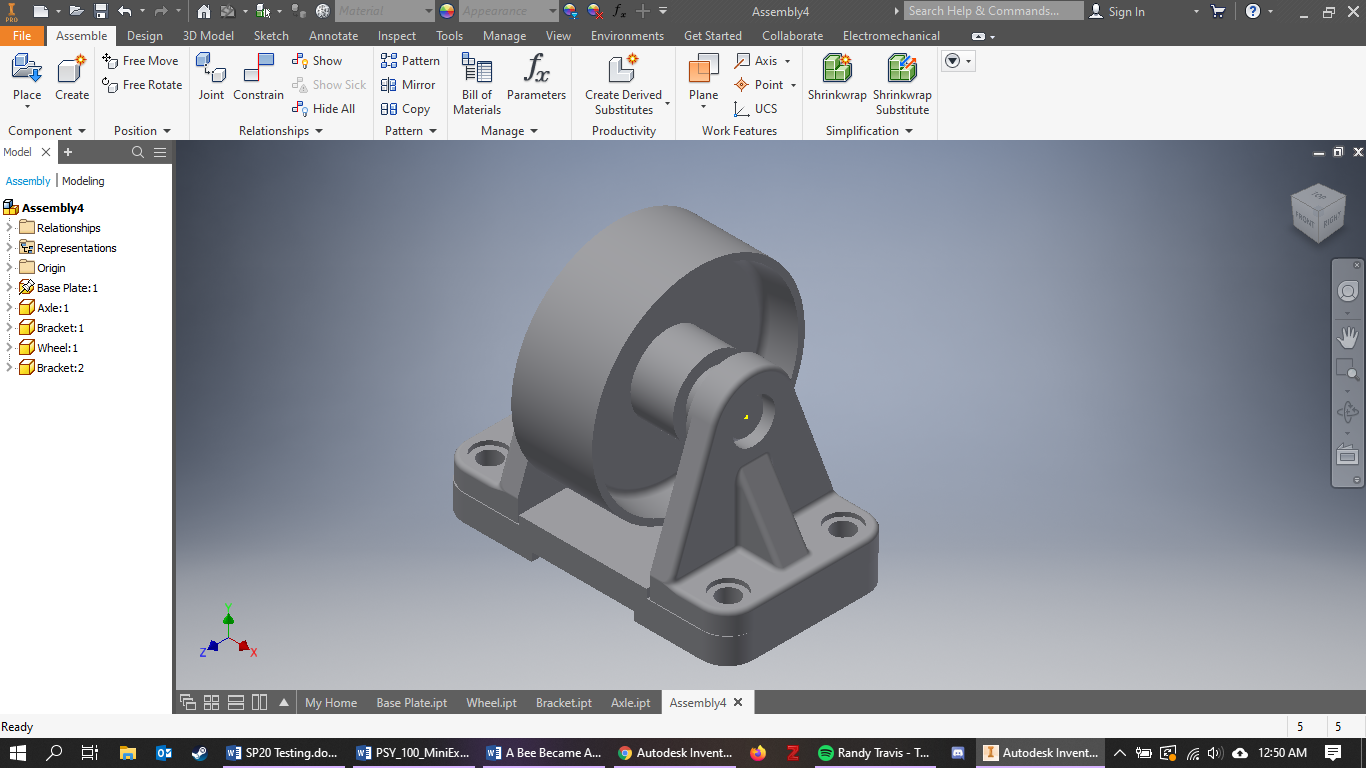.png)
The final step is to enjoy the wheel that you have assembled! Make sure to reflect on how this was constructed, for it may come in handy on your future assemblies.