How to Apply a Texture to a Selection in Photoshop
by ZaniuM in Circuits > Websites
499296 Views, 48 Favorites, 0 Comments
How to Apply a Texture to a Selection in Photoshop

Ever wondered how edited pictures or websites often have a slight texture that only applies to a certain part of an image? Such as the texture used in this logo design?
Materials:
- Photoshop
- Unedited picture or element
- Texture image (wall, metal, wood, etc.)
- Basic Photoshop knowledge (layers, tools, overlays)
Open the Picture You Intend to Add a Texture To
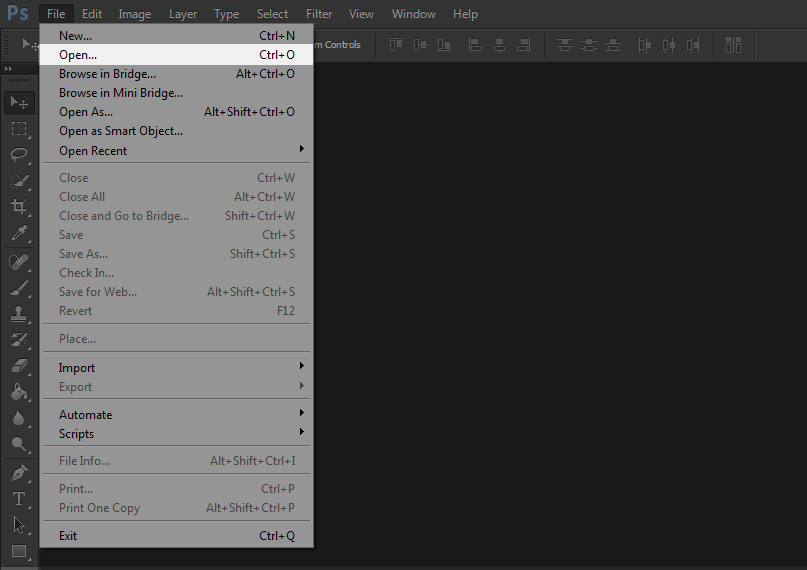
I'm choosing to add a texture effect to a logo that I have recently created, however textures can be added to any picture, design, etc. to create a more complete, realistic look.
Placing the Texture Image
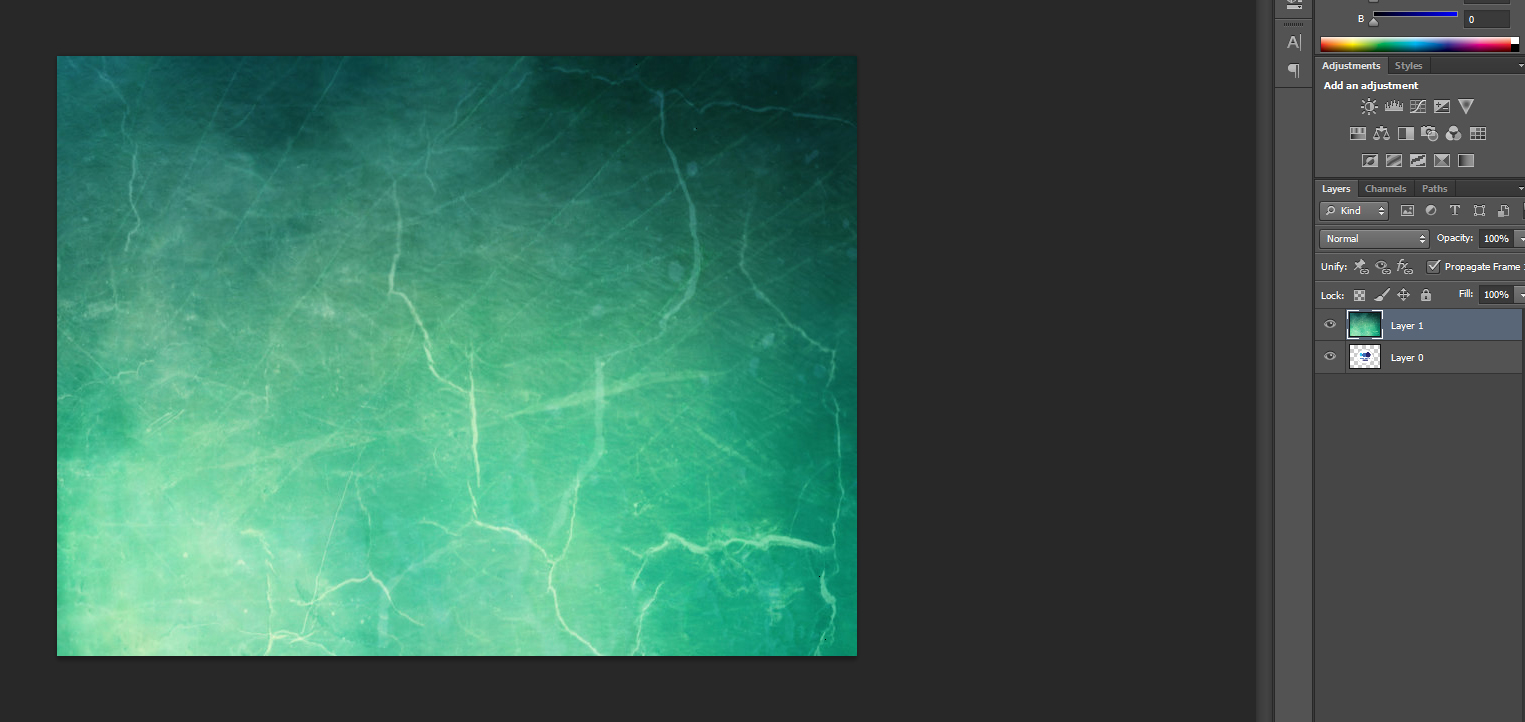
Now that the image you want to apply a texture to is opened in Photoshop, you're going to want to add the texture image to a separate layer above the original picture.
Tweaking the Texture Layer's Options
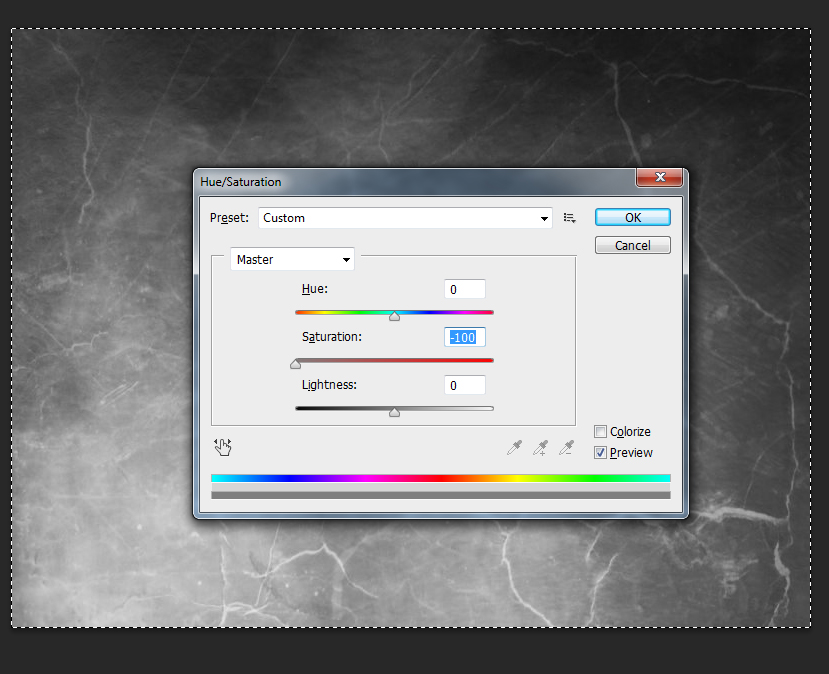
Textures rarely come in gray-scale; however, we need gray-scale images to avoid ruining the colors of our original image and to bring out the shadows that textures intend to bring.
- To do this select the texture layer, then select it's content by pressing CTRL+A
- Press CTRL+U and move the saturation slider all the way to the right
Tweaking the Texture Layer Options
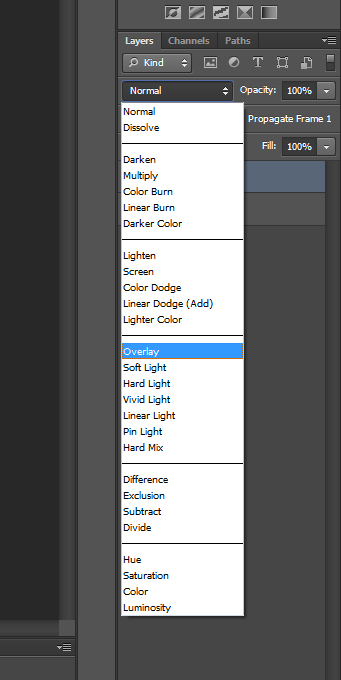
By default, layers will just stack onto each other instead of blending together. We need the highlights and shadows from our texture to standout on our original image.
- From layer blending styles, select overlay from the drop down box.
Masking the Texture
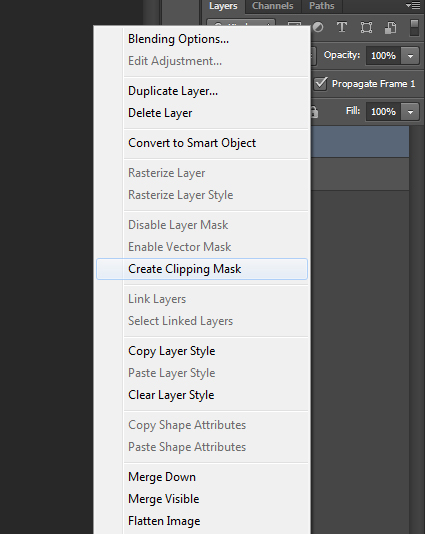
Now that the texture is overlayed, our image is now textureized. However, the image AND the background have a texture. To fix this, we need to mask the texture so that it only applies to our image we want texturized.
Right click on the texture layer and click "Create Clipping Mask"
Adjusting Texture Contrast
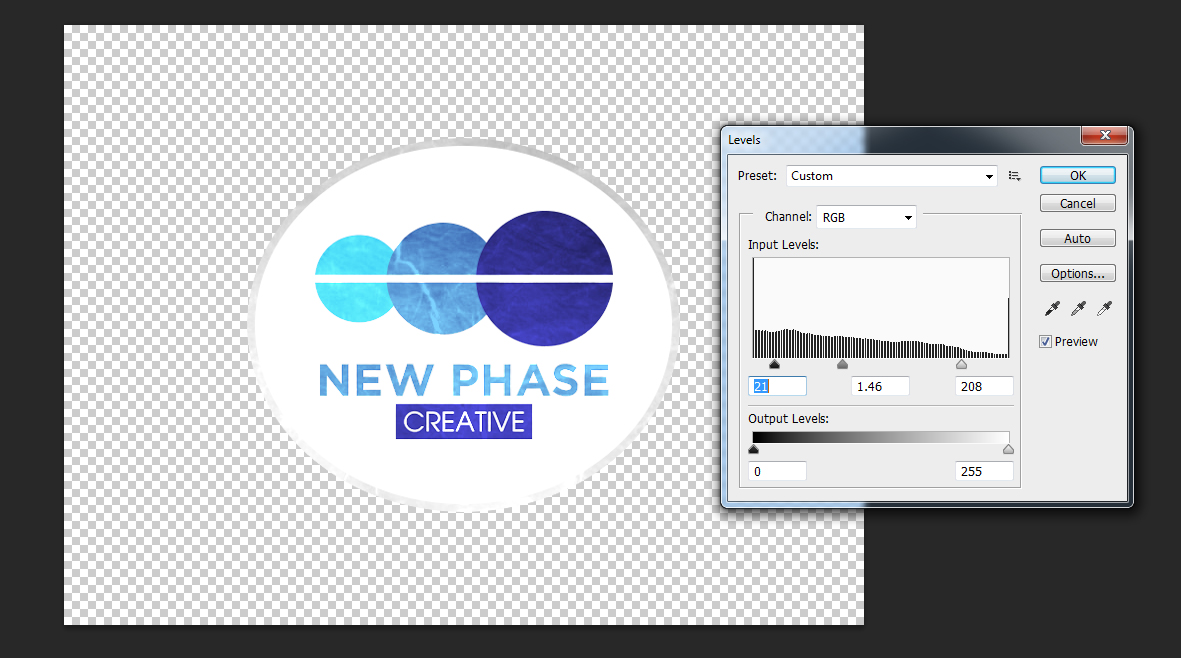
Congratulations, your image is now textured! However, the texture is not as prominent as we'd like. So, to combat this we need to make our whites whiter and our blacks blacker.
With the texture layer selected, press the Image tab and then click on Adjustments > Levels. Then, move the input sliders until the texture is more visible on your image.
Finishing Touches and Before/After

You are now done adding a texture to your image. However, feel free to add a background, drop shadows, and any other touches that you seem fit. Congrats on adding your first texture to an image! Be sure to utilize textures into your design to create depth and realism.