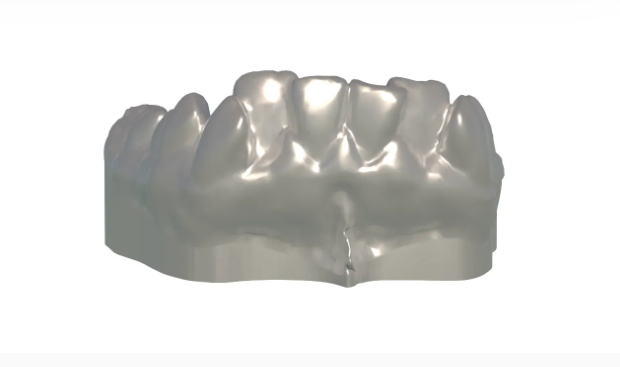
How to Add a Smooth Base to a Dental Model Using 3D CAD Software
by Julie80 in Craft > Digital Graphics
5 Views, 0 Favorites, 0 Comments
How to Add a Smooth Base to a Dental Model Using 3D CAD Software

Learn How to Add a Smooth Base to a Dental Model Using 3D CAD Software with the help of this article
How to Add a Smooth Base to a Dental Model Using 3D CAD Software
Creating a well-structured and polished dental model is a crucial step in modern dentistry and orthodontics. Whether for educational purposes, patient consultations, or advanced prosthetic designs, the quality of a dental model significantly impacts its usability and presentation. In digital design, SelfCAD, a versatile and user-friendly 3D modeling software, offers an efficient platform for refining and enhancing these models. This article explores the step-by-step process of adding a smooth base to a dental model using SelfCAD. By mastering this technique, users can ensure that their dental models are both aesthetically pleasing and functionally sound, reflecting professional standards in digital fabrication
To access the interactive tutorial to this article, check out https://www.selfcad.com/tutorials/326e3f5x736x4h2zmv3yg1s3x3j4p3a21492
Once you’ve launched the editor;
From the file menu on the top toolbar click import; click load object from tutorial button to add object
Click back face coloring button to enable back face coloring
Click rotate on the toolbar; set x to 90
Click ‘x’ to close transformation panel
From the modify category on the toolbar choose simplify object; set intensity to 5
Tick the checkmark to finalize simplify object
Click copy button to copy selected objects; click move on the toolbar; set x to 71 using highlighted gizmo
Click ‘x’ to close transformation panel
Click to activate edge selection; click on the gear icon to open the advanced selection tools, click select loose button to select loose regions
Click ‘x’ to close selection settings panel
From the deform category on the toolbar choose flatten; set y to 0 using highlighted gizmo
Click ‘x’ to close transformation panel
Click on highlighted region to deselect it
From the tools category on the toolbar choose fill polygons
Tick the checkmark to finalize fill polygons
Click inverse selection button to inverse selection; click on the gear icon to open the advanced selection tools, click select loose button to select loose regions
Click copy button to copy selected objects
Click ‘x’ to close selection settings panel
Click copy button to copy selected objects; click move on the toolbar; set move mode to move by, y to -1
Click ‘x’ to close transformation panel
Change object name from profile 1(1), to 2nd
Click highlighted part on selection cube to turn off region selection
Click on profile 1 to select it; from the tools category on the toolbar choose bridge, set fill last to false
Tick the checkmark to finalize bridge
Click to activate polygon selection; click on highlighted region to select it
From the deform category on the toolbar choose flatten; set y to 0 using highlighted gizmo
Click ‘x’ to close transformation panel
Click on highlighted region to deselect it
Click on shell occlusion 1 to select it; from the edit menu on the top toolbar choose merge
As you continue honing your design skills, remember that SelfCAD offers a wealth of resources to support your learning journey. To deepen your understanding and explore more advanced features, consider checking out the interactive tutorials (https://www.selfcad.com/tutorials) available on the SelfCAD website. The tutorials page provides a treasure trove of guides, tips, and tricks that cater to designers of all levels.
More structured learning experience can also be accessed at the SelfCAD Academy (https://www.selfcad.com/academy/curriculum/), https://www.youtube.com/@3dmodeling101, and 3D Modeling 101 series (https://www.youtube.com/playlist?list=PL74nFNT8yS9DcE1UlUUdiR1wFGv9DDfTB). This comprehensive resource offers in-depth courses taught by industry experts, allowing you to master the intricacies of SelfCAD at your own pace.