How to Add Konami Code to Your Website
by noveldork in Design > Websites
17666 Views, 19 Favorites, 0 Comments
How to Add Konami Code to Your Website
If you play a lot of video games, you might be familiar with the classic Konami Code. The Konami Code was introduced as a cheat code in many Konami video games, however it was later picked up by other video game studios.
In recent years, the Konami Code has been adopted by websites all over the world as a hidden joke secret within the developer and geek community. Some of my favorite Konamii code websites are:
Try it out for yourself, the code is "up up down down left right left right b a enter"*
*Some sites do not include the enter as it's not part of the code, but rather the activation key in Konami games, but if your Konami doesn't work, then try enter!
Look at all these hidden secrets on the internet you never knew about! And now, you're about to make your very own Konami coded website!
Open the HTML for Your Website
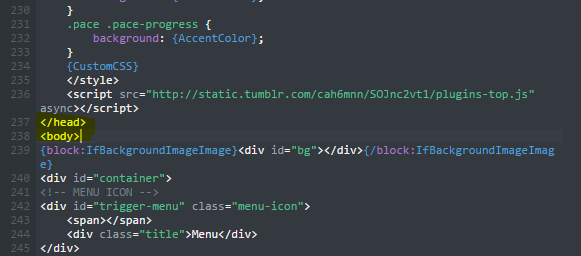

For this example, I will be using a Tumblr webcode for the HTML. Tumblr is not a highly customization html/css hosting site, so if you can get the Konami Code to work here, you can get it to work anywhere.
If your website does not allow you to modify the HTML (of the site or the theme), you might want to look into another hosting service for your Konami site.
Html codes contain a <head> and <body> tag inside the <html> tags. I've had the best luck with placing the Konami code right before the end of the body tag, so in your code, search for </body> and create a set of tags right above the close body tag.
The tags might be something like
<!-- KONAMI -->
<!-- /KONAMI -->
These tags are super useful later when you are trying to modify your Konami so it isn't lost in a sea of code!
Add Your Konami HTML

For this Konami, we will be making an image appear on the bottom of the page and move on a scroll. Using a knowledge of Javascript, you can do tons more!
Copy the following code between your KONAMI tags:
<div class="className"><img src "LINK TO IMAGE HERE" style="display:none" alt""/></div>
The display:none and empty alt hide the image on the page initially*
*Occasionally I have run into problems where my hidden image flashes before the page loads so check back for edits when I am able to solve this problem!
Add Your Konami Style
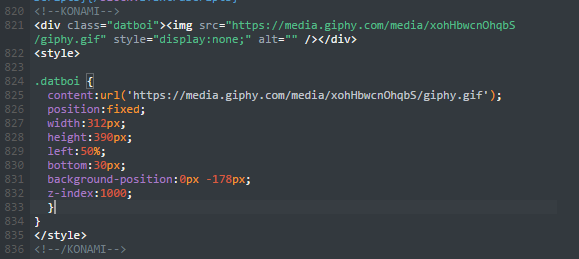
Adding a set of style tags allows for you to use custom CSS within your Konami code. You do not need to follow my dimensions because my dimensions are for my image.
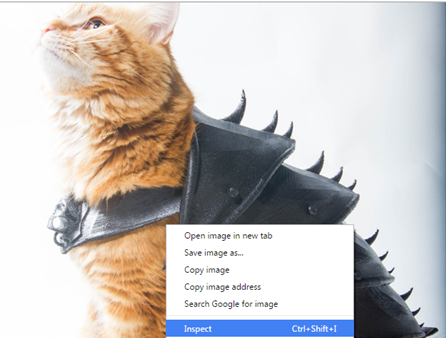
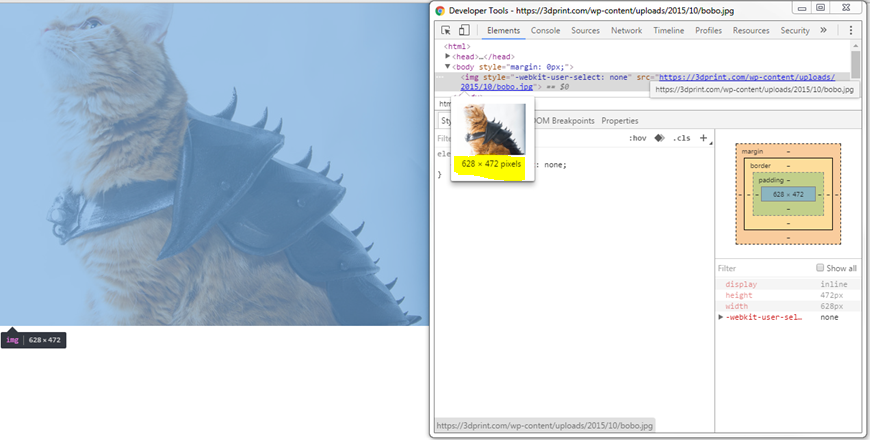
To find out the dimensions of your image for height and width, view the image and then right click on your image and select inspect. The developer tool window will pop up on the right and you'll see some code. Hover your mouse over the link you see; if your image highlights blue, this is the link for the image. The height and width you need are here.
Now, under your <div> tags, add a set of style tags (<style></style>) and in between the tags, add the following:
.className {
content:url('IMAGE URL FROM BEFORE');
position:fixed;
width: YOUR WIDTH;
height: YOUR HEIGHT;
left:50%;
bottom:30px;
background-position:0px -178px;
z-index:1000;
}
Feel free to play with the other css elements. The Z-Index brings your image in front of other page elements, so you will want to keep that high. But you can feel free to play around with the orientation of your image on the page!
Start Your Script and Initialize Your Secret

You are about to have coded in 3 different languages today, so basically you are a computer science wizard now!
After you close your style tags, open up a pair of script tags (<script></script>). This denotes that you are going to begin working with javascript, and interactive web developer language. Despite popular belief, Javascript is not related to Java-- the Javascript creators just wanted to ride on the Java popularity coat tails. The more you know.
Add the following variables:
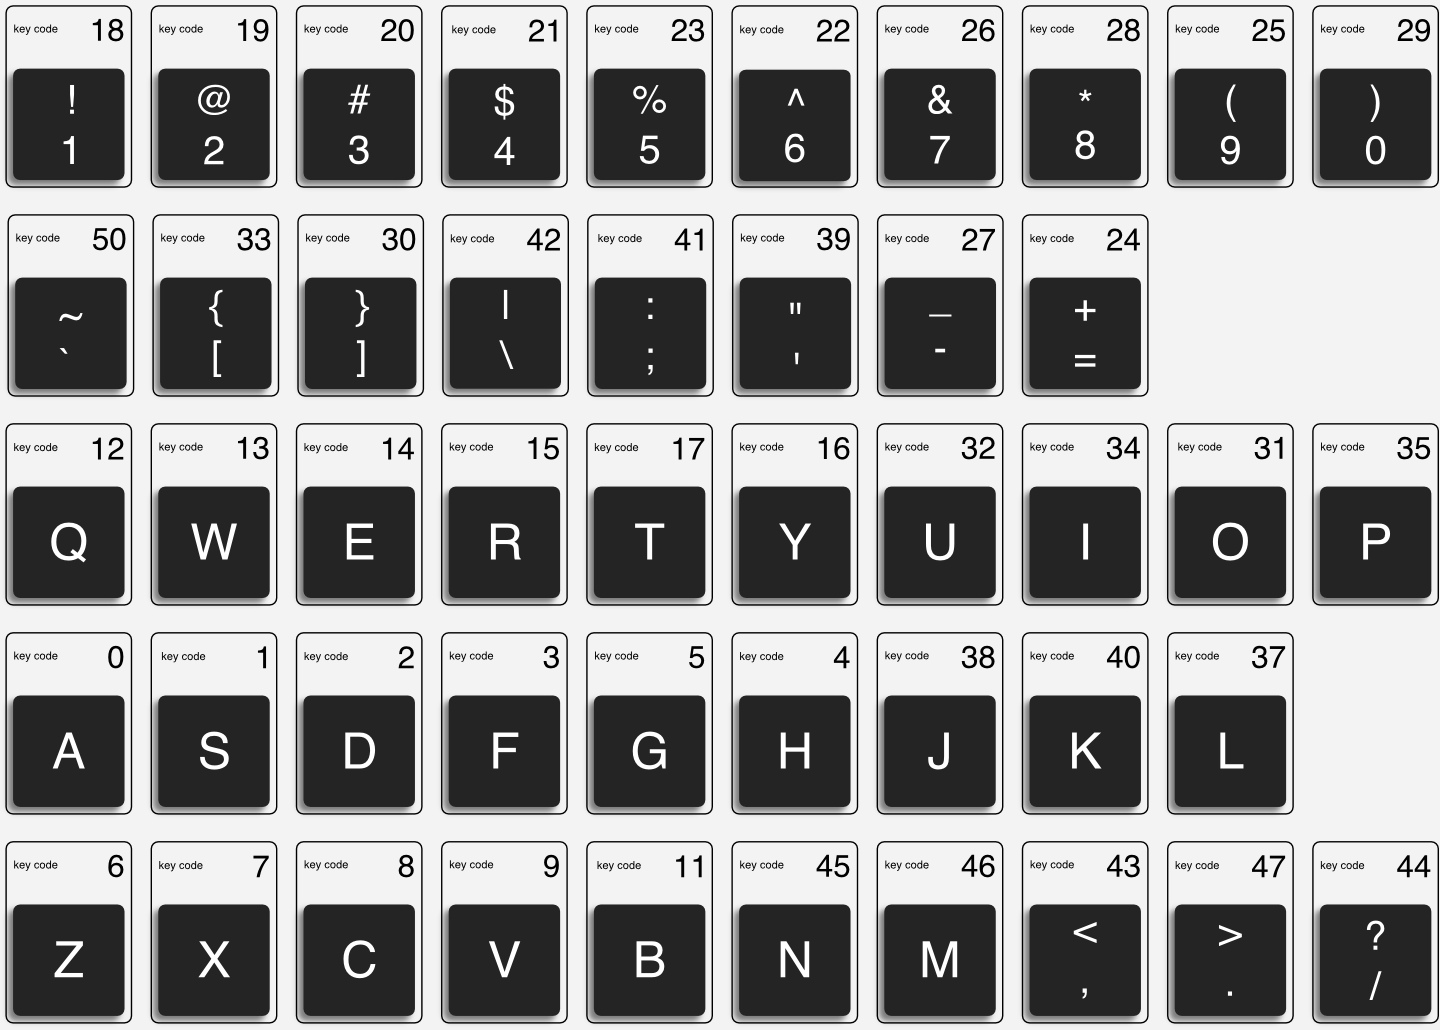
var secret = "3838404037393739666513"; //Konami Code
var input = "";
var timer;
var mode = false;
var showclassName =false;
Konami Code reads keystrokes and in computers, each keystroke has an associated number. The numbers I am providing are for the Konami code, but it is easy to make the cheat code to your website anything you want by changing the keystroke values. The input variable reads the keystrokes on the website, and when it matches the secret, the code with activate.
Add Basic Script Functions


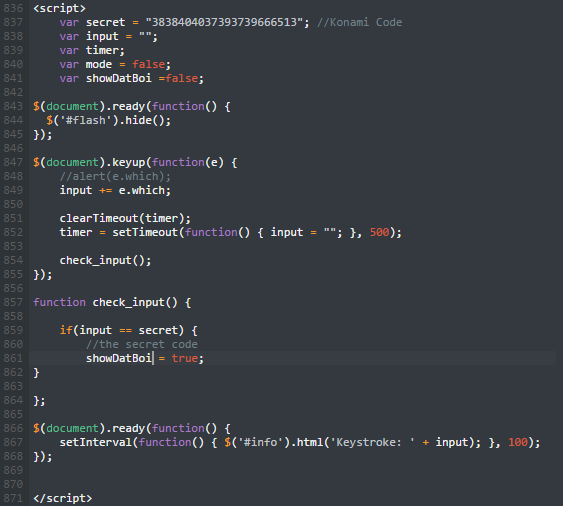
To complete a basic scrolling Konami, you need a lot of code, but it's not that hard! For a description of what each section of code does, click on each individual code snippet image.
Essentially, these next few lines handle the reading of the input key and beginning your Konami.
Add the following functions under your var's:
$(document).ready(function() {
$('#flash').hide(); });
$(document).keyup(function(e) {
//alert(e.which);
input += e.which;
clearTimeout(timer);
timer = setTimeout(function() { input = ""; }, 500);
check_input(); });
function check_input() {
if(input == secret) {
//the secret code
showclassName= true; }};
$(document).ready(function() {
setInterval(function() { $('#info').html('Keystroke: ' + input); }, 100); });
Add the Scroll Function


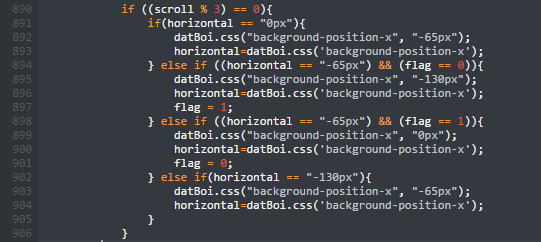
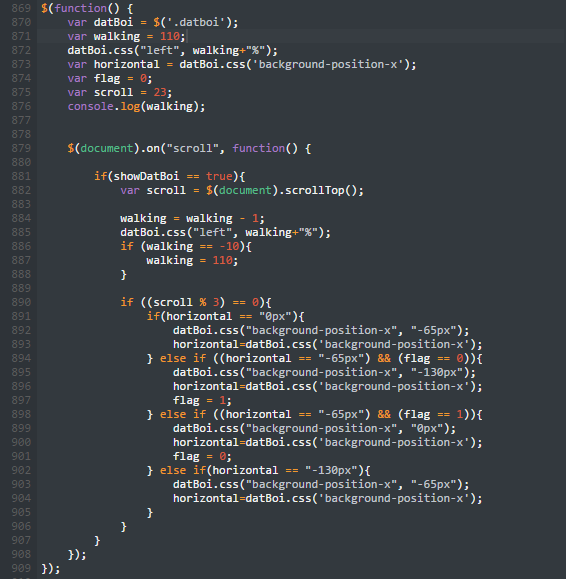
In my opinion this is the most complex part of the code, but we are almost done!!!
This next chunk of code we are adding allows your image to move right to left across the screen. To move it left to right, just change the "left" to "right" in the initialization.
Once again, for a further description of what each snippet does, click on the images and read the notes.
Pas this code right before your </script> tag:
$(function() {
var className = $('.className');
className.css("left", walking+"%");
var horizontal = className.css('background-position-x');
var flag = 0; var scroll = 23;
console.log(walking);
$(document).on("scroll", function() {
if(showclassName == true){
var scroll = $(document).scrollTop();
walking = walking - 1;
className.css("left", walking+"%");
if (walking == -10){
walking = 110; }
if ((scroll % 3) == 0){
if(horizontal == "0px"){
className.css("background-position-x", "-65px");
horizontal=className.css('background-position-x');
}
else if ((horizontal == "-65px") && (flag == 0)){
className.css("background-position-x", "-130px");
horizontal=className.css('background-position-x');
flag = 1;
}
else if ((horizontal == "-65px") && (flag == 1)){
className.css("background-position-x", "0px");
horizontal=className.css('background-position-x');
flag = 0;
}
else if(horizontal == "-130px"){
className.css("background-position-x", "-65px");
horizontal=className.css('background-position-x');
} } } }); });
Test Your Secret Code
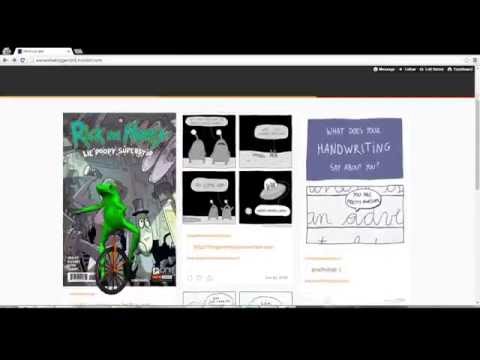
Just like any coding project, you might run into some bugs along the way. Play and poke around with the code until it is to your liking; the internet is a great resource for coding help in HTML/CSS/ and Javascript.
Once it's all clean, just scroll up and down for hours and watch it go! I find transparent images best for this sort of code, and even gifs work too!
Play around with my test site here
It might be fun to not tell people about your Konami secret and let them find out, much like my Instructables team will find out upon reading this tutorial!
Up the ante and embed videos, video games, or just more interactive features.
Thanks for following along and if you have any questions, drop a comment below!
