How to 3D Print With an Ender 3 Max Neo and Change the Filament
by Made Studio in Workshop > 3D Printing
5855 Views, 6 Favorites, 0 Comments
How to 3D Print With an Ender 3 Max Neo and Change the Filament
This guide will help you get started on using the Ender 3 Max Neo 3D printer at Made Studios.
Supplies
Ultimaker Cura
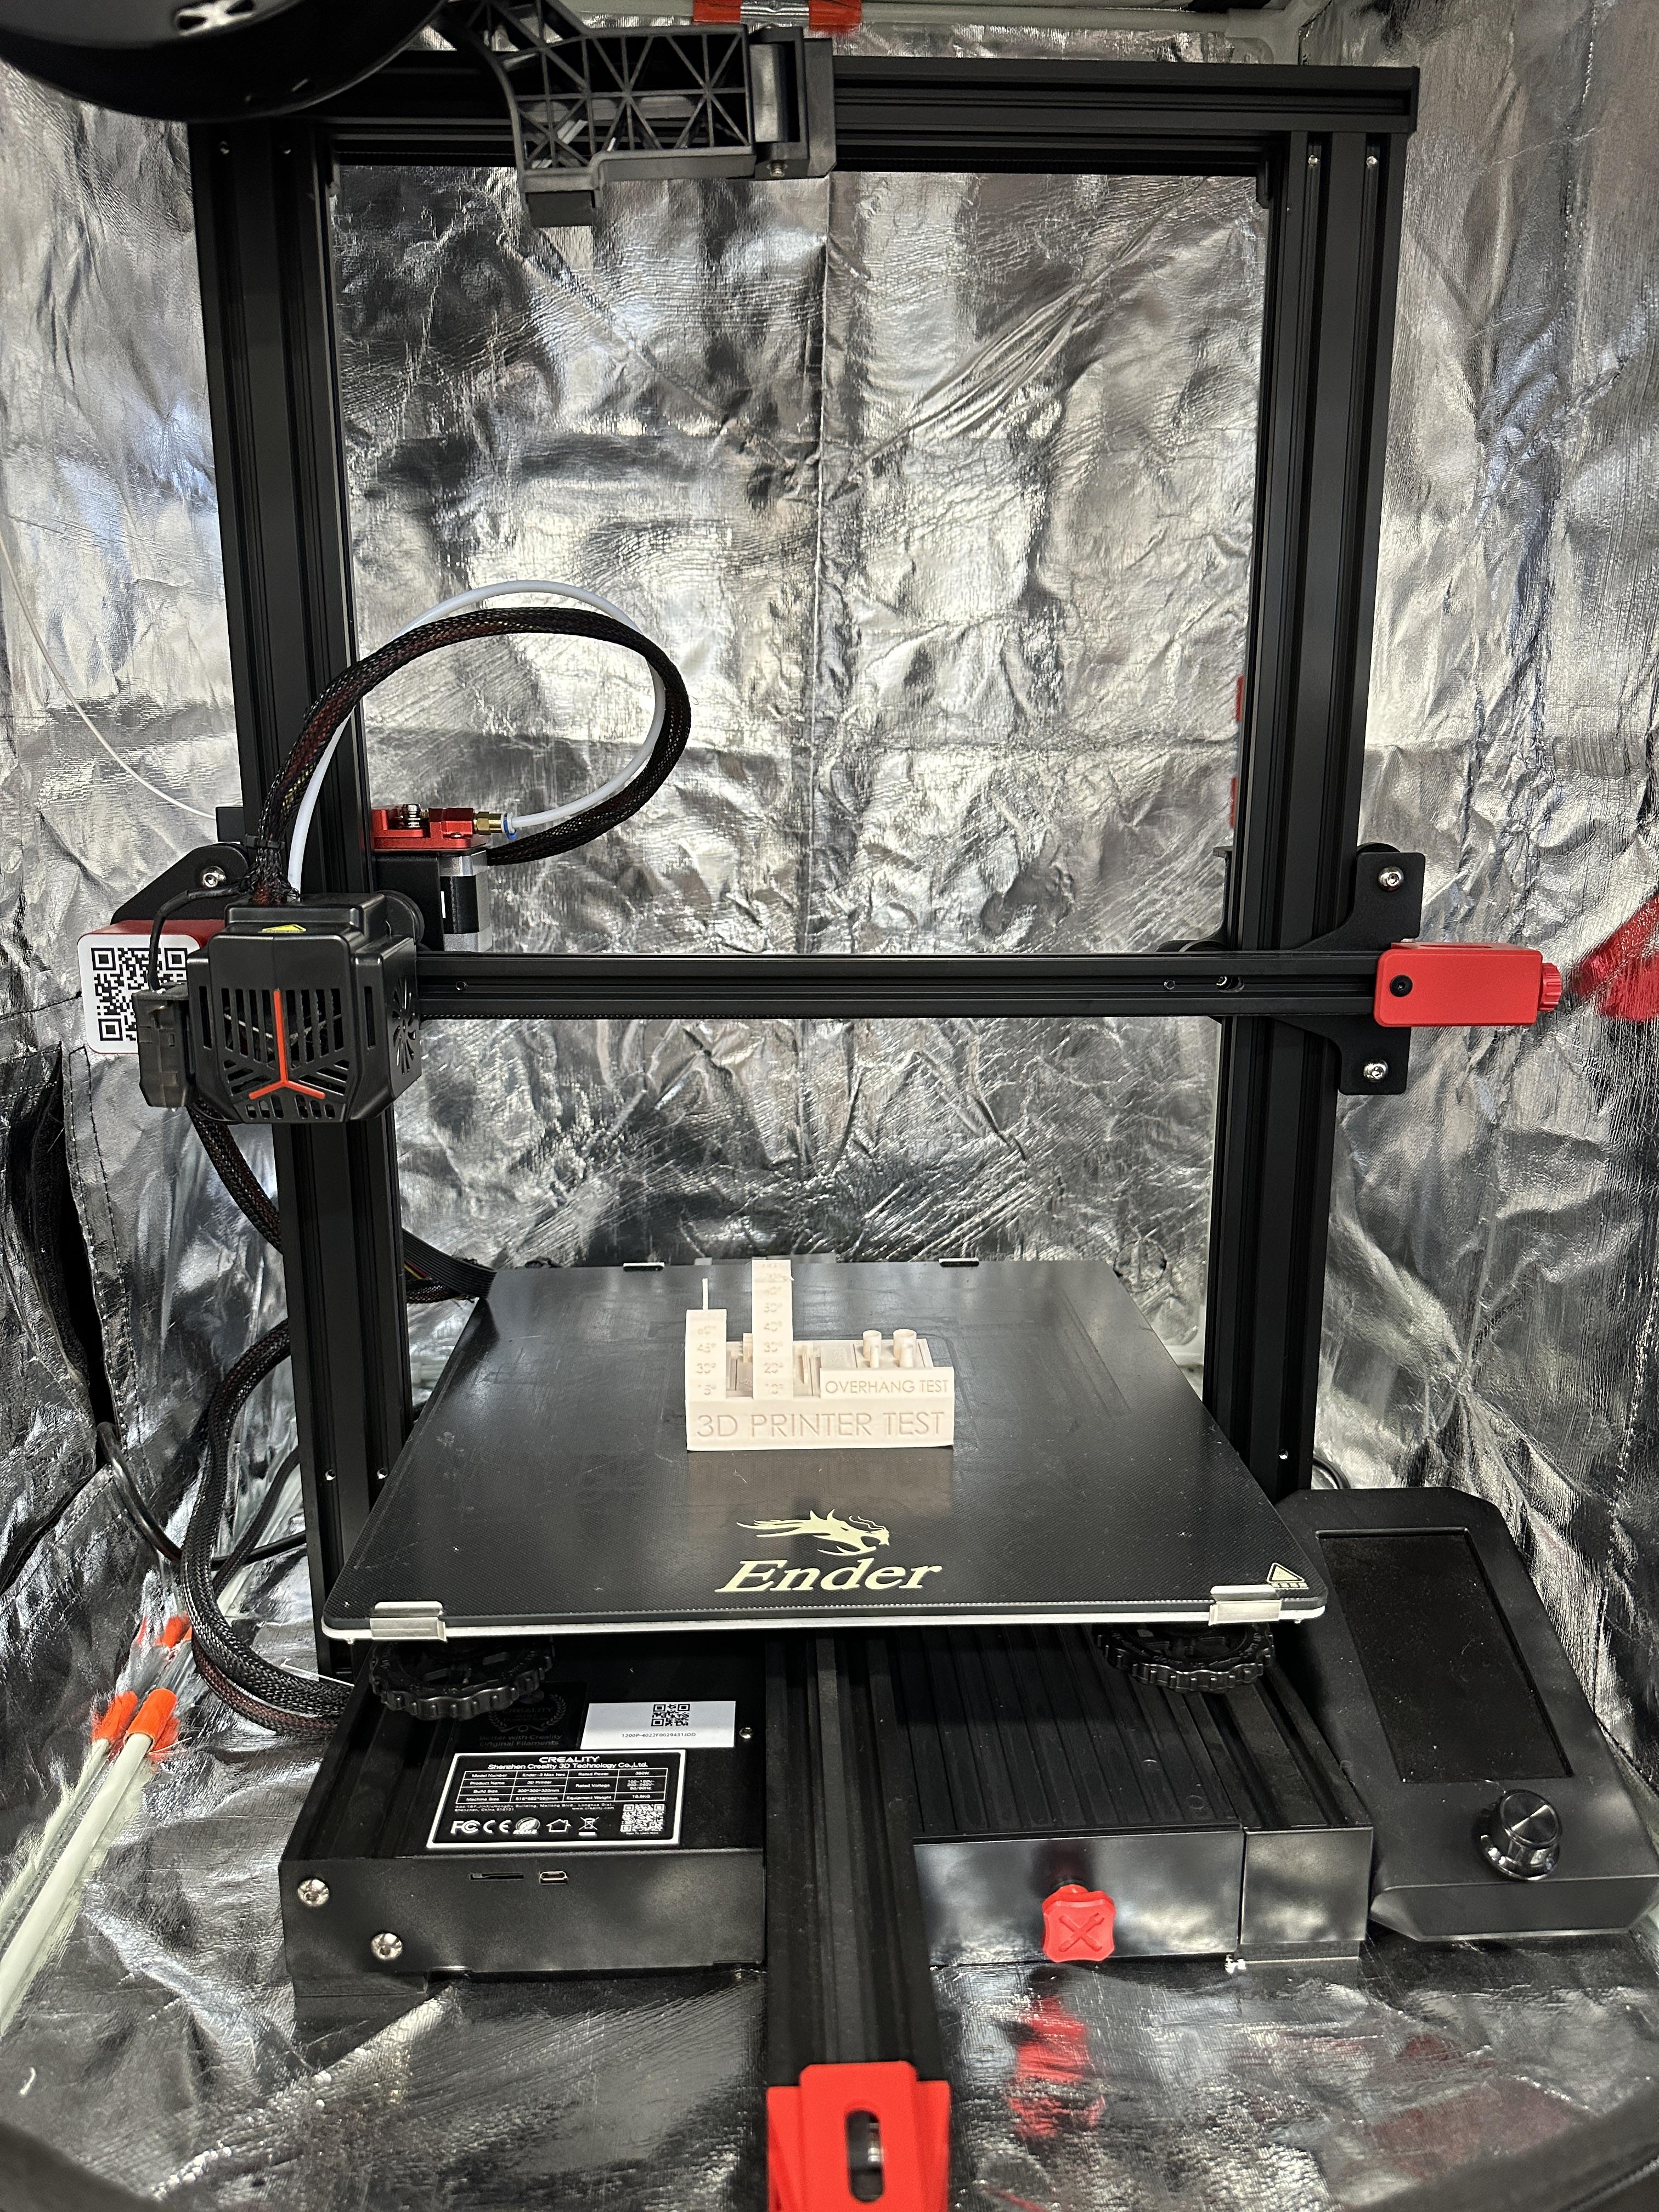
Creality Ender 3 Max Neo
PLA Filament
Setting Up the Slice in Cura
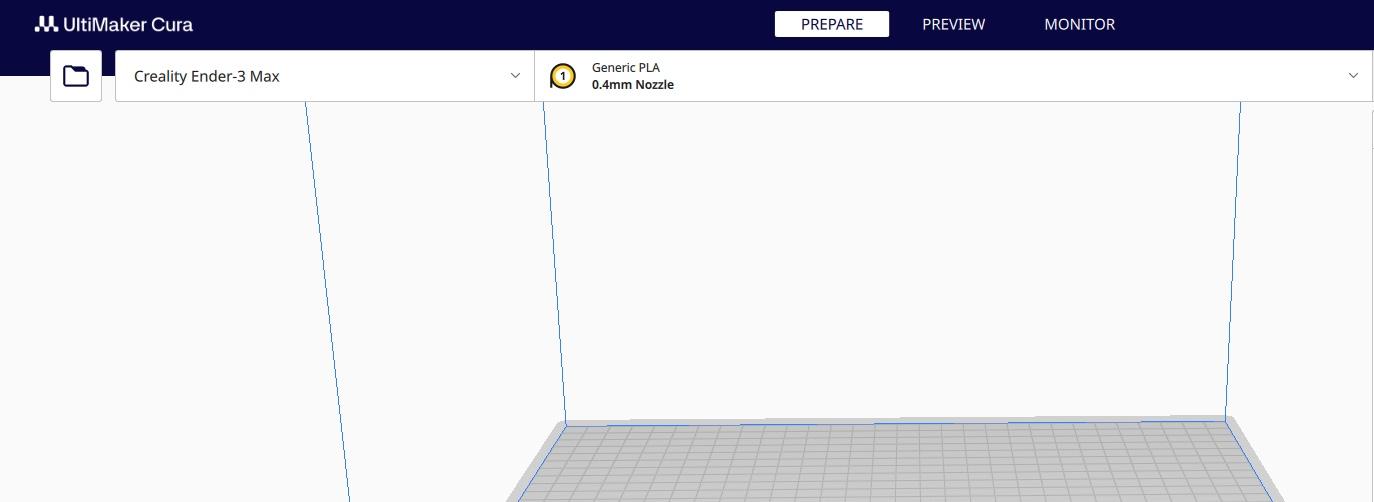
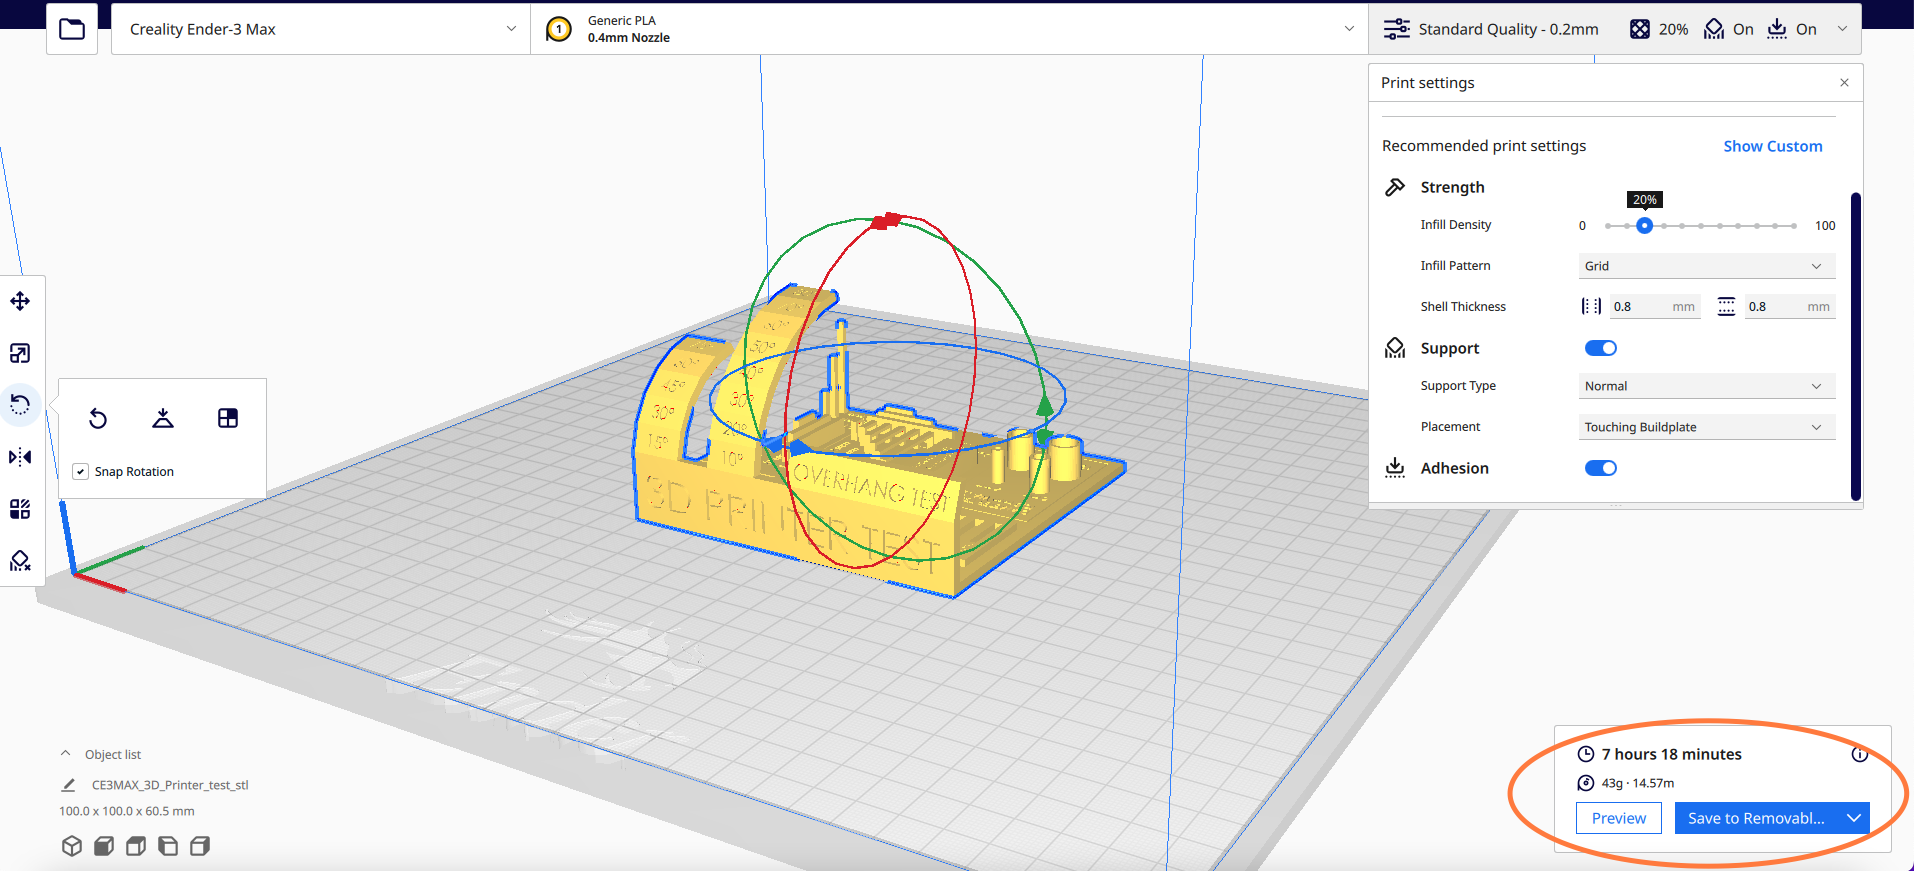
Make sure you already have a 3D model file opened into Ultimaker Cura. Then make sure the following settings look as they do in the image to ensure Cura is set to Ender 3 Max and the correct plastic for your print (Made Studio default is PLA).
Set Your Print Quality
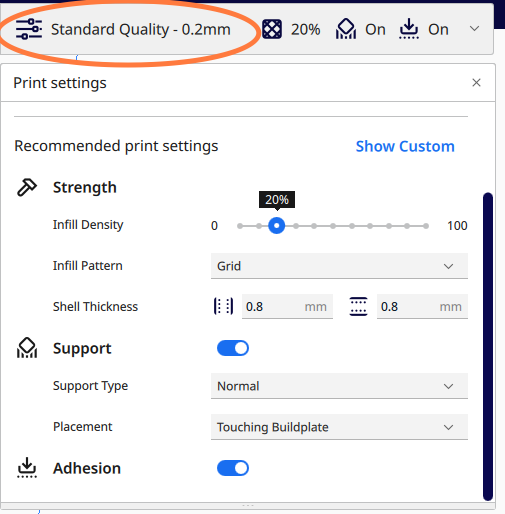
Set the quality of the print to 0.2mm
You Can Add Supports That Hold Up the Model(optional)
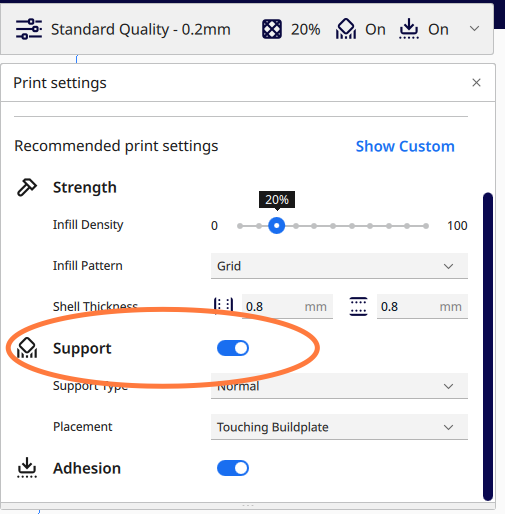
If the model has overhangs make sure that supports are enabled
You Can Also Add a Base With Set Adhesion(optional)
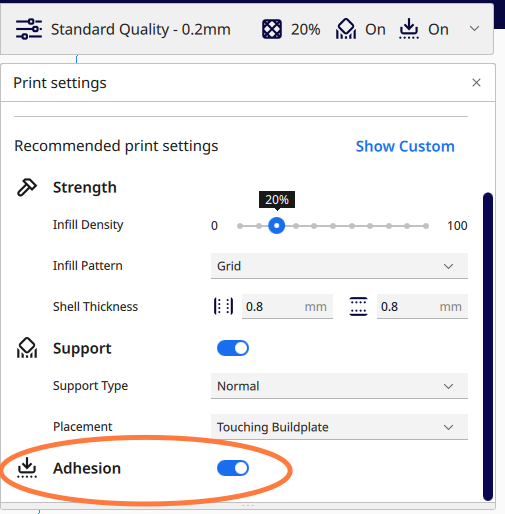
If bottom of model doesn’t have adequate surface area, enable Build Plate Adhesion.
Set Your Print Temperature
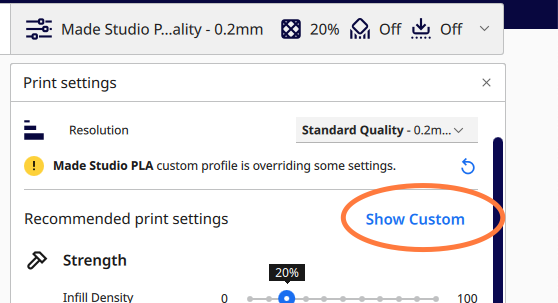
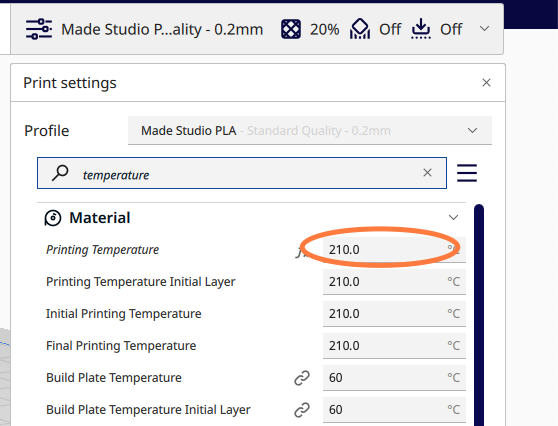
Ensure the printing temperature is between 205 degrees and 215 degrees. To do this press Custom and then type in ‘temperature’ to the search field. You will see the printing temperature there.
We Can Finally Slice the Model

Next we slice the model, simply click the slice button in the bottom right.
Save the Sliced Model to a Mini SD Card
Next make sure you have a mini SD card plugged into the computer. You can find the mini SD card in the front of the 3D printer.Use a USB to Mini SD card converter. Then once those are in the computer simple clicked "Save sliced file to Removable Disk"
Lets Power on the Machine
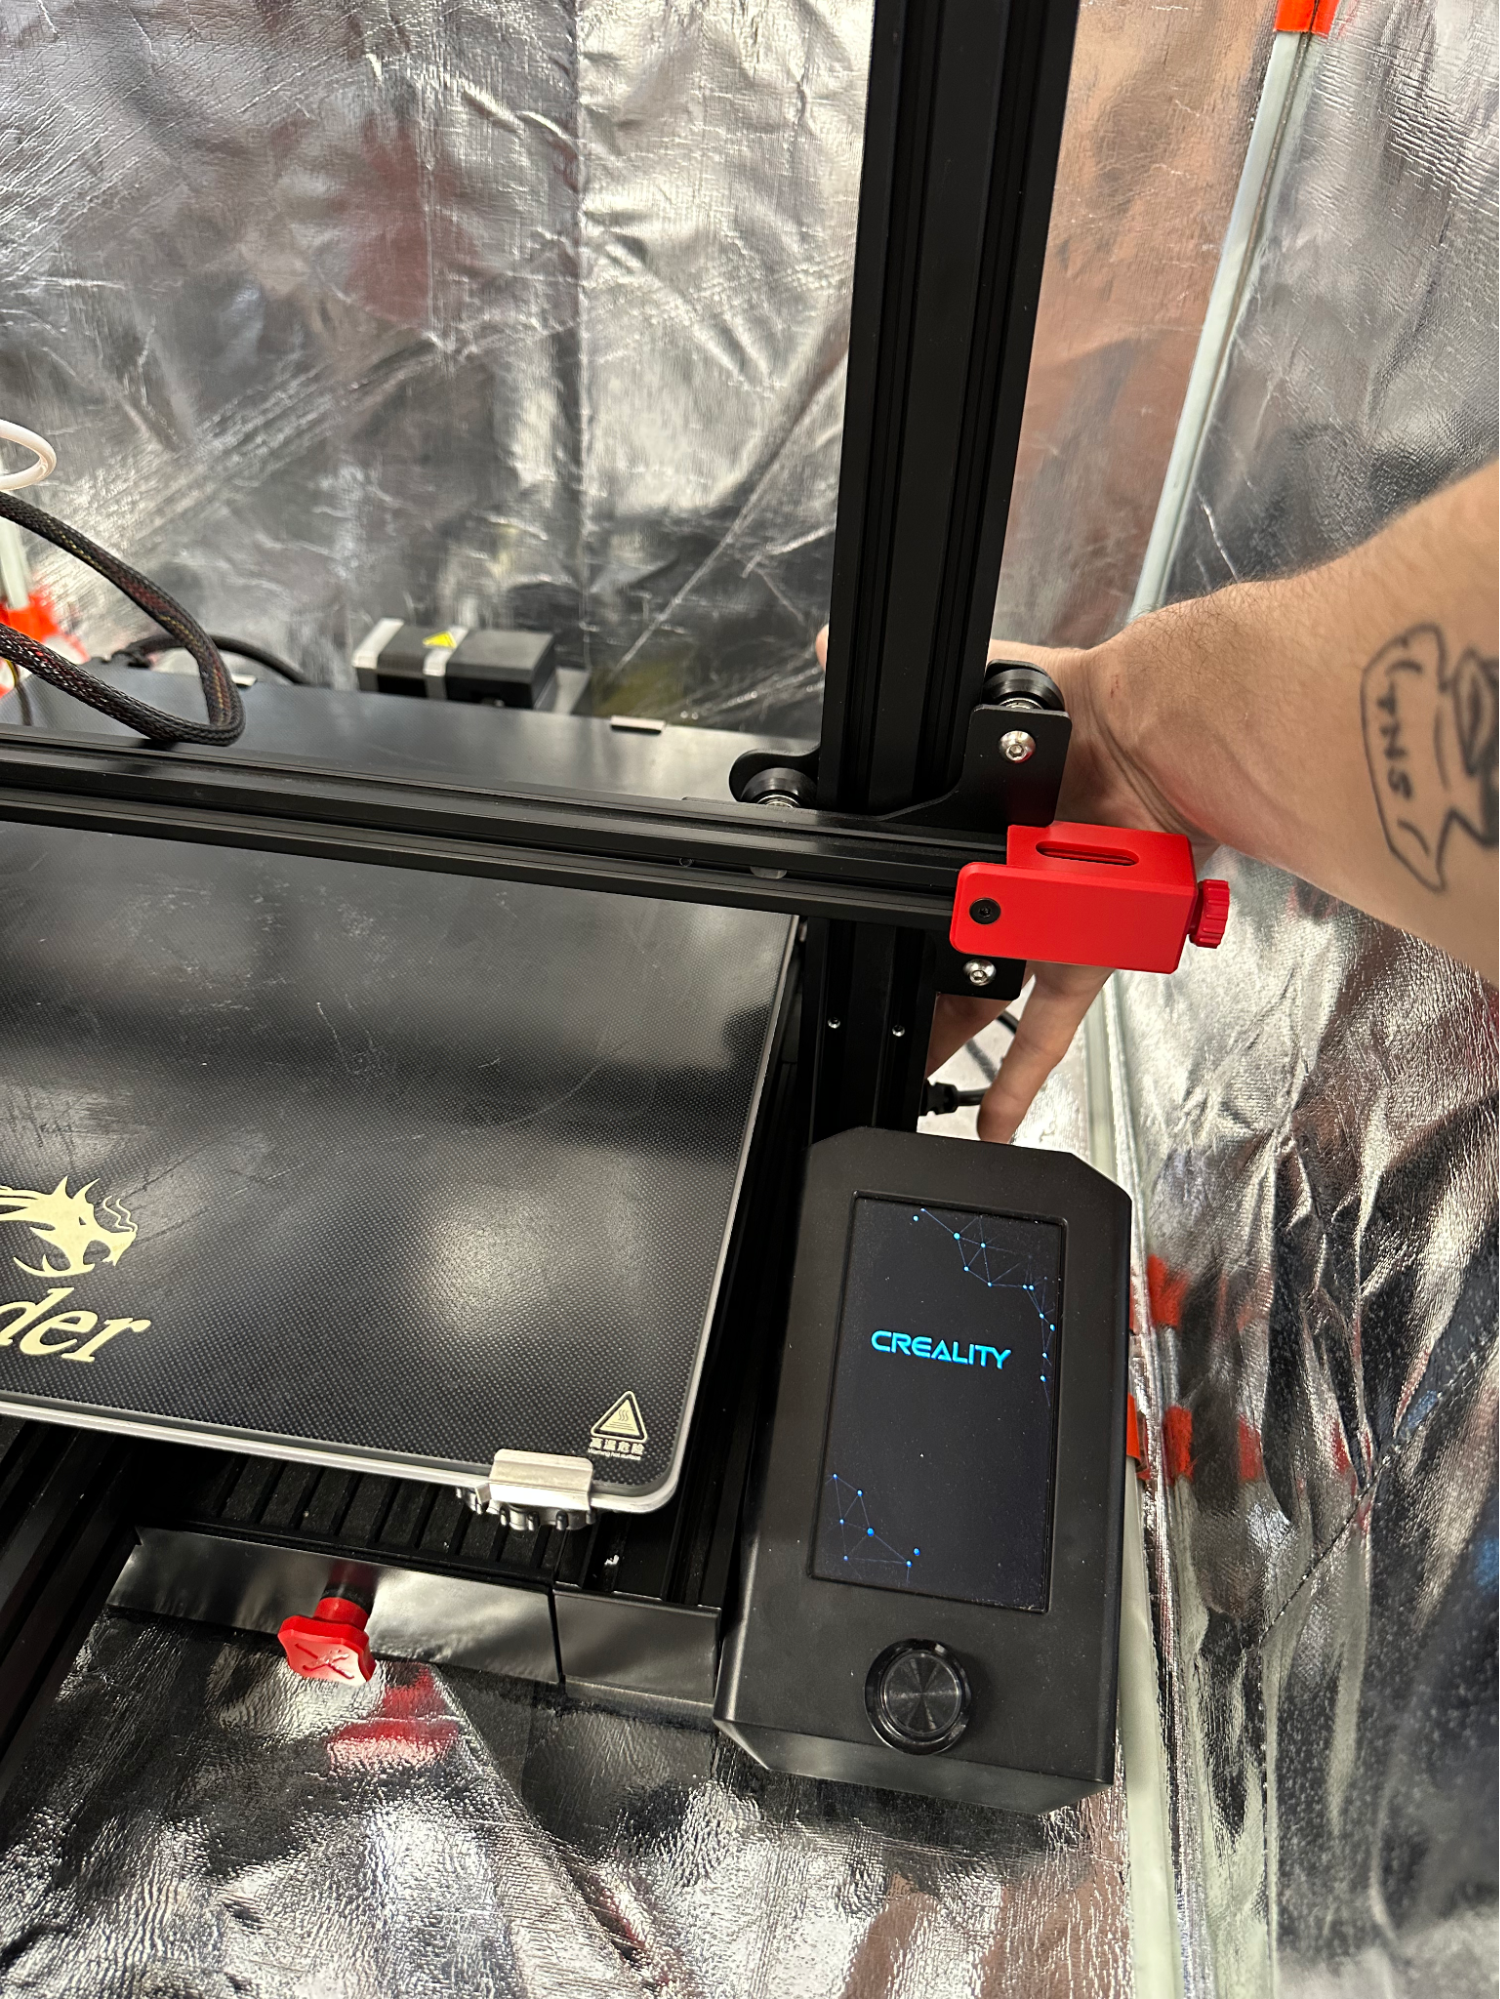
Now Turn on the machine. The power button is located on the back-right side of the machine.
Be Sure to Check the Plastic Filament
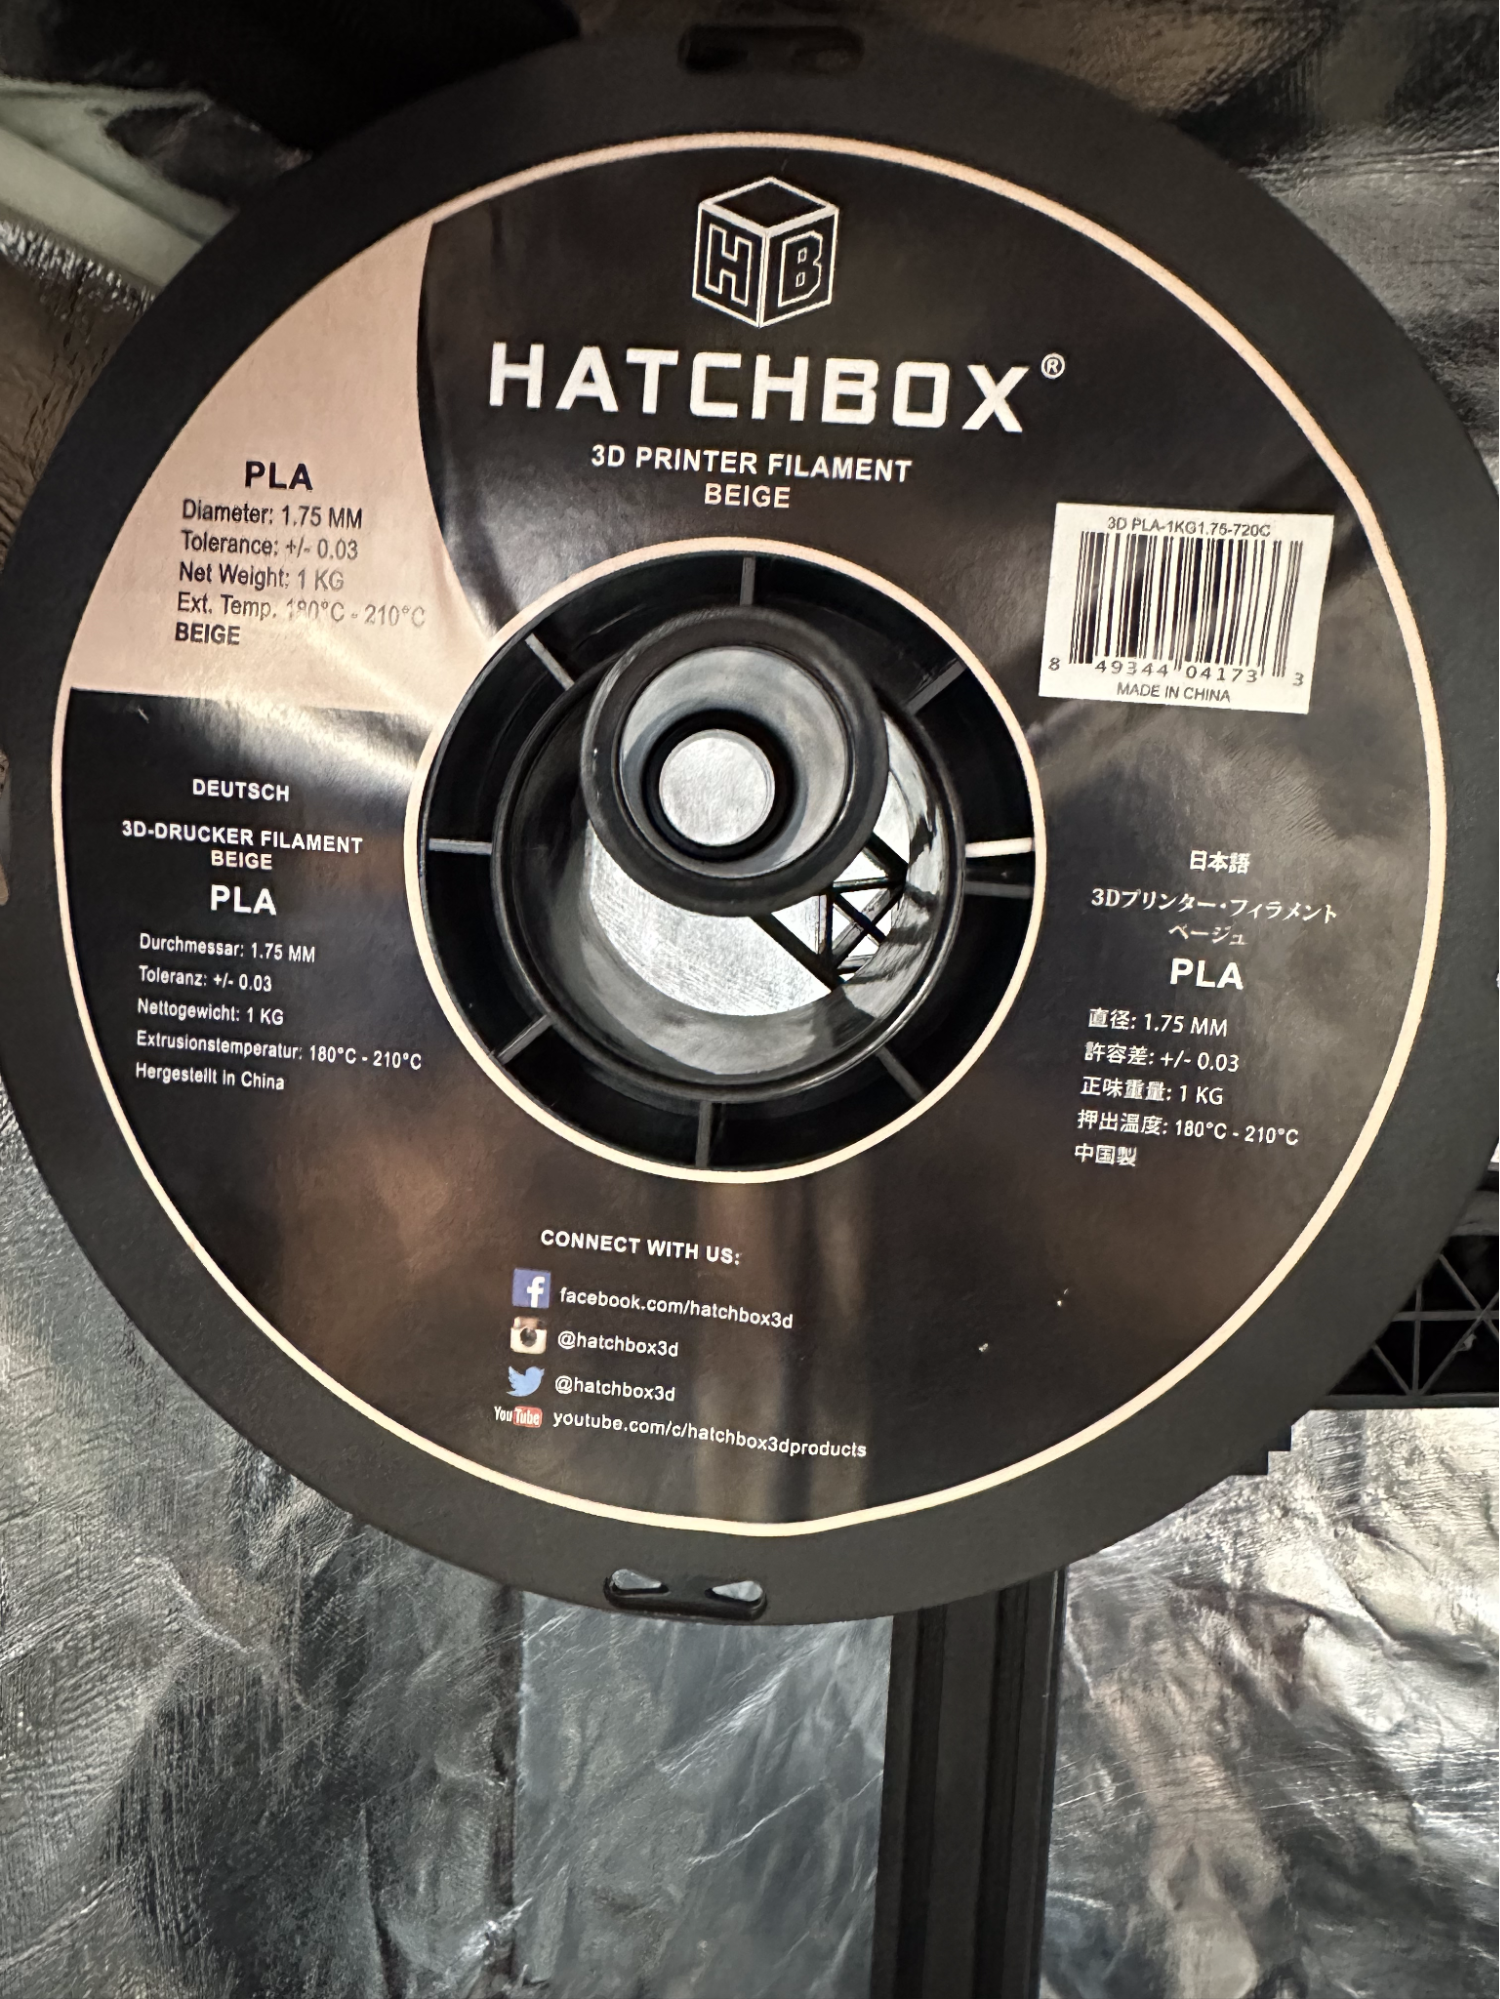
Check to make sure that the correct plastic is on the printer and that it is feeding into the machine. Also ensure there is enough plastic on the roll for the print job.
TIP: Cura will tell you the amount of plastic in meters that will be used in the print. This is a rough estimate.
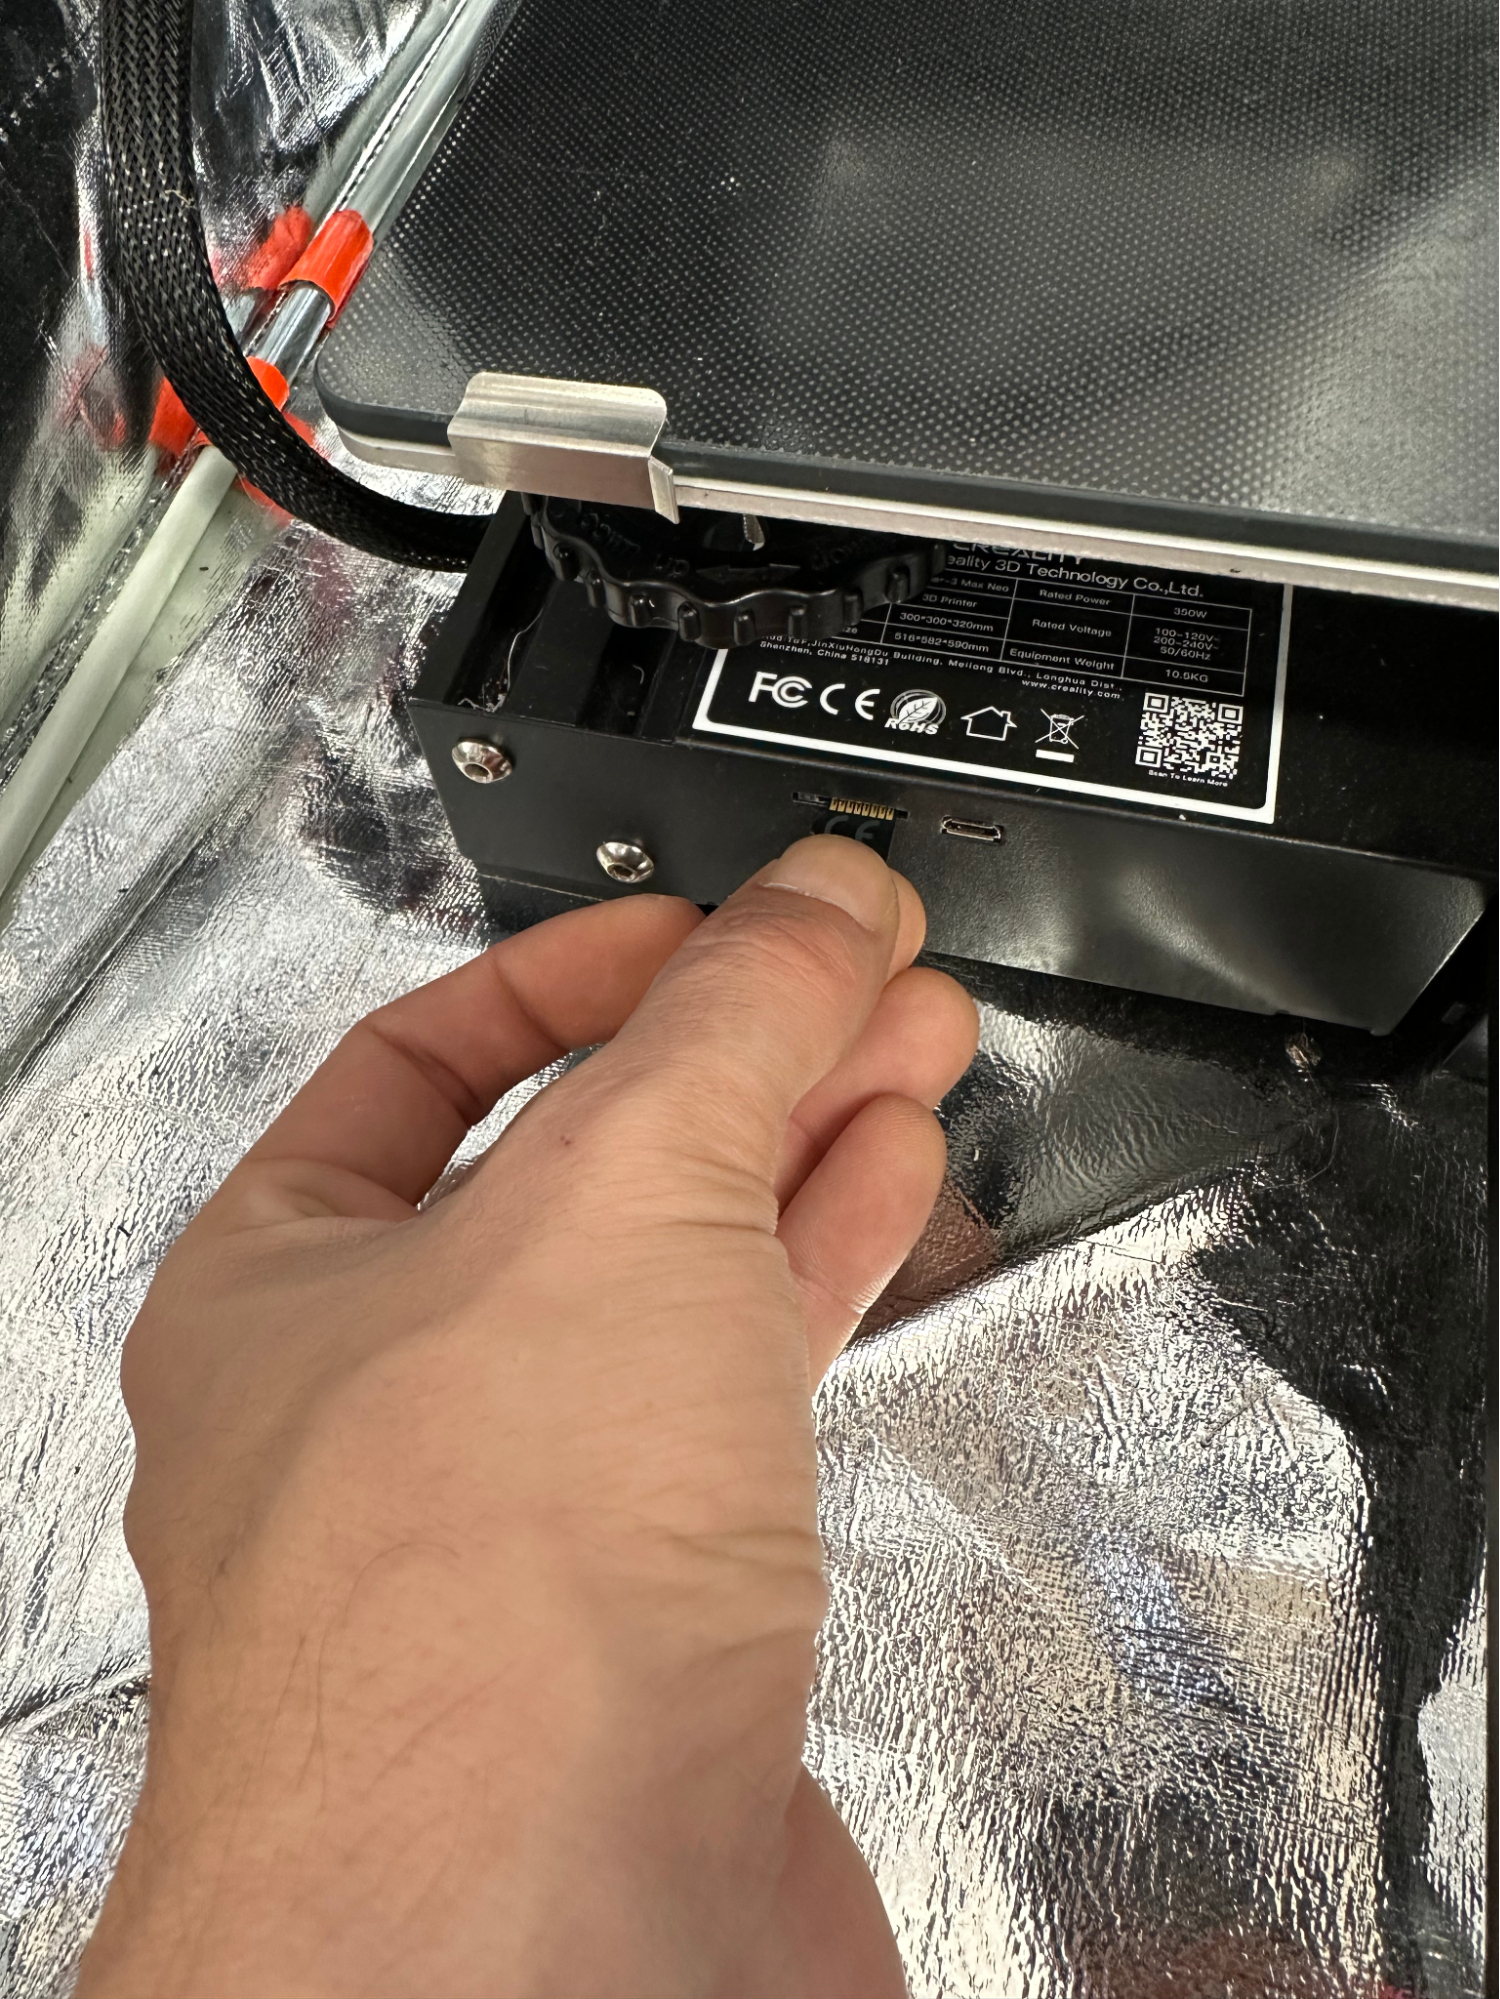
Now We Can Insert the Mini SD
Insert the mini-SD card back into the slot on the machine to be able to read print files.
(Tip: Gently push back the print bed if you cannot access the SD slot)
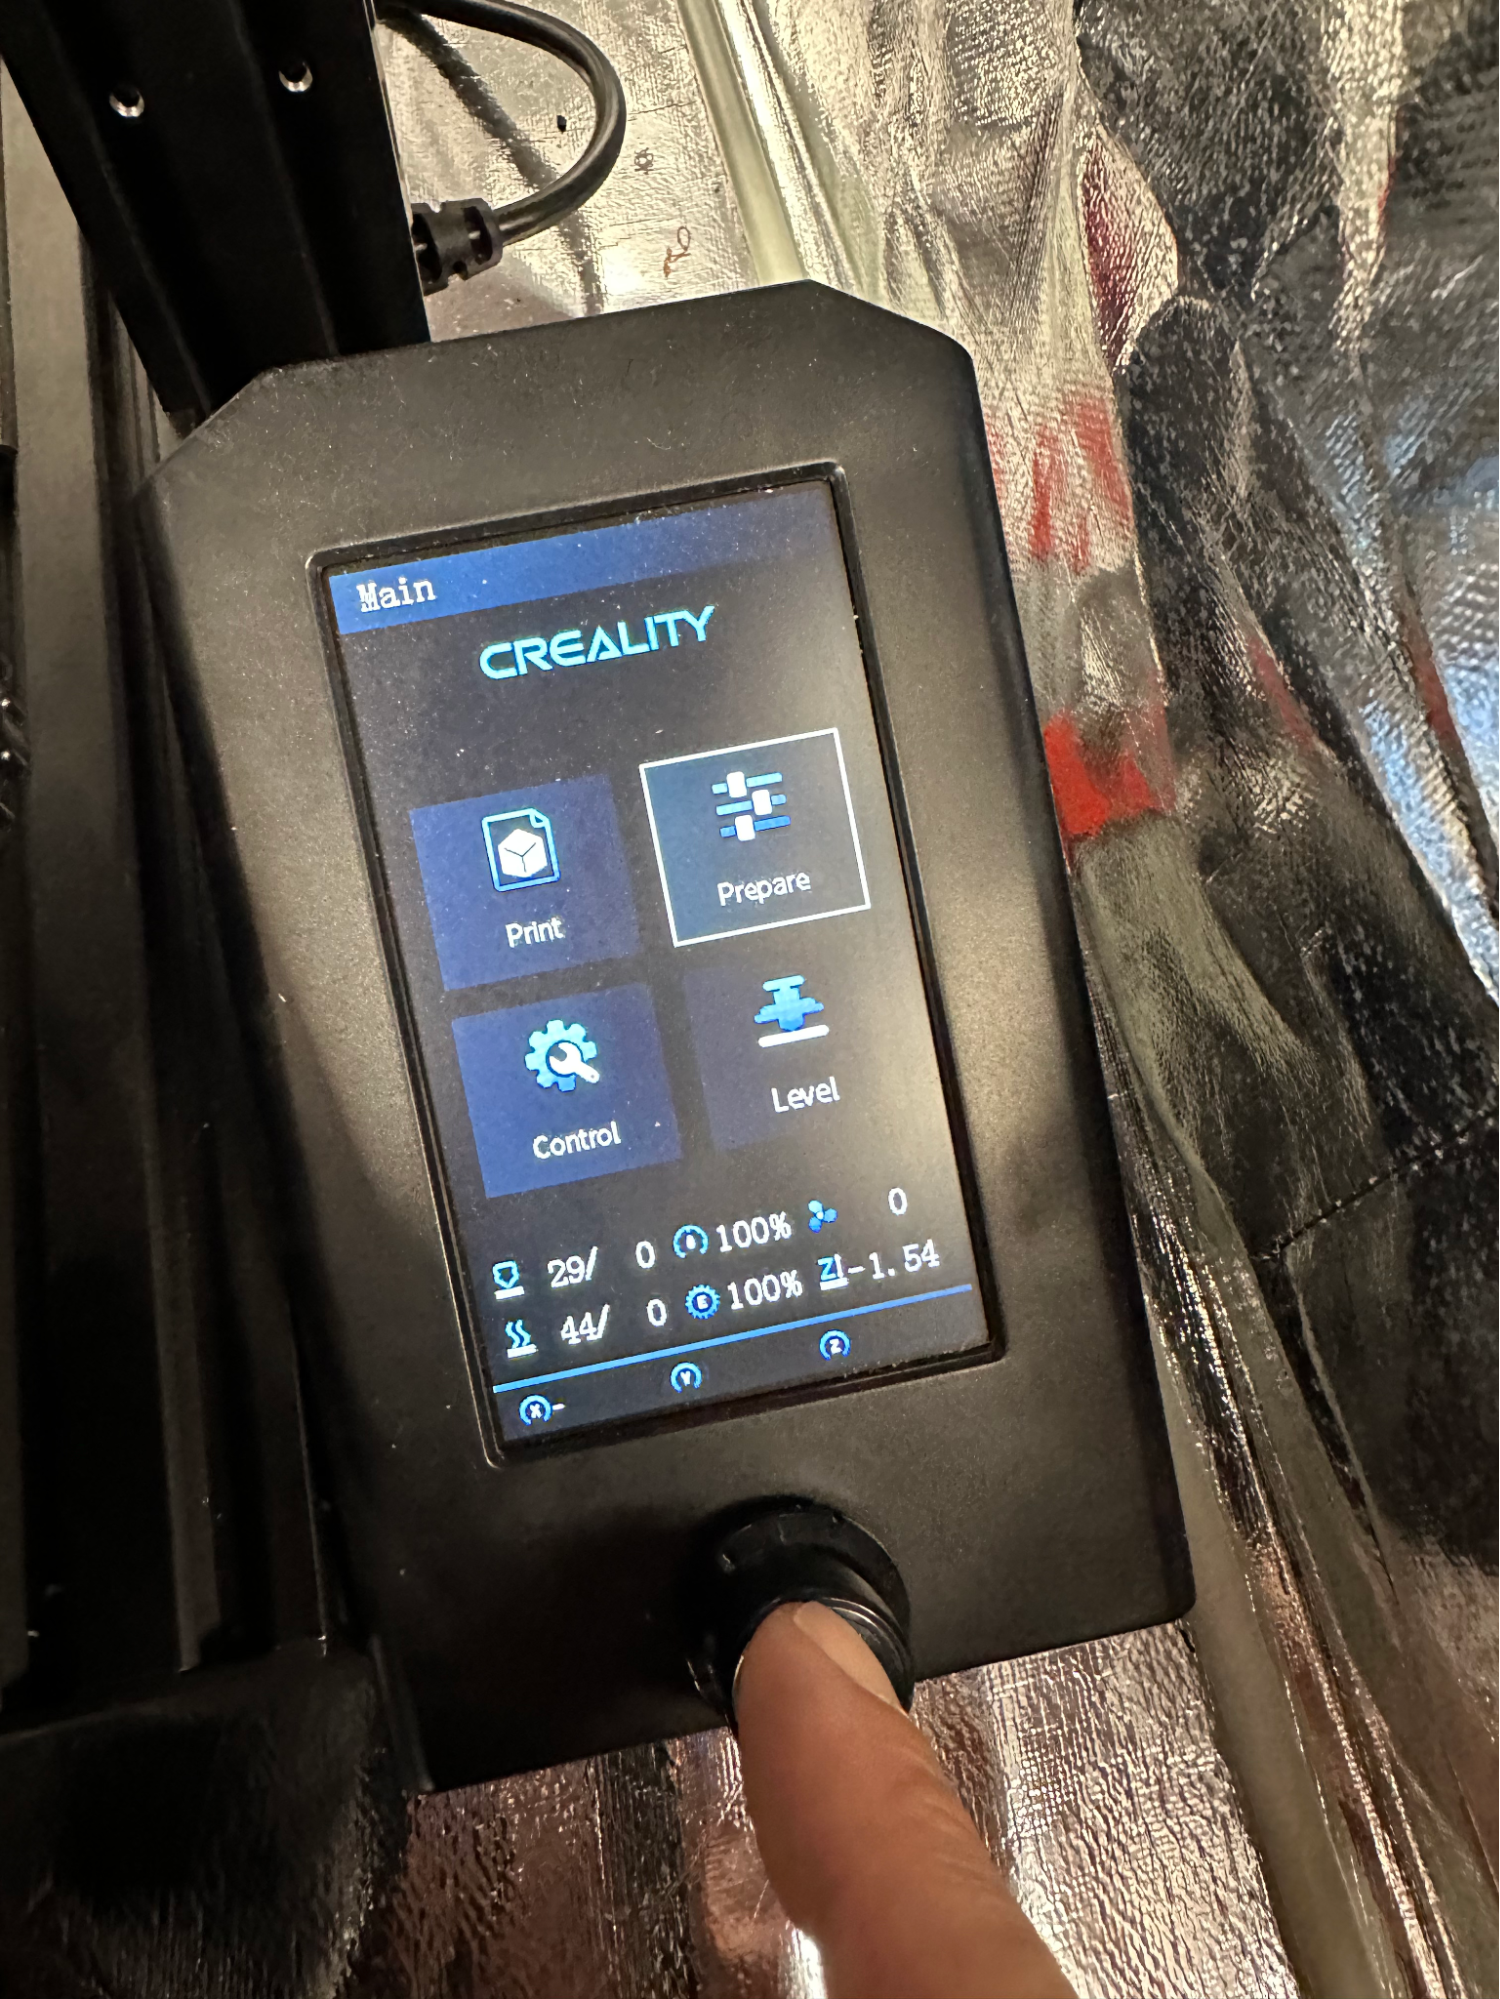
Lets Auto Level the Print Bed
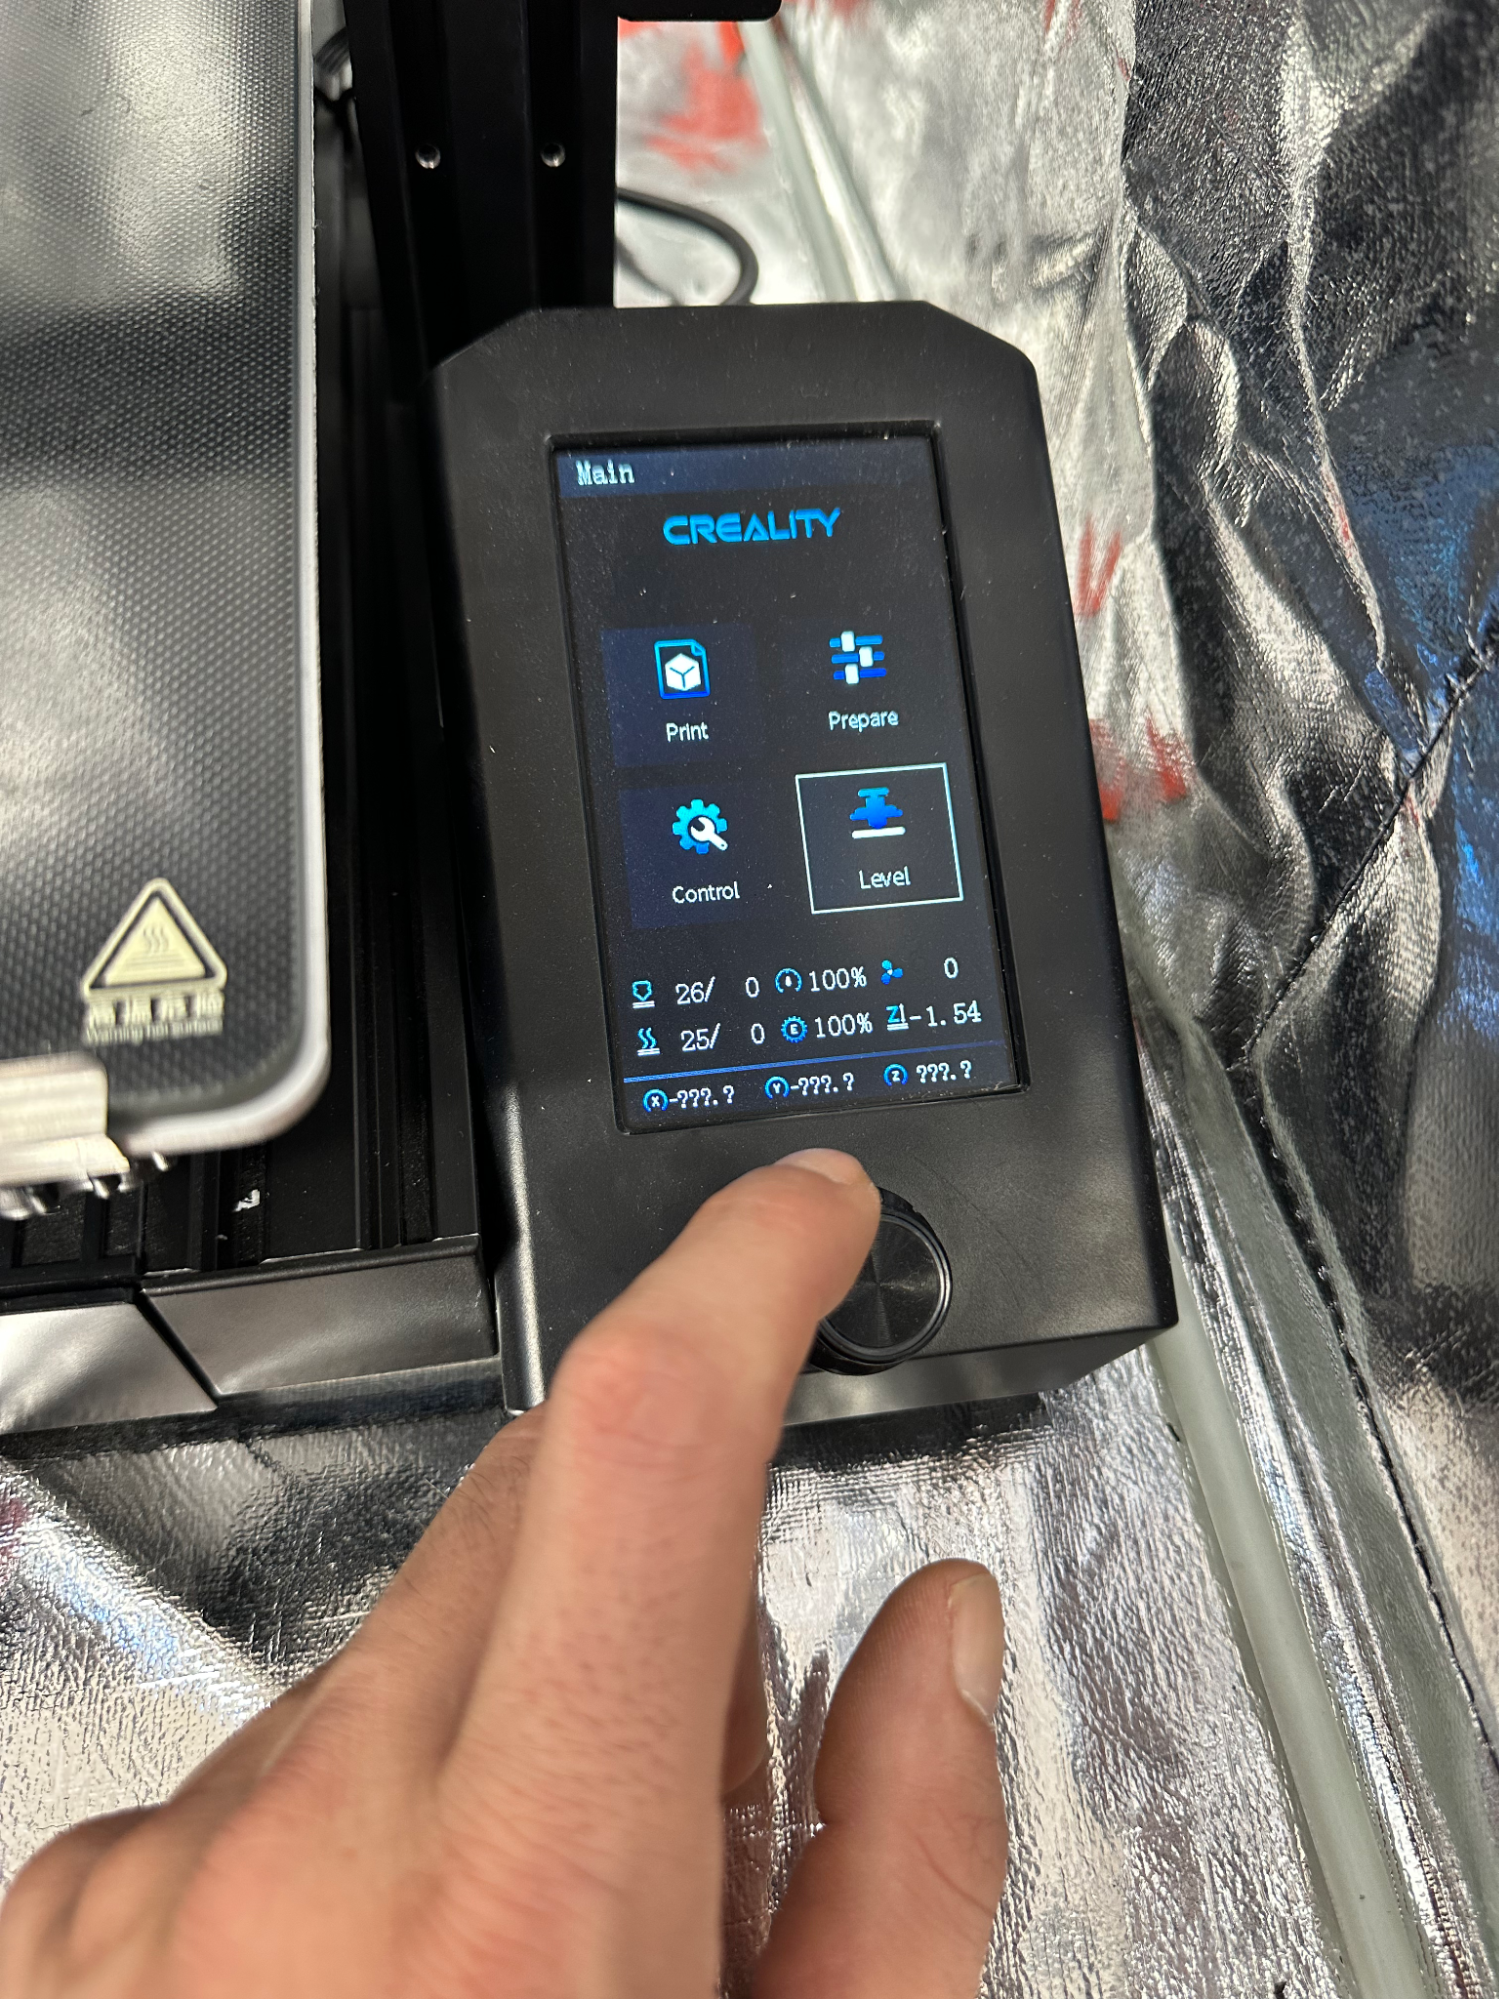
Before running a print, select Level from the main menu. This will do a little bit of auto leveling to help make sure your print adheres to the bed.
Time to Run the Print!
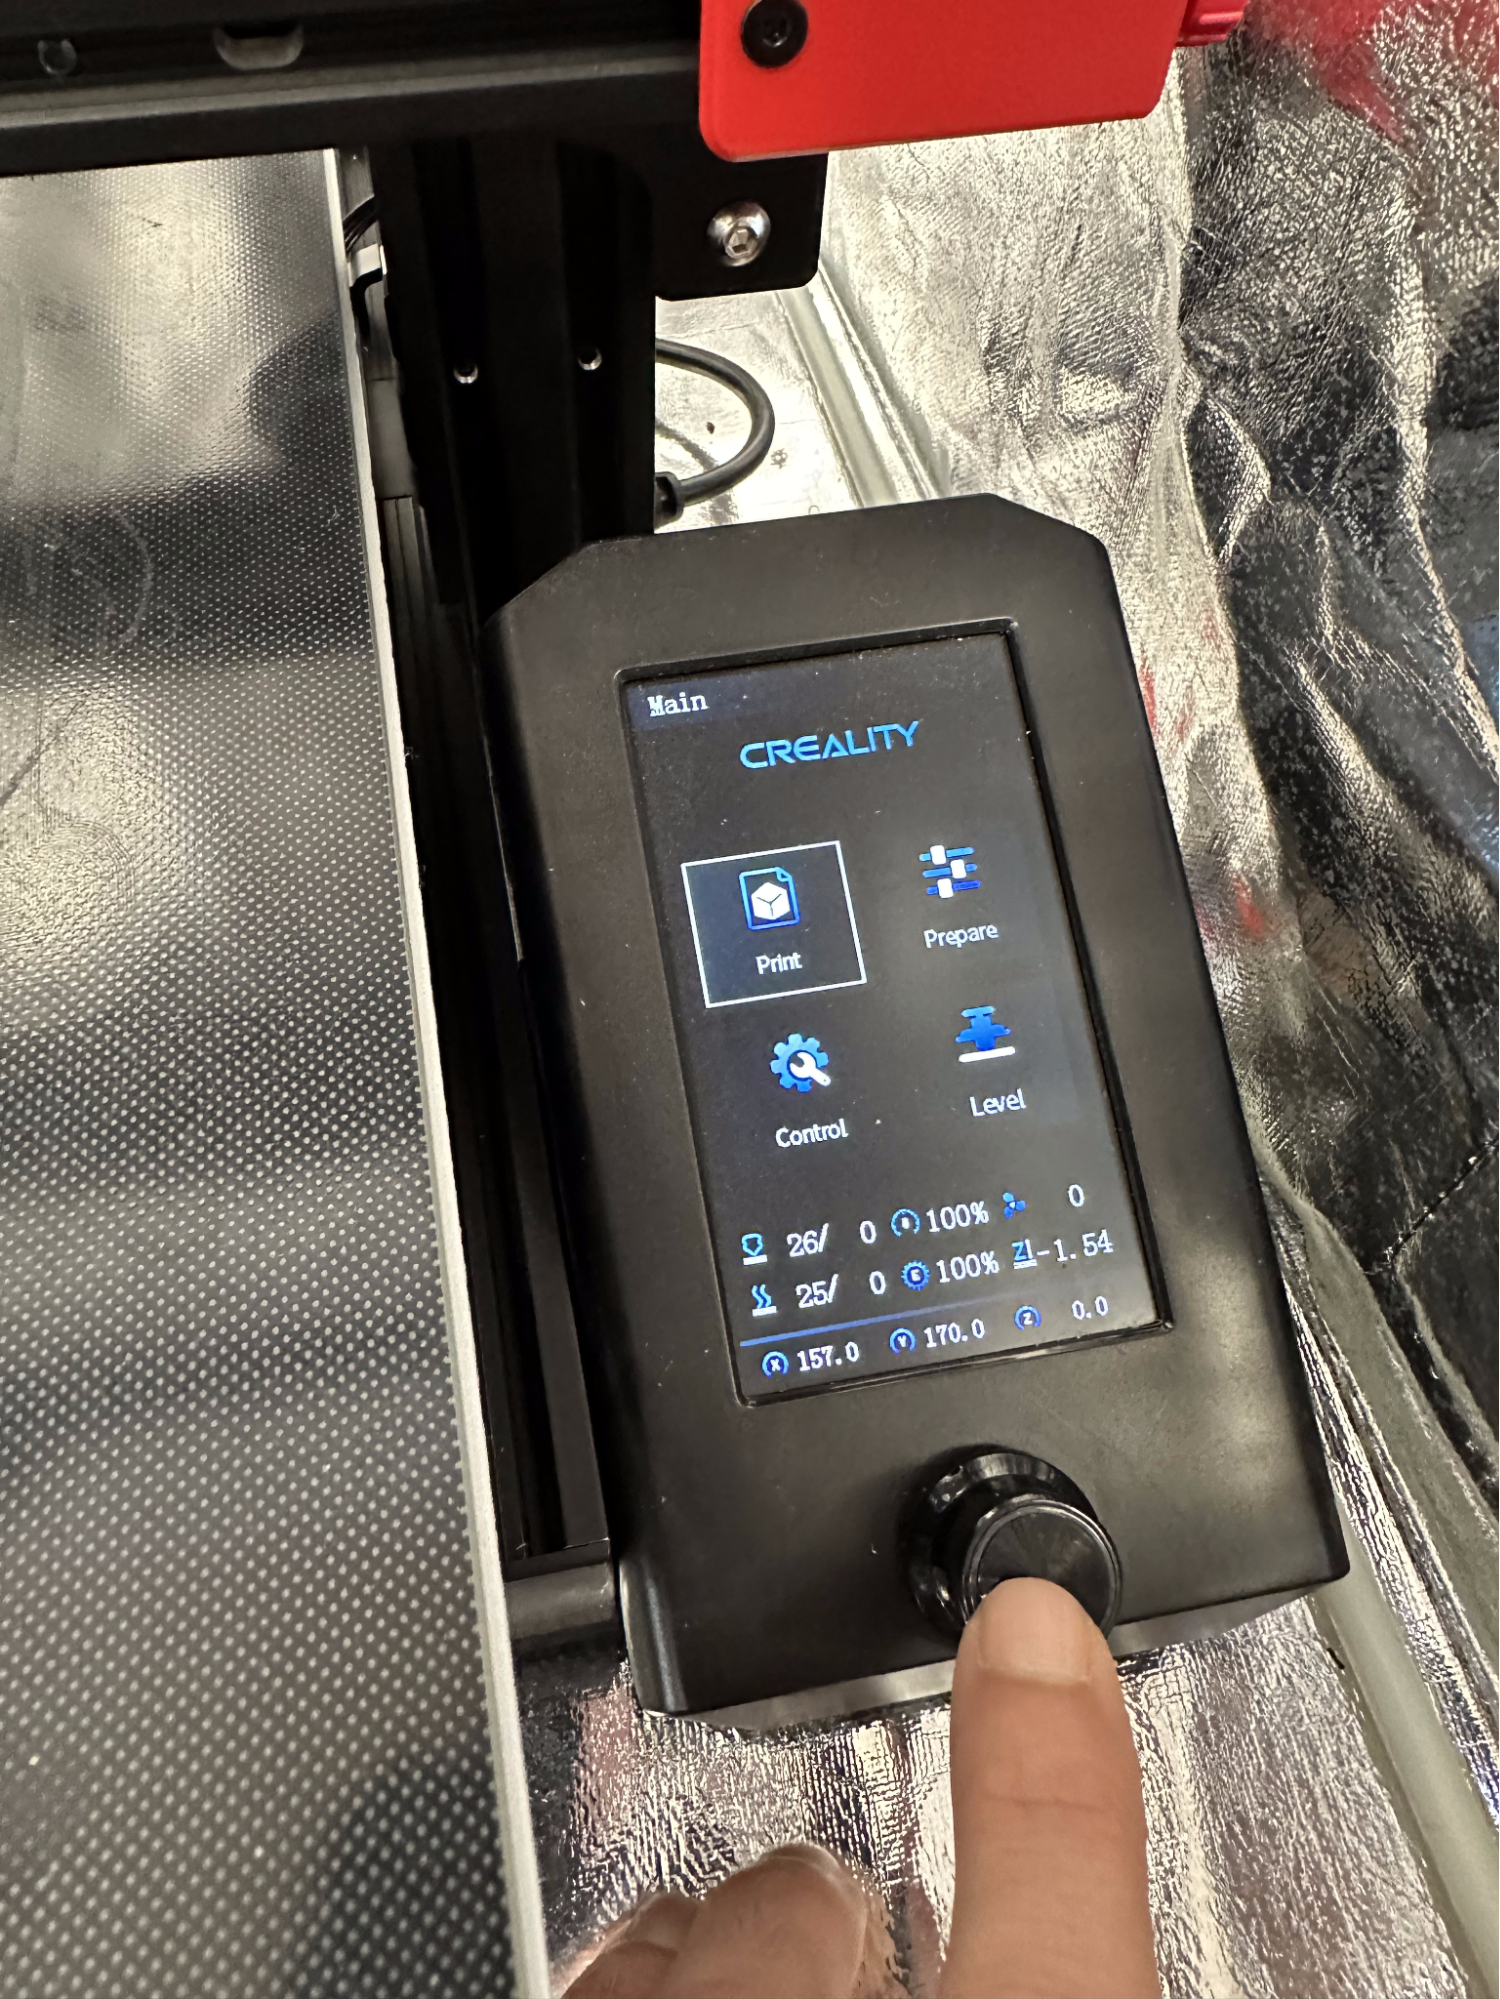
To run the print, select Print from the main menu, select the print with the correct name and press in the knob to print. The printer will now heat up the print bed and then the nozzle to target temperatures. Take caution as these components will now become very hot.
(Tip: Do not touch the print bed as this will deposit oils from your hands and possibly make the print not stick to the bed properly)
You Can Tune the Print As It Goes
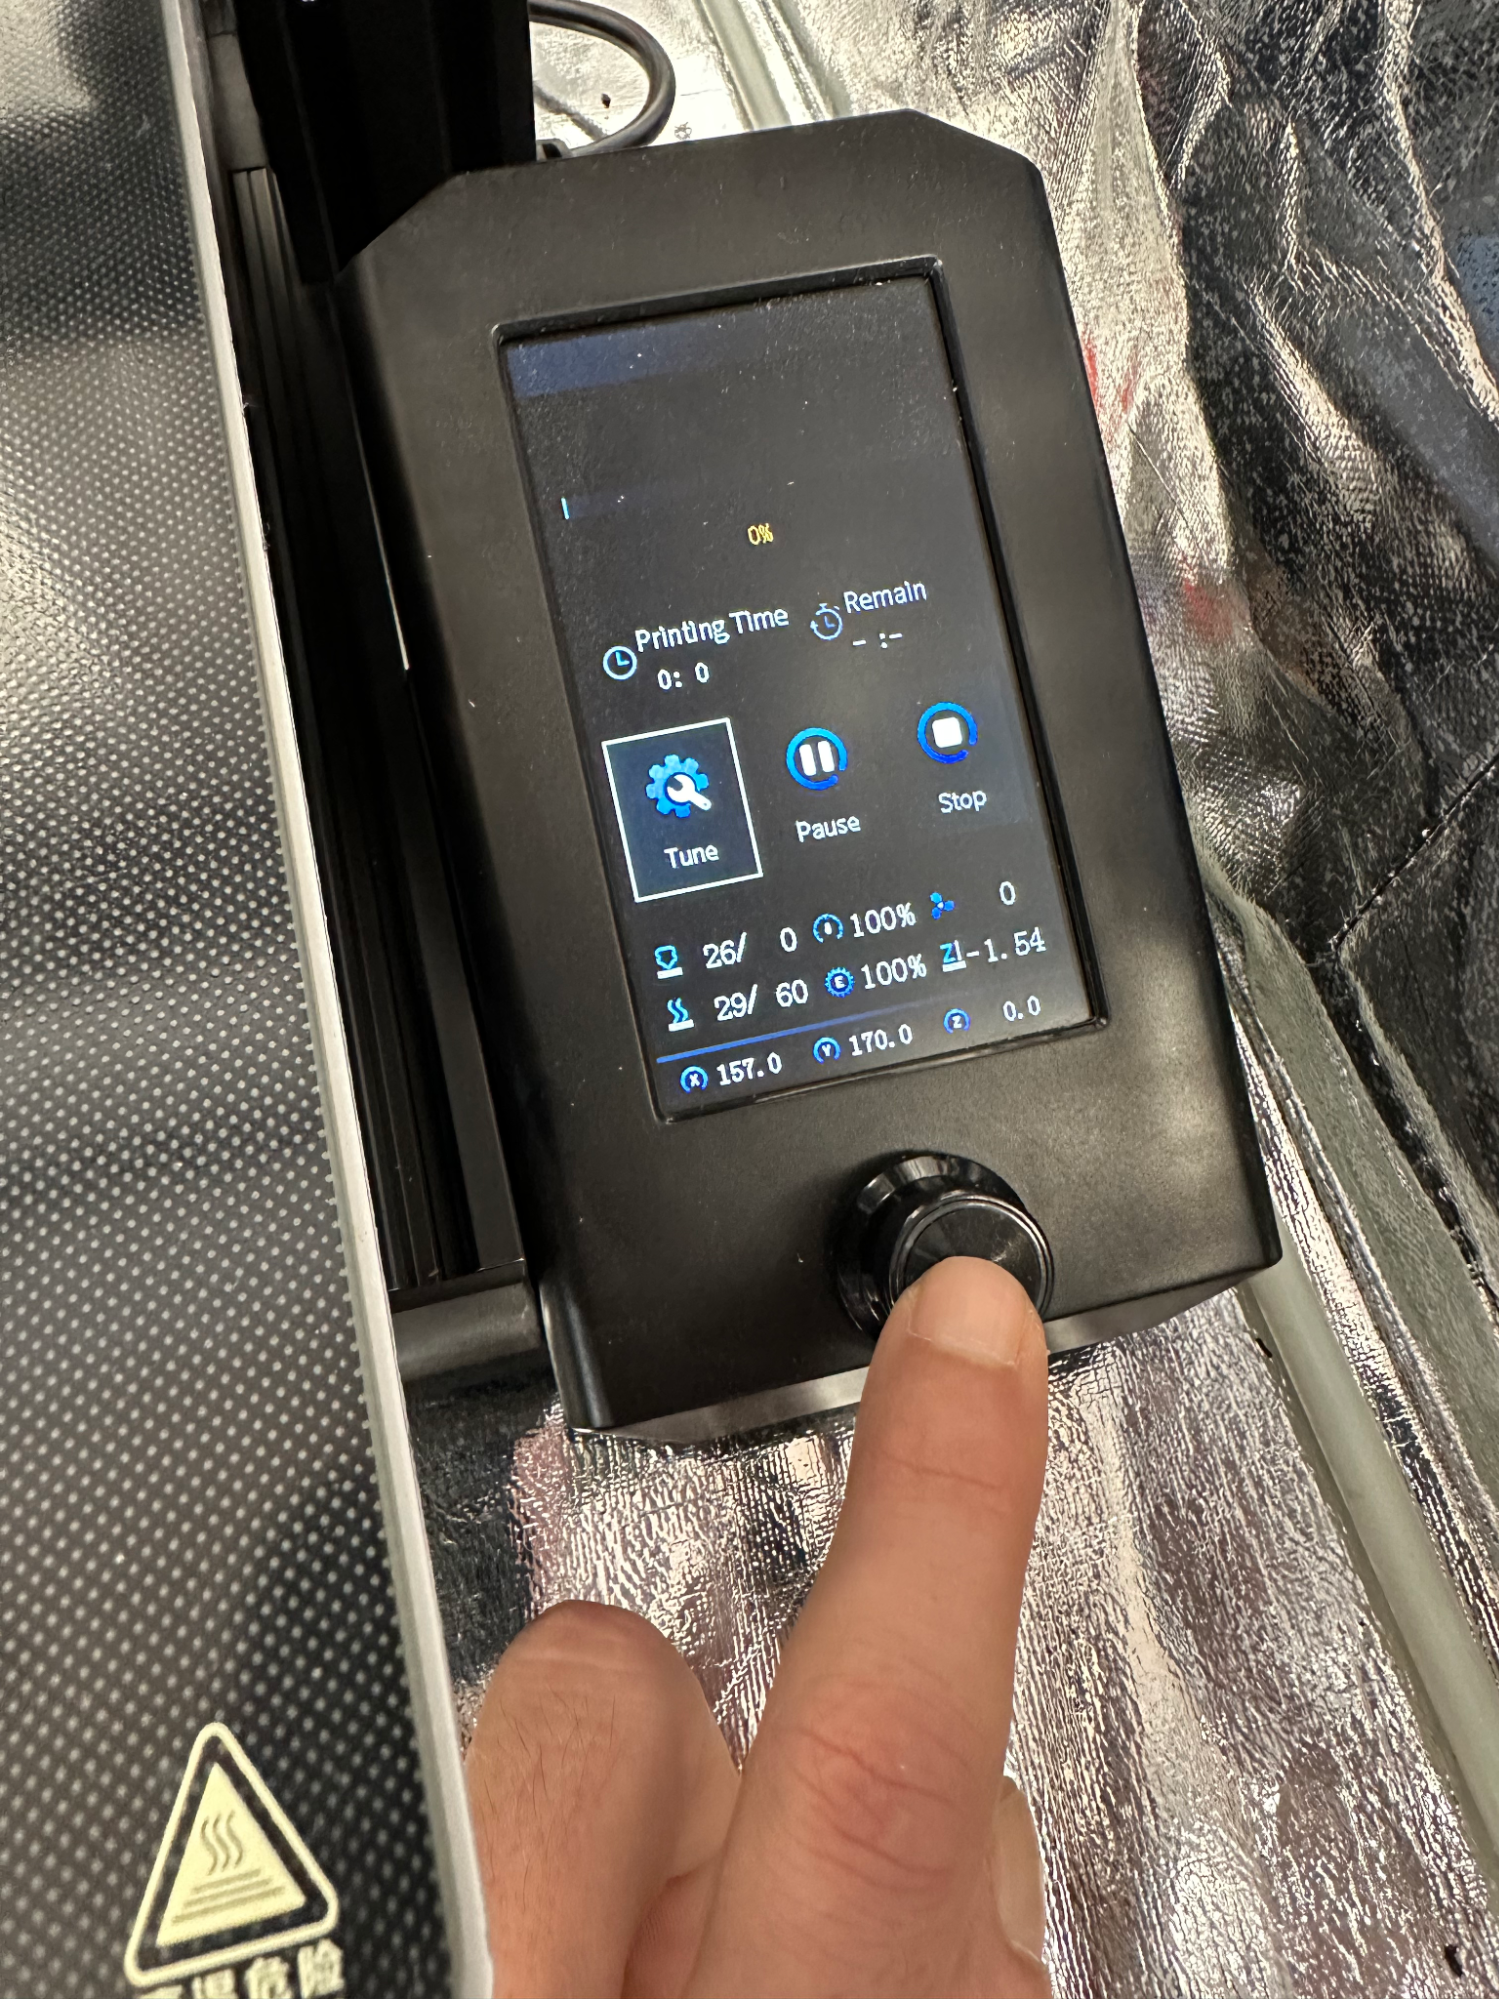
You can tune print settings, pause or stop a print from this menu if needed.
Be Sure to Watch Your Print in the Beginning
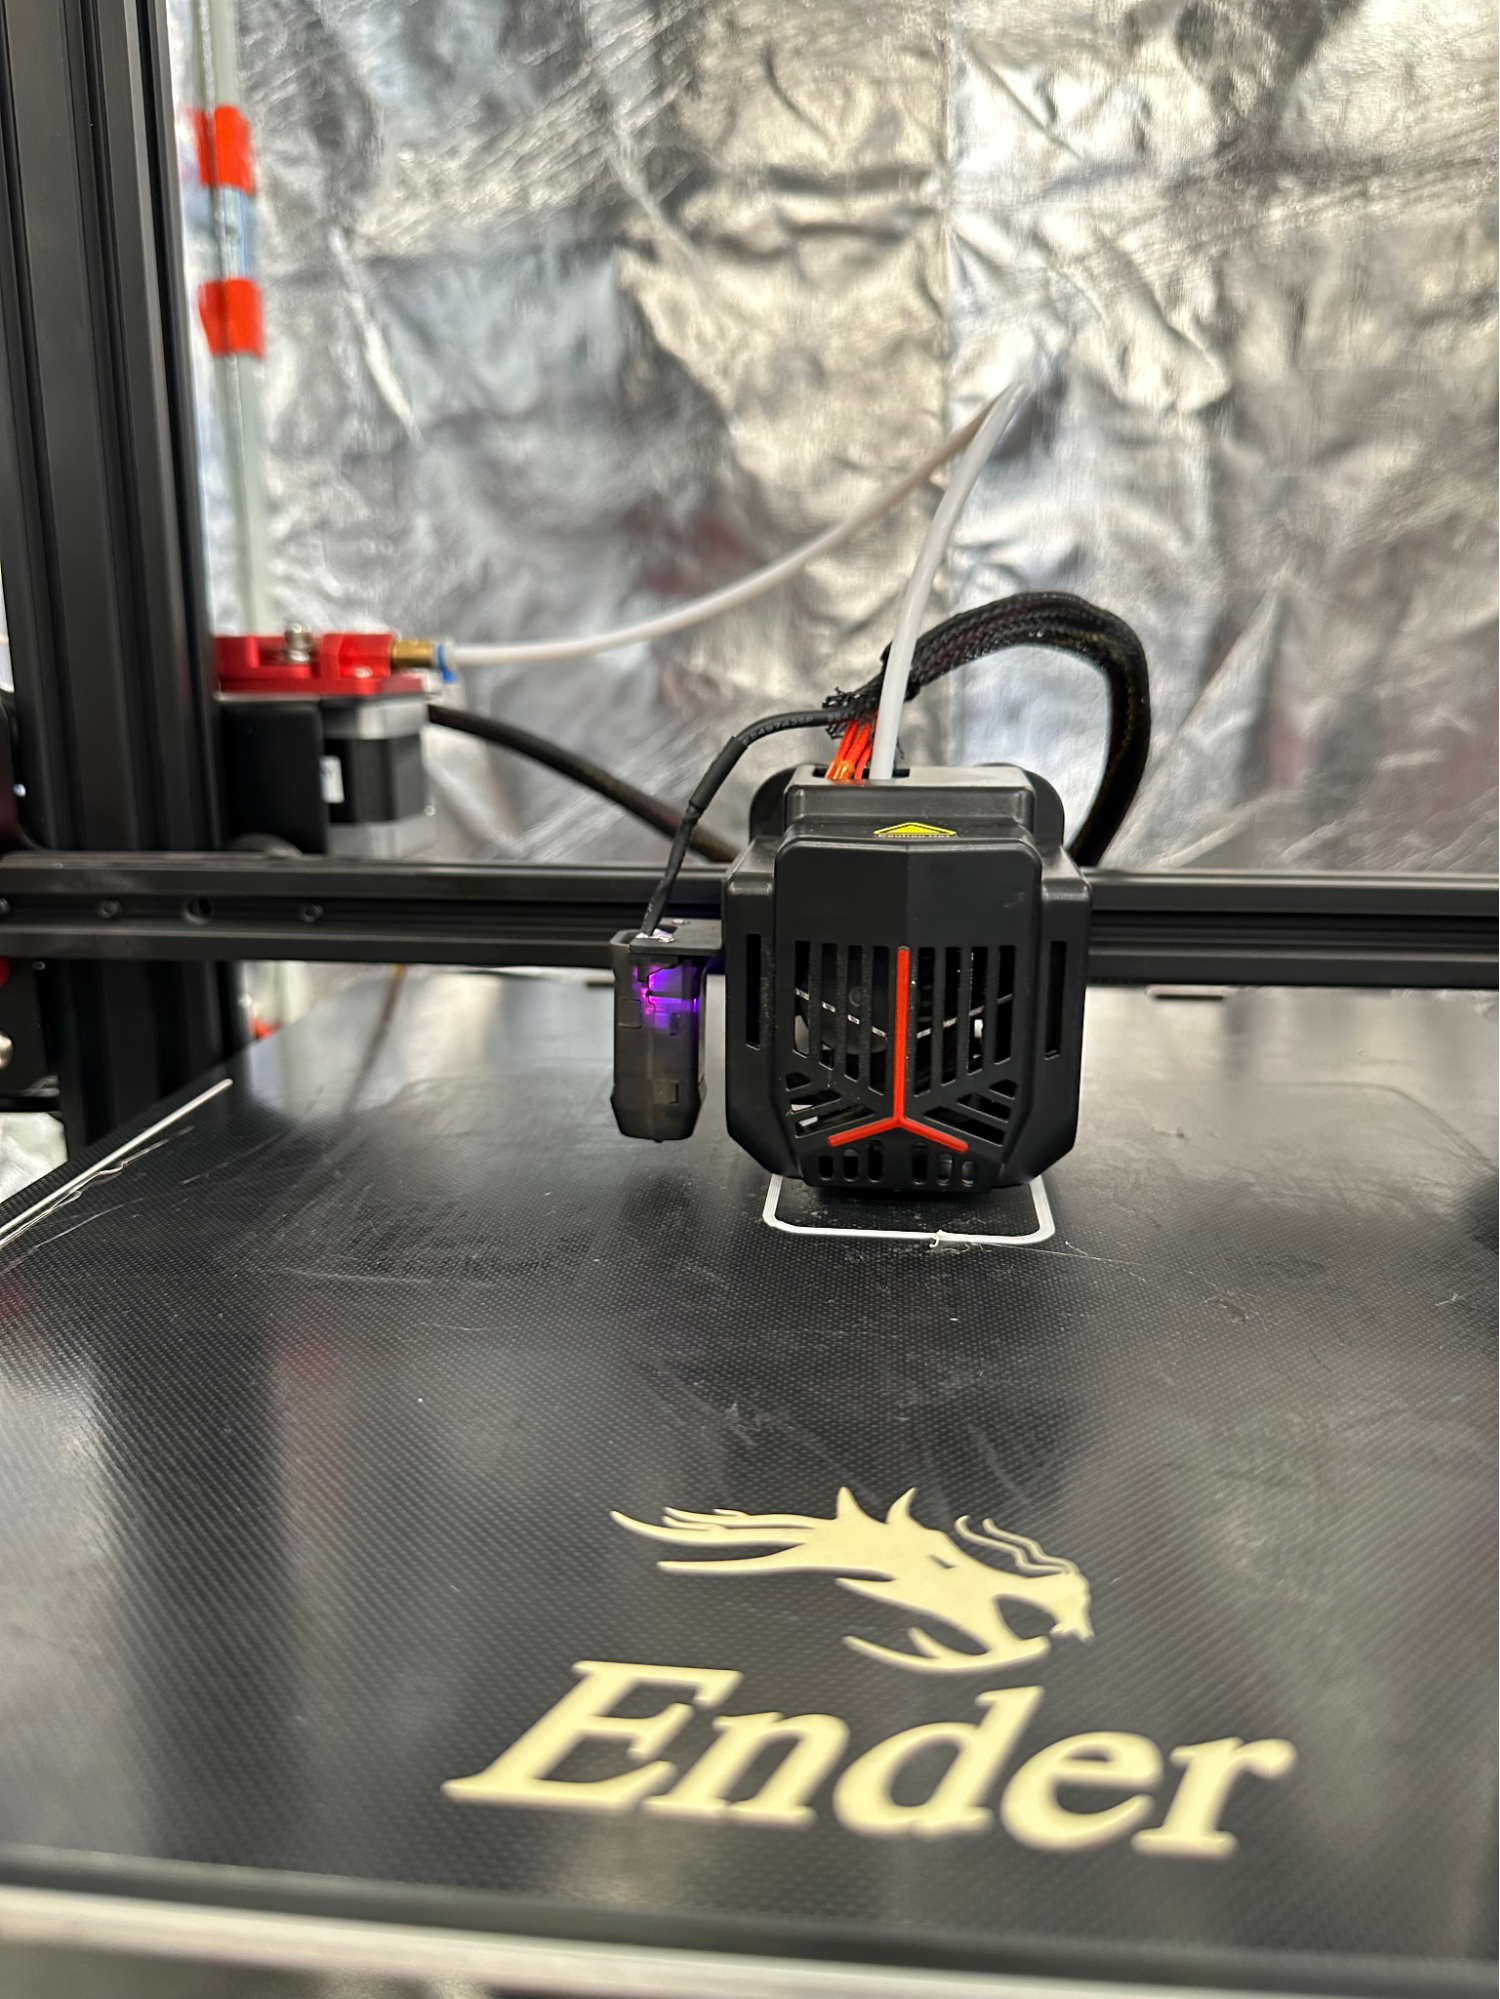
Observe the print for the first 2-3 layers. This is a great time to ensure your print settings are correct and that the print bed is level. You are ensuring the plastic is extruding properly and looking to see a ‘flat noodle’ shape as the plastic filament is deposited onto the print bed.
If for any reason, you think the print isn't running correctly, you can stop the print from the menu, clean off the build plate and try again. Think about whether you need to change settings in Cura and start the process over and save it again to the mini SD card and try again!
(Tip: If the print bed seems to be unlevel, ask a makerspace technician to assist you in leveling the print bed.)
When It Finishes, We Can Remove the Model From the Build Plate
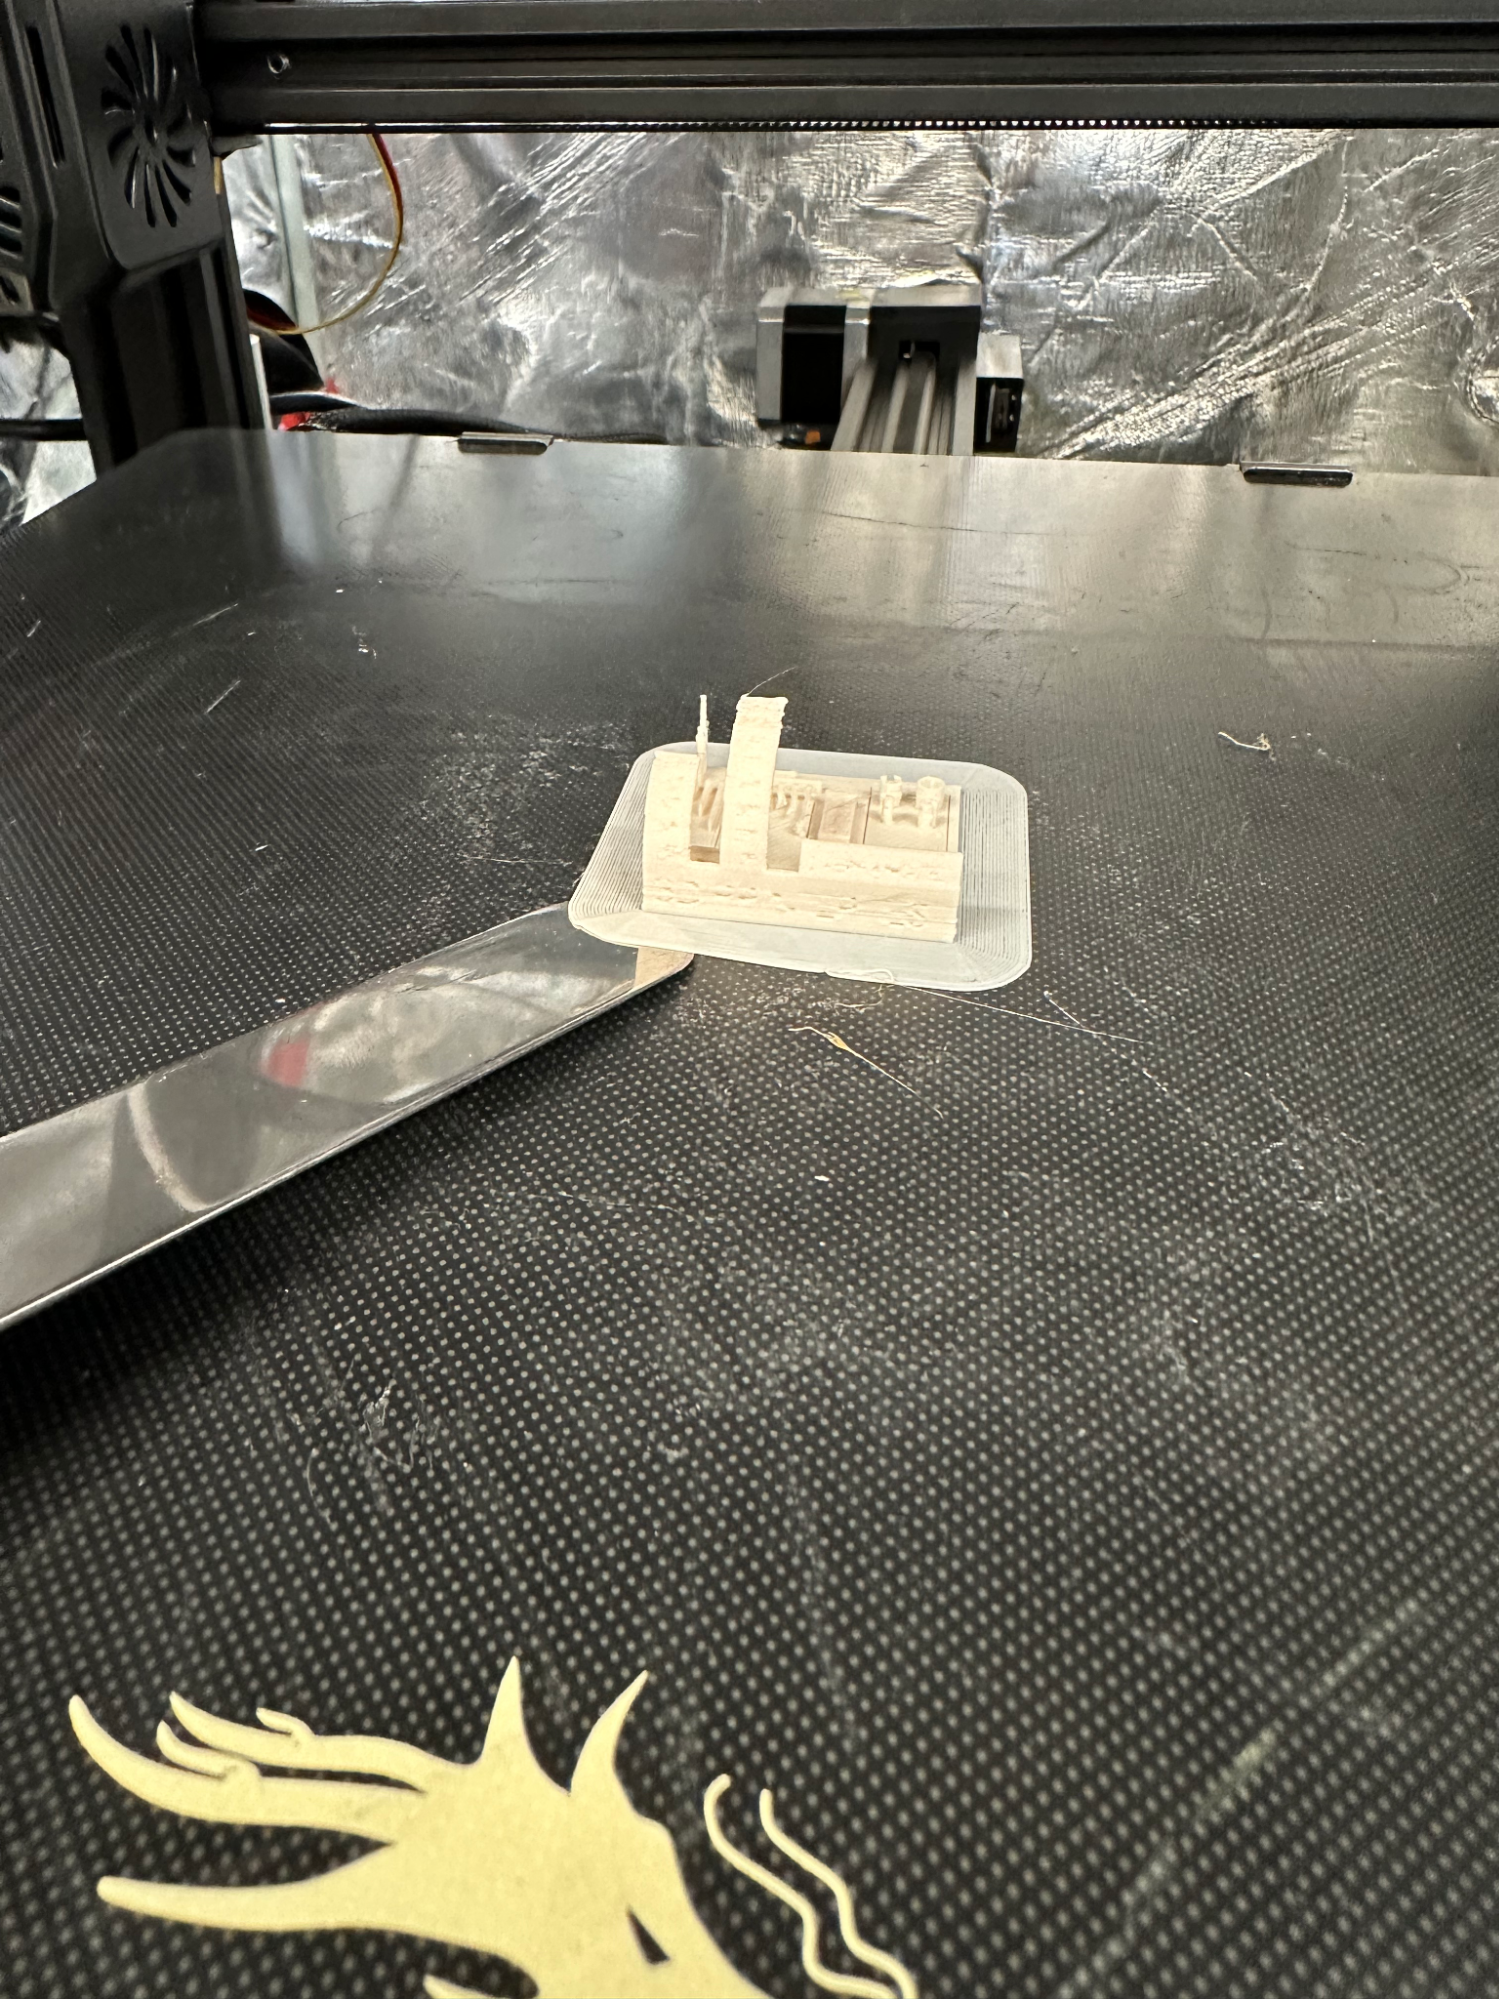
When your print finishes, try and remove the print, if it is hard to remove, use a rounded putty knife(located in the side pocket of the 3D printer covering) to get under the print and pry it off. Be careful not to harm the print bed or your print.
Let's Go Over How to Change the Plastic Filament
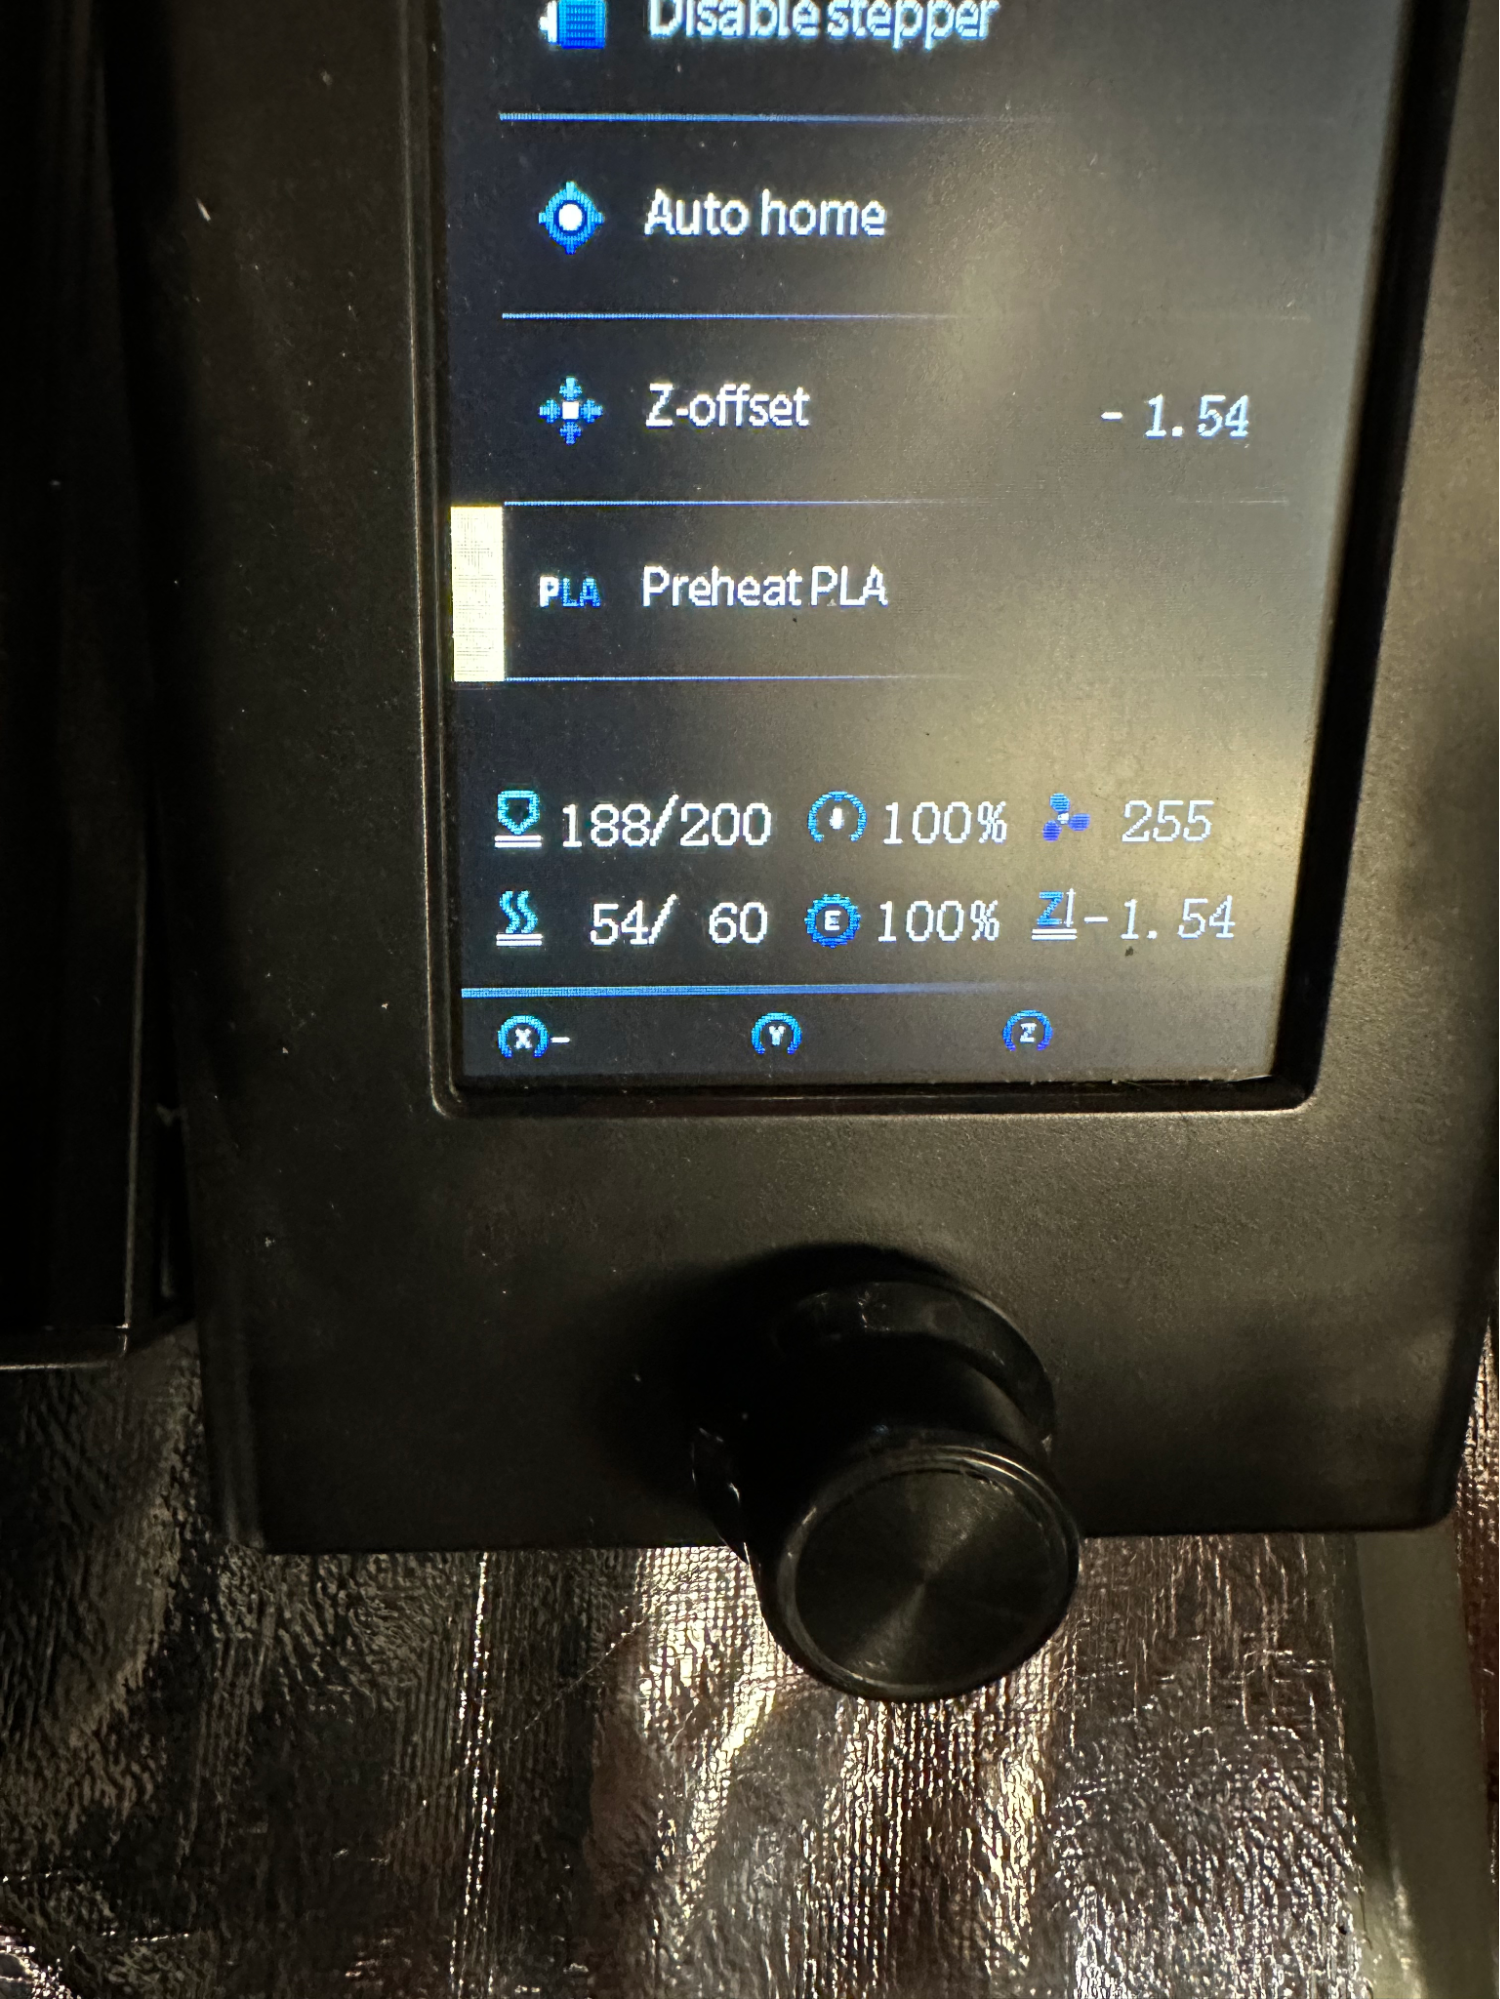
From the main menu, select Prepare>Preheat PLA
( If there is another type of plastic in the printer, look at the side of the plastic roll for suggested temperature or use google to see the correct nozzle temperature for it. Go instead to Control>Temperature >Nozzle temperature and select Nozzle Temperature to manually heat the nozzle for that plastic type.)
Its Important to Wait Until the Nozzle Temperature Has Reached Its Target
Wait for the nozzle temperature to reach it’s target temp..
We Can Then Start to Remove the Filament
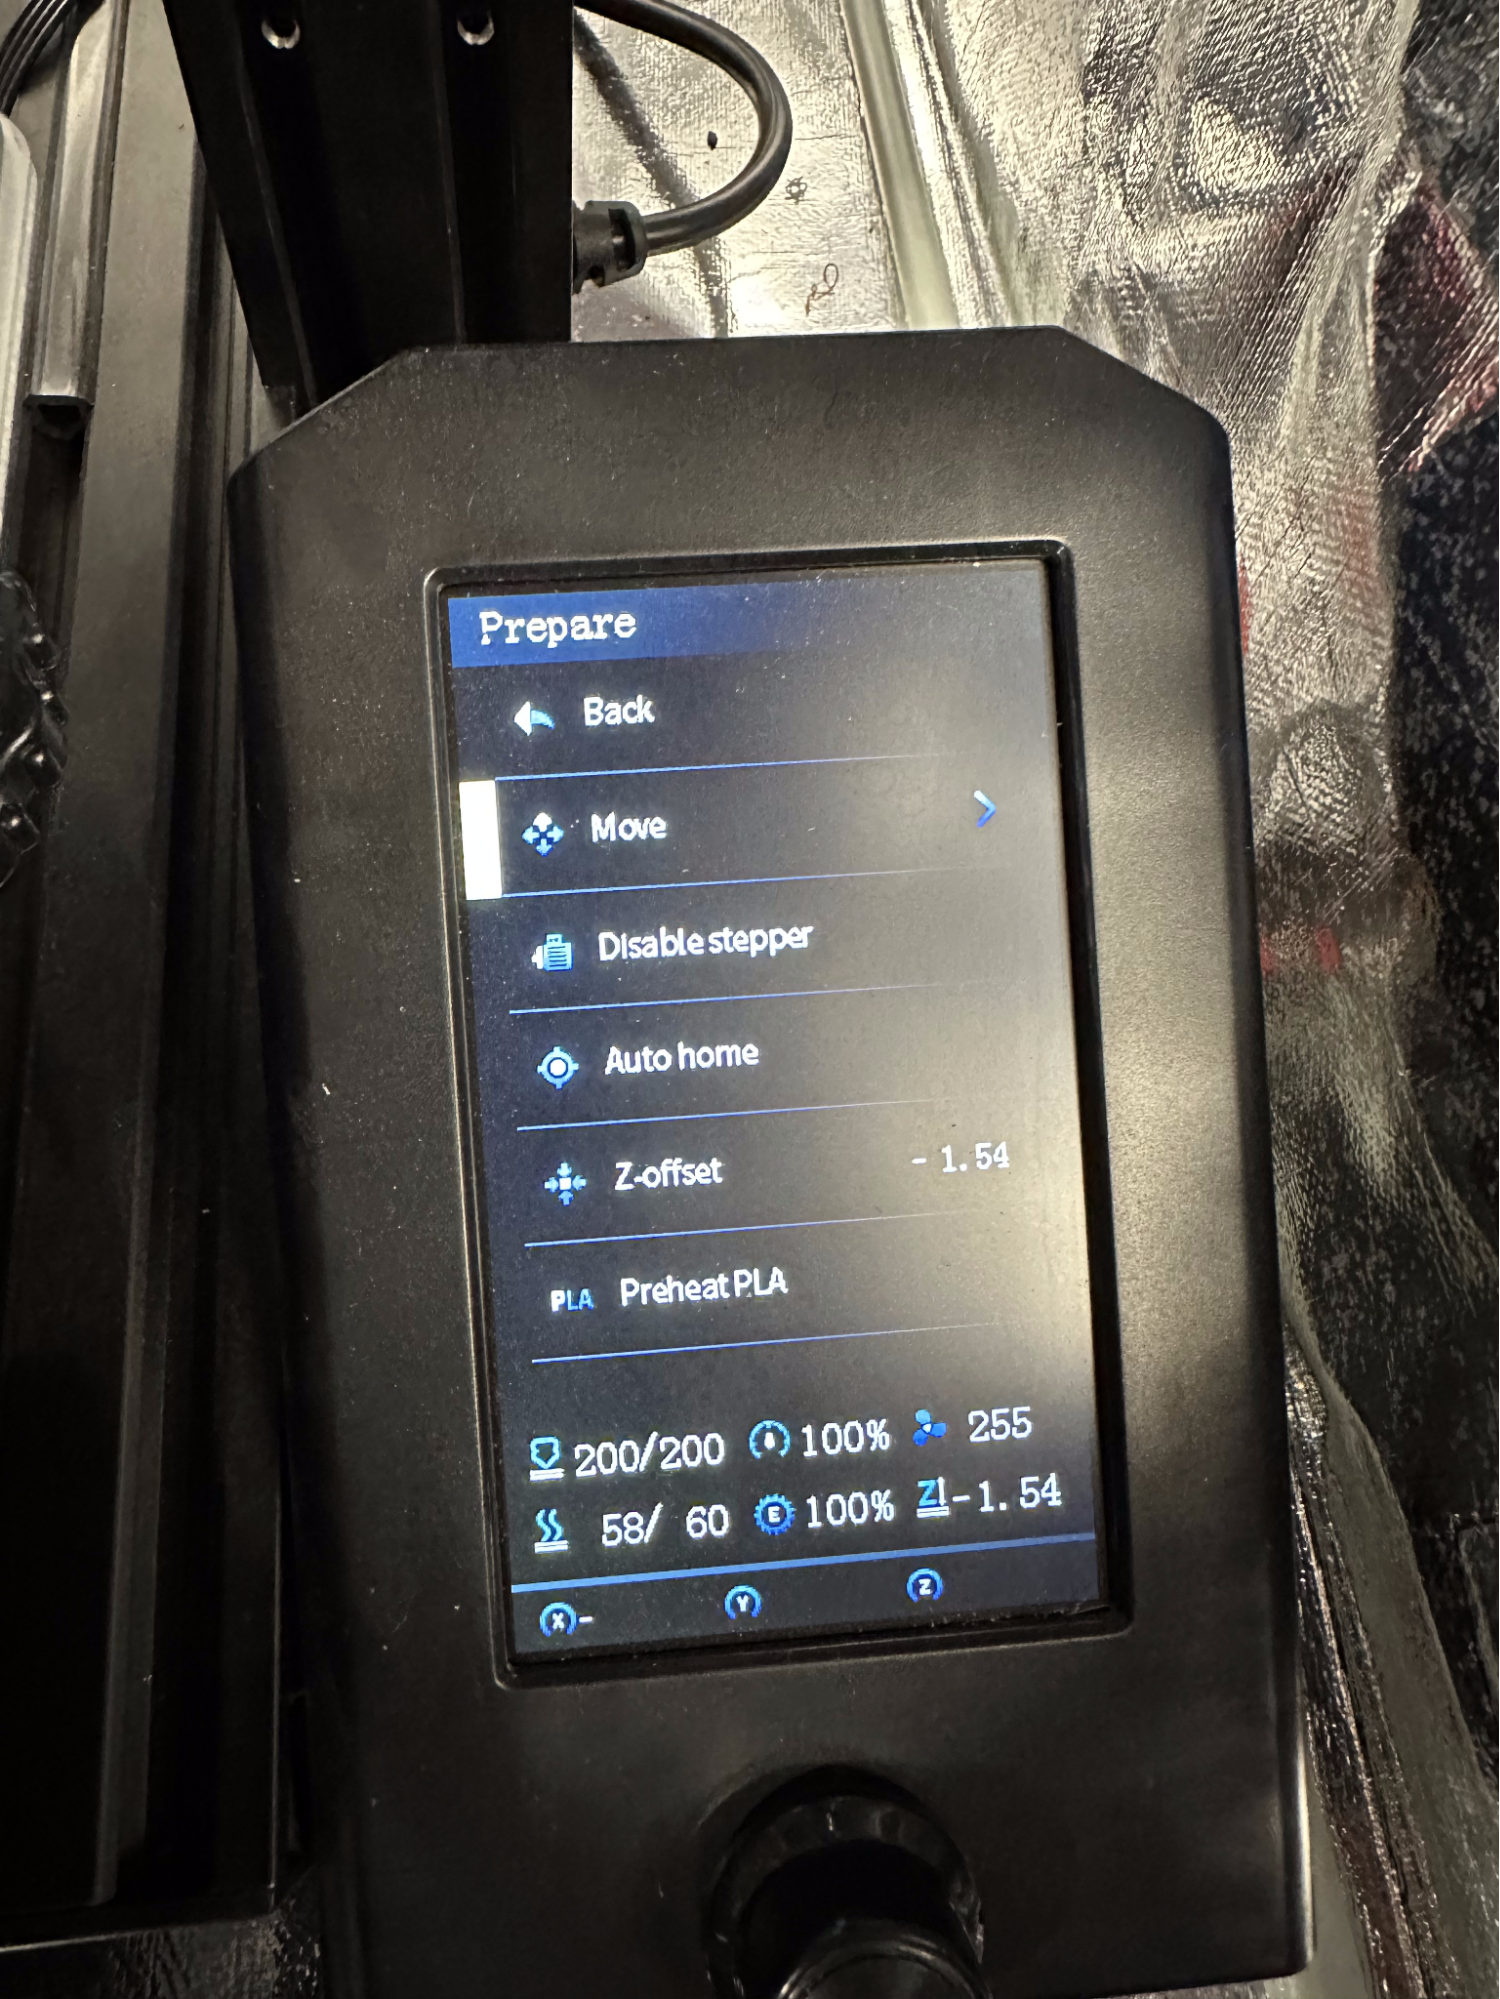
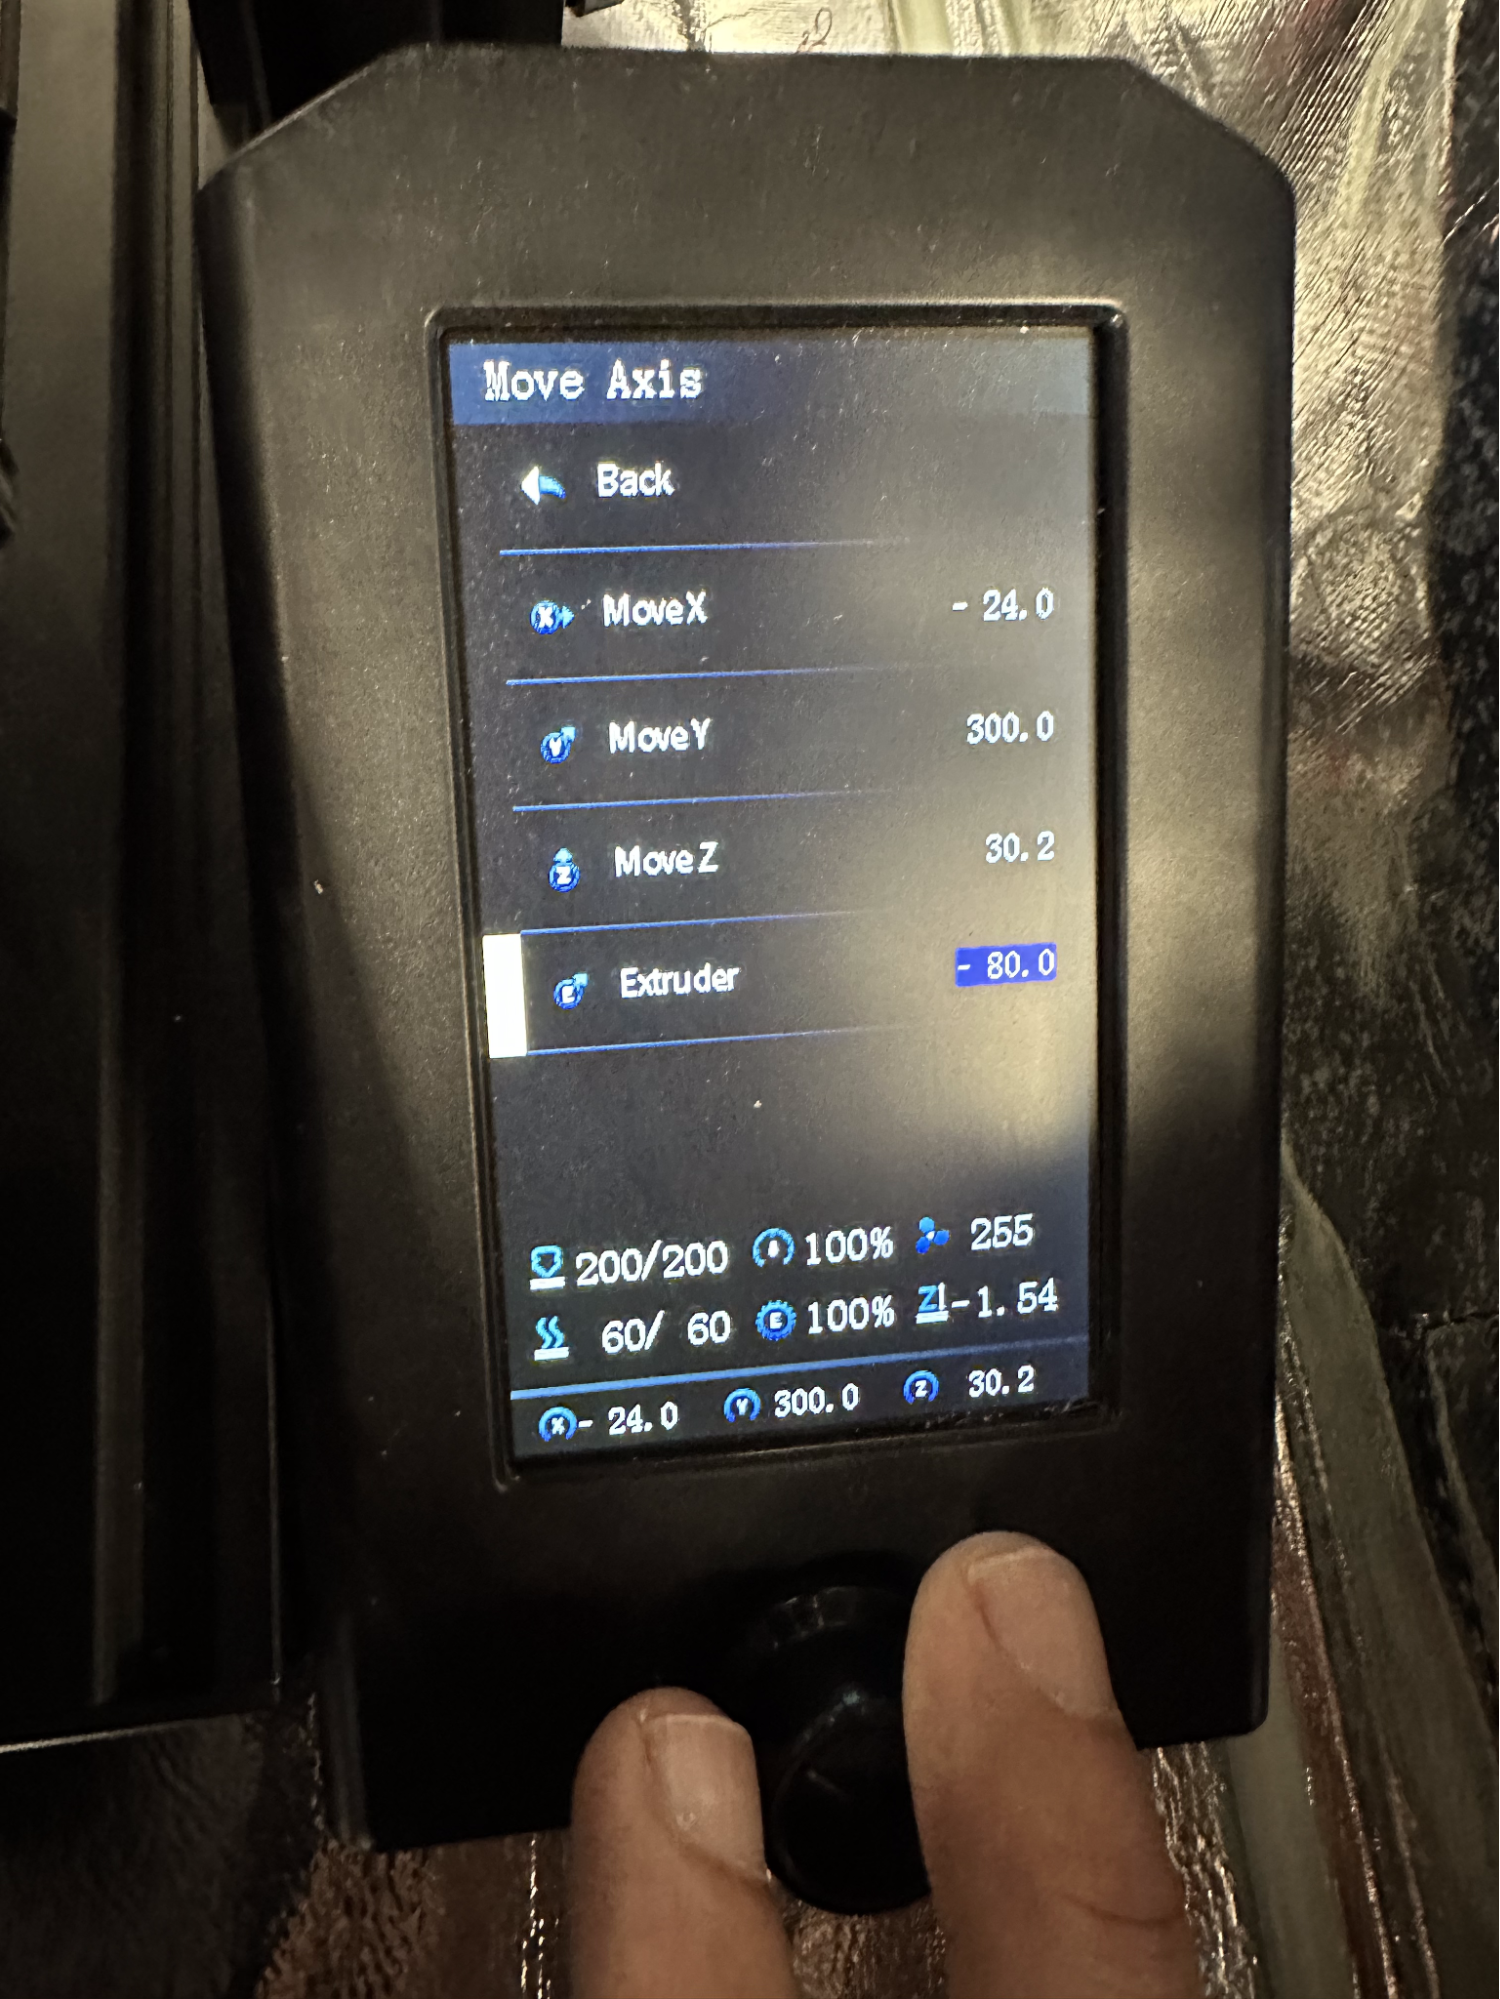
From the main menu, select Control>Move>Extruder. Rotate knob counter-clockwise and set the extruder motor to move -80. Wait for the extruder motor to stop moving. Press the knob in and go back to the main menu.
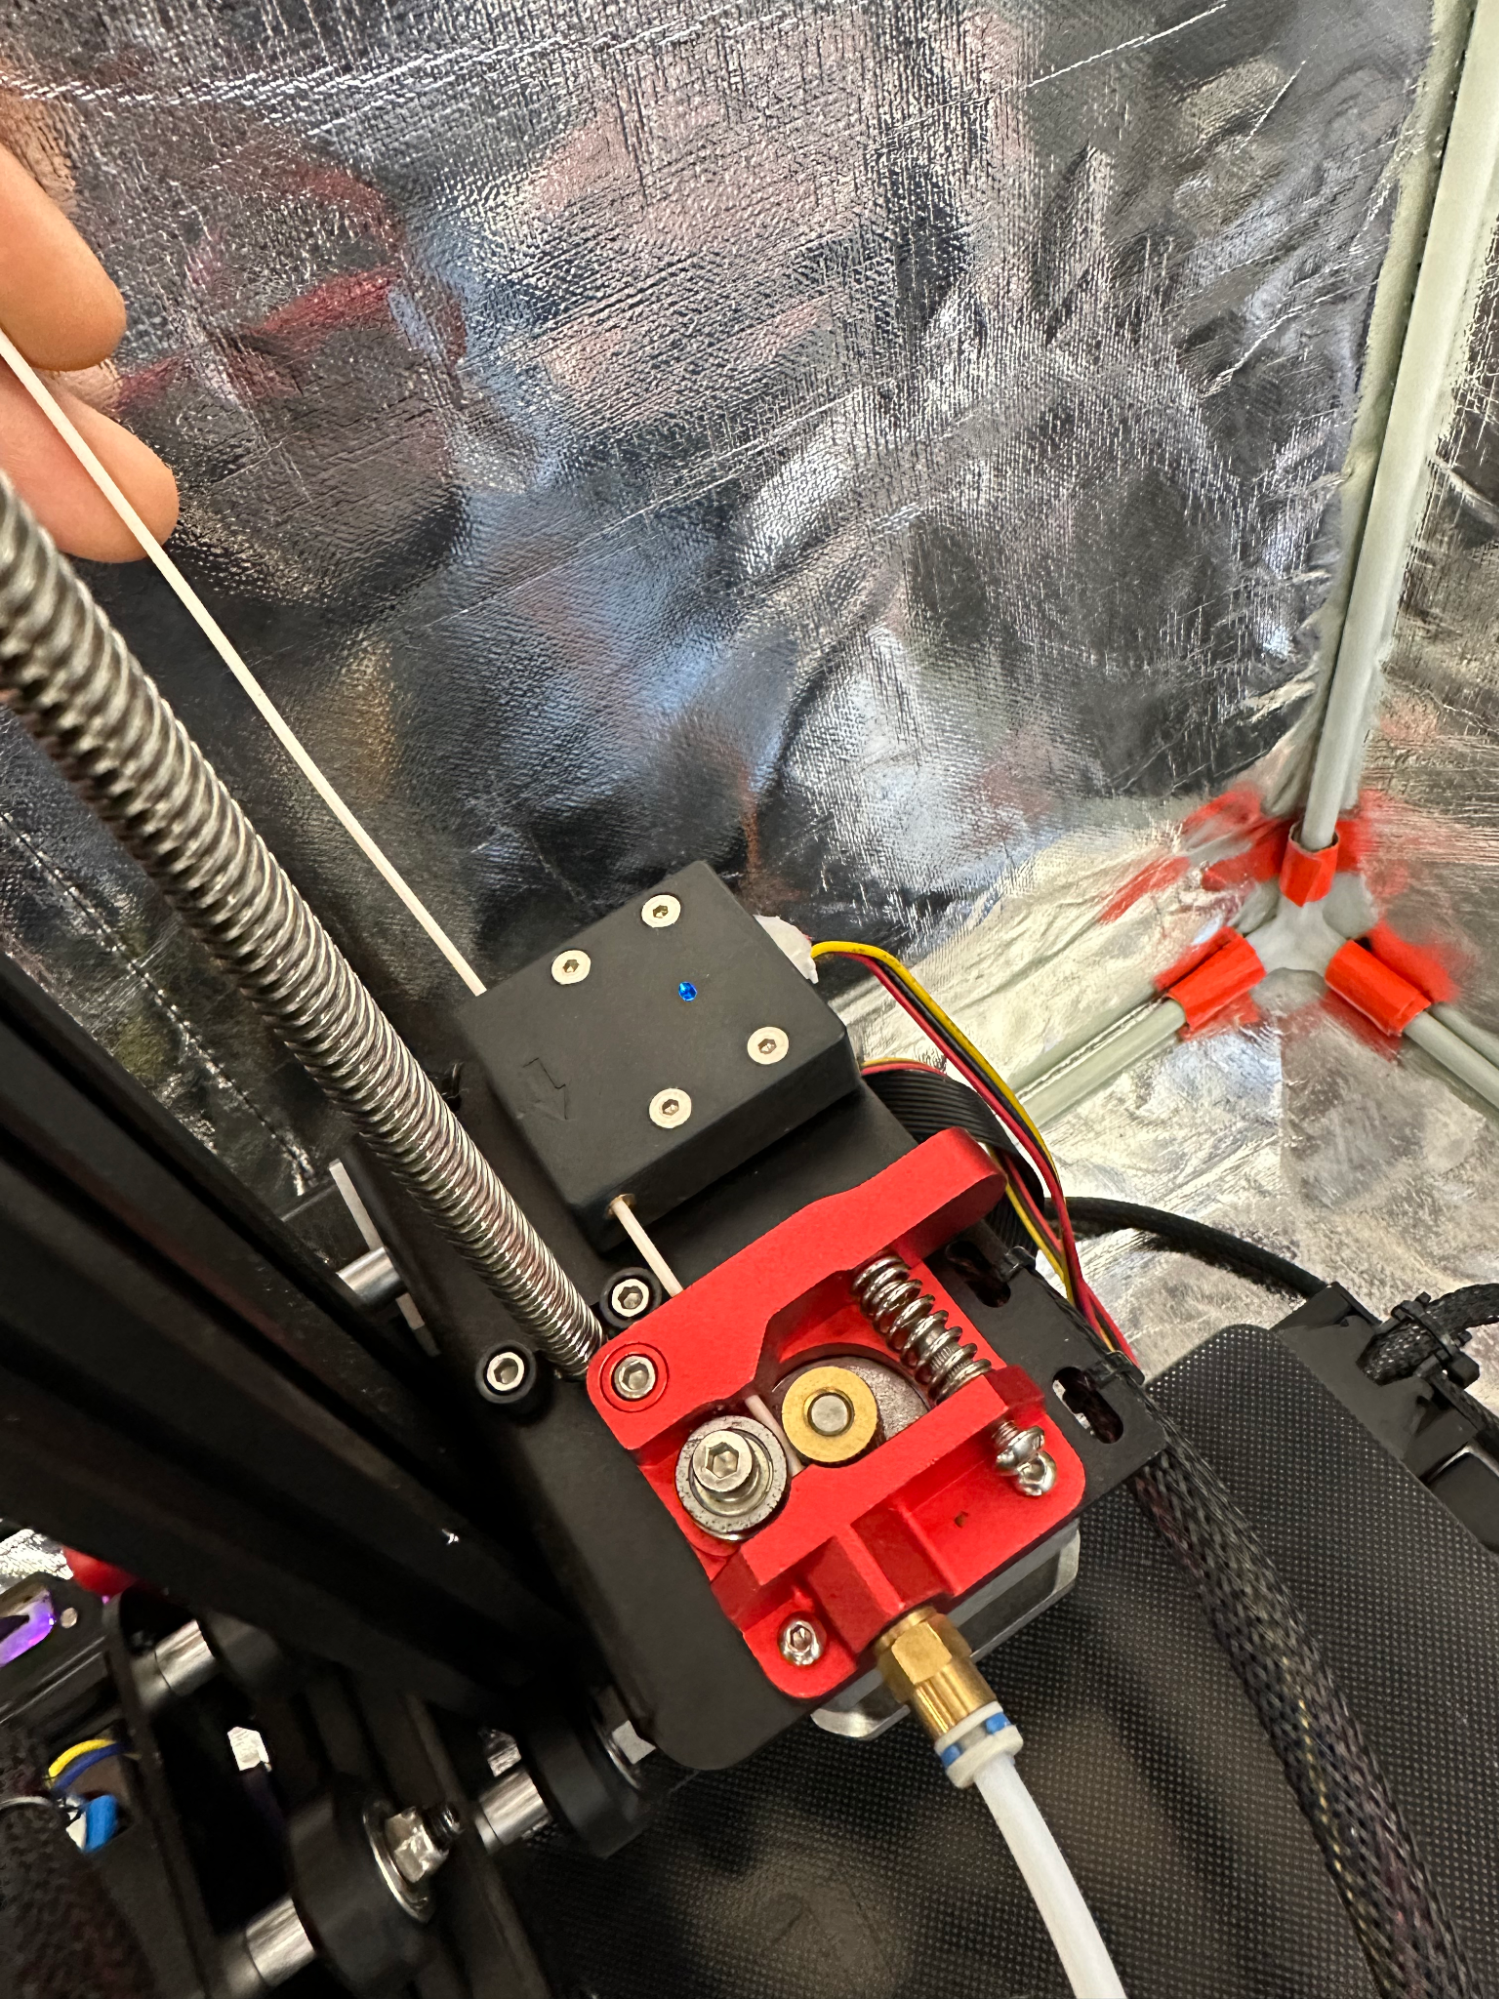
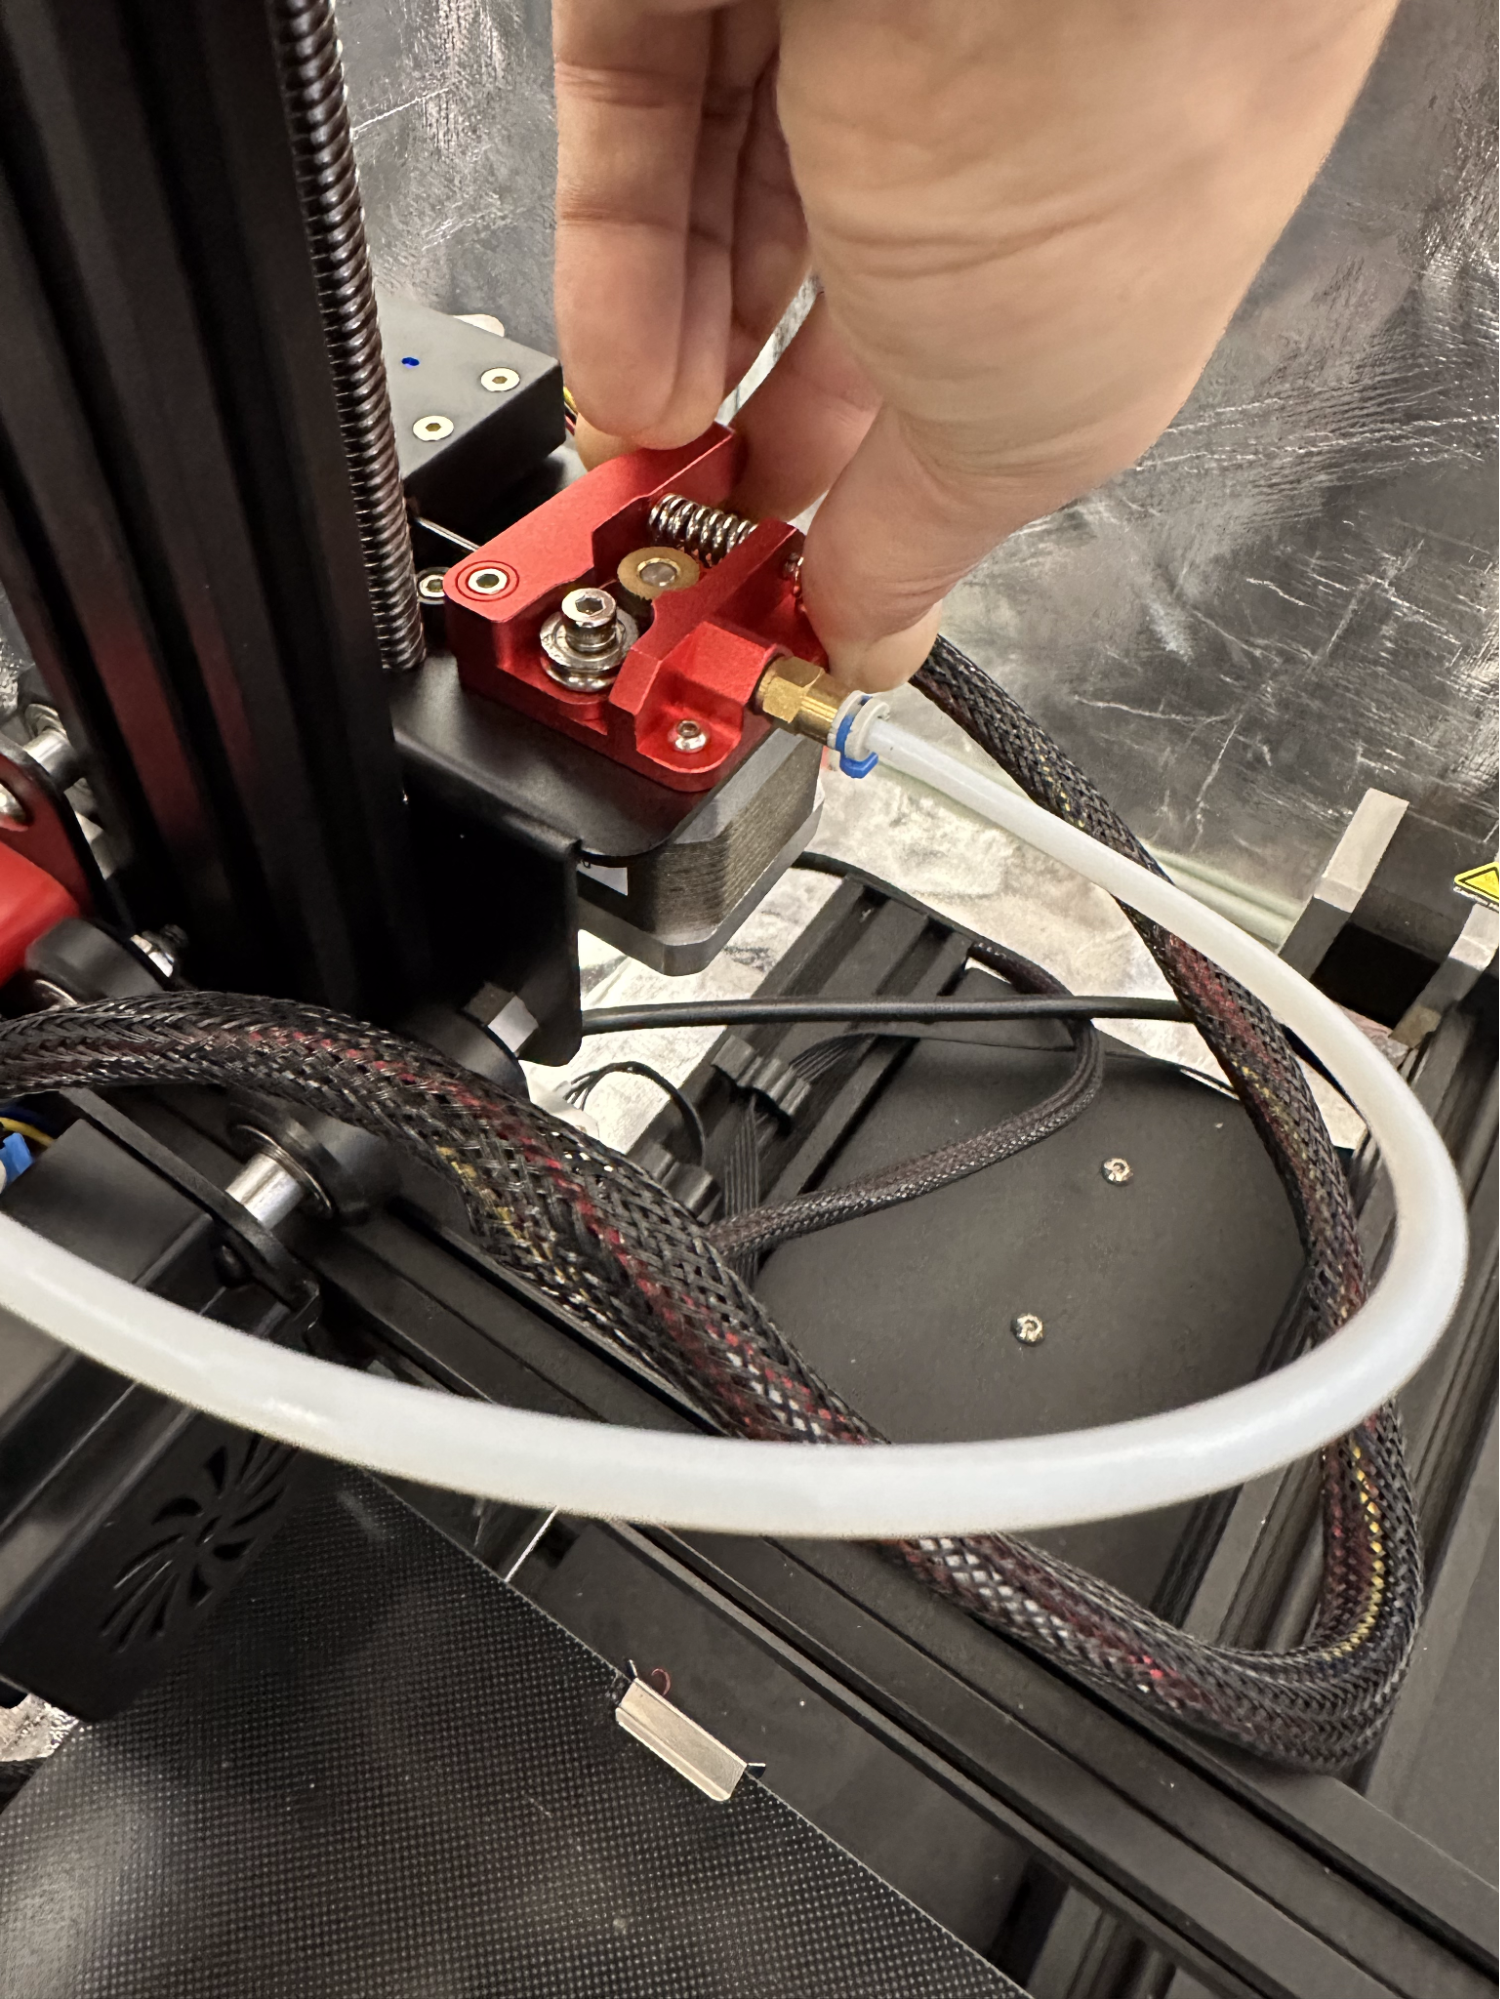
Let's Pull the Filament All the Way Out

Engage the spring clamp near the filament motor, and gently pull the filament out of the machine.
We Should Clip the End of the New Filament We Are Going to Insert
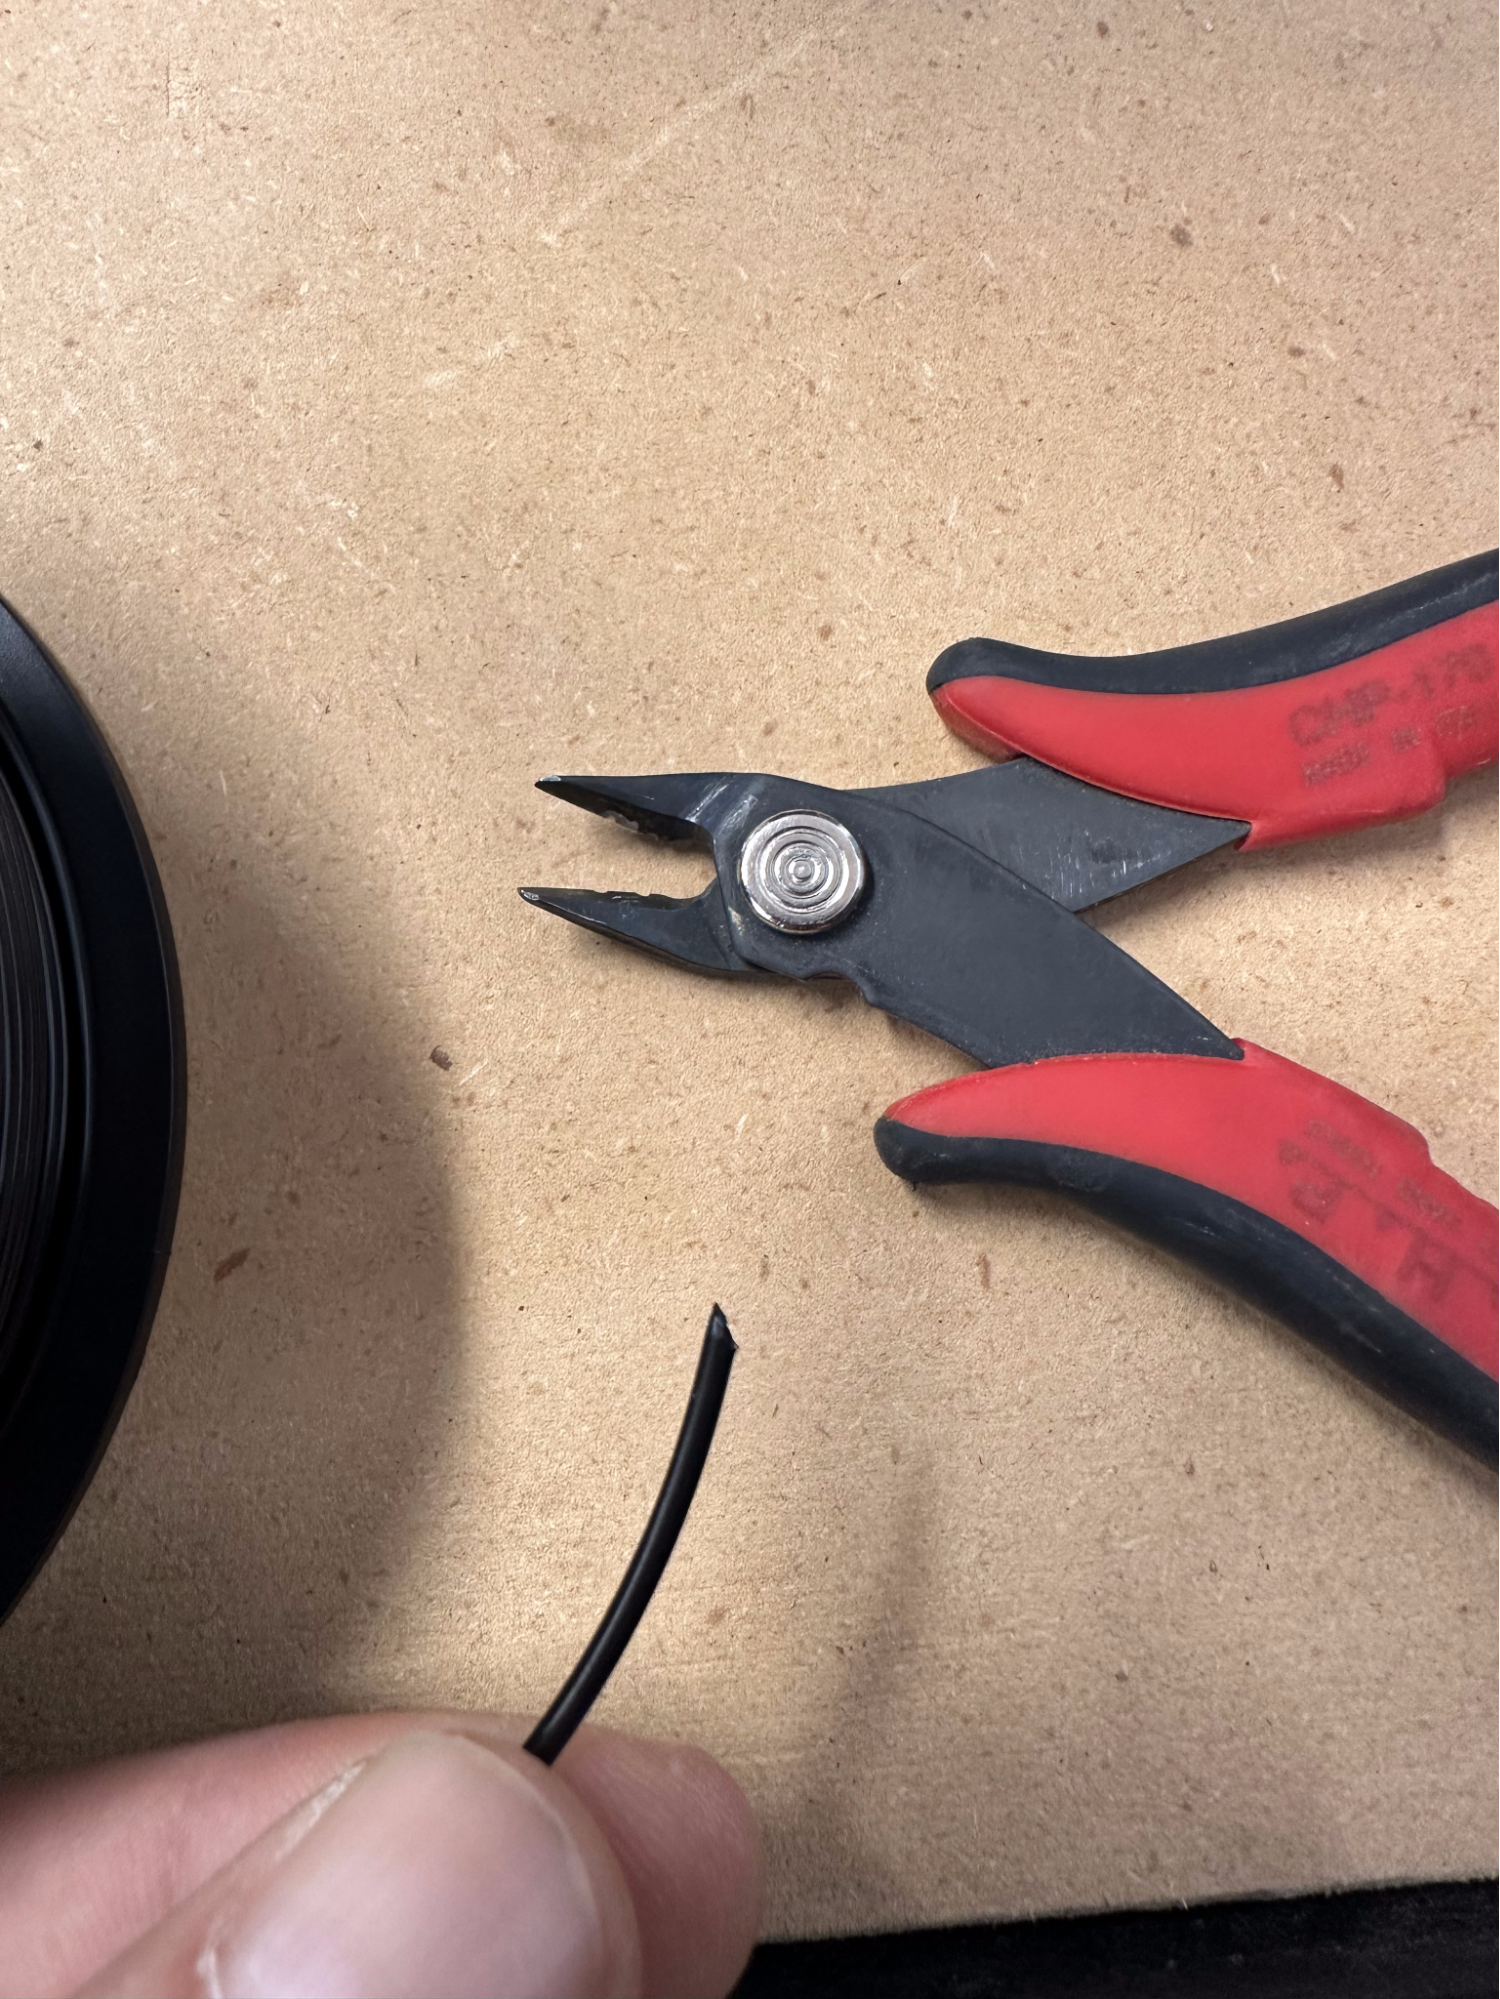
Before inserting new filament, cut the tip of the filament to a 45 degree angle with cutters.
Make Sure the Filament Is Going in the Correct Direction
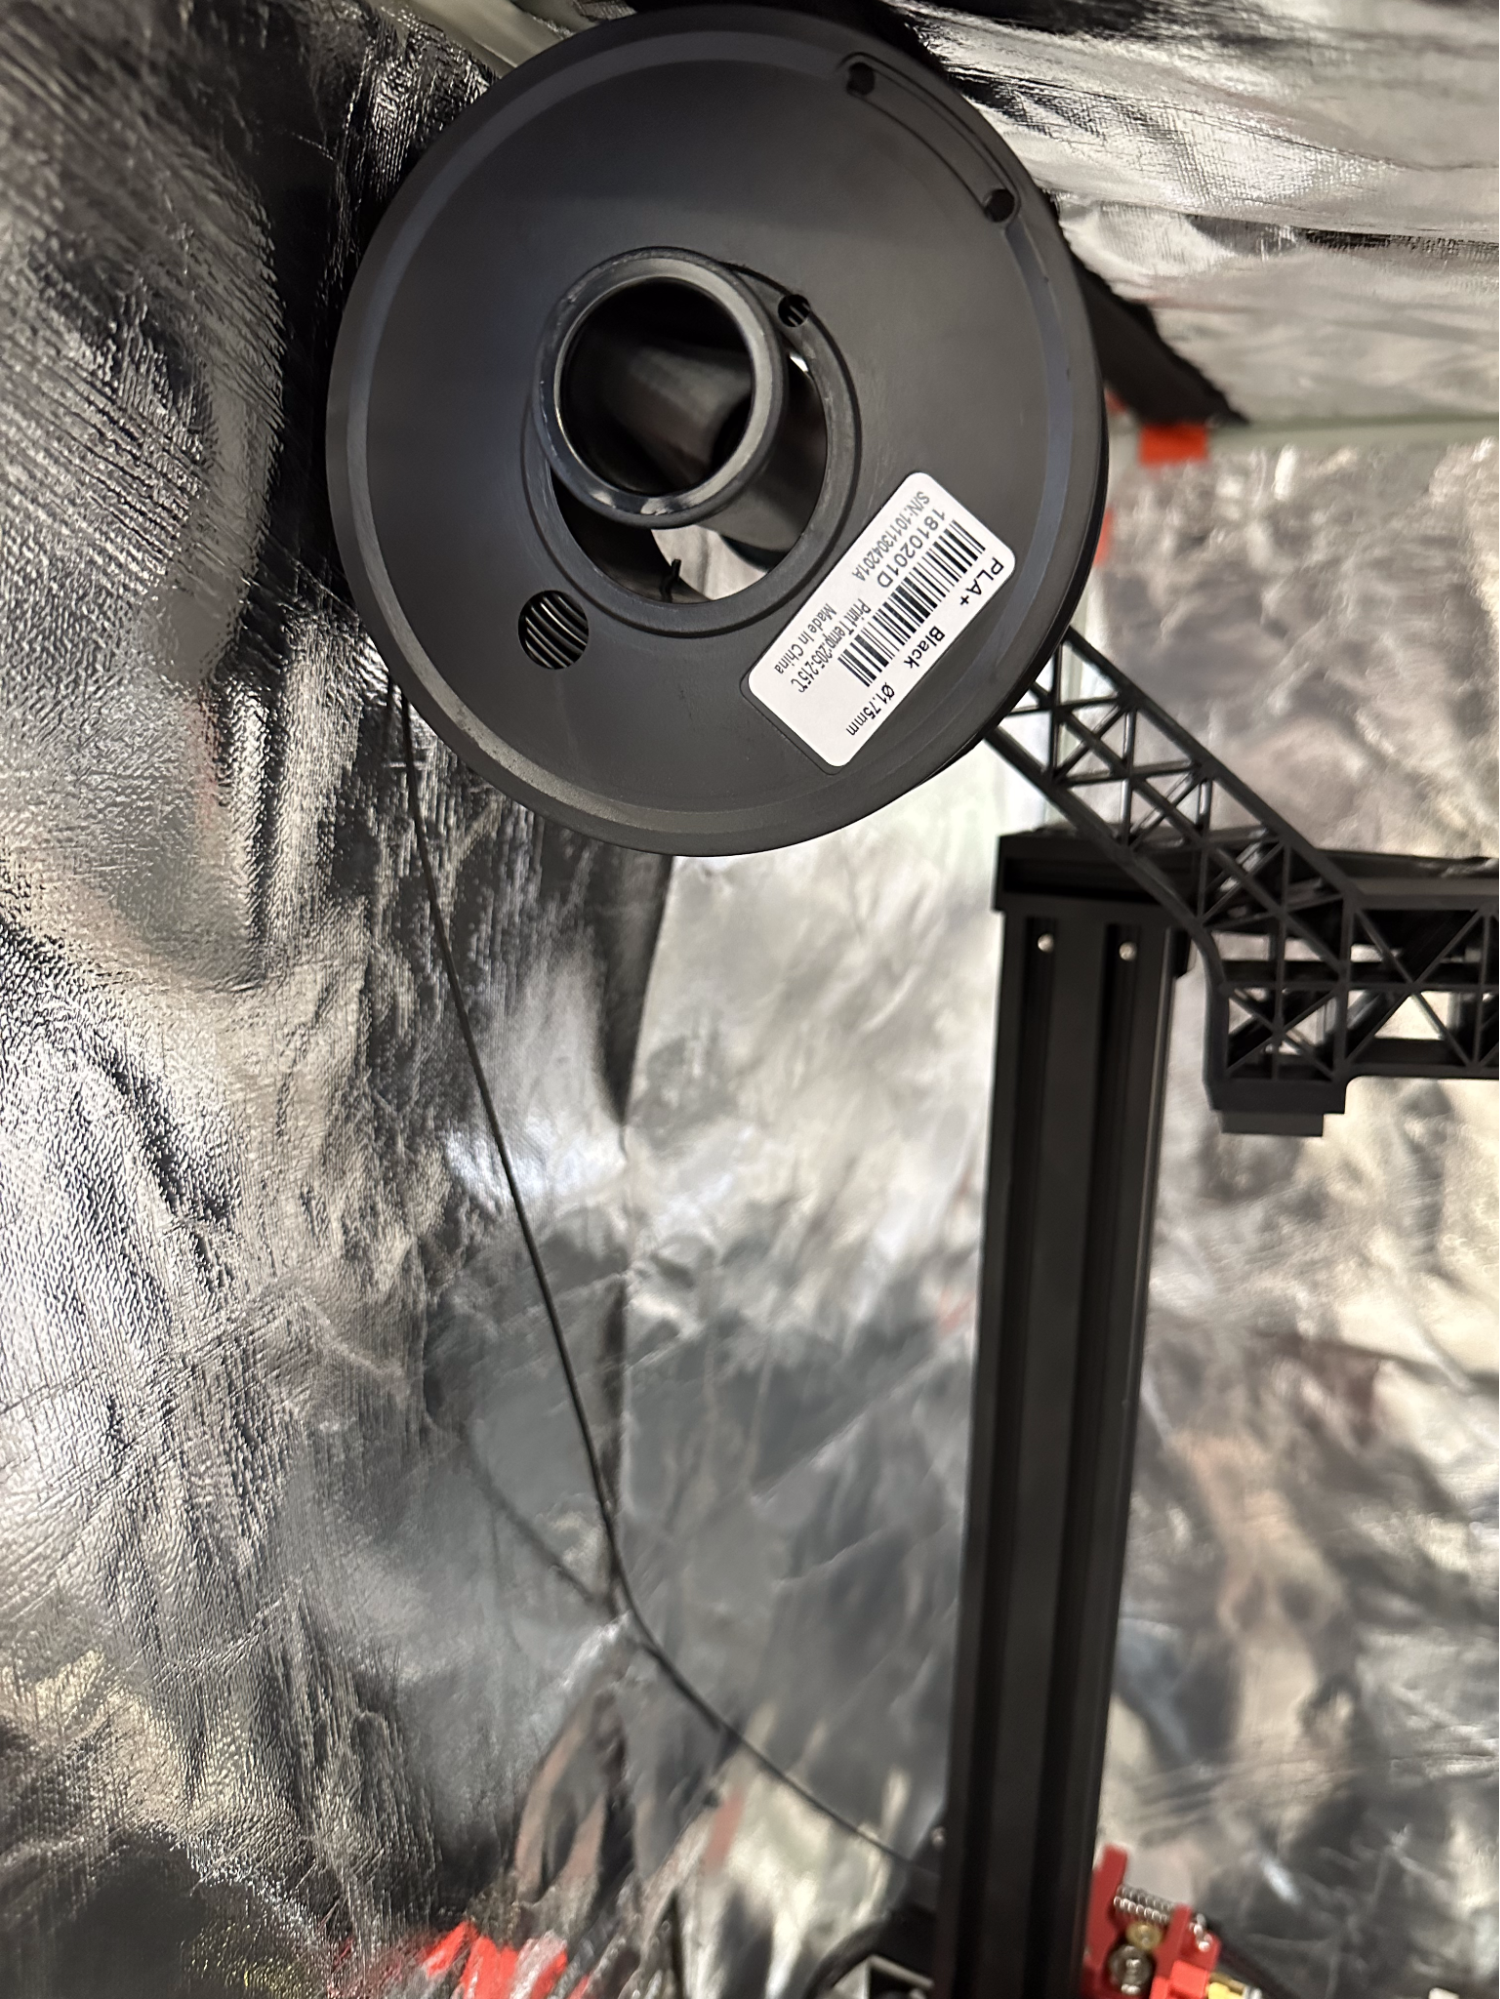
Put the roll of plastic on with filament rolling over the top of the filament roll facing the left side.
We Can Now Insert the New Filament
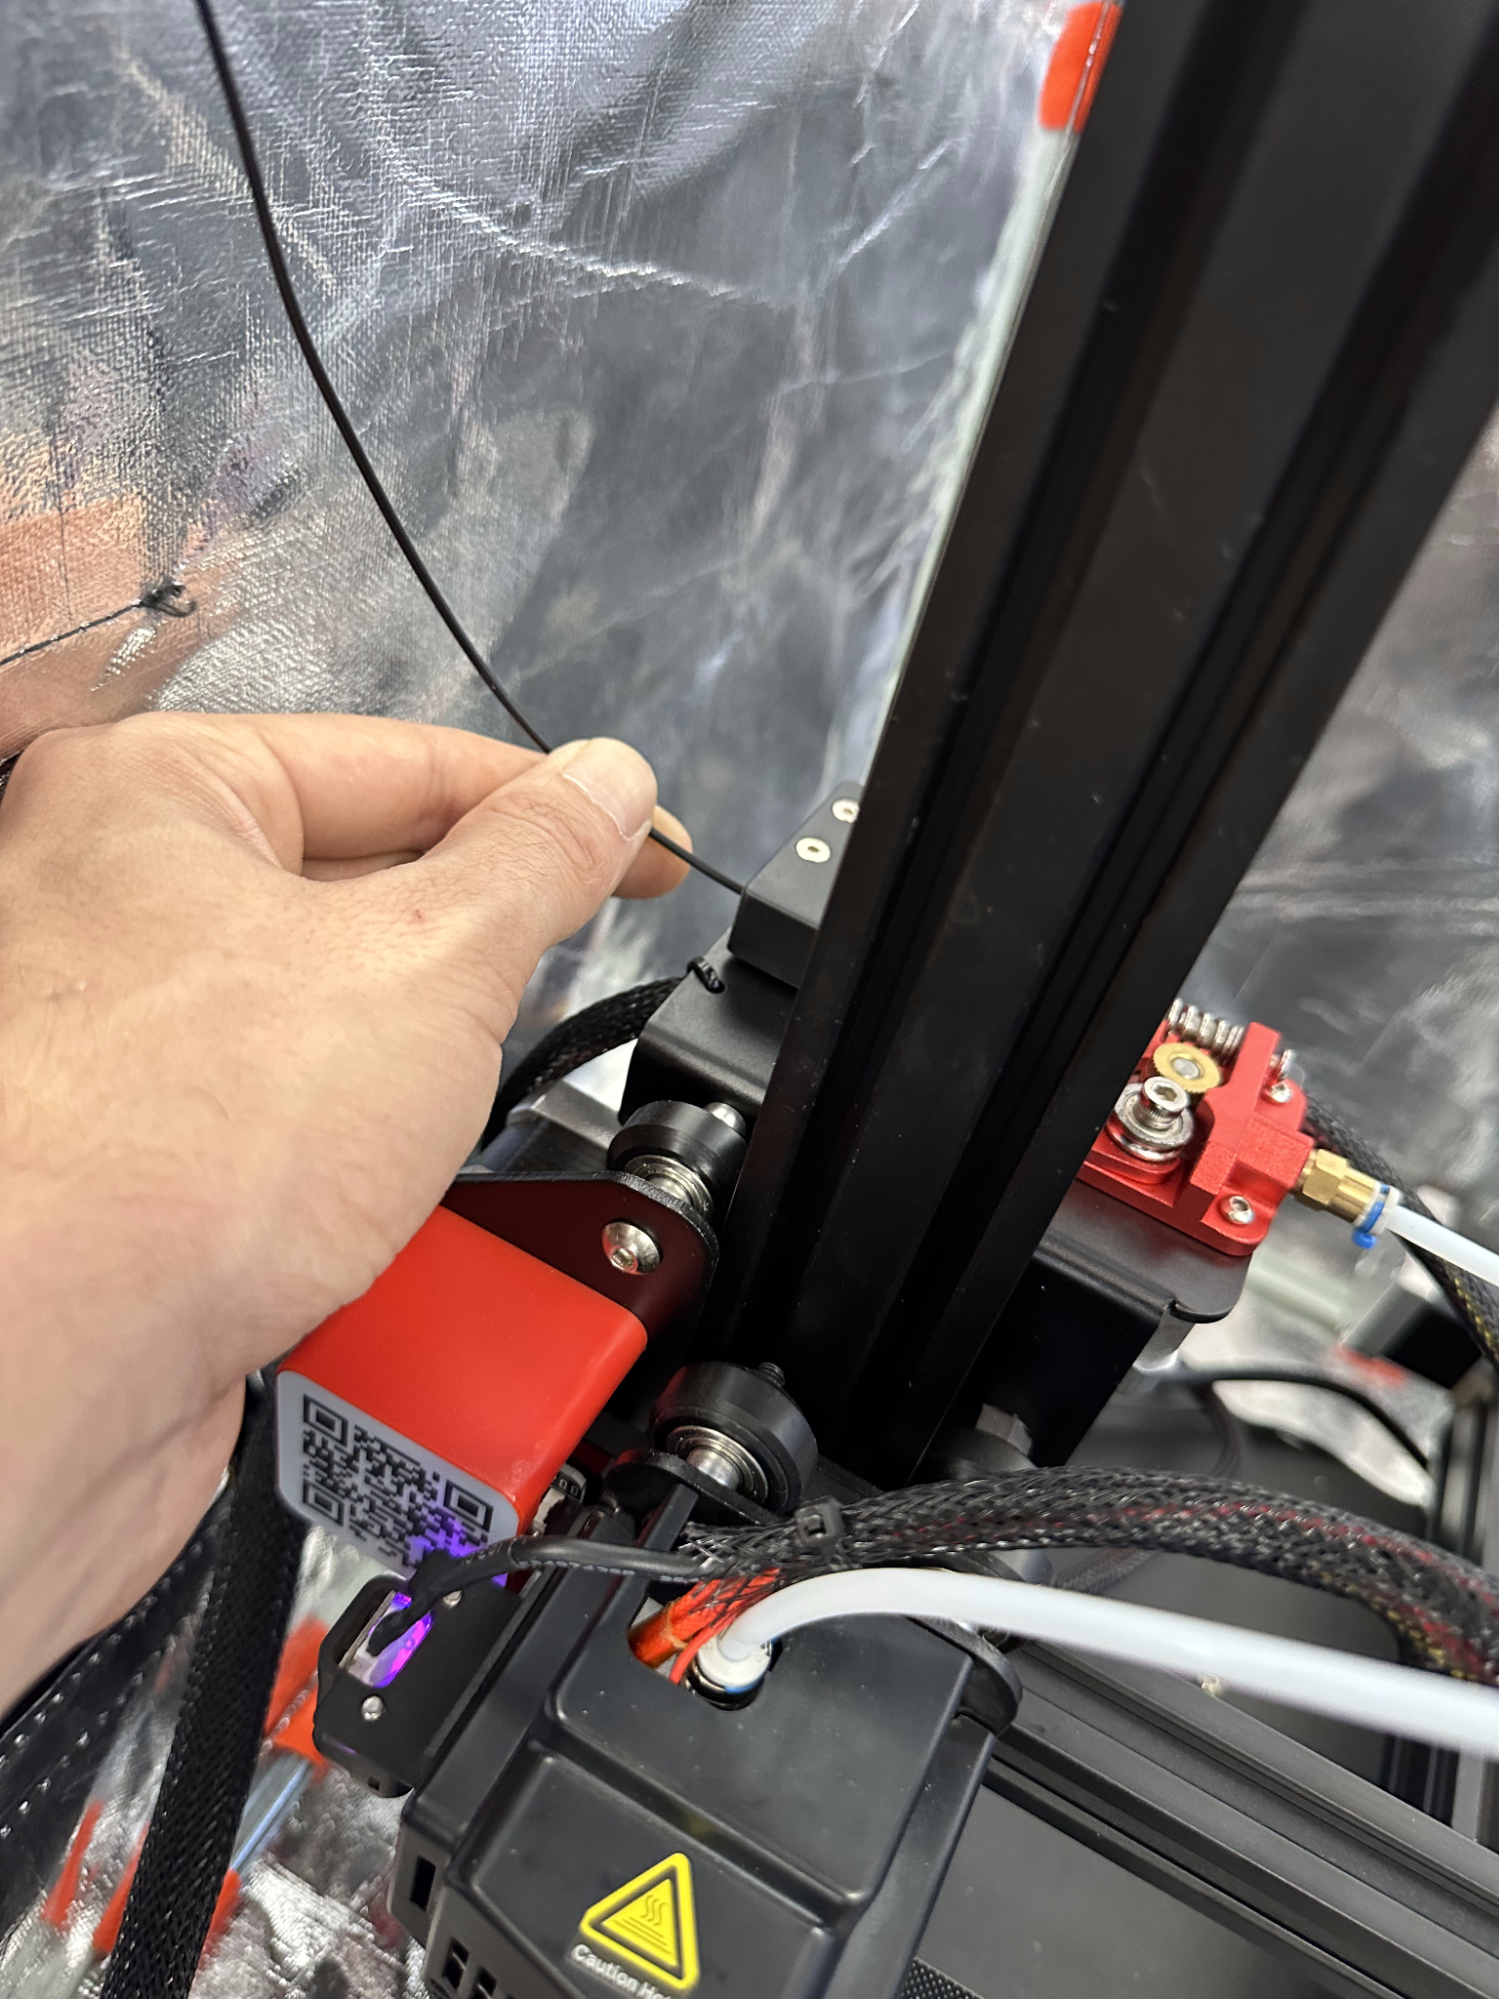

Feed filament through the extruder sensor and engage spring clamp near the extruder motor. Push it through the holes in the spring clamp assembly until it feeds into the tube. Gently push it until you feel resistance at the nozzle tip and ensure the plastic is extruding the new filament before you proceed.
(Tip: Twist/Rotate the filament as you gently push it through the extruder sensor if it is not going through the extruder sensore right away. You just have to find the correct angle to get it to pass through.)
Made Studio 3D Printer Etiquette
If you use a plastic other than the Made Studio stock PLA, please re-insert the PLA stock back in after your print and ensure extrusion is happening before leaving the print area.
3D prints that are finished will be removed and set near the 3D print area for a maximum of 48 hours before being thrown away.
We do not allow printing of sharp weapons, functional gun parts or any item deemed to be a dangerous weapon.
Leave a piece of paper or post-it with your name and phone number in front of the 3D printer if you are leaving the makerspace area while your print is running. This allows another member or a makerspace technician to contact you if it fails, or if the print is left in the makerspace for more than 48 hours.
Troubleshooting
If a print keeps failing, try tuning the temperature of the nozzle either through Cura settings or in the Tune menu once a print has started. Sometimes a 5-10 degree increase in nozzle temperature works better for some colors and manufacturer’s PLA plastics.
If a print keeps failing, sometimes reducing the print speed can help greatly with a print. You can do this in Cura settings or in the Tune menu once a print has been started.