How to Upload Music to Google Play
by bbyer93 in Circuits > Audio
95089 Views, 30 Favorites, 0 Comments
How to Upload Music to Google Play
Google allows you to store up to 20,000 songs on your own cloud for free through Google Play. Google Play allows you to access your favorite tunes anywhere from your computer, to your cell phone. In a few easy steps you will be able to take your music with you if you have a Gmail account. You must also have audio files to upload to Google Play. Without music or audio books, this program will be of no use to you. Google Play Music helps solve the problem of having limited storage space on your phone or other device. Instead of having the music installed directly on your phone, the music is streamed from Google Play Music. Streaming music can use quite a bit of data so connecting to WiFi will help reduce your data usage if you have a limit on your cell phone.
Go to the Website:
Click the Sign in Button
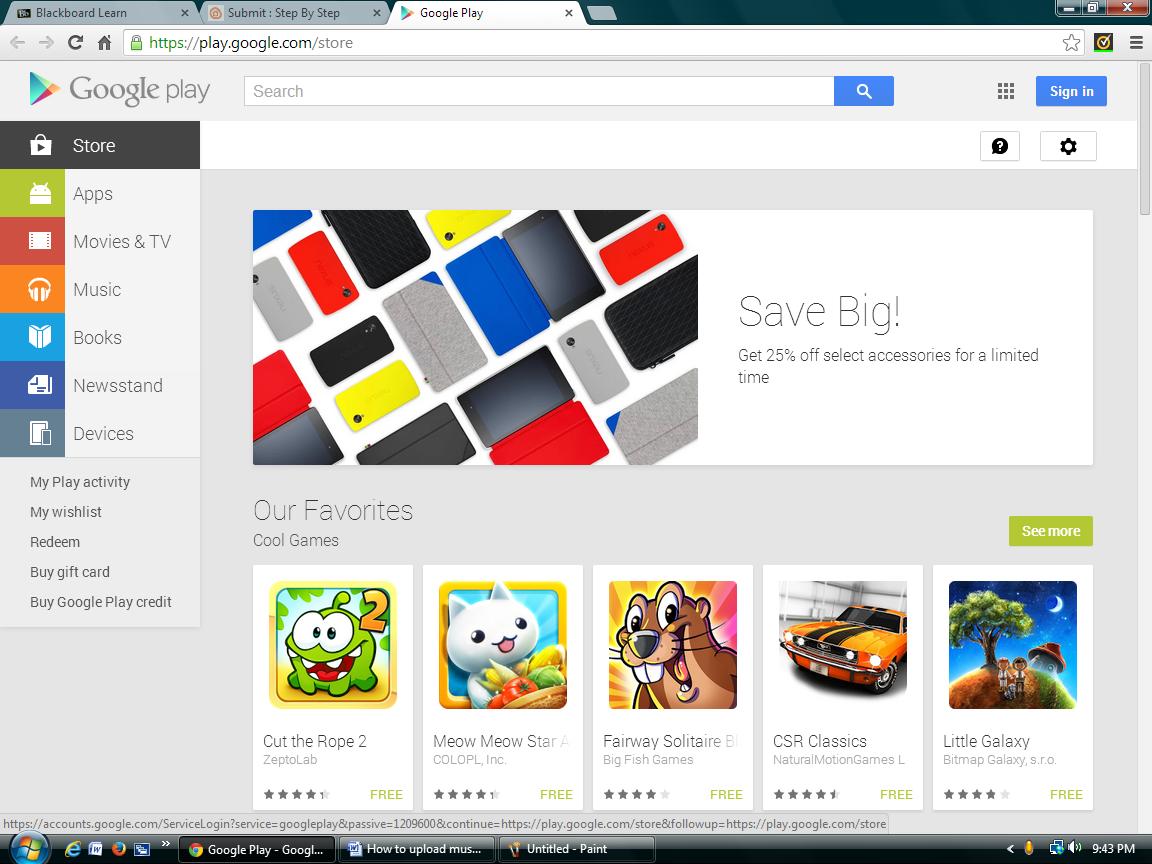
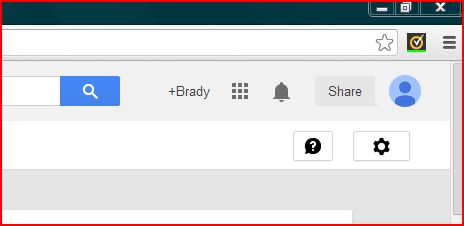
This is where you need to know your Gmail log-in information or create a Gmail account and then come back to this step. Click the sign in button in the top right to access your Gmail account(Top) Note: if you are already signed into your Gmail account, you will see your name displayed (Bottom).
Log-in Using Your Gmail Account
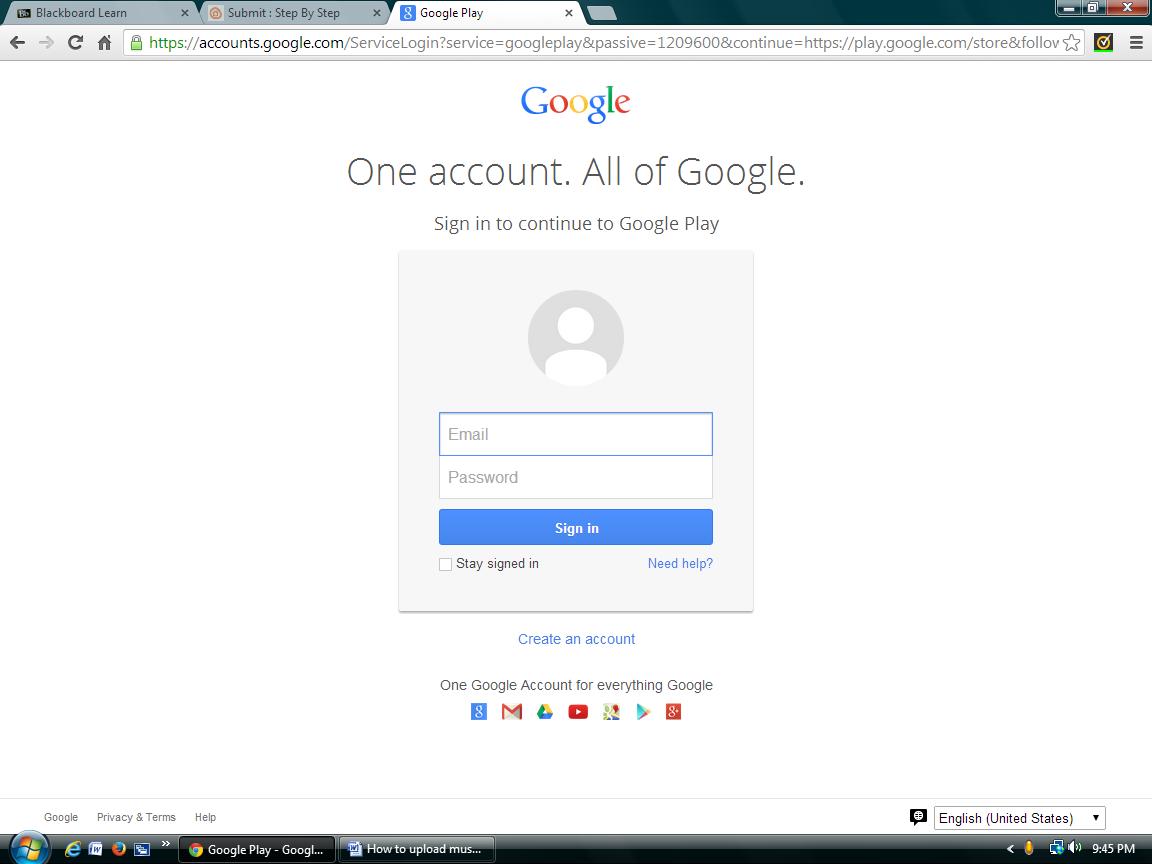
If you are not currently logged in, log in using the same credentials you would use to access your Gmail account.
Click the 'Music' Tab on the Left Hand Side
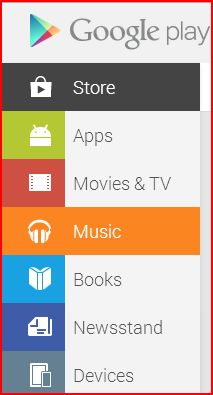
You will be redirected to this screen. Look on the left side of the page and click the orange icon with the headphones entitled “Music.”
Click the 'My Music' Option
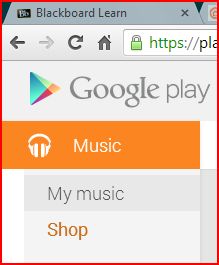
After clicking on the Music icon, click on the “My music” option on the left
Begin to Upload Music
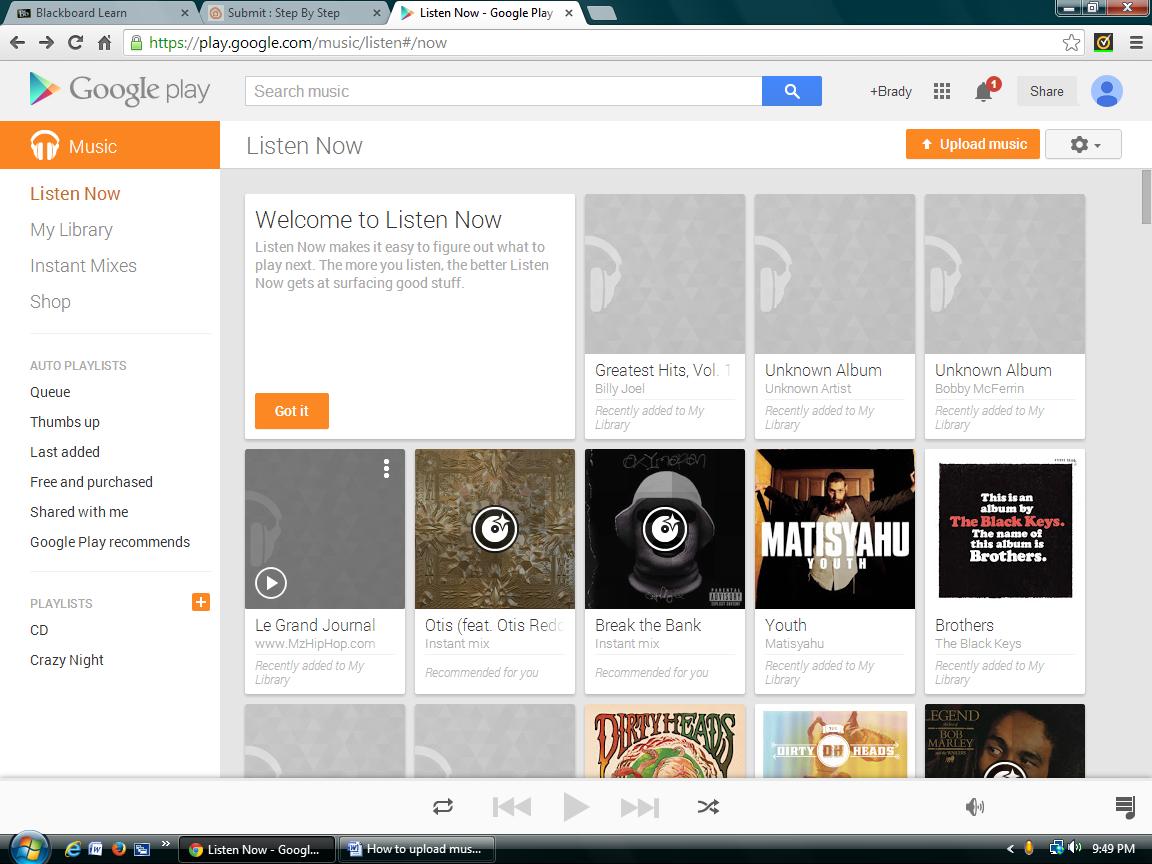
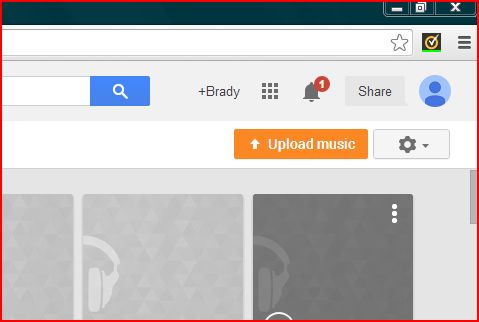
You are now ready to begin uploading music that you can listen to anywhere or anytime. The next screen you have will look like this. In the top right you will see an orange icon with the words “Upload Music” on it. Click this to continue.
Install 'Google Play Music Manager' on Your Computer
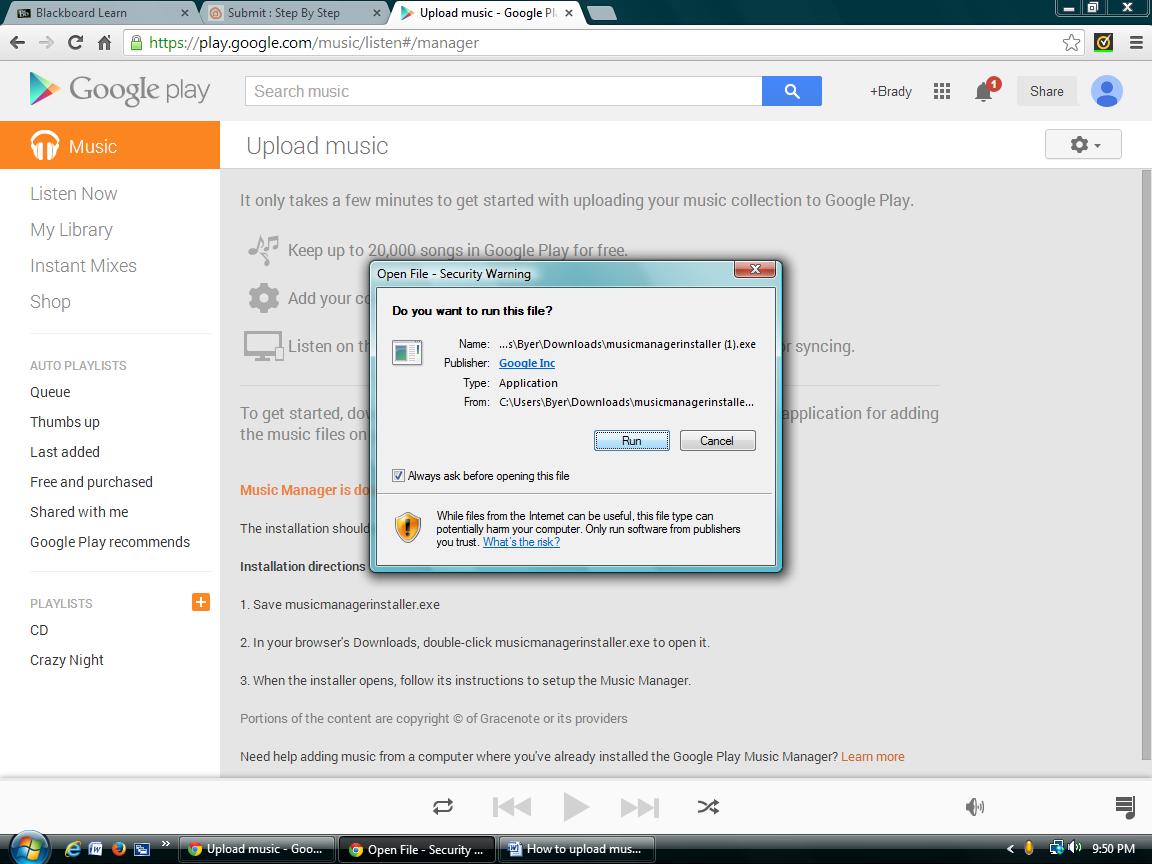
This is the step where you will be prompted to download the “Google Play Music Manager” if you do not already have it on your computer. The purpose of this manager is to automatically upload music to your Play account whenever new music is uploaded to your computer. Follow the prompts, once the first download is complete, click the download box titled musicmanagerinstaller.exe. After that, click run. Once complete go to Step 8.
Follow the Installation Instructions and Sign In
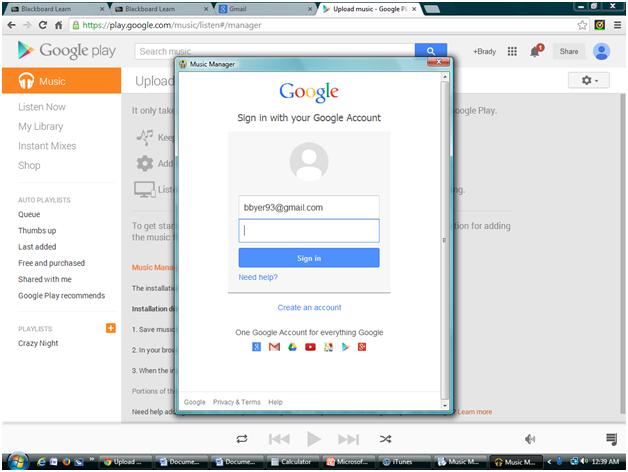
You will now be asked to install the Google Play Music Manager. Follow the simple instruction prompt. When it is complete, you will be prompted to sign into your Gmail account again.
Choose to Upload or Download
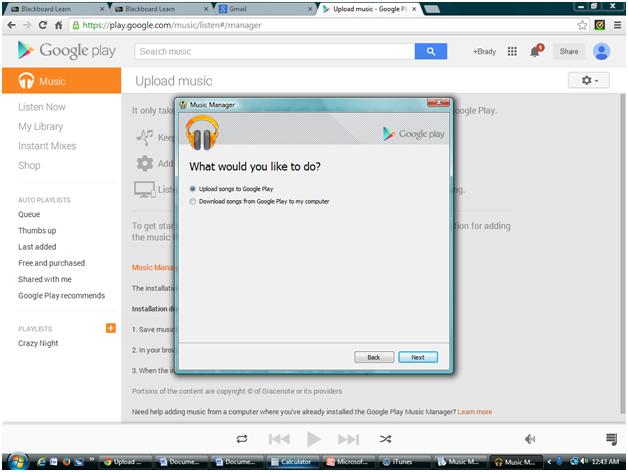
Now you are asked if you want to upload songs to your Google Play Drive from your computer, or the other way around. This is cool in the sense that you can upload songs to your Play account, go to a friends computer and download the Music manager, and download your songs onto their computer. It works both ways.
Select Where the Music Files Will Come From
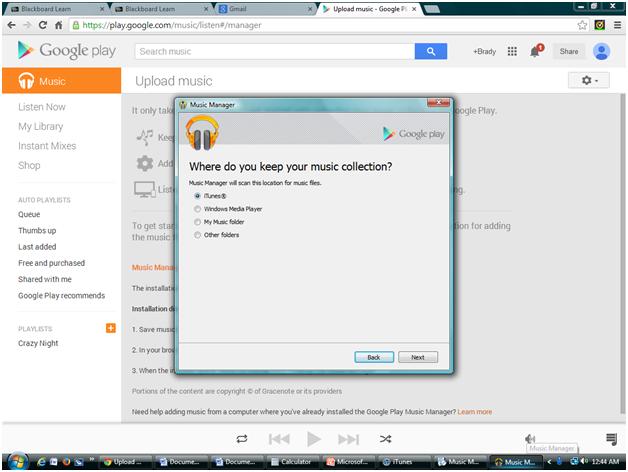
Choose where you want the files to be chosen from. I personally use iTunes, so I selected that one.
Select All Your Music to Upload or Specific Playlists
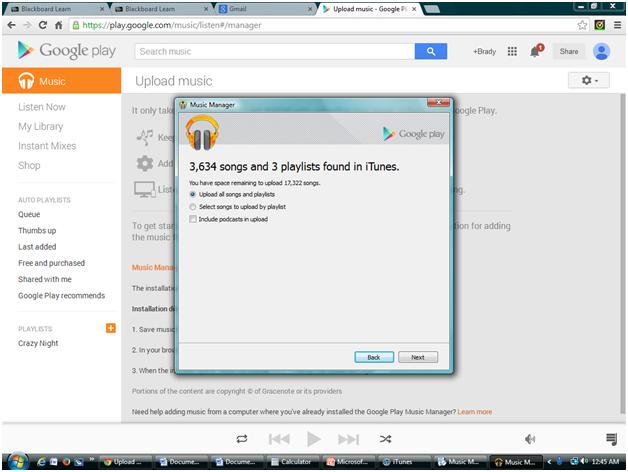
It will now tell you about the amount of songs that can be uploaded to your account. In this instance, it is 3,634 songs.
Wait As Your Music Uploads
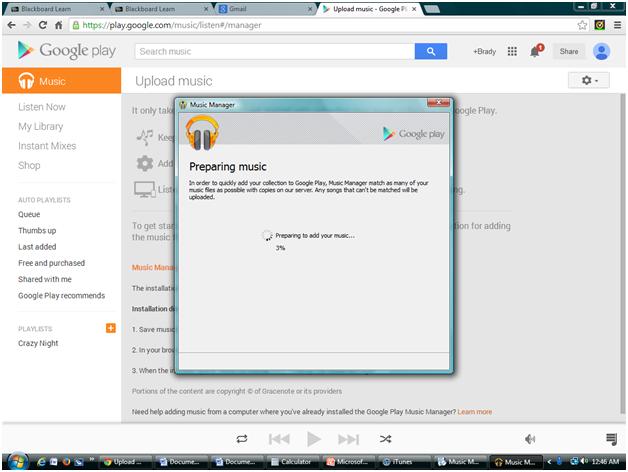
Follow the prompts to complete uploading your music. Depending on the amount of music and the size will depend on how long this step takes. Be patient. After it is done, you will have your music ready to go! So if you leave your iPod at home, you can always listen to music or eBooks if you can log into your Gmail account
Step 13: Enjoy
Once your music is done uploading to your account, you are able to enjoy your music. Try accessing your music from another computer or phone. If you have an Android smartphone, you should have it preinstalled on the phone so just look for the infamous orange headphones.