How to Manually Merge Gmail Account With Apple Mail 2.0-3.x
by EngUA313 in Circuits > Apple
10690 Views, 33 Favorites, 0 Comments
How to Manually Merge Gmail Account With Apple Mail 2.0-3.x
This tutorial will instruct those with basic computer skills how to merge their Gmail account into Apple Mail 2.0-3.x in 10-15 minutes.
YOU WILL NEED:
-an Apple computer with Apple Mail 2.0-3.x
-an Internet connection.
-an existing Gmail account.
HOW TO CHECK IF YOU HAVE THE CORRECT VERSION OF APPLE MAIL (2.0):
1. Open the APPLE MAIL APPLICATION.
-The mail icon will be on your desktop. This looks like a postage stamp with an eagle on it.
-If you cannot find Apple Mail, search for the application using the magnifying glass on the top right corner.
2. Click MAIL on top left of the computer screen.
-A drop down menu will appear.
3. Select ABOUT MAIL from the drop down menu.
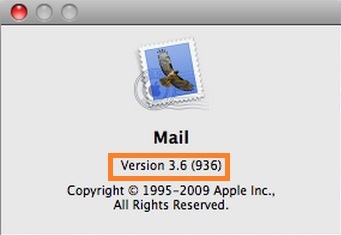
4. A pop up screen should come up stating what version of Apple Mail you have.
5. If you have Apple Mail 2.0 or any Apple Mail 3.X , then you can manually follow this tutorial.
6. Exit out of all windows.
YOU WILL NEED:
-an Apple computer with Apple Mail 2.0-3.x
-an Internet connection.
-an existing Gmail account.
HOW TO CHECK IF YOU HAVE THE CORRECT VERSION OF APPLE MAIL (2.0):
1. Open the APPLE MAIL APPLICATION.
-The mail icon will be on your desktop. This looks like a postage stamp with an eagle on it.
-If you cannot find Apple Mail, search for the application using the magnifying glass on the top right corner.
2. Click MAIL on top left of the computer screen.
-A drop down menu will appear.
3. Select ABOUT MAIL from the drop down menu.
4. A pop up screen should come up stating what version of Apple Mail you have.
5. If you have Apple Mail 2.0 or any Apple Mail 3.X , then you can manually follow this tutorial.
6. Exit out of all windows.
Open your desired your Internet Browser (Safari, FireFox, Google Chrome, etc).
Go to www.gmail.com and sign into your account.

Click the GEAR IMAGE on the TOP RIGHT CORNER of the website.
- A drop down box of options will appear.
-Click MAIL SETTINGS.
- A drop down box of options will appear.
-Click MAIL SETTINGS.
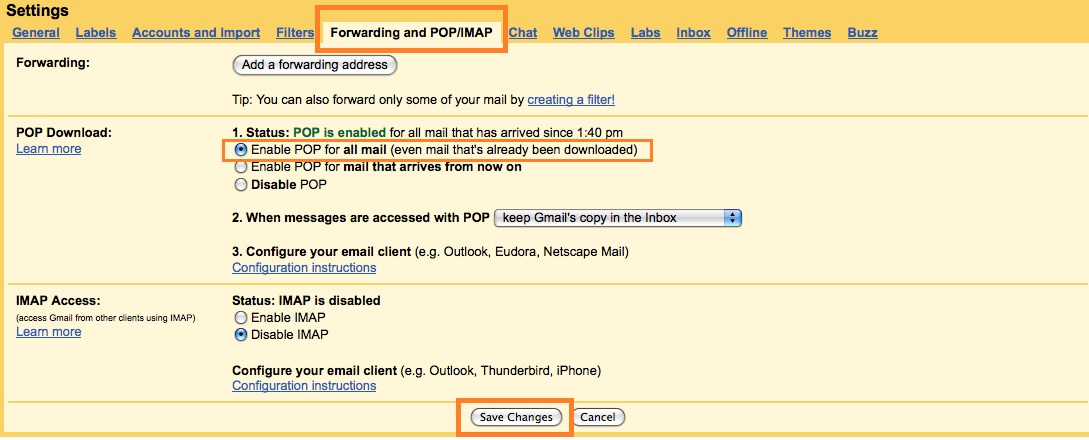
Click the tab Forwarding and POP/IMAP.
Click the bubble ENABLE POP FOR ALL MAIL.
Click SAVE CHANGES at the bottom of the page.
Exit out of the Internet Browser.
Open the APPLE MAIL APPLICATION .
-The mail icon will be on your desktop. This looks like a postage stamp with an eagle on it.
-If you cannot find Apple Mail, search for the application using the magnifying glass on the top right corner.
-The mail icon will be on your desktop. This looks like a postage stamp with an eagle on it.
-If you cannot find Apple Mail, search for the application using the magnifying glass on the top right corner.
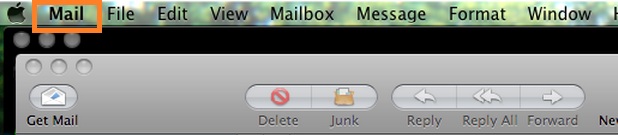
Click Mail on the TOP LEFT CORNER of your screen.
-Click PREFERENCES.
-Click PREFERENCES.
Click the tab Accounts.
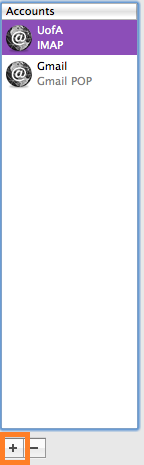
-Click the PLUS SIGN [+] AT THE BOTTOM LEFT OF THE WINDOW to create an account.
-Click the PLUS SIGN [+] AT THE BOTTOM LEFT OF THE WINDOW to create an account.
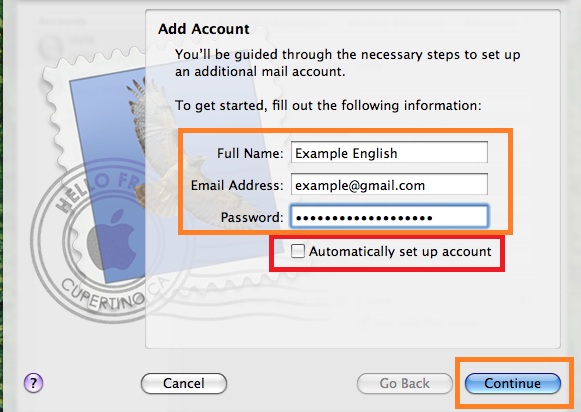
Enter all information correctly on the window titled “Add Account”:
a. Your Full Name.
b. Email Address: (the Gmail address you are linking)
c. Password: (for the Gmail account)
a. Your Full Name.
b. Email Address: (the Gmail address you are linking)
c. Password: (for the Gmail account)
UNCHECK AUTOMATICALLY SET UP ACCOUNT.
Check all information is correct and click CONTINUE.
Incoming Mail Server
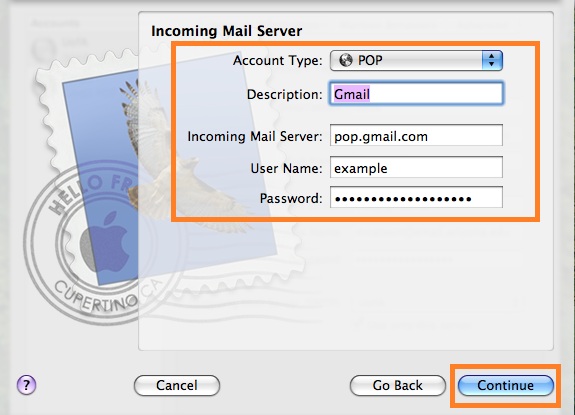
Enter and check all information:
a. Account type: POP.
b. Description: YOU DECIDE. EX: GMAIL ACCOUNT.
c. Incoming mail server: POP.GMAIL.COM
d. Username: ENTER GMAIL USERNAME.
* If your email address is: example@gmail.com then your user name would be: example.
e. Password: YOUR PASSWORD FOR THIS ACCOUNT.
a. Account type: POP.
b. Description: YOU DECIDE. EX: GMAIL ACCOUNT.
c. Incoming mail server: POP.GMAIL.COM
d. Username: ENTER GMAIL USERNAME.
* If your email address is: example@gmail.com then your user name would be: example.
e. Password: YOUR PASSWORD FOR THIS ACCOUNT.
Click CONTINUE.
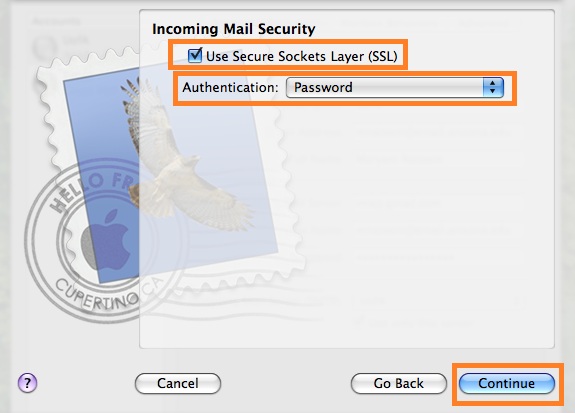
**If the “Incoming Mail Security” window appears, makes sure that “SSL” is checked, and the Authentication box is set to “Password.”** After, Click CONTINUE.**
**If the “Incoming Mail Security” window appears, makes sure that “SSL” is checked, and the Authentication box is set to “Password.”** After, Click CONTINUE.**
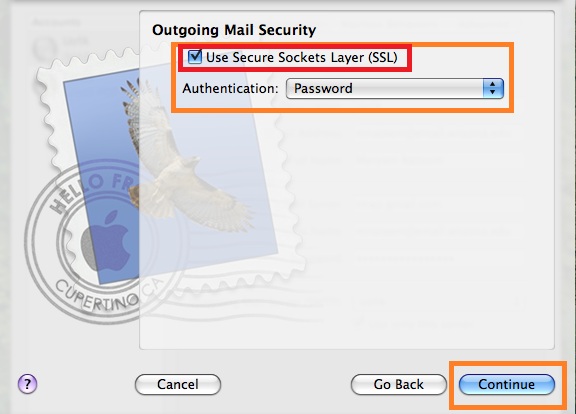
Outgoing Mail Server
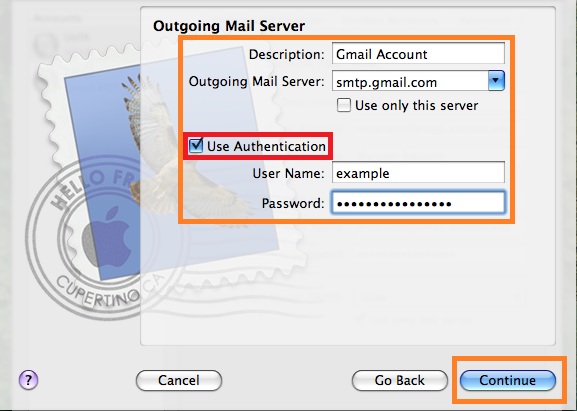
Enter and check all information:
a. Description: LEAVE BLANK.
b. Outgoing Mail Server: SMTP.GMAIL.COM.
-Leave ‘USE ONLY THIS SERVER’ unchecked.
c. Check USE AUTHENTICATION.
- Username: ENTER GMAIL USERNAME.
*Email: example@gmail.com
*Username: EXAMPLE
d. Password: ENTER GMAIL PASSWORD FOR THIS ACCOUNT.
a. Description: LEAVE BLANK.
b. Outgoing Mail Server: SMTP.GMAIL.COM.
-Leave ‘USE ONLY THIS SERVER’ unchecked.
c. Check USE AUTHENTICATION.
- Username: ENTER GMAIL USERNAME.
*Email: example@gmail.com
*Username: EXAMPLE
d. Password: ENTER GMAIL PASSWORD FOR THIS ACCOUNT.
Click CONTINUE.
**If the “Outgoing Mail Security” window appears, makes sure that “SSL” is checked, and the Authentication box is set to “Password.” ** After, Click CONTINUE**
**If the “Outgoing Mail Security” window appears, makes sure that “SSL” is checked, and the Authentication box is set to “Password.” ** After, Click CONTINUE**
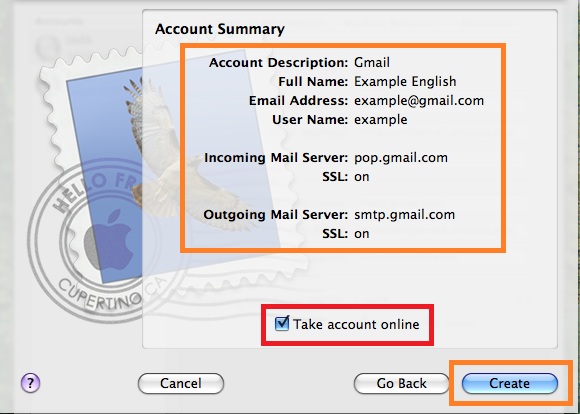
Check the "Account Summary" is correct:
a. Incoming Mail Server: POP.GMAIL.COM
*SSL: ON.
b. Outgoing mail server: SMTP.GMAIL.COM
*SSL: ON.
c. Check TAKE ACCOUNT ONLINE.
a. Incoming Mail Server: POP.GMAIL.COM
*SSL: ON.
b. Outgoing mail server: SMTP.GMAIL.COM
*SSL: ON.
c. Check TAKE ACCOUNT ONLINE.
Click CREATE. The account should now be set up.
Exit out of ACCOUNTS and PREFERENCES windows and return to the APPLE MAIL APPLICATION.
How to Use Apple Mail
Click MAIL.
-Select PREFERENCES.
-Select PREFERENCES.
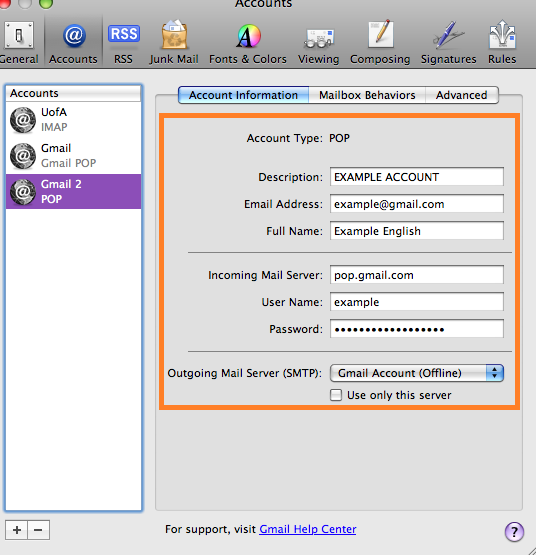
Go to ACCOUNTS TAB.
Select the ACCOUNT you just configured on the left side.
Check ACCOUNT INFORMATION.
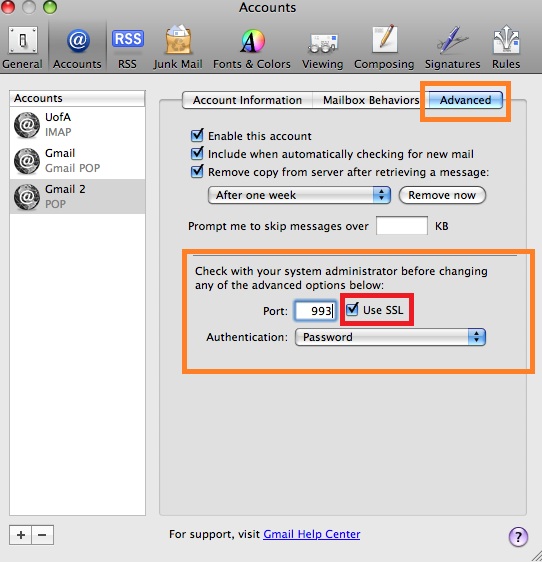
Click ADVANCED TAB.
Check PORT NUMBER:
-Port: 993.
-Port: 993.
Make sure ‘USE SSL’ is checked.
Close PREFERENCES WINDOW and return to the APPLE MAIL application.

To RECEIVE MAIL:
-Click GET MAIL on the top left corner of the application.
-Click GET MAIL on the top left corner of the application.
To SEND MAIL:
-Click NEW MESSAGE in the middle of the application.
-Click NEW MESSAGE in the middle of the application.
To Add an Additional Gmail Account
Return to PREFERENCES.
To Add Another Account
Click ACCOUNT.
a. Click the PLUS SIGN (+) on the bottom left corner.
b. Repeat steps 11-28.
a. Click the PLUS SIGN (+) on the bottom left corner.
b. Repeat steps 11-28.