How to Make a Keypad Door Lock Using Arduino
by Madrajib in Circuits > Arduino
5207 Views, 28 Favorites, 0 Comments
How to Make a Keypad Door Lock Using Arduino
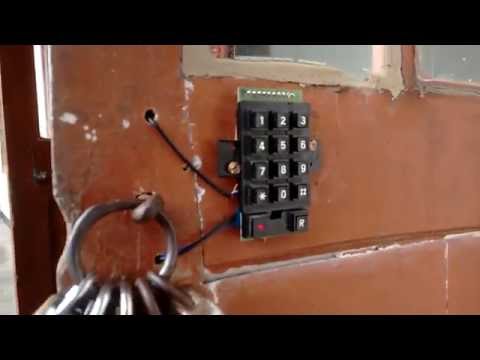
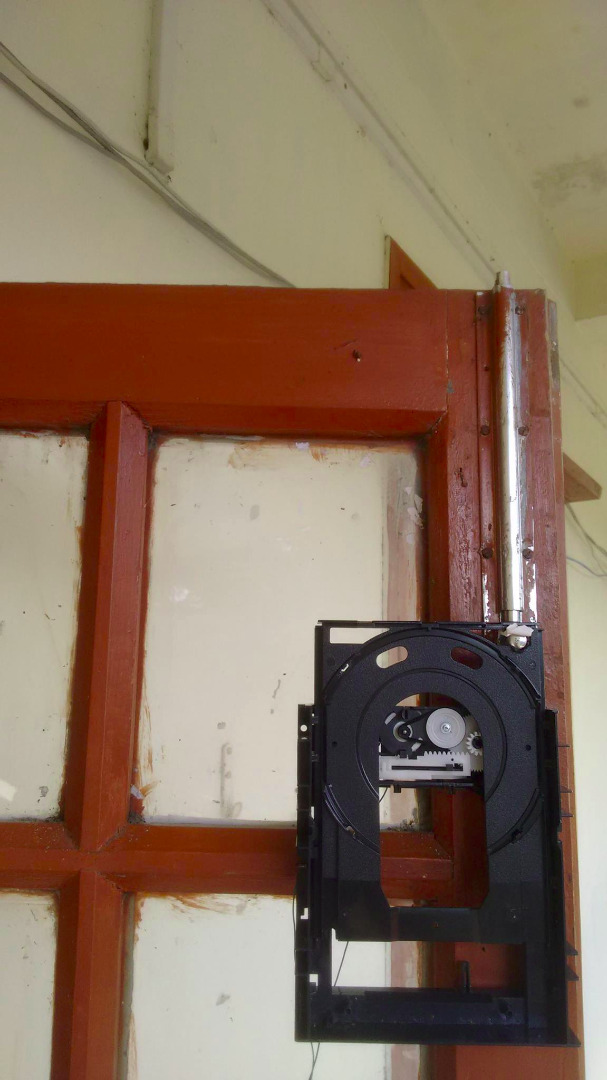
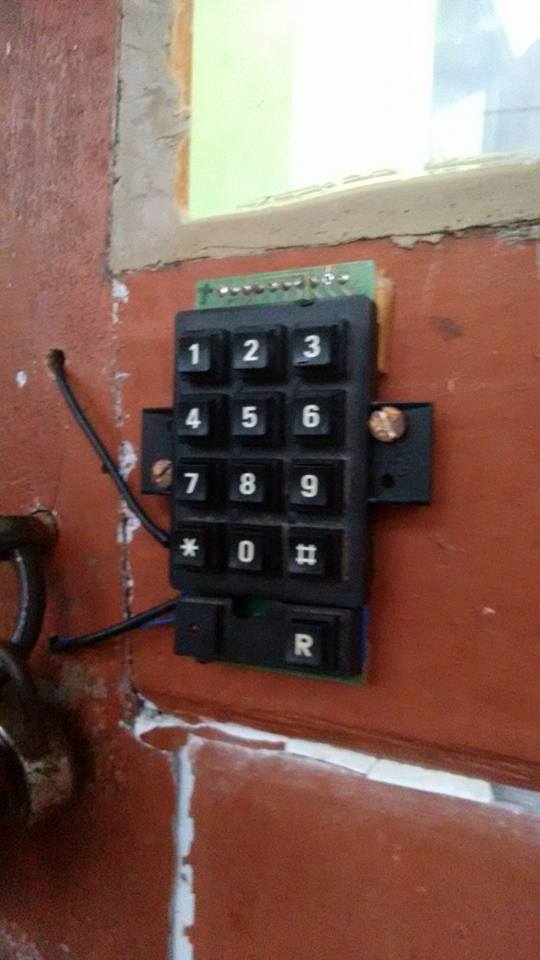
Have you ever thought what you can do with the old dvd drive... Well I turned it into a cool door locking unit..
Thing you will require
1. Arduino Uno
2. A old Dvd drive
3. A keyPad (I took it from old telephone)
4. Lm293d motor driver
5. 2 9v battery
6. wires
Step 1: Making the Locking Mechanism.!

Scavenging all the covers, circuits and extra stuff. I was able to get hold of this frame.Don't worry..Its easy to take apart this part from the drive .
After removing frames , search or the dc motor circuit at the very front (mouth) of the drive.
You have to just solder two wires to the two terminals of the motor, which will be latter used for driving the motor ... that's it our locking mechanism is complete.... yes it is.
you can test it by applying dc source of 5v to 9v to the terminals and the dvd drive will open or close base on how you provided the voltage across them...
Step 2: Setting Up the Driver Circuit..!
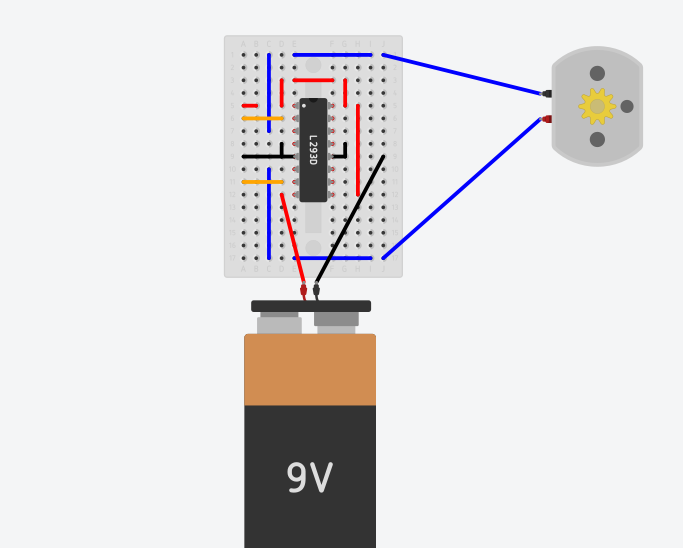
in this project i am using Arduino Uno , as there is 5v power port in it which we can use to power of devices , but
what i found was that this voltage or current was sufficient to drive the dc motor ..
So i had to use a driving circuit , which is very though ...!
I used an Lm239d Motor driver to control the rotation of the dvd motor..
so here is the pin configuration ..
pin 1 5v from the arduino port
pin 2 signal/input line (which will go to pin 12 of arduino)
pin 3 to one of the terminals of dc motor
pin 4 ground(to pin gnd of arduino)
pin 5 ground
pin 6 to the other terminal of the dc motor
pin 7 signal/input line (which will go to pin 13 of the arduino)
pin 8 to the external positiv 9 volt.
pin 9 5v from the arduino port
pin 10 pin 11 pin 15 pin 14 not required
pin 12 and pin 13 grounded (to pin gnd of arduino)
Step 3 : Setting Up the Keypad
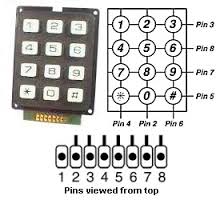
Here i got a keypad that i scavenged from an old landline telephone ...
It is in good condition .. so rather than buying one i recommend to search for old broken telephone sets...
So here is one same as like mine ... the keys of the keypad are connected in 4x3 matrix i.e., 4 rows and 3 colums
the pin layout of the keypad is shown in the pic ....
My recommendation will be to write everything you wired with proper tags so that when installing the system you would know exactly which wires goes where... and believe me not having that save you lots of valuable time... and it is useful for future re-installation too....
Step 4 : Adding the Components to Arduino
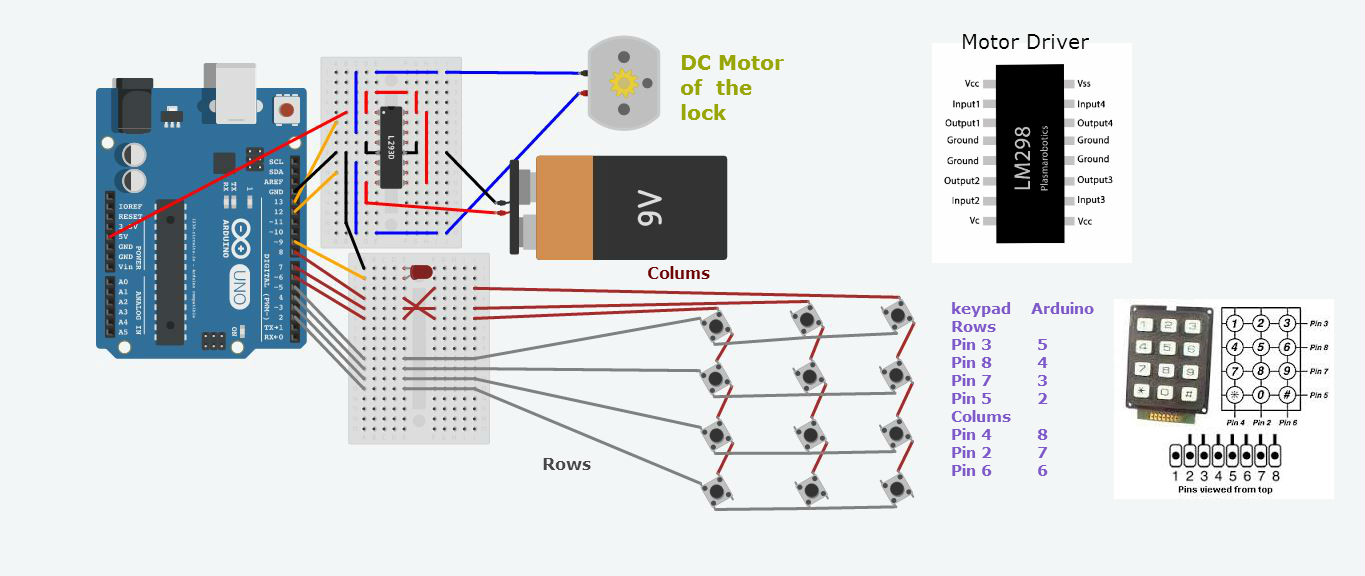
Here comes the brain ...... I used an arduino uno .. which i got in cheap from Snapdeal for 490 rupees! .. i would really recommend you to buy it..
Okay back to business ..!
Here are the pics to make you understand which pins should so where...!
Step 5 : Adding the Code !
Here's the Fun part writing the code ...
First you have to add the keypad.h library to your arduino ide Library..
here is the zip file...
And the code too...
compile it and upload it....
open up the serial monitor of the arduino ide .. and press the keys and check if the right keys are pressed or not.. if not there might be a loose connection or miss connection trouble suit it ... and you are good to go..
And Wait there's one more thing to change your password .. you have to replace the prewirtten code .. also you have to change the password array size...
//my code is of 10 digit so i have to make two array of 11 digit.. (1 more for the null value)
char lastFour[11]={'a','b','c','d','e','f','g','h','i','j'};
char unlockCode[11]="9954653295";
// what this code below does is that it takes the key and pushes it to the preceding place in the array when next key is press
lastFour[0]=lastFour[1];
lastFour[1]=lastFour[2];
lastFour[2]=lastFour[3];
lastFour[3]=lastFour[4];
lastFour[4]=lastFour[5];
lastFour[5]=lastFour[6];
lastFour[6]=lastFour[7];
lastFour[7]=lastFour[8];
lastFour[8]=lastFour[9];
lastFour[9]=key;
for creating any size of password as you wish for, you have to just change the size of the two arrays the the pushing code..
example: if i want to add 5 digit code... i had to only do
char lastFour[6]={'a','b','c','d','e','f'};
char unlockCode[6]="123456";
lastFour[0]=lastFour[1];
lastFour[1]=lastFour[2];
lastFour[2]=lastFour[3];
lastFour[3]=lastFour[4];
lastFour[4]=lastFour[5];
lastFour[5]=key;
Short it down .... and you are done...