How To: Laser Etch a Sign
by tadunsto in Workshop > Laser Cutting
243 Views, 1 Favorites, 0 Comments
How To: Laser Etch a Sign
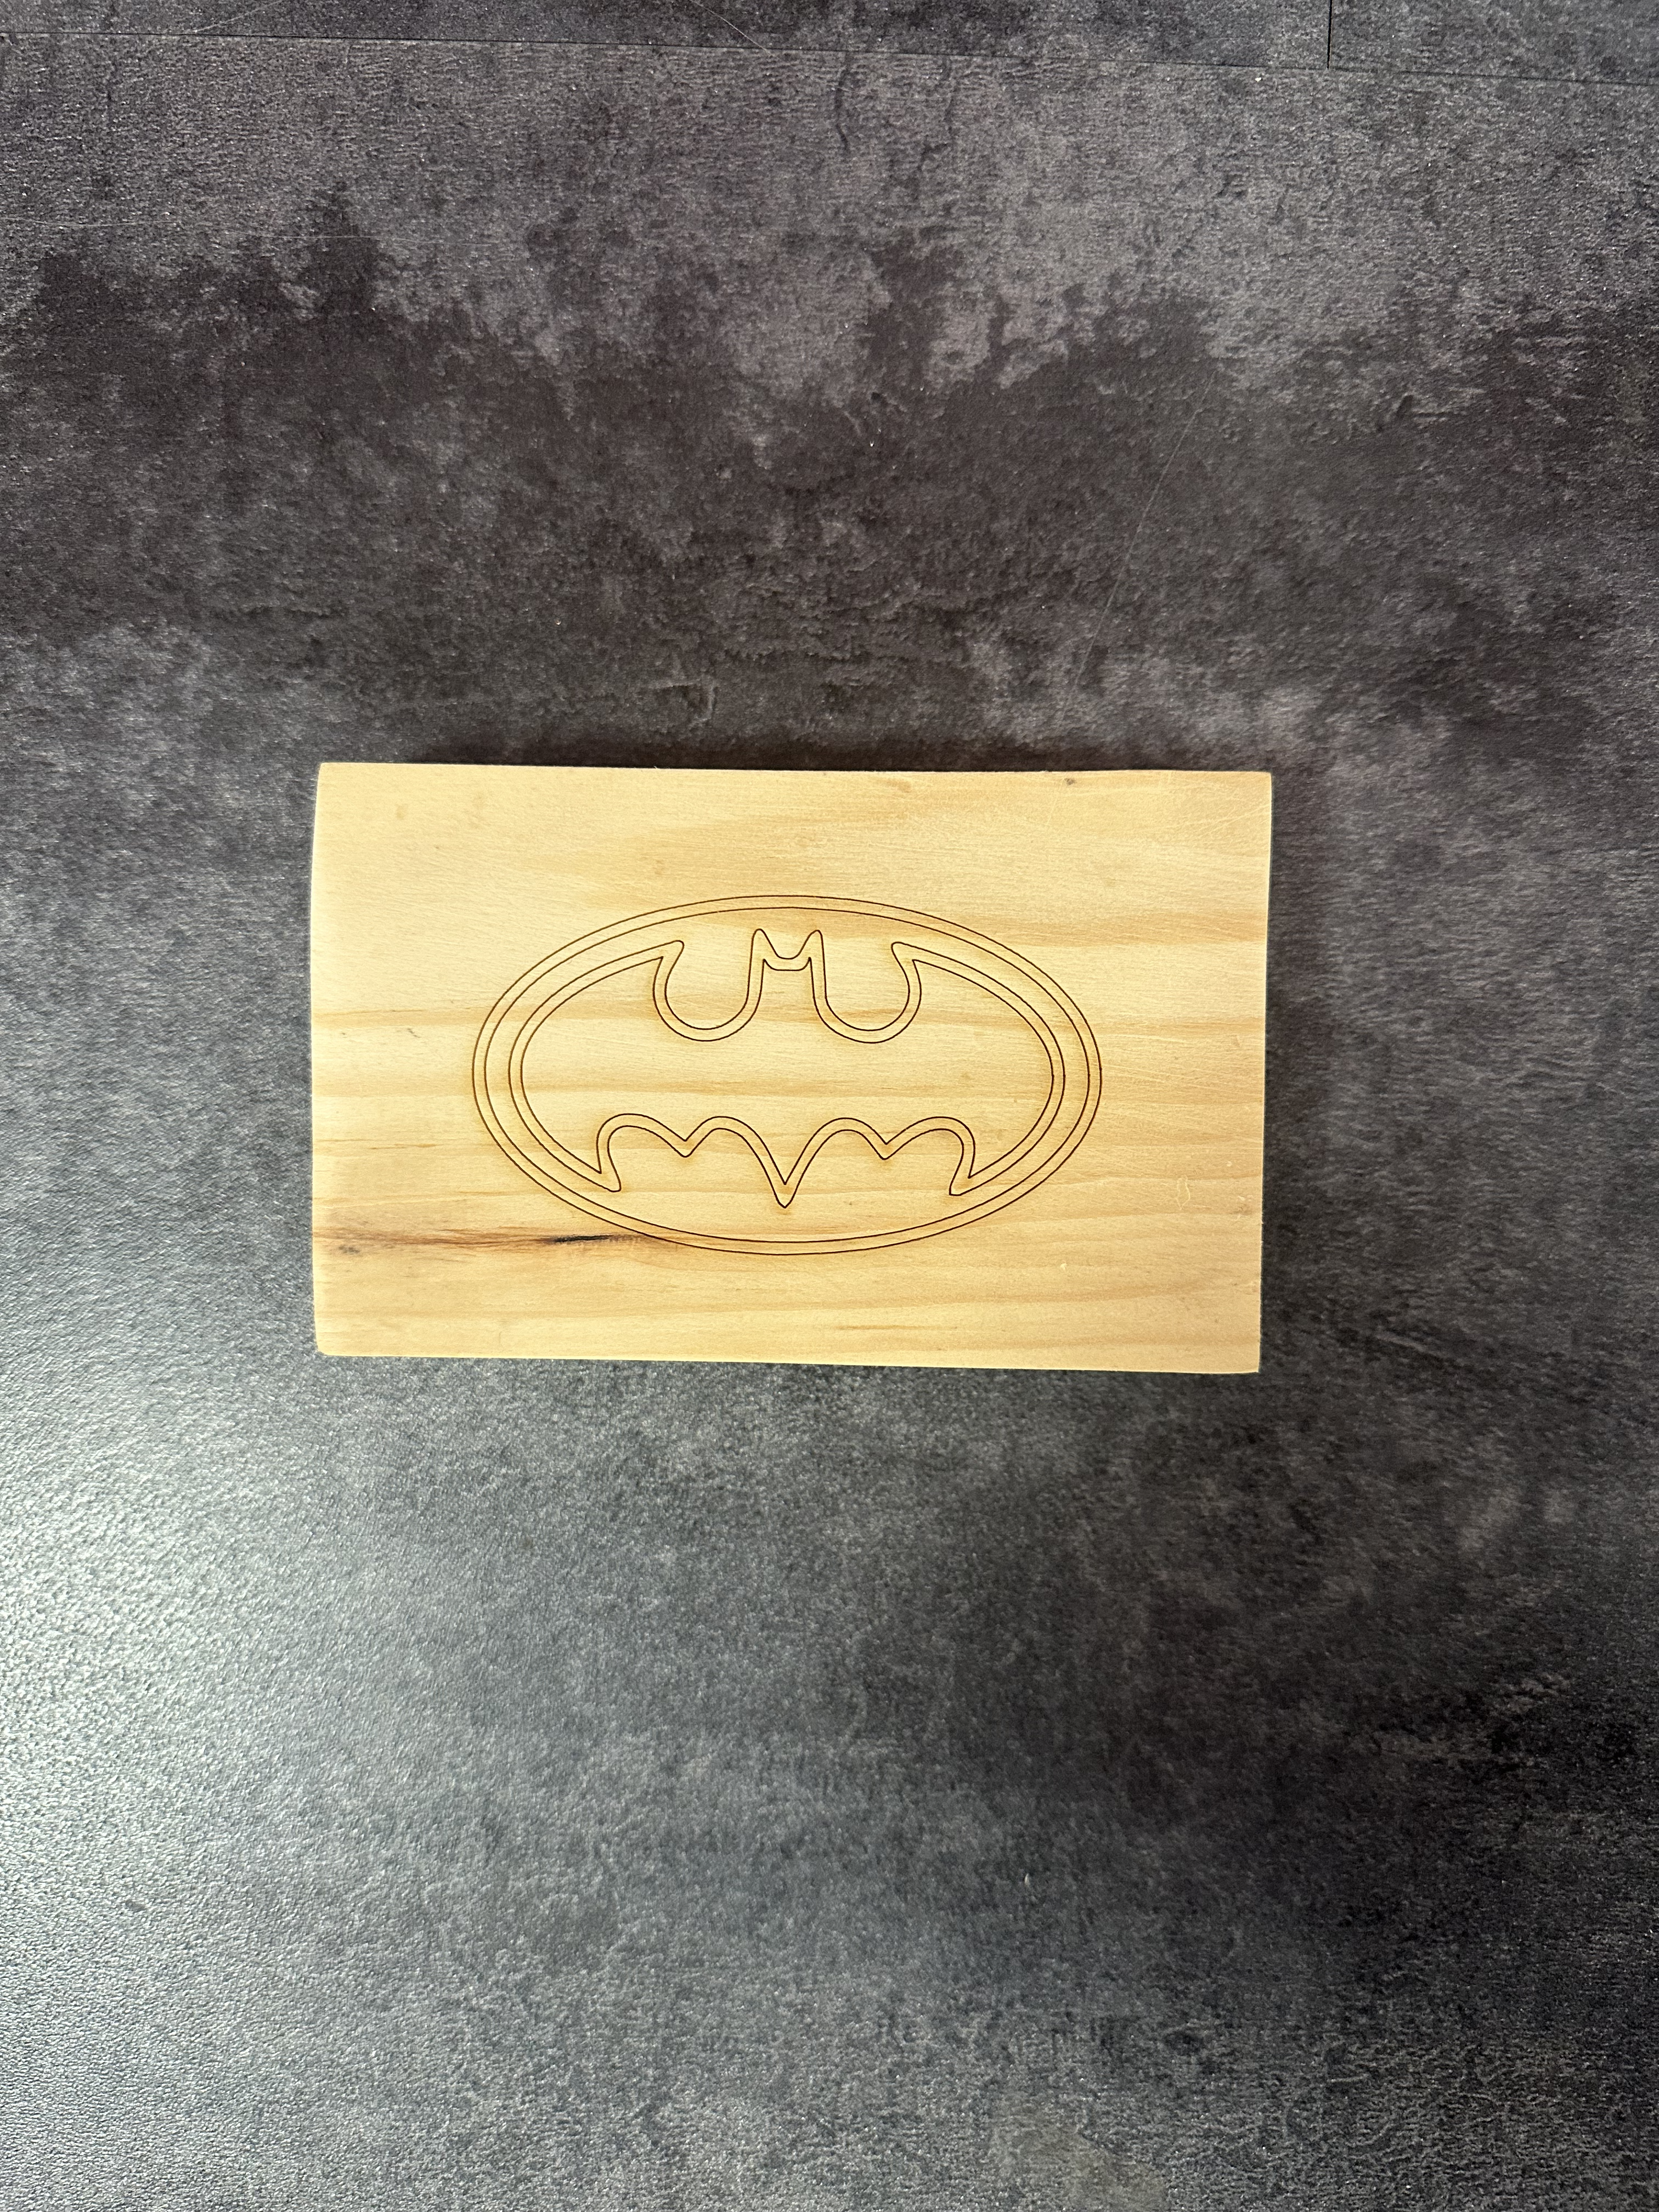
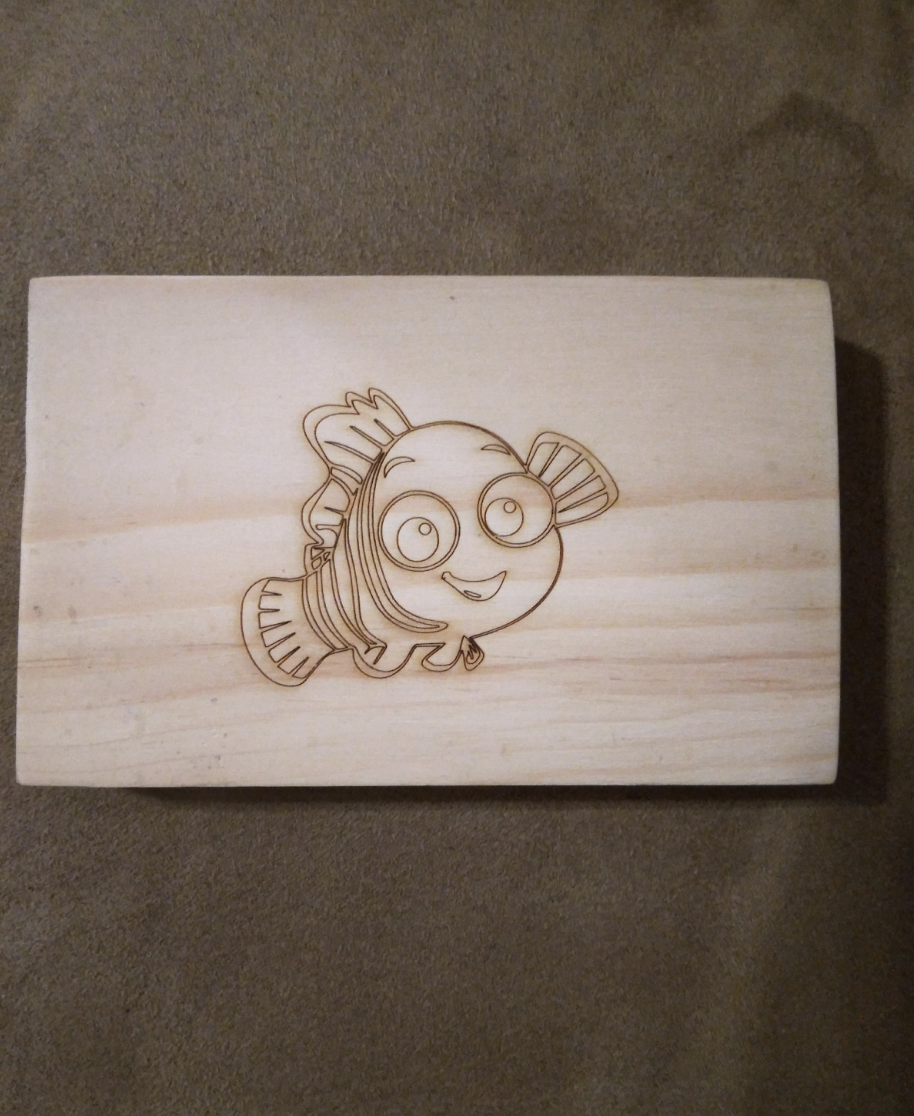
Are you in search of a beginner-level project for laser etching? Do you only have a limited amount of time to figure out the system basics? Well, look no further!
Intended for classroom use, with a mindful instructor and beginner-level students, this step-by-step is for those excited to see how the laser etch machine works while walking away with a personalized creation! Students will feel confident about the new skills that they have learned, and they will be able to use these skills as the building blocks for more advanced projects.
--
Ideal Makers: 9-12 grade students
After completing this project, students will be able to:
- Utilize basic Adobe Illustrator commands
- Set up graphics for laser etching machine usage
- Apply general instructions to a specific project
- Be safe in the lab
- Import Illustrator file to laser etching machine
Context
- Material Conversion and Processing
Practices
- Making and doing
- Creativity
Standards
- Applying, Maintaining, and Assessing Technological Products and Systems
- Integration of Knowledge, Technologies, and Practices
Supplies
(All of which are to be provided by the instructor)
Equipment
- Laser etch machine
- Computer
- That runs Adobe Illustrator
Materials
- Safety Goggles
- Ear plugs
- Ruler
- Pre-cut pine wood
- Any excess wood in the lab can be used so long as the teacher approves and it is cut to the specified size
Suit Up
Before any project in the lab, all students should know that safety is the top priority!
- Before the introduction of any new machine within your lab space, the instructor should go over all safety procedures with your class
- Know how to quickly alert your instructor if anything goes wrong during machine use
- Know how to turn off the machine if necessary
- Know where to find the first aid kit in the lab
For this project:
- Make sure that safety goggles are on at all times while in the lab and ear plugs are in (unless told otherwise by the instructor)
Gather Supplies
Get your pre-cut pine wood and make sure, with your ruler, that it is cut to the size of 4.75in x 3in x .75in.
- As long as the thickness of the wood is correct, your project should run smoothly.
- If the length and width of your piece of wood are different, you can either have your teacher give you another piece OR adjust your settings in Adobe Illustrator and in the laser etch software according to your specified dimension
Set-Up Adobe Artboard (pt. 1)
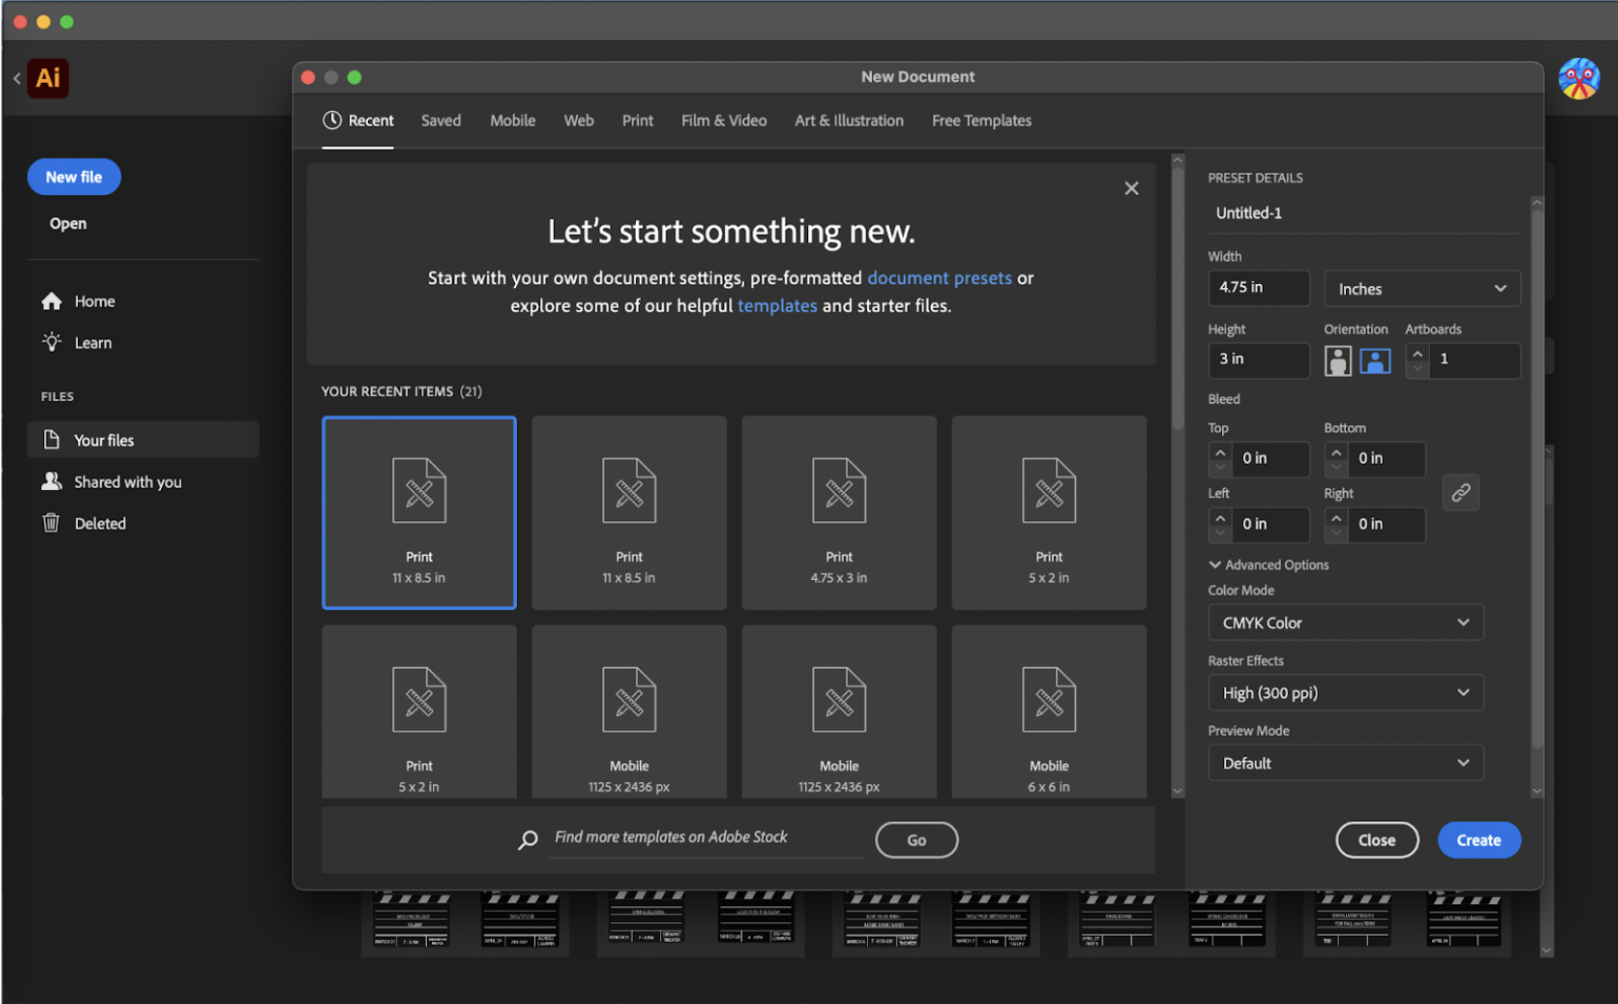
On your computer, open Adobe Illustrator and create a landscape artboard with the length and width of your piece of wood.
- In this case, it should be 4.75 inches by 3 inches (unless you are using a piece of different dimensions. In that case, fix these numbers accordingly).
- Make sure that the document color mode is RGB, otherwise, the graphic will not show up in the laser preview.
Set-Up Adobe Artboard (Pt. 2)
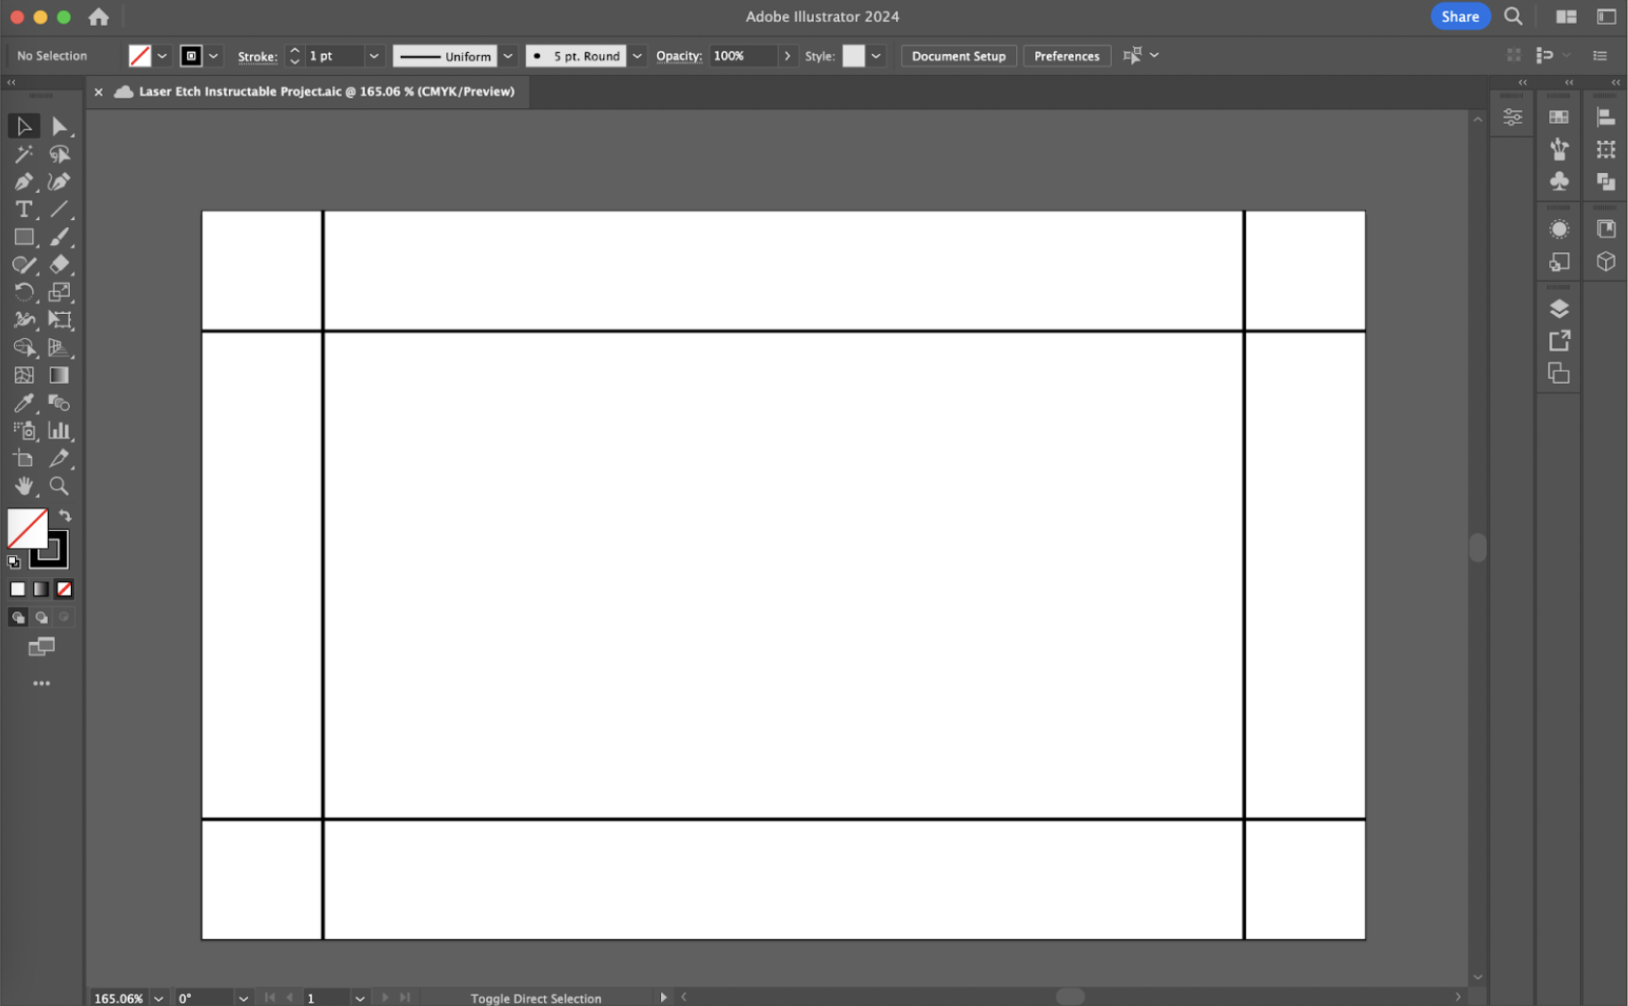
Using the line segment tool, create a half-inch border around the page
- The rectangle in the center is where your etch will be placed
(This step is optional and the borders can be smaller. We added this to make sure your design properly fits within the boundaries of the wood.)
Borders
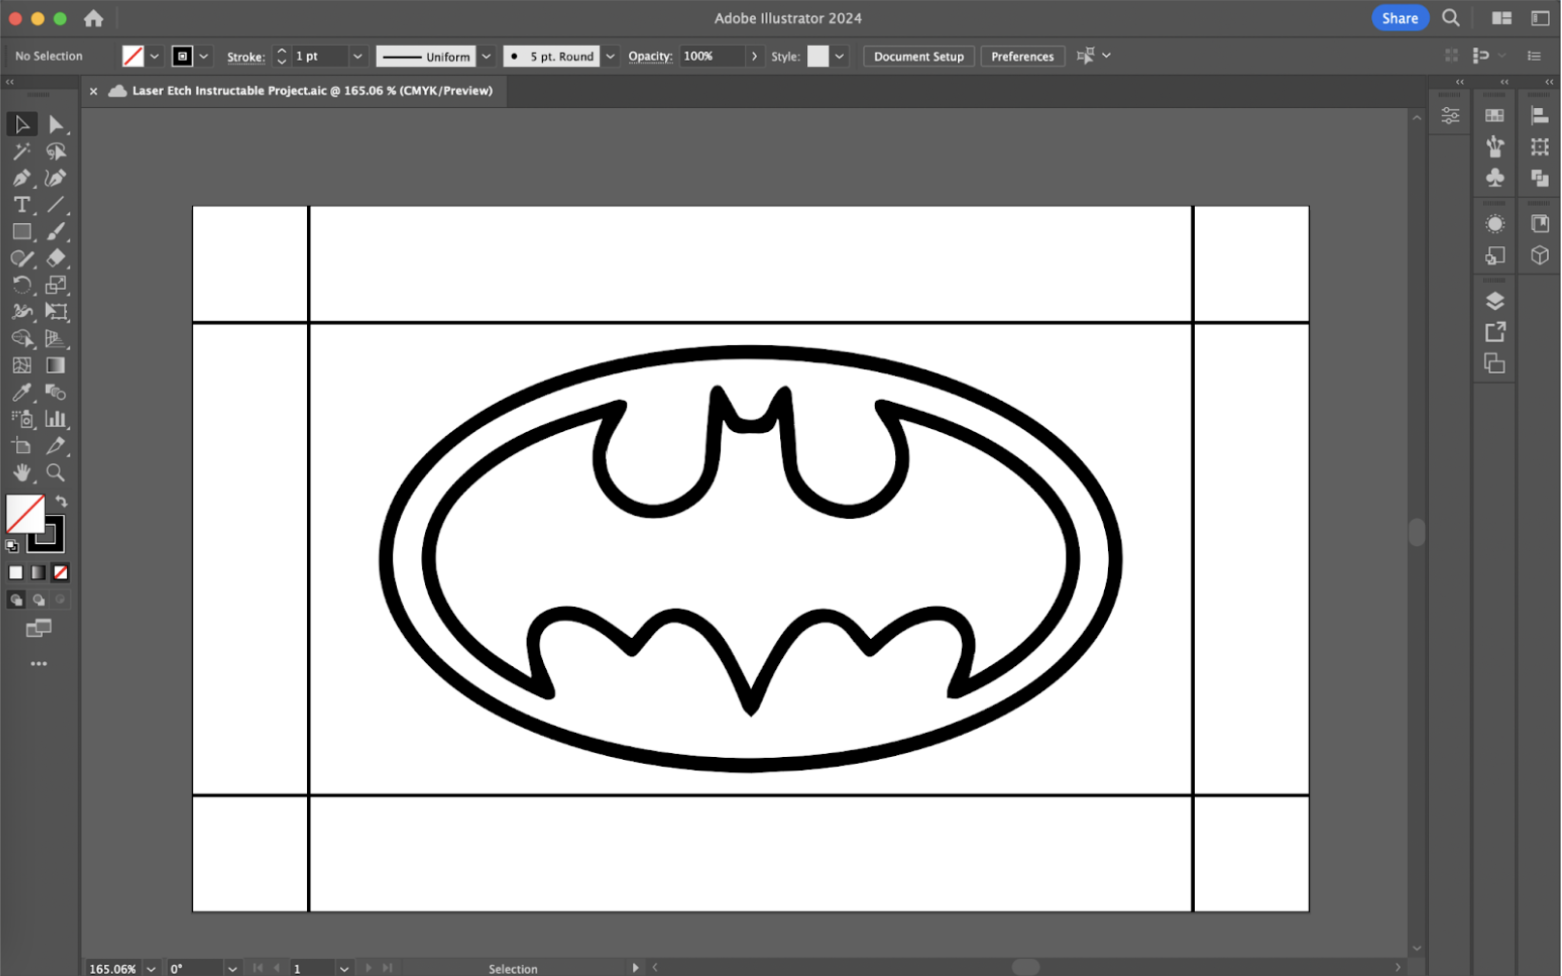
Place an image of your choosing within the borders and roughly centered on the artboard.
- Make sure that the image selected has obvious defining lines
- Be sure to scale the image appropriately, so that the image does not become compressed or stretched.
Expand the Image
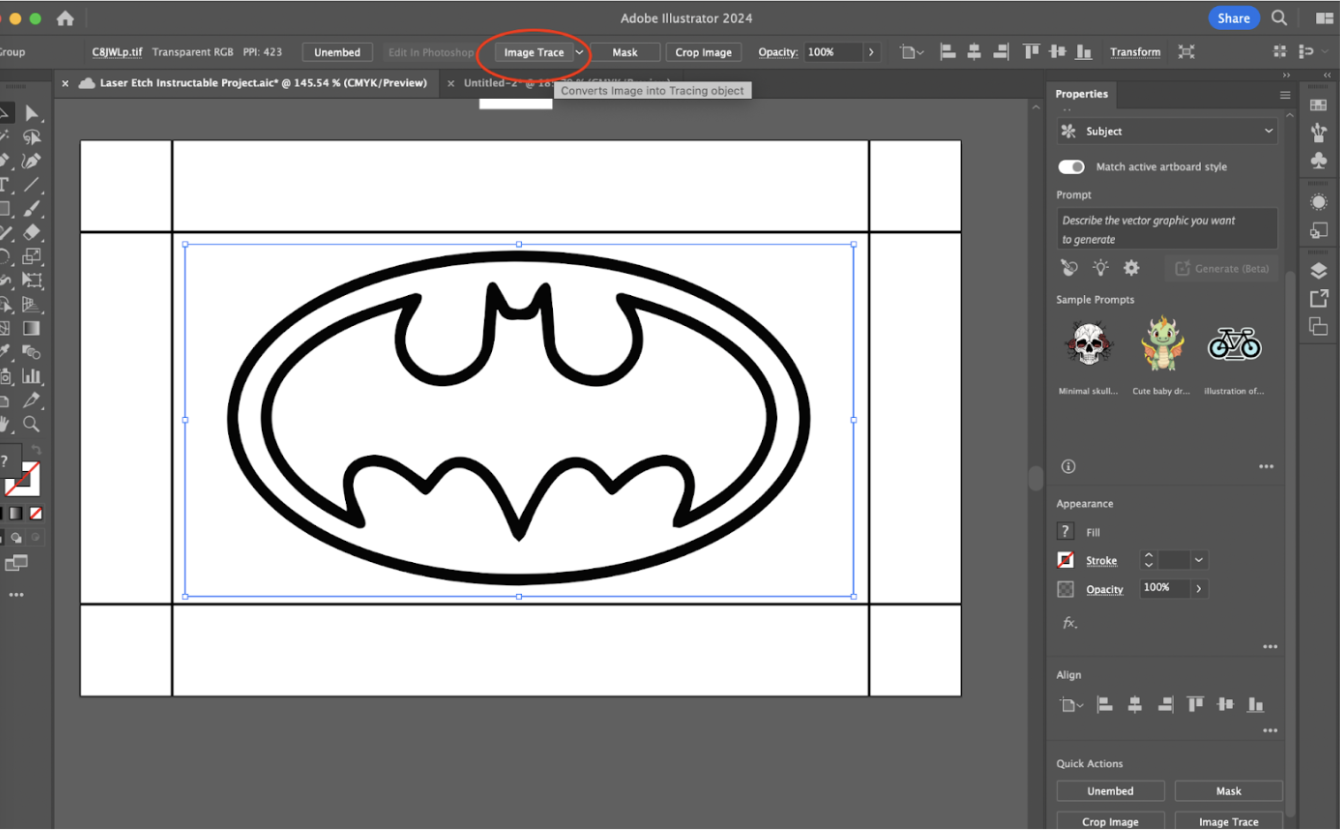
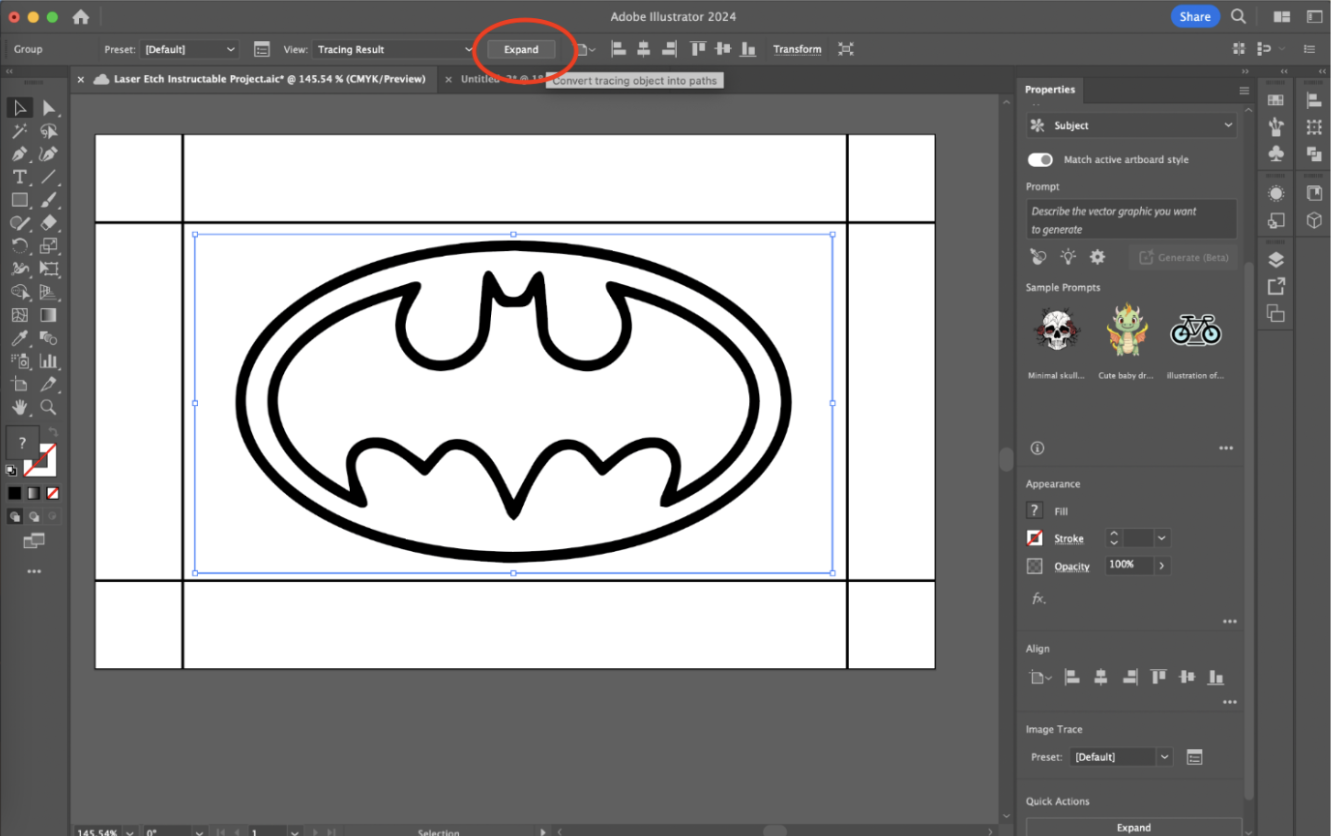
Select the image, select image trace, then expand your image to create solid lines of the graphic.
Separate the Lines
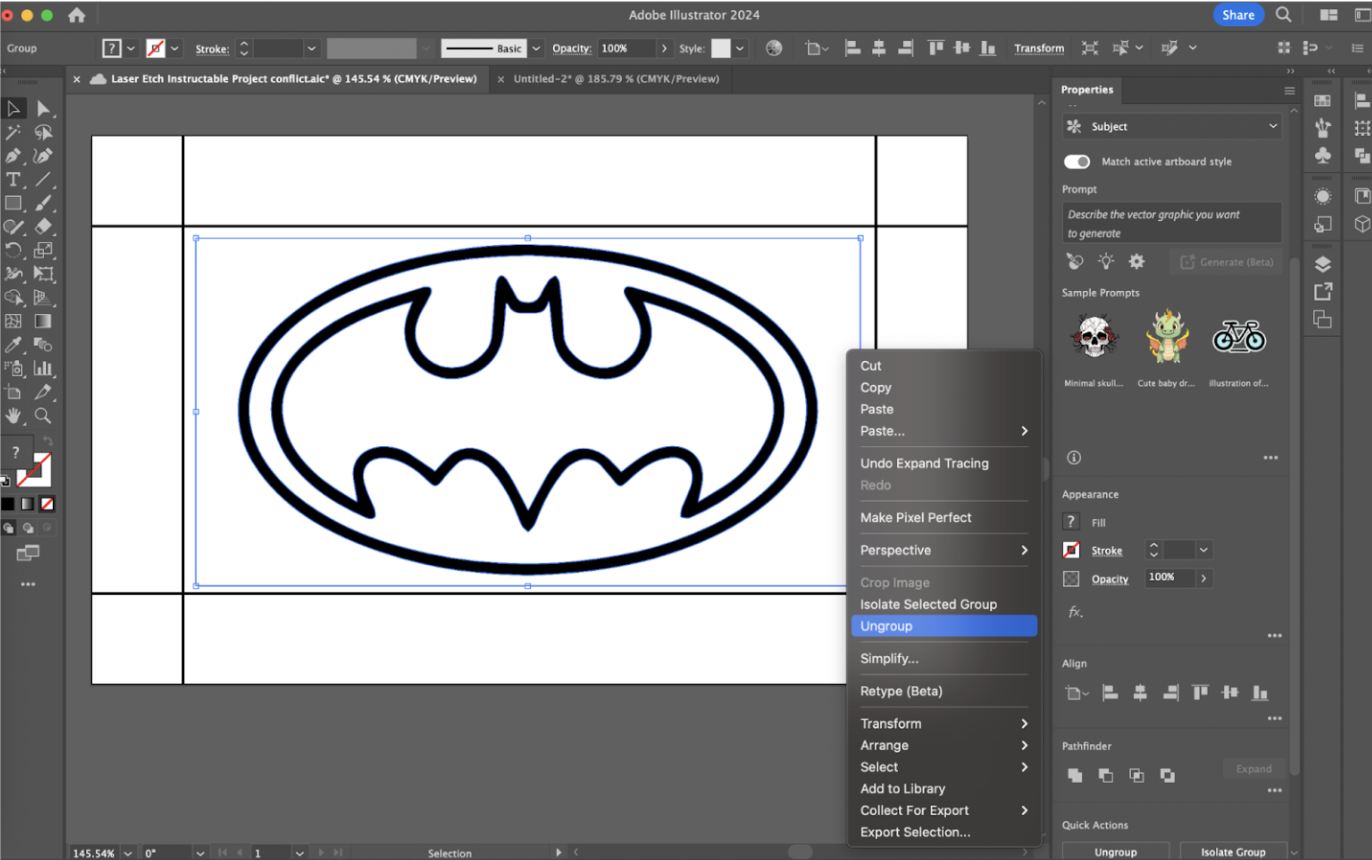
Select the image, right-click, and select ‘ungroup’ to separate the lines from the extra spaces of the image.
- While not necessary but helpful in future steps, you can delete the areas that are not the graphic outlines. For example, in the graphic below, the white spaces surrounding the Batman logo and within the logo can now be individually selected and removed.
Edit the Line Size
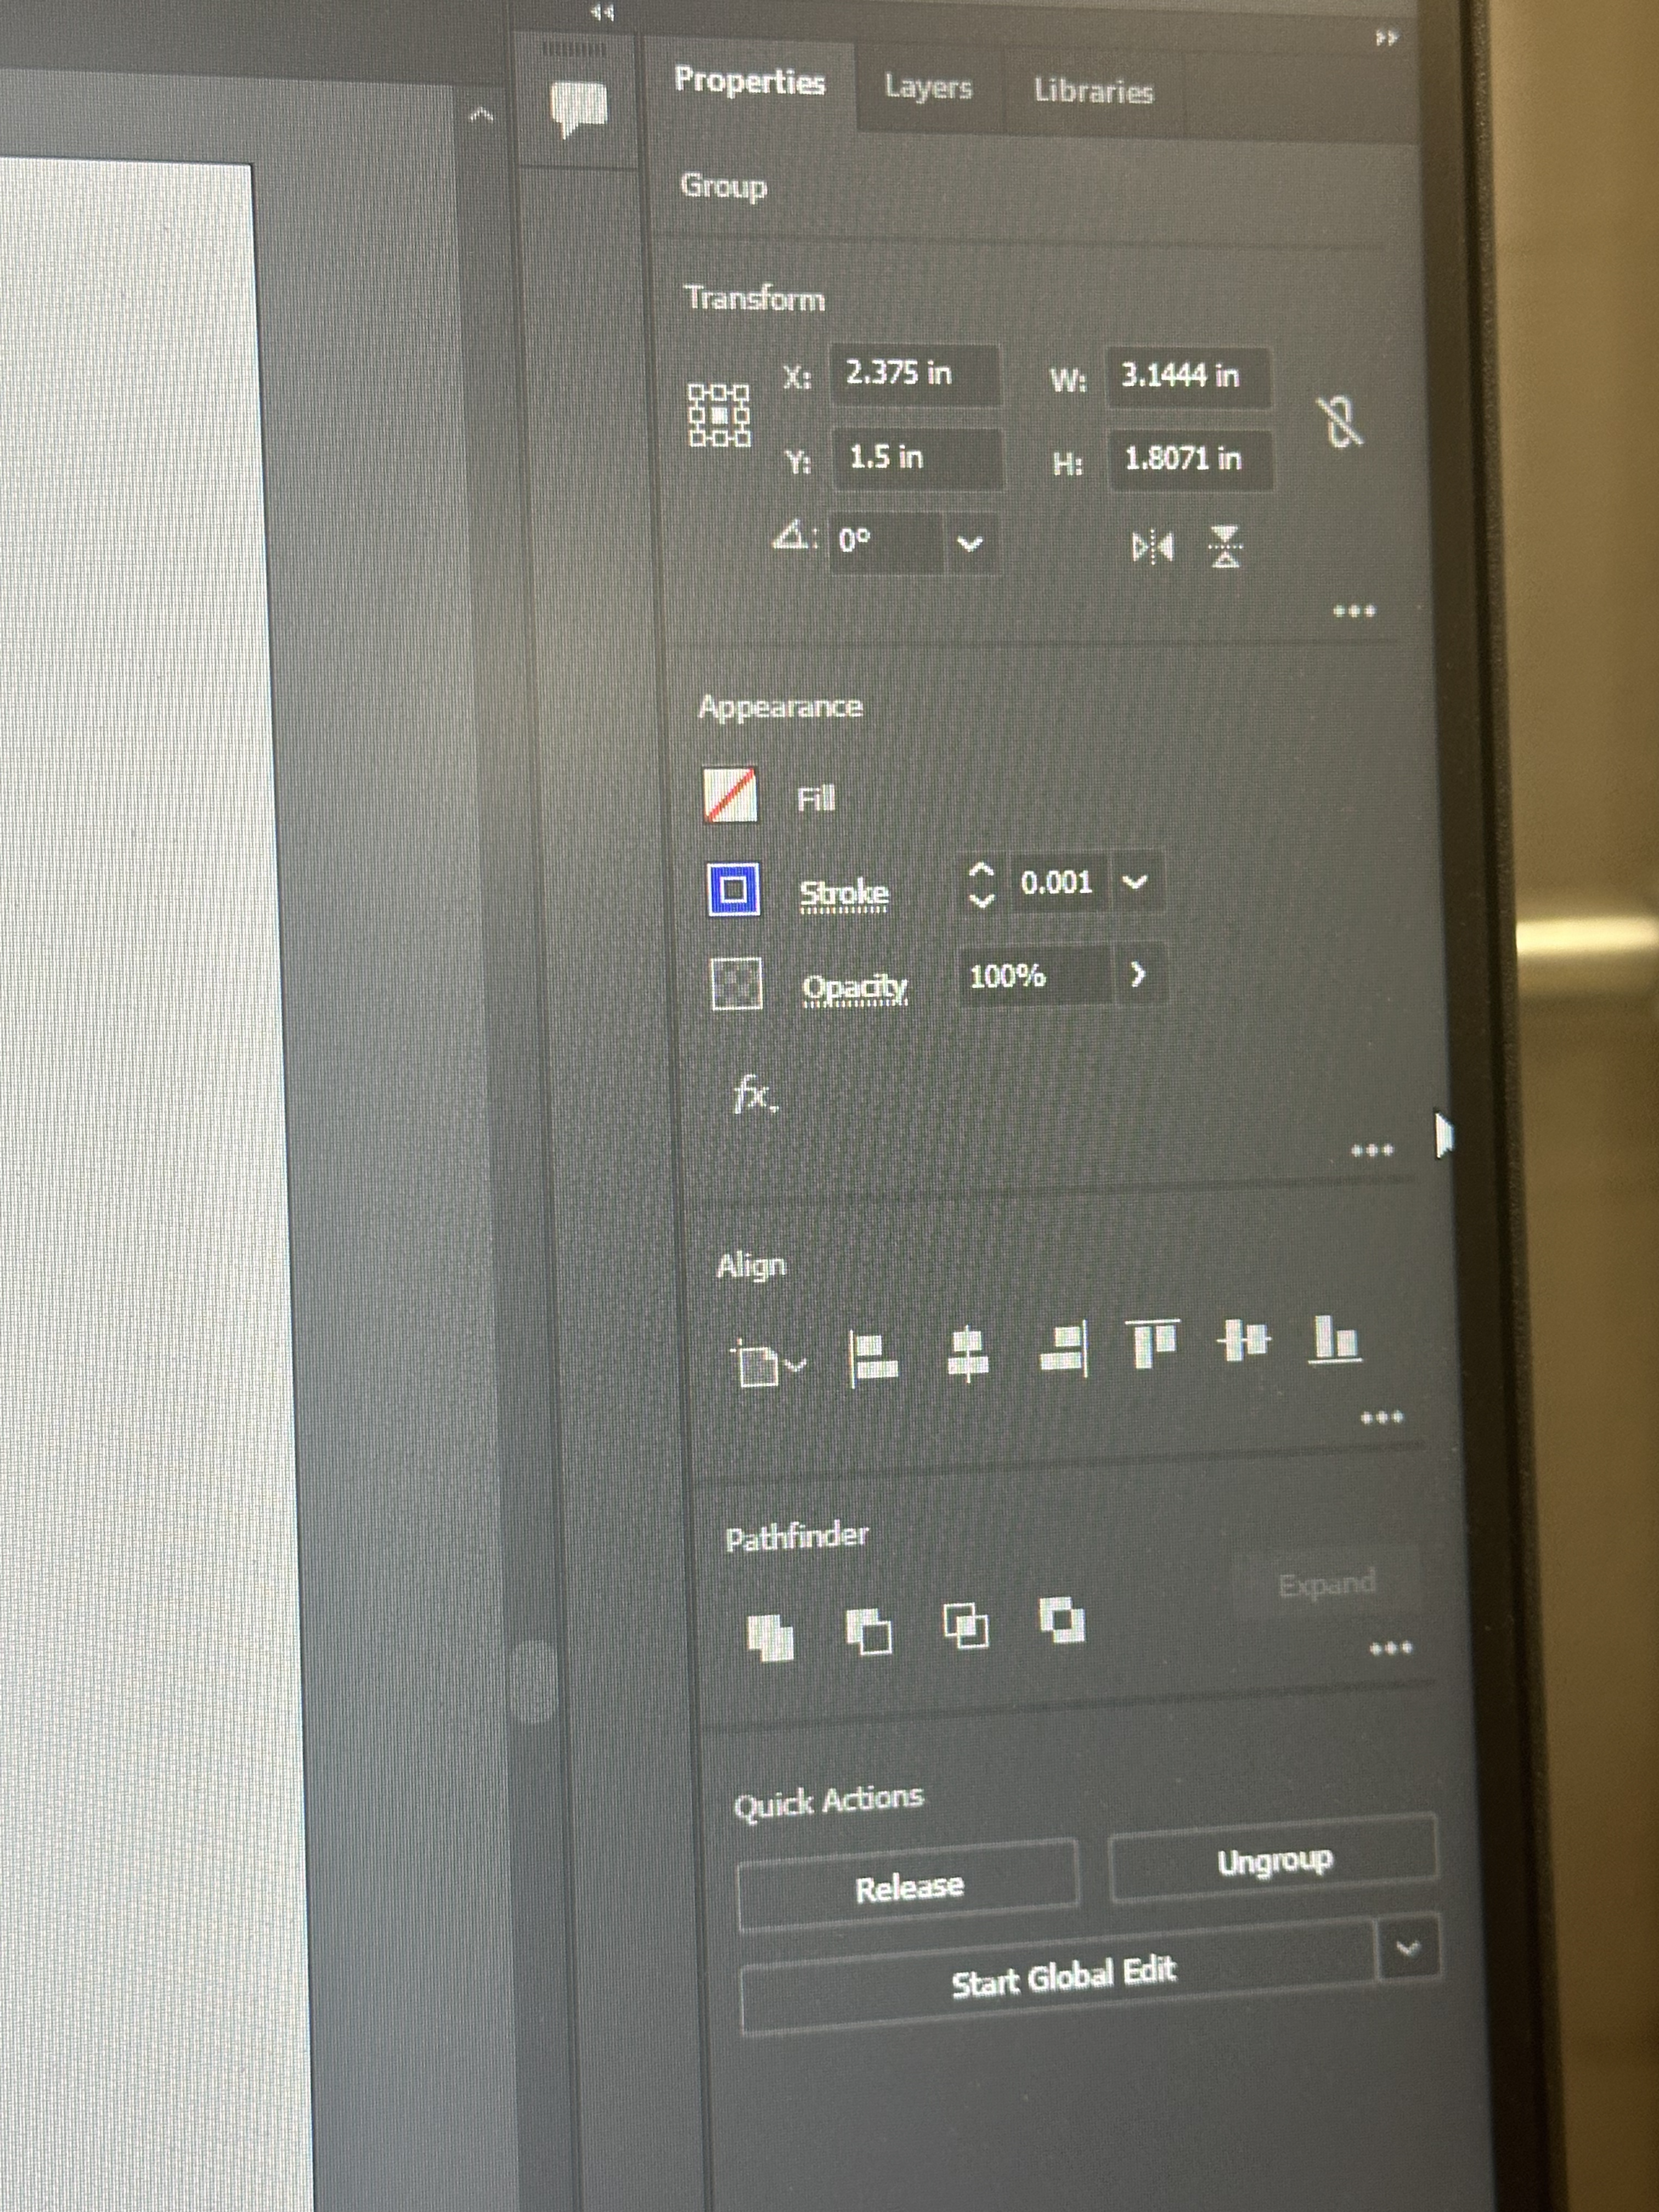
Select the outlines of the image, turn off the fill, and change the stroke to .001 inches.
- The size of the laser is extremely small and needs to be thought of when creating etches of simple line-based graphics.
Edit the Line Color
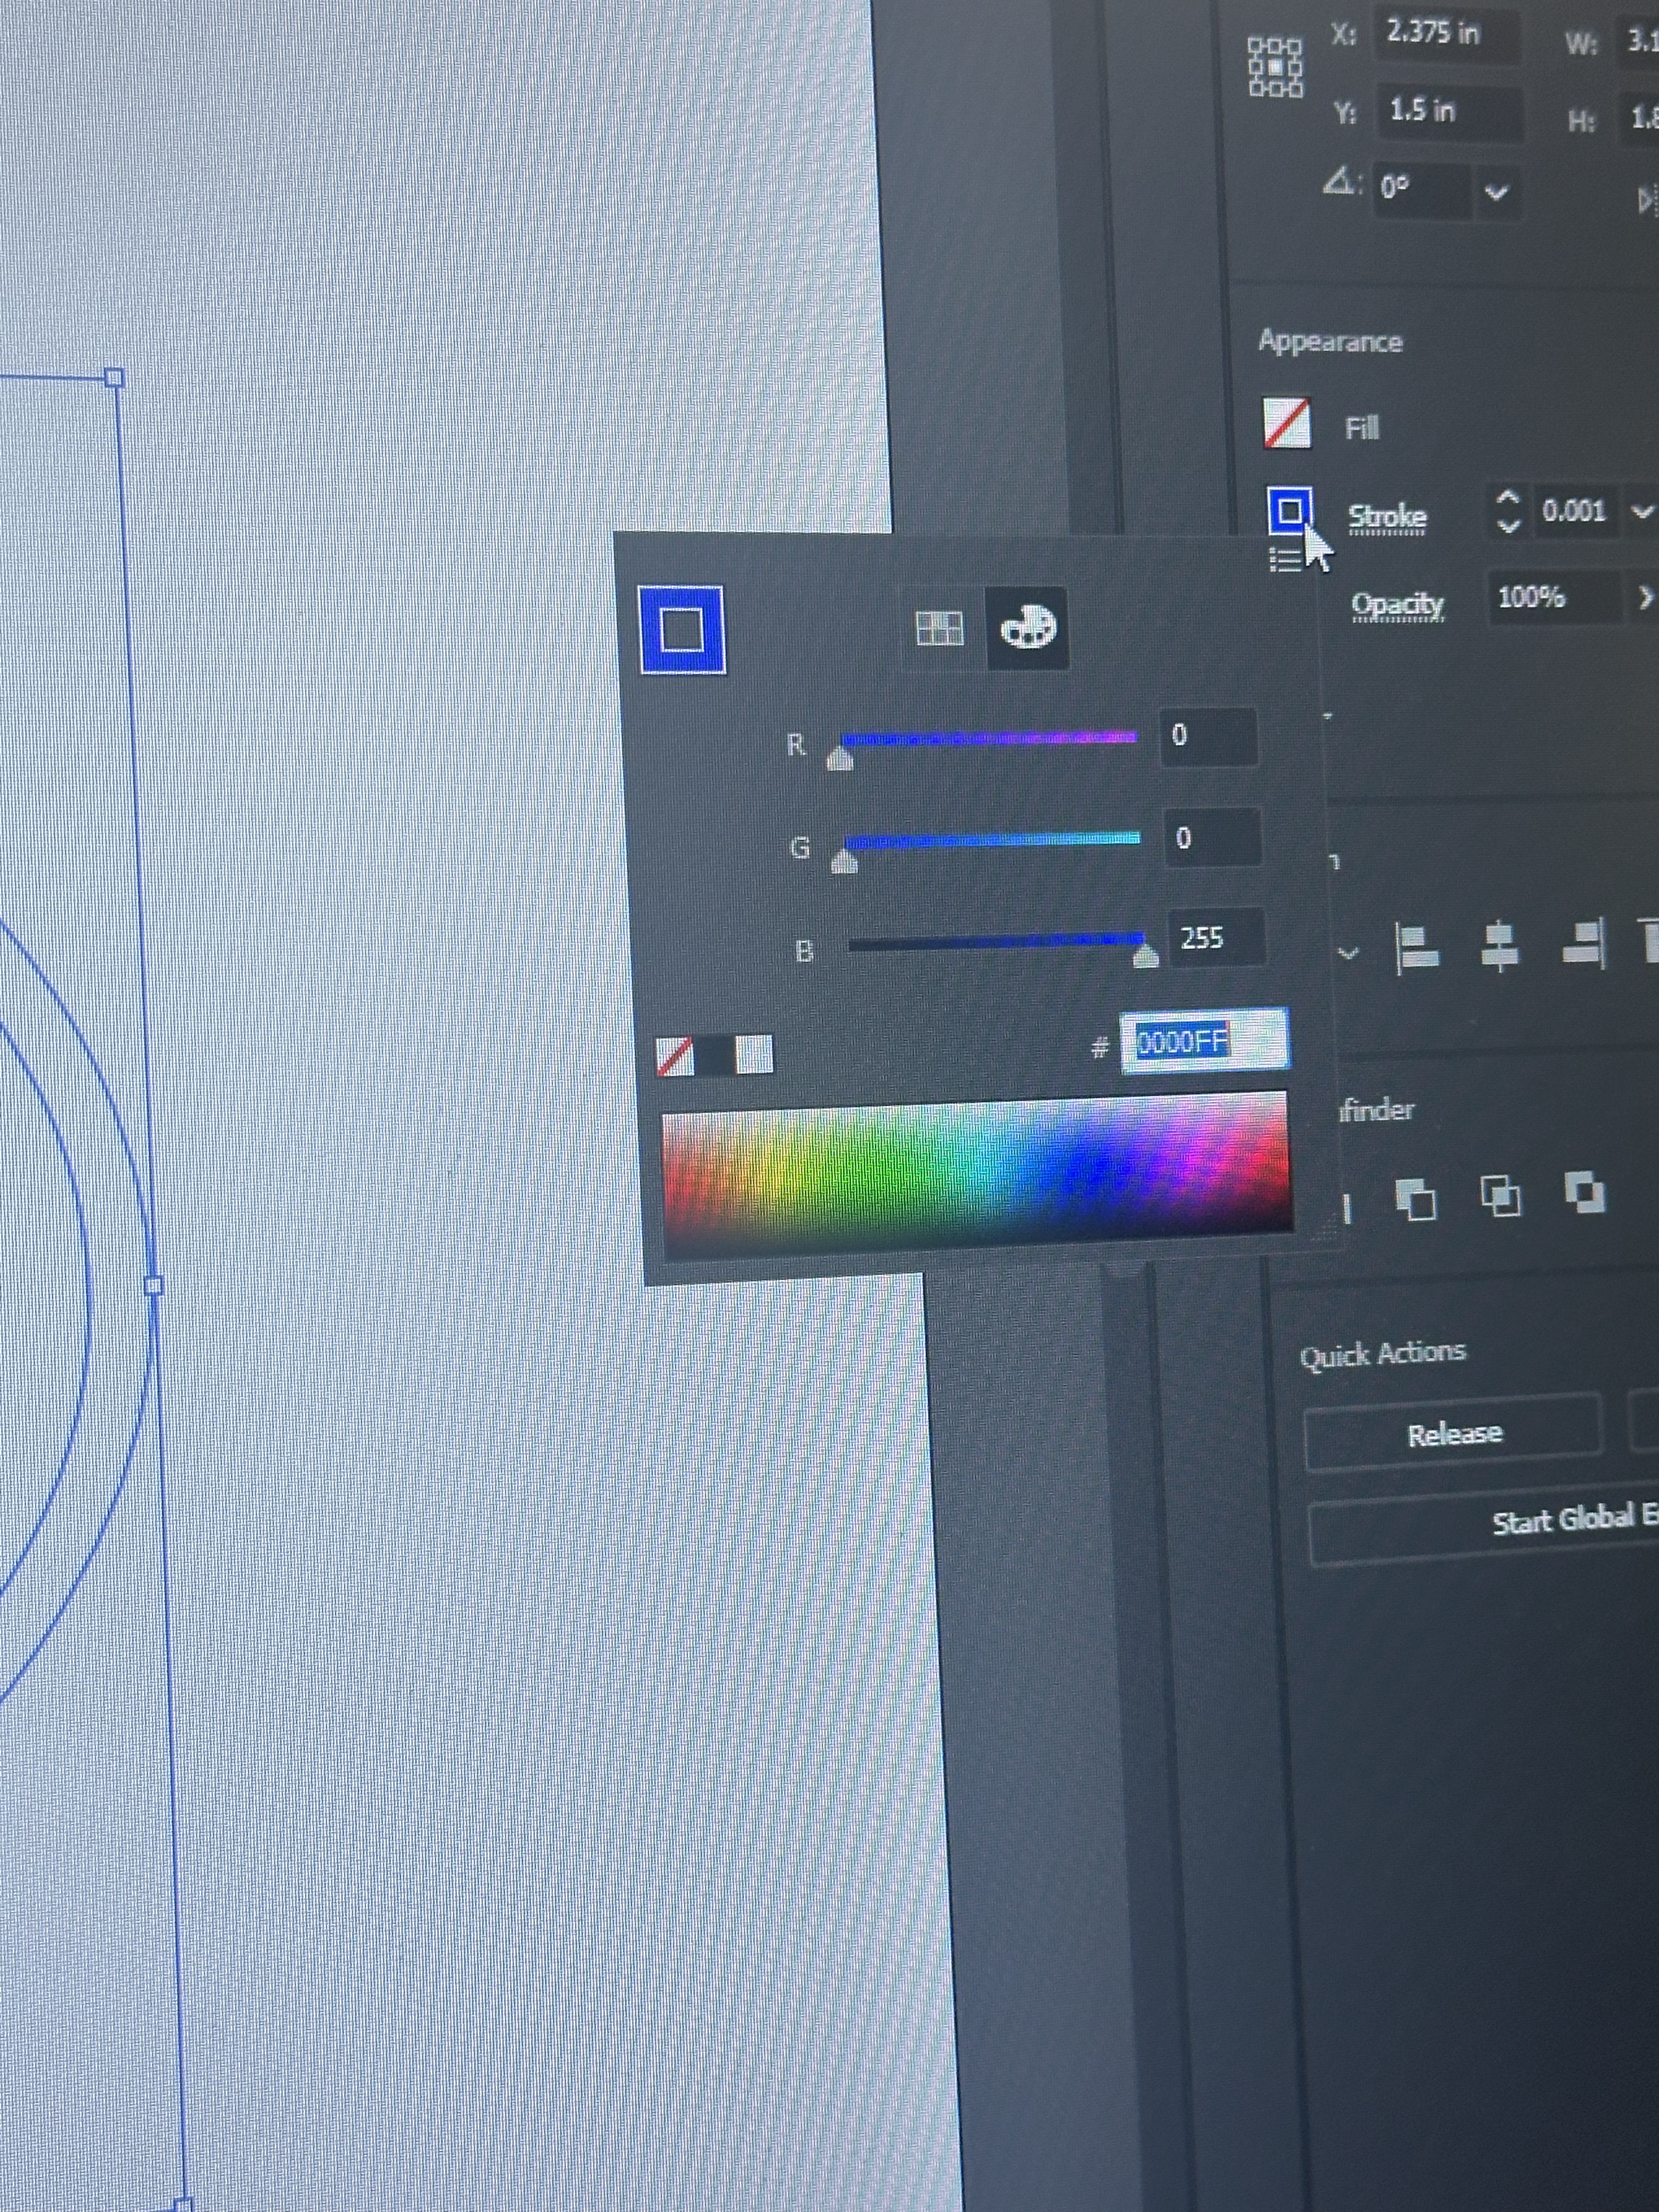
Make the color of the lines in the image blue (RGB values 0, 0, 255).
- Making the color blue allows the laser to read that the image is supposed to be etched rather than cut.
Align the Image
Center the image in the middle of the artboard. In the “Properties” panel, under the “Align” heading, you can select the setting that will align it to center both horizontally and vertically.
Place the Wood
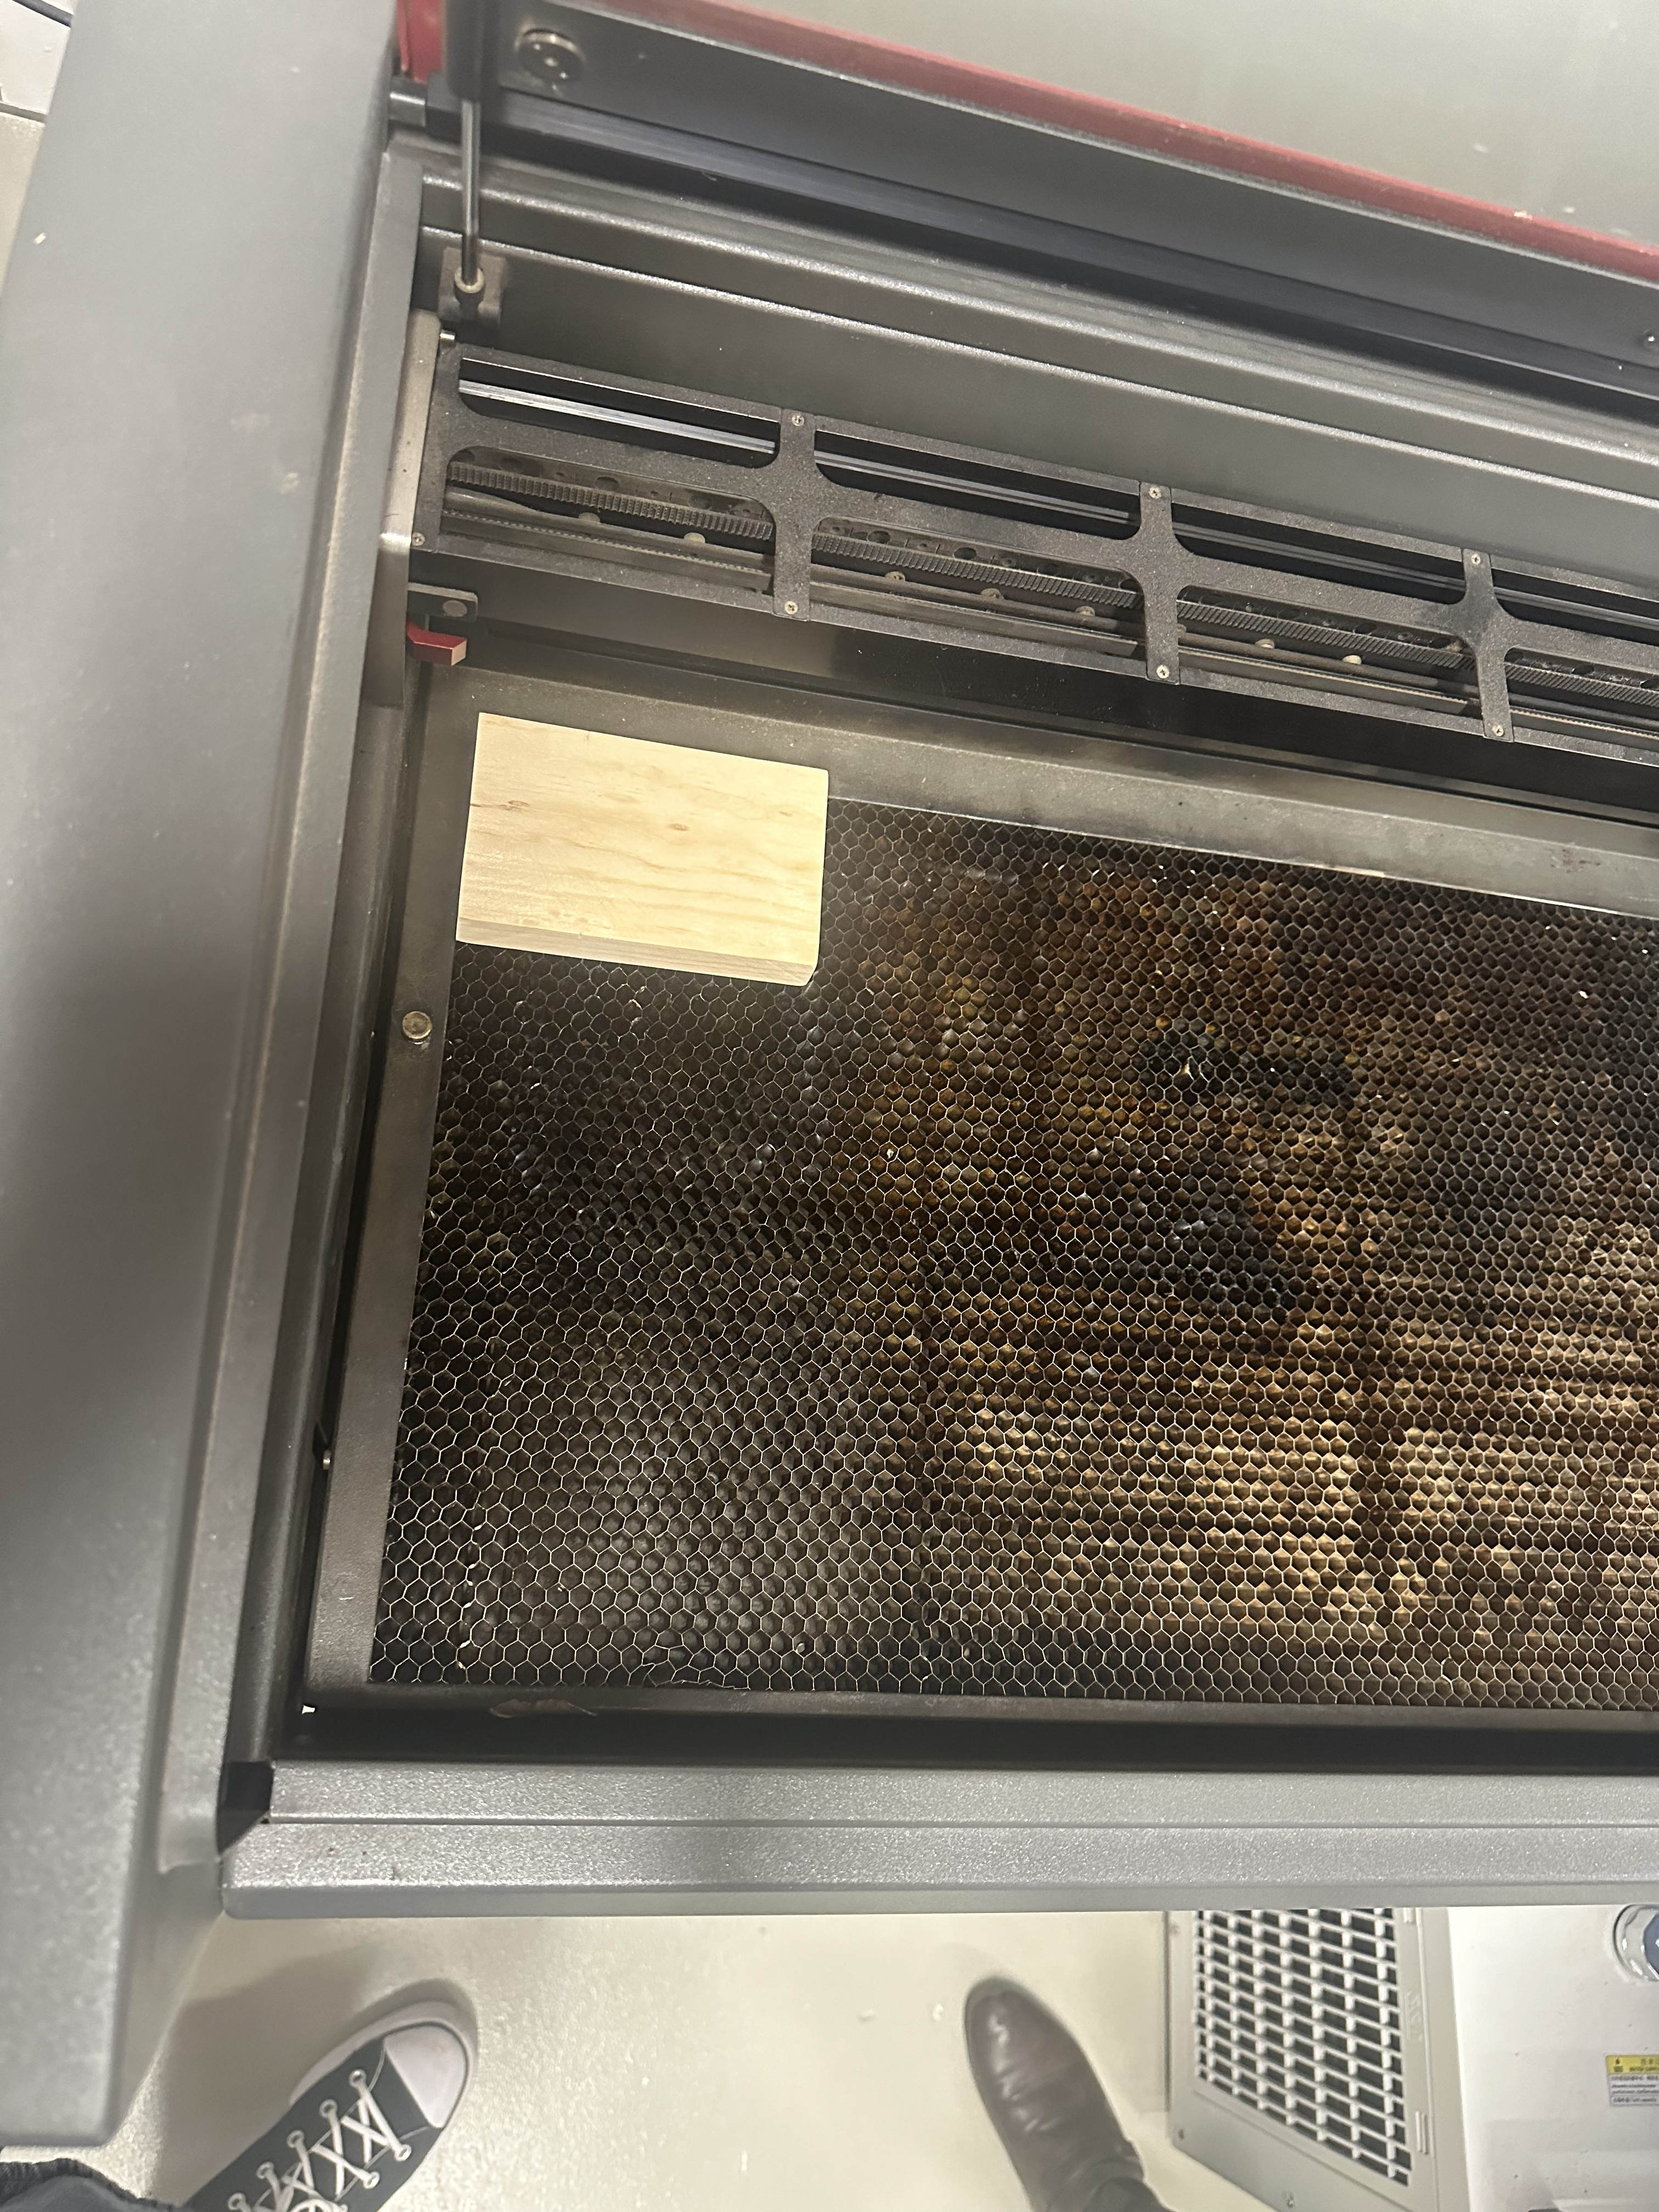
Put the piece of wood on the bed of the laser etching machine
- Line the piece of wood up with the top-left corner of the bed.
Print the Job
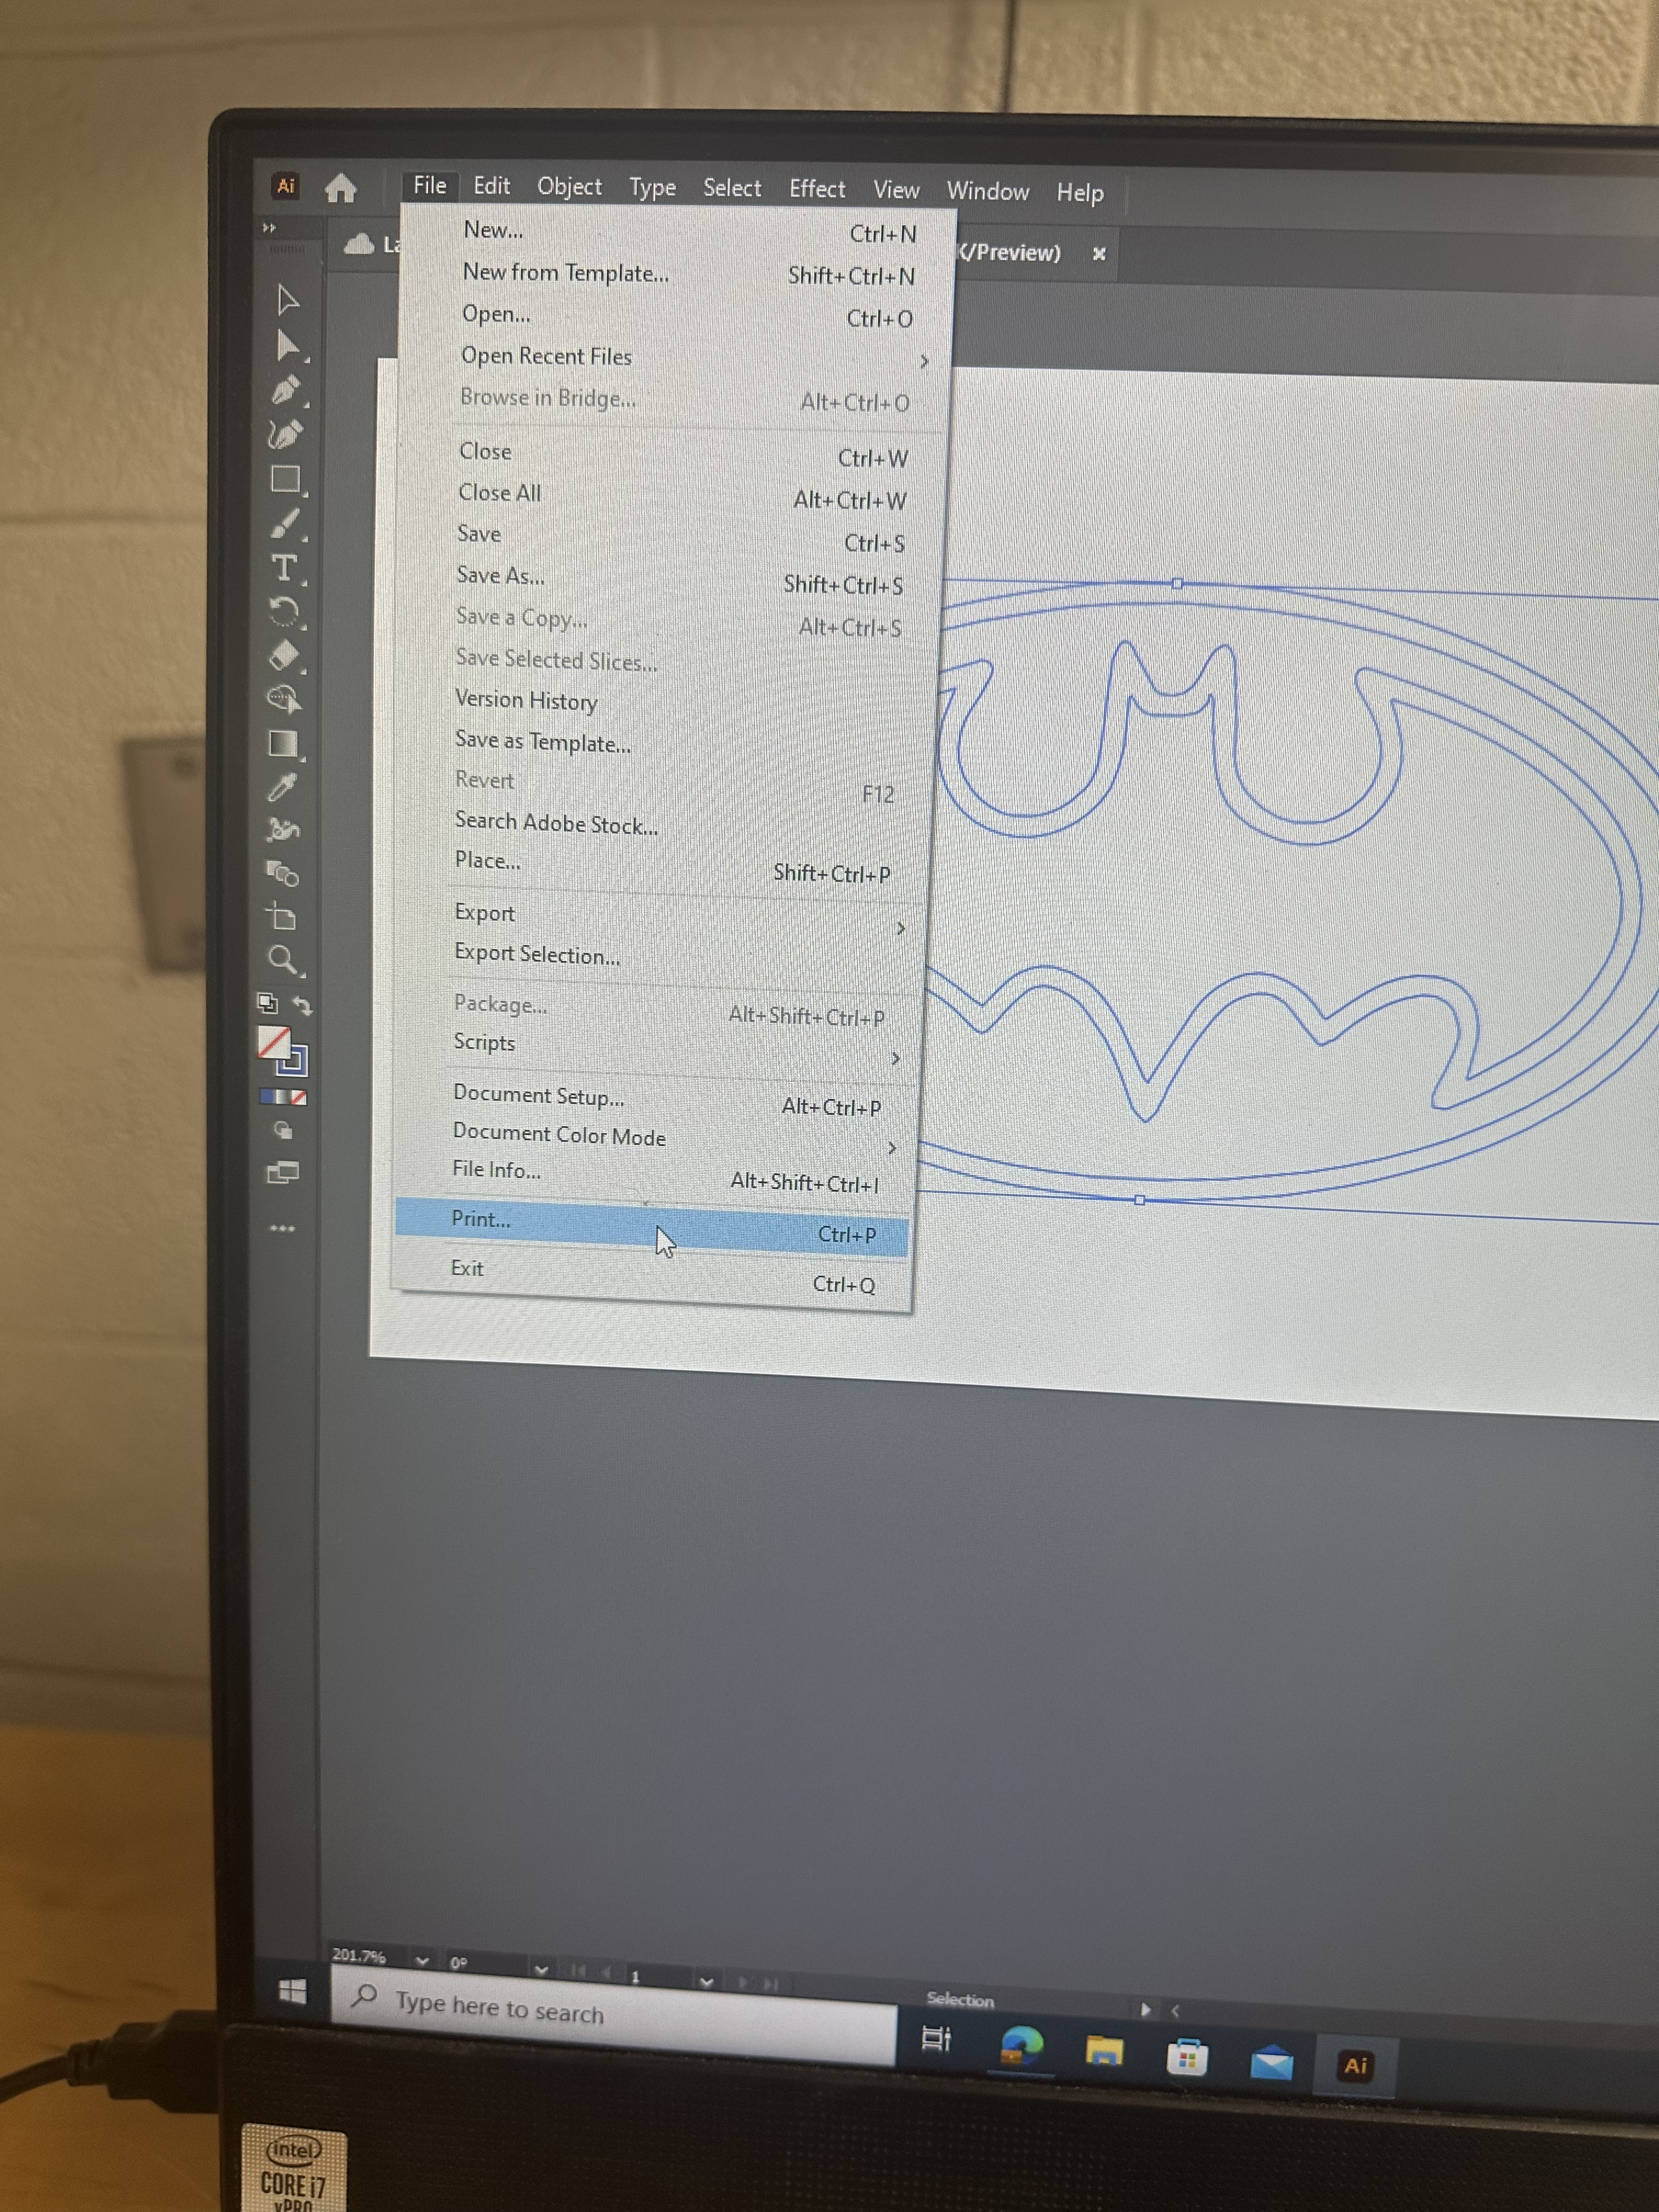
Print the document to send it to the laser etcher. The computer should be set up so that the laser etching machine is the default printer
Open the Software
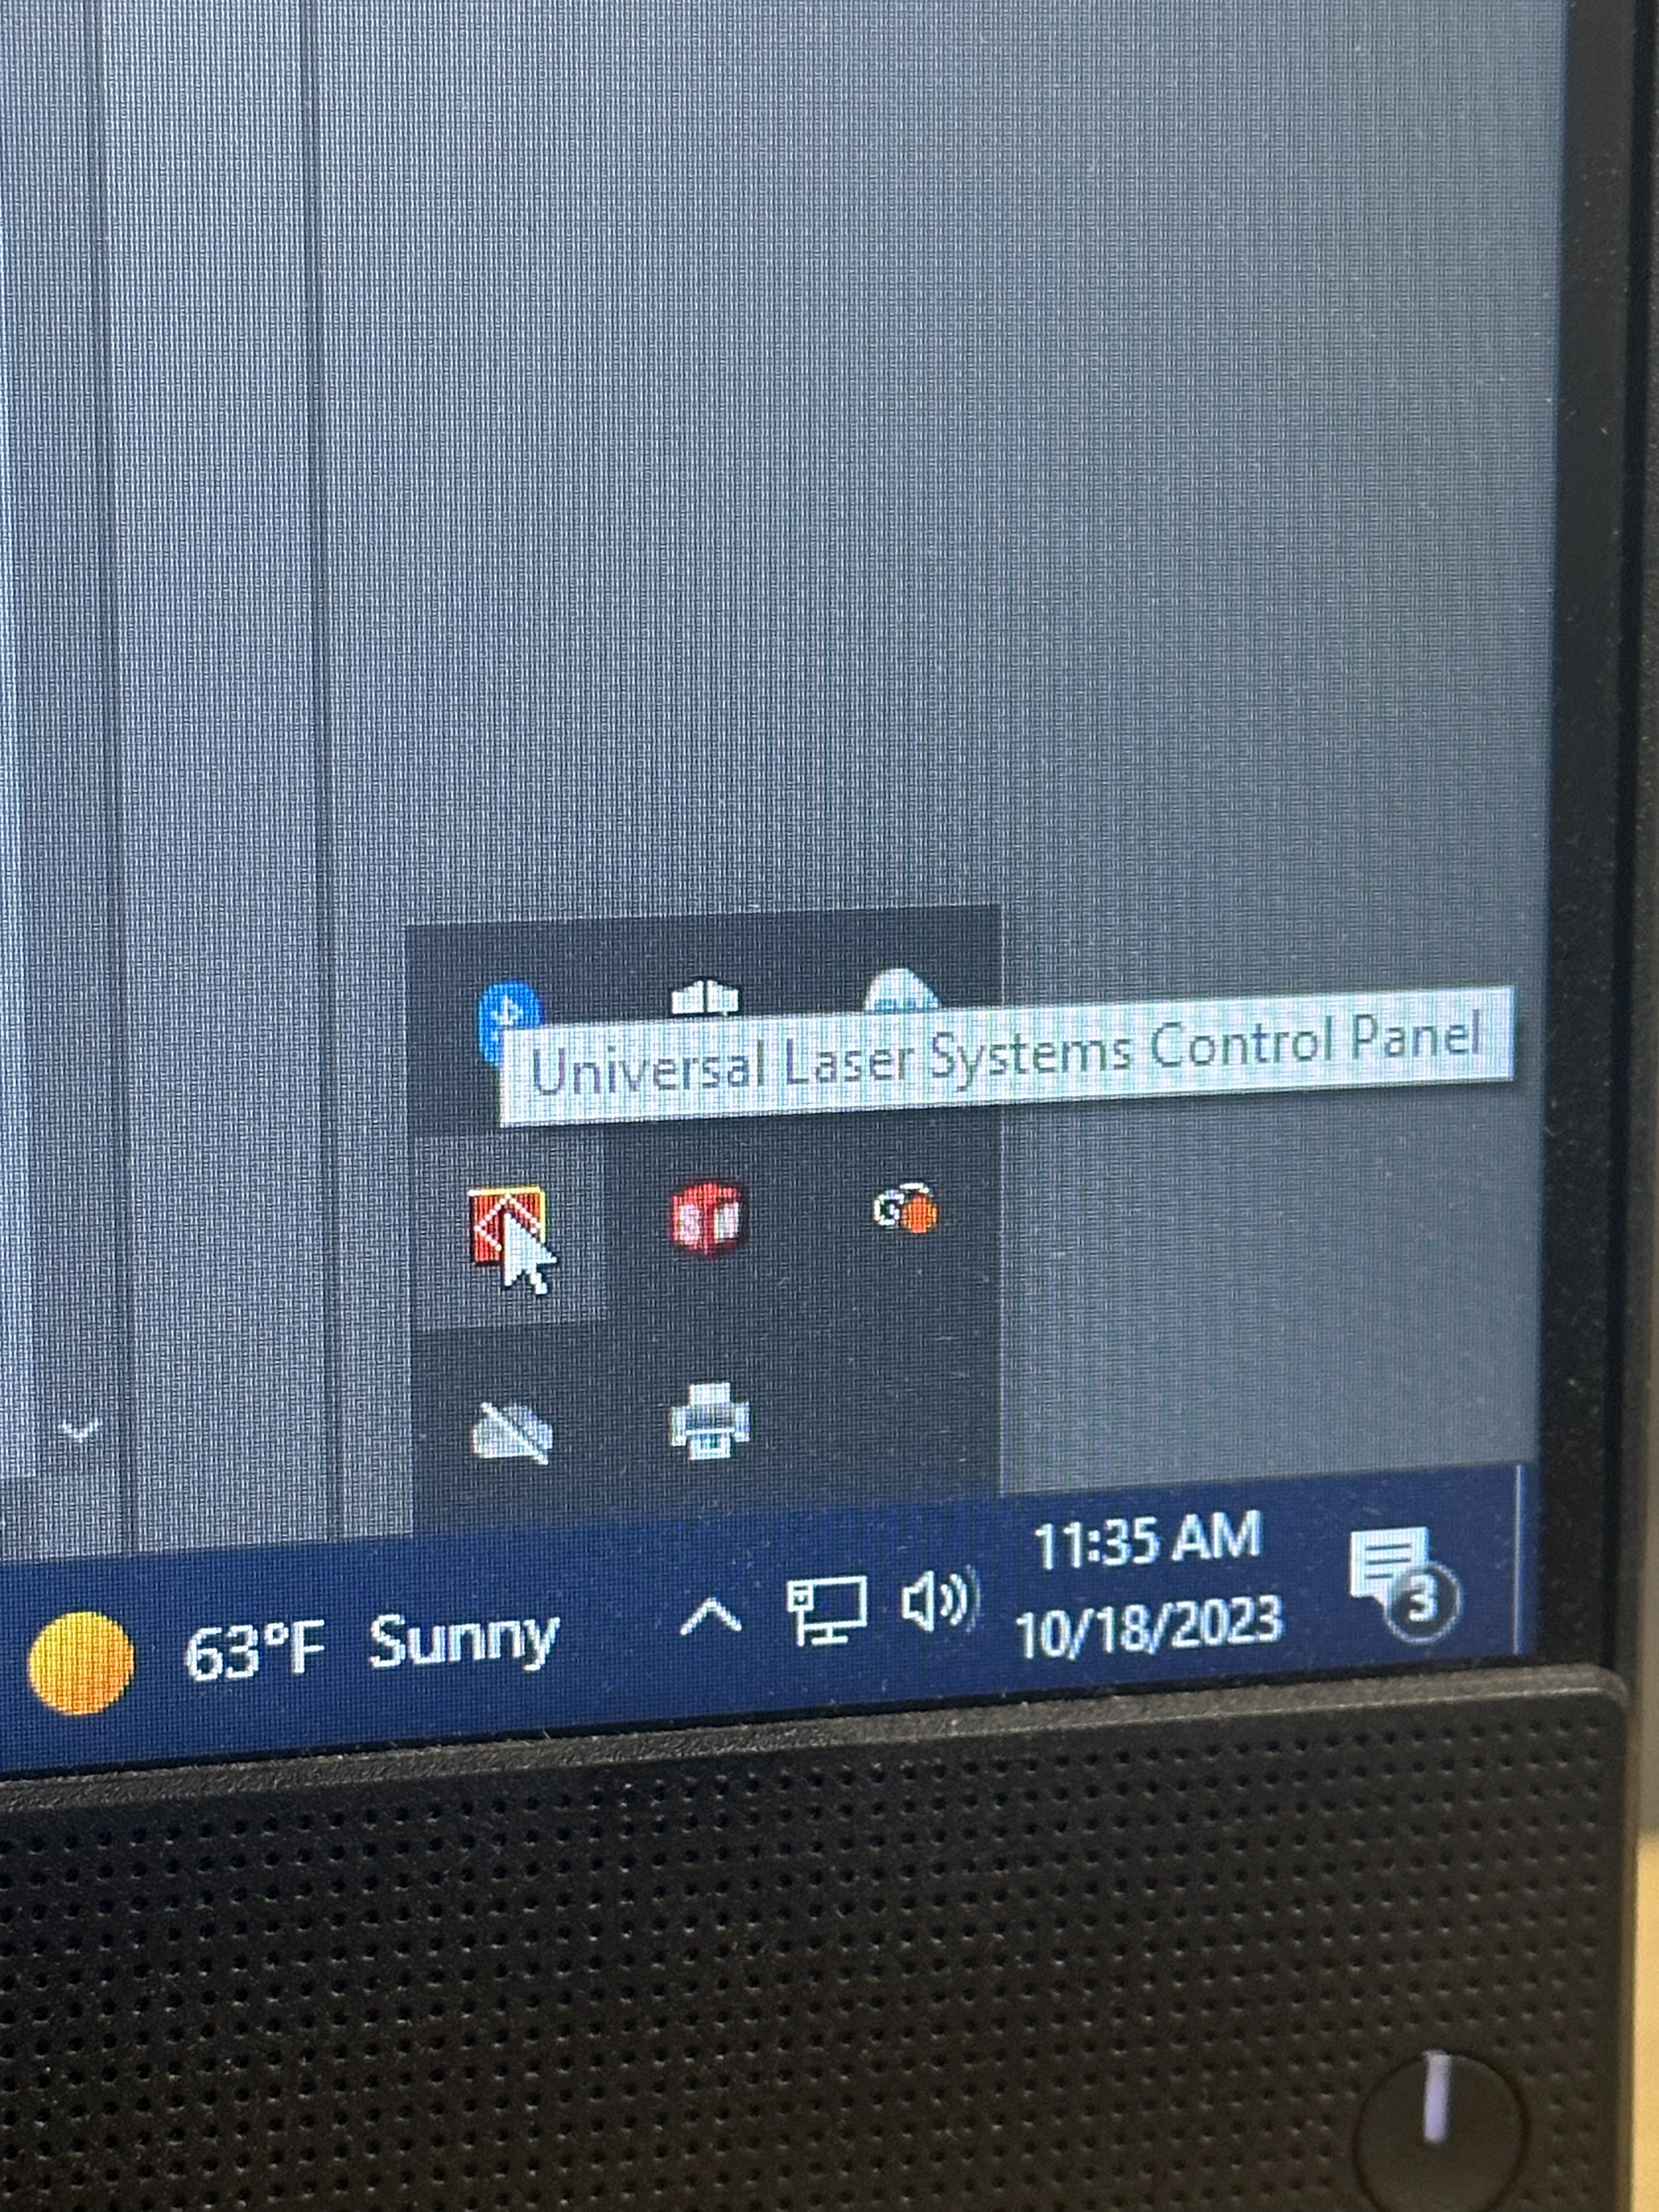
Open the laser etcher software, and you should see the file of the image on the artboard.
Adjust Etch Placement
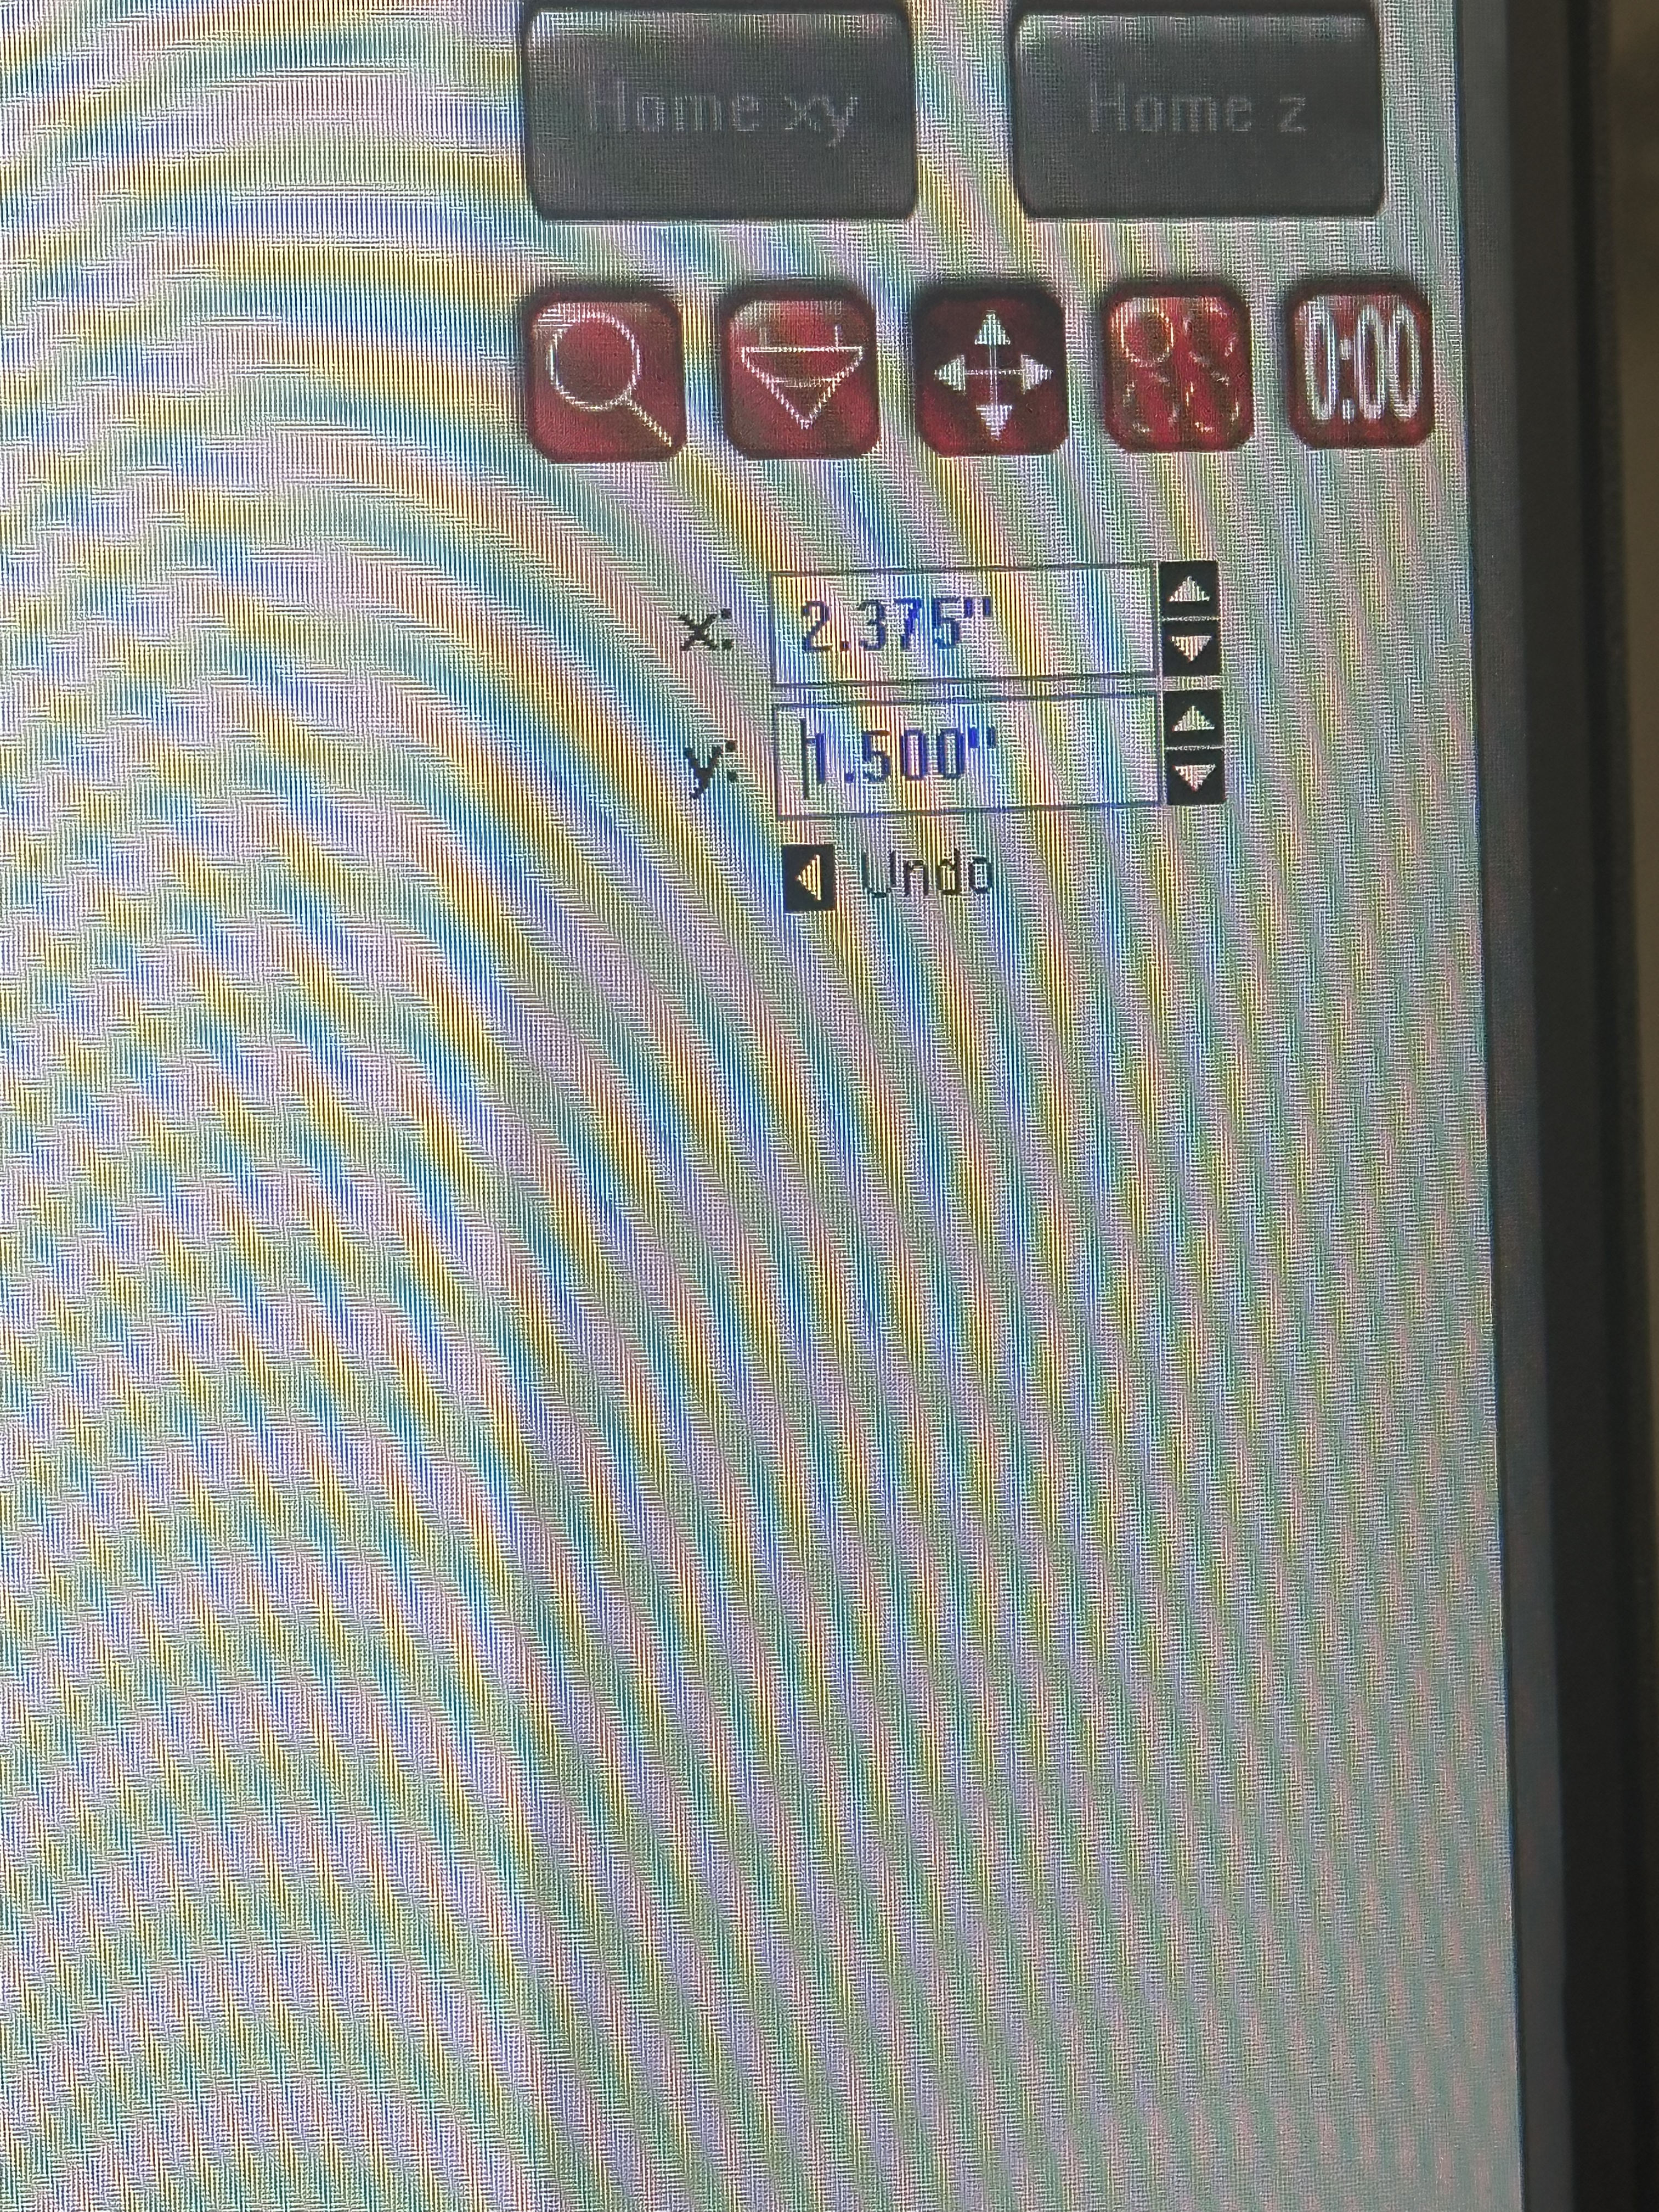
Move the image to the top left corner of the virtual laser bed. The middle node of the image should be set to half of the width and half of the height of the piece of wood (ie. the X-coordinate of the middle node should be 2.735 inches, and the Y-coordinate should be 1.5 inches)
Material Selection
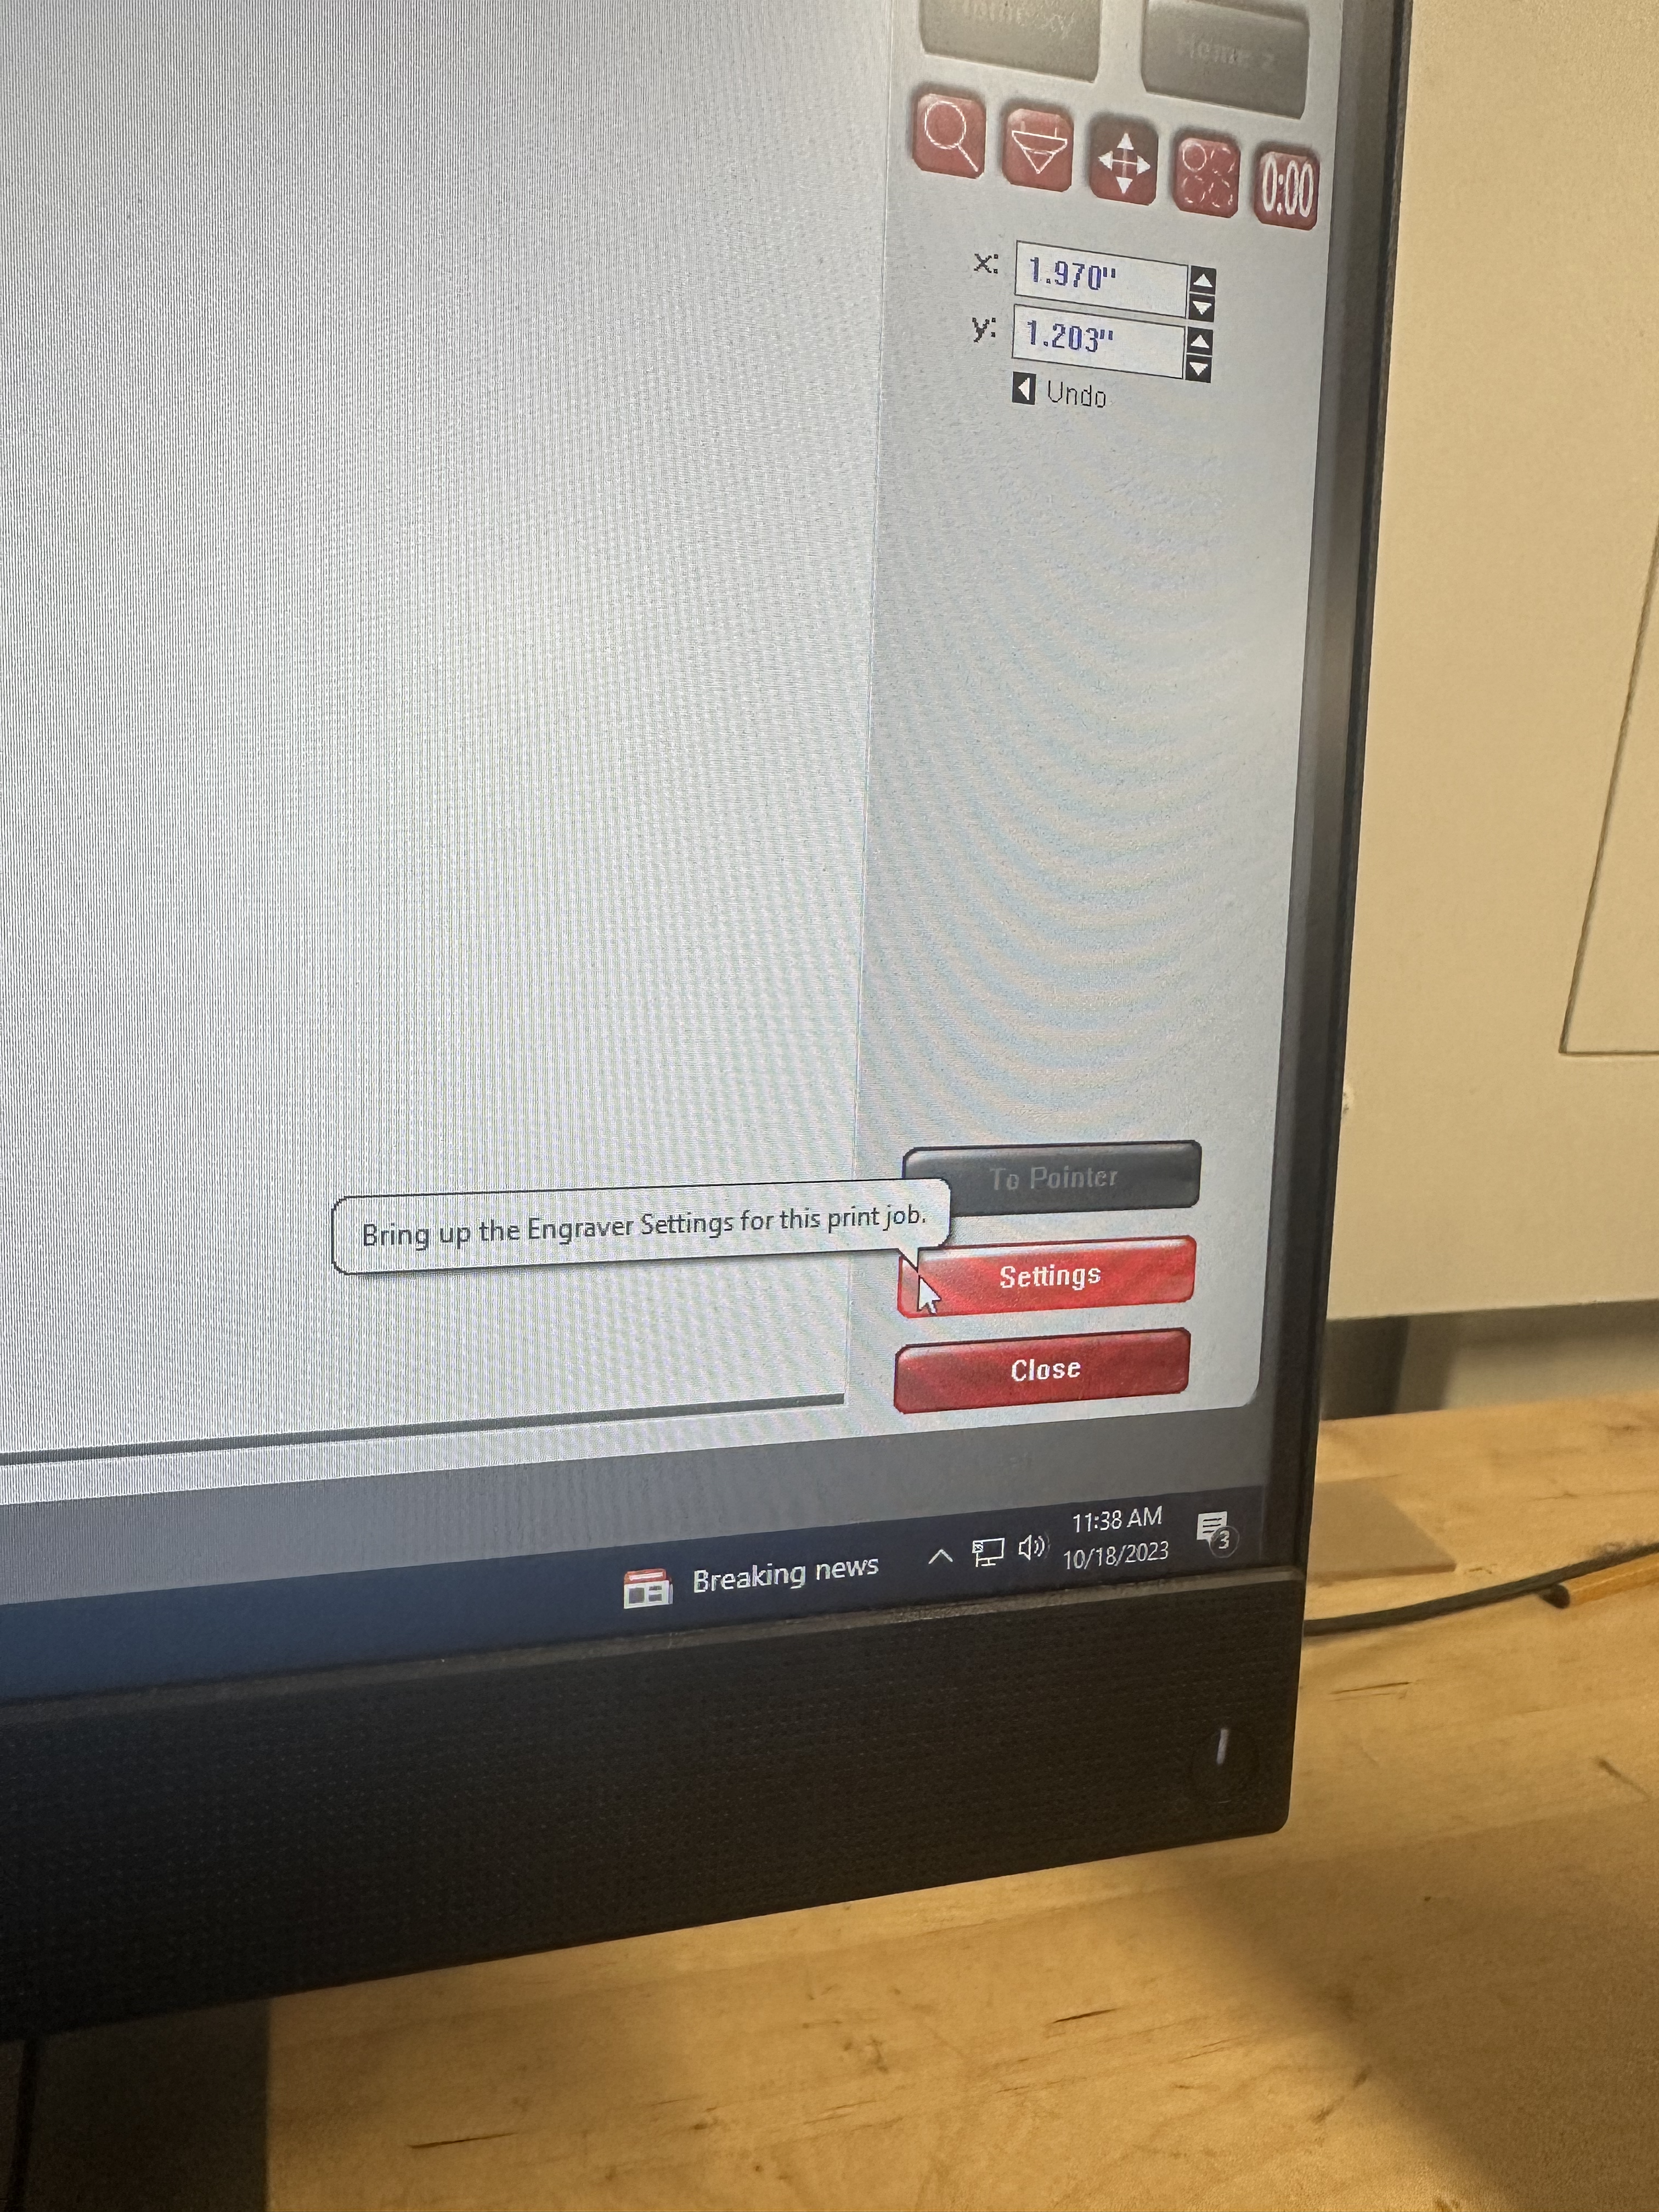
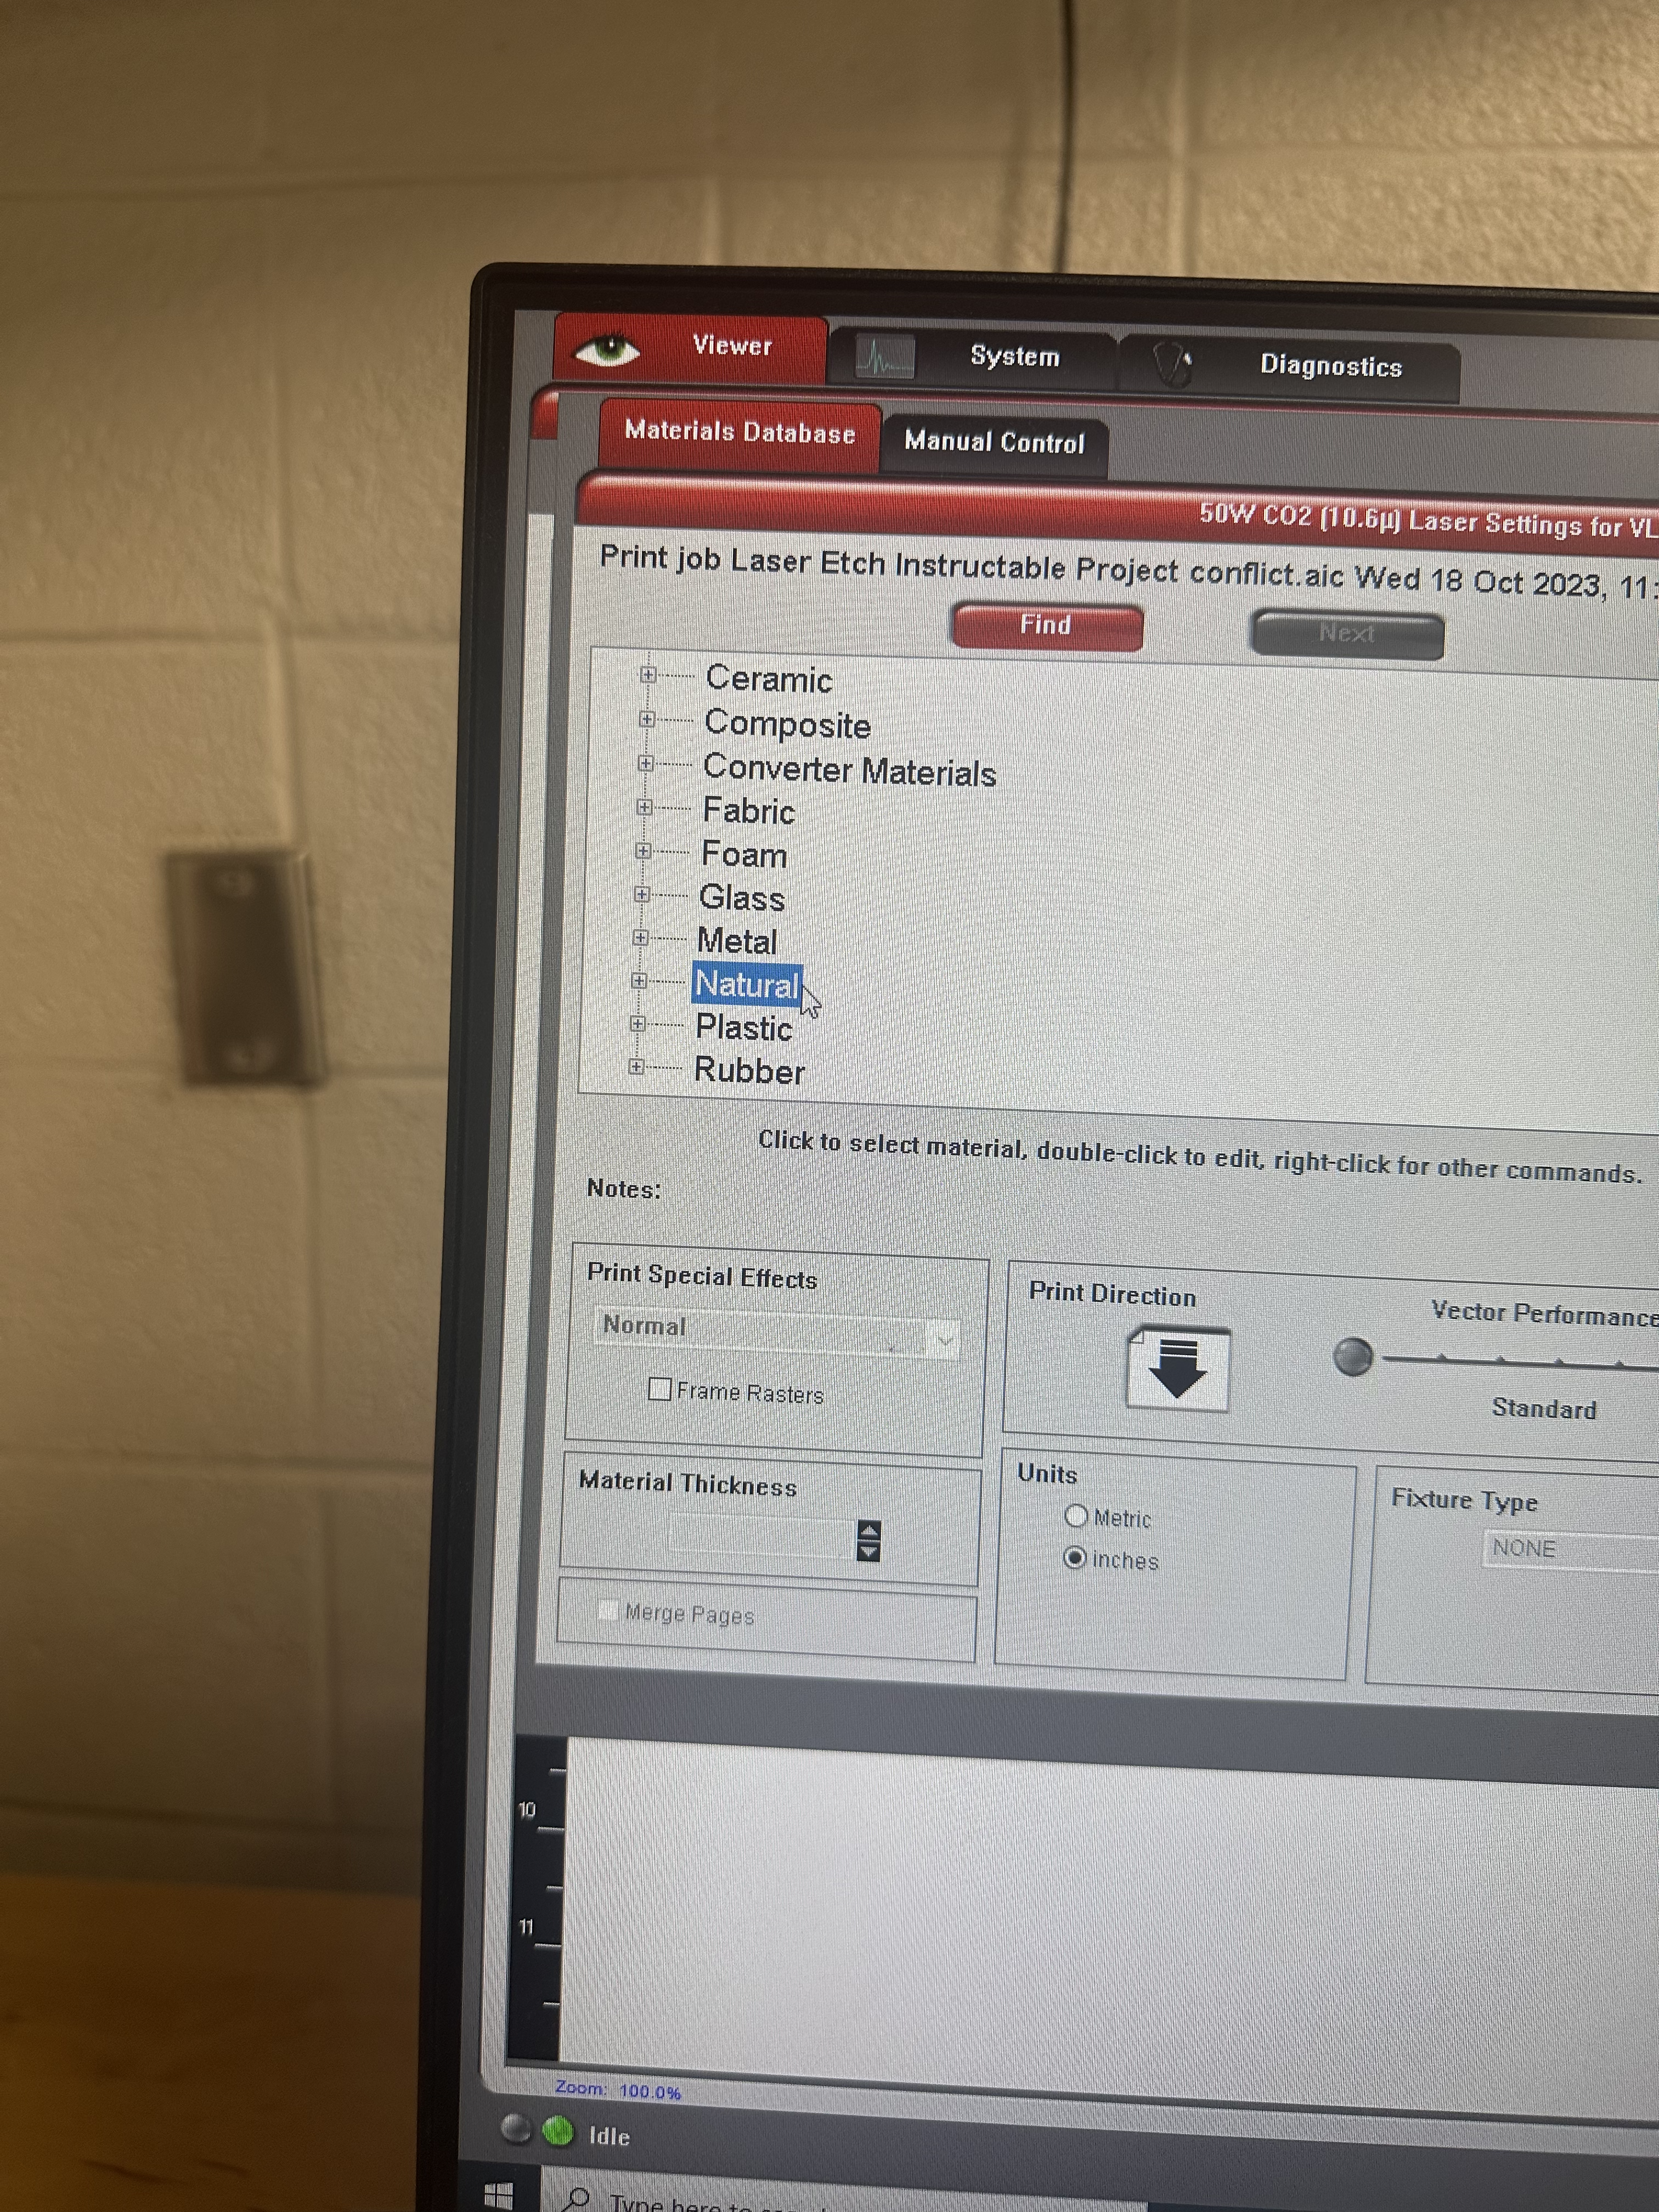
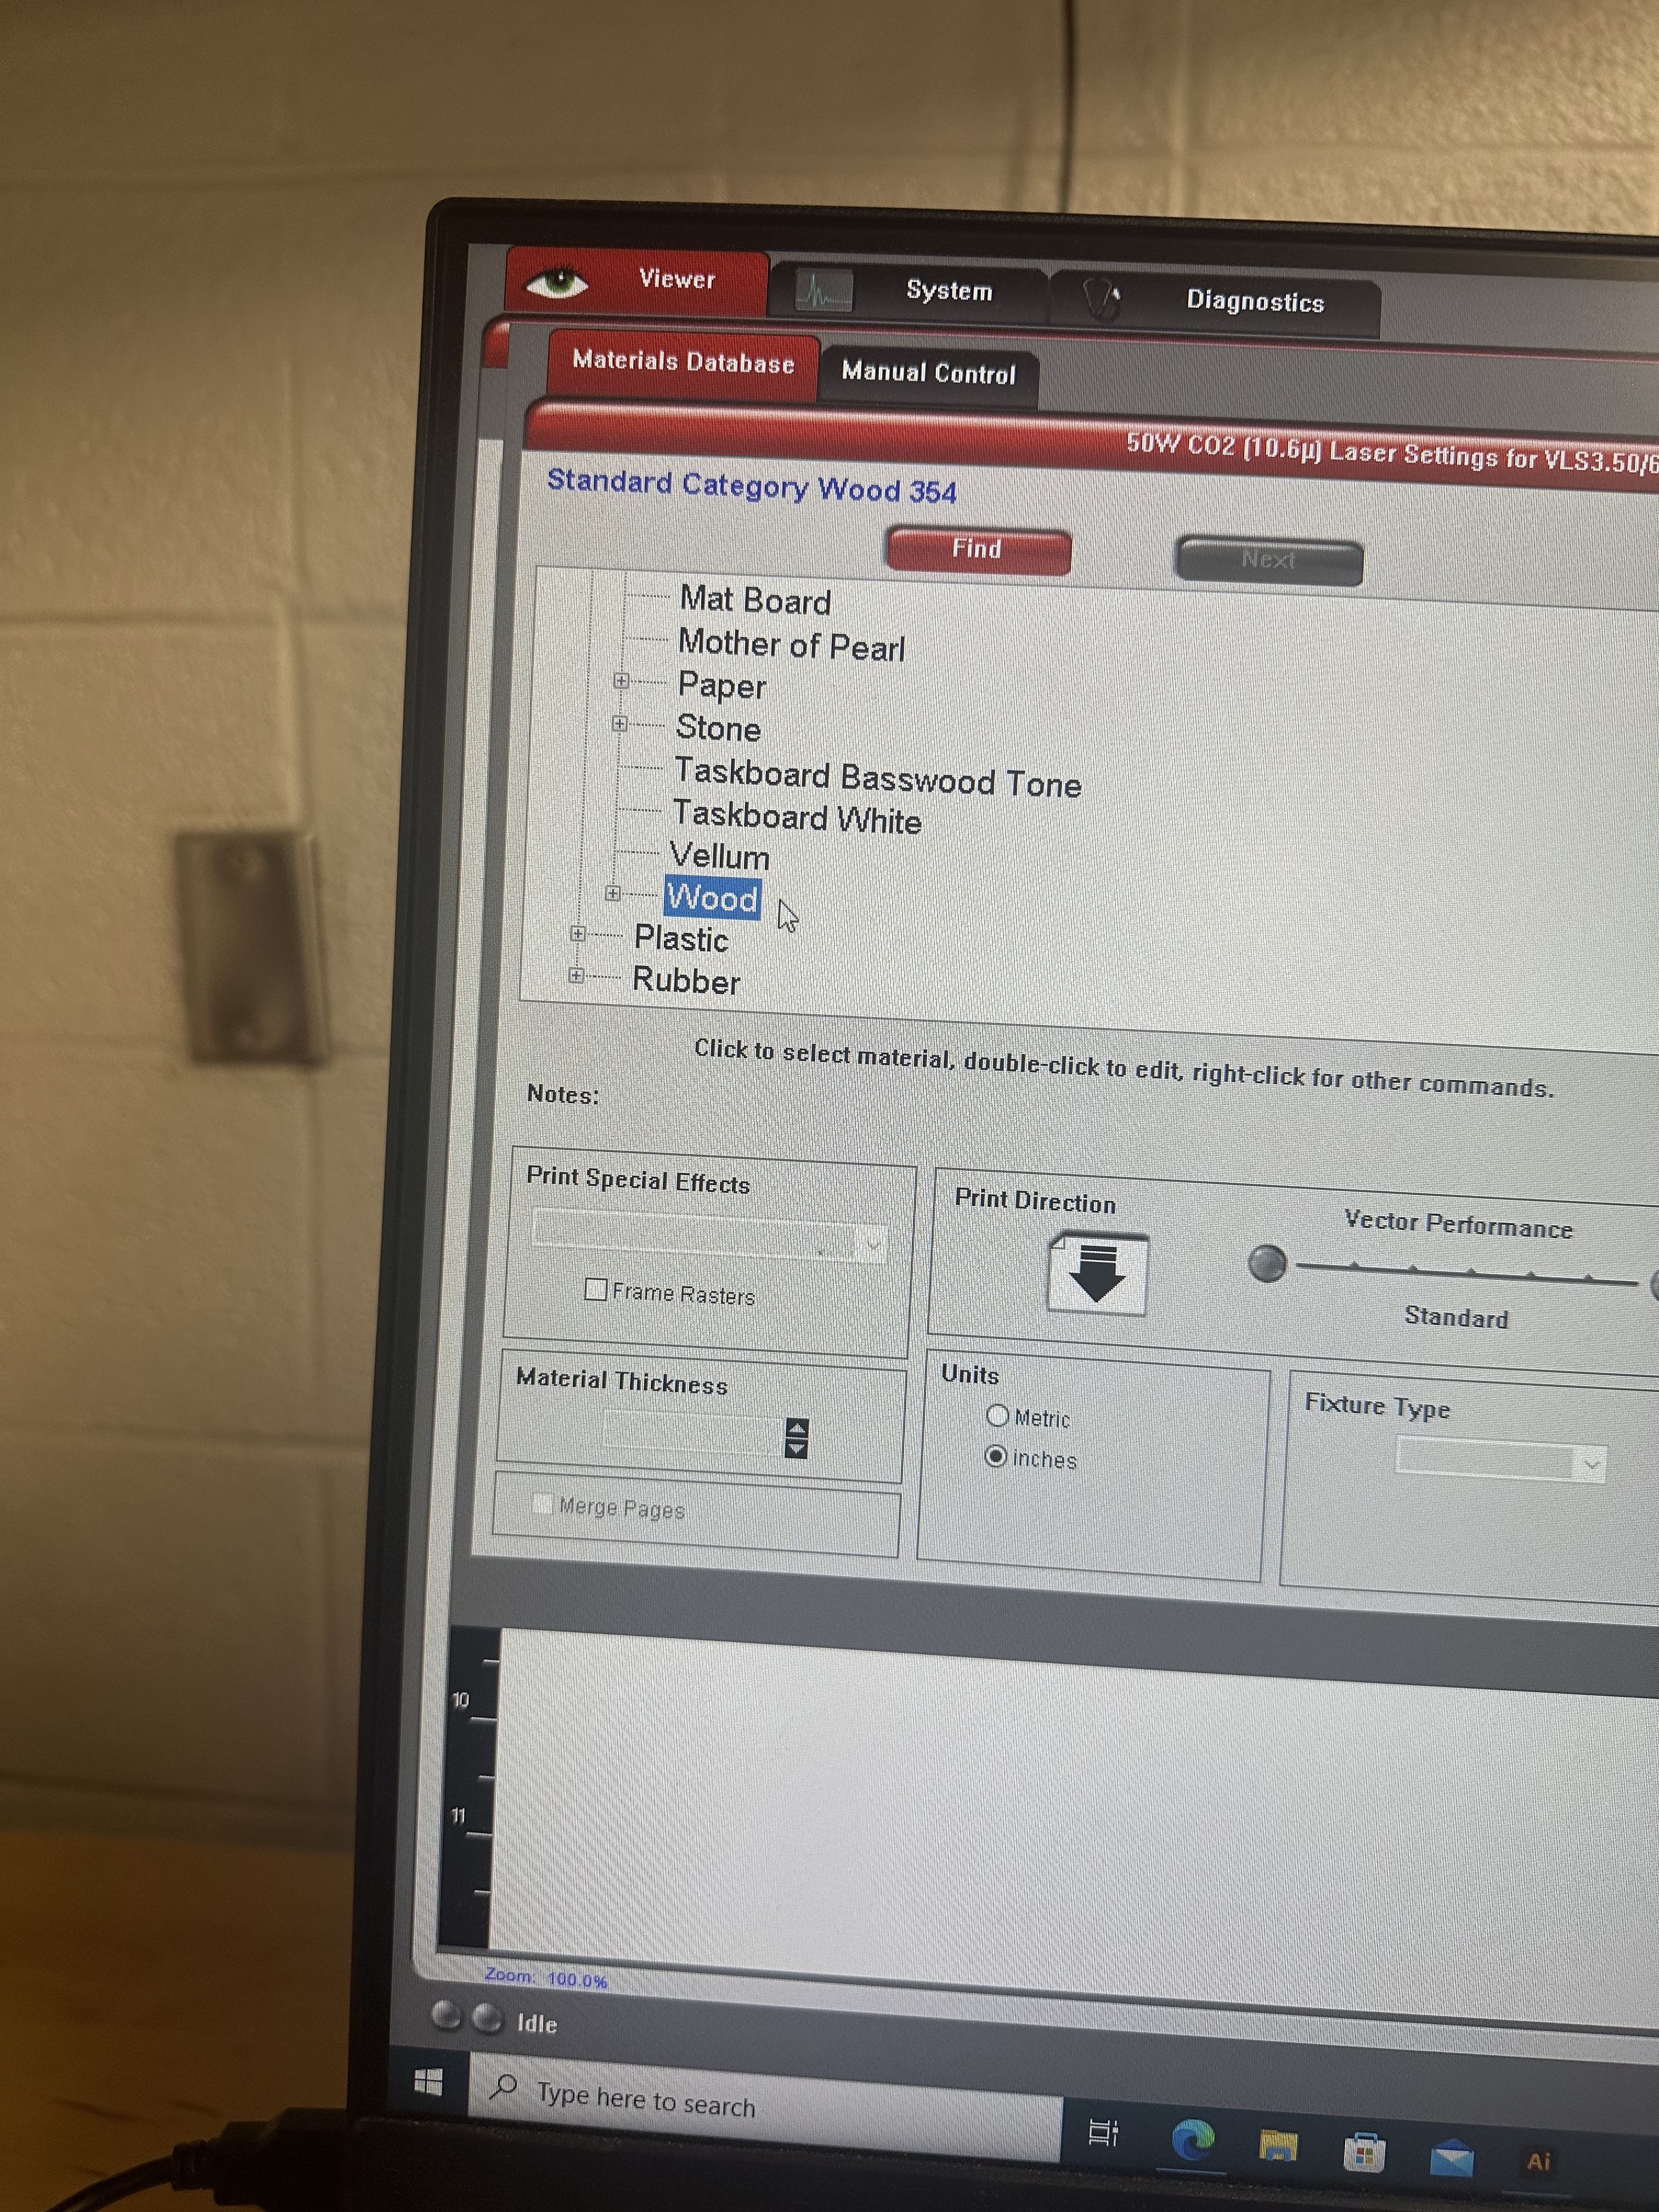
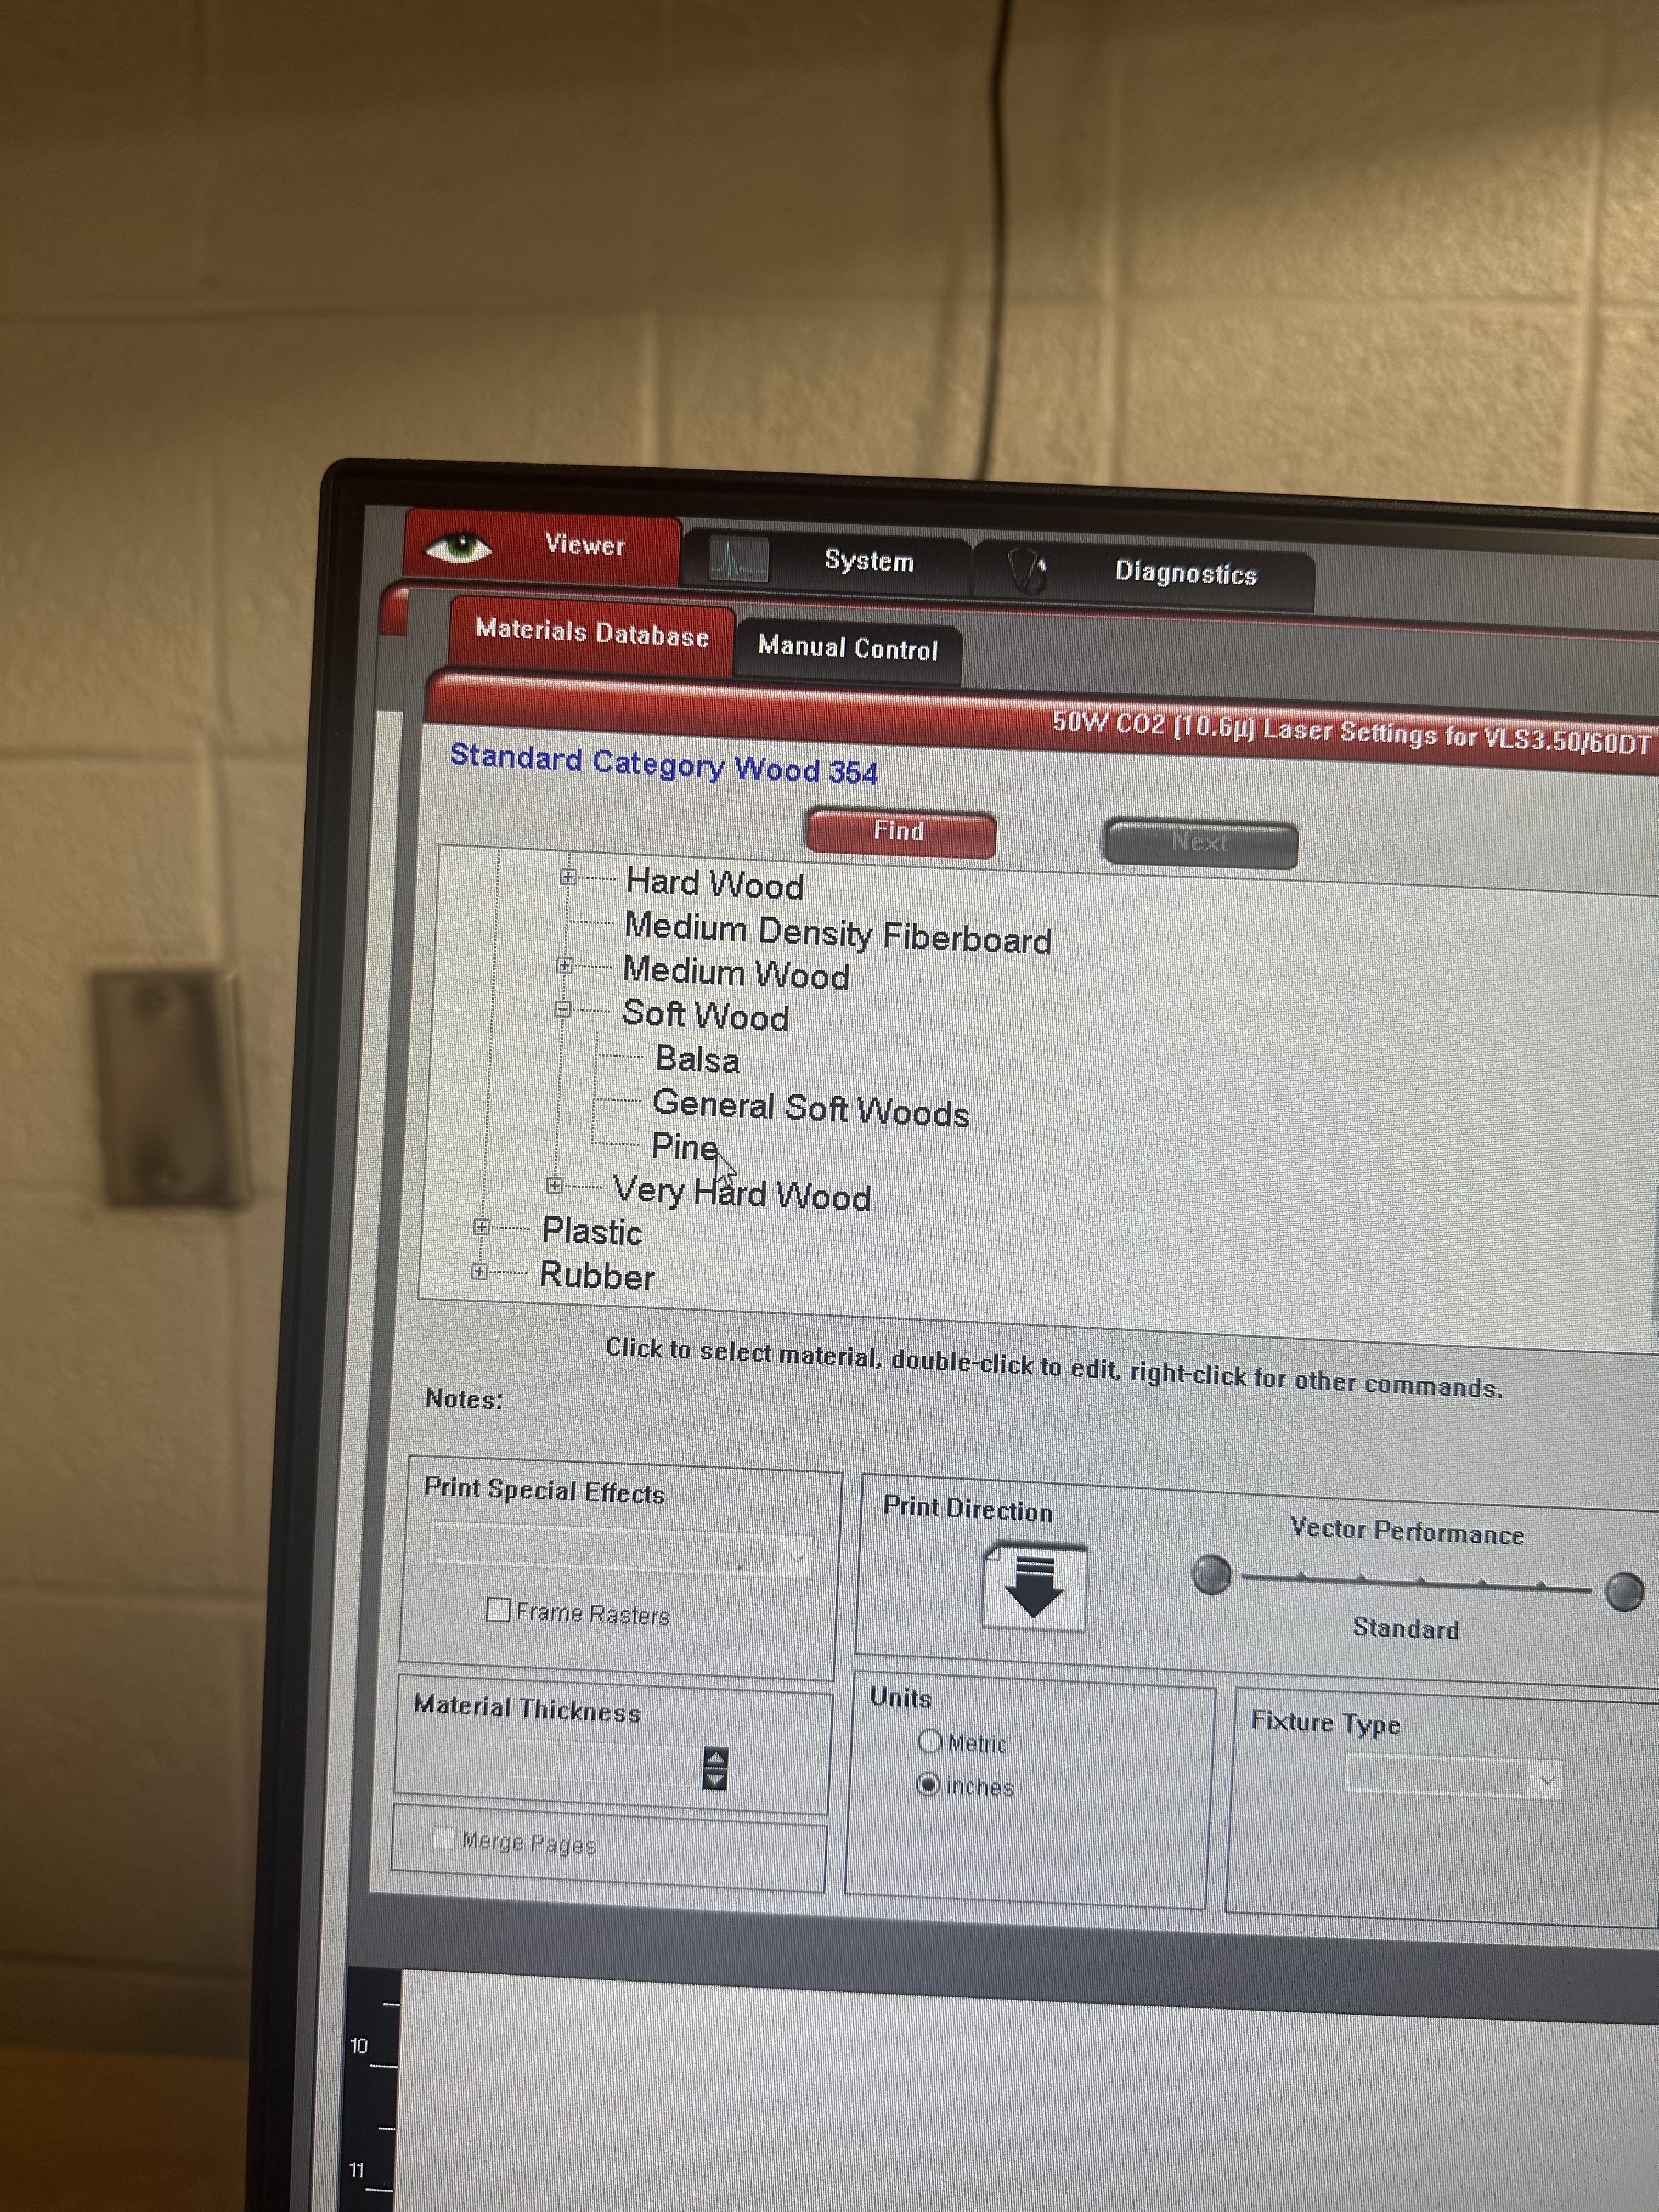
Select the right material using the settings tab and then the material database
- To find the pine selection, you will need to first find the material selection panel in the far left, select ‘Natural’, scroll down to select ‘Wood’, scroll again to select ‘Soft Wood’, and lastly, select ‘Pine’.
- If given another type of wood for this project, adjust the wood settings as needed.
- Input the thickness (in inches) into the Material Thickness box. The thickness should be 0.75 inches. Please note that you might get a warning message that the material is too thick, but just be sure to click “Yes”.
Etch Settings
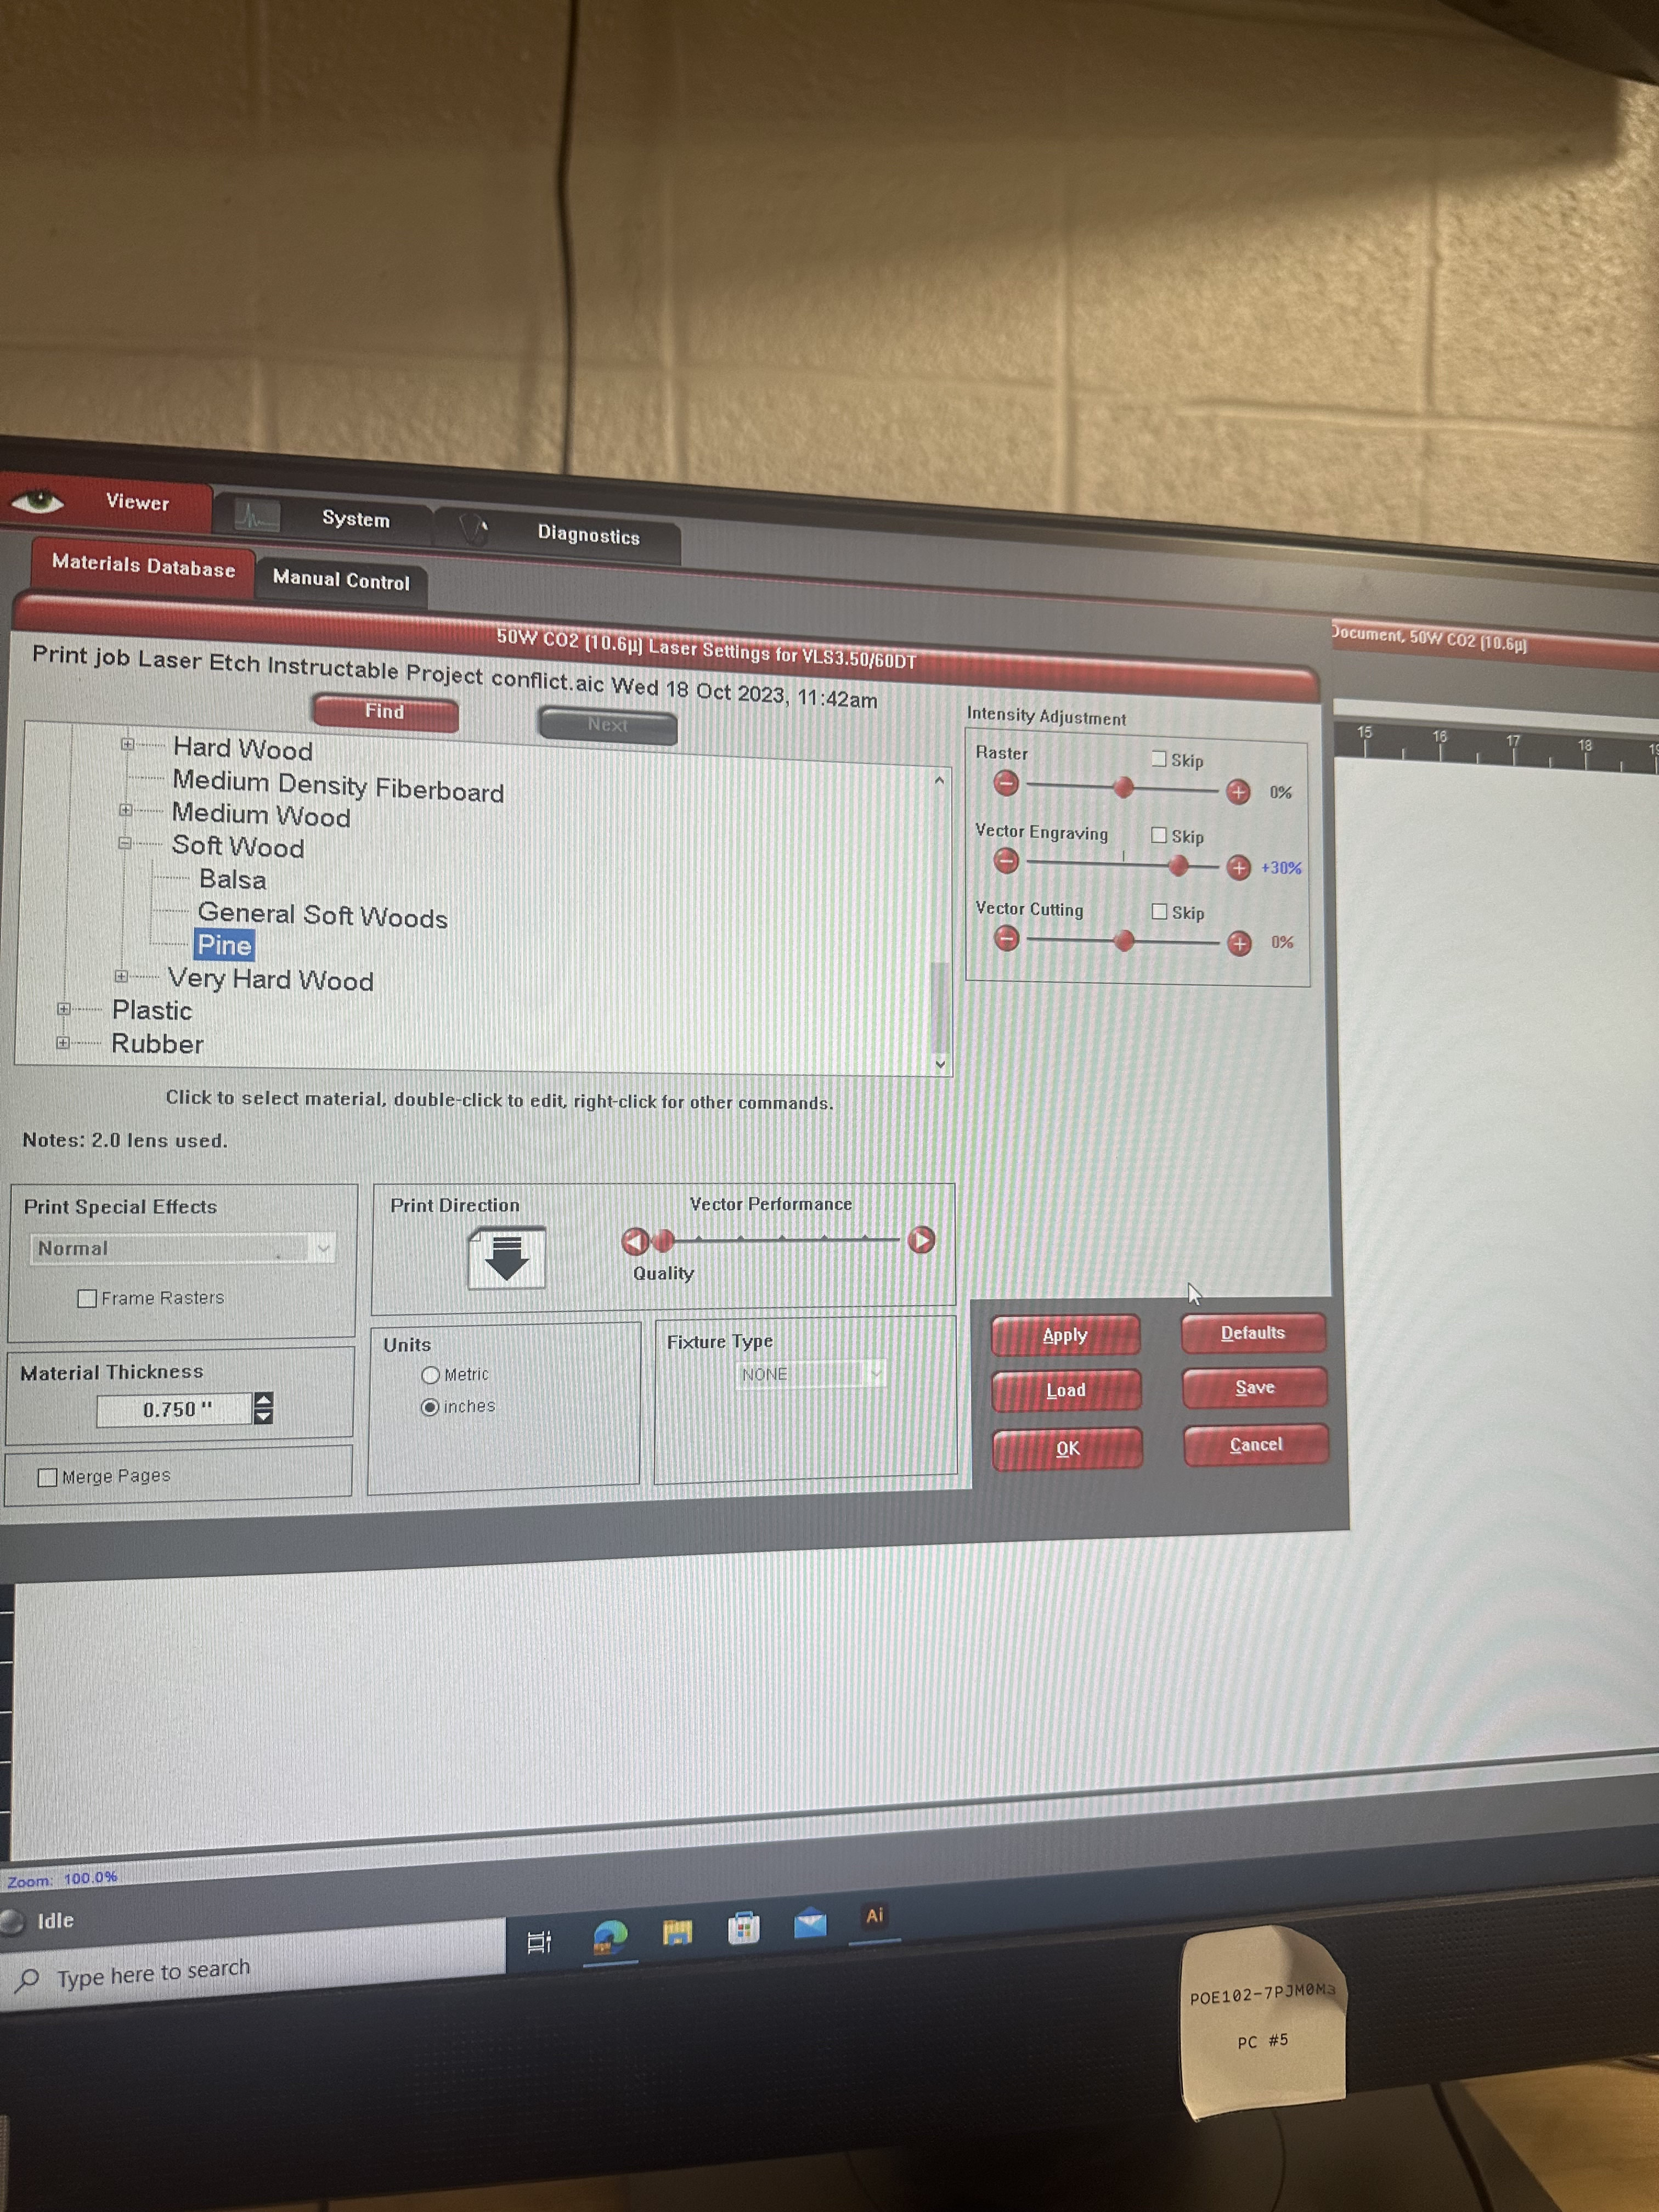
Change the settings to what is listed below:
- Sliding the Vector Performance slider to the far-left to get ‘Quality’ performance
- Ensuring that in the ‘Intensity Adjustment’ panel, the ‘Raster’ and ‘Vector Cutting’ sliders are set to 0% and the ‘Vector Engraving’ slider is set to 30%
- This percentage specifies the laser power percentage
Once done, click "Apply" and then "OK" to save the settings to your designs' laser job.
Apply Auto-Z
Auto-Z is a function that helps with the calibration of the z-axis of the laser.
- Go to the “System” tab in the top left corner of the page and make sure the Auto-Z box is checked. After this, go back to the “Viewer” tab.
- This will be on the bottom left-hand side of the screen.
Power Up the Laser Etch Machine
Make sure the lid of the machine is closed and click the power button on the right side of the screen to turn on the laser engraving machine.
- While this can be done at the beginning of the process, we find it best to have the device on only once the material has been placed inside and turned off before the completed piece is taken out for safety purposes.
Let the Etch Begin!
Once the machine is on, click the circular start button on your screen that should now be green. The etching has begun!
- In the top right corner of your screen, you will see the run time of the etching job.
Remove Your Completed Sign
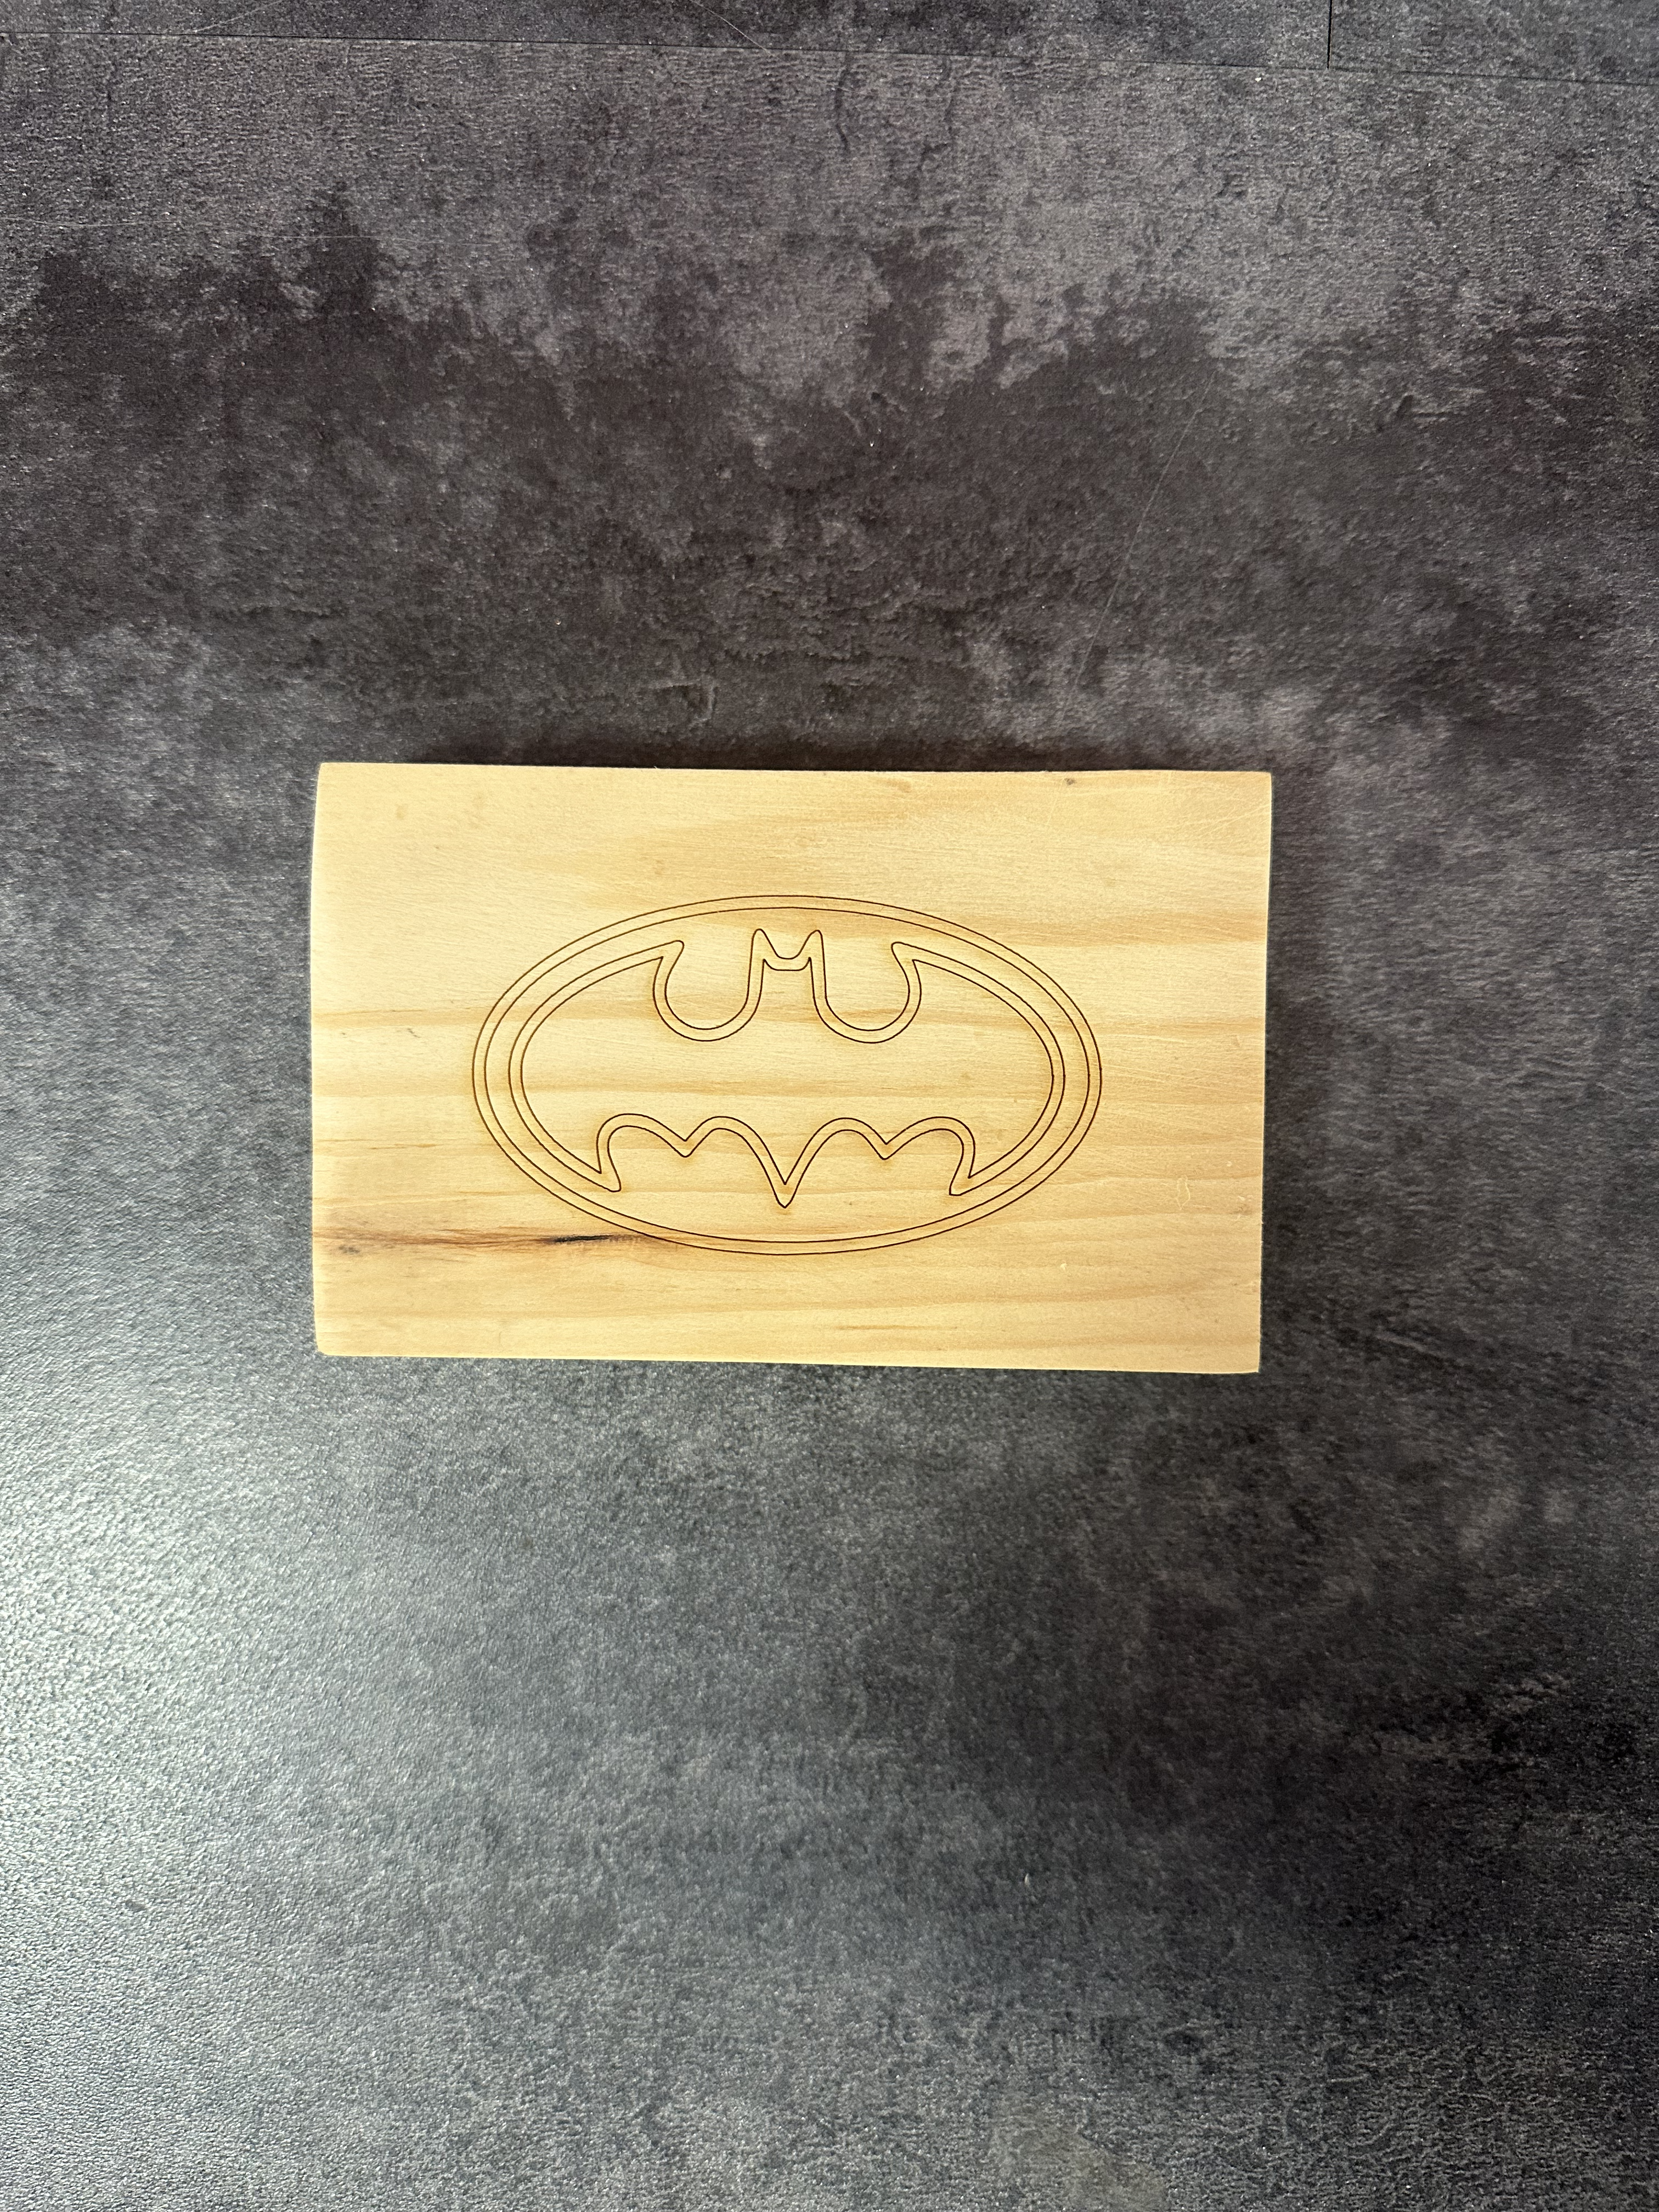
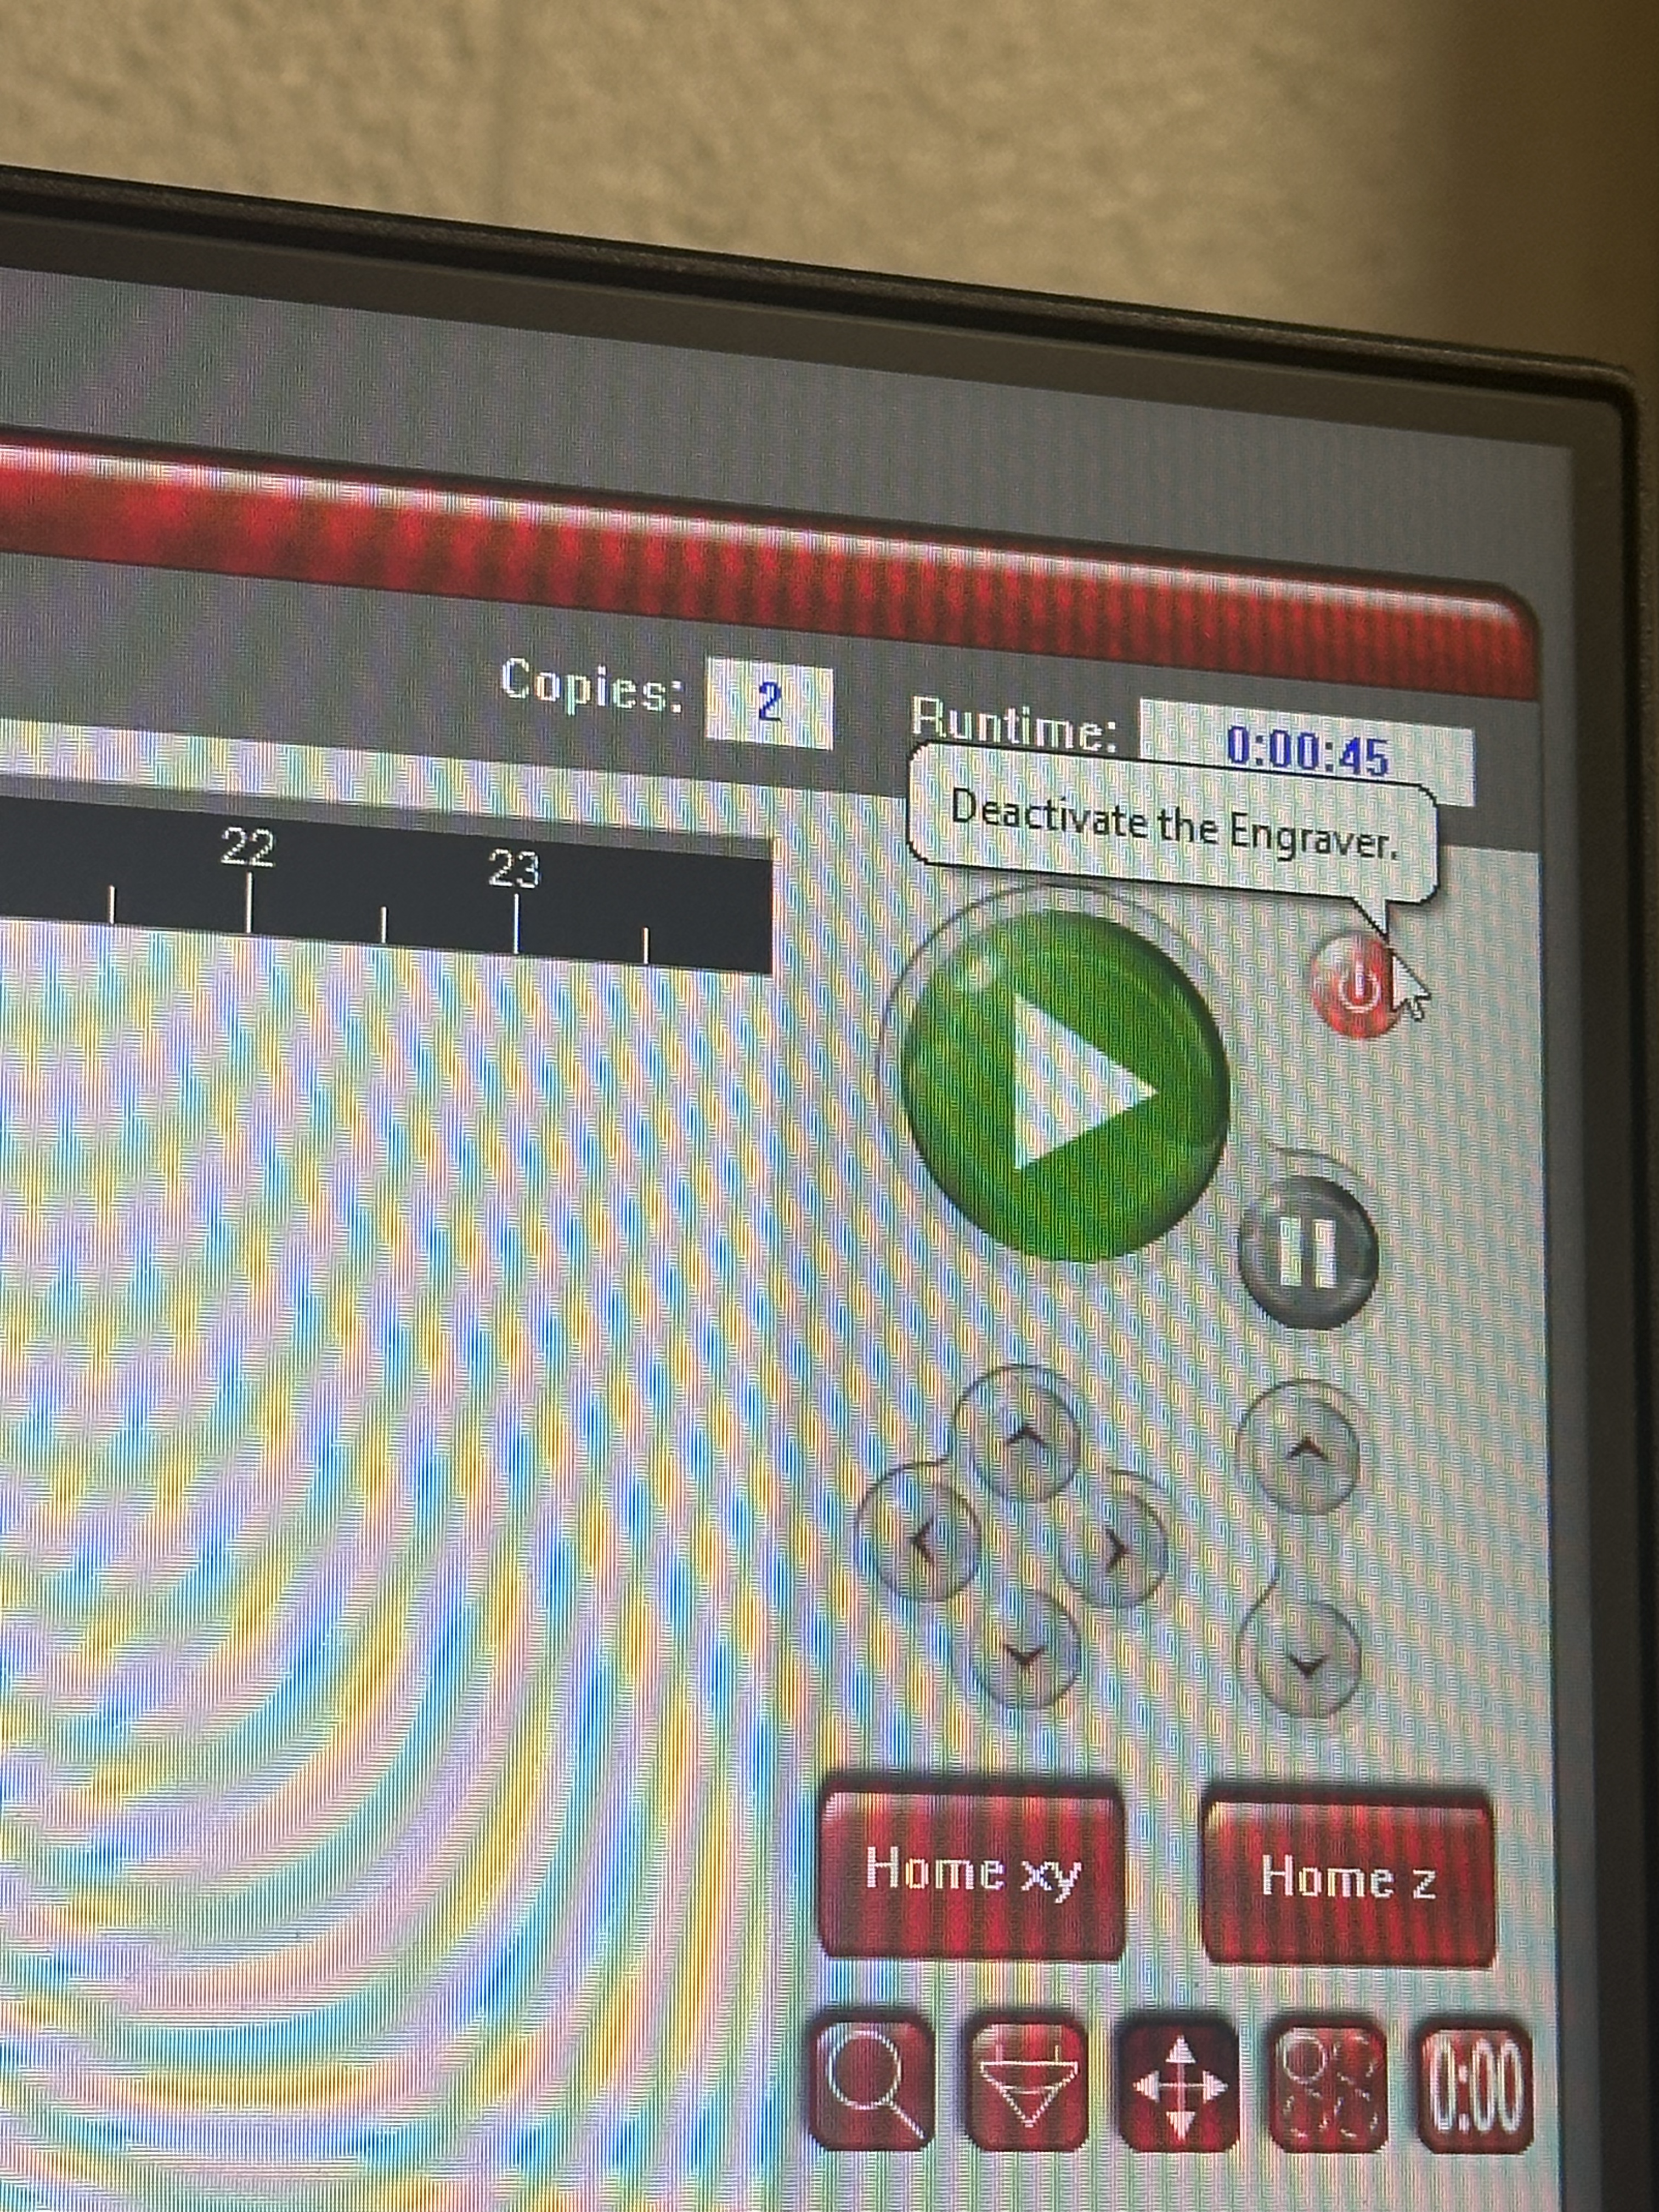
Once the etching is complete, you may deactivate the machine with the power button, lift the lid, and remove the wood piece. The sign has been successfully etched!
Reset Your Workspace
Be sure to close the lid of the machine, sign out, and close all programs (if using a shared computer) before leaving the machine.