How to Create a Technical Description (Using MS Word)
by lusk1993 in Living > Education
2816 Views, 14 Favorites, 0 Comments
How to Create a Technical Description (Using MS Word)
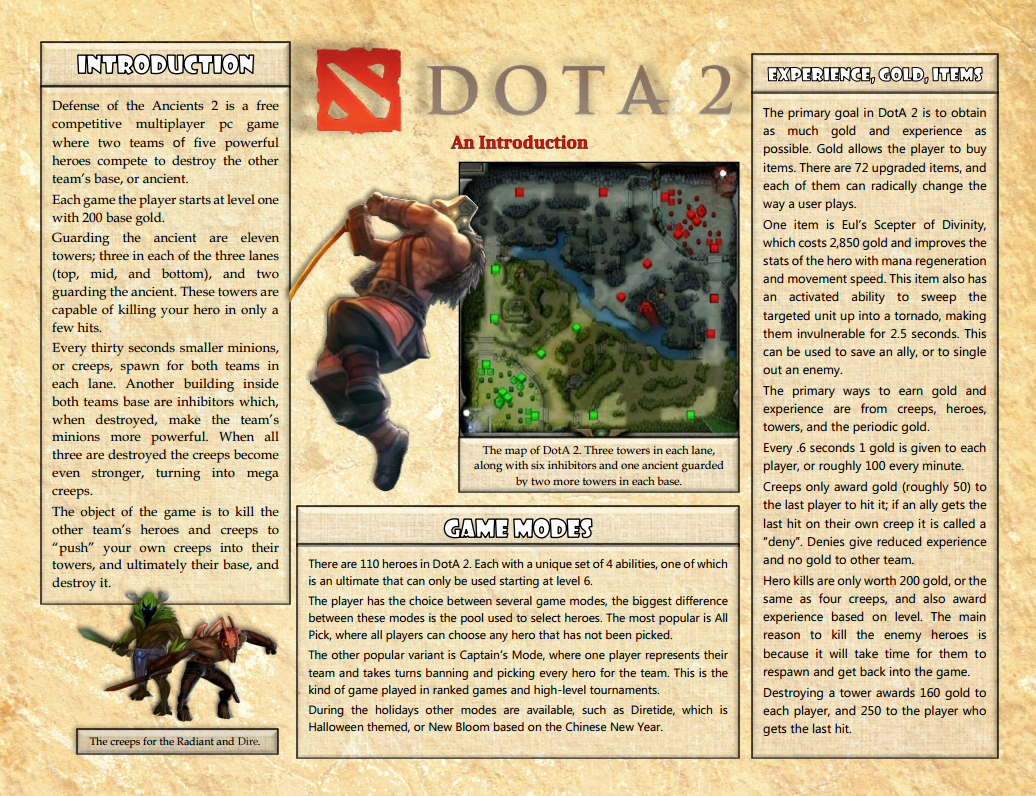
Technical documents are a very important form of technical communication across a wide variety of fields. Technical descriptions appear in all technical documents including brochures, specifications, proposals, and field reports. This Instructable will help you create a technical description using the correct moves and procedures. These instructions used Microsoft Word, as it is easier to teach and understand than Adobe InDesign. For the purposes of these instructions, I am using Microsoft Word 2013. If you are using a different version of Microsoft Word, buttons may be placed very differently!
A technical description can take anywhere from a couple of hours to a few days.
For this Instructable you will need:
- Microsoft Word 2013
- A reason to create a technical description
- A pencil
- Some paper
Note: The technical description I will be using as an example was made for a class, and did not have to follow any strict standards. If your technical description will be used in a place of work, check to see if you are required to use ISO standards such as ISO 9000 or ISO 14000. More information on ISO standards can be found at www.iso.org.
Plan the Document
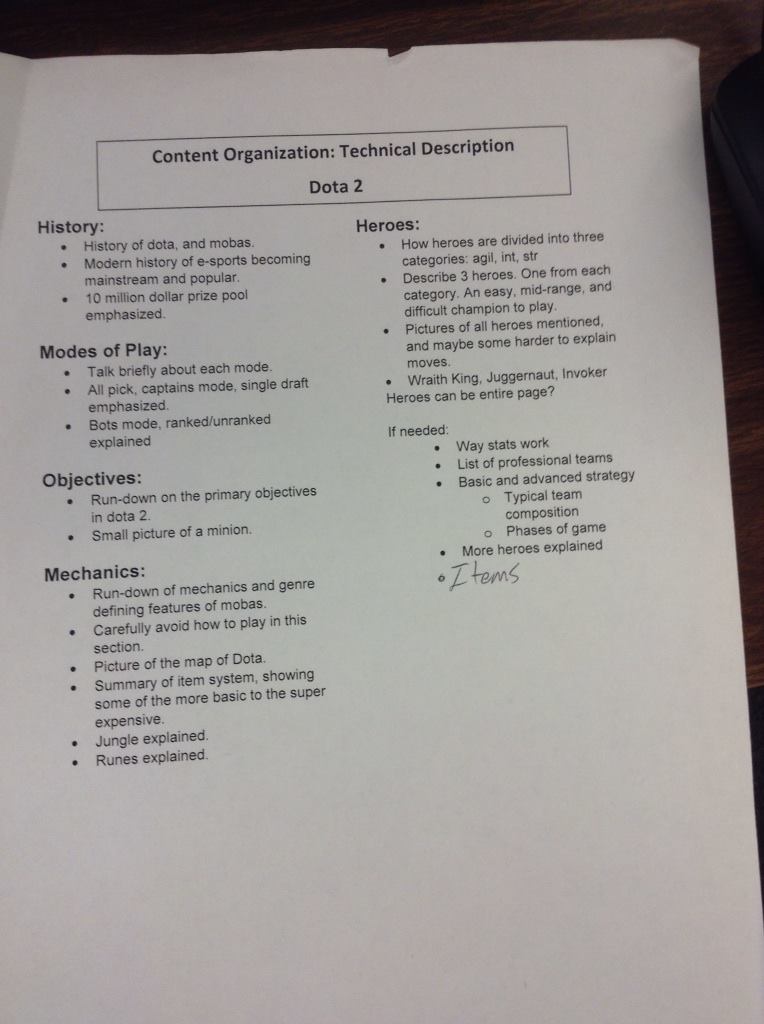
The first thing to do with any written document is to plan the material to be included. Even if nothing in the original plan gets used, it is important to begin thinking about the document as a whole before working on individual pieces. It is very useful to glance at other technical descriptions to get a grasp on the "feel" of how a proper one looks.
- When developing a plan for your technical description, ask the following questions:
- Who will be using this document?
- What will need to be included in this document?
- When will this document need to be used?
- Where will this document be used?
- Why is this document necessary?
2. Segment the topic into various logical sections. Examples include:
- Parts - Segmenting the topic into its various parts or features is the most straight forward way, and can be very logical to the reader.
- Steps - If one thing needs to happen for the process to continue, steps would be the ideal way to separate the description.
- Note: If the purpose of this document is to teach the reader how to do a process, it may not be a technical description but instructions!
3. Plan on the graphics or logos that will need to be used.
- Charts, pictures, and graphs are genre defining features of technical descriptions! They are used to break up text, and to give important information to the reader.
- A good graphic can stand on its own and tell a complete story. The goal should be for the reader to not need to scan through paragraphs for the graphic to be relevant.
- Caution: If this technical description will be used in a commercial setting, be sure to only include graphics the company has the legal right to!
Prepare the Document

- Change Orientation to Landscape
- Click on the "Page Layout" tab
- Click "Orientation", which is located second from the left
- Choose "Landscape"
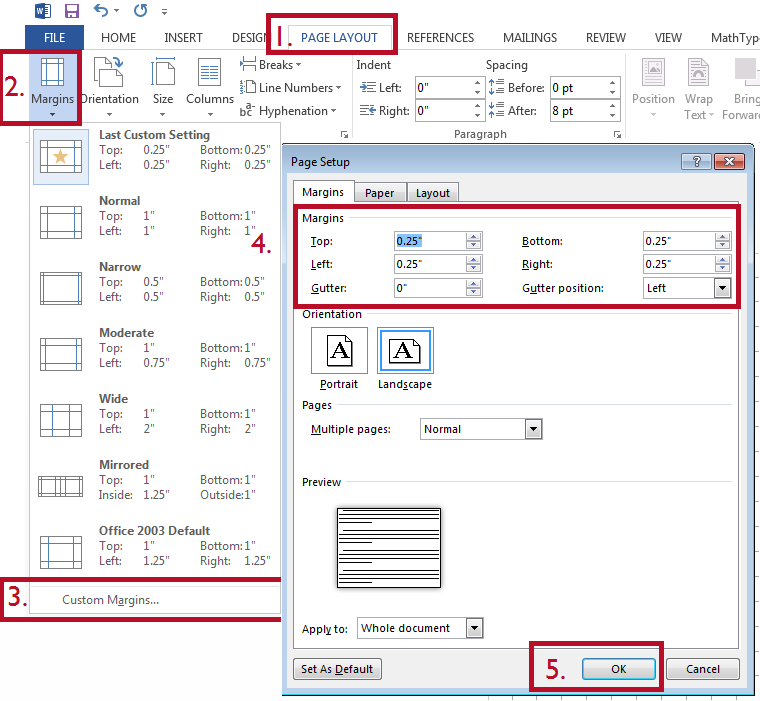
- Set Margins
- By default, margins are set to 1 inch. For a stylish document, margins should be set lower!
- Select the "Page Layout" tab
- Choose "margins"
- Either select one of the predefined margins or click custom
- If custom margins were selected, be sure to hit "Okay"
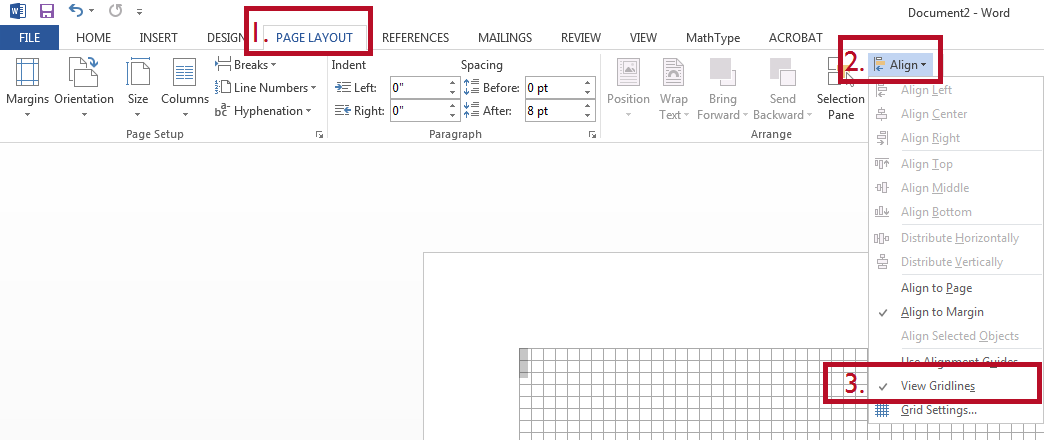
- Turn Grid Lines On
- Grid lines will help keep your columns even and are useful for sizing pictures.
- Select the "Page Layout" tab
- Click on the small button "Align" on the right-most side
- Edit the grid lines using "Grid Settings"
- Note: I recommend setting Vertical and Horizontal margins to every 2 inches.
Insert Pictures and Text Boxes
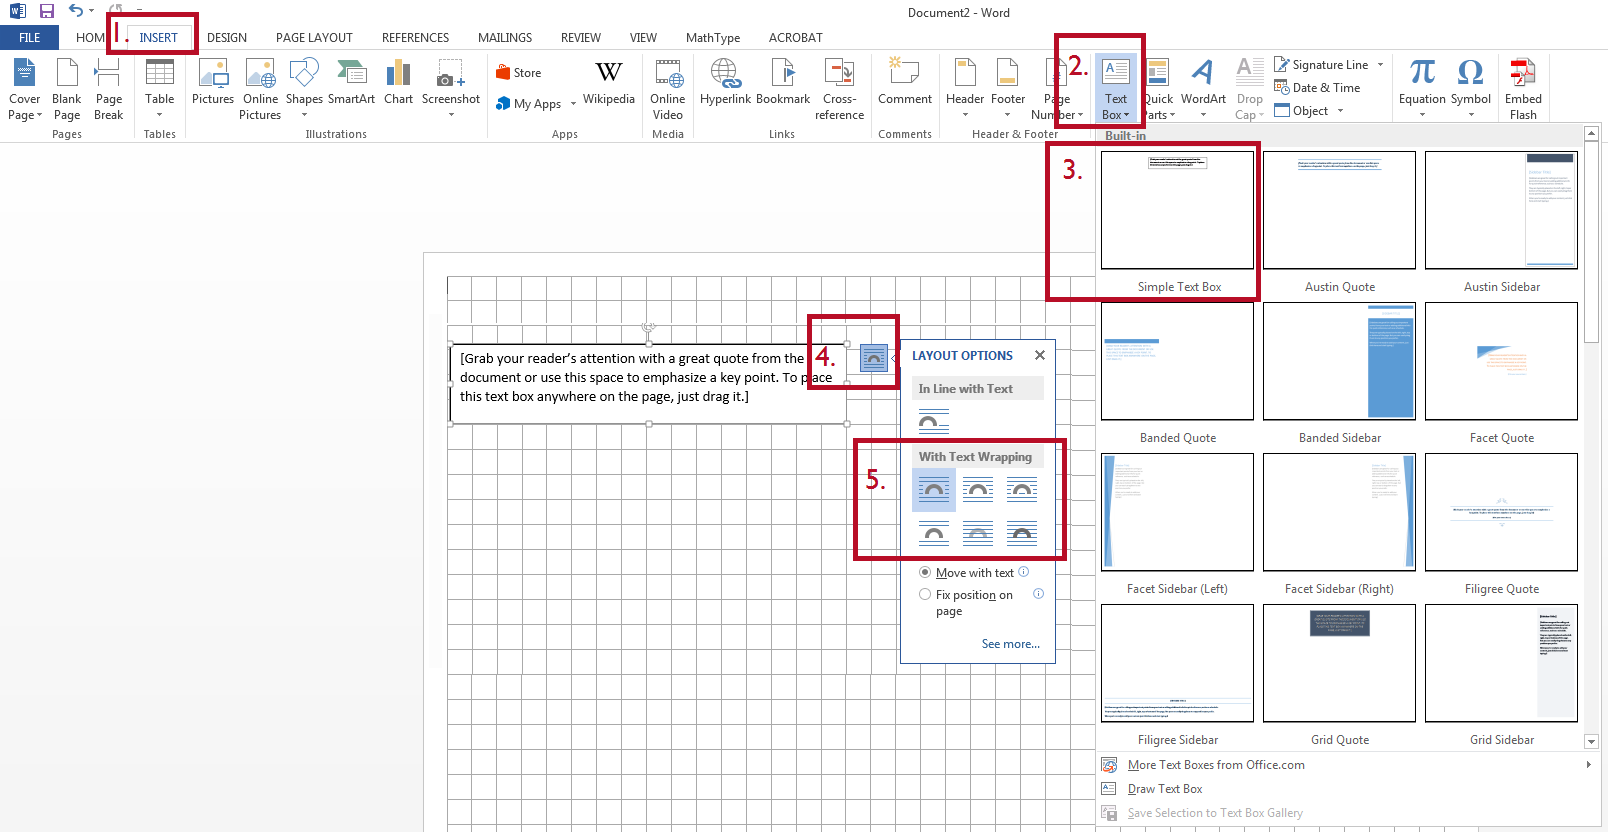
- A stylish description should make full use of images and text boxes to store its information. Text boxes in particular are useful for rearranging data effectively, and are much easier to create equality among the dimensions of each section.
- Note: Use separate Text Boxes for headings and body. This will be much easier as you can then use ctrl+a to make sweeping changes to text!
- Creating a Text Box:
- Select the "Insert" tab.
- Click "Text Box".
- Use the appropriate style.
- Click on the outer edge of the text box.
- Change the "Layout Options" to "Behind Text" or "Above Text"
- Right click the outer edge of the box and choose "Format Shape" for style options
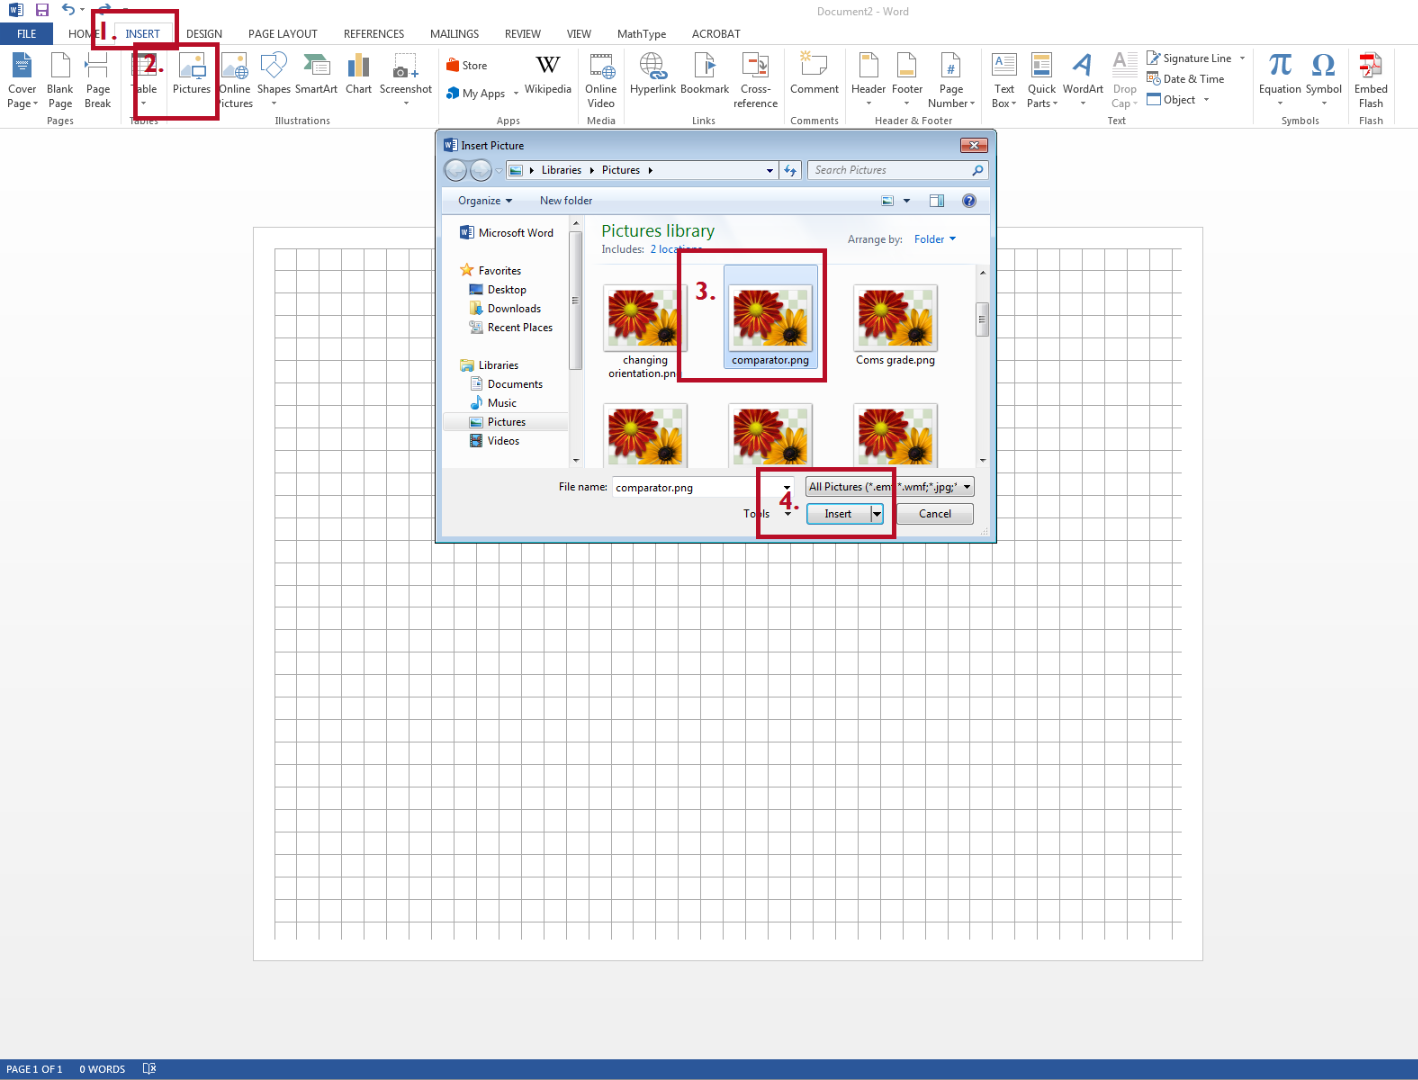
- Inserting Graphics:
- Choose the "Insert" tab.
- Click "pictures"
- Browse to the directory where the image is stored, highlight the image and click "insert"
- Click on the button showing a curve among text.
- Choose a different "Text Wrapping" such as "Behind Text" or "Above Text"
- Right click the picture and choose "Format Picture" for style options.
- Note: Pictures hold weight. Try to balance pictures and text as to create a balance within the document. For example, if there is a picture on the left side, there should be some sort of graphic on the right side. Same goes with white space. This is important for having a "clean" and nice looking document.
Write an Introduction
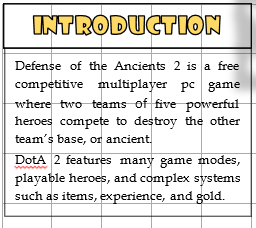
- The introduction is key to capturing the reader's attention and showing the various features to be discussed in the document.
- It is important to put the introduction where the reader will logically look for it. In English communities, this would be the top and left most part of the document.
- When introducing a term or concept, use a "sentence definition:"
- The framework for this type of sentence follows these three components: The subject to be described followed by the category the term belongs to and the key features that can be used to differentiate it.
- Also be sure to include a main point, which is a major claim the description will attempt to verify or prove.
- Other topics that can be covered in an introduction: importance of the topic, list of the major features or steps that will be described in the document, or a purpose statement to explain the necessity of this document.
Create Body Text and Headings
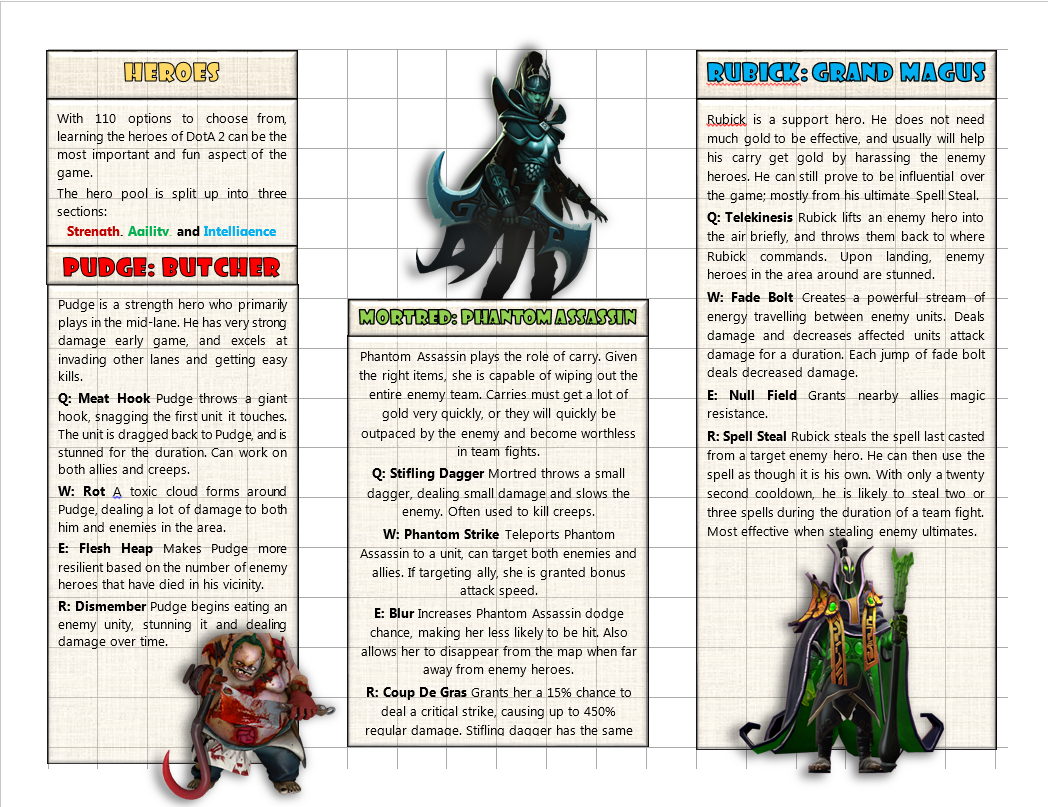
- Your readers will most likely not read every single word of the technical description! This is why headings and subheadings are very important genre features. Be sure to make appropriate sections for your data, so readers can easily find the information they are looking for.
- Consider changing the font and size of your headings to make them more distinguishable than body text.
- Anytime a word needs to be defined, use the "sentence definition" as described in the last instruction.
- Use sub-headings to break text into smaller pieces.
Conclusion (Tips and Tricks)
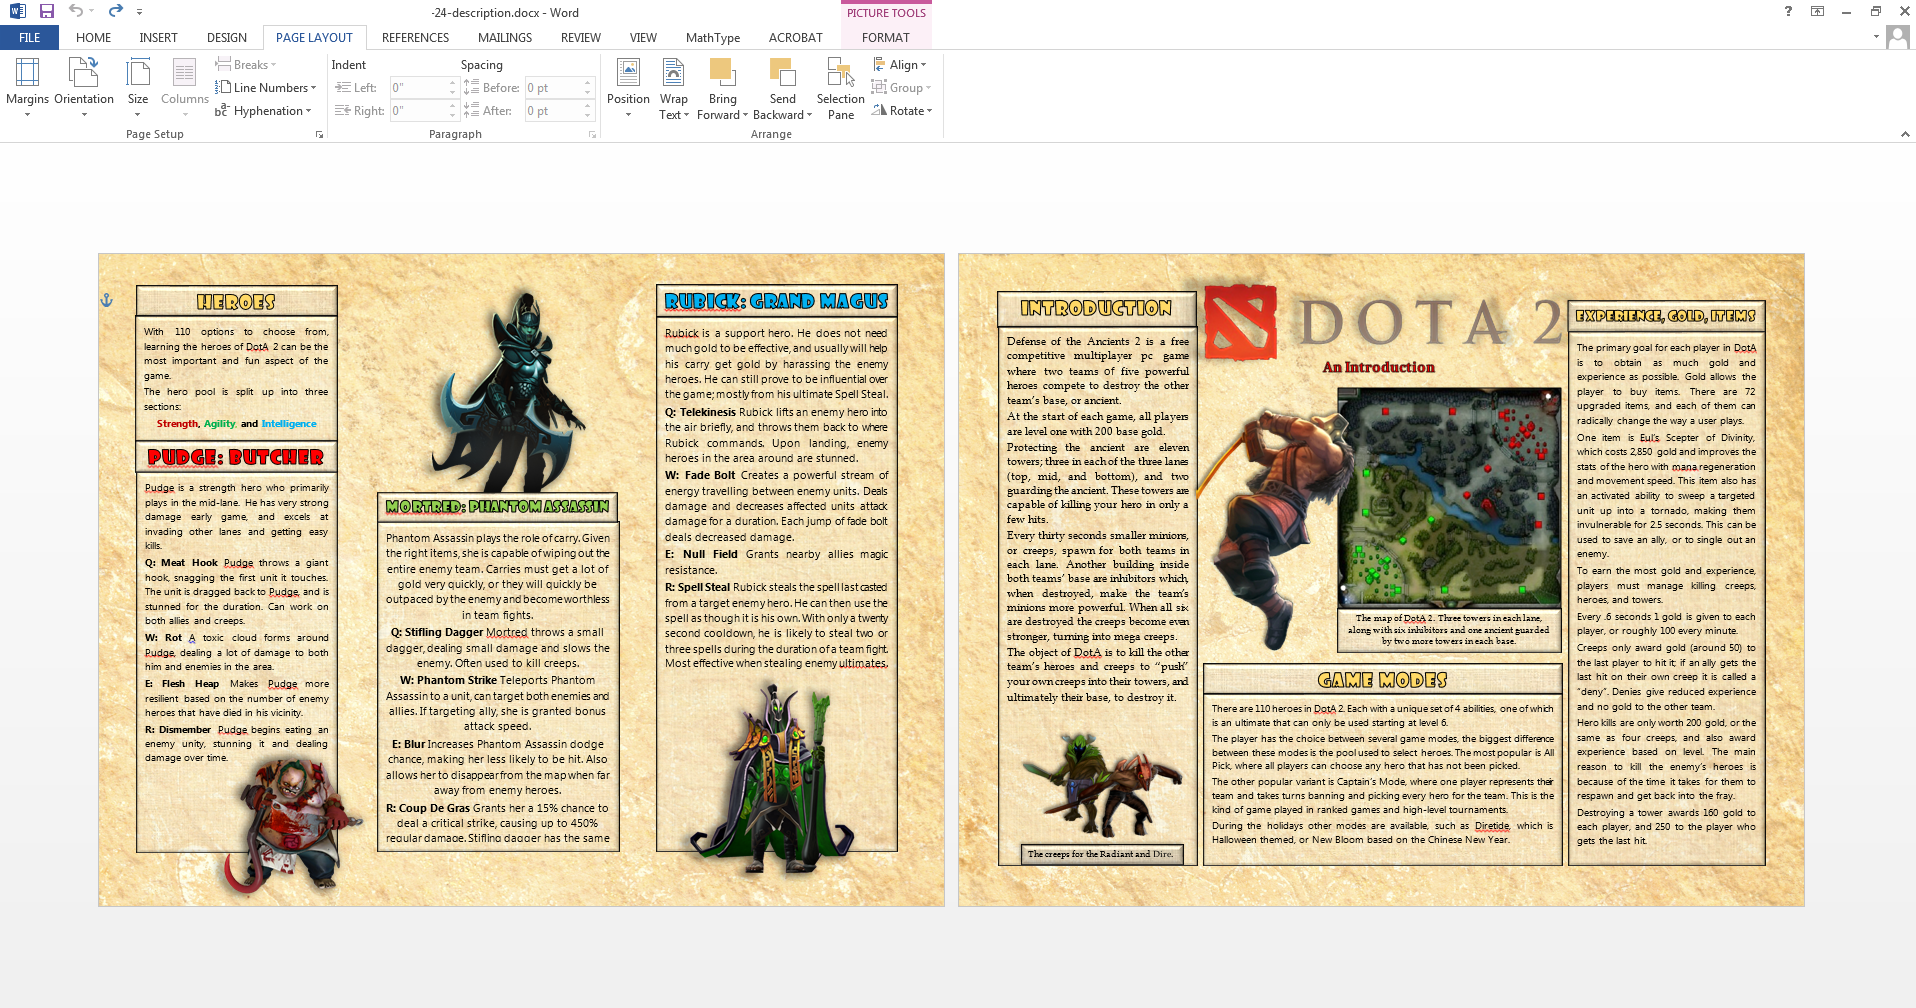
- If this description is supposed to appear stylish, consider a background image to decrease the white further.
- Be sure to include text boxes below images that may need clarification. Try not to include too much new information than what is included in the document.
- For more information on technical descriptions check out Tu-chemnitz.de and Prismnet.com or the book Technical Communication Today