Bike Simulator With Real-time Speed Adjustment
by JoshHolmes in Circuits > Arduino
1361 Views, 7 Favorites, 0 Comments
Bike Simulator With Real-time Speed Adjustment
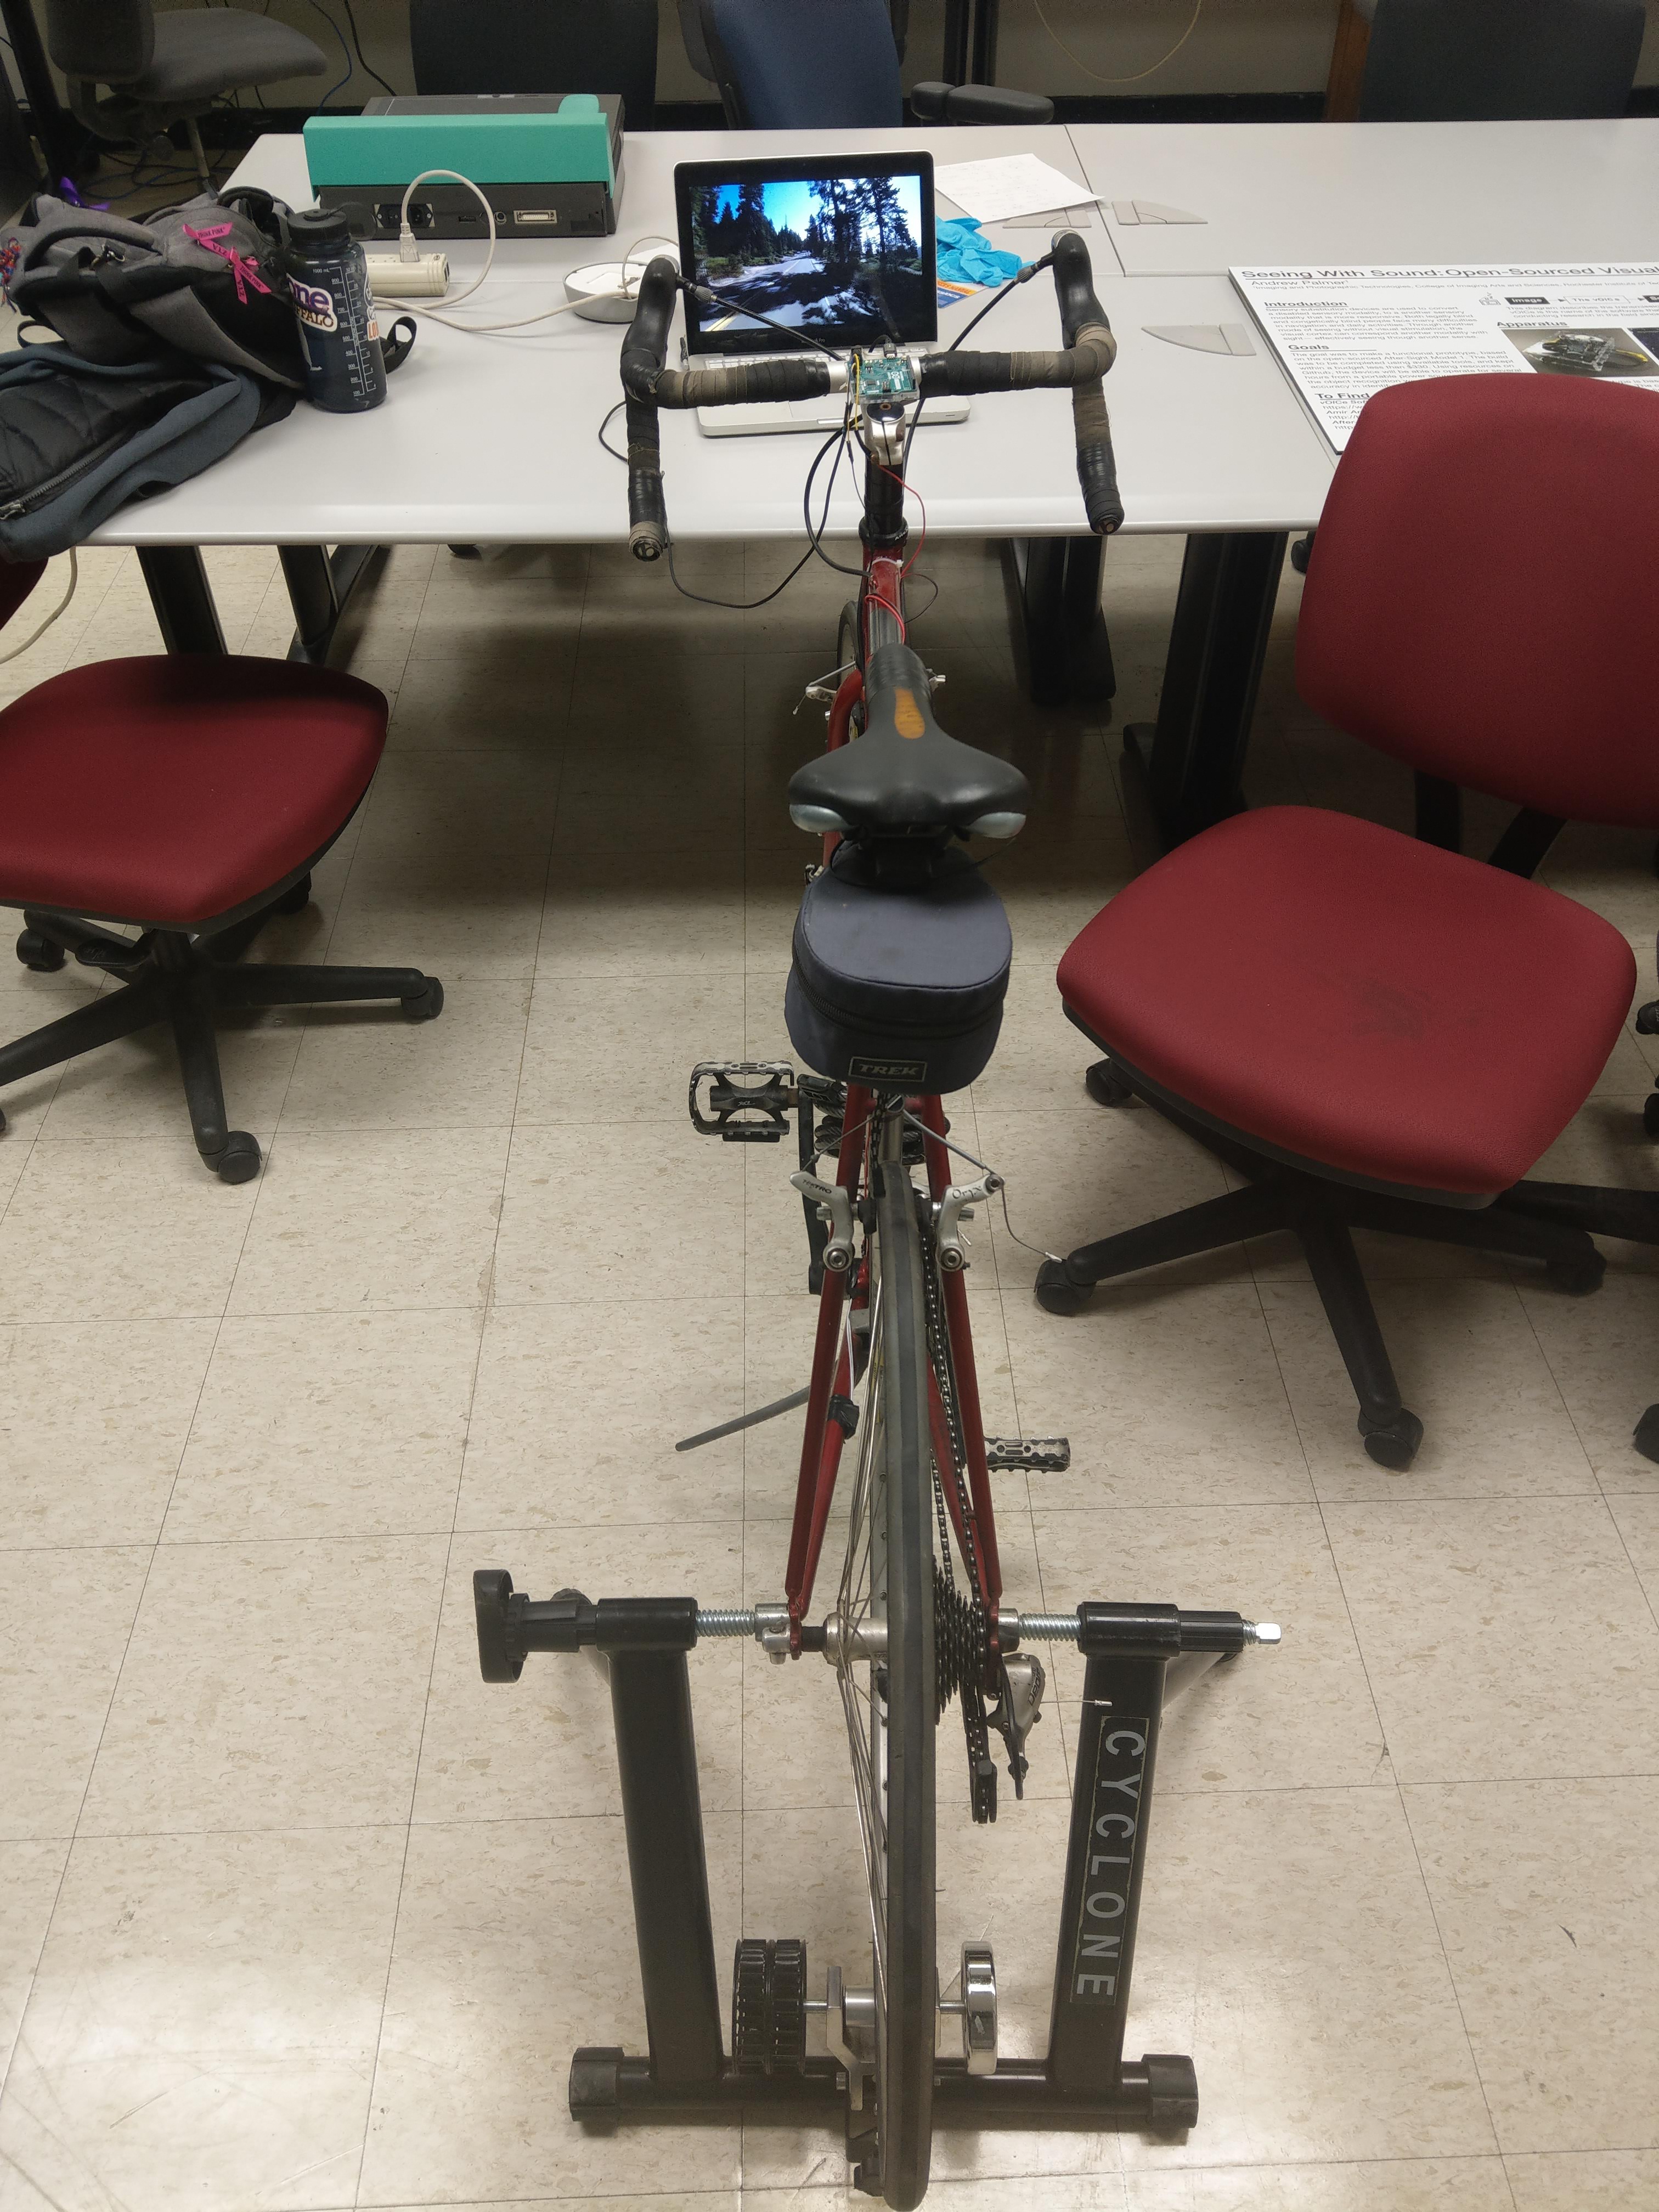
This project uses a magnetic reed switch to create a speedometer and control the video speed of first-person cycling videos on YouTube or other media. The Arduino calculates the mph and then uses that information to simulate a computer button press. This button press, paired with a Google Chrome extension, speeds up or slows down the video based on the change in velocity. It has a basic hardware set-up that those who are beginners to Arduino can easily create on their own.
The speedometer code is based on this project: https://bit.ly/2ZtnUI2
Hardware List:
2. Micro USB Cable (Needs to be capable of file transfer and < 3ft)
4. 10k Ohm Resistor
5. 22 Gauge Wire (< 4ft)
6. Soldering Iron
7. Solder
8. Electrical Tape
9. Zip Ties
11. Bicycle
Download Relevant Software Onto Your Computer
Hardware
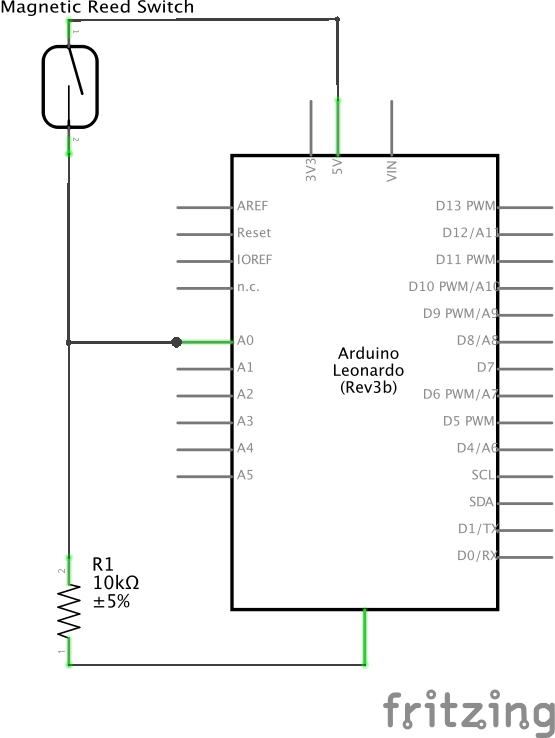
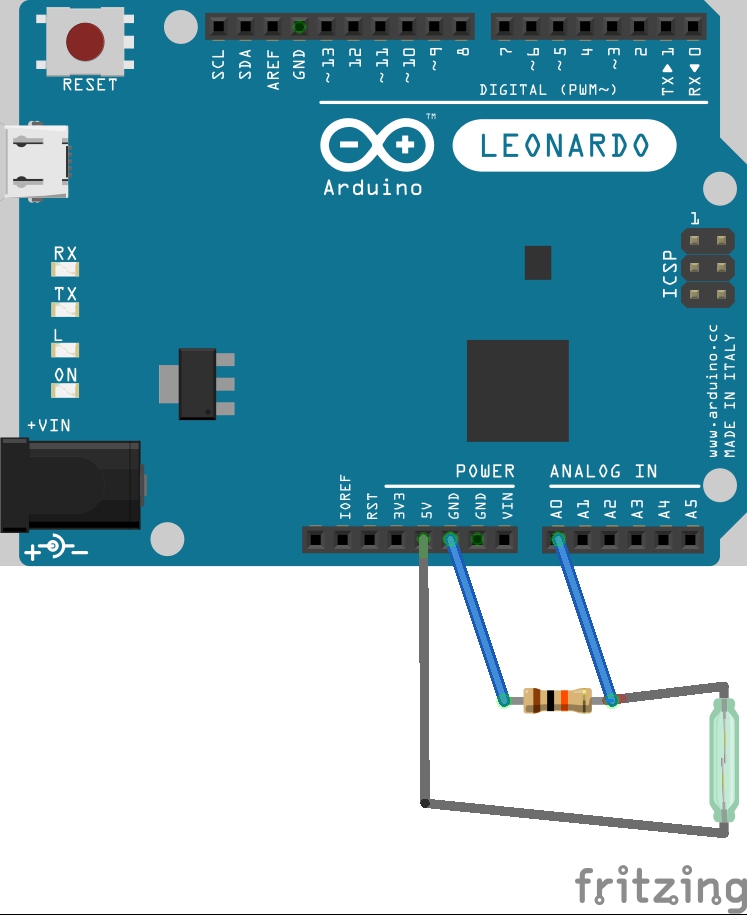
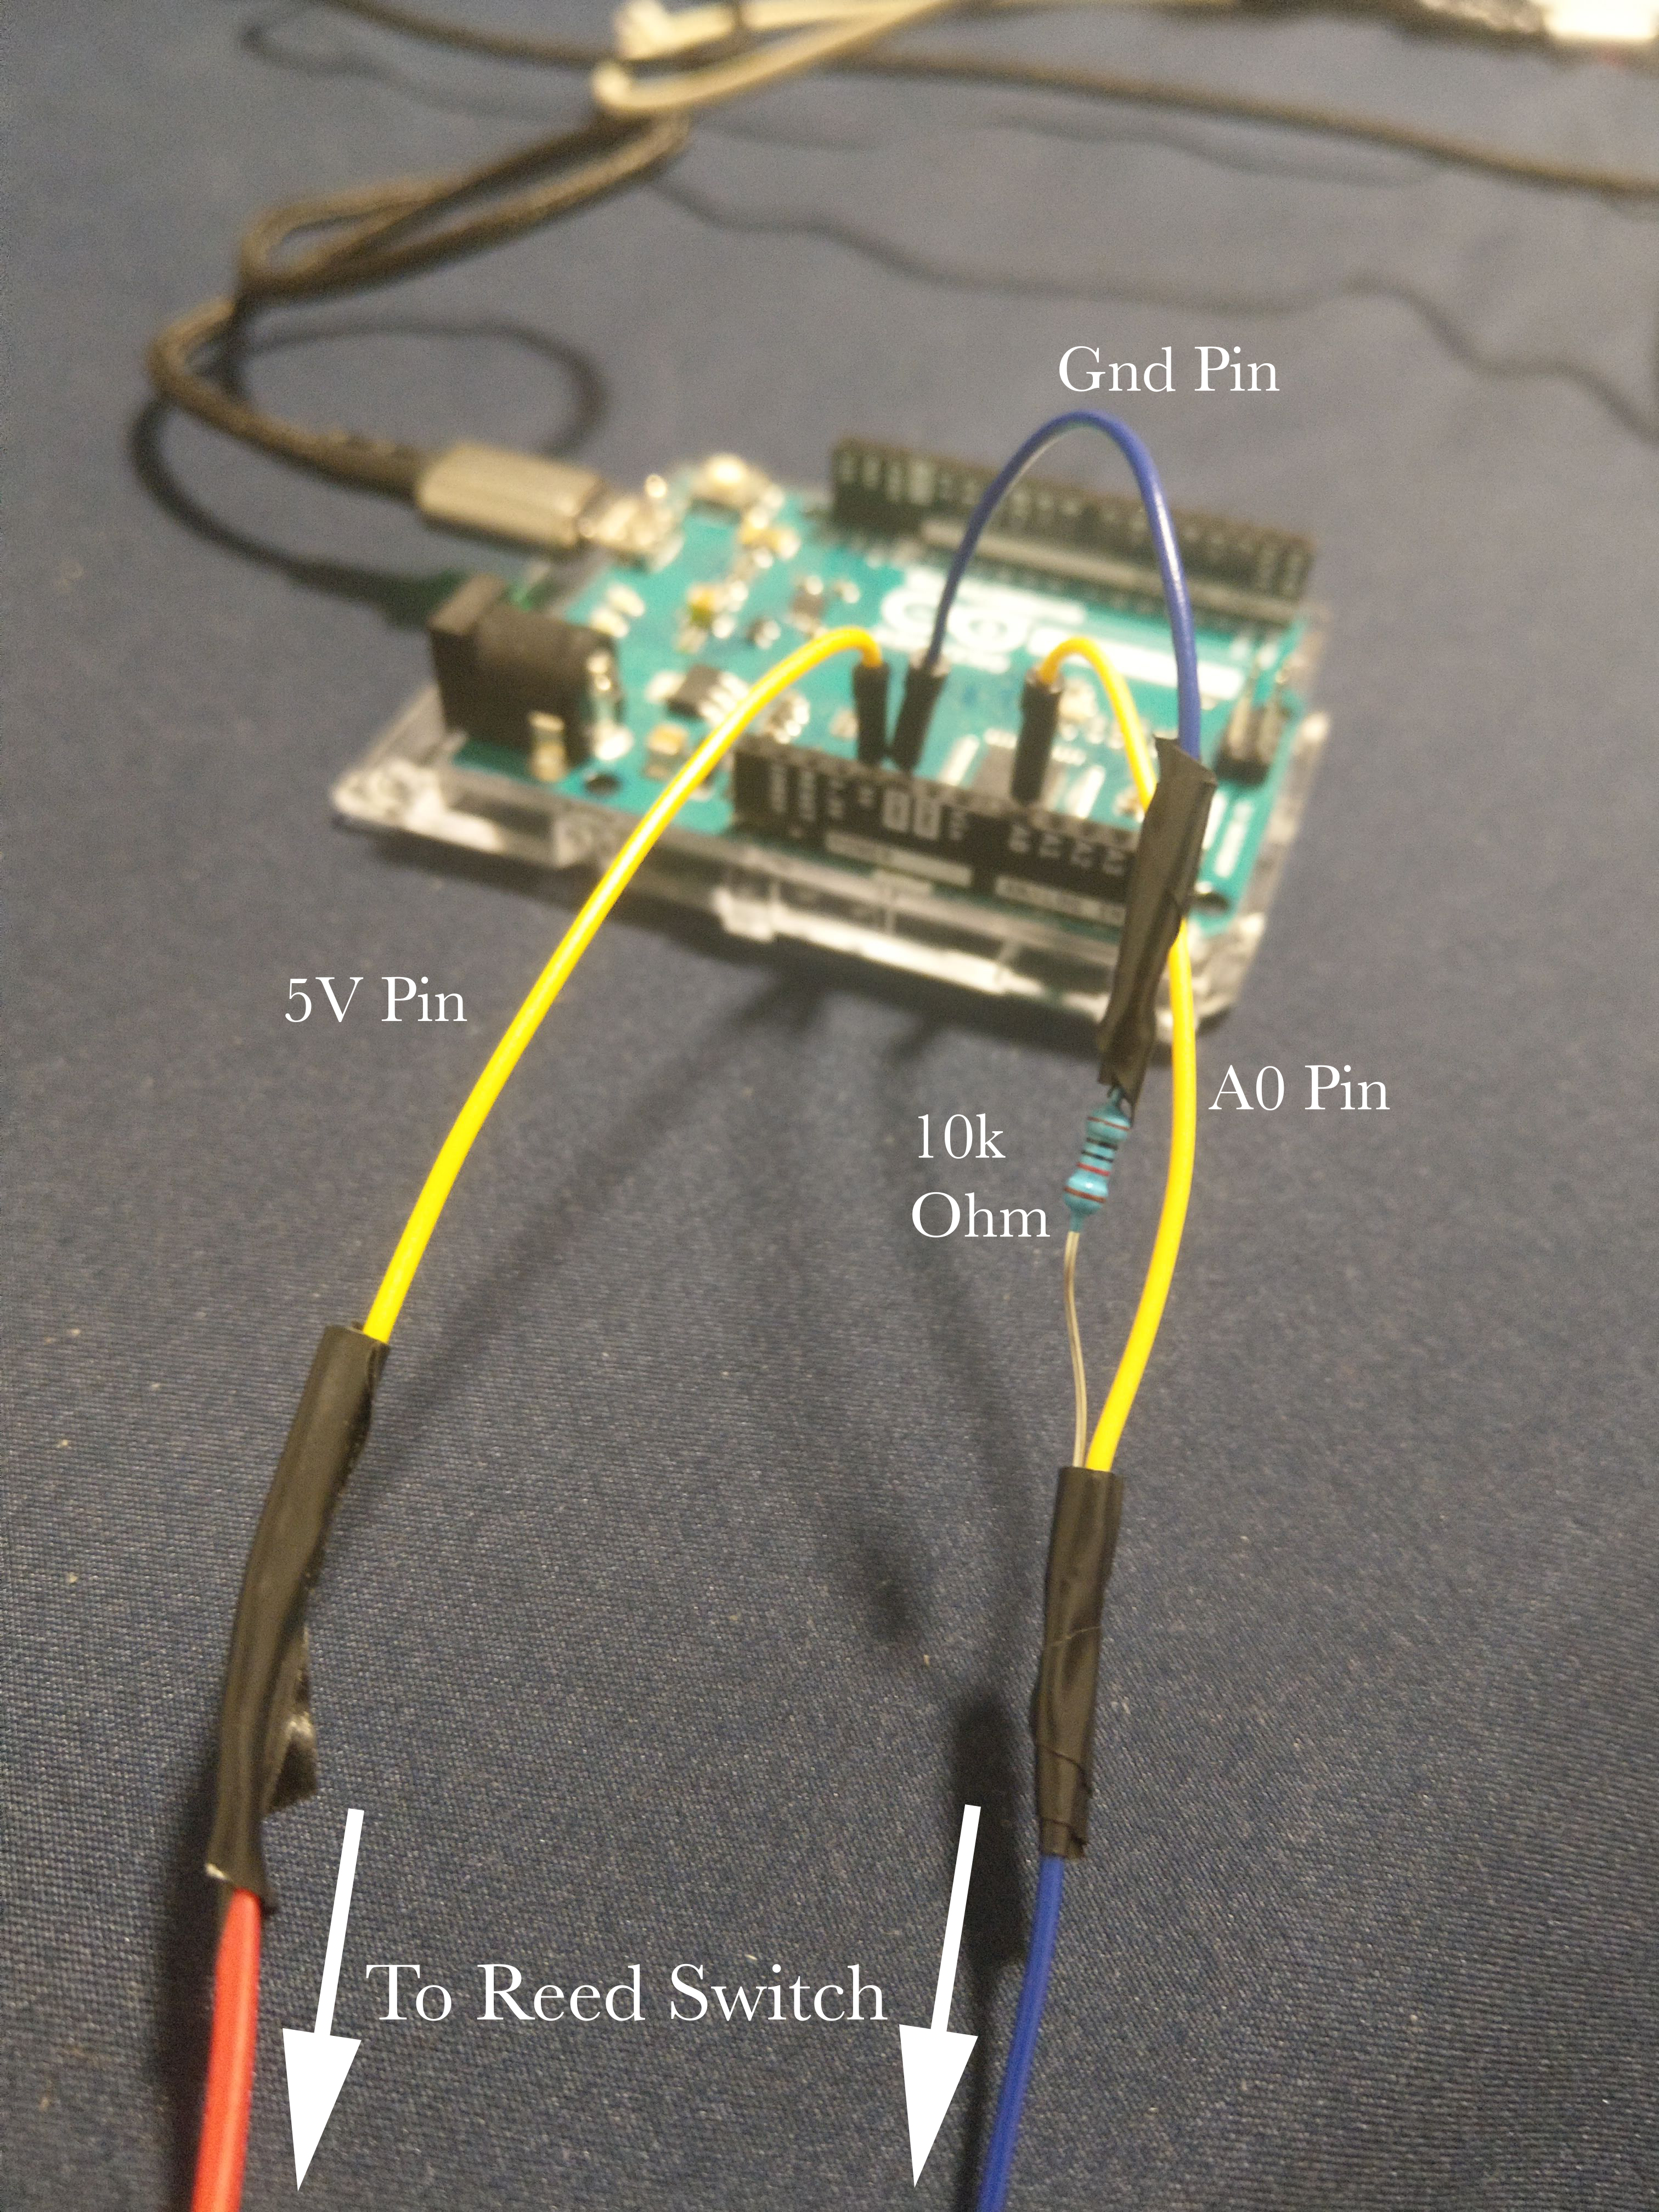
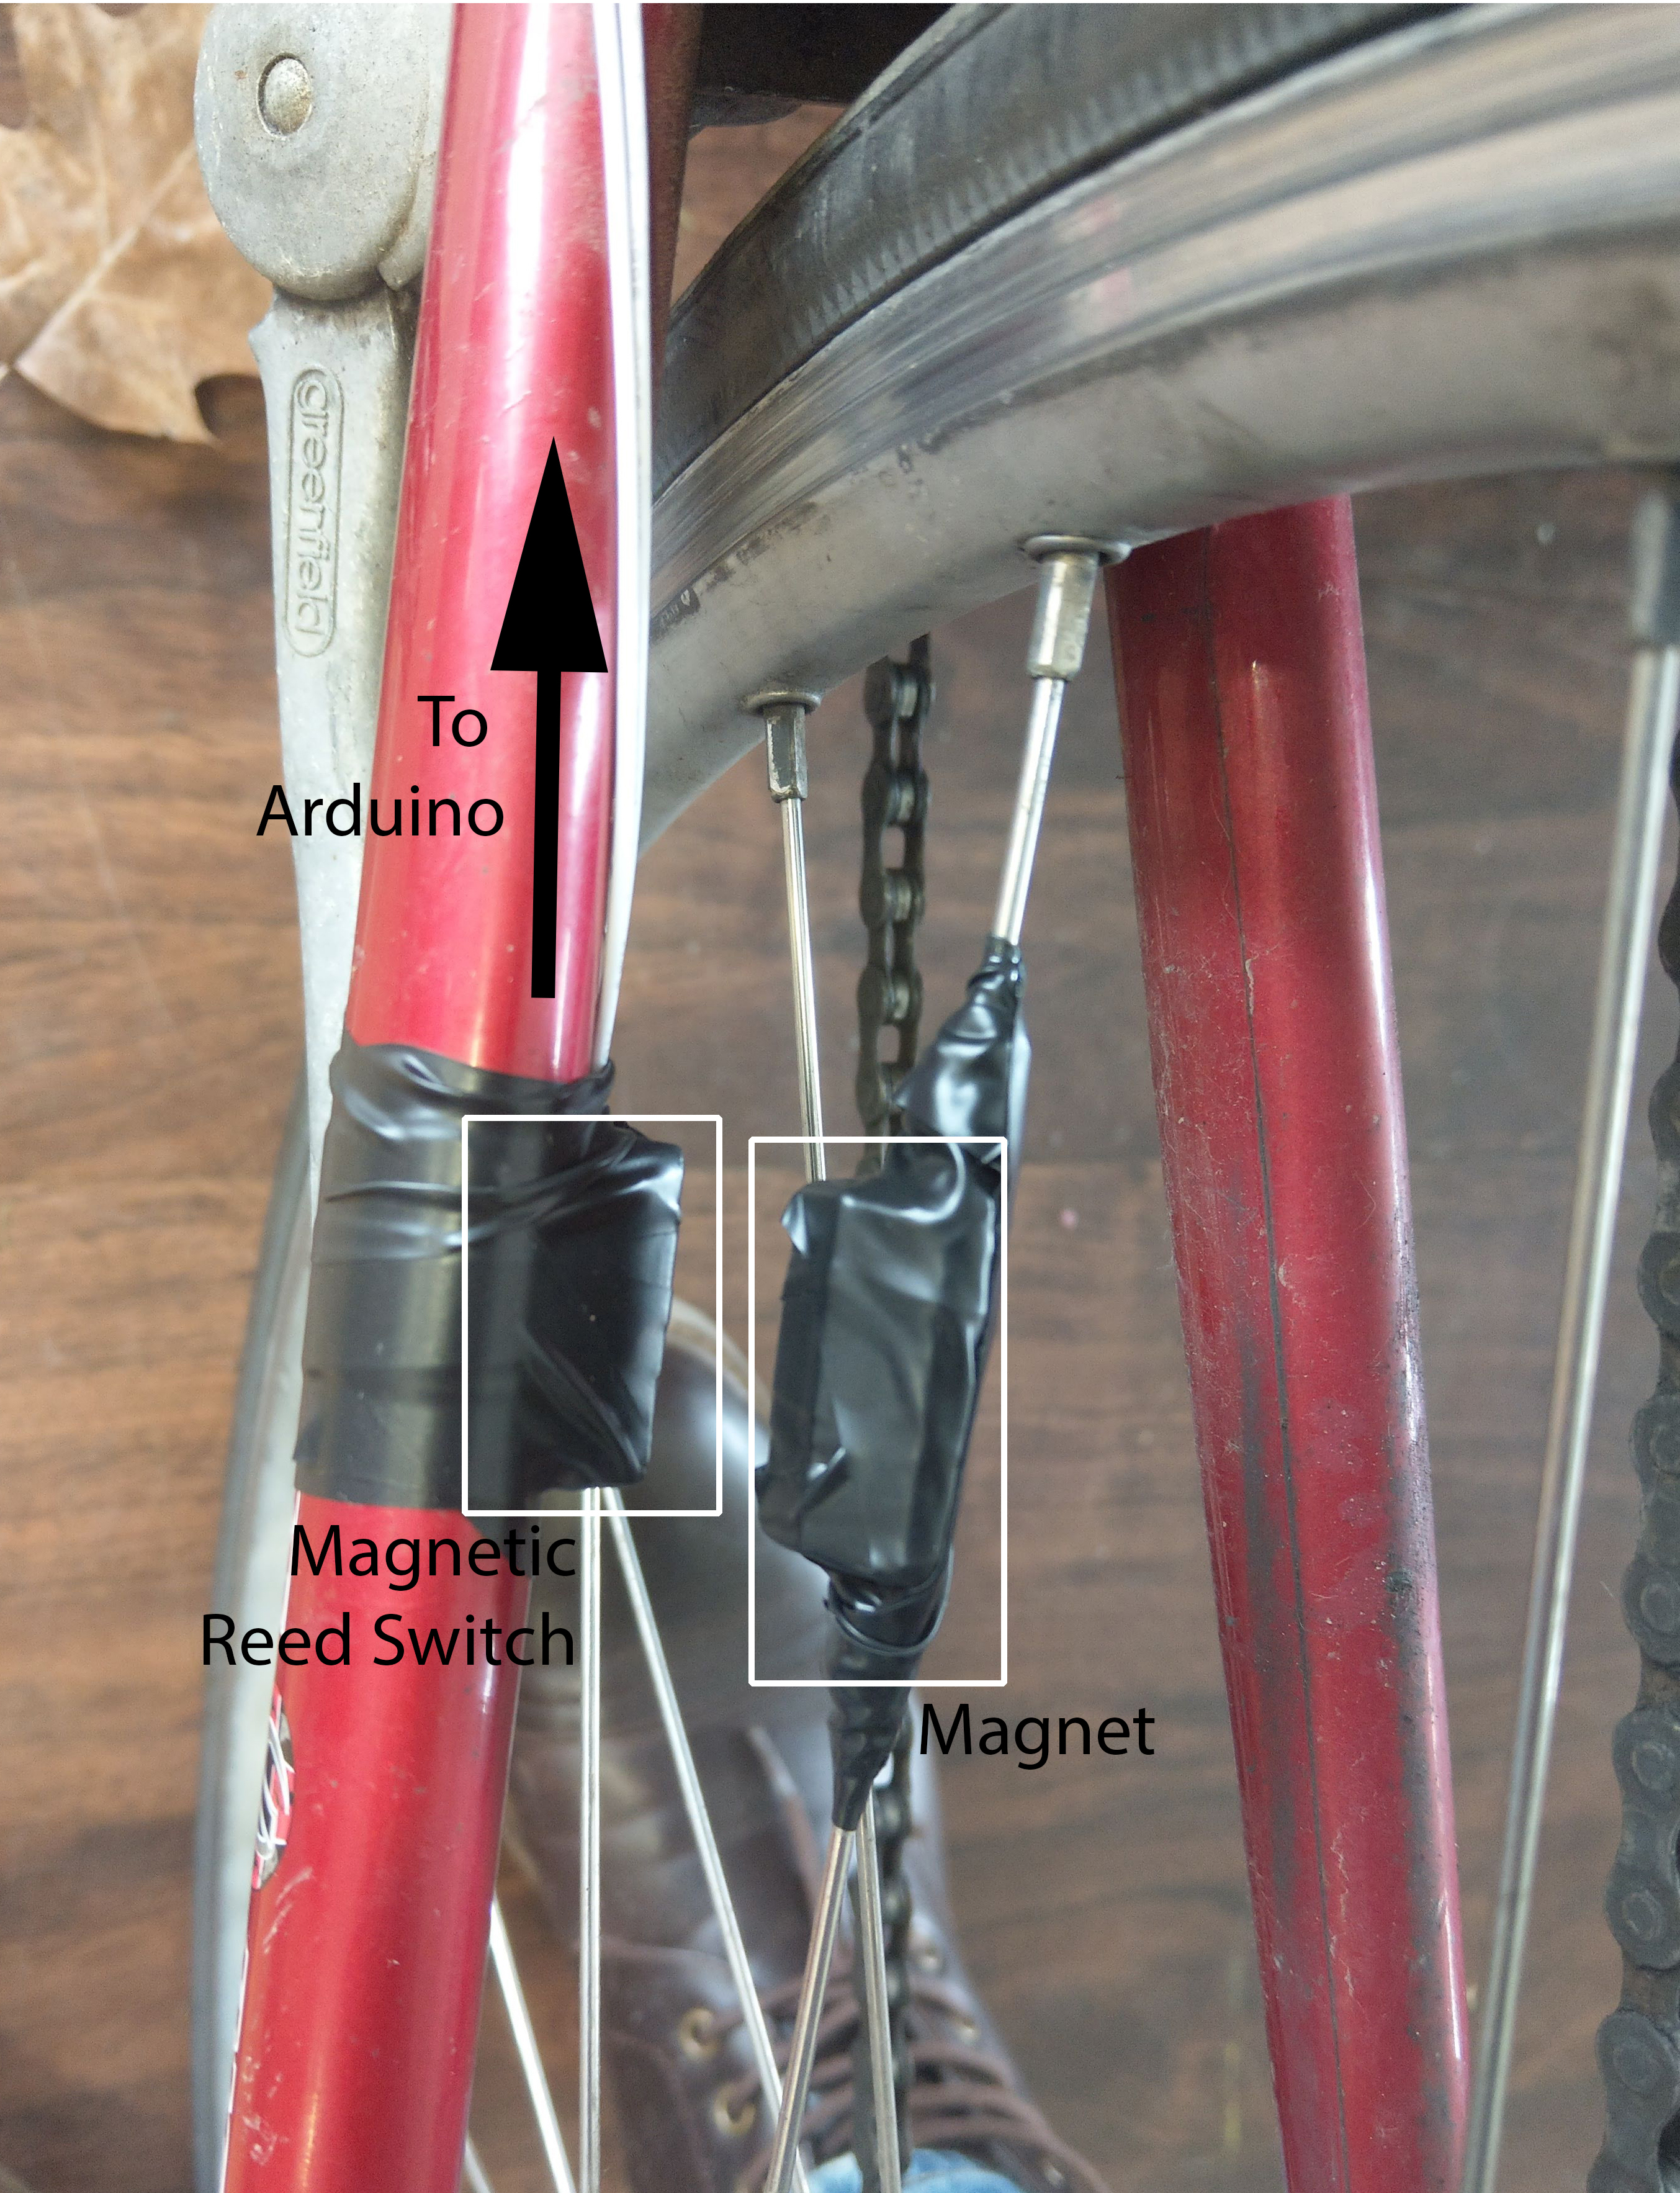
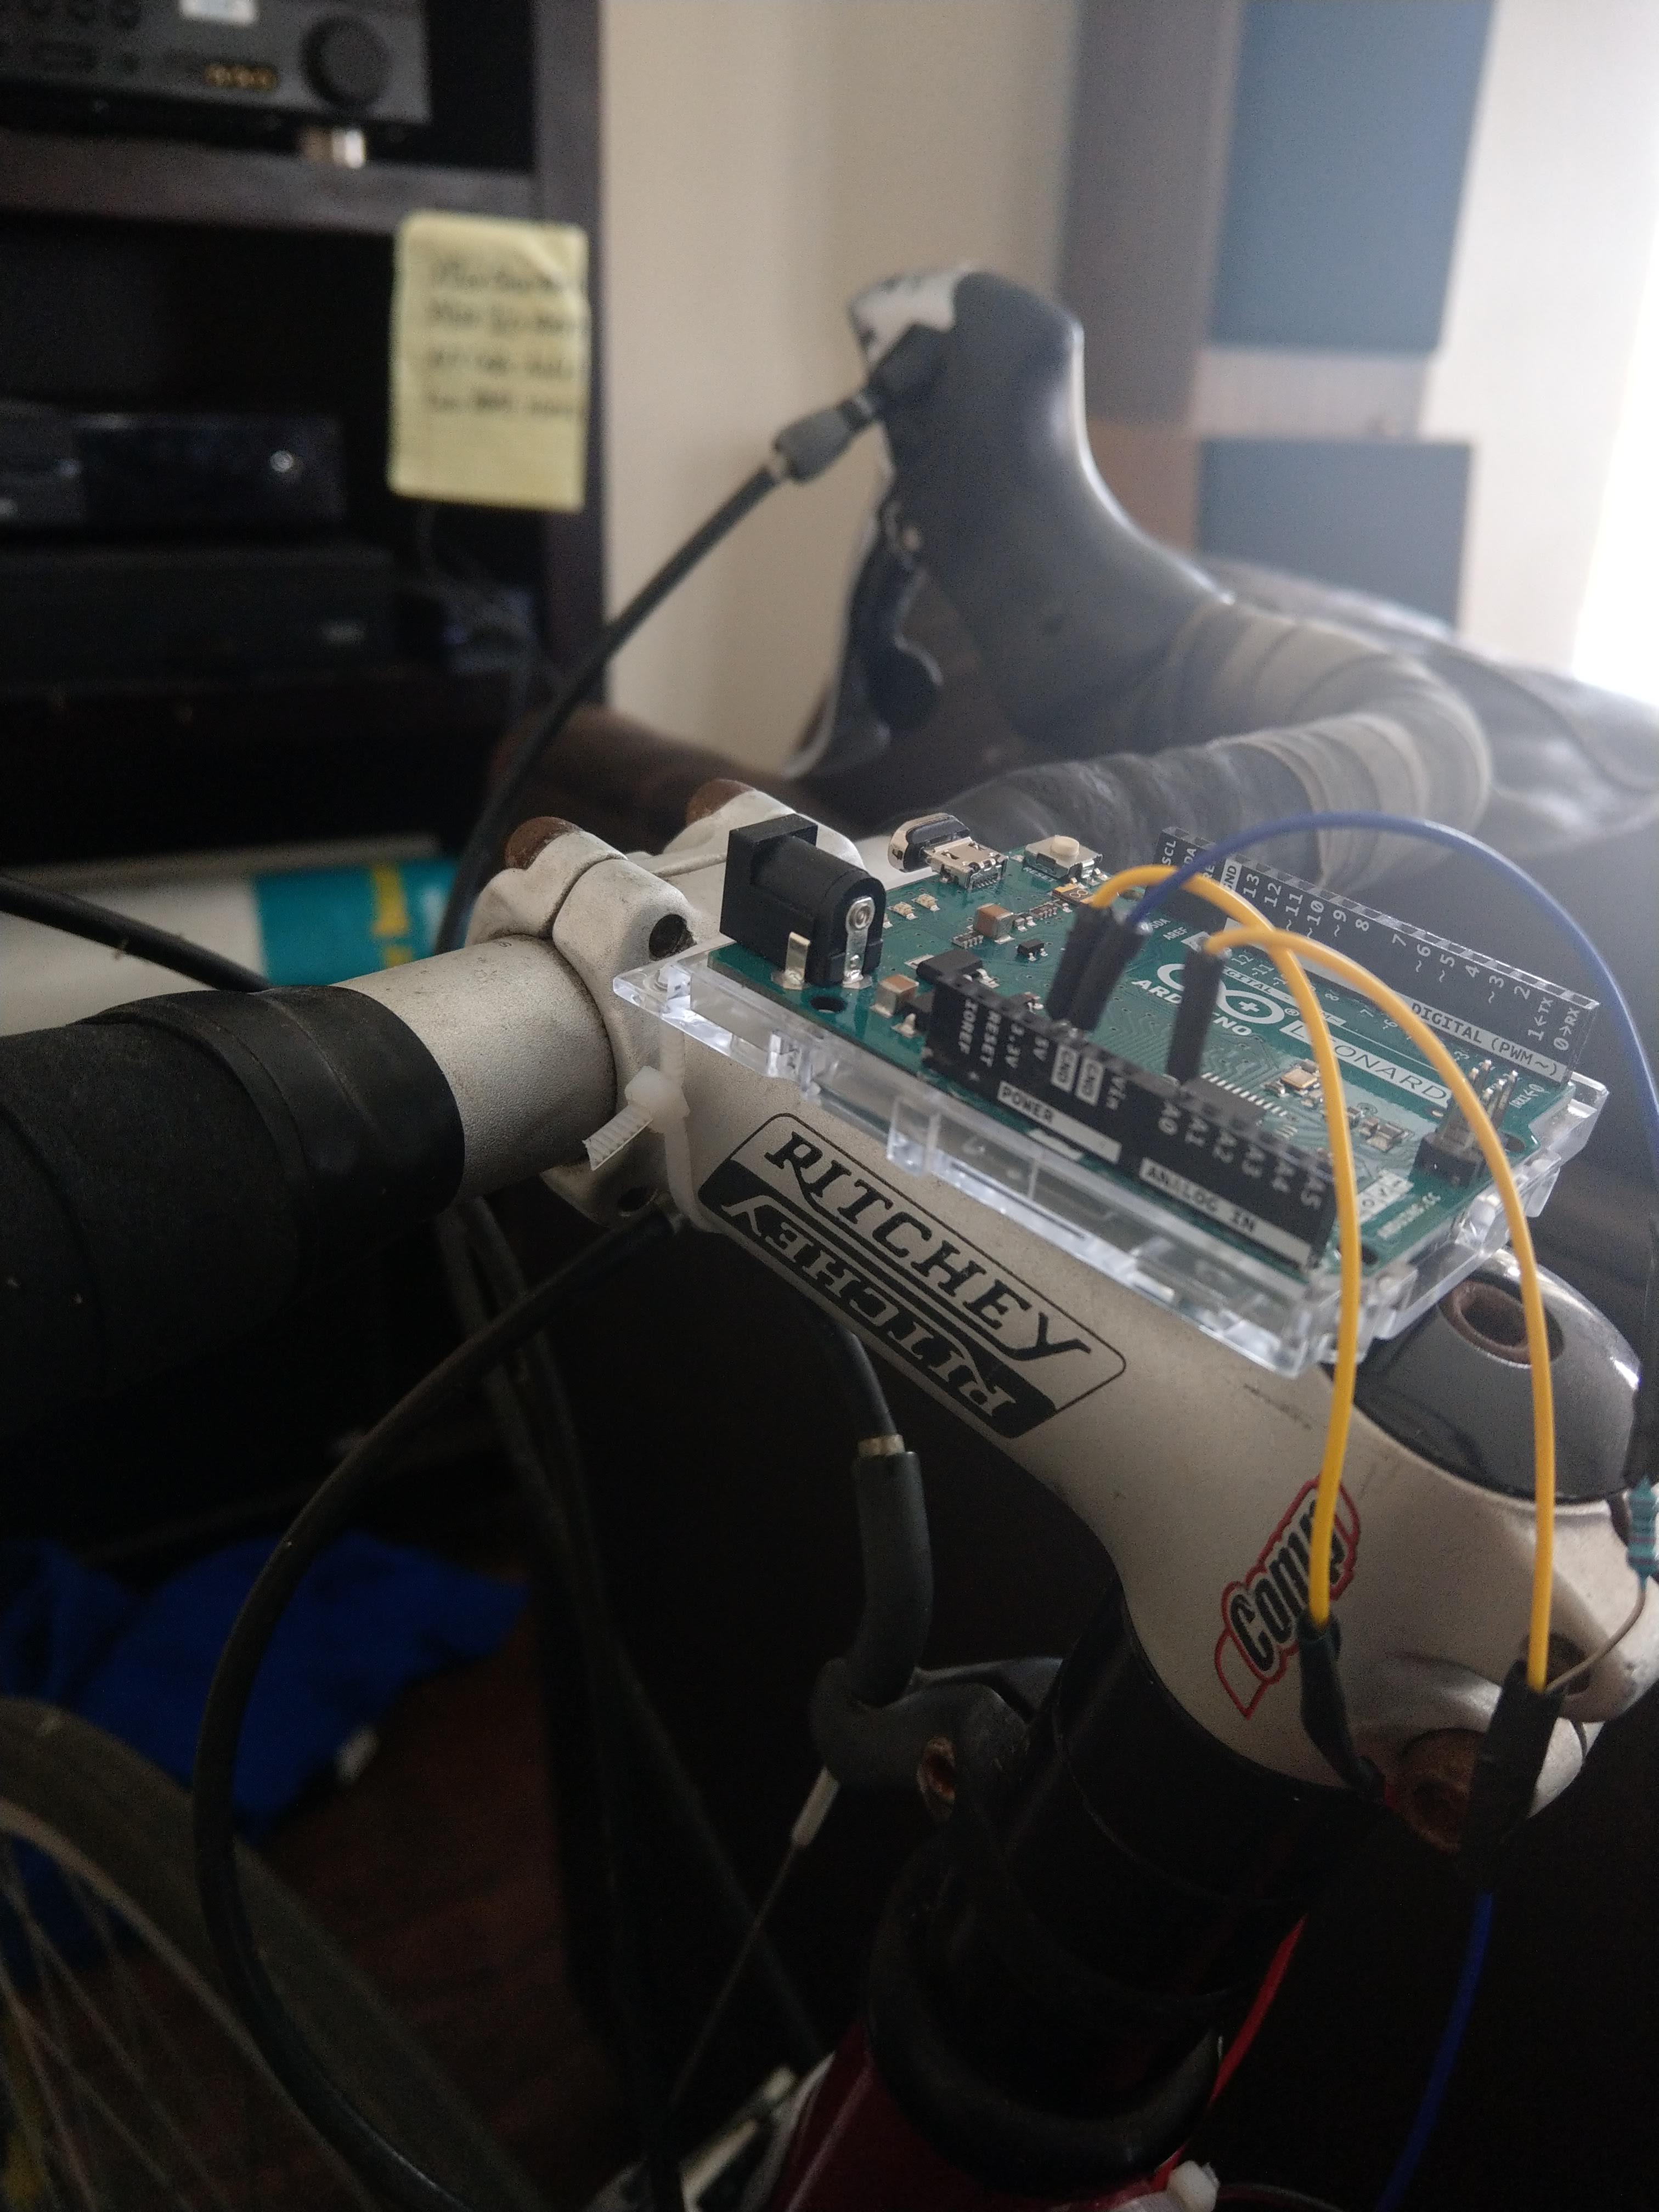
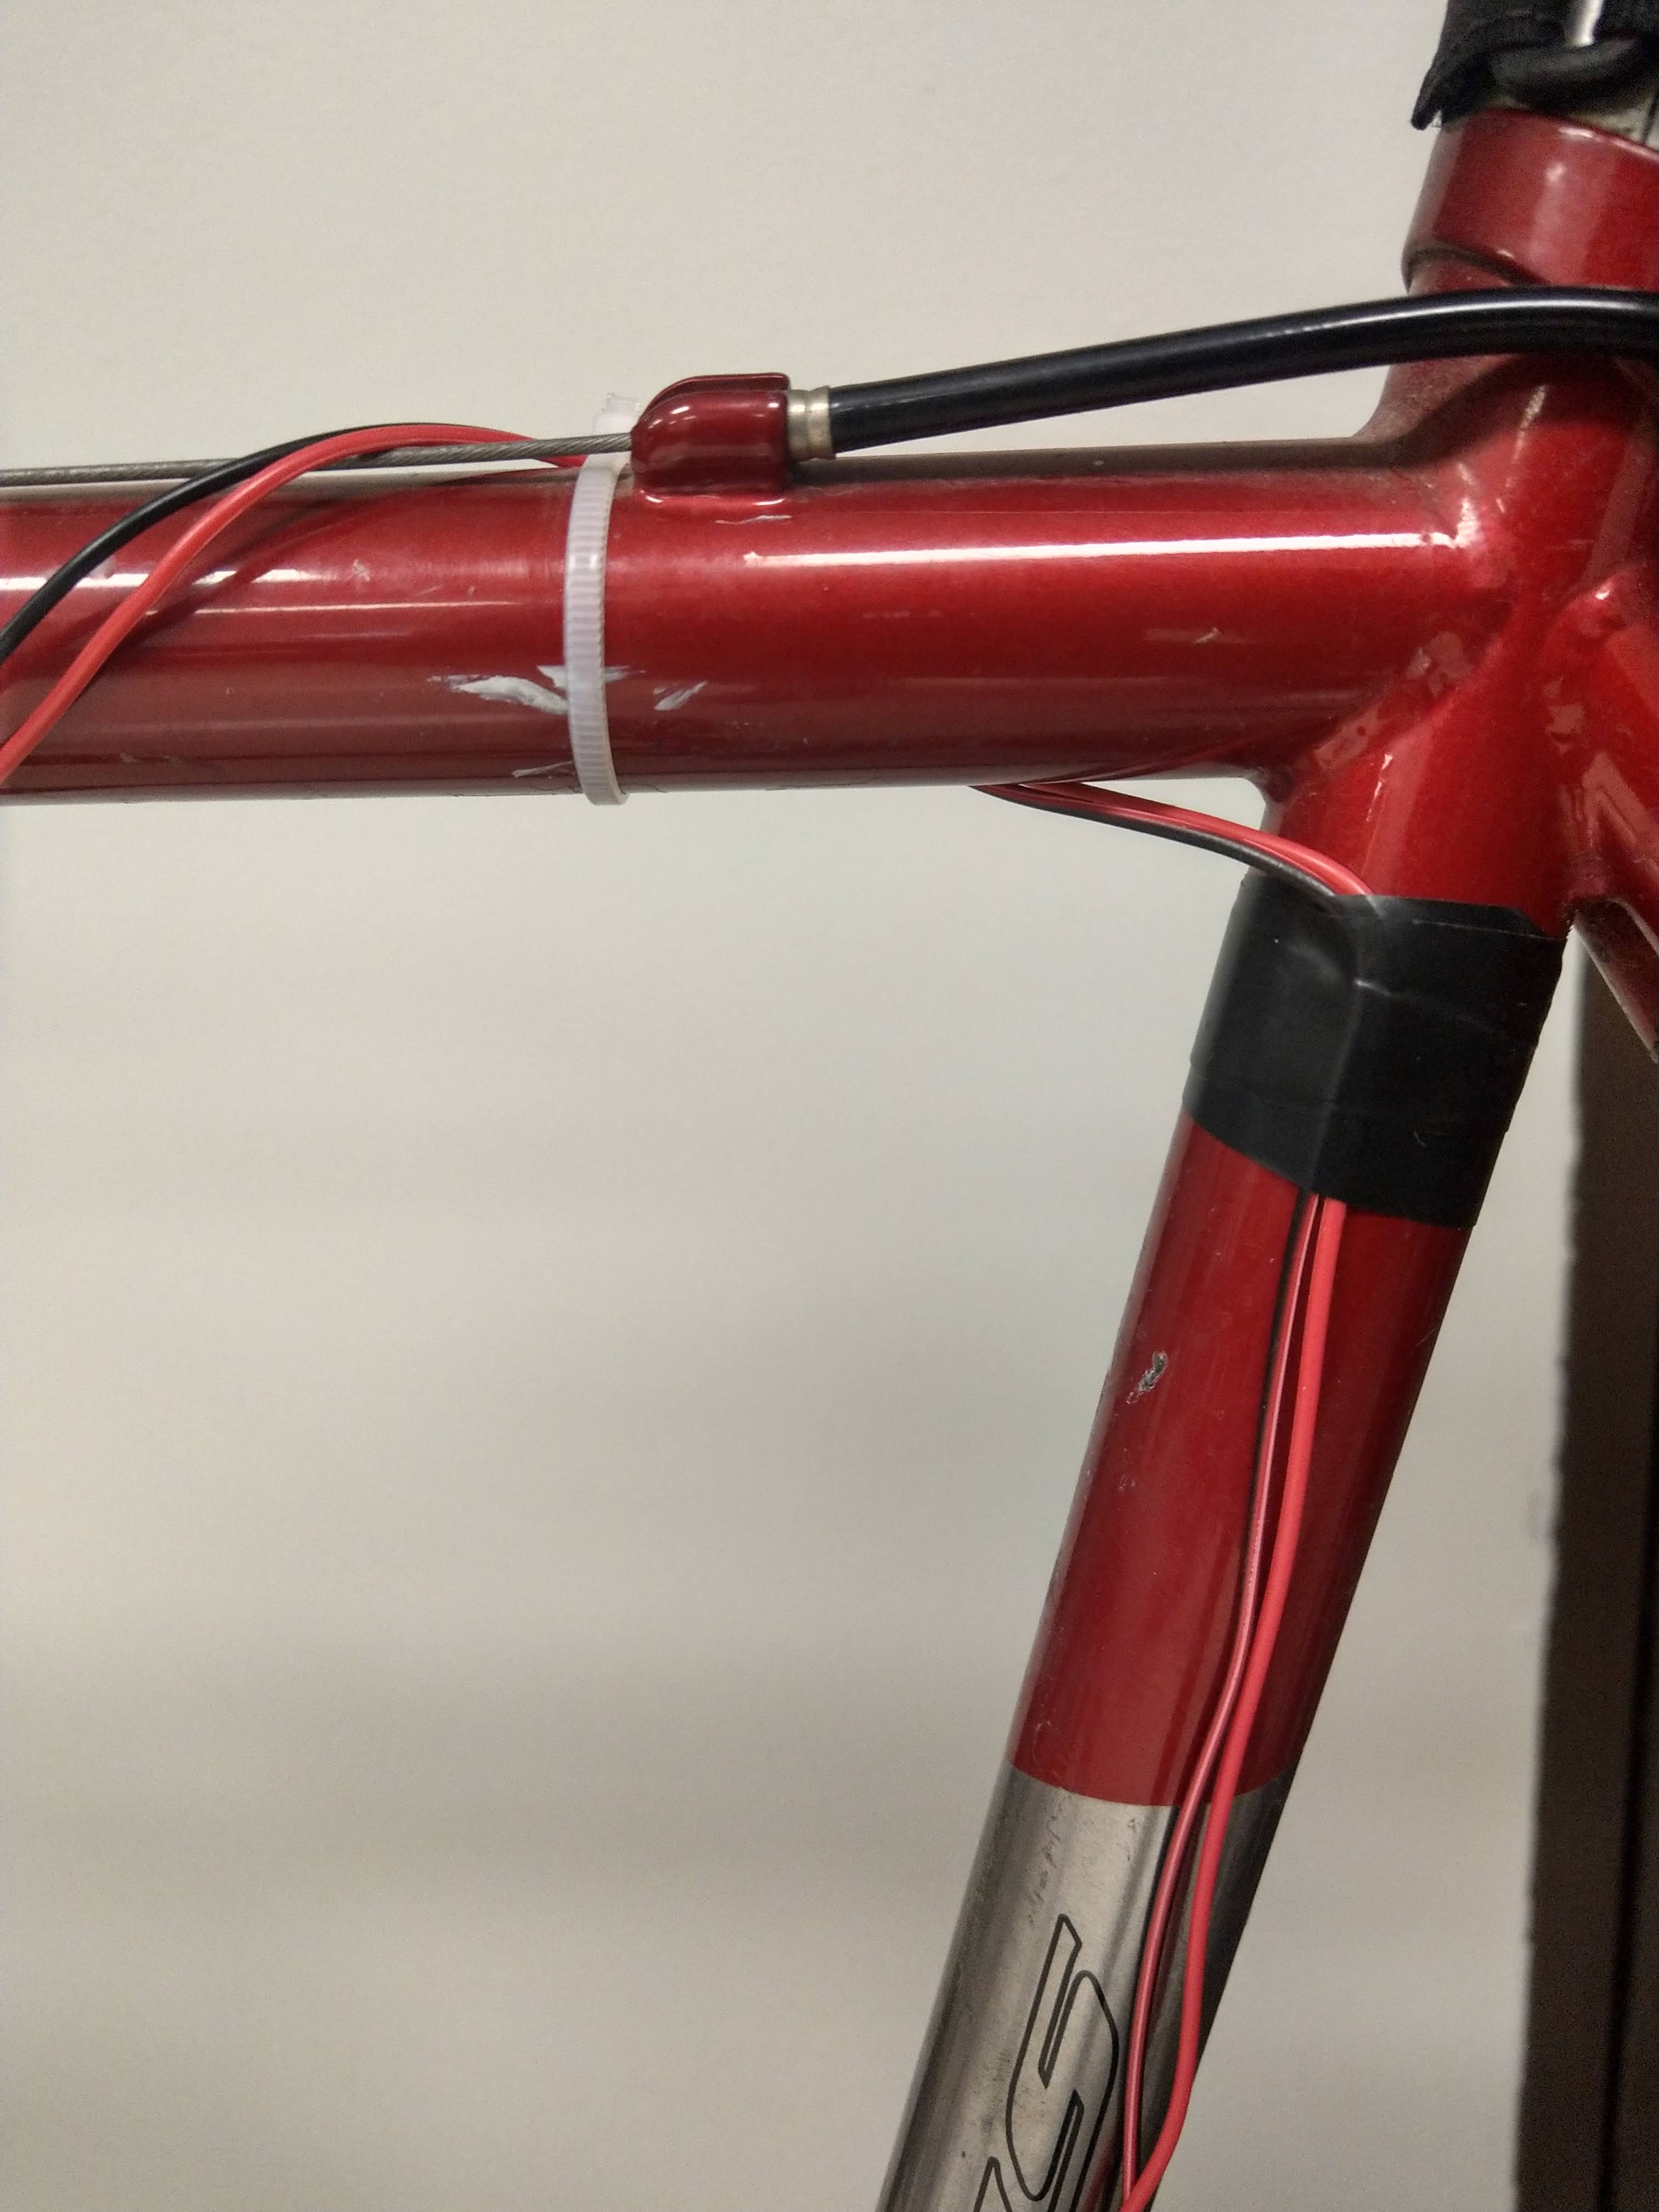
All connections should be soldered together and taped over with electrical tape. The Arduino can be mounted onto the bike using a plastic case included with the Arduino (linked in the parts list above). This is important because if the bike metal is in direct contact with the pins, it could create unwanted connections. The case also has holes that make zip-tying the case to the bike simple. The 22 gauge wire should be wrapped along the frame of the bike and secured with tape or zip ties. Make sure to avoid wrapping the wire any places where it can get caught on moving mechanisms.
Place Bike on Stationary Bike Stand
Secure the bike into the stationary bike stand and make sure it is close enough to your computer for the micro-USB cord to reach your computer. Also, make sure the viewing distance for you is suitable to be able to comfortably see the screen. A tutorial on how to securely place your bike on the stand can be found here.
Upload and Test Arduino Code
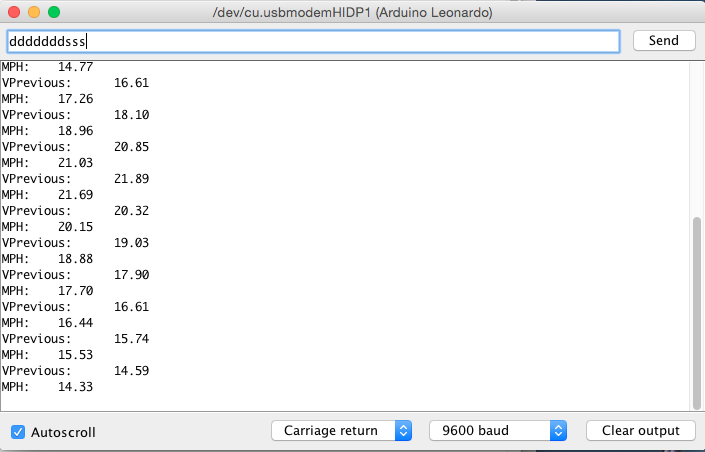
If you are new to Arduino IDE, an introduction page can be found here. It is important to note the Leonardo requires a micro-USC cable to upload that has file transfer capabilities. Many micro-USB cables are used just for charging and those will not work. Once the Arduino Leonardo is recognized by the computer, copy and paste and upload the following code:
//This code finds the speed of a bike and converts that to computer keyboard press
//calculations //tire radius ~ 13.5 inches //circumference = pi*2*r =~85 inches //max speed of 35mph =~ 616inches/second //max rps =~7.25
#include #define reed A0//pin connected to read switch
//storage variables int reedVal; long timer;// time between one full rotation (in ms) float mph; float radius = 13.5;// tire radius (in inches) float circumference; float vprevious; float rate;
int maxReedCounter = 100;//min time (in ms) of one rotation (for debouncing) int reedCounter;
void setup(){ reedCounter = maxReedCounter; circumference = 2*3.14*radius; pinMode(reed, INPUT); Keyboard.begin(); // TIMER SETUP- the timer interrupt allows precise timed measurements of the reed switch //for more info about configuration of arduino timers see http://arduino.cc/playground/Code/Timer1 cli();//stop interrupts
//set timer1 interrupt at 1kHz TCCR1A = 0;// set entire TCCR1A register to 0 TCCR1B = 0;// same for TCCR1B TCNT1 = 0; // set timer count for 1khz increments OCR1A = 1999;// = (1/1000) / ((1/(16*10^6))*8) - 1 // turn on CTC mode TCCR1B |= (1 << WGM12); // Set CS11 bit for 8 prescaler TCCR1B |= (1 << CS11); // enable timer compare interrupt TIMSK1 |= (1 << OCIE1A); sei();//allow interrupts //END TIMER SETUP Serial.begin(9600); }
ISR(TIMER1_COMPA_vect) {//Interrupt at freq of 1kHz to measure reed switch reedVal = digitalRead(reed);//get val of A0 if (reedVal){//if reed switch is closed if (reedCounter == 0){//min time between pulses has passed vprevious = mph; delay(500); mph = (56.8*float(circumference))/float(timer);//calculate miles per hour timer = 0;//reset timer reedCounter = maxReedCounter;//reset reedCounter } else{ if (reedCounter > 0){//don't let reedCounter go negative reedCounter -= 1;//decrement reedCounter } } } else{//if reed switch is open if (reedCounter > 0){//don't let reedCounter go negative reedCounter -= 1;//decrement reedCounter } } if (timer > 2000){ mph = 0;//if no new pulses from reed switch- tire is still, set mph to 0 vprevious = 0; } else{ timer += 1;//increment timer } }
void controlComp(){ if (vprevious < mph ) //Speed Up Video speed { Keyboard.press('d'); Keyboard.releaseAll(); delay(1000); } if (vprevious > mph ) //Slow Down Video Speed { Keyboard.press('s'); Keyboard.releaseAll(); delay(750); } if (vprevious == mph) //do nothing { ; } } void loop(){ //print mph twice a second Serial.print("VPrevious:"); Serial.print("\t"); Serial.println(vprevious);
Serial.print("MPH:"); Serial.print("\t"); Serial.println(mph); controlComp(); }
Once the code is successfully uploaded, open the serial monitor. With no movement of the rear wheel, the “MPH” and “VPrevious” should be reading 0.00. Rotate the wheel so that it speeds up for a few revolutions and then slows down. The monitor should read the speed and type d’s for acceleration and s’s for deceleration. If no values appear when the wheel is rotated, the magnet may not be detected by the reed switch. Make sure the magnetic is strong enough by listening for a quit *clink* noise when the magnet passes the switch.
Set Up YouTube Controller
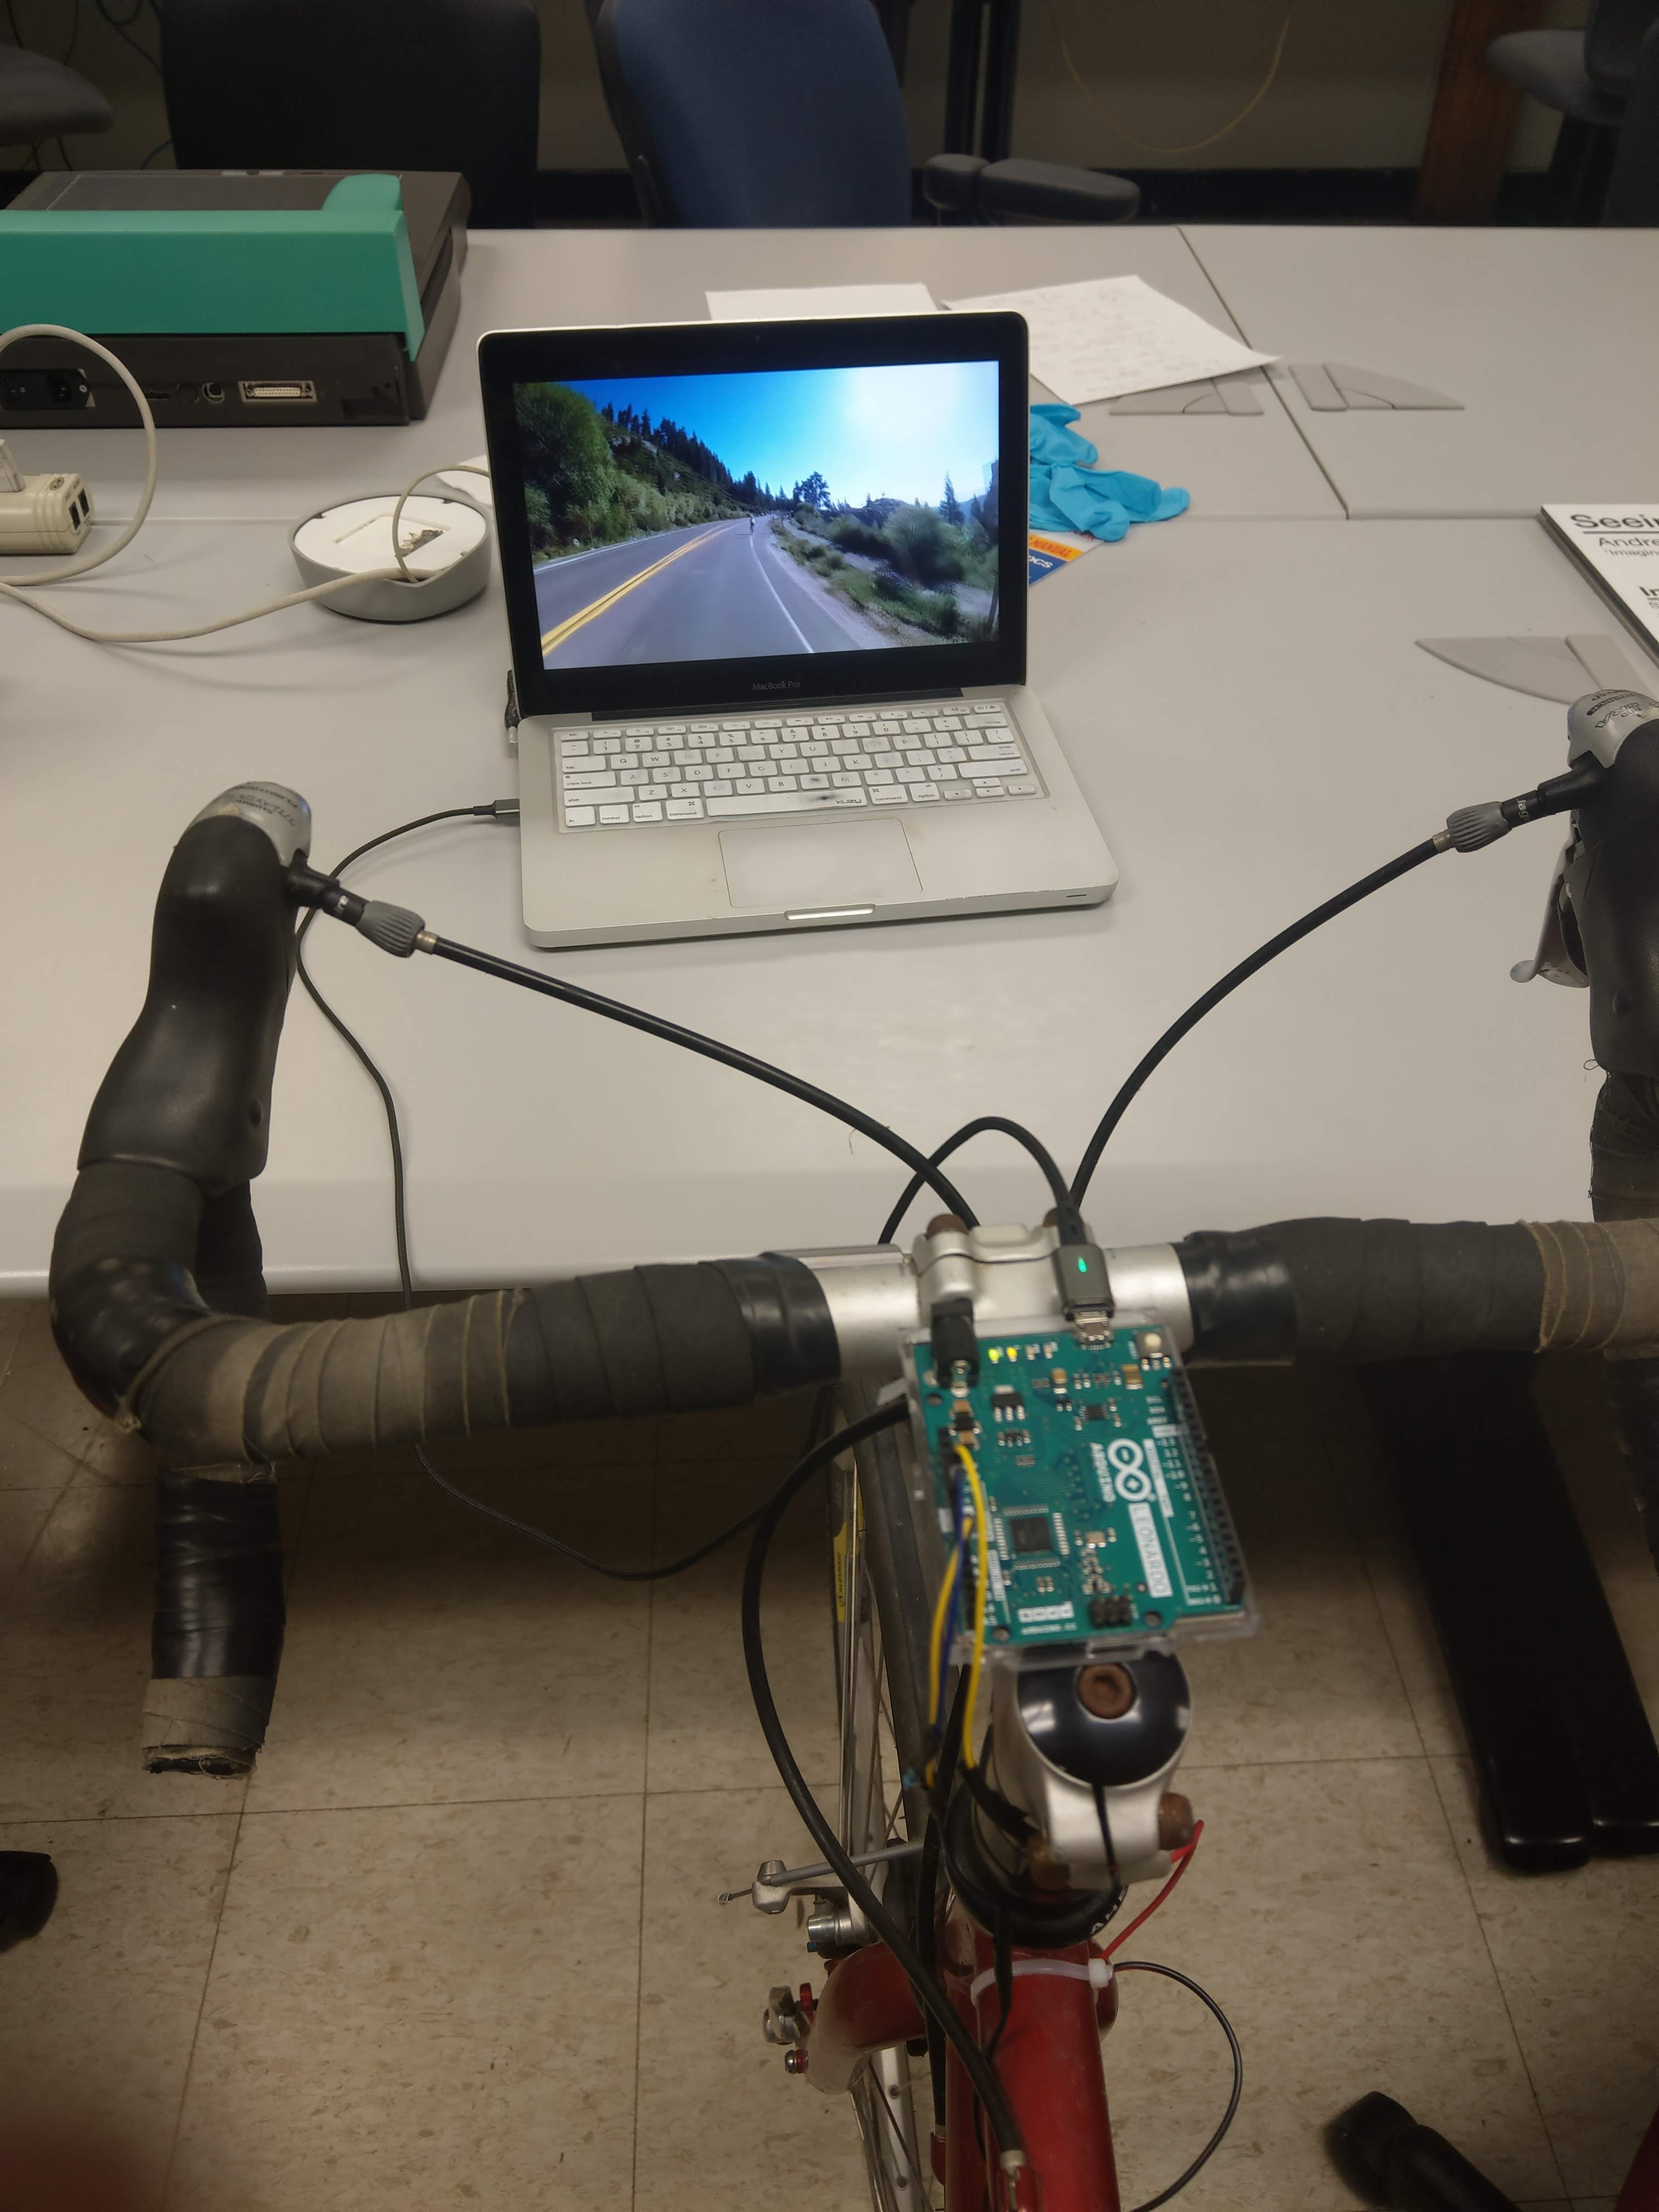
The final step is to bring up the YouTube videos you desire to use to follow along on your bike. The idea is to have first person videos that you can fully immerse yourself in and enjoy the scenery while biking. I have complied a YouTube playlist of a variety of video options. They range from a number of channels that upload videos that match this first-person criteria. They are also videos like flying through clouds and cross-country train trips for some variety of first-person adventures.