HoloJacket - Wearable Video Players
by brittany35 in Circuits > Art
859 Views, 3 Favorites, 0 Comments
HoloJacket - Wearable Video Players



In todays world we hide behind electronic devices avoiding social interaction with one another. Sometimes we might want to break the ice and make conversation with someone sitting next to us but how do we do this easily? HoloJacket makes for easy ice breakers by showcasing ones interests to the world. Now one can know a little bit about the person and can see if they might have similar interests.
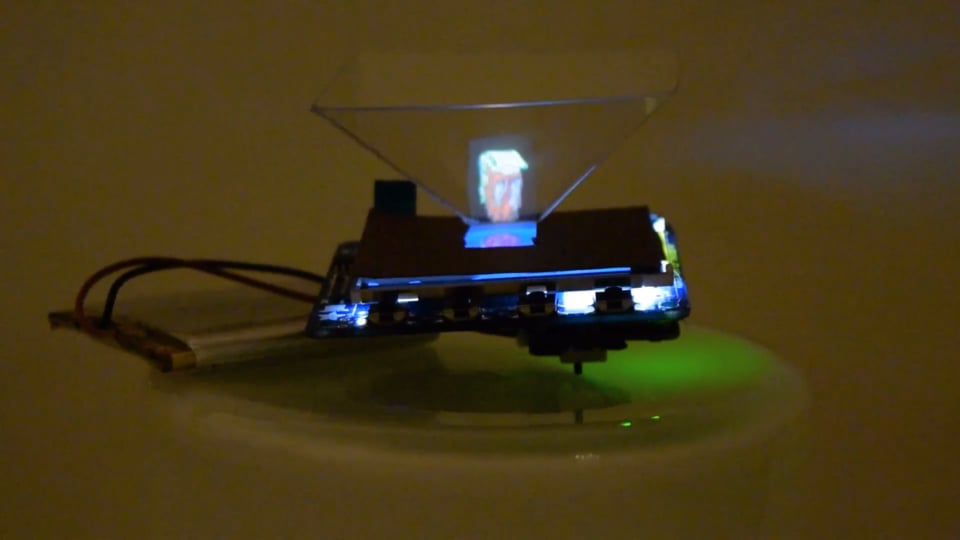
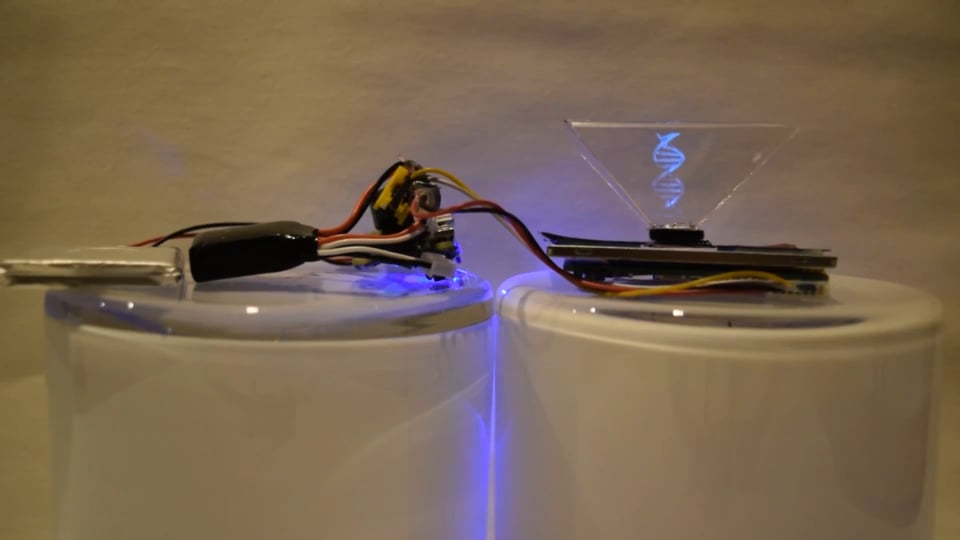
HoloJacket features two hologram displays that represent what the wearer wants to share with the world. Each display is connected to a Raspberry Pi Zero . One of the displays uses a PITFT HAT while the other a NTSC/PAL TFT Display. The hologram displays are detachable from the jacket making it easy to wash. A Python program runs automatically when the Pi is turned on. Easy access to the GPIO pins allows the user to escape the video loop to access the computer interface and safely shutdown the device. The HoloJacket also uses a power boost 500 to make it easily portable by allowing a 3.7 LiPo battery to to be used.
This instructable will show you how to make a wearable video player using a PiTFT Hat and NTSC/PAL TFT display. The instructable is made for someone that has never used a raspberry pi interface before. If you have then skip all the nitty gritty details on setting up a pi.
Materials:
For display with pitft:
- raspberry pi zero, micro usb, usb power port
- PiTFT Hat
- USB mini Hub to attach your mouse, keyboard, and usb key to
- Breakaway Headers
- Lithium Ion Polymer Battery 3.7V 2500mAh
- PowerBoost 500
- Lipo charger for when your lipo battery dies
- switch
- usb wifi module
- mouse
- keyboard
- usb key
- solder
- soldering iron
- 22 gauge wire (in black and red)
- wire stripper
For regular display
- raspberry pi zero, micro usb, usb power port
- NTSC/PAL TFT display
- USB mini Hub to attach your mouse, keyboard, and usb key
- Lithium Ion Polymer Battery 3.7V 2500mAh
- PowerBoost 500
- Lipo charger for when your lipo battery dies
- 2 switch
- usb wifi module
- 2 momentary pushbuttons
- ProtoBoard
- 7.4V Lipo
- 7.4V Lipo charger
- RCA male
- mouse
- keyboard
- usb key
- solder
- soldering iron
- 22 gauge wire (in black and red)
- wire stopper
- JST 2-pin cable (optional)
- JST-PH 2-Pin SMT (optional)
How to Attach the PiTFT to the Pi Zero
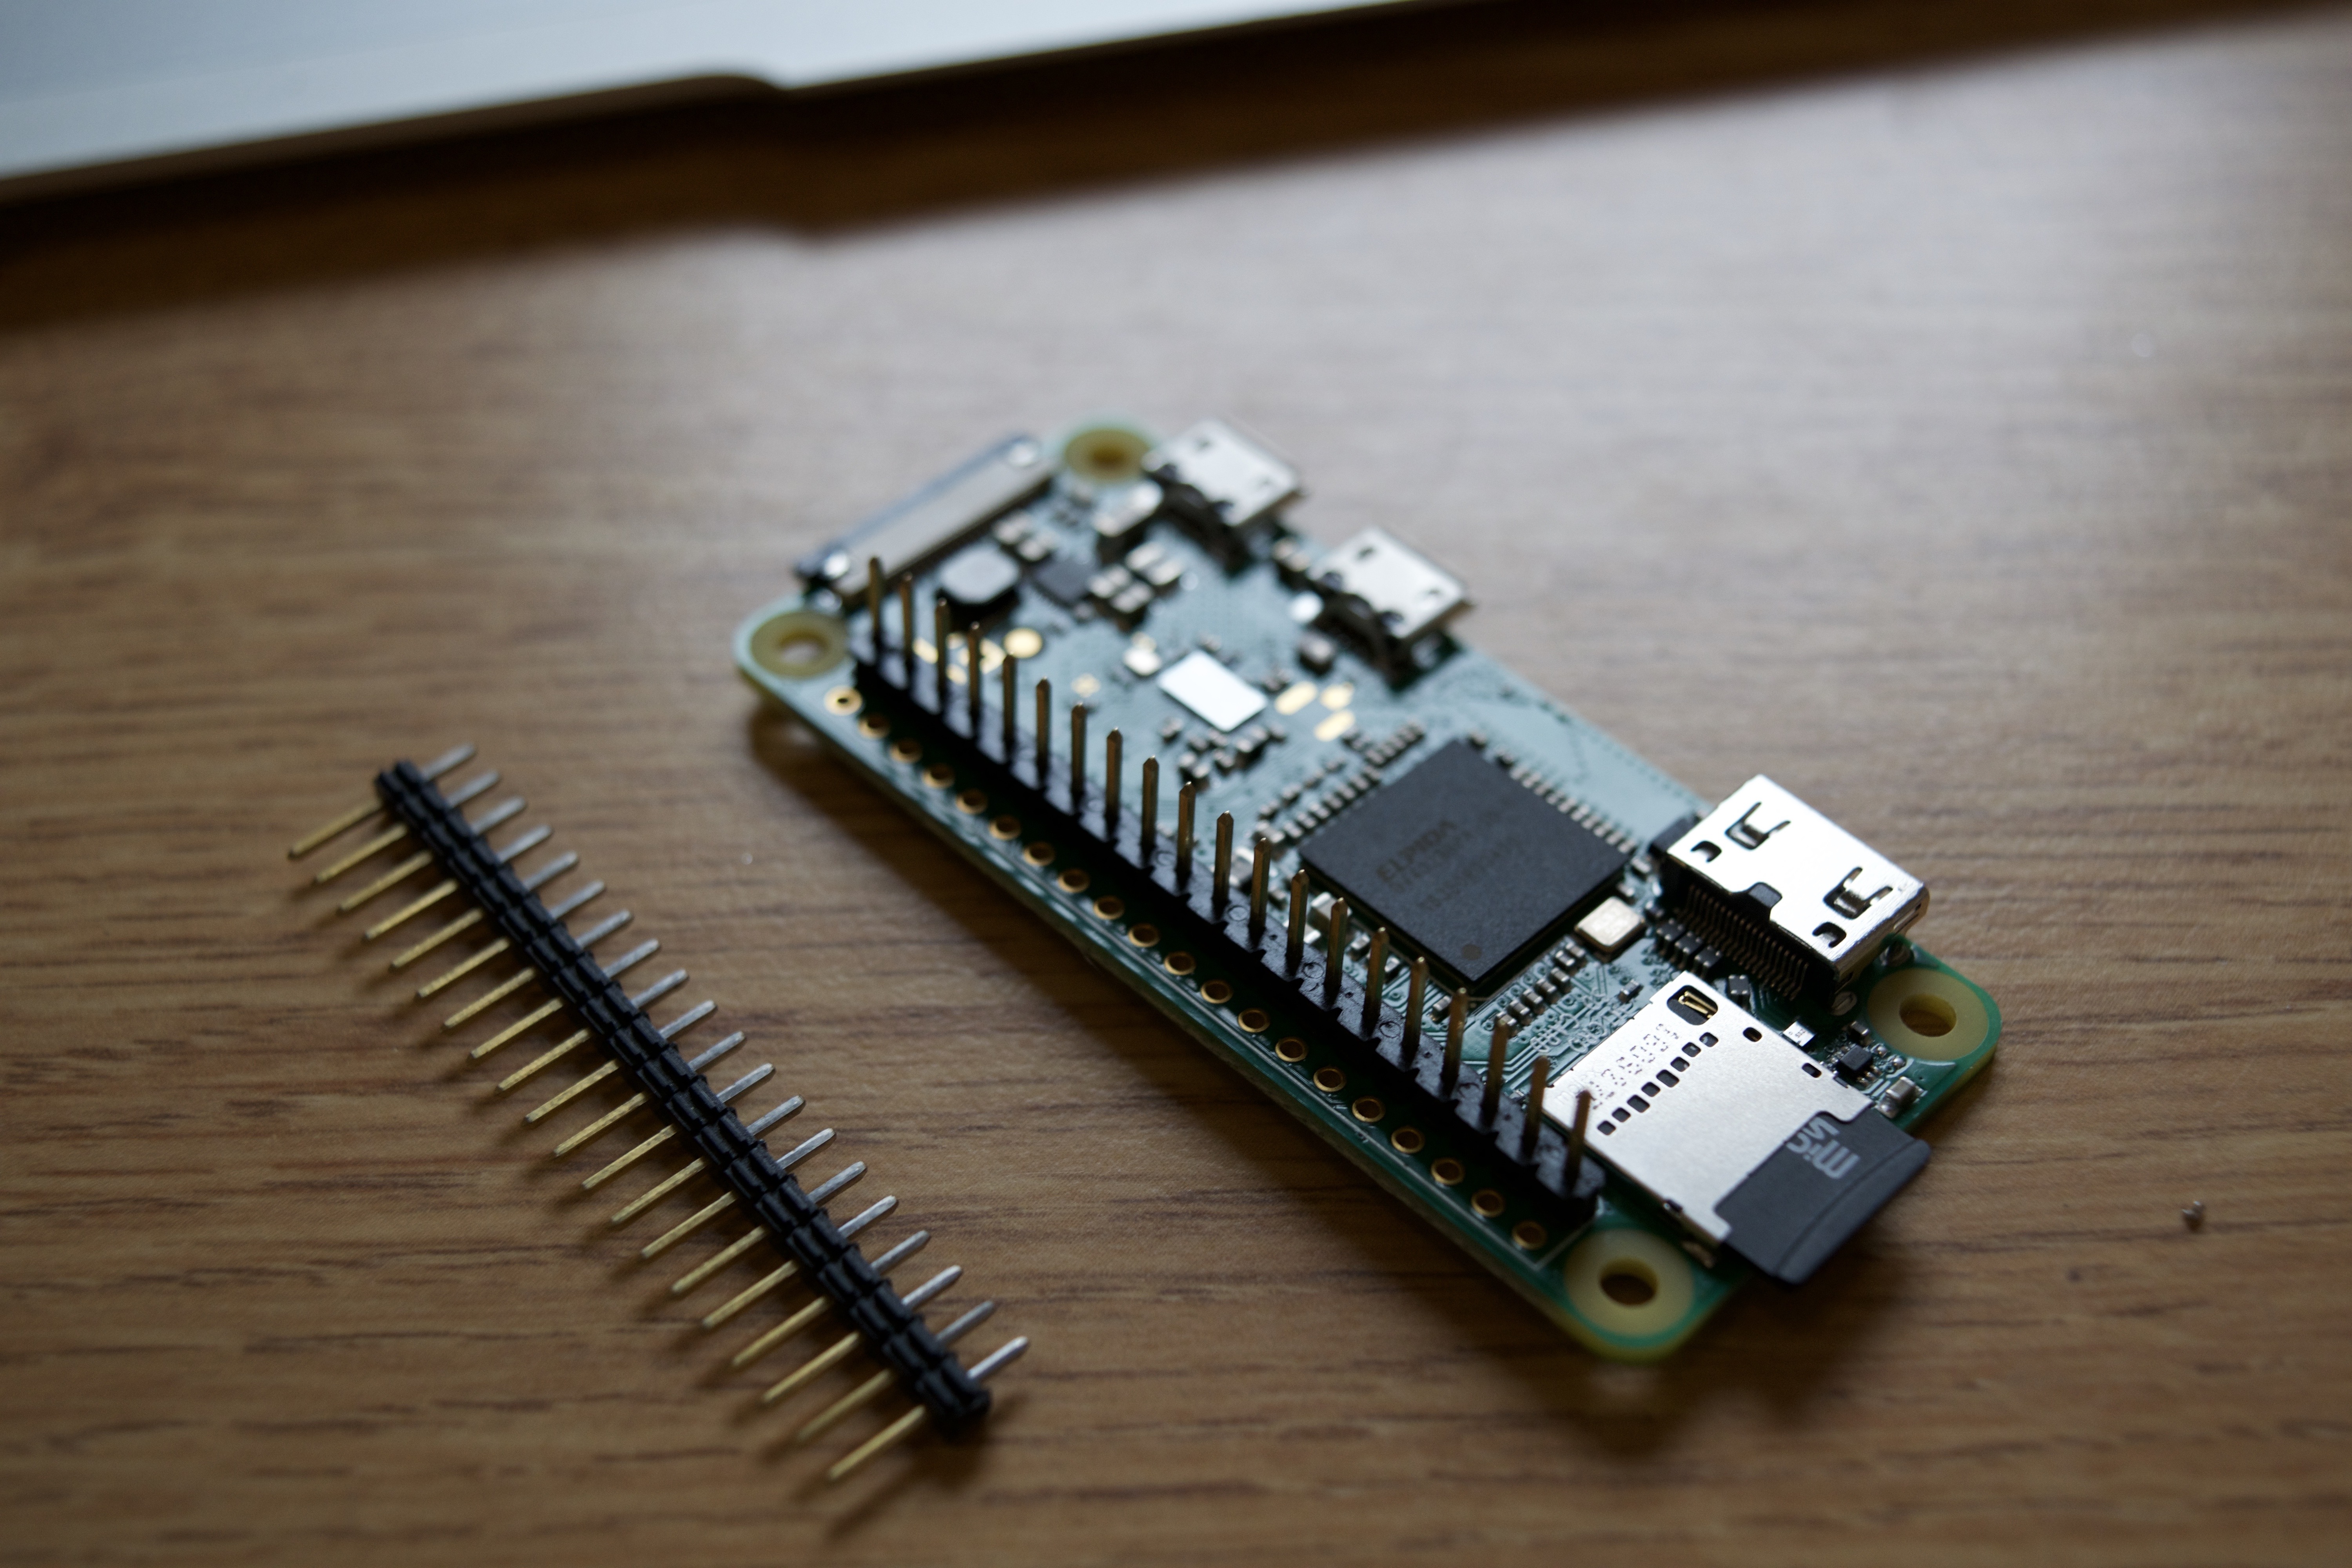
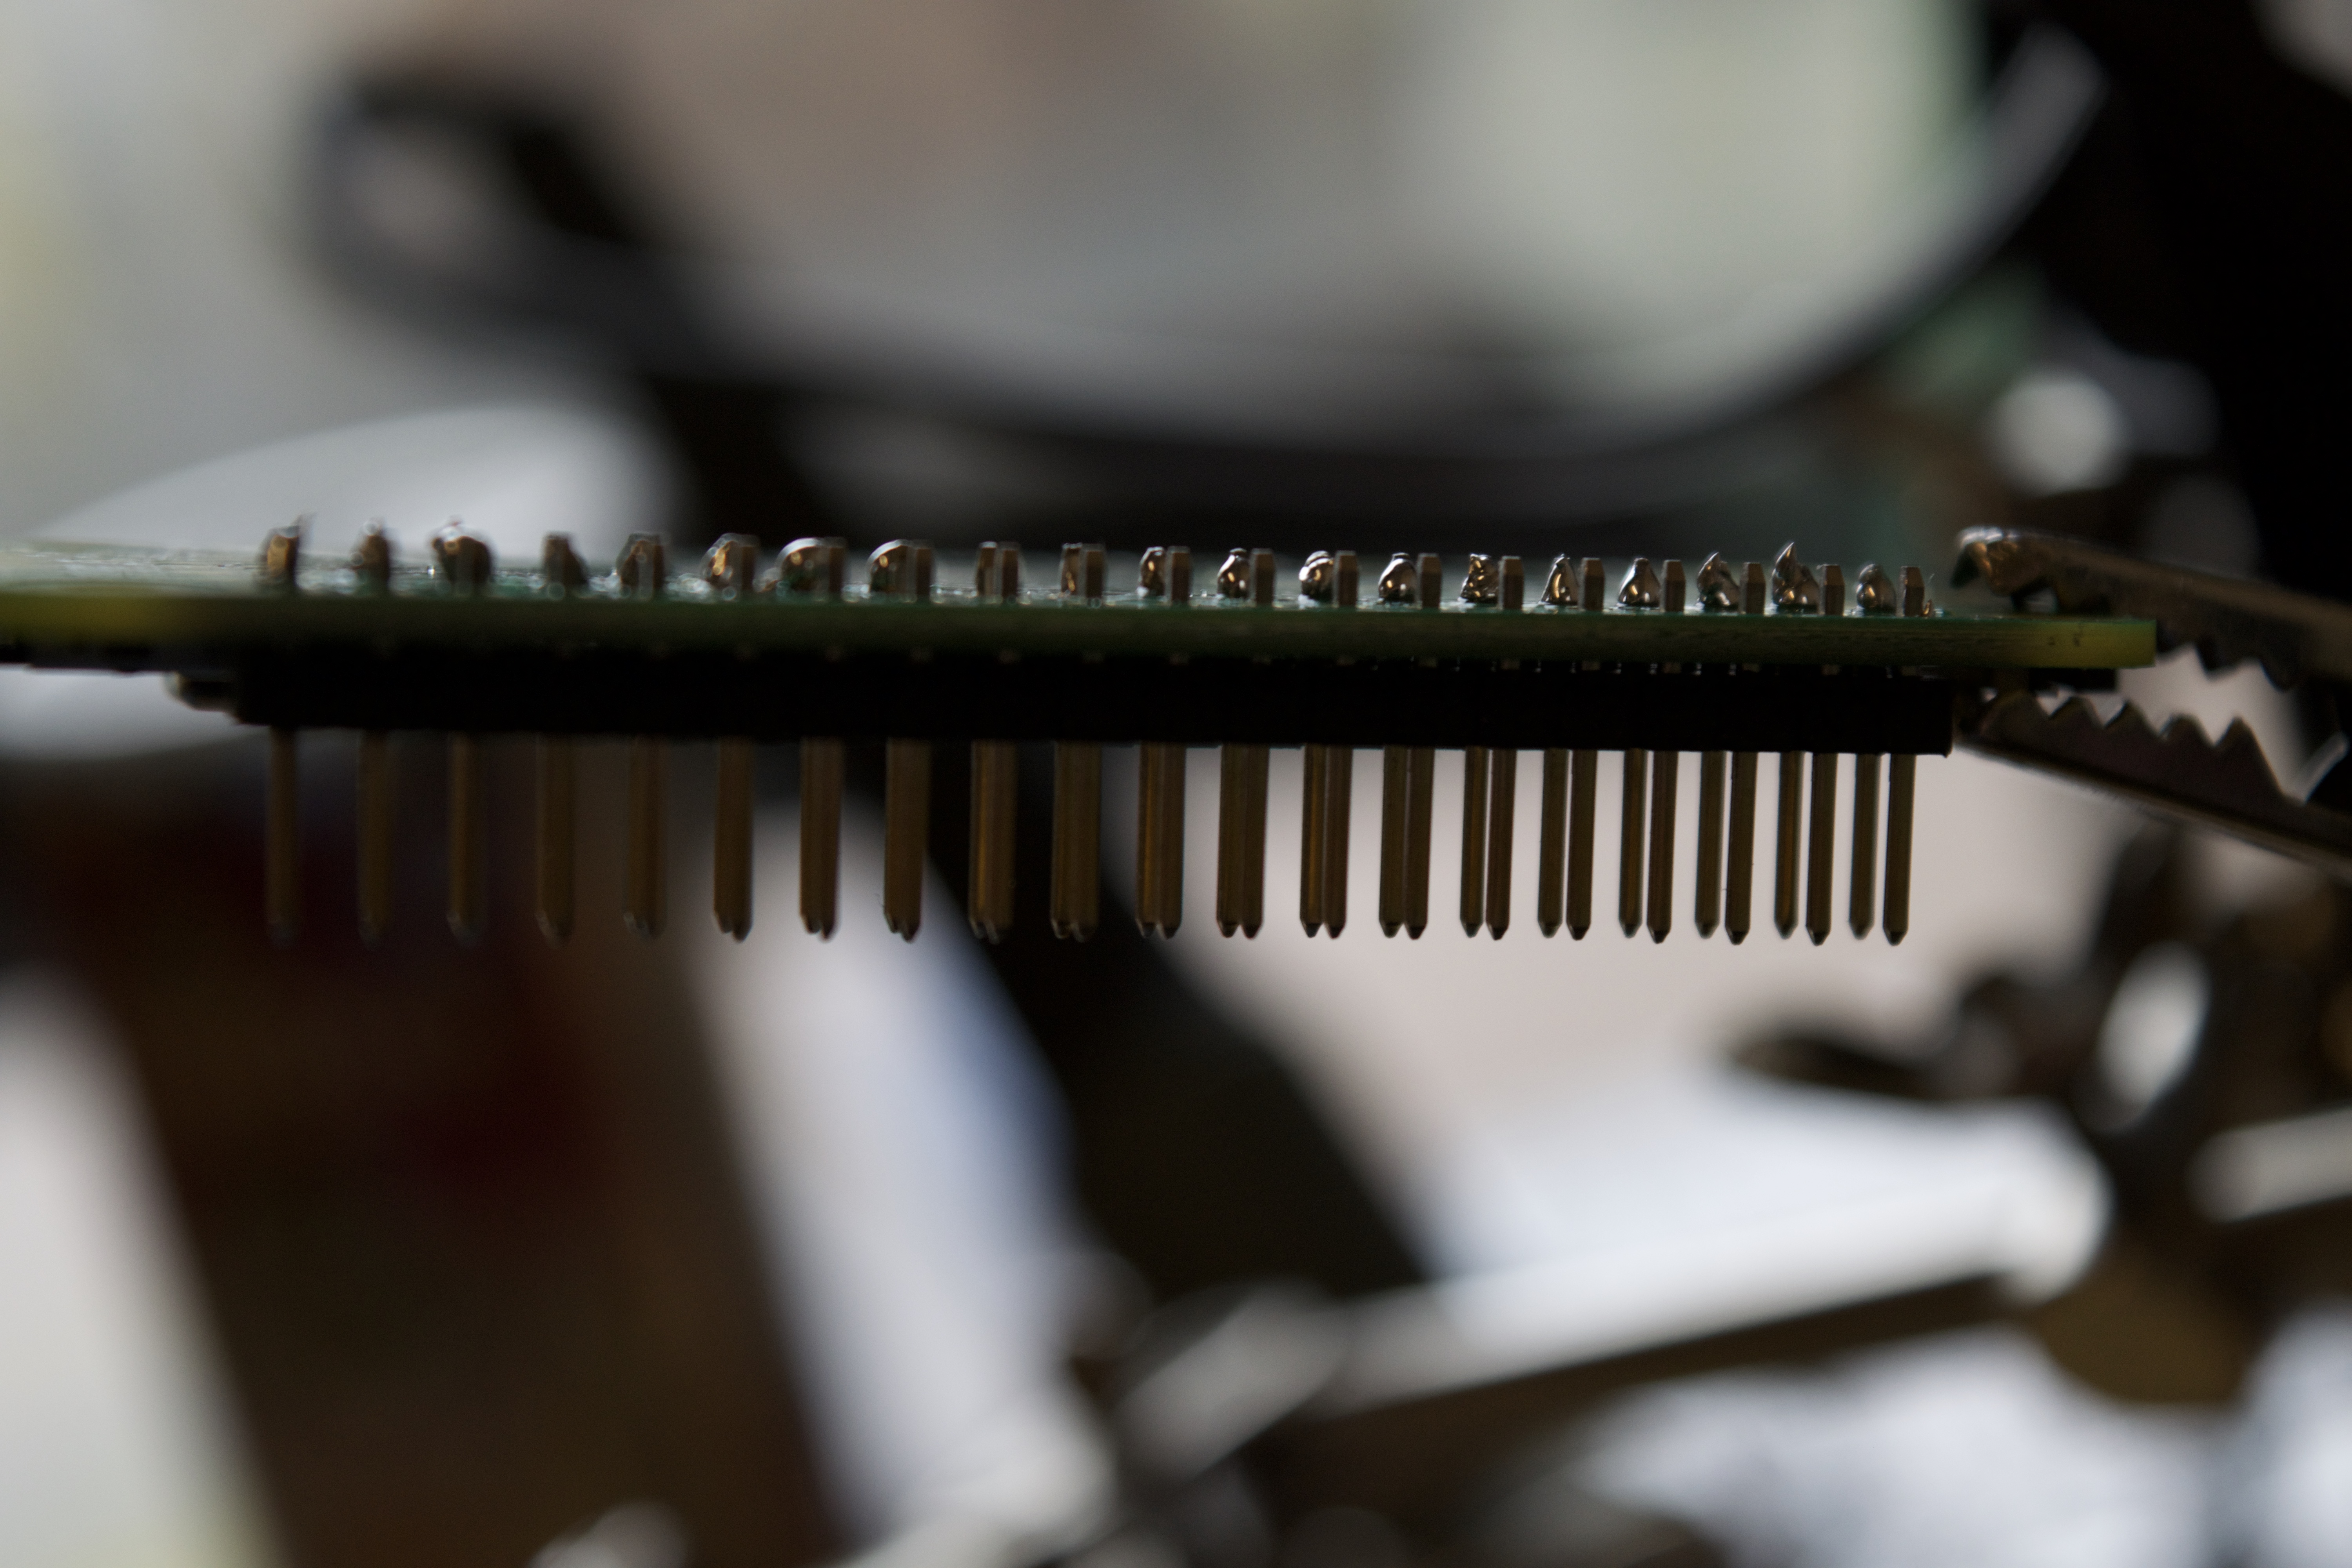
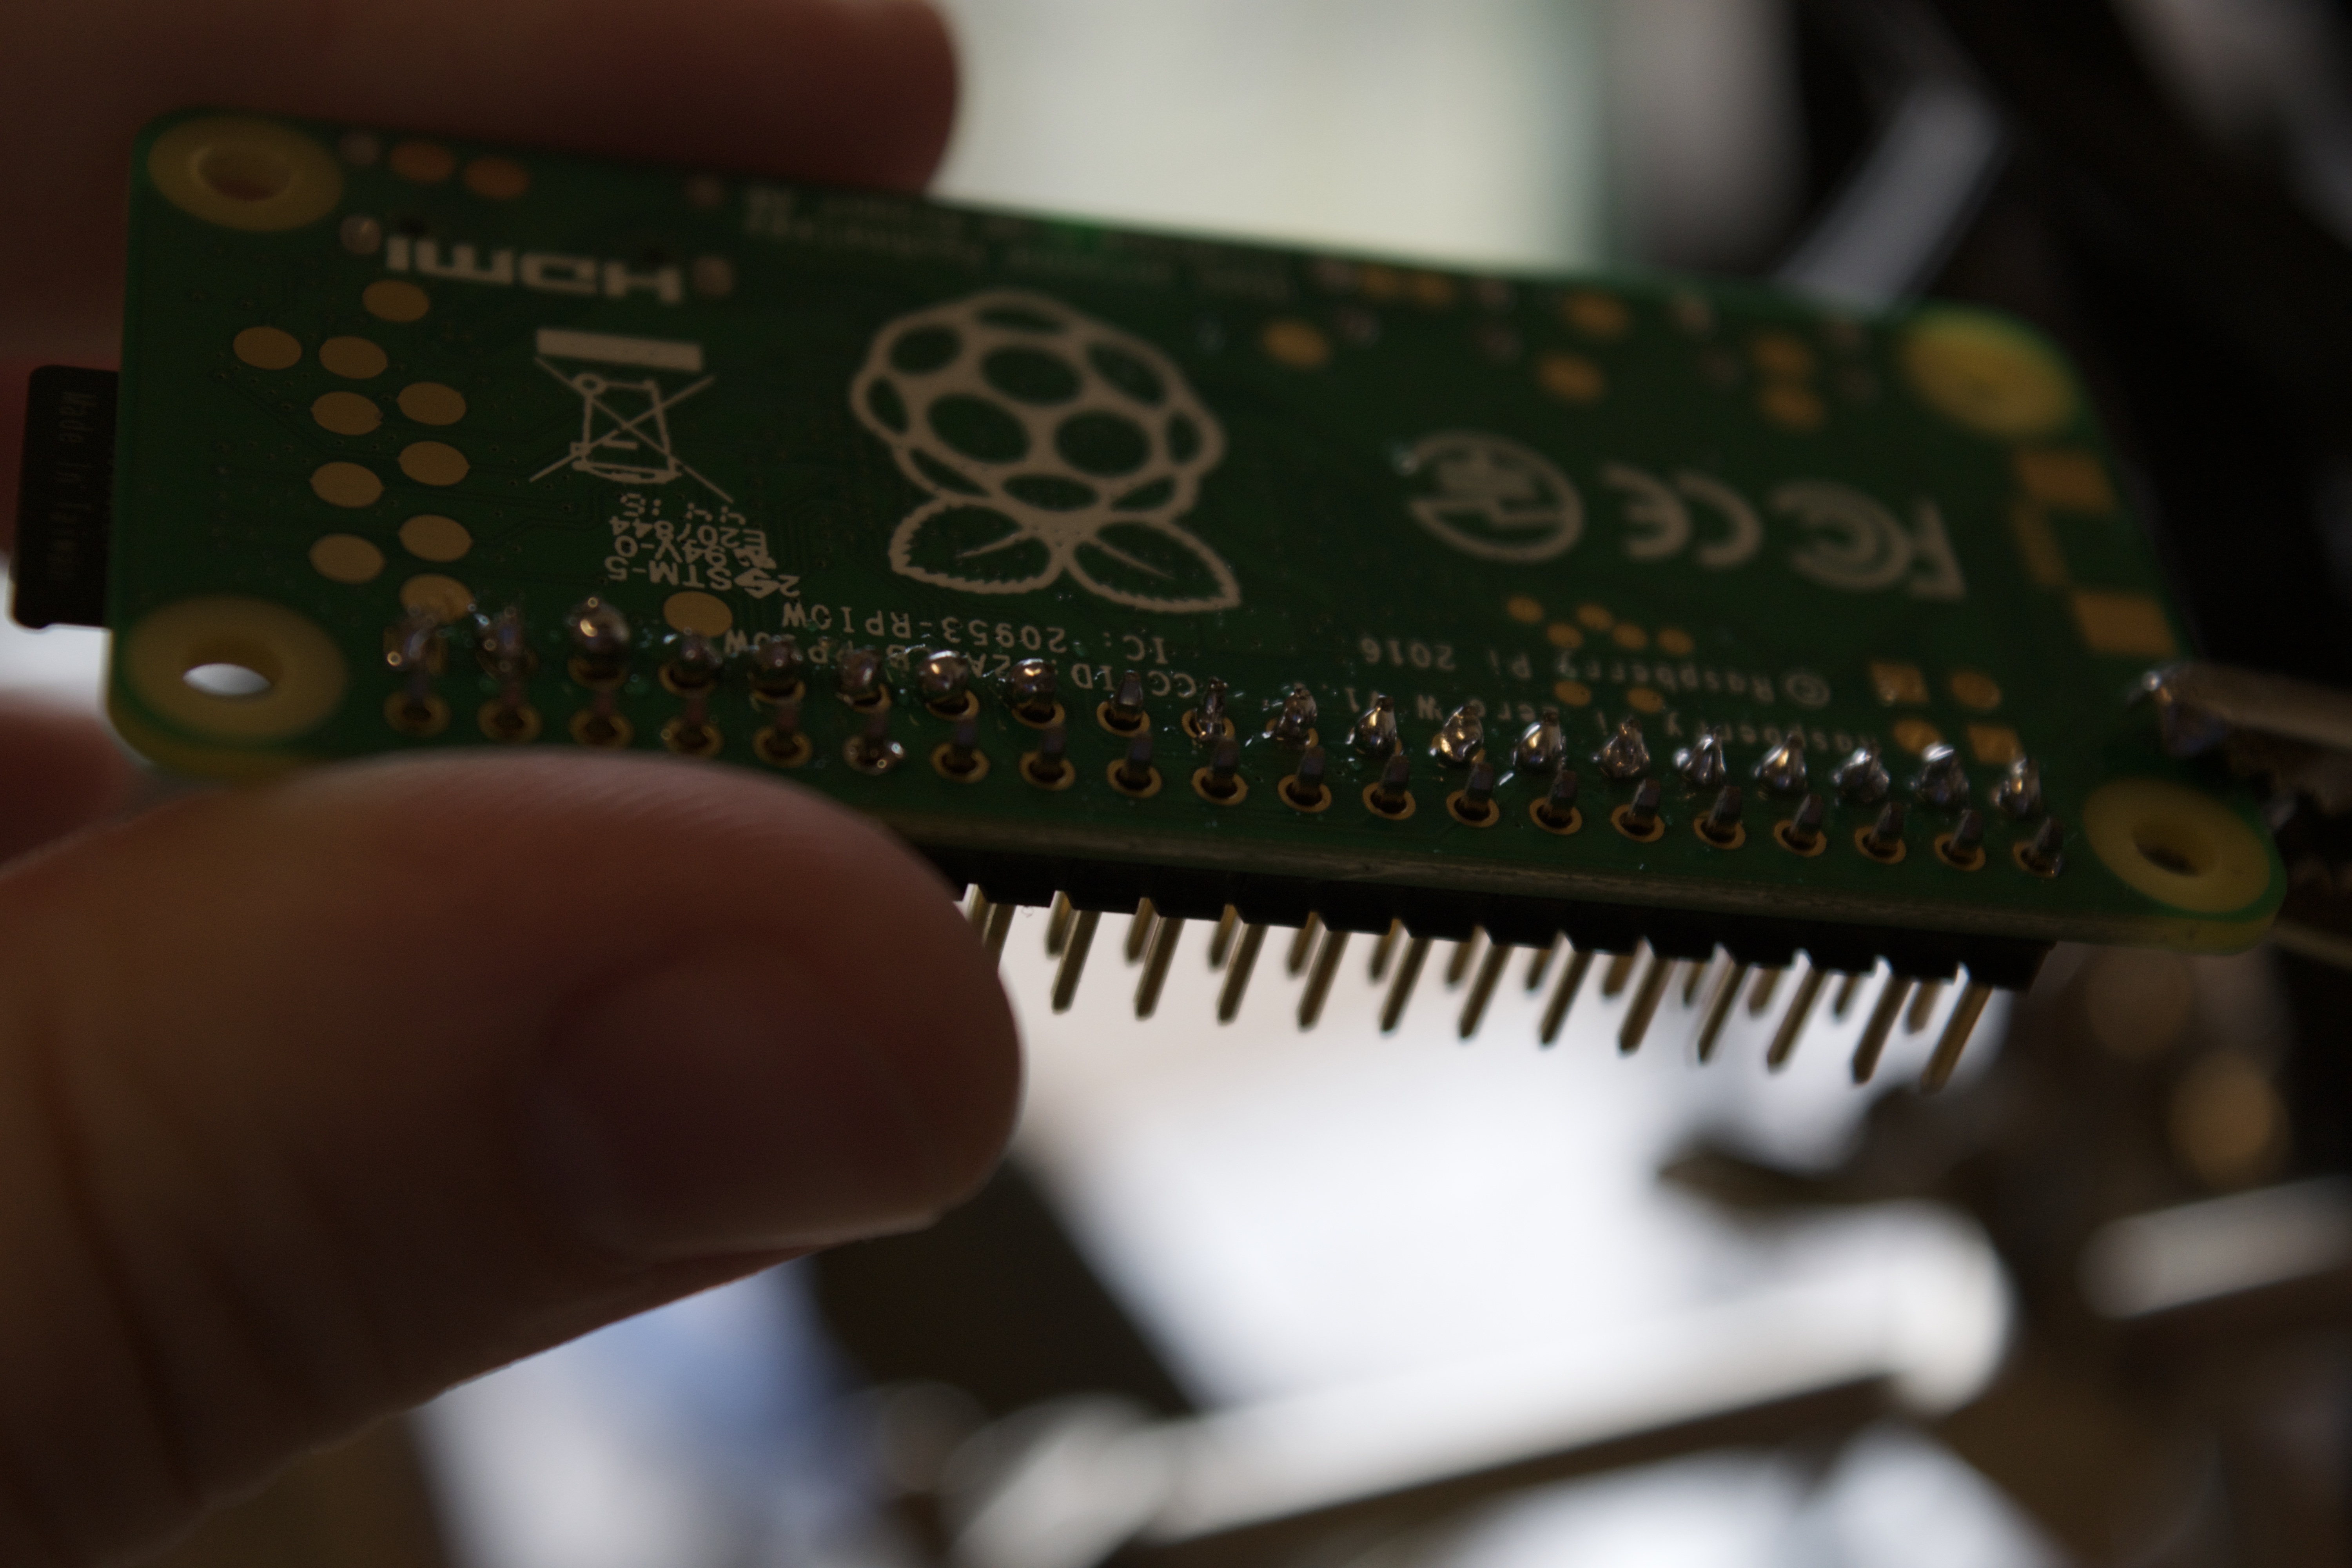
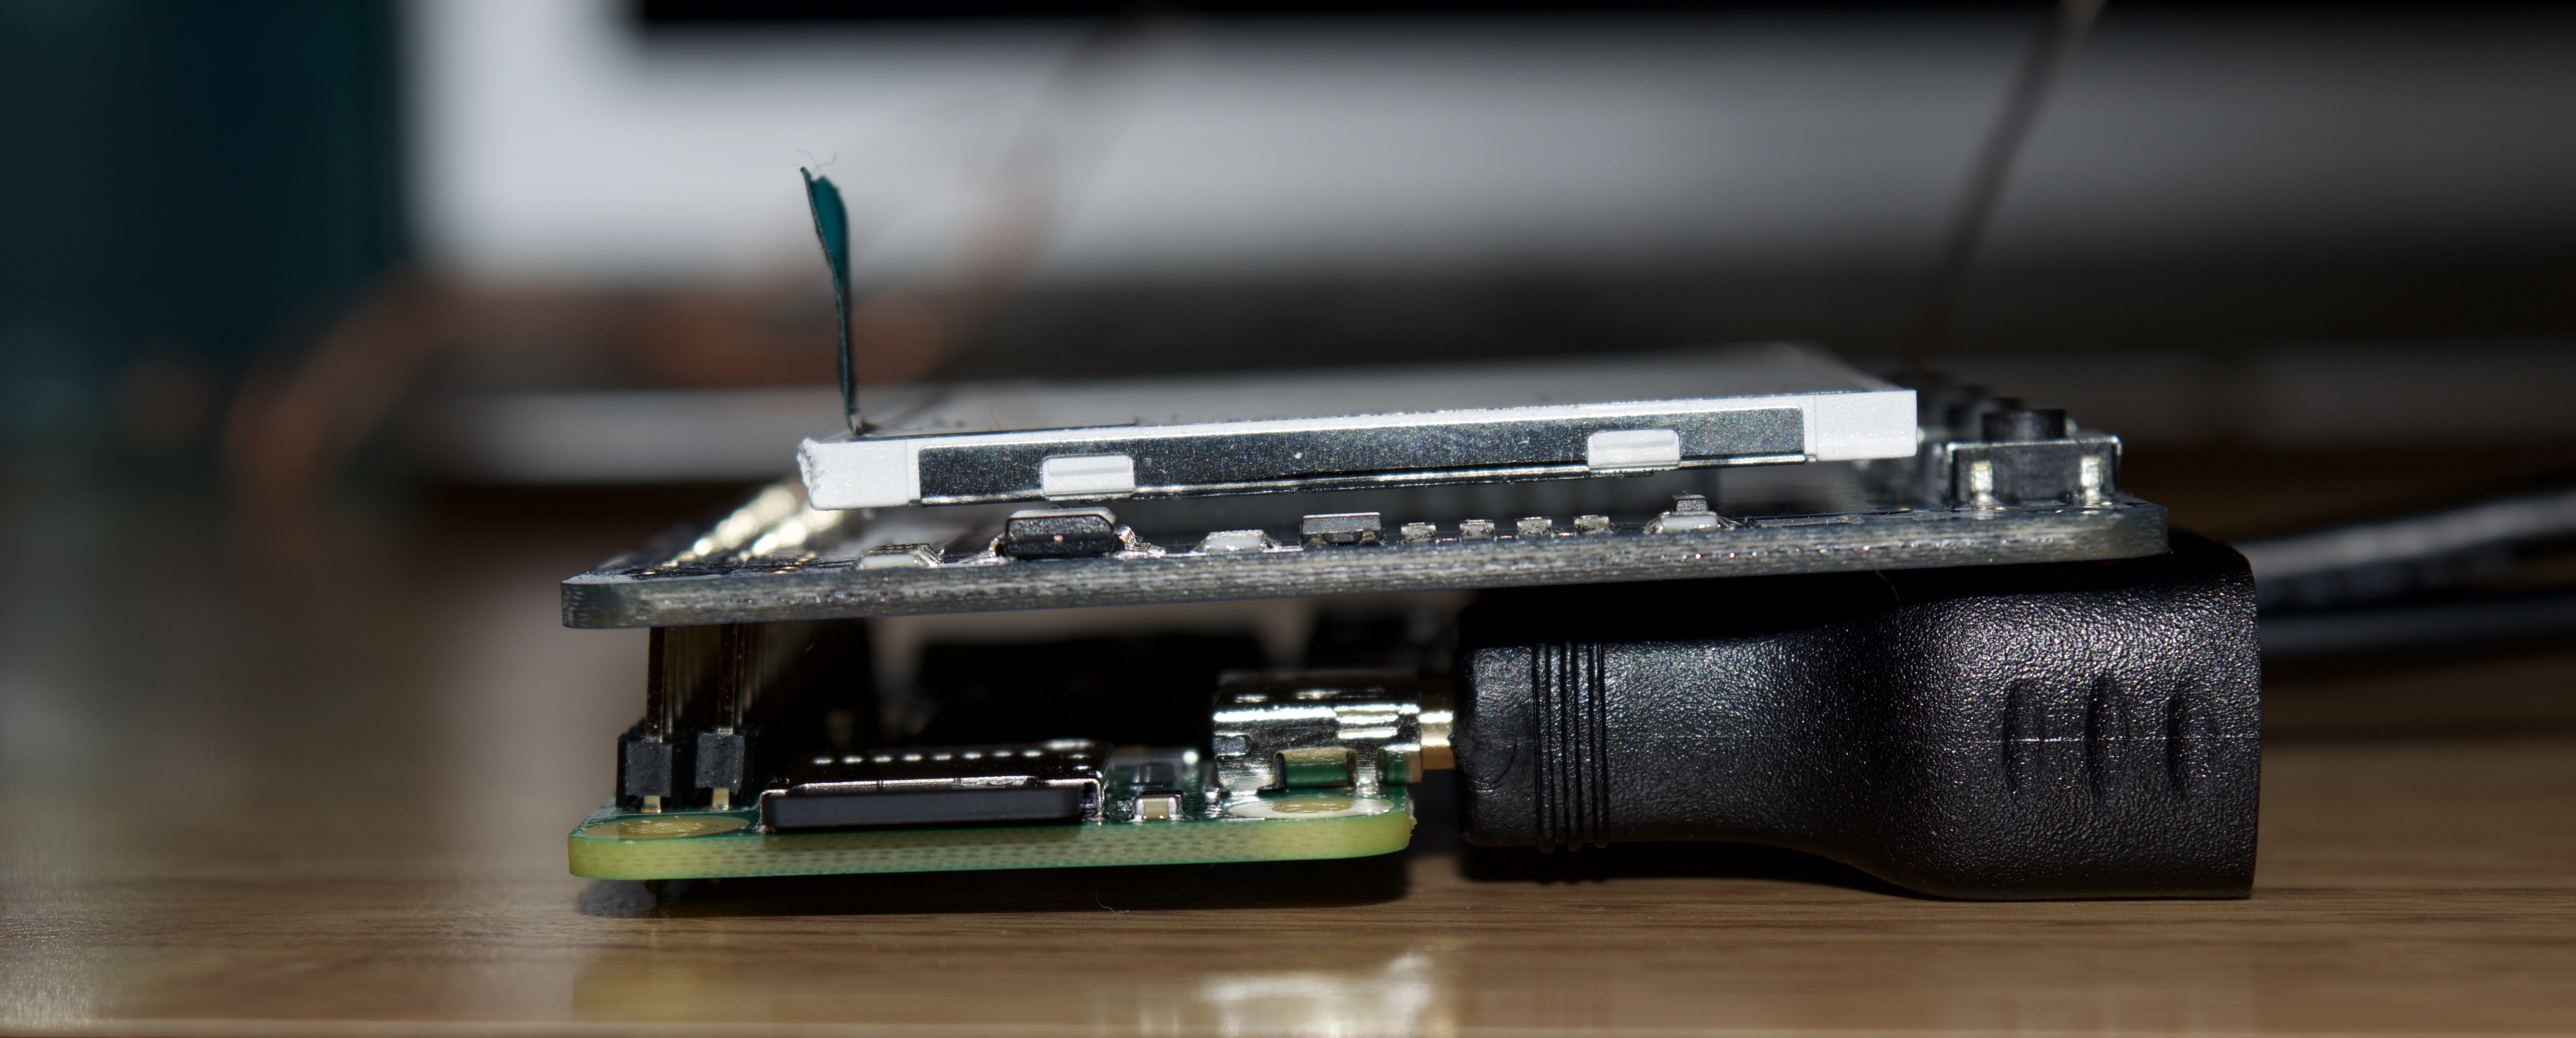
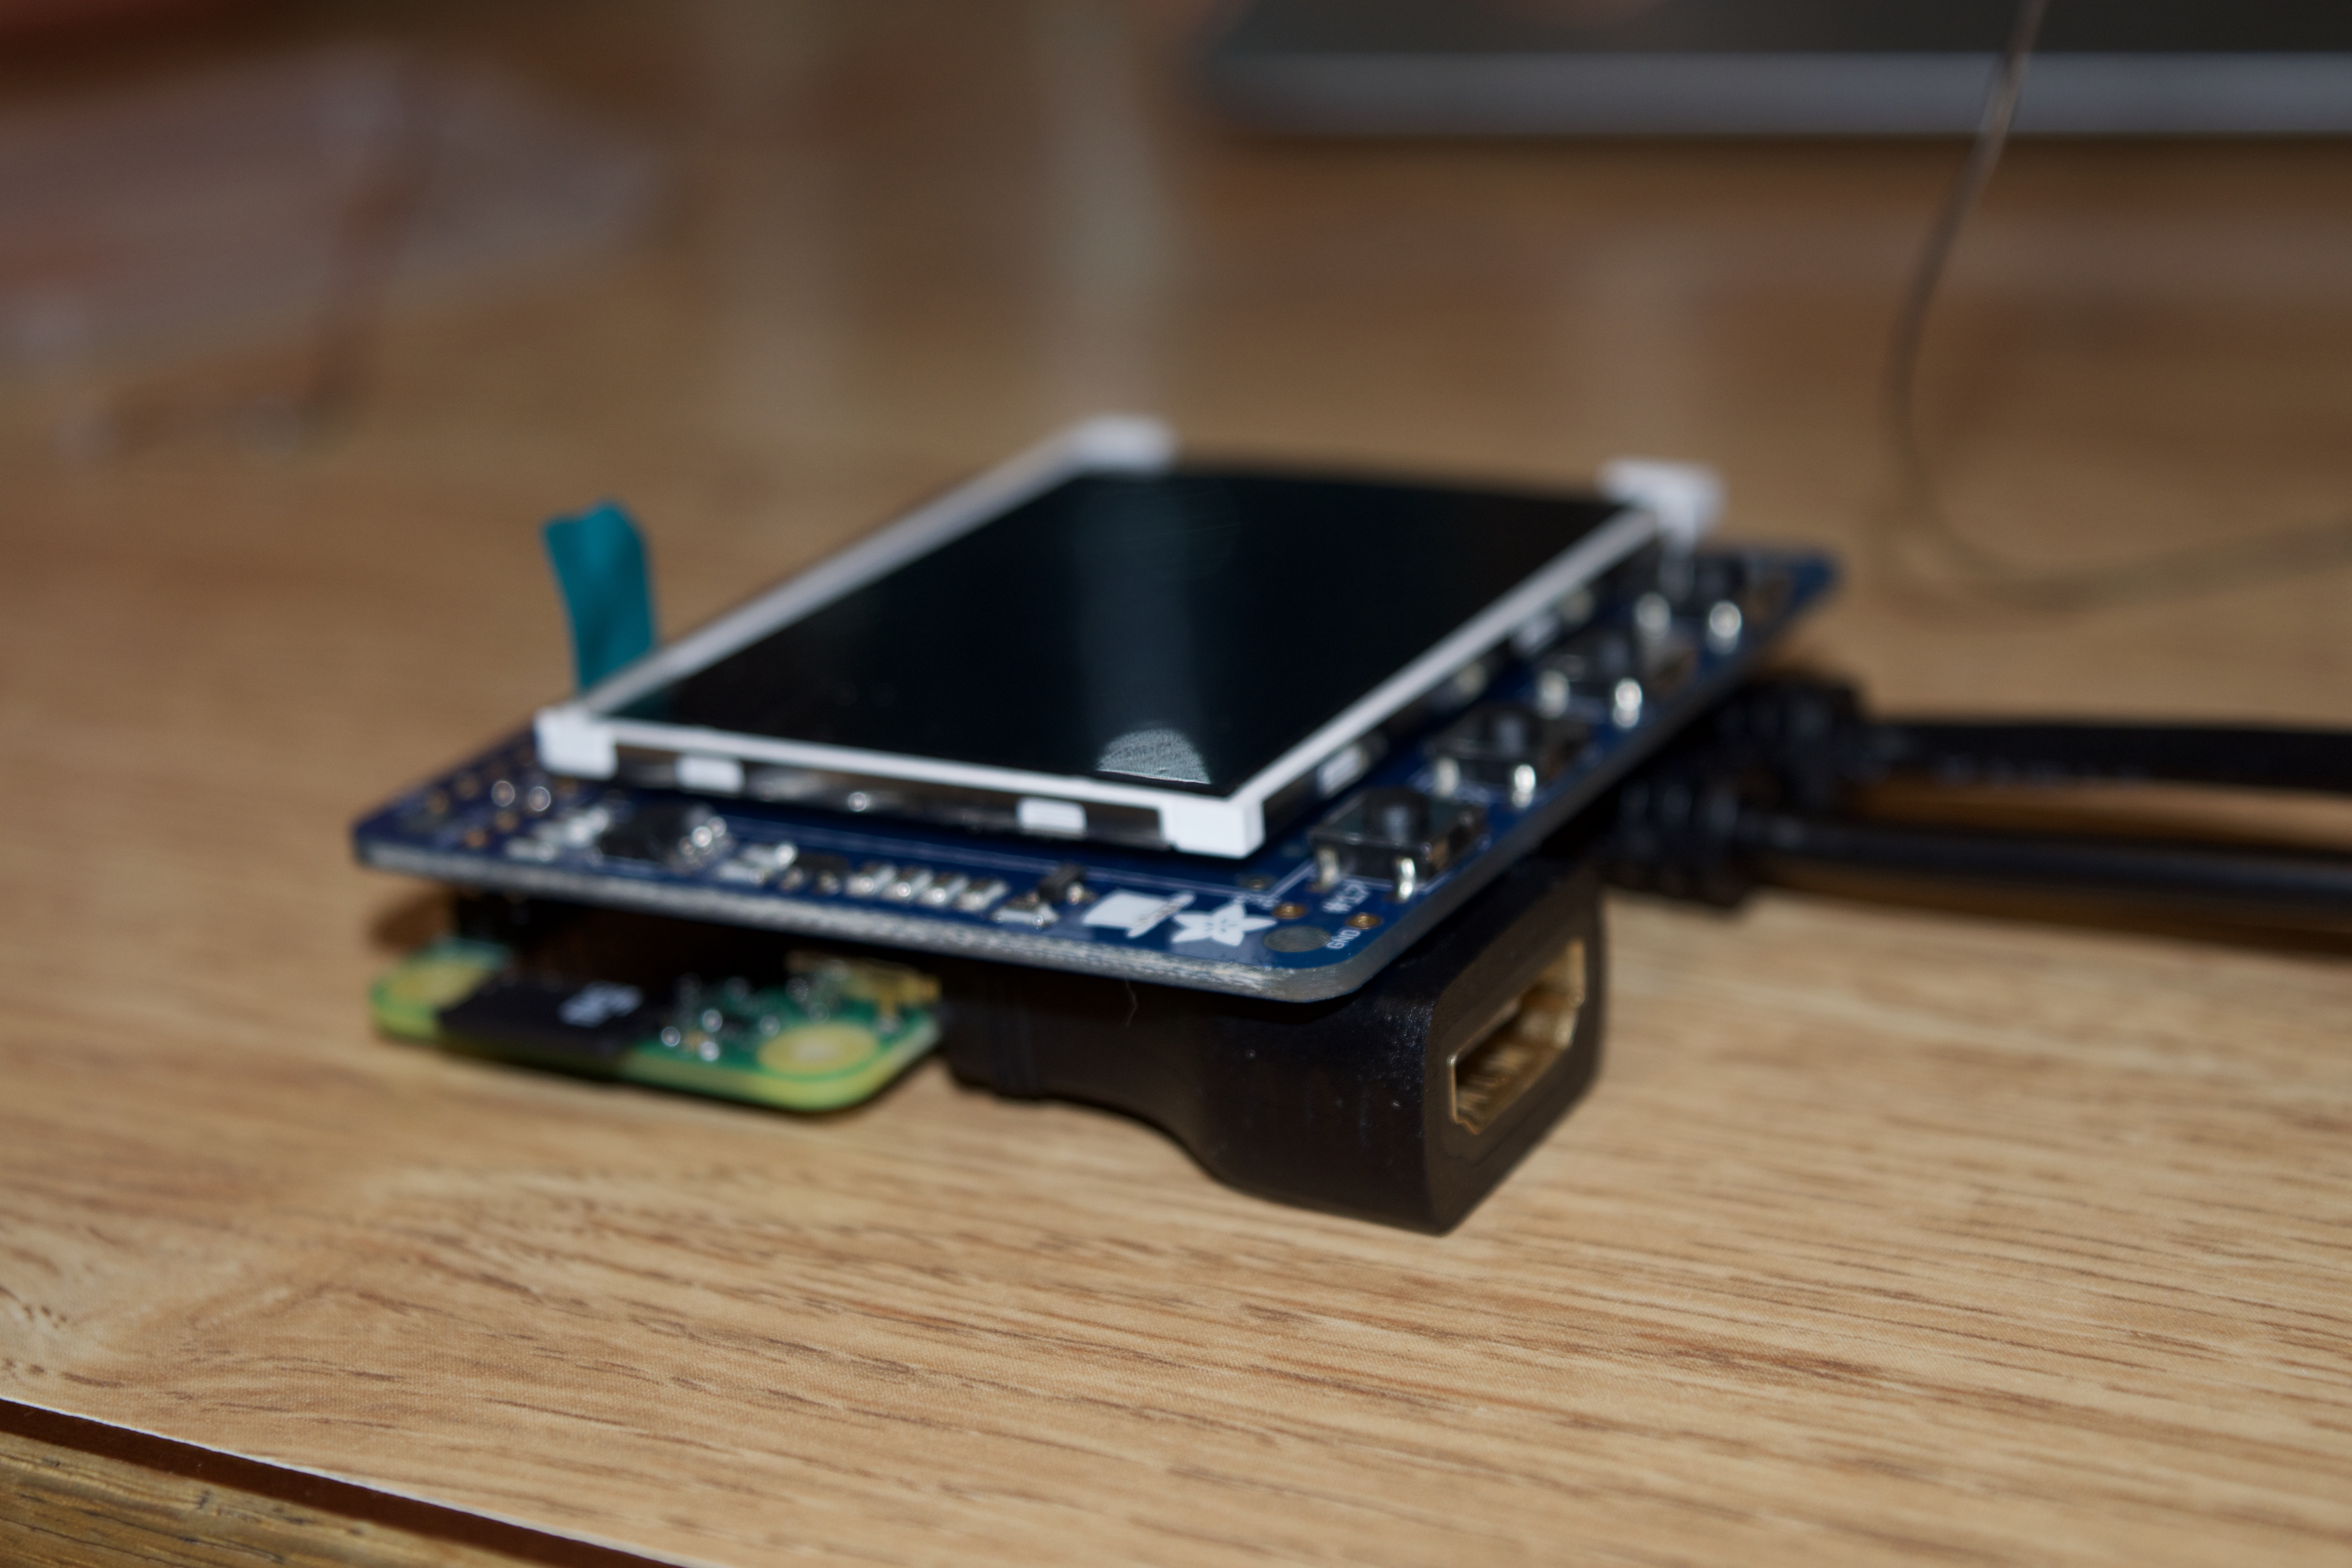
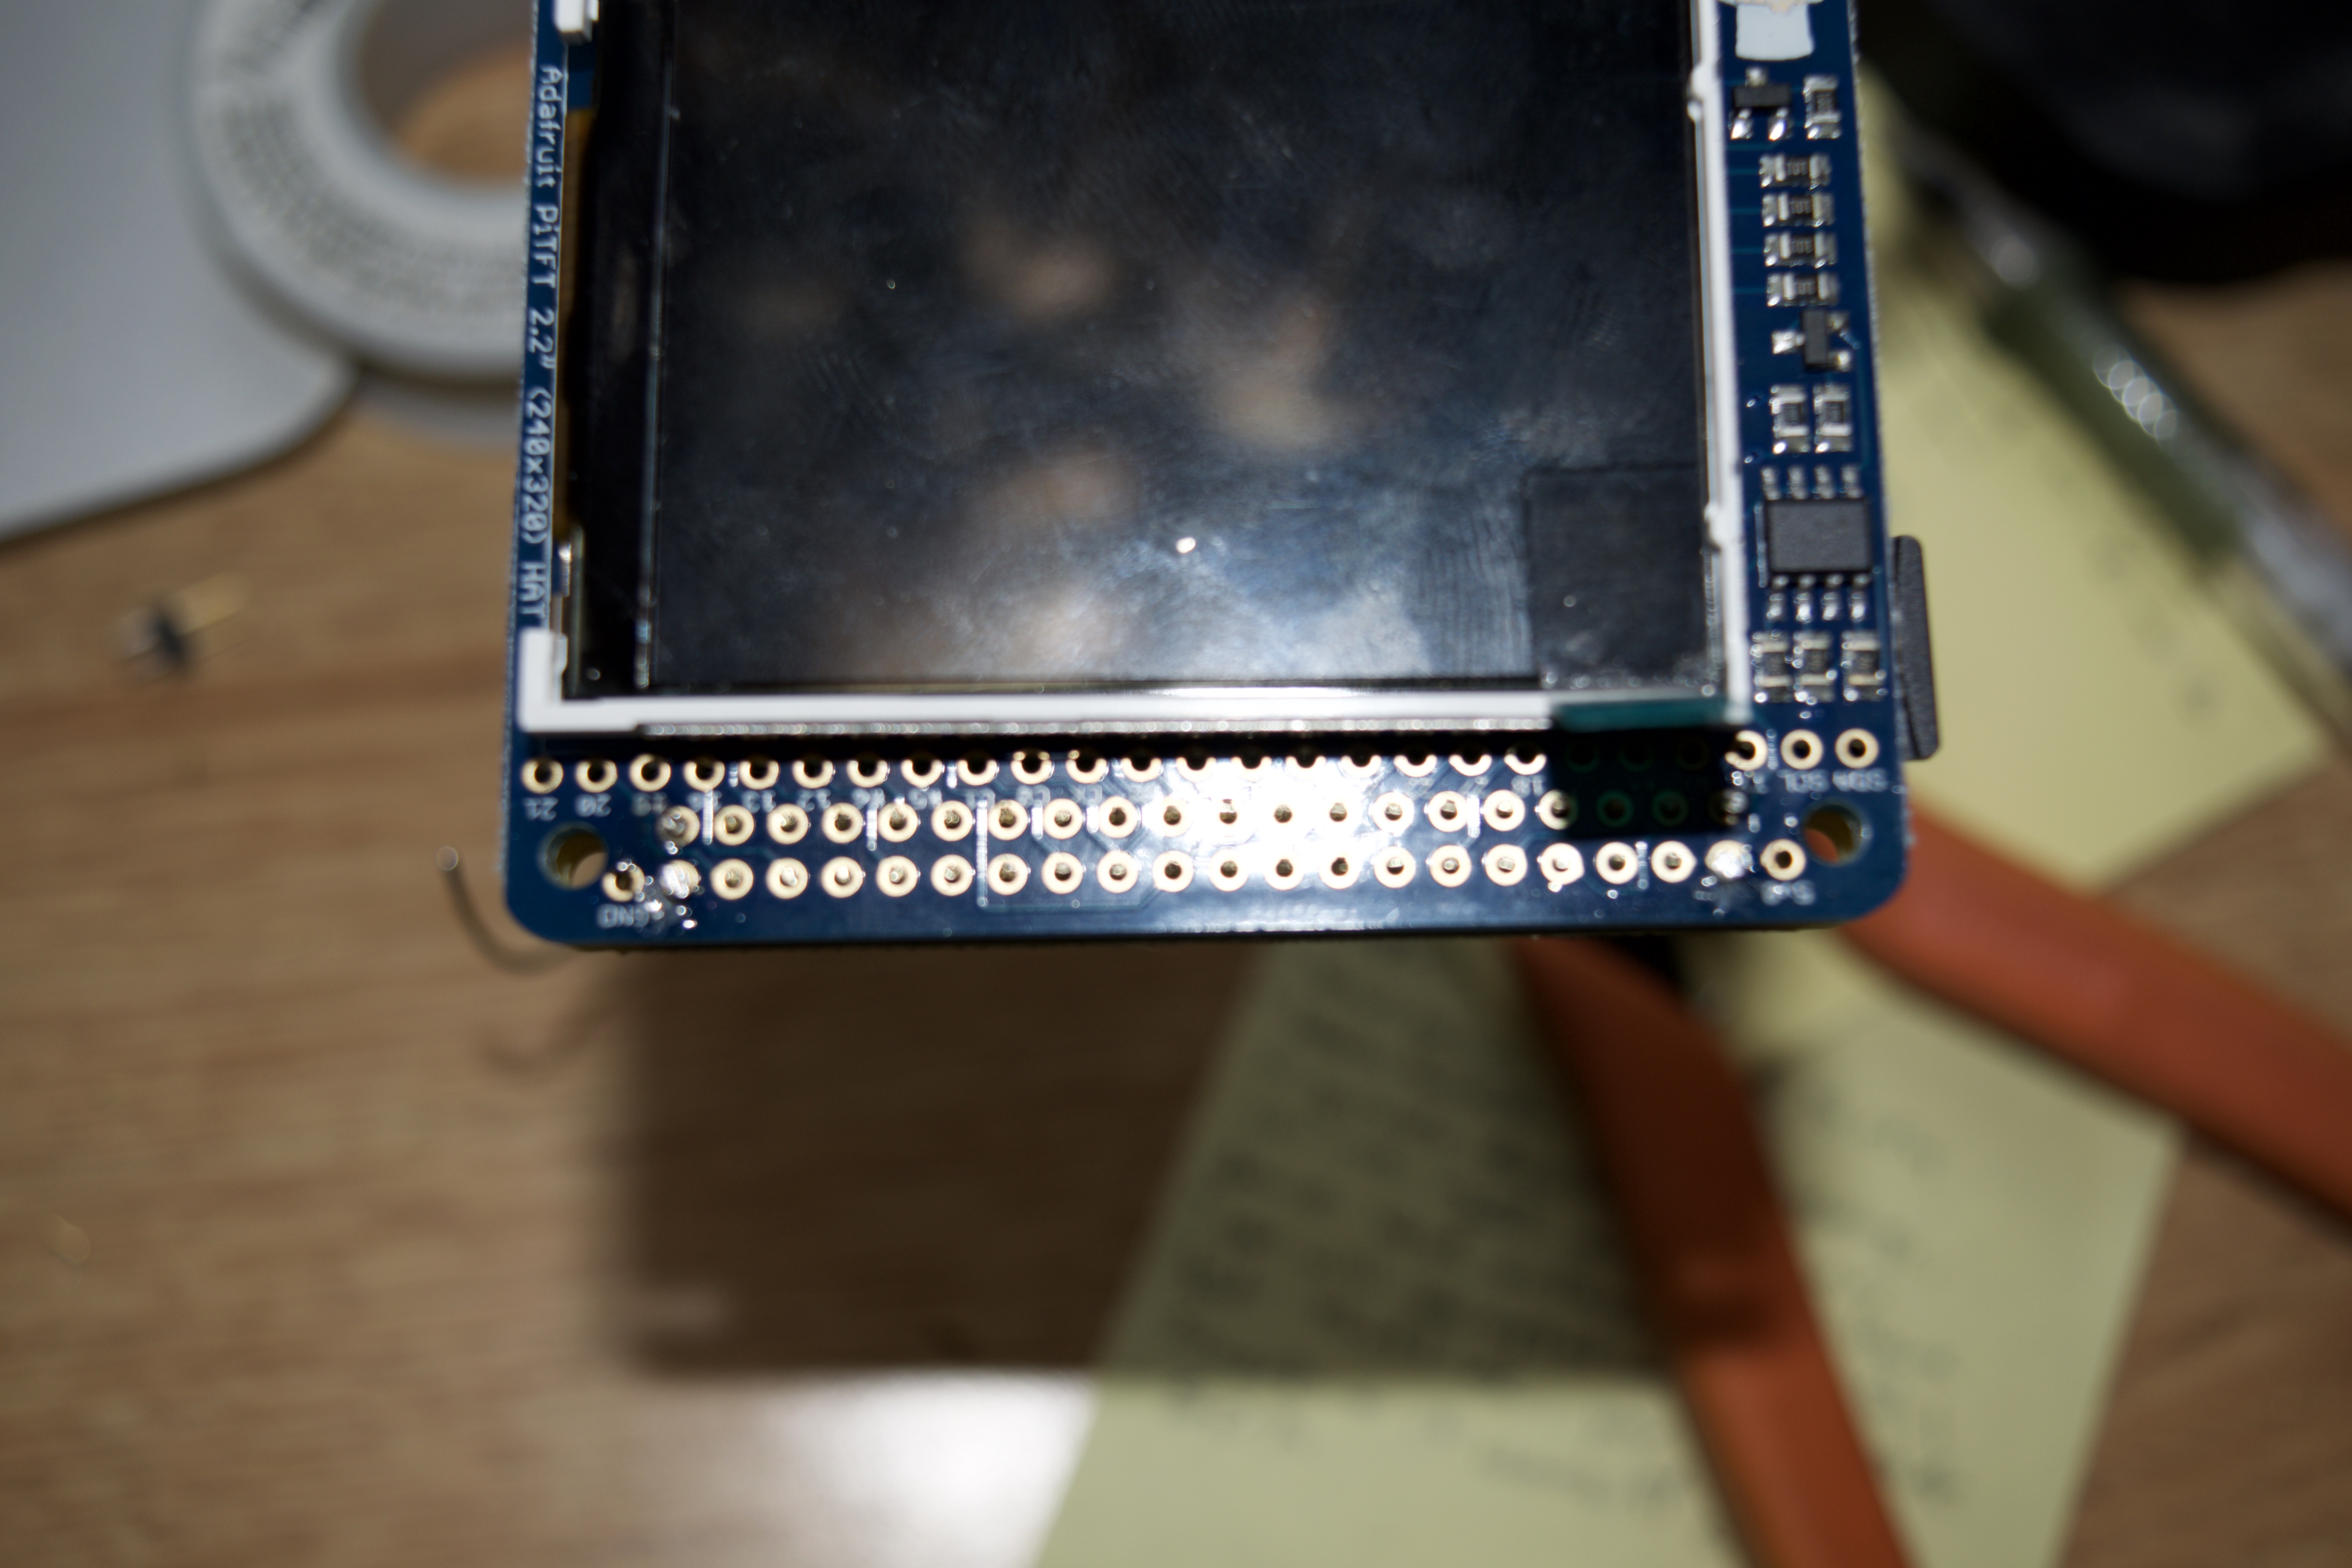
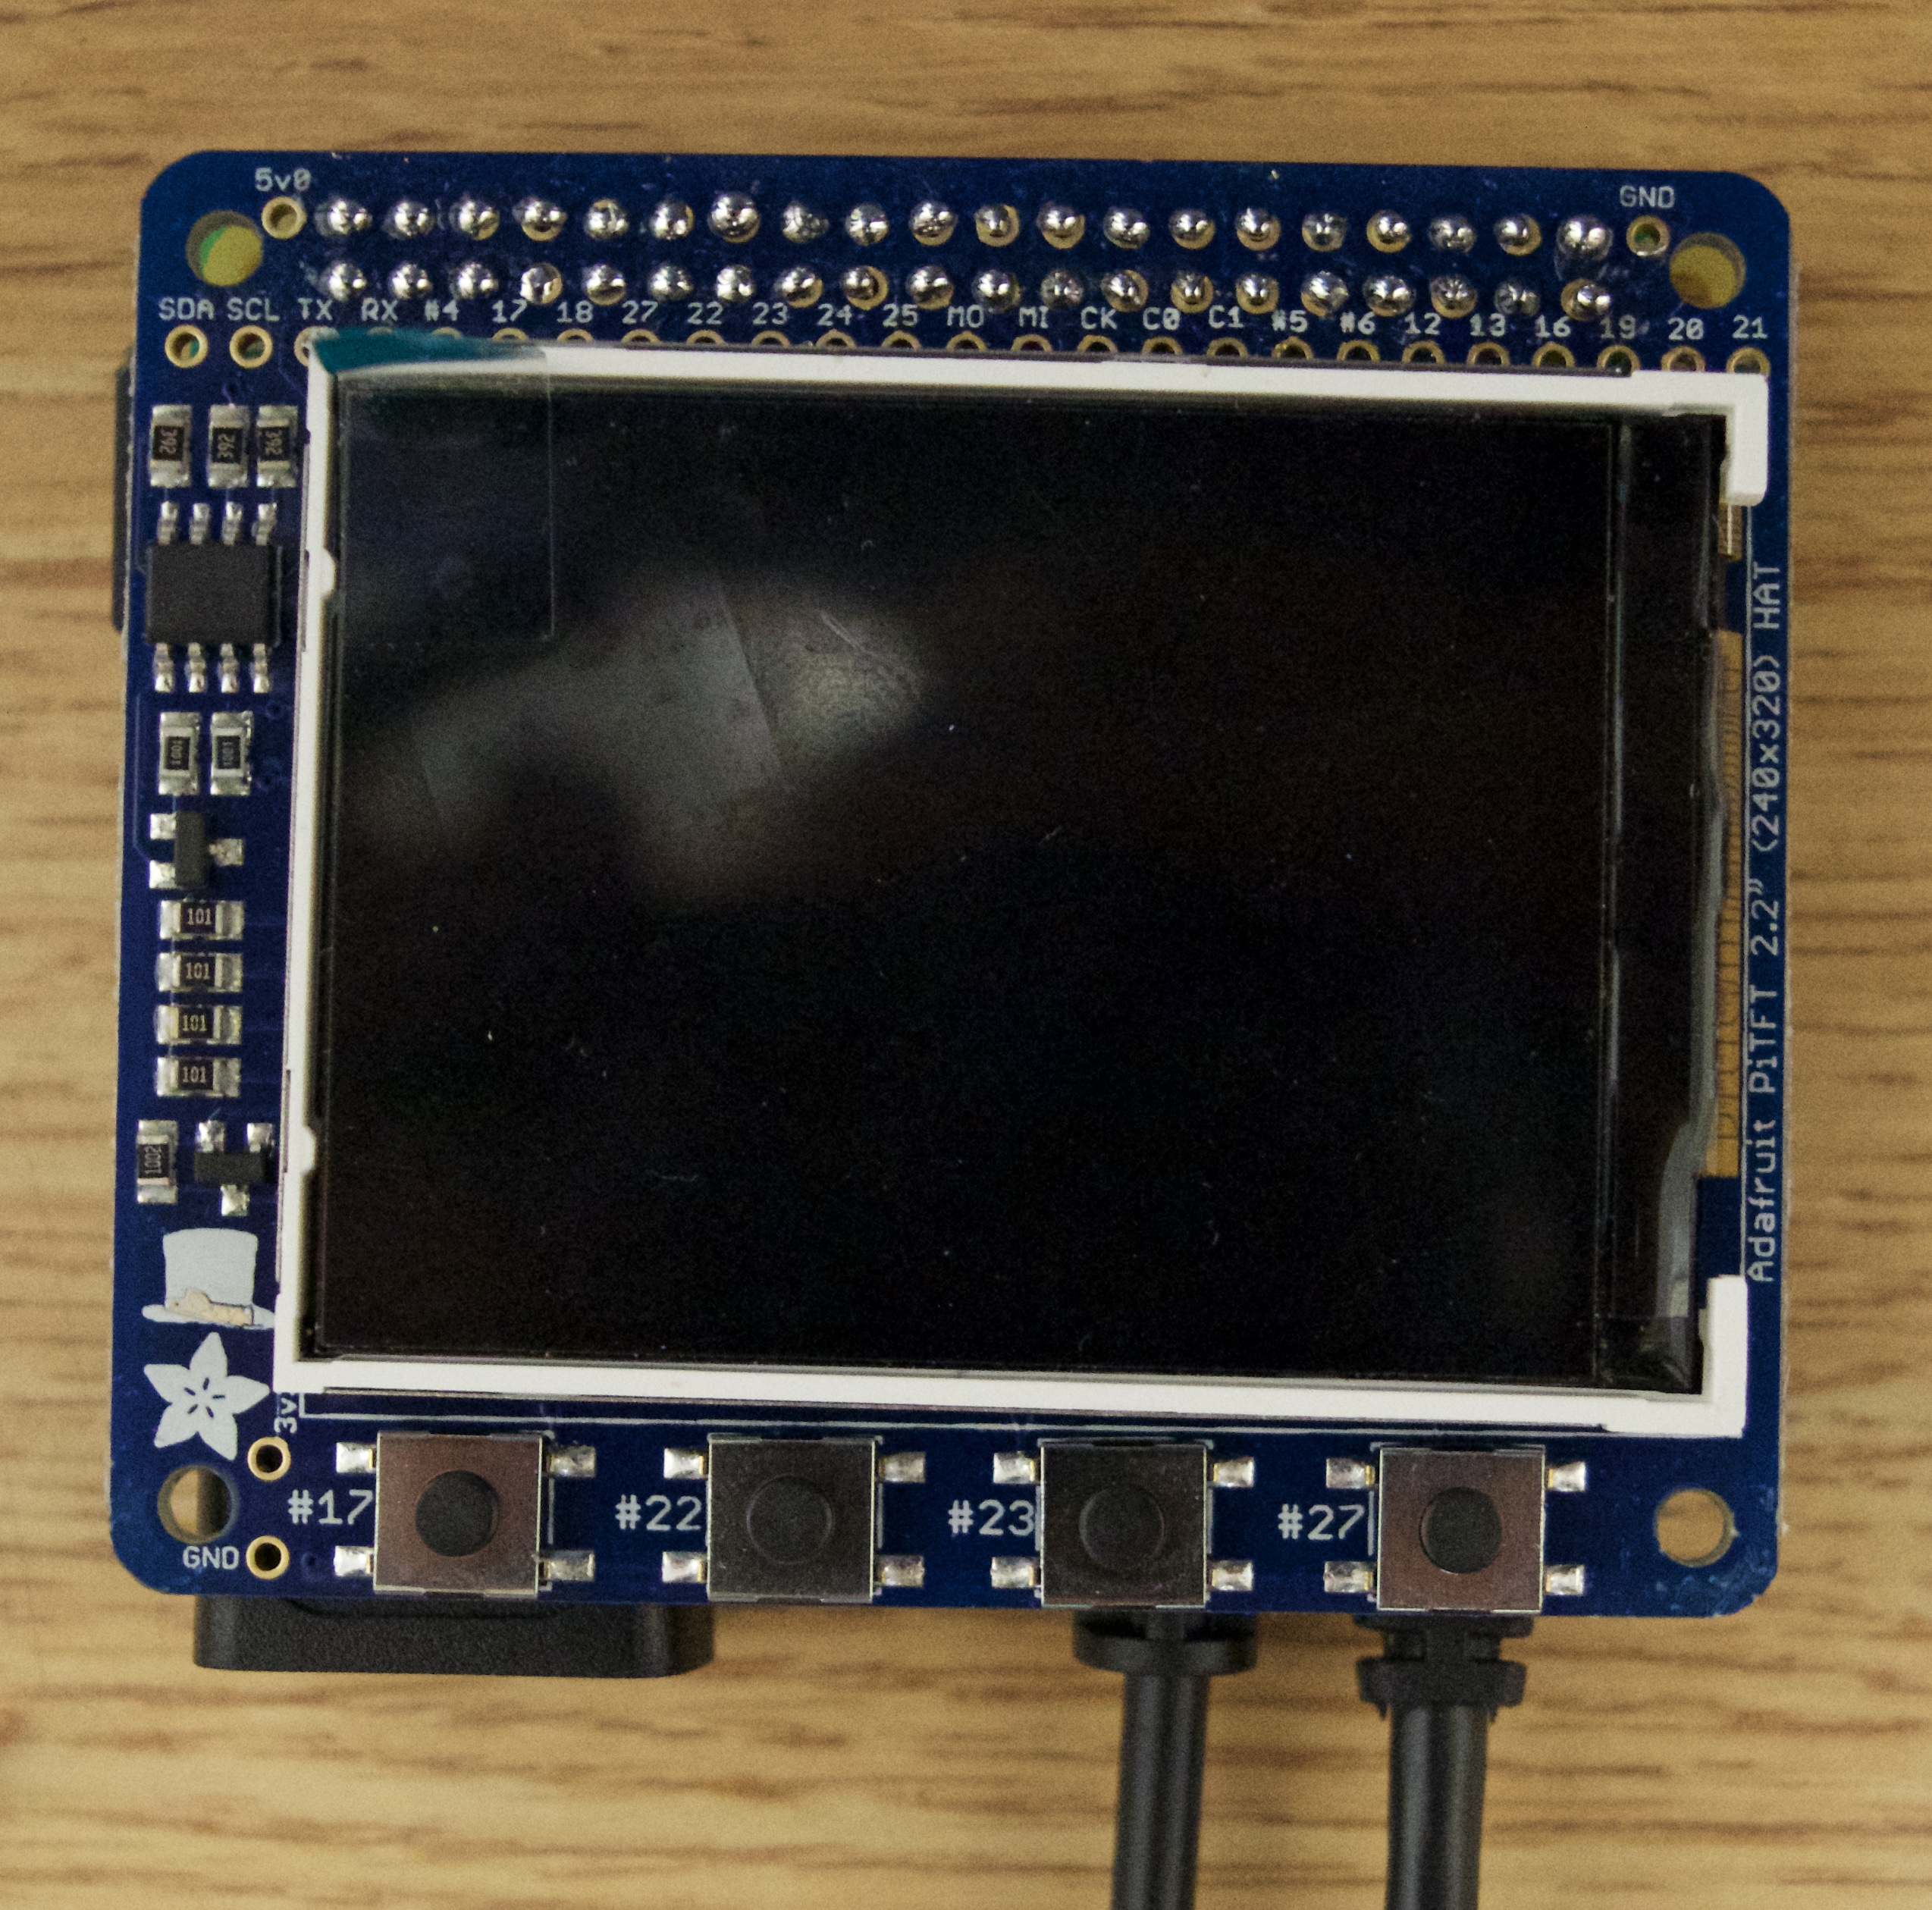
(pictures 1-3)
1) solder on 20 of the breakaway headers onto one row of the Pi Zero covering all the GPIO pins, repeat for the next row, this will make your life easier for soldering.
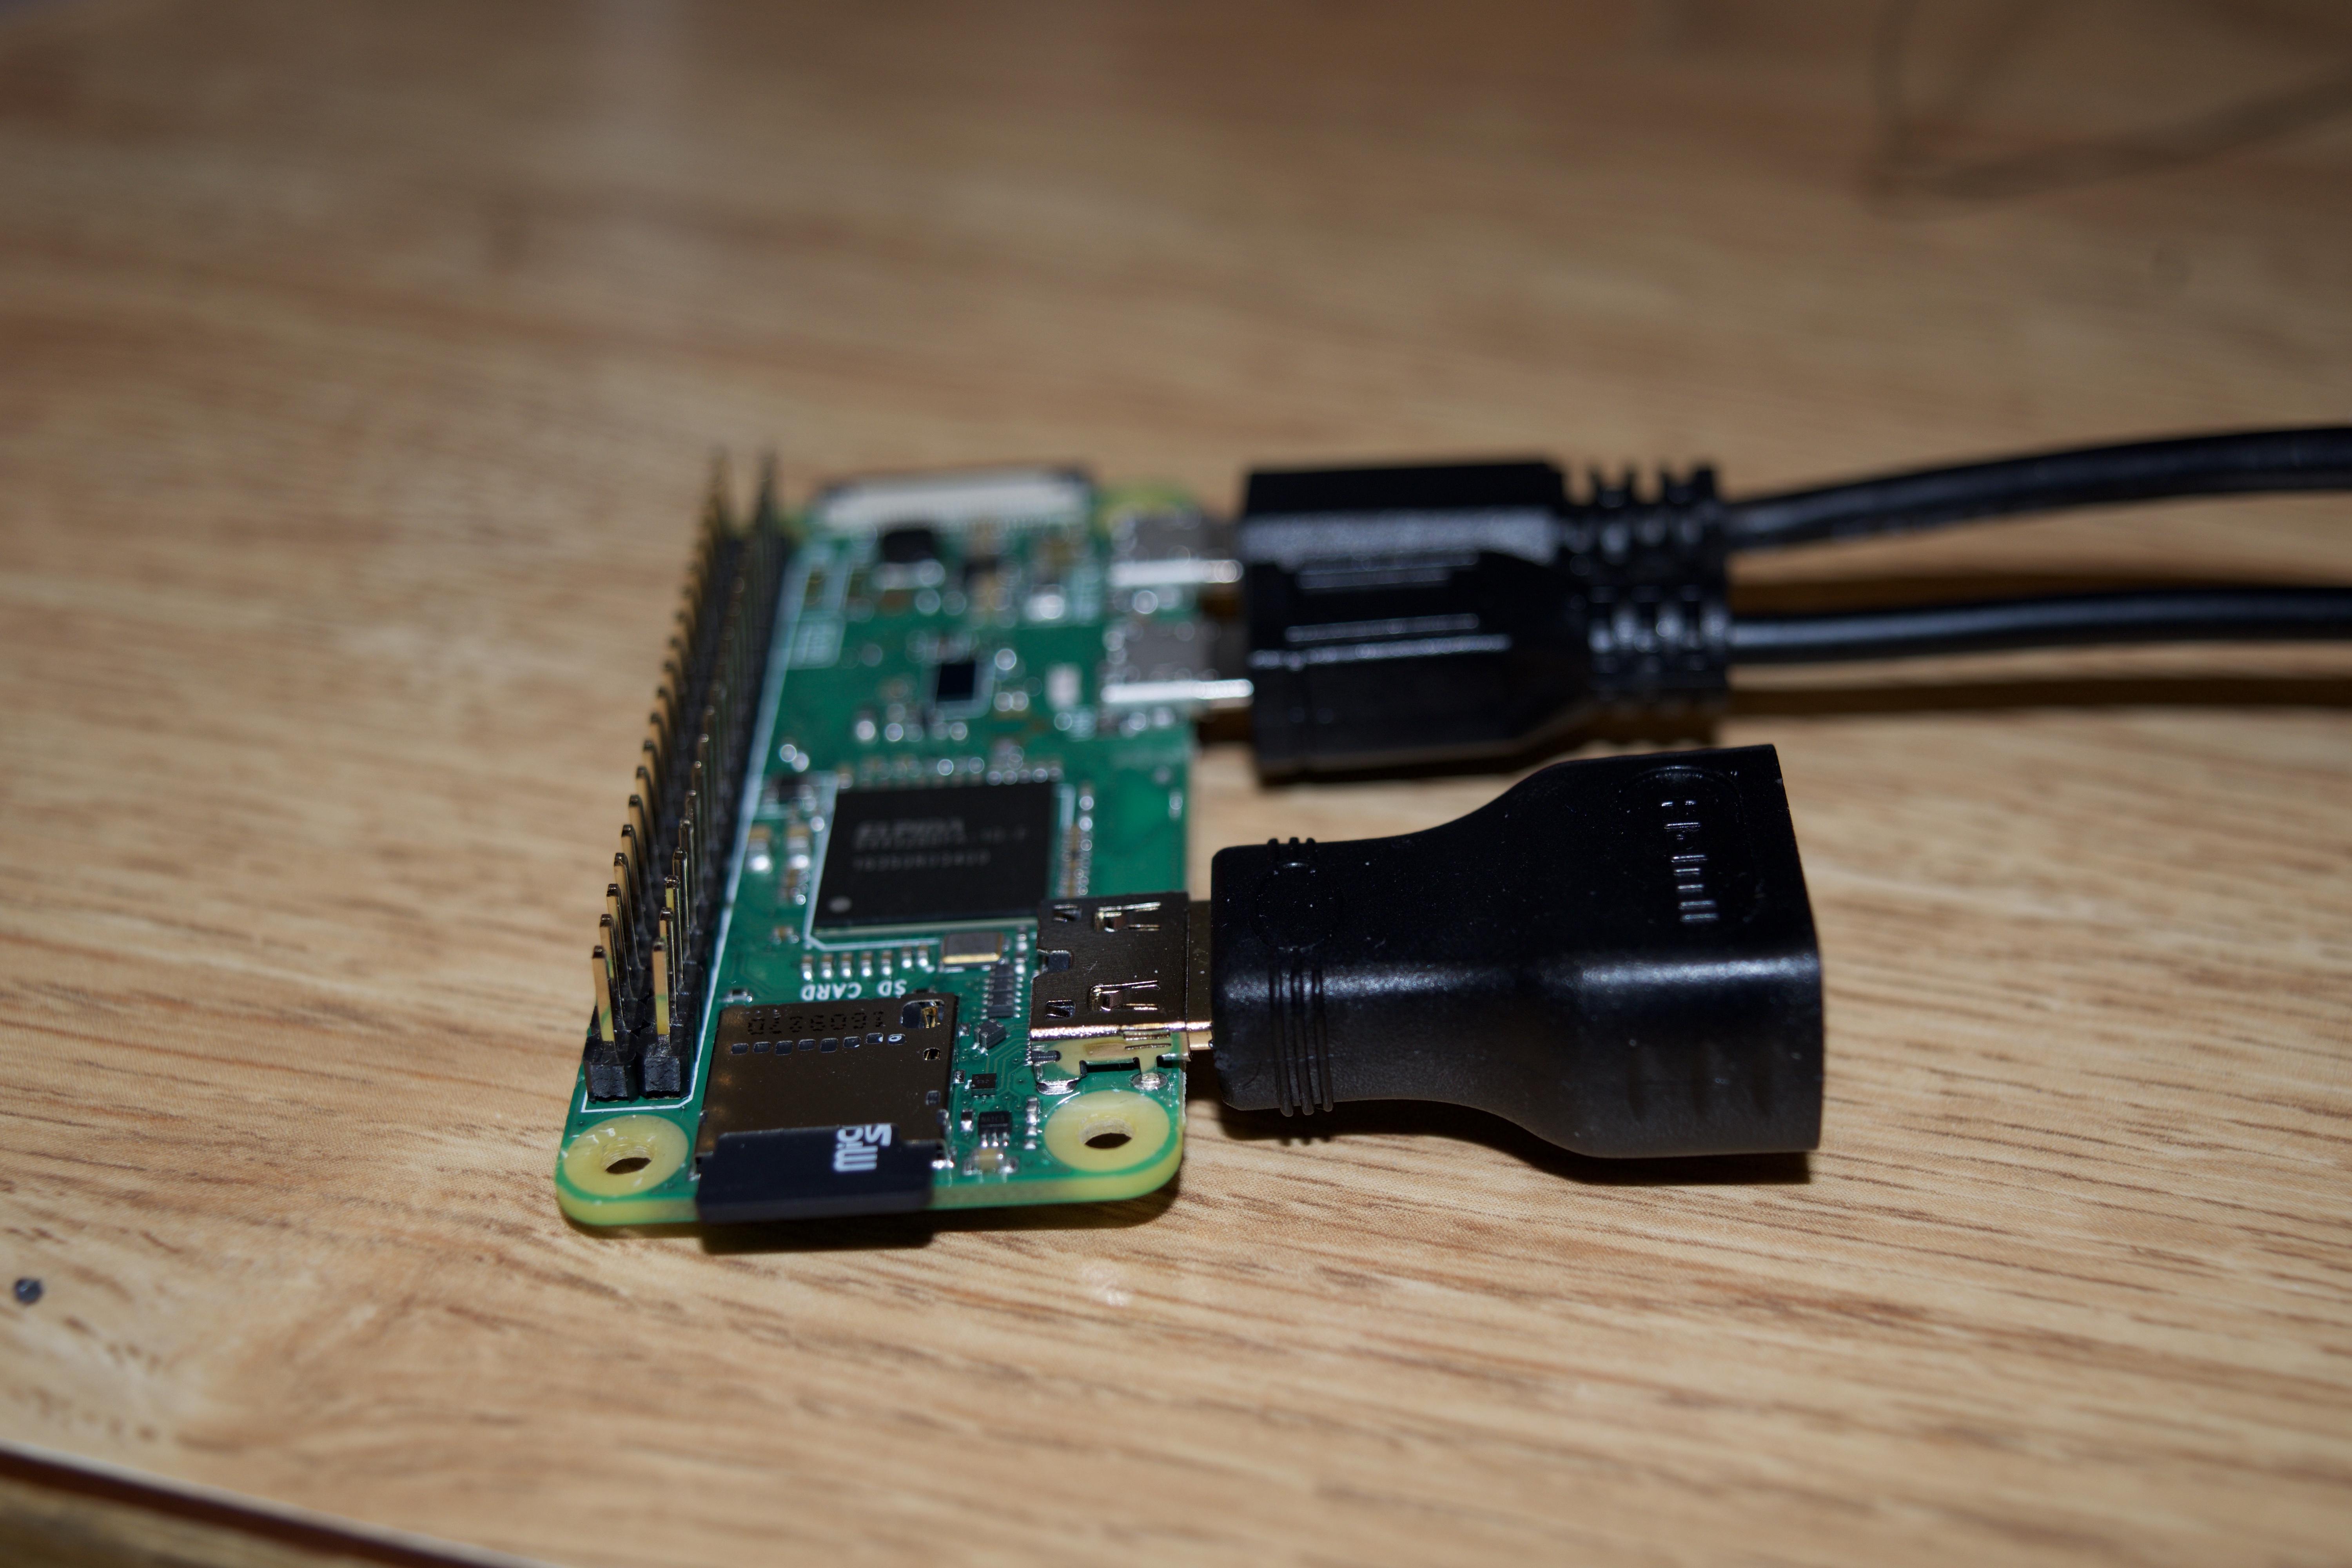
(pictures 4-6)
2) plug in your mini HDMI Plug and any other cords you might be using, i.e. USB Mini Hub and 5V 2.4A Switching Power Supply with 20AWG MicroUSB Cable. This will tell us how much room we need to leave between the PiTFT and the Pi Zero. We want to make sure we can still access these ports once we solder the two together!
(pictures 7-8)
3) Now solder on your PiTFT hat onto the header pins from the pi zero. Make sure you have a very good soldering connection with the header pins to the Pi Zero and the PiTFT hat otherwise the screen will not work!!
Getting the PiTFT Hat to Work

All you have to do to get the PiTFT hat to work is download the jessie based PiTFT hat image onto your micro usb card.
Adafruit has a more detailed instruction on how to do this if you get confused (same link as before). Please note: if simply downloading the jessie based PiTFT hat image doesn't make your PiTFT hat work that is due to your soldering connections with the Pi Zero to PiTFT hat so check those and make sure everything is really soldered well!!
Initial Steps With PiTFT
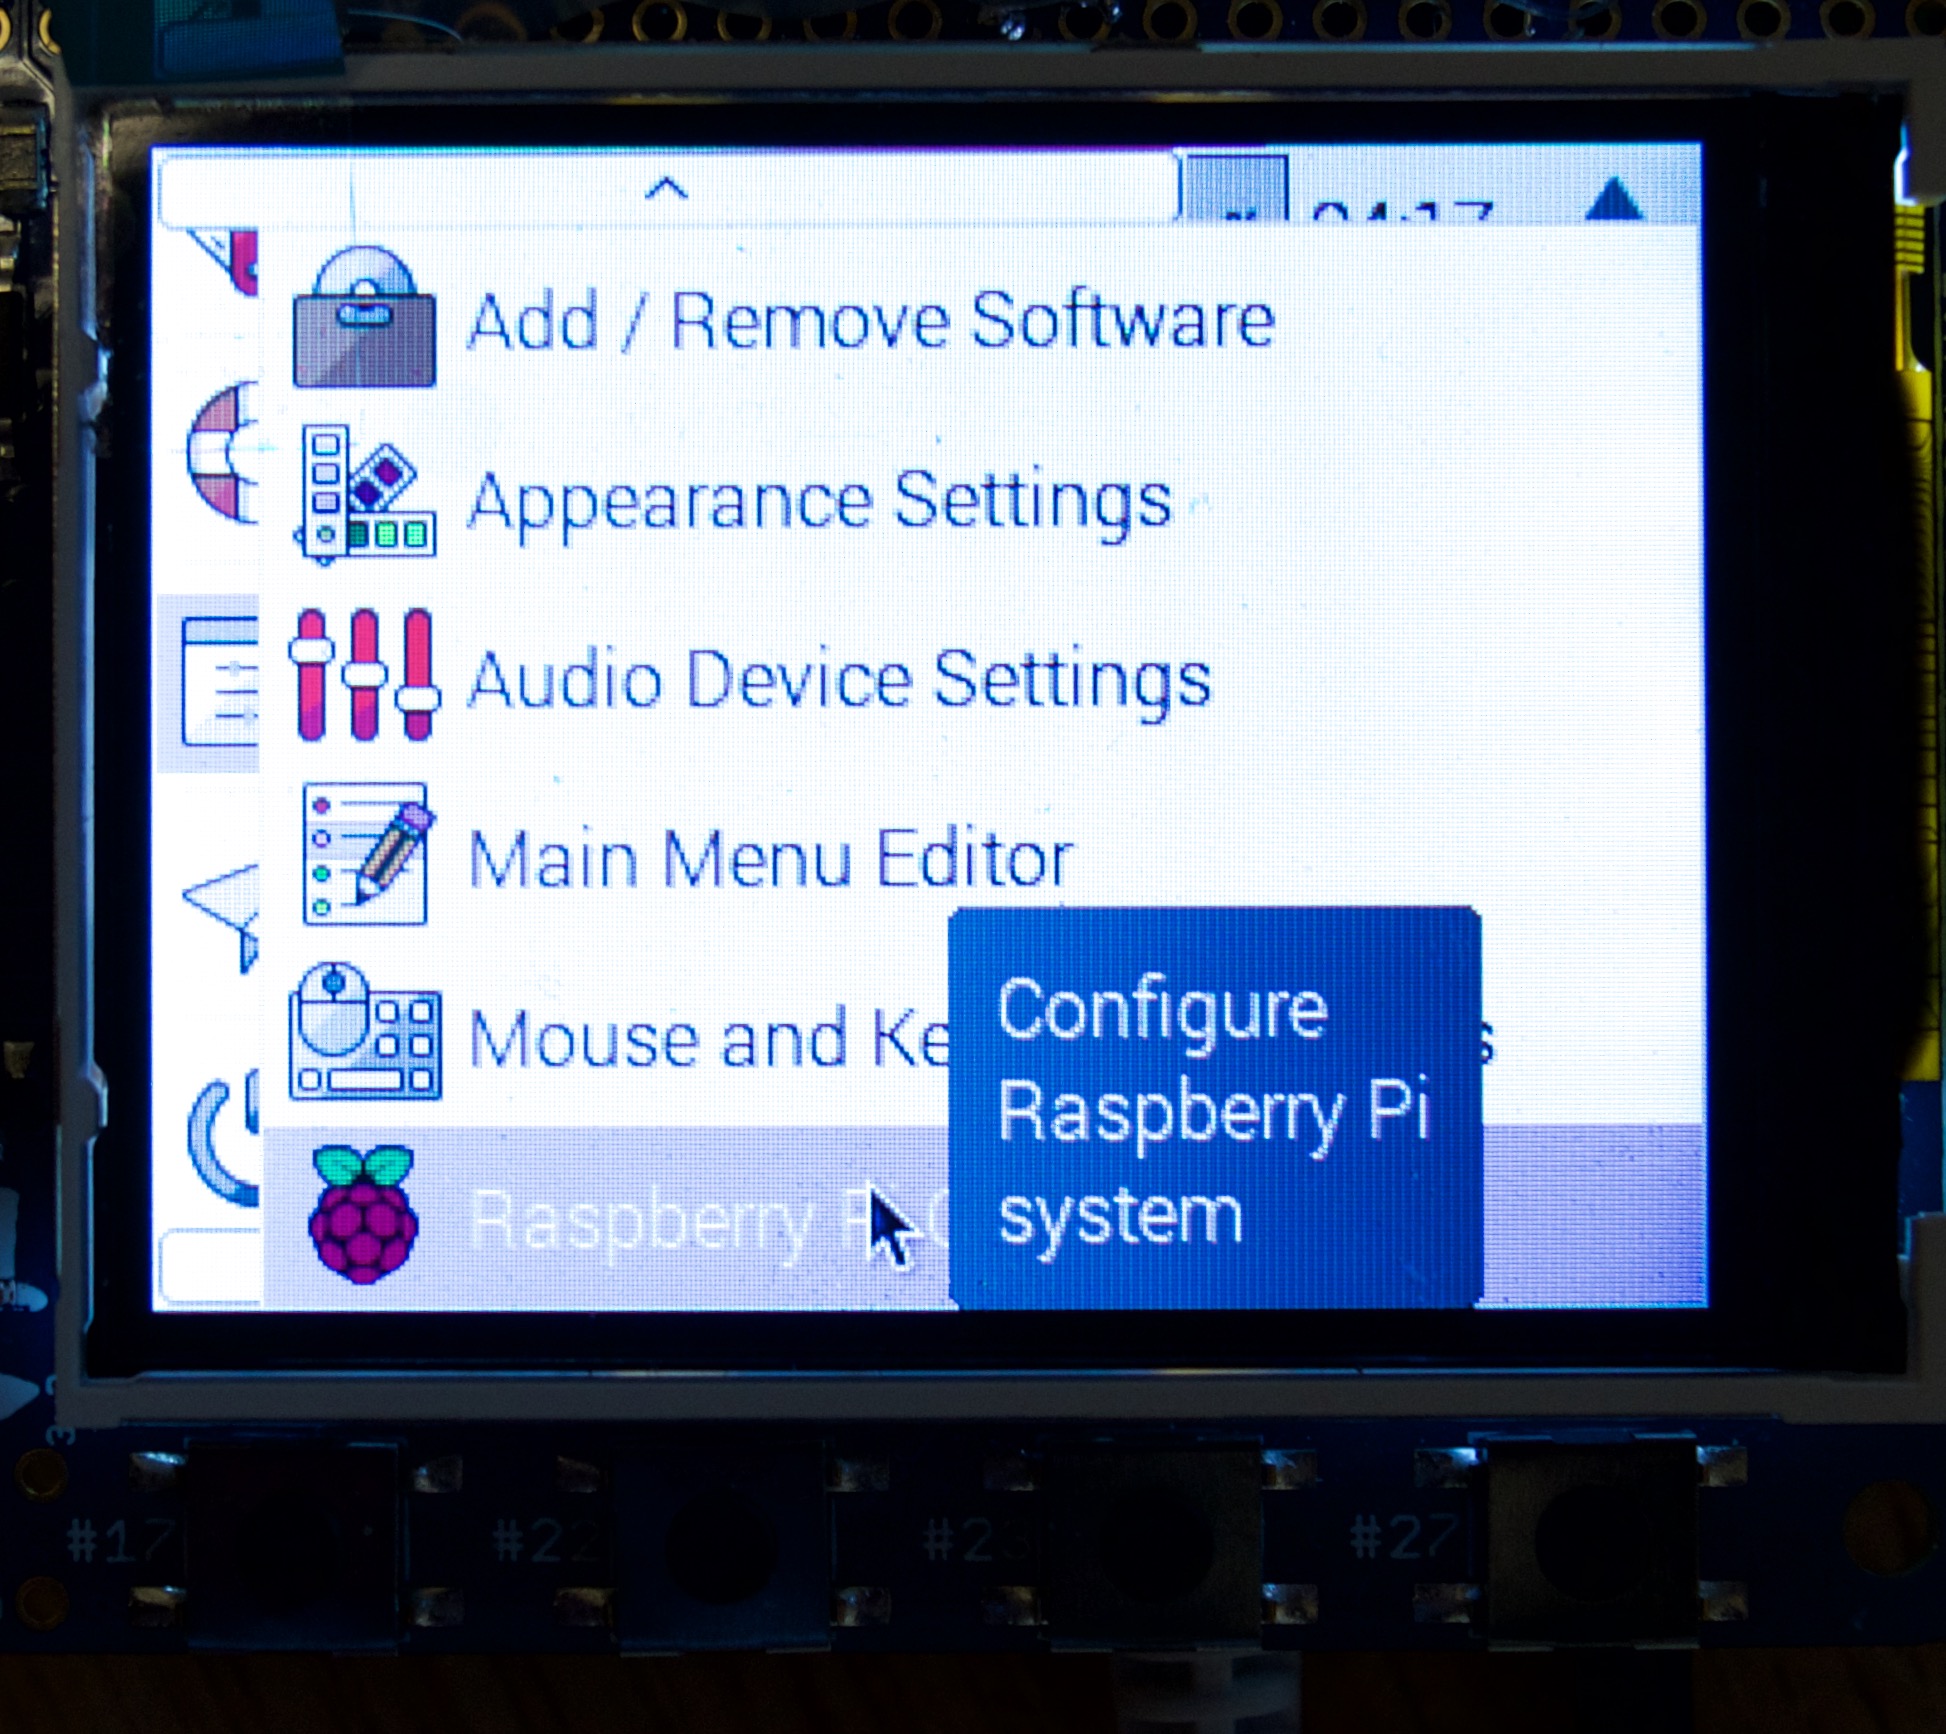
1)first connect everything to your Pi Zero, this includes the mouse, keyboard, power port, and mini wifi module (you will need your mini usb hub to attach all of this)
(picture 1)
2) Once you have the power port plugged in your PiTFT will turn on. When you first turn on you PiTFT go into the main menu and go to raspberry pi configurations
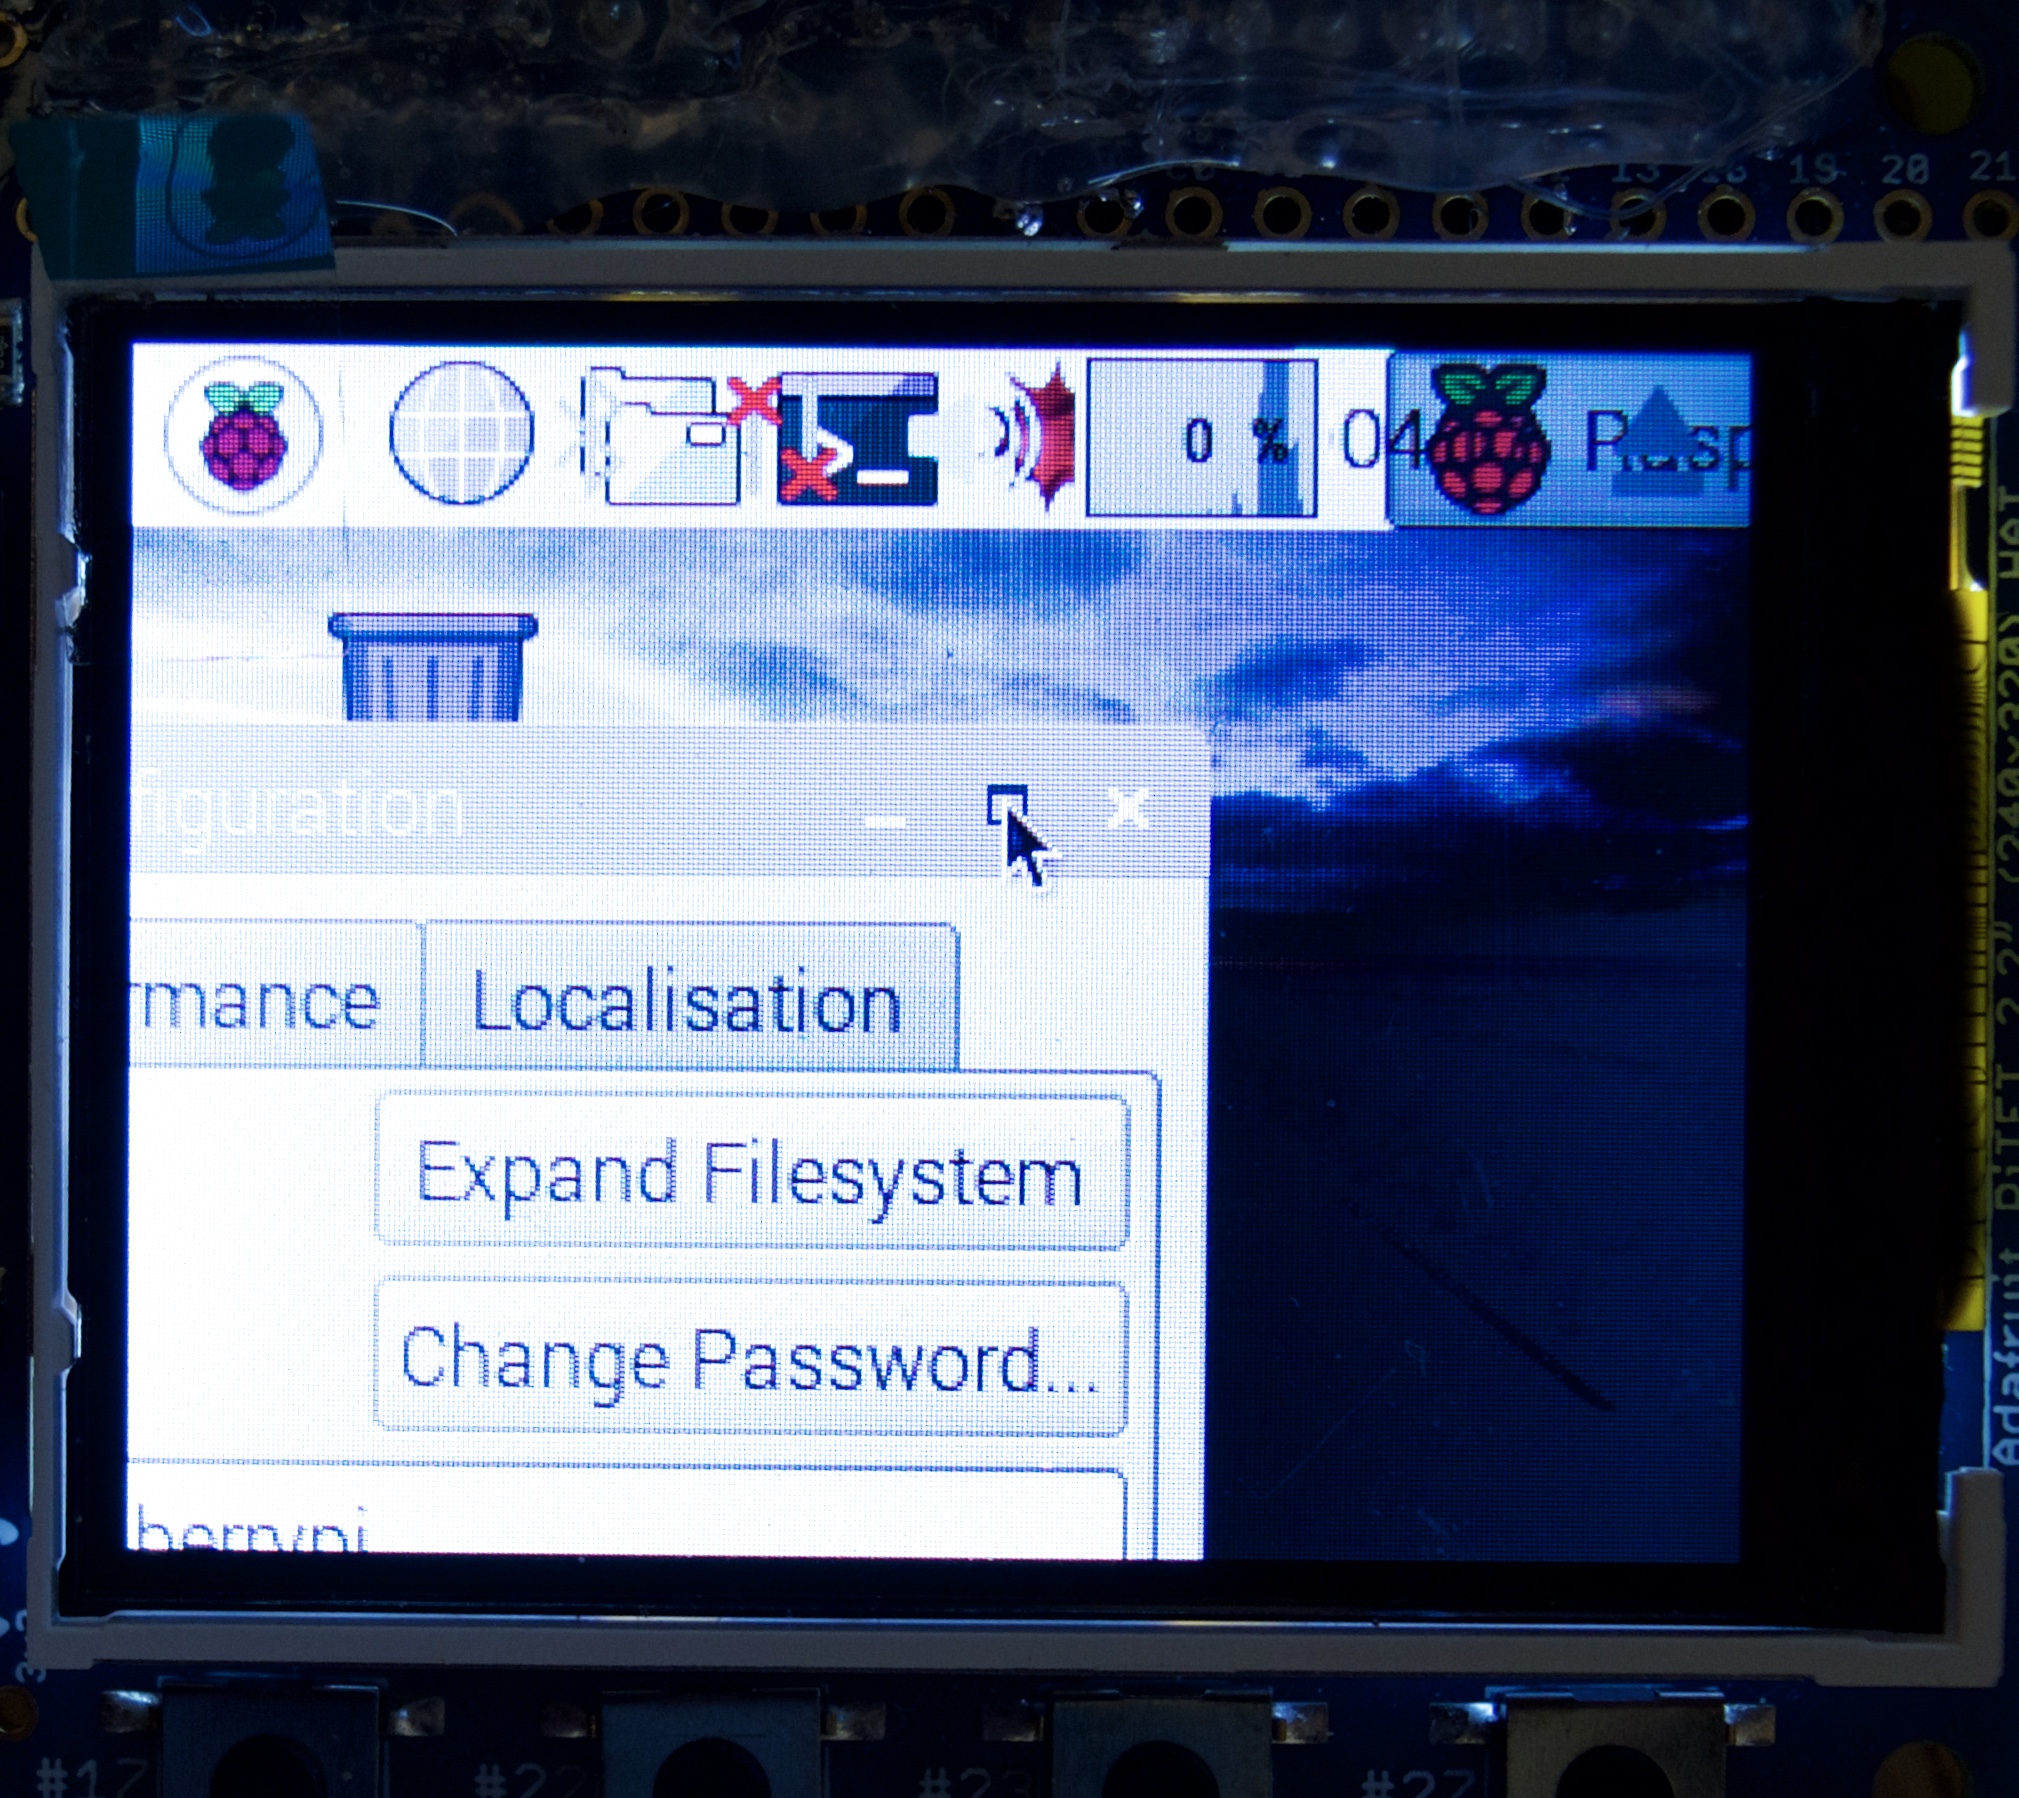
(picture 2)
3)once you are in the configuration click on the expand window in the right hand corner to view the window properly on the tiny screen
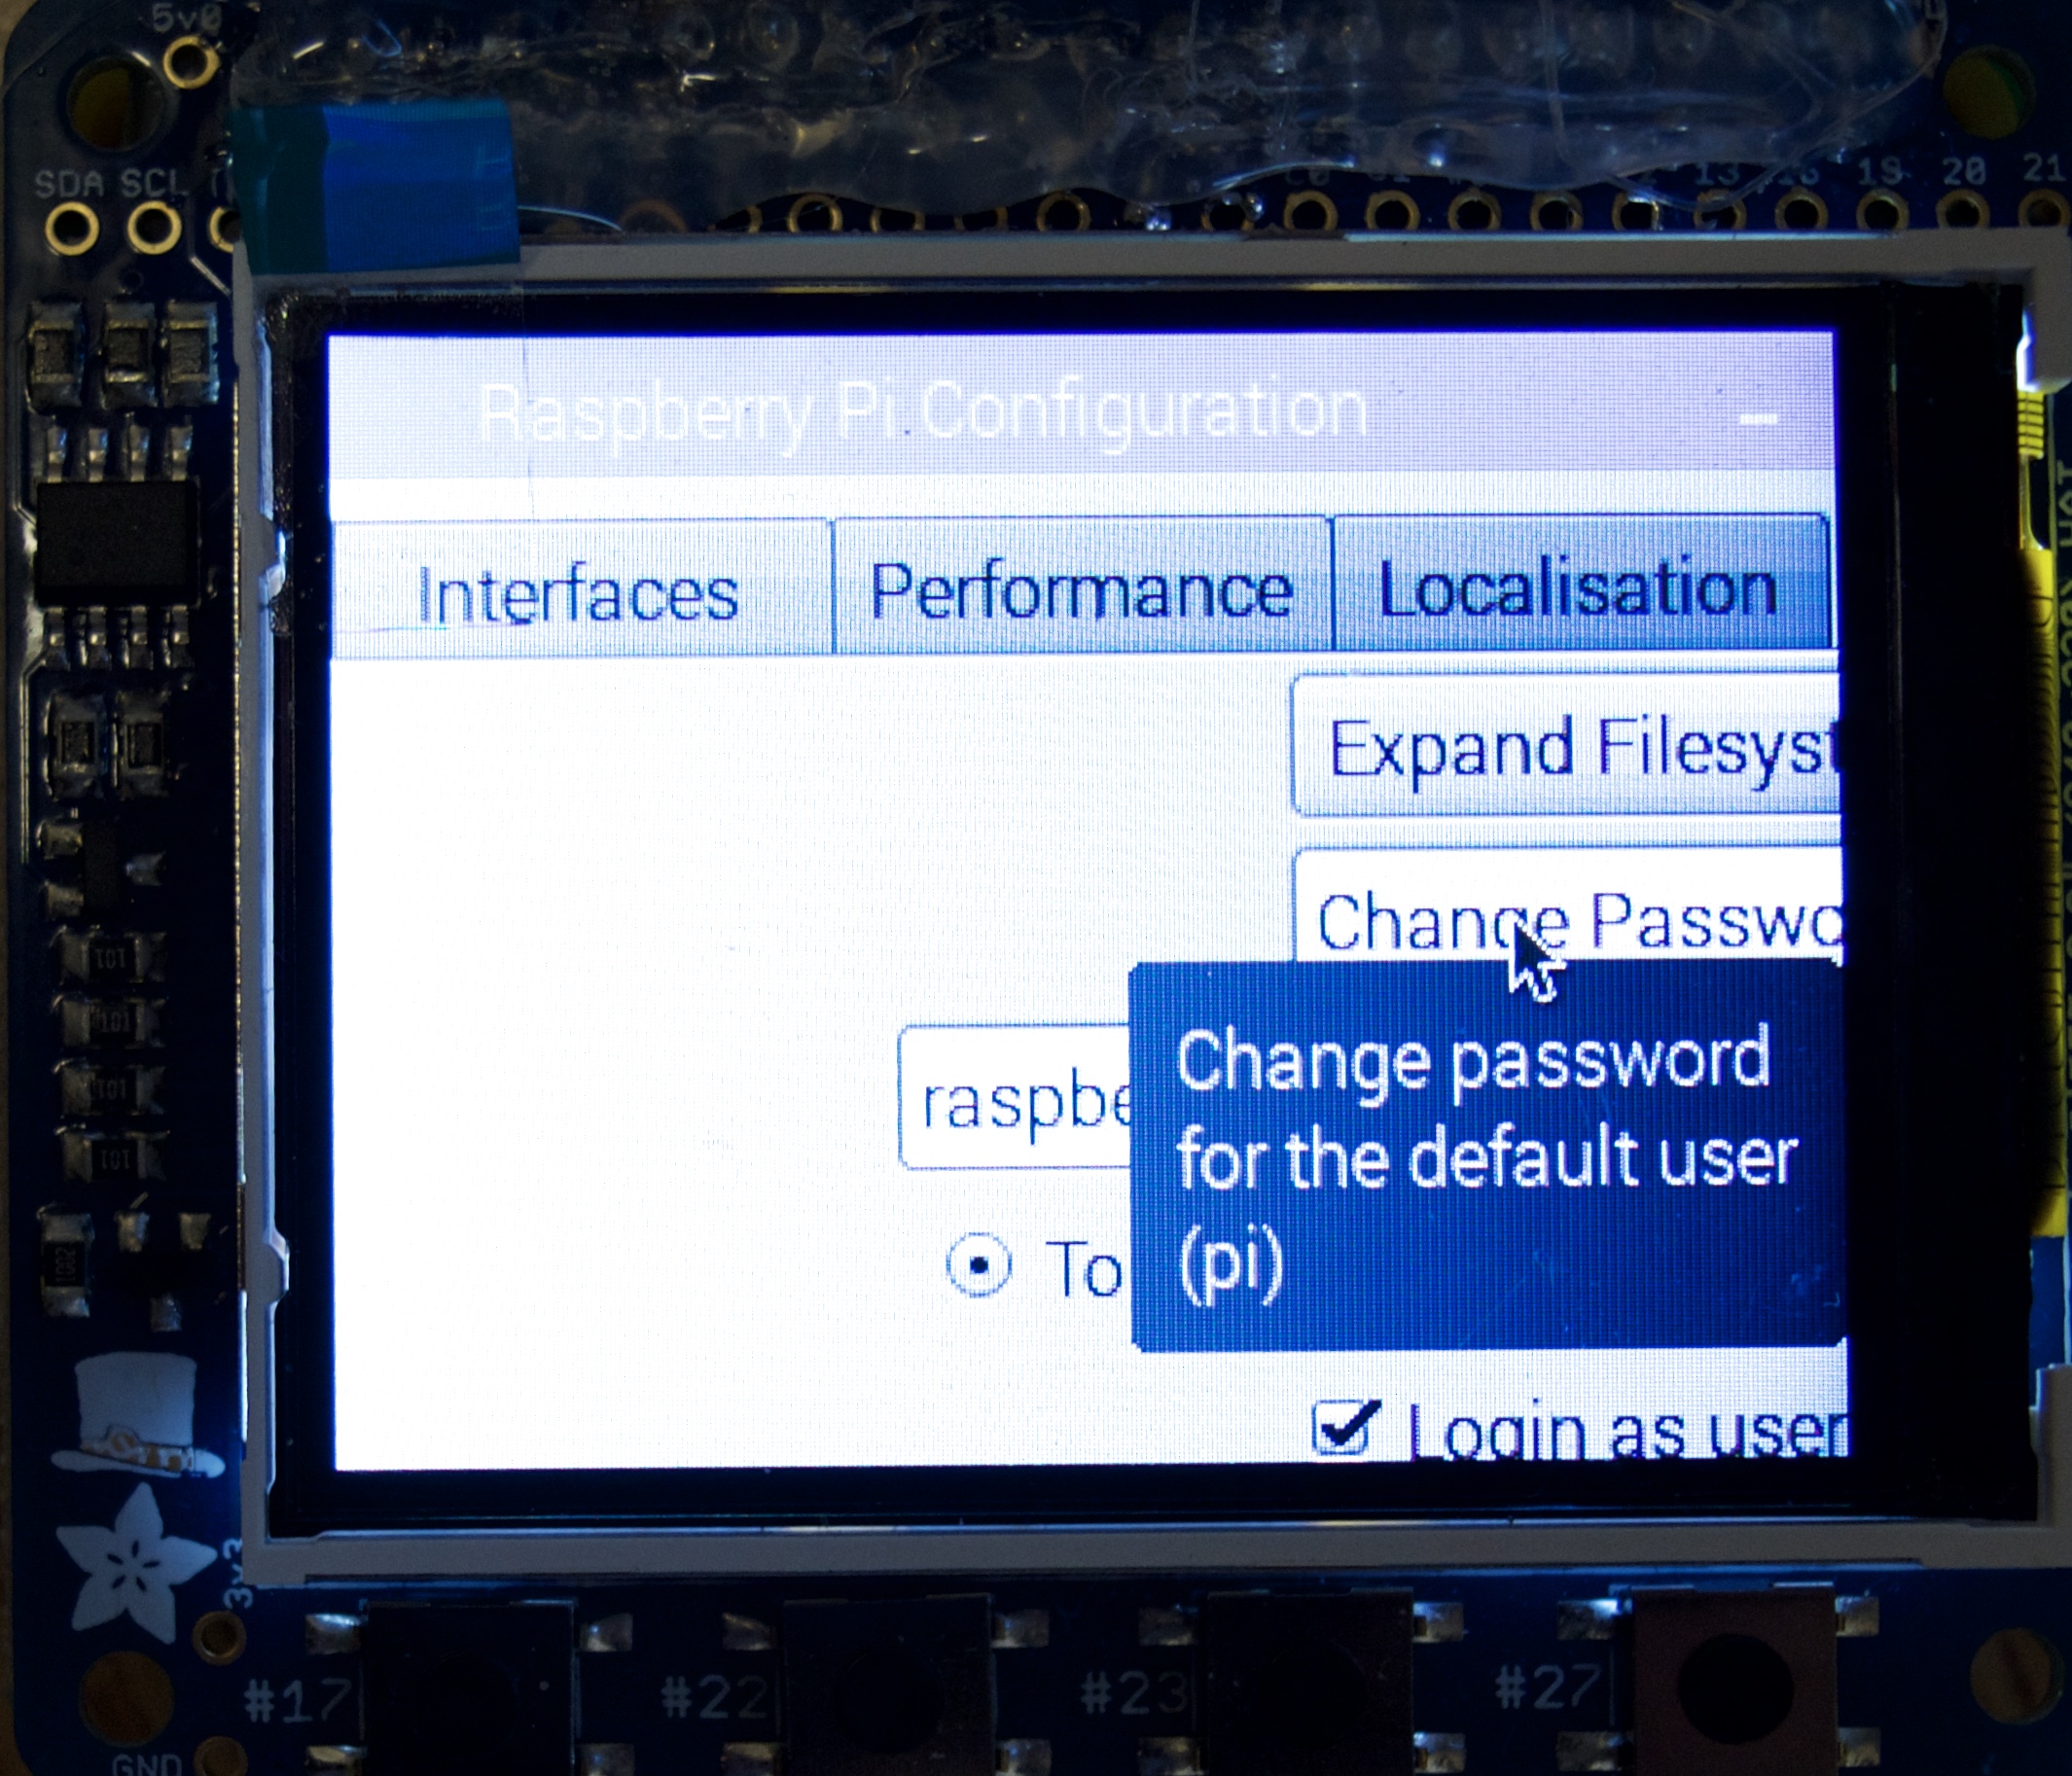
(picture 3)
4)change your password(note the default password on a pi is raspberry), this will be useful for when you need to ssh (explanation of what ssh is in step 6) into your Pi Zero
(picture 4-5)
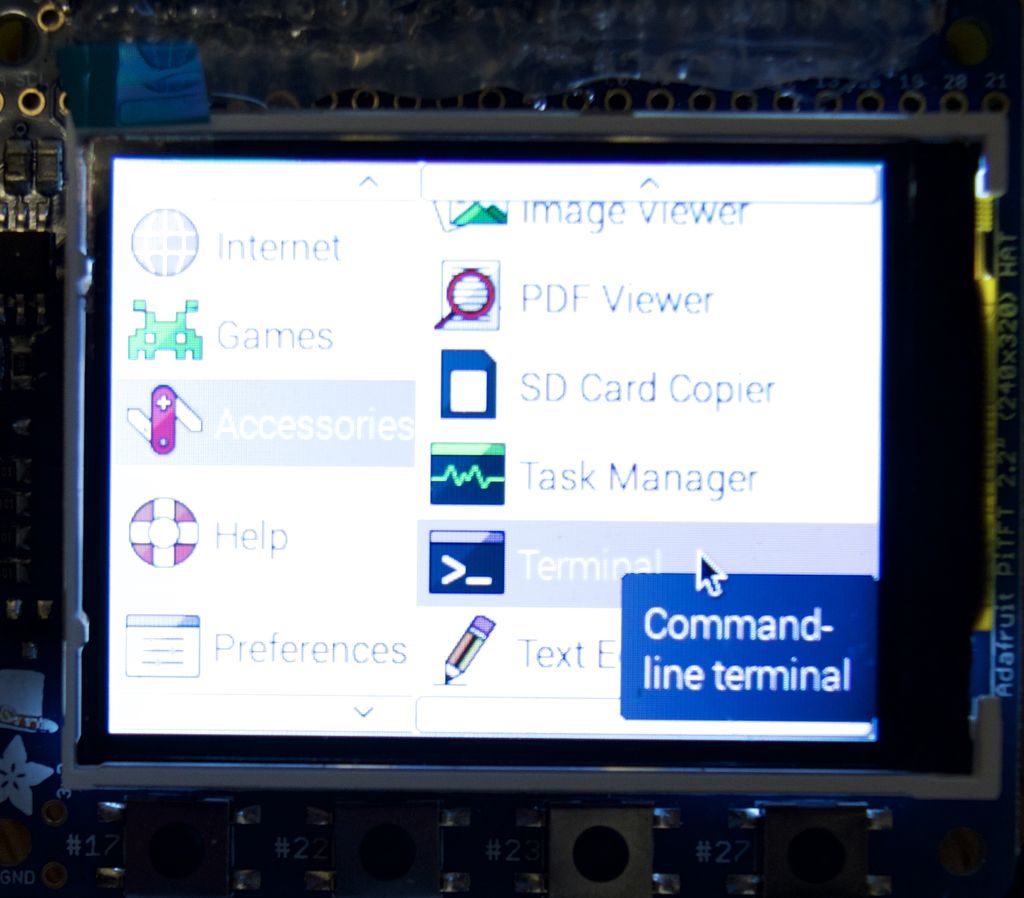
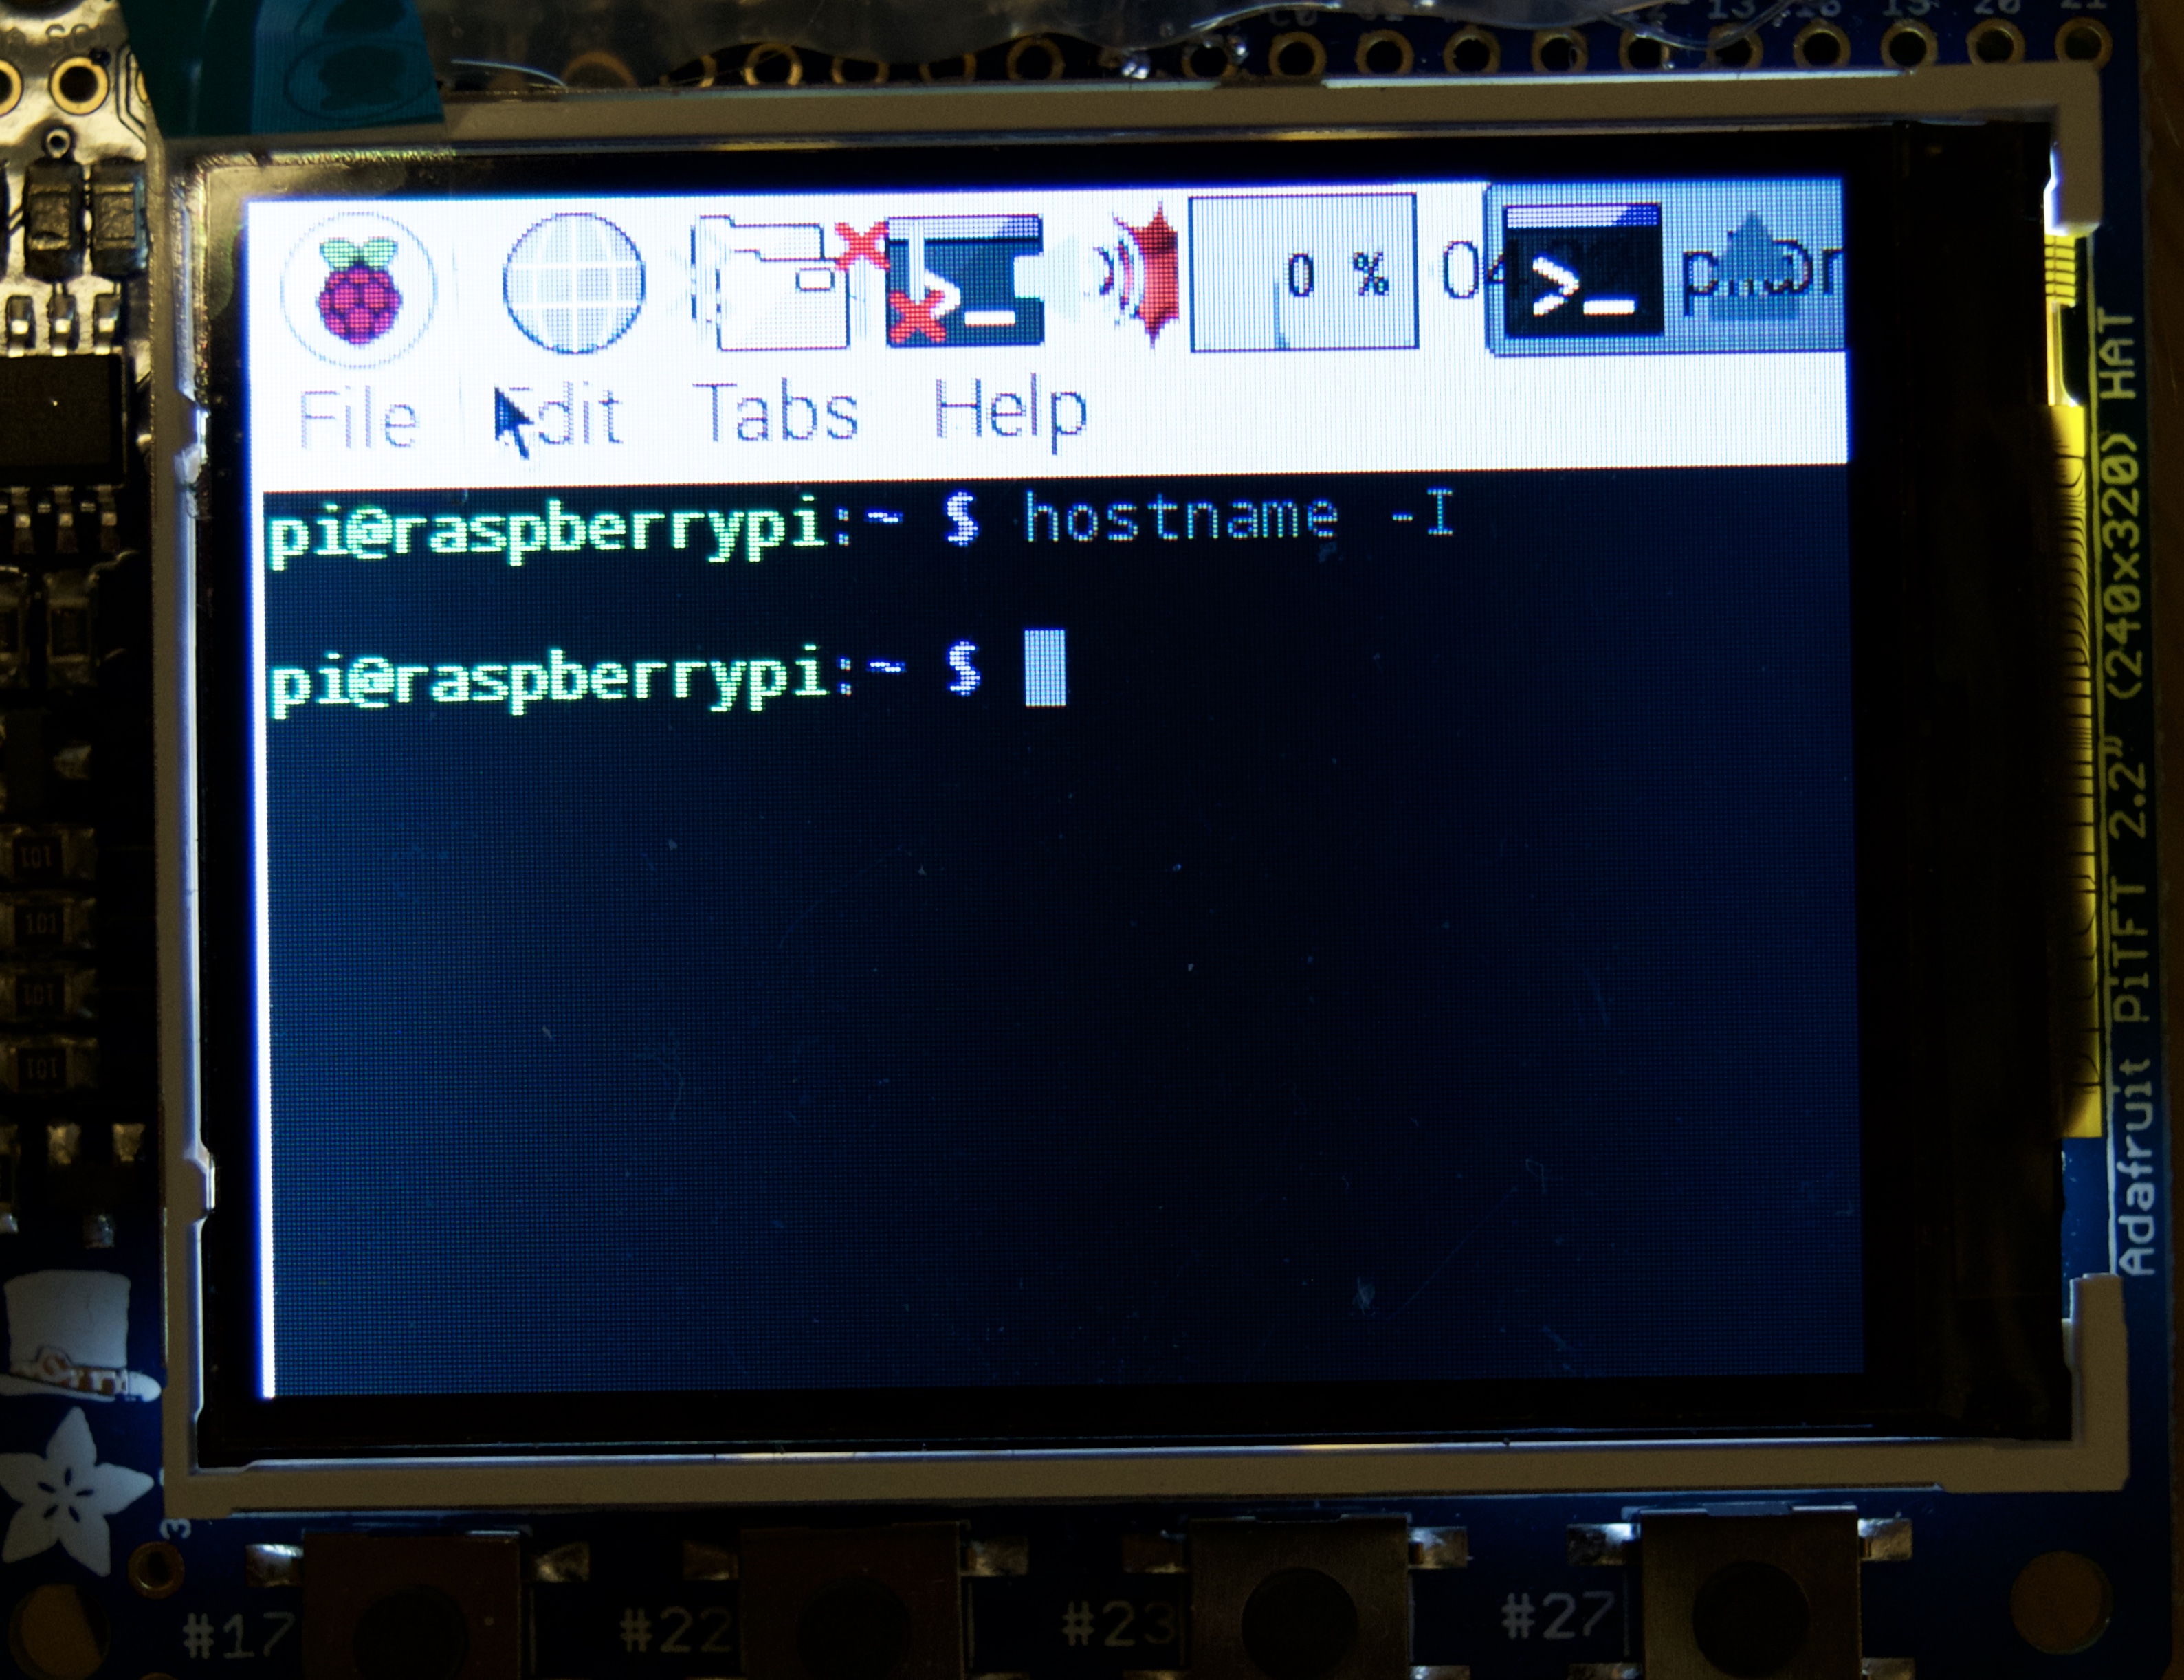
5)now we are going to need to find the ip address of our pi for sshing since it's annoying to actually type on the pitft. So go into terminal and type
hostname -I
(picture 6)
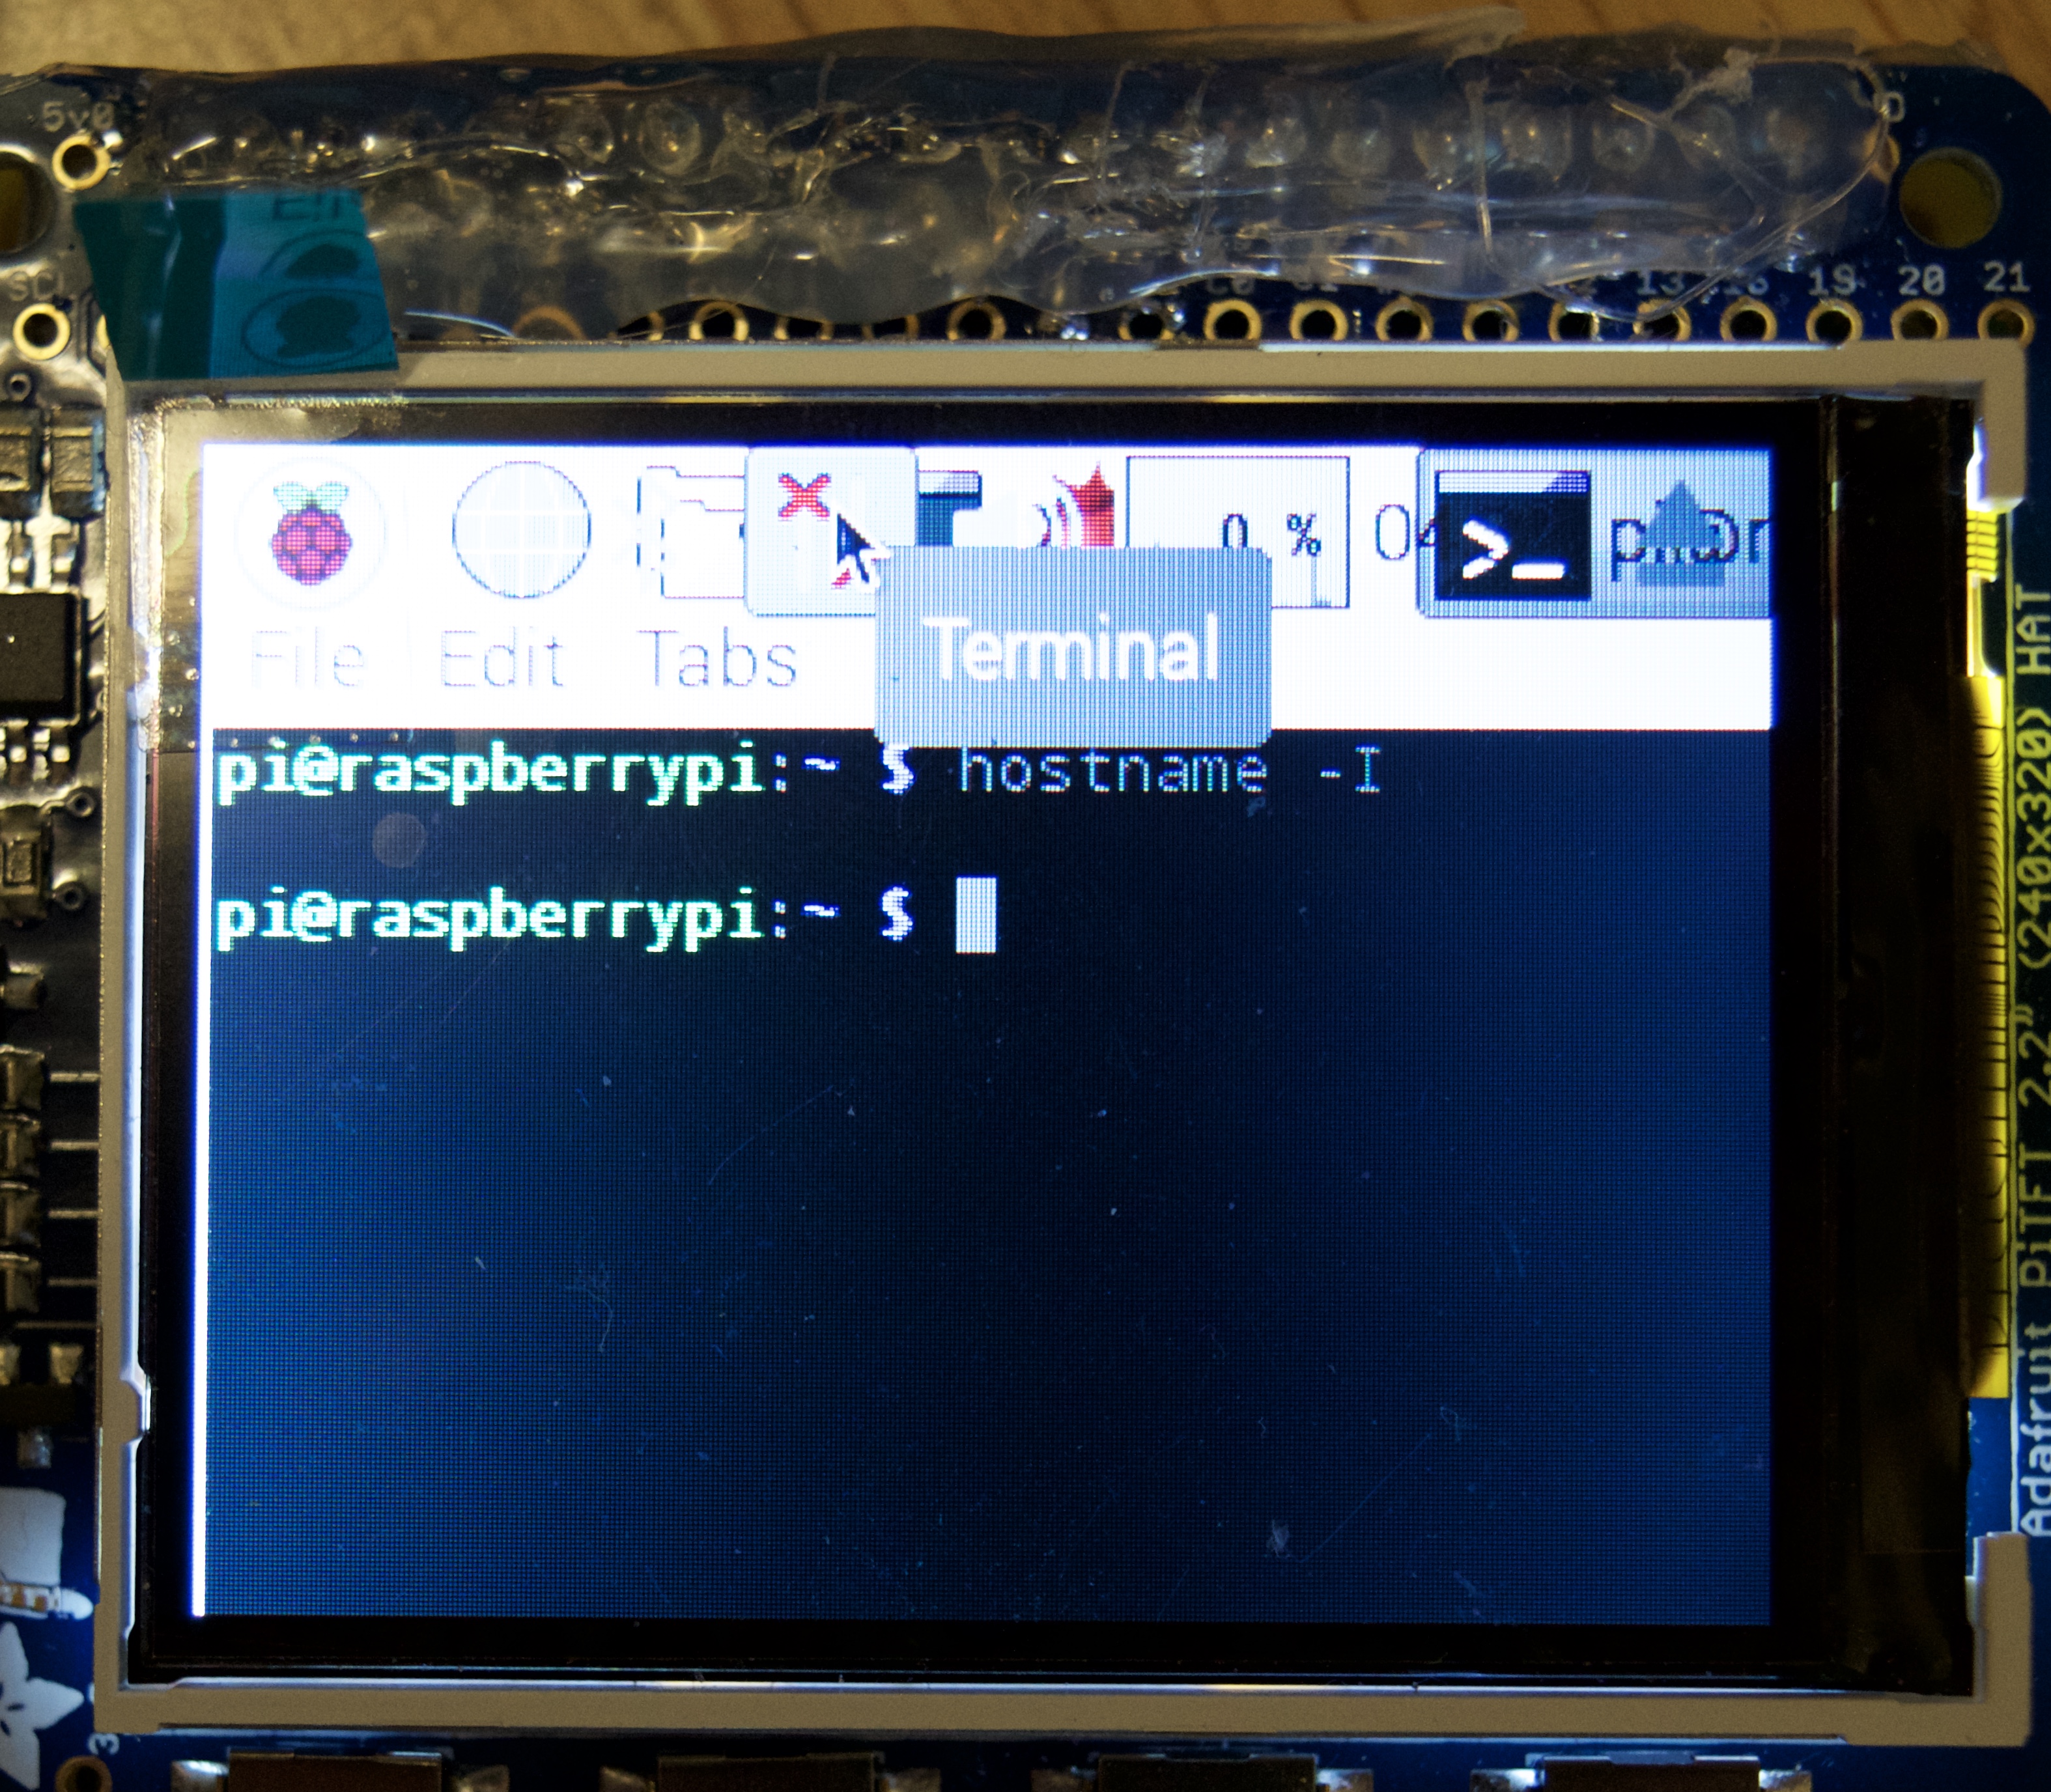
6)if nothing shows up that is because you aren't connected to the internet so click on this image where the mouse is being hovered and connect to your wifi (you will see pulsing blue light coming from the wifi module if you are connected)
(picture 7)
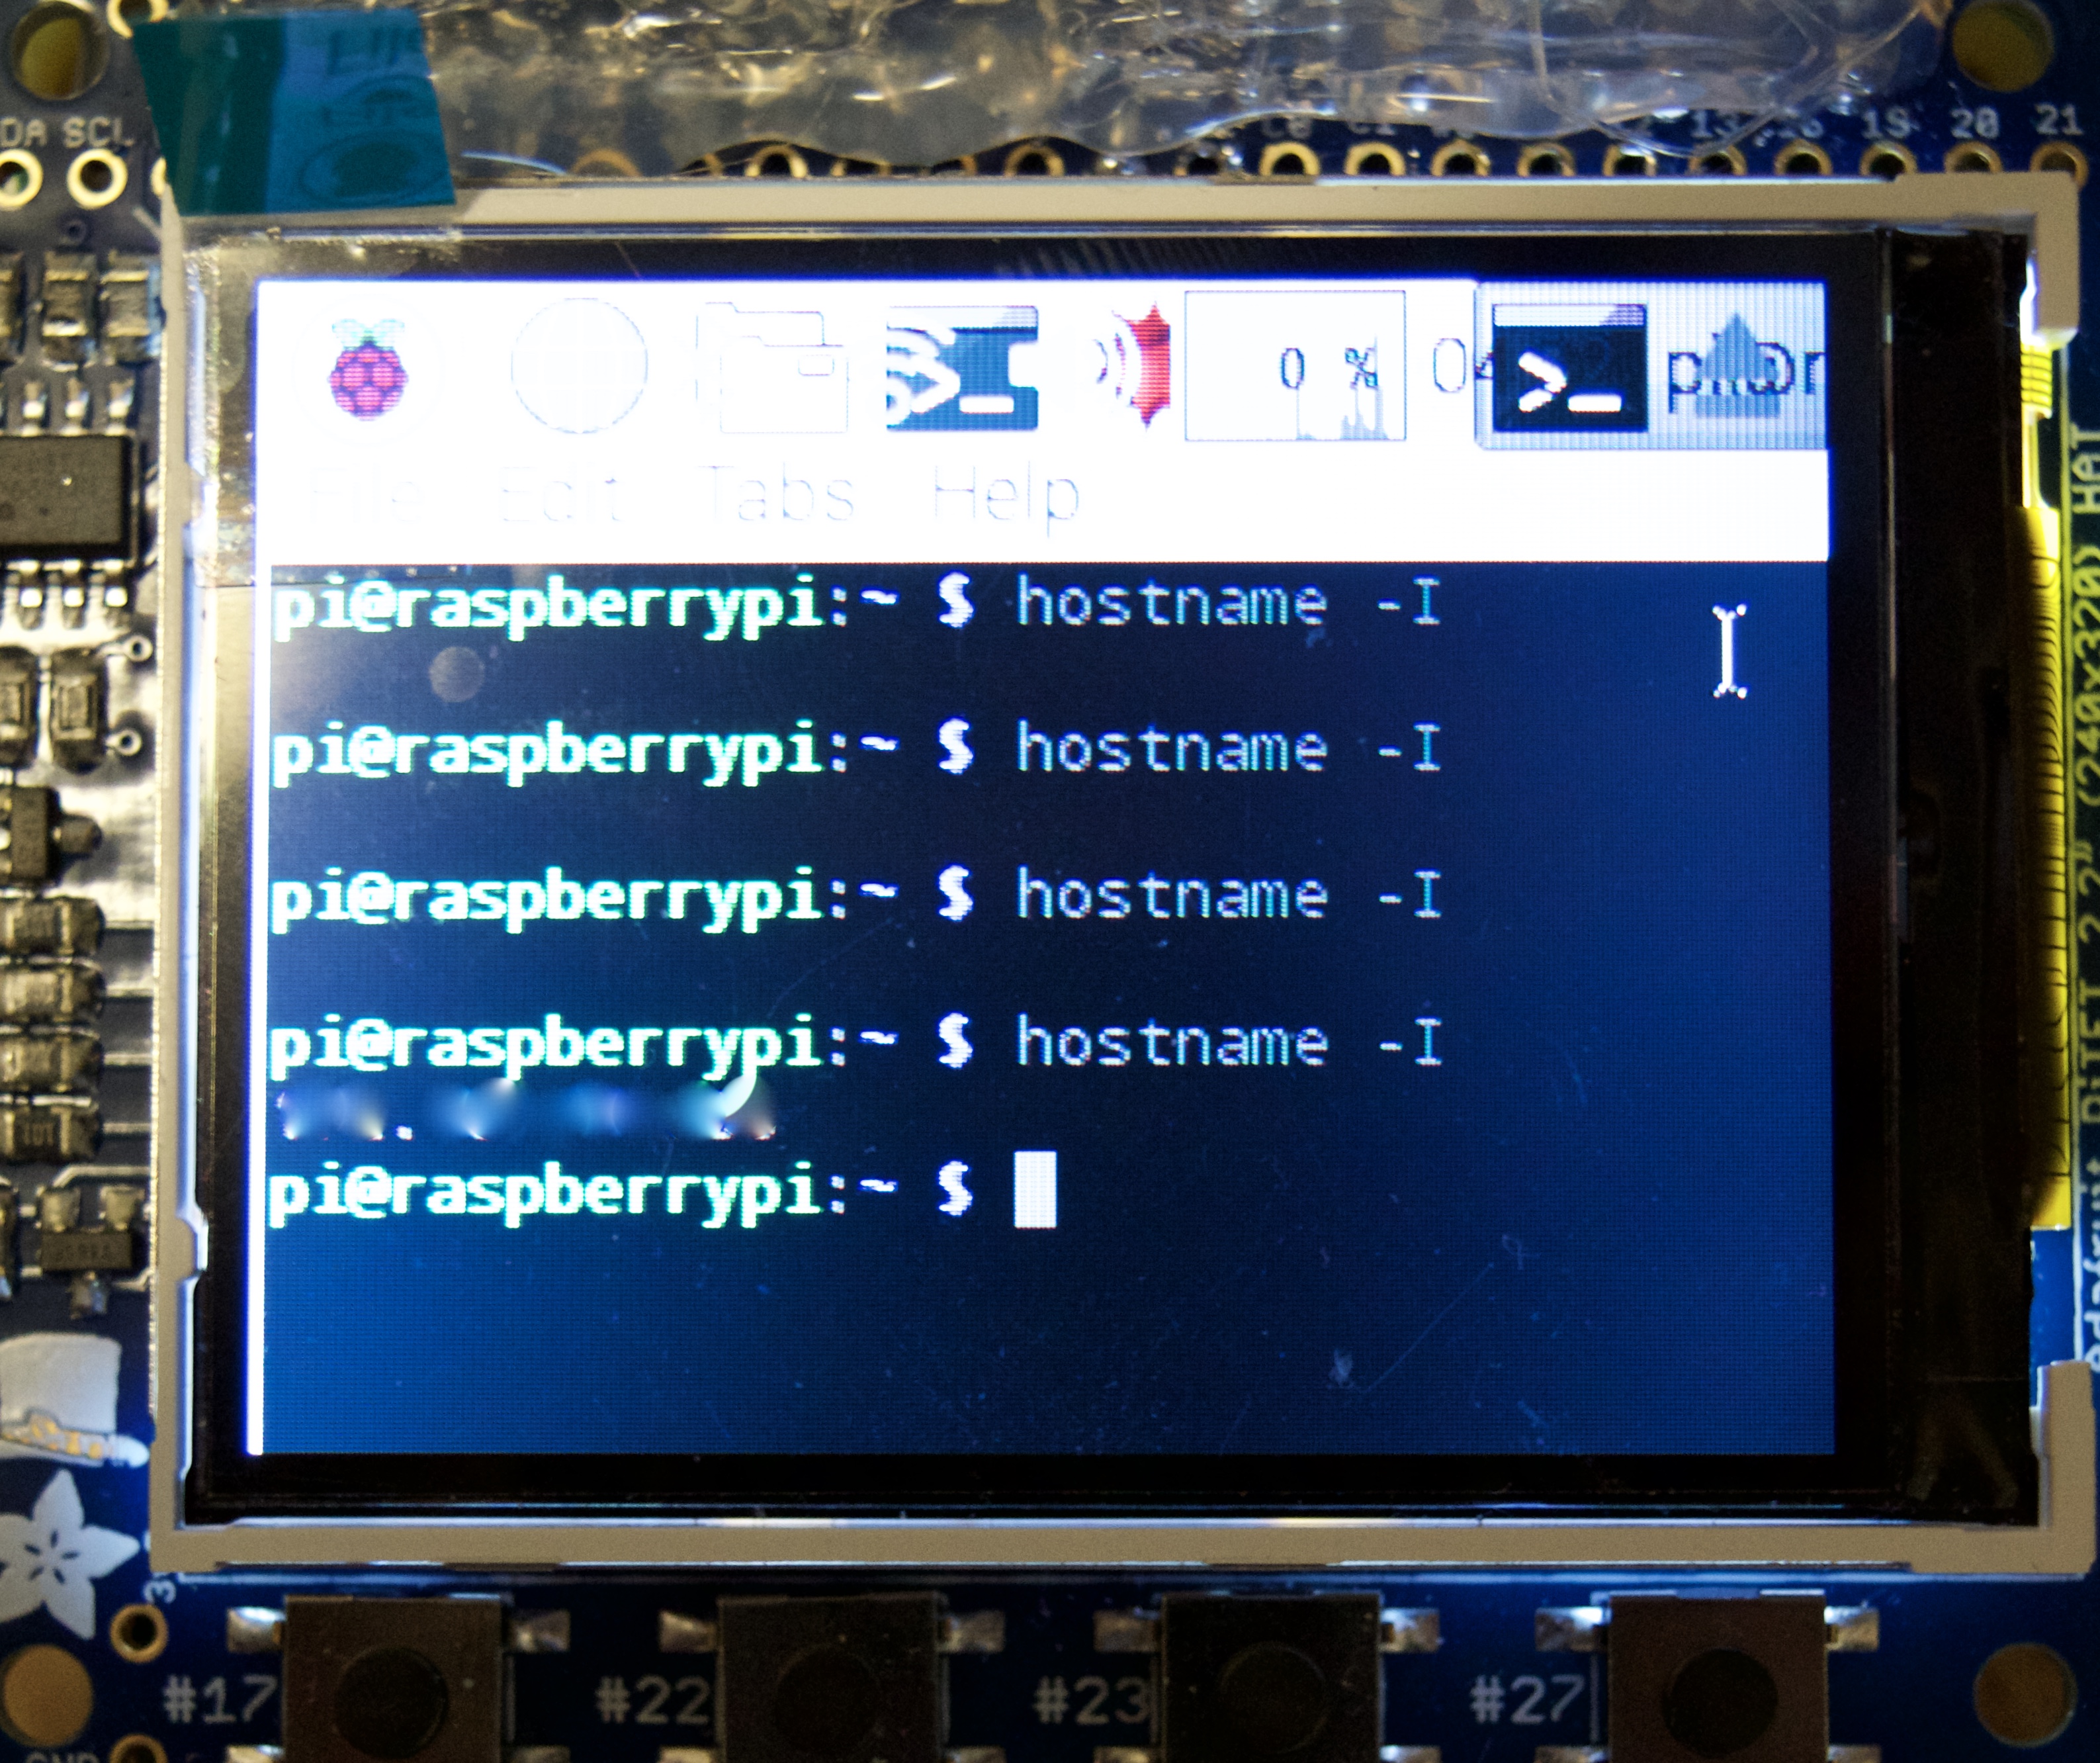
7)retype hostname -I and your ip address will show up (I blurred mine out for security reasons)
8)in raspberry pi configurations go to interfaces and enable SSH, then click ok, then go to terminal and type
reboot
Setting Up a Shell to Write the Code for the PiTFT
There is probebly an easier way of doing this but when I sshed (explained in step 6) I personally couldn't find the text editor on the raspberry pi interface so I just made one on the PiTFT and opened it in up in the folder on my ssh screen. These steps will explain how I did this.
(picture 1)
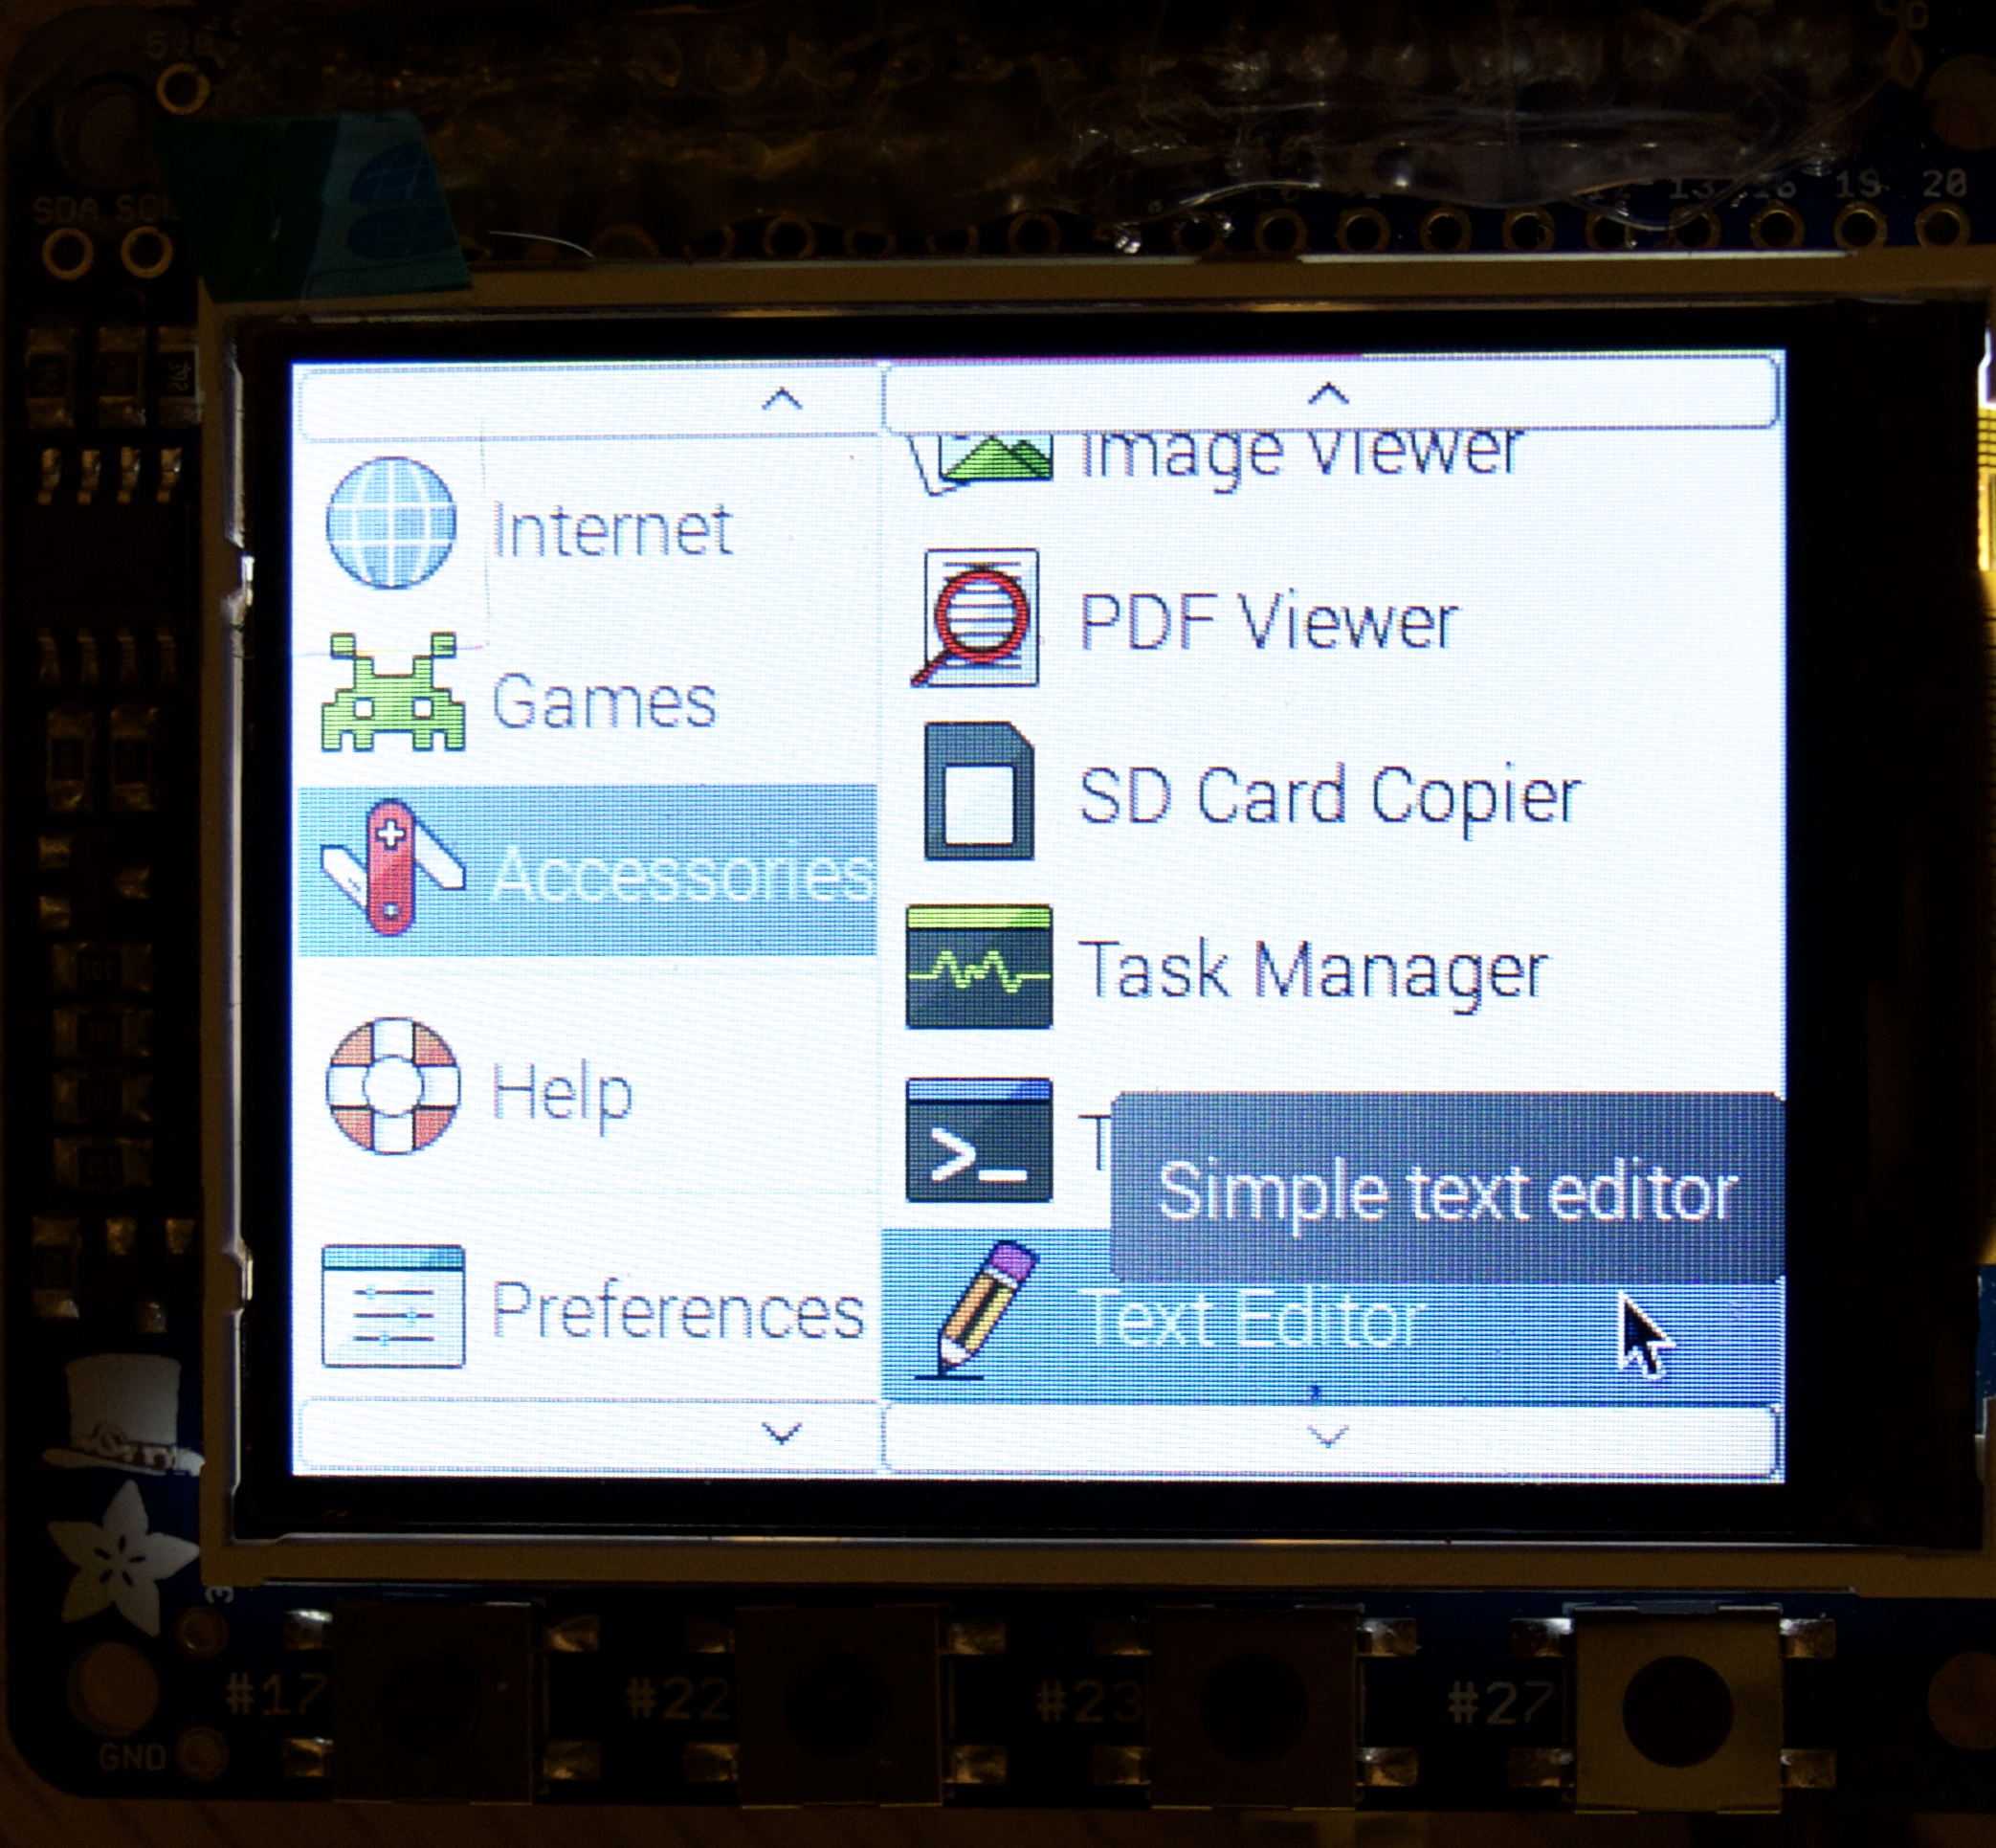
1)We want to create code for the video player in a Text Editor file so lets open that up.
On your PiTFT go to main menu and open text editor.
(picture 2)
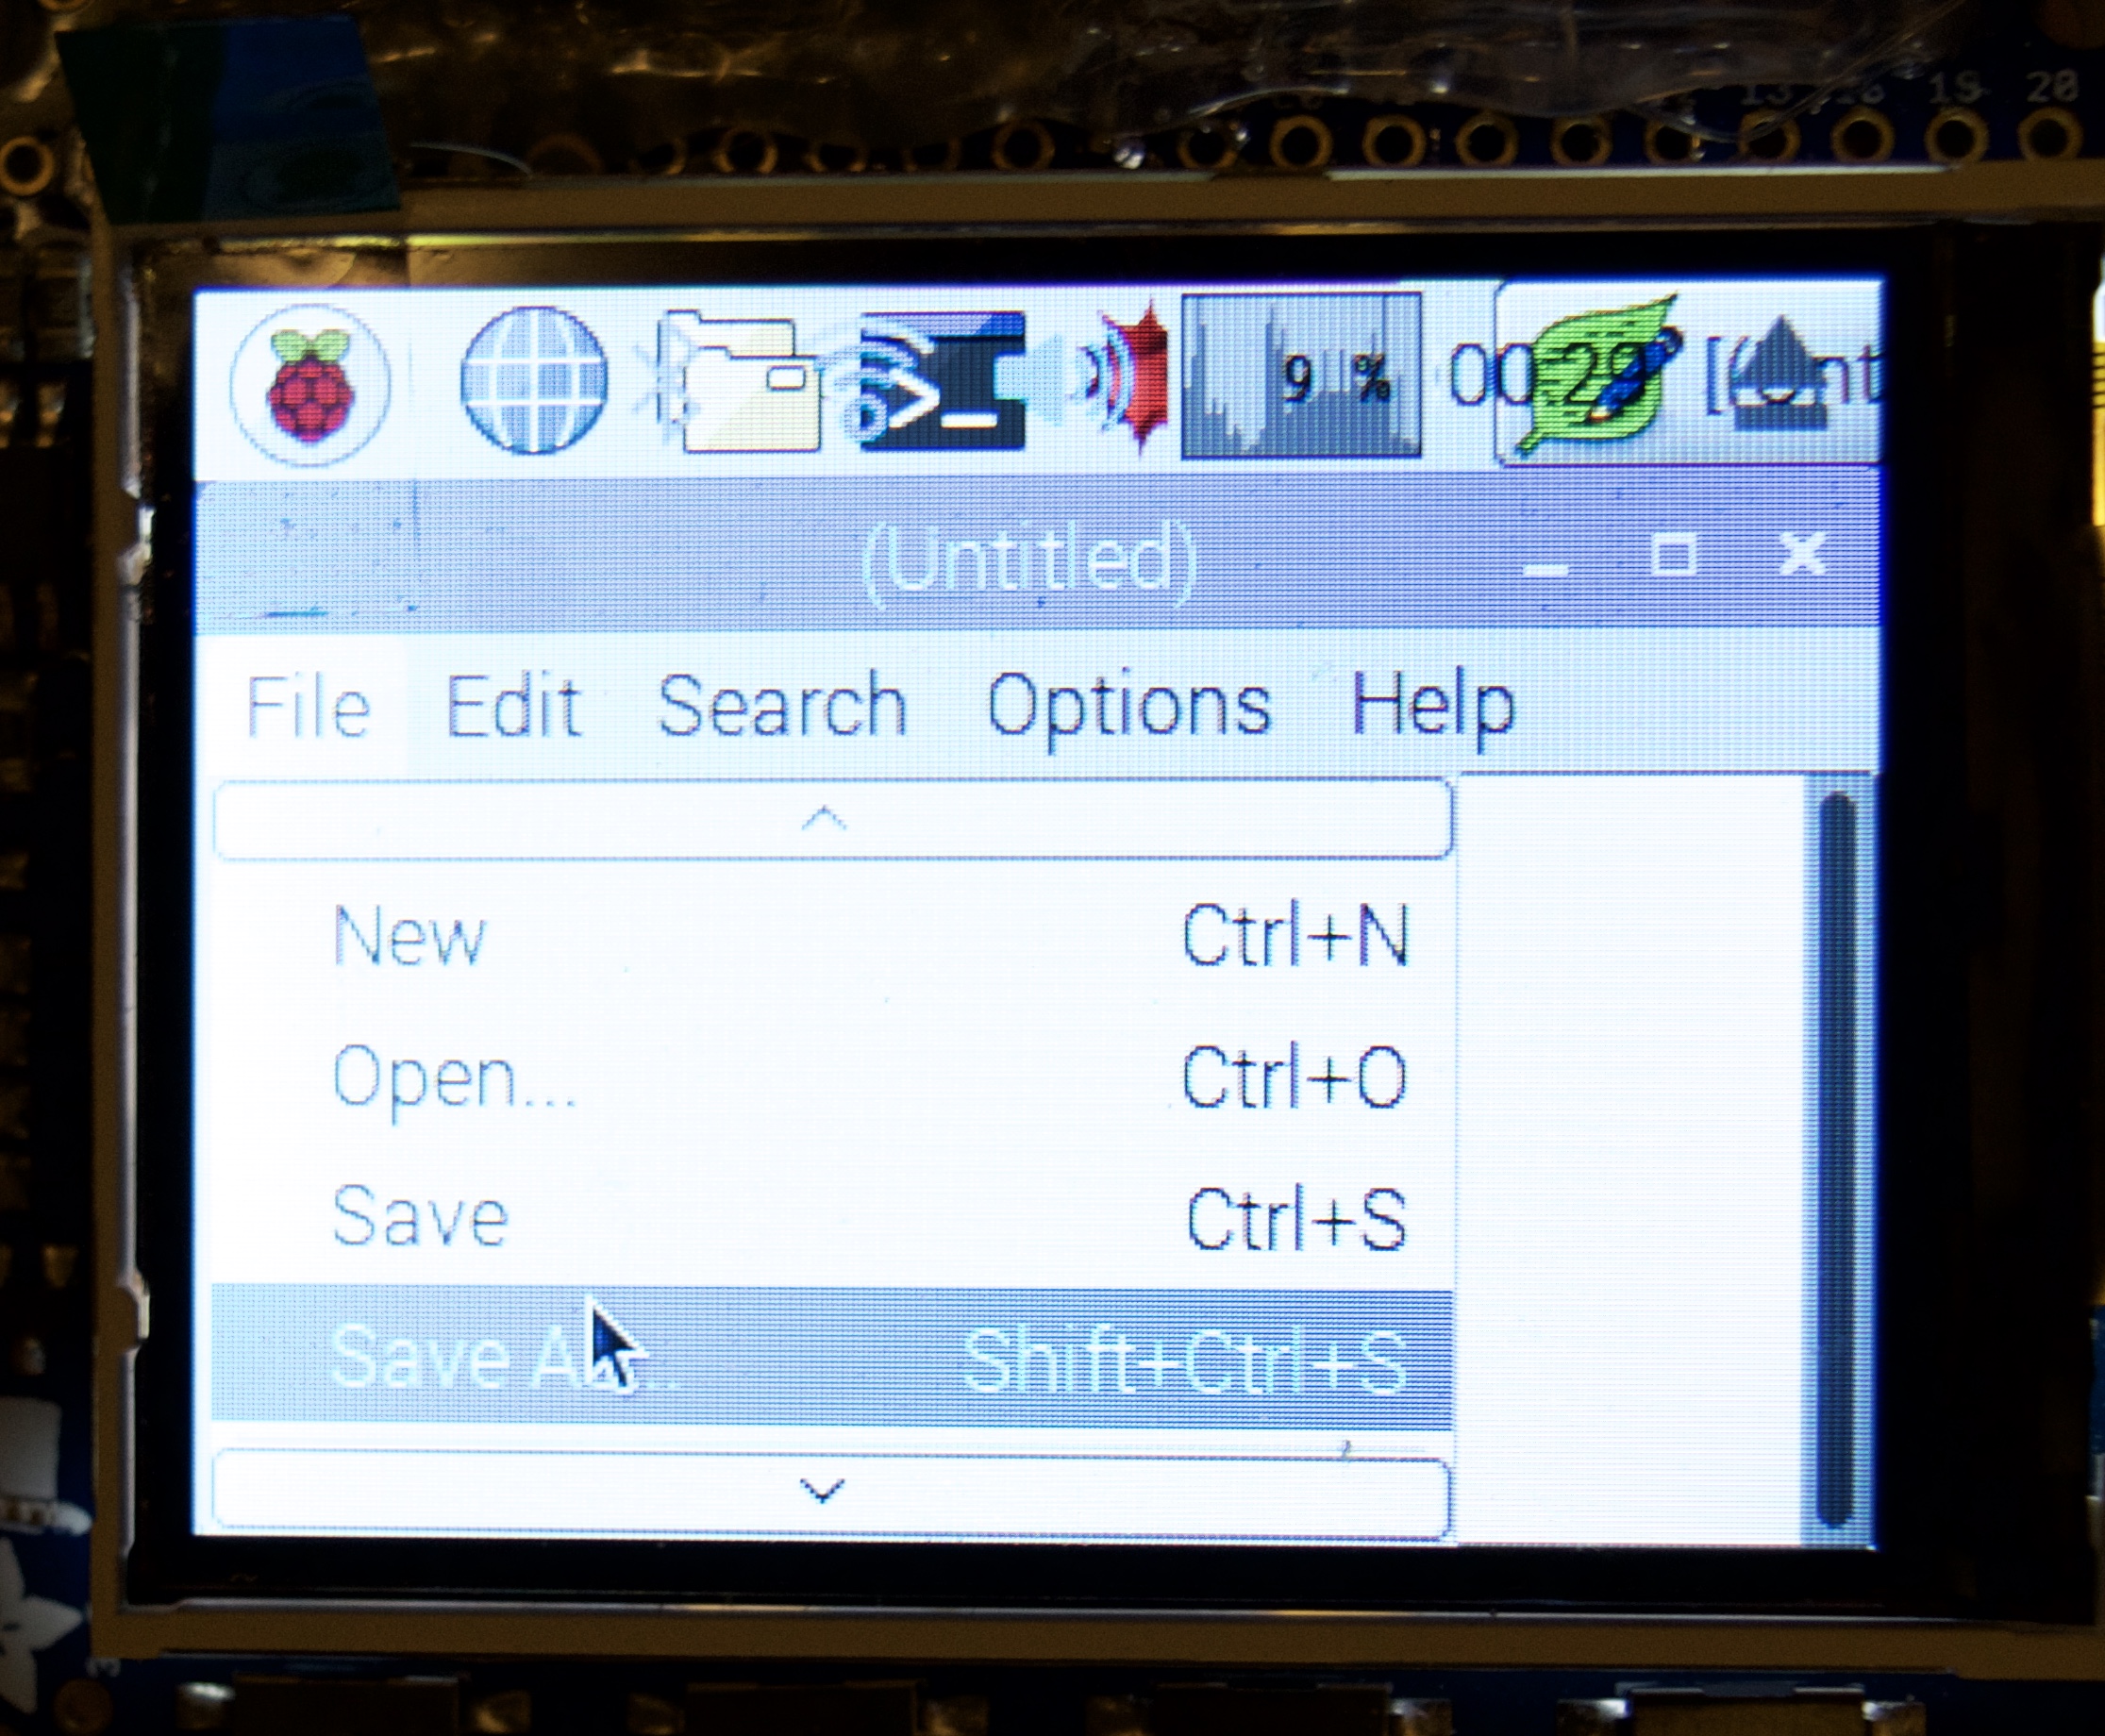
2) within the TextEditor file click save as
(picture 3)
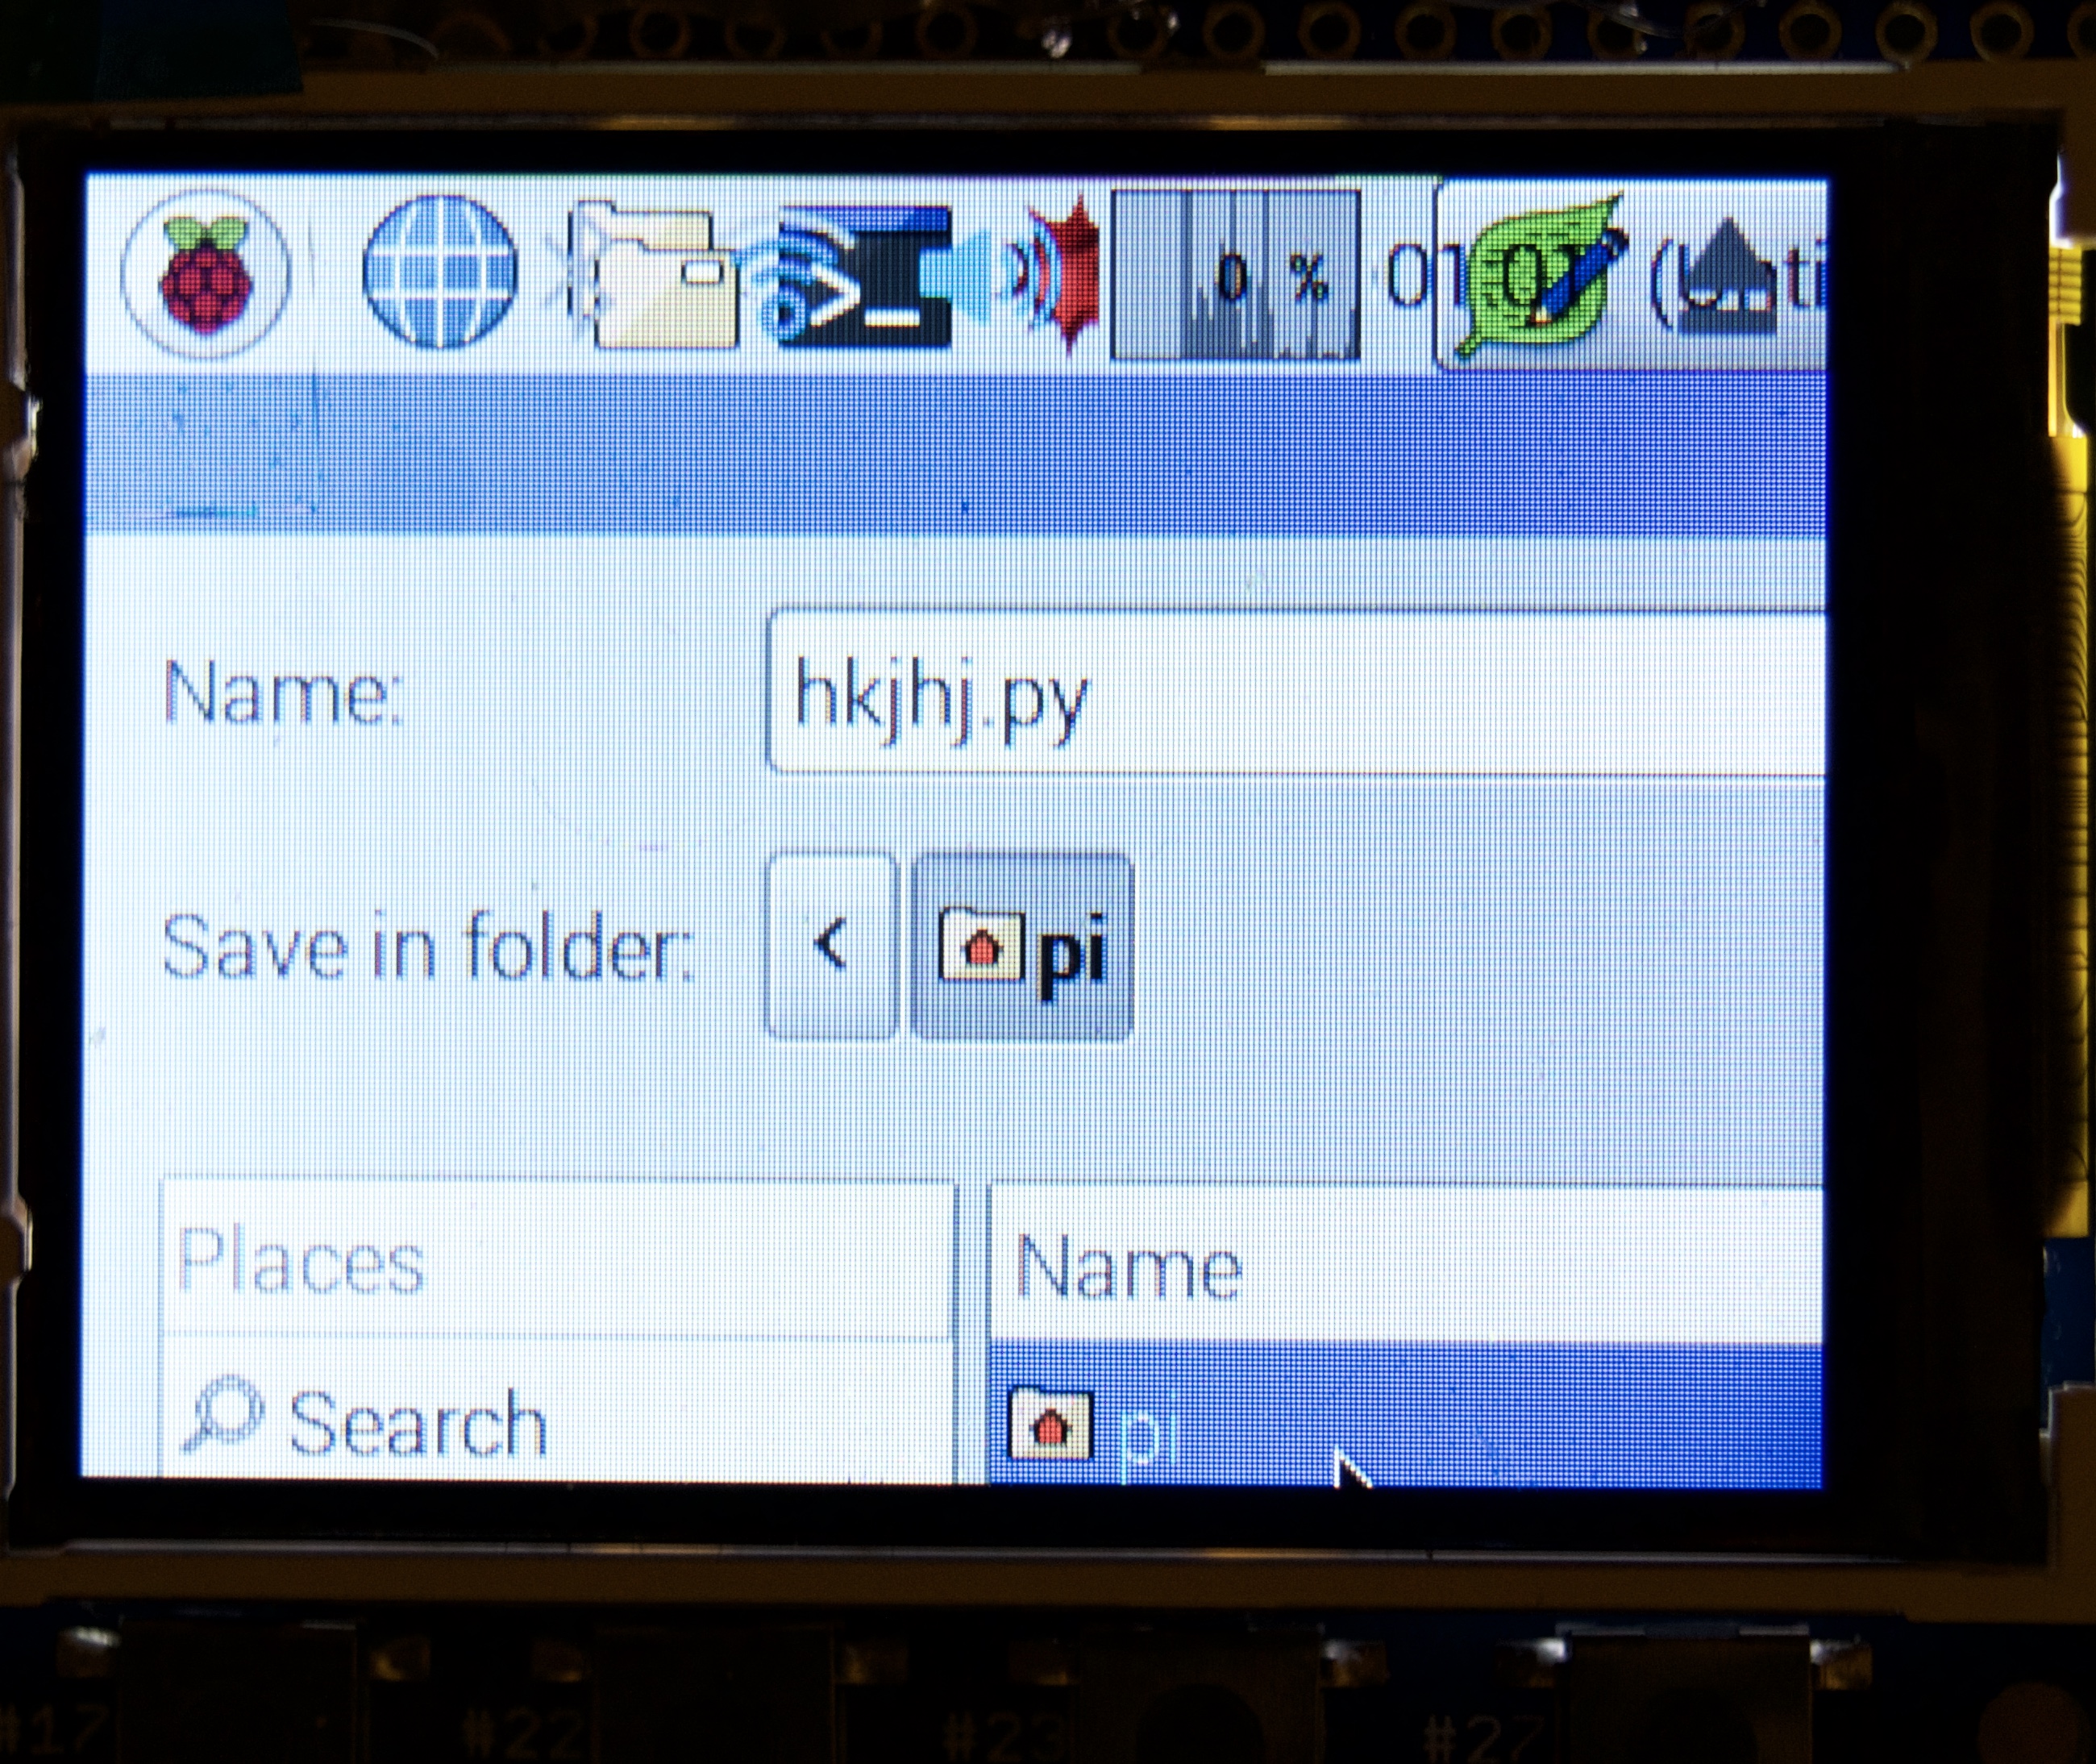
3) type in a random name and save the file as a .py . Then save this file in the pi home director
SSH


What is SSH
SSH is a way to communicate with your raspberry Pi on your regular computer. Instead of having to attach a monitor to your Pi you are able to use your computer as an interface for the Pi. This come in handy when you are using something as small as a PiTFT and can't maneuver around well due to it's small size. It's also useful if you need to go back and forth on the internet since the Pi tends to run slow.
Getting started
Since I own a mac I will teach you how to SSH to your mac, there are other tutorials on how to SSH to a PC online.
(picture 1)
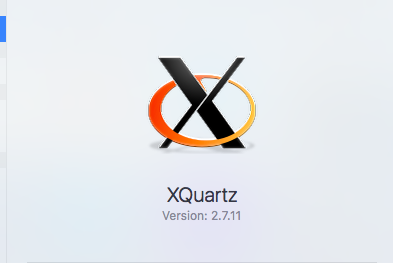
1)First download XQuartz onto your Mac
(picture 2)
2) open up XQuartz and type ssh-keygen -R IPAddress (replace IPAddress with the IP address from step 4 (an IP address is specific to every pi but changes based on what wifi you are connected to for safety reasons I have chosen to green out my IP address)
ssh-keygen -R IPAddress
(picture 3)
3) now type in (again with your IP address)
ssh -X pi@IPAddress
then type
yes
(picture 4)
4)now type the password that you made for the pi in step 4
(picture 5)
5)to access the interface of your pi type:
lxsession
you might need to wait a couple of minutes as your screen changes it's interface to be the Pi's to exit out of the interface just quit out of XQuartz
Installing the Video Player Program

There are many different types of video player programs for the raspberry pi but unfortunately not all work with the PiTFT interface. For example Omxplayer will not work on a PiTFT. I am using Mplayer
Installing MPlayer
(picture 1 and 2)
1)open up your terminal to install mplayer. then type
sudo apt-get install mplayer
Making a Hologram Video

There are many resources online to create Hologram videos of your own. I am attaching below one that uses Power Point and another that uses Adobe Premiere which is what I used.
Power Point
Adobe Premier
Note:
- videos tend to run slower on the pitft so you might want to increase the frames per second of your video in preparation of this dilemma
- make sure you export your video with width size 320 to fit on the pitft screen
Uploading a Video
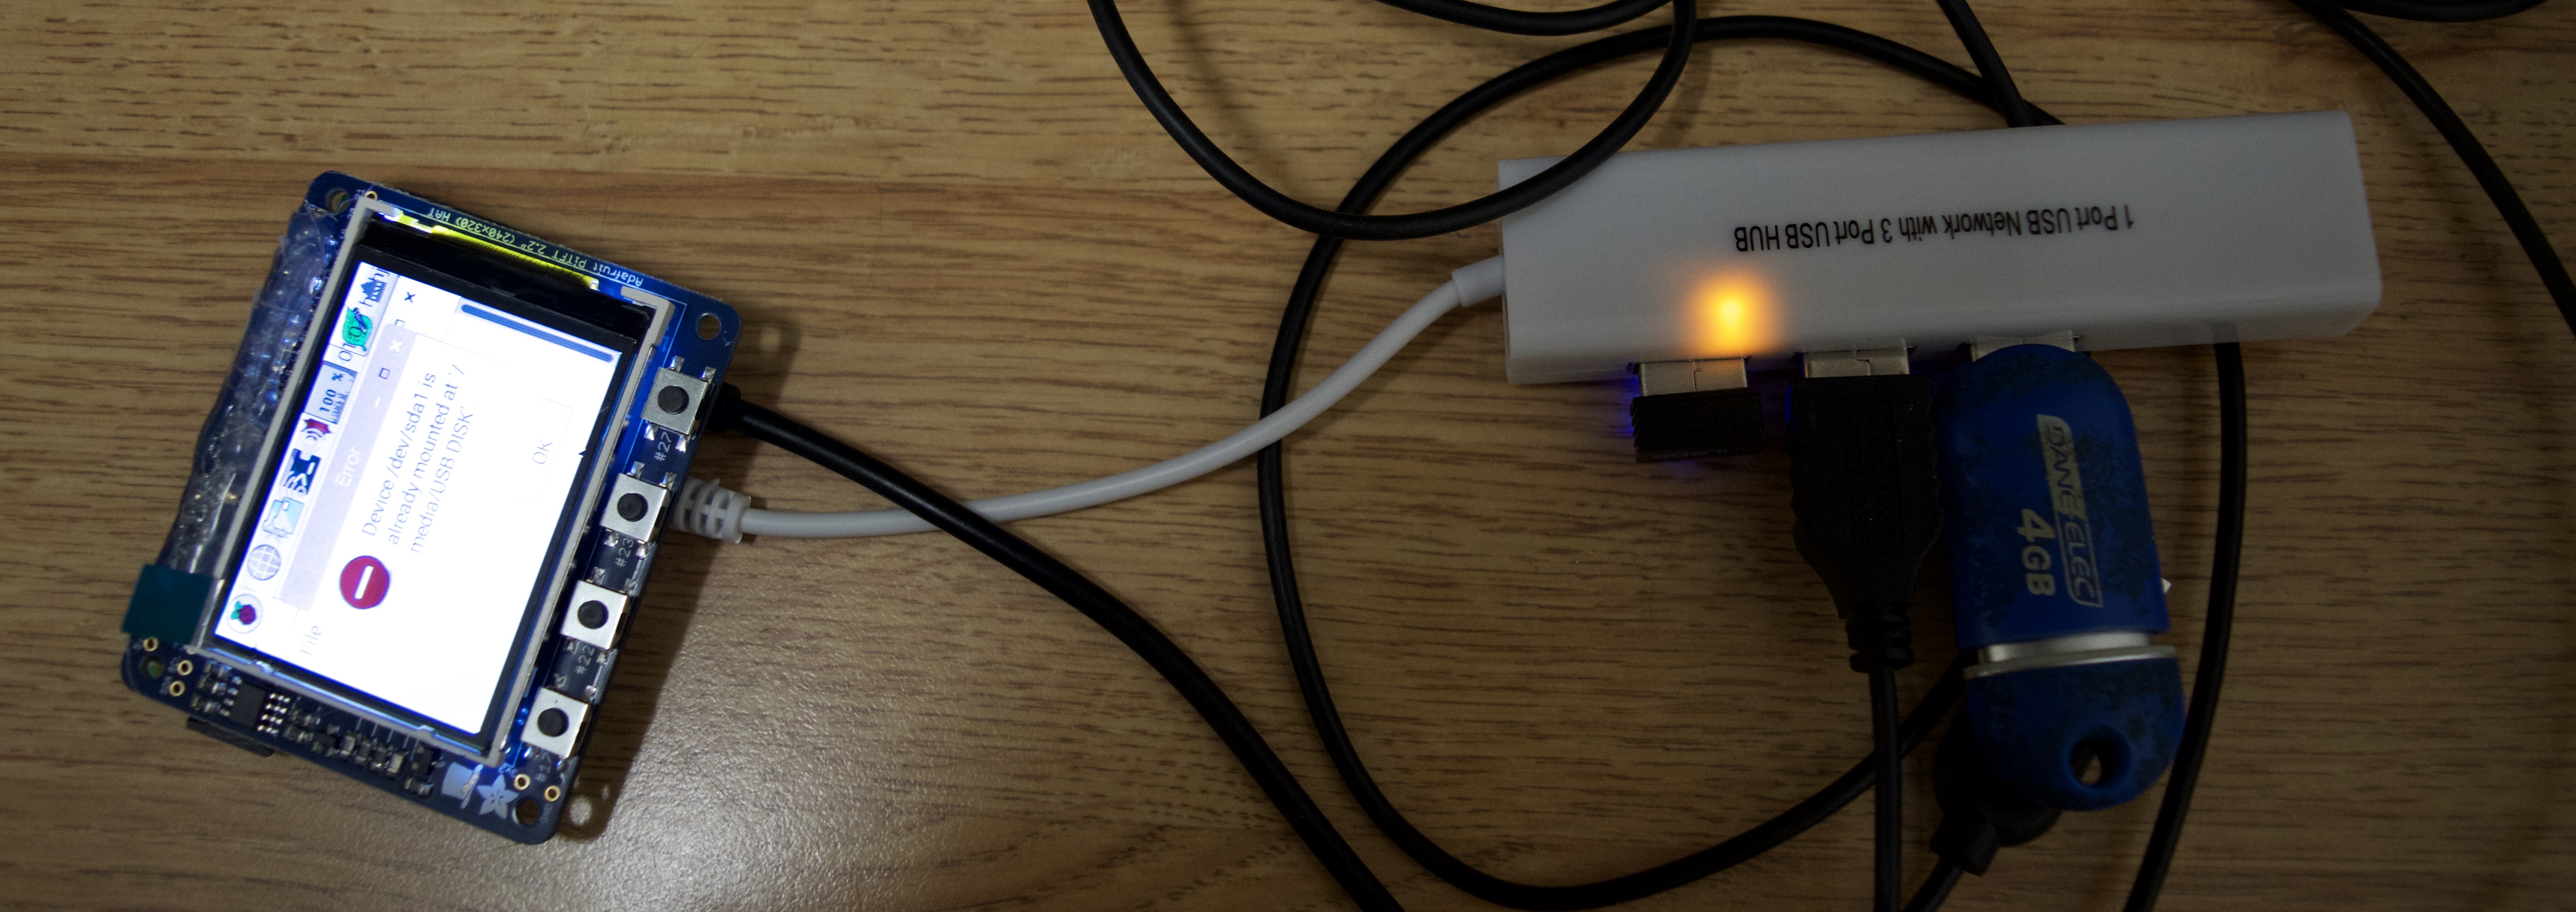
While using SSH:
(picture 1)
1)put in your usb key into the usb hub to upload the video
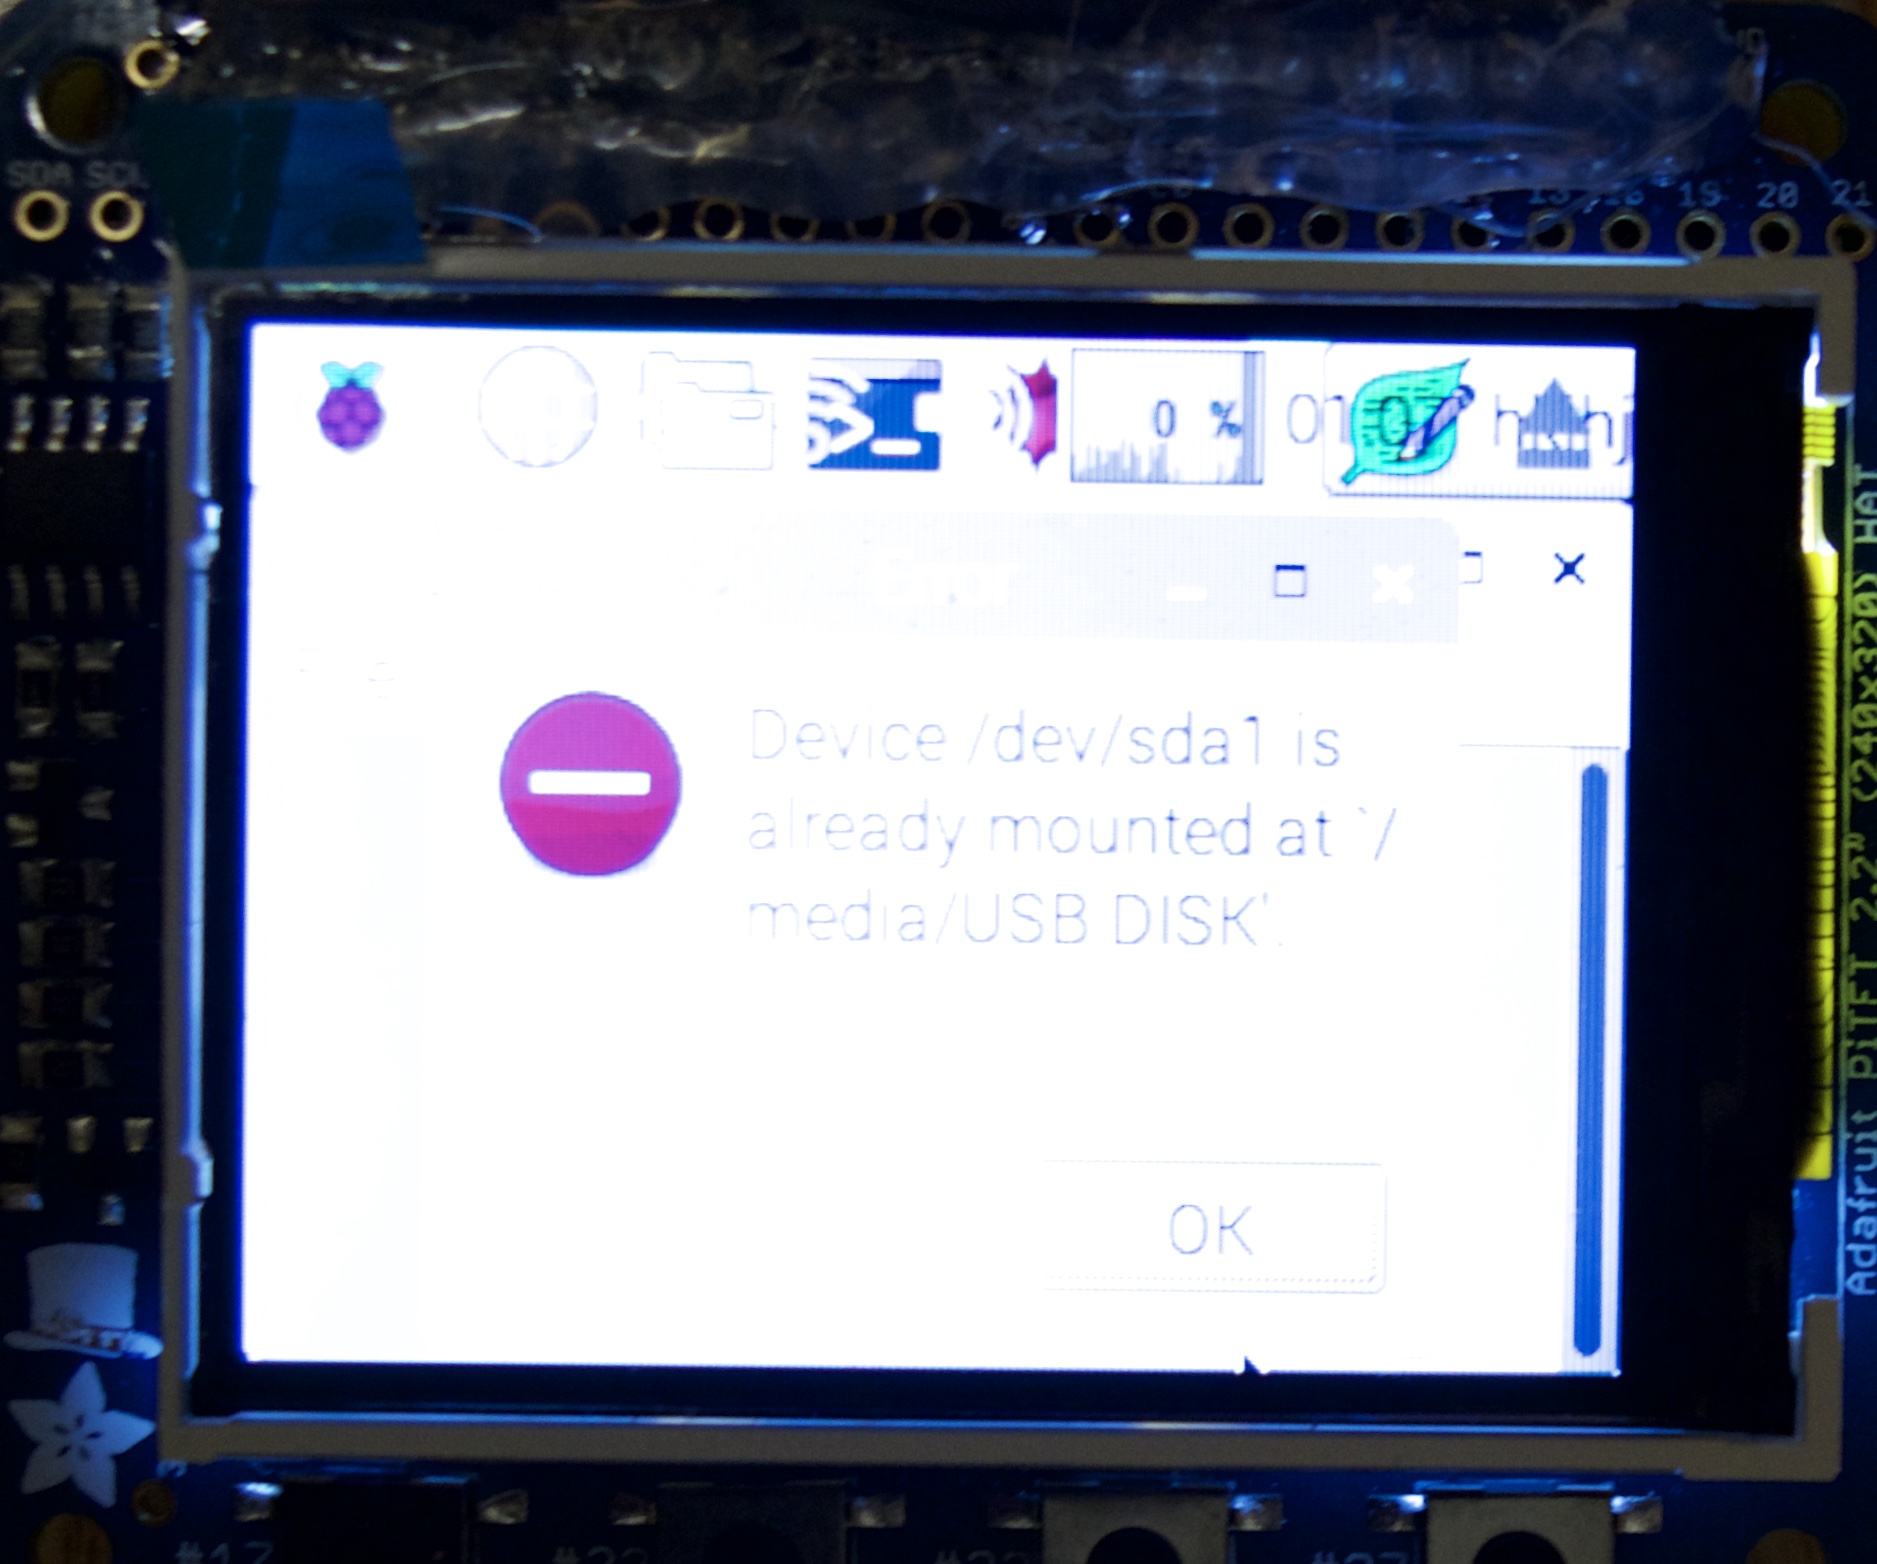
(picture 2)
2) an message should pop up on your PiTFT
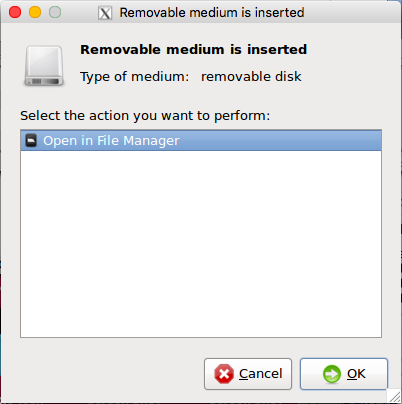
(picture 3)
3) on your SSH interface, the message: removable medium is inserted will show up, click ok
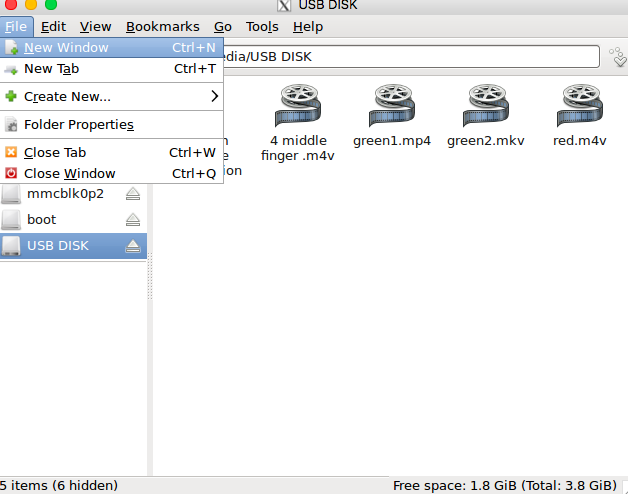
(picture 4)
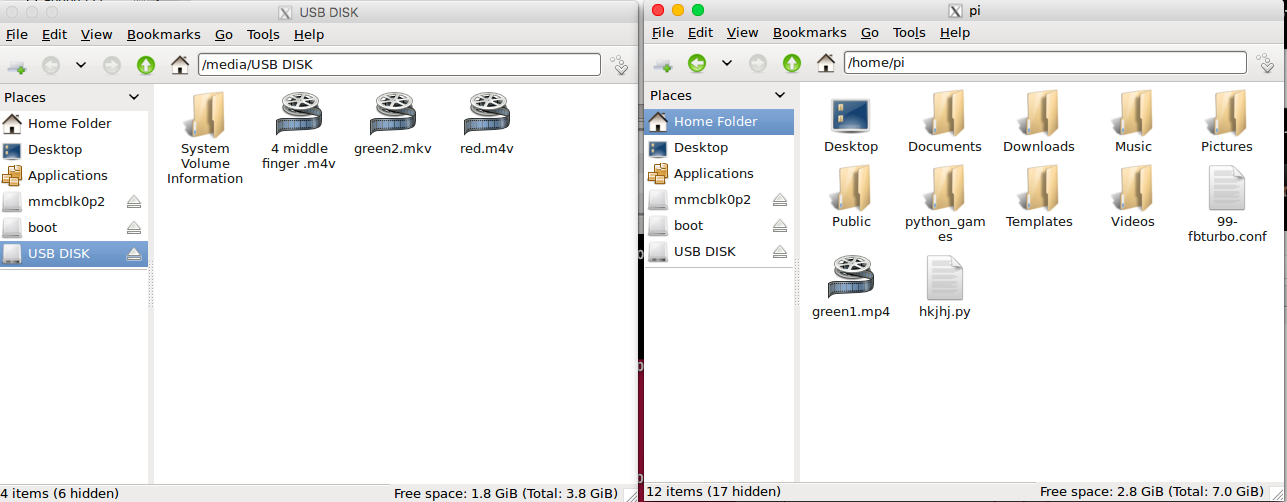
4) USB Disk window will pop up with the files you have on your usb key. Open a new window while keeping this window open.
(picture 5)
5) on that new window go to the the home folder and drag the video from the previous window onto your home folder
6) to test out your video go to terminal and type mplayer nameofvideo.mp4 replacing nameofvideo.mp4 with the video file you uploaded. Note you can upload other video files like .mov.
mplayer NAMEOFVIDEO.mp4
Writing the Code to Play the Video

(picture 1)
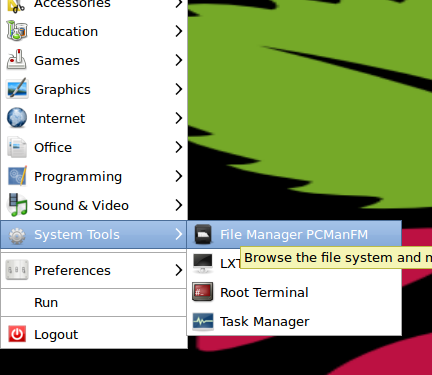
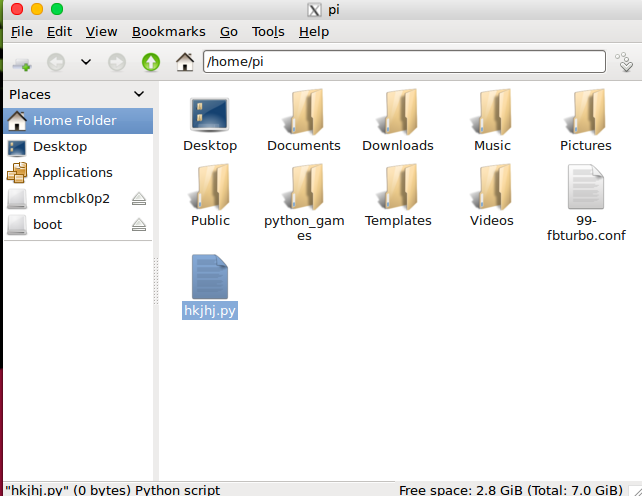
1)remember the file I had you make in text editor from step 5. Well we are going to be opening that up now using the SSH interface in file manager so go to the main menu and click on File Manager
(picture 2-3)
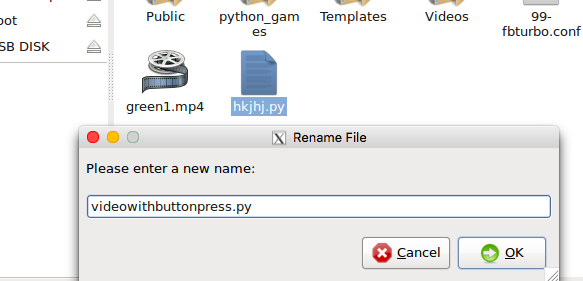
2) lets change the name of that file to something that makes more sense to us. Right click on the file and change it to what you like
(picture 4-5)
3)
you might have noticed before that when you played your video from the terminal i.e. you typed player NAMEOFVIDEO.mp4 that the video doesn't open to cover the full screen unless you double click on the video or type fs (fs is from the API for mplayer standing for full screen) while the video is playing. This is a problem since we are making a wearable, so we won't be able to double click on our screen or use a keyboard! So we will need to access the GPIO pins. It is also important that we can quit out of the video if something goes wrong and we want to access the pi zero again.
GPIO pins
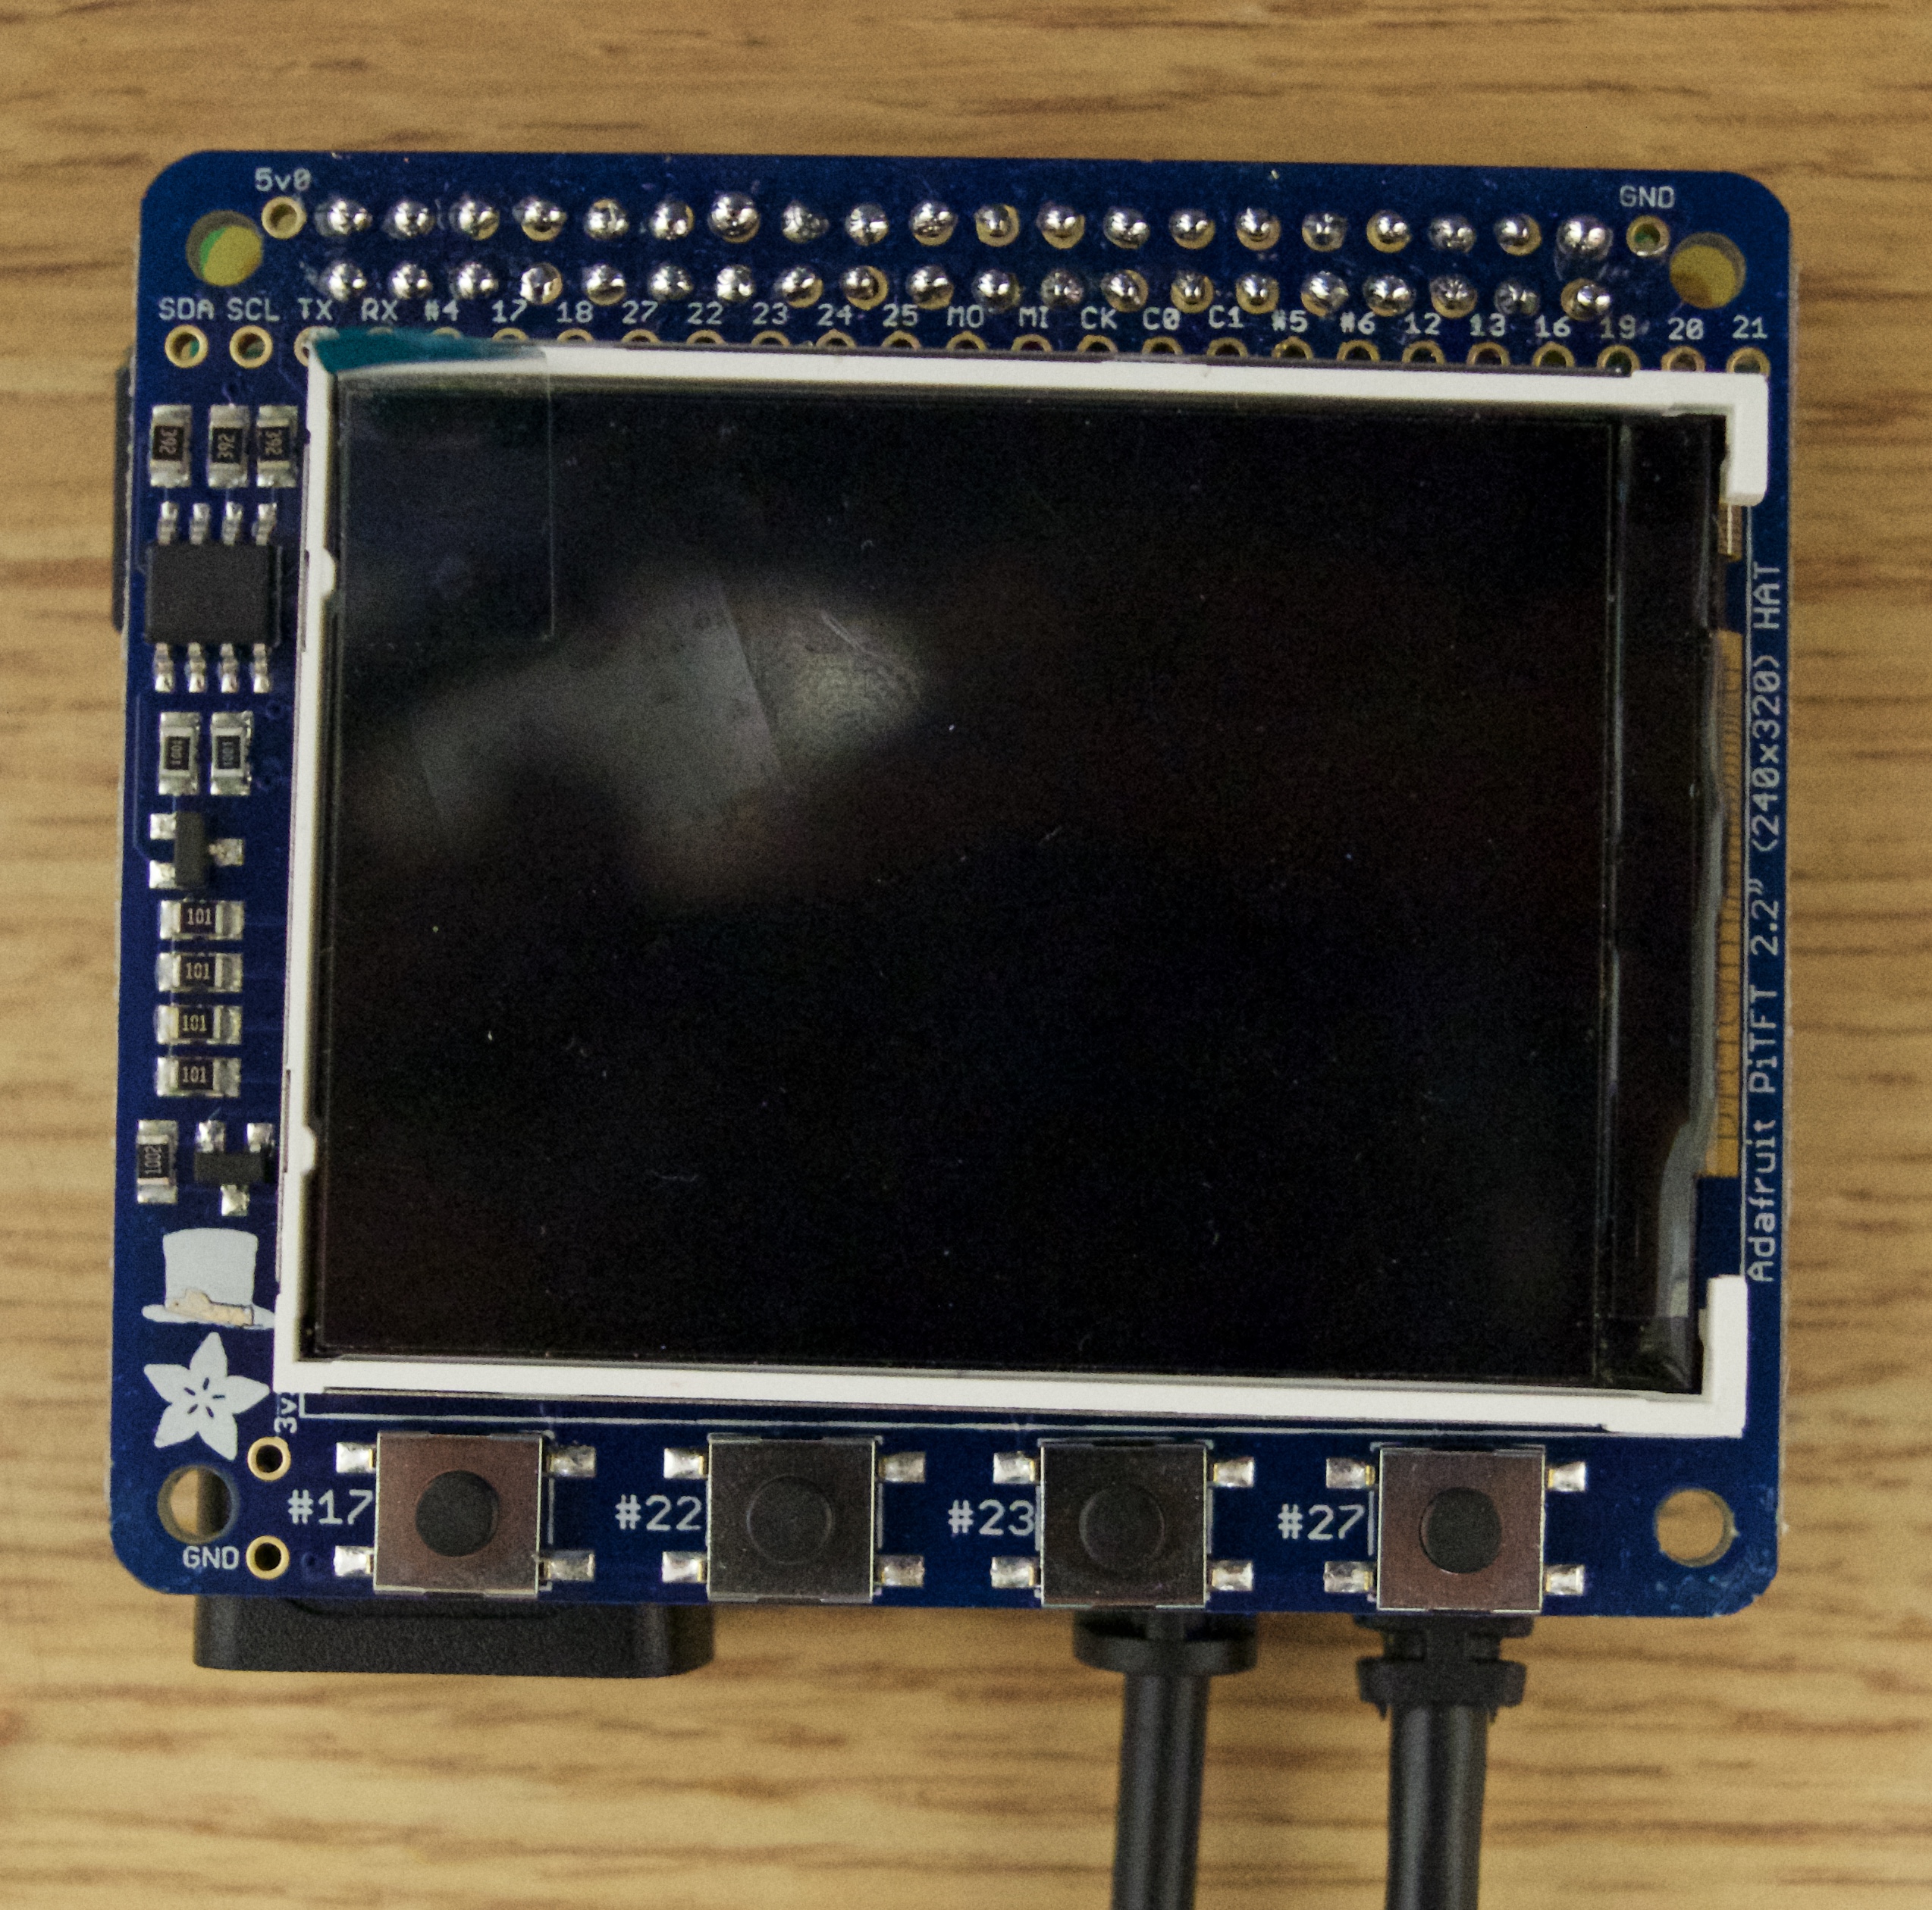
Here we are going to access the buttons on the PiTFT that aren't being used (see picture 4 as a reminder of what the buttons are on the PiTFT). The numbers next to the buttons corresponds to the GPIO pins being used. I chose buttons 17 and 22 to use but you can use 27 as well, assuming you are using 23 to turn off the pitft screen (this would have been done in the very initial steps of setting up the PiTFT on the jessie-based PiTFT image).
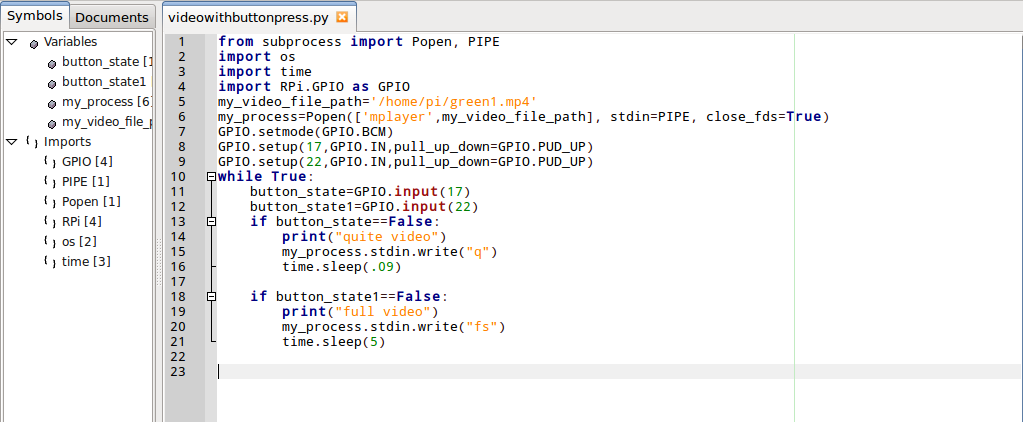
Code: (NOTE REPLACE green1.mp4 with your video) link to github code
from subprocess import Popen, PIPE
import os
import time
import RPi.GPIO as GPIO
my_video_file_path='/home/pi/green1.mp4'
my_process=Popen(['player',my_video_File_path], stdin=PIPE, close_fds=True)
GPIO.setmode(GPIO.BCM)
GPIO.setup(17,GPIO.IN,pull_up_down=GPIO.PUD_UP)
GPIO.setup(22,GPIO.IN,pull_up_down=GPIO.PUD_UP)


while True:
	button_state=GPIO.input(17)
	button_state1=GPIO.input(22)

	if button_state==False:
		print("quite video")
		my_process.stdin.write("q")
		time.sleep(.09)

	if button_state1==False:
		print("full video")
		my_process.stdin.write("fs")
		time.sleep(5)
Testing out the code:to test out the code and make sure that it runs open up terminial and type python NAMEOFCODE.py replacing NAMEOFCODE.py with the name of the text editor file you created.
python NAMEOFCODE.py
now just press the buttons on the PiTFT. 17 will quit out of the video and 22 will allow you to make the video full screen.
Making the Code Play Automatically When Pi Turns On
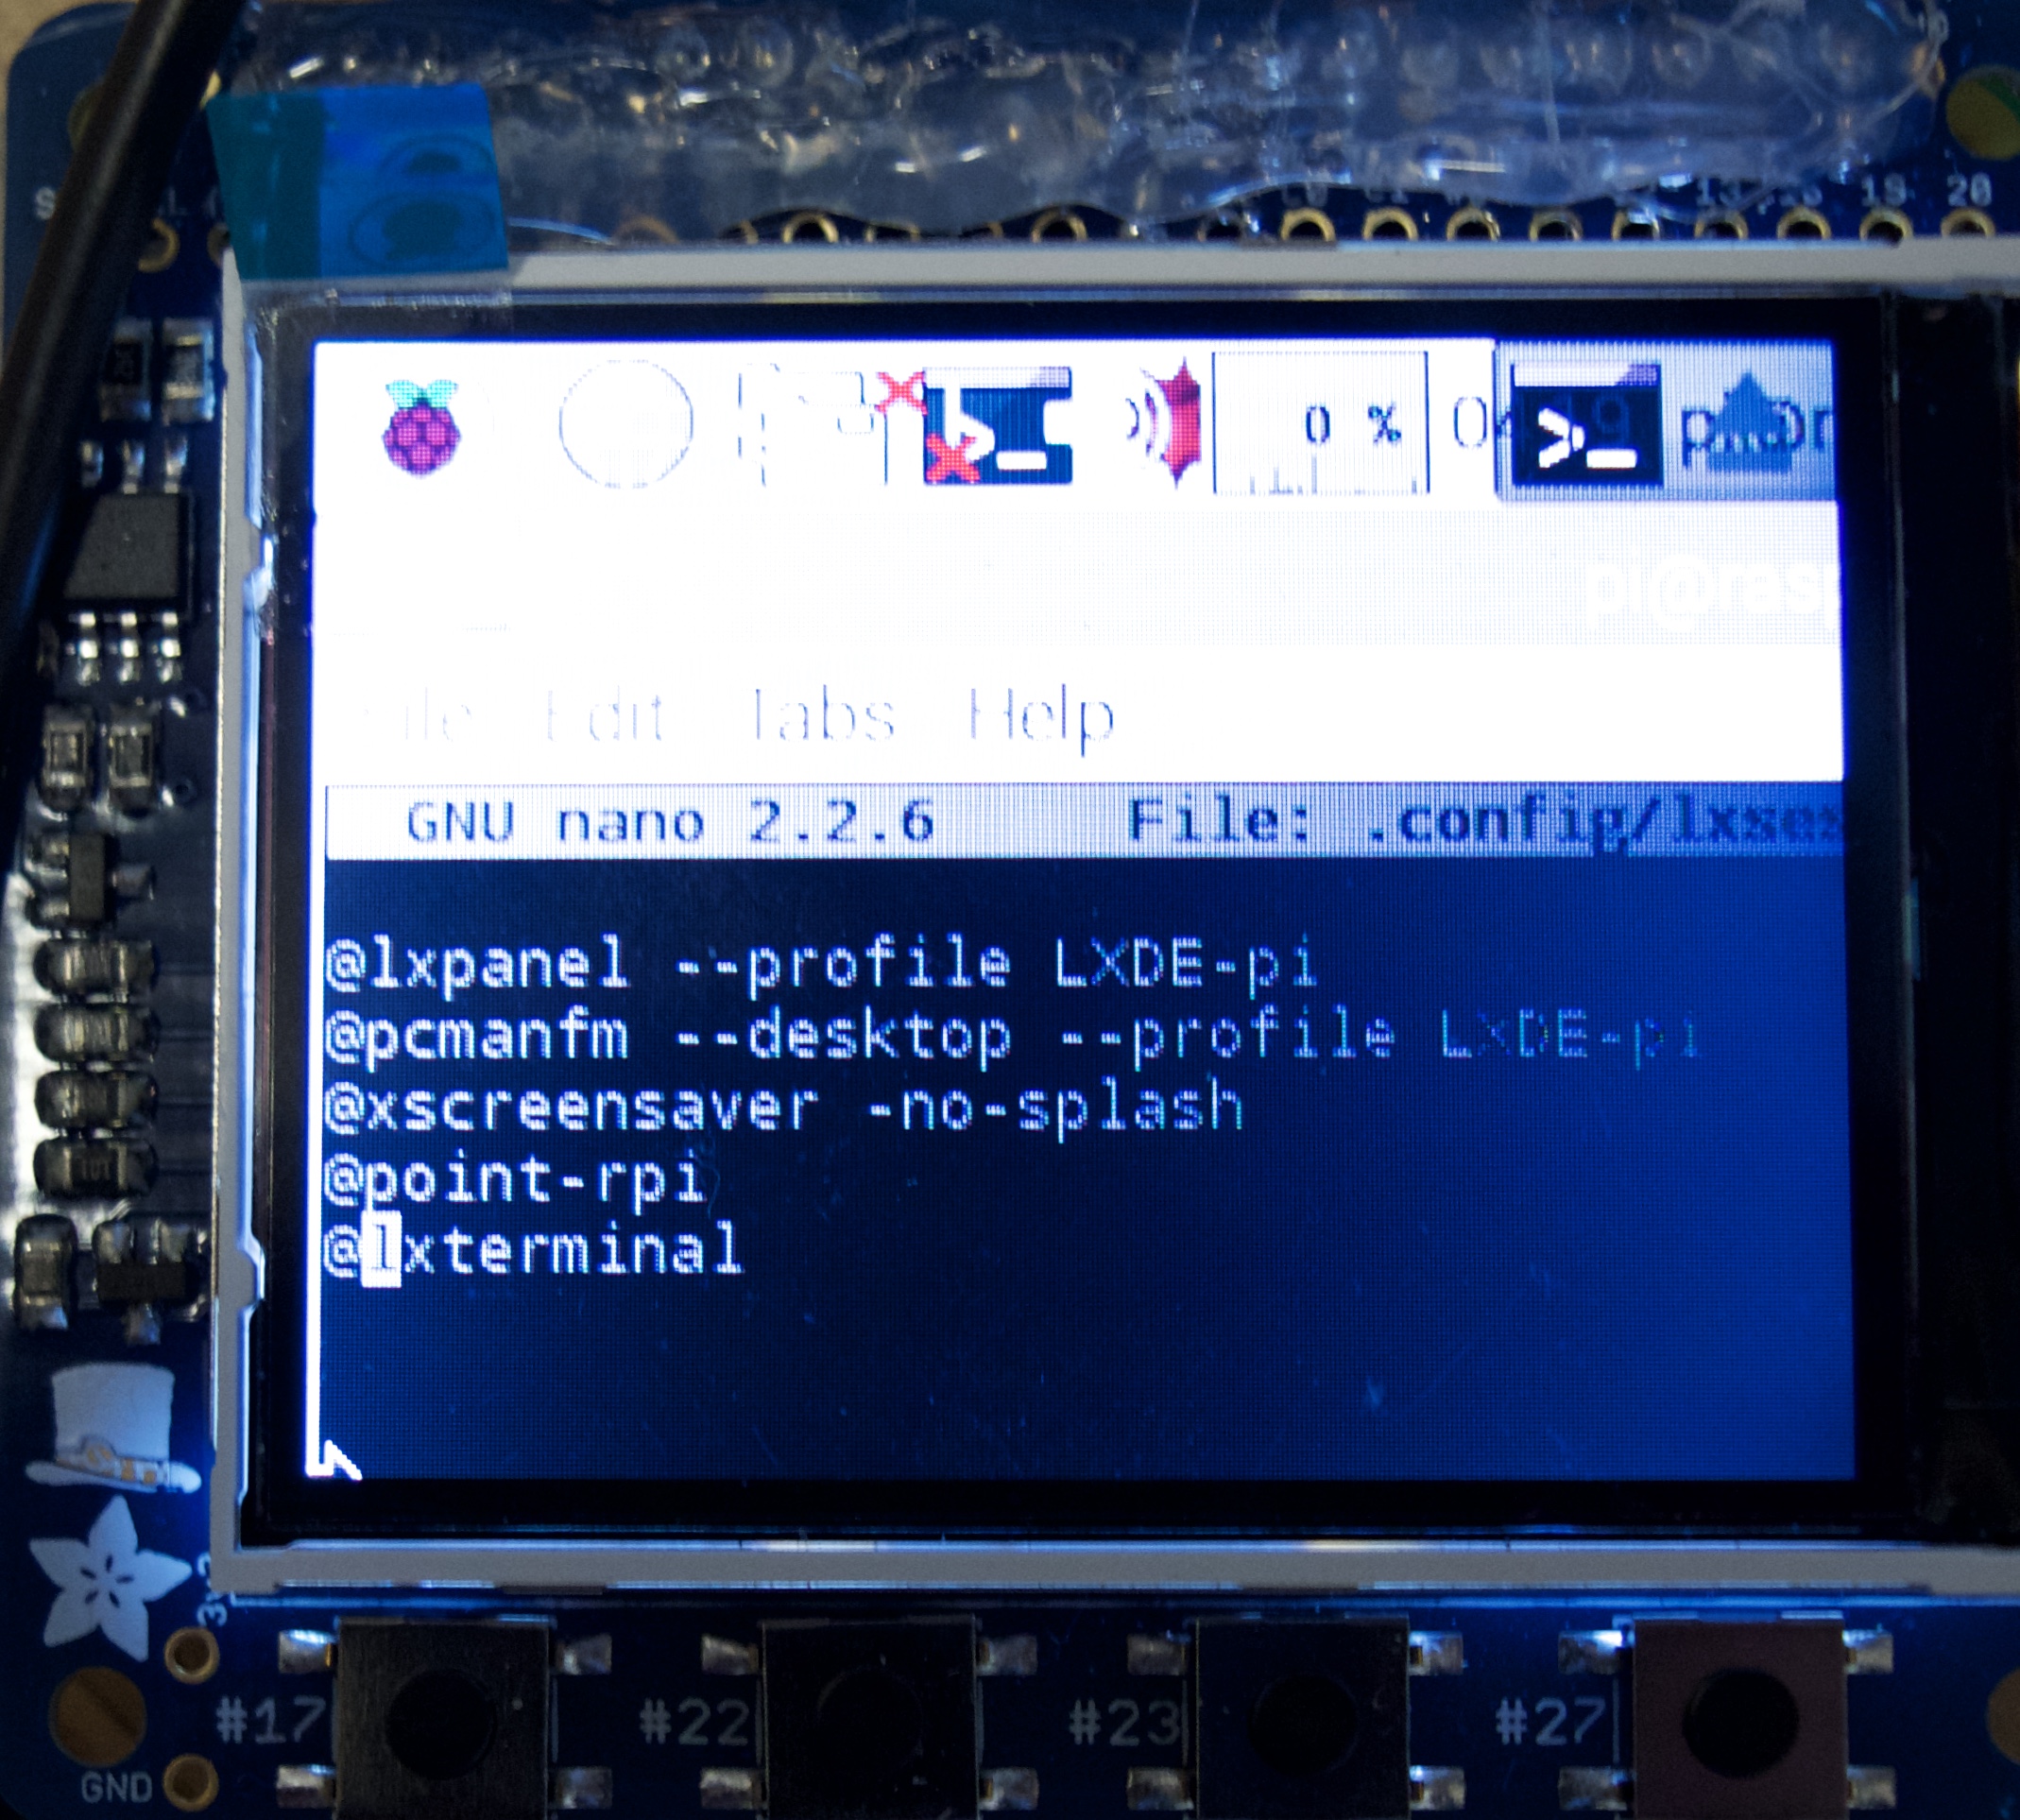
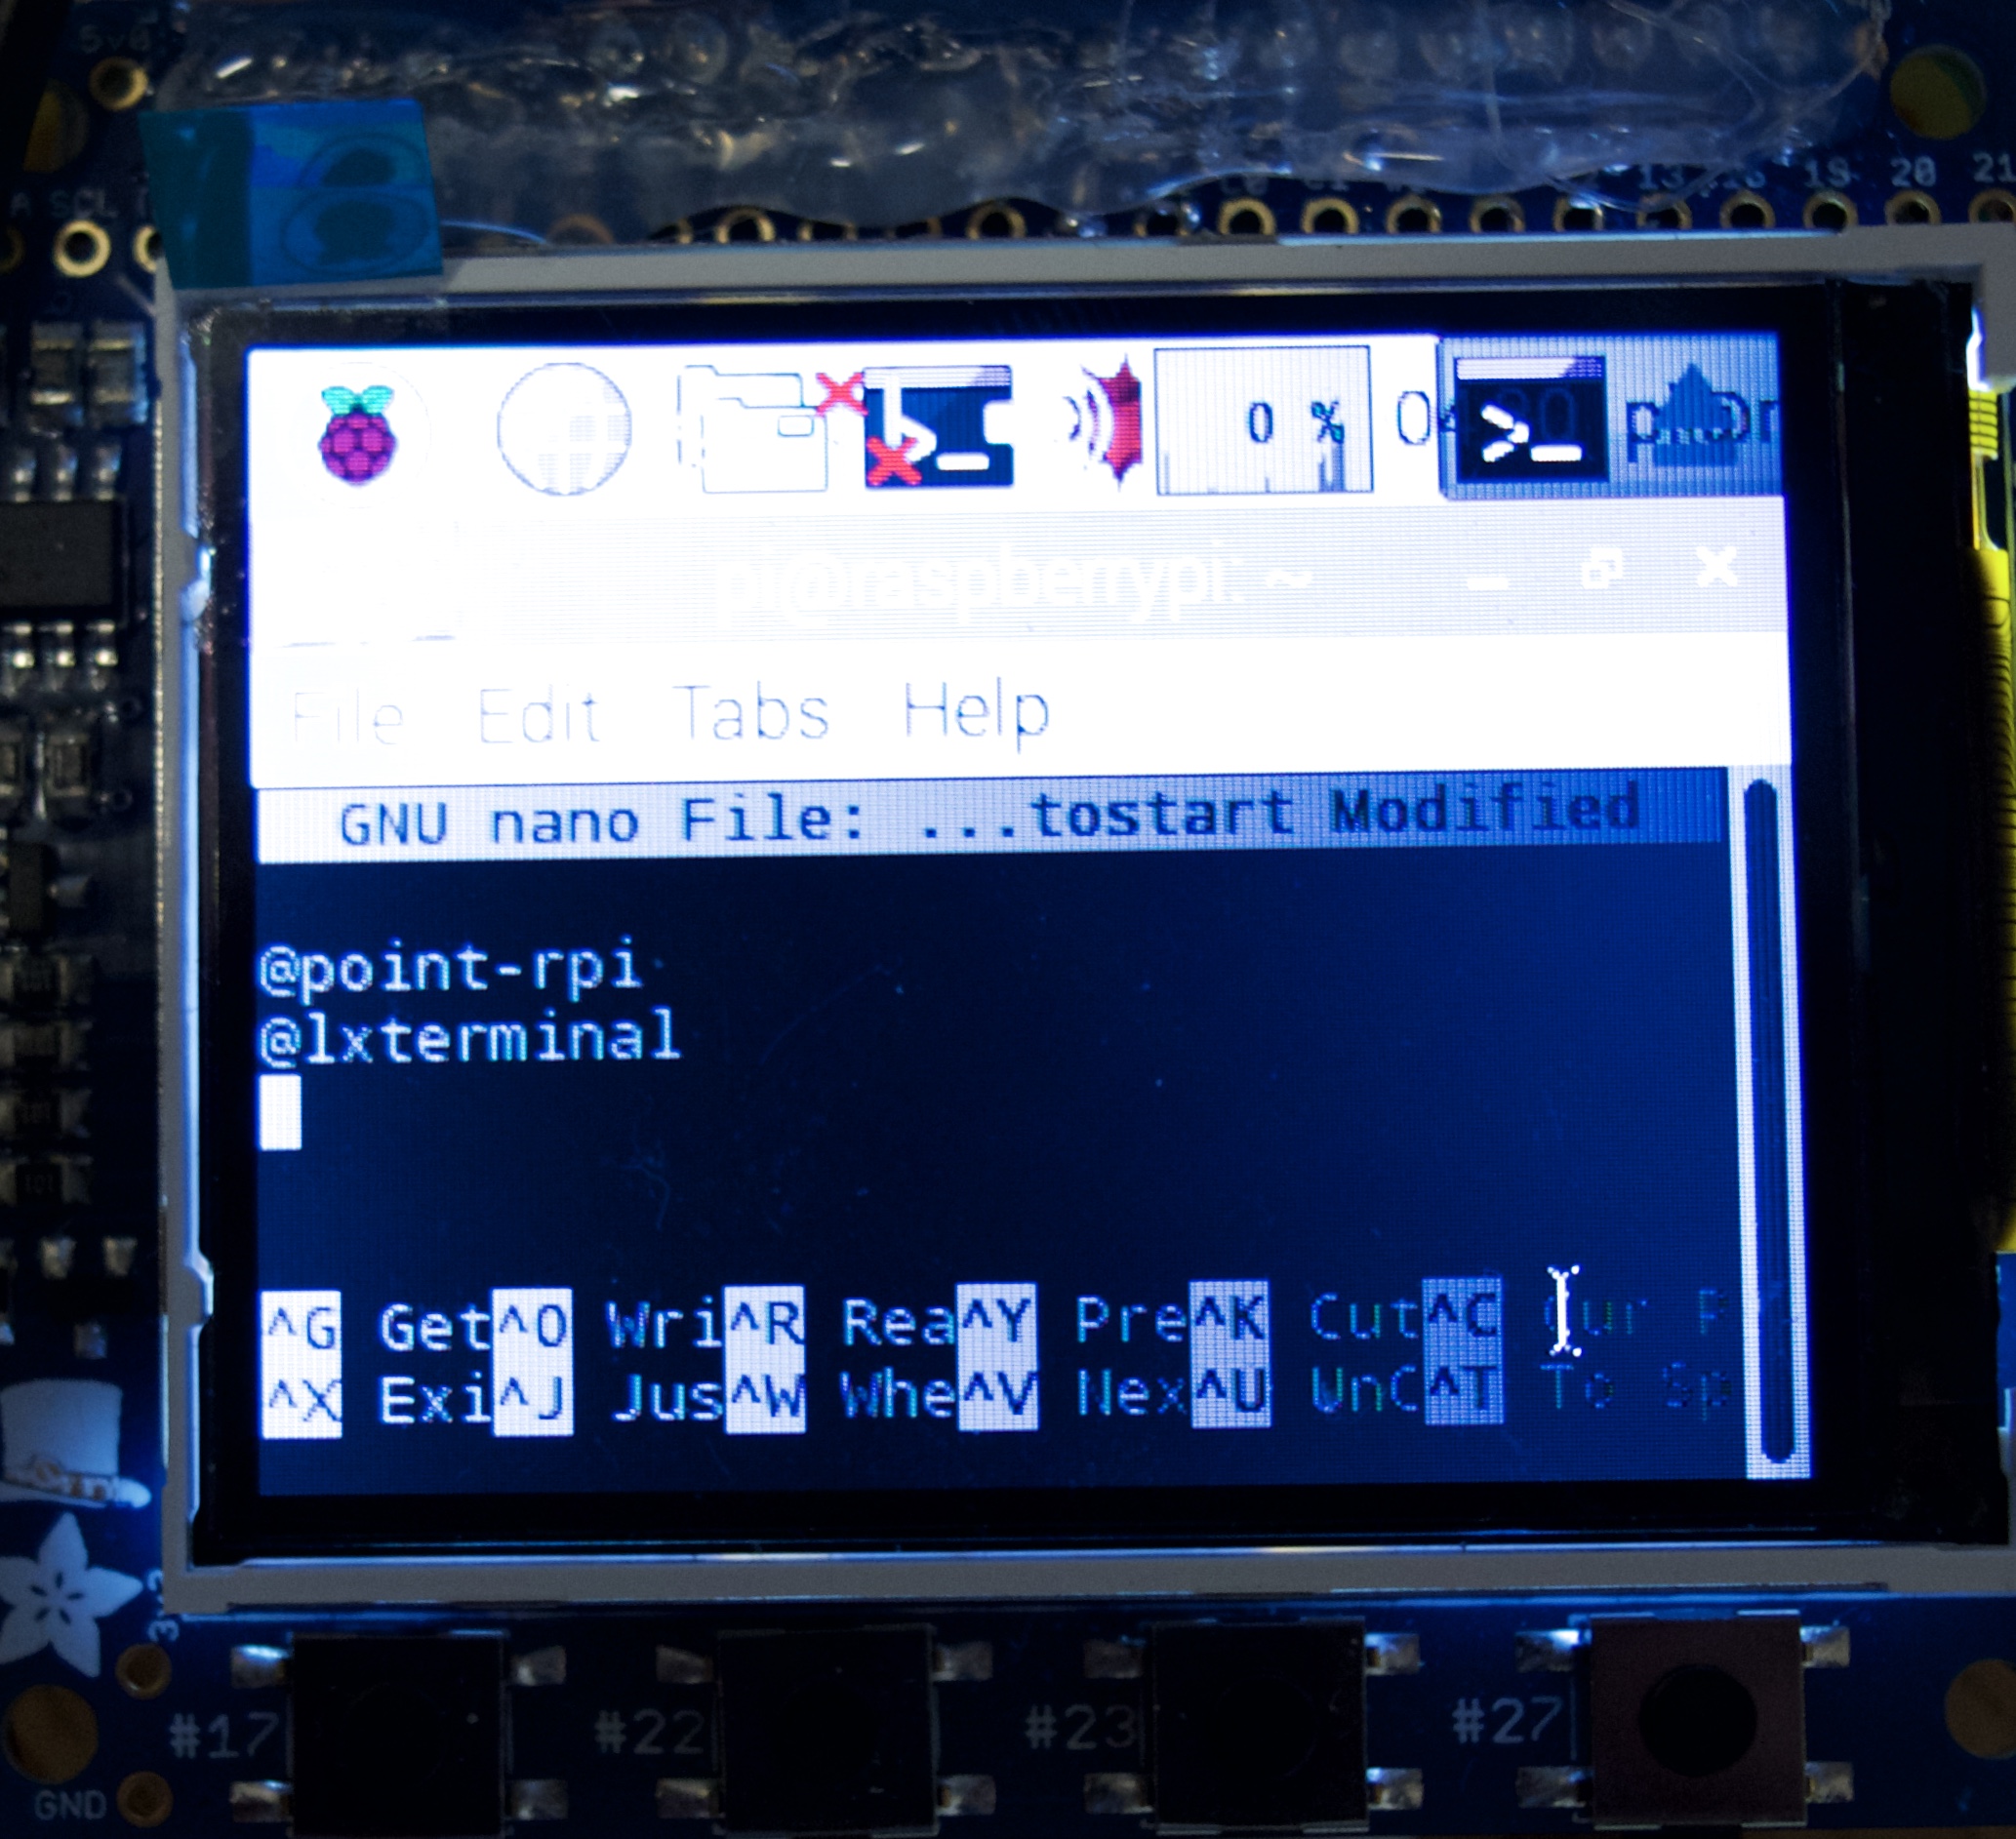
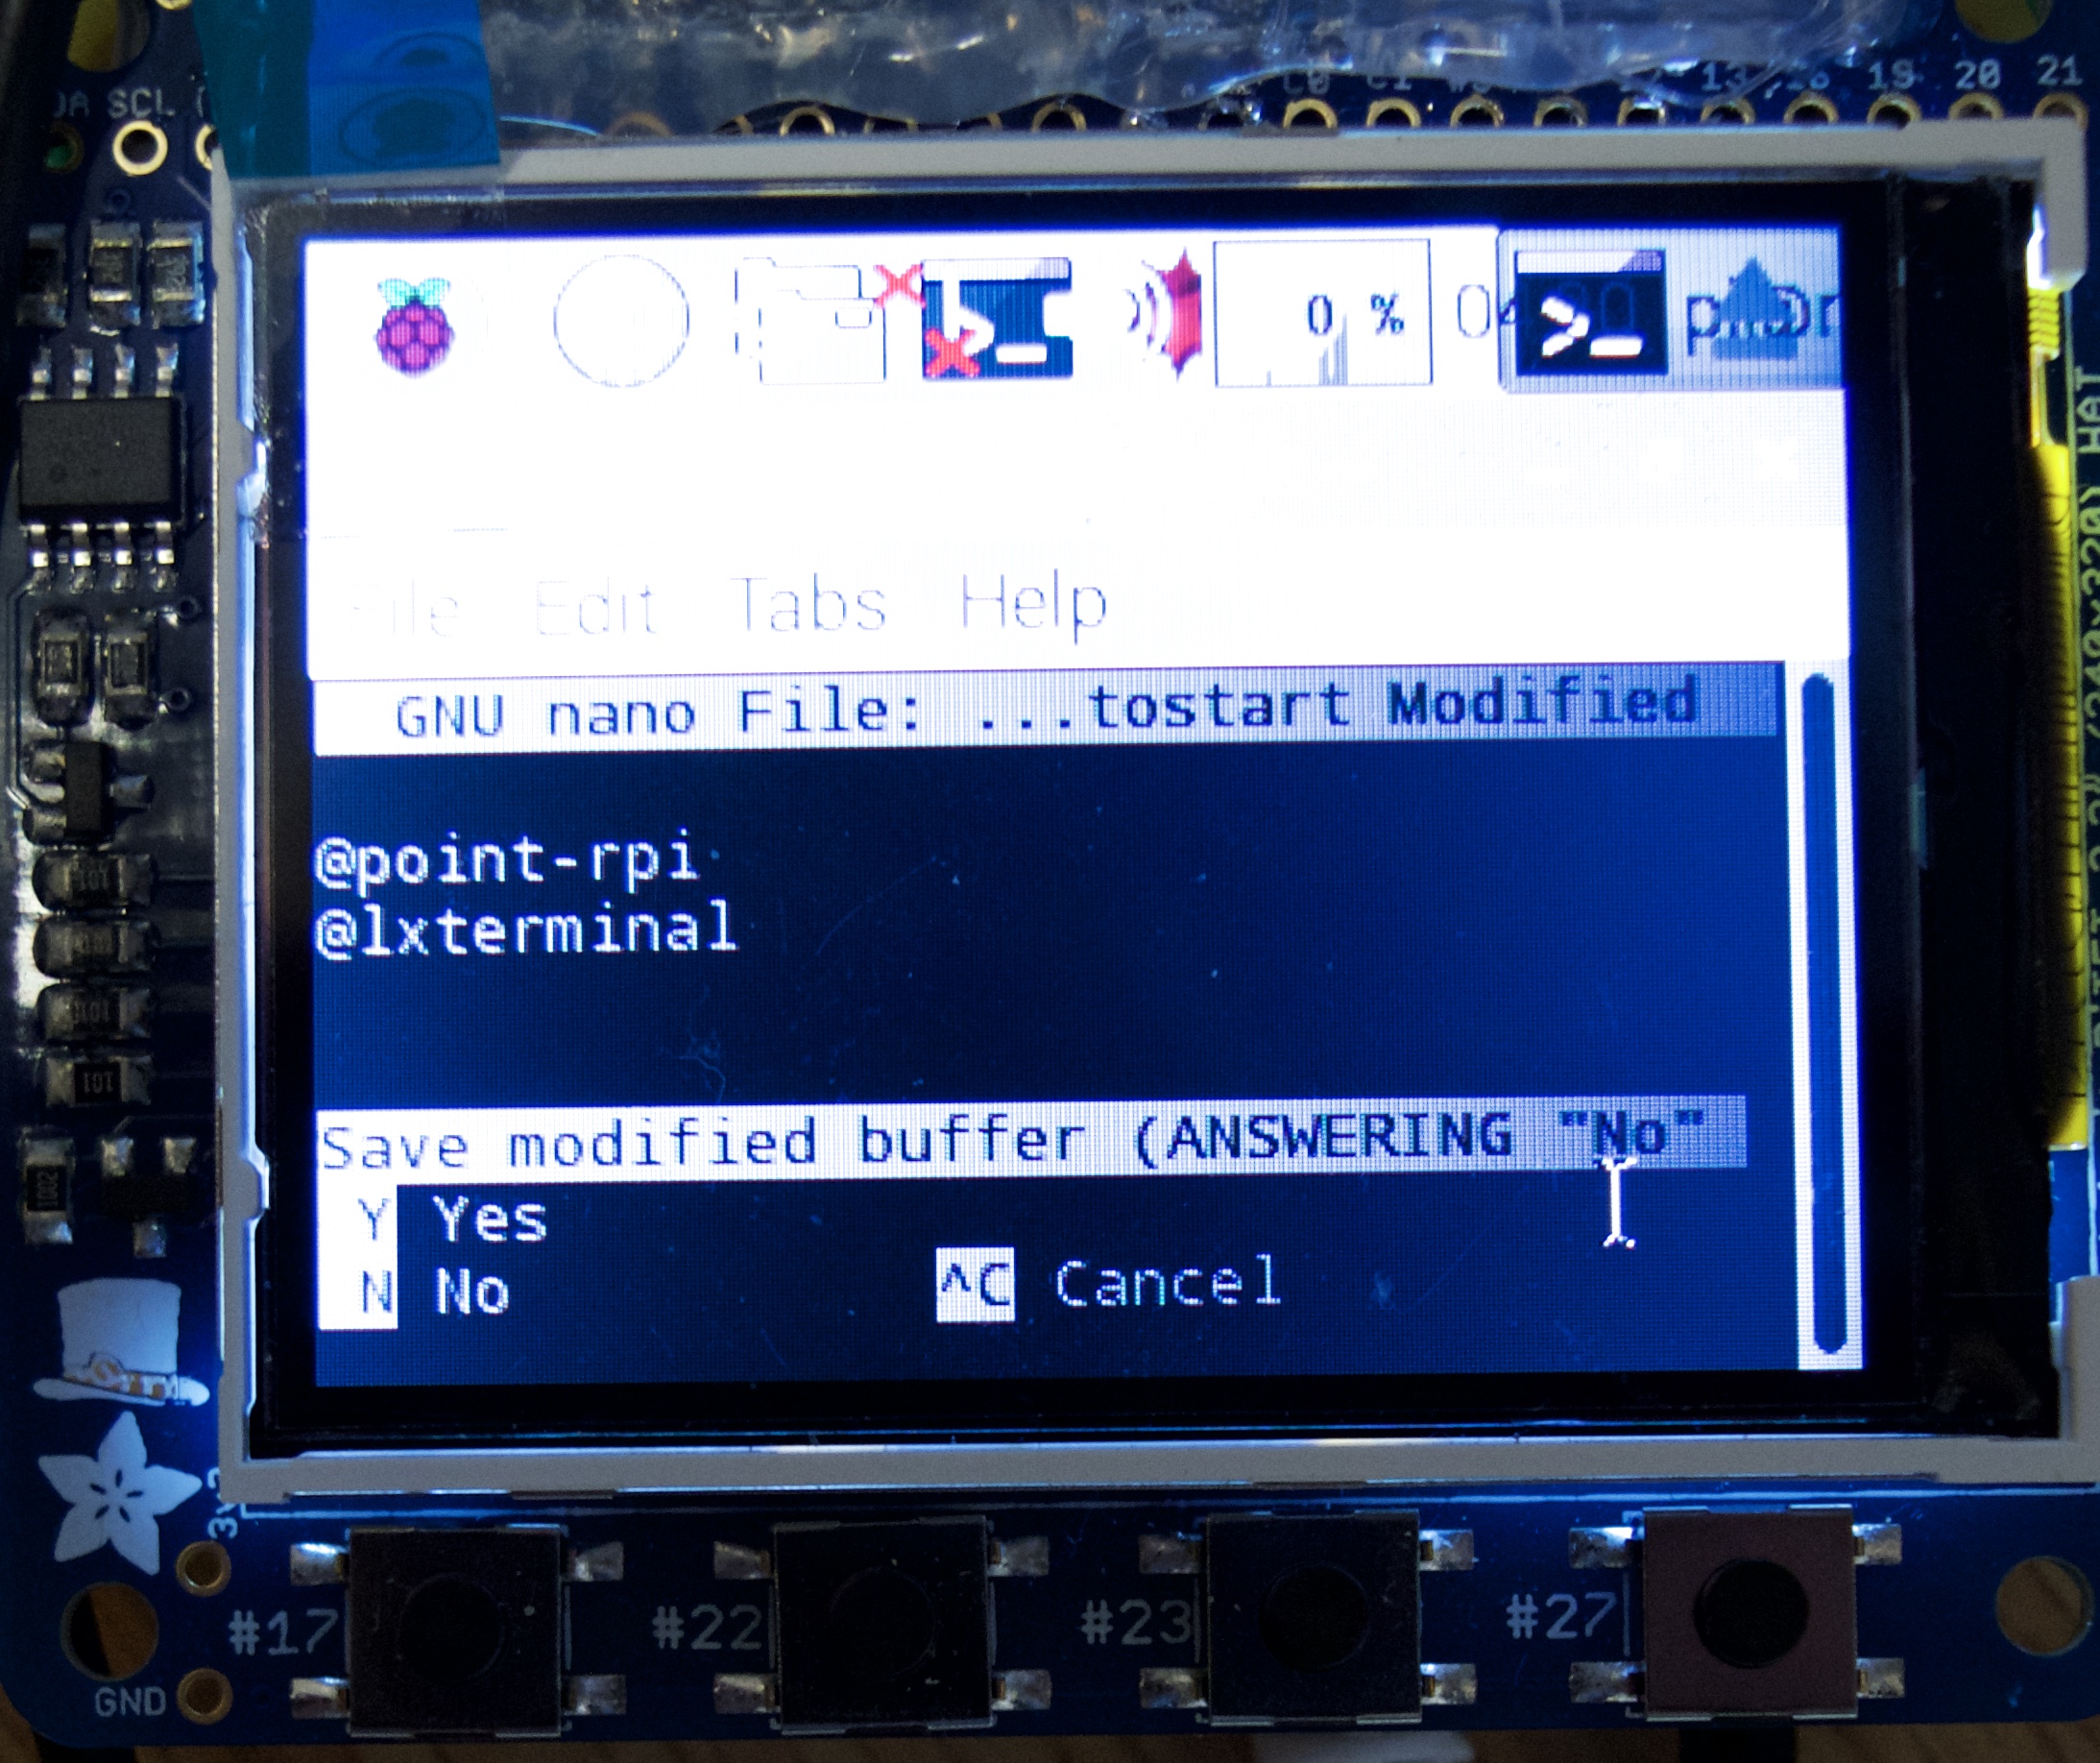
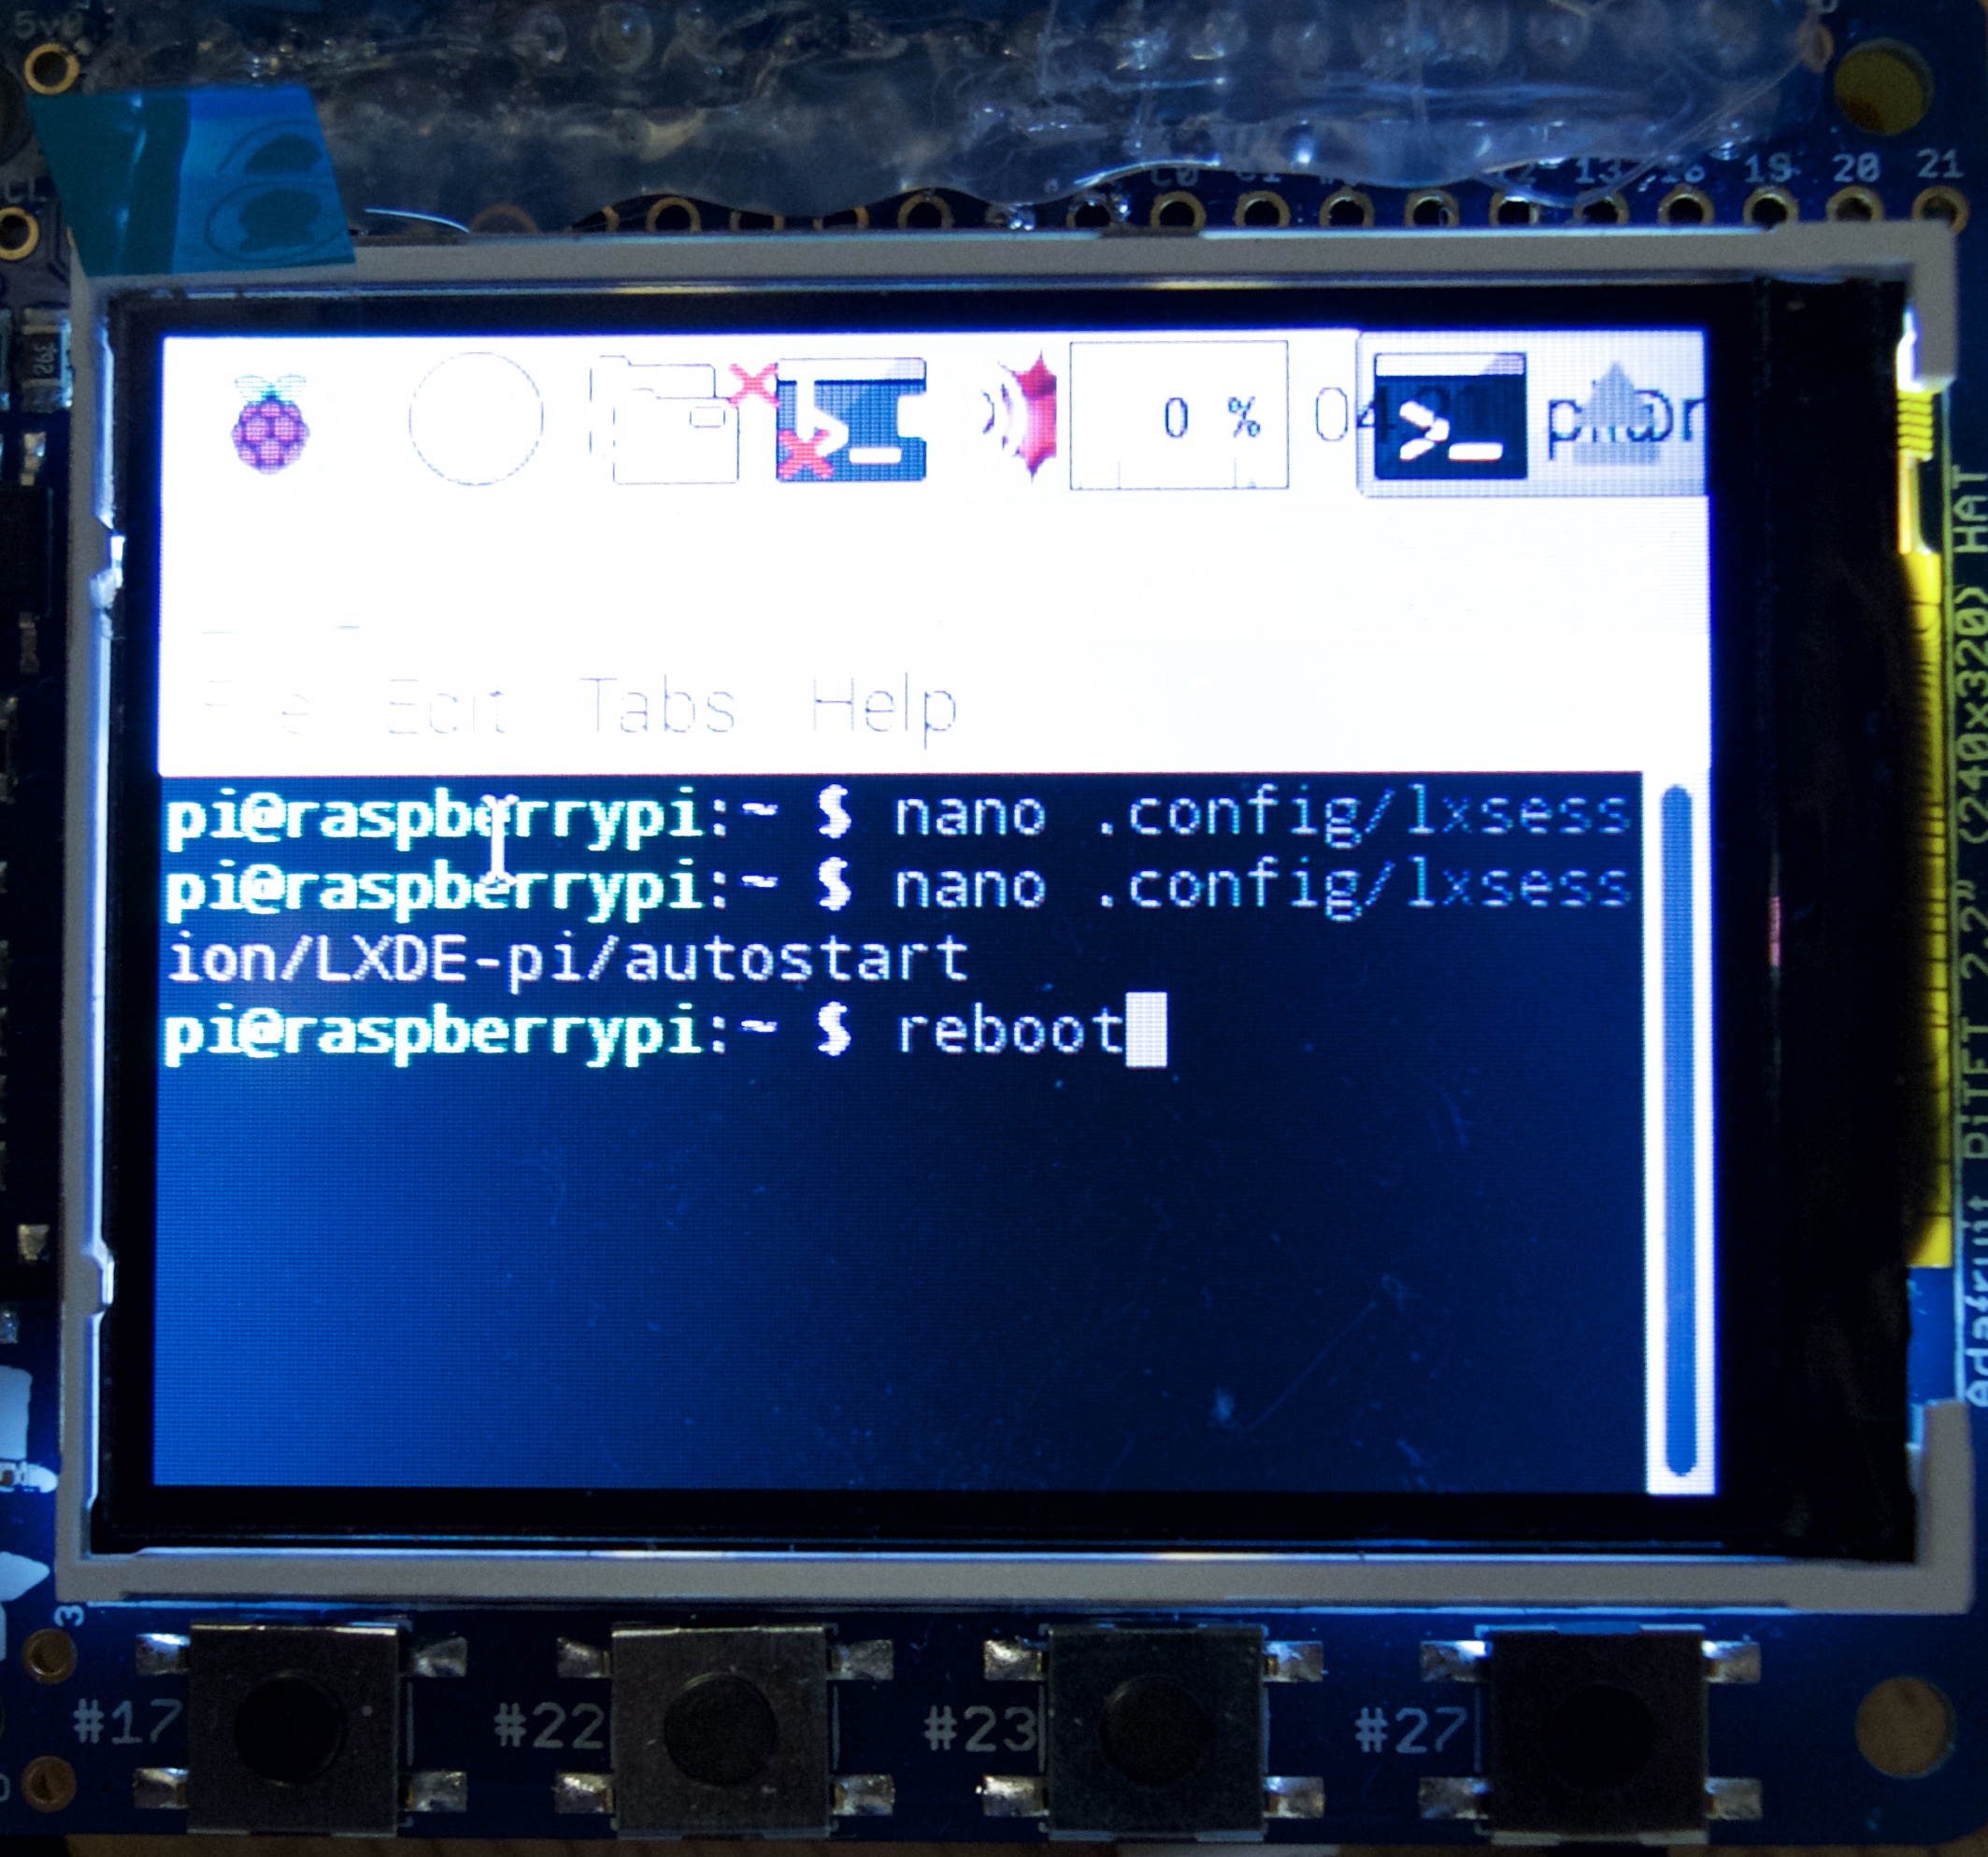

We want to make the code play automatically when the Pi is turned on. Unforunitly the PiTFT boots up differently then a normal display with a raspberry pi so we can't just move our text editor file to the booting system. What we are going to do is have the Pi automatically open straight into terminal and run the code from there.
Setting up the Pi to open terminal automatically:
(picture 1)
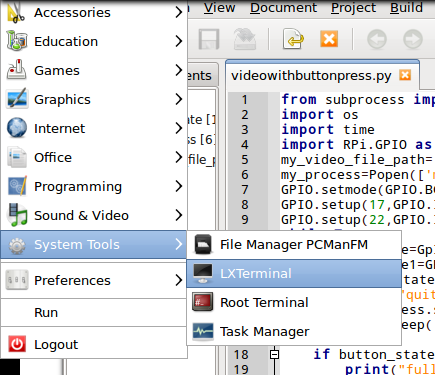
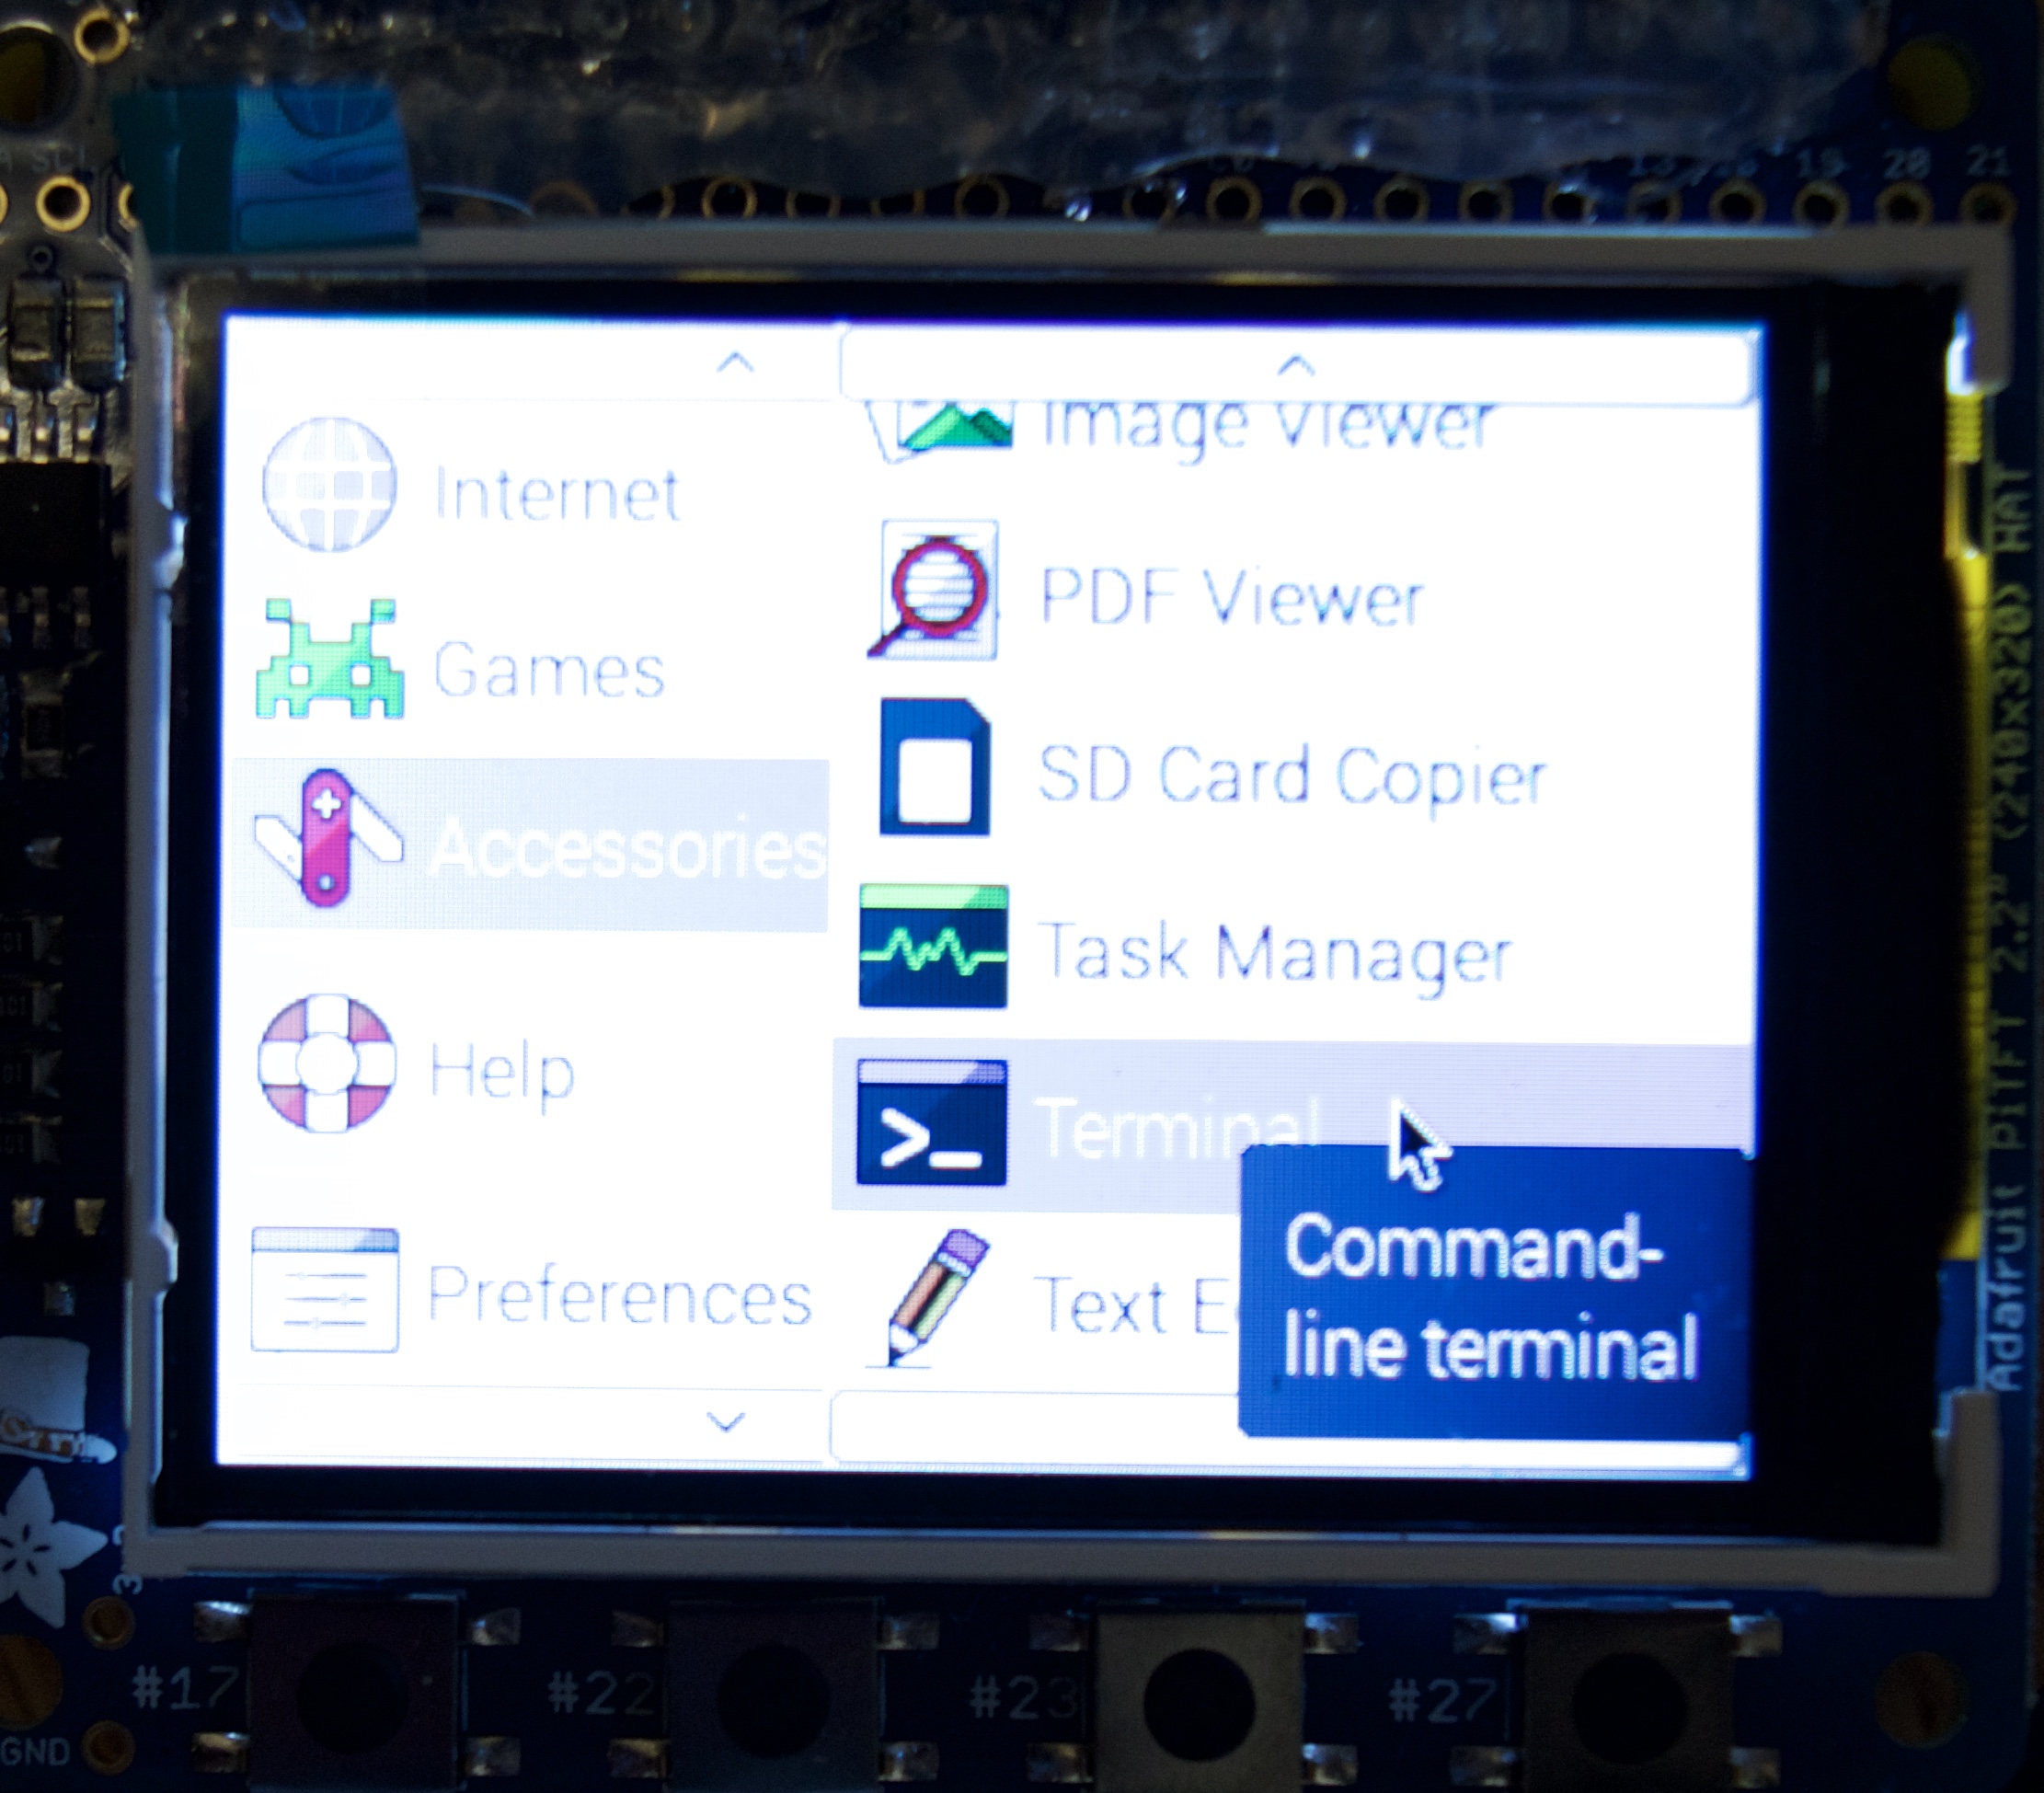
1) open up terminal (note you can do this by sshing but I just did it on the PiTFT )
(picture 2)
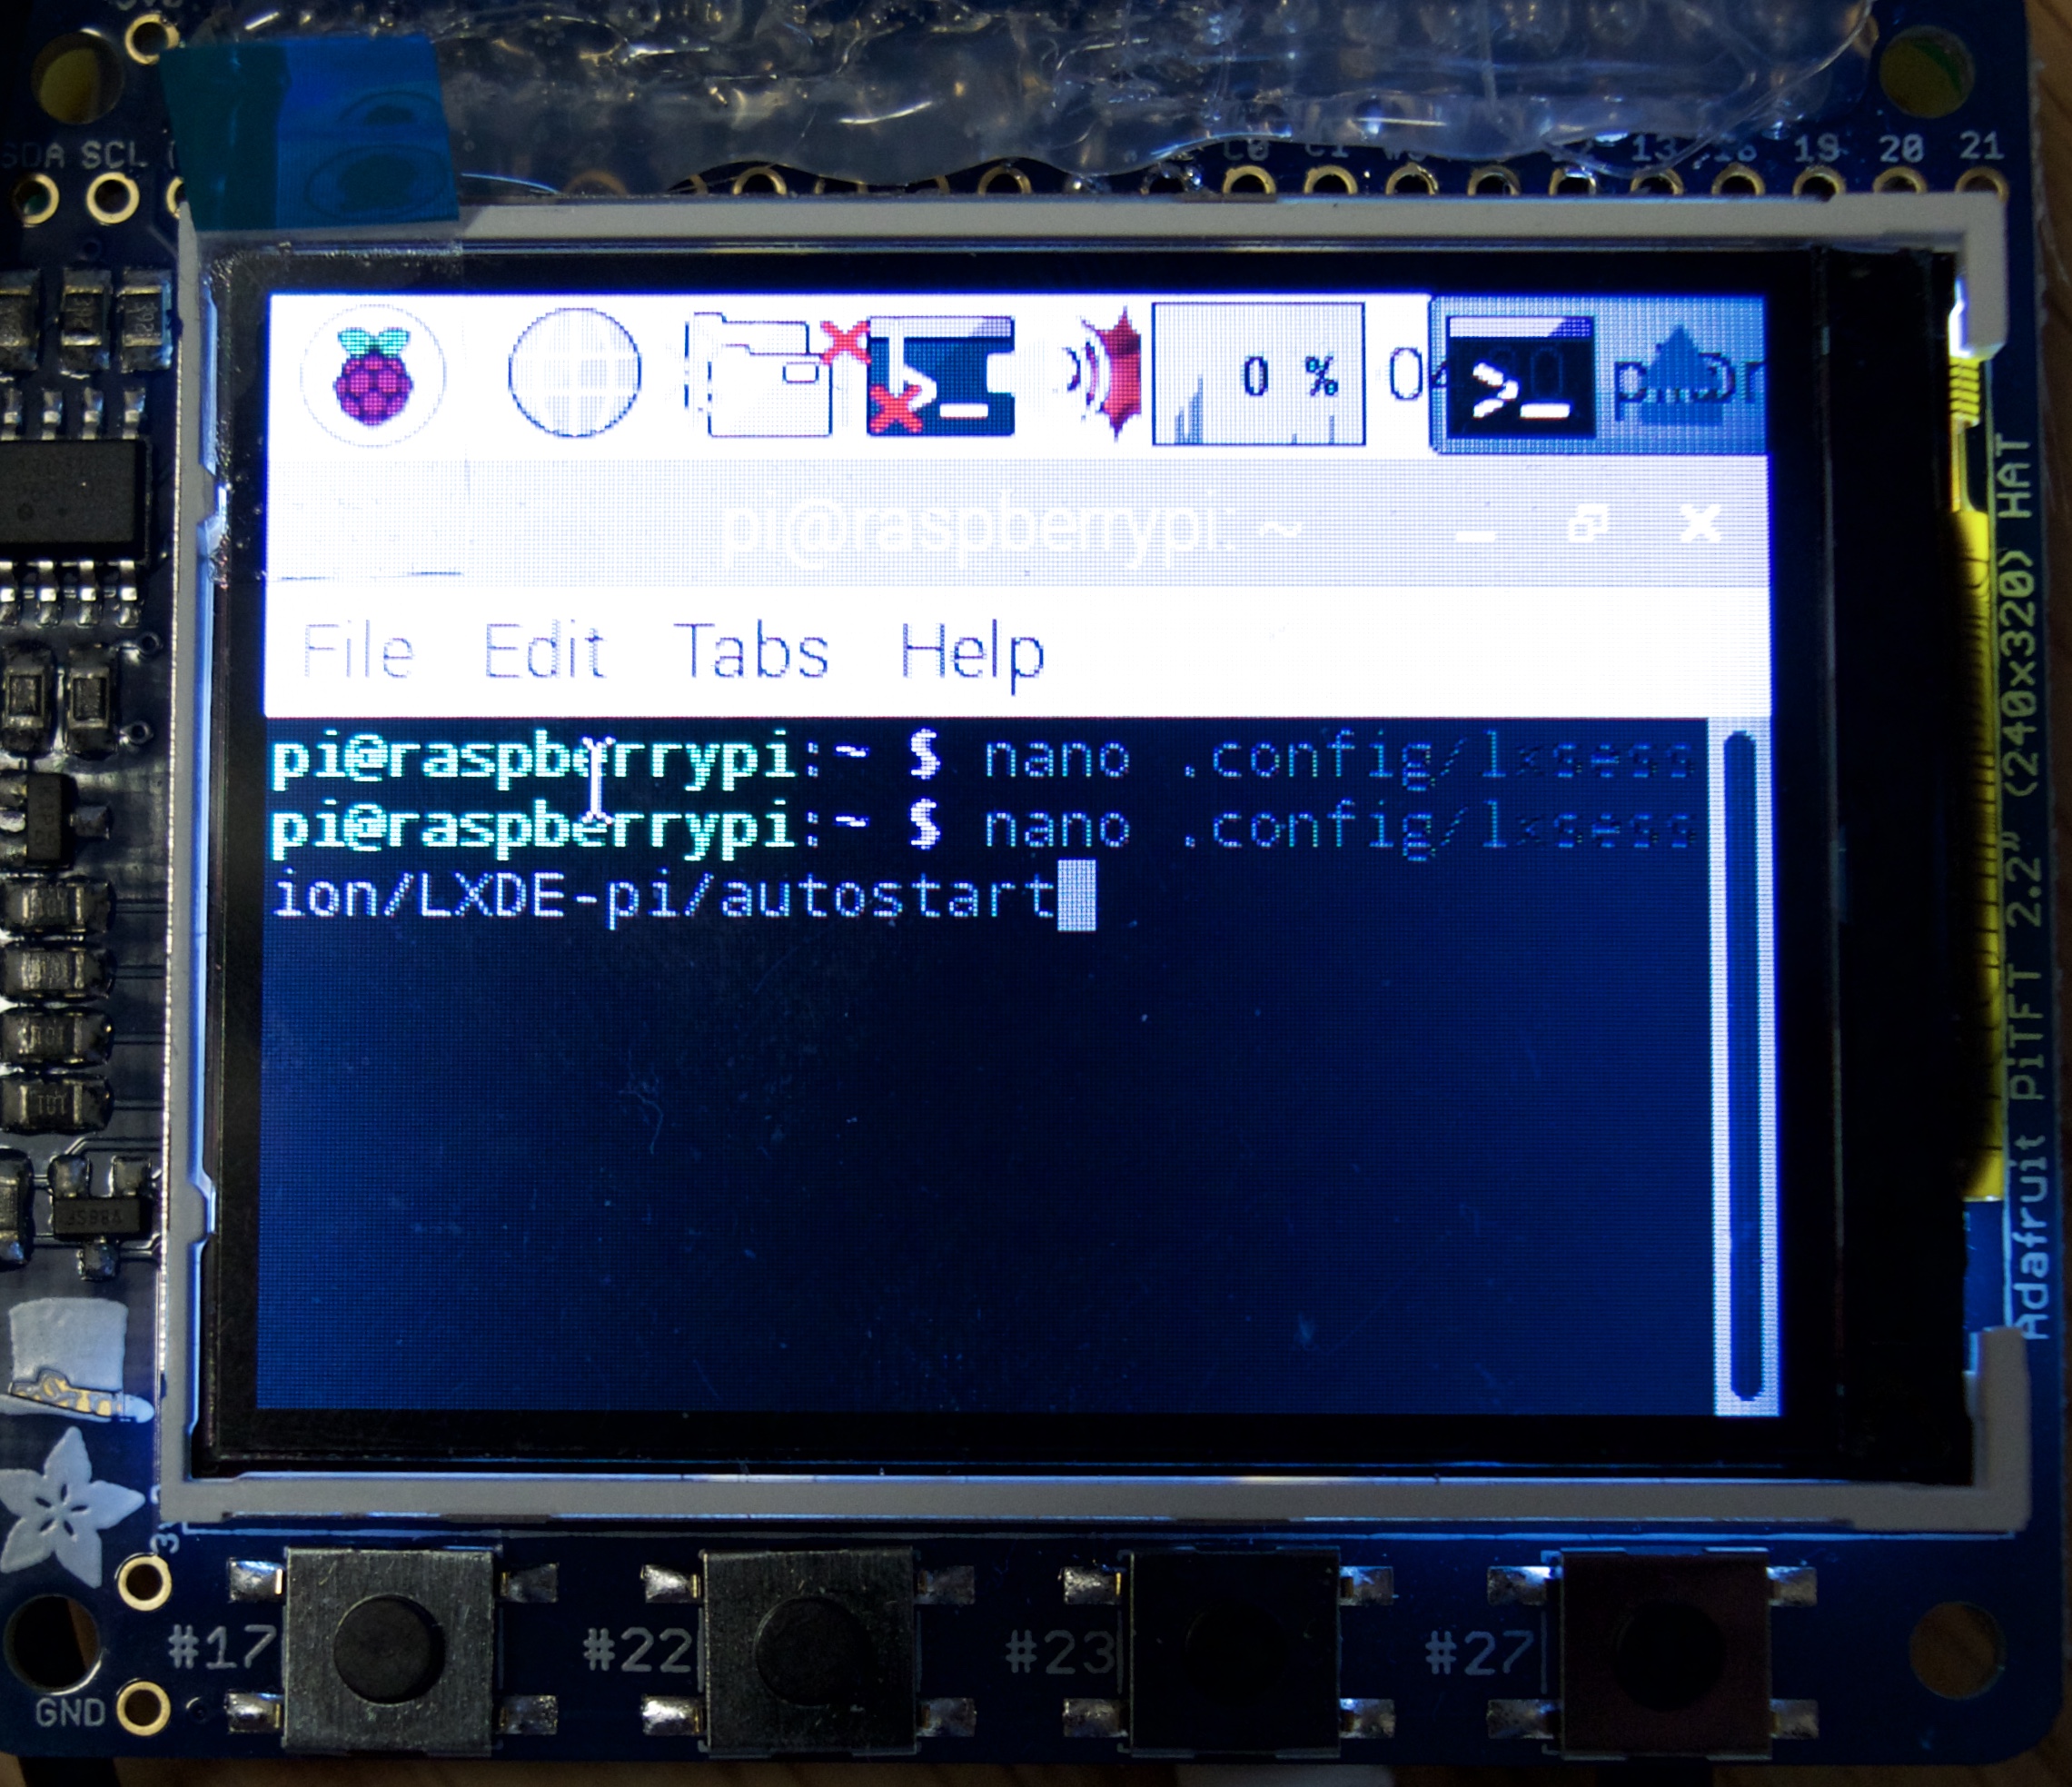
2) type:
nano .config/lxsession/LXDE-pi/autostart
(picture 3)
3)now add the line
@lxterminal
(picture 4-5)
4)type:
control y
(picture 5)
5)type:
reboot
now when the pi starts up it will open right in the terminal!
note:
if you ever want to get rid of this just type again
nano .config/lxsession/LXDE-pi/autostart
and delete the line
@lxterminal
Setting up the code to run automatically in the terminal
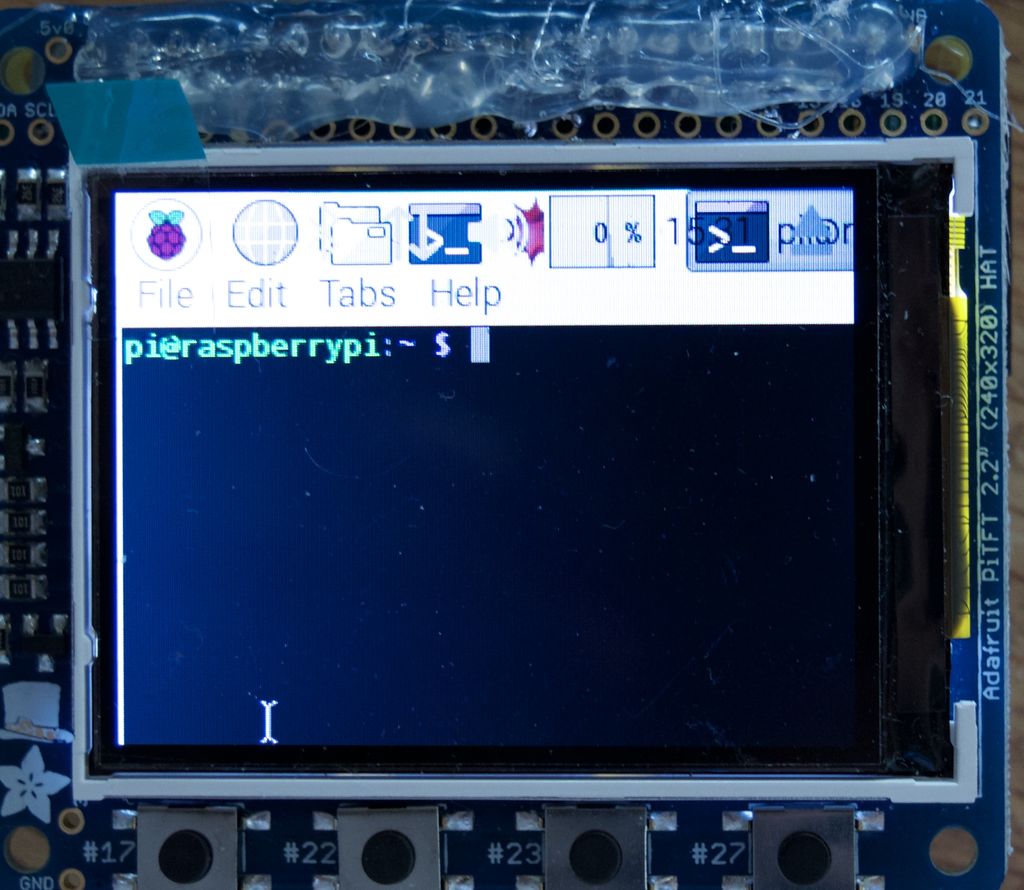
(picture 7)
1)once you turn on your pi this is what will now show up on your screen when it is booted up
(picture 8)
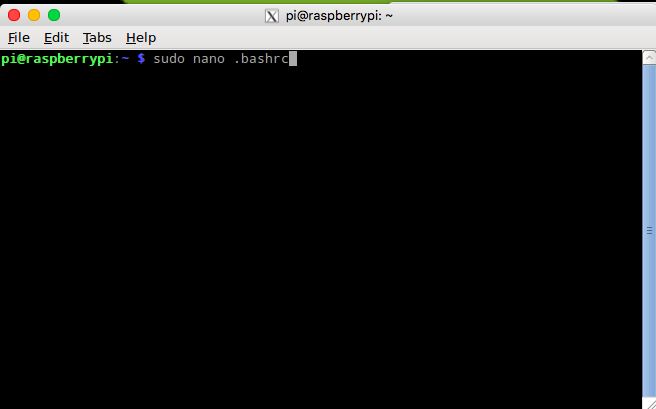
2)in terminal type the line
sudo nano .bashrc
(picture 9)
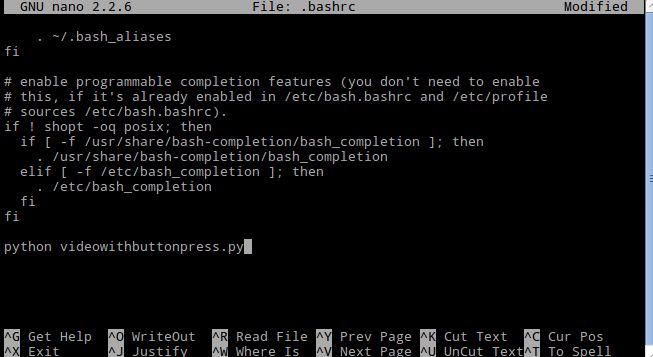
3)scroll to the bottom where you see the two fi fi and add (replace nameofyourcode with what you named your code)
python NAMEOFYOURCODE.py
(picture 10)
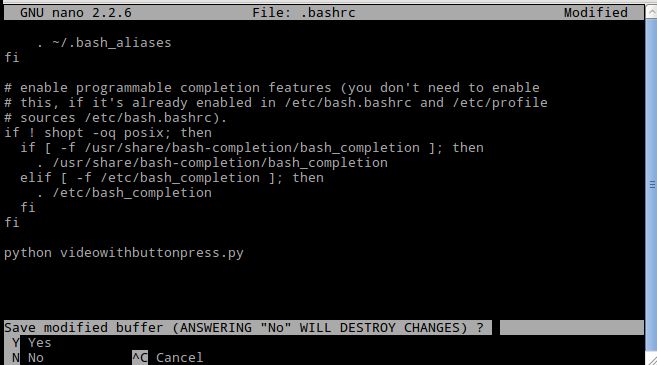
4)hold control x then type
y
then enter
(picture 11)
5)now reboot your pi! when the pi starts up again it will go to the terminal and load the code, this may take a couple of minutes, if you ever have trouble and need to get out of the video player just press
control c
a couple of times
Assembling the Power Boost
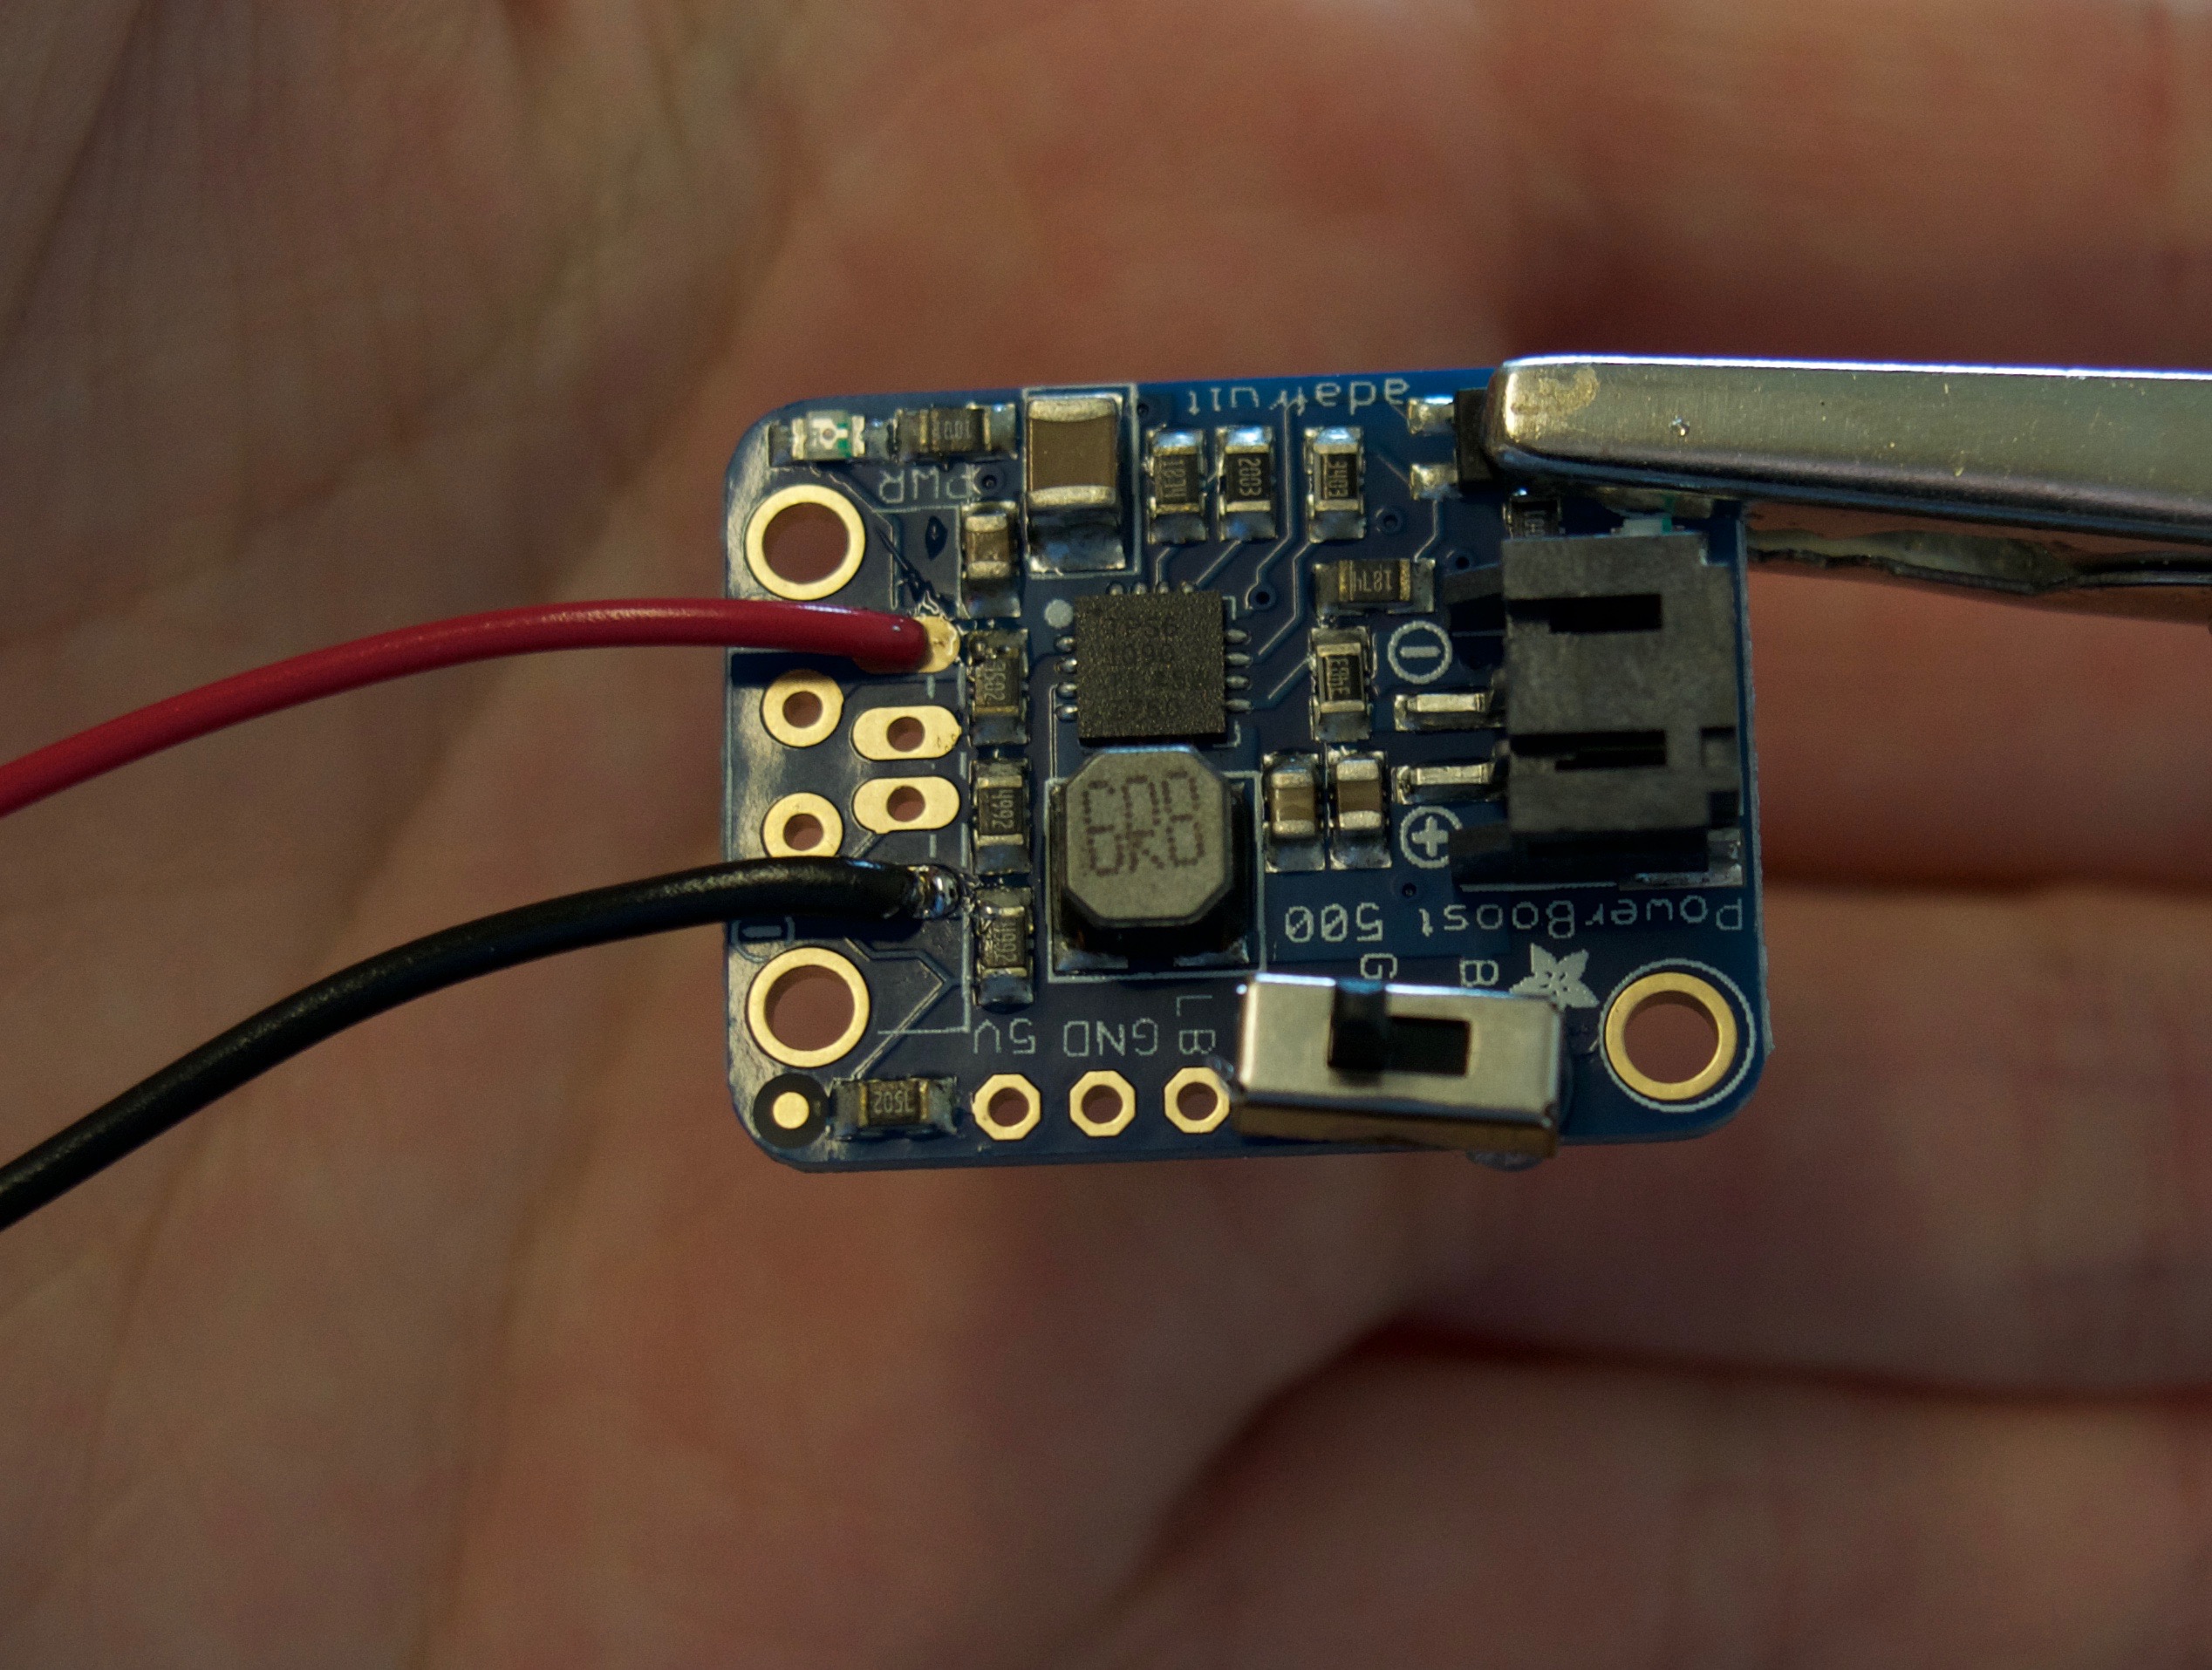
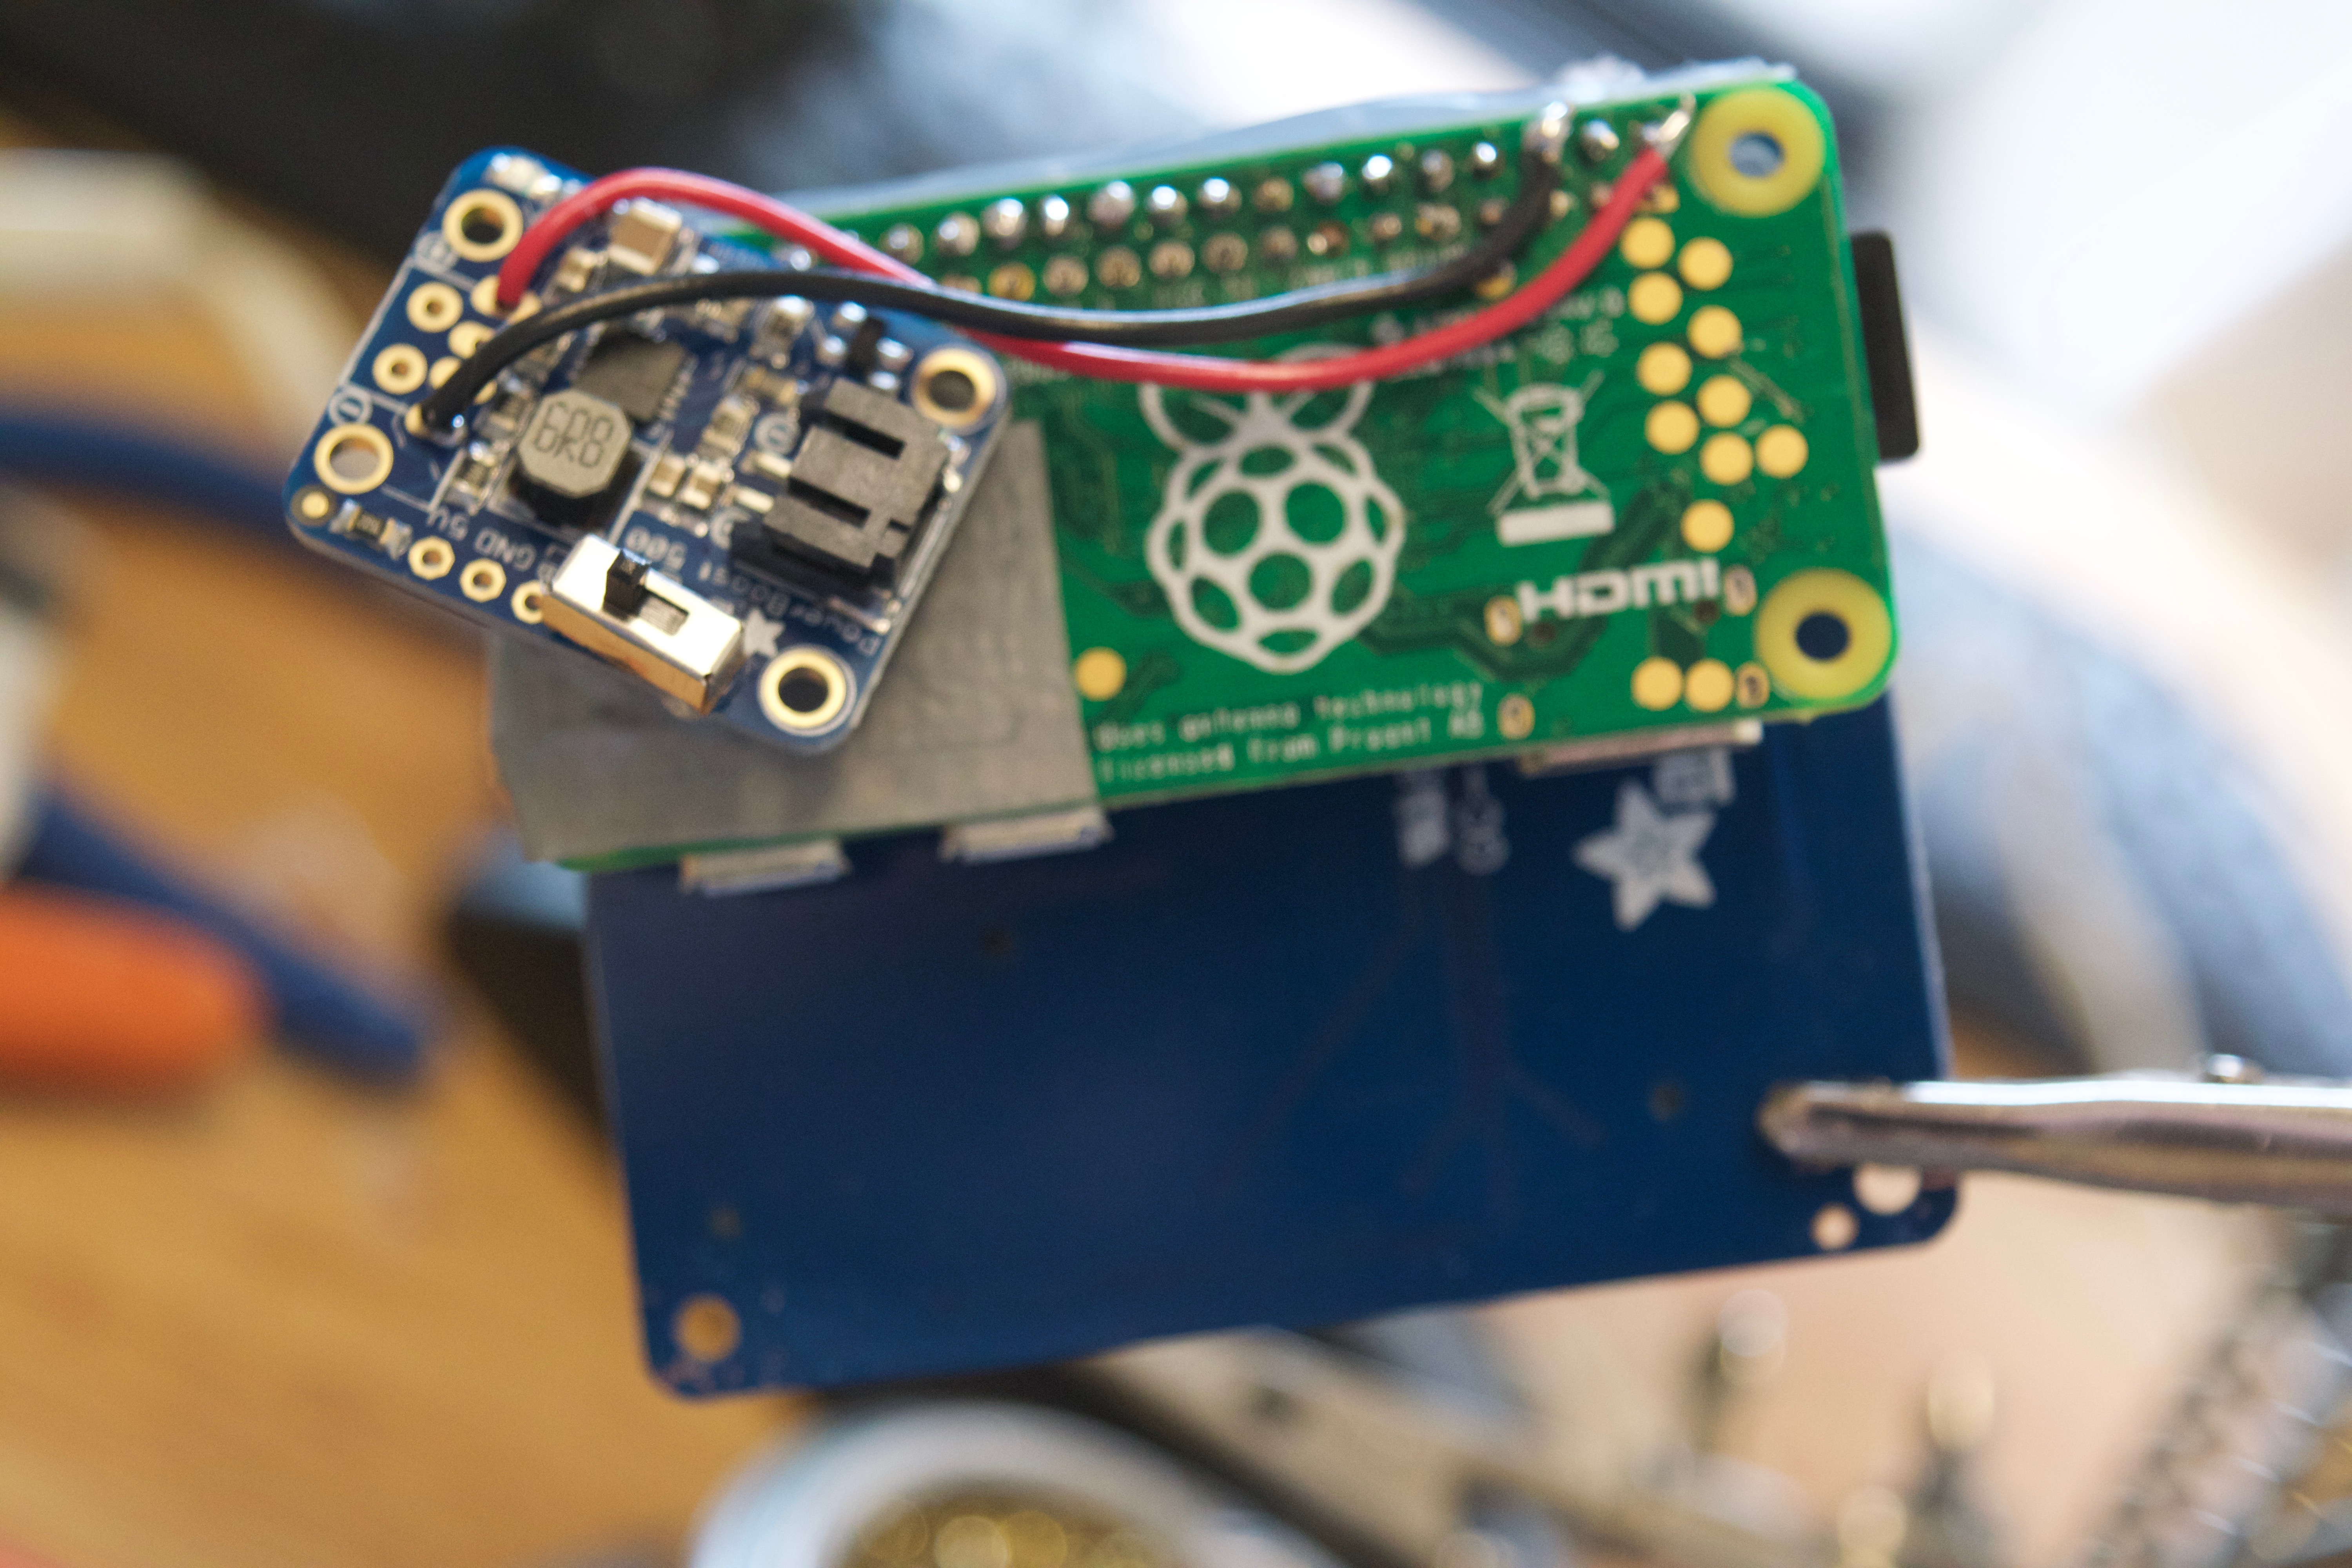
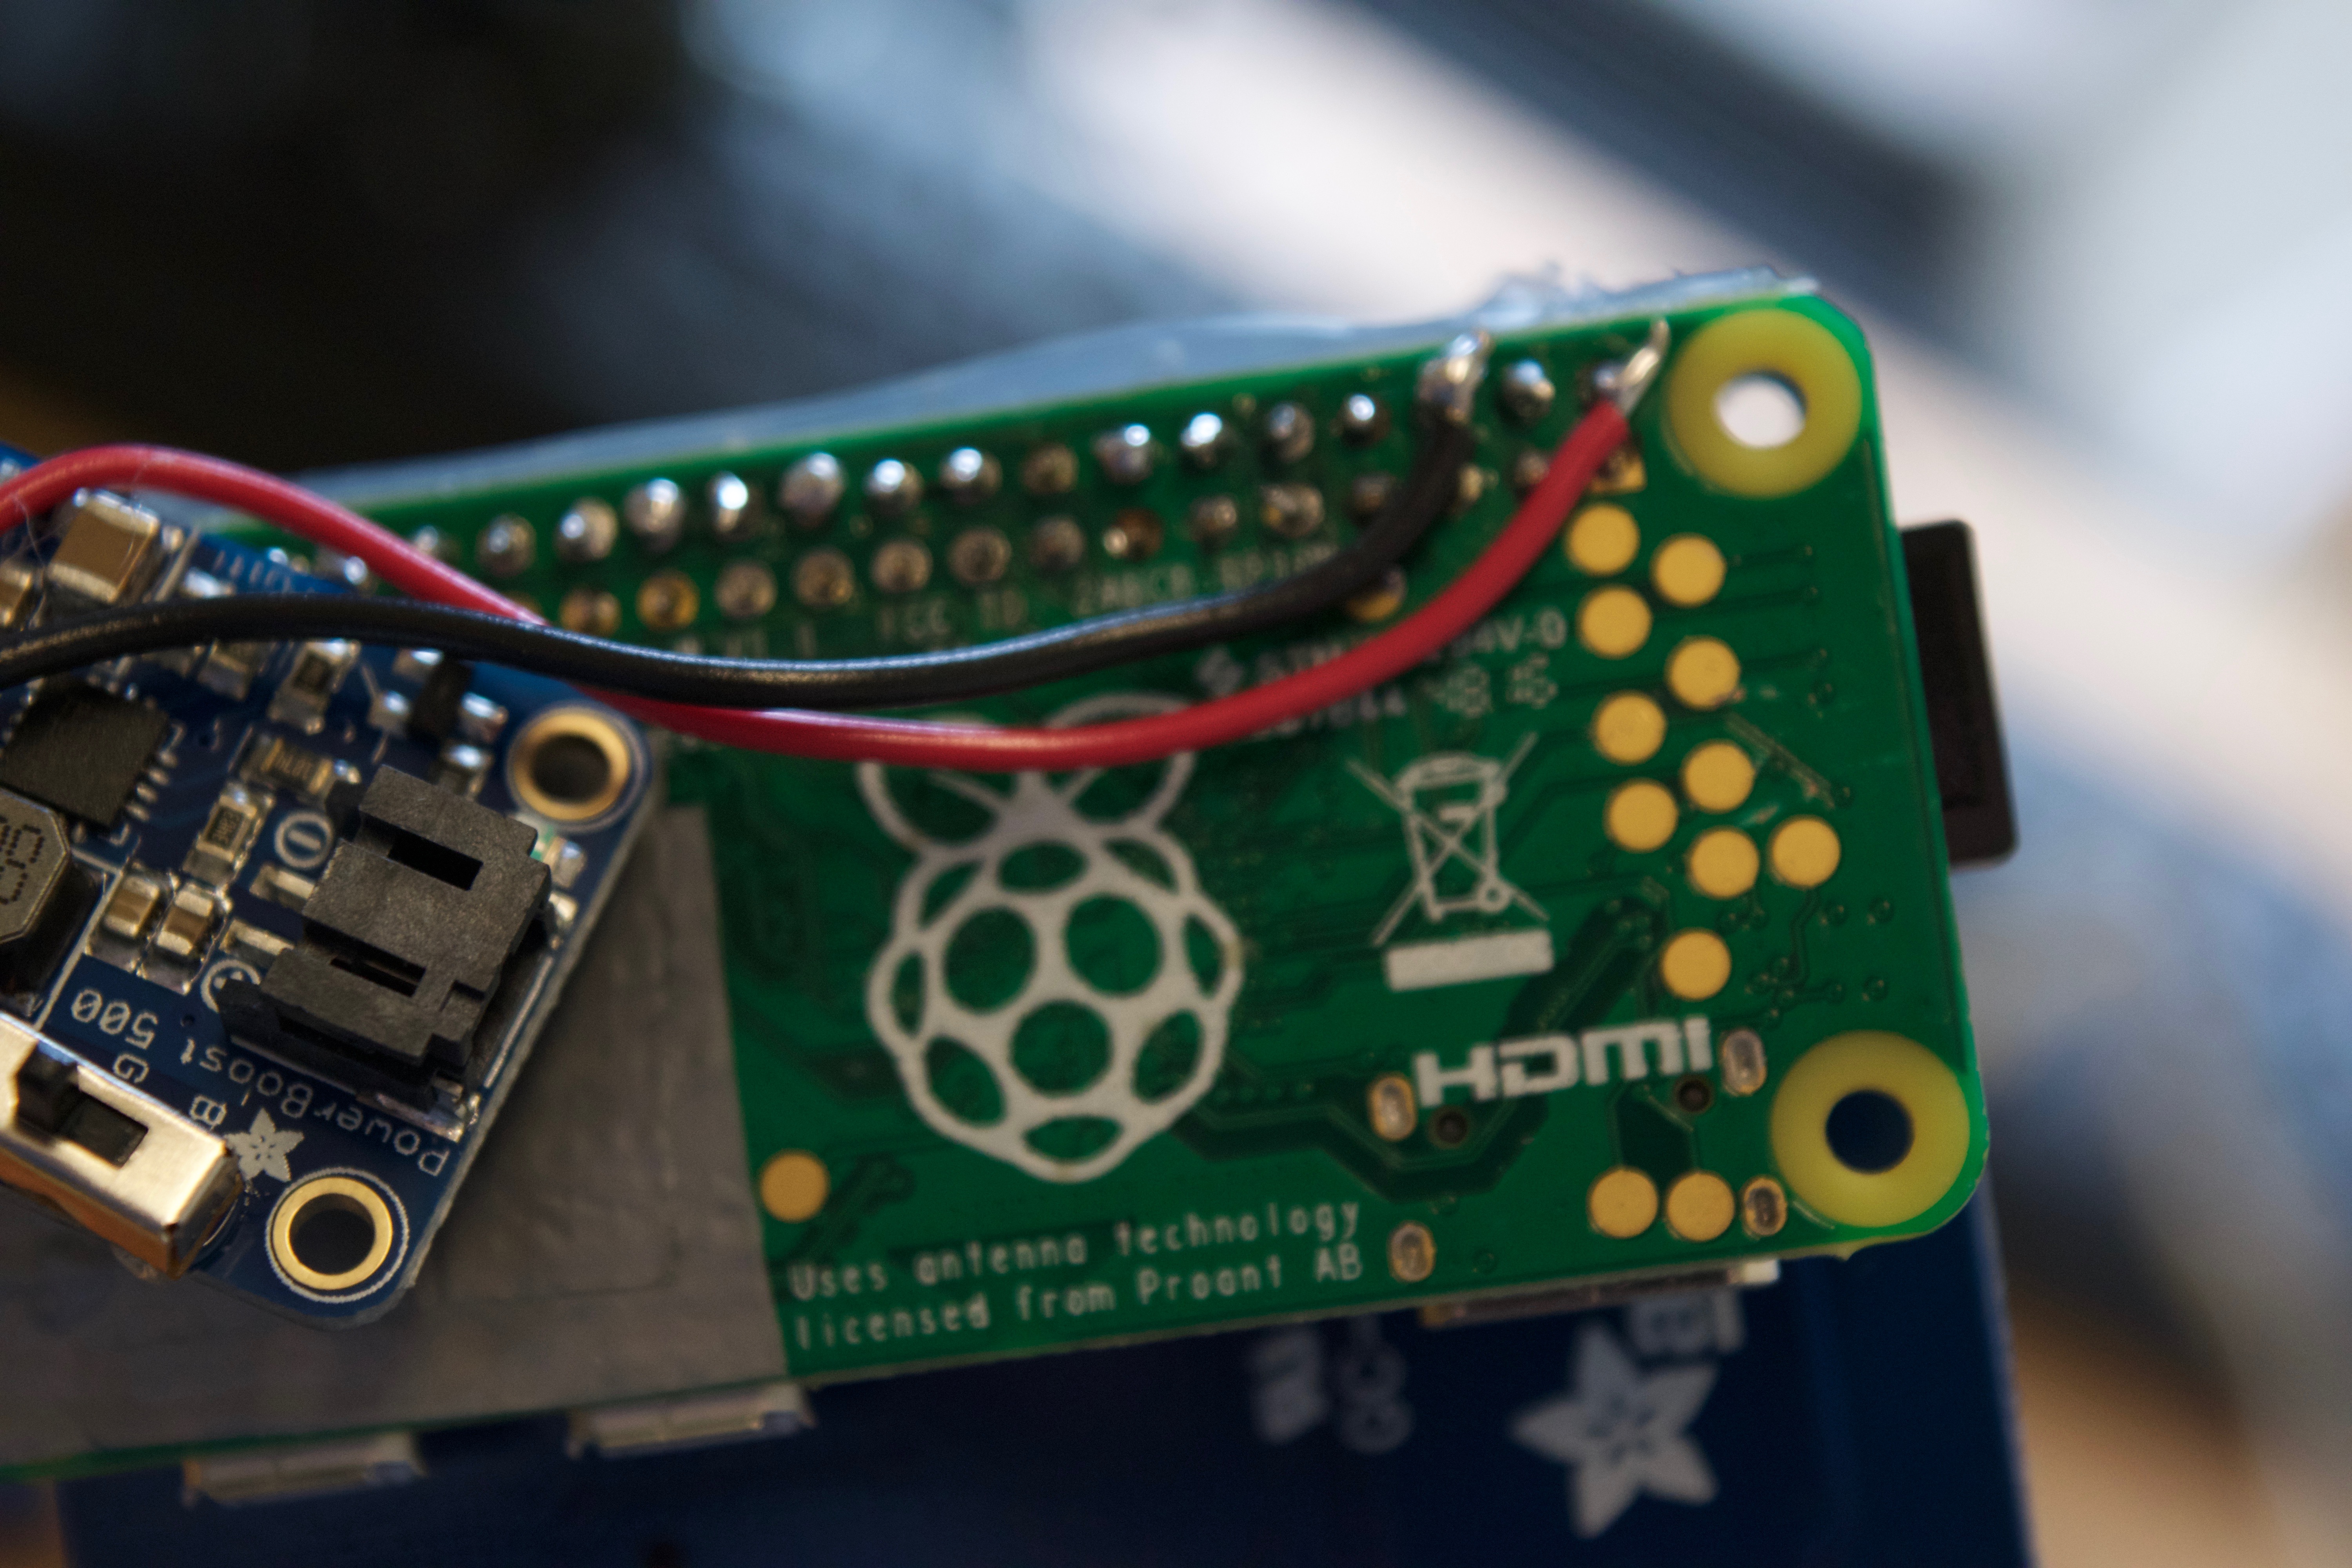
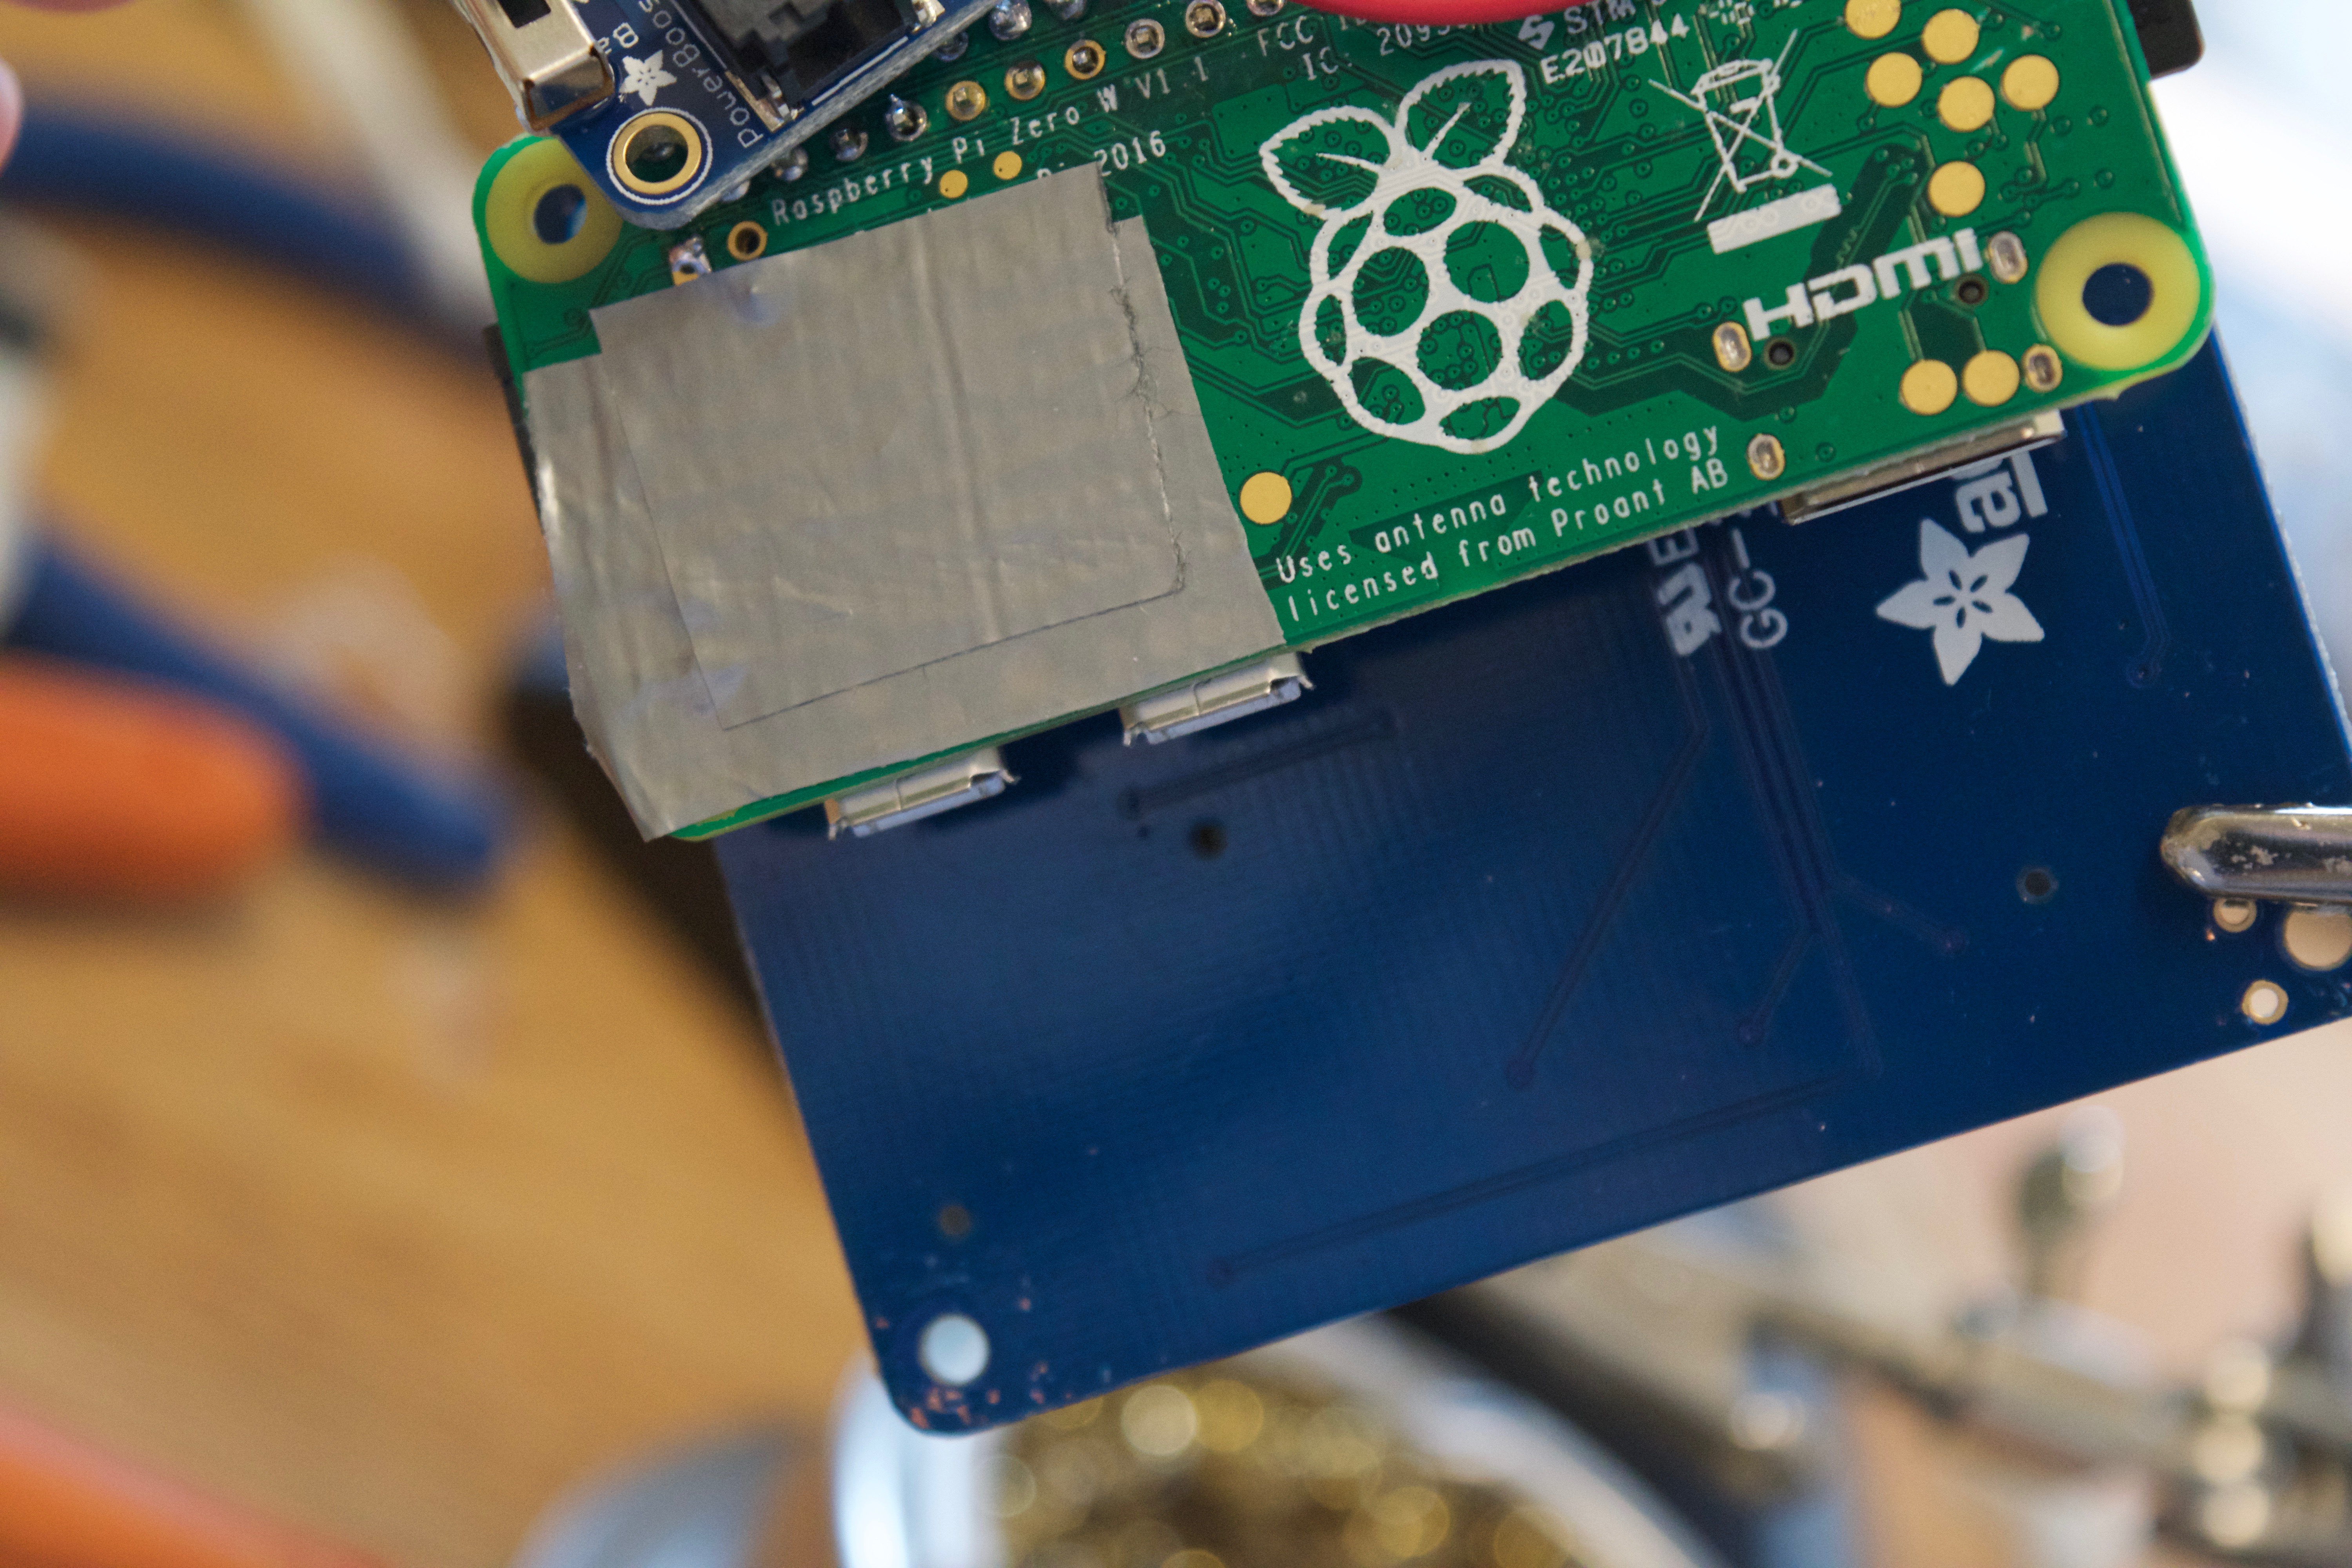
So we want to make this thing wearable right? We need to create someway to power the pi and PiTFT hat to make it portable so we are no longer using the usb charging port.
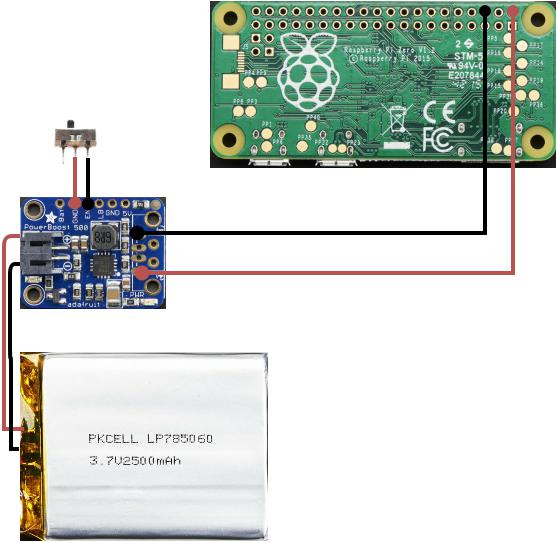
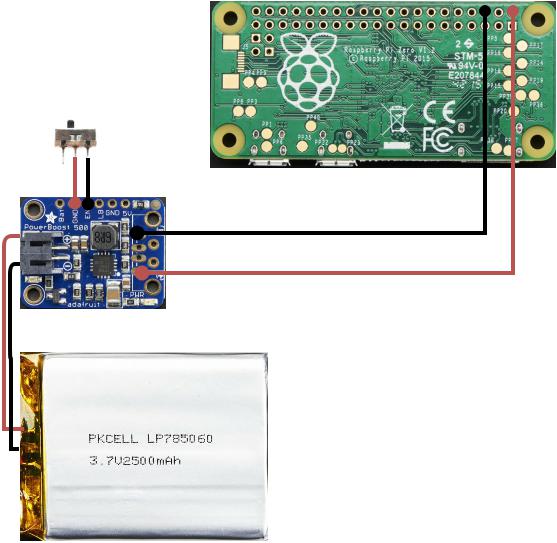
circuit diagram:
(picture 1)
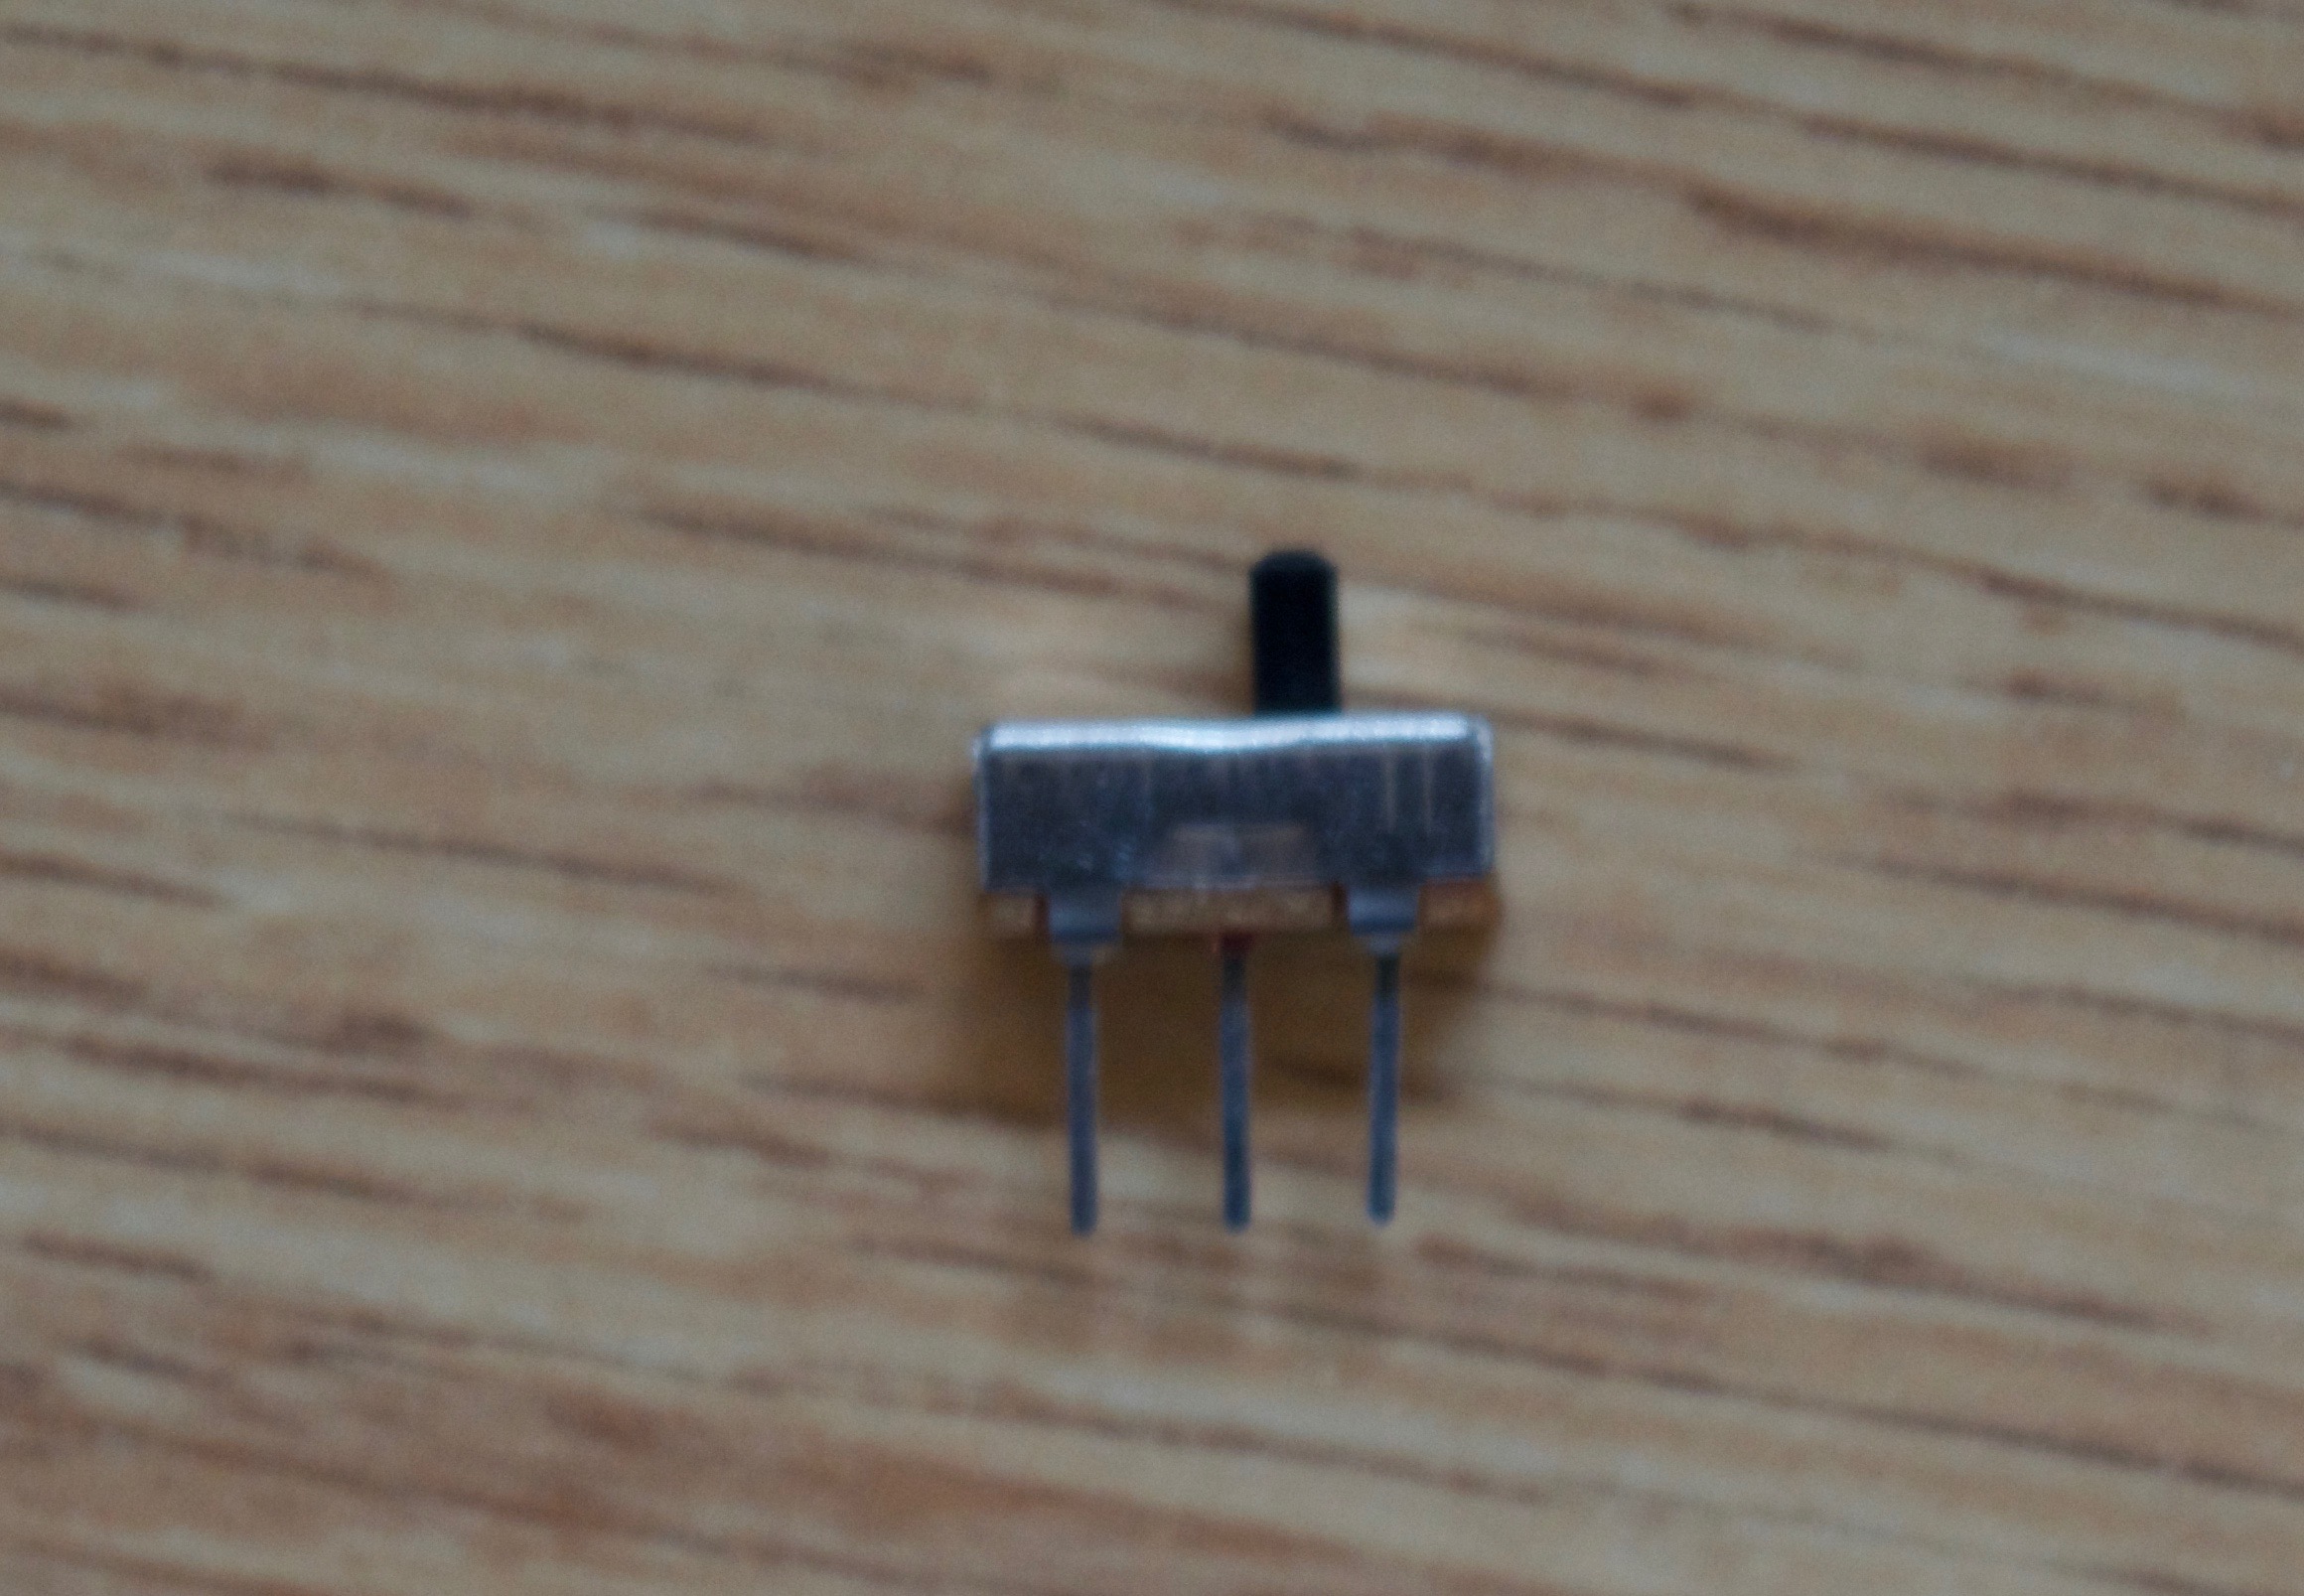
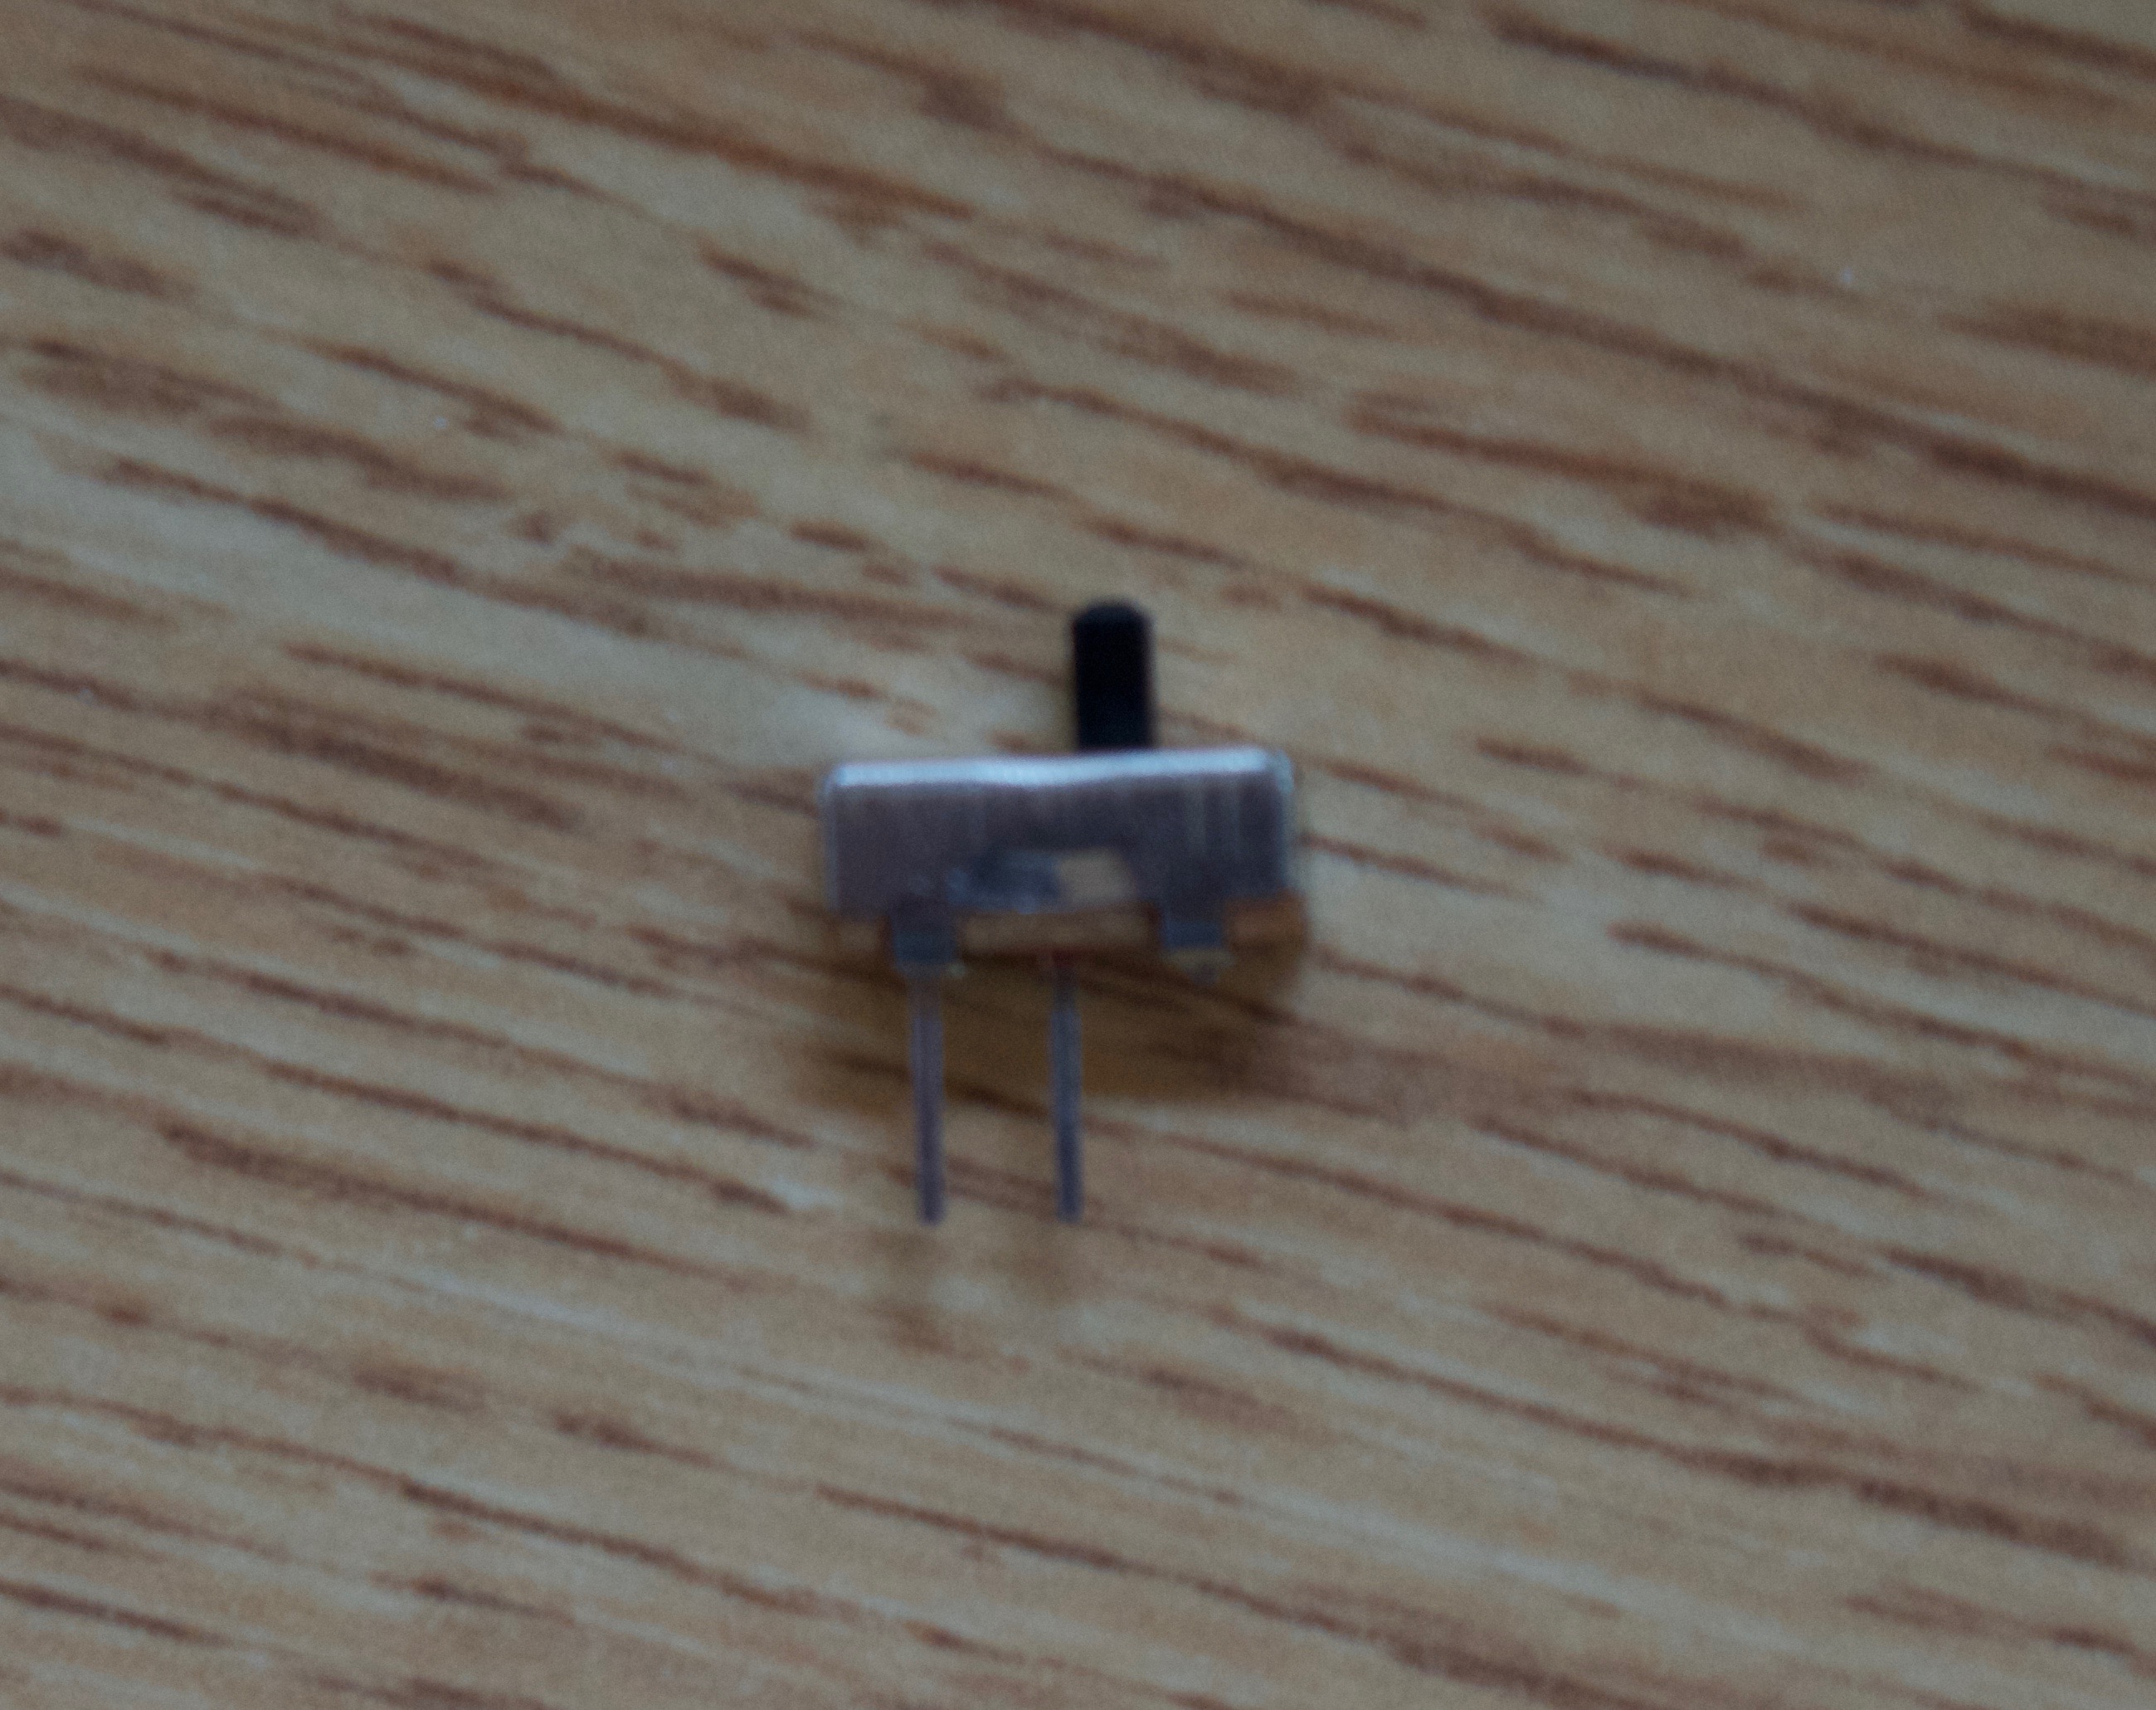
(pictures 2-3)
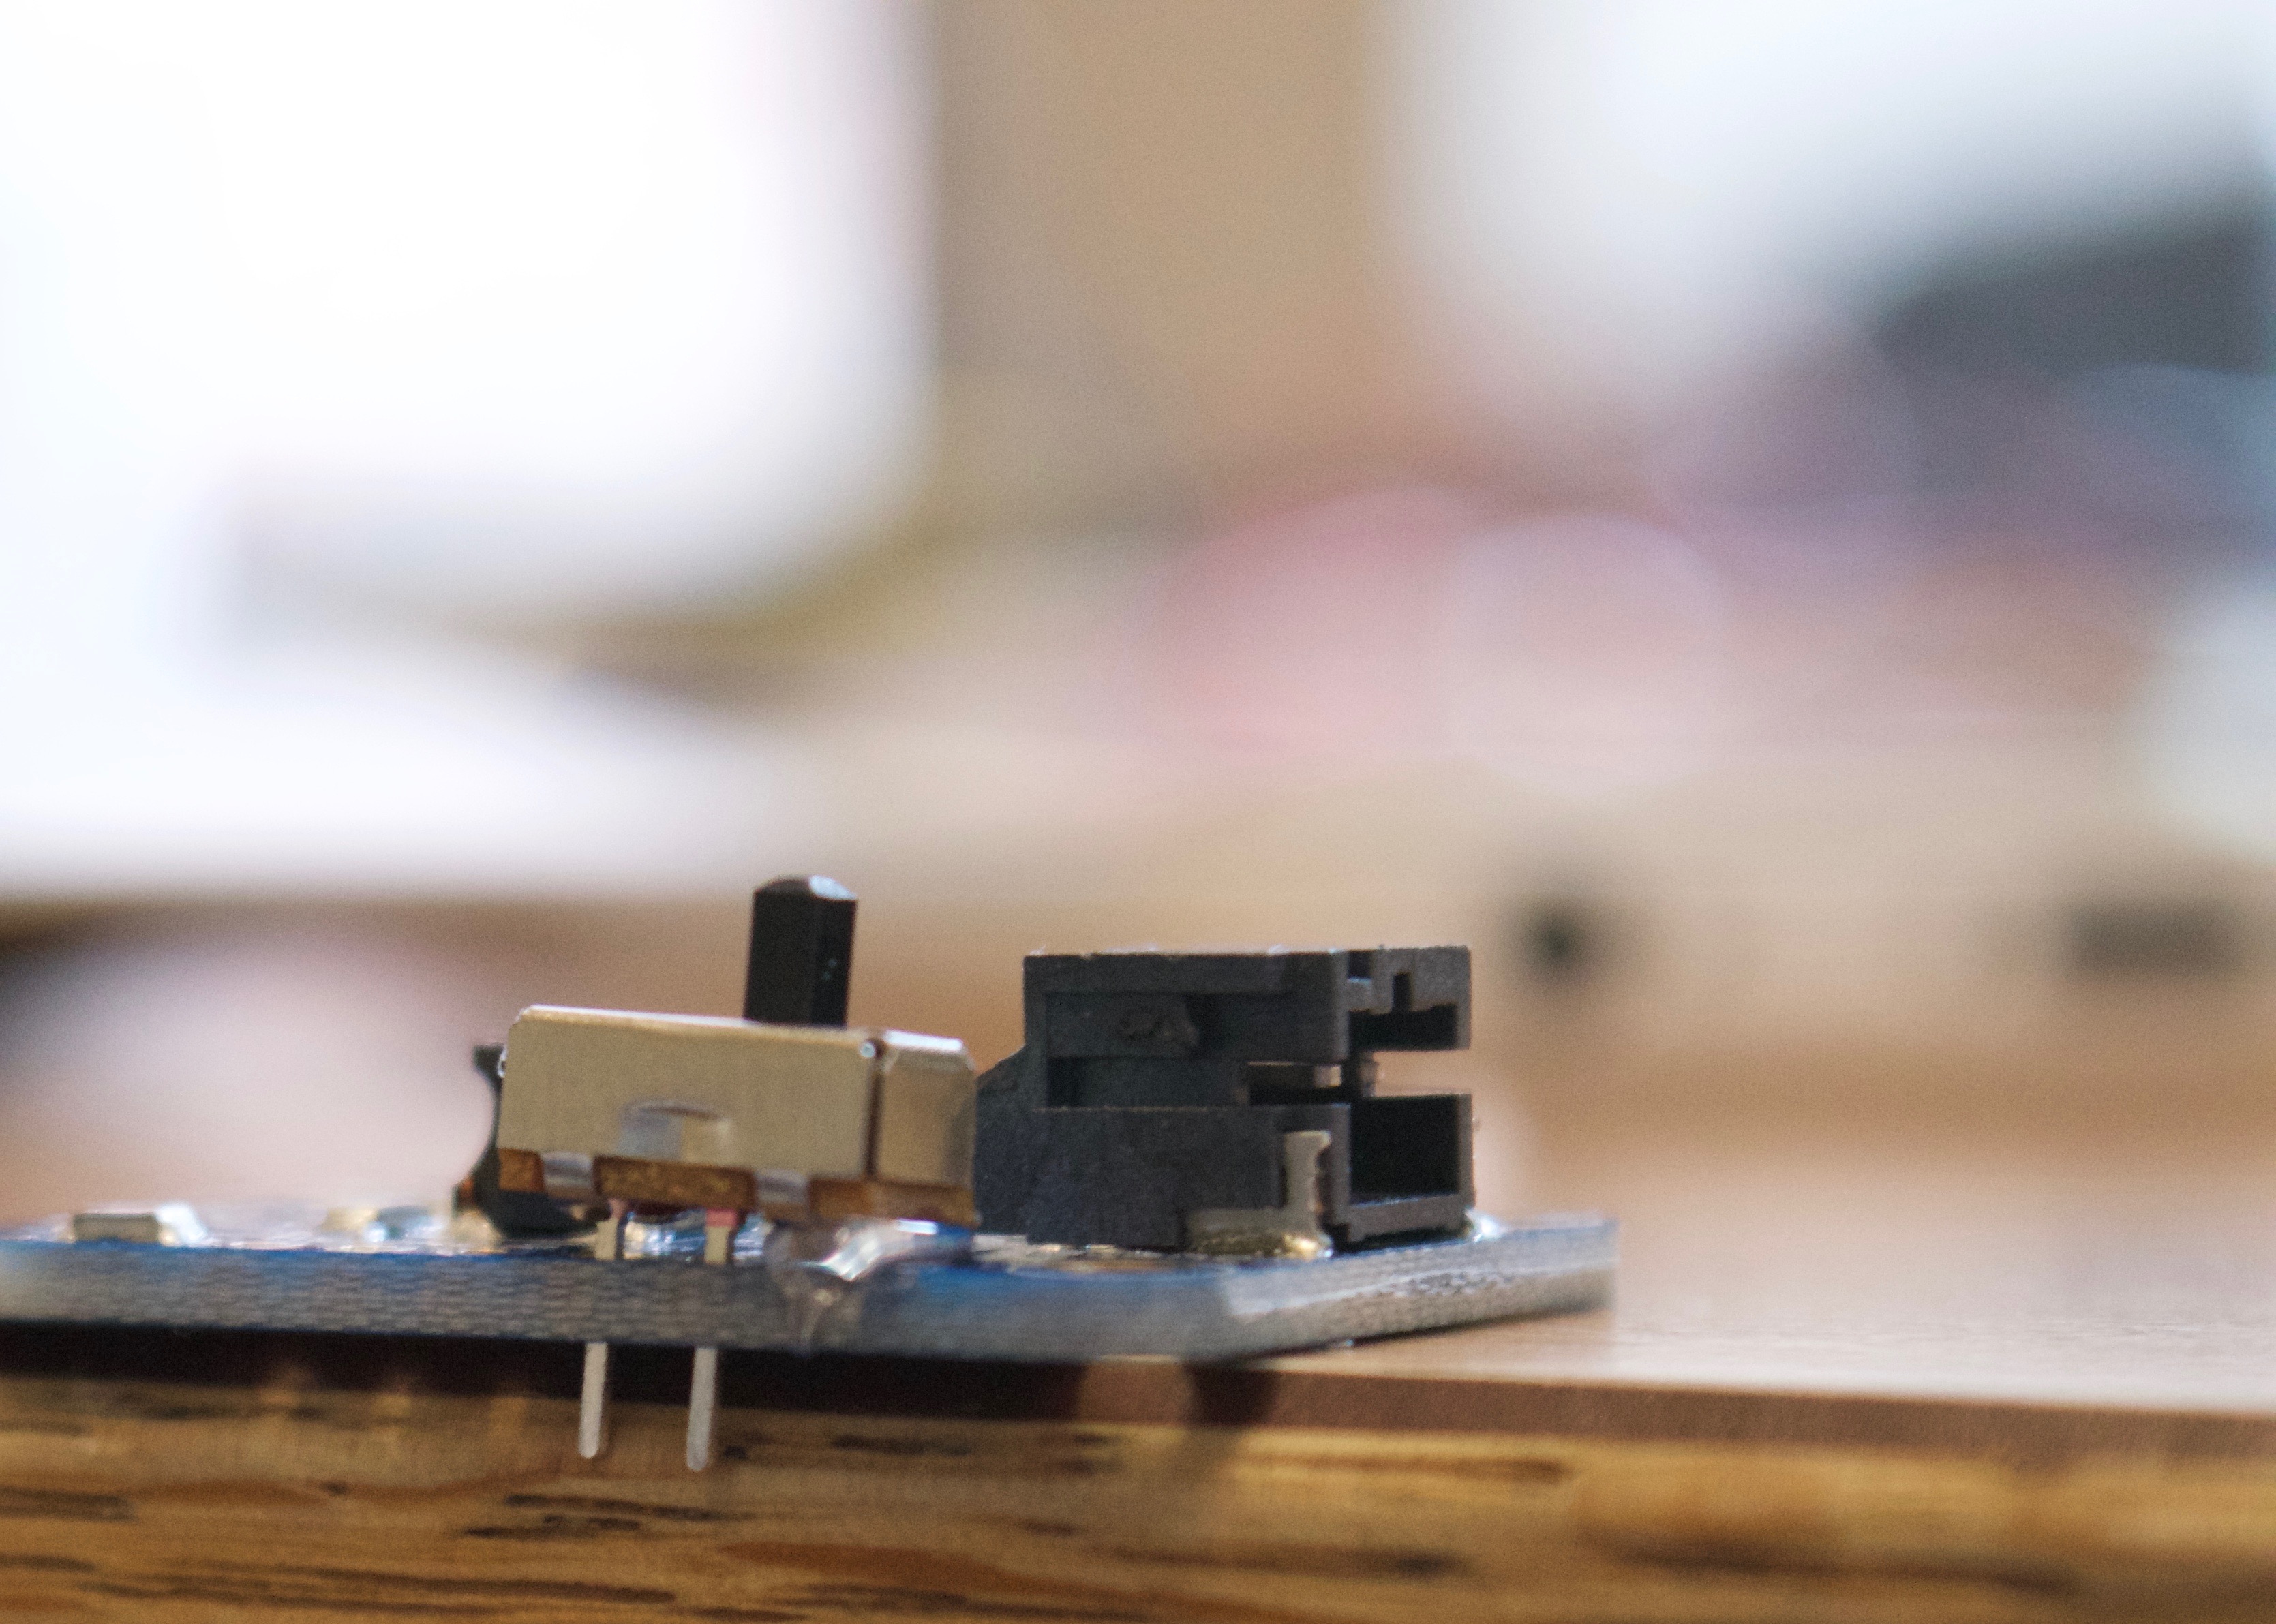
1) take your switch and cut off either the right or left lead
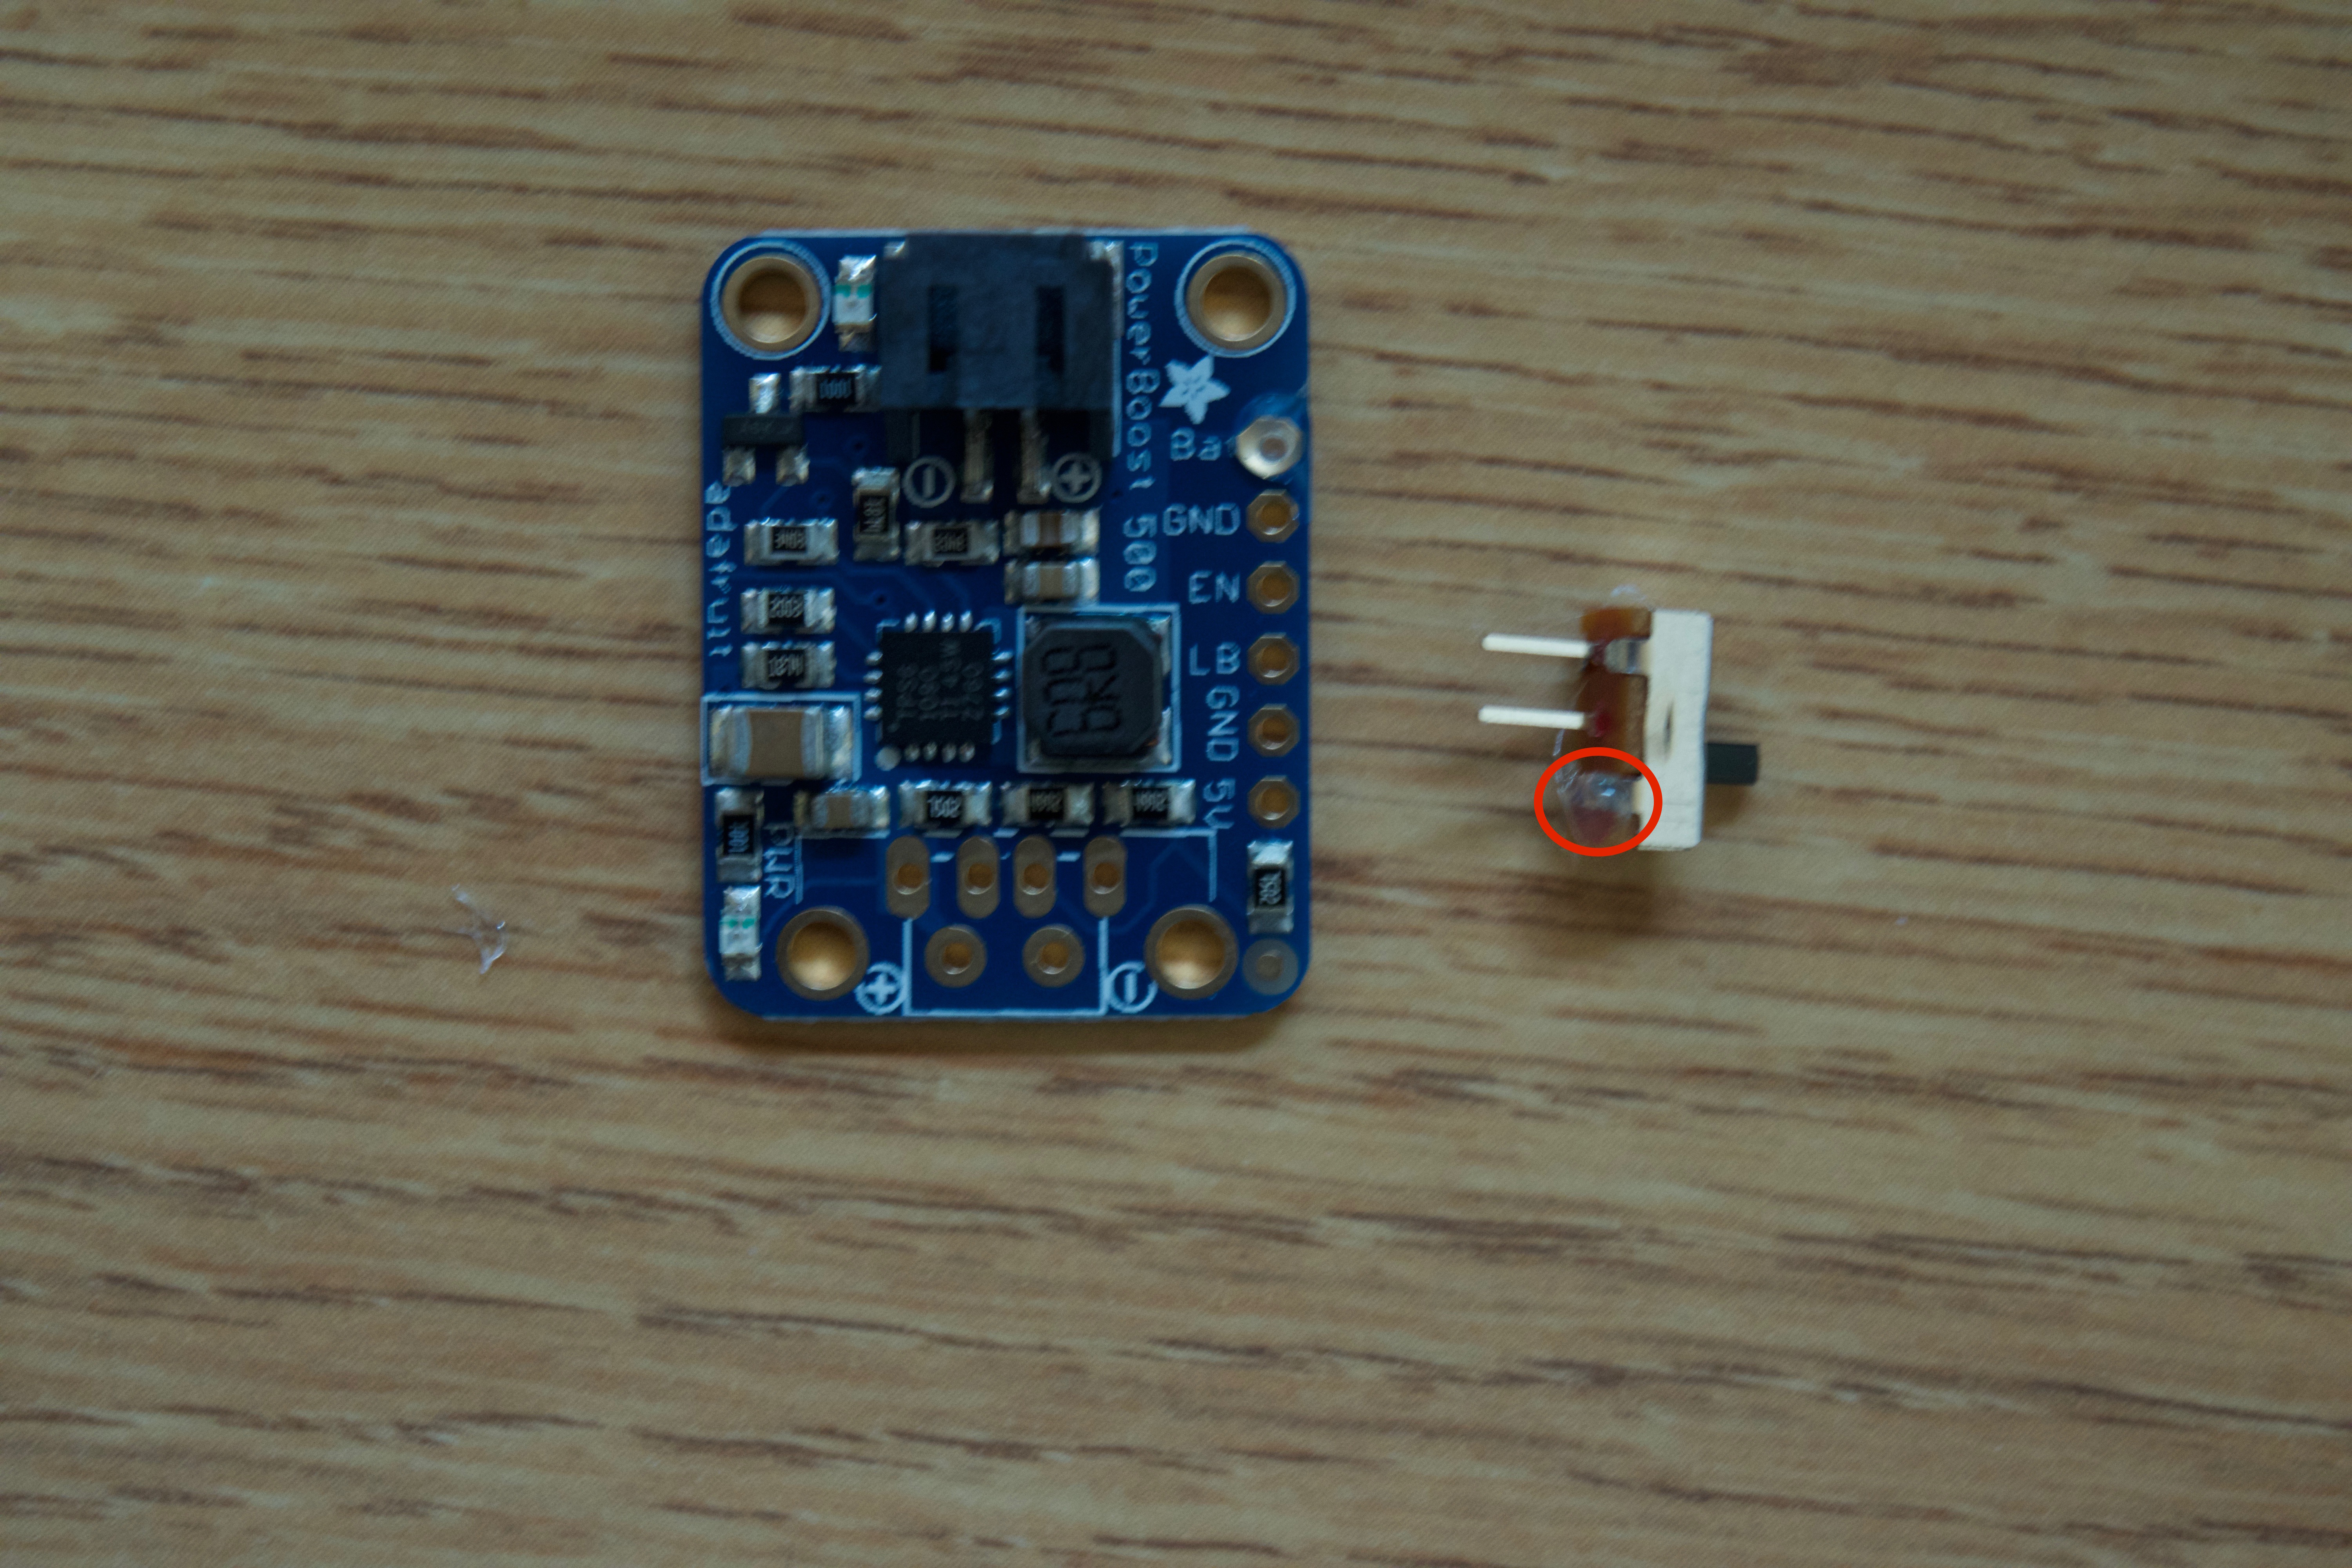
(picture 4)
2) now hot glue the end of the switch which you cut off the legs. We are doing this to prevent any connection from the metal area to the pins on the power boost.
(pictures 5-7)
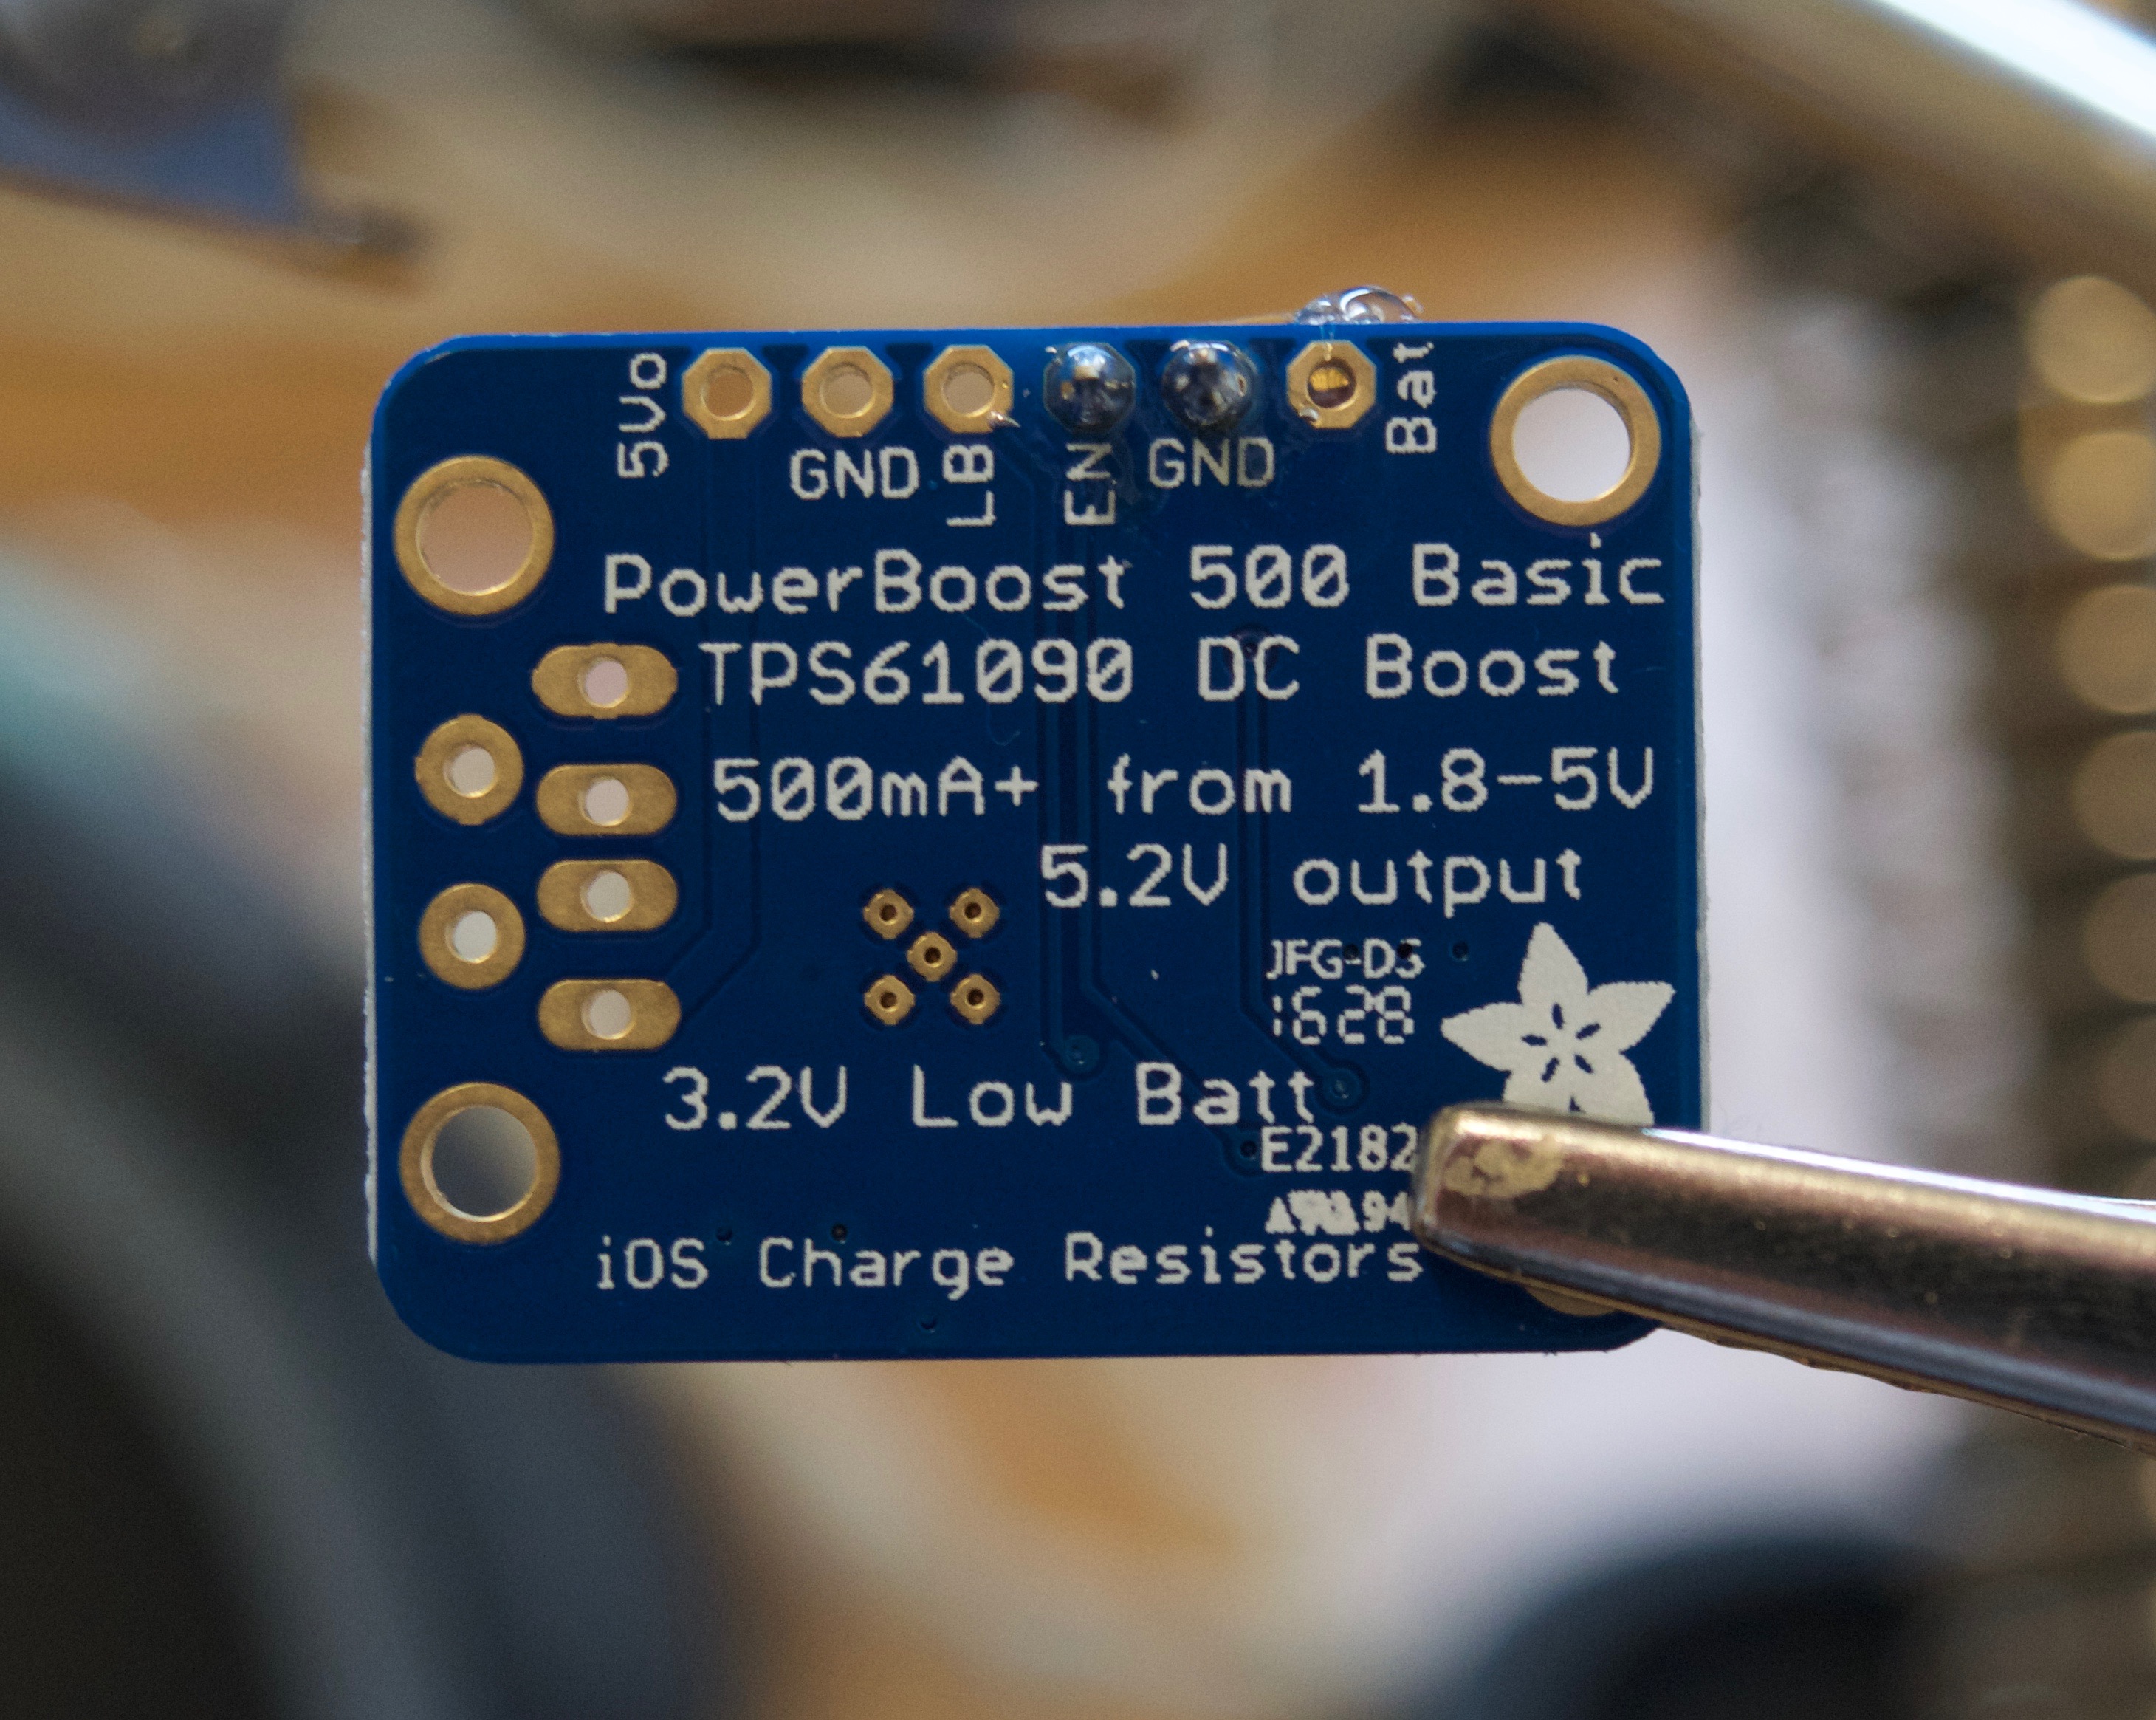
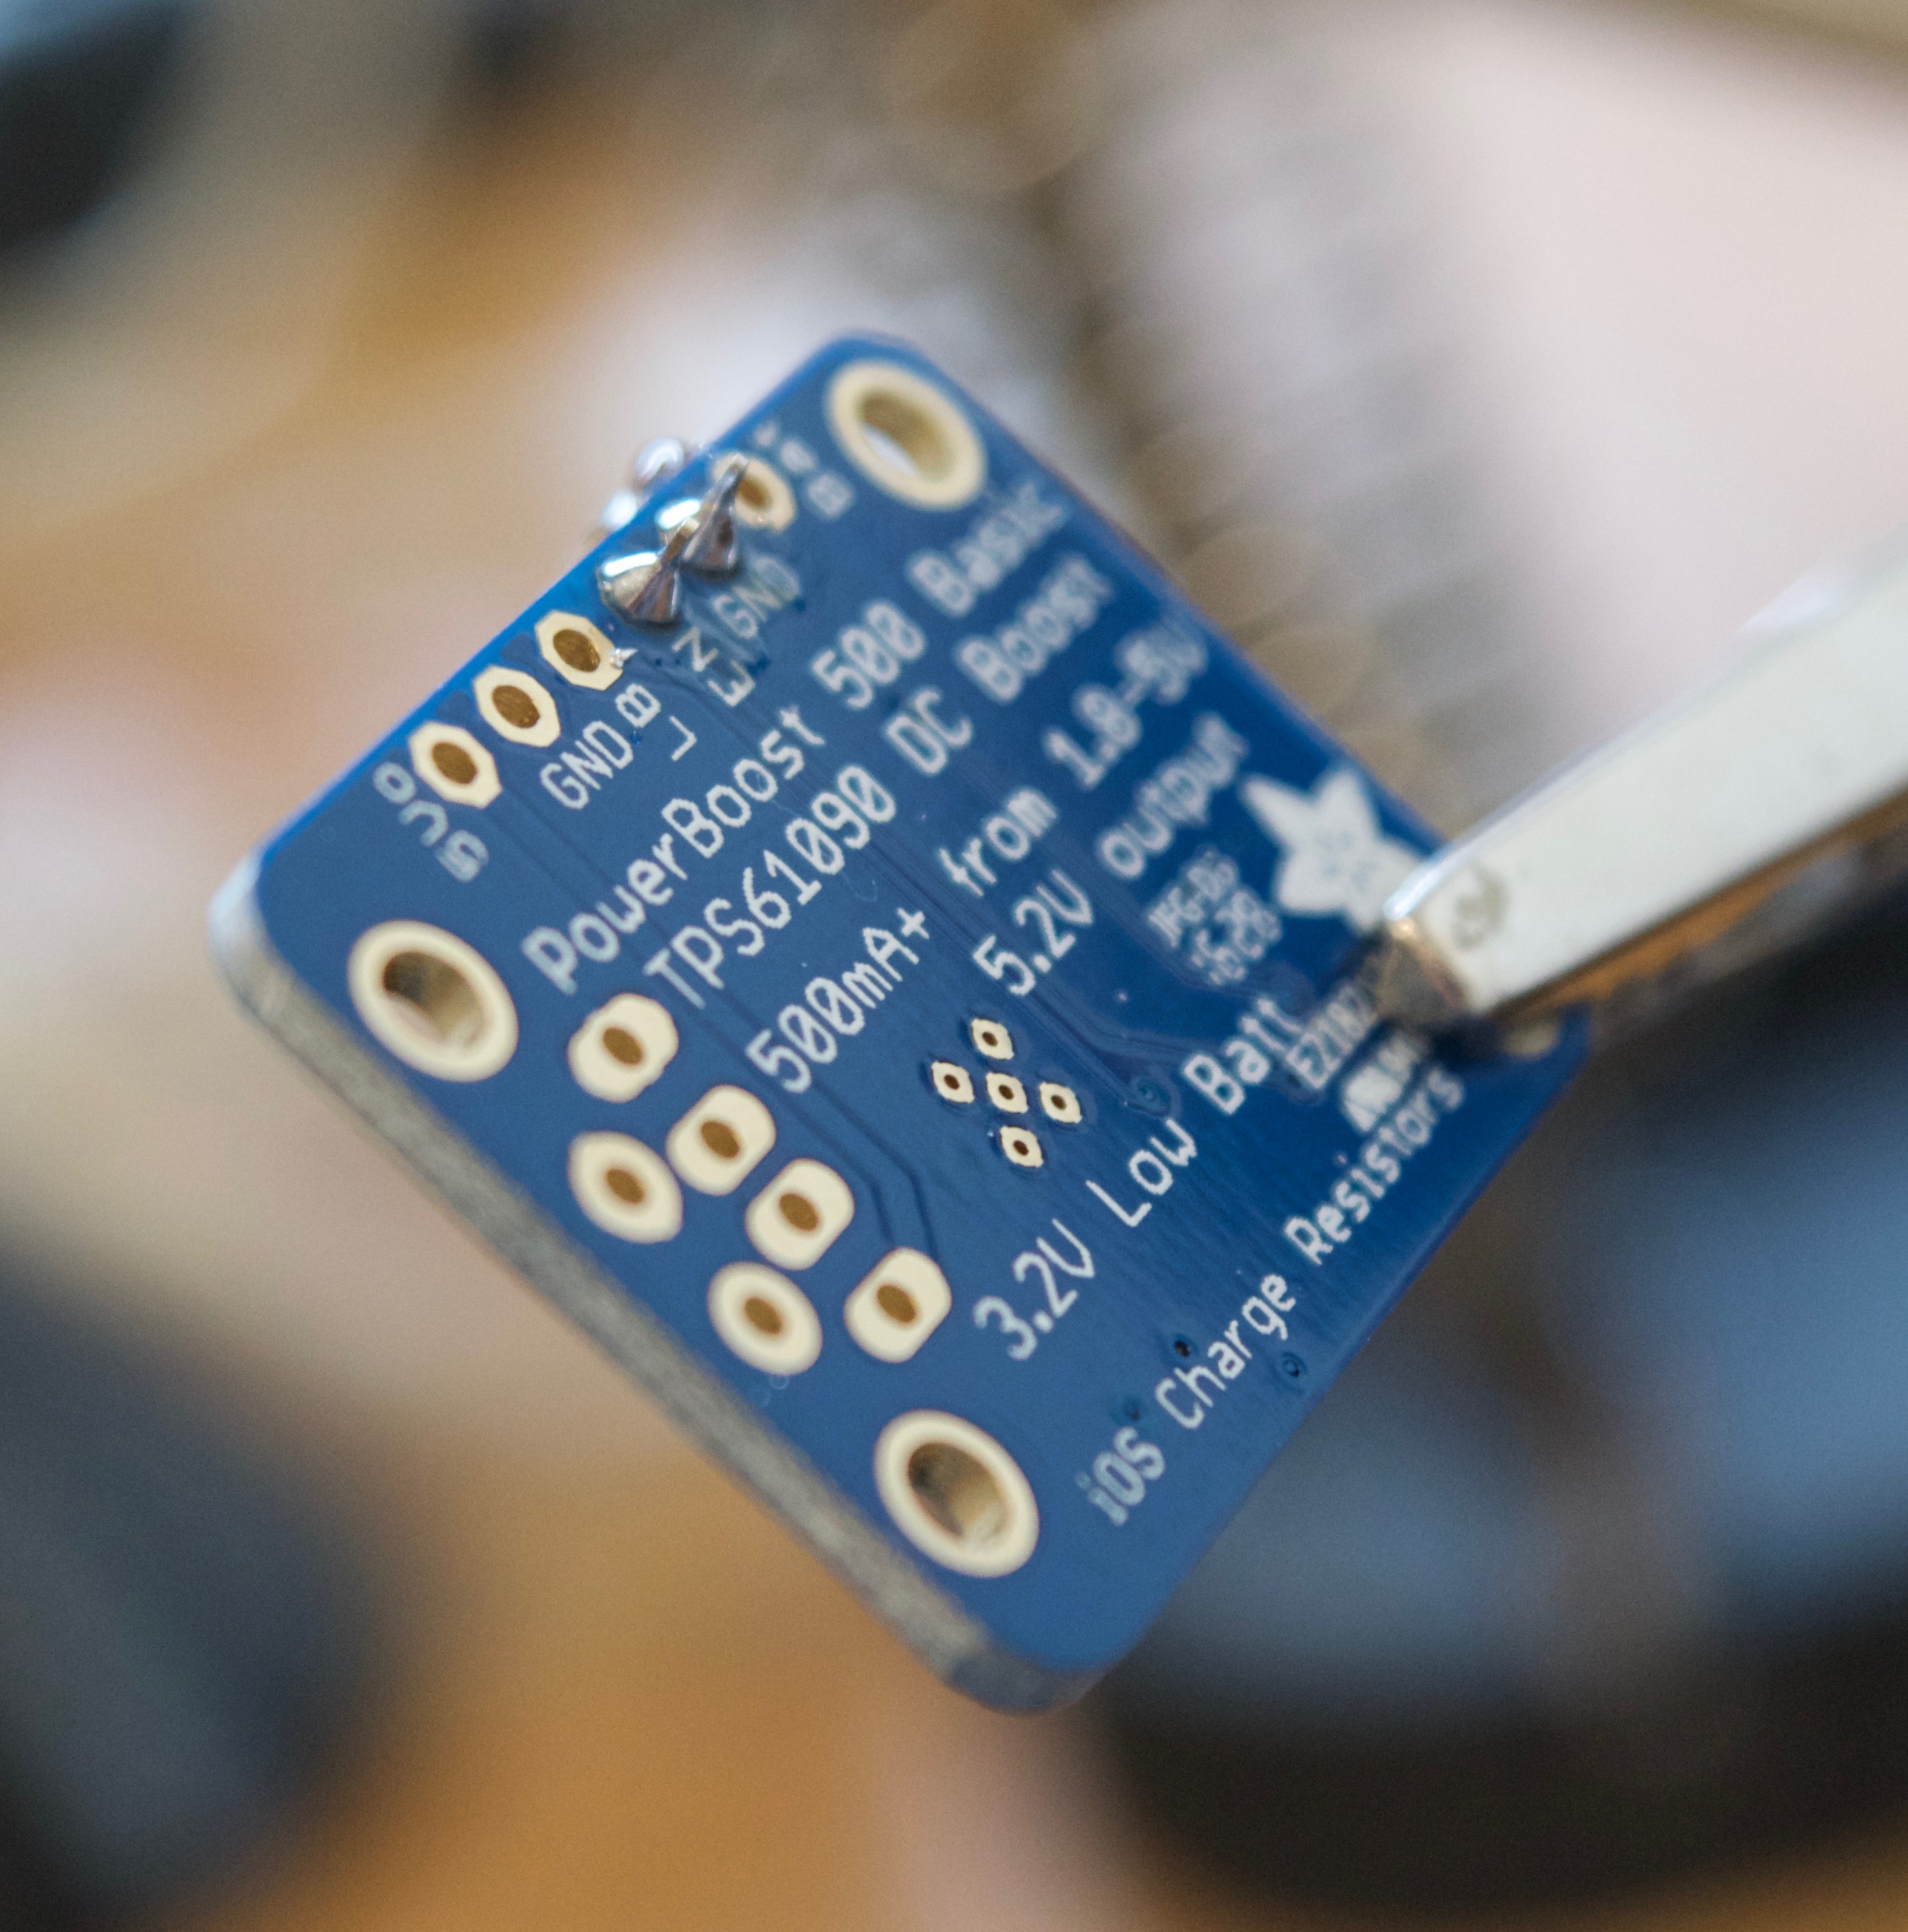
3) put the two leads of the switch into enable (EN) and ground (GND) and the lead that you cut off hot glue that over battery (Bat) to prevent any connection onto the pin. Now solder the two leads into the EN and GND.
(picture 8-9)
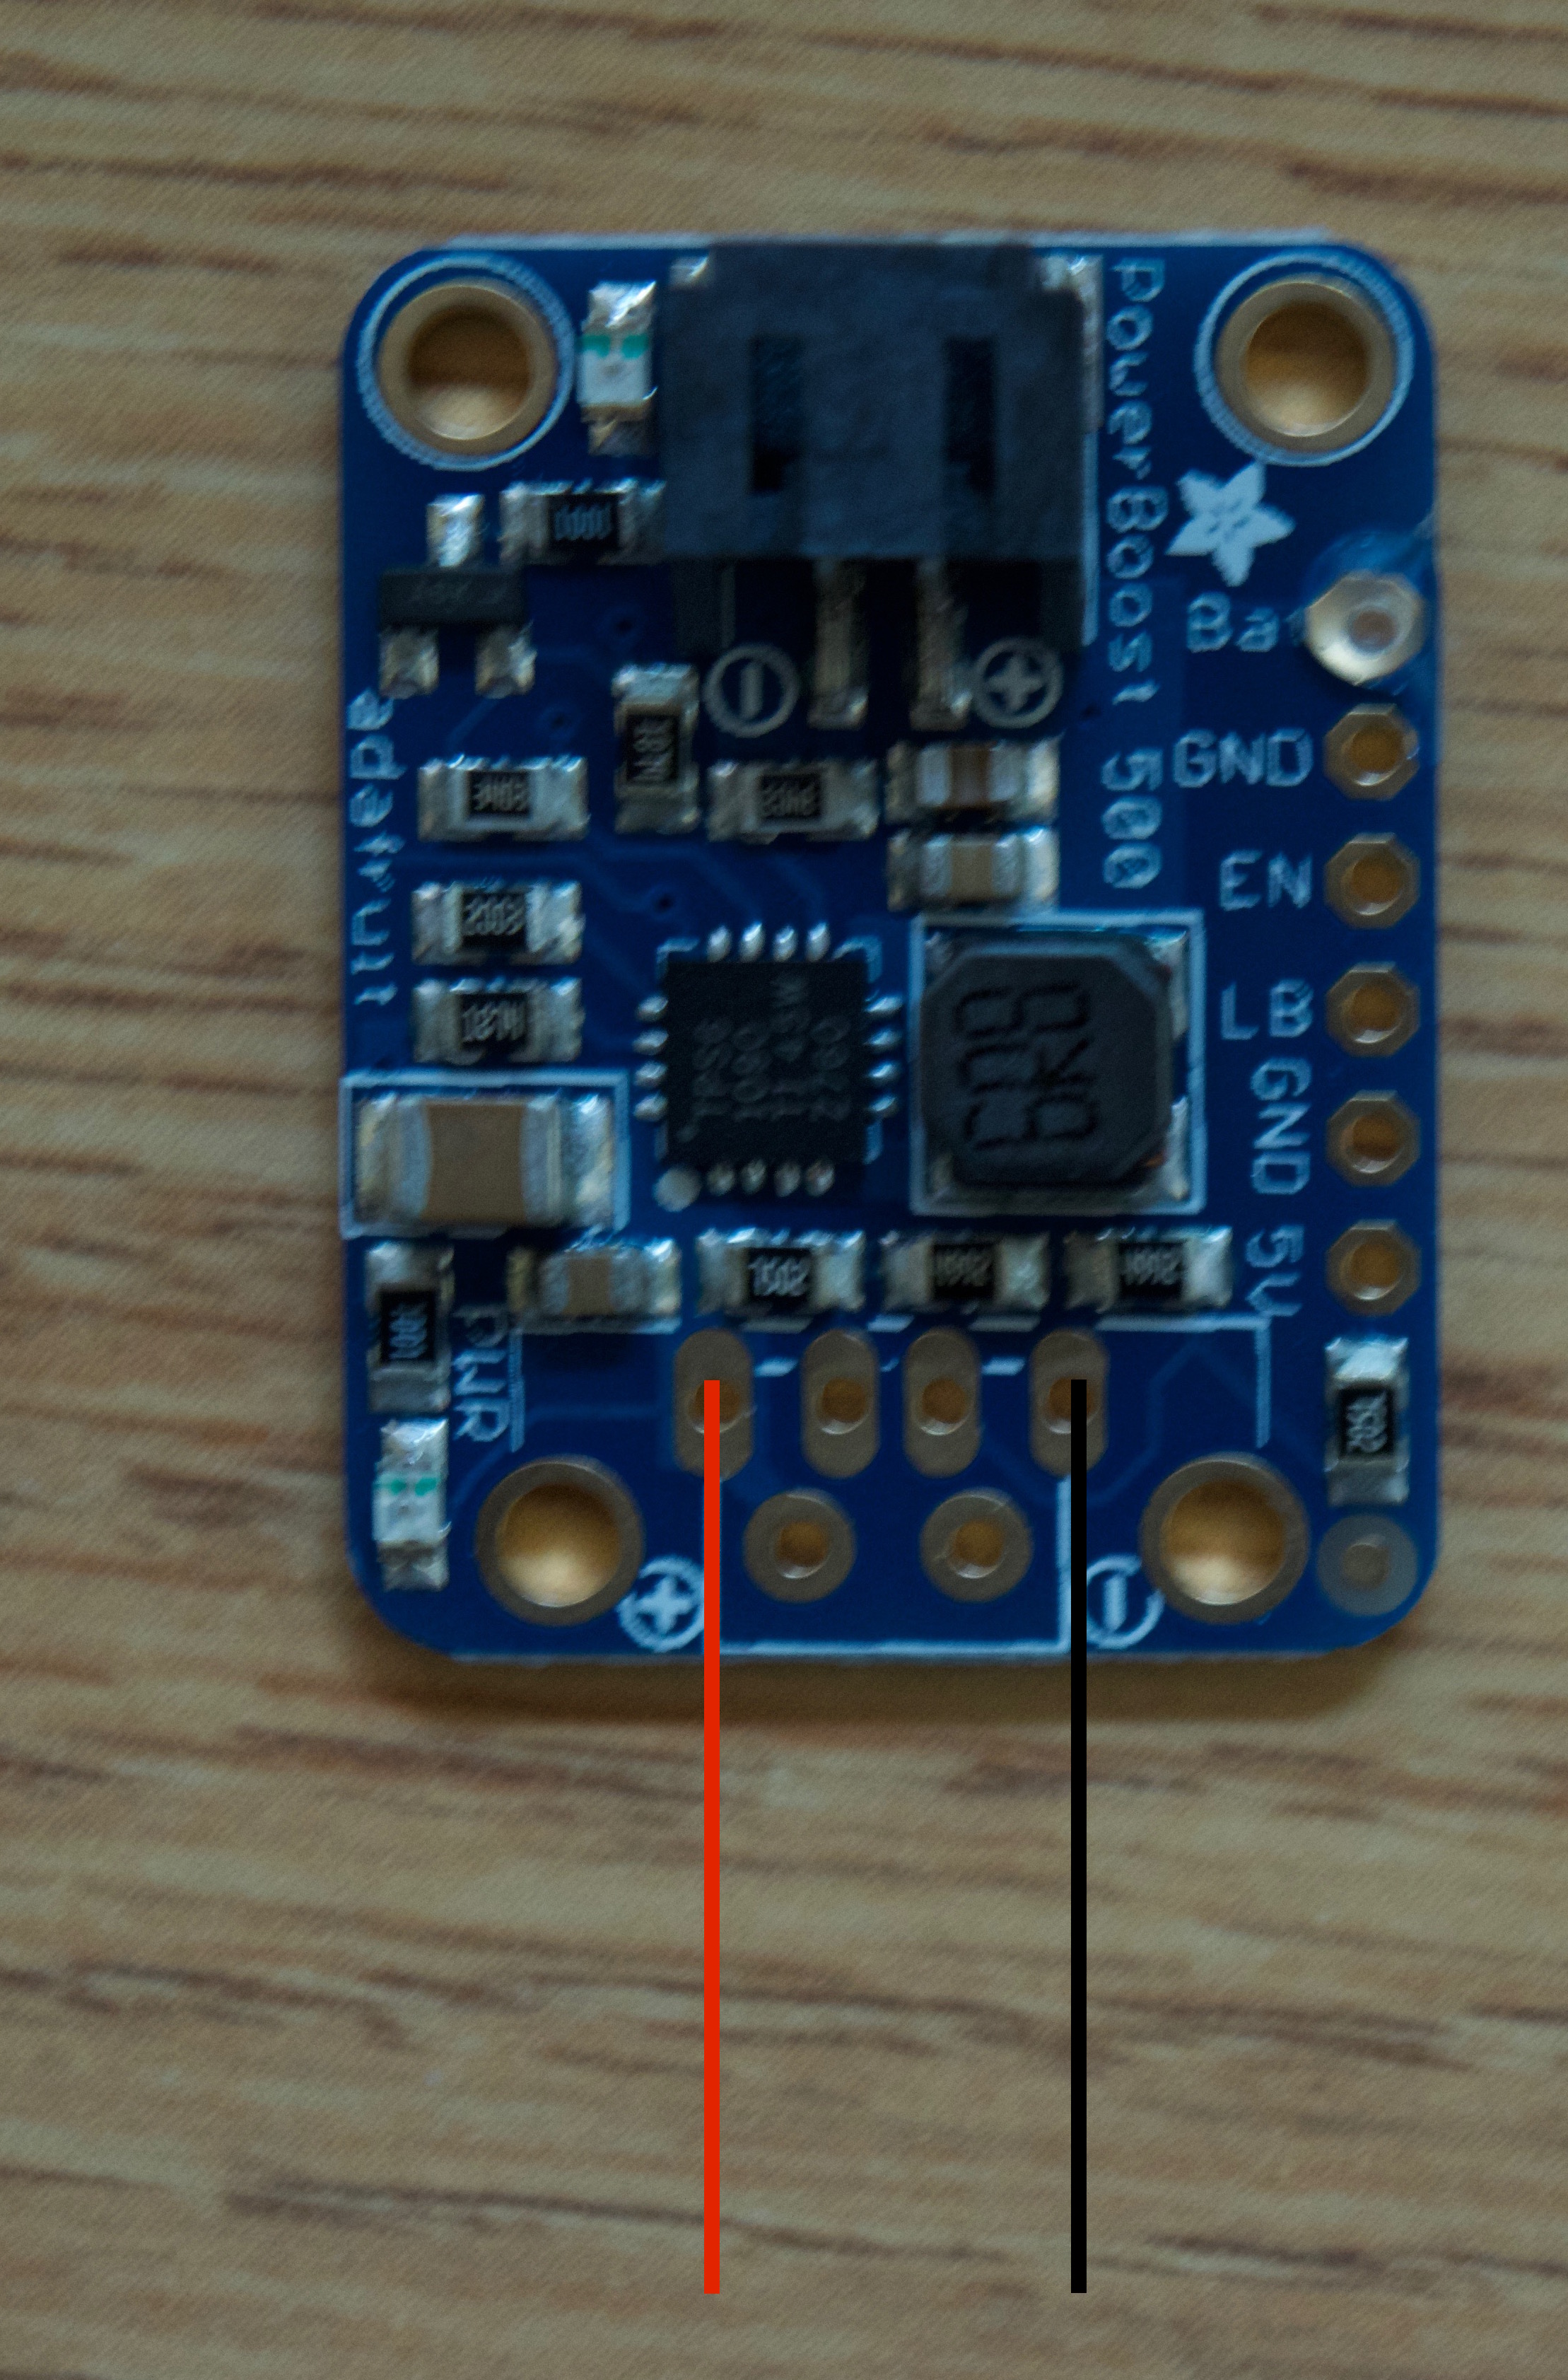
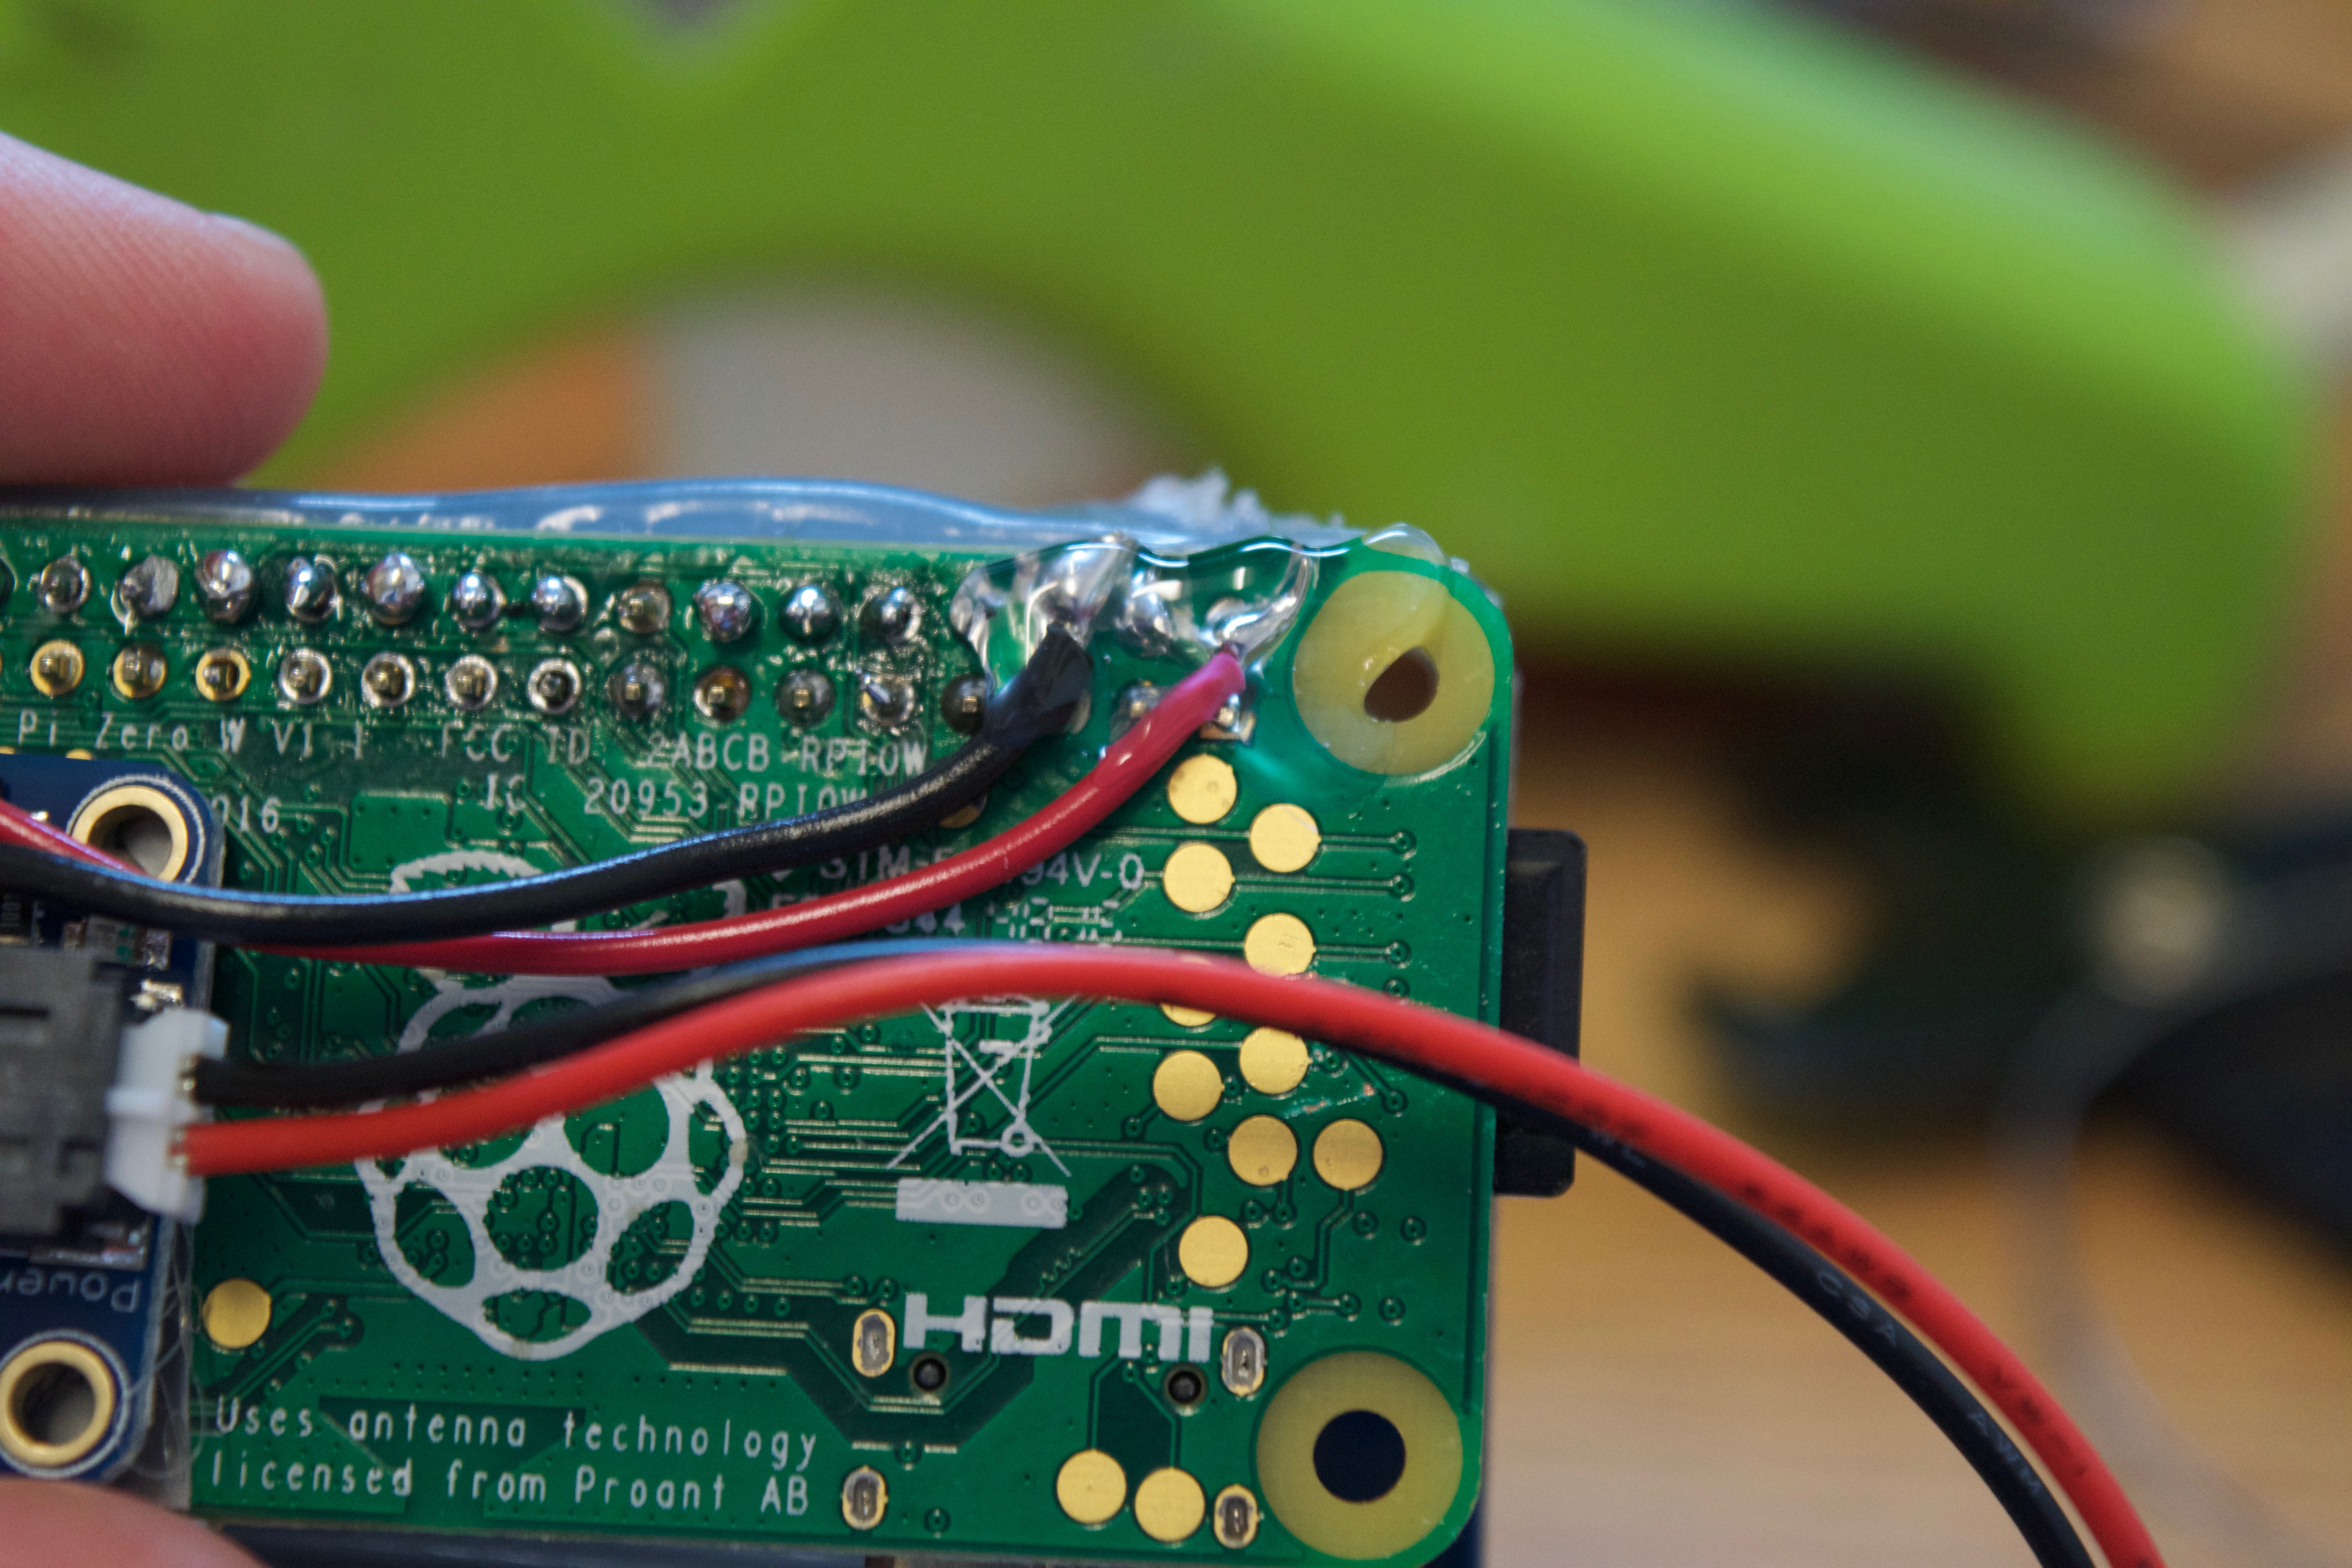
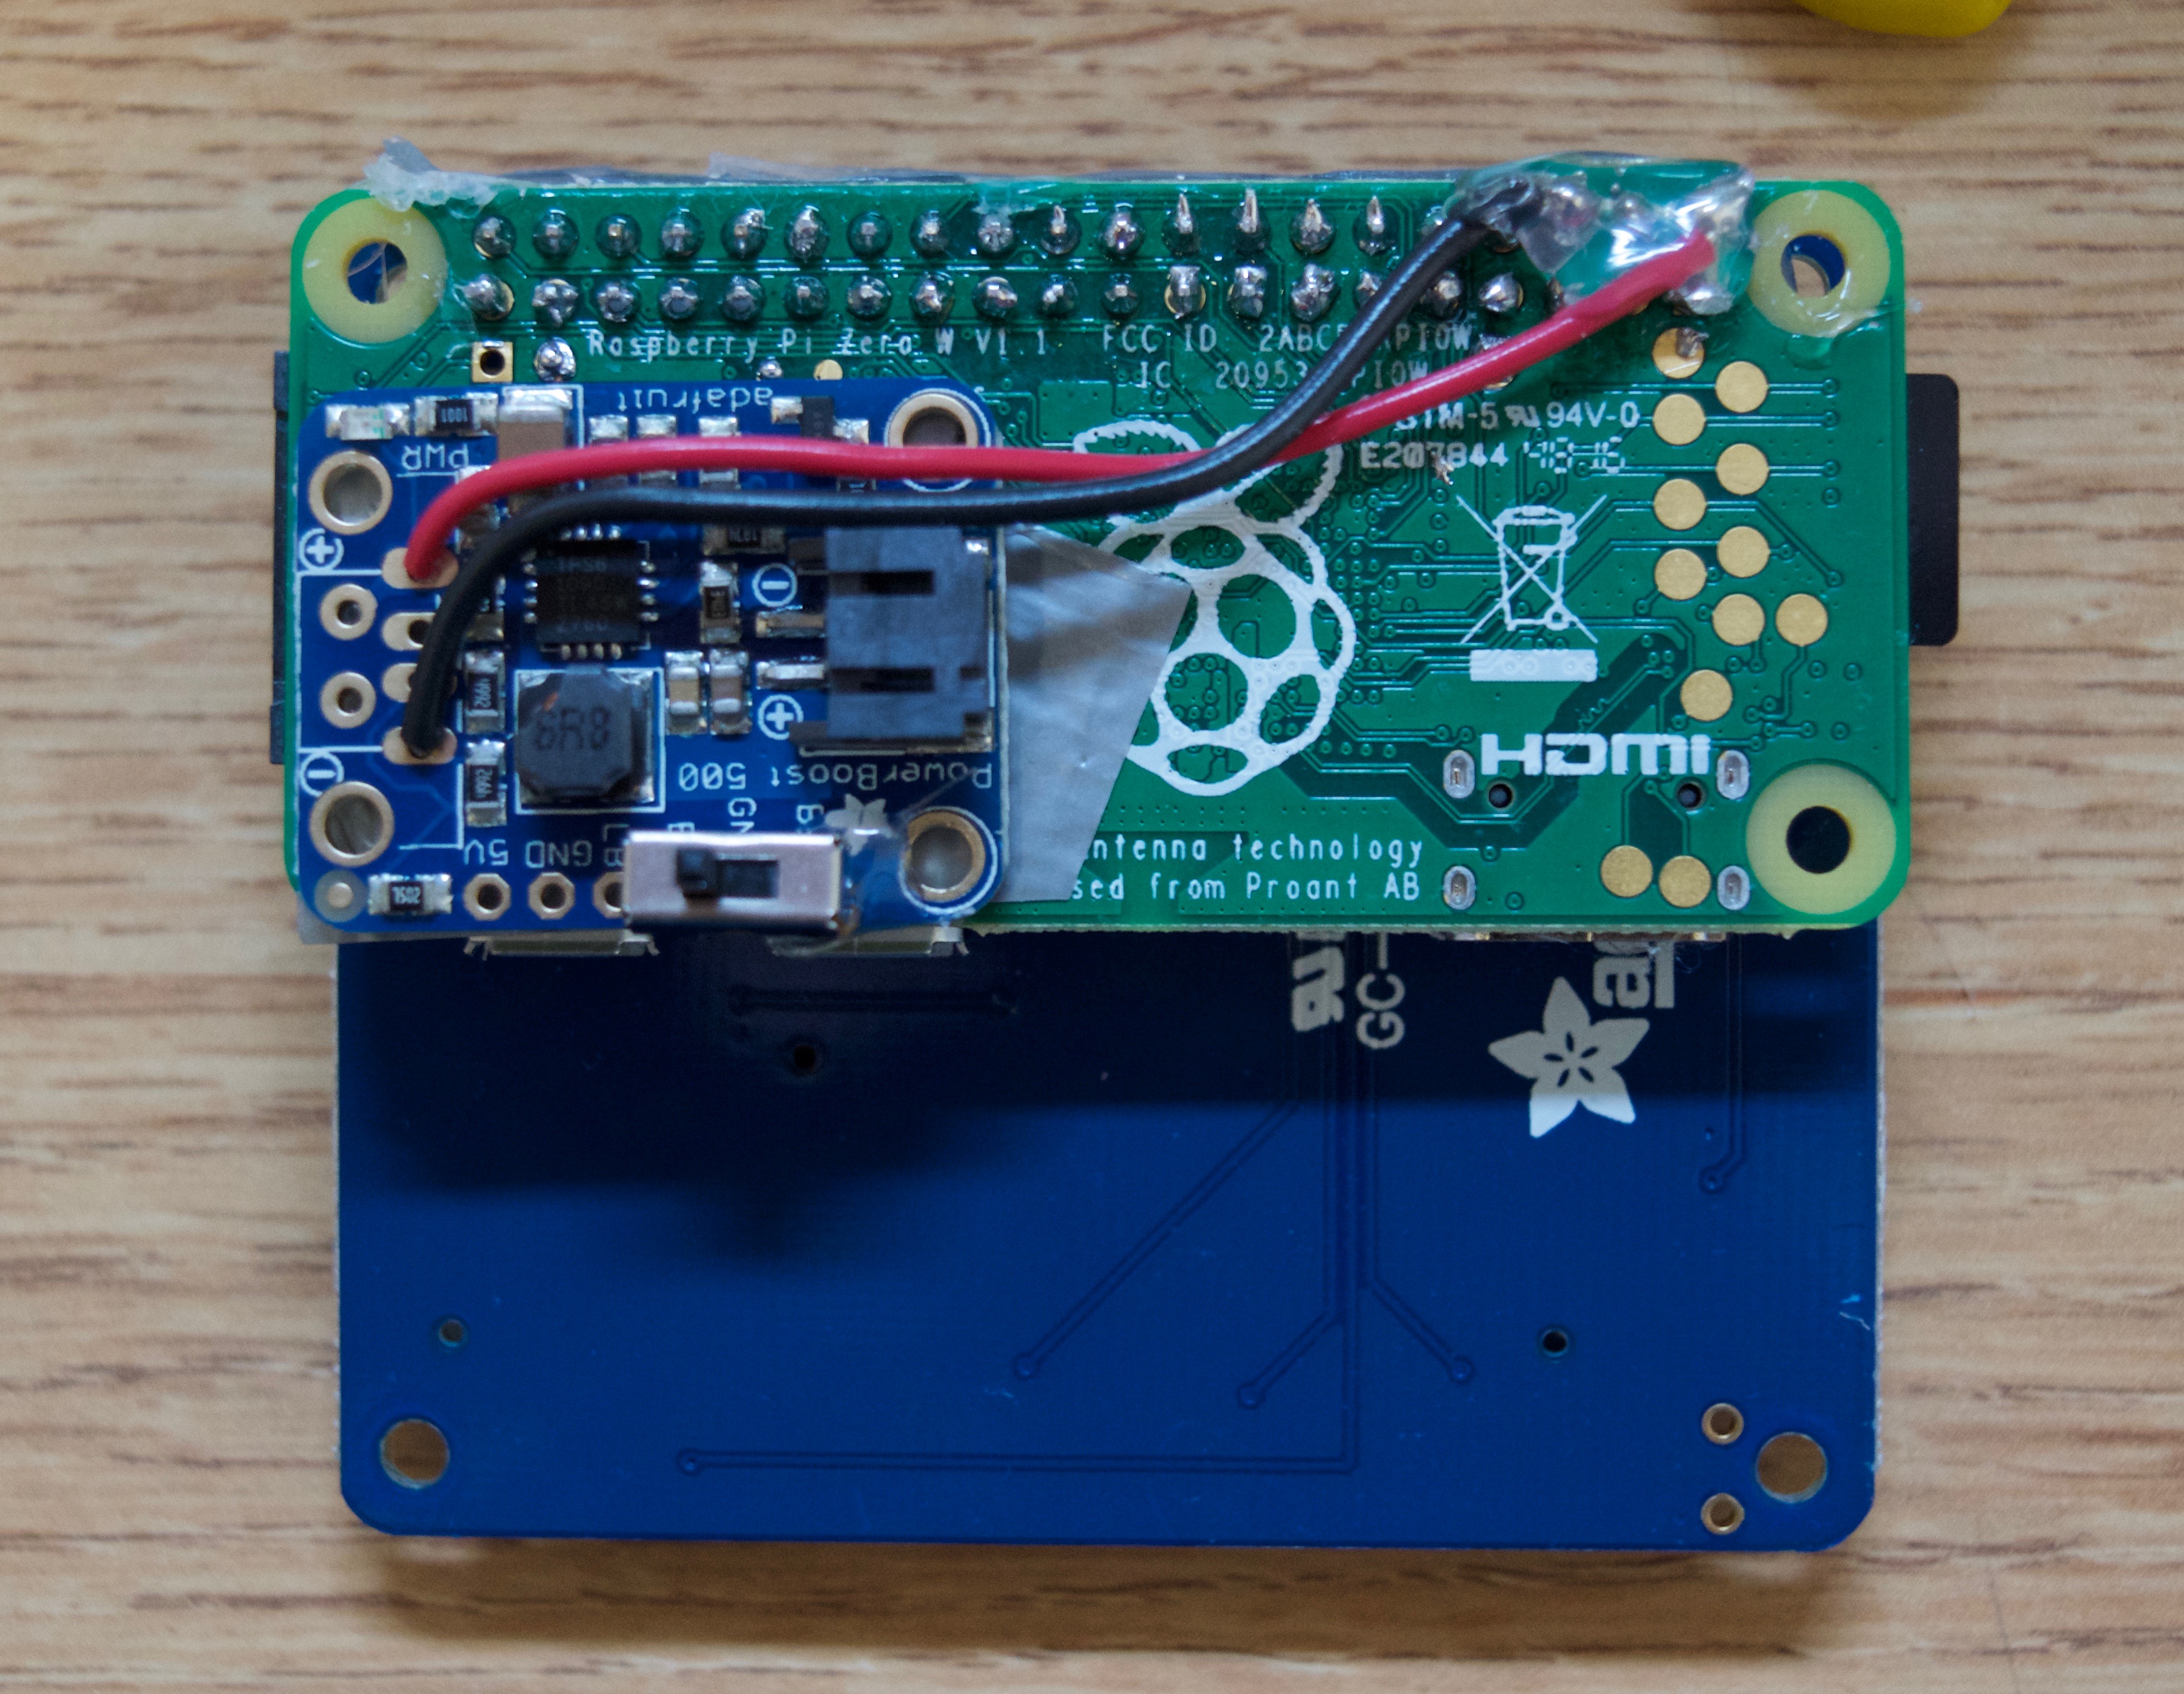
4) attach two wires to the pins shown in the photo. One is connected to power the other is connected to ground of the power boost.
(pictures 10-11)
5) now solder these two wires to 5v pin and the ground pin on the raspberry pi. pin outs of pi . I connected mine to pin 2 and 6 but you can connect it to any 5v pin and any ground pin. Where red wire goes to 5V and black wire to ground.
(picture 12-13)
6) I then just added duck tap to the area that I was hot gluing the power boost to so that I made sure there were no unwanted connections between the power boost and the Pi. Then I hot glued over the soldered connections to the pi to assure it would be stable since this is a wearable and things move.
(picture 14)
7) finished version!
Creating a Wearable Video Player With a NTSC/PAL (Television) TFT Display
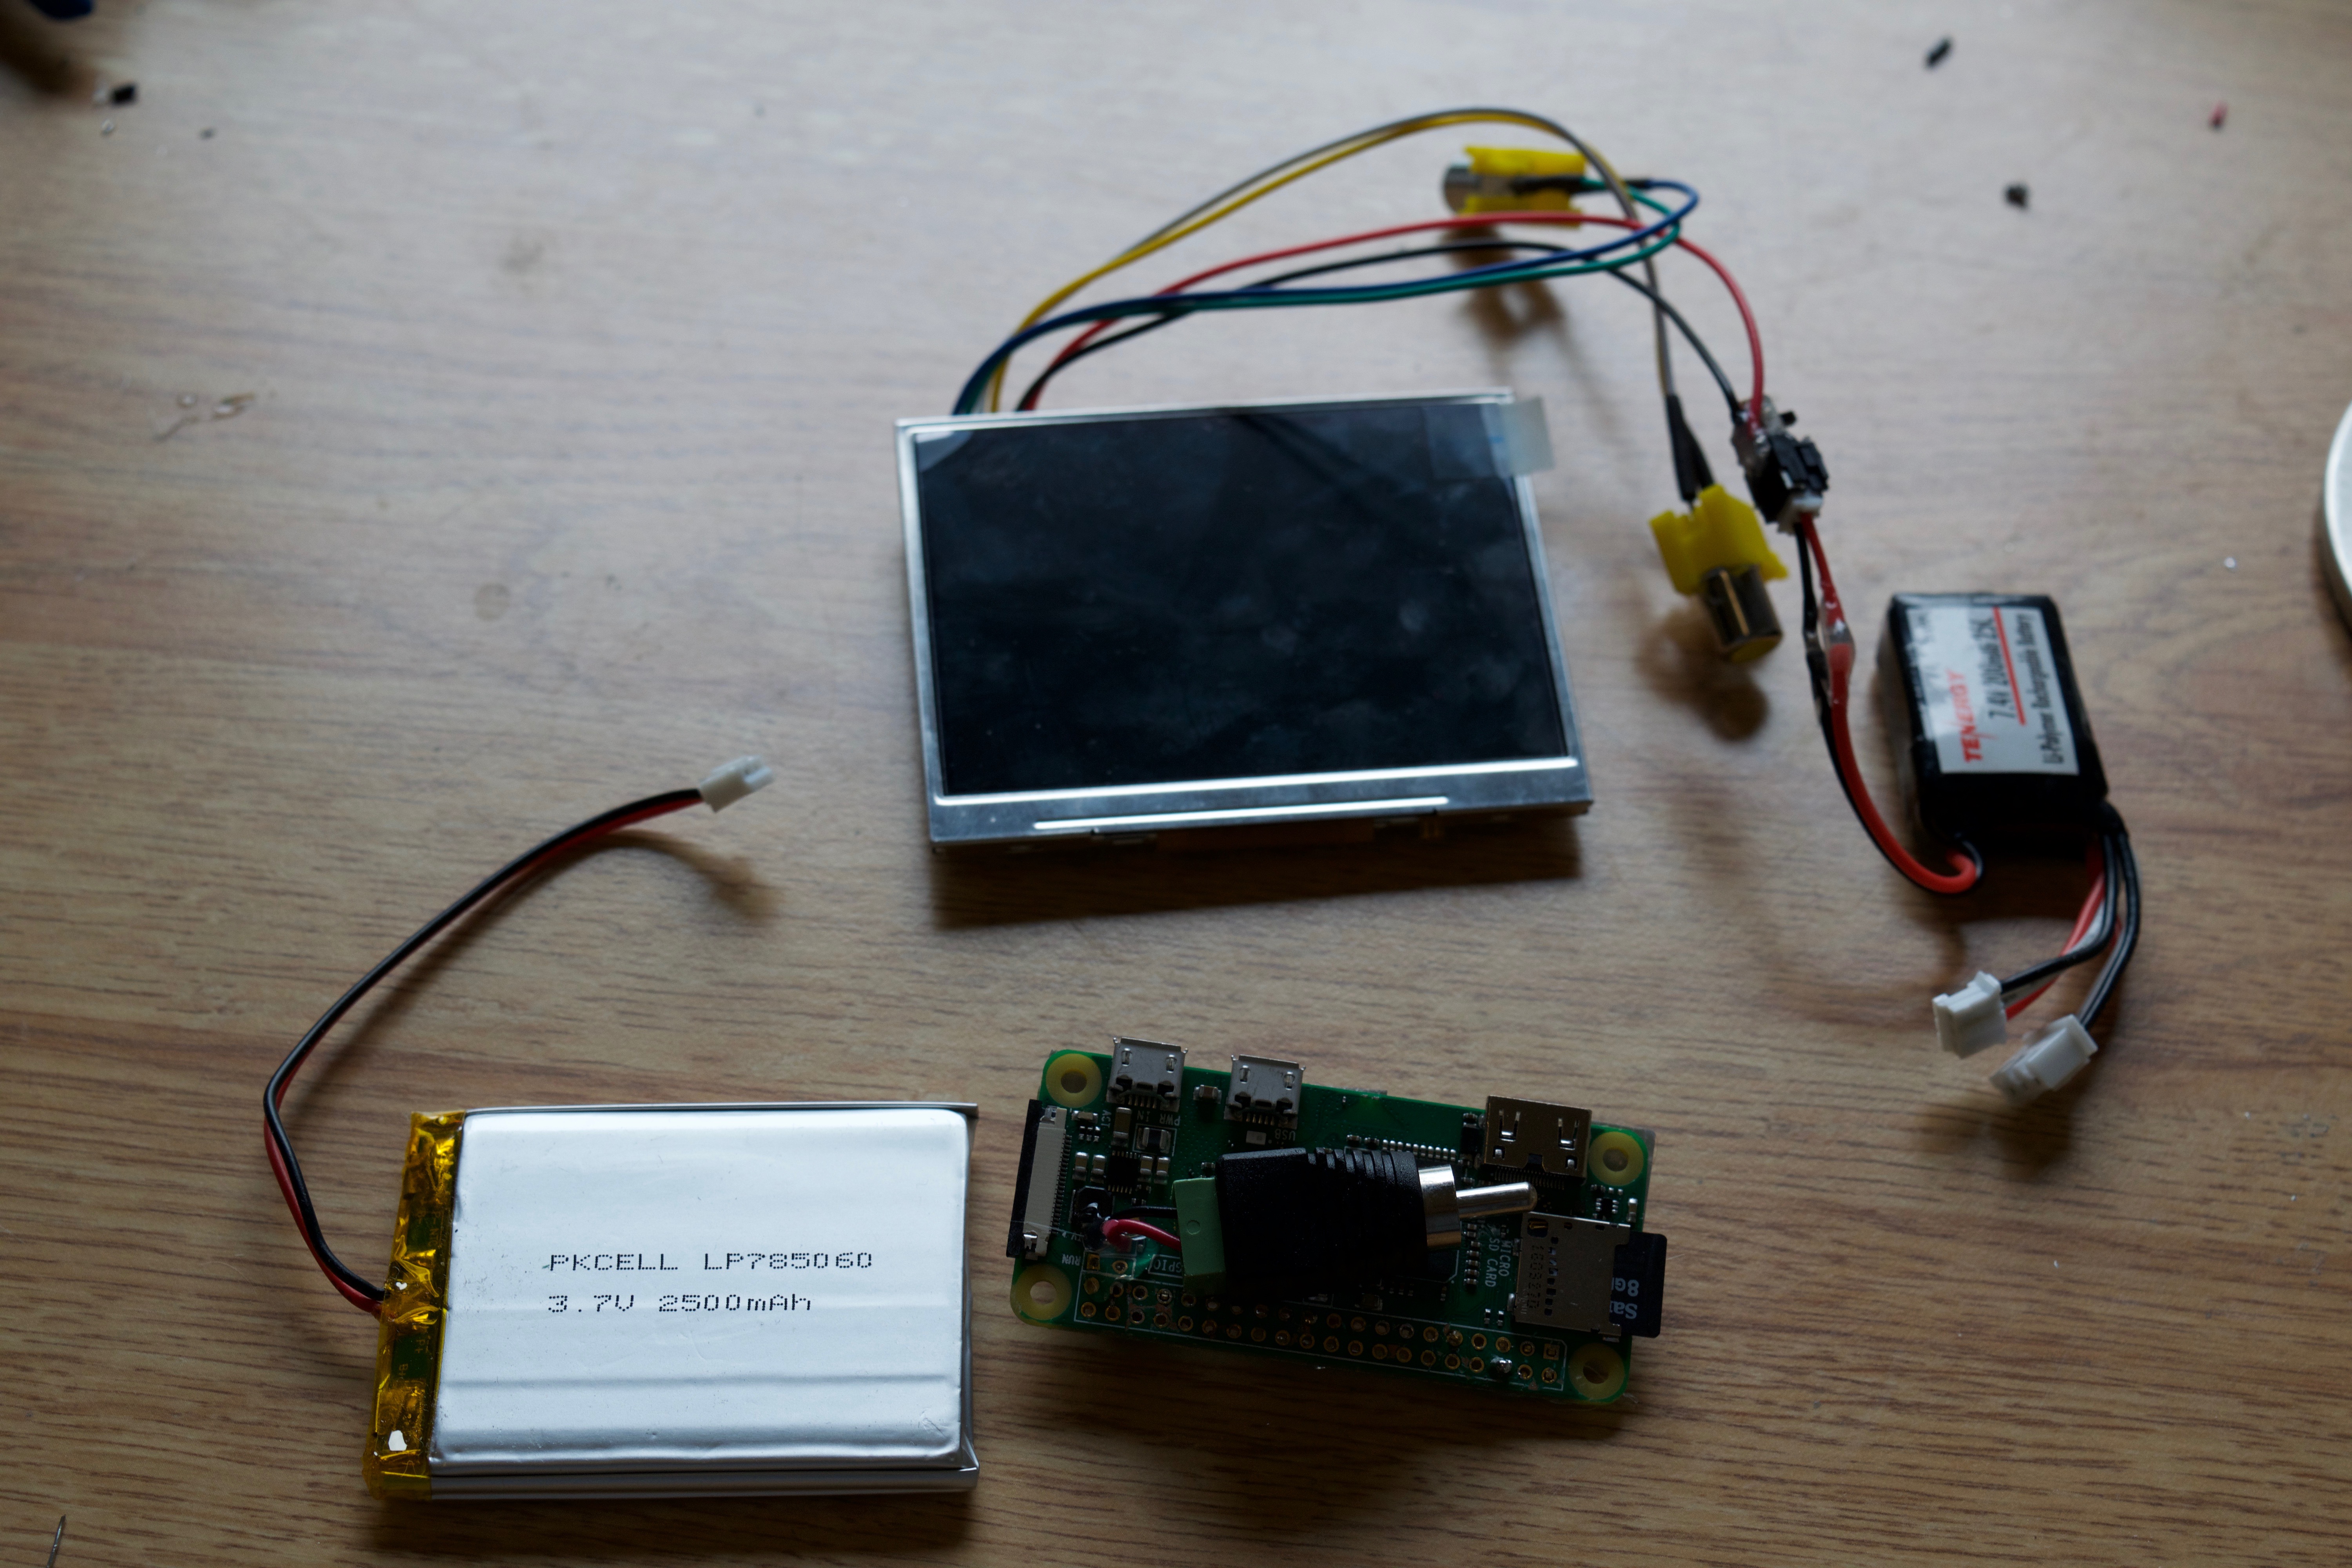
NTSC/PAL (Television) TFT Display vs. a PiTFT hat
Pros:
-Simple to work with
-better image
-allows for different video player software
-easier coding
-loads video software faster
Cons:
-expensive
-a little more circuitry involved
Because this tutorial has been geared towards how to use a cheaper display I won't go into as much depth with the NTSC/PAL (Television) TFT Display but heres a quick tutorial to using it. The TSC/PAL (Television) TFT Display works very similar to the PiTFT hat.
Tutorial:
1)download raspbian on your micro usb card
(picture 1-2)
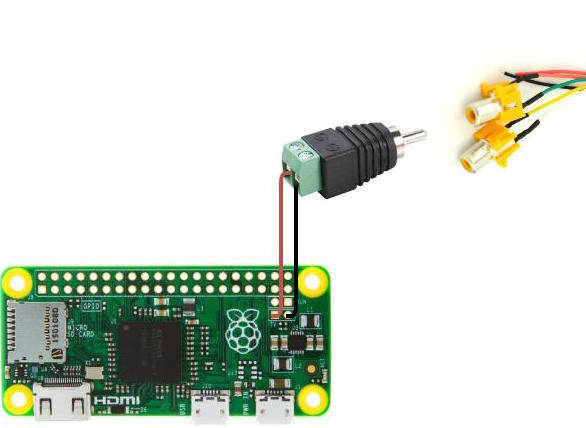
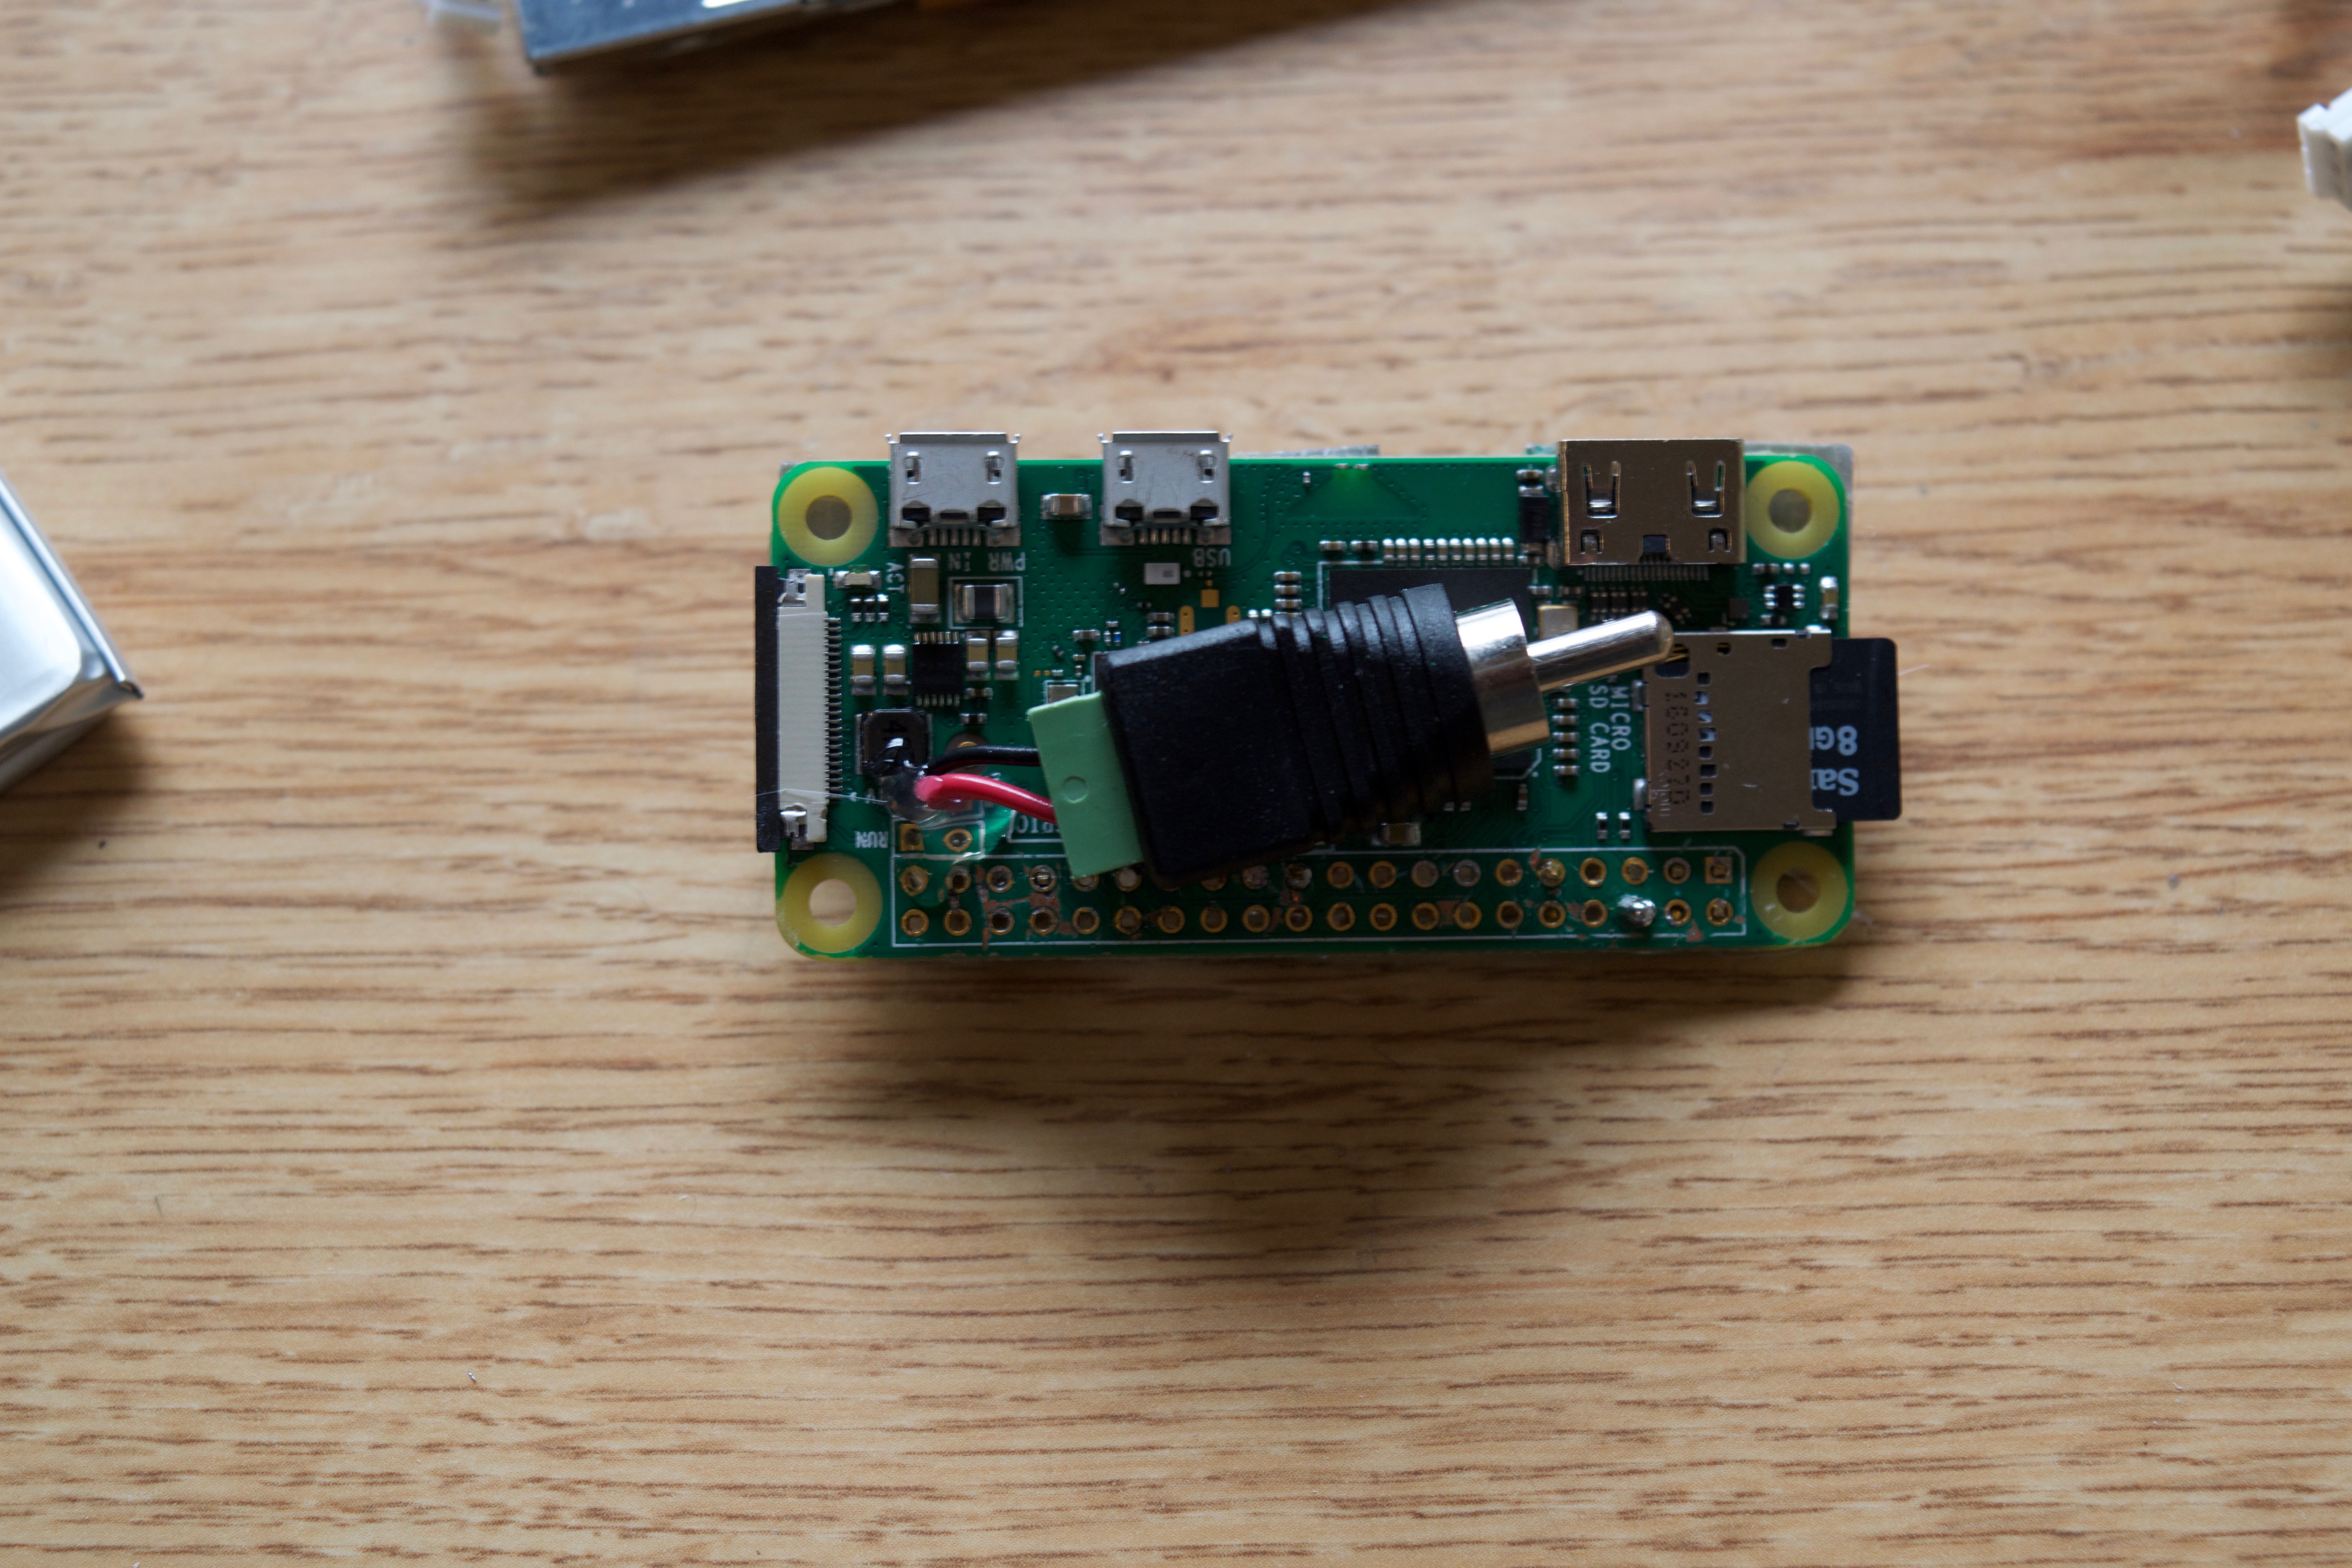
2) connect the male RCA into the RCA socket , for the 3.5" diagonal screen connect the green wired RCA socket to the male RCA.
(pictures 3 and 4)
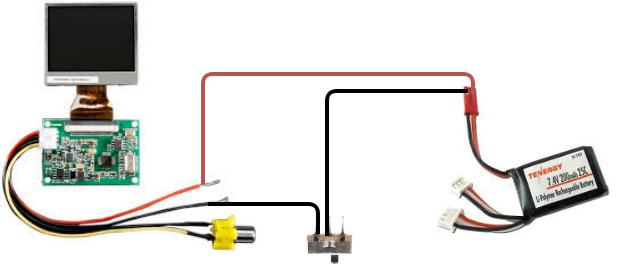
3) These screens require a bit of voltage so you are going to need to buy a battery that supplies at least 7 volts and gives off at least 150milliamps. Plug in the battery to power the screen. Since we want to turn this off and on I just made a switch for it. I happened to solder the switch to a JST-PH 2-Pin and attach a JST 2-pin cable to the battery since it didn't have one for easy in and out connection but what's shown in the circuit is just fine.
(picture 5)
4) Then I connected the power boost same way as for PiTFT (refer to step 12).
(pictures 6 and 7)
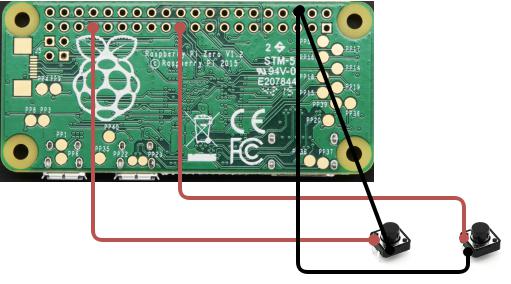
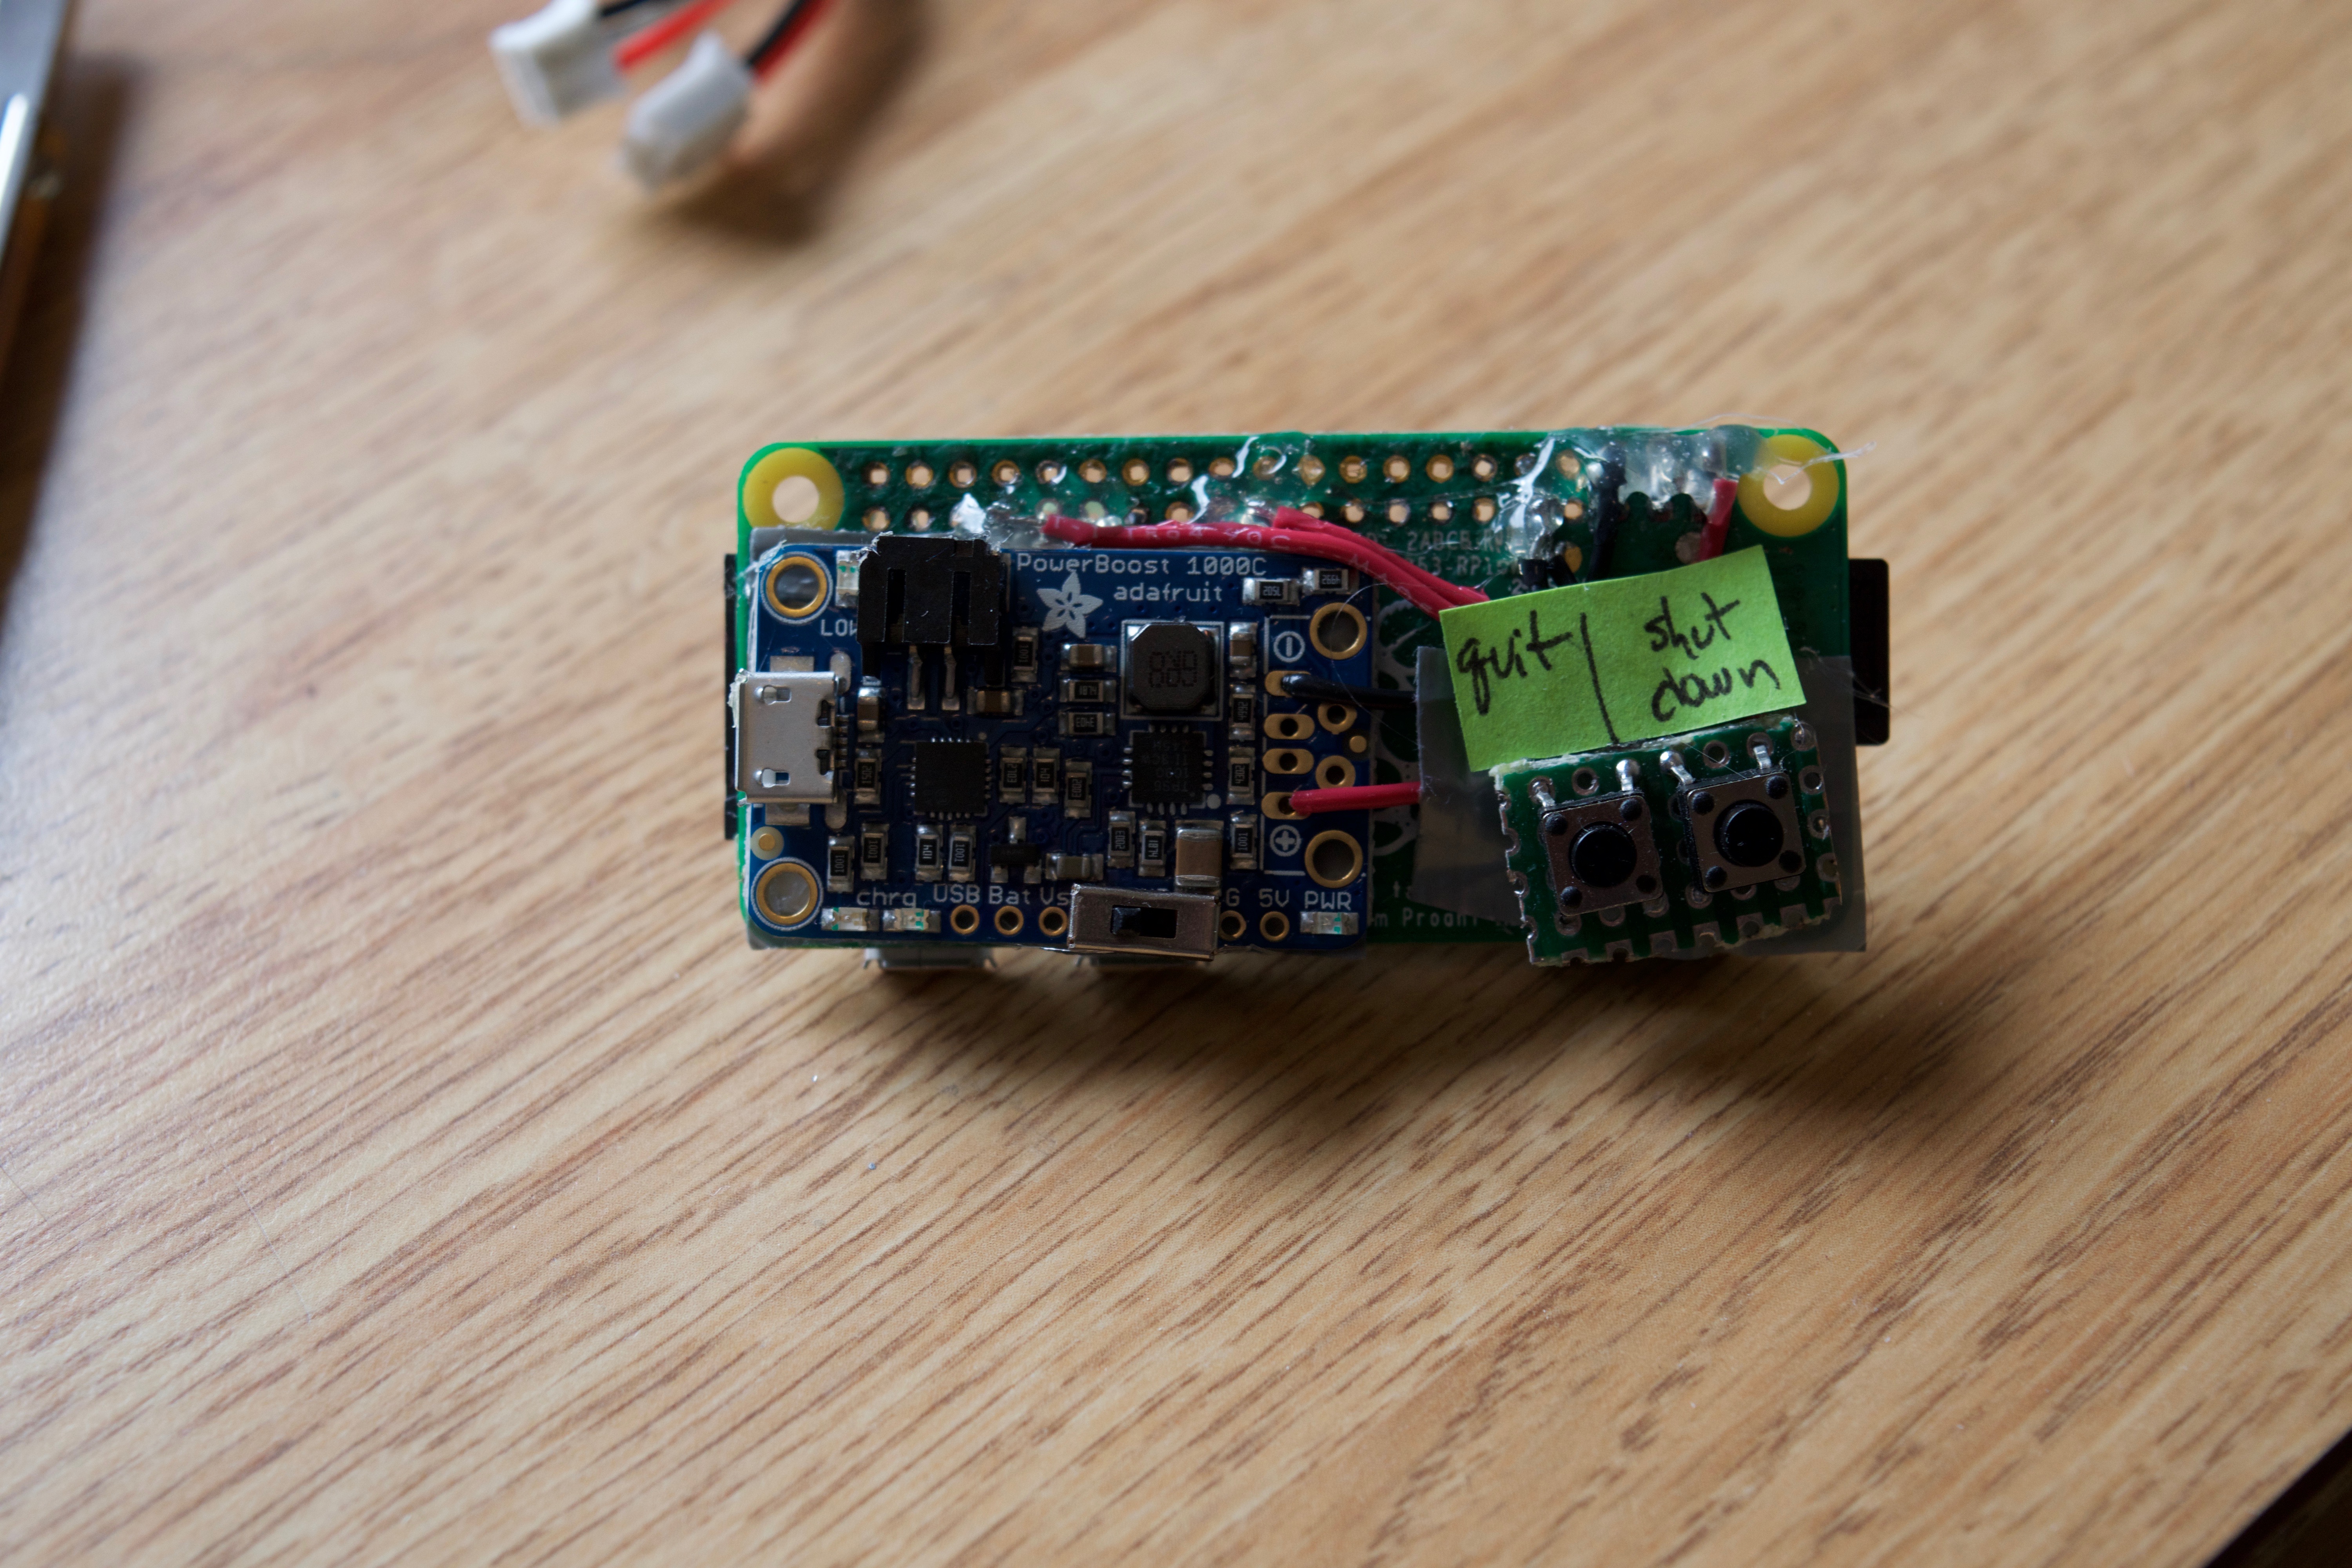
5) I then covered the area I would place the push buttons on with duck tape and began soldering on 2 momentary push buttons ( like the ones attached the to the PiTFT hat) to a proto board and then soldered them to the GPIO pins 9 and 13 and to ground. I labeled them just to make myself remember which button did what for simplicity.
(picture 8)
6)
for uploading a video refer to step 9
This code is similar to the one used for the PiTFT hat except we are using omxplayer as appose to mxplayer ( I personally prefer omxplayer which works on this display). Don't forget to first install omxplayer though by typing
sudo apt-get install omxplayer
We are also using the momentary push buttons as a replacement for the buttons that would be on the PiTFT. One of the nice things about omxplayer is that when it runs a video it will open it full screen unlike mxplayer, just make sure the video size is 640 x 480. Don't believe me? type (replace nameofvideo.mov with the video file you have that can be mp4, mov, etc) in terminal:
omxplayer NAMEOFVIDEO.mov
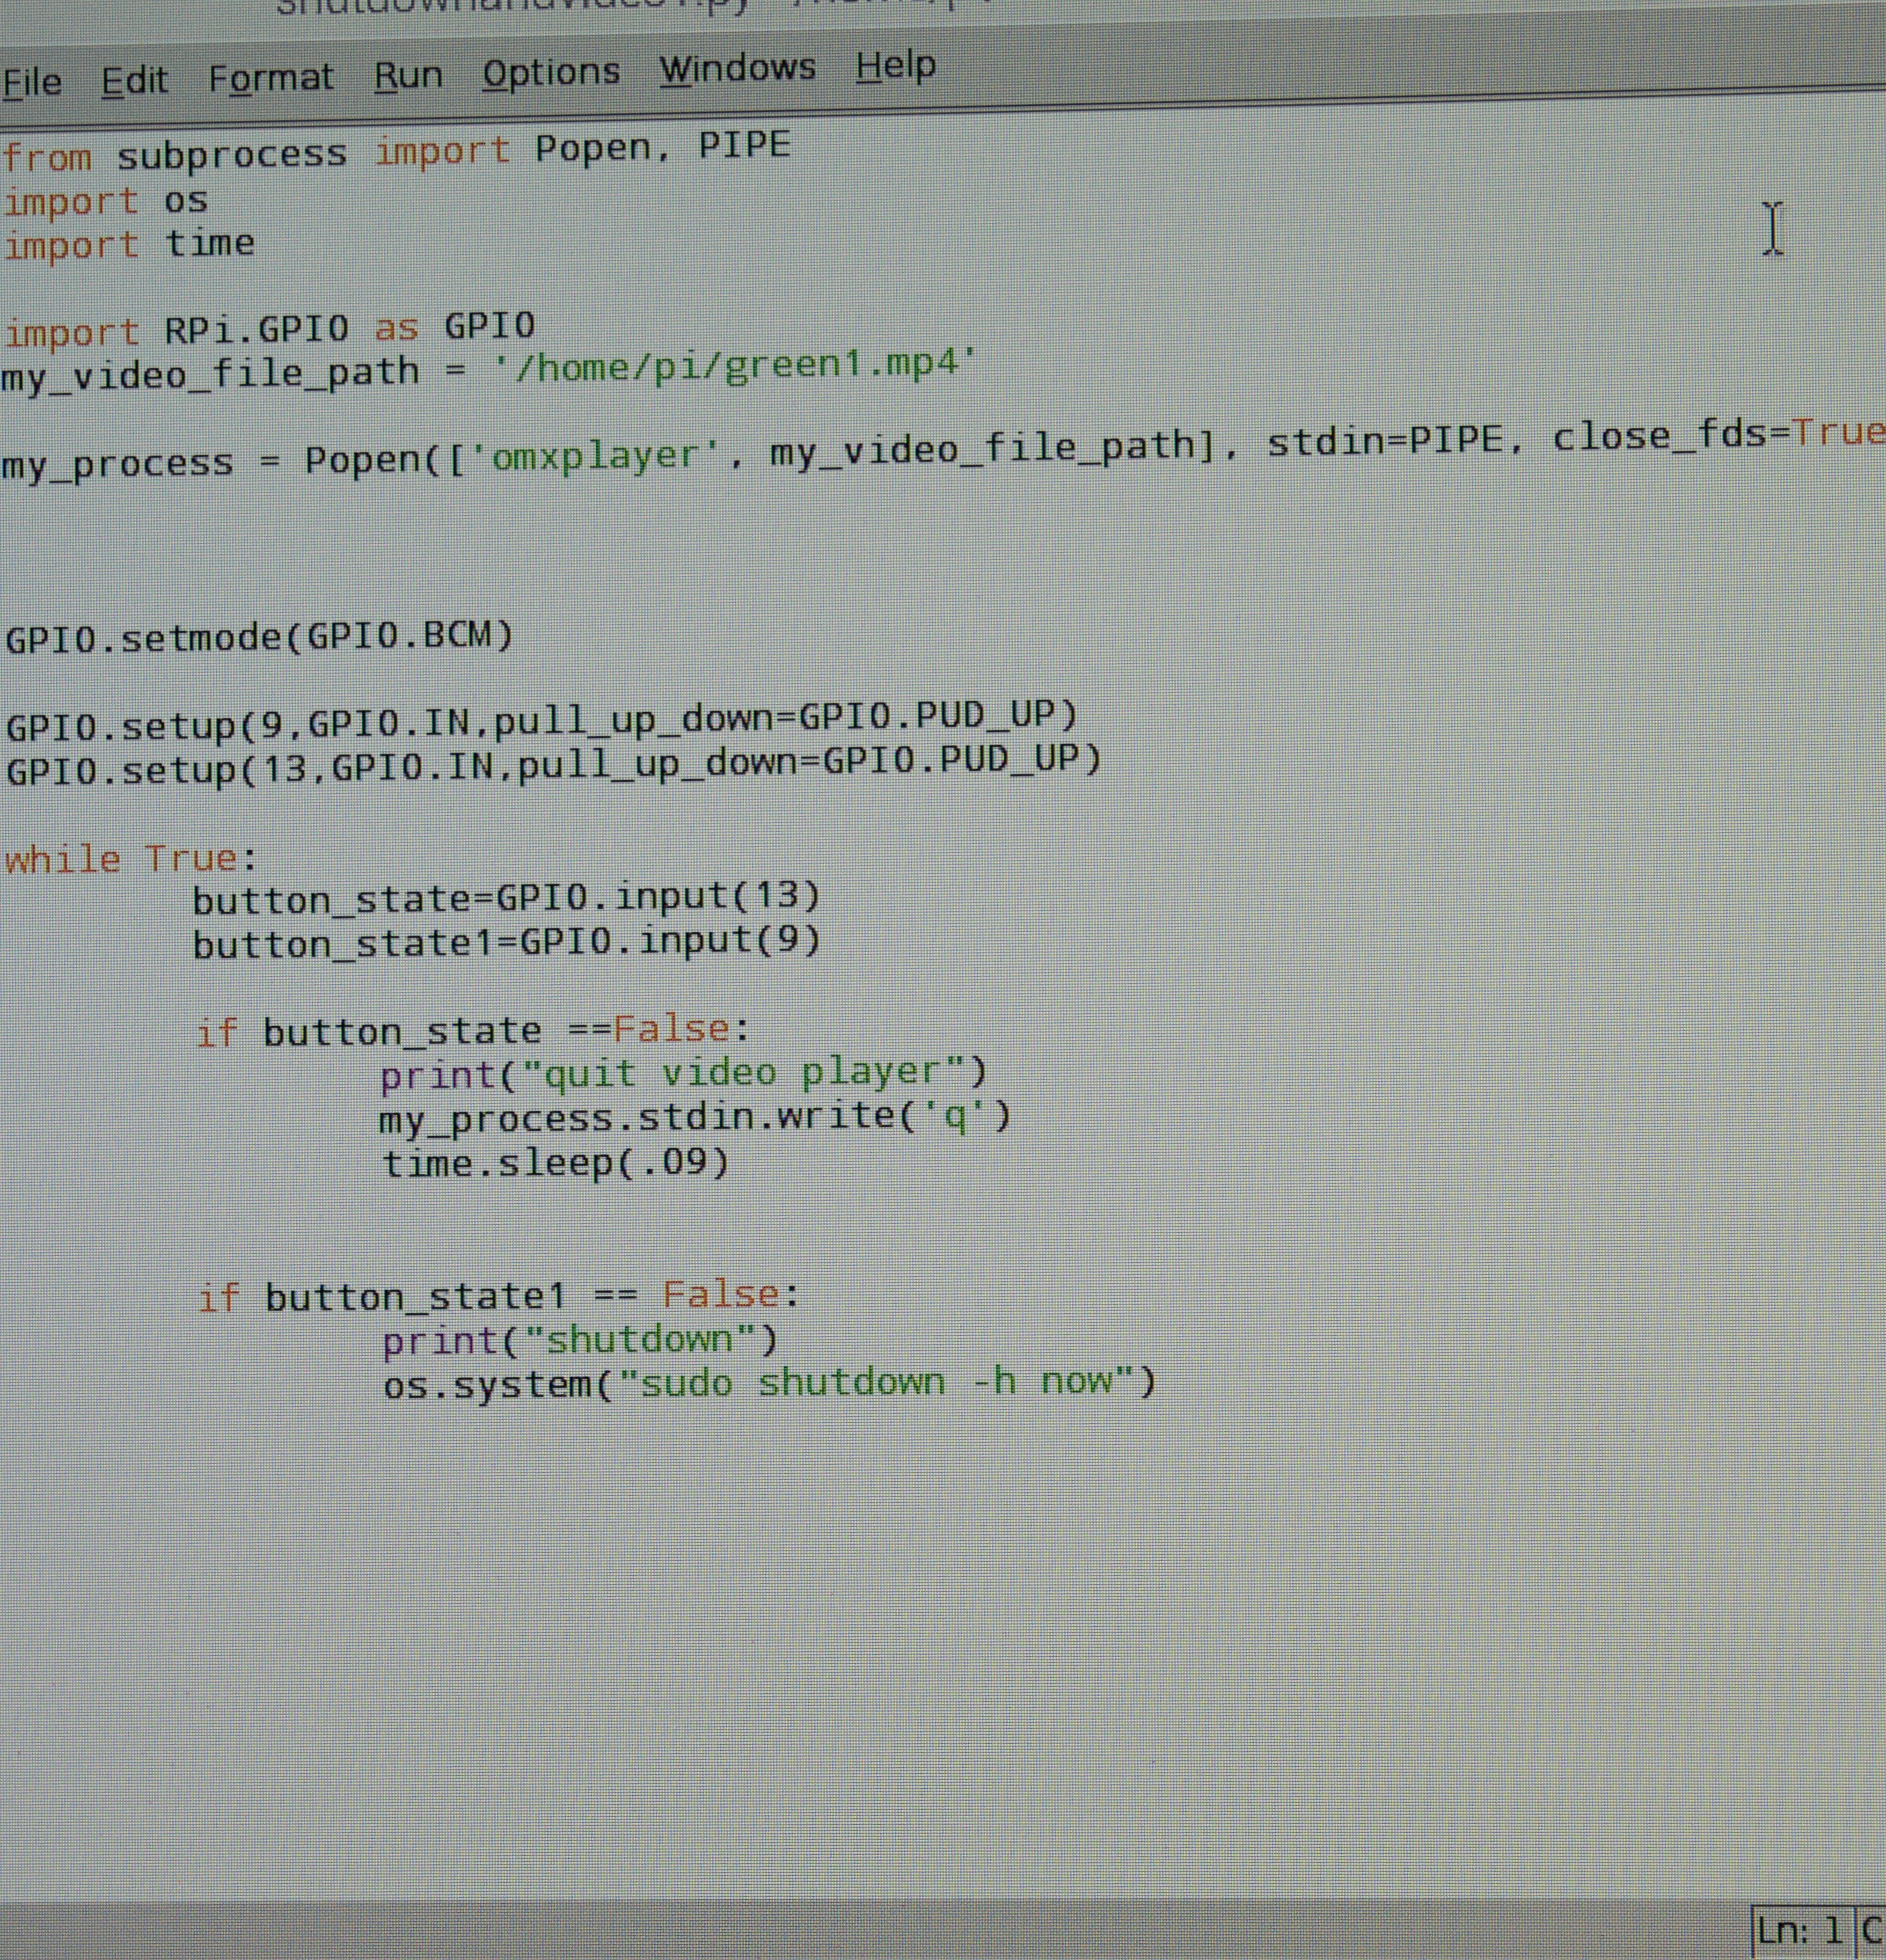
Unlike the PiTFT that we were able to install button 23 to act as a shutdown button we have to create that on this display so that is what the one of the button's is for. The other button is for quitting out of the video just incase if we need to access the pi.
code: (NOTE REPLACE green1.mp4 with your video) link to github code
from subprocess import Popen, PIPE
import os
import time
import RPi.GPIO as GPIO
my_video_file_path='/home/pi/green1.mp4'
my_process=Popen(['player',my_video_File_path], stdin=PIPE, close_fds=True)
GPIO.setmode(GPIO.BCM)
GPIO.setup(9,GPIO.IN,pull_up_down=GPIO.PUD_UP)
GPIO.setup(13,GPIO.IN,pull_up_down=GPIO.PUD_UP)
while True:

	button_state=GPIO.input(13)
	button_state1=GPIO.input(9)

	if button_state==False:
		print("quite video")
		my_process.stdin.write("q")
		time.sleep(.09)

	if button_state1==False:
		print("shutdown")
		os.system("sudo shutdown -h now")
Testing out code:to test out the code and make sure that it runs open up terminial and type:
python NAMEOFCODE.py
now just press the buttons and voila!
Making the Code Play Automatically When the Pi Turns On
We want to make the code play automatically when the Pi is turned on. As appose to the the PiTFT which boots up differently then a normal display with a raspberry pi the NTSC/PAL (Television) TFT display boots up regularly so we just have to move our text editor file with the code to the booting system.
To do this type in terminal
sudo nano .bashrc
go to the end of the file and type:
python NAMEOFCODE.py
save changes and type
reboot
for a step by step tutorial on how to do this
Now everything is up and running when you turn on your pi!
Trouble Shooting
If you ever want to use your pi the regular way again without the videos playing what you will need to do:
For the PITFT:
when your pi is booting up and it is in loading the code in the terminal type
control c
a few times to stop the video from playing (if you miss the time window that the code is loading in the terminal no worries! That's why we added the use of button 17. Press button 17, this will quite out of the video and bring us to the terminal, type control c a few times) then type
sudo nano .bashrc
and delete the python NAMEOFCODE.py so that your code is no longer running automatically when the pi boots up
For the NTSC/PAL (Television) TFT Display
when your pi boots up and plays the video press button 13 this will quite out of the video. Open up terminal, type
control c
a few times to get out of the video loop then type
sudo nano .bashrc
and delete the python NAMEOFCODE.py that you added so that that the code no longer is running automatically when the pi boots up.