A Simple Robot That Will Delight Young Children
by craiganderic in Circuits > Arduino
1052 Views, 5 Favorites, 0 Comments
A Simple Robot That Will Delight Young Children
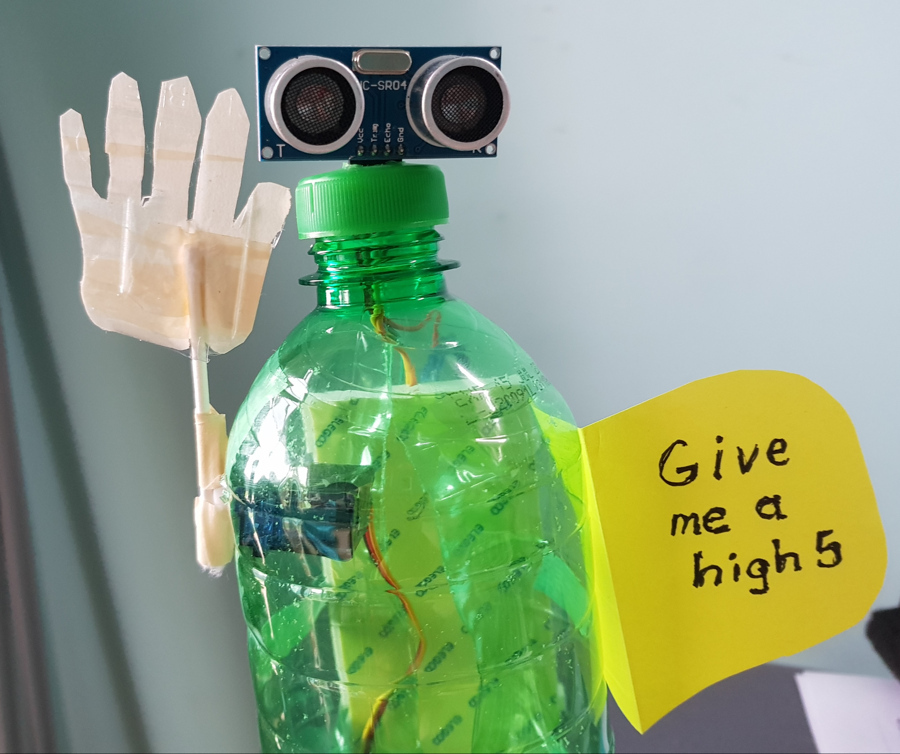
I'm new to Arduino tinkering, and barely beyond the introductory level of making the red, green, and blue LEDs flash on and off. I only have the Elegoo Starter Kit, but my 8-year old granddaughter wanted me to make a robot.
I searched the internet for a simple robot project, but they all seemed to require at least two servo motors, and even the "simple" projects were too complicated for a beginner like me. On finding the Instructables web site, I combed through the projects for something that looked like a robot and didn't require many parts. When I saw the Automated Gate System posted by FABLABJubail (https://www.instructables.com/id/Controlling-a-Ser...) it occurred to me that I could use the same ultrasonic sensor and servomotor to create a robot with a moveable arm. [Only much later did I find the project called High Five Robot by ericmarsh that uses a similar concept (https://www.instructables.com/id/High-Five-Robot/).]
So I adopted the code and the wiring scheme from the Automated Gate System, and assembled it into a plastic bottle to make it look like a robot. The sonic sensor causes it to raise its hand when you give it a high five. My granddaughter is delighted!
Supplies
Hardware:
Ultrasonic sensor
Arduino uno-type controller board
Servo motor
USB cable
Jumper cables
Additional material:
Plastic soda bottle
Q-tip
Scrap of plastic (to cutout the hand)
Small rock (for weight)
Duct or masking tape
Post-it note
Preliminary Wiring
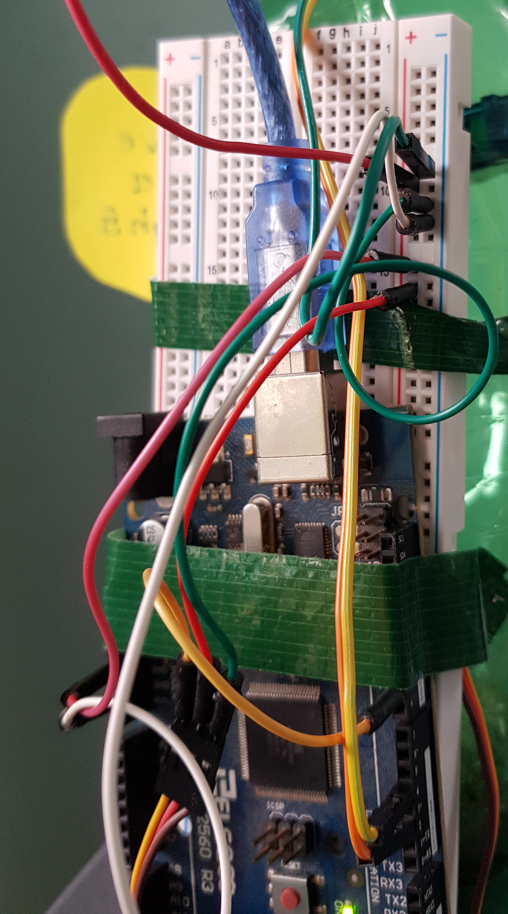
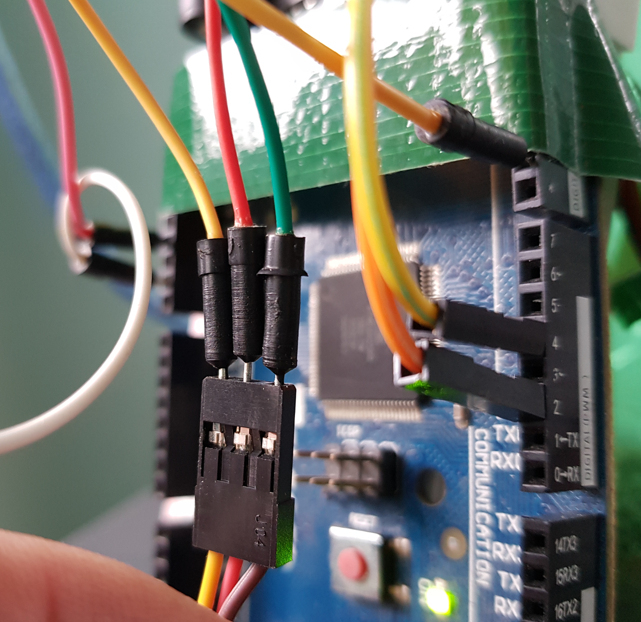
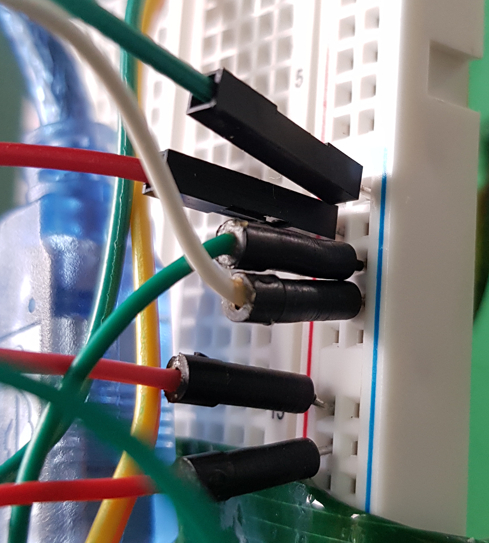
Using the Arduino (mine is a Elegoo Mega 2560 R3), a breadboard, the Ultrasonic Sensor, the Servo Motor SG90, and the USB Power Cable from your Starter Set, make the following connections.
1. The Arduino is connected as follows:
A. 5 volt power port at the bottom of the Arduino connects to any port in the red (+) row near one end of the breadboard (The exact position in that row is not critical; I chose port 15)
B. Ground (Gnd) port at the bottom of the Arduino connects to a port in the blue (-) row of the breadboard (I chose port 12)
2. The Ultrasonic Sensor is connected as follows:
A. Voltage (Vcc) pin to the red (+) row of the breadboard (I chose port 10)
B. Trigger (Trig) pin to Digital Port 2 at the top of the Arduino
C. Echo pin to Digital Port 4 at the top of the Arduino
D. Ground (Gnd) pin to the blue (-) row of the breadboard (I chose port 9)
3. The Servo Motor is connected as follows:
A. Yellow wire to Digital Port 9 at the top of the Arduino
B. Red wire to the red (+) row of the breadboard (I chose port 16)
C. Brown wire to the blue (-) row of the breadboard (I chose port 11)
4. The main Power/Communications port of the Arduino is connected to your computer using the USB cable
Start the Arduino Application on Your Computer and Configure
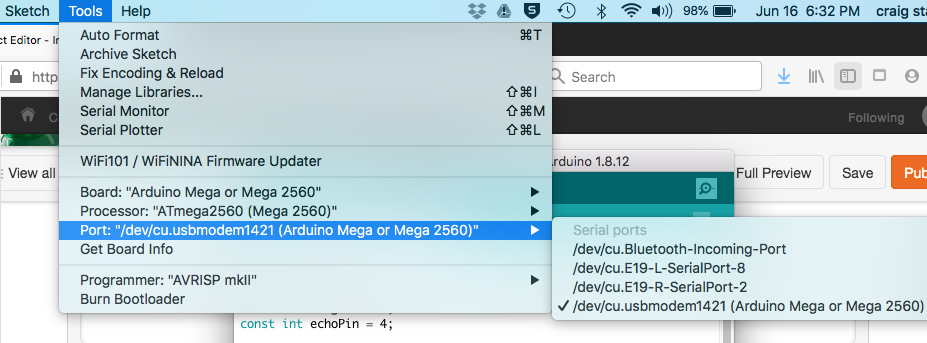
Make sure that the Arduino application on your computer is configured properly for your control board and the USB port. (For me, running the application on Mac OSX, the board type was set to "Mega 2560" and the Port setting was "cu.usbmodem1422" in the Tools menu.)
The Code
Copy the code below, paste it into your Arduino application, then upload it to the Arduino Controller. Note that this code is modified from the Automated Gate System (https://www.instructables.com/id/Controlling-a-Ser...)[Comments have been removed and some curly brackets have been changed to correct compile errors.]
You must connect the USB cable to make the upload, and while connected you can confirm that the Sensor activates the Servo Motor. Troubleshoot as necessary. Then disconnect the power cable before assembling the robot body.
...
#include
Servo myservo;
const int trigPin = 2;
const int echoPin = 4;
void setup() {
Serial.begin(9600);
myservo.attach(9);
}
void loop() {
long duration, cm;
pinMode(trigPin, OUTPUT);
digitalWrite(trigPin, LOW);
delayMicroseconds(2);
digitalWrite(trigPin, HIGH);
delayMicroseconds(20);
digitalWrite(trigPin, LOW);
pinMode(echoPin, INPUT);
duration = pulseIn(echoPin, HIGH);
cm = microsecondsToCentimeters(duration);
if (cm > 7 && cm < 14) {
myservo.write(140);
delay(4000);
}
else if (cm < 8) {
myservo.write(40);
delay(100); }
else { myservo.write(40);
delay(100); }
Serial.print(cm);
Serial.print("cm");
Serial.println();
delay(100); }
long microsecondsToCentimeters(long microseconds) {
return microseconds / 29 / 2;
}
Assemble Robot Body and Components
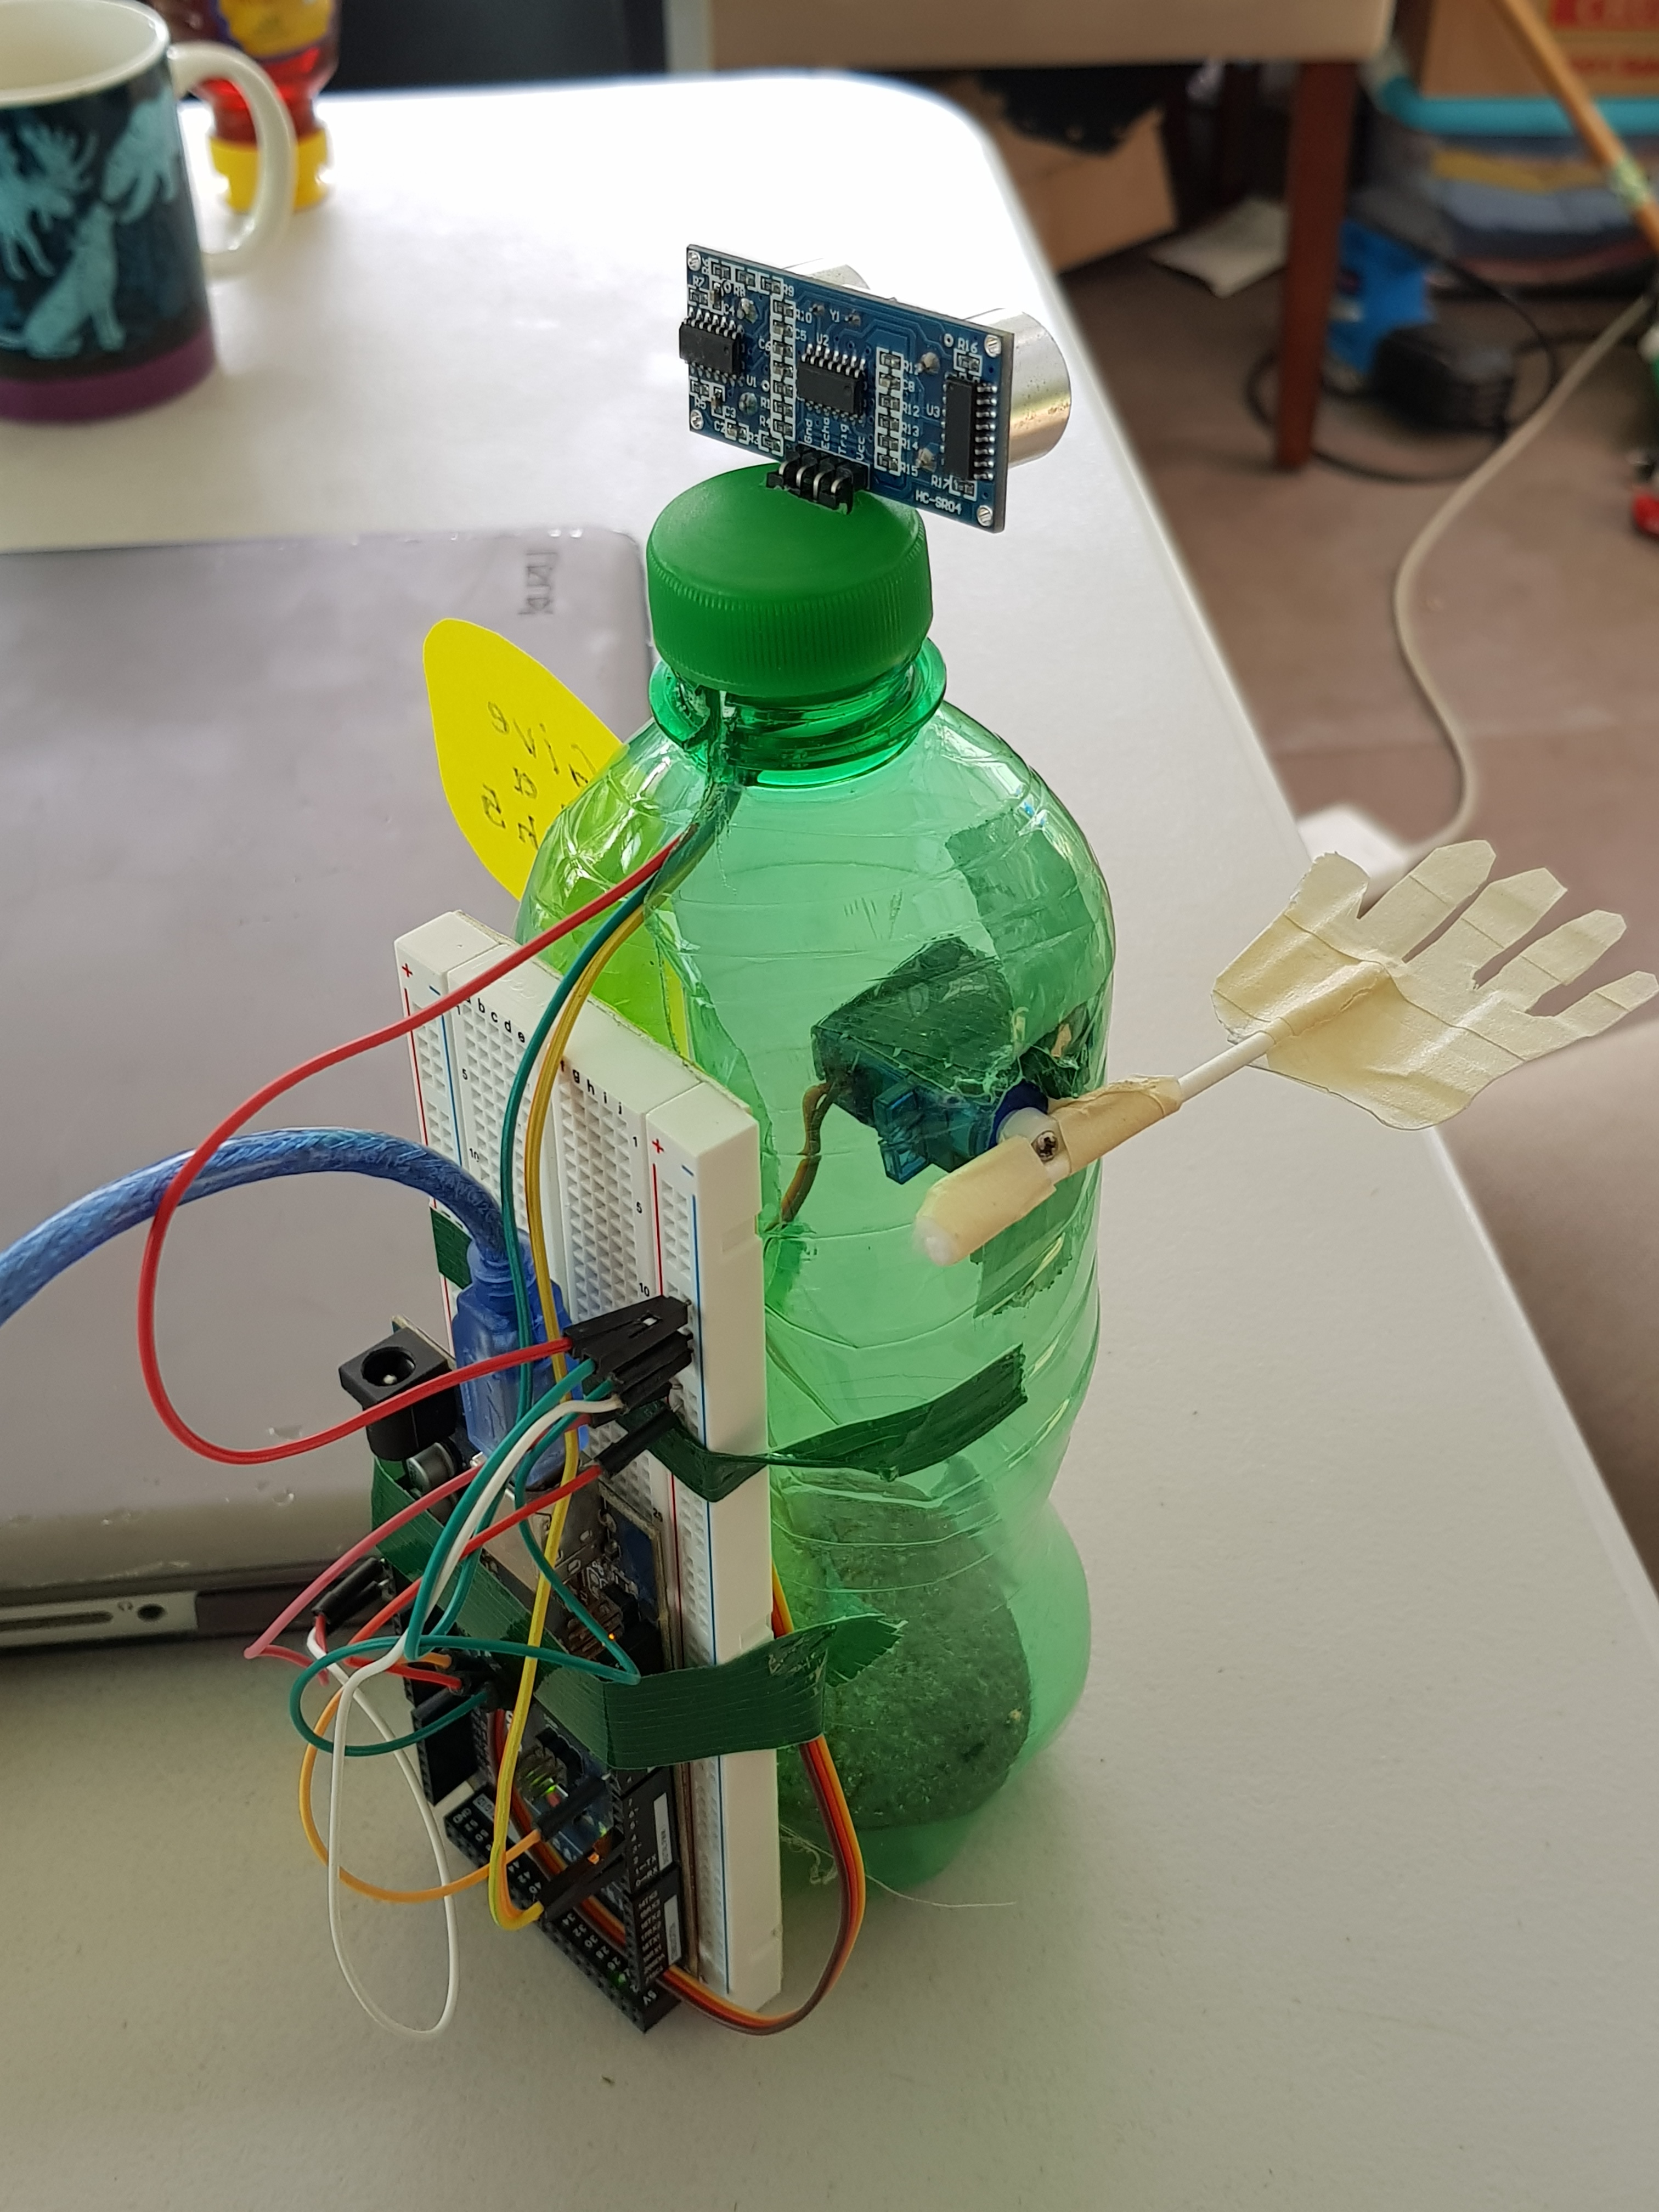
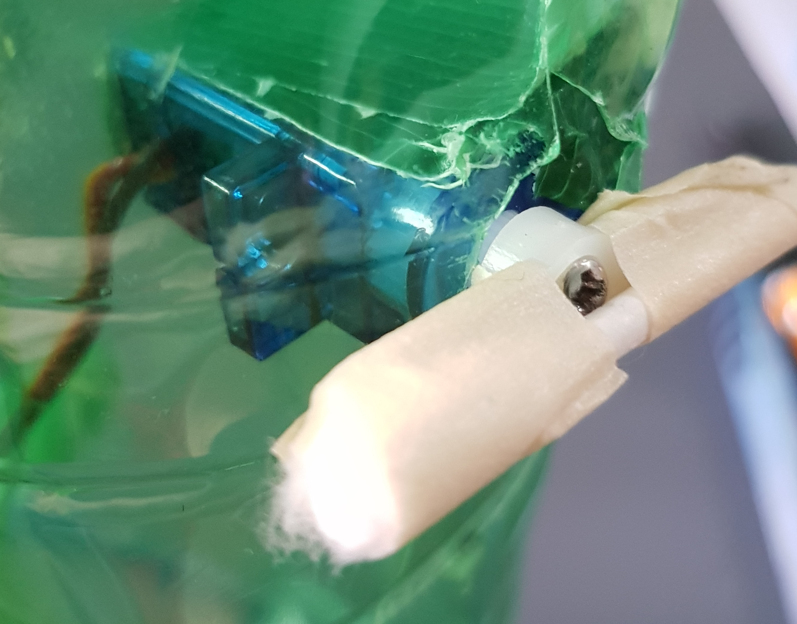
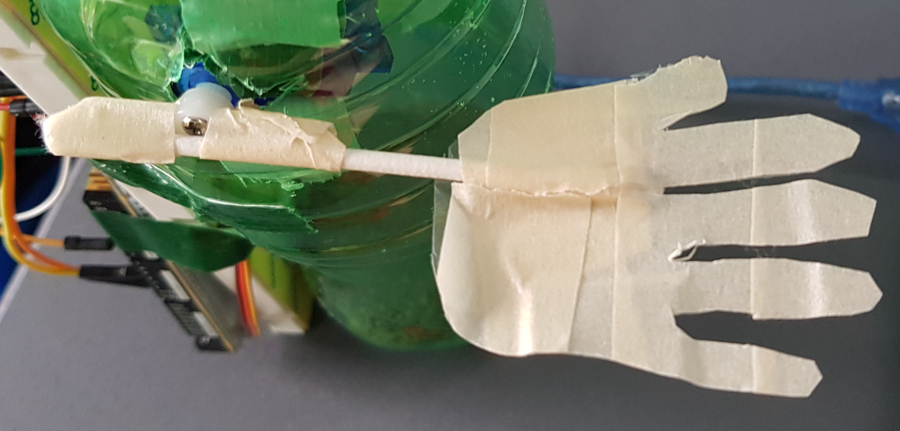
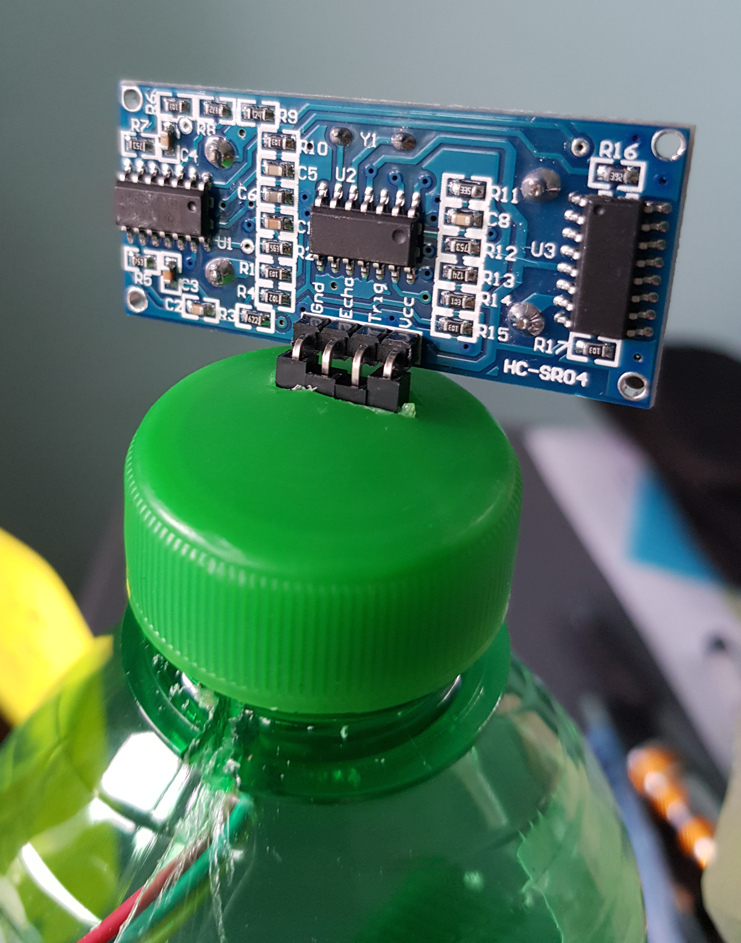
1. Carefully slit the back of a plastic soda bottle, including the thicker plastic of the neck (which may require a saw). Make the slit in the neck wide enough for wires to pass through easily. (Save the bottle cap for Step 5.)
2. Put a clean small rock in the bottom of the bottle as a weight to help stabilize it and tape it in place.
3. Make a hole in the side of the bottle large enough to accommodate the collar of the Servo Motor, then tape the motor inside the bottle. It is necessary to pry open the back of the bottle to apply the tape to the inner surface. Screw the motor arm on the projecting collar.
4. Cut out a hand shape from scrap plastic or cardboard, and tape it to a Q-tip. Then tape the Q-tip and hand to the motor arm, leaving enough room for proper clearance when the hand in raised. You may need to back out the attachment screw, reposition the arm, and re-tighten, once you see the full range of motion.
5. Make a small slit in the bottle cap to allow the wire connectors to pass through to the Ultrasonic Sensor. (I used a small electric drill bit and an exacto knife.) Then mount the Sensor on the cap. Attach the the cap to the bottle by pressing it in place while guiding the wires through the slit. (The slitted neck should now compress, so there is no need to screw it on.)
6. Connect the Arduino to the USB port of your computer. Test that all electrical connections are still tight and the Sensor still activates the Servo Motor.
7. Tape the breadboard and Arduino to the back of the bottle. [Option: You could use a liter-size bottle and fit all component inside the bottle, even substituting the 9 volt battery source for the USB cable.]
8. As a finishing touch, tape on a Post-it note to the left side with the message "Give me a high 5."
Let the Kids Enjoy!
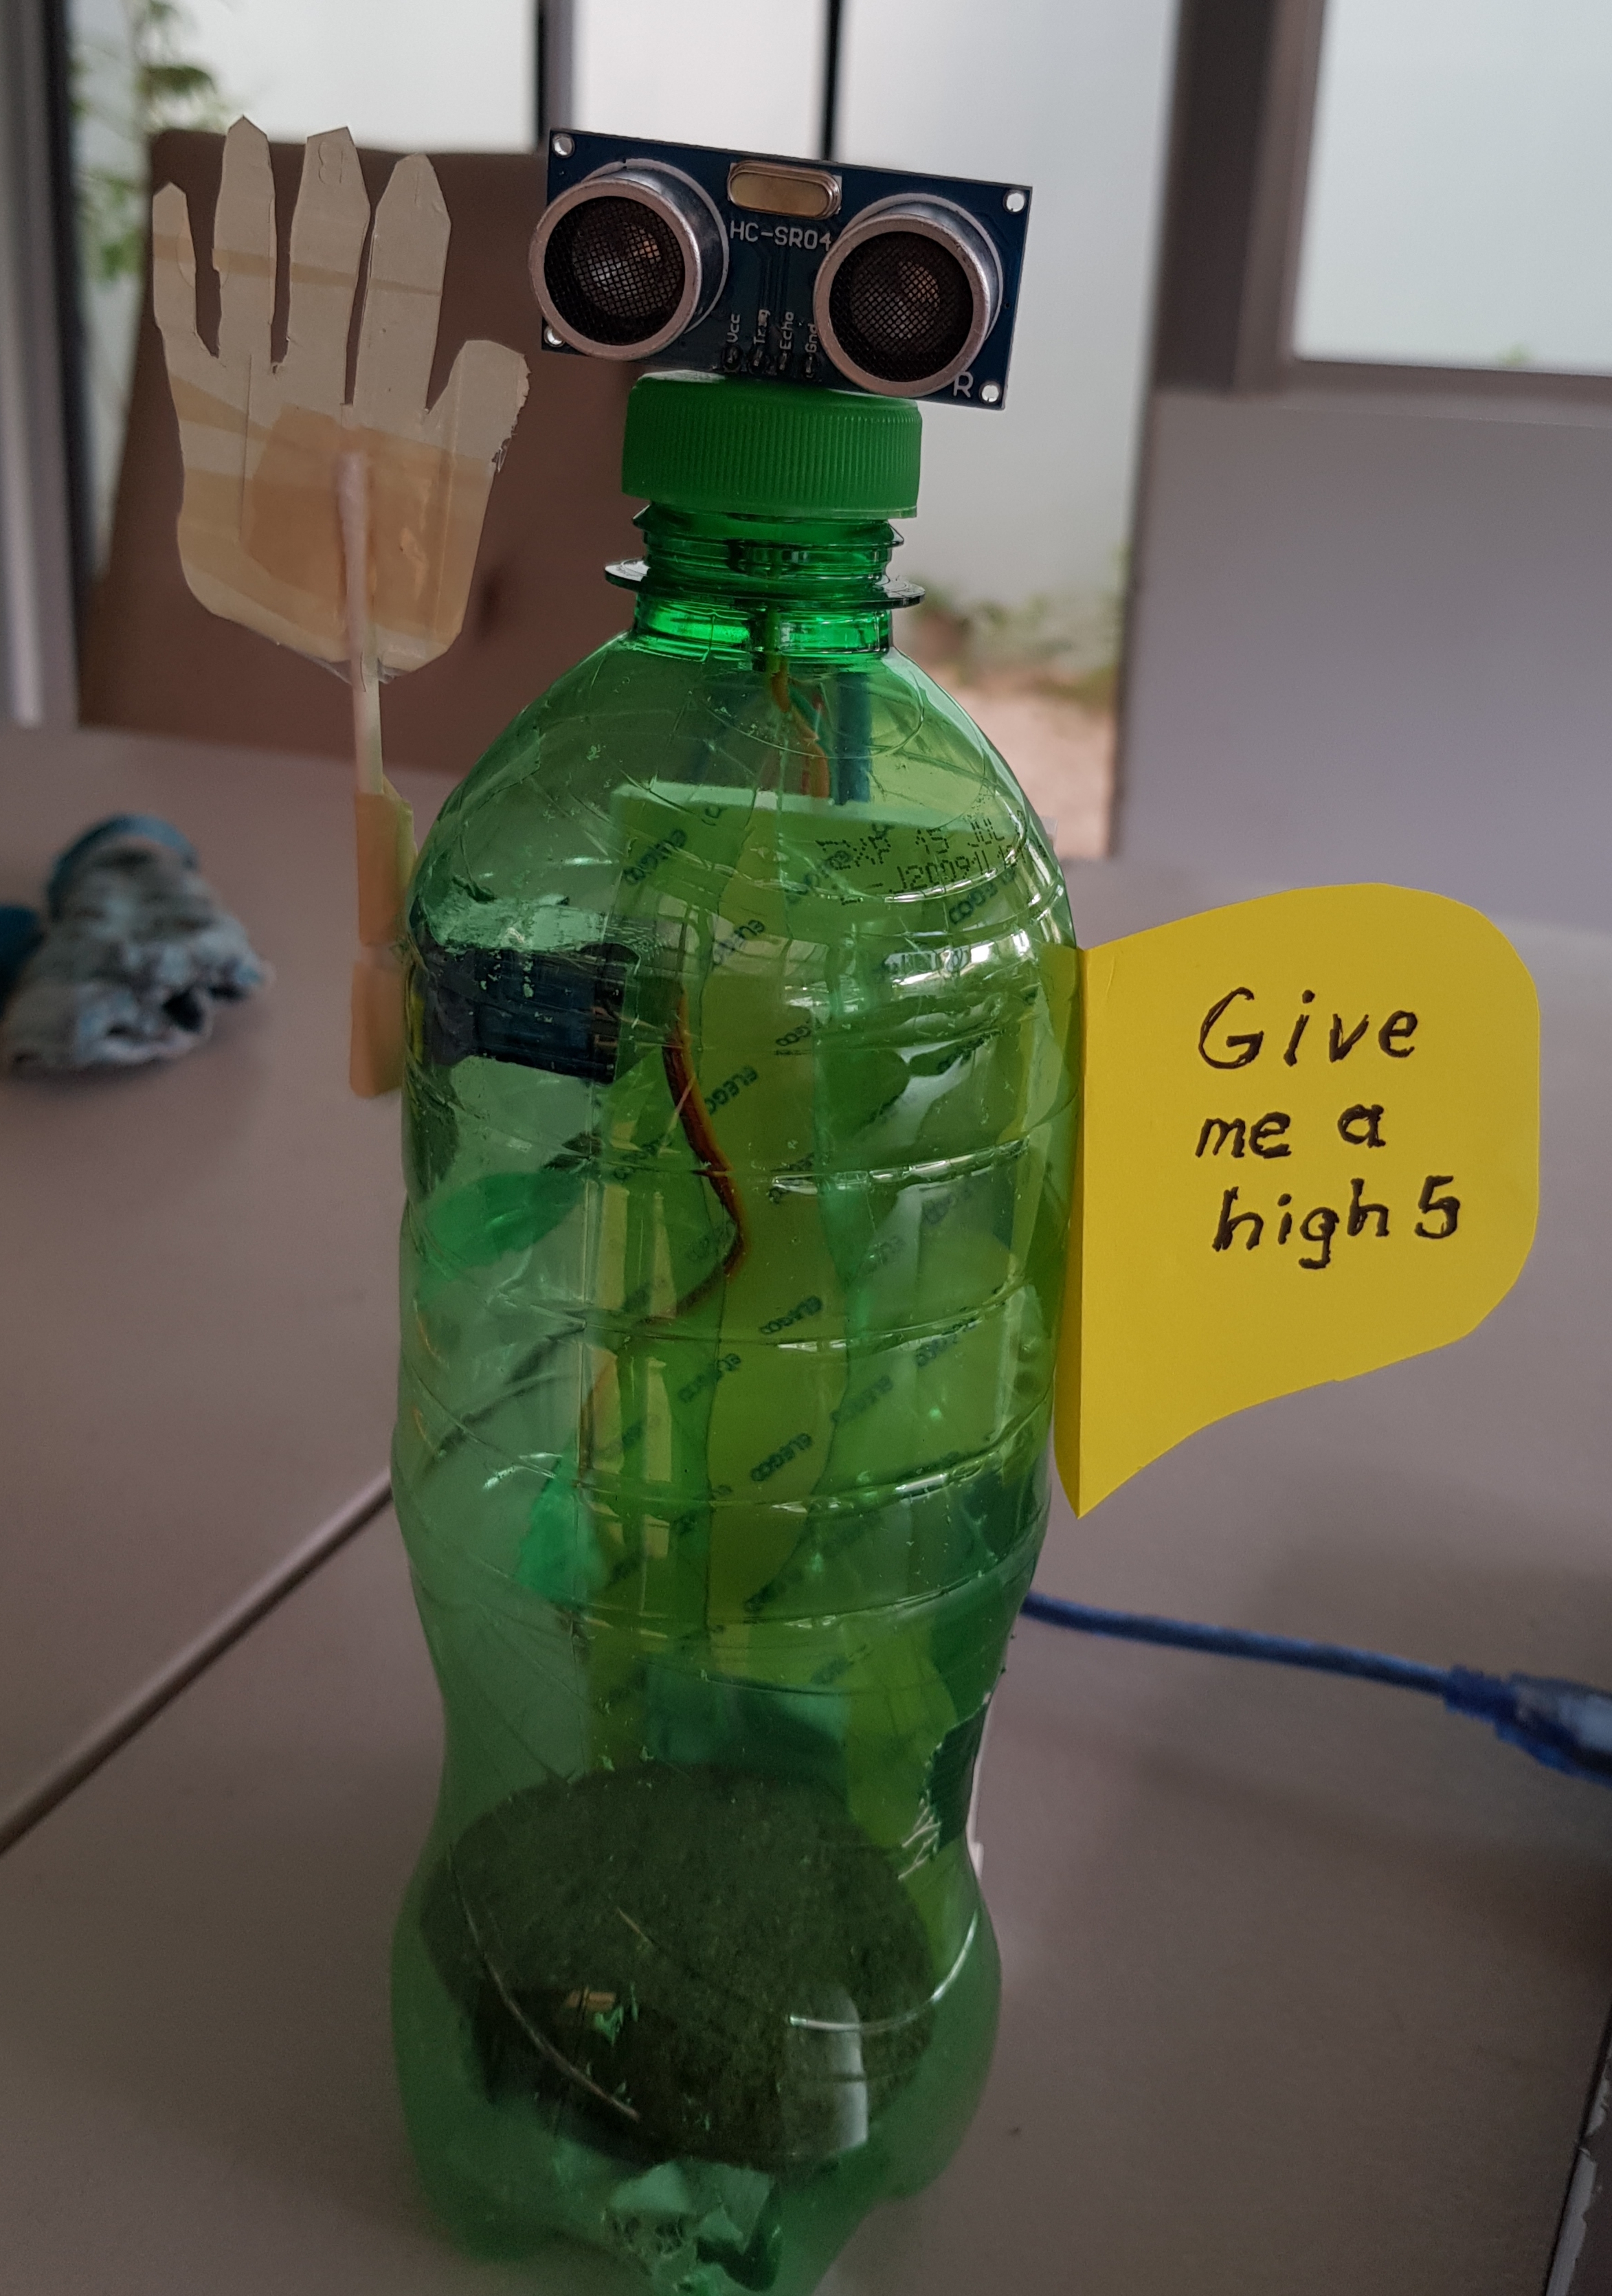
Although this is a "one-trick pony," young kids will enjoy interacting with this humble robot over and over.