Hifi Audio System Using Linkit ONE
by BharathRam in Circuits > Microcontrollers
698 Views, 8 Favorites, 0 Comments
Hifi Audio System Using Linkit ONE
![Hi-Fi audio system using Linkit ONE](/proxy/?url=https://content.instructables.com/FNH/XUIW/IGA7YOFD/FNHXUIWIGA7YOFD.jpg&filename=Hi-Fi audio system using Linkit ONE)
Hi
This instructable will teach you to build a Hi-Fi audio system using Linkit ONE......u can able to control audio using IR remote
Components Required
![F0958UCIG16BHB9.jpeg](/proxy/?url=https://content.instructables.com/FVY/7ARJ/IG16BJVW/FVY7ARJIG16BJVW.jpg&filename=F0958UCIG16BHB9.jpeg)
![lcd-shield-arduino.jpg](/proxy/?url=https://content.instructables.com/FHX/G8NU/IG89DT6B/FHXG8NUIG89DT6B.jpg&filename=lcd-shield-arduino.jpg)
![displays.jpg](/proxy/?url=https://content.instructables.com/FML/T3SF/IG89DT69/FMLT3SFIG89DT69.jpg&filename=displays.jpg)
![re.jpg](/proxy/?url=https://content.instructables.com/FJD/15V3/IG89DWSE/FJD15V3IG89DWSE.jpg&filename=re.jpg)
- Linkit ONE
- Arduino UNO
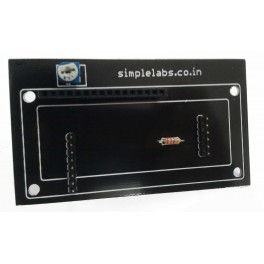
- LCD with LCD shield
- Sd card
- Speakers
- IR remote
- Tsop1738 (connect Vcc of tsop to 3.3v as Linkit ONE is 3.3v tolerant)
Connections
![C360_2015-10-27-17-02-51-931.jpg](/proxy/?url=https://content.instructables.com/FK1/P7PQ/IG89DQ1K/FK1P7PQIG89DQ1K.jpg&filename=C360_2015-10-27-17-02-51-931.jpg)
![IMG_20151027_120105.jpg](/proxy/?url=https://content.instructables.com/FQ8/25P6/IG89DQ6V/FQ825P6IG89DQ6V.jpg&filename=IMG_20151027_120105.jpg)
![C360_2015-10-22-16-26-14-573.jpg](/proxy/?url=https://content.instructables.com/FOO/ATMH/IG16BH2R/FOOATMHIG16BH2R.jpg&filename=C360_2015-10-22-16-26-14-573.jpg)
- connect Linkit ONE to Arduino
TX---------------------------RX
RX---------------------------TX
GND------------------------GND
2.Insert SD card to the slot provided
3.connect 3.5mm of speakers to the audio jack of linkit ONE
4.connect TSOP output pin to Digital pin 8.
Coding
Arduino code
In Arduino IDE select board to Arduino UNO and port to Arduino comport
click the below link to download arduino code
Linkit ONE code
In Arduino IDE select board to Linkit ONE and port to Linkit one debug port
click the below link to download Linkit ONE code
Working
![IMG_20151027_131942.jpg](/proxy/?url=https://content.instructables.com/F57/6X42/IG89DQ9P/F576X42IG89DQ9P.jpg&filename=IMG_20151027_131942.jpg)
![IMG_20151027_132009.jpg](/proxy/?url=https://content.instructables.com/FET/Q646/IG89DQHF/FETQ646IG89DQHF.jpg&filename=IMG_20151027_132009.jpg)
![IMG_20151027_131953.jpg](/proxy/?url=https://content.instructables.com/F79/W13W/IG89DQC5/F79W13WIG89DQC5.jpg&filename=IMG_20151027_131953.jpg)
![IMG_20151027_131959.jpg](/proxy/?url=https://content.instructables.com/FXE/ERH6/IG89DQF7/FXEERH6IG89DQF7.jpg&filename=IMG_20151027_131959.jpg)
![Hi-Fi audio system using Linkit ONE](/proxy/?url=https://content.instructables.com/FCW/V6TO/IG89DWPX/FCWV6TOIG89DWPX.jpg&filename=Hi-Fi audio system using Linkit ONE)
For each button in IR remote produces different values, first find out them by using
Serial.println(remote_value);
now modify the code for your different IR remote values in the IF condition...
add your own functions to different remote buttons and enjoy music...!!!!