Heart-bot
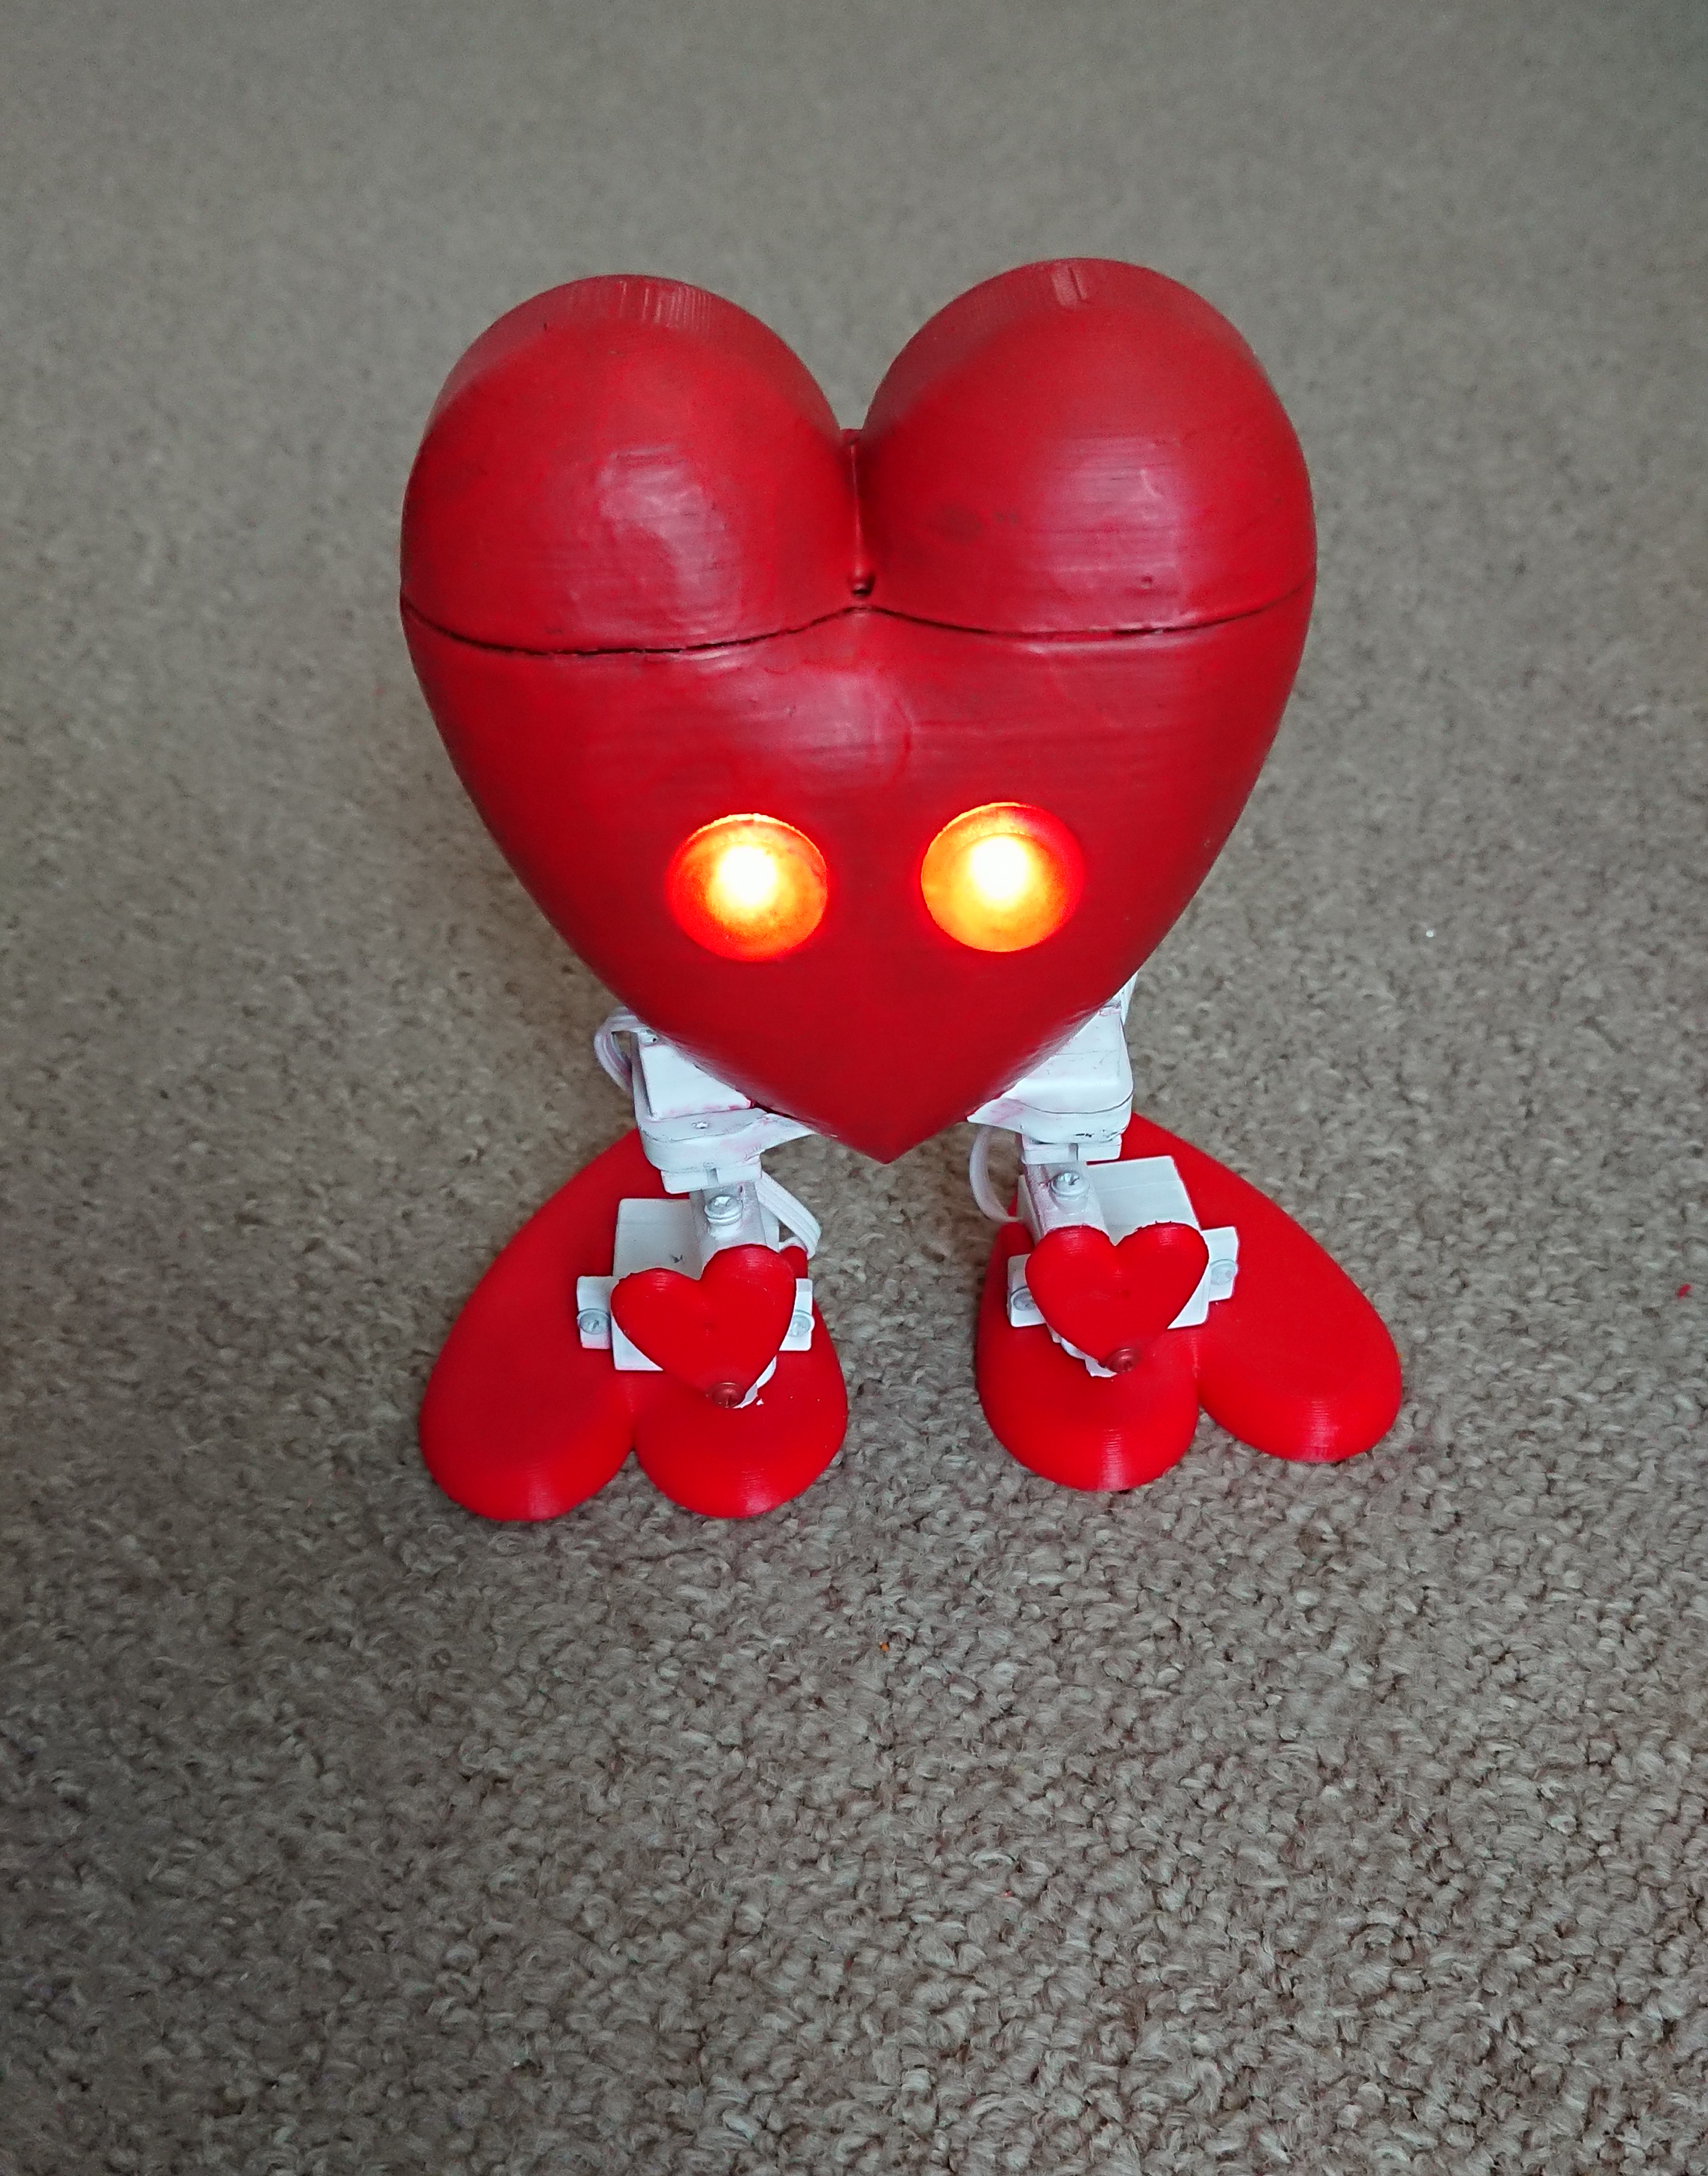

It's Valentines time, well it was just few days ago :) so I decided to combine my passions for 3D design and Arduino and create something that would include it all. That's how the idea of Heart-bot was born and huge thanks to my wife for coming up with the name. It's a simple robot that is shape like a heart and in this instructable I will show you step by step how you can make one yourself.
Supplies
- Arduino nano
- 2 x 5mm Red LED
- 2 x 220Ohm 0.5W resistors
- HC-06 bluetooth module
- 4 x SG90 servos (with arms and set of screws)
- 9V battery - PLA (preferably red color)
- Mini on/off slide switch
- 2 M3 x 20mm screws
- Solder
- Super glue
Tools:
- 3D printer
- Soldering iron
- Wire cutters
- Screw driver
- Mobile phone (optional for remote control)
Software:
3D Design and 3D Printing
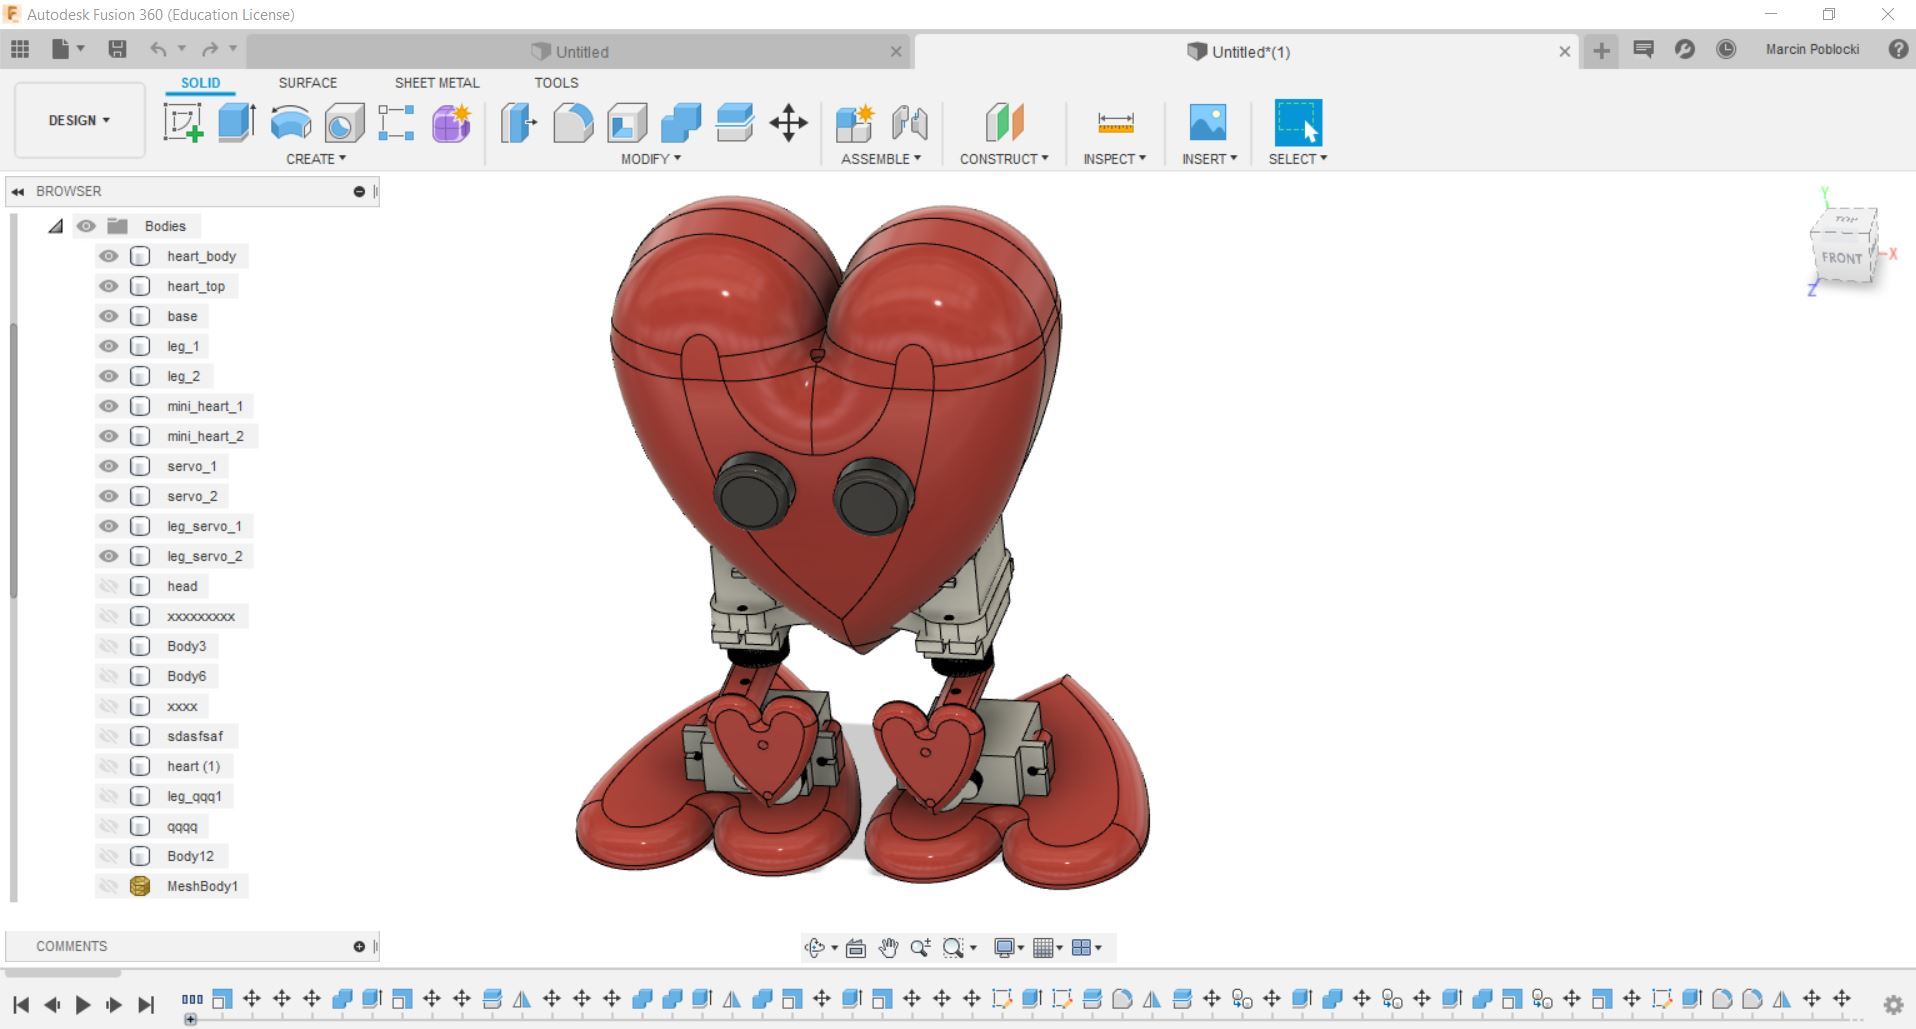
To design the Heart-bot I used Fusion 360 which I have been using for few years now. It took about 6 hours to design entire body and couple more hours to render and animate movements just to make sure it will all work fine before actually printing it.
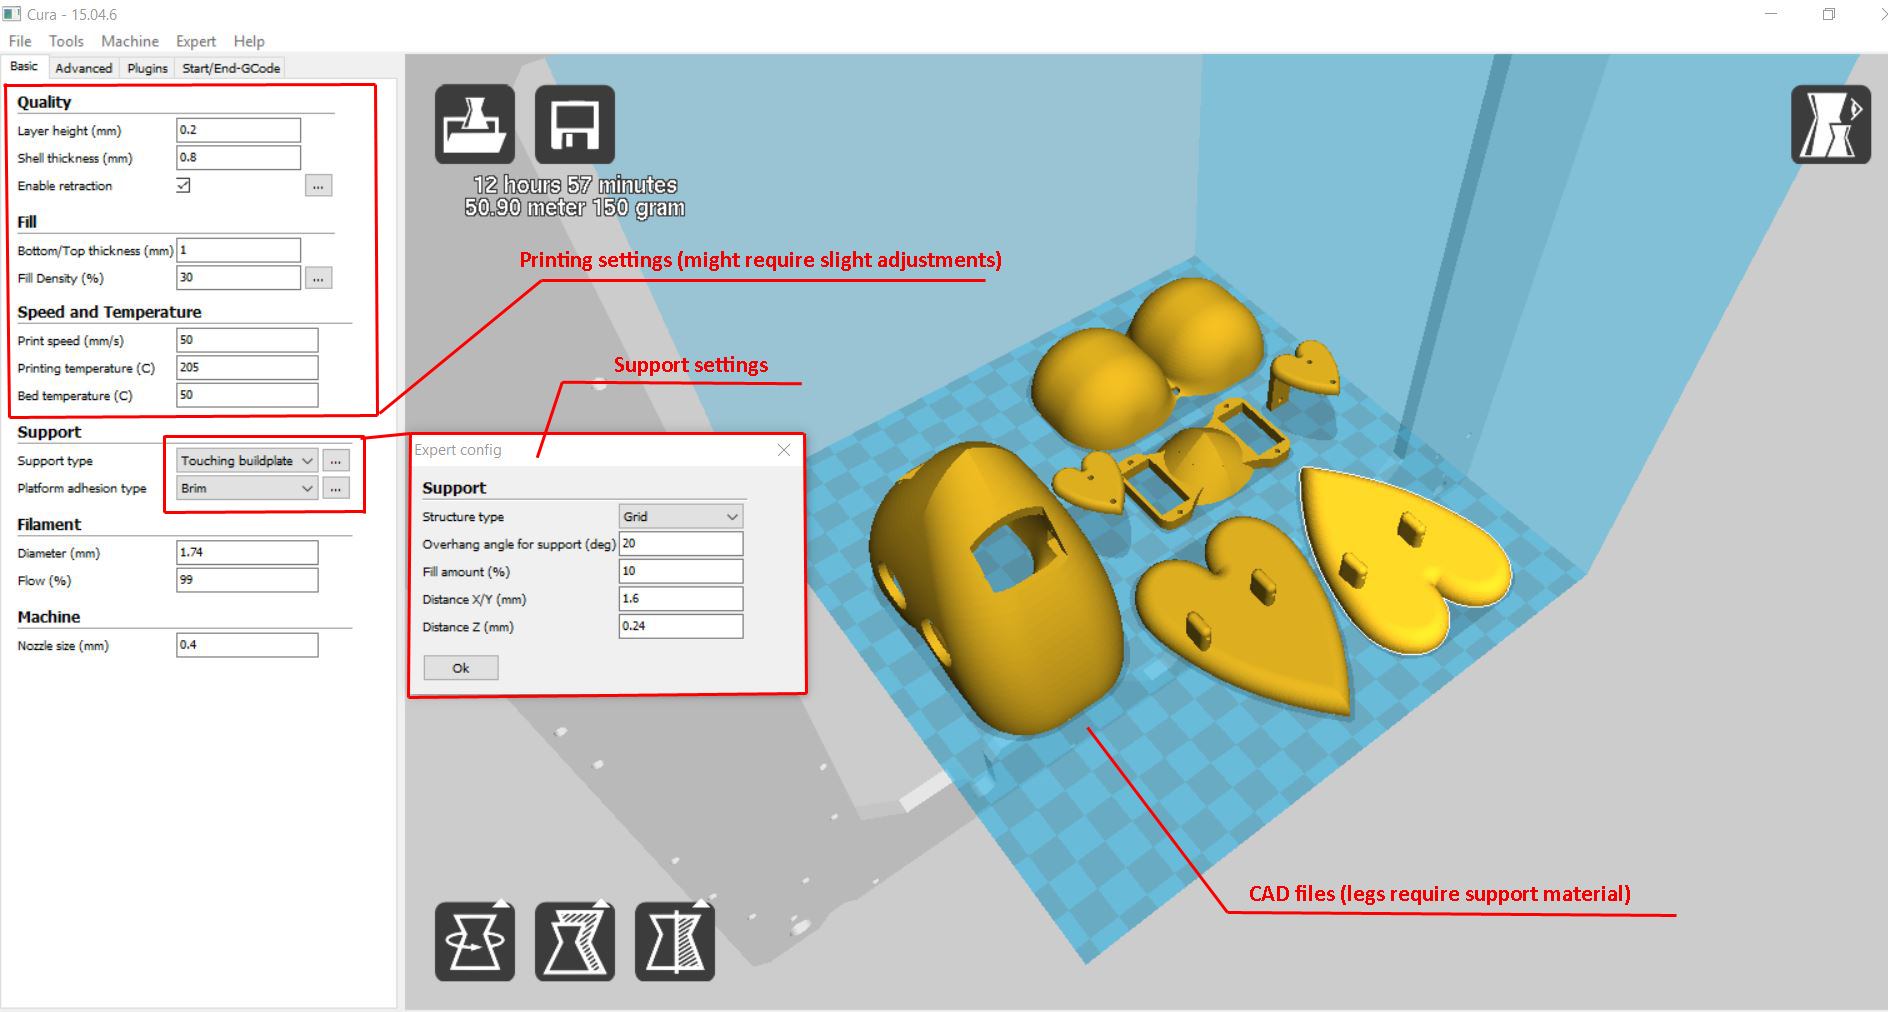
To print all your parts you need slicer to convert CAD model into G-code which your printer can read. I'm sure most of you will have their favorite slicing software, but if you just beginning your adventure with the 3D printing I would recommend Cura.
Cura is free, very powerful and reliable slicing software and personally I never had any issues with it.
I recommend to print all parts in red PLA (unless you prefer other materials) and then paint some of the parts white (like on the picture above). Of course you can paint as you like and I would love to see your creativity i painting Heart-bot should you decide to make it.
The PLA I use prints well at 205 Celsius with heated bed setup to 50 Celsius. My typical printing speed is 60mm/s and for legs you would have to use support material, unless you decide to flip the CAD file, but that could result in bad surface finish.
Arduino - Uploading Code and Calibration
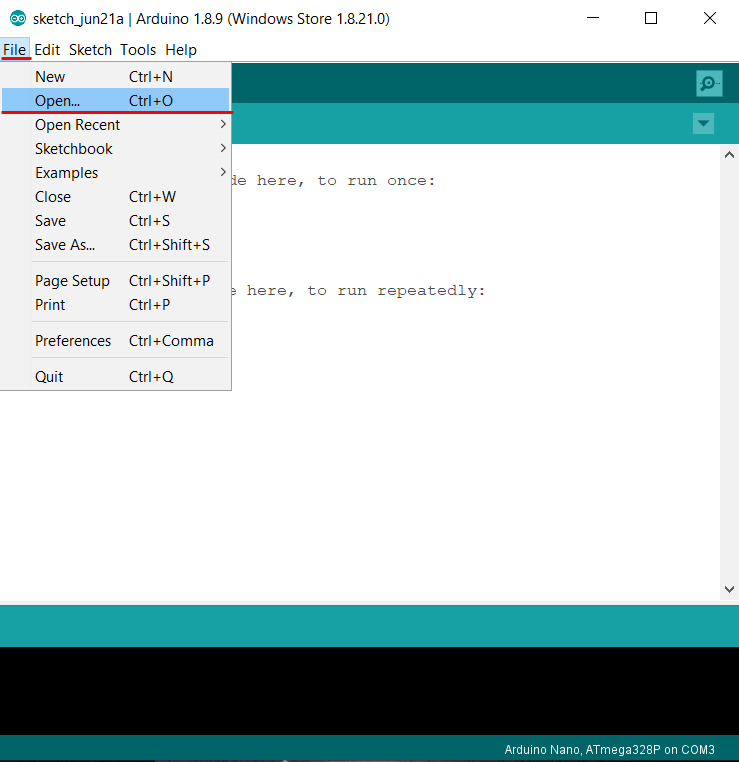
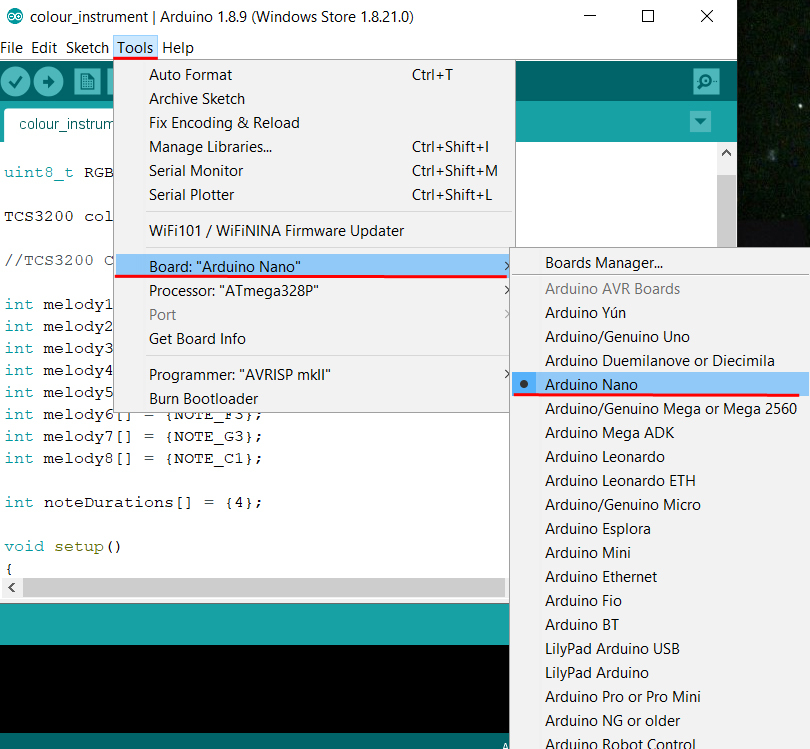
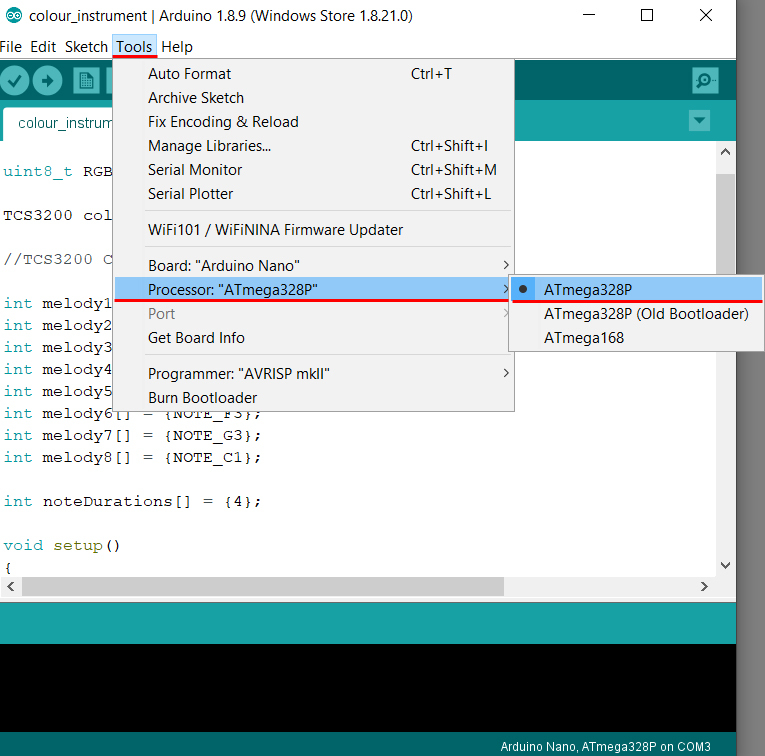
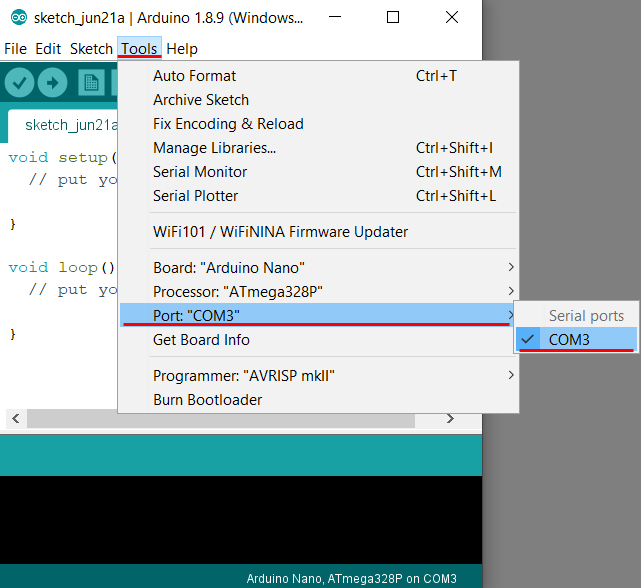
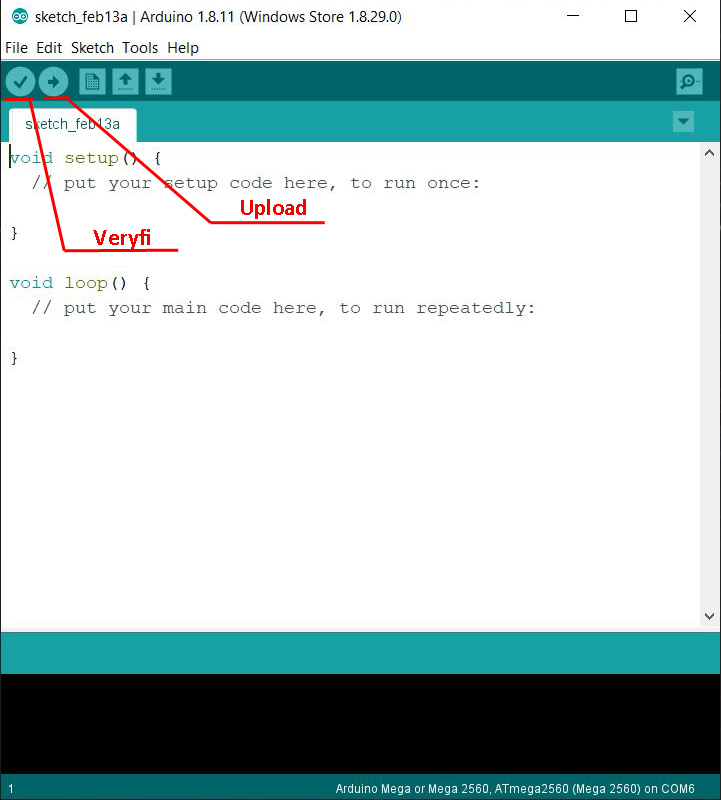
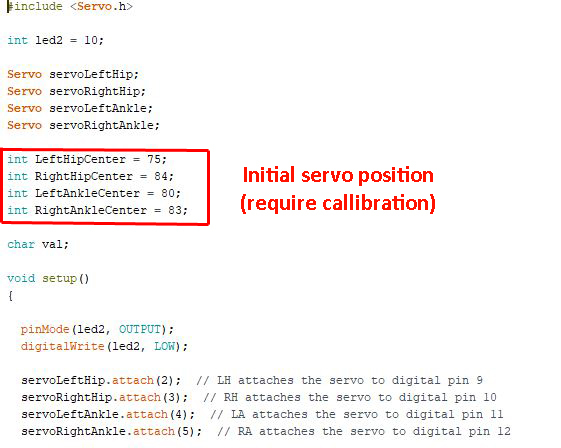
Below you can find the code to upload for your Heart-bot. To upload you will need to install Arduino IDE free software and then follow the instruction below.
- Open Arduino IDE
- Open the code [File -> Open -> colour_instrument.ino]
- Connect Adruino Nano to PC/Laptop using USB cable
- Choose COM port [Tools -> Port “…” -> COM…]
- Choose Arduino board type [Tools -> Board: “…” -> Arduino Nano]
- Choose Arduino Nano processor type [Tools -> Processor: “…” -> ATmega328P]
[It is possible that you will need to change it to ATmega328P (Old Bootloader) depending on Arduino Nano]
- Verify the code
- Upload
NOTE: Once your Heart-bot is assembled you might have to go back to the code and adjust servo initial position values (see picture 6).
Downloads
Arduino - Electronics Assembly
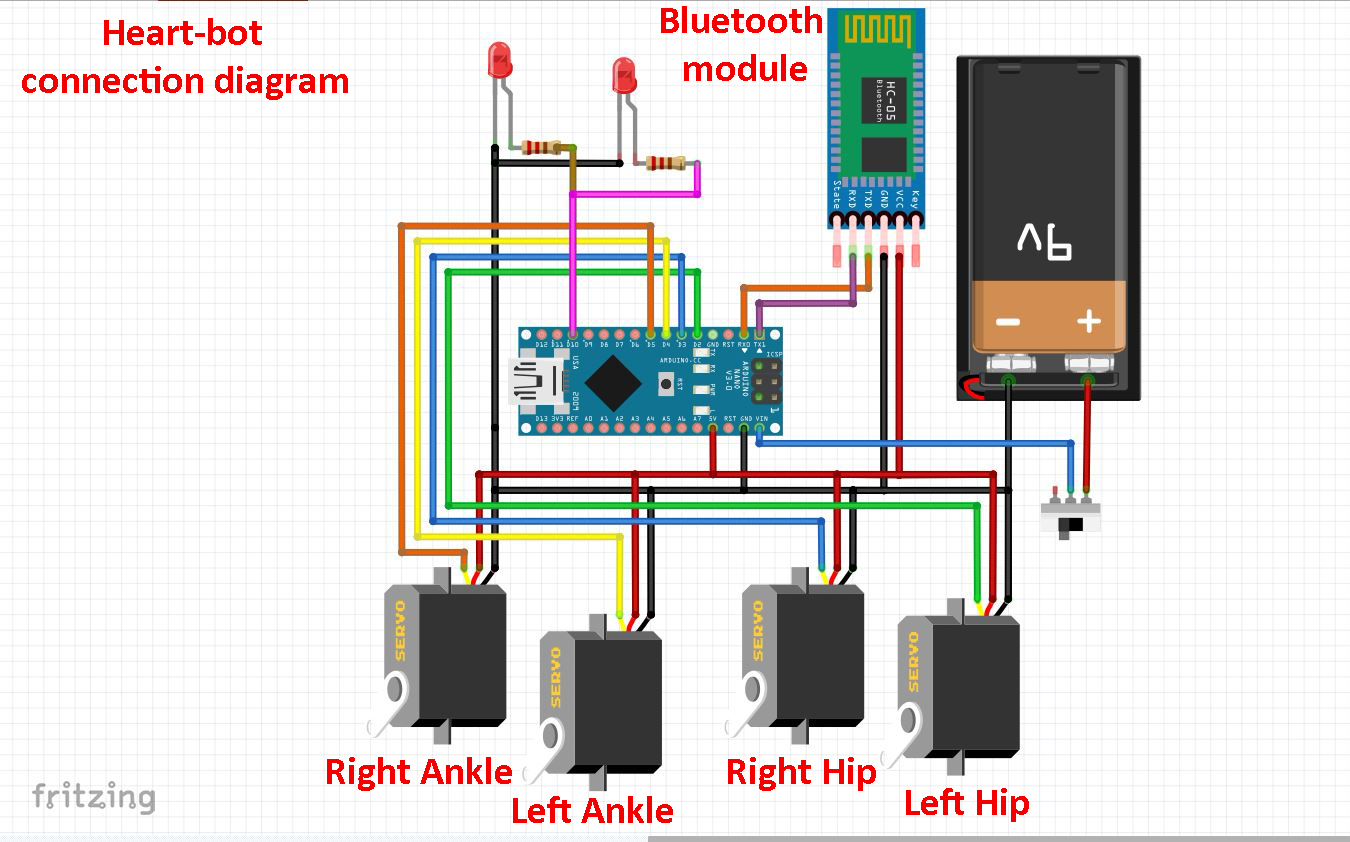
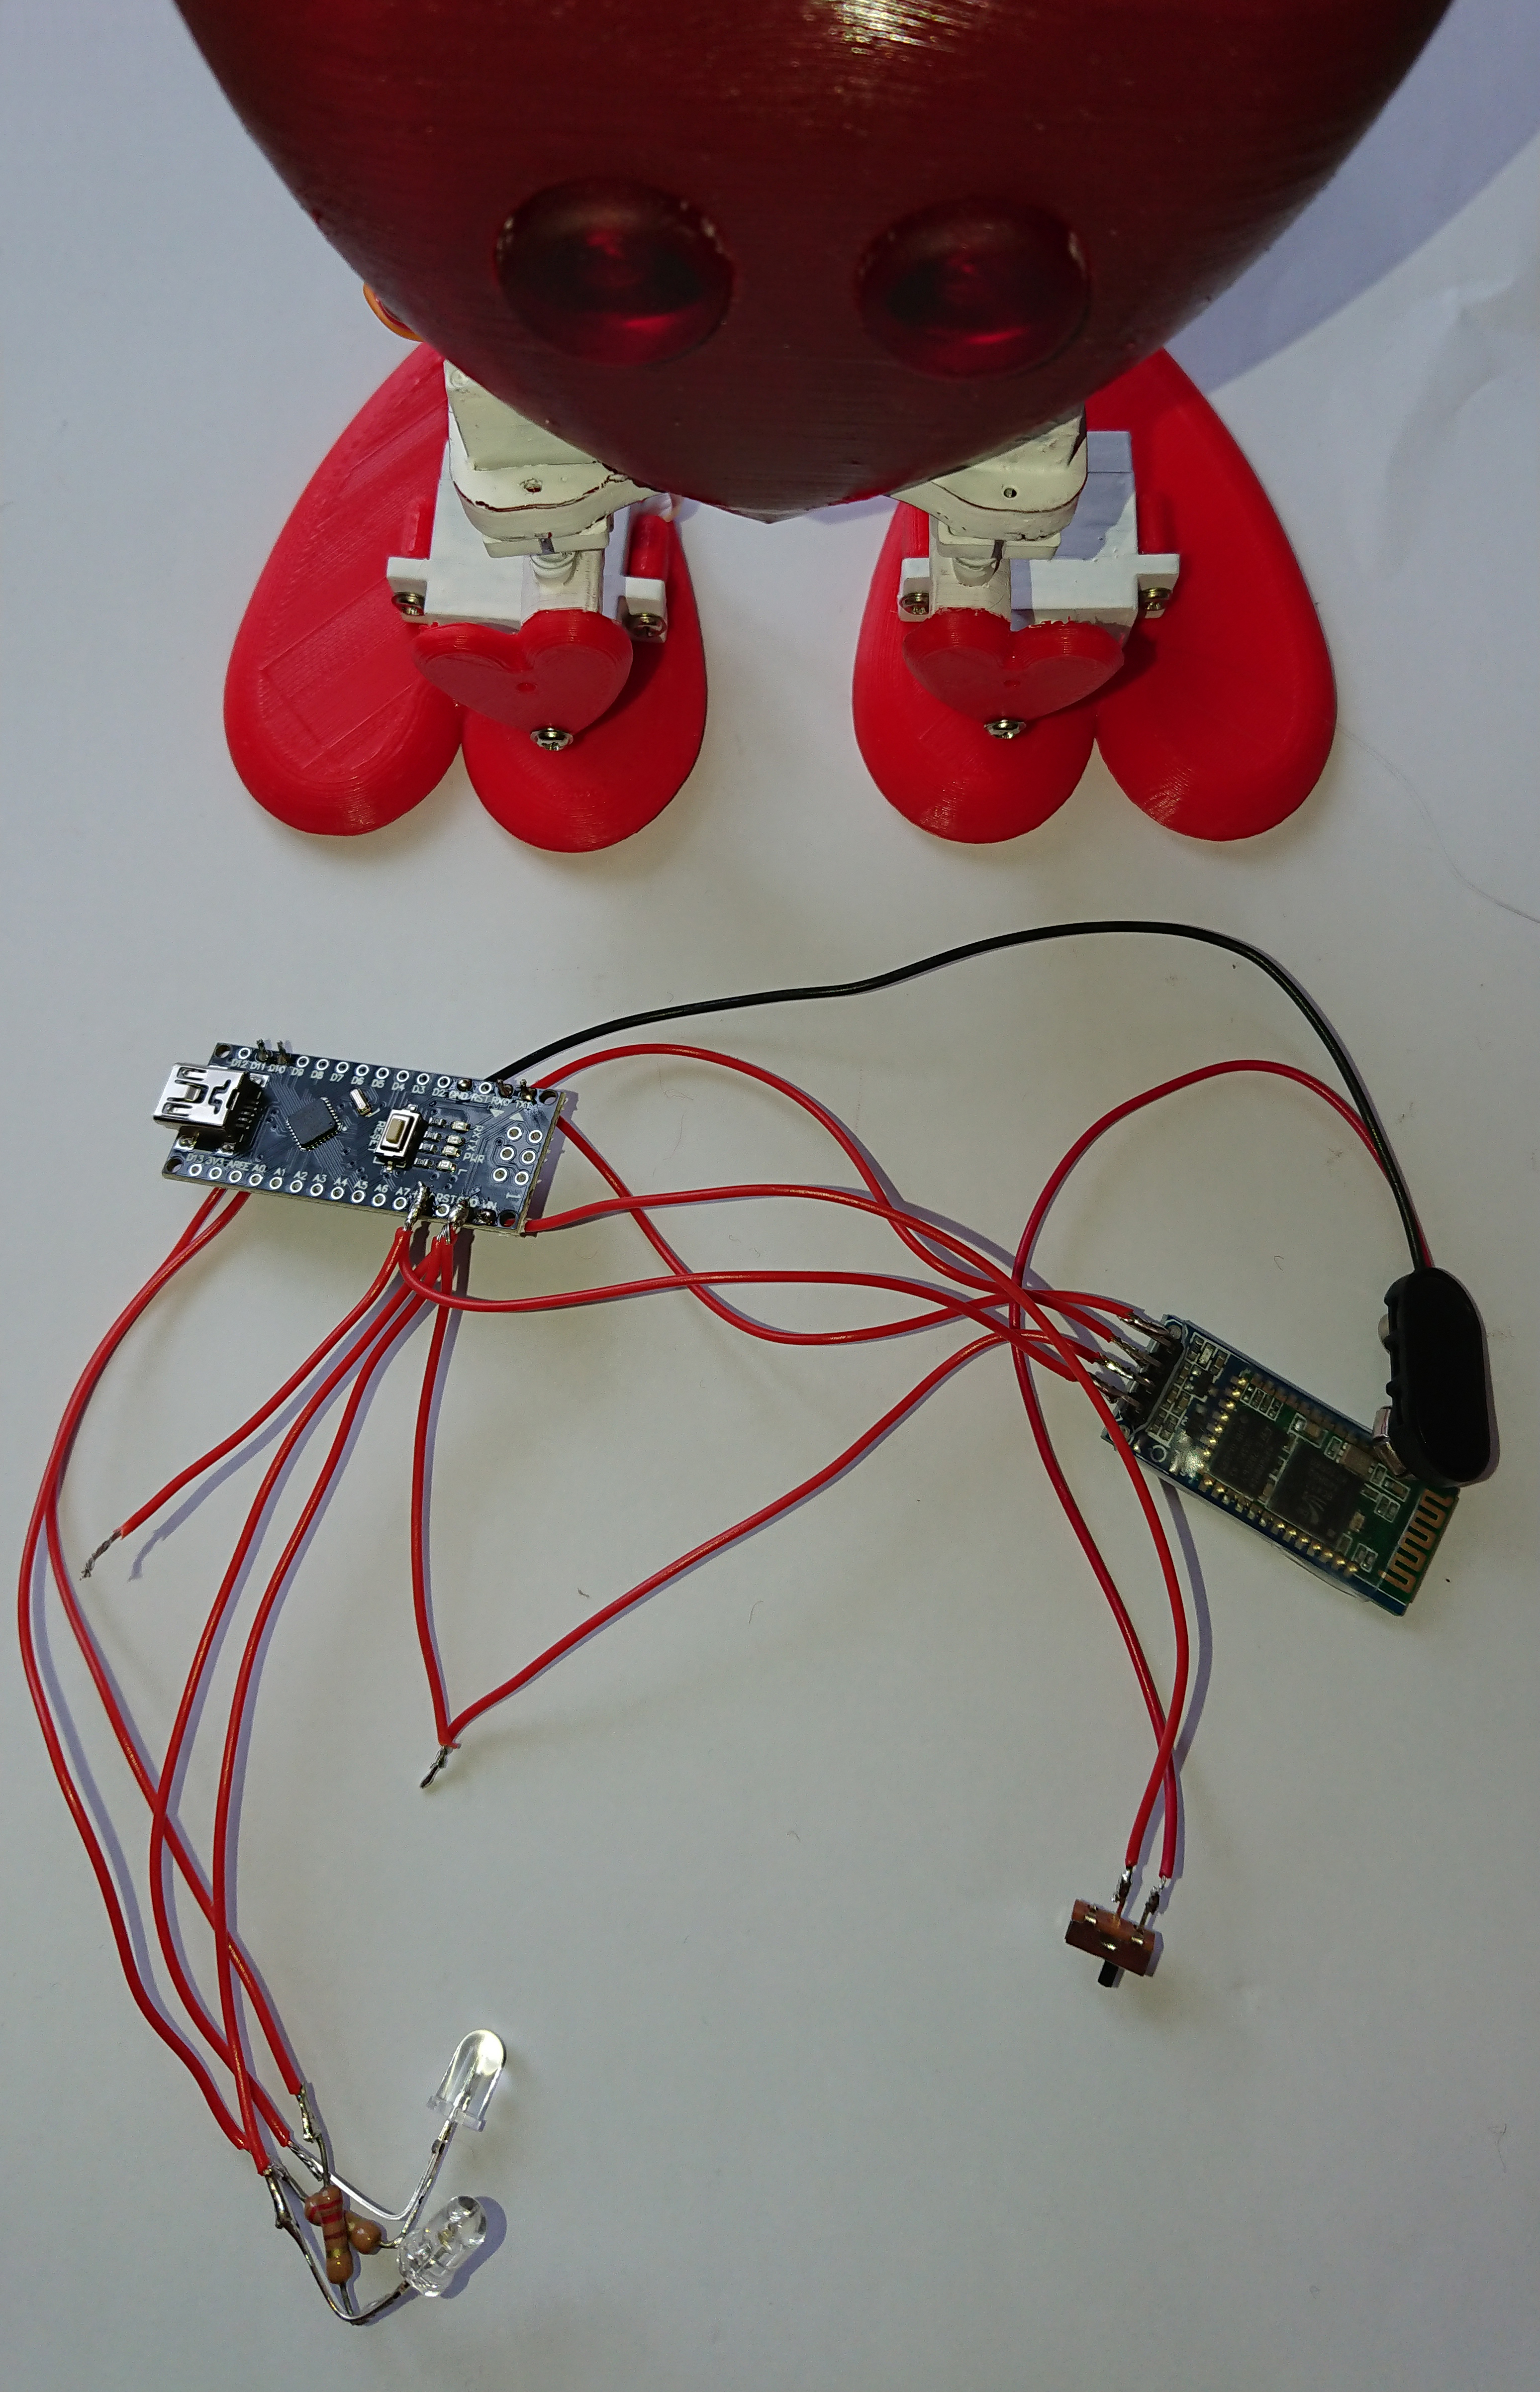
Here is the connection diagram and picture of already assembled electronics.
As for servos you need to solder them to digital pin 2,3,4 and 5. Two LED's goes to digital pin 10 and the Bluetooth module (HC-06) is connected to Tx and Rx (according the schematic).
NOTE: Make sure you upload code before soldering the Bluetooth Rx/Tx connections. Once they are soldered you Arduino Nano might not upload the code.
Heart-bot Assembly
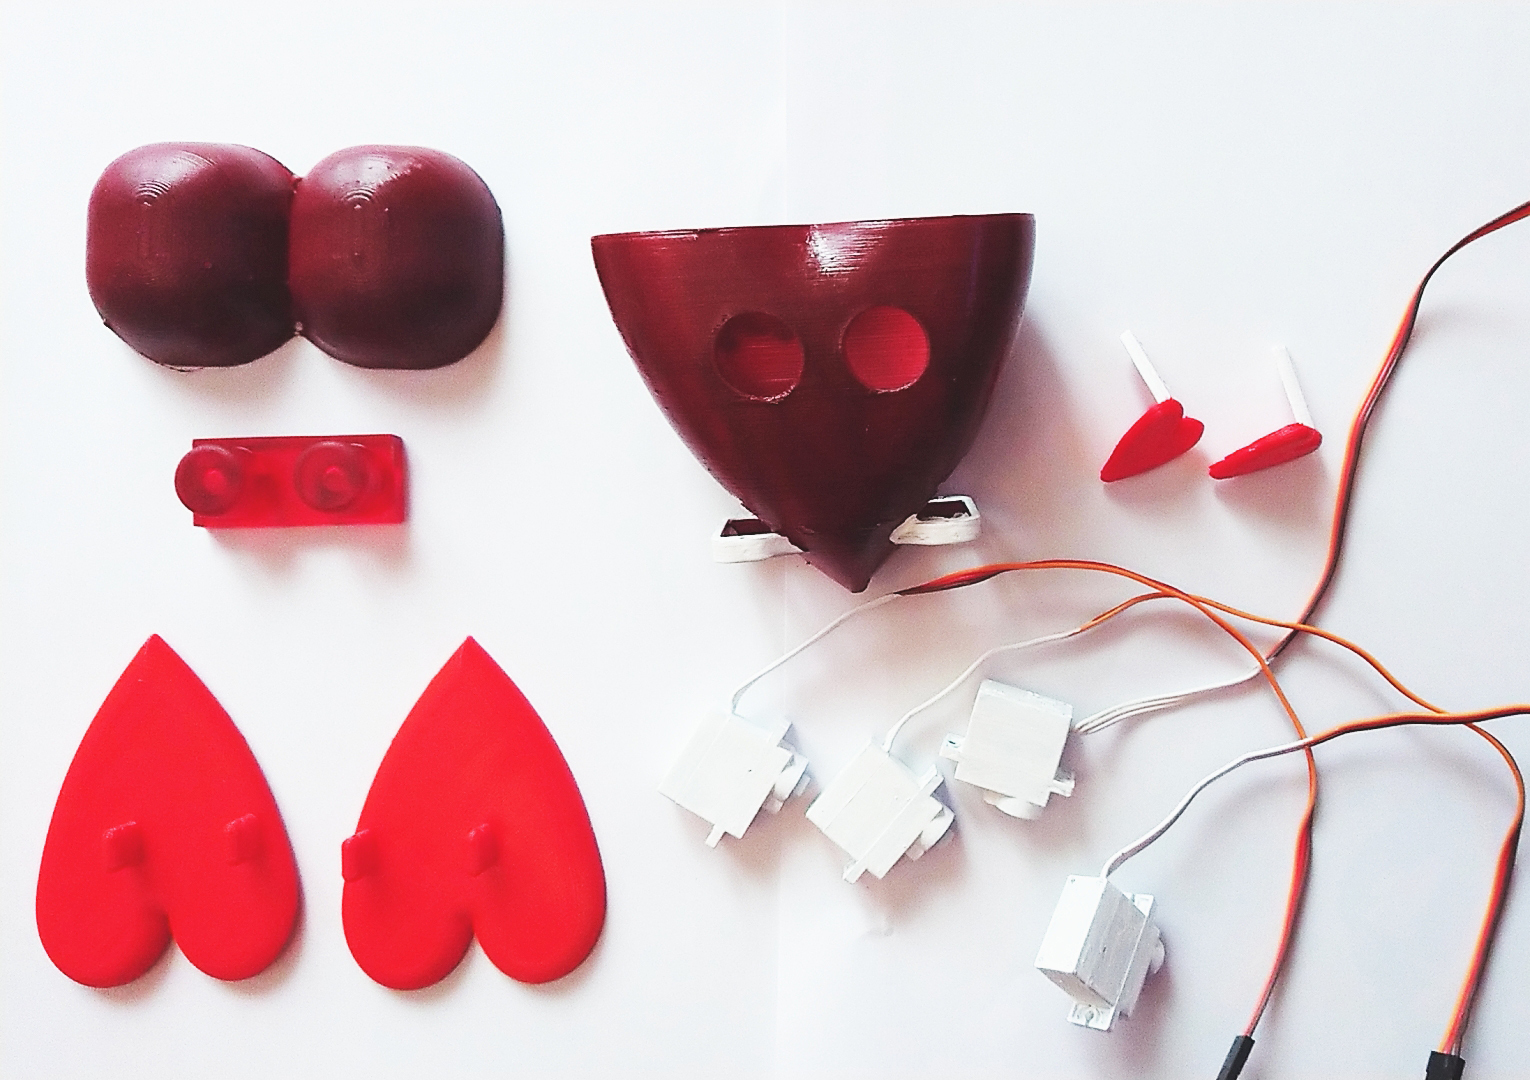
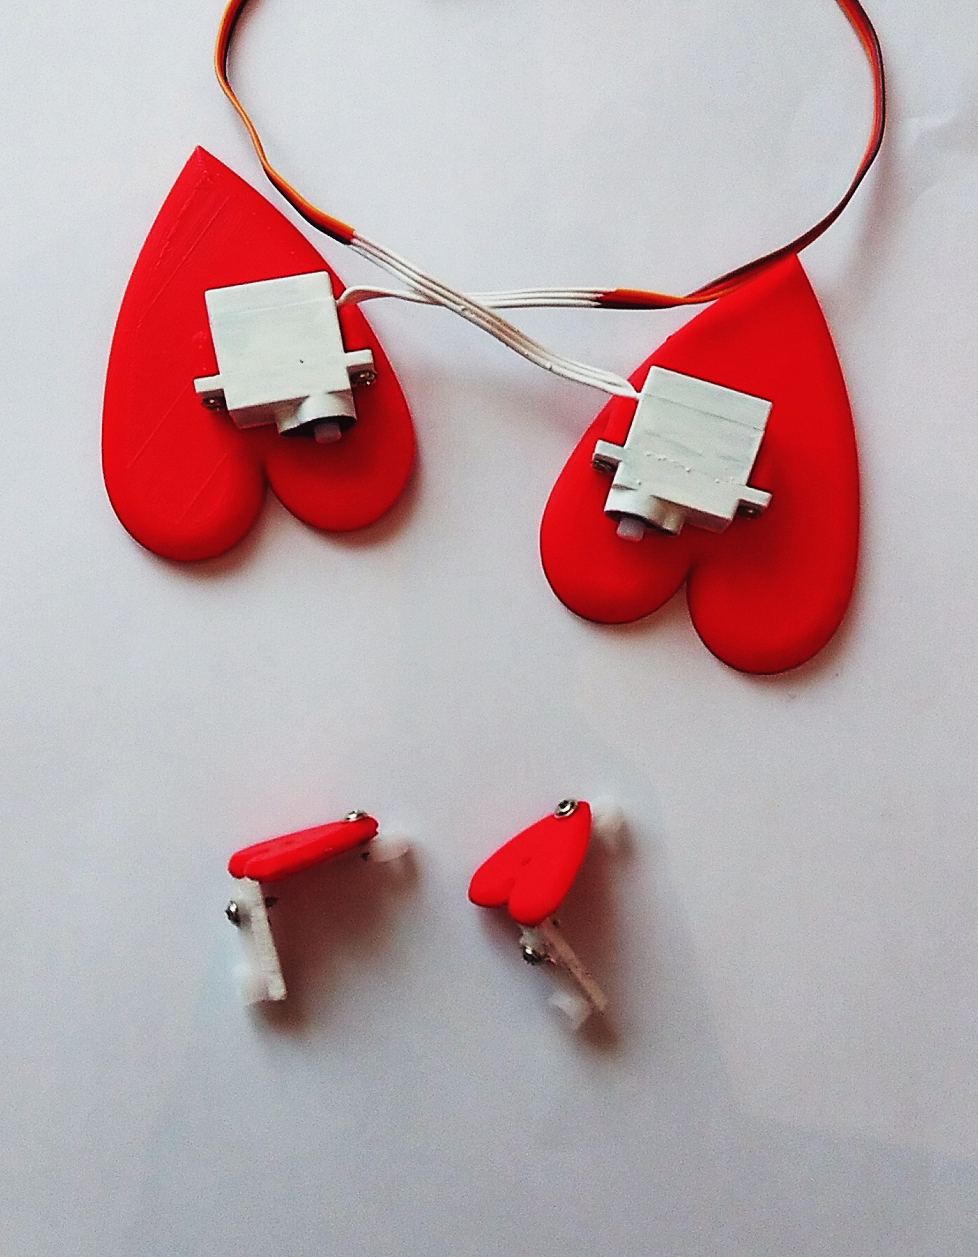
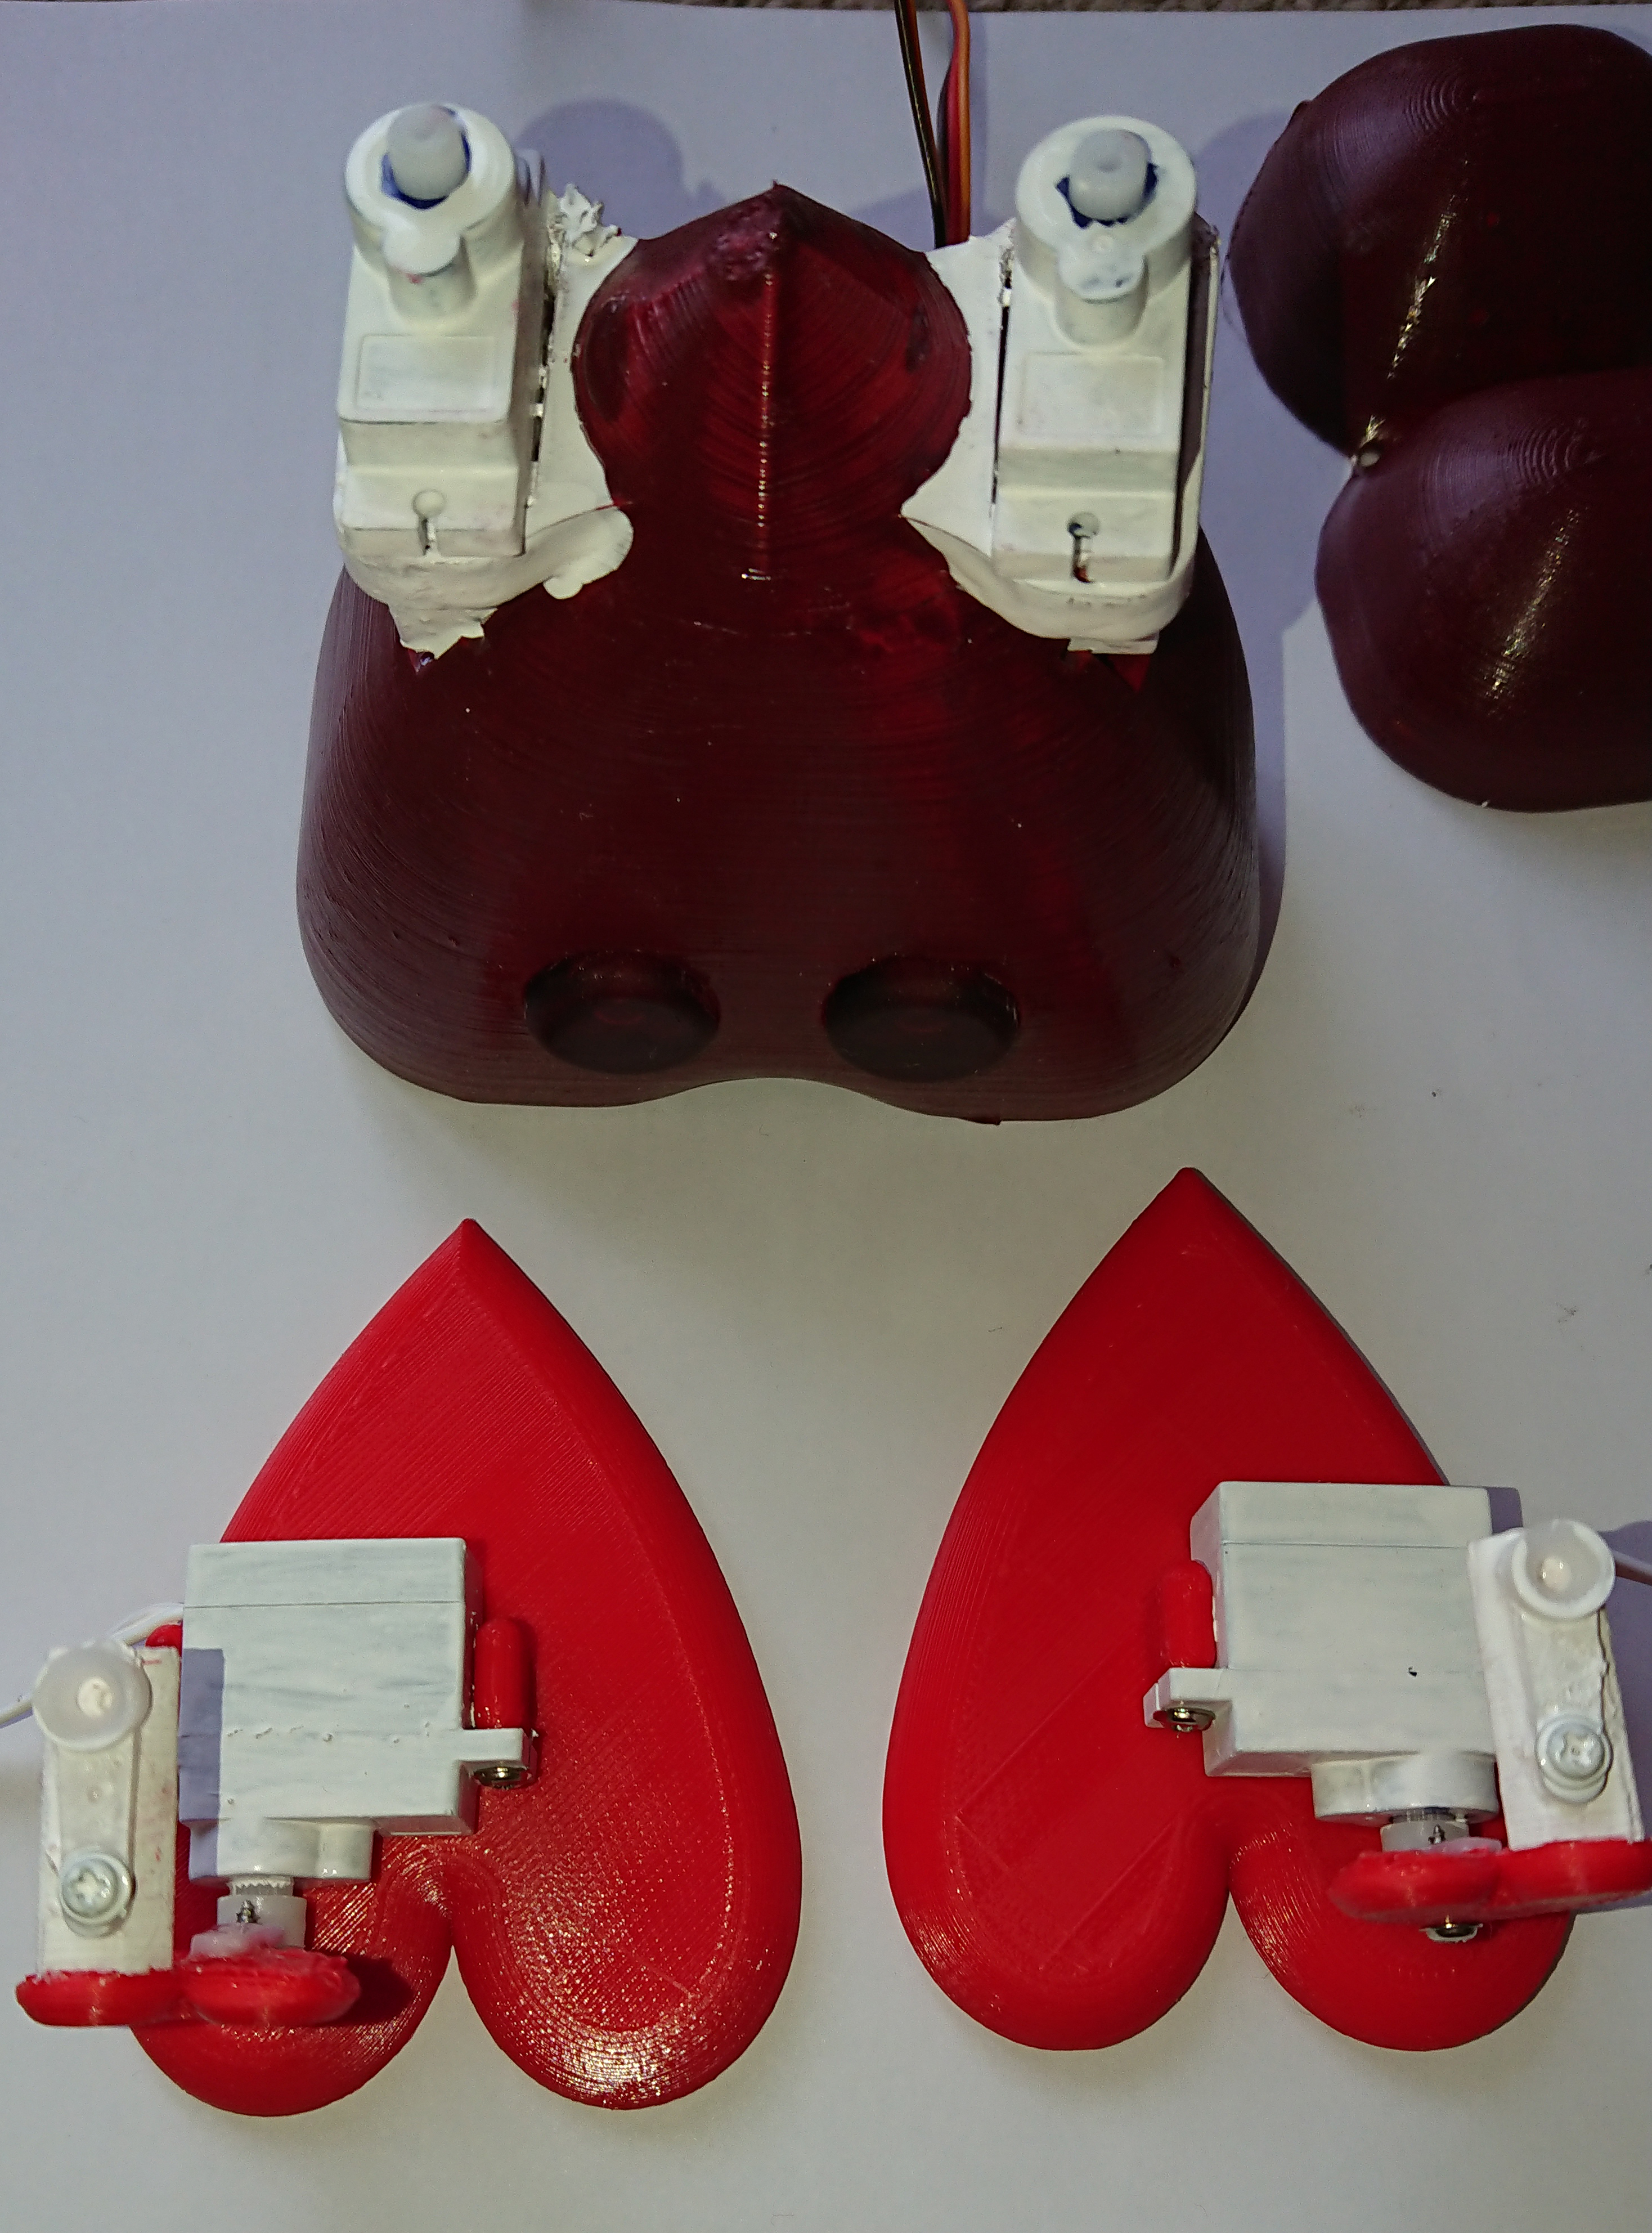
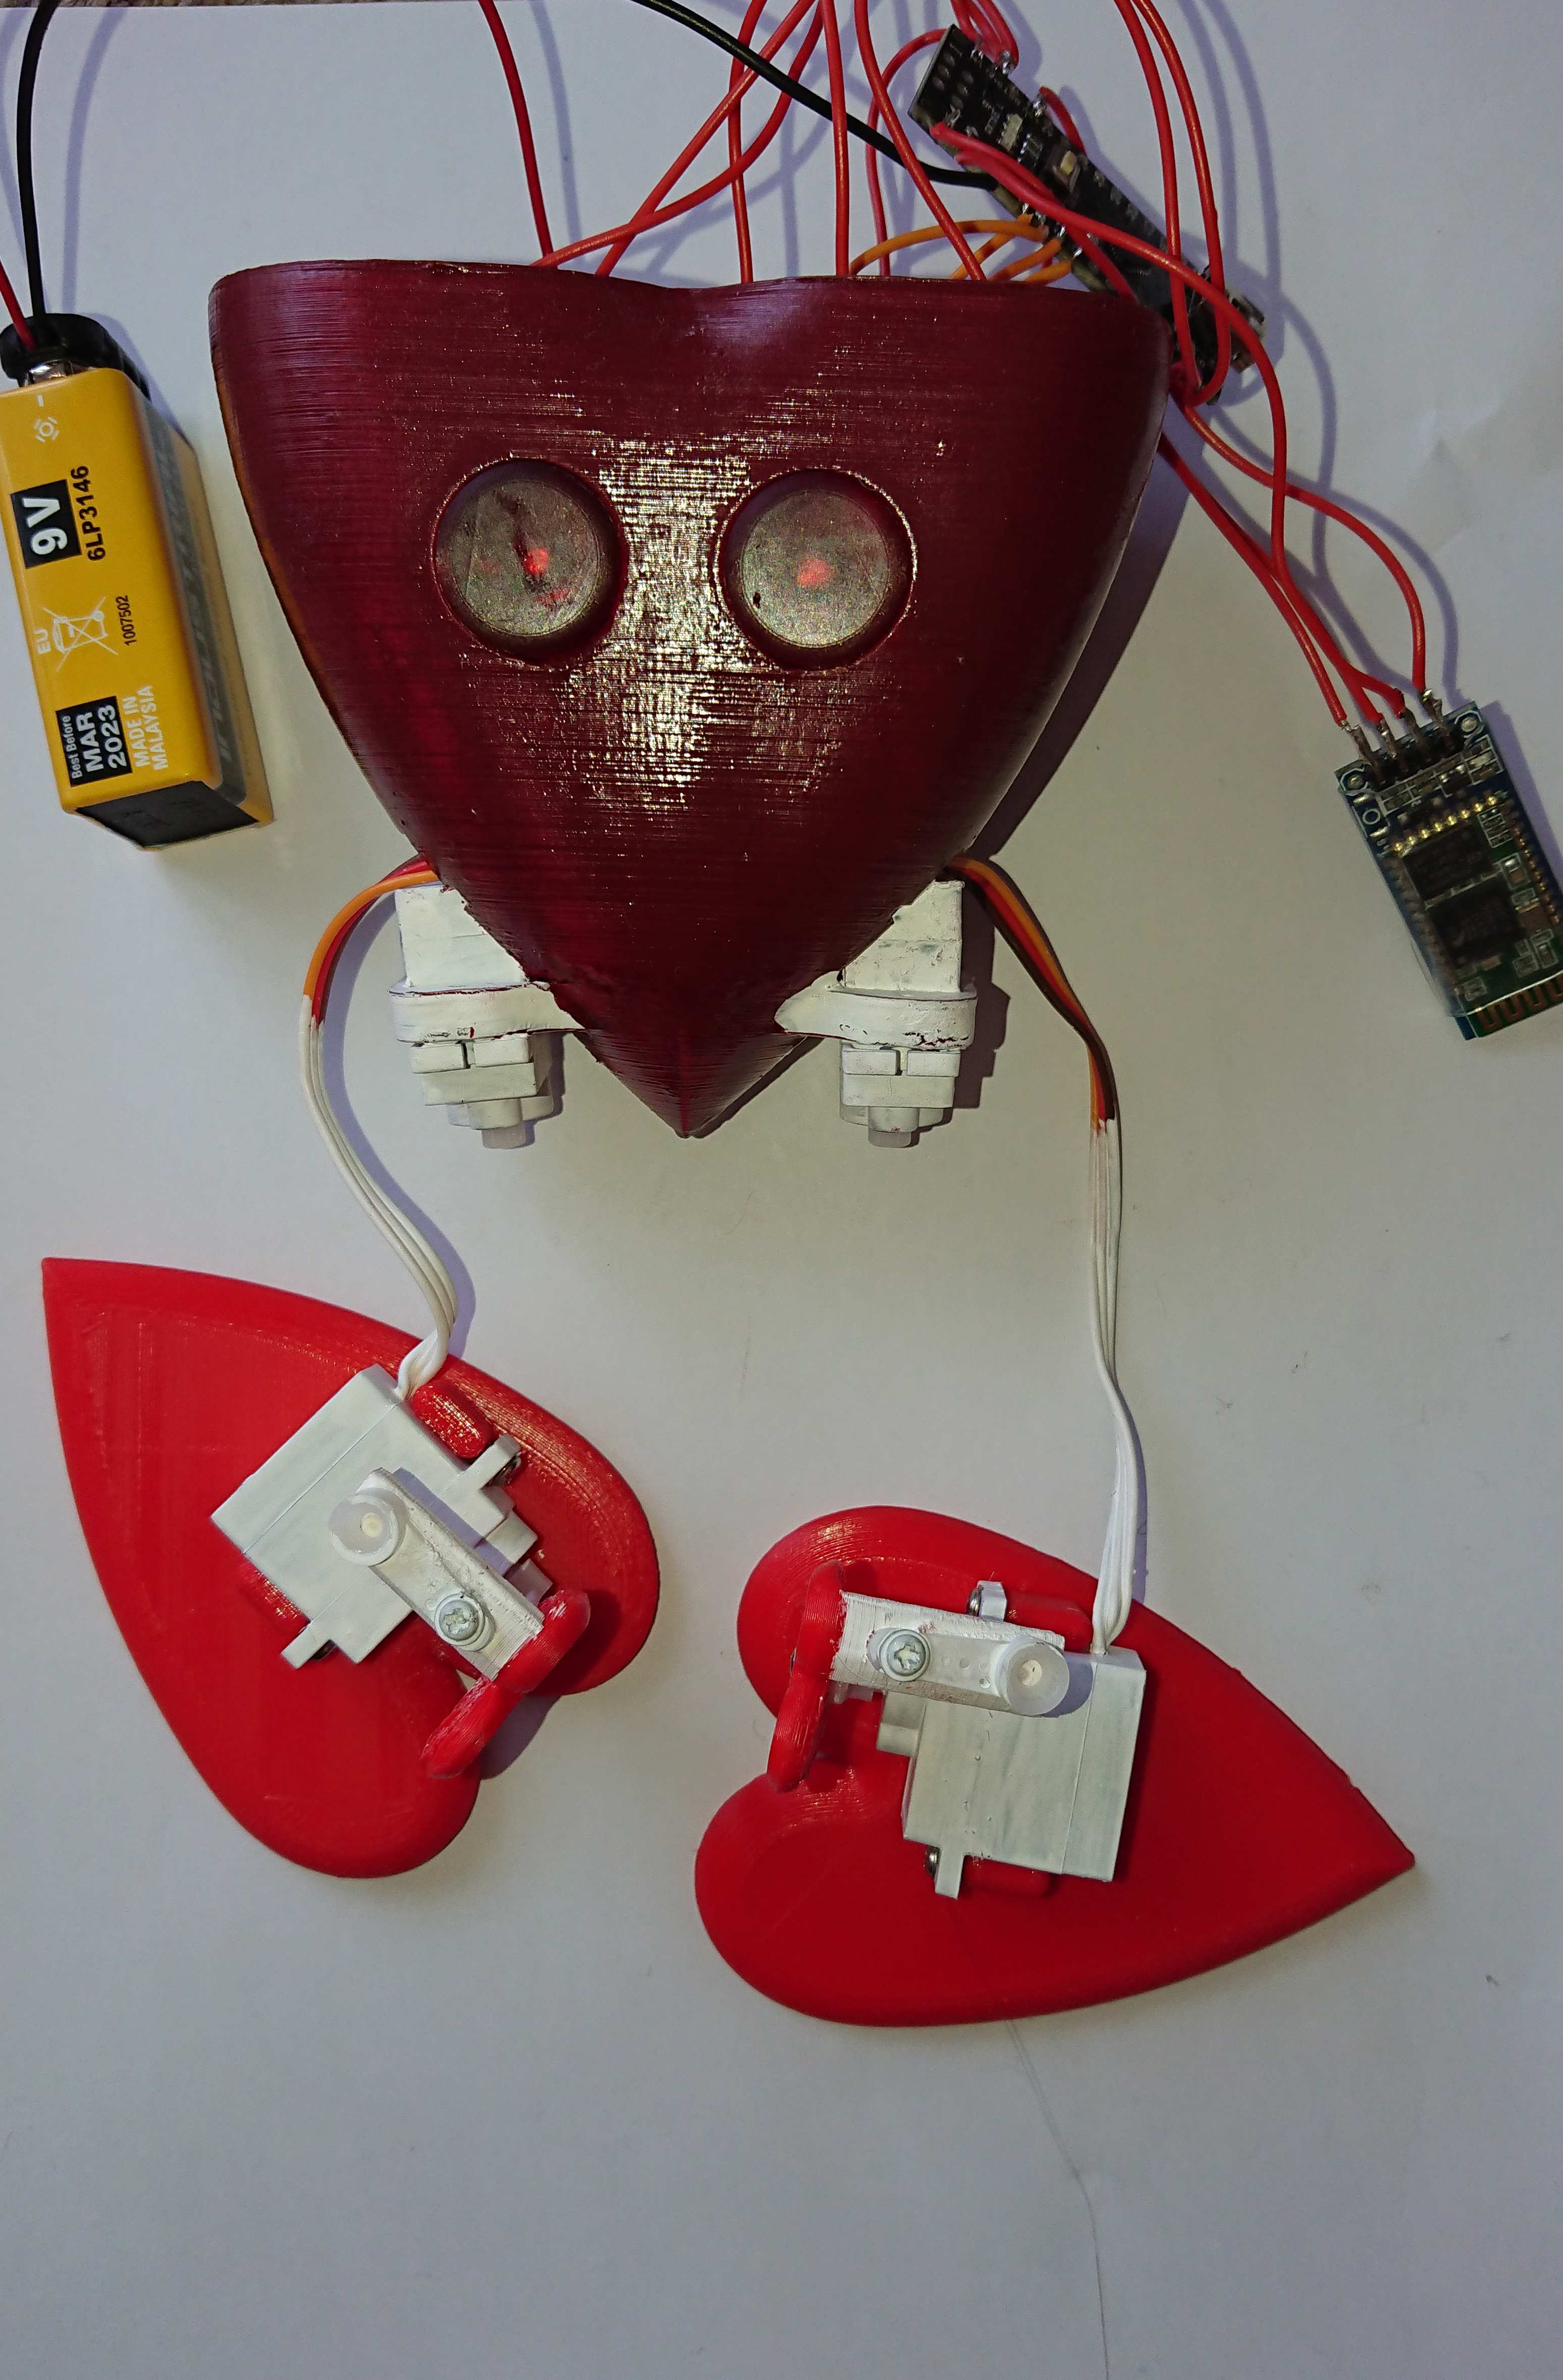
Here are pictures of various stages of assembly.
First you will need to glue few parts together, heart_bot_main_body, heart_bot_base and heart_bot_bottom.
Once that's done you can insert servos, one on each side of the heart_bot body. Next step is to assemble legs.
As you can see on pictures, I installed servos on both foots and then I glued the servo arms (should be in the package with SG90 servos) onto the legs (see second picture). After gluing I also used small screws to make sure the servo arms will stay in the correct position.
Next step is to attache legs to the main body and don't forget to use screw (also attached with SG90 servo) to secure the servo arms.
Now it's time for the eyes and electronics. I printed my eyes in translucent red resin, but clear PLA or translucent HD glass will work too. When inserting electronics try to make sure the 9V battery is in the center of the body and as for the rest of the components, try to spread them evenly (it will make heartbot more stable and easier to calibrate).
Heart-bot Remote Control
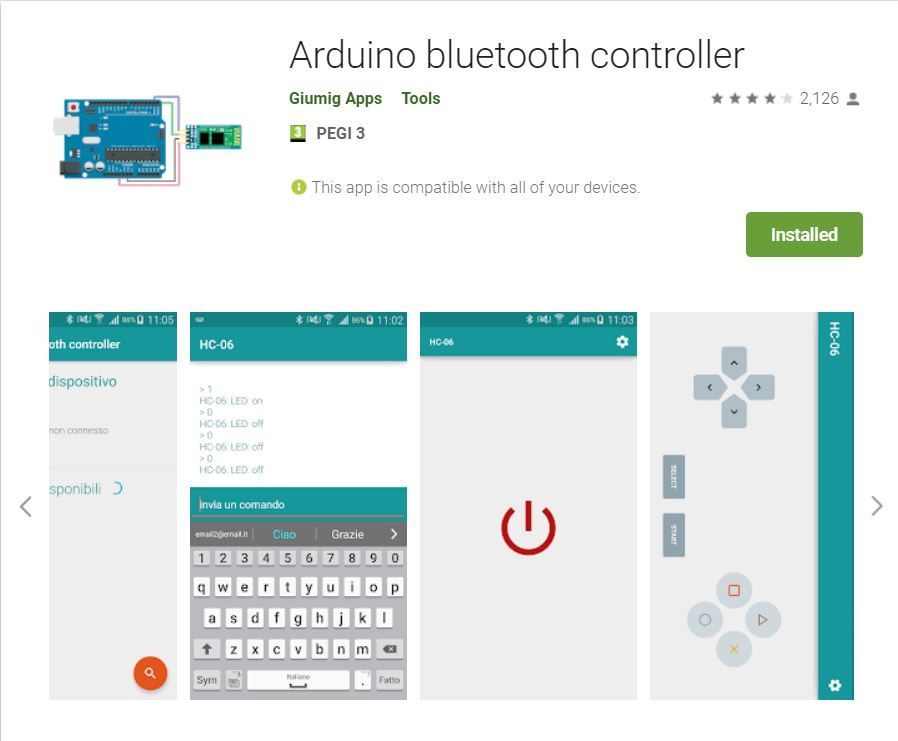
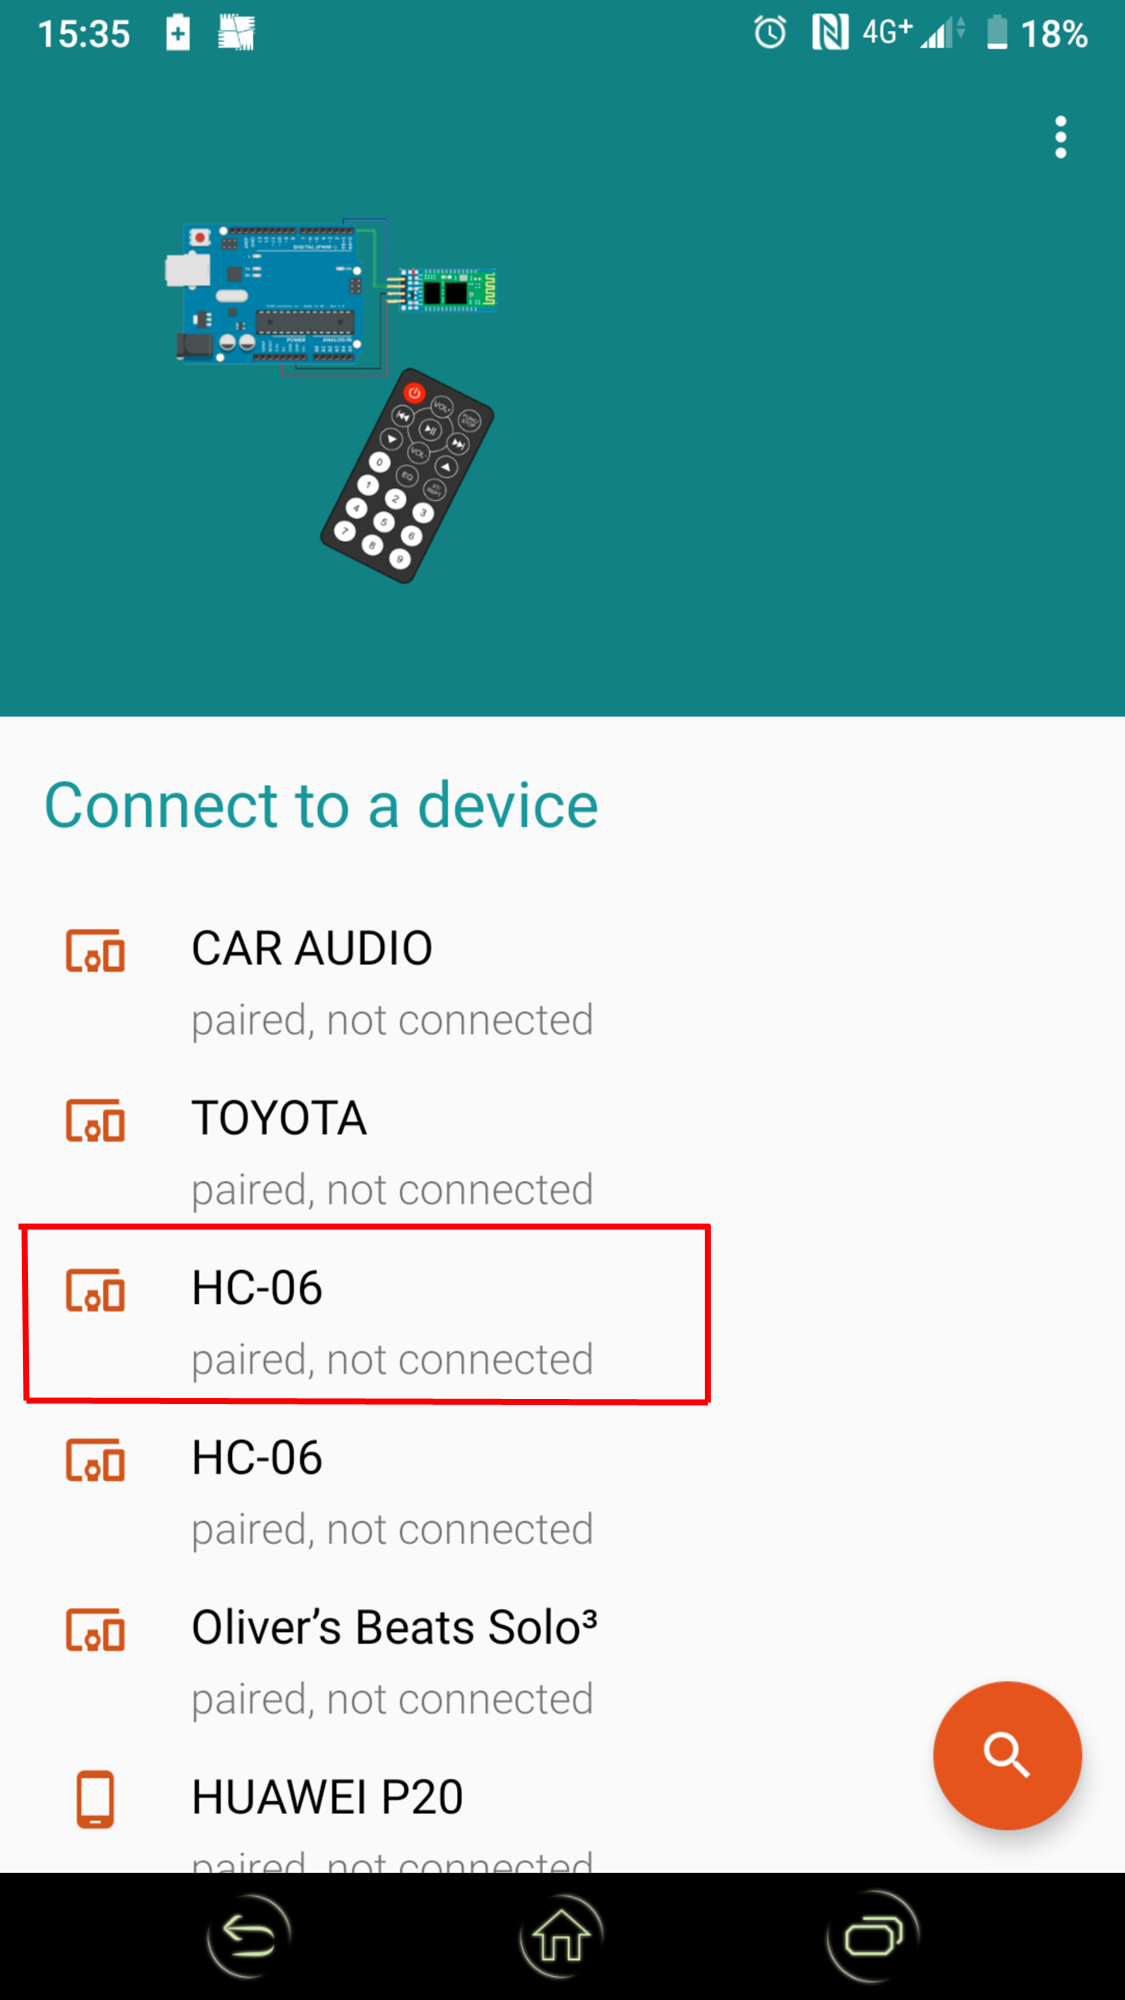
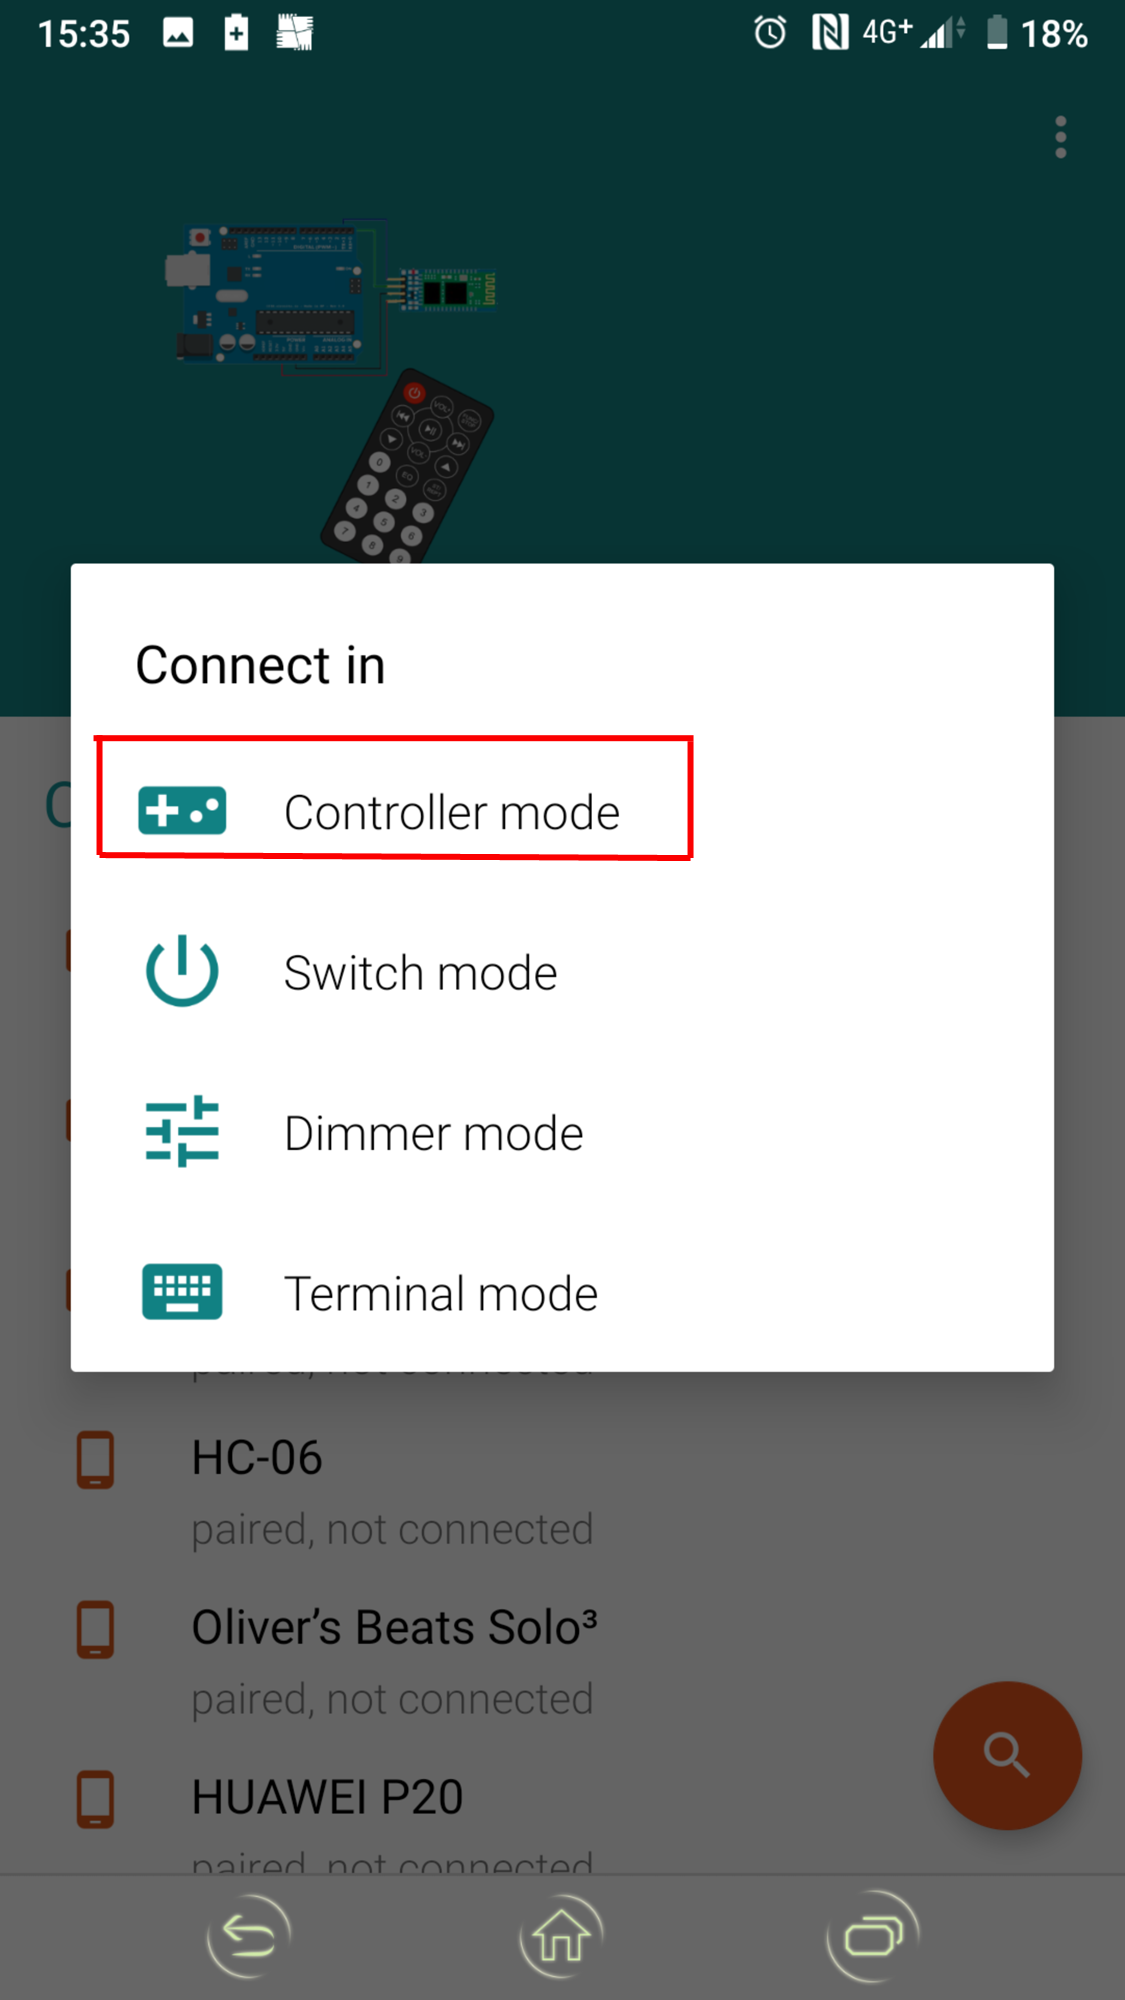
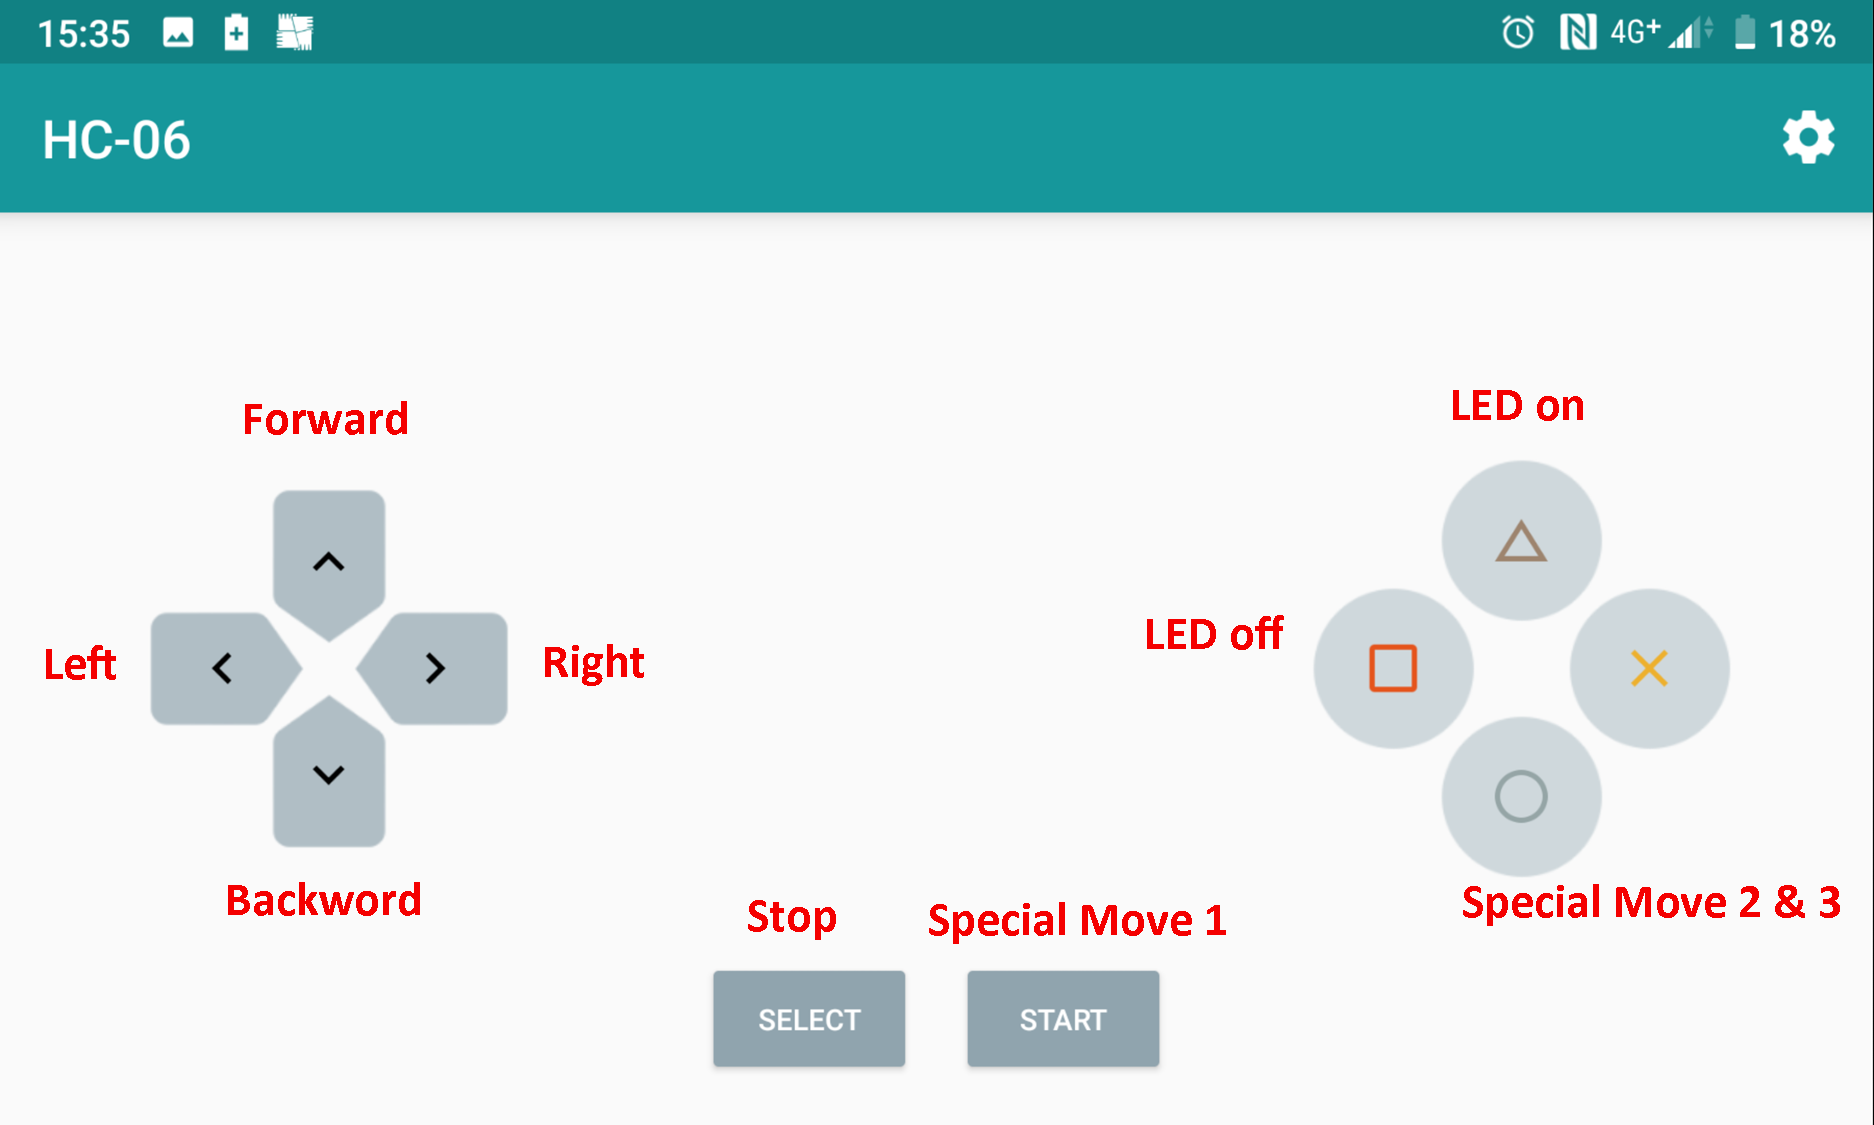
Now it's time to install the Arduino Bluetooth app on your phone to enable Heart-bot remote control.
- Download the Arduino Bluetooth Controller from the Playstore
(https://play.google.com/store/apps/details?id=com....
- Enable Bluetooth connection on your phone and switch on your assembled Heart-bot
- The App with display available Bluetooth devices and teh one you looking for is named HC-06
- Once you click o that you will see few different connection options, choose Controller mode
- Now you are ready to remote control your Hear-bot
Heart-bot in Action
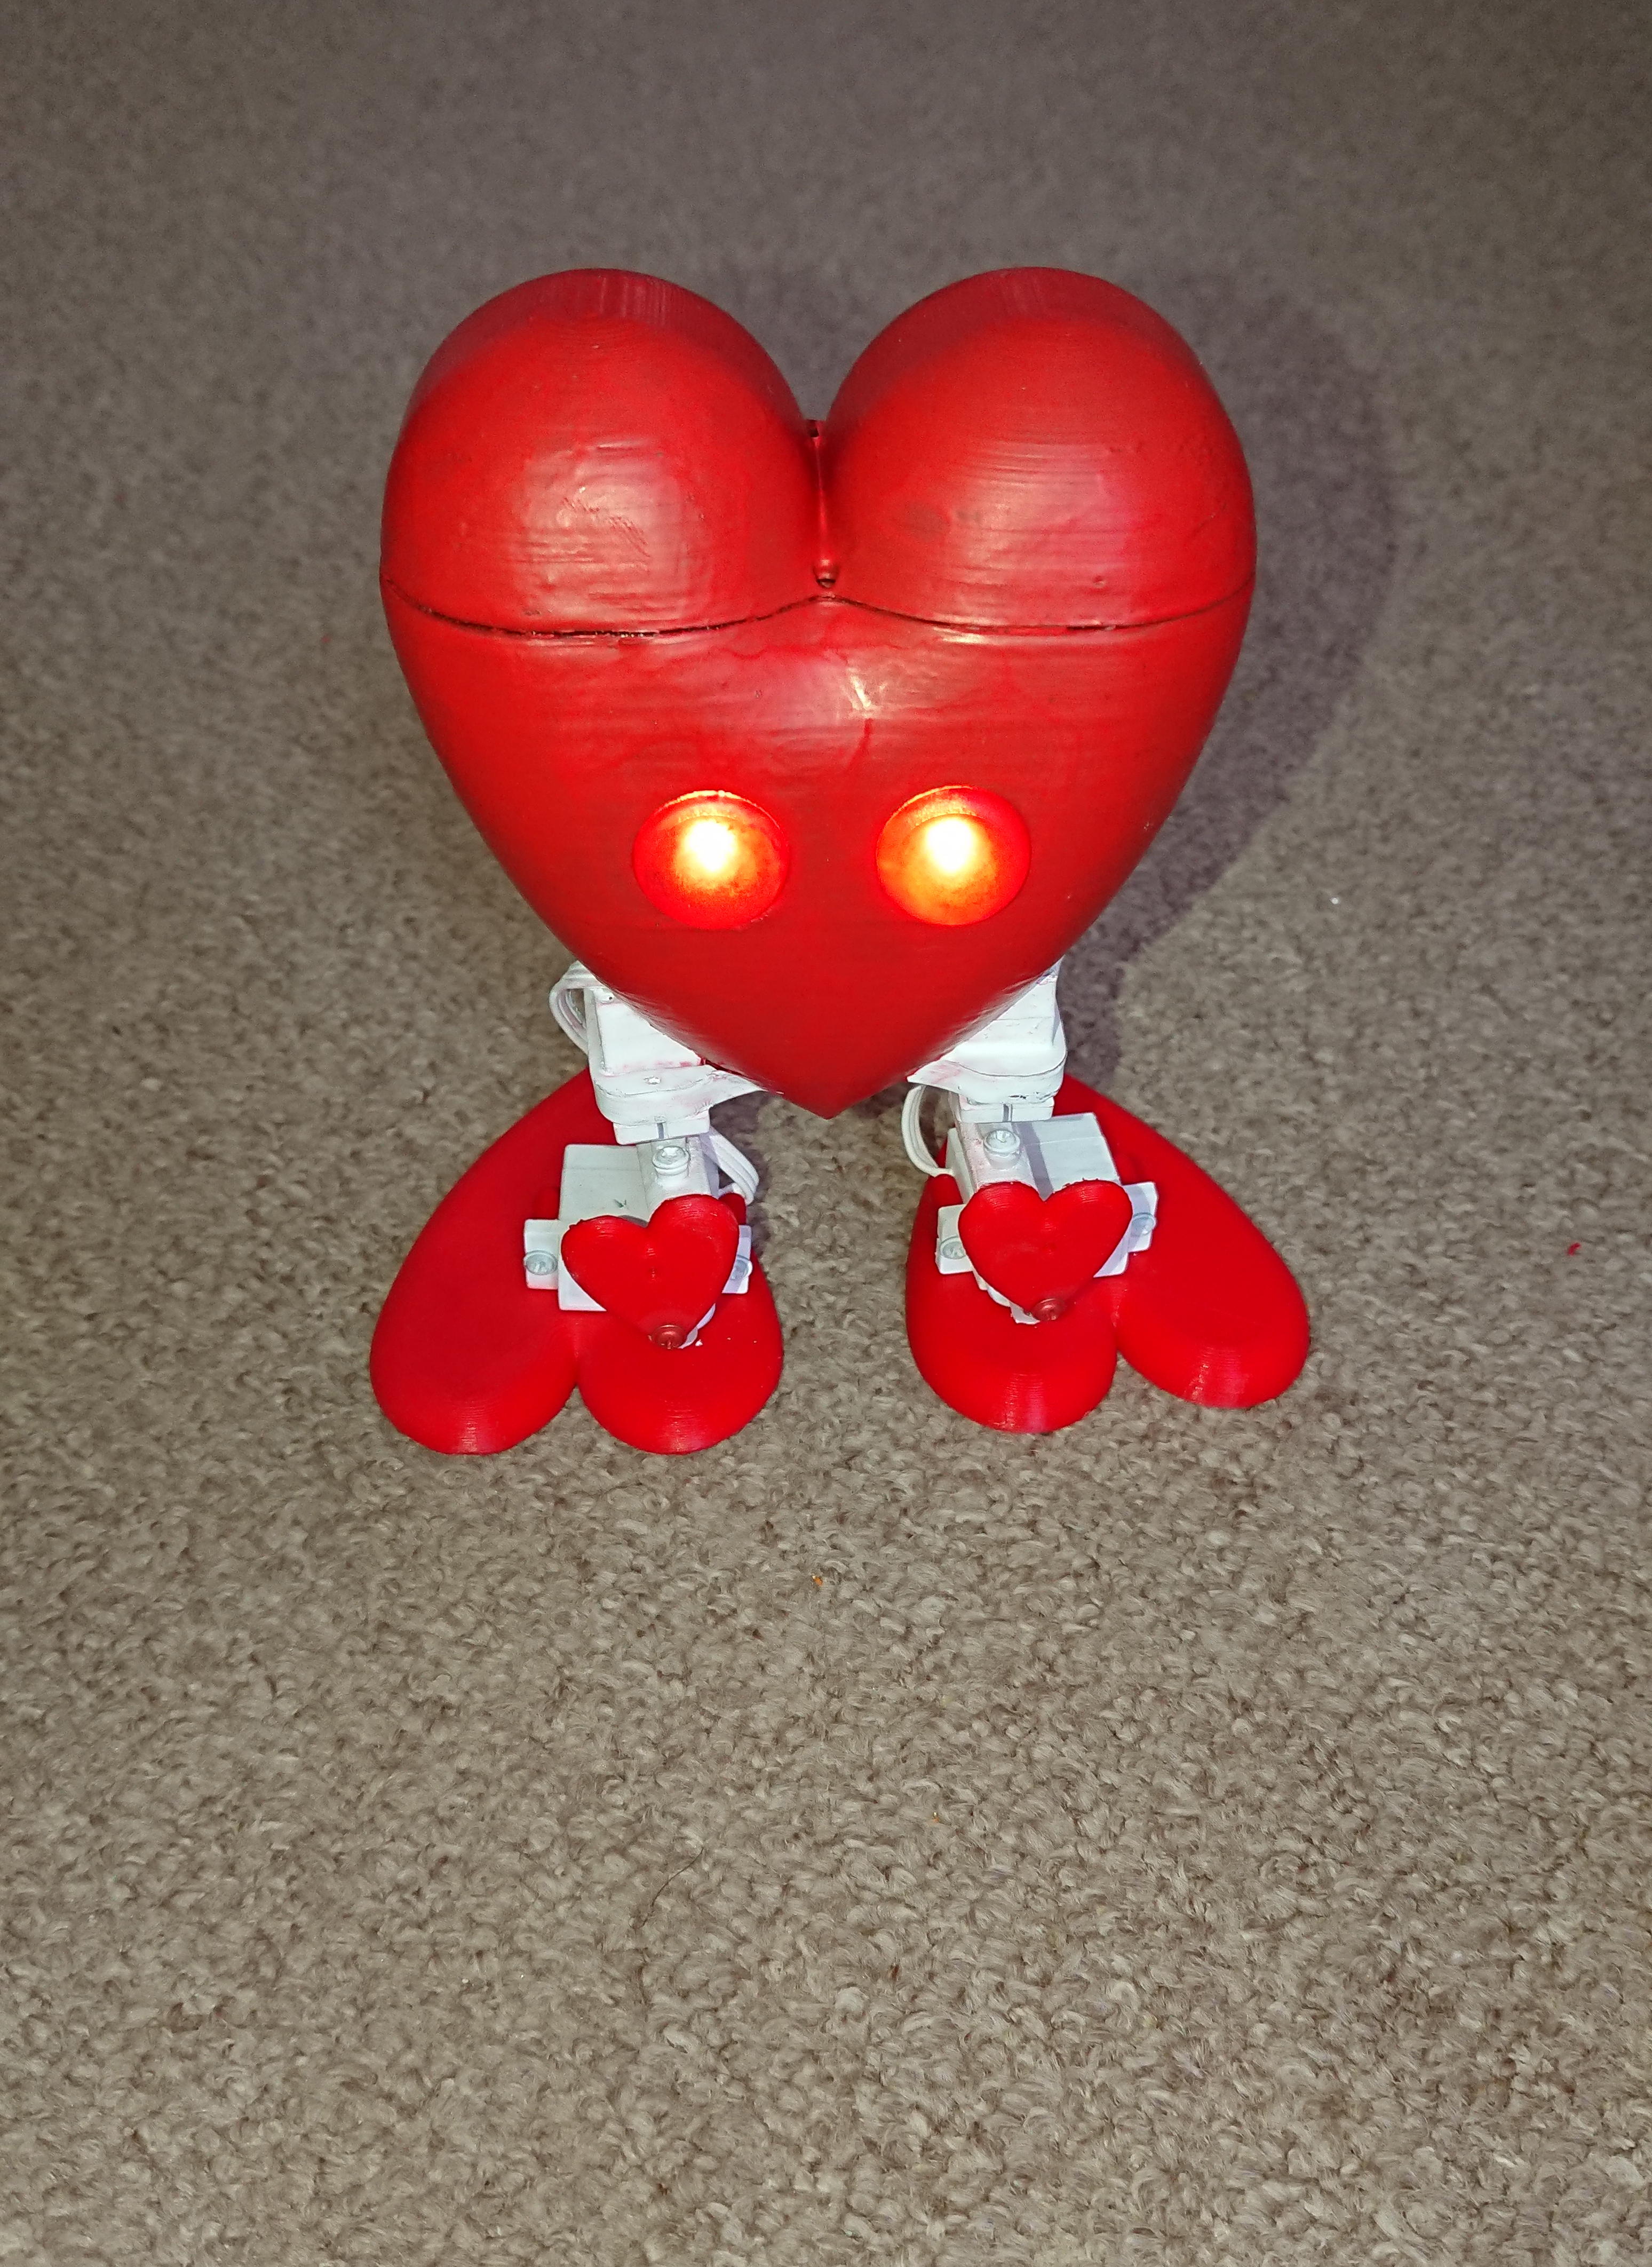
Here is a short video of working Heart-bot that is controlled with mobile phone via Bluetooth.
NOTE: It might take a while to balance the Heart like robot properly (battery and components inside) and to calibrate servos as mentions in Arduino step, but once you sort out all this is can be a good fun especially for kids.