Haptic Augmented Reality CAD [HARCAD]
by ykaradayi in Circuits > Tools
2494 Views, 16 Favorites, 0 Comments
Haptic Augmented Reality CAD [HARCAD]

Hey everyone!
My last project posted on Instructables was a system that allows you to use your 3D printing pen like a 3D coloring book, using a haptic feedback device called the Geomagic Touch. This project is an idea I came up with while working on that one and realizing that while I was 3D printing, I was still unable to see the boundaries until I filled them in with my pen. It needed Augmented Reality for me to actually see a "preview" of what I'm making. So, I started this project to address that. Once again, it's by no means a perfect solution to anything, it's just me trying out cool new design processes that hopefully inspire others to build upon it. I'll get into my conclusions at the end of the tutorial.
Devices + Software
This project requires only three things:
- a haptic feedback device.
- a Windows 10 desktop.
- a Hololens.
To be more specific, the haptic device I am using is a Haptic Phantom Premium 1.5, from 3DSystems, and this specific device, unlike the Geomagic Touch device, requires a parallel port in order to work with the computer. The device is shipped with this port for you to install onto your desktop.
If you do not have the Premium but you do have a smaller version like the Geomagic Touch, this project can still work for you, but you may have to mess with the Unity project to fit your needs- I'll get into that later.
I assume if you have a Hololens you've already done the setup from the Hololens website. The Windows 10 computer requires the latest Unity Beta in order to run the Holographic Remoting Application. You must also download the Holographic Remoting application on your Hololens, which you can easily find by searching for it in the Windows Store on the headset.
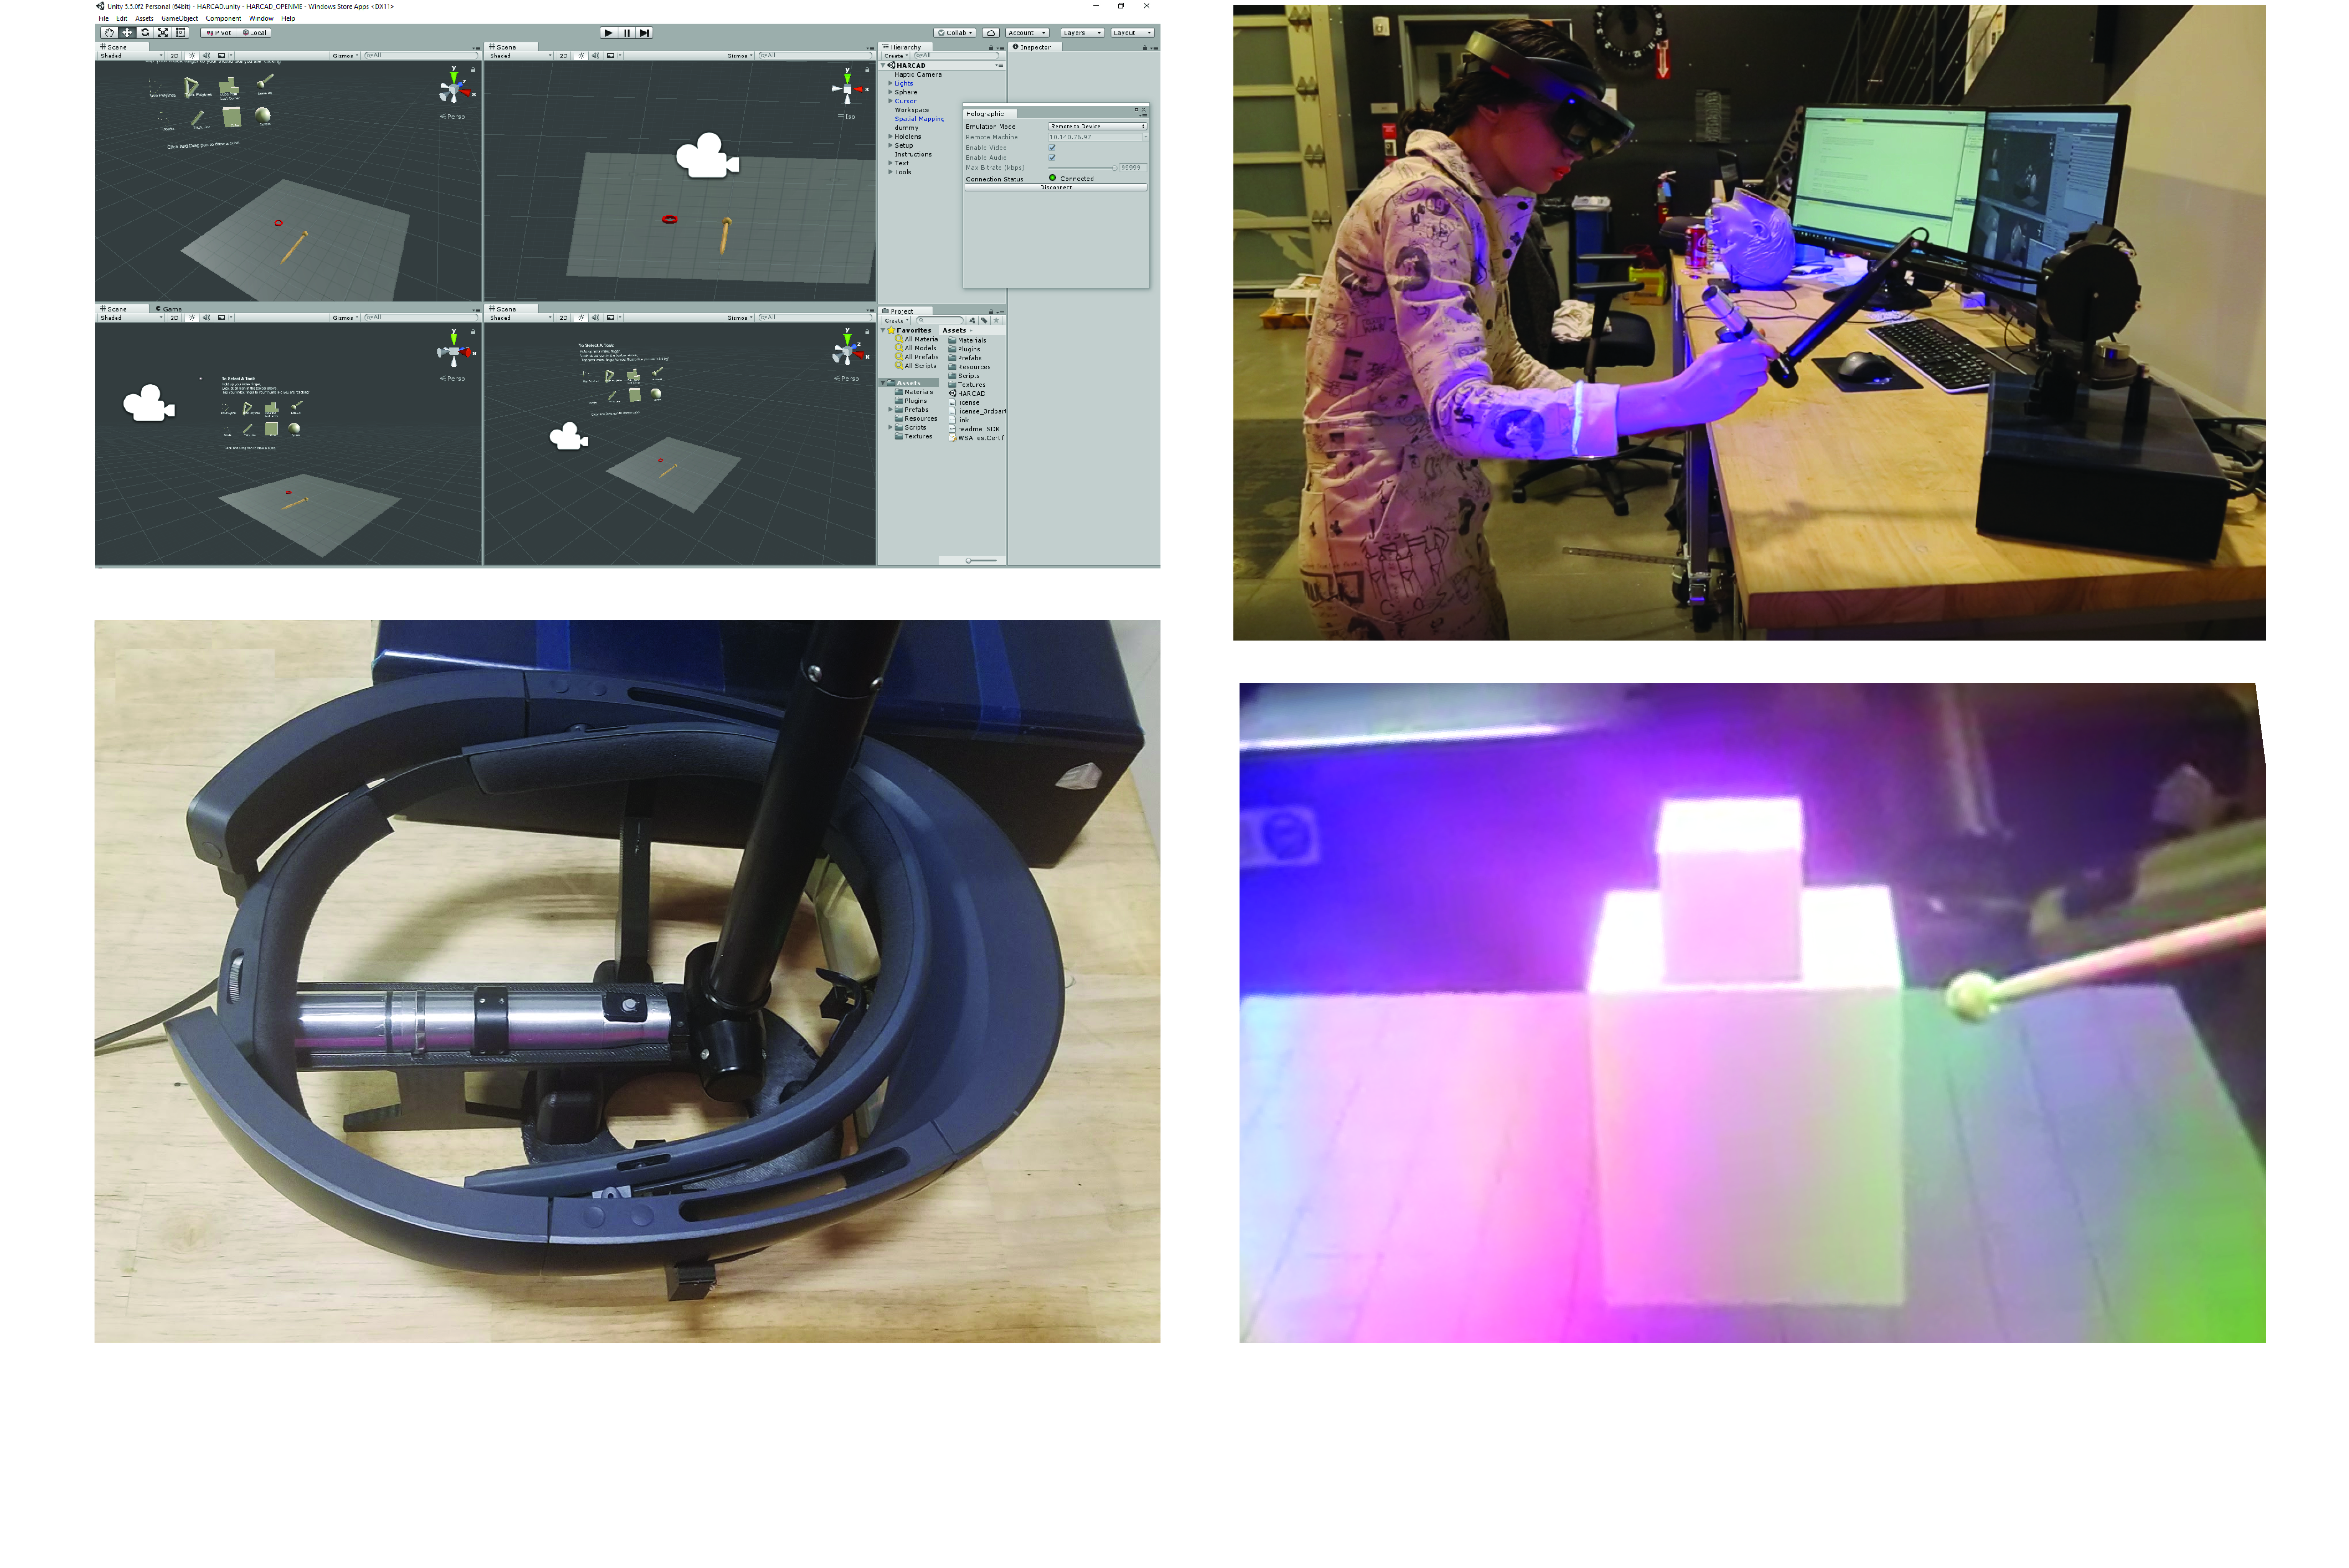
((((To explain why the Beta: My project does not run directly on the Hololens because I did not have time to figure out how to wirelessly control the haptic feedback device from the headset. Instead, this project runs from the computer straight out of the Unity beta version which has a feature called Holographic Remoting, which provides the capability to flash the camera right to the Hololens and track its positioning. (Kind of like an Oculus or Vive, but with AR). This allows me to run the entire application on the computer so that I can easily control the Haptic device and use the Hololens, without the headache of having to consolidate the build with some method of controlling haptics remotely [it just seemed like a lot of work for a demo].))))
Open the Unity Project
Attached is a Unity 5.5.0f2 version of my project.
Upon opening, Go to Windows, then Holographic Remoting, and in the menu select "Remote to Device".
Open the Holographic Remoting Application on your Hololens, and it will show you the IP address that you need to put in. At this point, with your haptic feedback device plugged in and your Hololens on, the entire system should work, but that does not mean we are finished here.
Downloads
Callibrating the Hololens to the Haptics
Essentially what's missing at this point is the alignment of what you're seeing to what you're feeling. There will be a wooden wand in the AR view, and the goal is to align it as closely as possible with the actual haptic pen control.
I had tried numerous options at this point- image tracking, position-alignment, even rigid-body transforms from the haptic device to what the hololens sees. Unfortunately, as great as the Hololens is generally at spatial mapping, it is not in a fine enough detail to perfectly map using these tactics.
I ended up running with a simple idea: Run the project with the Hololens placed on the table, put the pen right up against the Hololens on the table, hit the spacebar to move the camera position to where the pen is positioned in Unity, and then put the Hololens on. It's not the best in terms of user flow, but it's the simplest and most accurate way technically speaking.
I recommend printing out this Hololens + Pen stand. The original model is taken from user SystemUnderDesign at thingiverse, and I greatly appreciate his work. I took the model he created and edited it a little to include a pen holder, to ensure the relationship between the pen and Hololens is always the same when I callibrate.
Make Your Own Drawings! Add Functionality! MAKE MAKE MAKE!
At this point it should be all set up and ready to go. If you are a coder, I'll be getting into some of the details below within a couple days.