Hanger Out of a Cardboard Box

In the instructable below, I will show you how to make a rigid hanger out of a box of corrugated cardboard.
I used a box of Zalando instead of normal corrugated cardboard, because it is a part of my idea to transform Zalando boxes (or in general, boxes from apparel e-tailers) into a hanger. In this way, the cardboard box can be used as a hanger instead of being thrown away. The box's second life is useful and cool for the customers, friendly towards mother nature and positive for e-tailers, since the surprise factor and thereby the overall appreciation of the shop by the customer rises.
Download the pdf 'instructable hanger' and get started!
Downloads
Required Materials and Tooling

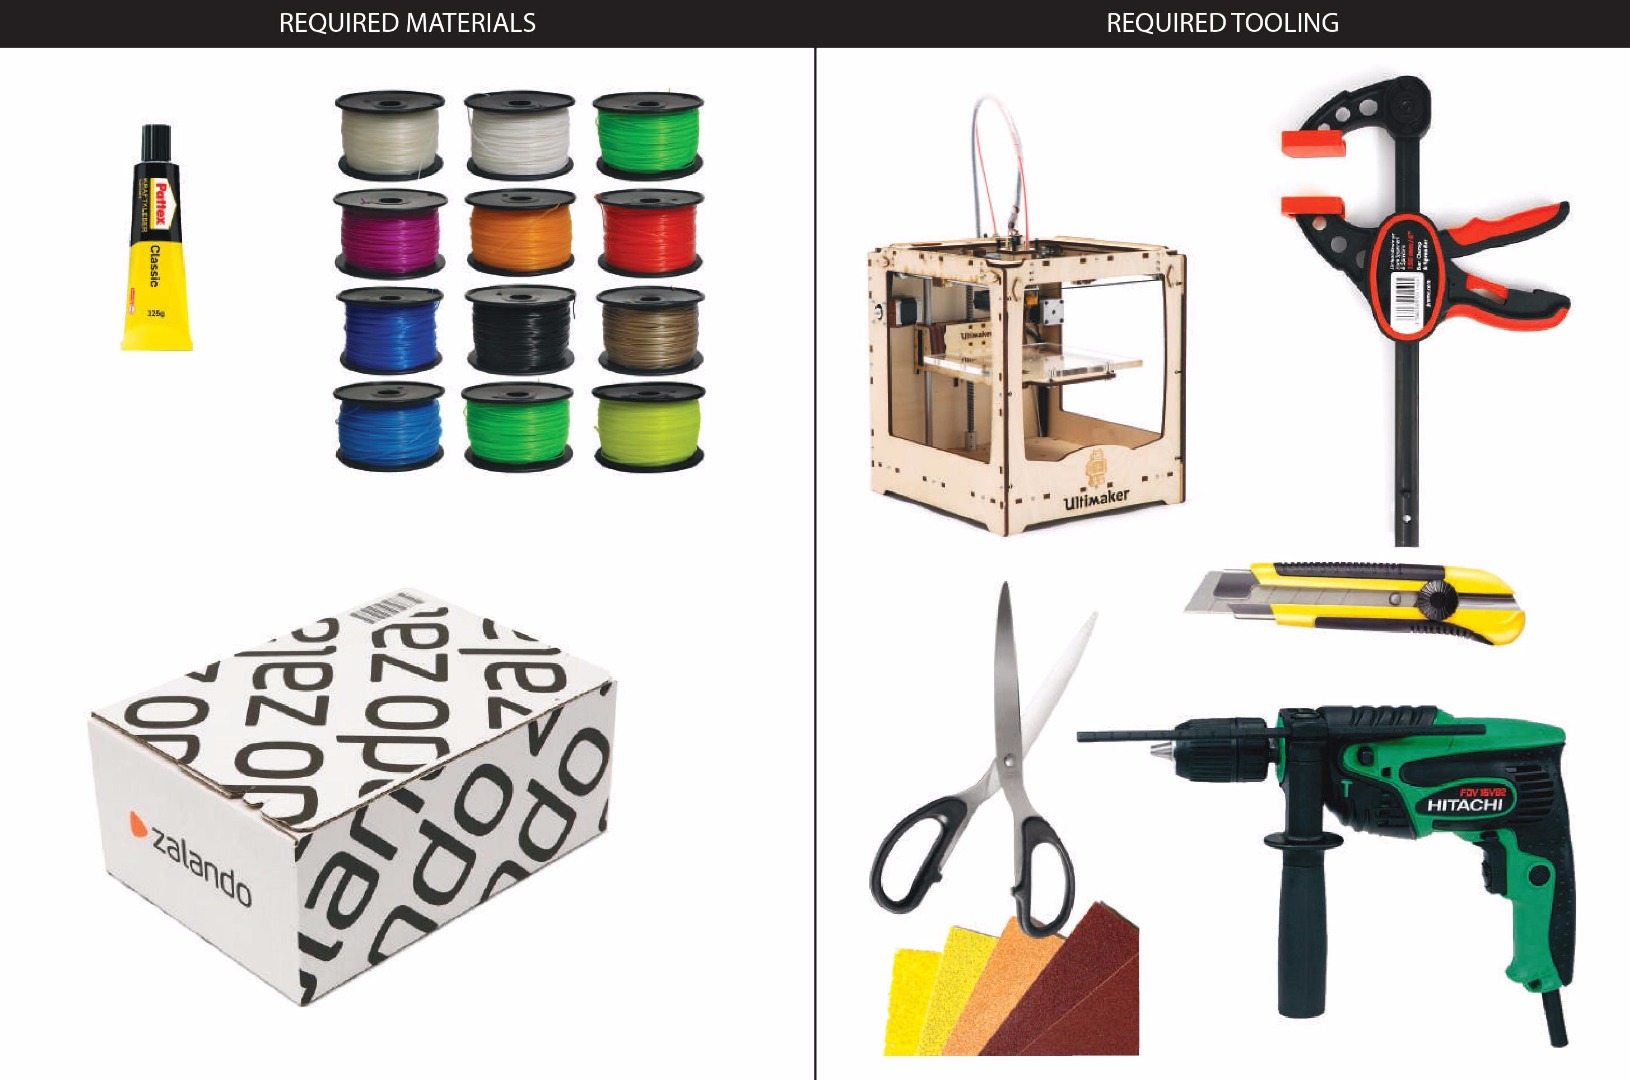
Required materials
- classic glue (Pattex)
- one roll of PLA (for 3D-printing purposes)
- a big box of corrugated cardboard (for example a Zalando box)
Required tooling
- a bar clamp
- a drilling machine (for example an Ultimaker)
- a 3D printer
- a utility knife
- a pair of scissors
- sanding paper (soft and hard)m2
How to Make a Rigid Hanger Out of Corrugated Cardboard?

First of all, start 3D-printing the stl-file 'main-body' and 'pluggers' twice. Both files must be 3D-printed twice, since the main body part is divided in half. If it were not divided in half, it would be impossible to 3D-print the whole part. You also need two pluggers.
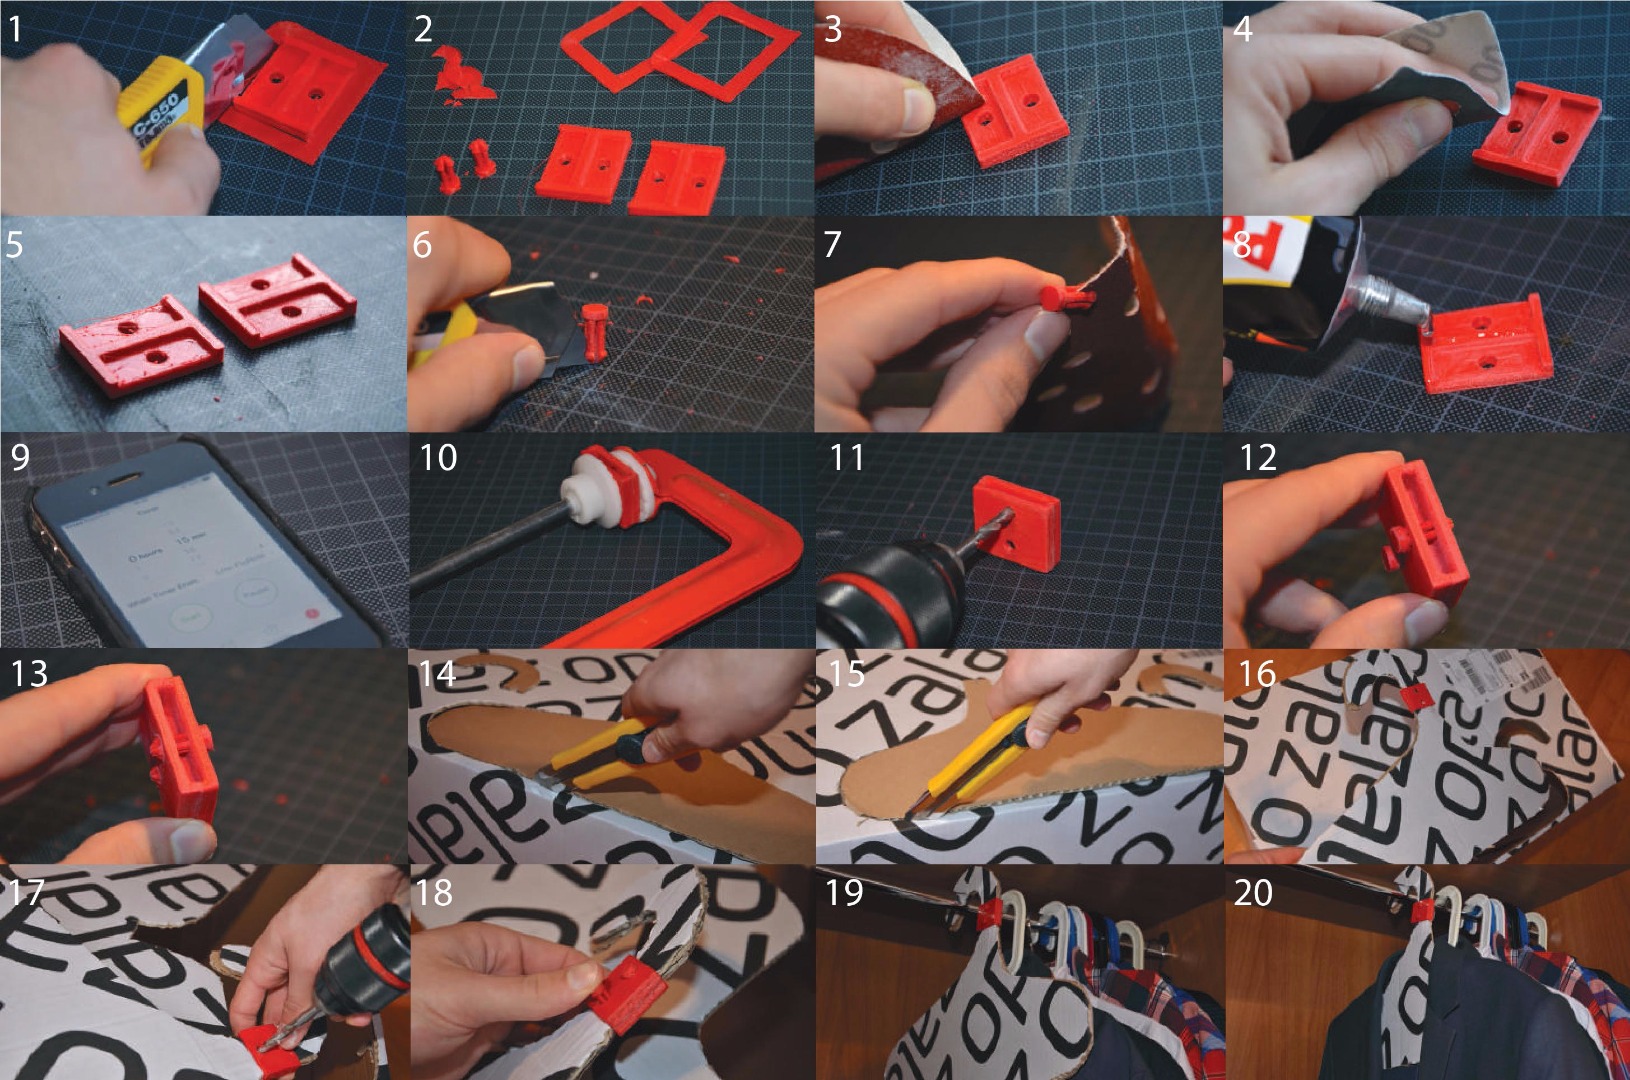
After 3D-printing, follow these next steps (the picture above shows the steps more in detail).
- Take a utility knife and cut out the undesired edges.
- After finishing step 1, you will have to separate the unwanted edges from the main body and pluggers. These edges can be thrown away. Proceed with the main body and pluggers.
- Use sanding paper (hard - grain 60-80) to debur the main body parts (2 parts).
- Repeat step 3 with soft sanding paper for the finishing touch (soft - grain 200-400).
- Picture 5 shows the body parts before and after deburring.
- Use a utility knife to cut out unwanted edges. Also cut out the connection between the 4 pins, because the pins must move towards each other (it's a snapfit, so it must be flexible).
- Use sanding paper (hard - grain 60-80) to debur the plugger parts (2 parts). Make sure the pluggers fit into the main body after this step!
- Glue the I-shape side of the main body part as shown on picture 8. Repeat for both main body parts. Use the classic Pattex glue!
- Do not stick together both parts already, but set a timer for 15 minutes. During this time, you can already start with step 14 and 15.
- Press both sides together using a bar clamp.
- Take a universal drill bit (size 6) and drill out the holes. We do this to debur the holes.
- When the previous steps are done, your connecting piece will look like the one on the picture.
- Extra picture of the connecting piece.
- Print the shape of the hanger on a A3-format paper (pdf 'instructable hanger' page 3). Do not scale, but cut it out using a pair of scissors and use it to cut the shape out of the cardboard box.
- Repeat for the opposite side of the cardboard box. Now, you will have two hangers.
- Take the two hooks and press them inside the main body part. Press the two body parts of the hanger together on the opposite side as well.
- Use a drill to drill holes in the cardboard.
- Press the pluggers into the holes.
- Now you're ready! Put the hanger in the cupboard.
- The hanger is ready for use.