Handy Helper Hook
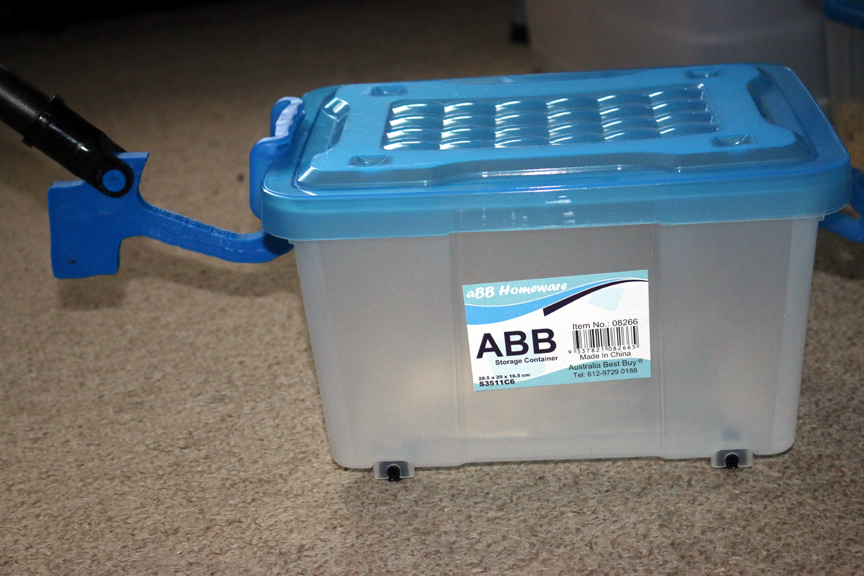
My husband has an extensive Lego collection that he stores in wheeled plastic tubs. Some are kept behind things like the lounge and can be a little awkward to retrieve. He asked if I could make some sort of hook to pull and push these crates in and out without too much strain. I have a basic knowledge in 3D modelling, and was able to make him something using just a drawing program, Tinkercad, an online file converter and an extendable pole from an old car washer.
Remove the Head From the Pole.
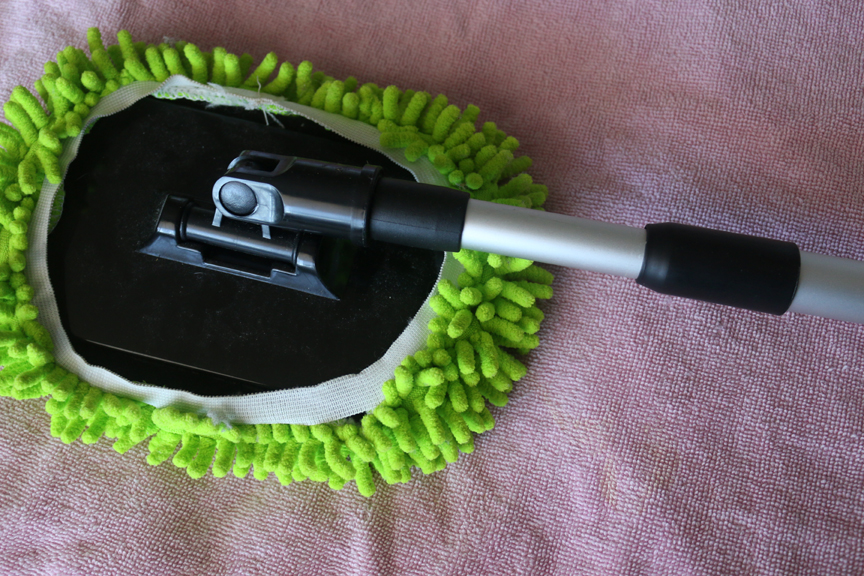
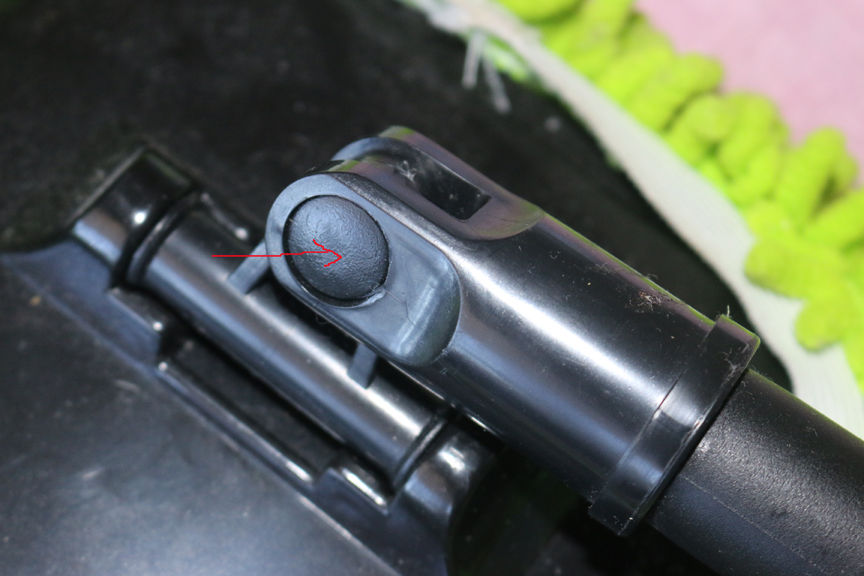
We had an extendable pole that had a car washer on the end that we could no longer get cleaning heads for. We decided to use this for the handle. These pictures are of our new cleaner, but the connecting part was almost identical on the older one.
The head was attached to the pole with a pin through brackets that enabled it to move around some. The first thing that needed to be done was to remove the head. This was done by drilling out the pin so as not to damage the brackets with the holes. This could probably be done by using a hacksaw to cut through the pin instead.
You can see the end of the pin (the red arrow is pointing to it) on the side of the bracket. If you have one of these and choose to drill out the pin, remember that the shaft of the pin is not as large as the end of the pin.
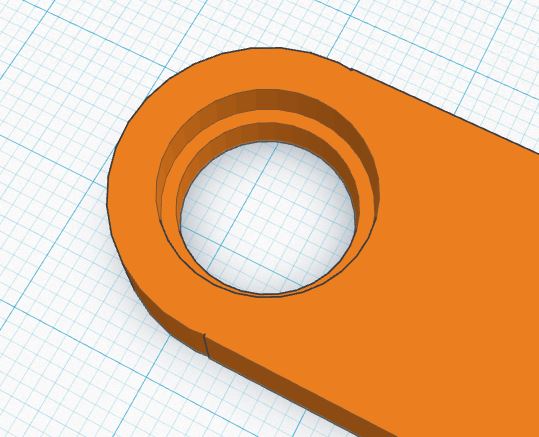
When the head was removed, the brackets had an indention on the outer sides like the third image. I didn't think to take photos as I was making this, so that image is just to show what the bracket looked like after the head was removed.
Design the New Head.
Before I could continue, I needed to get some measurement from the
bracket on the handle. Depending on the handle you use, these measurements might differ from measurements you take, but I will list my measurements so that you can see how I came about the final measurements of the hook.
The inner space between the two brackets was 10mm
The brackets were 5mm thick and the indentation on the outside of the bracket was 3mm deep and 14mm across.
The actual hole in the bracket was a little over 10mm across.
Once the head was removed, I placed the bracket of the
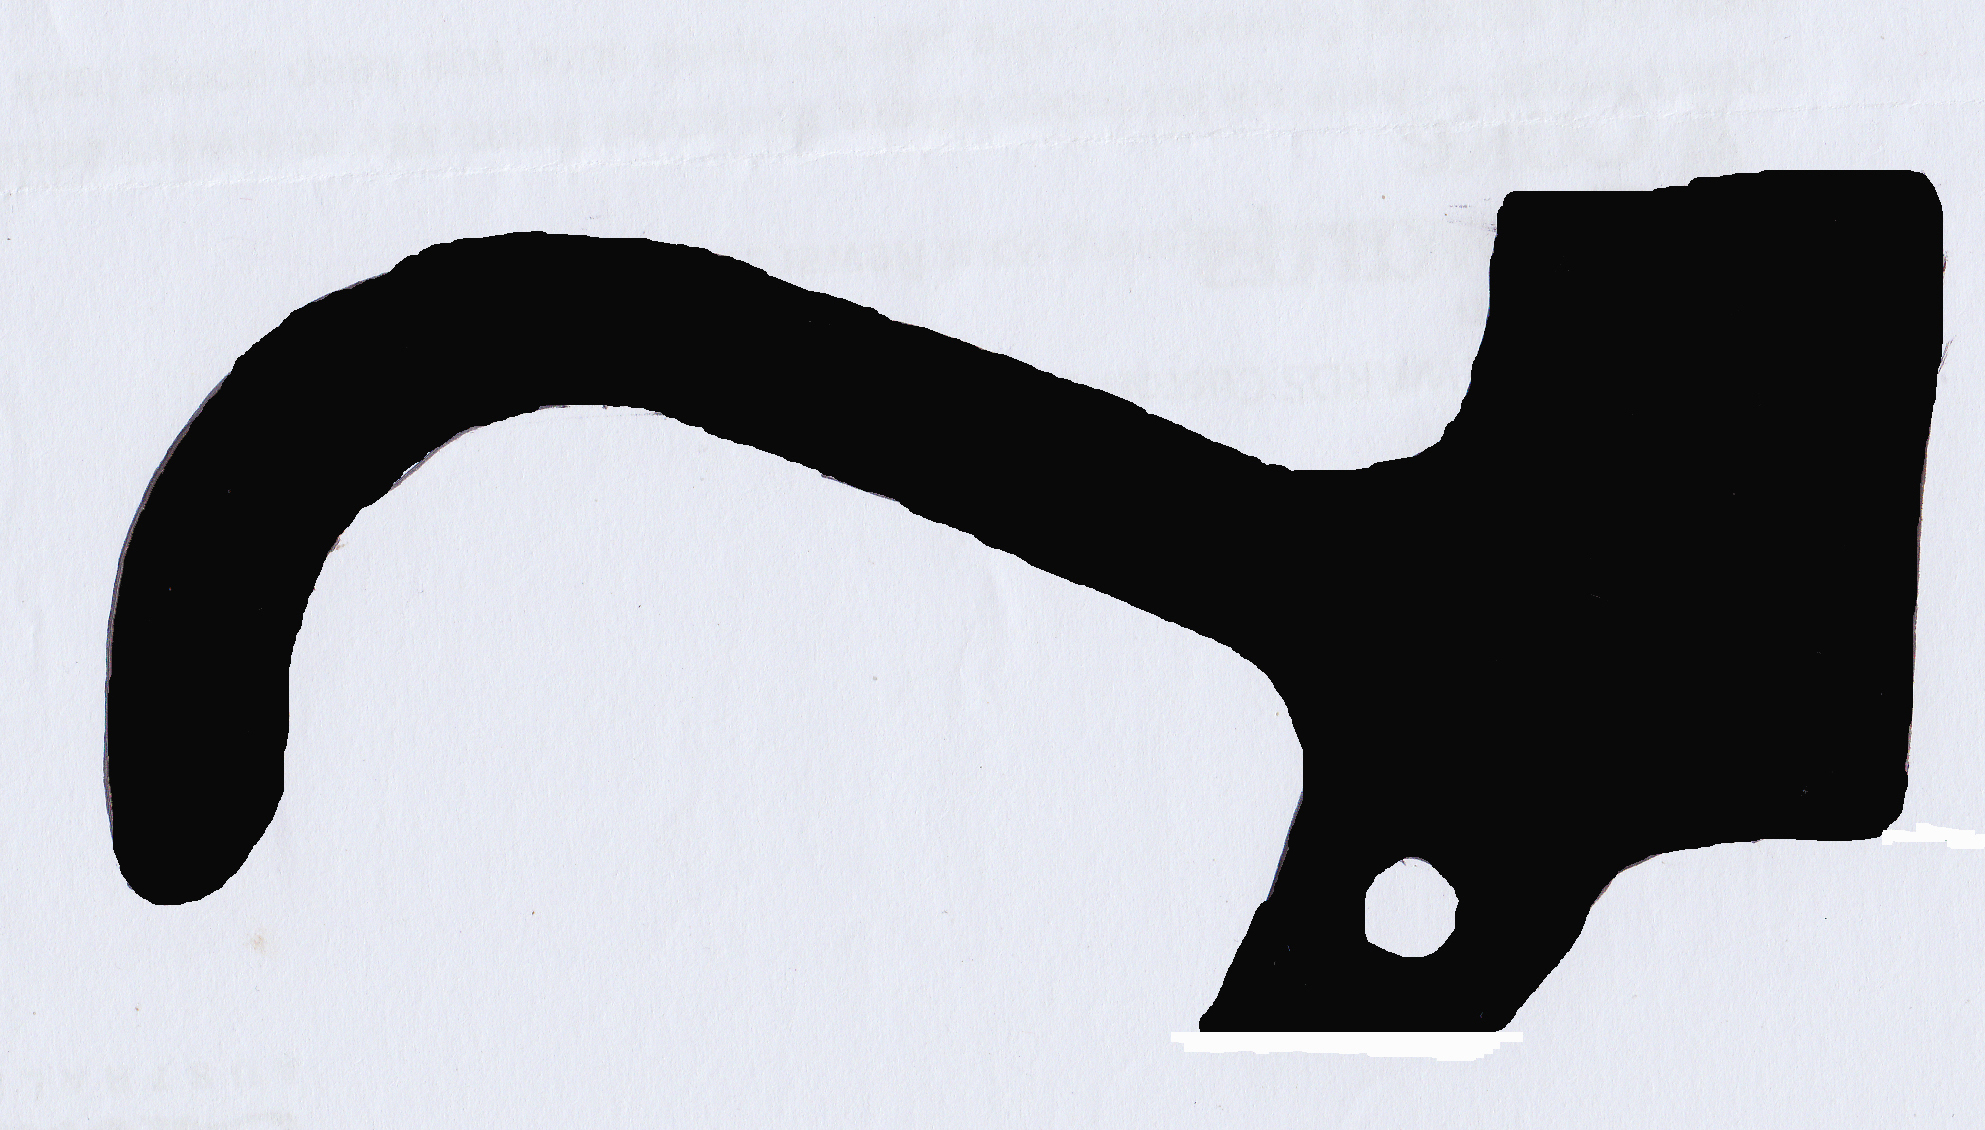
handle on its side on a piece of paper and drew a rough sketch of what I wanted the hook to look like. I roughly drew in the hole - at this point it wasn't important that it be a perfect circle, I just needed it there for placement.
When I was happy with the sketch, I went around the outlines with a thick black marker. Next, I scanned the drawing and opened it in Photoshop, but any drawing program will work. I used the paint bucket tool and filled in the drawing with black. At this point, you may need to clean up around the edges.
Save the image as a jpg and we are ready to continue to make it 3D printable.
Making the Image Into a 3D Printable File
I use a few different programs for modeling, but Tinkercad which is a free to use online based program is very easy to use and therefore good for beginners. You can find it here - Tinkercad
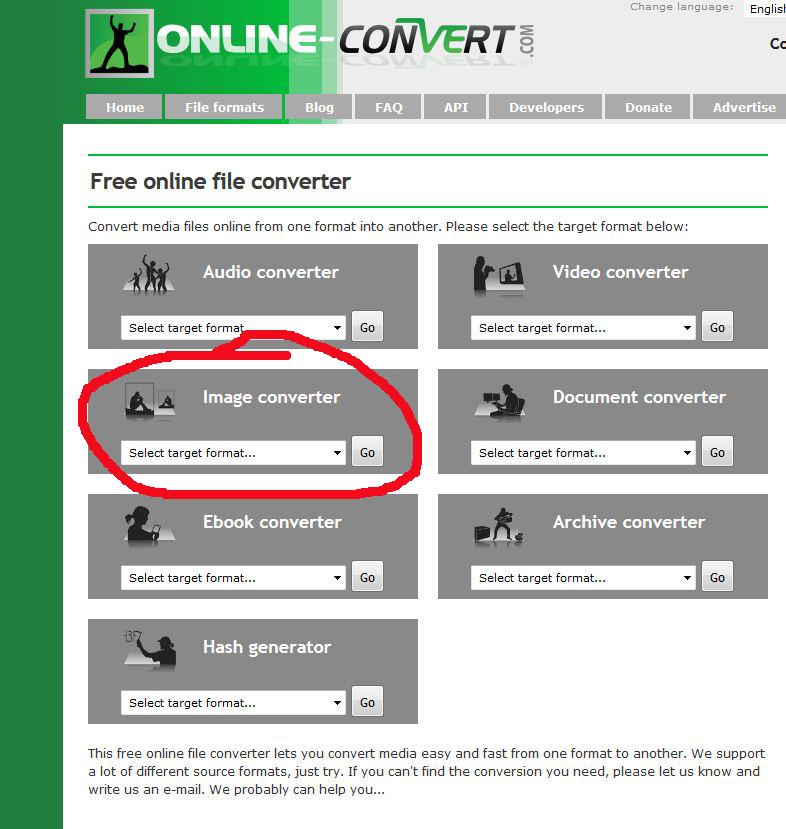
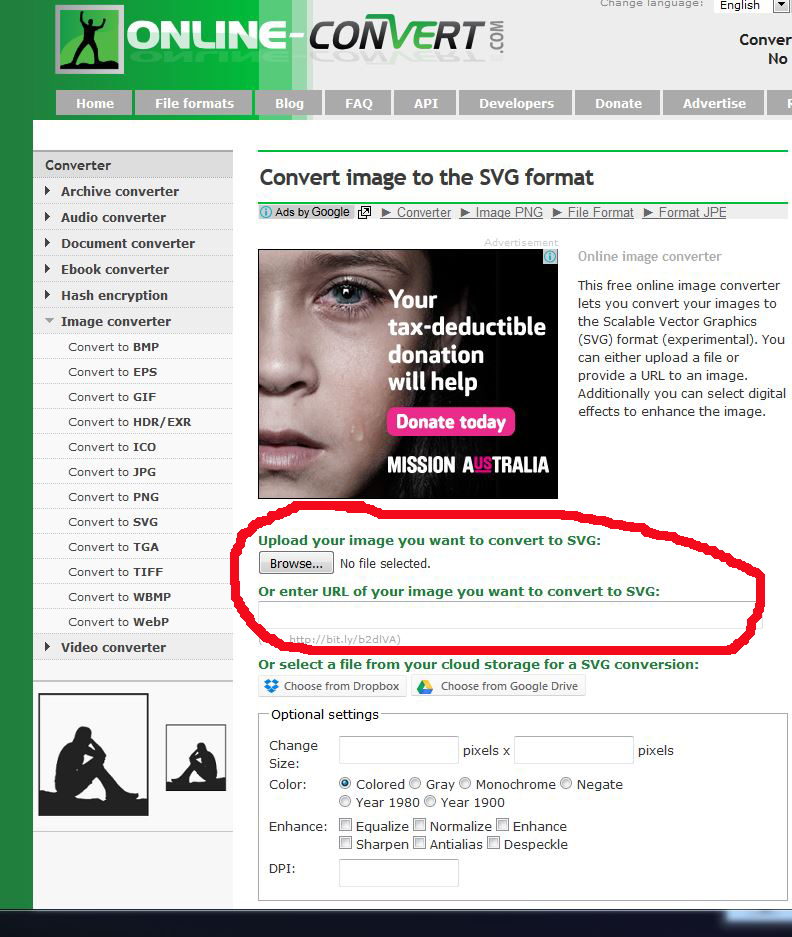
Tinkercad can open two file types - STL and SVG, so we need to convert our jpg into an SVG file before we can import it. For this I use the Online converter On the opening page of the converter, select 'convert to SVG' from the dropdown menu in the image converter section and then use the browse button to find your jpg.
Once selected, scroll down the page and hit the convert file button. When you do this, the file will be converted to an SVG file and you will be given the option to save the new file to your computer.
We are now ready to open up Tinkercad and finish off our hook.
Import Into Tinkercad and Fix Size


If you haven't used Tinkercad before, you will need to register - don't worry, it's free.
Once registered, hit the create new design button and you will be given a blank workspace to work on.
We need to import the SVG file, so go to the righthand side, and open up the import tab. Find the file and hit import. I've found that sizing can be a bit hit or miss so for now leave the scale at 100% and see how we go. If when you hit import, it says the file is too big or small adjust the scale and try again. You can also adjust how thick the hook will be by changing the height, but we will change that later.
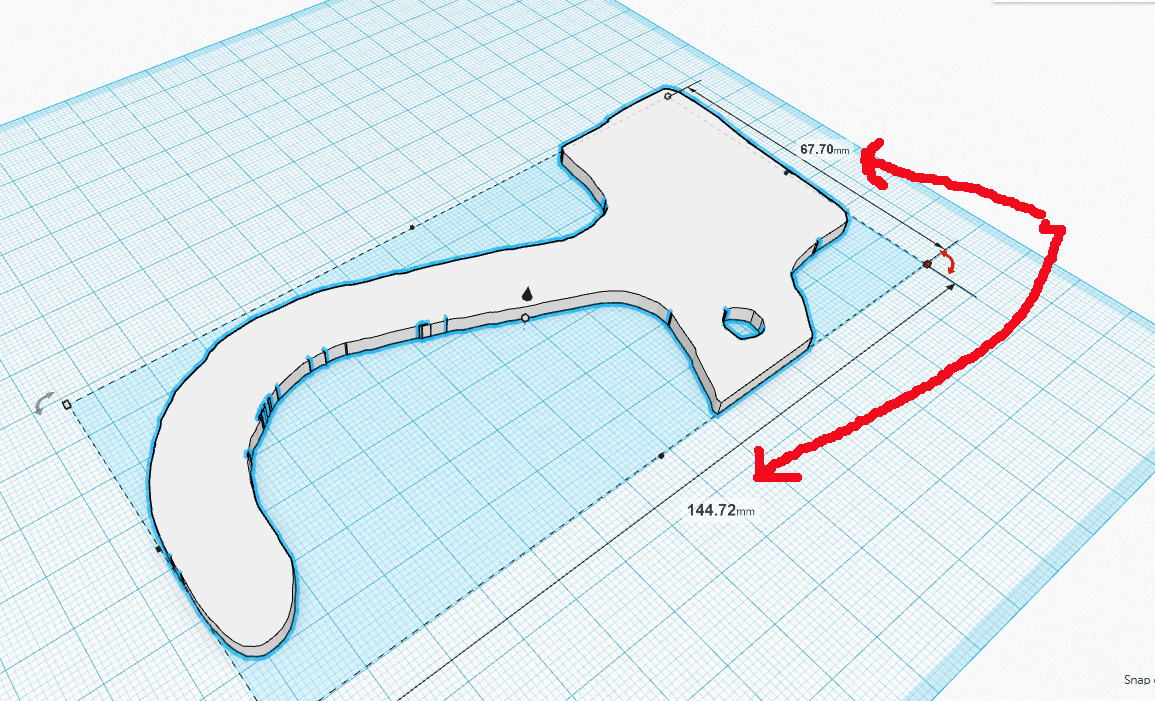
When I imported the SVG file, it said it was too large, so I had to import it at a smaller scale. Once in, I can change the dimensions by using one of two methods. You can either click on the item and then grab a corner of the outline and drag it in or out till it is the correct size, the size is displayed on the sides as you drag- remember though, to also hold the shift key so that the model is scaled proportionally.
The second way to change the size of the file is to use the ruler. Click on the model to select it (when selected, it will be contained within a box) then open the helpers tab on the right. Left click on the ruler and drag it onto the model. Release the button and you will now see the size of the sides. I know that my model fits into a box that is 144.72mm by 67.7mm, so I click on those two measurements and change them to the correct number. We can also adjust the height, but we'll do that a different way.
The distance between the two brackets on the handle is 10mm. I want the hook to fit in there but not be super tight, so I'm going to make it 9mm thick.
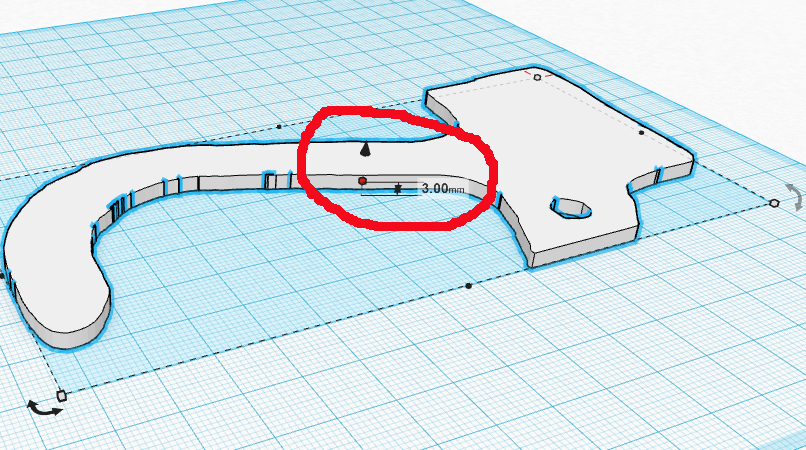
In the centre of the model and you will see what looks like a black arrow pointing up above a white box. Mouse over the white box and when it turns red, left click and drag it up or down until the measurement beside it is the height you want.
Now that the hook is the right size, we can fix up the hole and make the pin to attach it with.
Making the Pin Hole
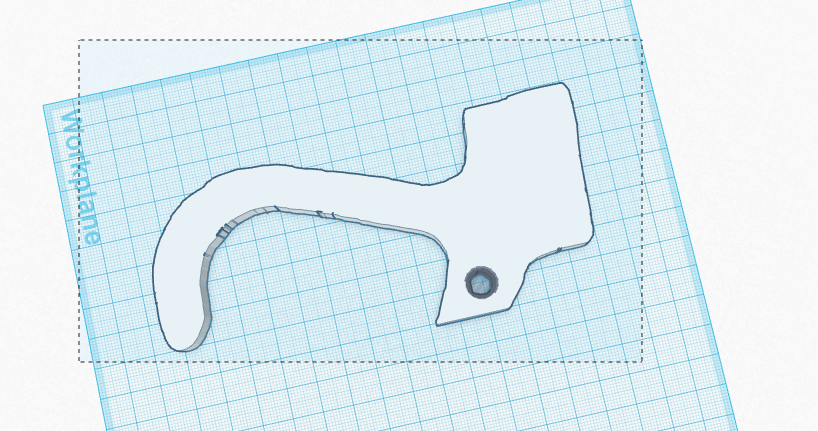

If we look at the hole in the hook, you will see it's not very neat and definitely not a true circle, so first up, lets fix that.
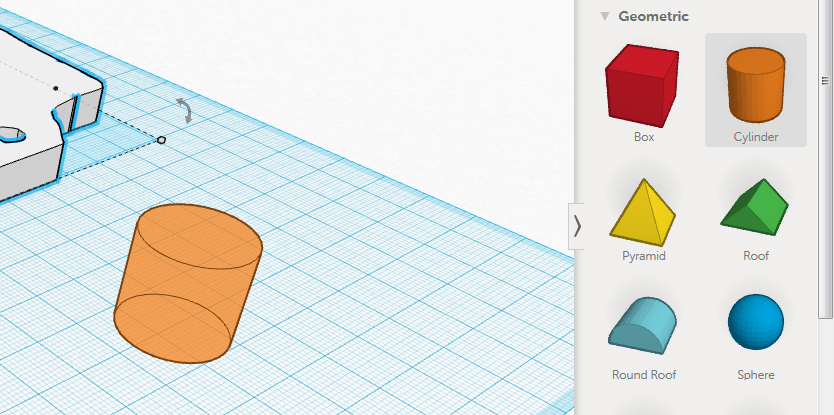
Open the geometric tab on the right and left click and drag a cylinder onto the workspace. The hole in the bracket was 10mm across, so we will make the hole in the hook 10mm also.
Click the cylinder and grab a corner and pull it toward the middle until the two side edges are 10mm (remember if you hold shift while doing this, both sides will be resized at the same rate)
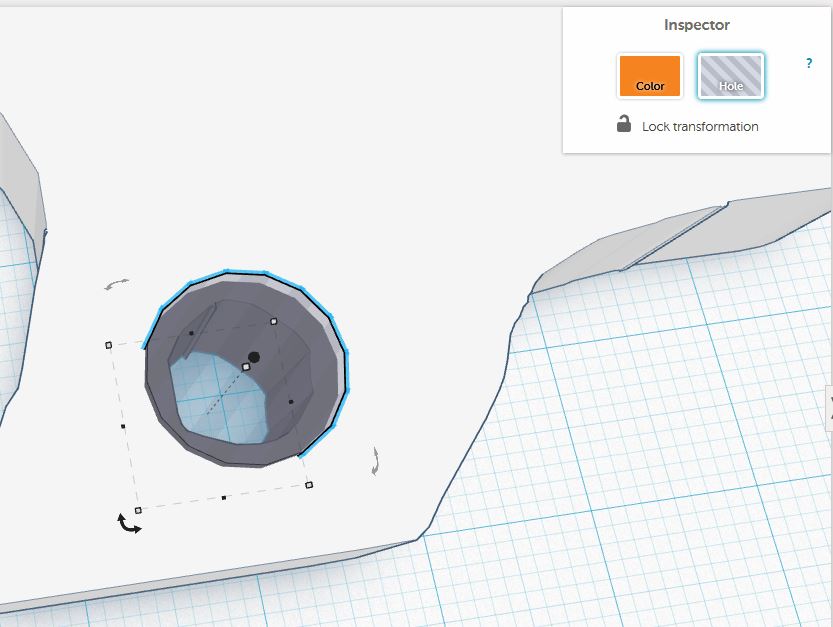
With the cylinder still sellected, click hole on the Inspector box in the top right corner. The cylinder will now be transparent and will remove any part of the model it intersects with once the pieces are grouped together. Move the cylinder untill it is in place where the hole should be. Left click somewhere outside of the model and holding the left button, drag a rectangle around the pieces. The model pieces don't have to be completely within the rectangle, just partly within it.
With both pieces selected, click the group button (just above the Inspector box). This will group the pieces together and when done, there will be a hole where the cylinder was. Now we can make the pin to attach it to the handle.
Making the Connector Pin
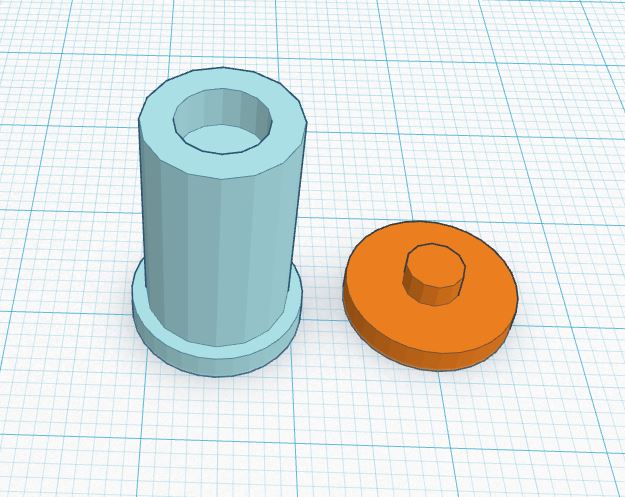
You can start a new project in Tinkercad by clicking the Tinkercad logo in the top left corner and then selecting create new desiign, but I like to keep parts of a project together, so I will just use the workspace the hook is on.
We will start with the main shaft of the pin, so we need to drag a new cylinder onto the workspace. This cylinder has to pass through the holes in the bracket and the hook, so we need to grab a corner and pull it down to 10mm. The pin needs to be long enough to pass through one side of the bracket, the hook and partly into the second side of the bracket, so grab the white bot on the top of the cylinder and pull it up untill it is 18mm tall.
We need to put a head on one end so that it doesn't just pass right through the holes, so grab a new cylinderand make this one 12mm across and 2mm high. When you have both pieces, pull a box around them both like we did when we grouped the pieces together earlier. Be carefule that no part of the hook falls into the rectangle or it will be added too. You can just click on pieces and drag them closer or further apart.
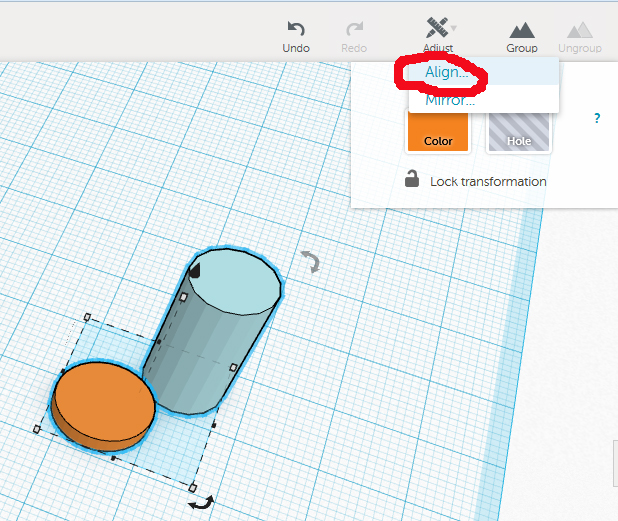
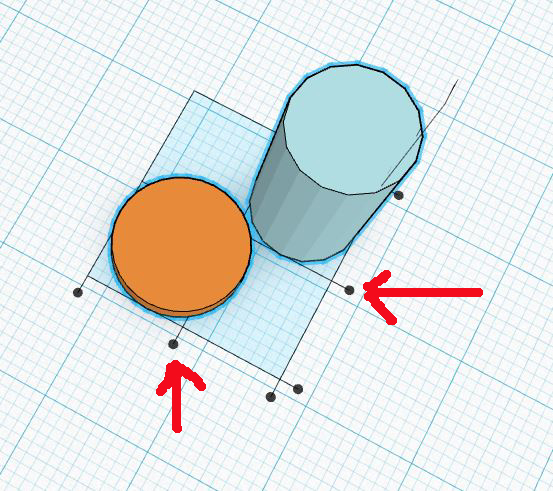
Once you have them enclosed in the rectangle, click adjust (just above the Inspector box) and select align. This will put a box around the pieces with dots along edges and on corners. Click the dots that are in the center of each edge, this will align the two pieces together. While they are still grouped together, click the group button and they will be joined into one unit.
We need to make another piece as a head for the other end of the pin, but before we do that, we'll put a hole in the end of the pin for the head piece to sit in.
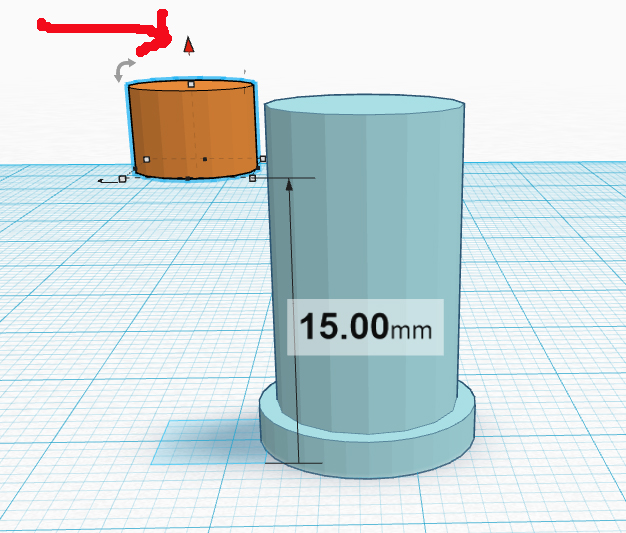
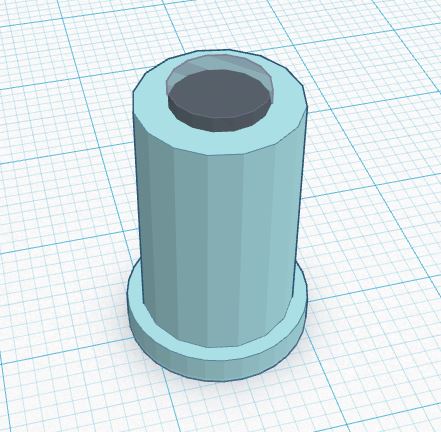
Grab yet another cylinder and make this one 6mm across and 4mm tall. Mouse over it and click the little up arrow in the centre. Pull the arrow up until this cylinder is 15mm above the workspace - you will see this measurement changing as you pull it up or down. When it is up 15mm, highlight both it and the pin and align them as we did before. When they are aligned, click on the higher piece and change it to a hole in the Inspection box. Highlight both pieces again and group them. This will make a hole in the end of the pin.
Make the head piece for the end of the pin by aligning two cylinders. Make the first one 12mm across and 2mm tall and the second one4mm across and 4mm tall. When combined these two pieces will form the head piece with a small lug to go into the hole at the end of the pin.
Saving the File for Printing
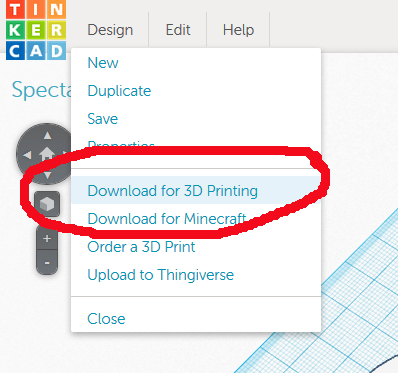
We've finished modeling the hook and pin and we just need to download it as a file to print. You could arange the files and save them all as one file, but I prefer to break them into 2 files - the hook as one file and the pin pieces as a second file. That way, if the pin is a little tight, you can adjust the file a little and reprint it.
If you started a new creation for the pin pieces, you can just save it as it is (put the pieces cloose together so they are not miles apart on the printer bed), but if like me, you made them on the same workspace as the pin, you need to remove pieces.
Click on the pieces for the pin and hit the delete key (don't worry - they are not gone forever). This will leave just the hook. In the top left corner beside the Tinkercad logo, click Design and then the option to Download for 3D printing. A box will pop up giving you 4 choices of file type. My printer uses either obj or stl, so I always select stl. When you click on a file type, another box will pop up giving you the option to save the file. Click OK and save your file.
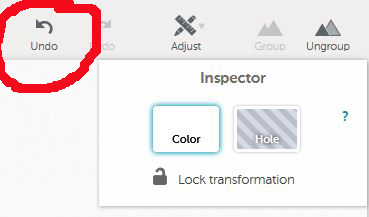
Once the file is saved, hit the undo button twice to undo the two delete objects we did before saving. The pin pieces will be back on the workspace and we can then delete the hook and save the pin pieces in the same way. When you have saved the files, hit undo again to return the hook back to the workspace.
We have now finished with Tinkercad and can close it - anything on the workspace will be saved and there if and when we return.
We are now ready to print and assemble our hook.
Printing and Assembly
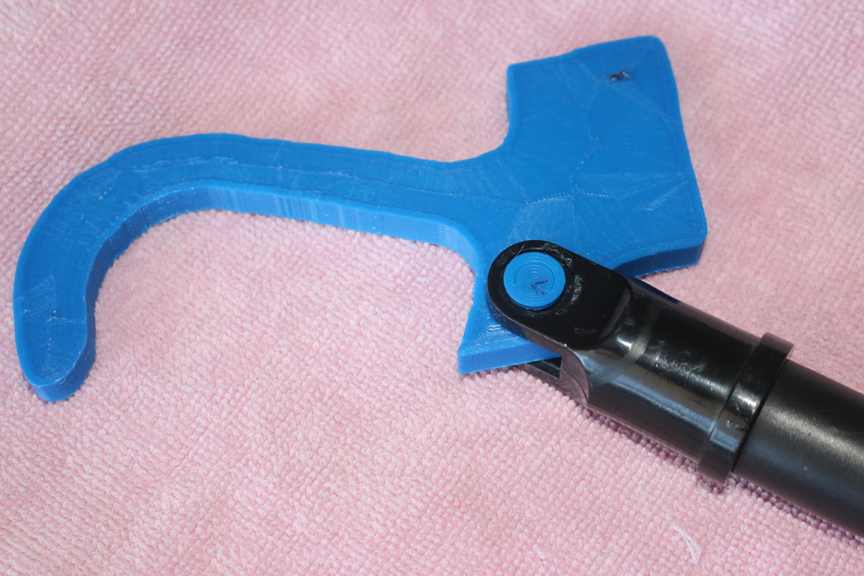
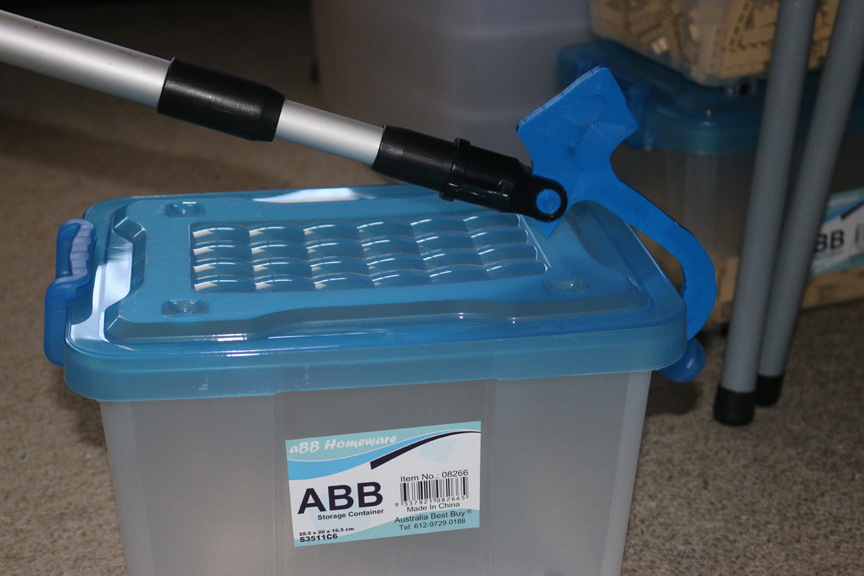
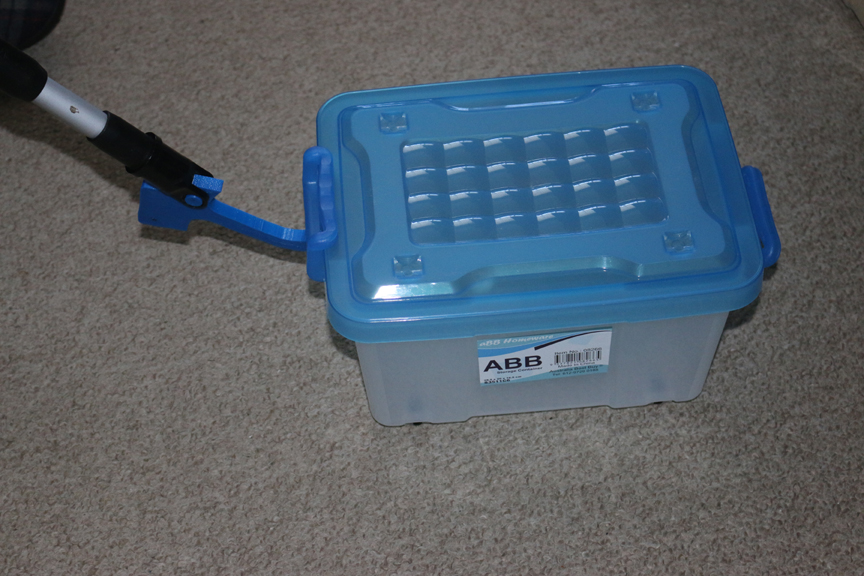
How you print the files are up to you. I originally printed the hook in PLA using a larger layer height and about 50% infill. This proved satisfactory as the hook started to come apart with use. We had to drill this hook out of the handle bracket and reprint it. The second time, I used ABS with a layer height of 0.1mm and 100% infill. This took a bit longer to print, but the end result was a much stronger hook.
When you have the pieces printed, put them together in the bracket to test the fit. If they all fit together well, you can go on to gluing. If they are tight or don't fit at all, you may need to go back into Tinkercad and reduce the width of the pin pieces a little - just remember to keep the length long enough.
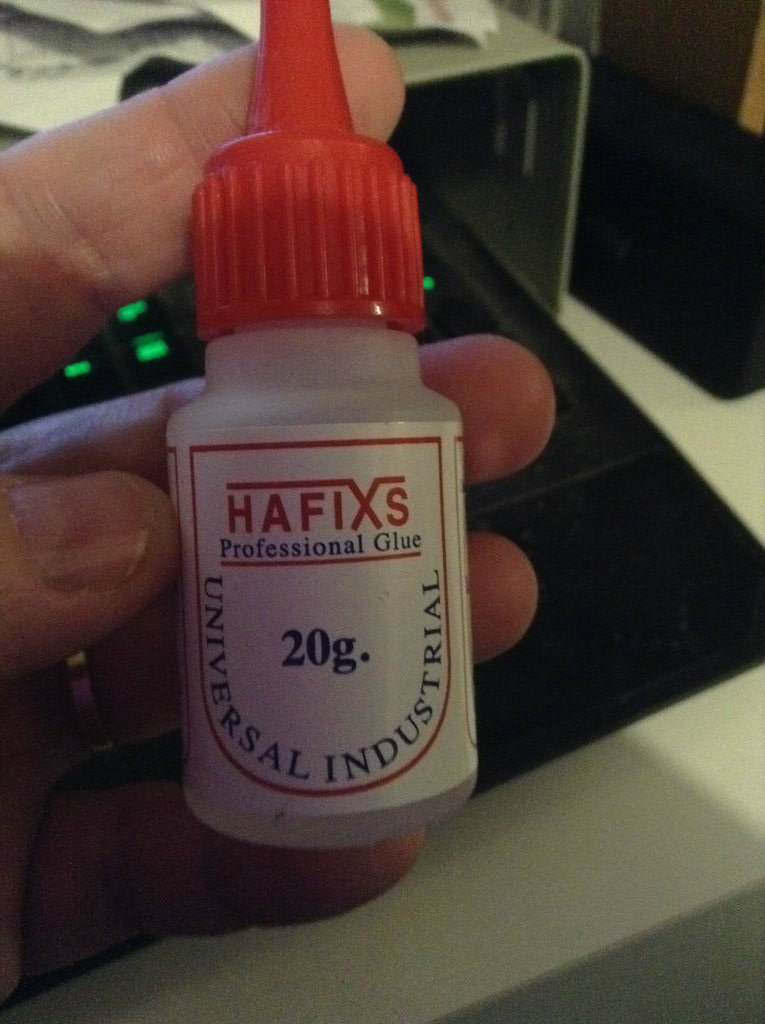
When you are happy with the fit, assemble the pieces and glue the head piece onto the end of the pin. I used Hafixs Professional Glue as it is my glue of choice for 3D printed pieces. It's very similar to super glue.
Once dry, your hand helper hook is ready to use!