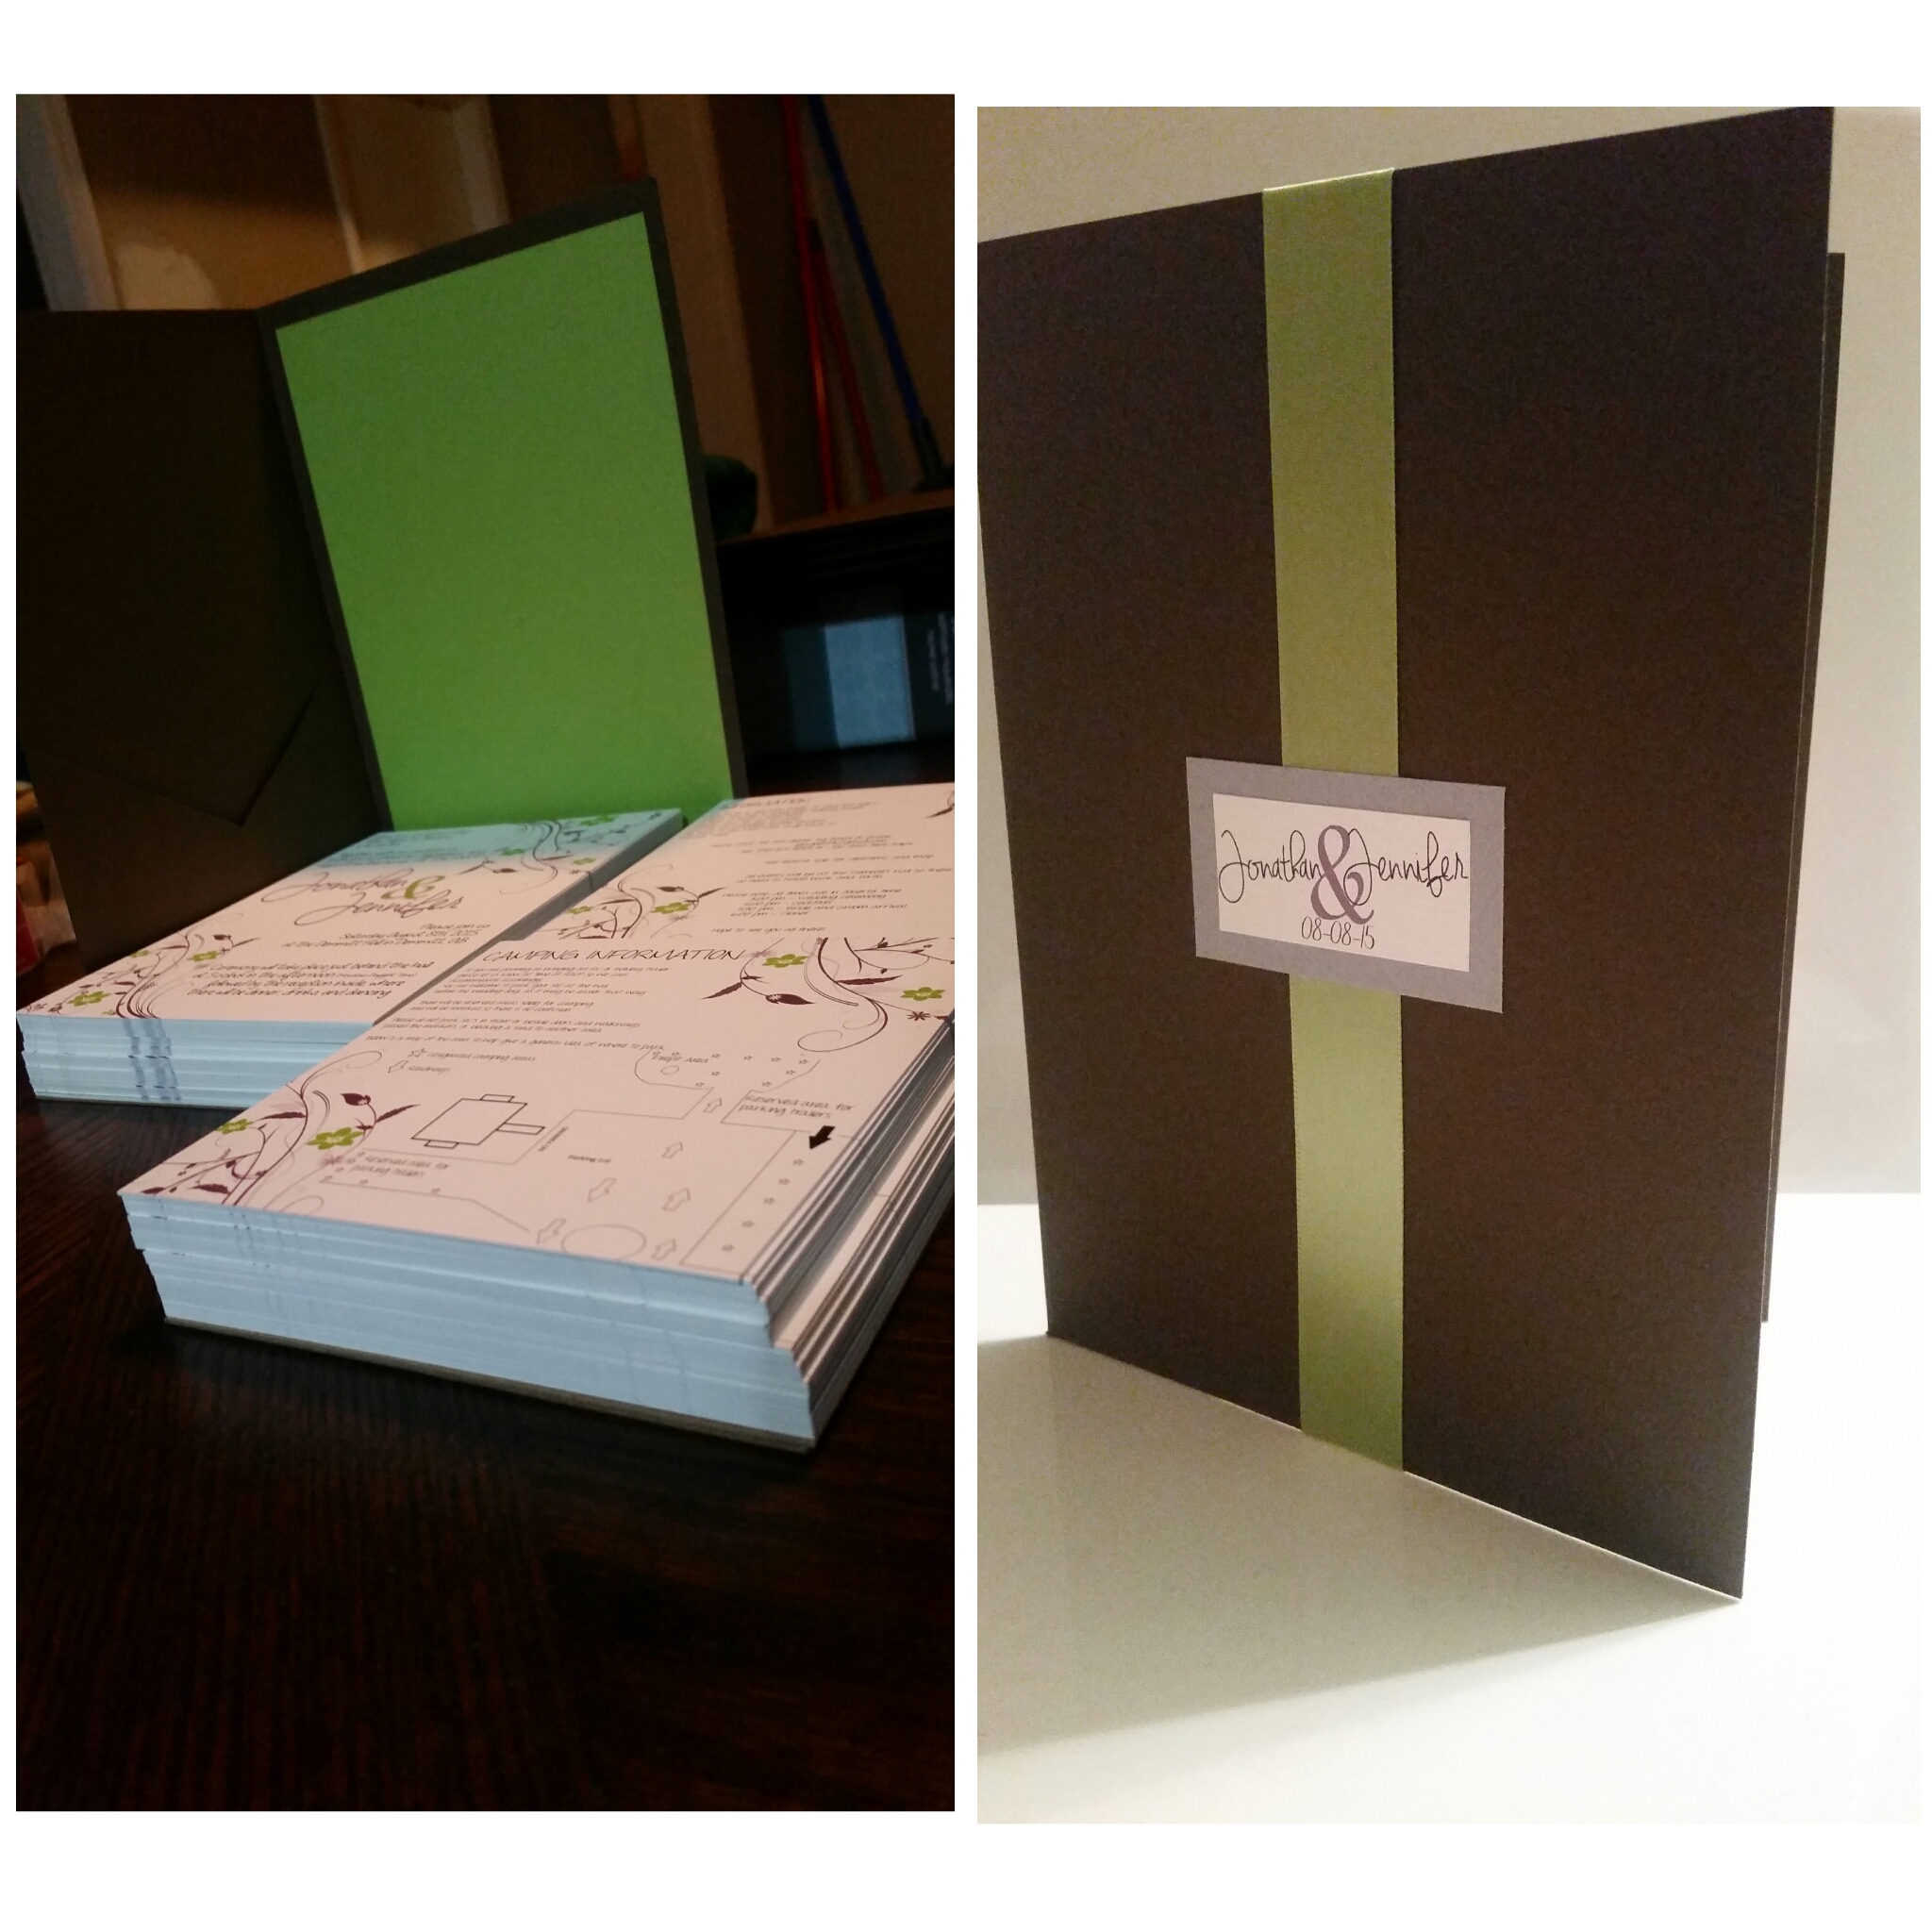
Handmade Pocketfold Wedding Invites
by Iffer1991 in Craft > Parties & Weddings
2894 Views, 22 Favorites, 0 Comments
Handmade Pocketfold Wedding Invites
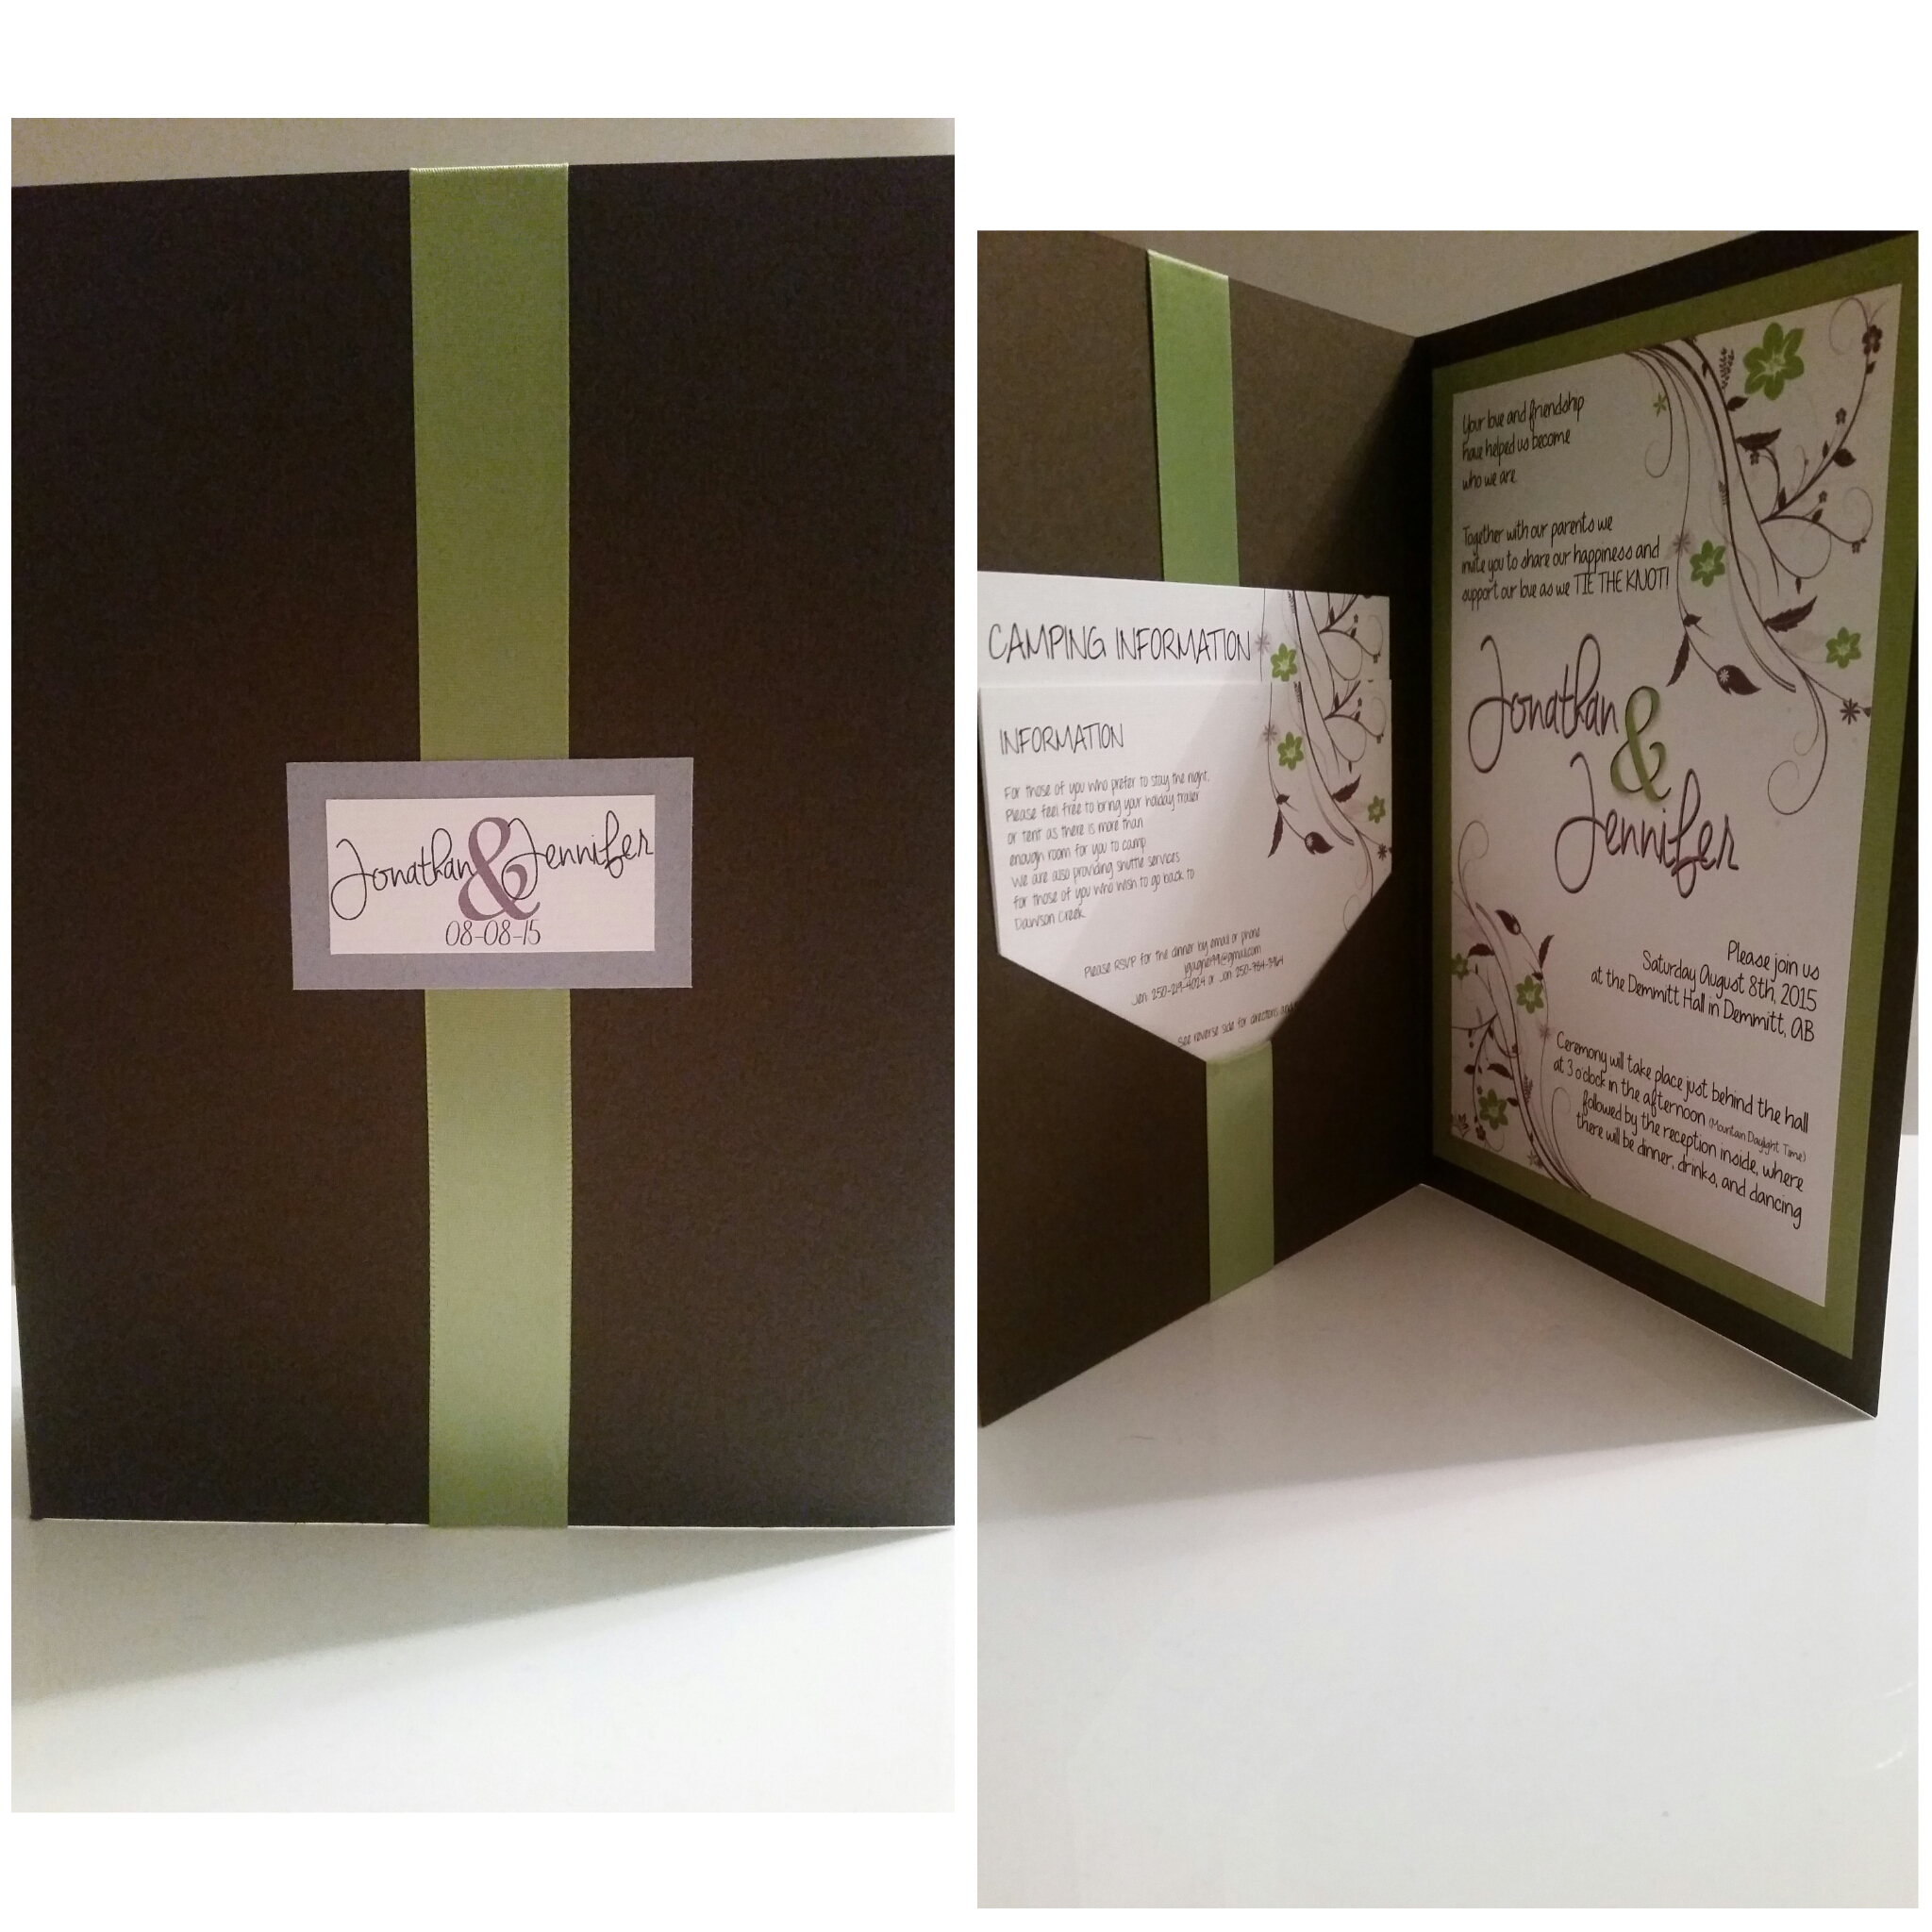
These are completely handmade wedding invites
I used Photoshop to create the invite and information cards as well as the front label.
If you are planning on using photoshop I recommend downloading stamps for photoshop, you can google it and download: super simple. (There are also tons of tutorials online for photoshop)
You can download different types but this is how I achieved my completely custom designs on each page.
I used multiple stamps put together to create my very own.
I didn't plan ahead when I created these for sizing I kinda just printed my invite then worked the pocketfold envelope size around it. When I tried to find the same size of mailing envelopes I couldn't but that didn't really bother me, the mailing envelope is maybe a half inch bigger then the pocketfold.
You Will Need....
1. A paper cutter
2. LOTS & LOTS of PERMANENT double sided tape. Scotch works amazingly
3. The Pocketfold Envelope: Square sheets of cardstock paper (I used a textured one and loved it) 1 sheet creates 1 pocketfold envelope
4. Your Accent coloured cardstock paper. (I got 2 pieces out of 1 square sheet)
5. Your ribbon for the front of the pocketfold
6. Secondary coloured cardstock for the front of the pocketfold
I hope these instructions are easy to follow, but this is my first time posting instructions so bare with me :)
Steps 1 & 2
Create your main invite first in photoshop or whatever program you are using. (I did mine in 5X7)
Create your information Cards (I did this in 4X6)
Print and Cut one of them so you can use it as your template
It's best to only do one because if you need to adjust your sizes you can easily do so.
Cutting the Accent Colour
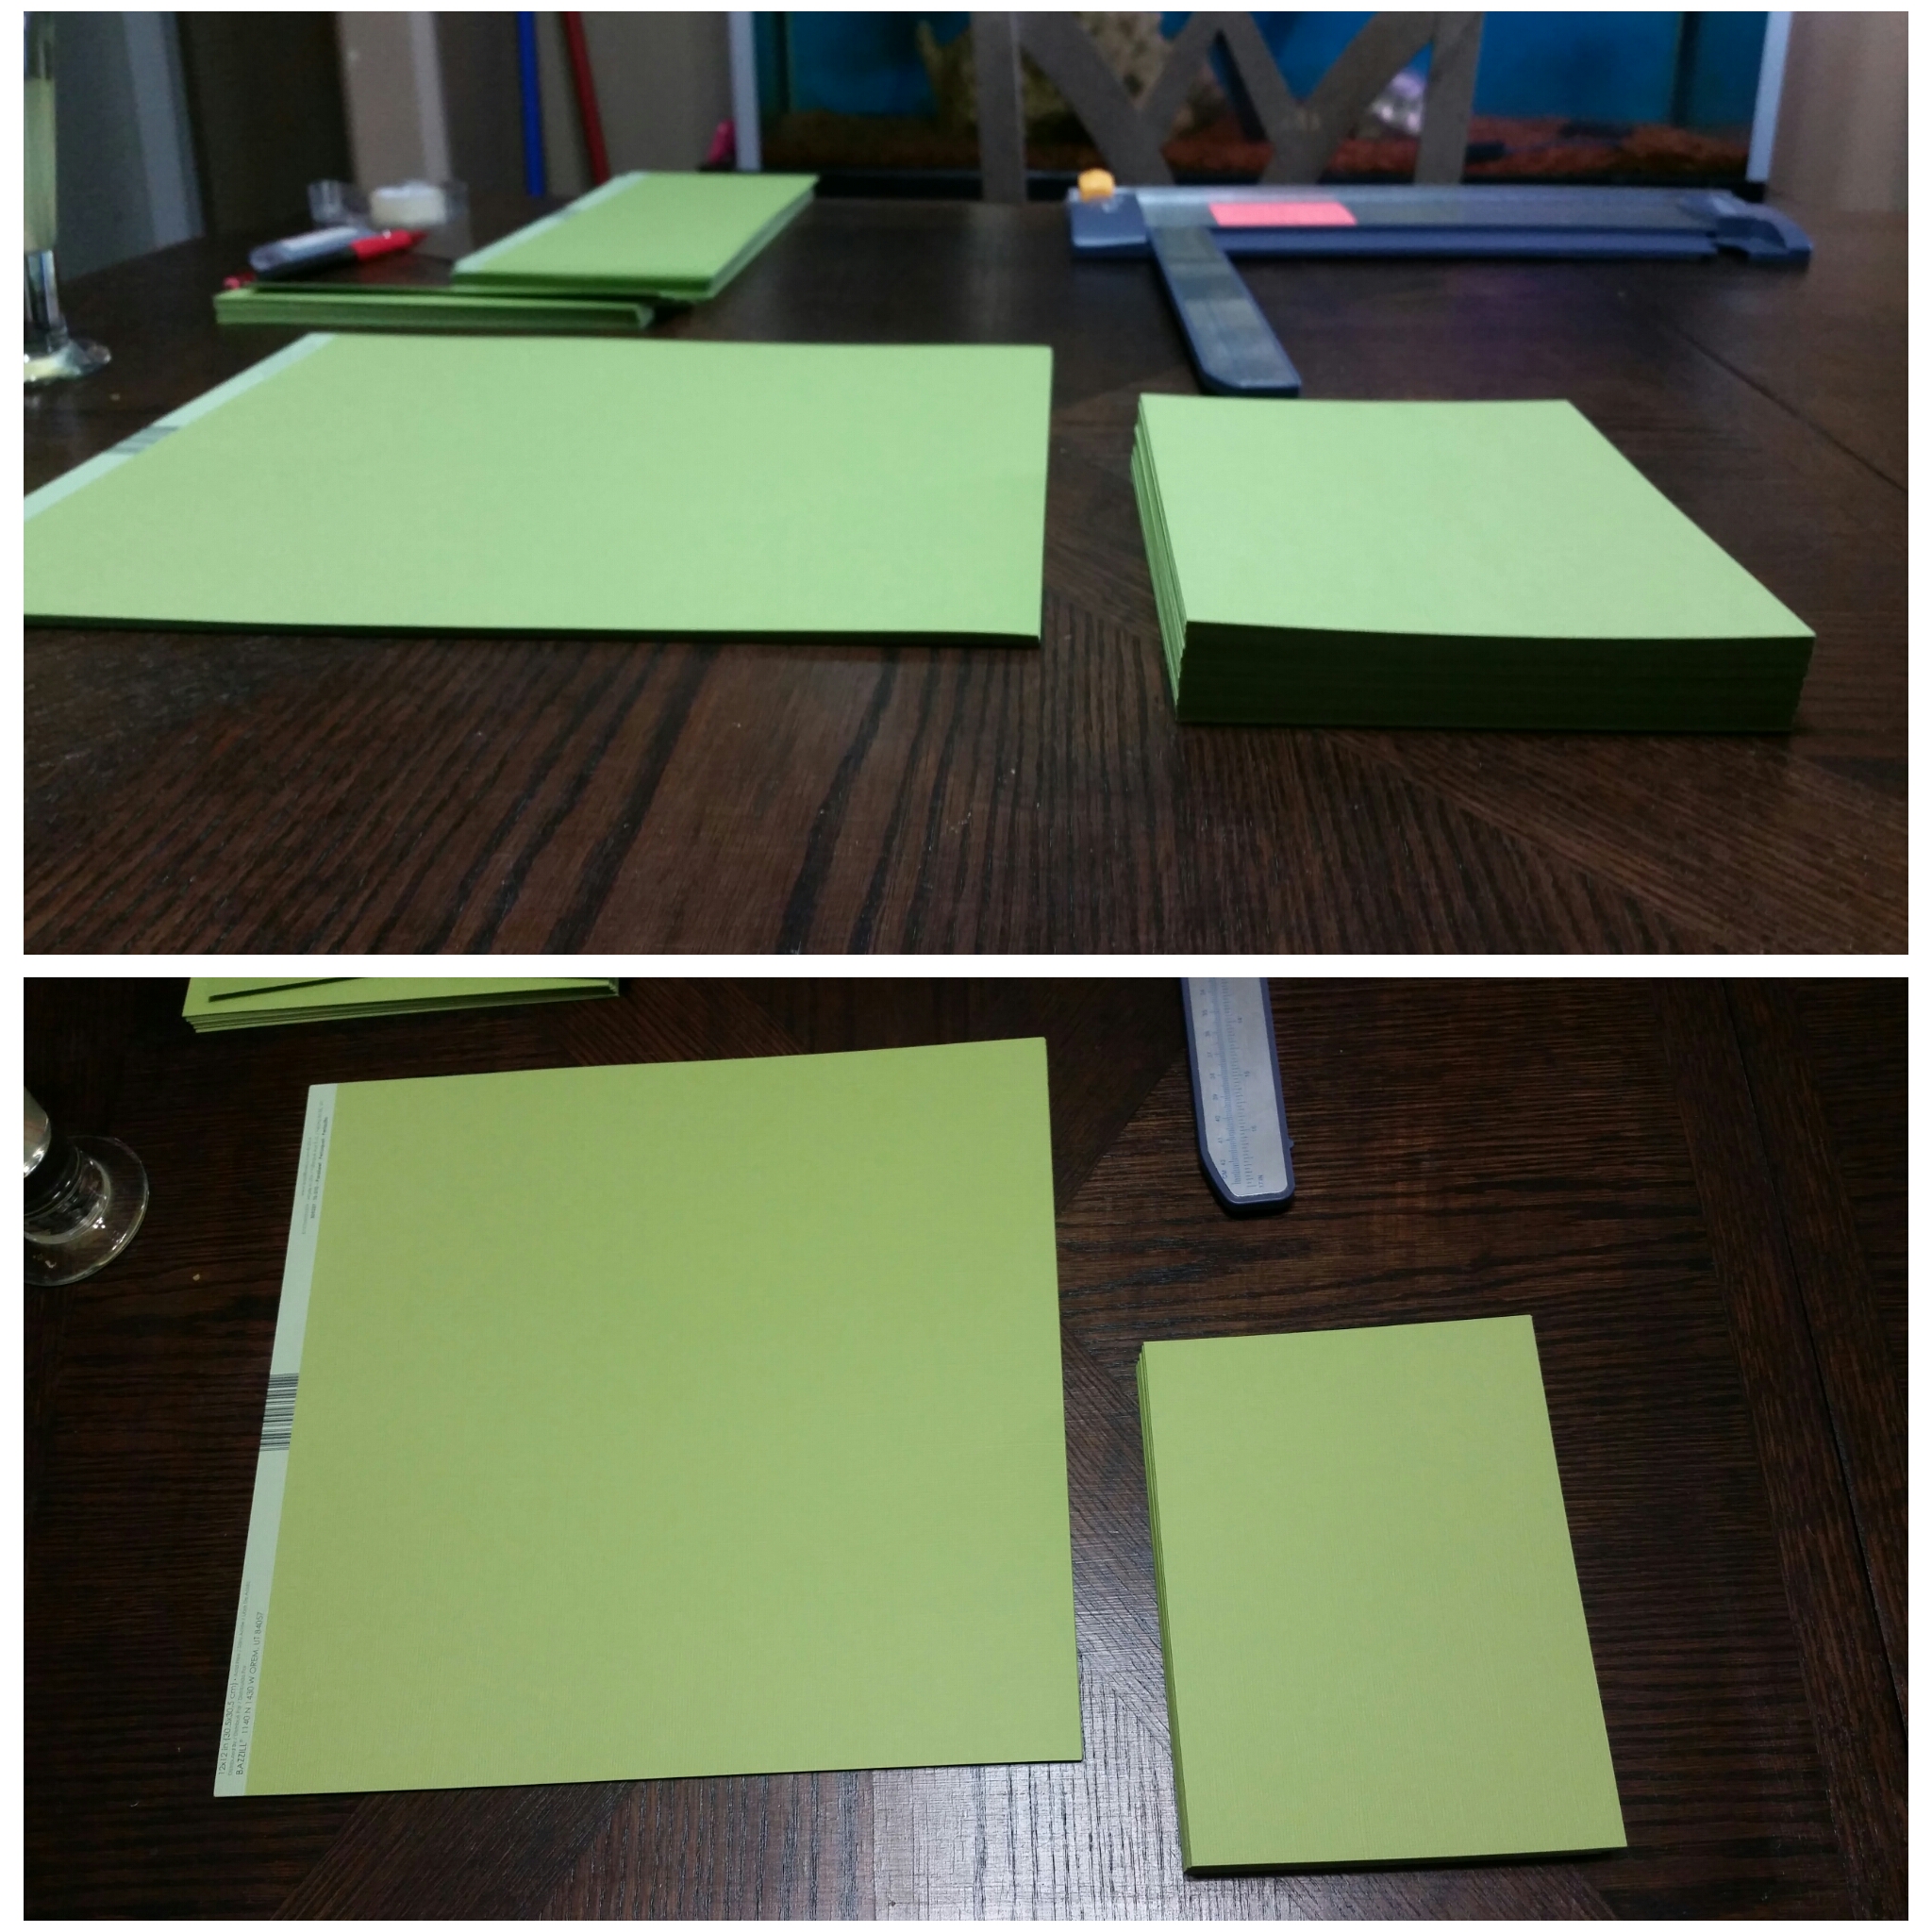
Grab your invite and place it on top of your accent colour.
Do this so you know how much you want your accent colour to border your invite.
I basically just eyeballed and then marked my paper cutter so I could cut them all out.
Making Your Pocketfold
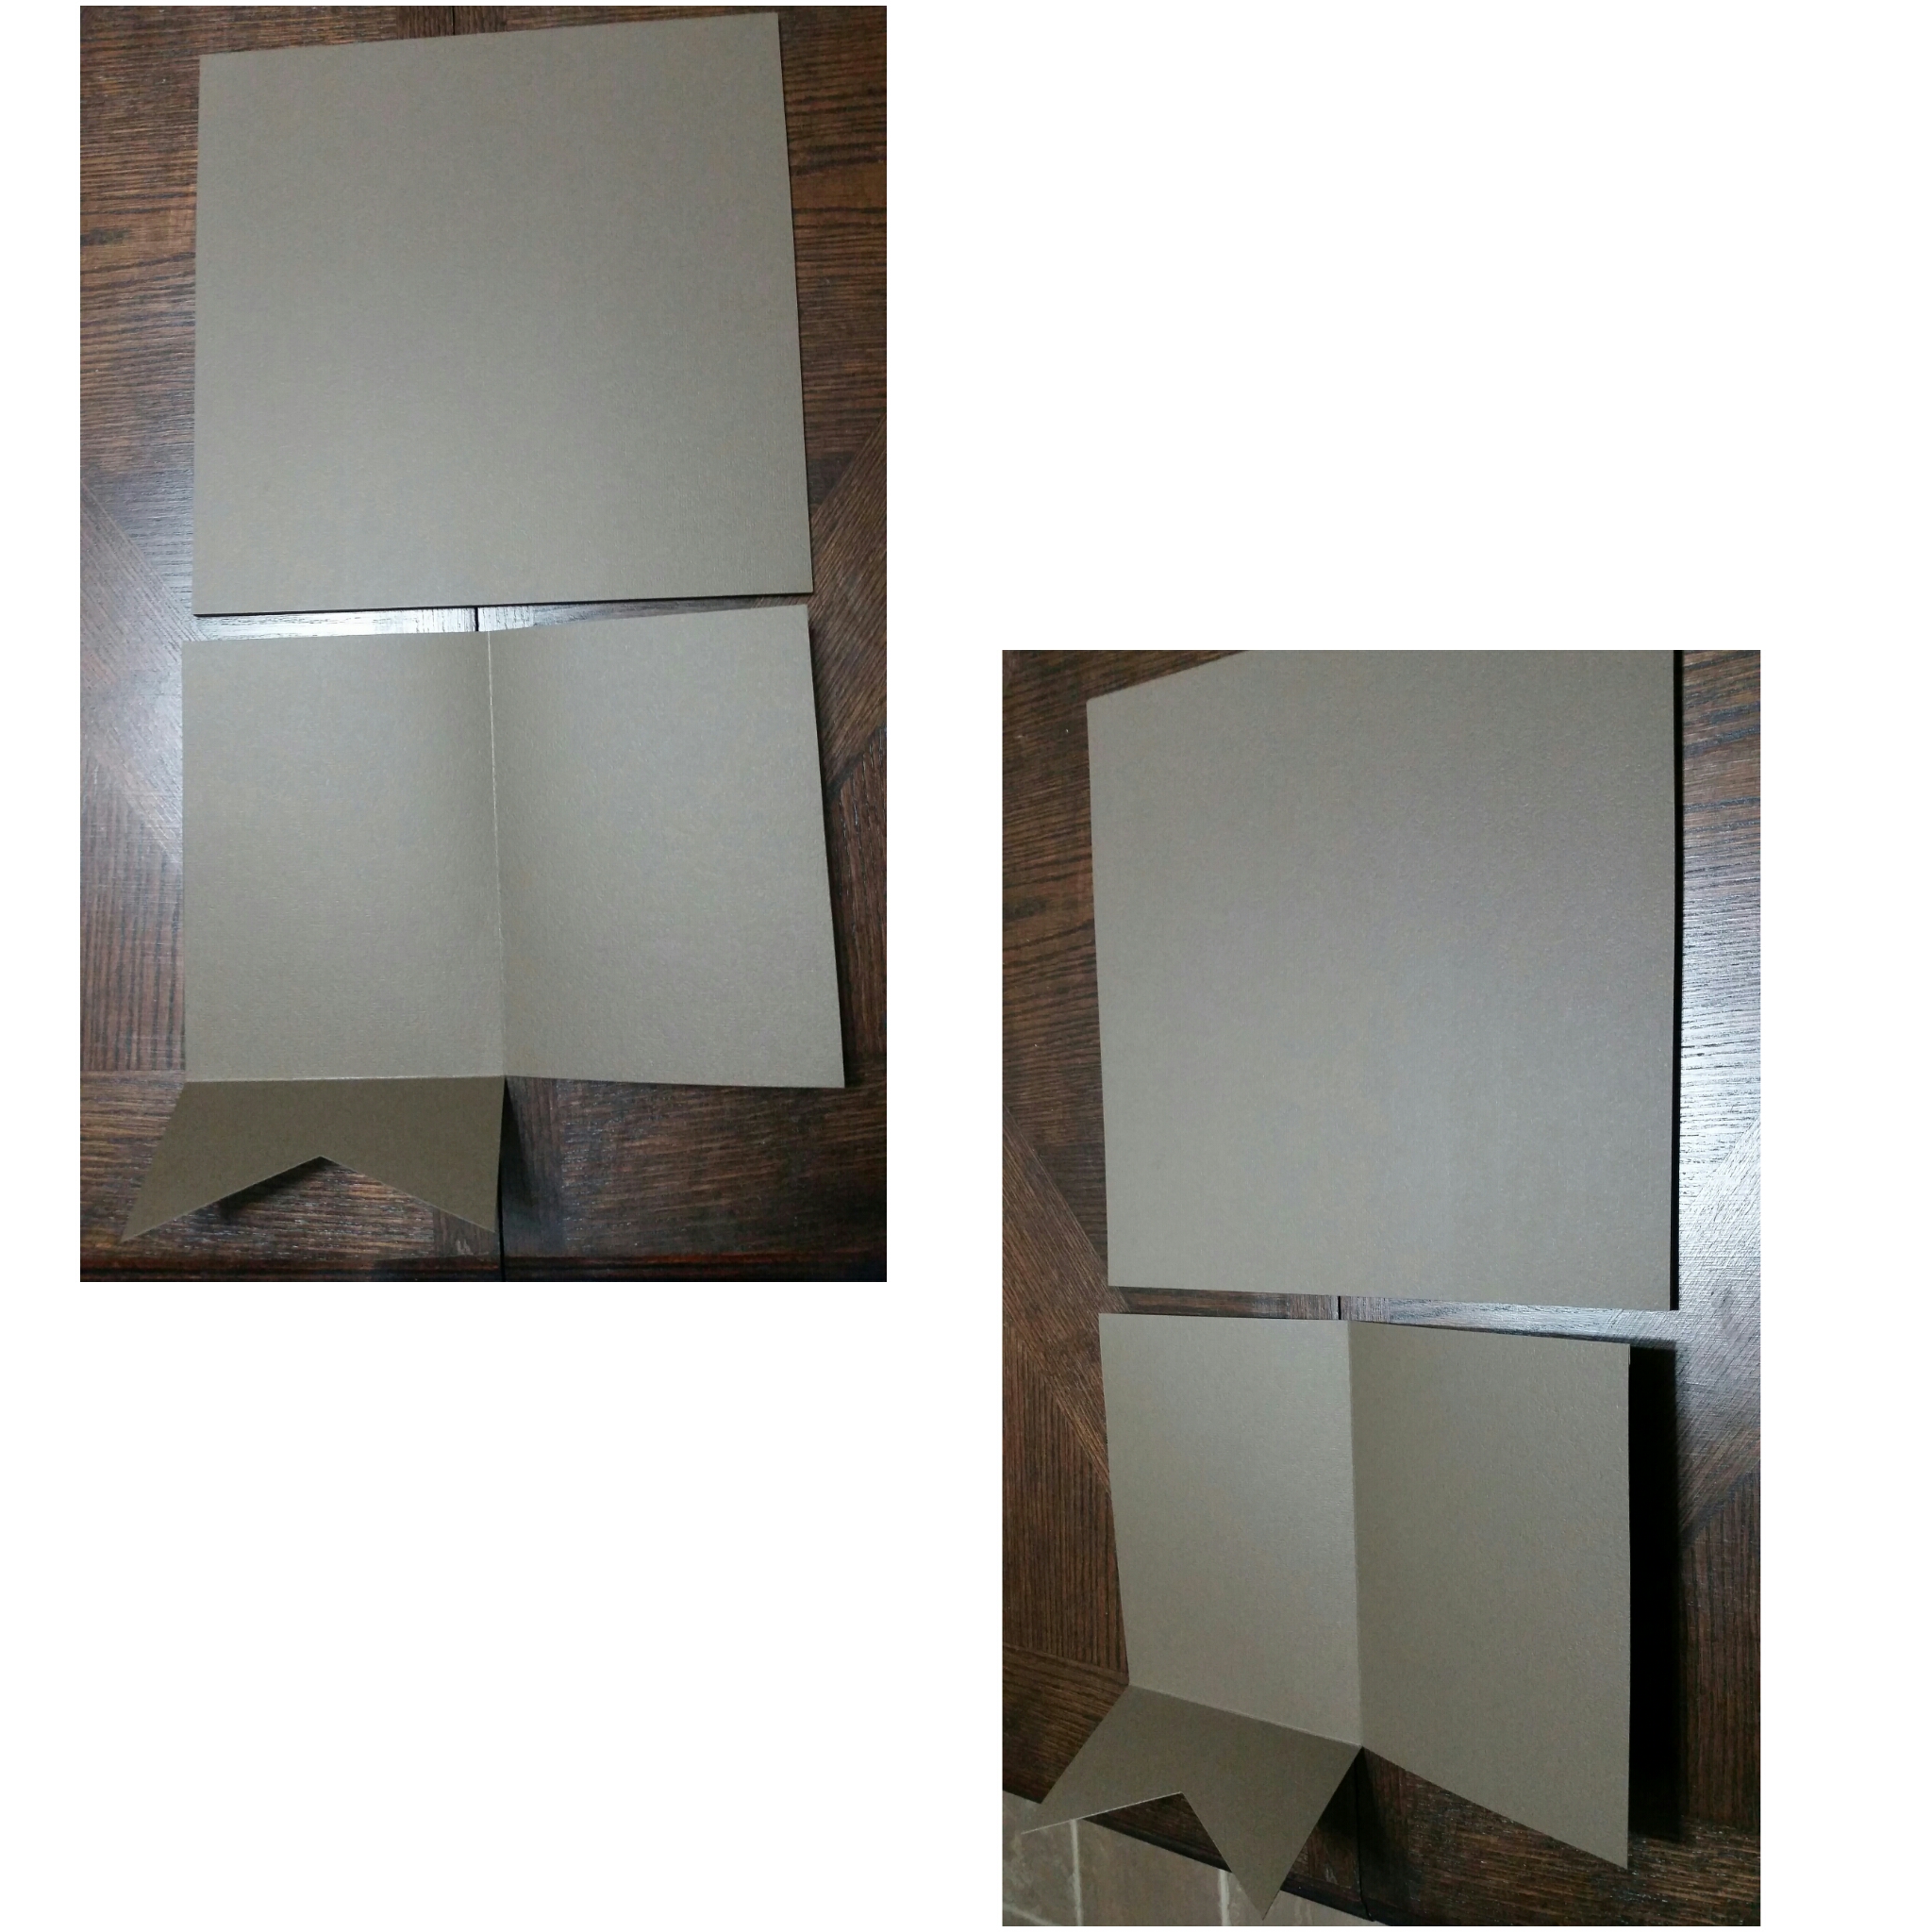
Score(in half) your square piece of cardstock for the pocketfold
Make sure that your accent colour cardstock with the invite fits on the right hand of the score, with enough room to have the pocketfold colour border it. (In this case Brown paper)
Measure and draw a line across the pocketfold (the bottom of pocketfold)
What you want to achieve here is cutting off the excess cardstock bottom on the right hand side but you need to leave the excess cardstock attached on the left as this piece will be used for the pocket.
So cut only half of the cardstock bottom across, then turn your paper cutter around to where you scored the center of the pocketfold and only cut from your first across cut, down to the bottom. this will remove the bottom right excess cardstock and leave you with the left hand side to use.
Score the left hand side so it can be folded up.
I did a nice little V in the pocket side because I thought it looked better,
I did this by measuring and cutting the first V out, then saving the excess cut as a template.
Creating the Pocket
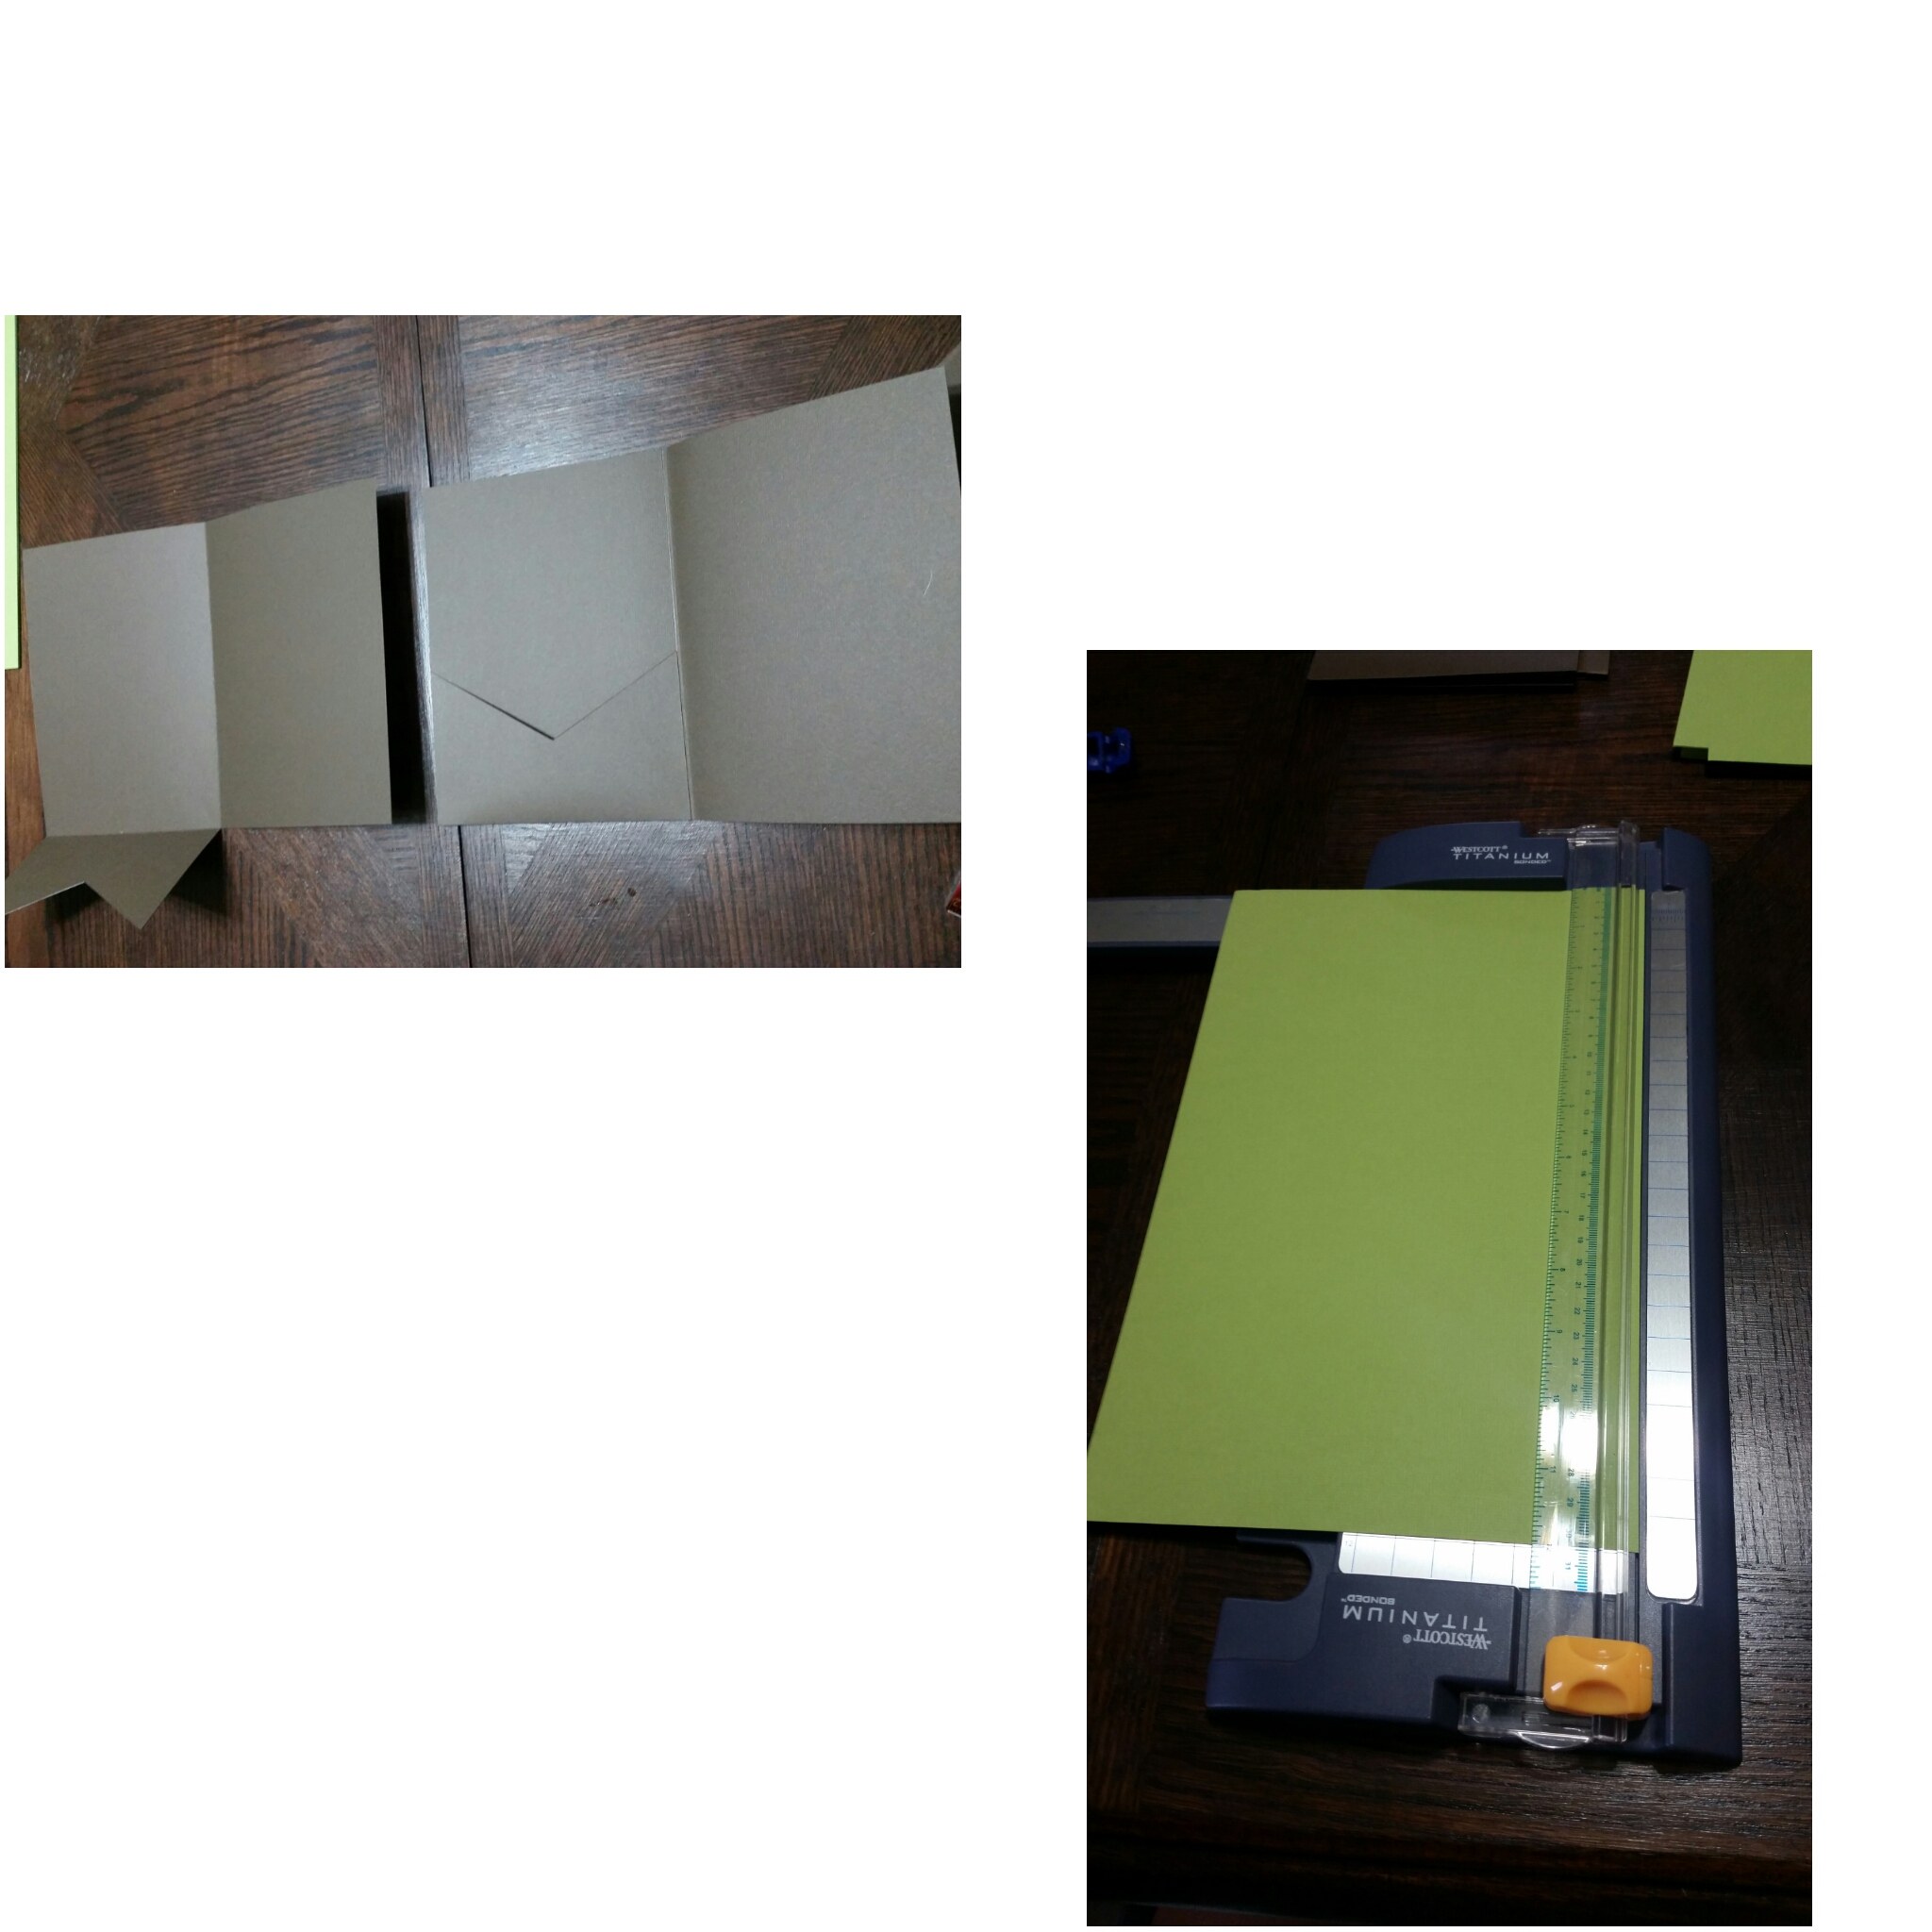
Once you've cut it, use double sided tape on the edges of the ''pocket'' to fold it up over
I folded my double sided tape so that I would still have room to put cards into the pocket. If you put one full strip of tape on the edges it won't leave you a whole lot of room to work with.
So there's your pocketfold!!
Putting Everything Into Place
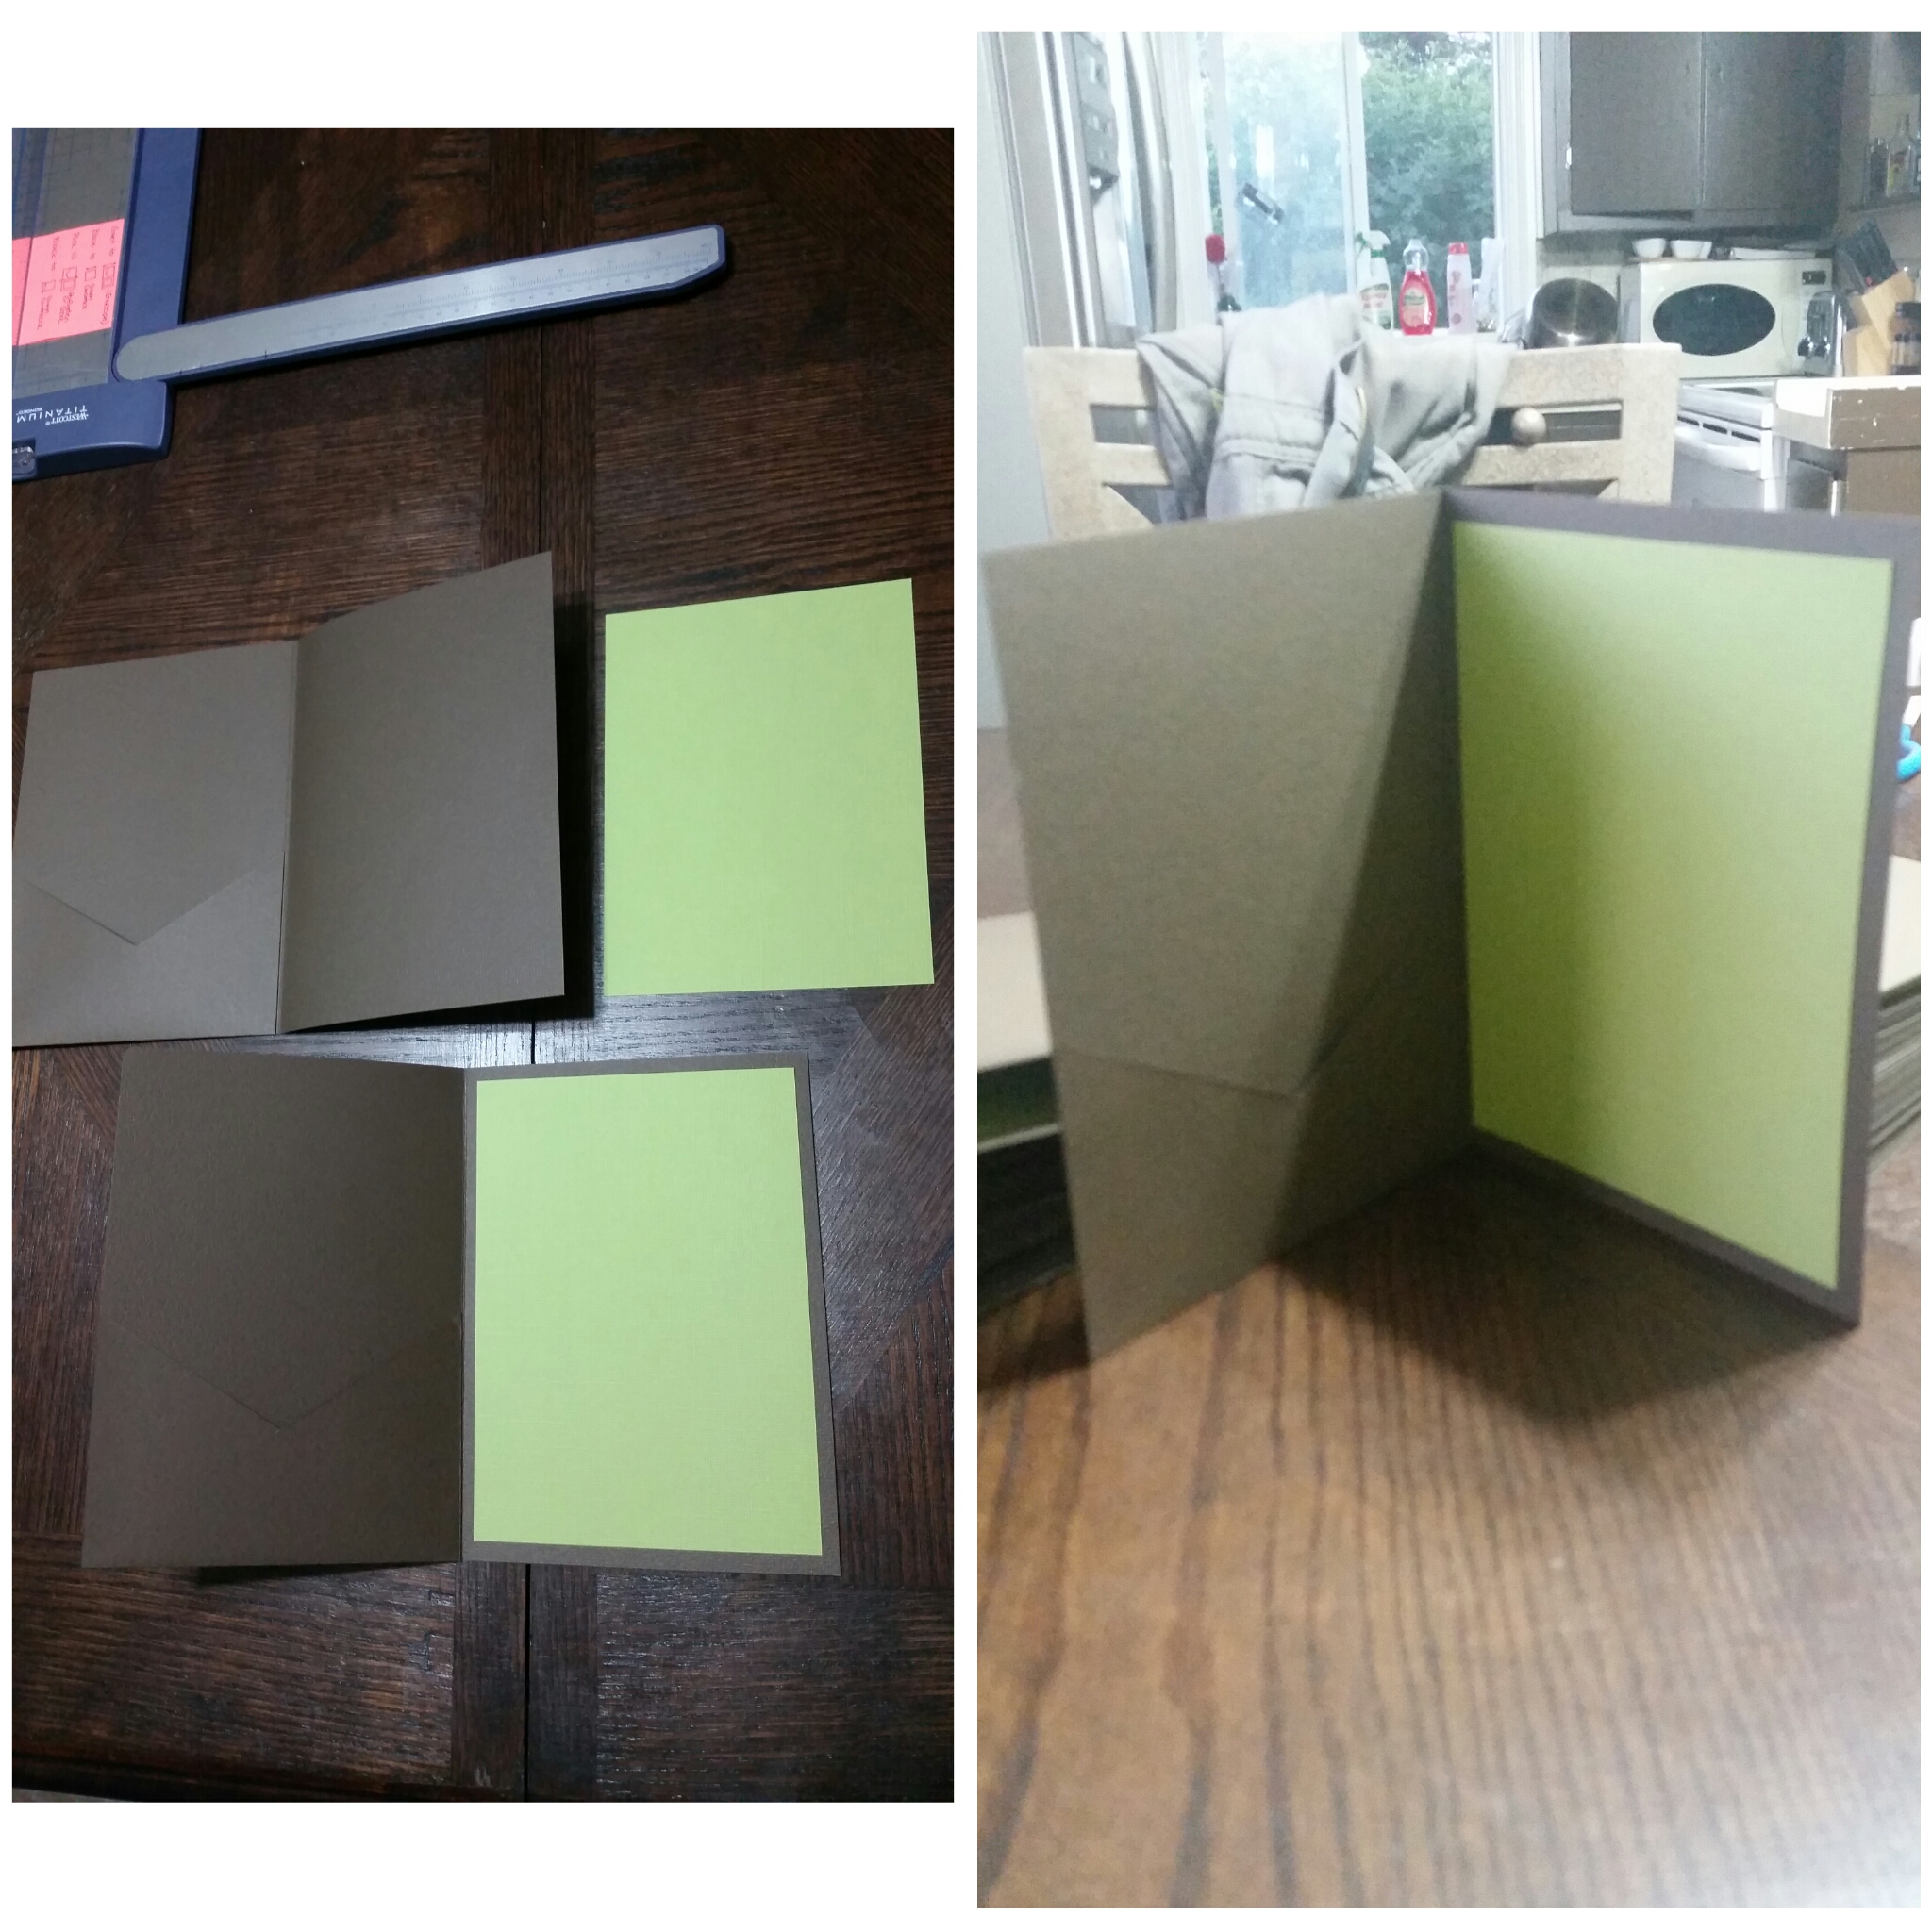
Now you are ready to attach the accent colour to the interior of the pocketfold (Green in this case)
Use double sided tape on the back of the cardstock (I did the whole outside of it but if you would prefer a 3 dimensional look you can do an X on the back of the cardstock and stick it on)
Now stick your accent to your pocketfold (I just eyeballed mine and it worked fine but you can measure if you like)
Putting It All Together
Now you are ready to tape in your invites
This is the exact same as the last step for the invite itself
For your information cards; just slide those into the pocket on the left
the Front of the Envelope
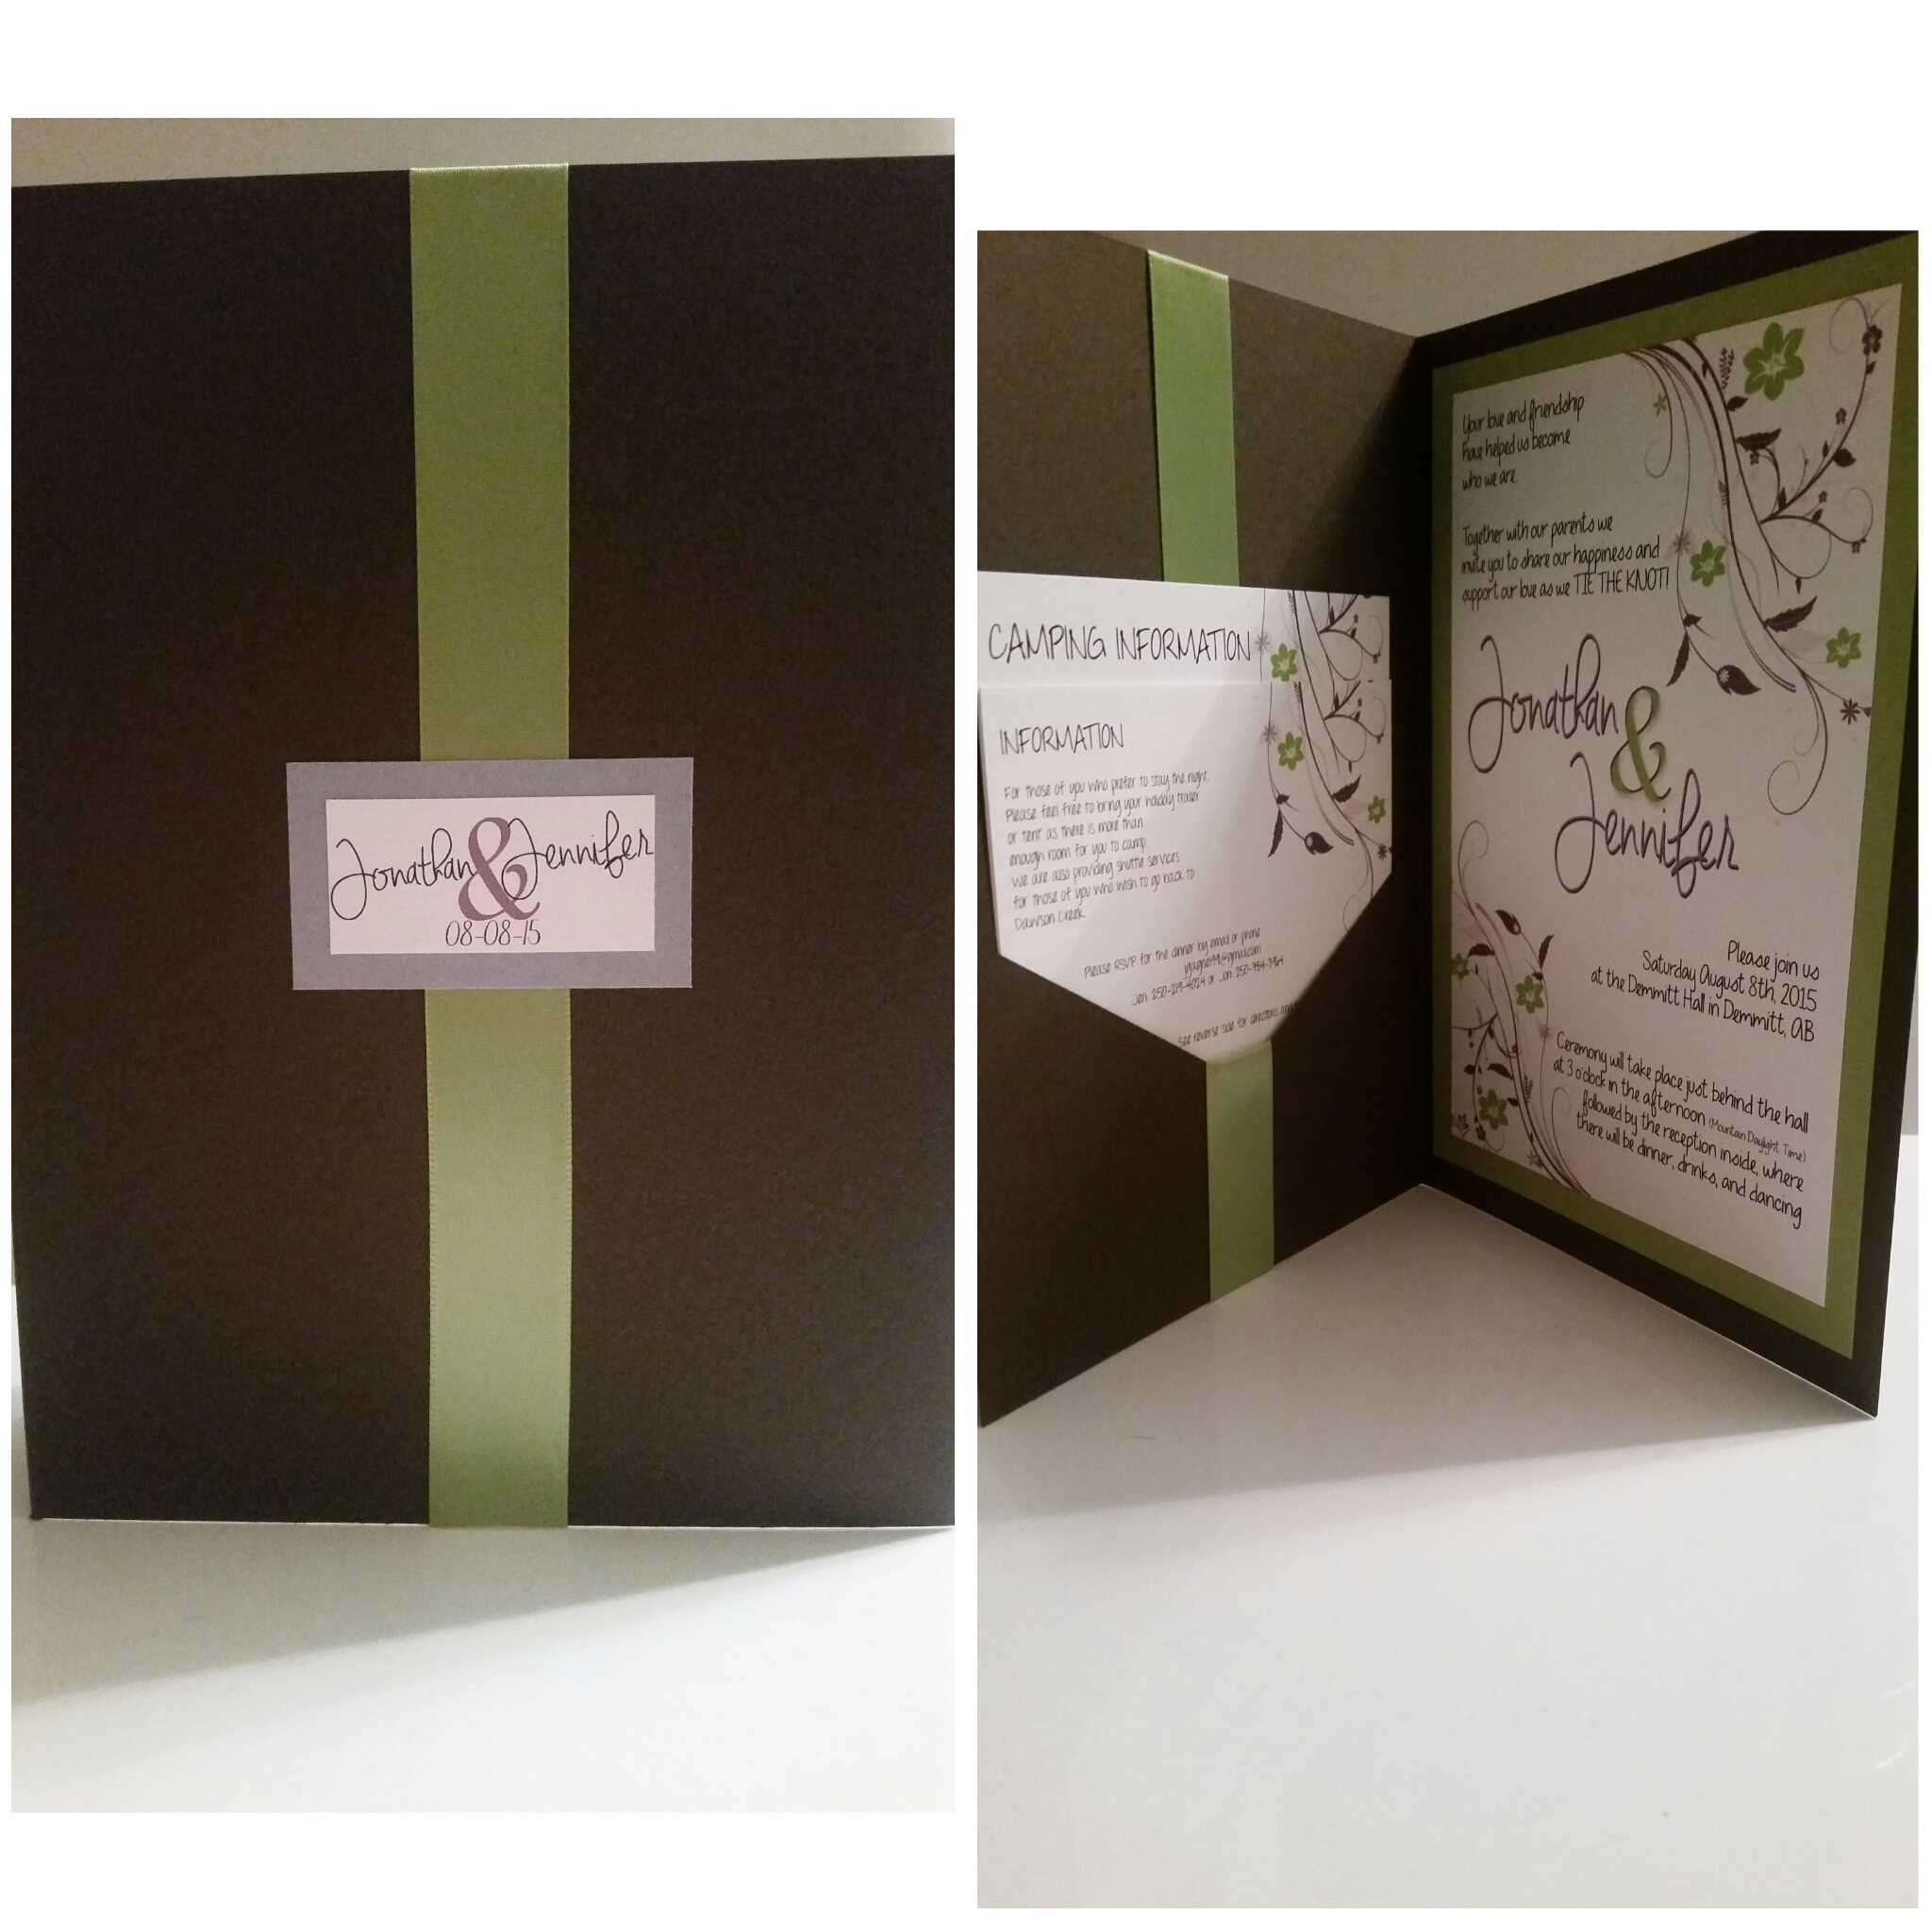
I made up a little label on Photoshop and cut it like I did everything else, as well as the cardstock and I used double sided tape to attach it to the purple piece of cardstock.
The ribbon:
I put a little strip of double sided tape to the inside of the ribbon (the not pretty side)
and with that side showing i went straight into the pocket and attached it to the inside of the pocket
folded it down and over to the front of the pocketfold. (I also put a little piece of tape on the middle of the front so the ribbon would stick down there)
then brought the ribbon over to the inside of the pocketfold again and taped it just inside of the pocket.
I then used double sided tape to secure the front emblem to the ribbon (Again eyeballing everything)
And There You Have It :)
