Handheld EEG Focus Monitor
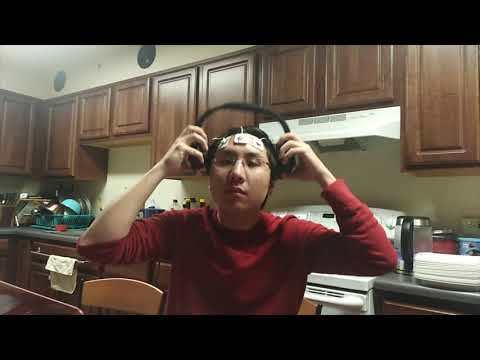
College life demands focus for classes, assignments and projects. Many students find it hard to focus during these times which is why monitoring and understanding your ability to focus is so important. We created a biosensor device that measures your brainwaves to gauge your level of focus and displays the data for you to see. The acronym "EEG" stands for electroencephalograph, which means that it is a machine used to record electrical activity in the brain.
This biosensor requires an EEG signal input and your finger to press on the screen to produce a frequency graph and extractable data (optional) that can be copied to Excel.
Disclaimer: This biosensor is NOT a medical device.
Supplies
- Arduino Uno ($23)
- Breadboard ($5.50)
- 2.8" TFT Touch Shield for Arduino with Resistive Touch Screen ($34.95)
- Wires ($0.95)
- EEG Bitalino ($40.79)
- Electrodes ($9.13)
- 3-lead accessory ($21.48)
- Alcohol swabs ($4.65) (optional)
- 9V battery ($2.18)
- 9V Battery holder ($1.69)
- USB 2.0 Cable type A/B $3.95)
- Tools
- Wire Stripper ($6.26)
- Hairband / headphones to secure wires above your head (optional)
Total cost: $142 (depending on price fluctuations)
Prerequisites

- Some basic knowledge on how brainwaves are read would be helpful to understand the graph, but not necessary.
-
This is a good resource for some basic background information.
-
You would also need access to GitHub website to obtain our code.
- You would need to download the Arduino application.
Safety Precautions
- Make sure the circuit is not powered (battery pack is off, USB not plugged in) when modifying the circuit.
- Make sure there are no fluids nearby that might spill onto the circuit.
- WARNING:This is NOT a medical device and does not have the same accuracy. Use a proper EEG if you need to do a study on brainwaves.
- Keep your hands dry when working with the circuit or biosensor.
Hints and Tips

TroubleShooting
- Make sure your wires are connected to the right pins. If not, an unintelligible reading would appear.
- When you plug in your screen, make sure that you did not fit everything one pin lower (if you notice that any of the screen pins are not connected, this is why)
- Make sure that you plugged the BITalino in properly (based on the logo and EEG sign as seen in the instructions)
- Make sure if the screen gets plugged in properly to a point that the metal of the pins are not visible anymore.
- If the code fails to compile and they cannot find a certain library, make sure that you have installed all the mentioned libraries.
Insights
- Remember to account for the space you need to strip the wire before you cut it to length.
- Before applying the electrodes to your forehead, Make sure to wash and dry it first or use an alcohol swab to reduce impedance.
- Using an Arduino Mega would provide extra Analog and Digital pins, which would mean that you would not need to "share" pins between the wires and the screen like we are doing in this model.
The Science Behind the Device.
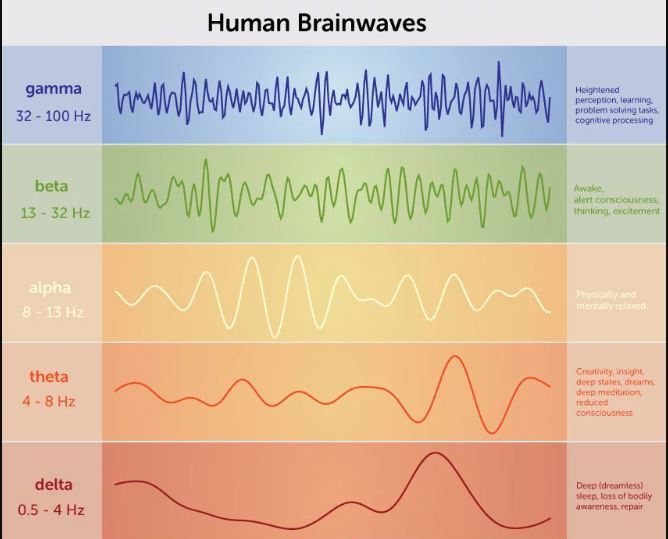
Your brain produces different frequencies of electrical signals depending on your level of consciousness/focus. It produces Gamma waves (32-100 Hz) when it is extremely focused on a task, processing information or learning. It produces Beta waves (13-32 Hz) when you are alert, thinking or excited. Alpha waves (8-13 Hz) are produced if you are physically and mentally relaxed. Theta waves (4-8 Hz) occur during deep meditation or REM (rapid eye movement) sleep. Delta waves (<4 Hz) occurs during deep, dreamless sleep.
Our sensor will let you know how much of each wave is present to allow you to gauge your level of focus. It only detects wavelengths from 0Hz-59Hz, which is the range where most brainwaves occur.
If you prefer a video tutorial, here's a good video you can watch.
In our intro video, we talked about Fast Fourier Transform. This video explains what that is.
Strip and Cut Wires
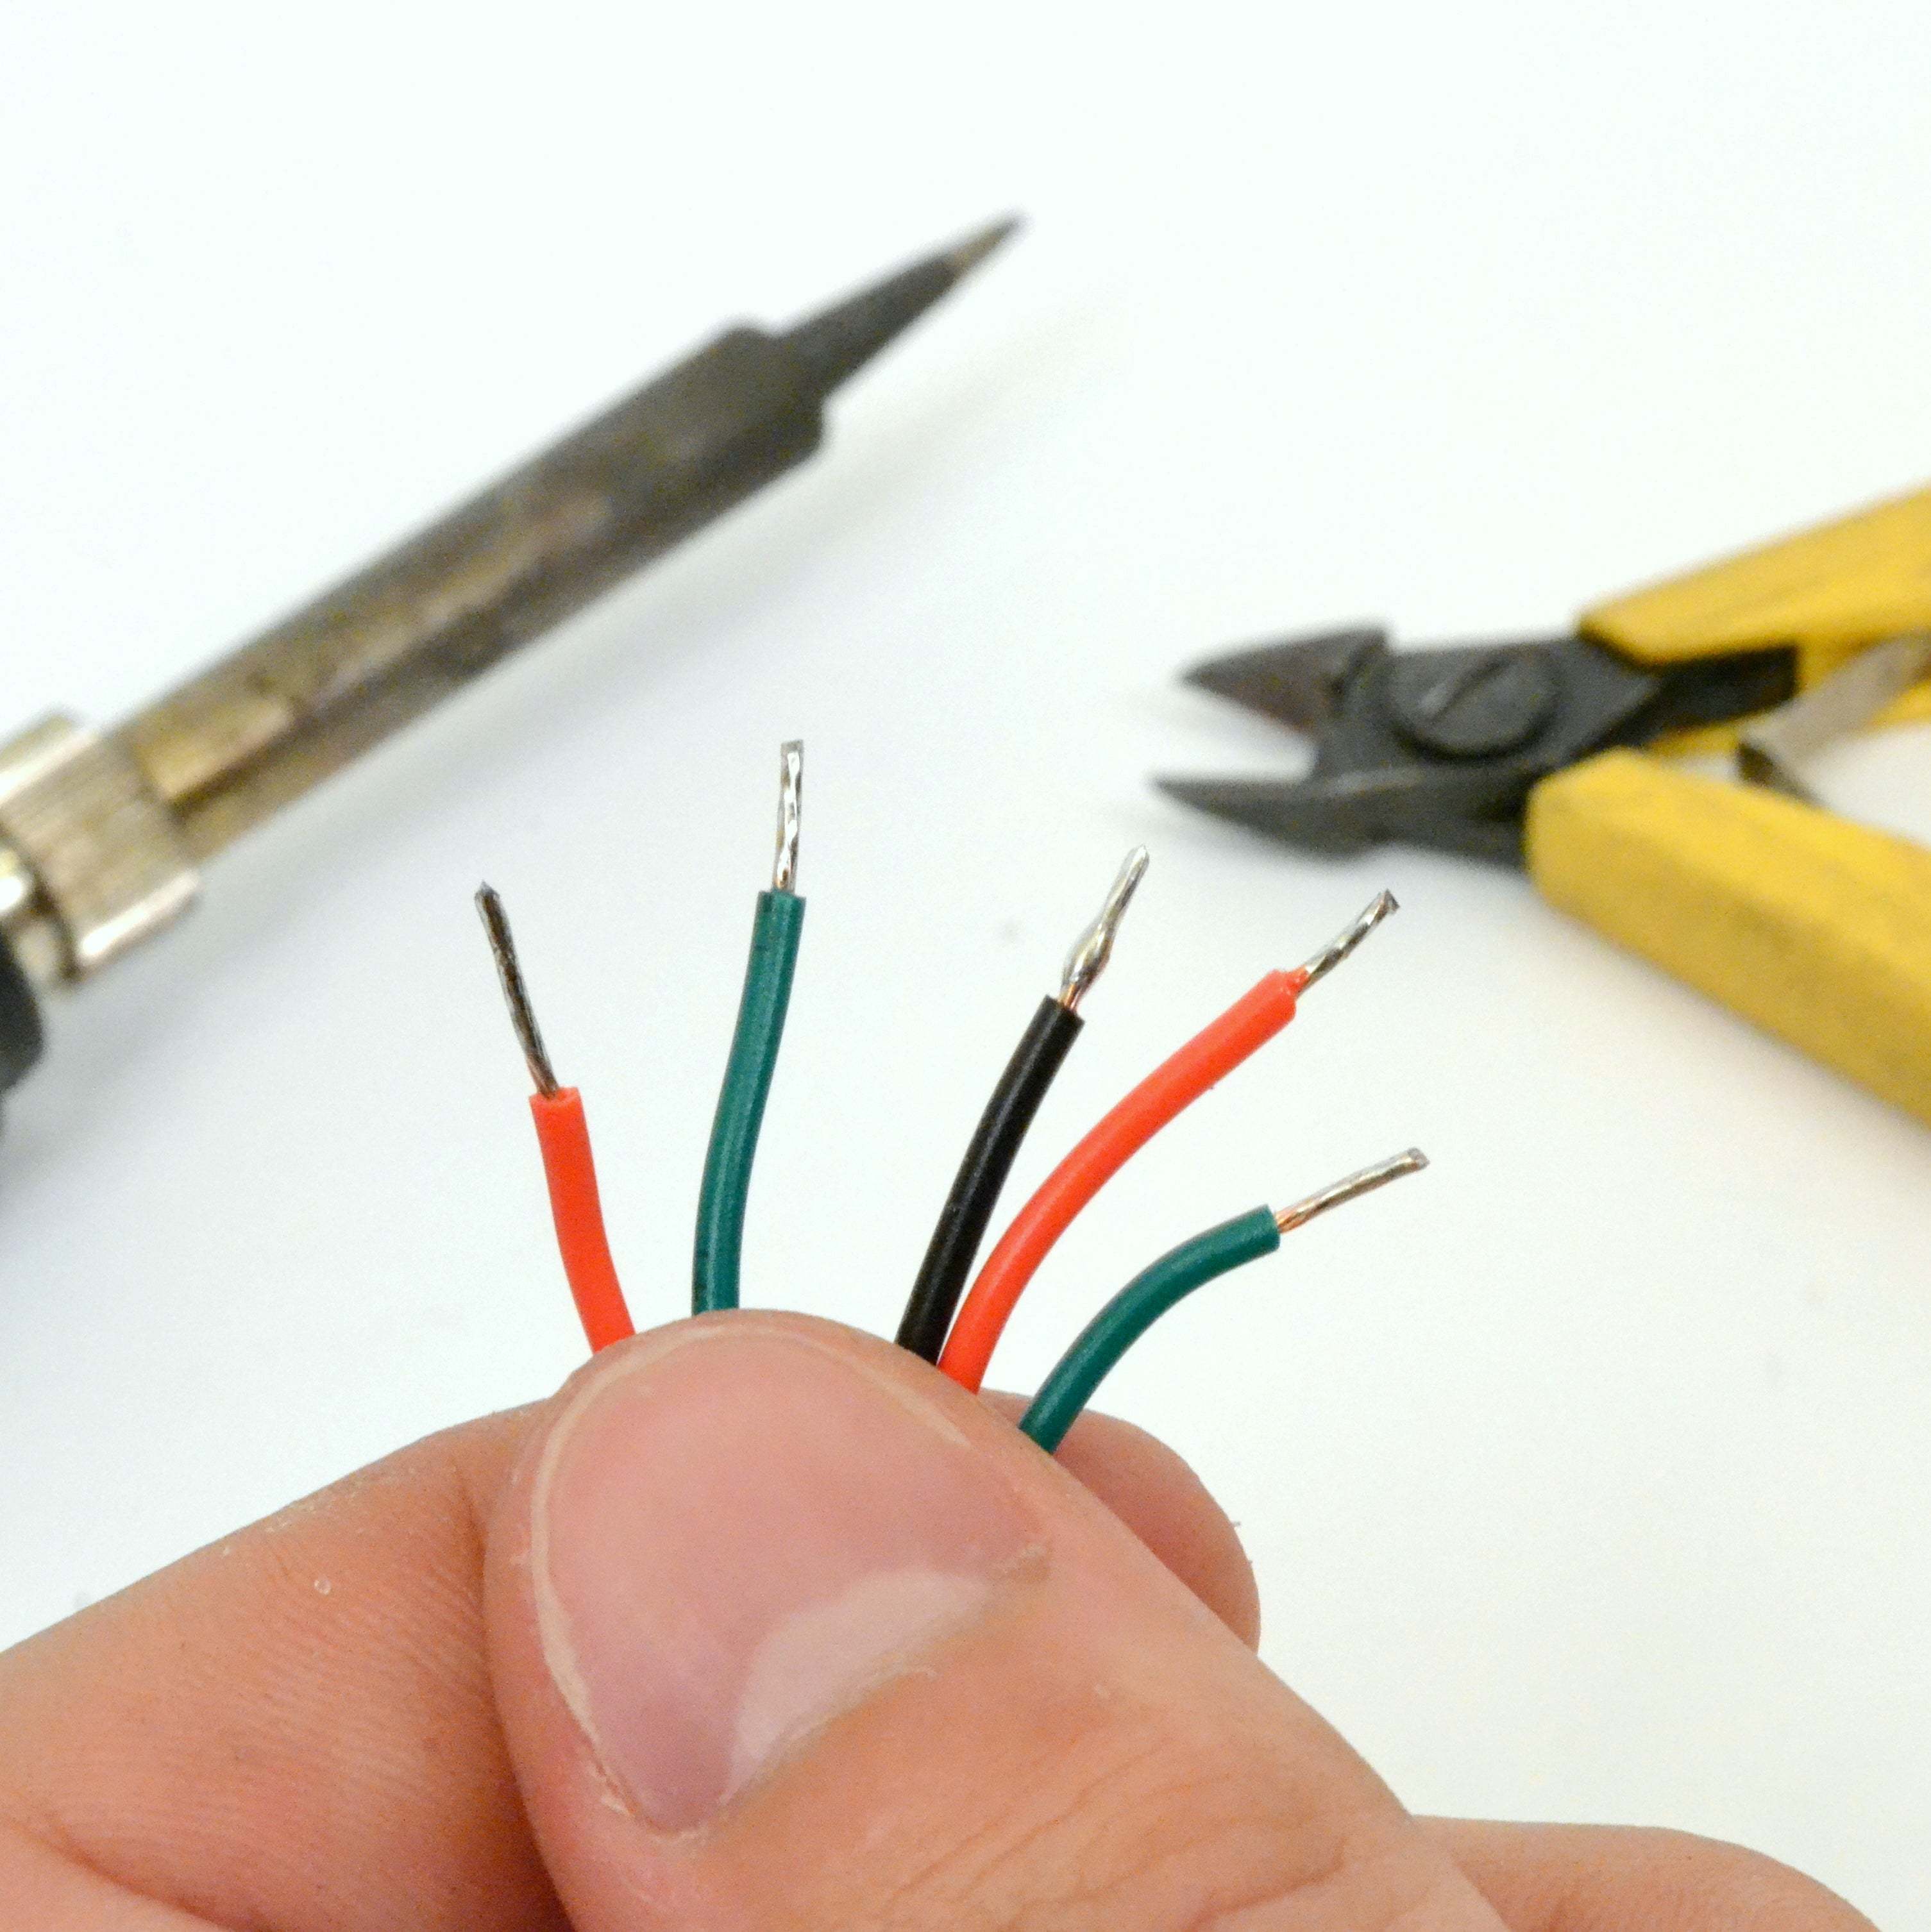
For best results, you would need 3 pieces at a minimum of 5" long.
If you have not stripped a wire before, here's a simple tutorial.
Tip: When you cut the wire, make sure to leave space for stripping the wire.
Loop One End of Each Wire
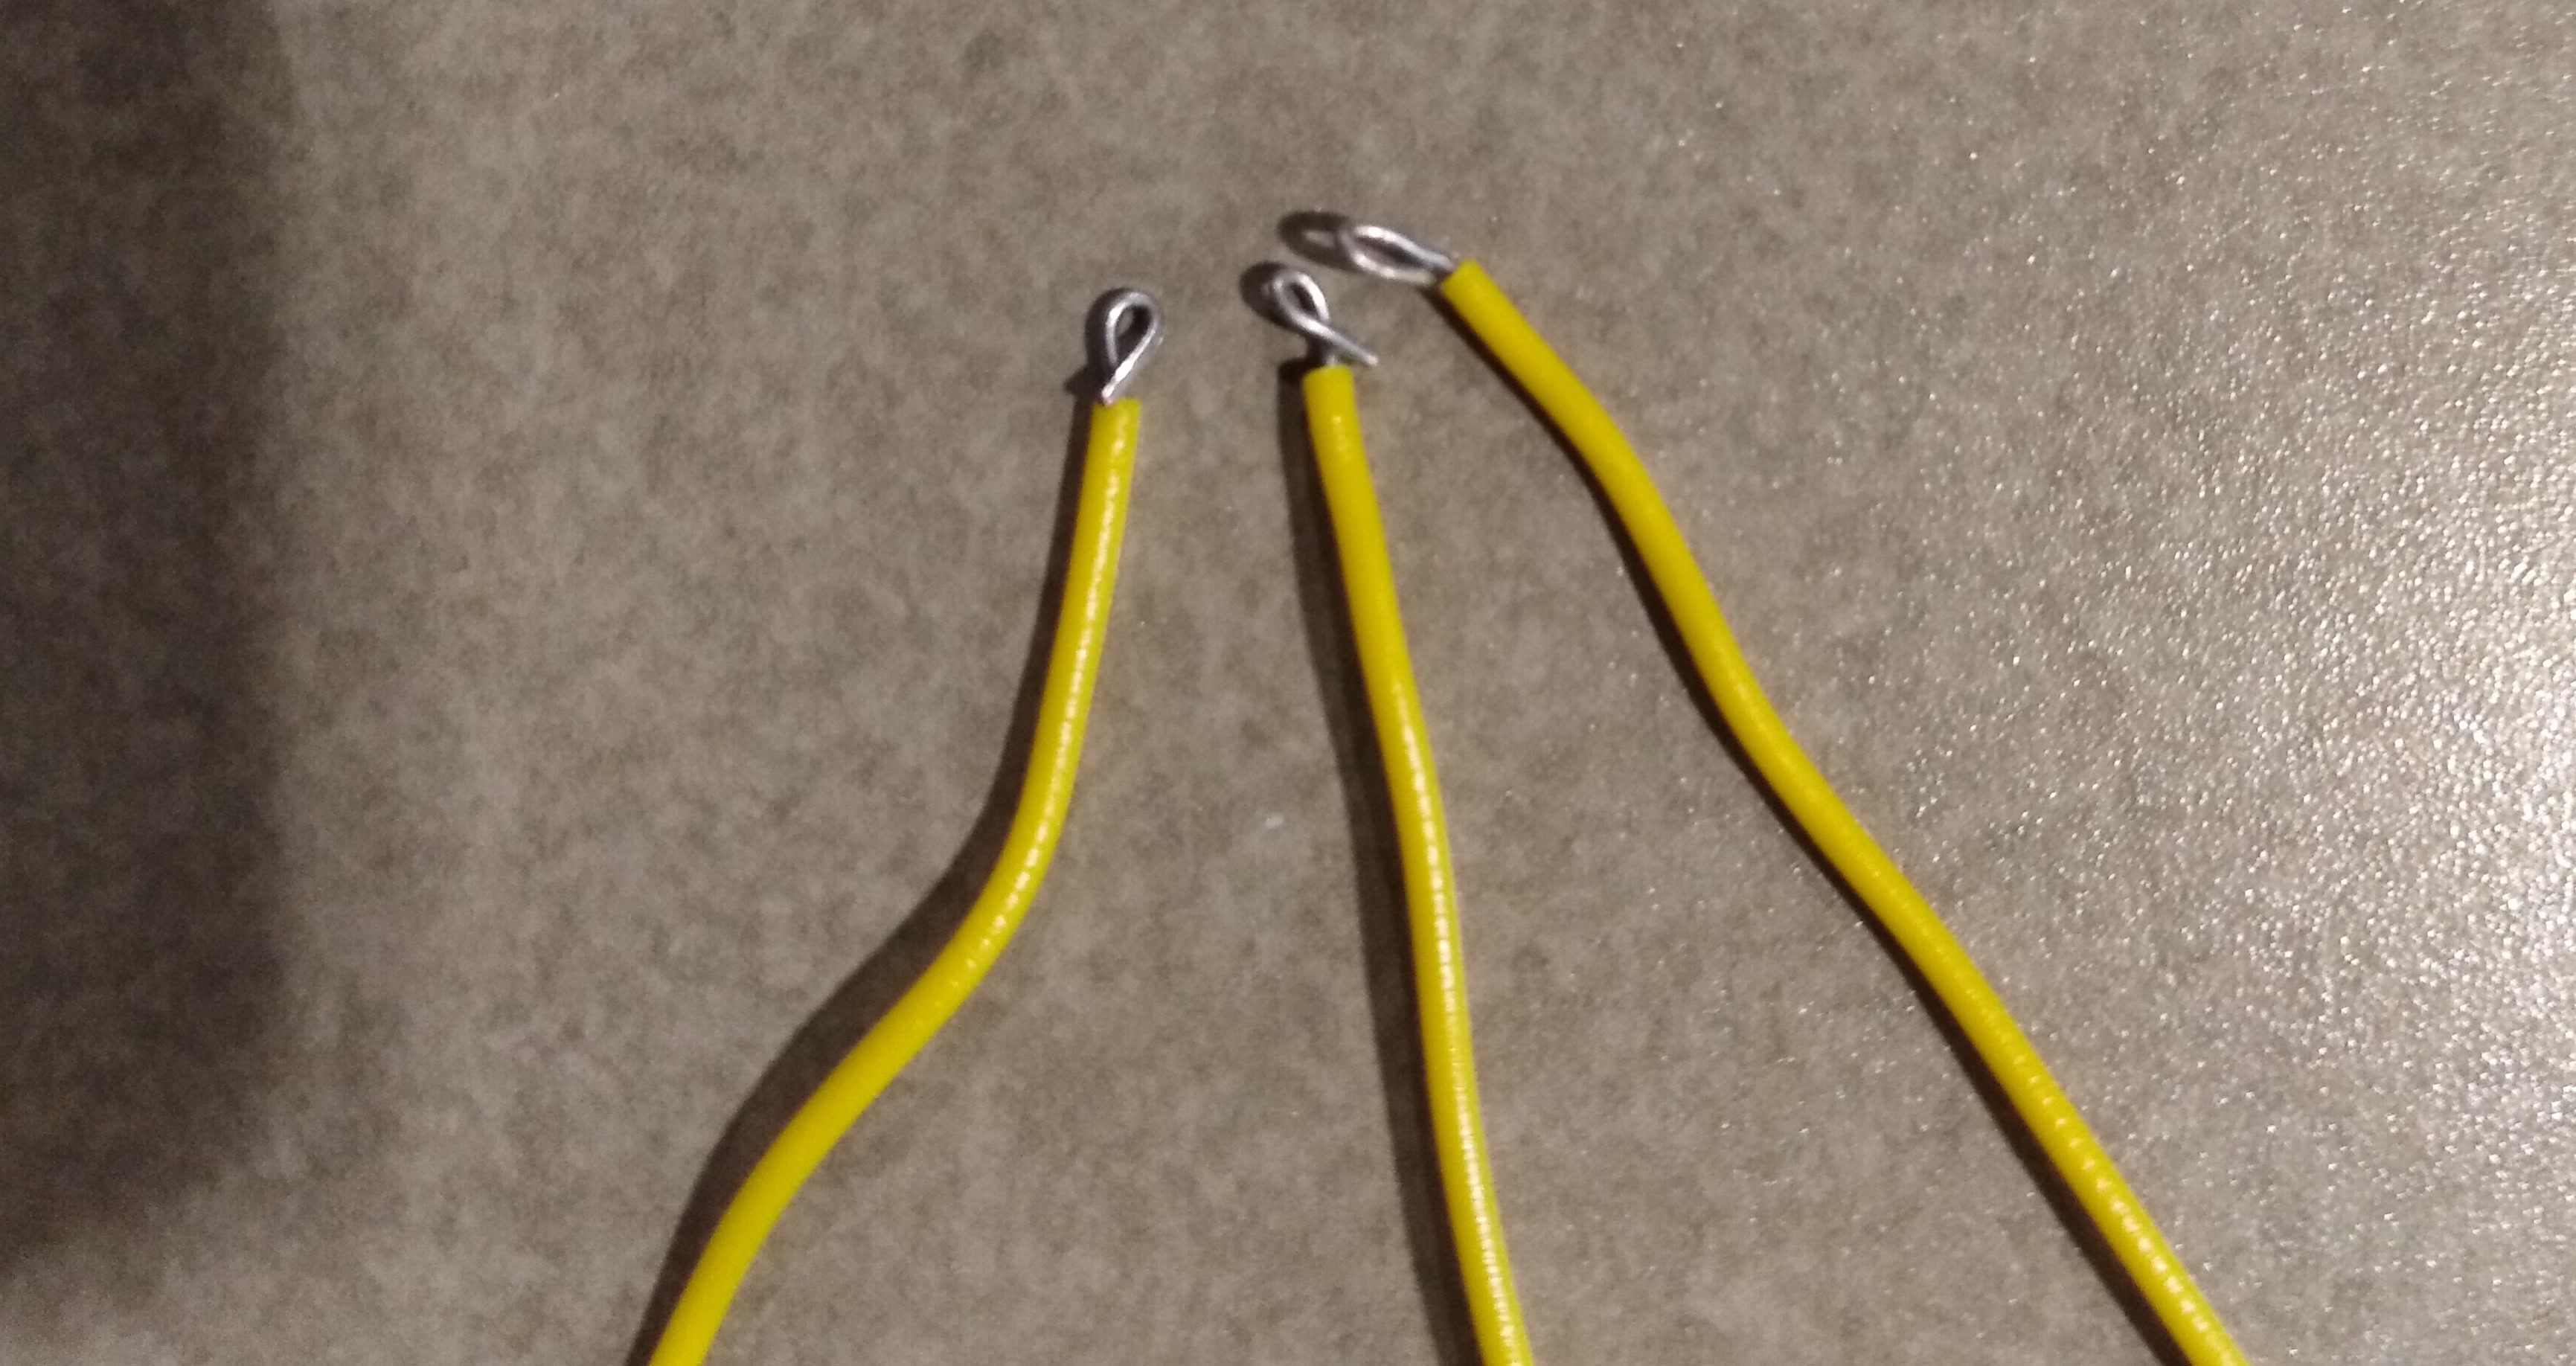
The goal here is to create a loop on one end the exposed part of the wire. This loop should be about the same size as the pins under the TFT Touch Shield or slightly larger.
Locate the Corresponding Pins Under the Screen
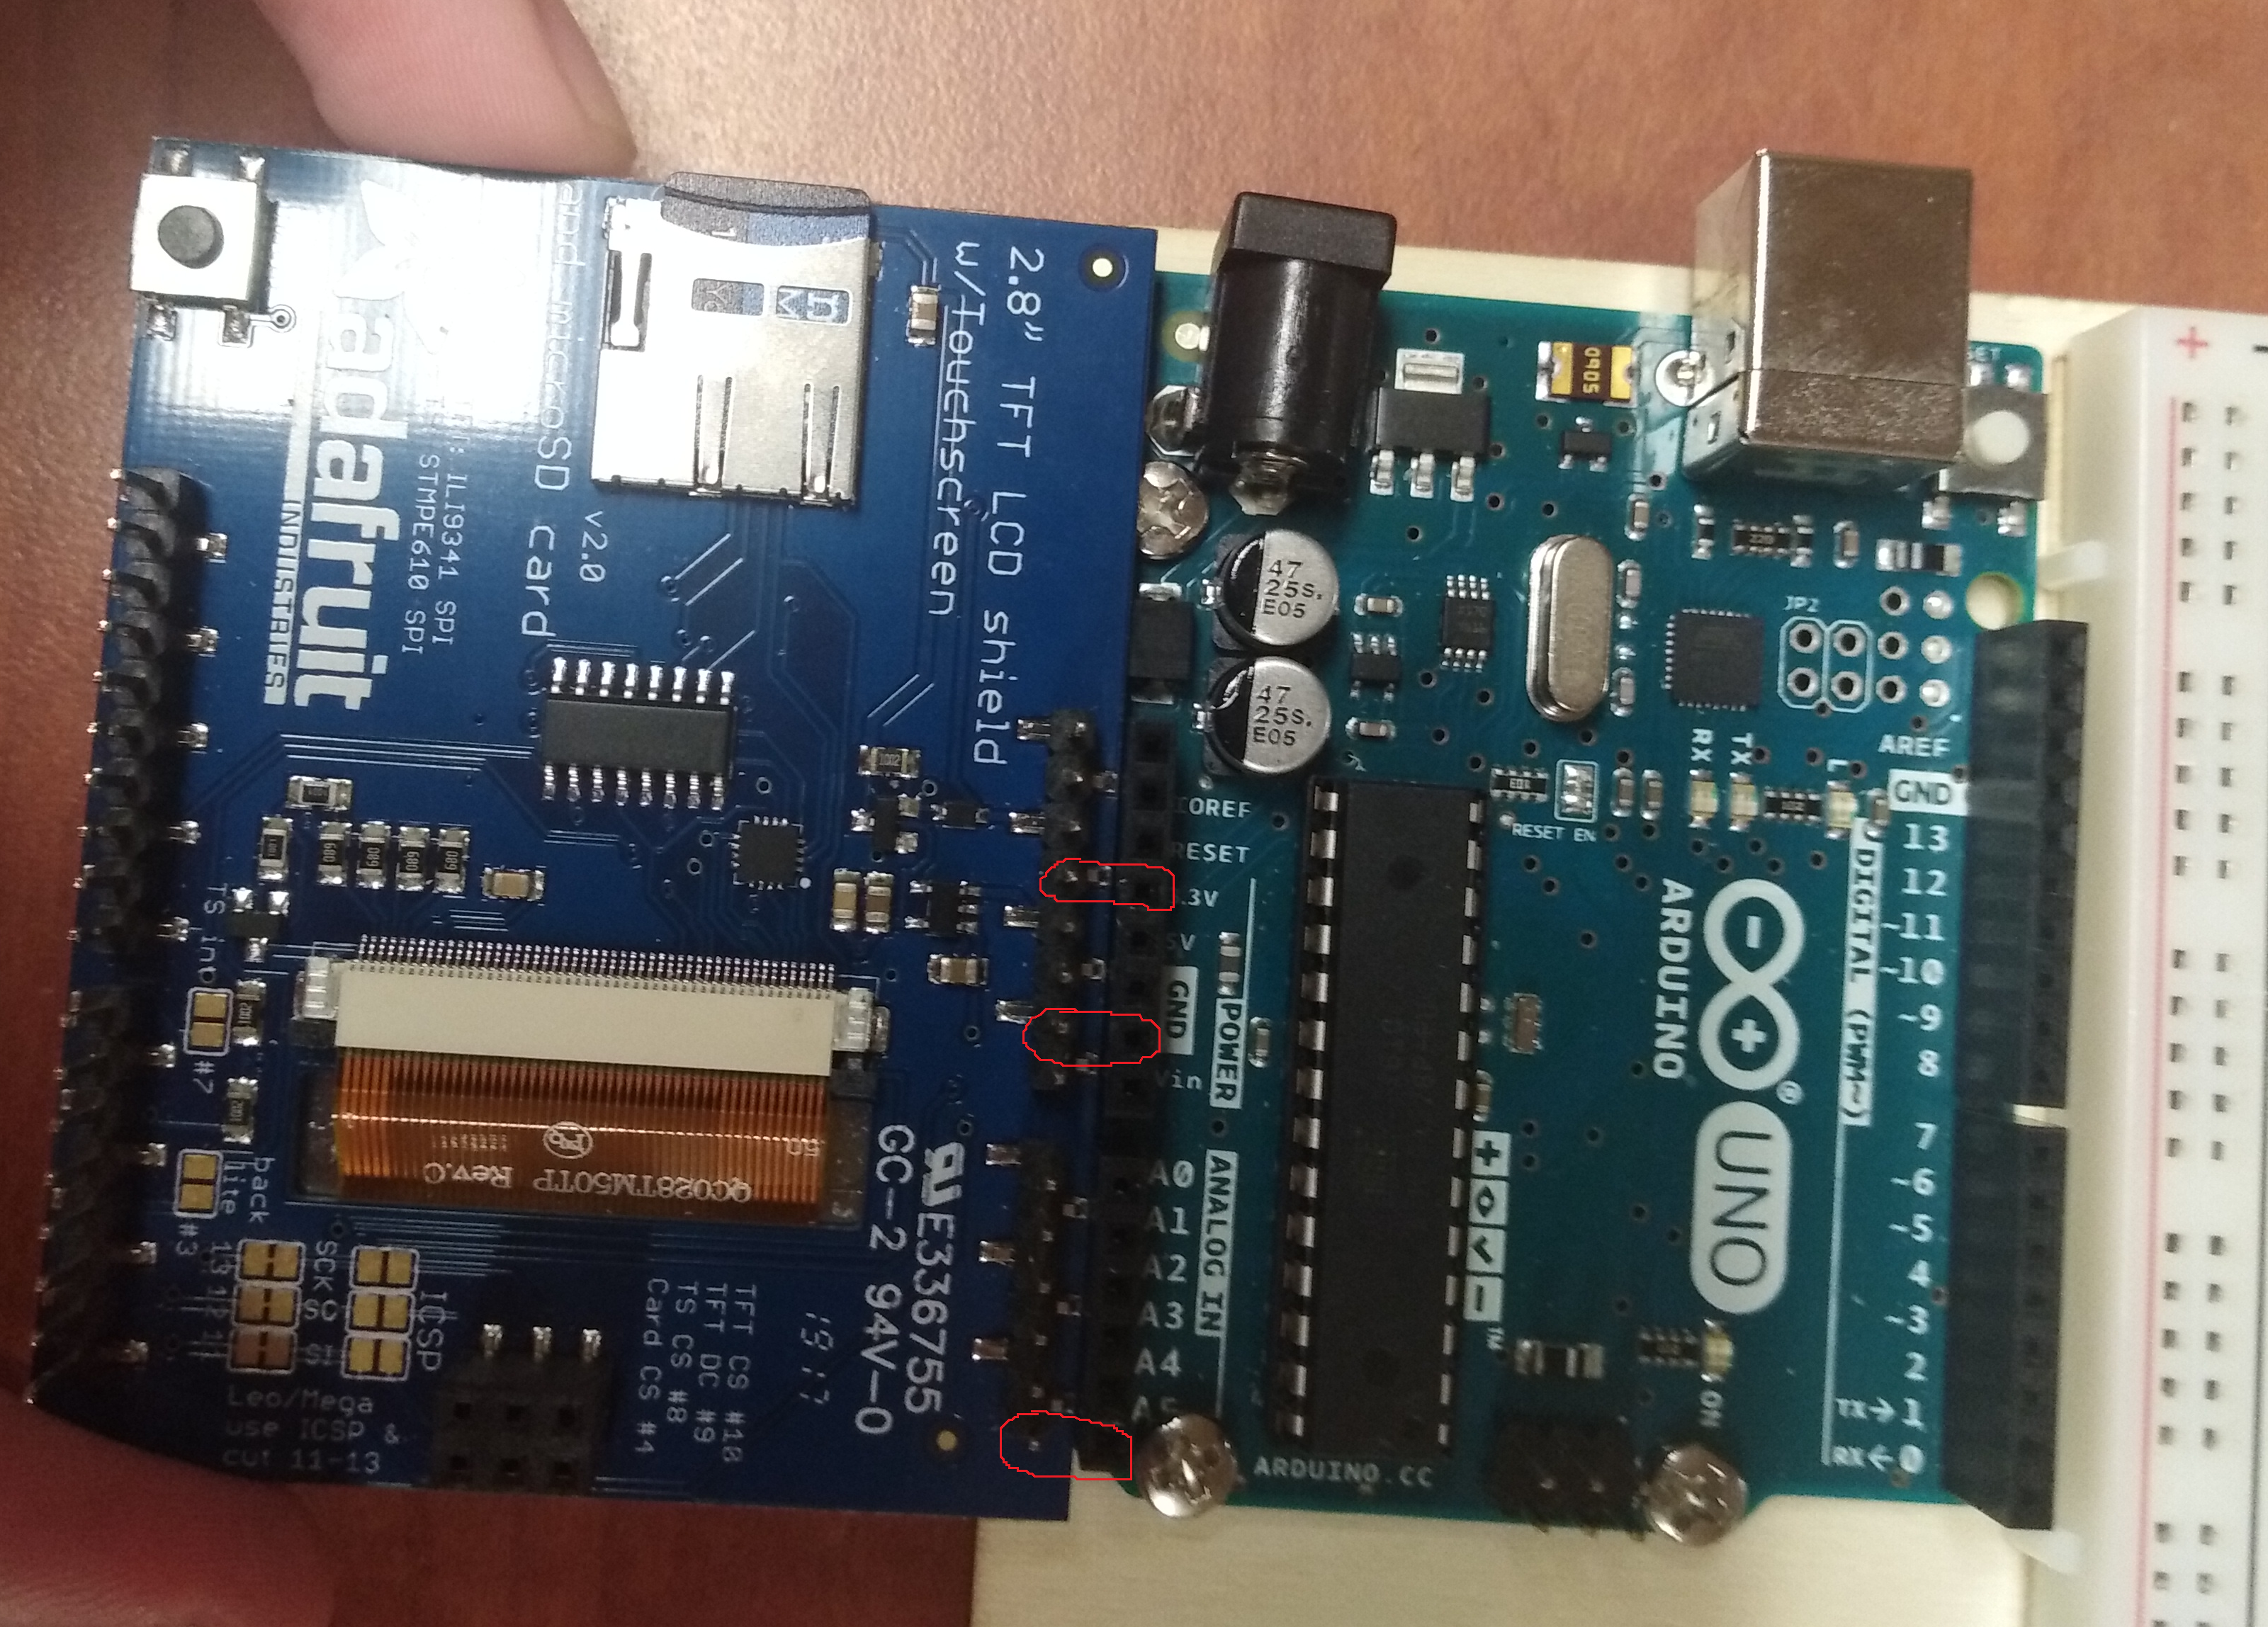
Compare the Arduino Uno and underside of the screen to identify the corresponding pins for 3.3V, GND and A5.
Hint: If you look closely, you can see the red circles in the picture circling the pins of interest.
Attach the Wires to the TFT Touch Shield Pins
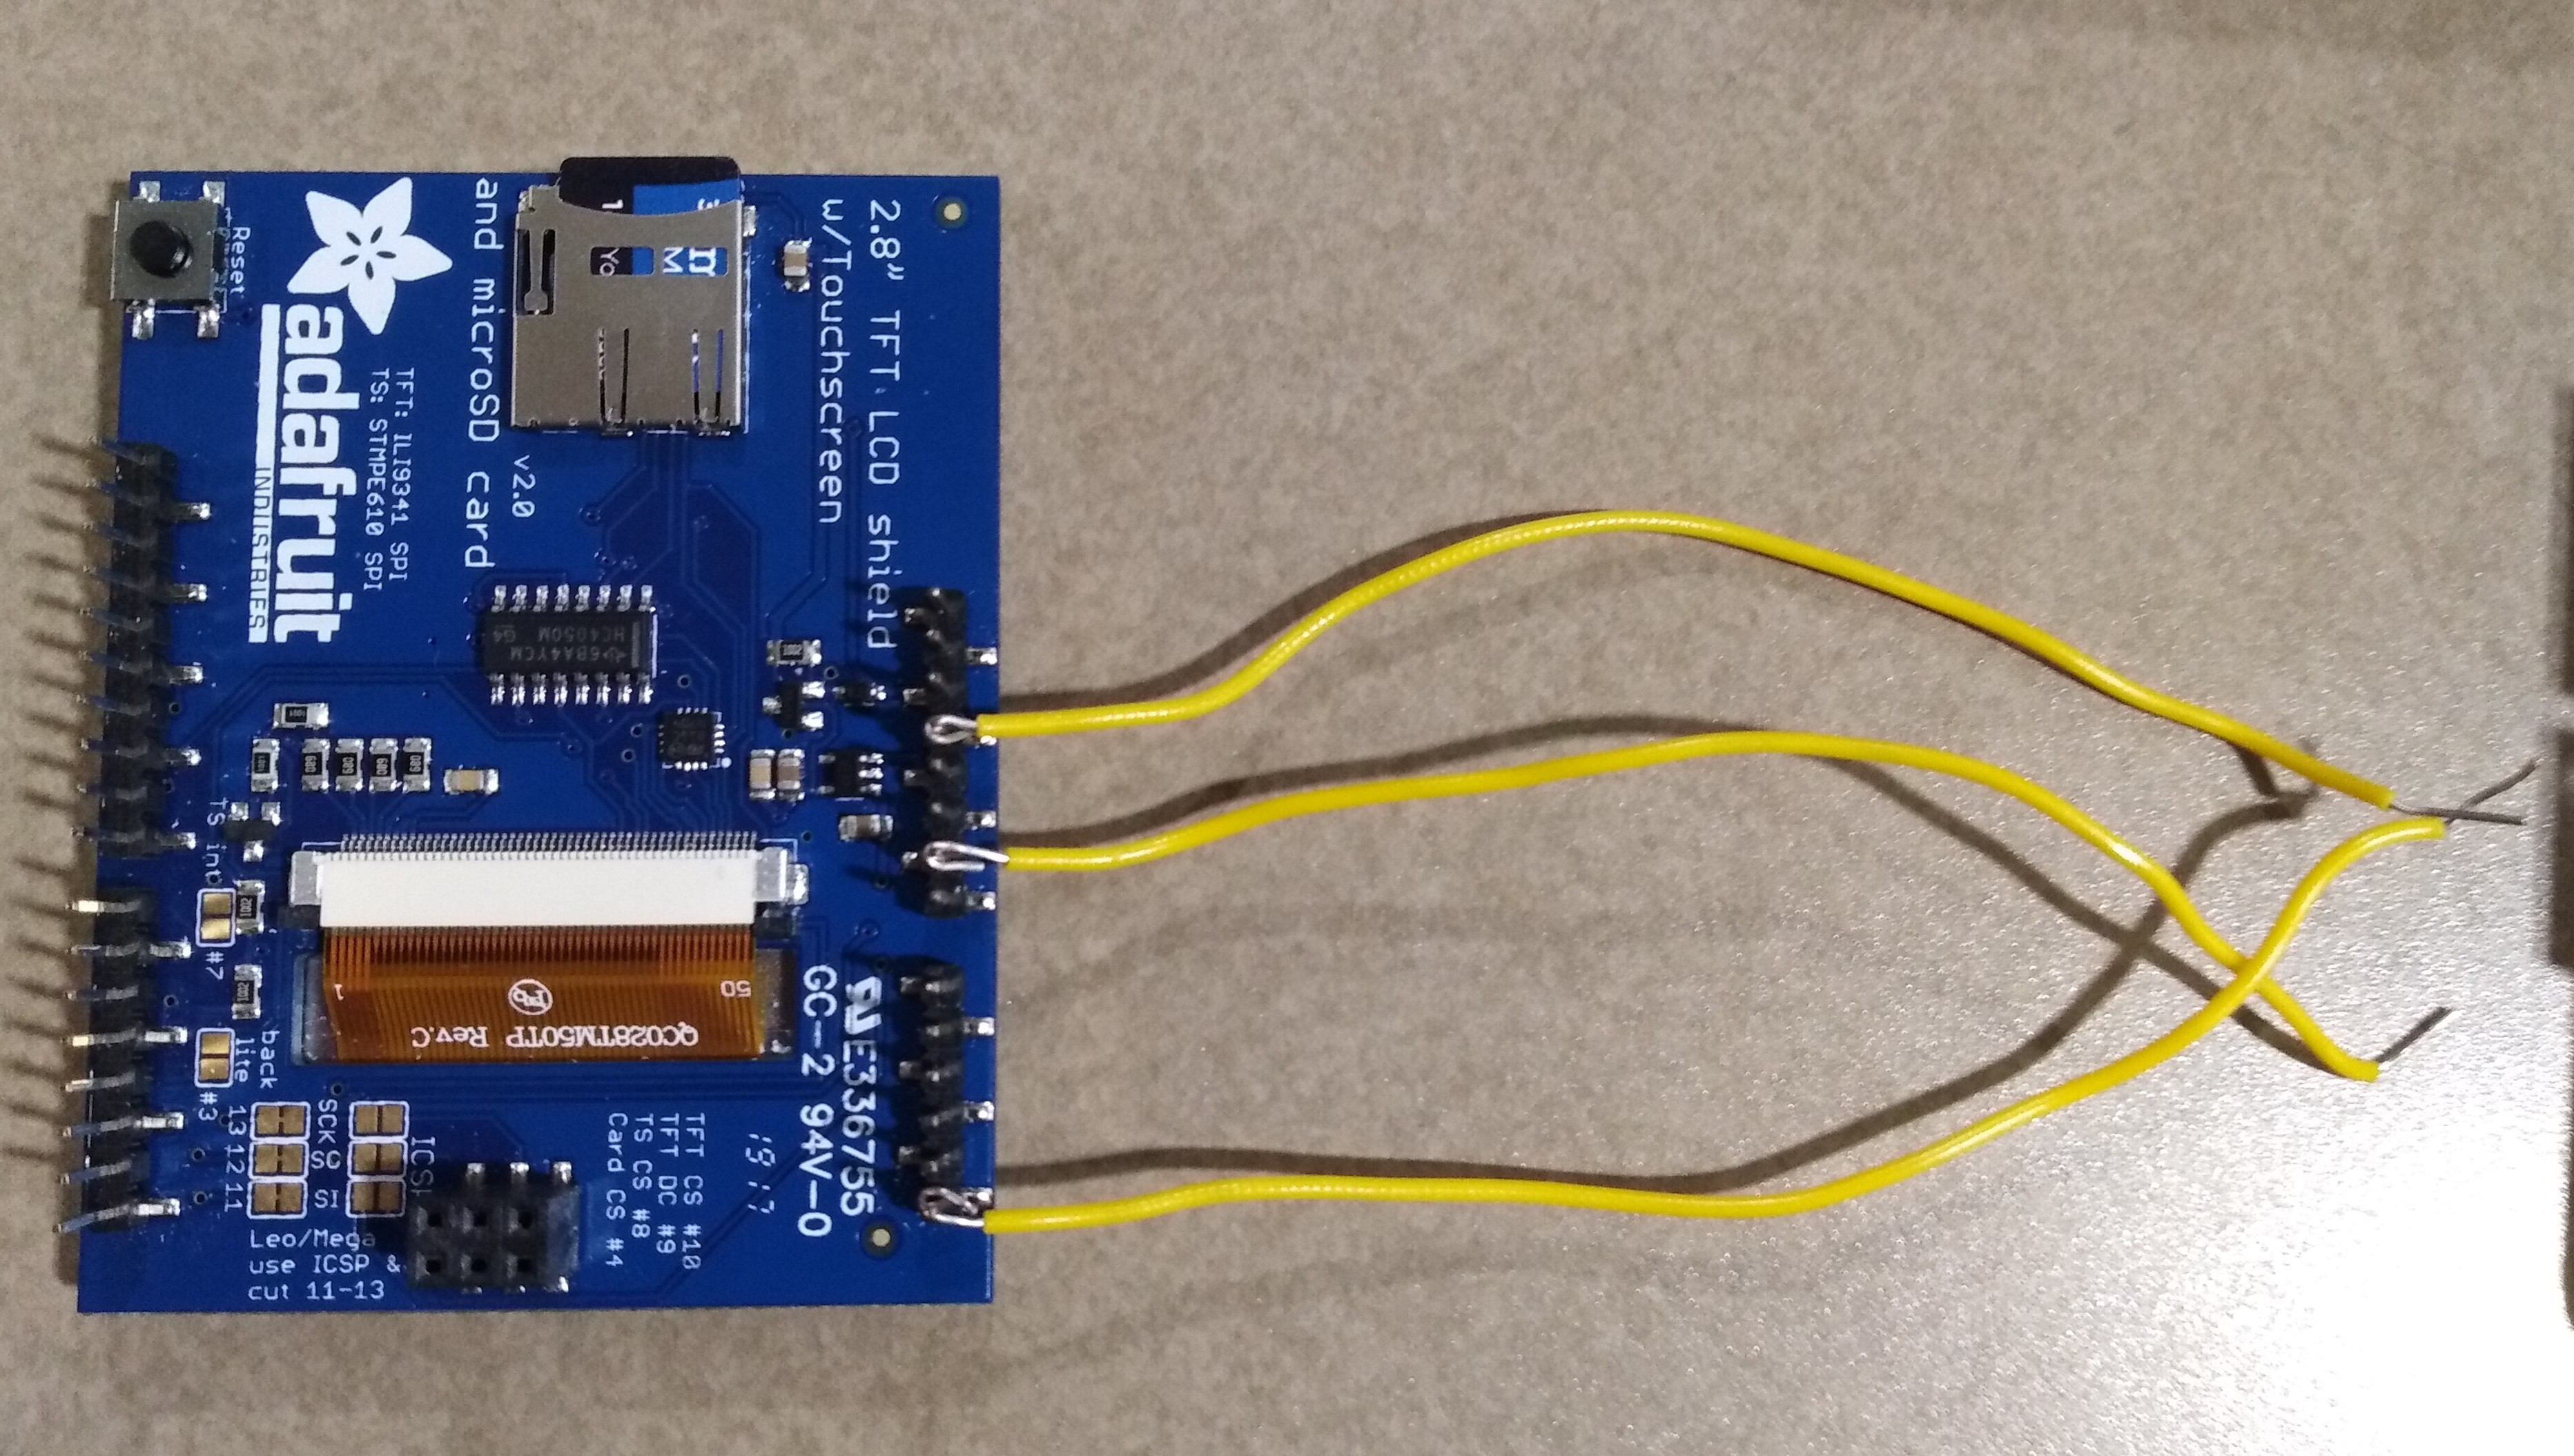
Attach the loops you made onto the TFT Touch Shield pins that correspond to the 3.3V output, GND and A5 analog pin on the Arduino.
Tip: If you're not sure which ones to attach it to, you may use the ones depicted in the picture above.
Tighten the Wire Loops
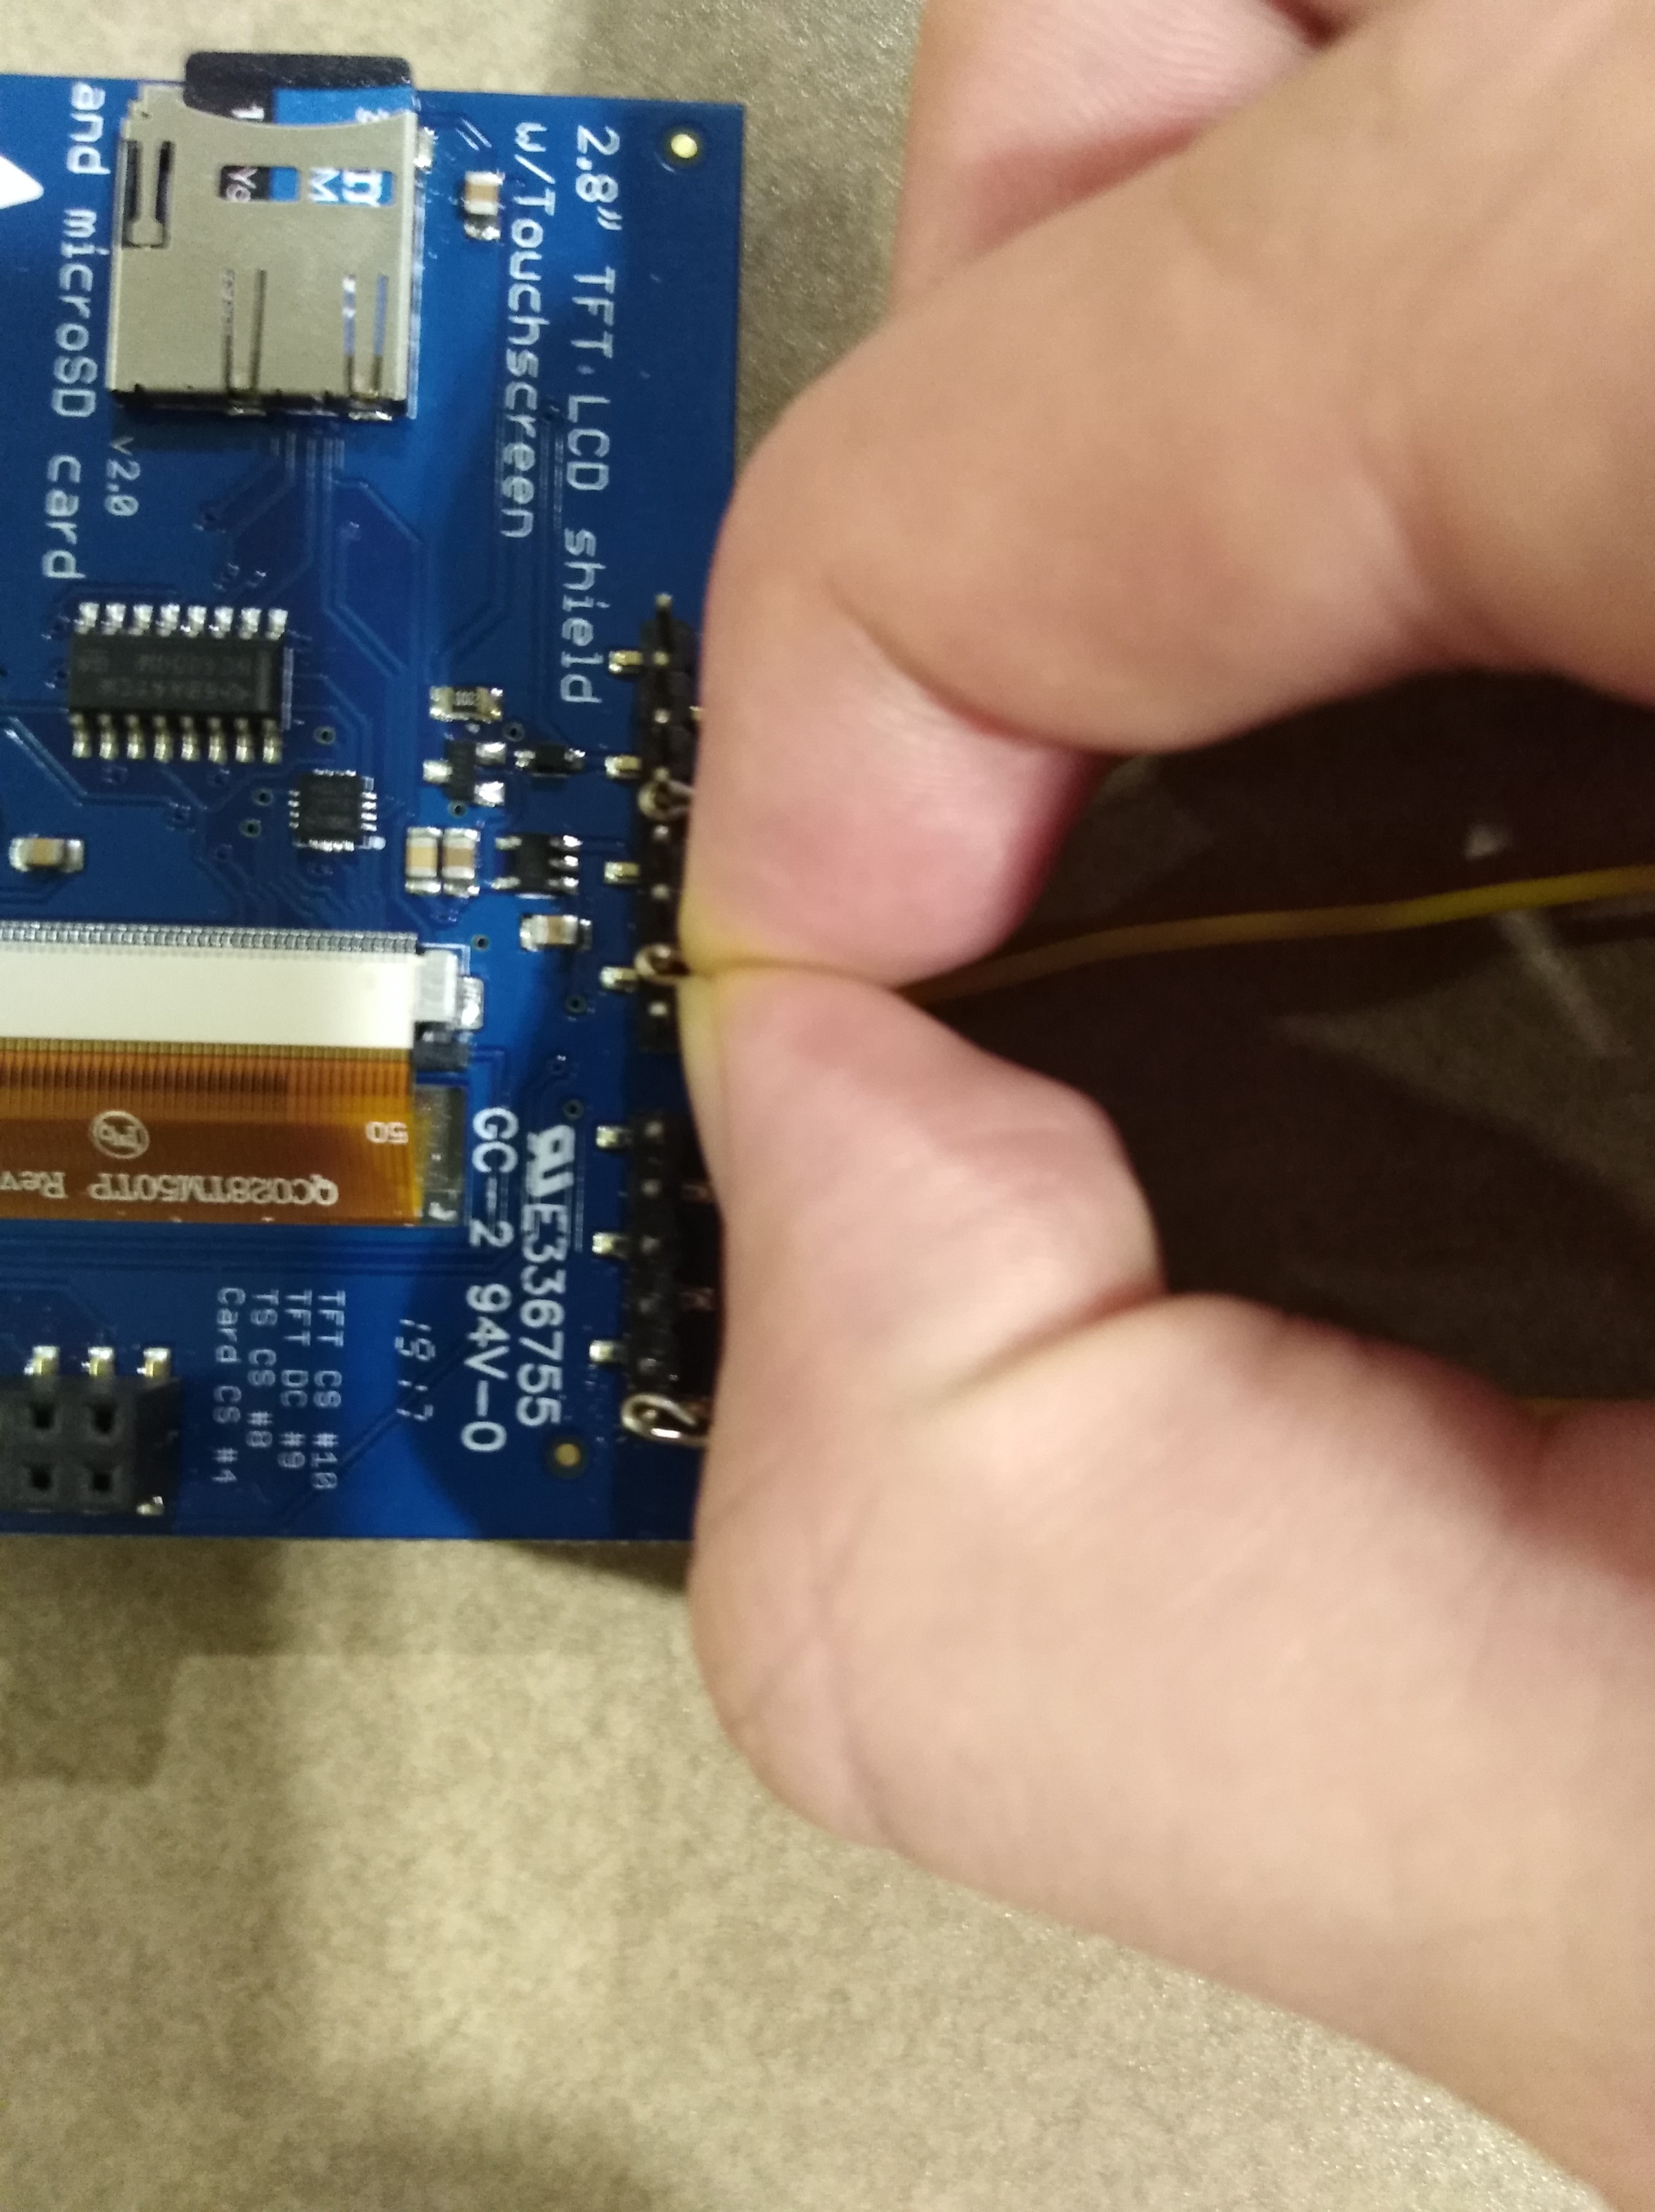
Pinch the metal part of the wire loop to tighten it. This will ensure a better connection.
Plug in the TFT Touch Shield
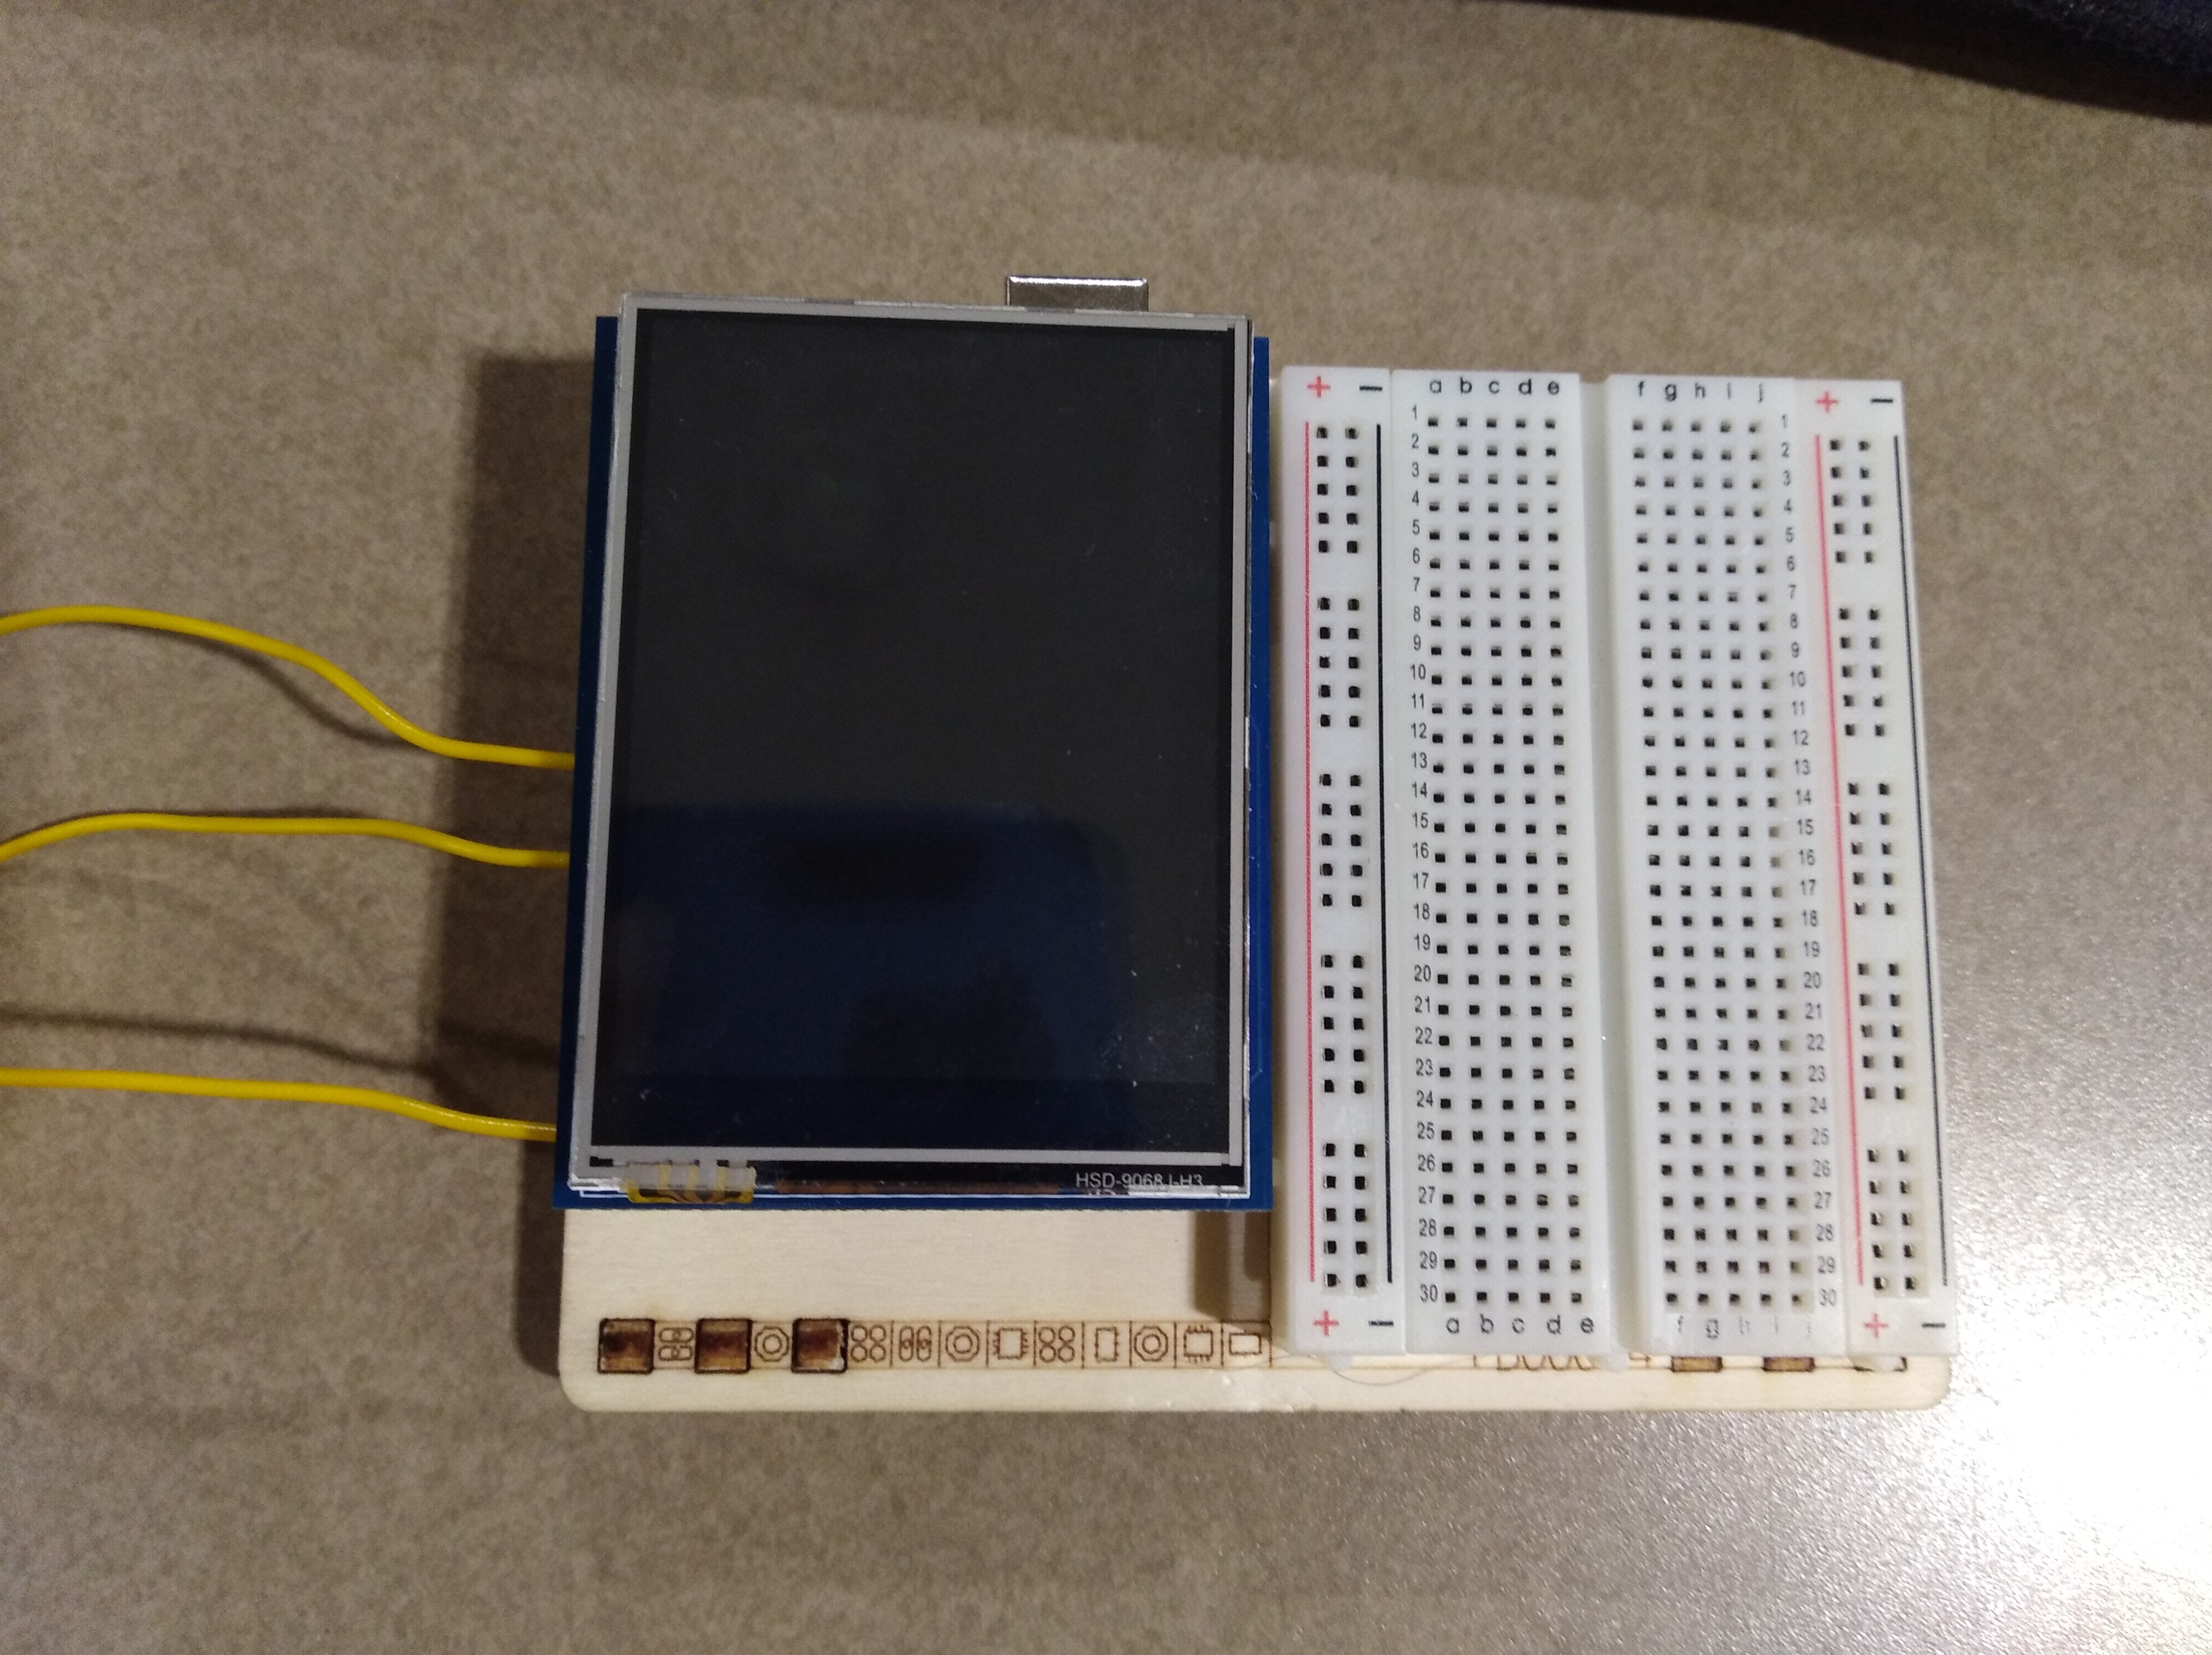
Use your fingers to secure the wires in their places and flip the TFT Touch Shield over. Plug it into the Arduino.
Plug the Wires Into the Breadboard.
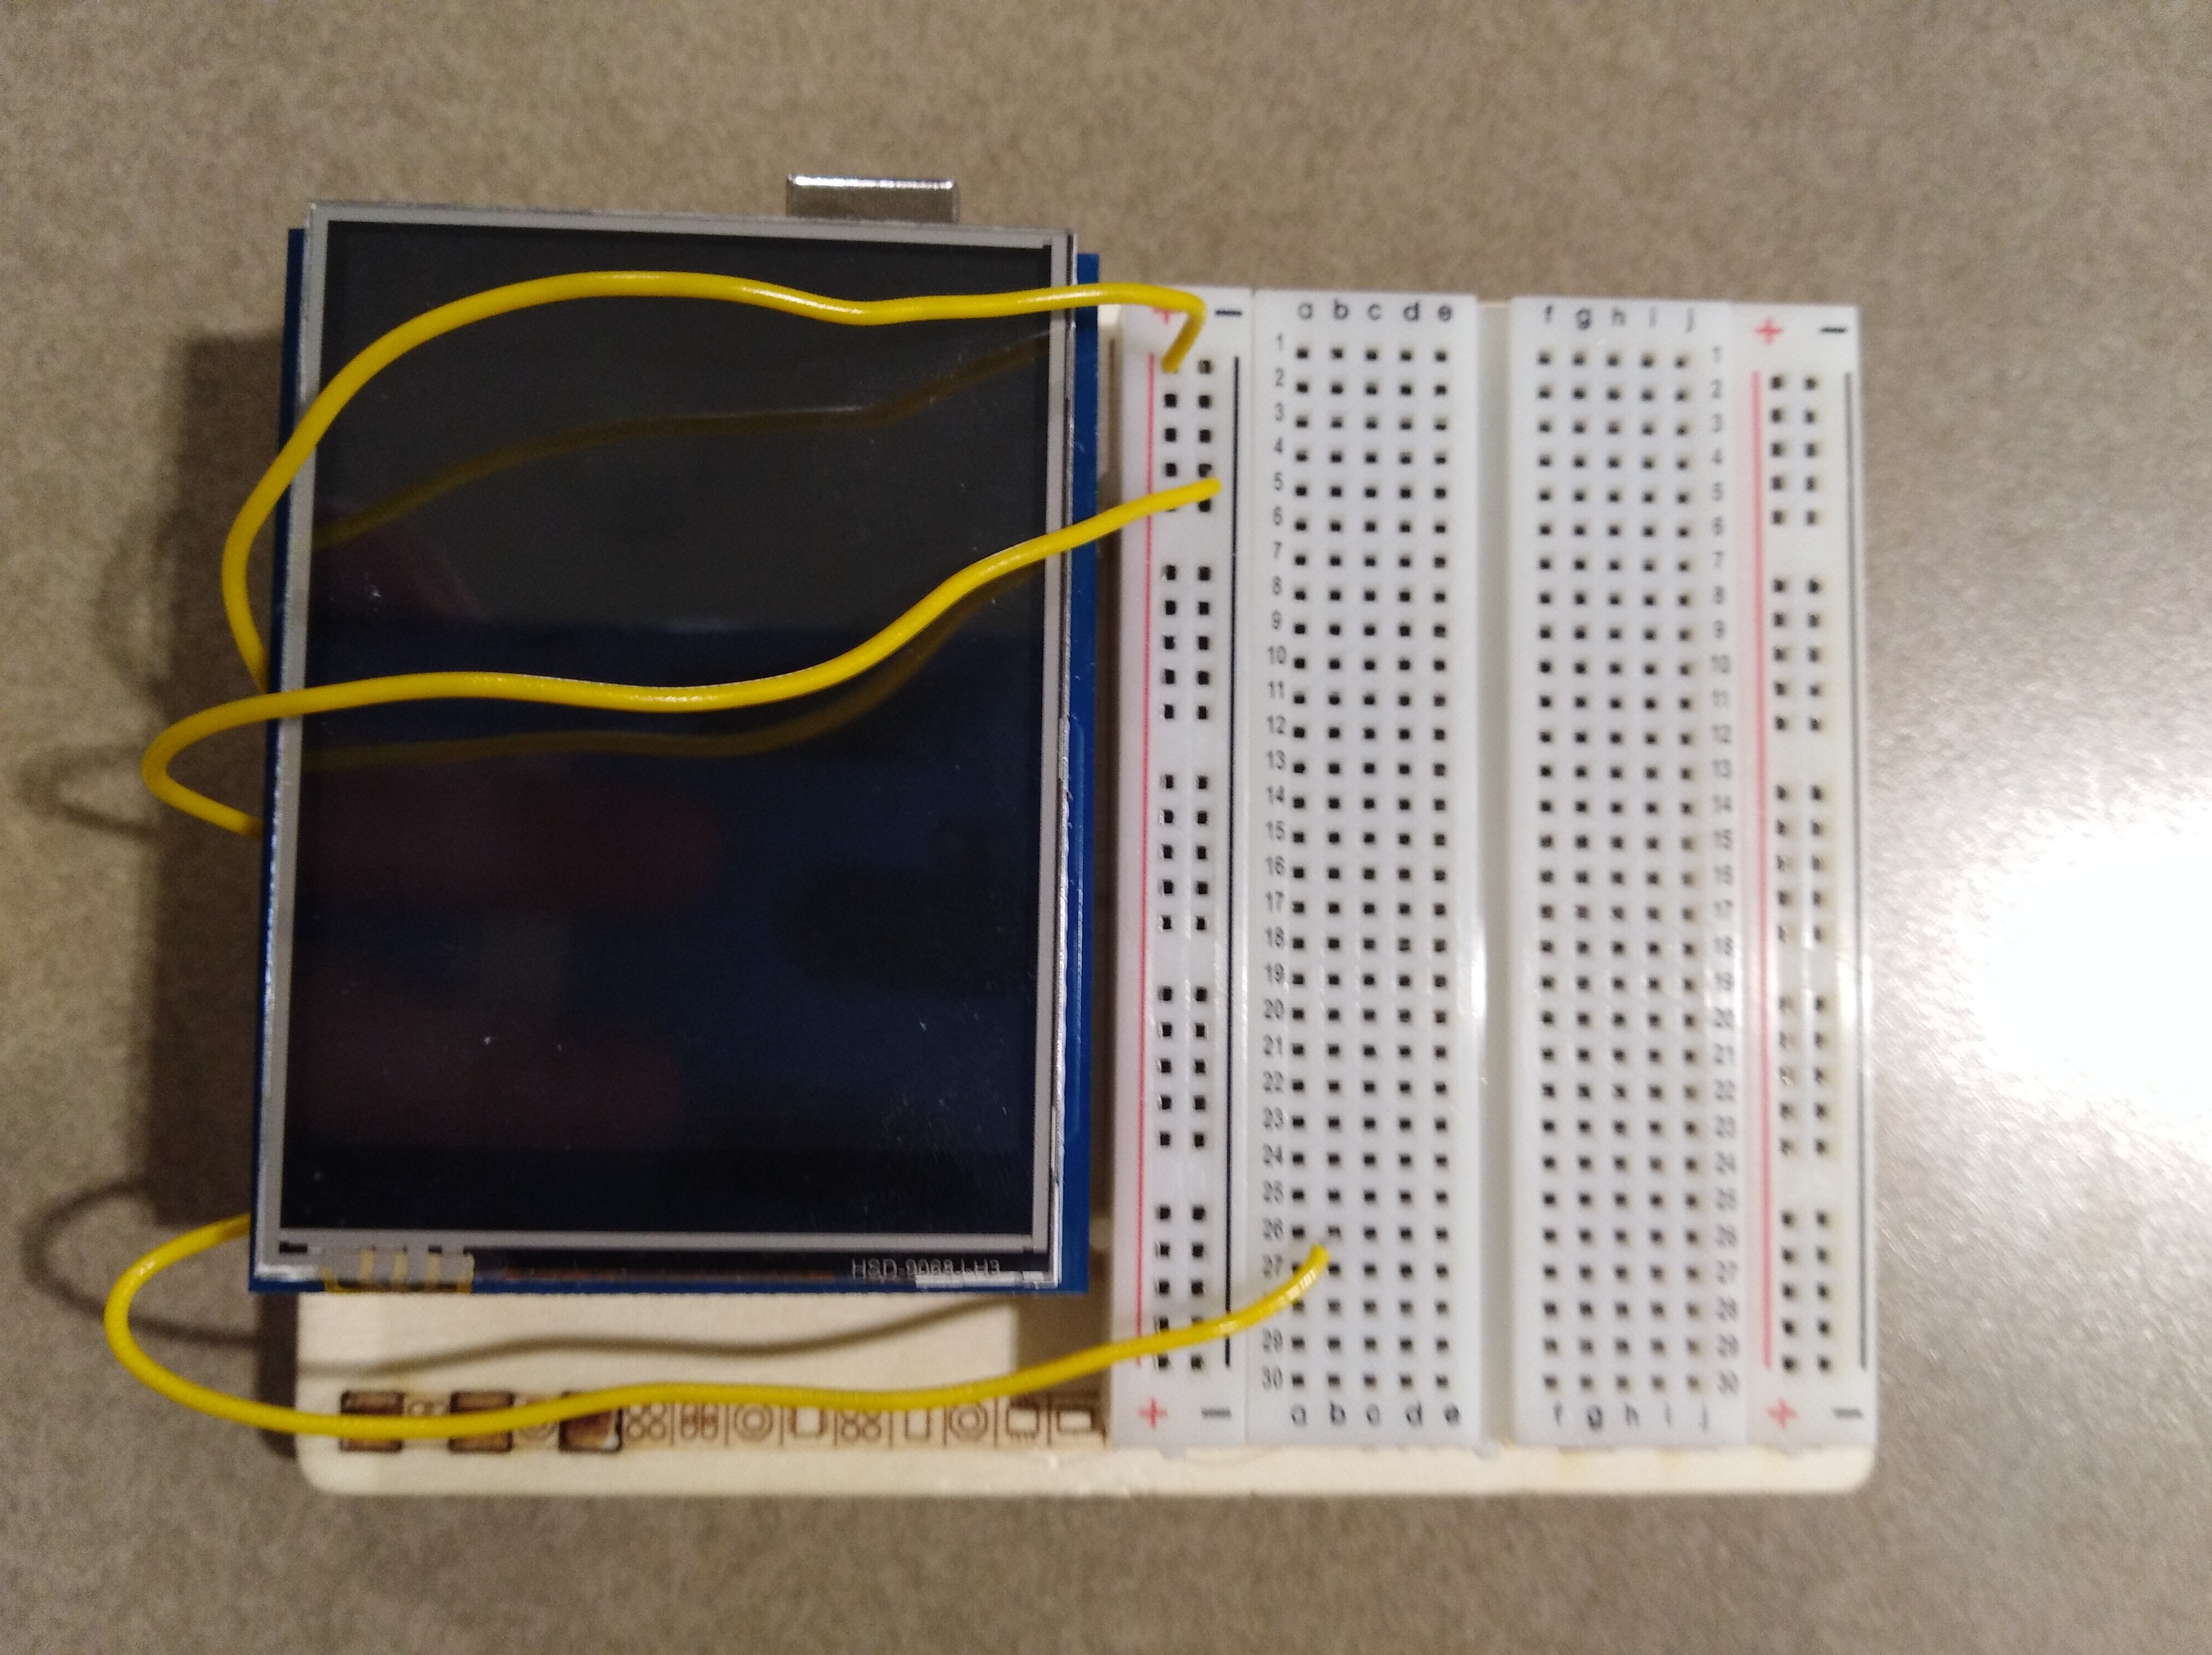
Connect the
- 3.3V wire to the + column on the breadboard.
- GND wire to the - column on the breadboard.
- A5 wire to any row on the breadboard.
Tip: The wires you see running over the screen are for illustration purposes. We opted to run the wires under the screen since the wires we had were too short.
Connect Your 3-lead Accessory
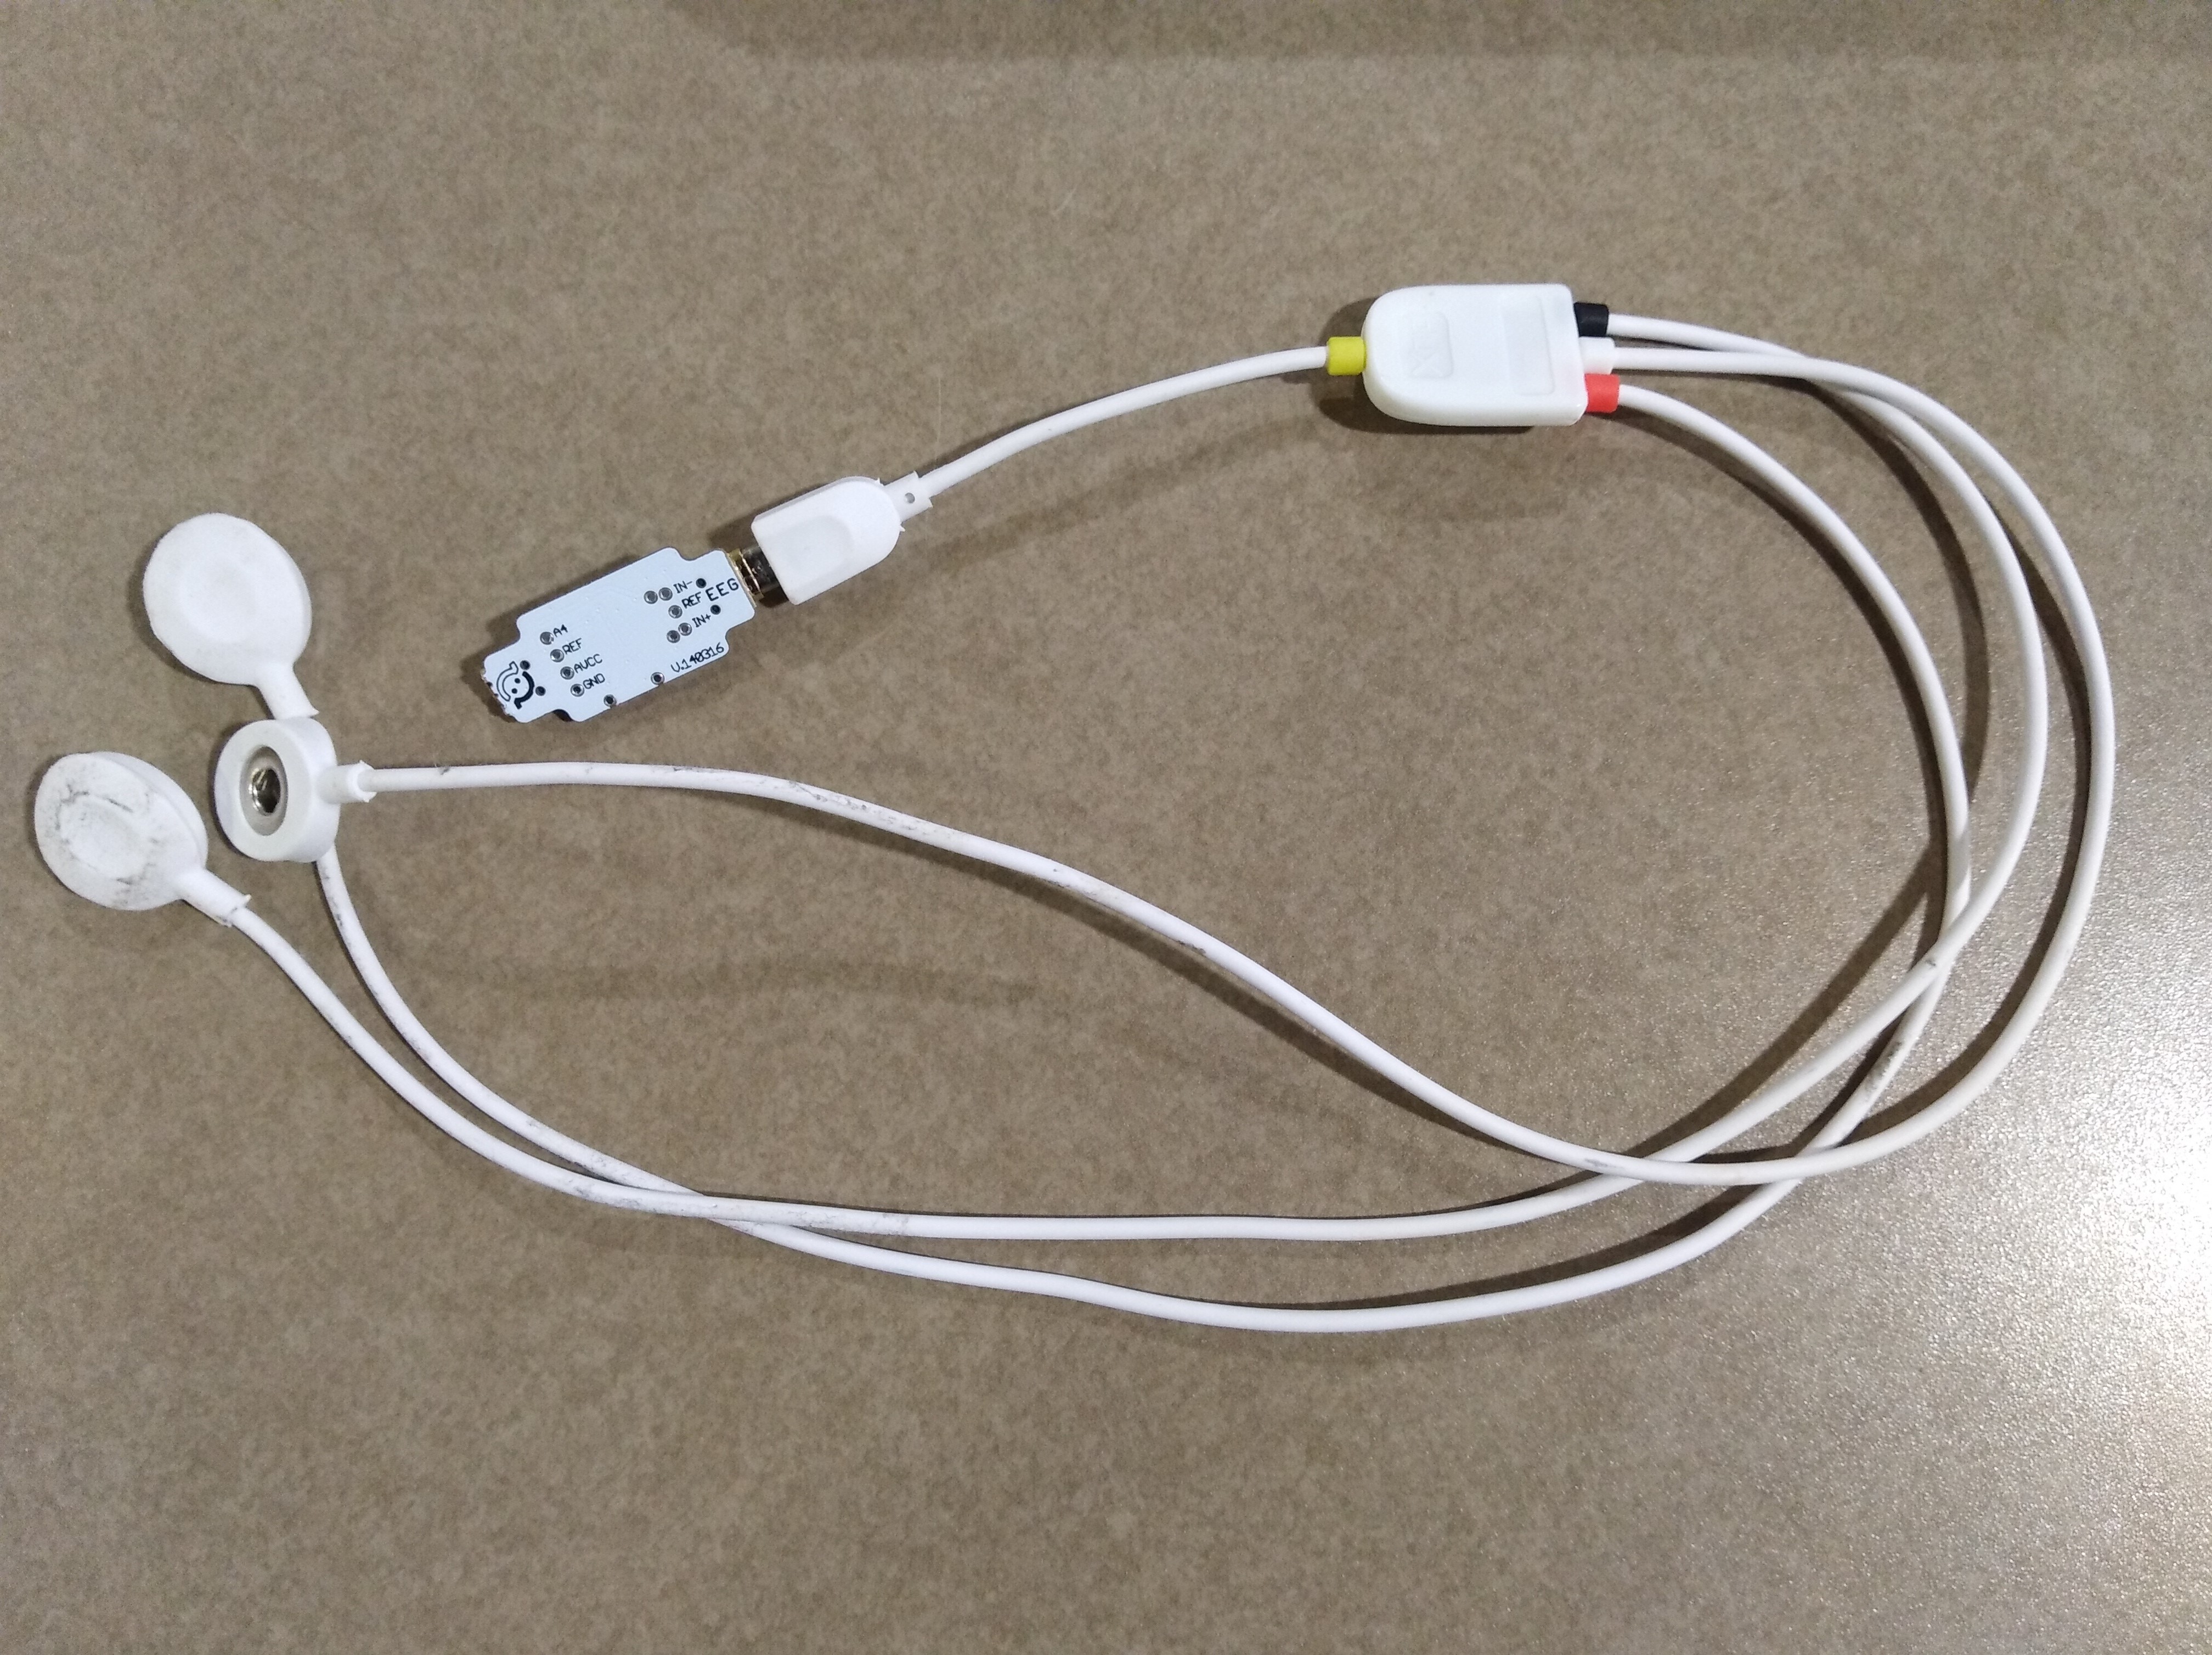
Connect the 3-lead accessory to the BITalino EEG sensor. Plug this in on the side which is labelled "EEG".
Connect Your EEG Sensor to a Wire
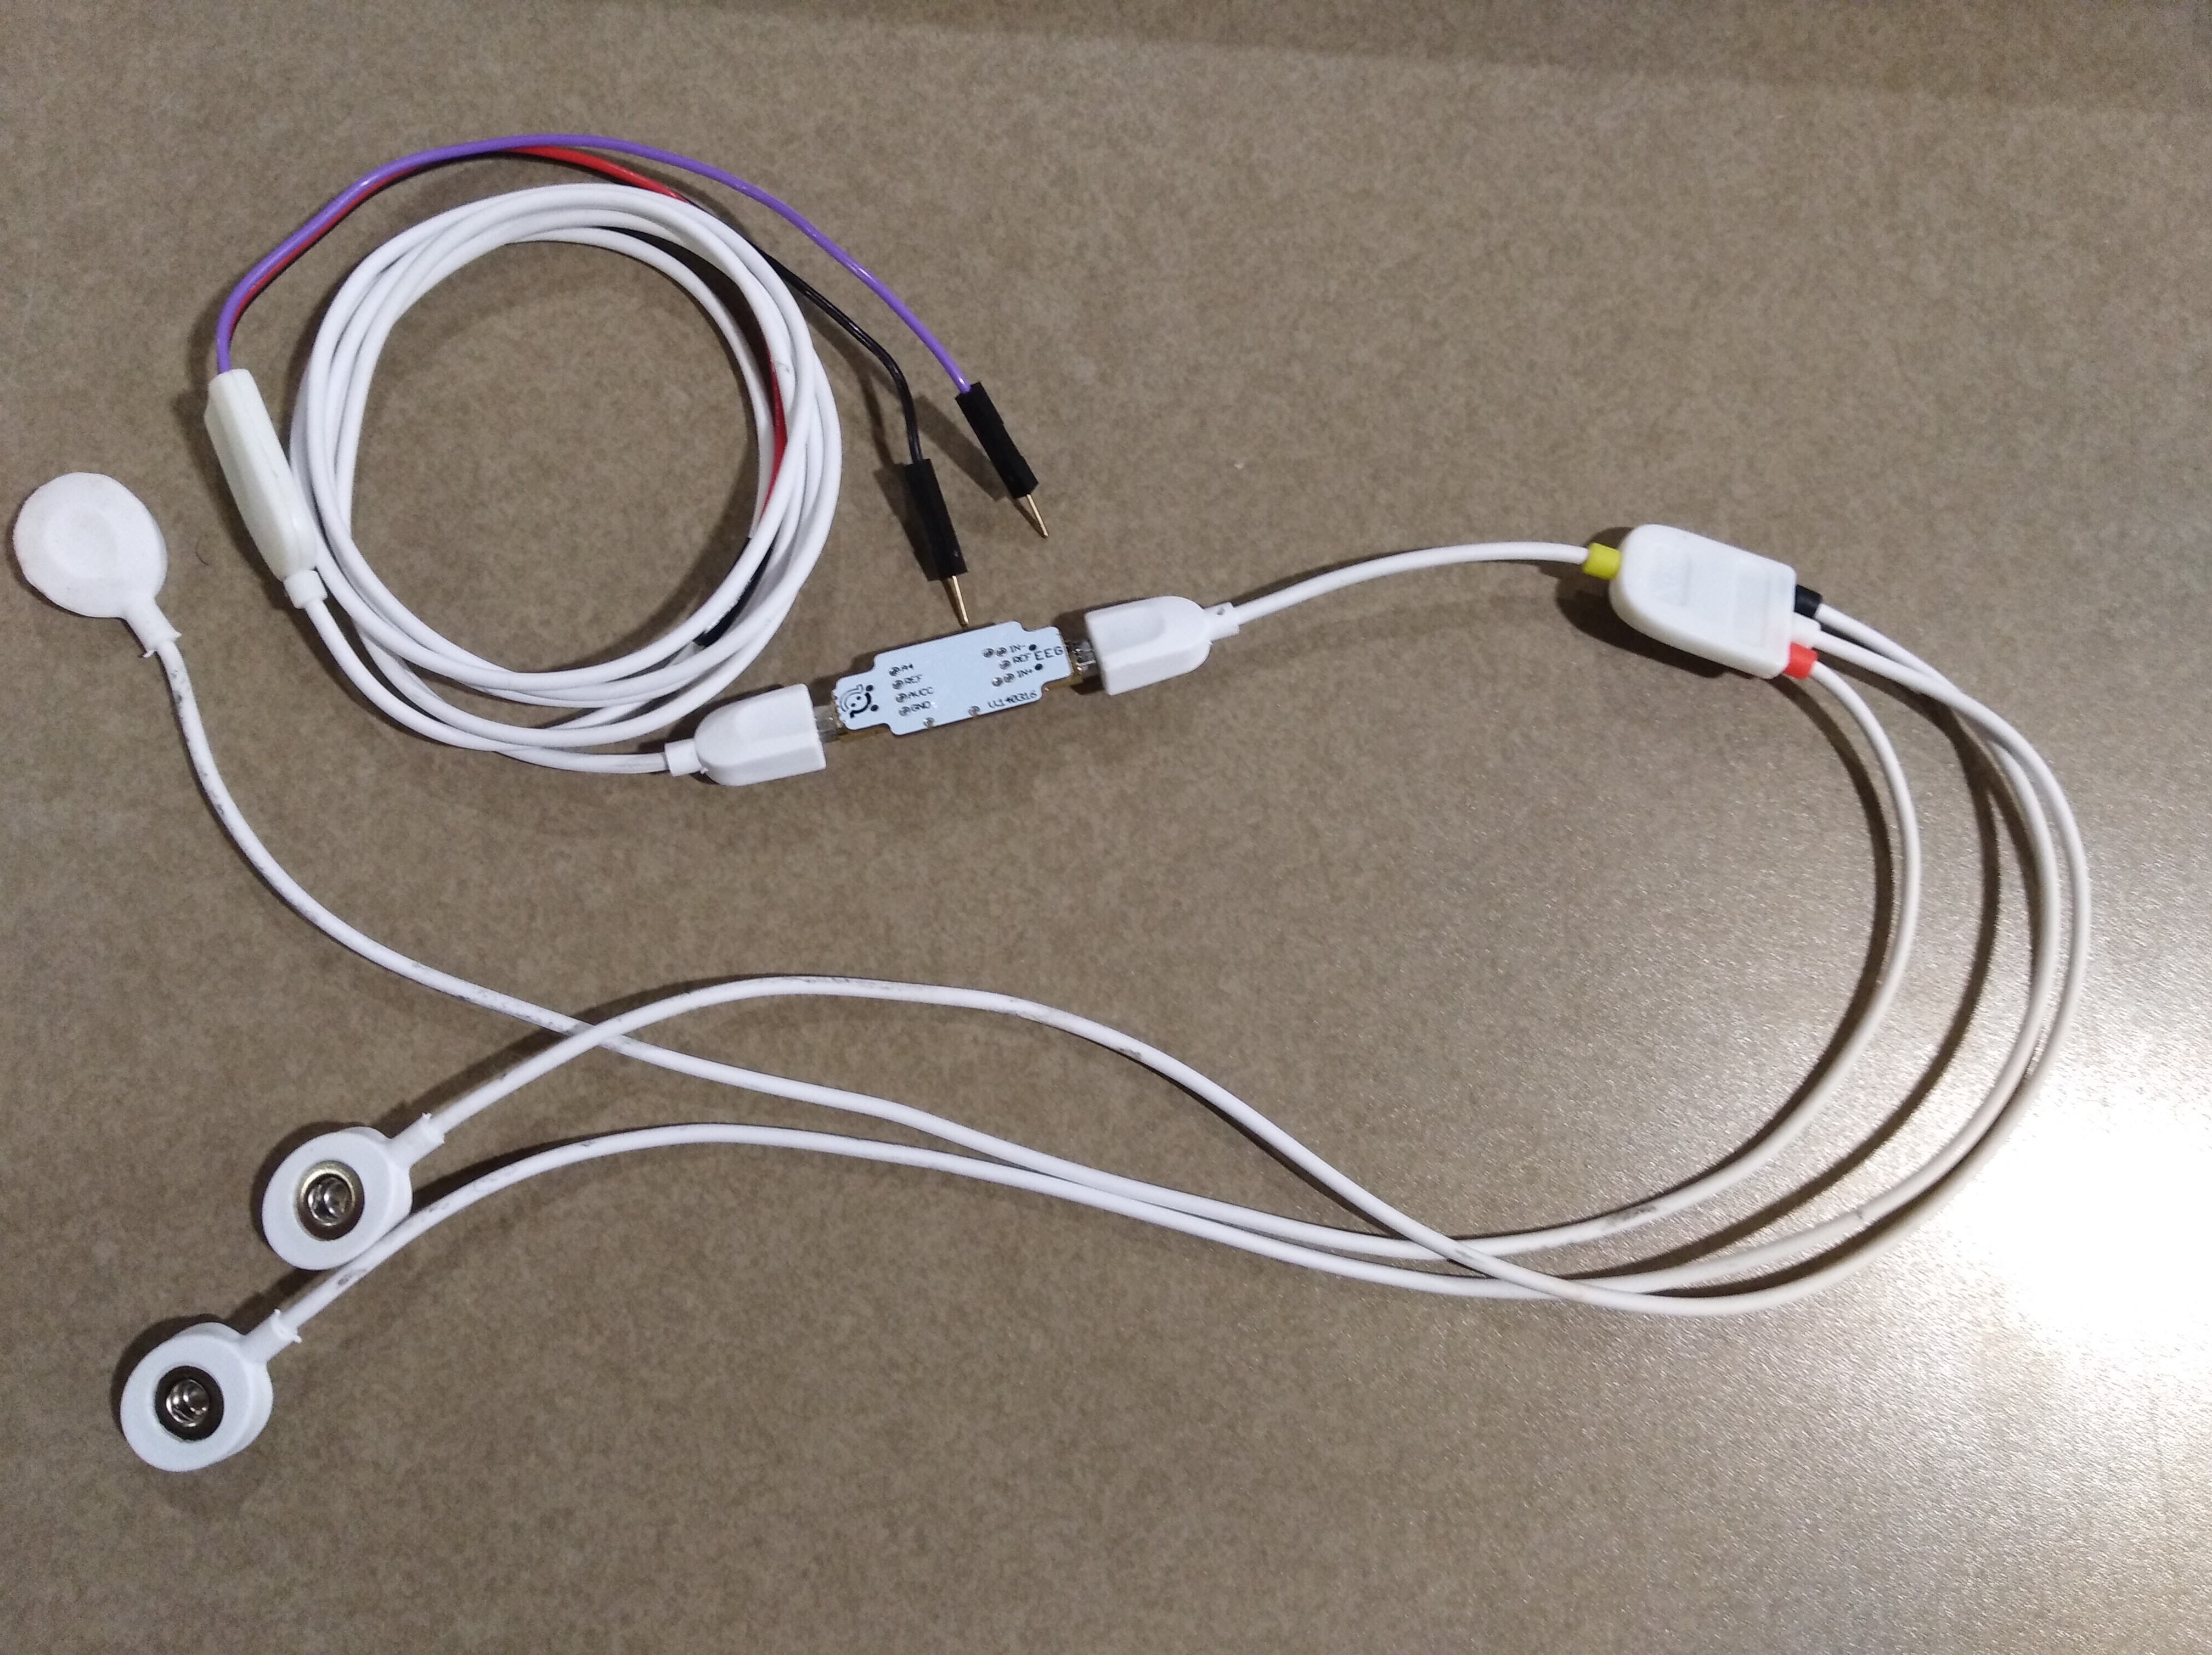
Connect your wire EEG sensor on the side with the BITalino logo on it.
Connect the EEG to the Breadboard
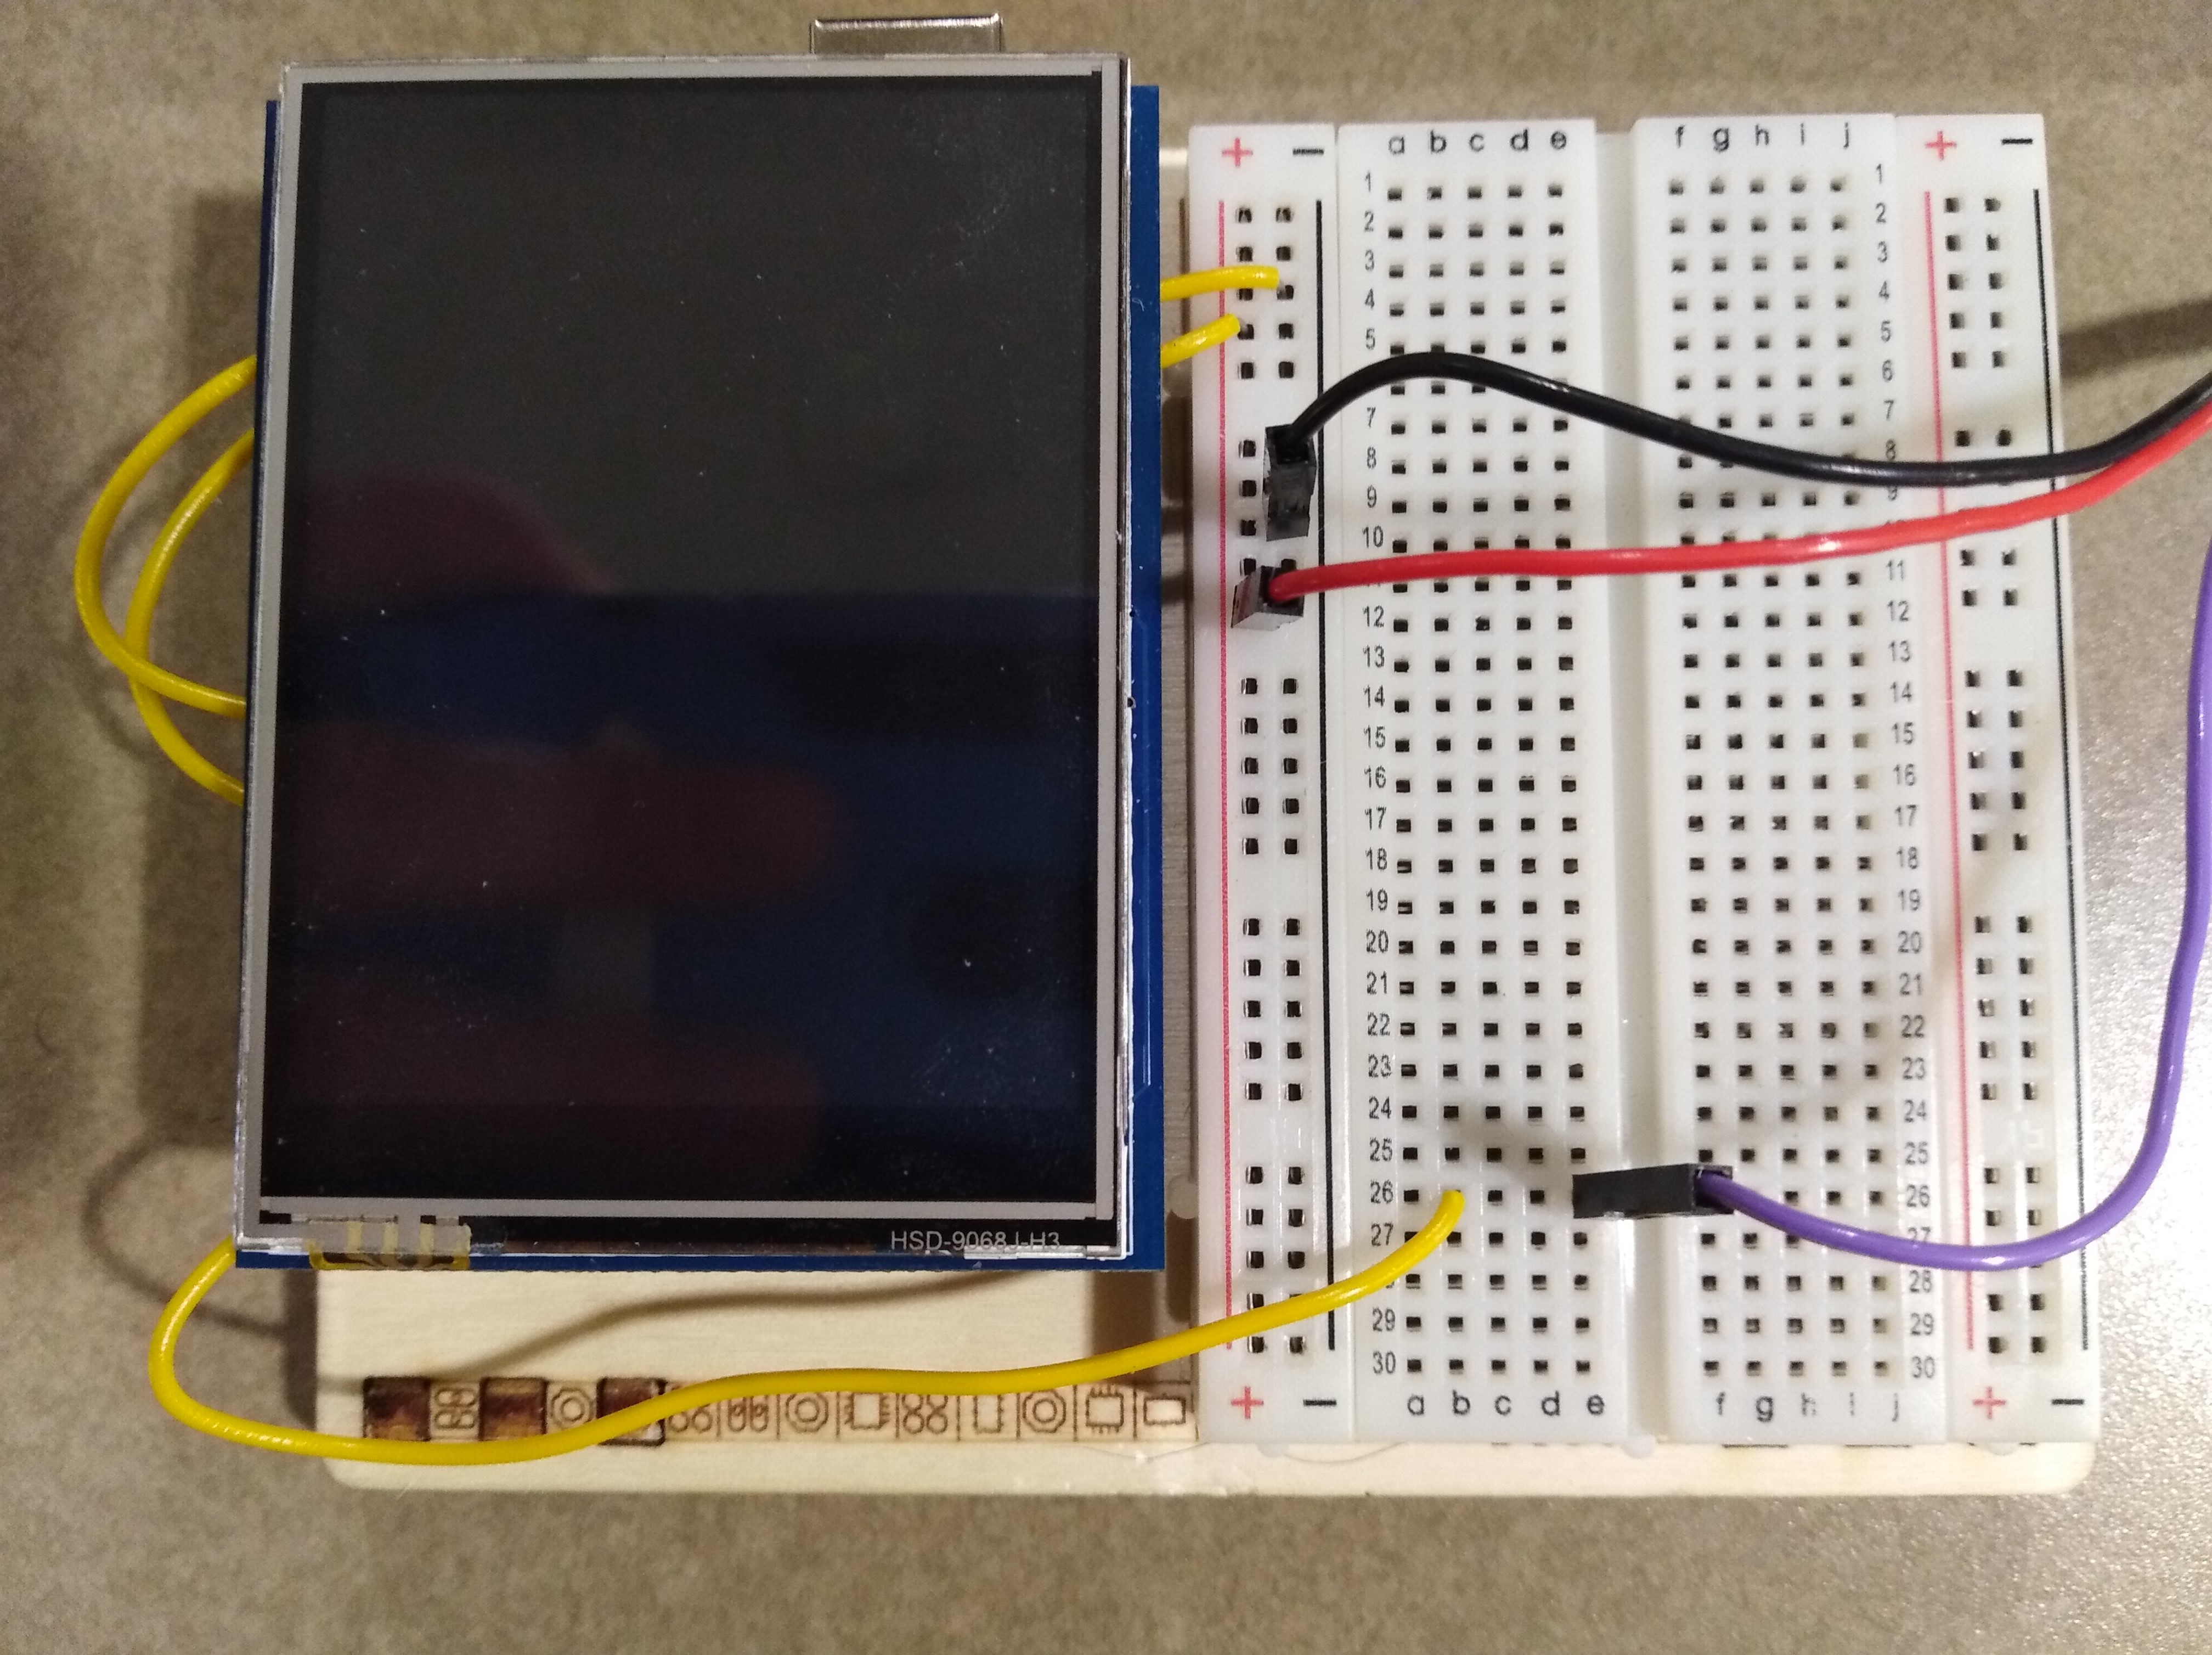
Connect the other end of the wires to breadboard as seen in the picture.
- Connect the red wire to the + column of the breadboard
- Connect the black wire to the - column of the breadboard
- Connect the purple wire to the row with the wire from the A5 pin.
Stick Electrodes to Your Forehead
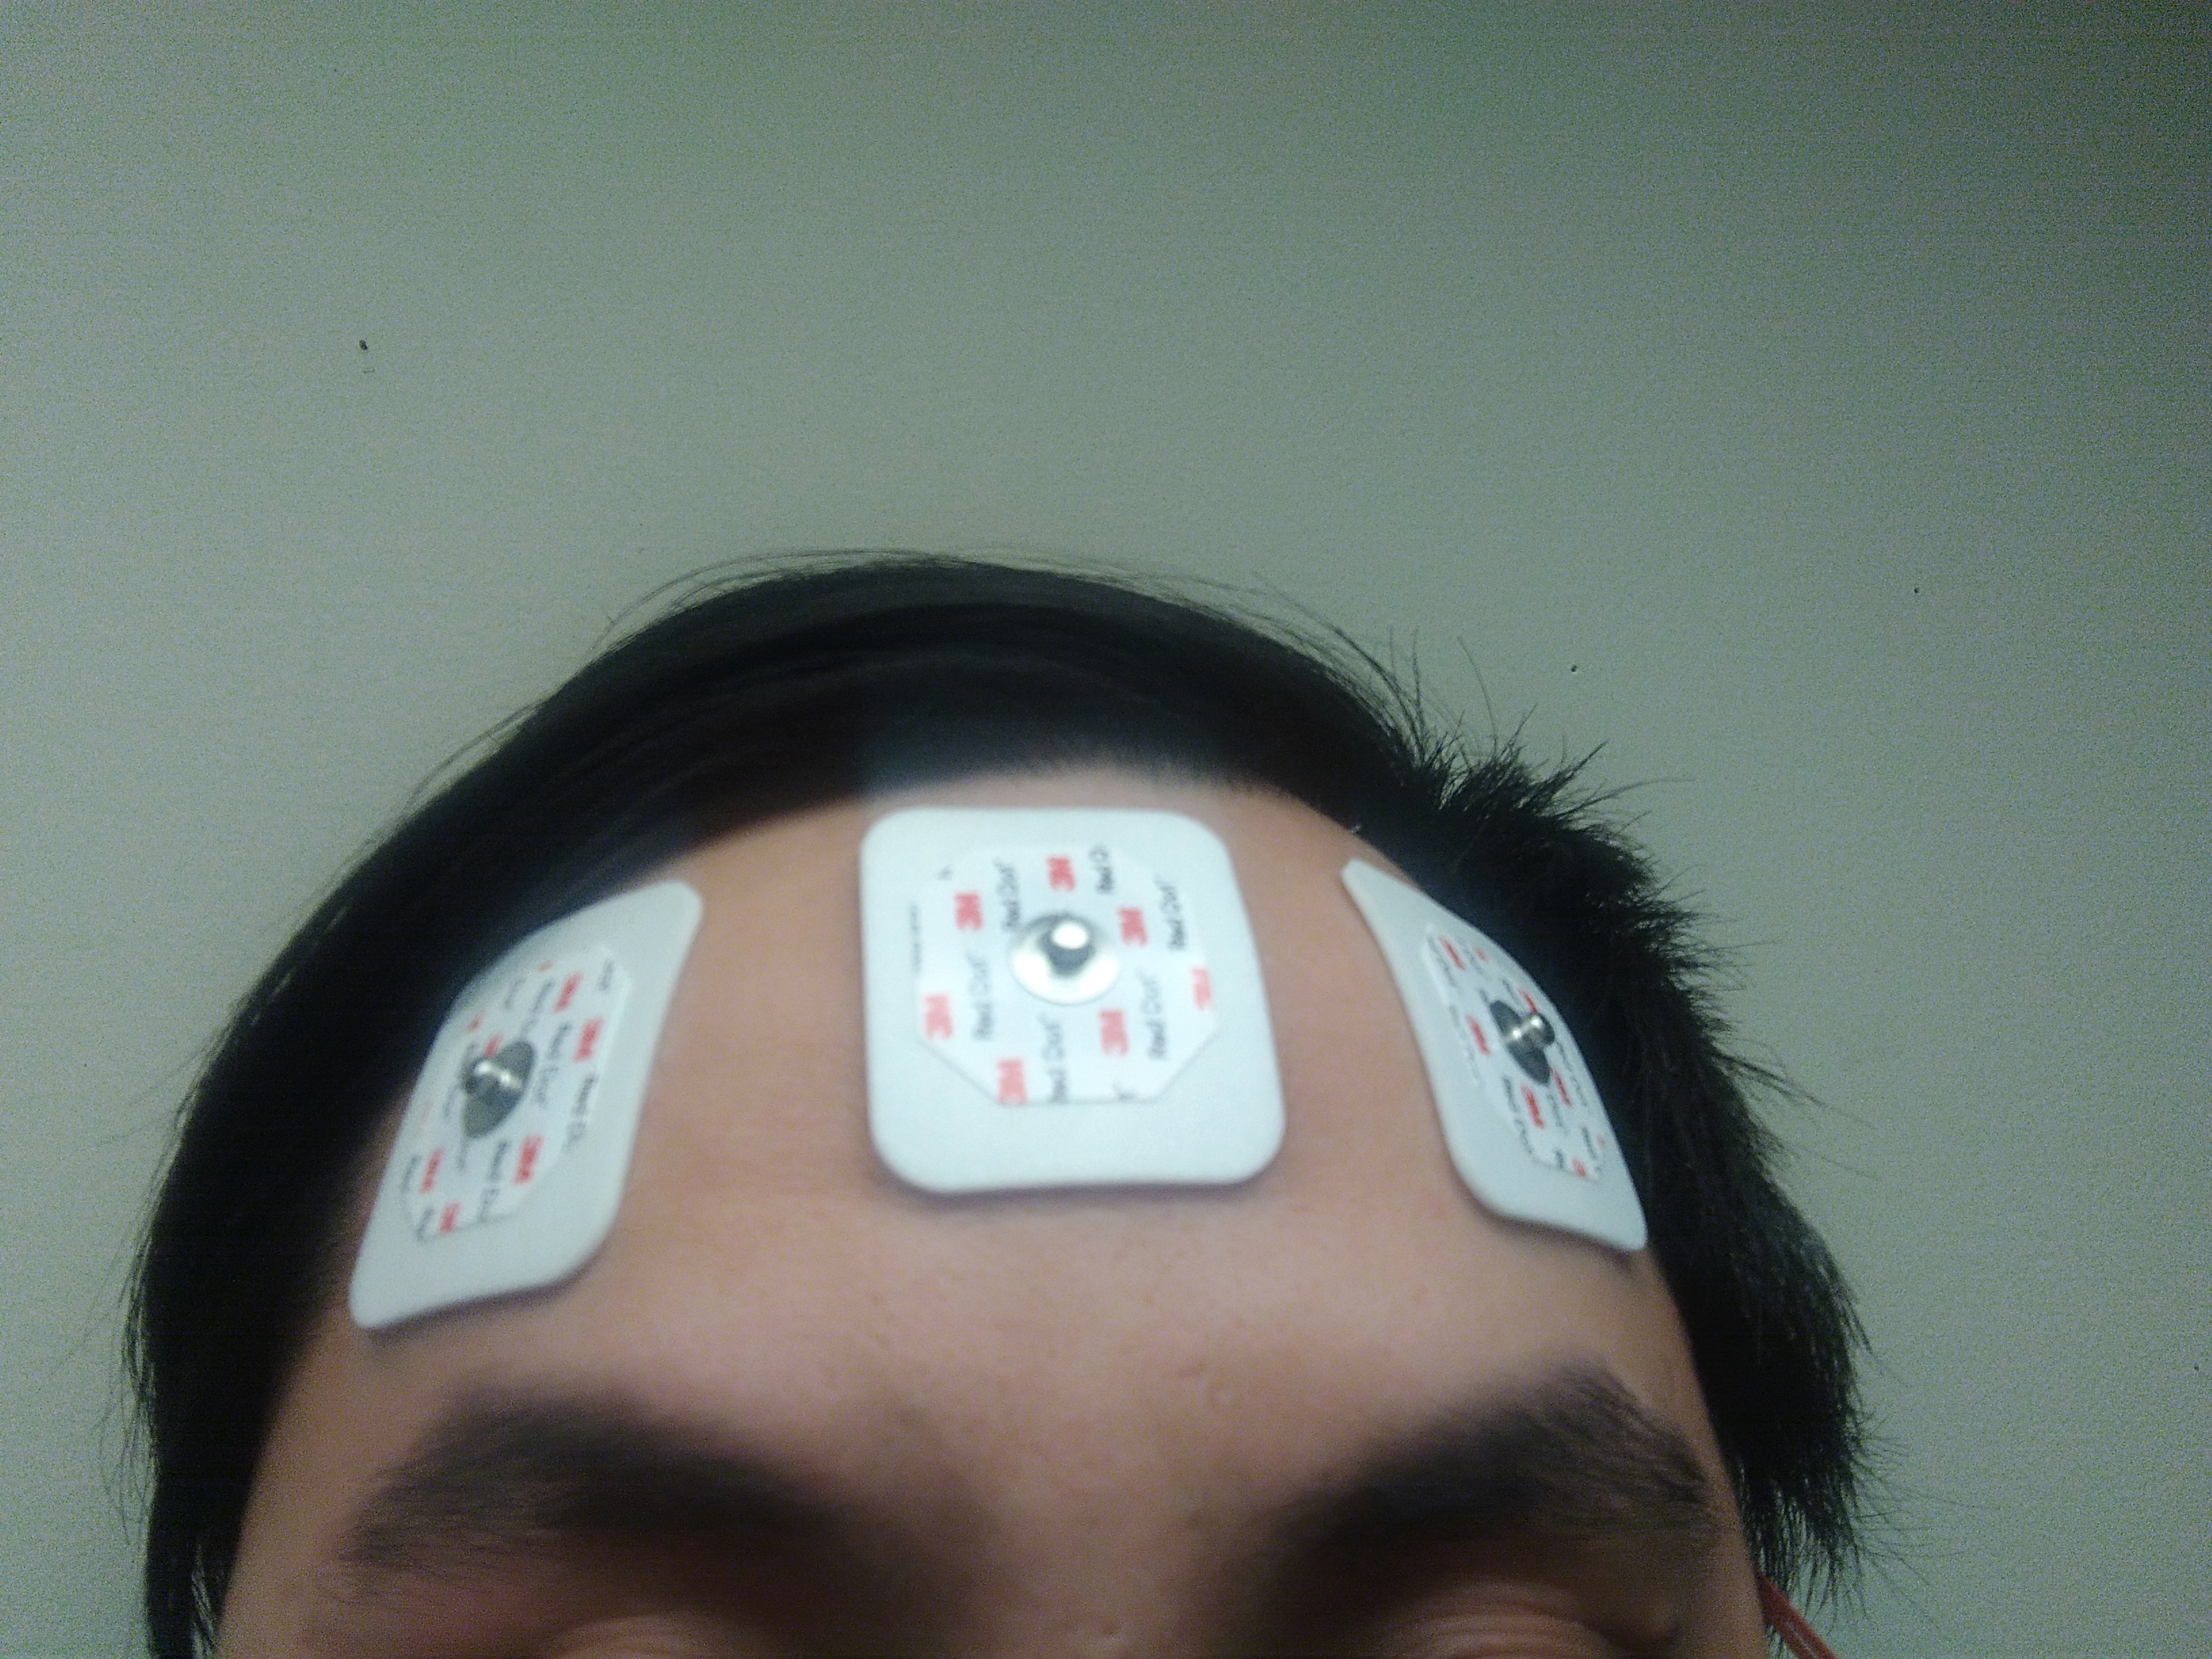
Peel off the electrodes and stick them to your forehead as seen in the picture.
Plug Yourself In!
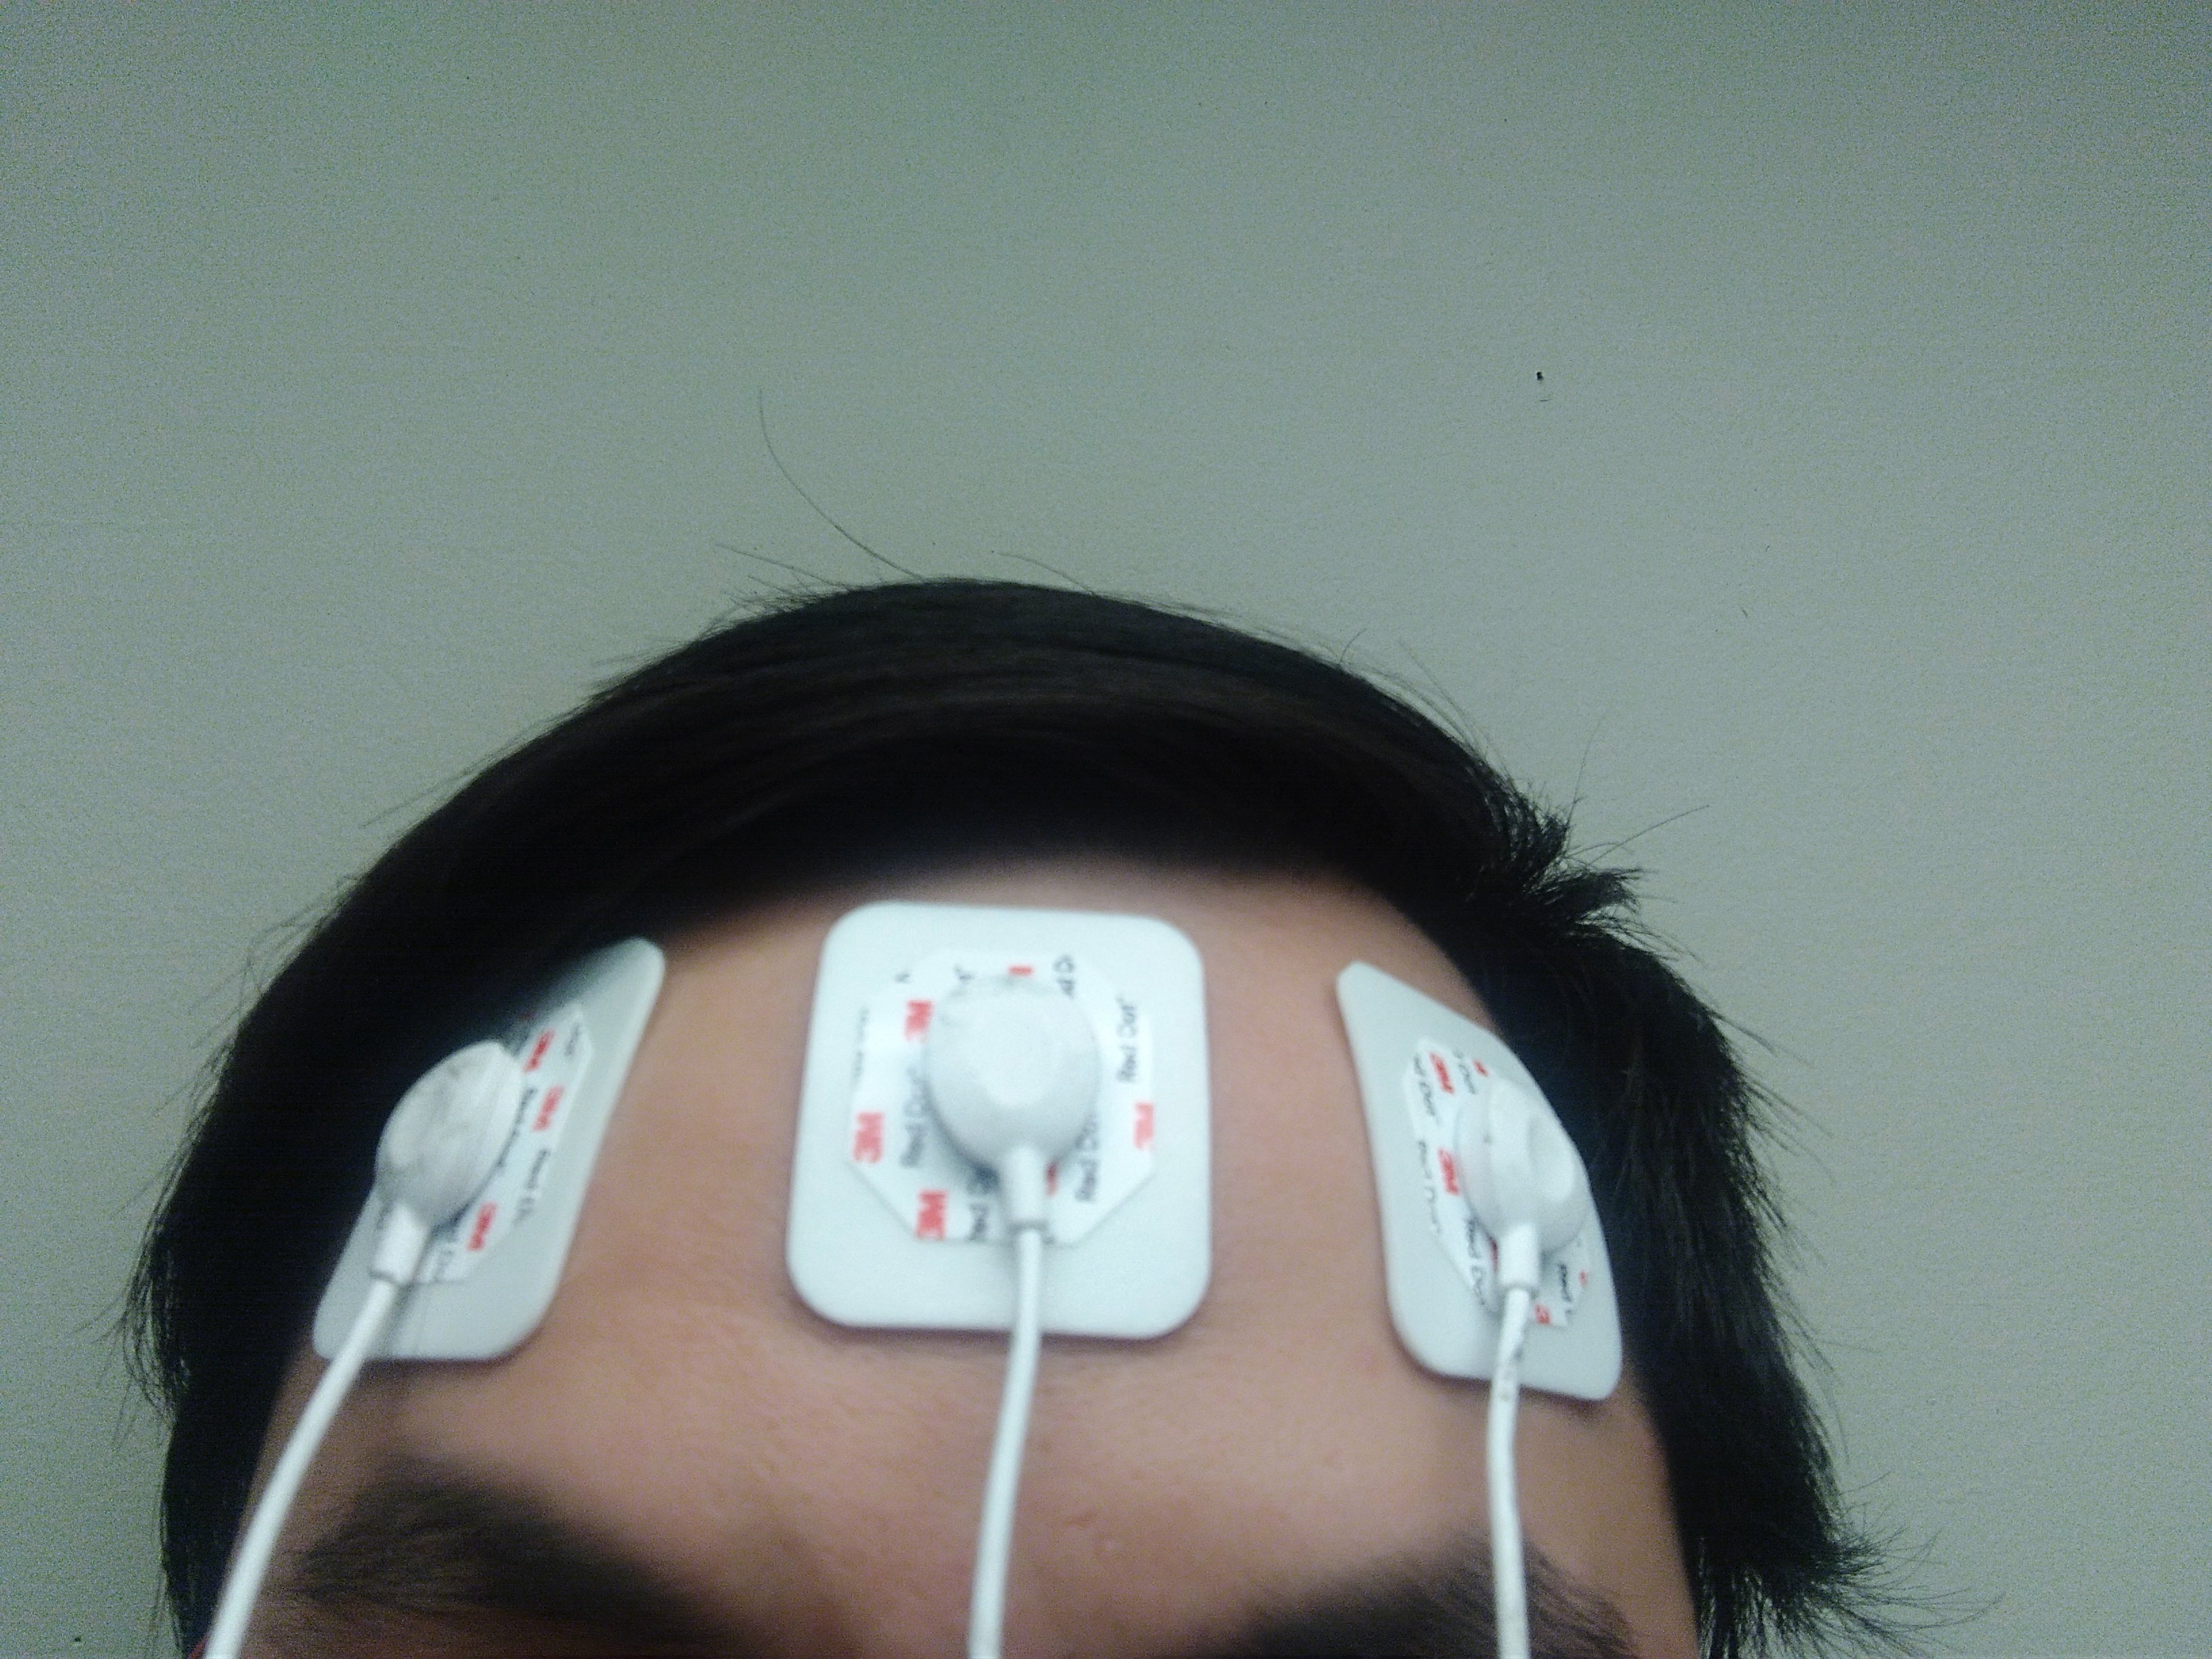
Become one with the circuit by connecting the ends of the 3-lead accessory to the electrodes on your forehead. The metal bit on the electrode should fit nicely into the holes of the 3-lead accessory.
It does not matter which lead goes to which electrode as long as the white one is in the middle.
Secure the Wires (optional)
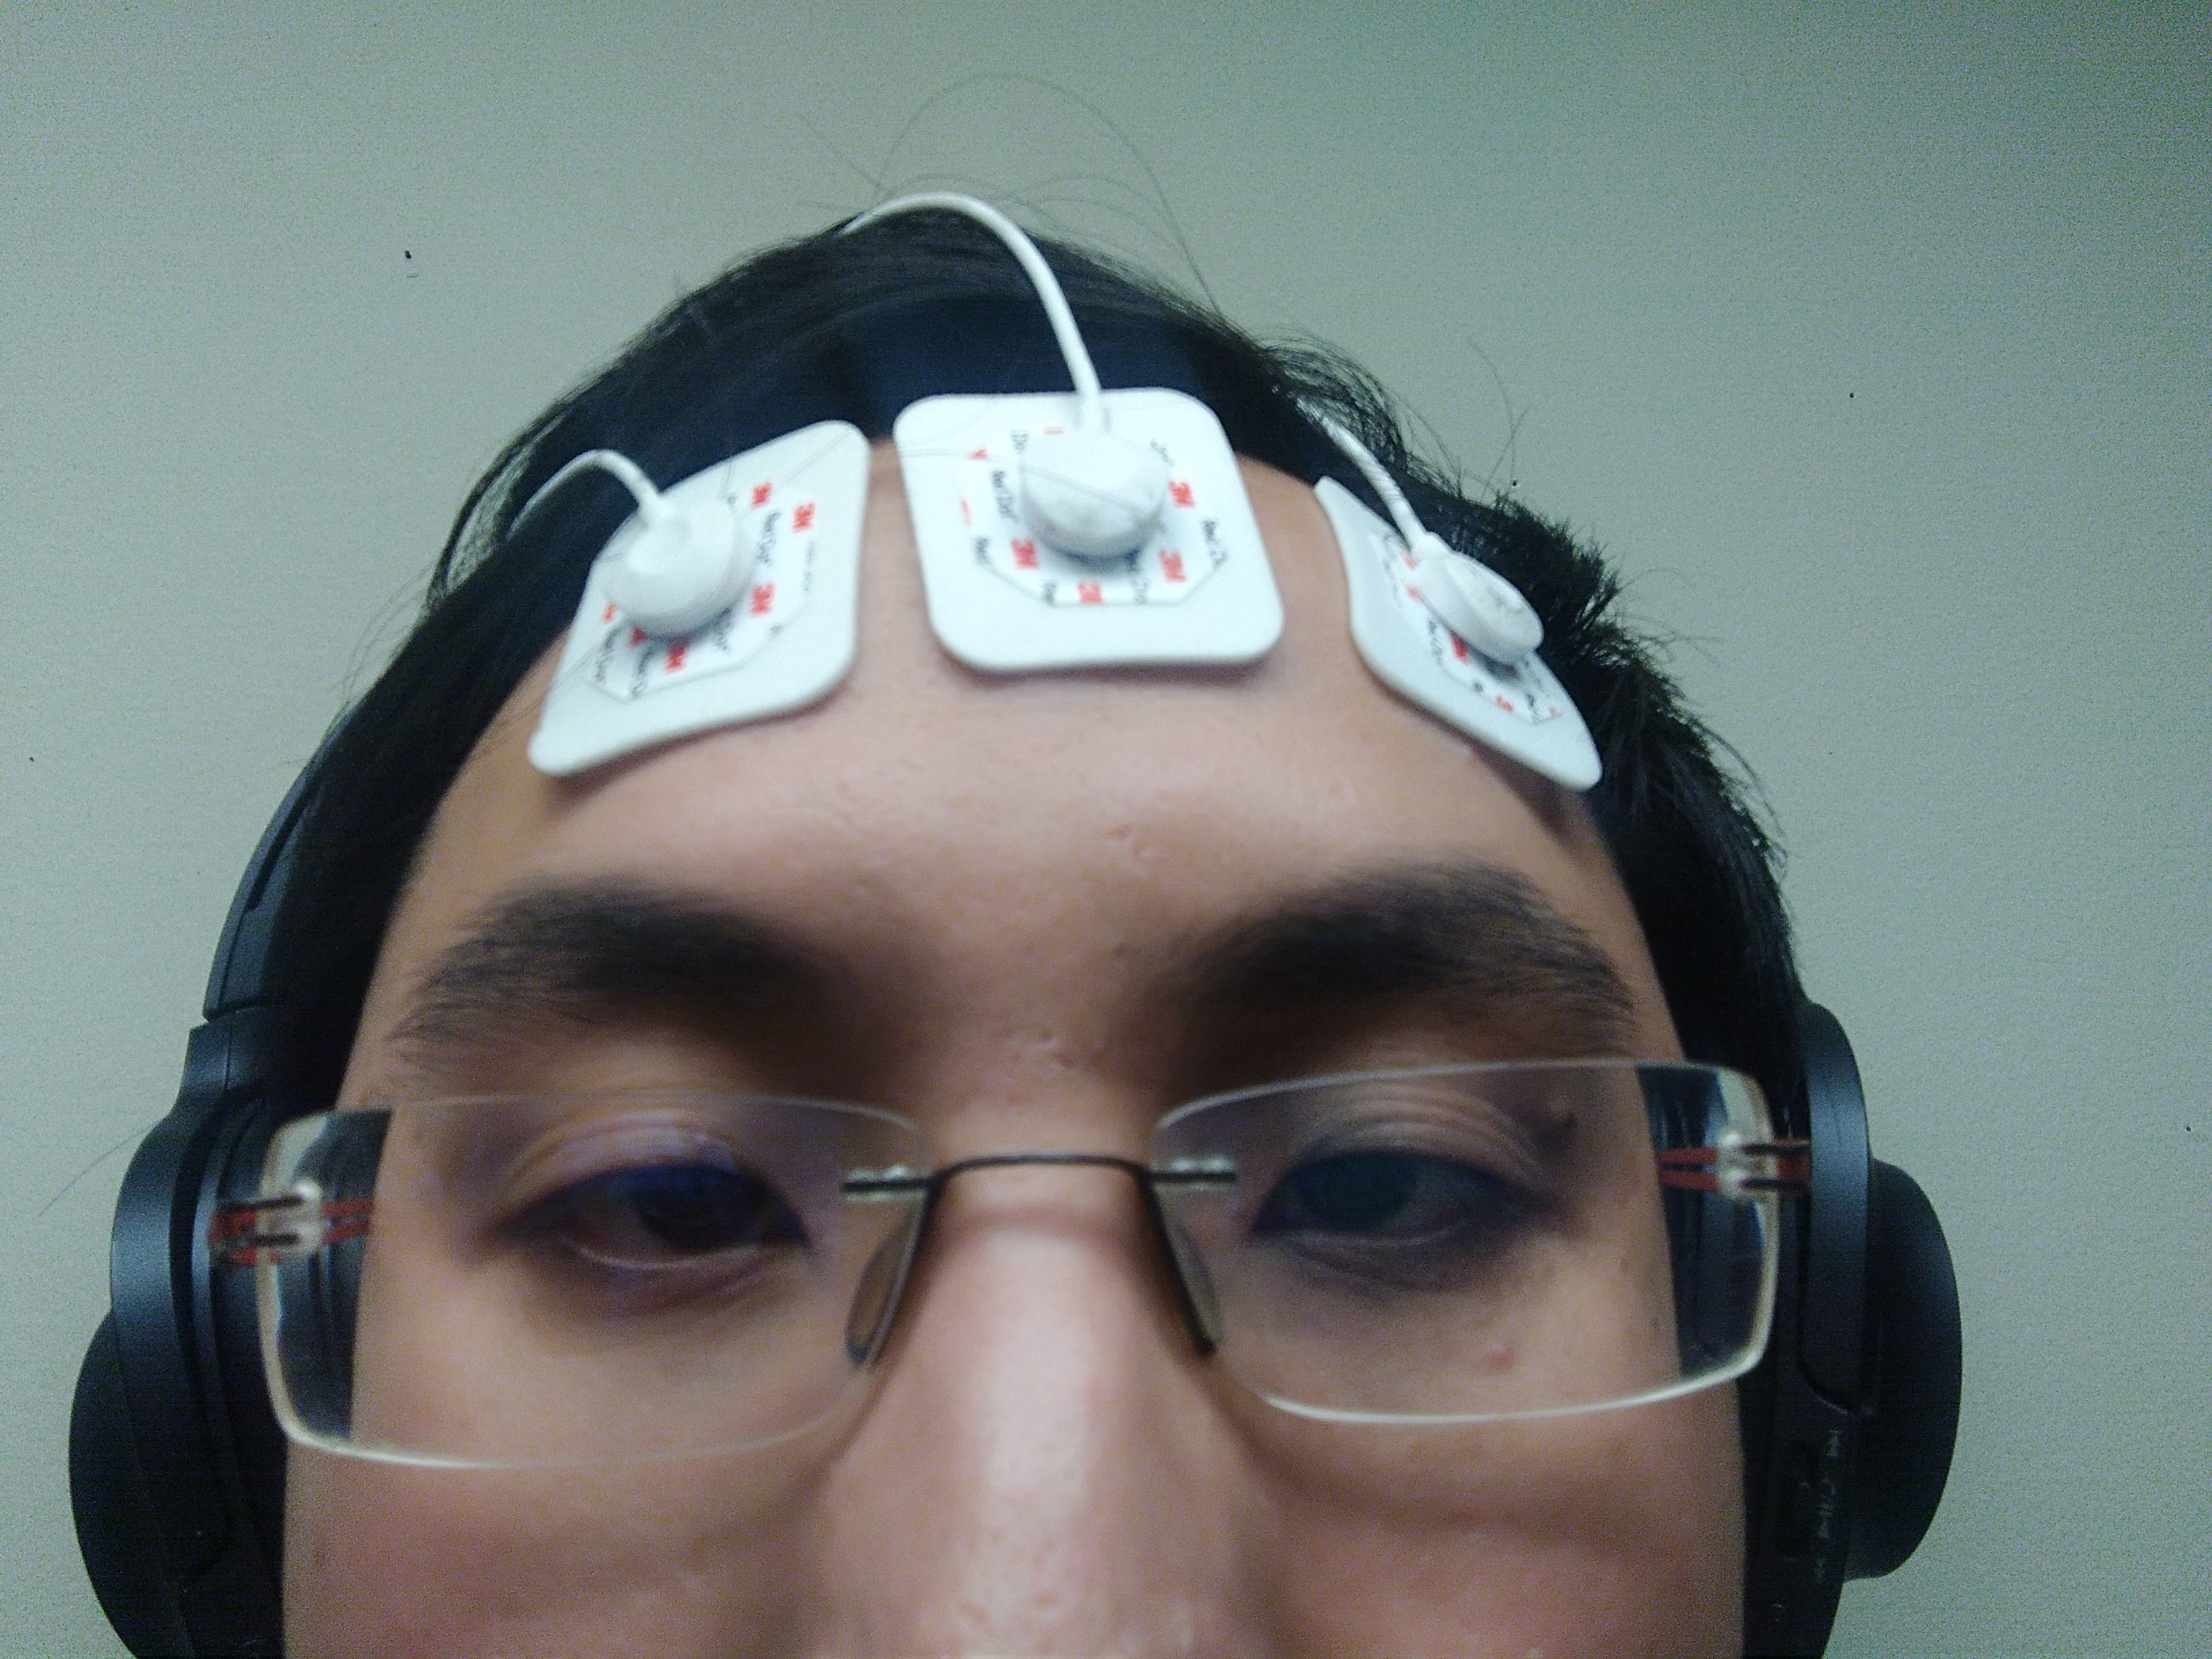
If you don't want the wires blocking your view, slick them back above your head and secure them with something. I chose to use headphones to do this.
Insert the 9V Battery Into the Battery Pack.
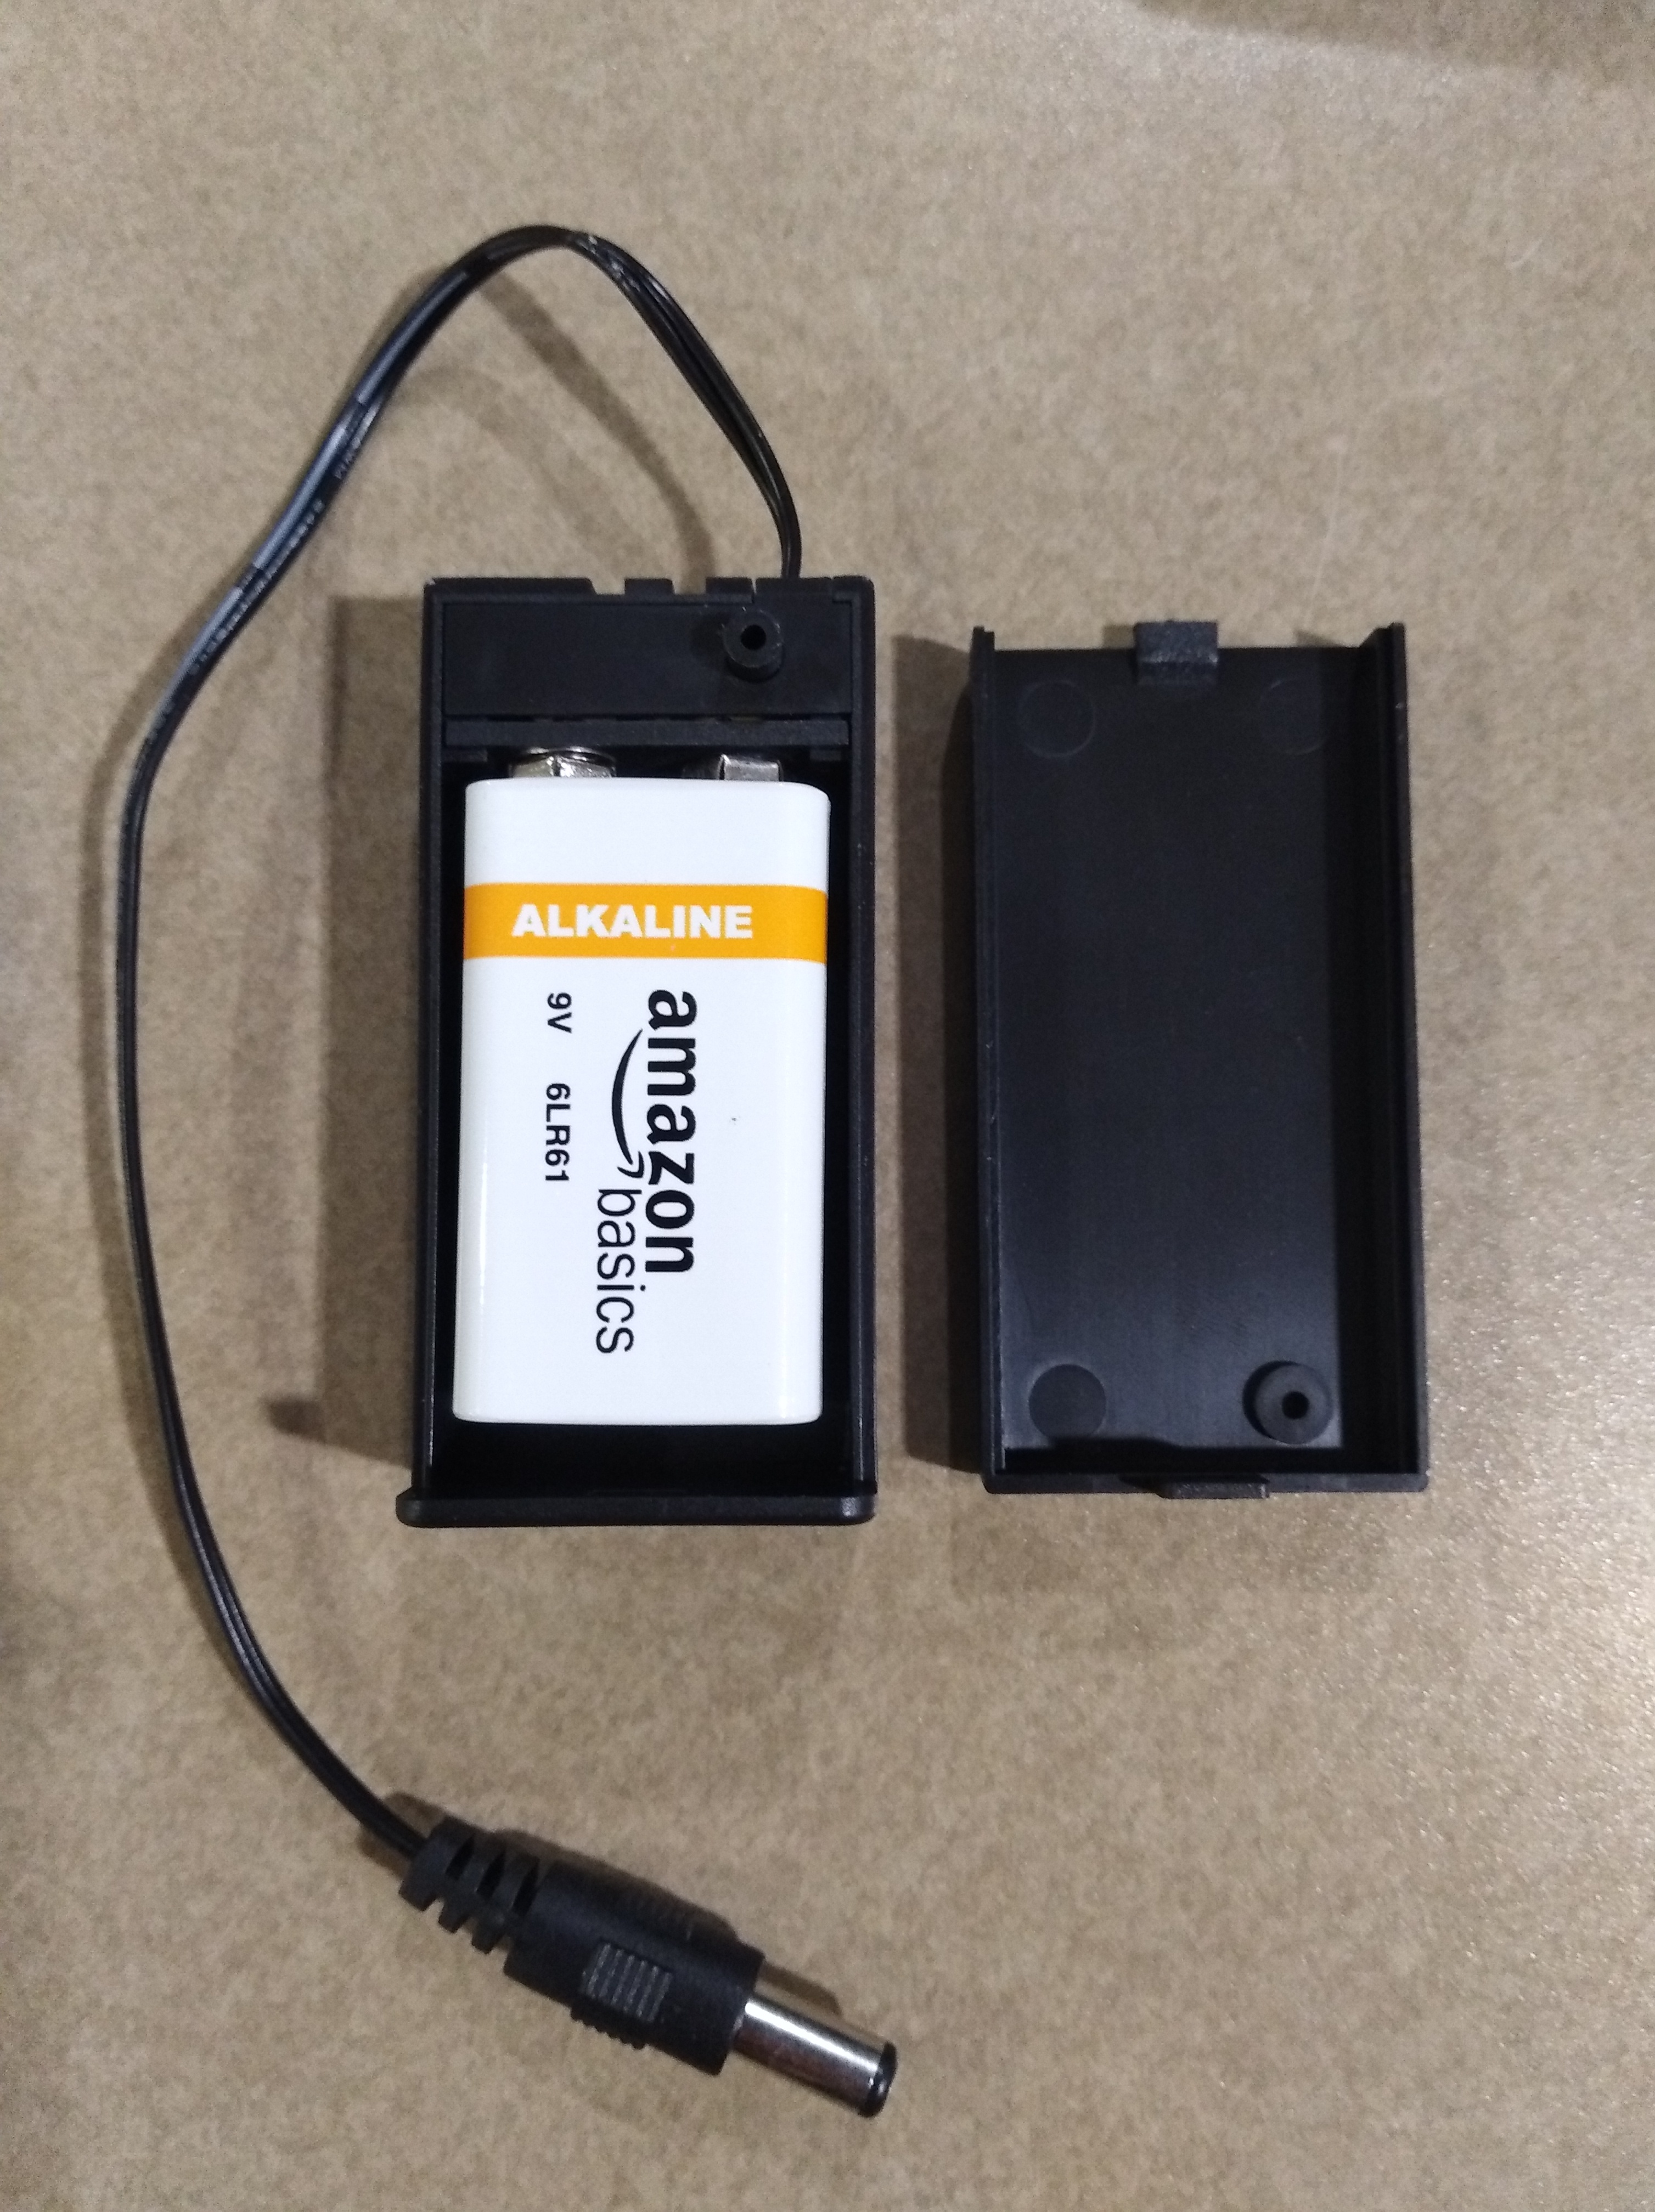
Insert the 9V battery into the battery pack.
Plug in the 9V Battery Pack
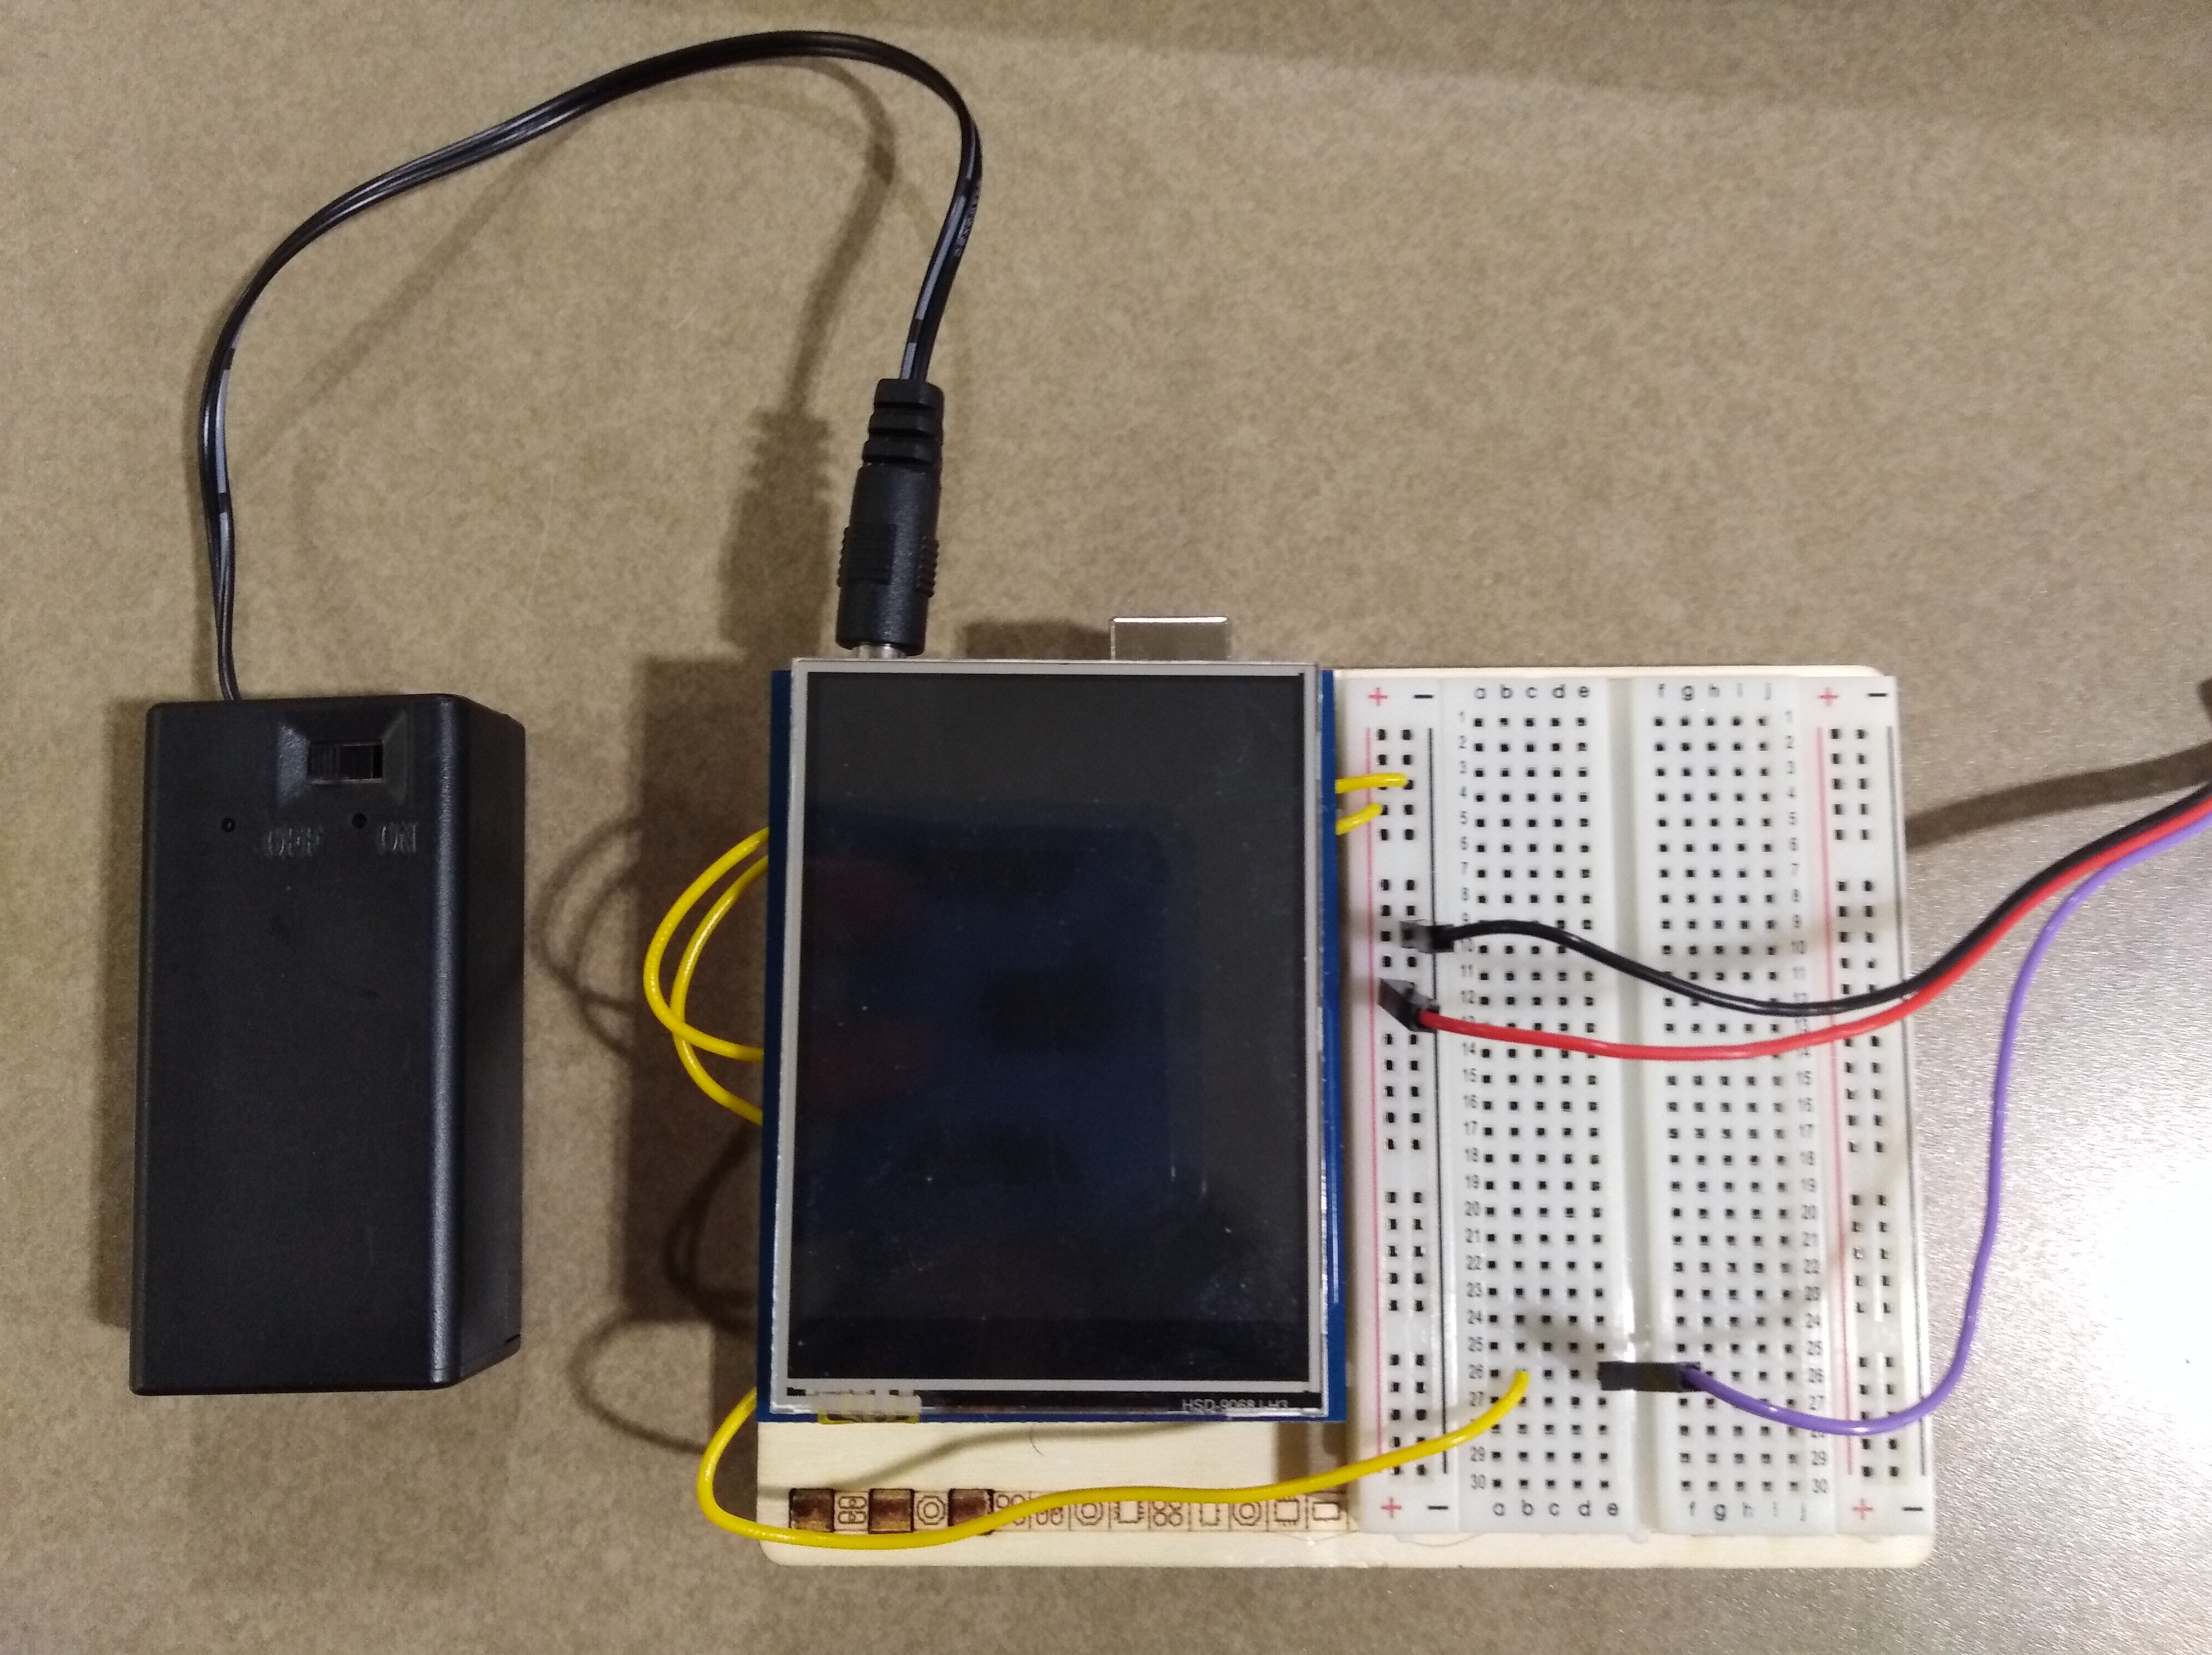
Plug in the 9V battery pack to the port shown in the picture. Keep the battery pack off when you do this.
Get the Code From Github
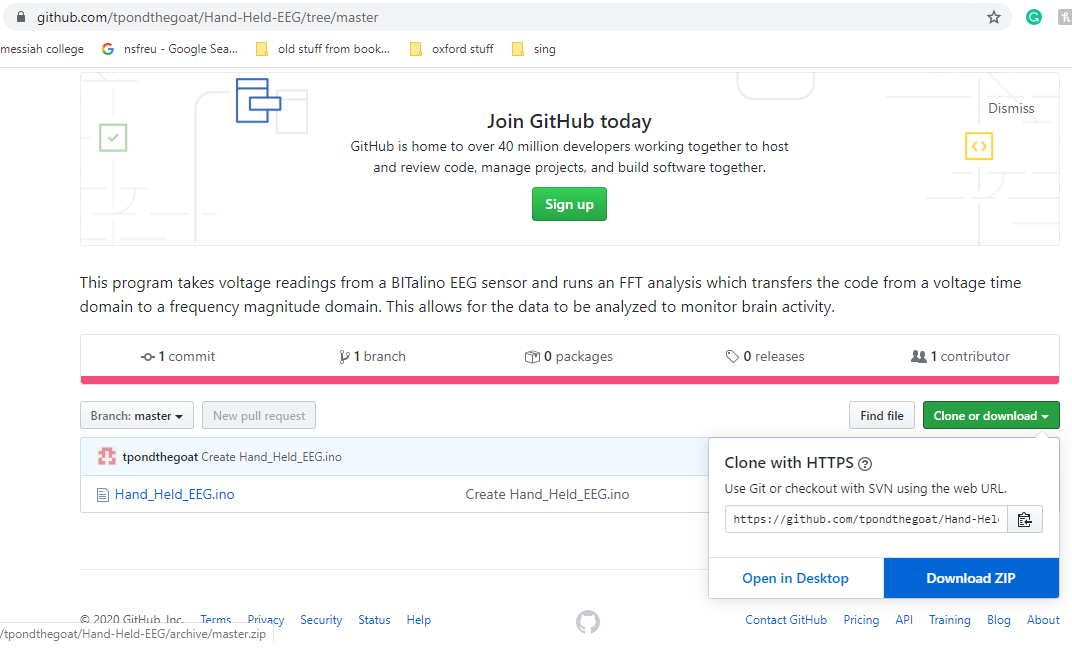
- Go to this link: https://github.com/tpondthegoat/Hand-Held-EEG/tree...
- Click on the Hand_Held_EEG.ino file. Copy and paste the code into your Arduino window.
- Alternatively, you can click on the green "clone or download" button, save it as a zip, then extract the file and open it.
Download the Appropriate Libraries
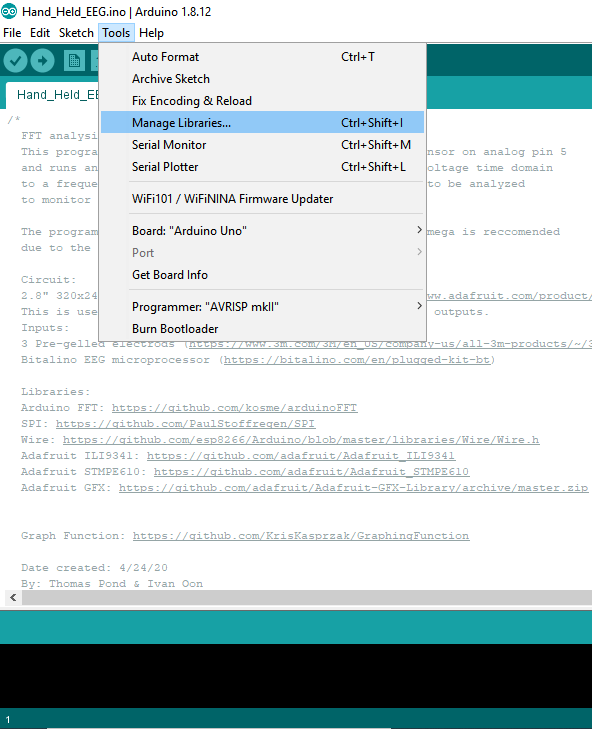
When you attempt to compile the code, you would be prompted to look for particular libraries.
- Go to tools>Manage Libraries
- Type in the library you need in the search bar. Download the one that matches the desired library the most.
- These are the libraries you will need:
- arduinoFFT.h
- Adafruit_GFX.h
- SPI.h
- Wire.h
- Adafruit_STMPE610.h
- Adafruit_ILI9341.
Alternatively, you can download the libraries from these links. and copy them into your libraries folder.
Arduino FFT: https://github.com/kosme/arduinoFFT
SPI: https://github.com/kosme/arduinoFFT
Wire: https://github.com/kosme/arduinoFFT
Adafruit ILI9341: https://github.com/kosme/arduinoFFT
Adafruit STMPE610: https://github.com/kosme/arduinoFFT
Adafruit GFX: https://github.com/kosme/arduinoFFT
Plug in the Arduino UNO to Your Computer
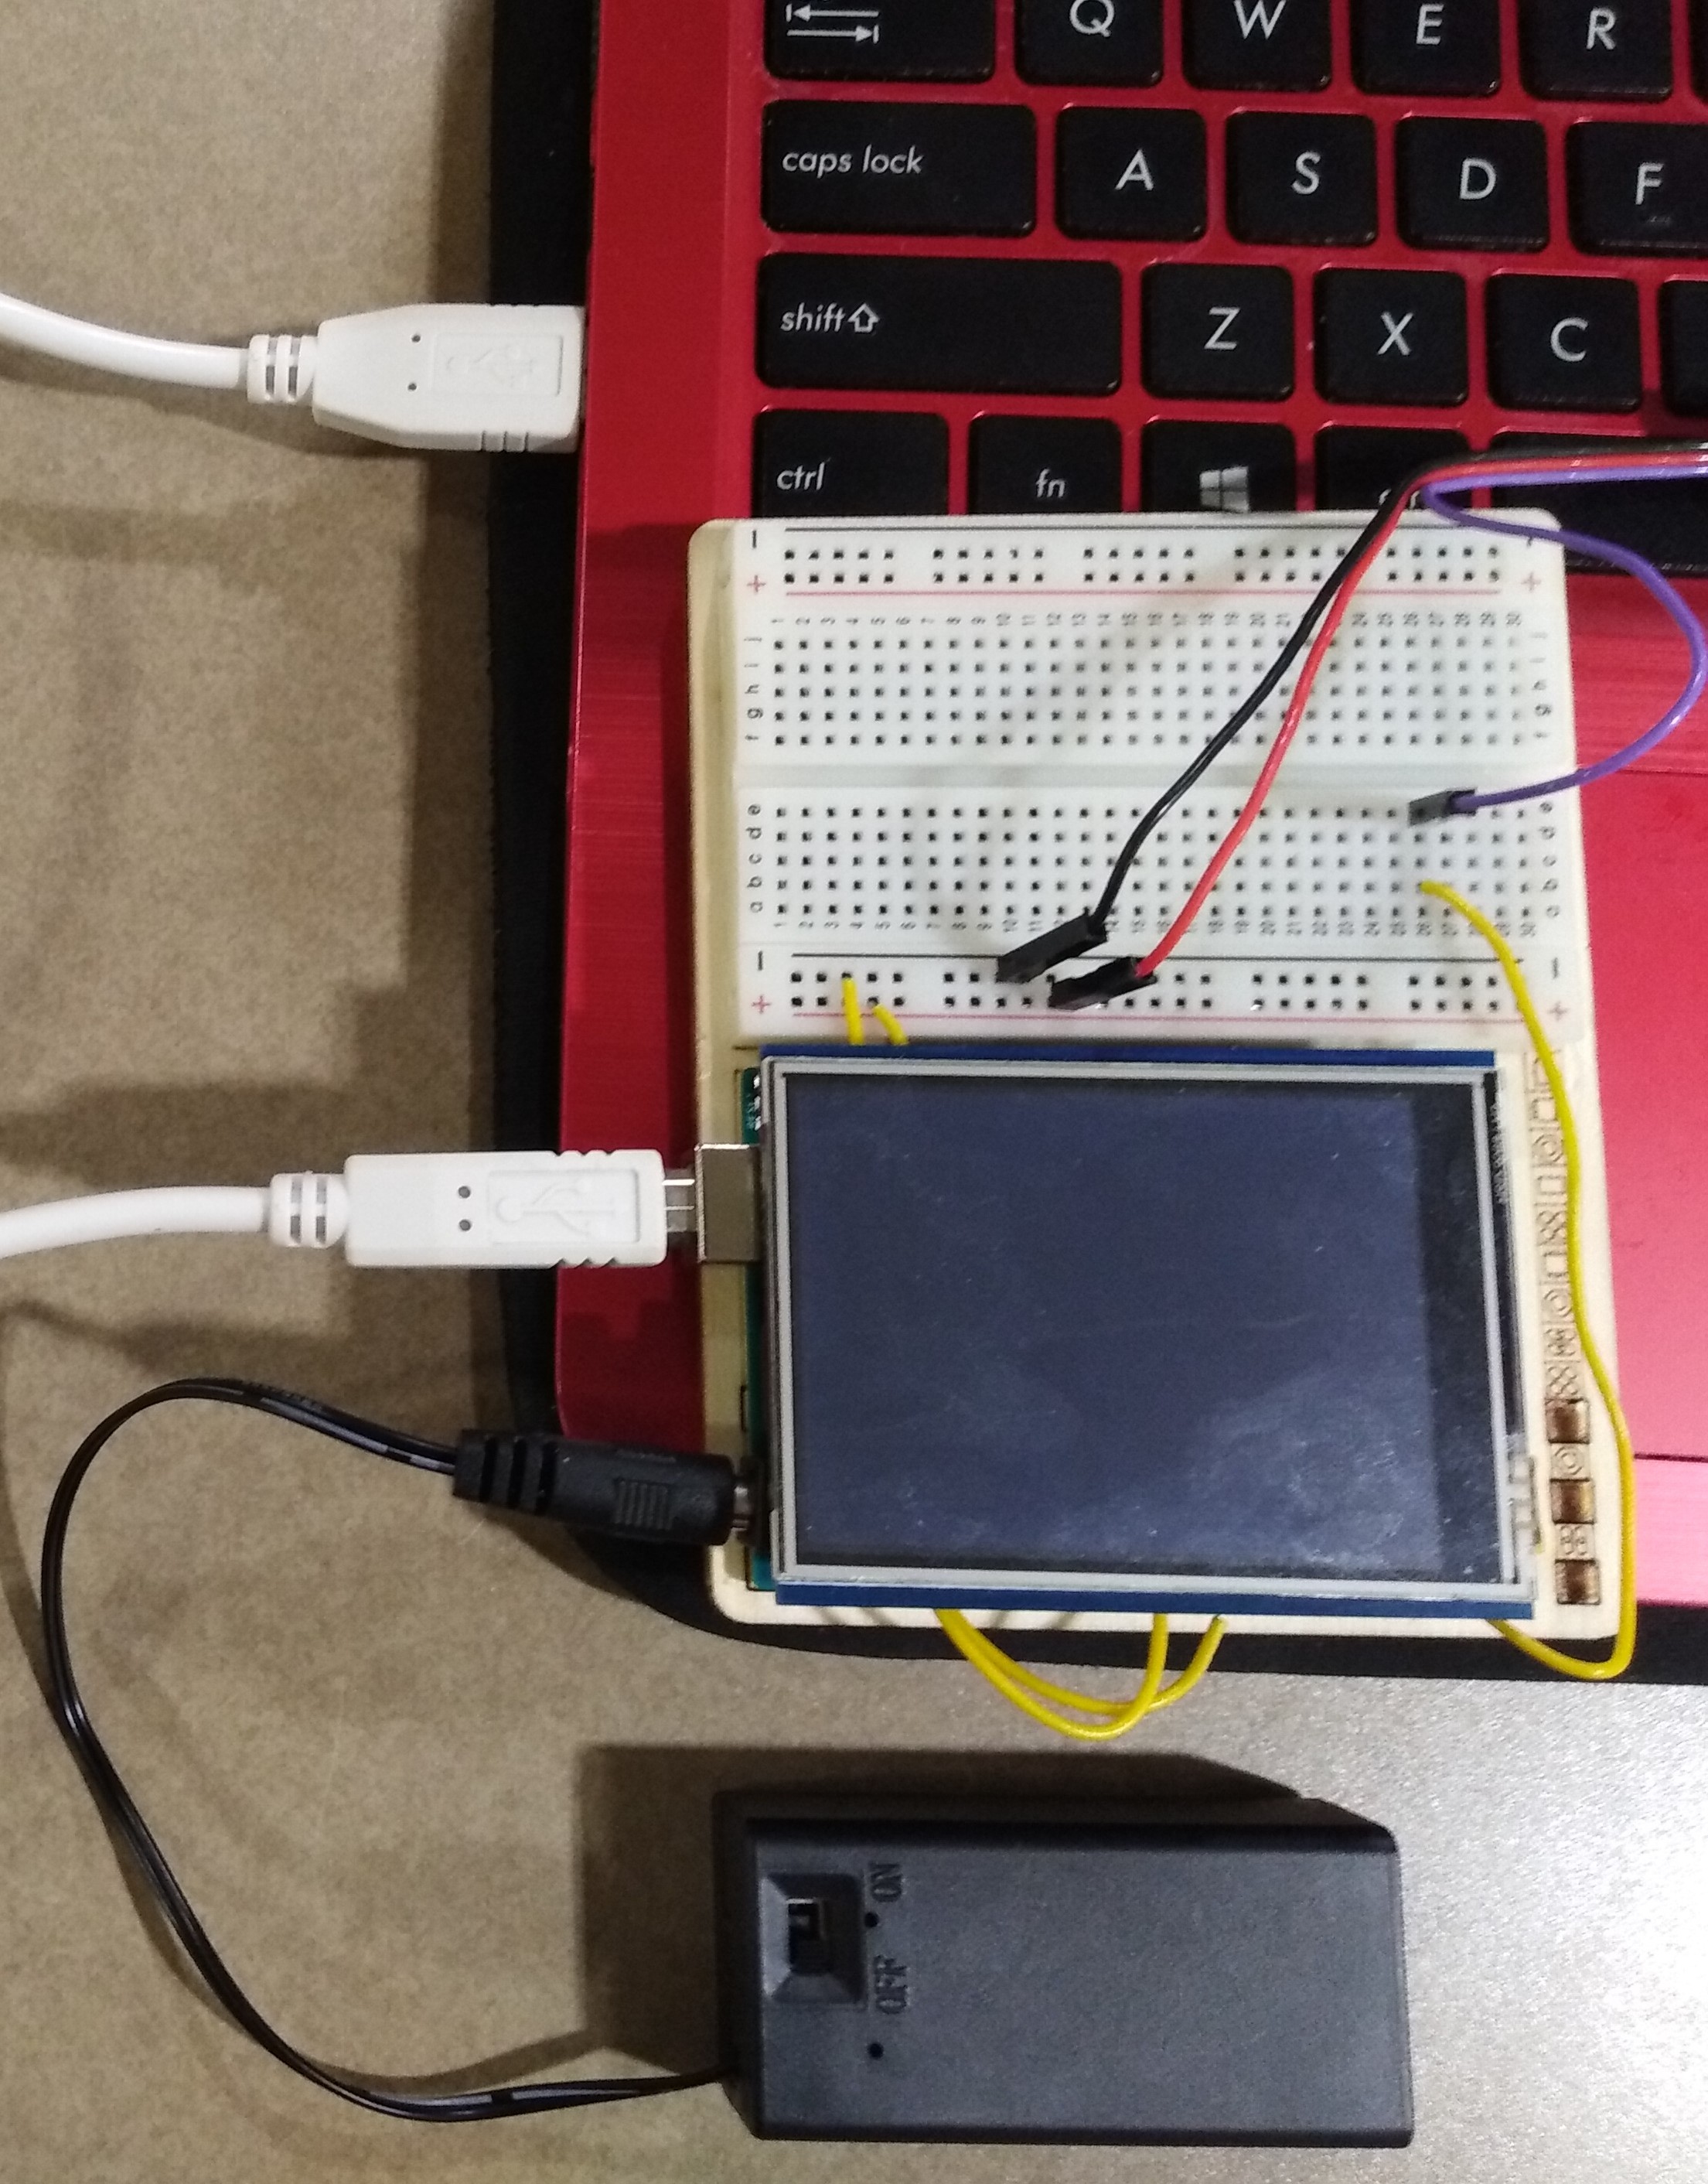
Plug in the Arduino UNO to your computer using the USB cable.
Upload the Code
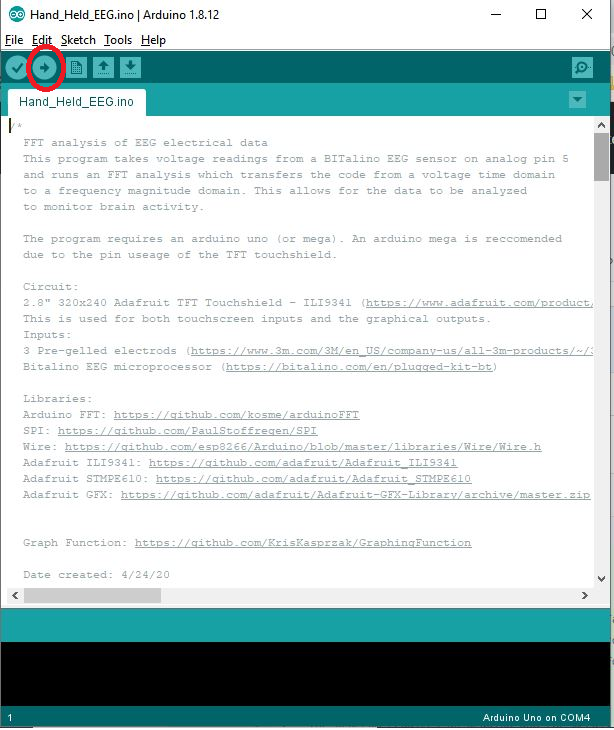
Press the upload button in your Arduino window as shown in the red circle in picture above. Wait for the uploading to complete.
The End Product!
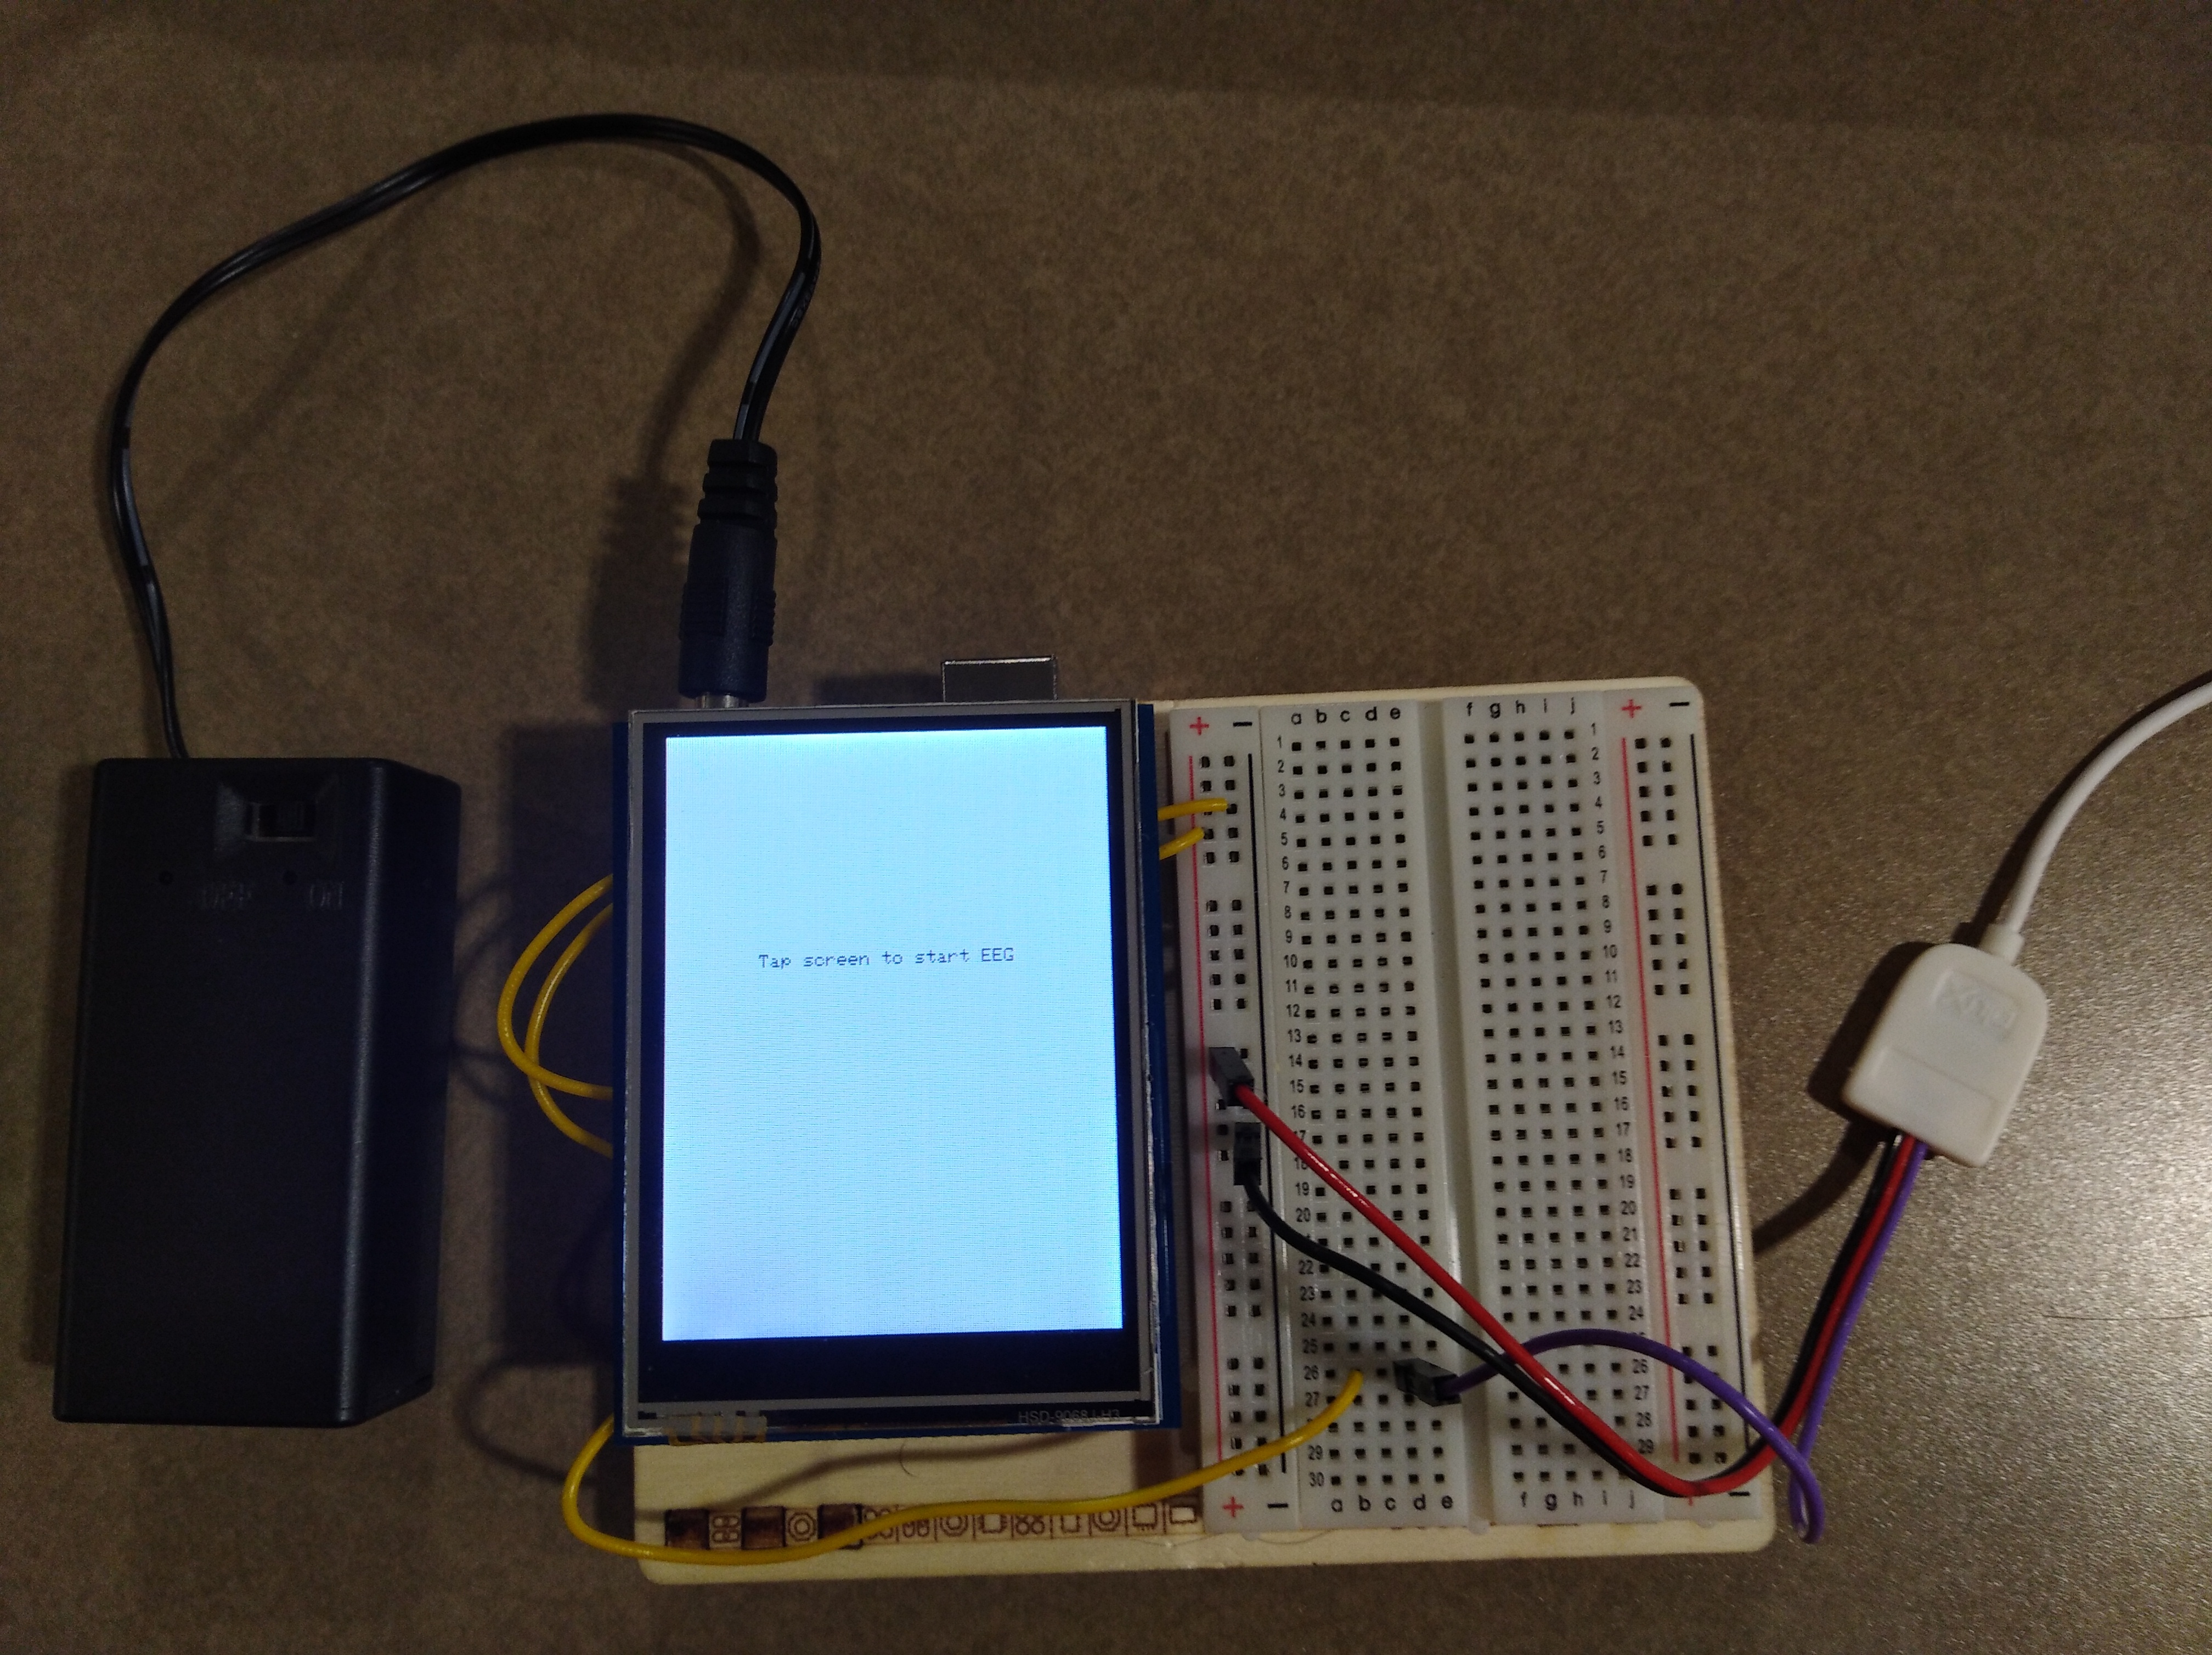
Unplug the USB cable and you now have the final product! All you have to do is turn on the battery pack and tap the screen to start collecting data!
The more spikes you see on the left side, the lower your focus level.
EAGLE Diagram
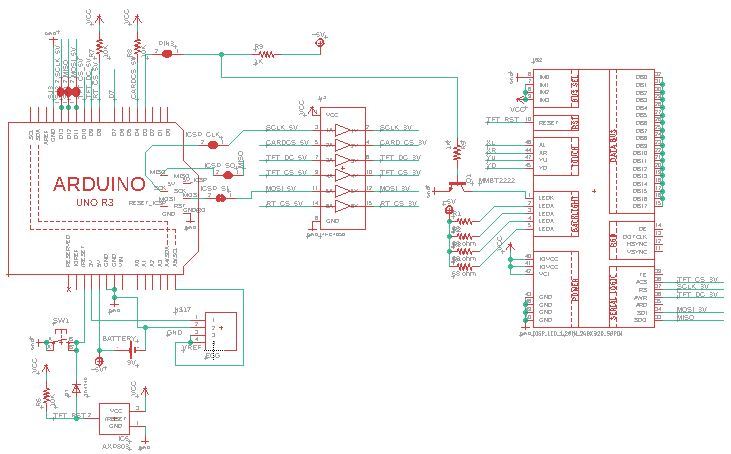
Above is the EAGLE diagram. The TFT Touch Shield, EEG sensor and 9V battery is labelled. The Arduino UNO has it's own label printed on it already.
The 9V Battery has its positive end connected to the 5V pin and negative end connected to the GND pin of the Arduino Uno.
The EEG Sensor has its VCC pin connected to the 3V pin,GND pin to the GND pin and REF pin to the A5 pin of the Arduino Uno.
The TFT Touch Shield is connected to all the pins of the Arduino Uno.
Reading the Data.
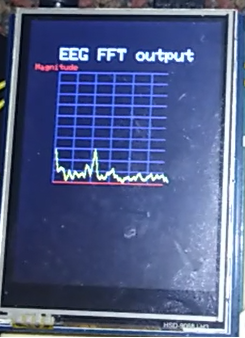
In step 4, there was a diagram showing what frequencies of brainwaves correspond to which level of consciousness/focus. Our graph is on a scale of 10Hz per square. So, if you see a peak at the end of the 2nd square (like in the picture). It means that there's a majority of brainwaves at 20Hz. This indicates Beta waves, meaning that the person is awake and focused.
Opening the Serial Monitor (Optional)
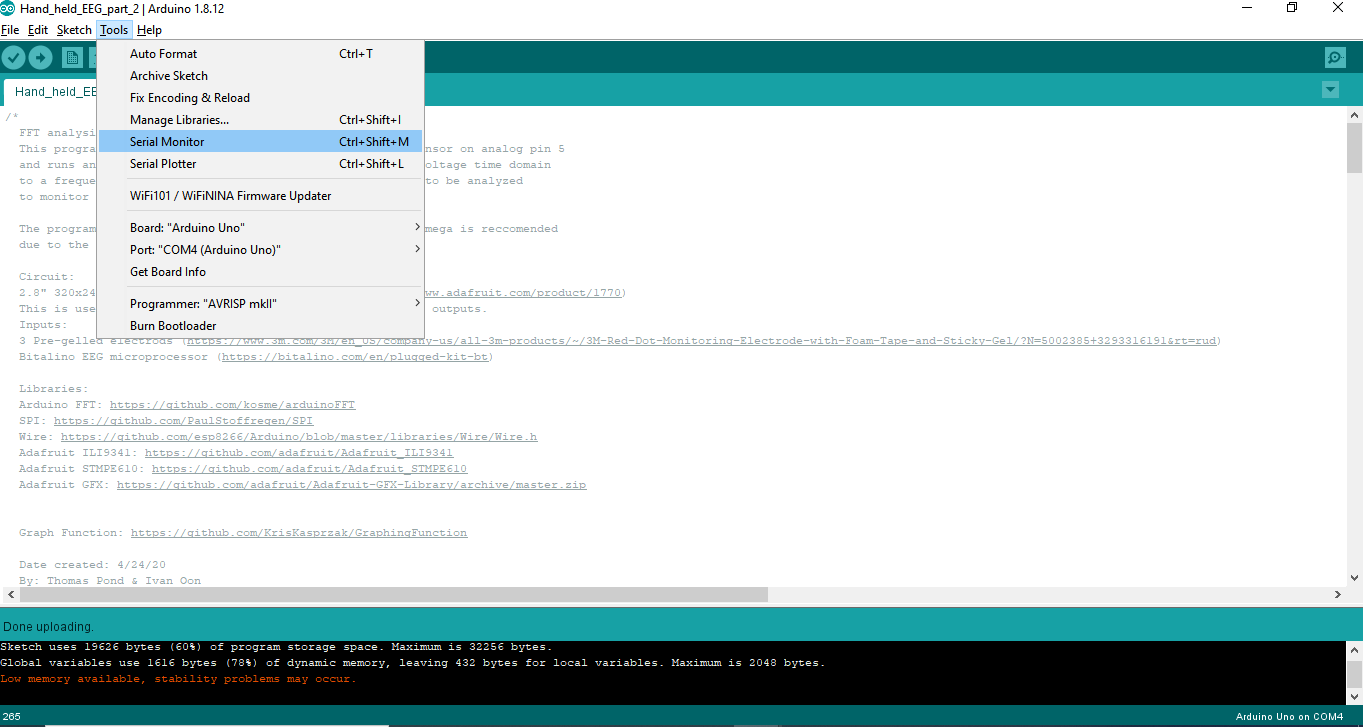
Open the serial monitor under the tools tab in the upper left.
Or, you can press Ctrl+Shift+M
Take a Reading on the Serial Monitor (Optional)
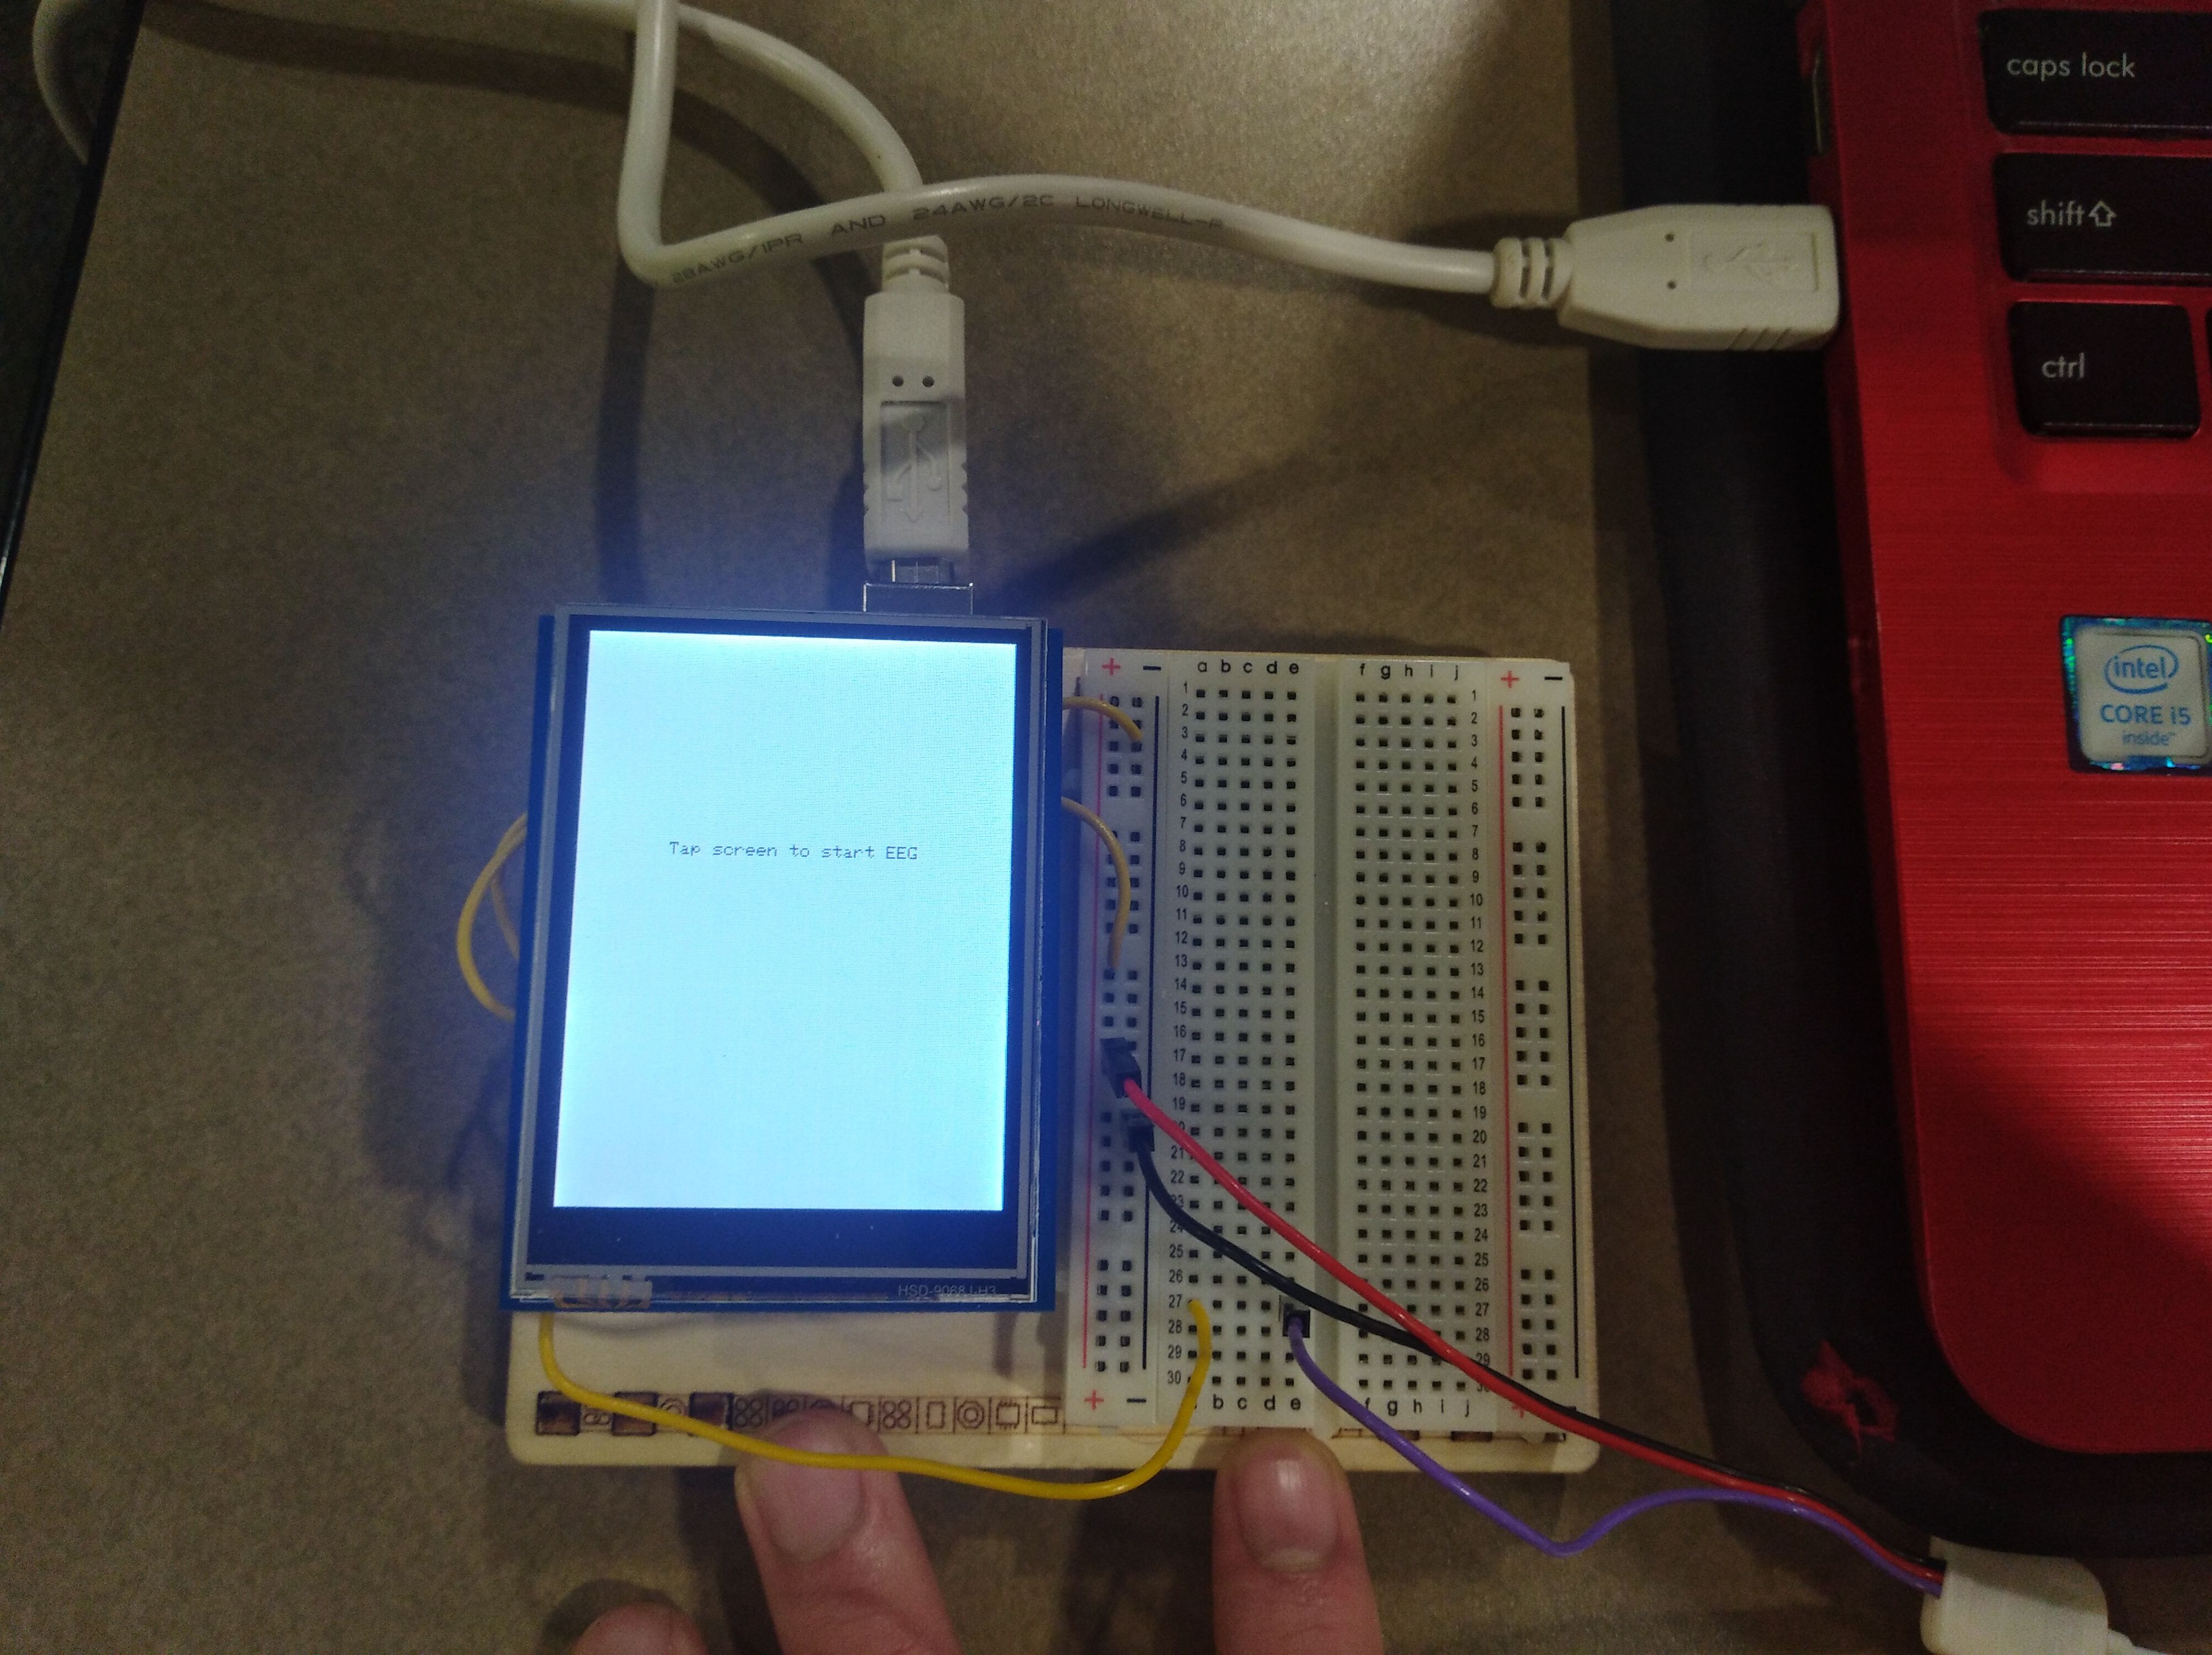
With the arduino plugged into the computer, take a reading using the touchscreen display.
Copy Your Results (Optional)
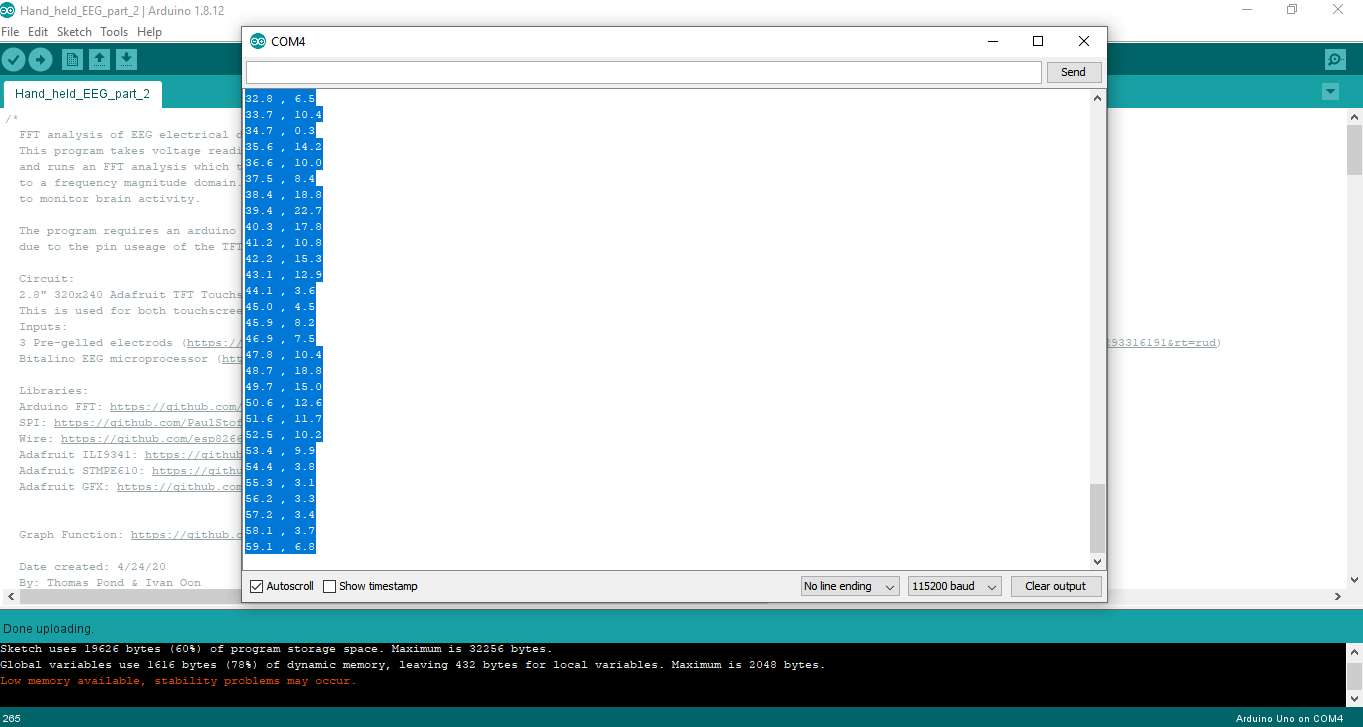
Click on the Serial Monitor, Press CTRL+A, and then CTRL+C to copy all the data.
Paste the Results Into a Text Document. (Optional)
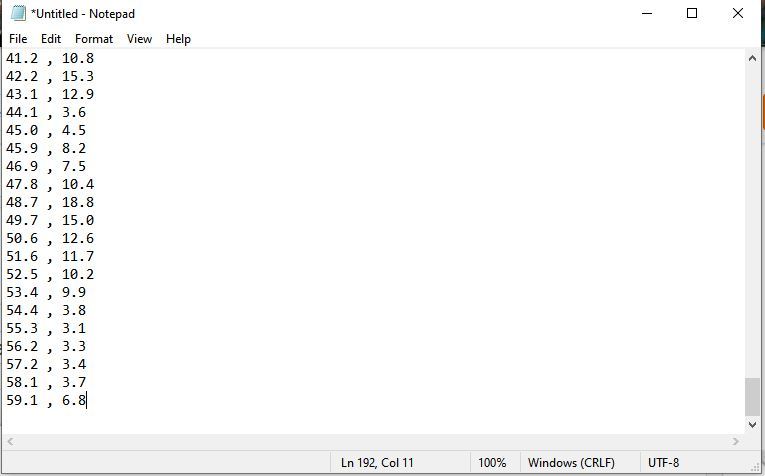
Open a text document like Notepad and press CTRL+V to paste the results.
Save the Results As a .txt File. (Optional)
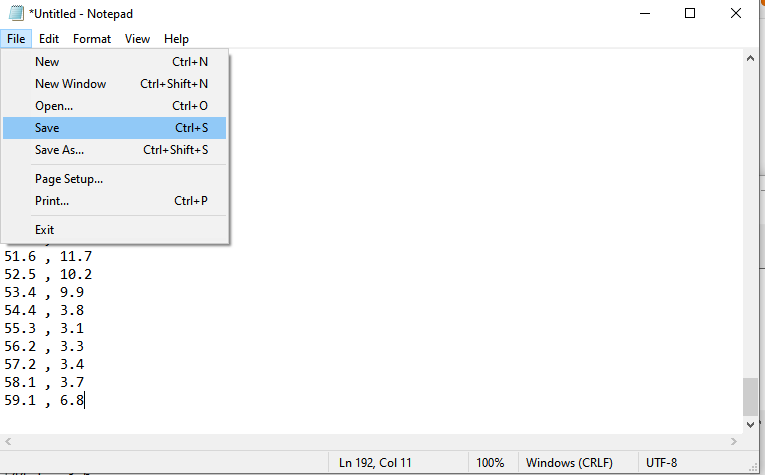
This code can then be exported into a software like excel in order to analyze the data.
Further Ideas
- You can create a device that jolts you awake when you lose focus by adding a vibrating motor and some code that activates the motor if it detects brainwaves below a certain frequency (similar to how a Fitbit vibrates).
- Adding SD card capabilities would allow you to store the data and process it in other ways through applications like Microsoft Excel.