Halloween-Themed Paper Circuit Building Kit
2220 Views, 13 Favorites, 0 Comments
Halloween-Themed Paper Circuit Building Kit

We will be presenting the Paper Robot Building Kits at the ATLAS Institute 2022 Research Open House. In order to bring the fun of building to more people, we have designed this Halloween-themed paper circuit for participants as a take-home building kit.
Supplies
With a paper circuit building kit (provided in ATLAS Research Open House):
- Paper circuit building kits (paper template, LED, button cell, copper tape)
- Glue stick or double-sided tape
- Pencil or marker
Without a paper circuit building kit:
- Cardstock (recommended) or printer paper
- Scissors or craft knife
- 5mm LED
- CR2023 (recommended) or other 3V button battery
- 18 inch length of 5 mm copper tape or other conductive tape
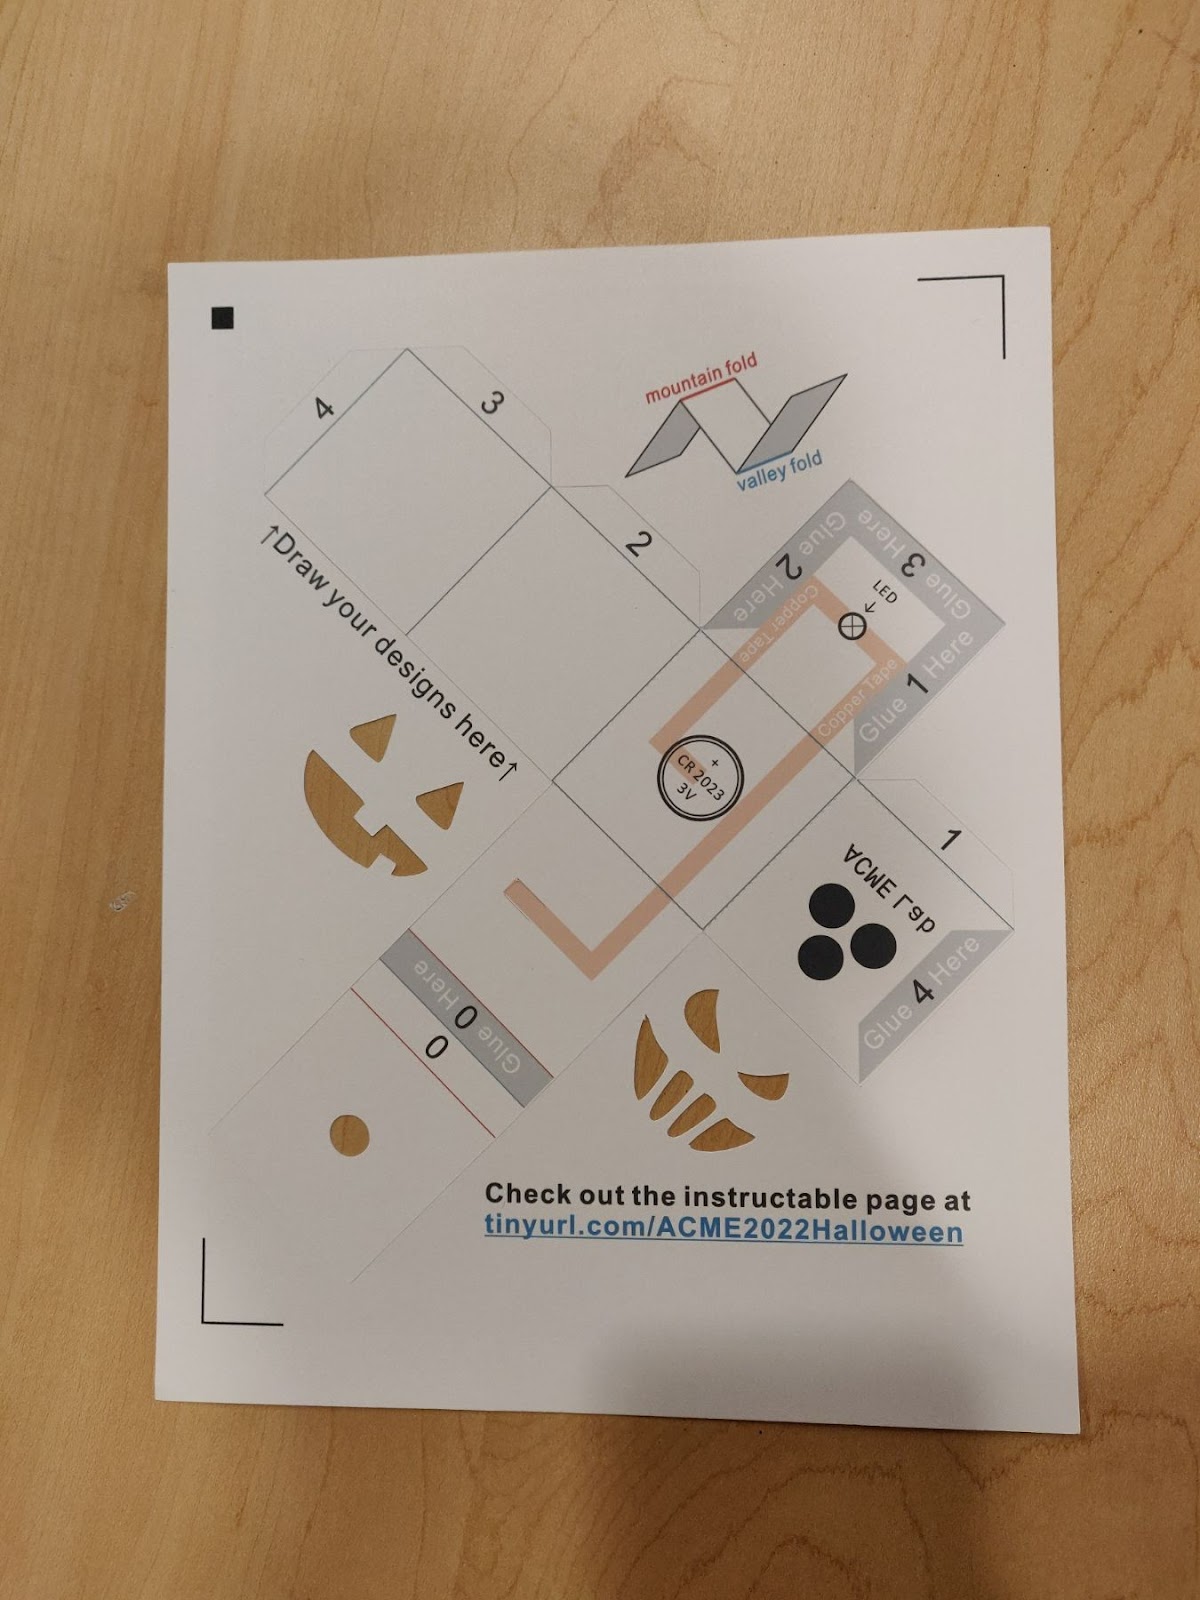
Prepare the Cube Template
With a paper circuit building kit:
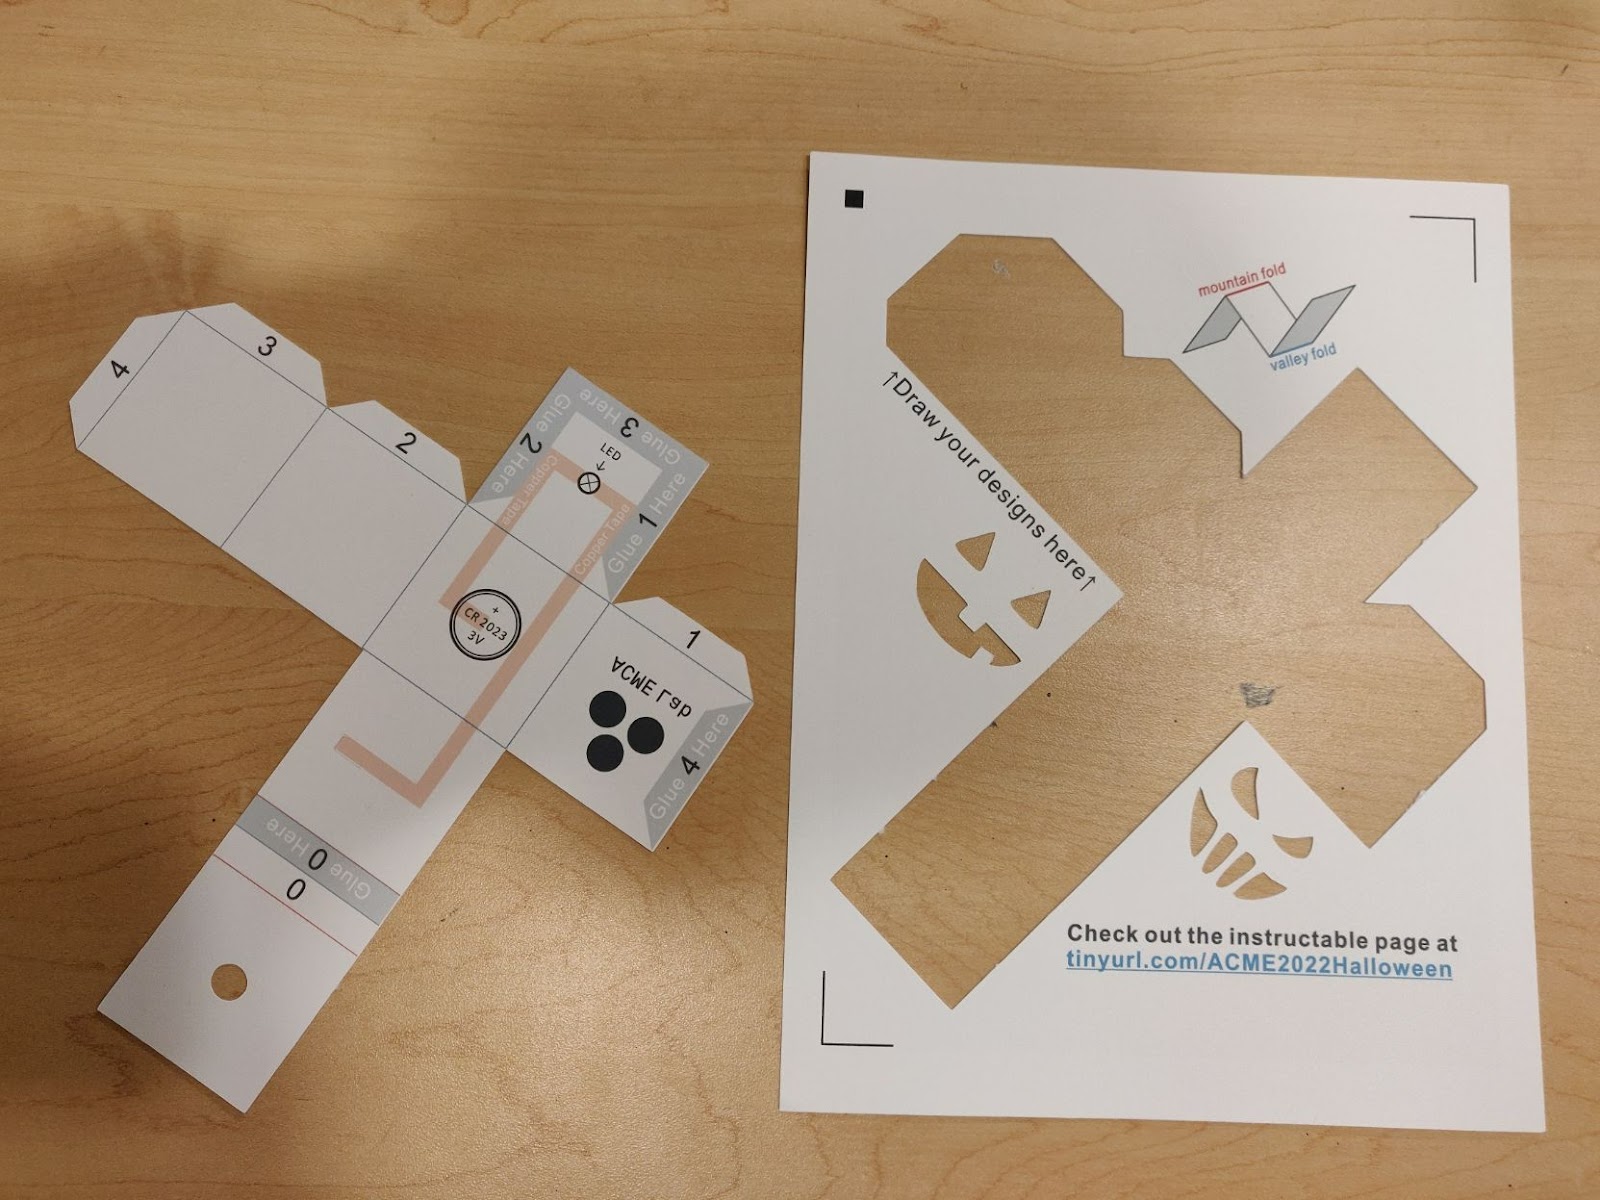
Pop out the the flat shape as shown below. We'll call this shape the cube template.
Without a paper circuit building kit:
Print this pdf file and follow the instructions to cut it (cardstock paper is recommended). Following the guide lines on the sheet, cut out the flat shape as shown below with the help of scissors or craft knife. At one end of the thick orange line on the template, cut out an additional slit as shown below.

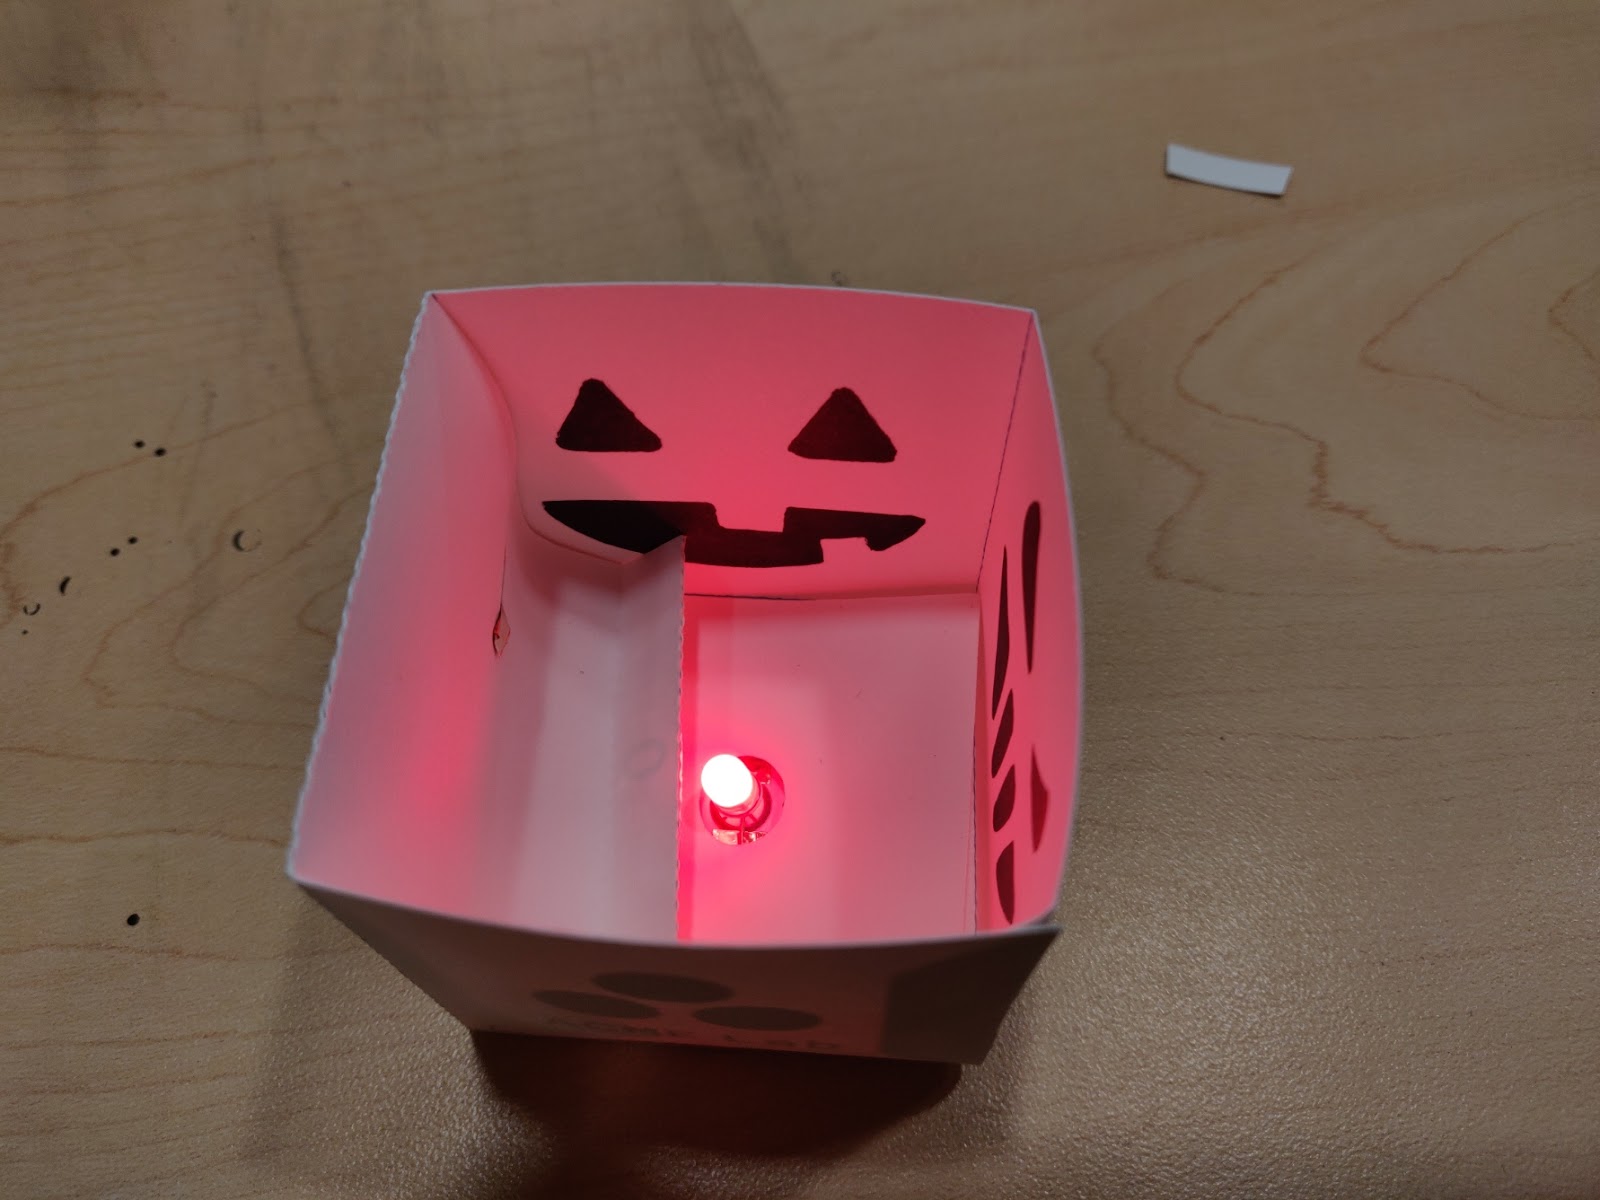
Decorate
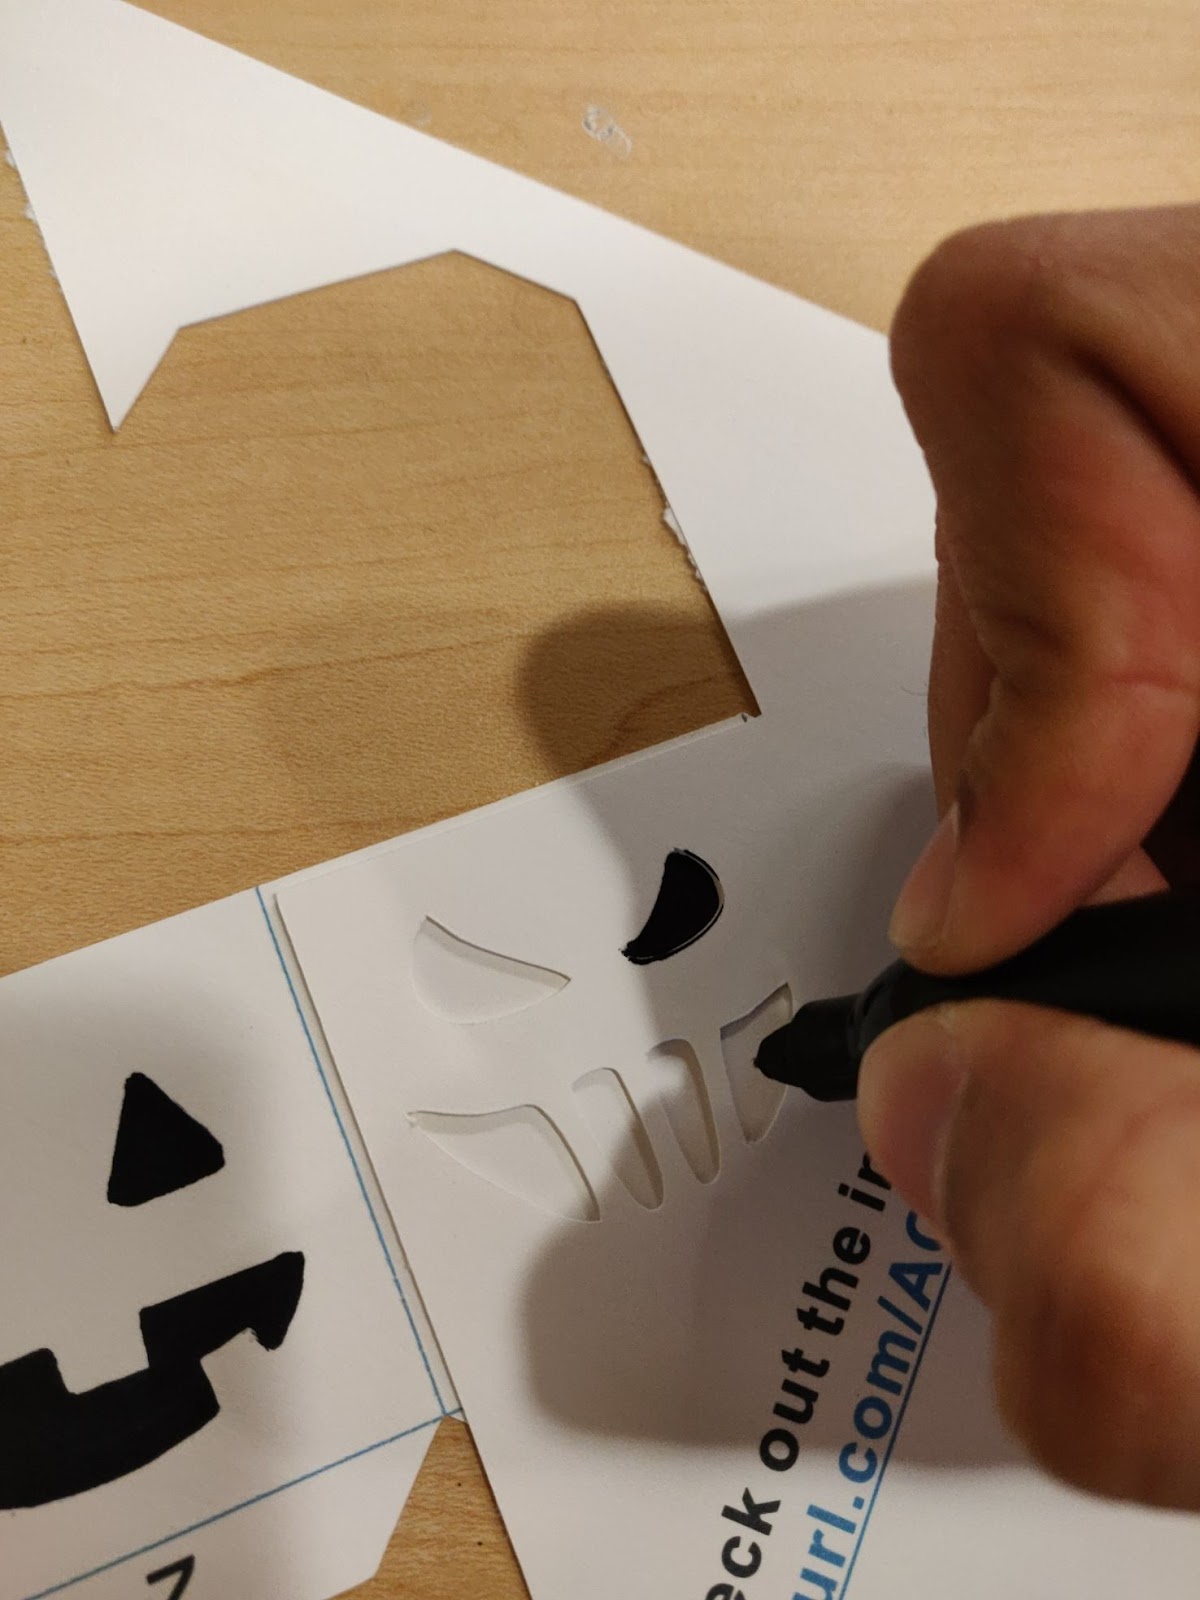
In order to make our unique Halloween decorations, we can draw our own designs on the two empty faces in the cube template. We can either use the Jack-O-Lantern cut-outs provided, or draw our own Halloween monster! Use a dark sharpie or pen to make drawings that look best with the light.
With a paper circuit building kit: Draw your own pattern, or use the cut-out template
Without a paper circuit building kit: Draw your own pattern, or cut out and stick the printed template onto the cube template.
Fold the Cube
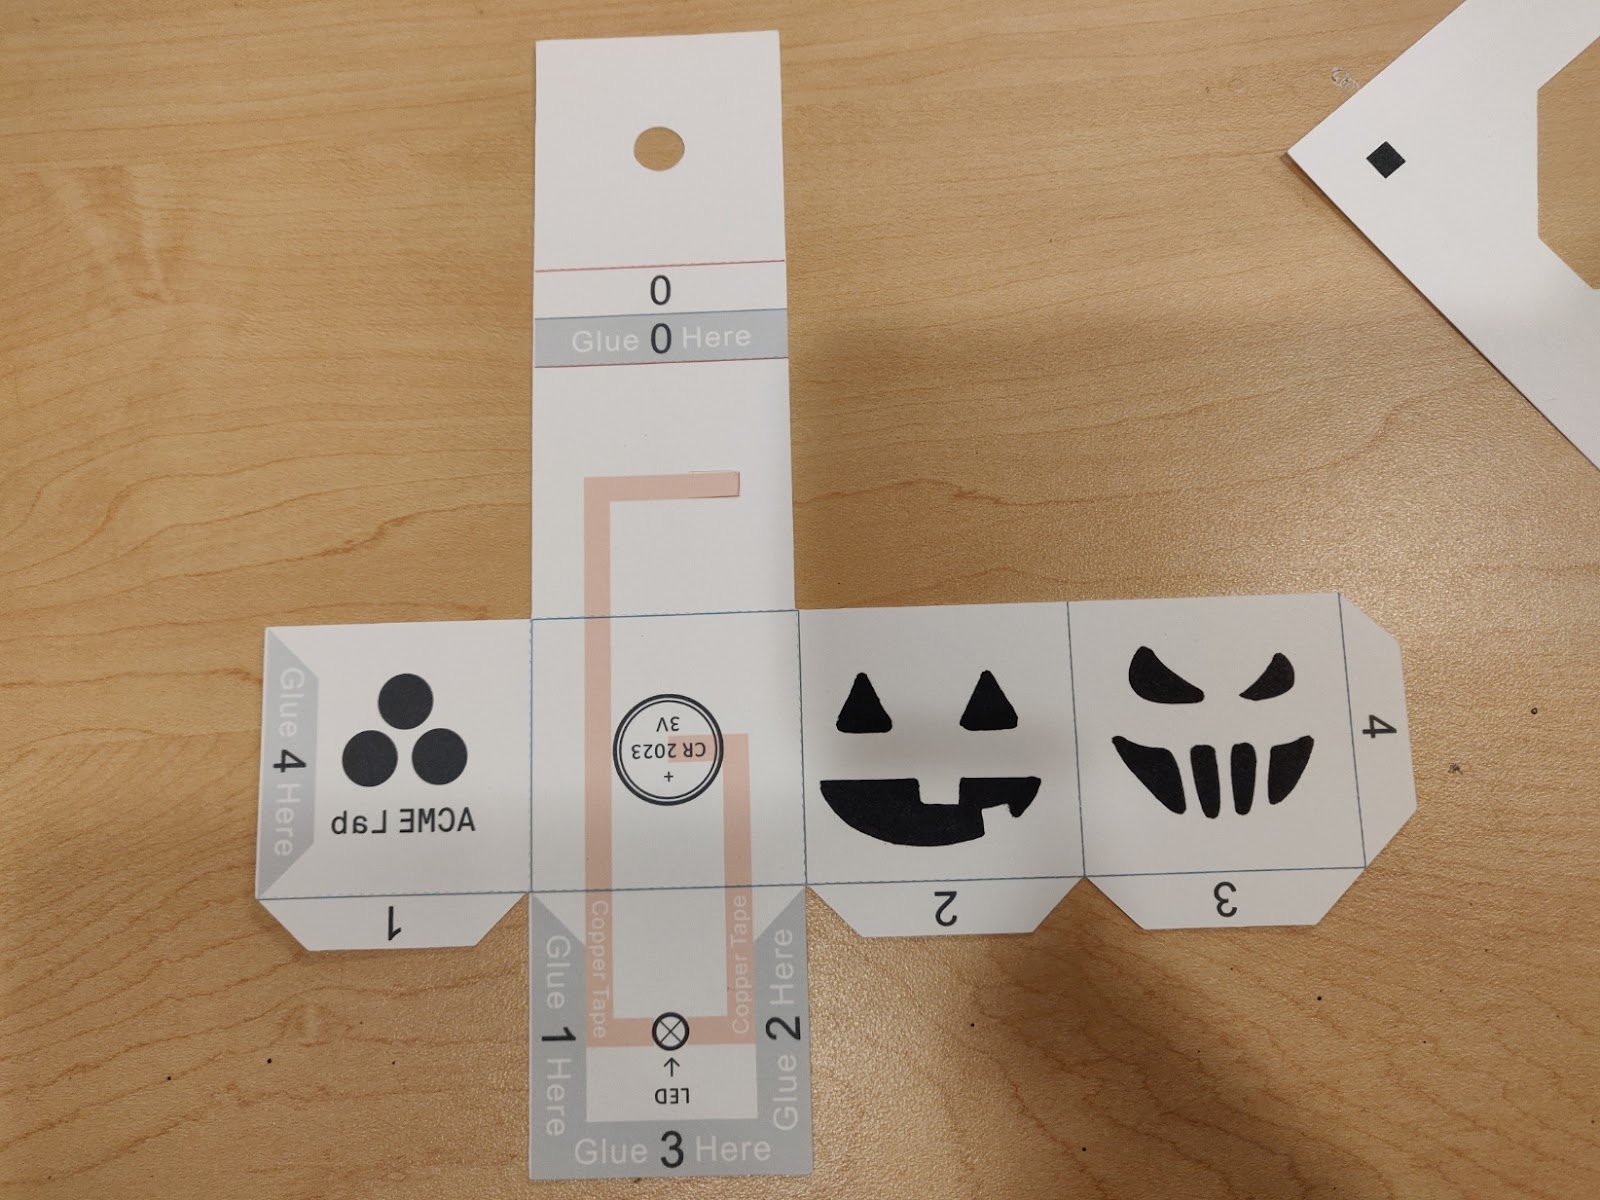
Based on the color of the lines in the cube template, perform mountain fold (red) or valley fold (blue) on each of the lines. Perform an additional semi-fold on the slit at the center of one of the faces, as shown. Note that you don't want to fold it too hard, as it acts like a spring later on.


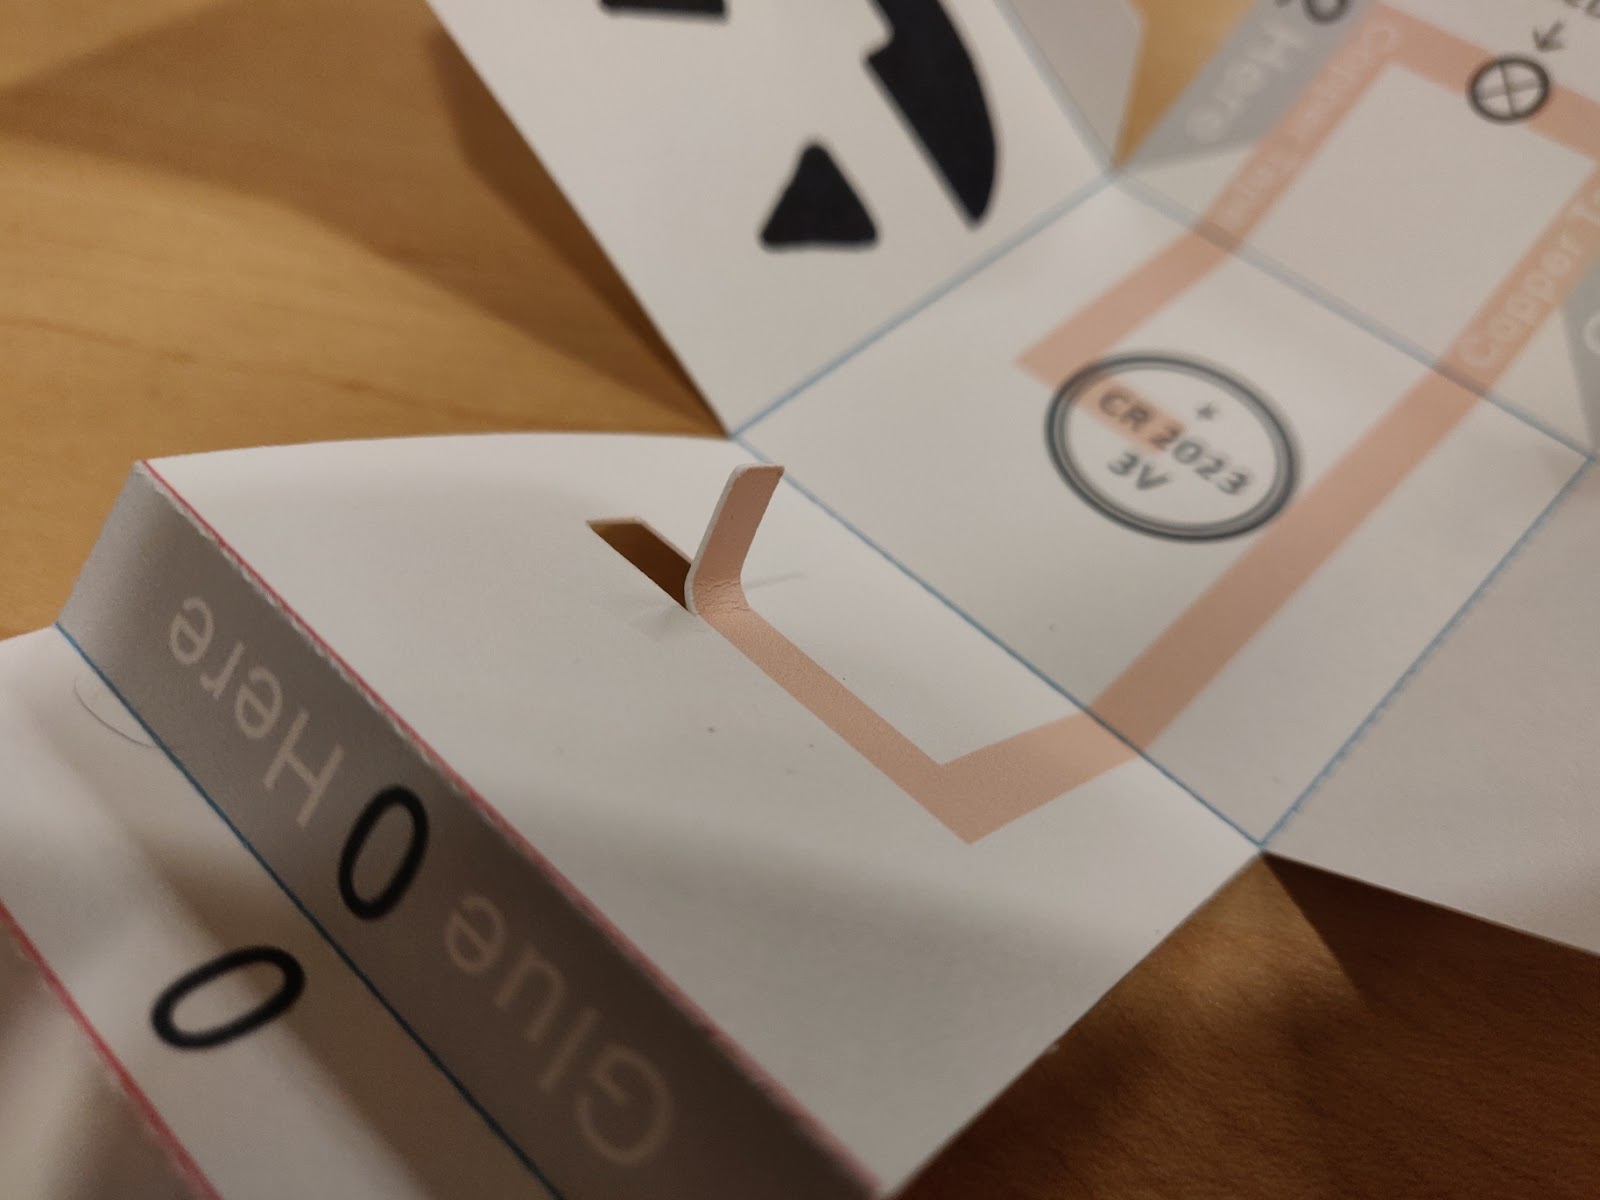
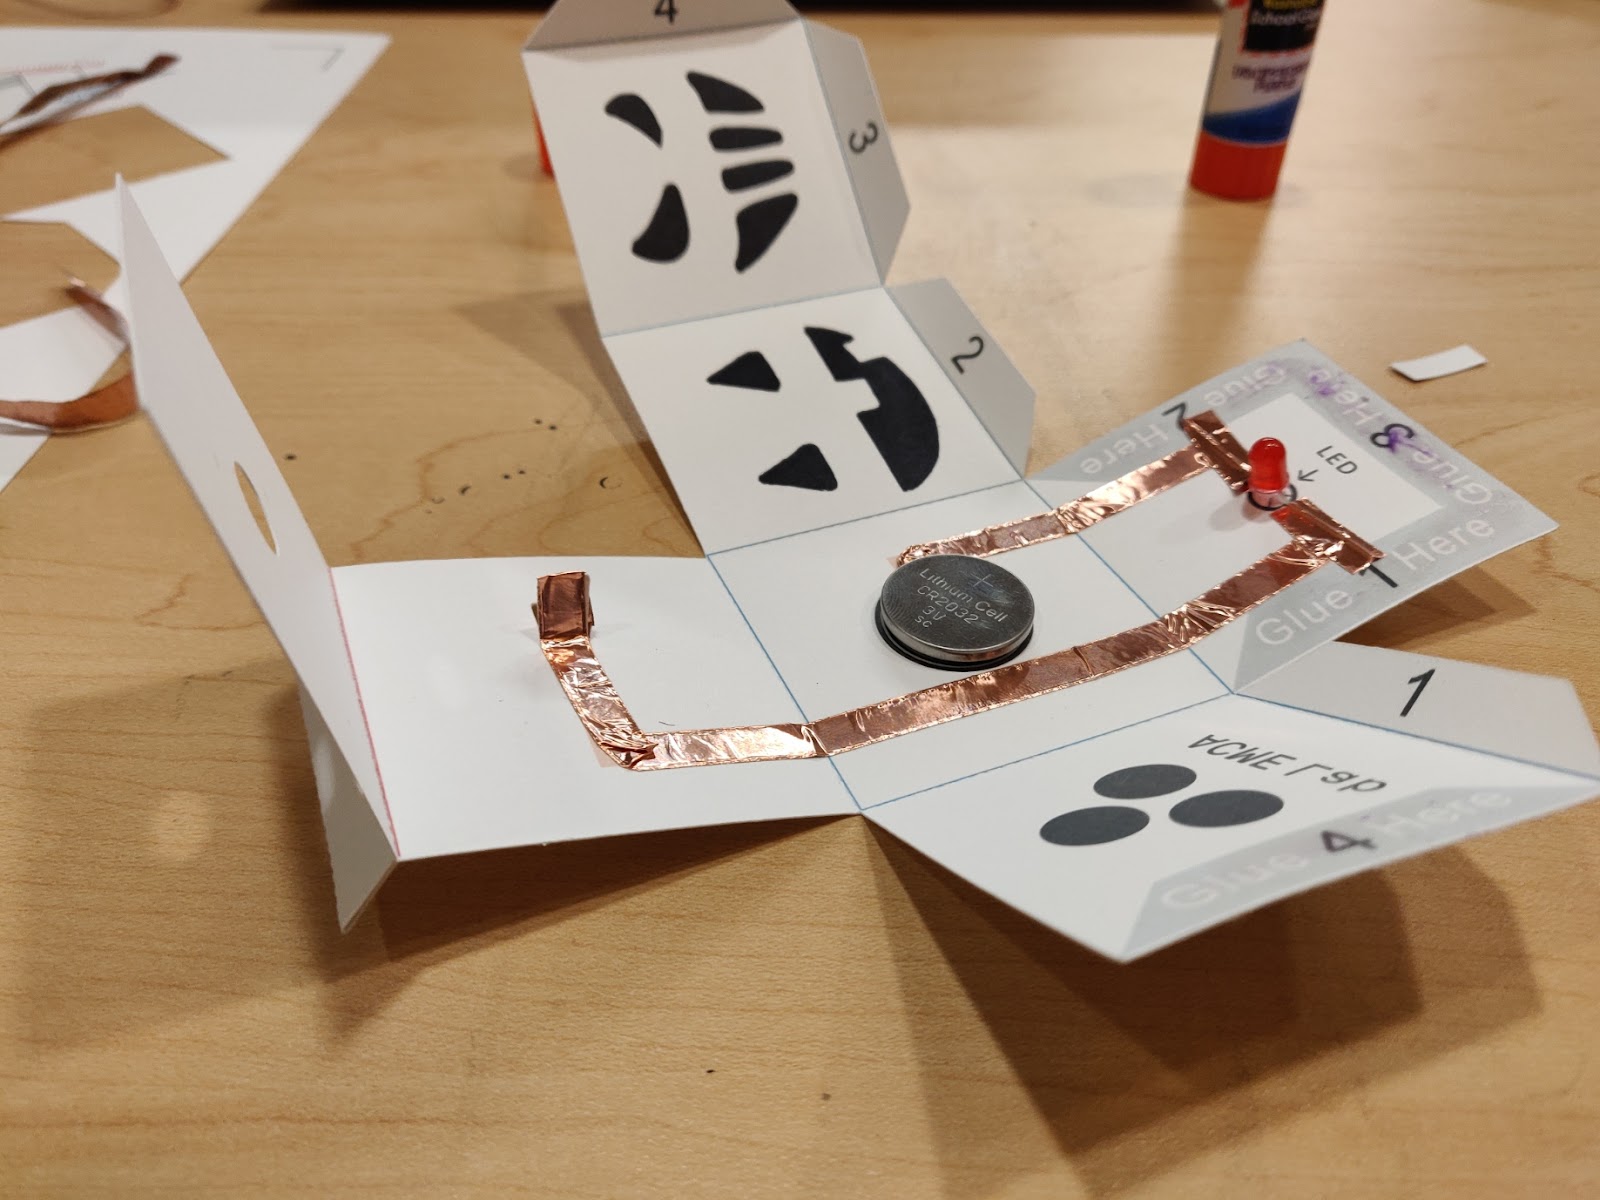
Place the Copper Tape
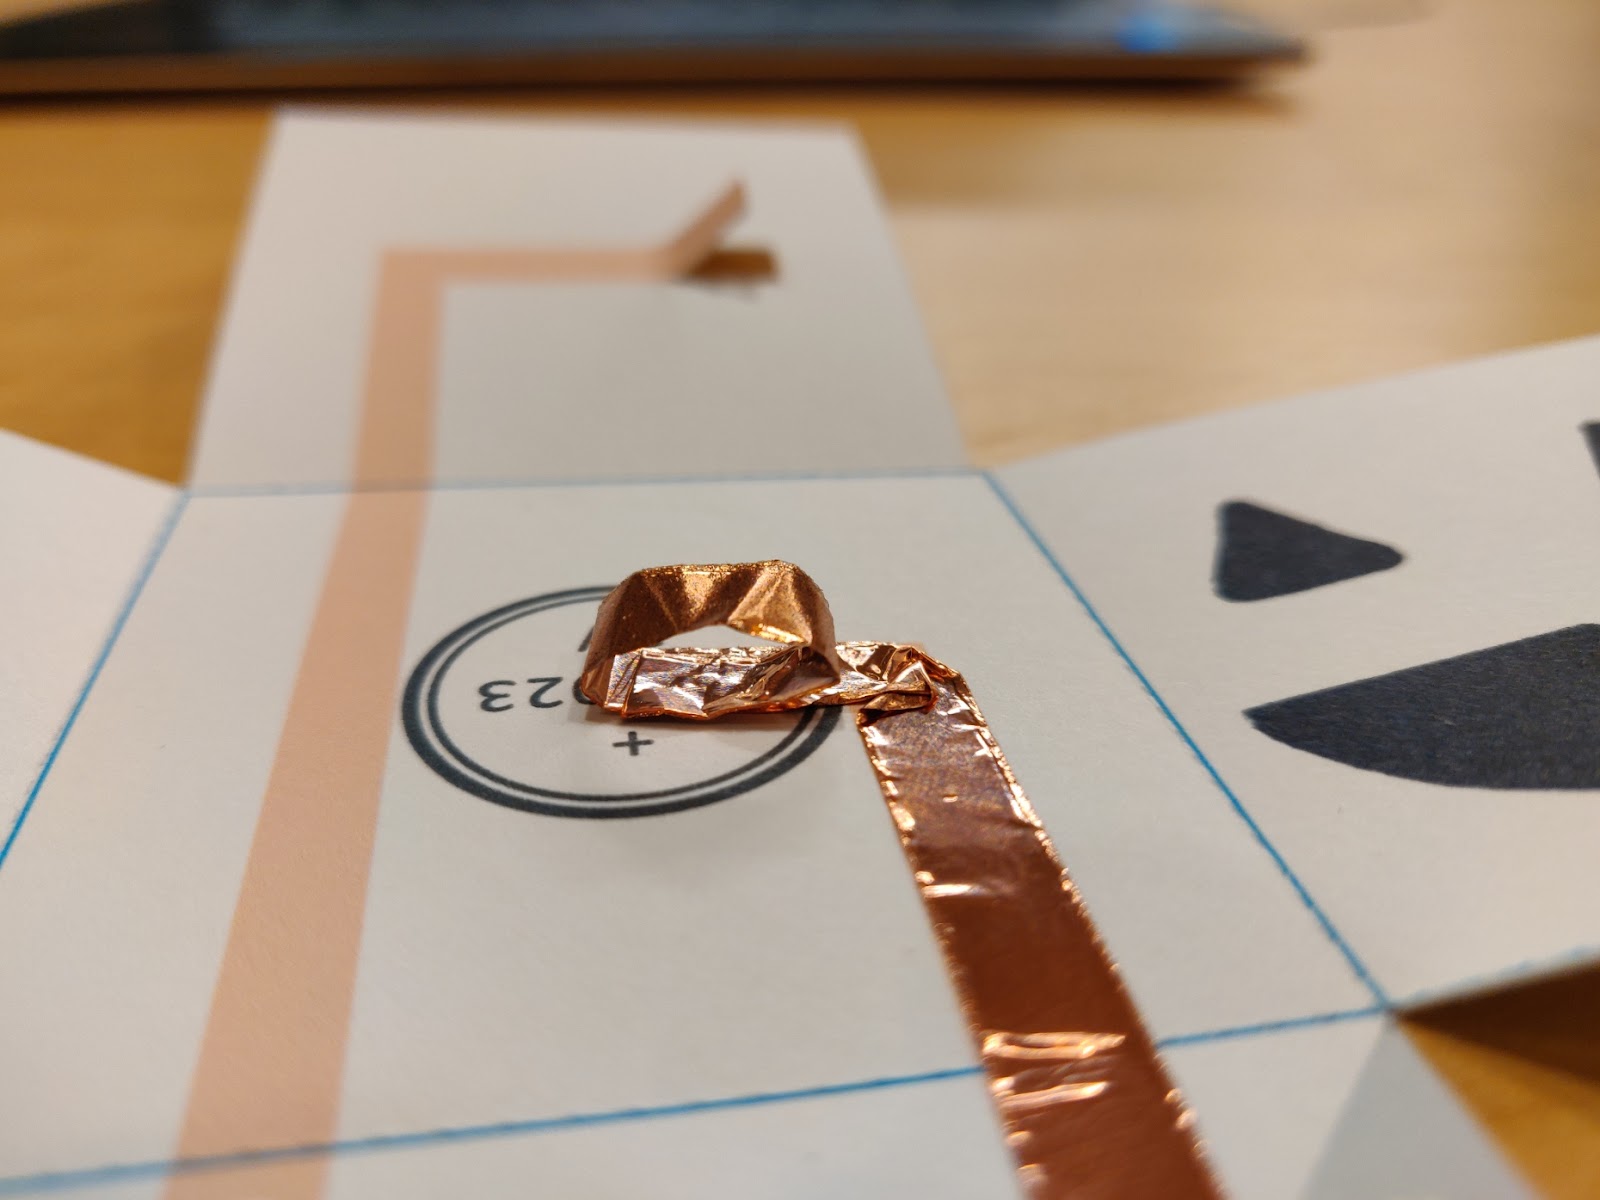
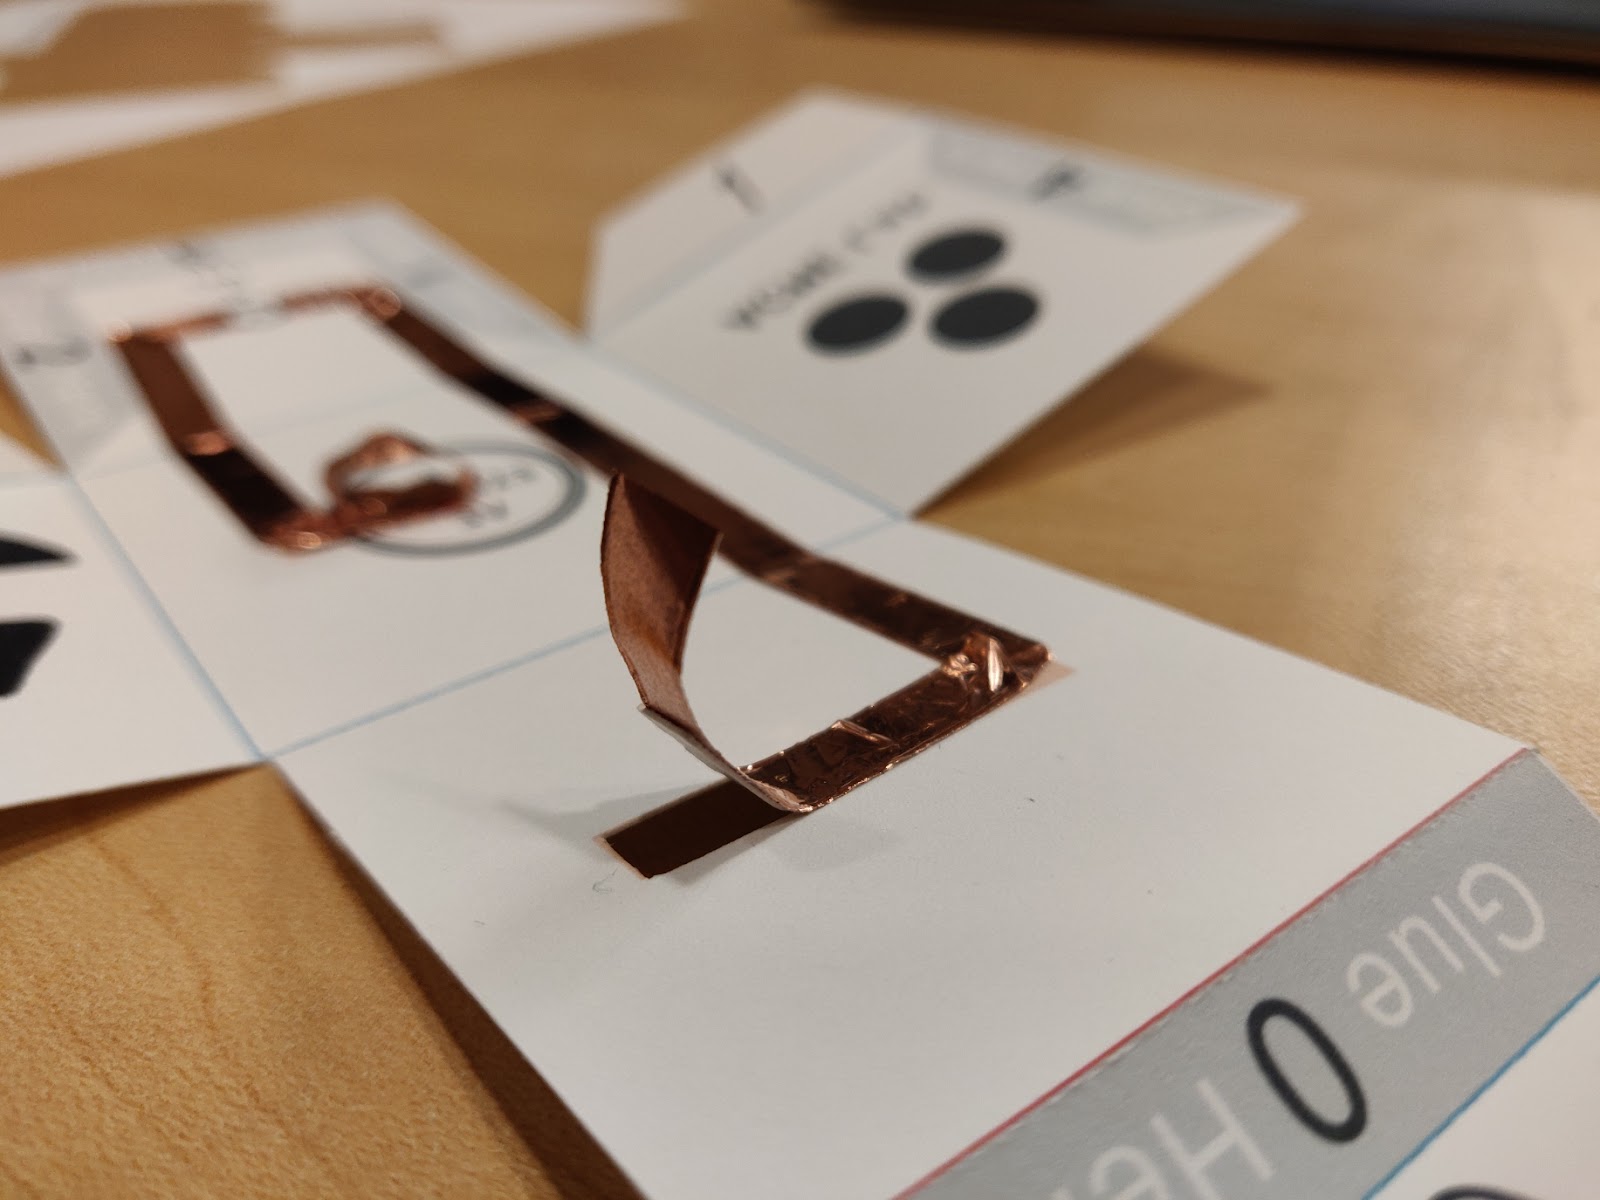
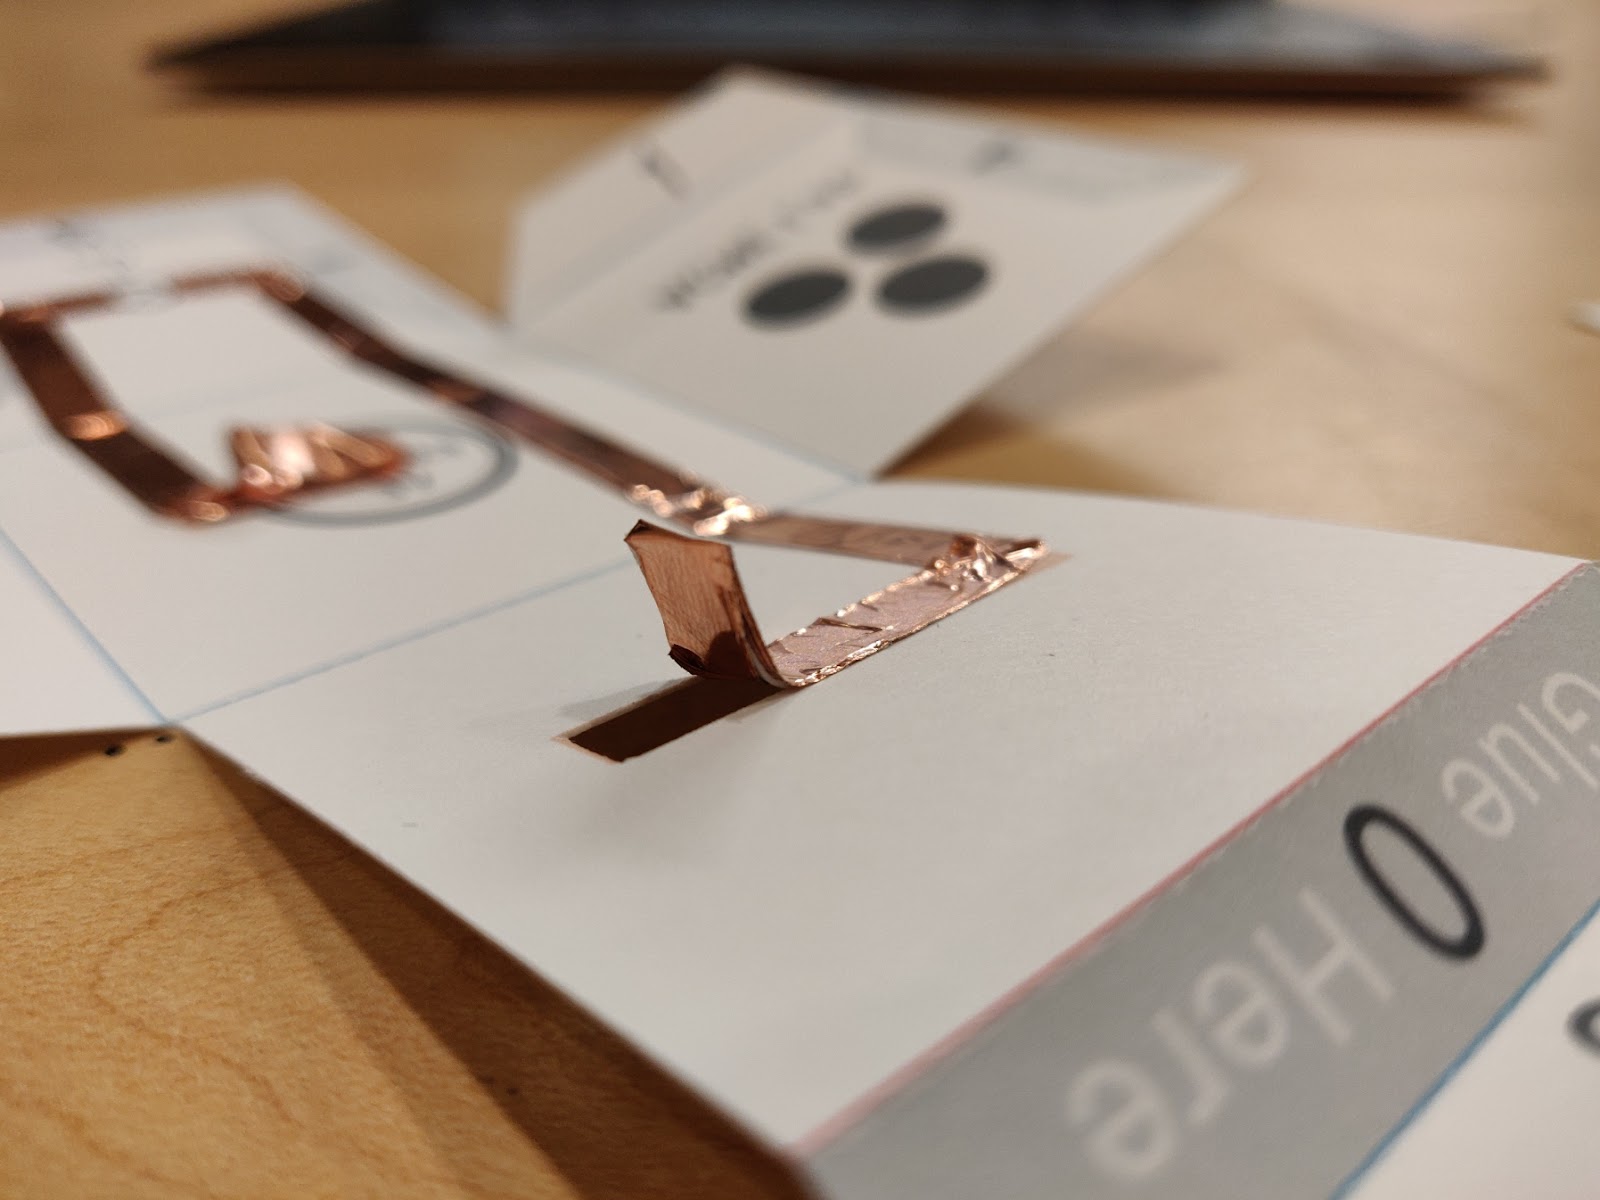
Carefully place copper tape on the orange-colored line on the cube template, splitting it into two parts at the LED circle. Pass the copper tape to the other side of the sheet through the slit on which we performed the semi-fold earlier.
Under the circle labeled CR 2023, loop the copper tape over in order to create an adhesive surface on the upper side as well.


Placing the Electrical Components
On the circle labeled CR 2023, place the button battery such that the negative side of the cell faces down and sticks to the looped copper tape. Press down to affix it.
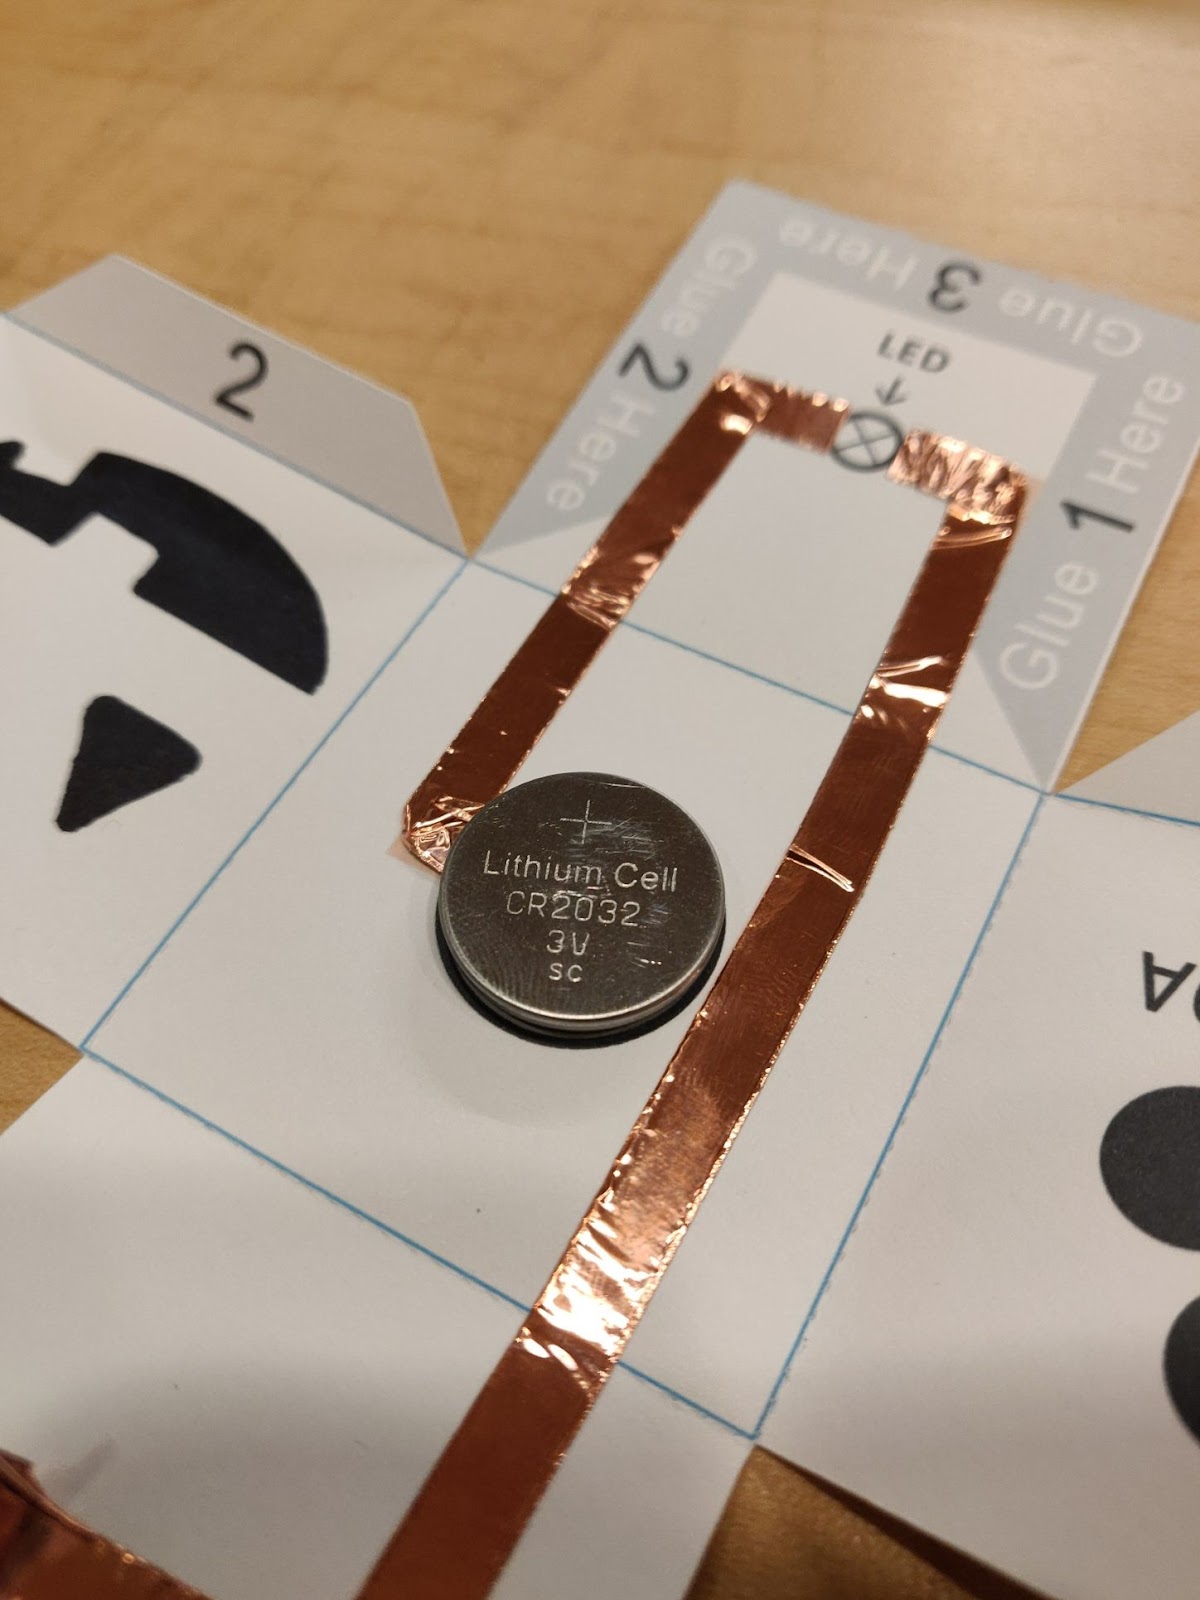
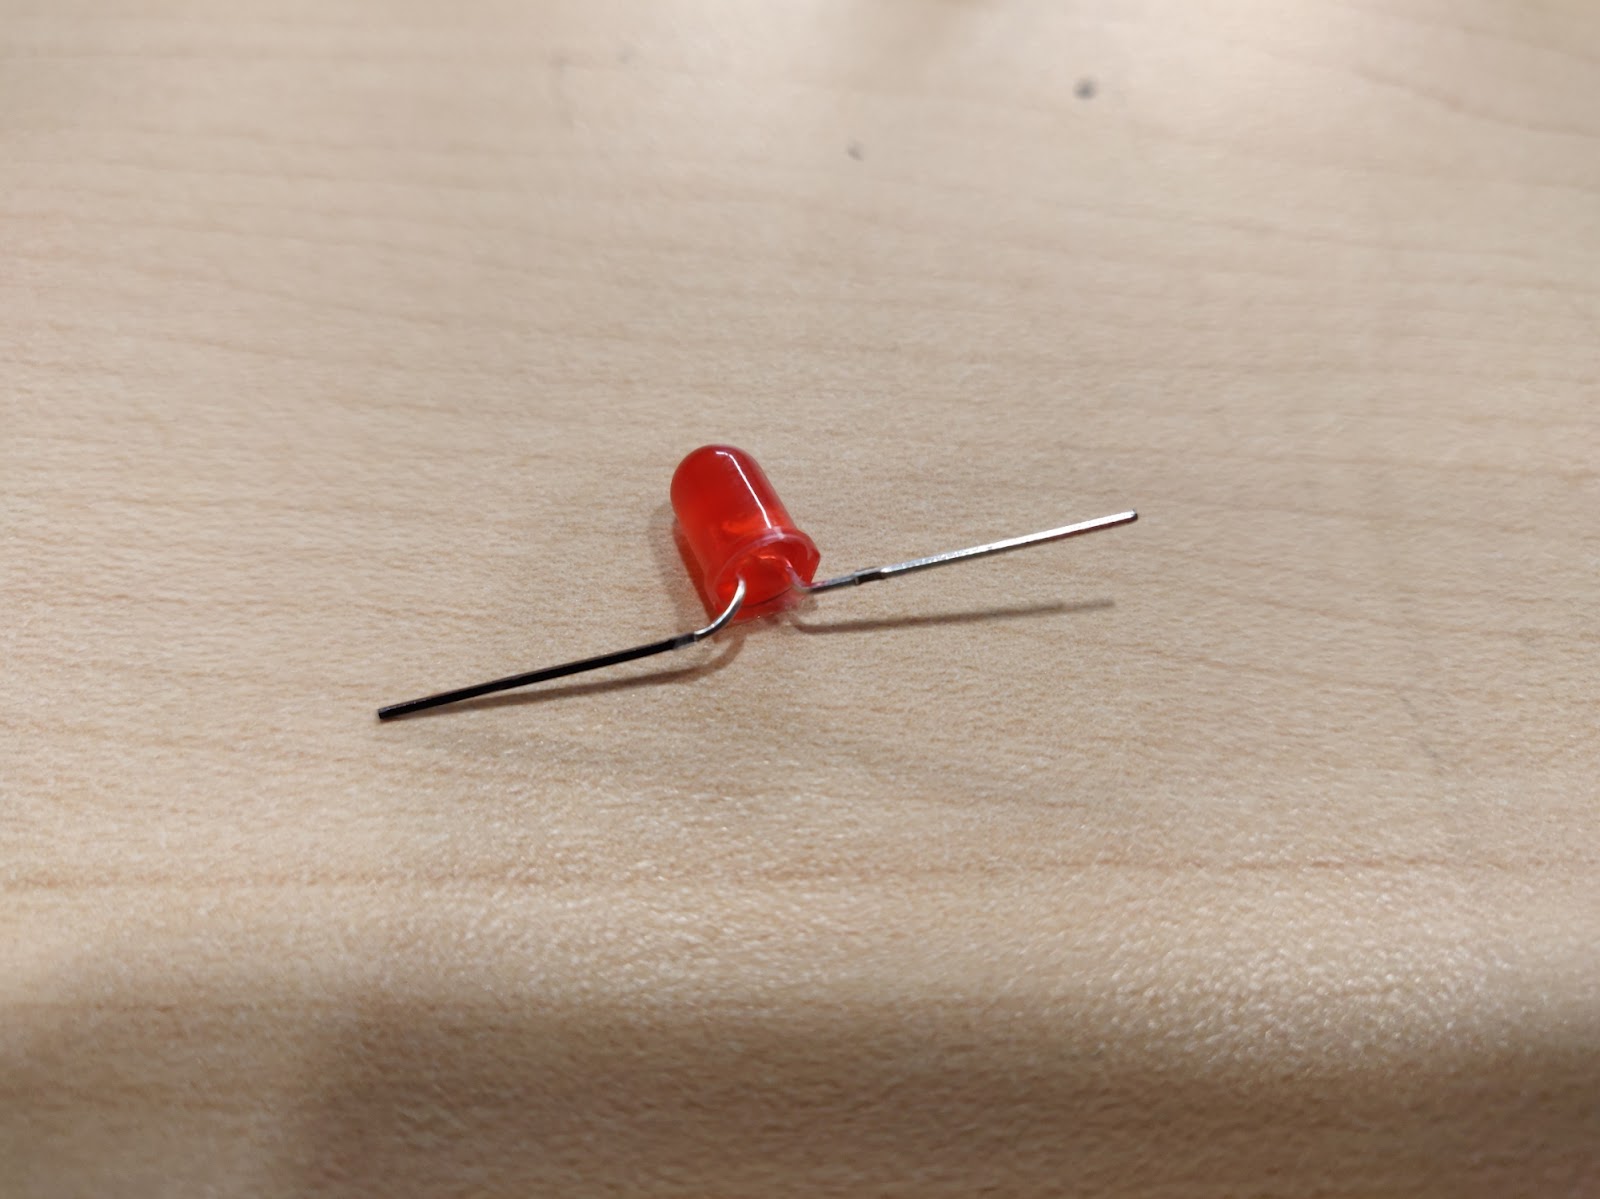
Take the LED and notice that one of the legs is longer than the other, which is the positive terminal of the LED. Mark this leg with a sharpie. Now, fold the two legs outwards at right angles to form the orientation shown below. After folding the legs, we can place the LED on top of the circle labeled LED such that the negative terminal (not marked with a sharpie) is on top of the copper tape which goes directly to under the button battery. This way, the negative of the LED is connected to the negative of the cell. The positive terminal of the LED is placed on the side with the longer copper tape. Secure the LED by placing small pieces of tape on each leg and pressing down.


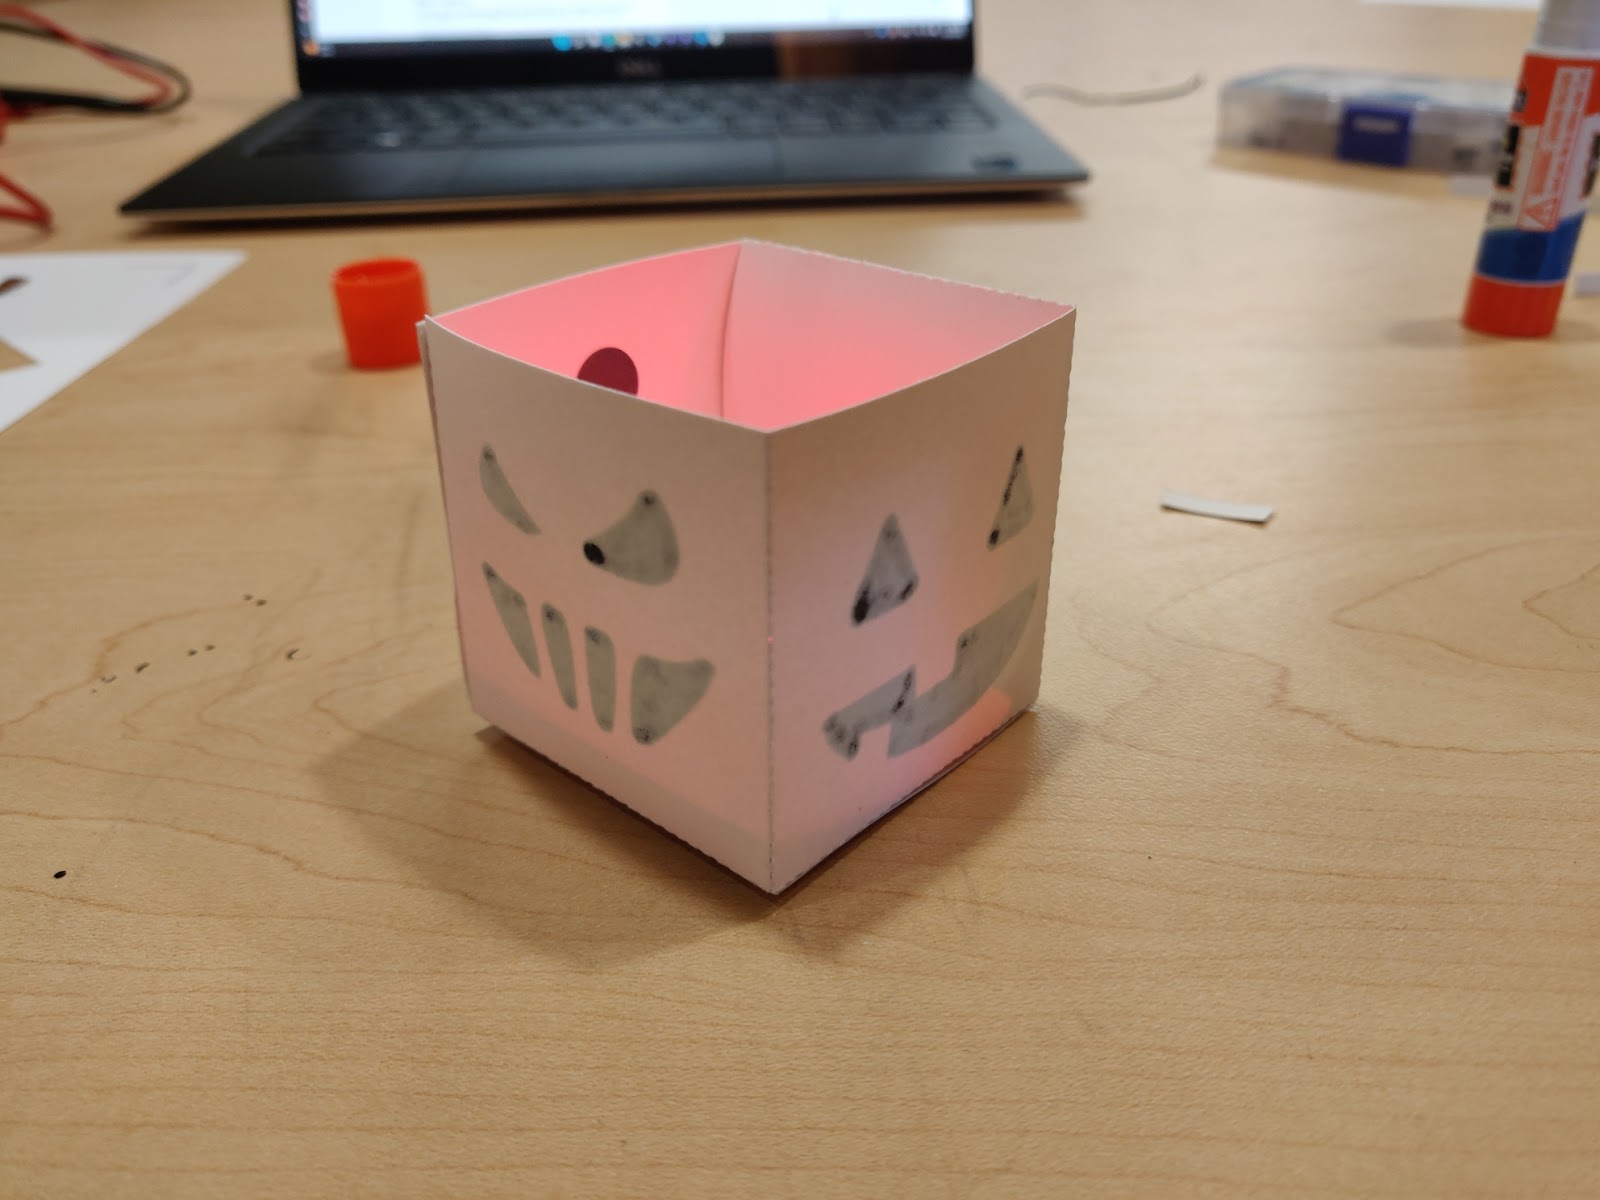
Gluing the Box Together
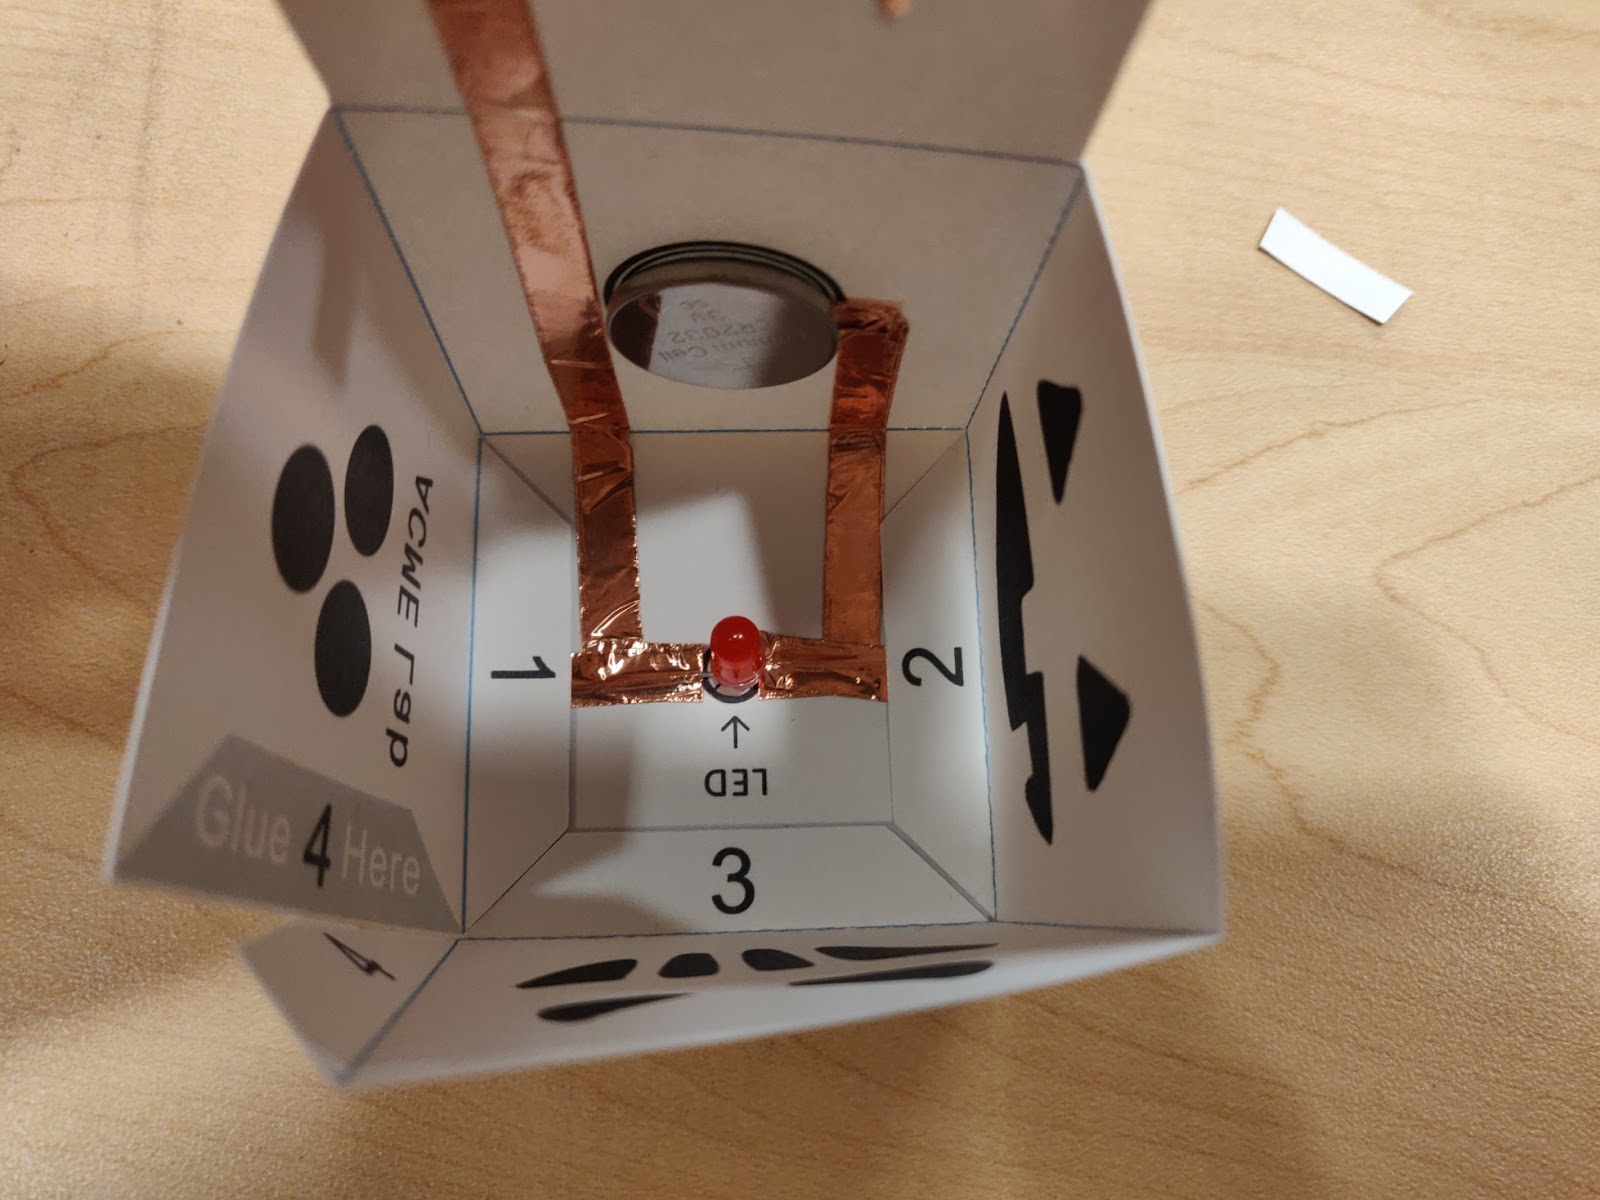
Once the circuit is set up, we can fold the cube template into a cube using the mountain and valley folds we did in Step 1. Apply some glue to all the grey regions with the label Glue Here. Now, following the numbers 0 - 4, carefully fold in the cube template and press on areas where we applied the glue. The resulting cube will look like the one below.


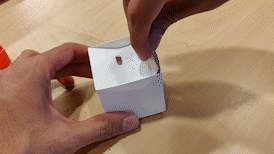
Light Up!
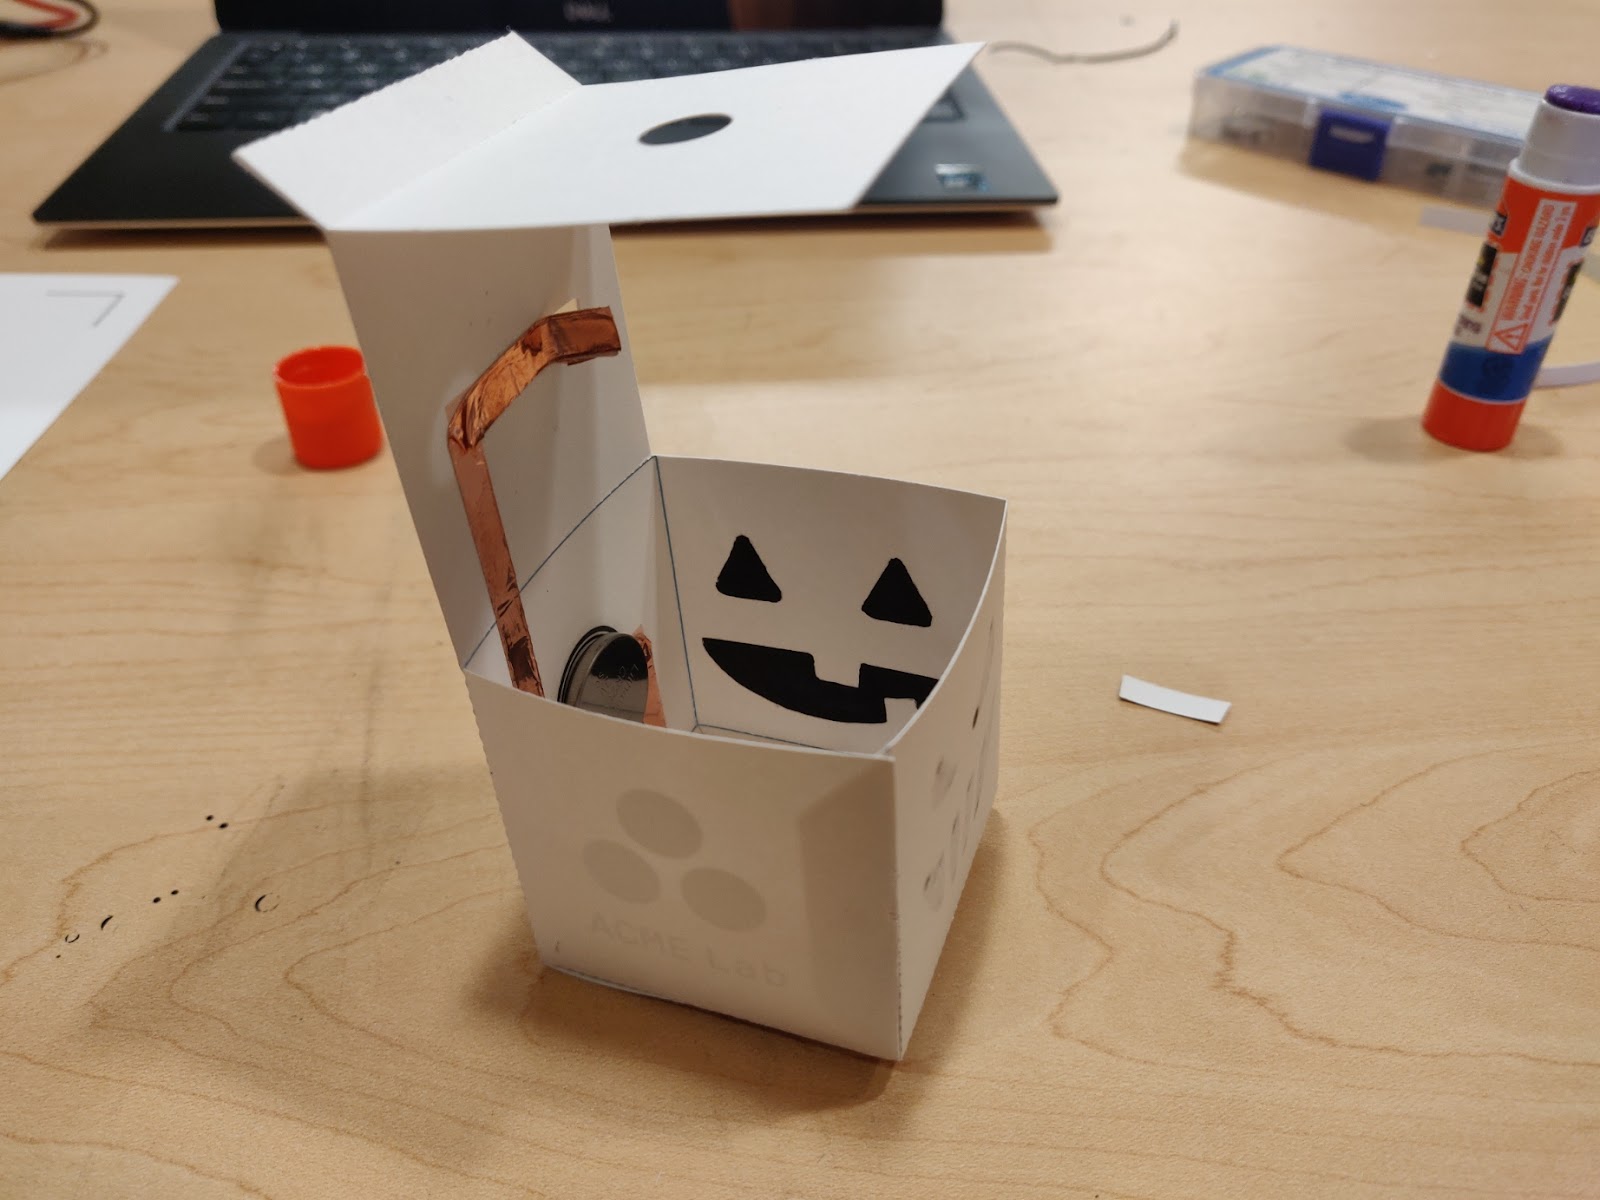
Once we have the assembled cube with the electronics inside, we can light it up! To activate the LED, carefully press the top tab all the way into the cube as shown, until the LED lights up.