Halloween Photo Manipulation Using Pixlr
by DarkRubyMoon in Living > Halloween
5786 Views, 1 Favorites, 0 Comments
Halloween Photo Manipulation Using Pixlr
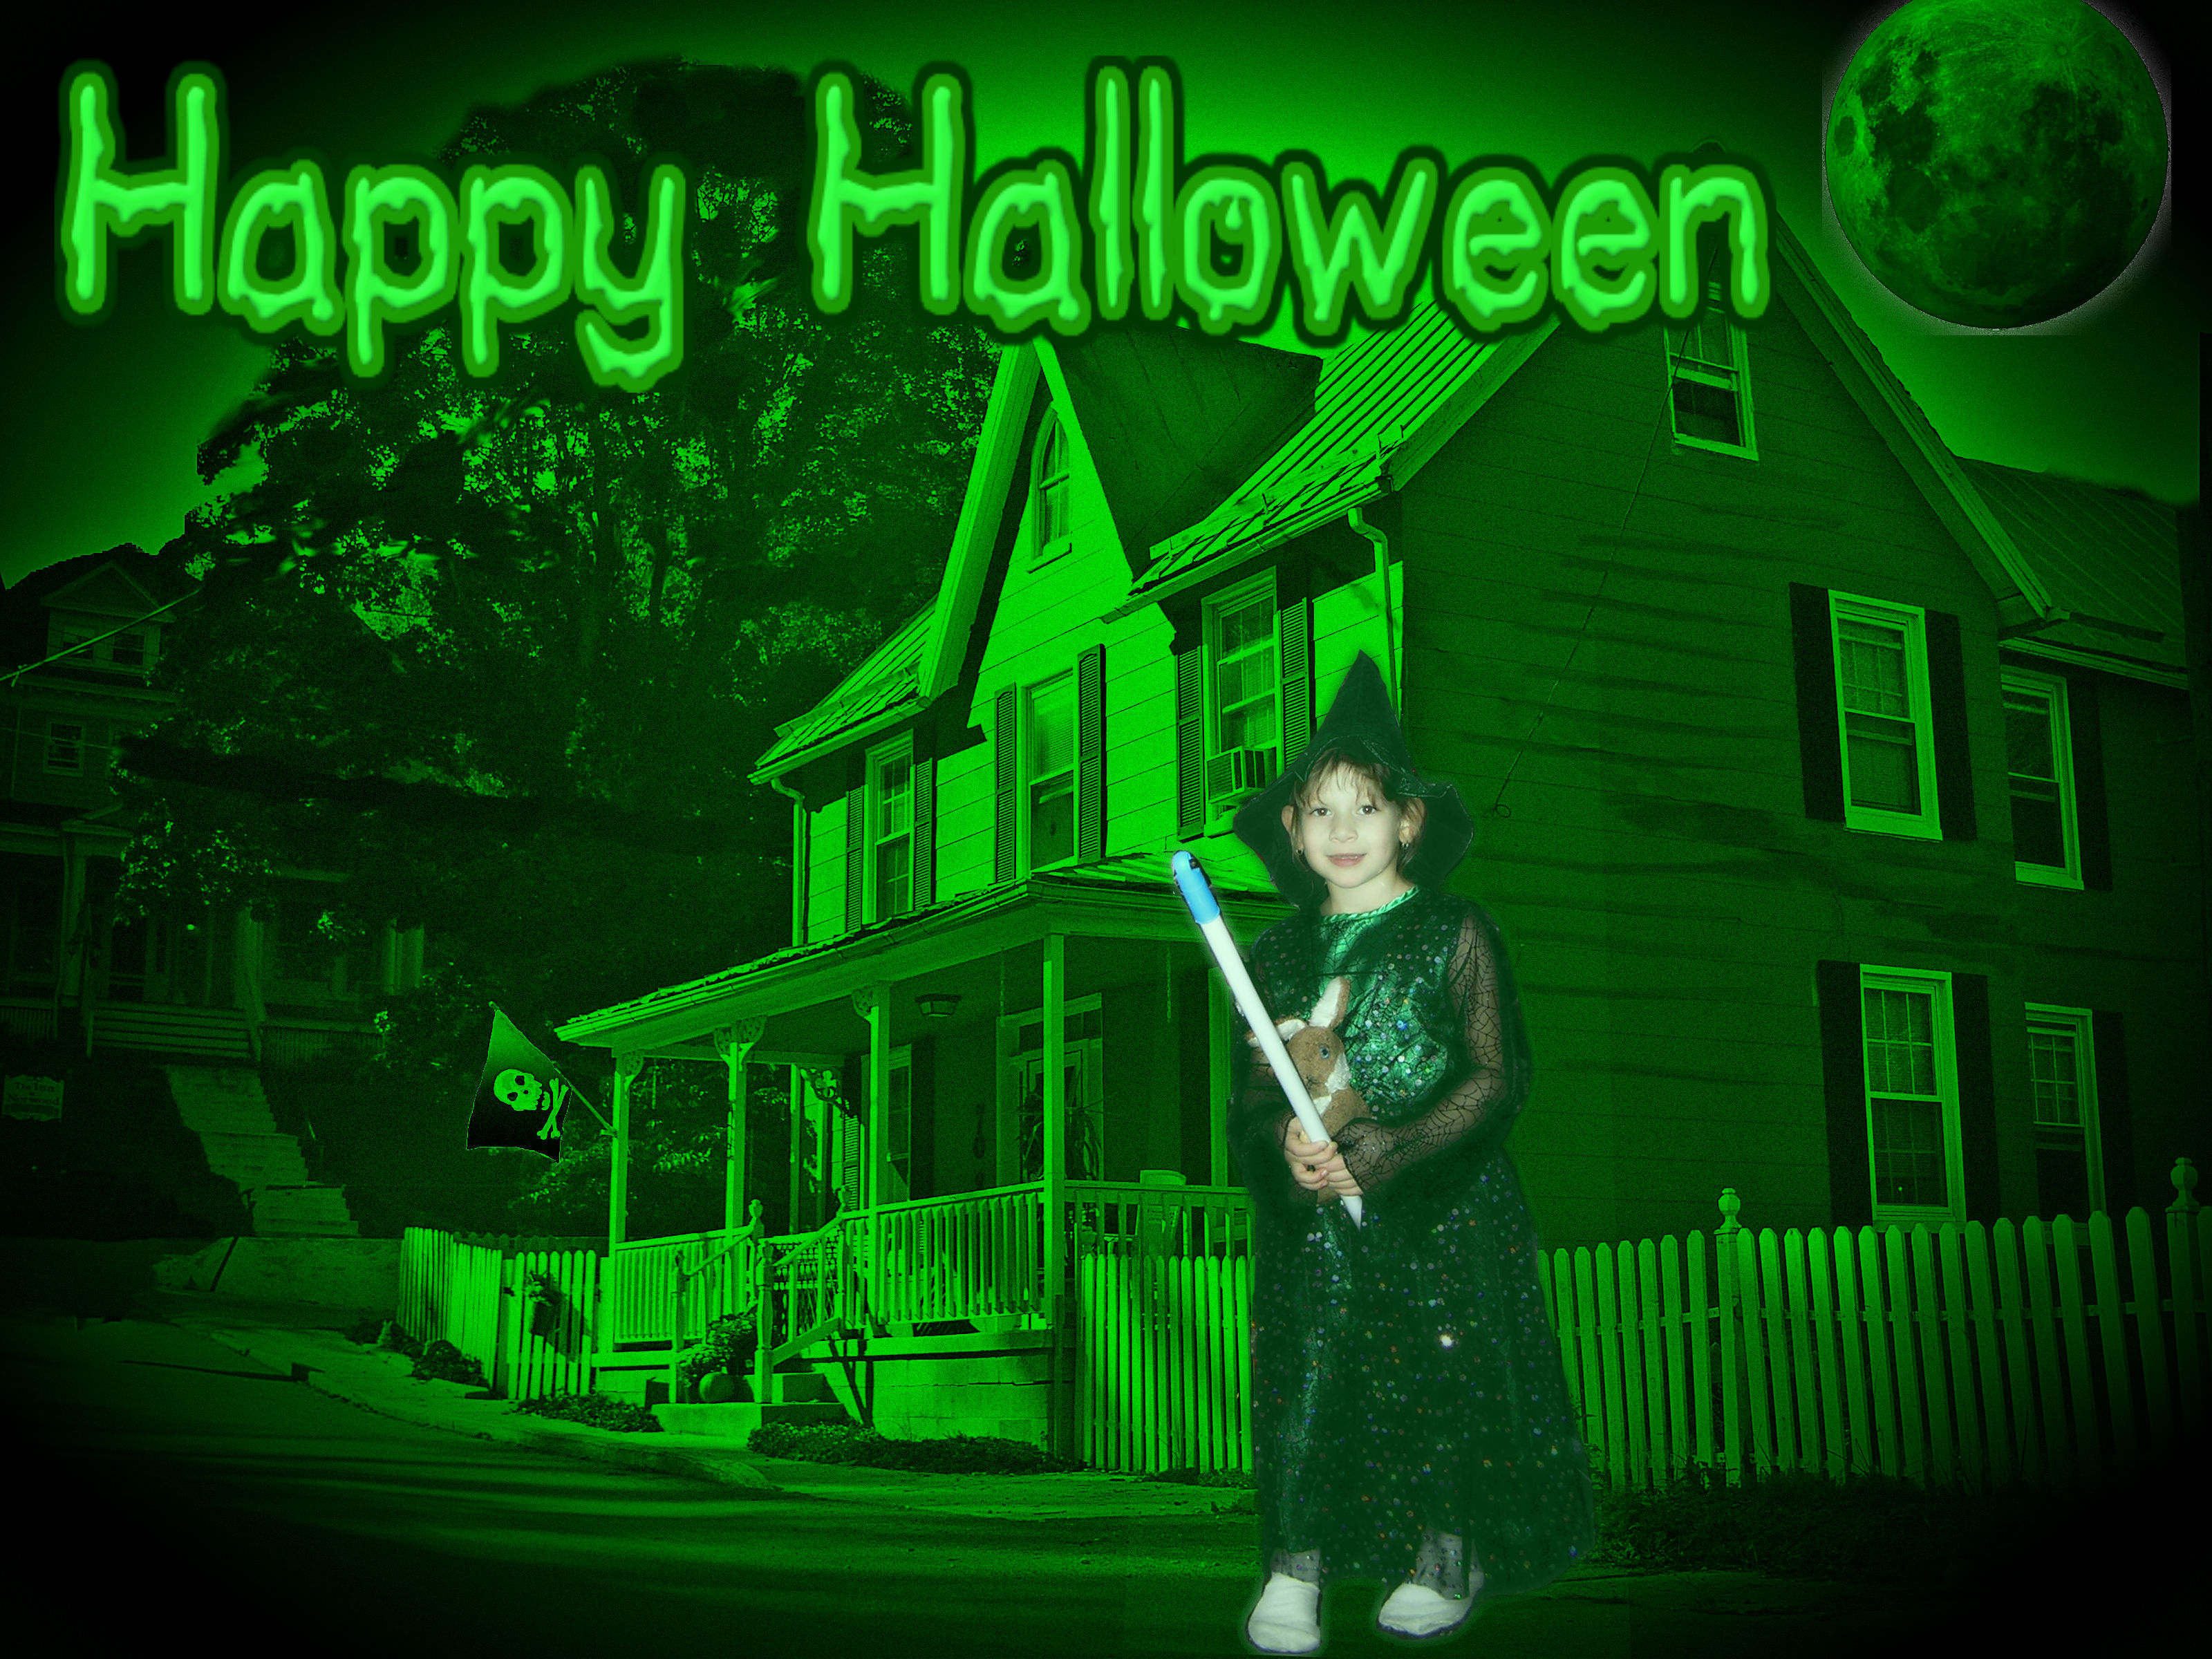
Have you ever tried to snap that perfect Halloween photo of your favorite little ghost goblin or ghoul? Get a perfect picture of your little Princess or Ballerina for that holiday photo? If you have, you soon realize just how difficult it is to get your little one to pose for a Halloween picture, especially if you want to take it in front of that scary haunted house with the howling sound effects as your little monster starts to cry. Even if your little one is not frightened by posing in front of a haunted house, he or she is is likely to have such a Halloween candy sugar rush that your little monster won't stay still long enough to get a non-blurry photo.
Luckily, there is technology to save the day! You don't even need an expensive photo manipulation software to create professional looking images. All you need is a digital camera. (Don't have a digital camera? Check out my store at http://www.cafepress.com/darkrubymoon for flip camera)
Below is a video that takes you step by step through the process. You can then follow along step by step through the rest of this instructable.
Step 1: Get an Embarrissing Halloween Picture of Favorite Little One
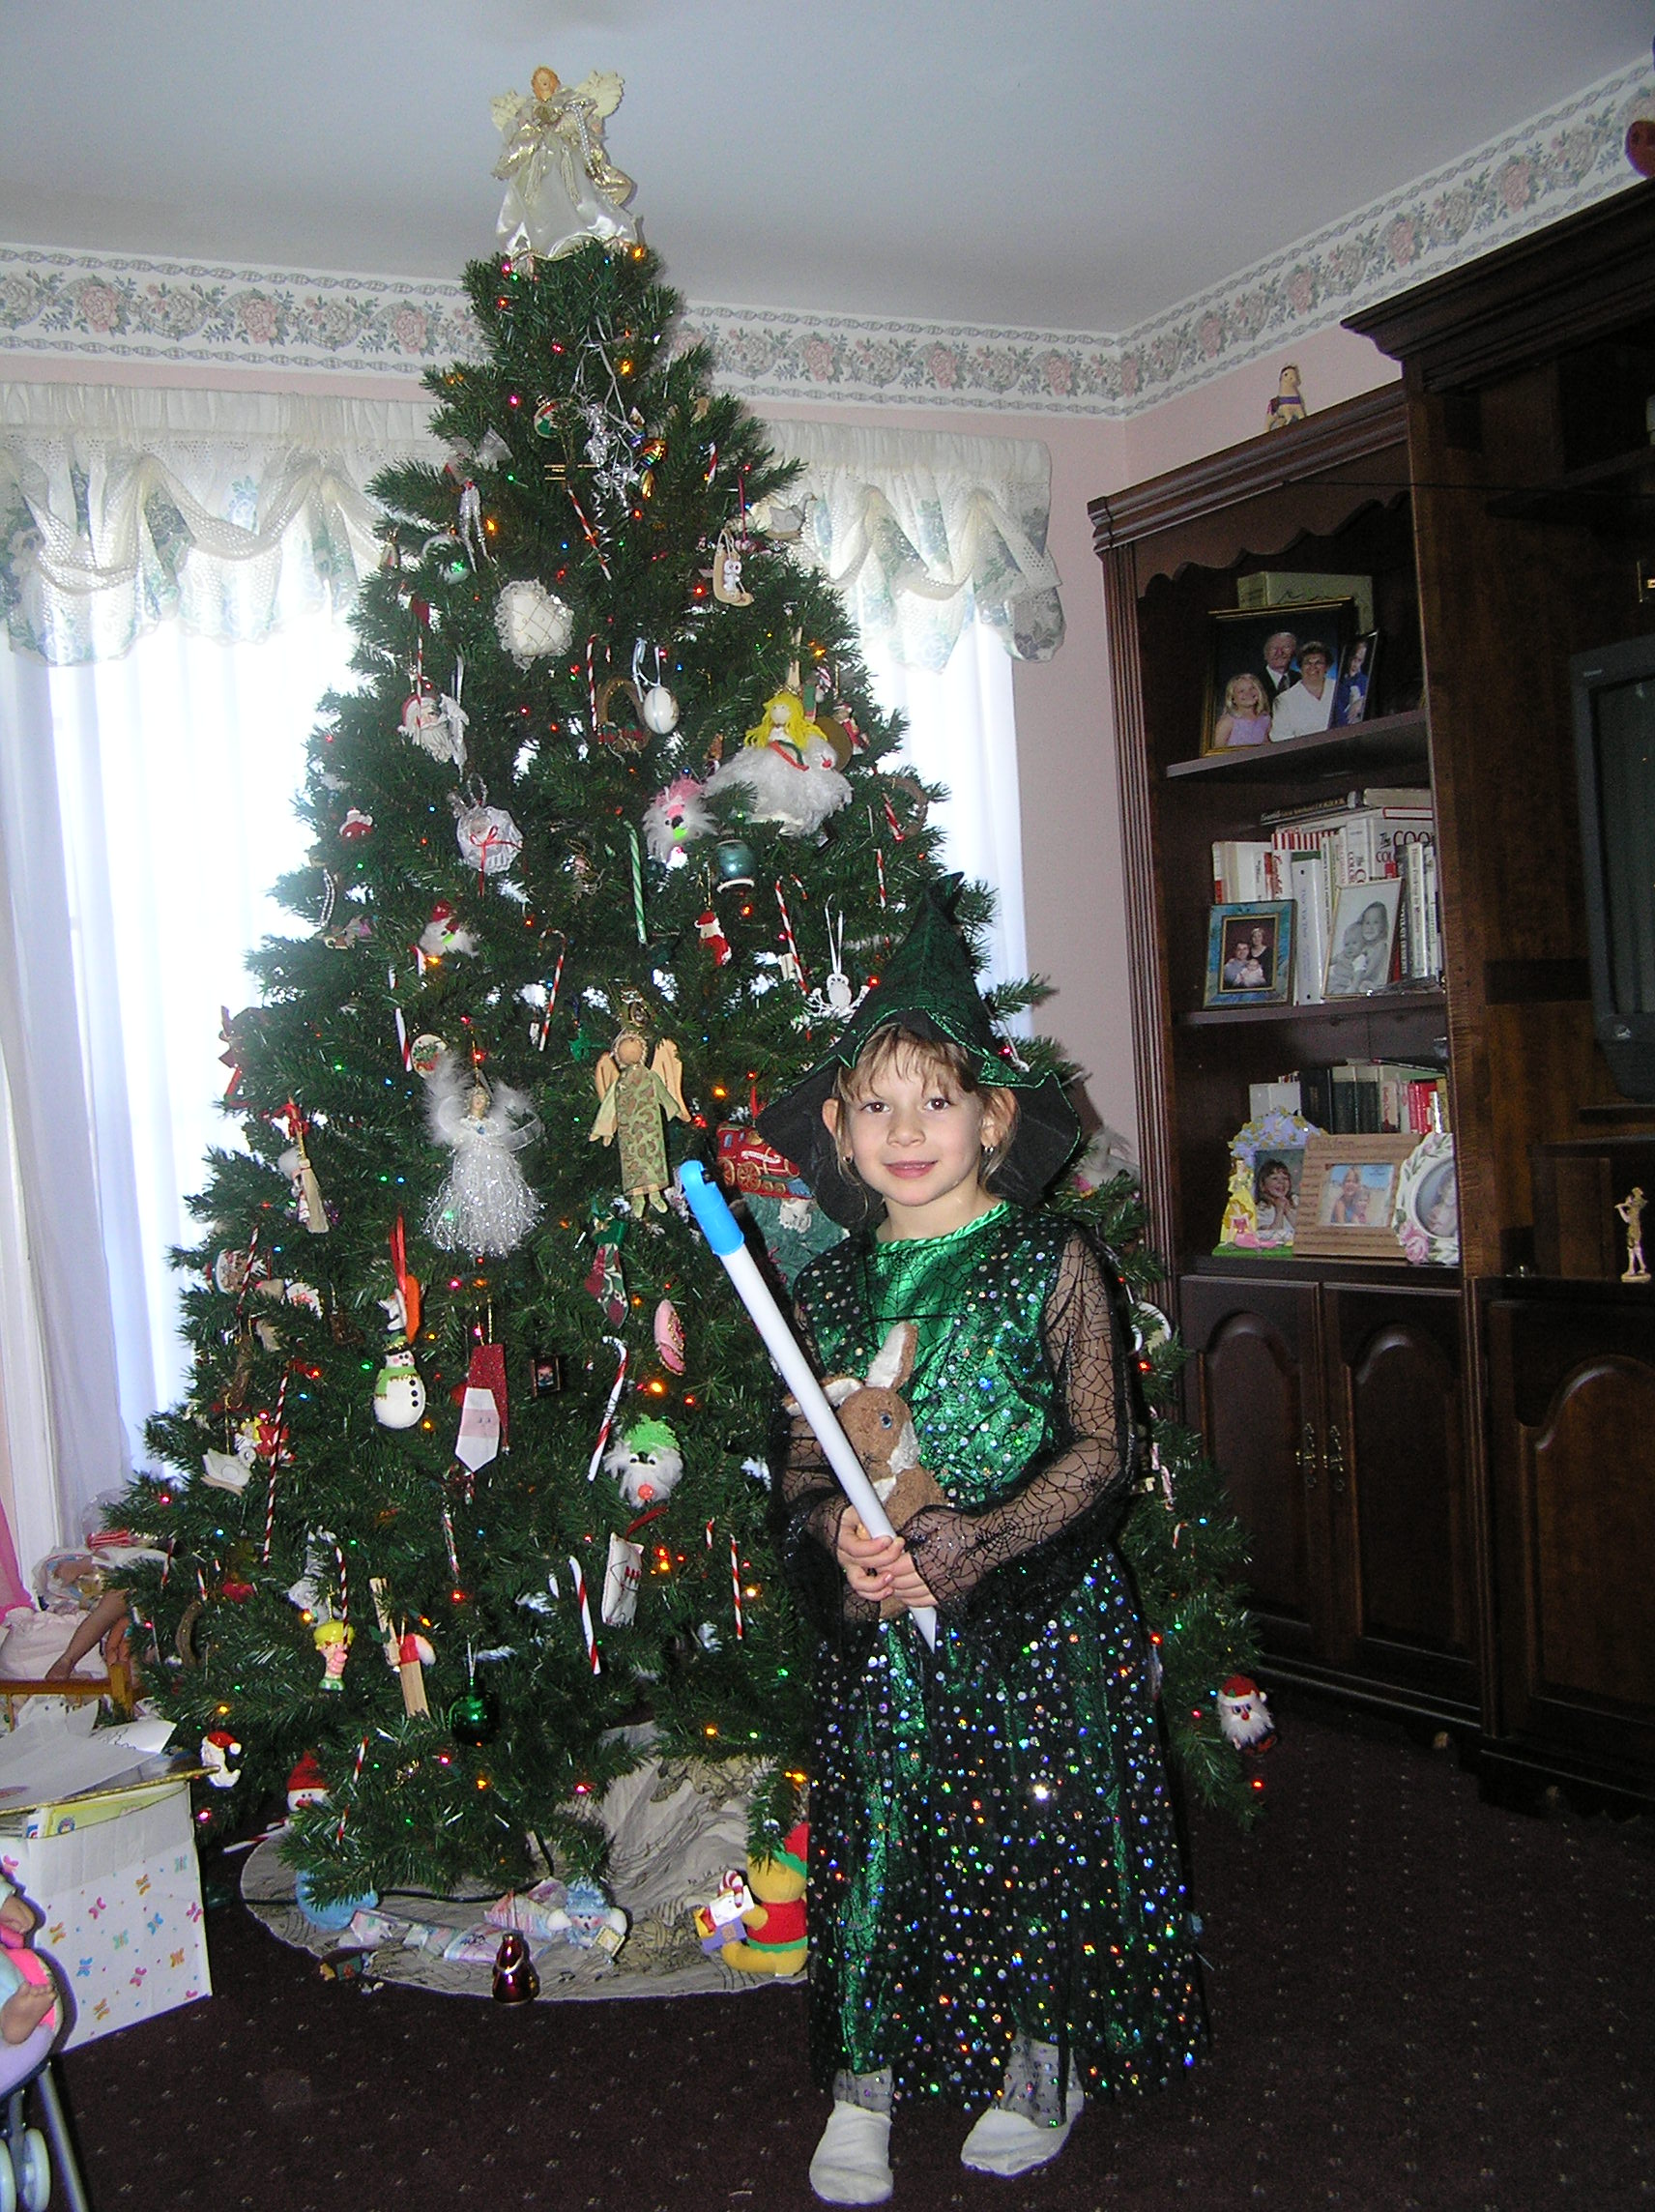
The first step in this process is the hardest, though luckily you have all year to complete this task. The first step is to take a non-blurry photograph of your kid, or in my case my niece, in their Halloween outfit. It doesn't necessarily have to be an embarrassing picture, but that helps. If you don't have a kid or a niece around, it is probably not a good idea to go around taking photos of someone else's kid, so substitute a picture of any consenting subject, preferably someone you know, in a Halloween outfit or costume.
So, here is the picture I finally got of my niece wearing her Halloween costume. Please note the Christmas tree in the background. It took me until Christmas to finally get her to pose for a picture in her Halloween outfit. It took that long for her to come down from the sugar rush from all the candy to finally get her to stand still for a picture. Fortunately, kids like to play dress-up, so if at first you don't succeed in getting your Halloween picture, try try try again. A helpful tip: The threat of Santa not delivering gifts is always useful to get your kid to pose for a holiday photo. Unfortunately the threat of the Great Pumpkin not delivering gifts does not work quite so well.
So, here is the picture I finally got of my niece wearing her Halloween costume. Please note the Christmas tree in the background. It took me until Christmas to finally get her to pose for a picture in her Halloween outfit. It took that long for her to come down from the sugar rush from all the candy to finally get her to stand still for a picture. Fortunately, kids like to play dress-up, so if at first you don't succeed in getting your Halloween picture, try try try again. A helpful tip: The threat of Santa not delivering gifts is always useful to get your kid to pose for a holiday photo. Unfortunately the threat of the Great Pumpkin not delivering gifts does not work quite so well.
Find a Picture of Something Spooky for Background
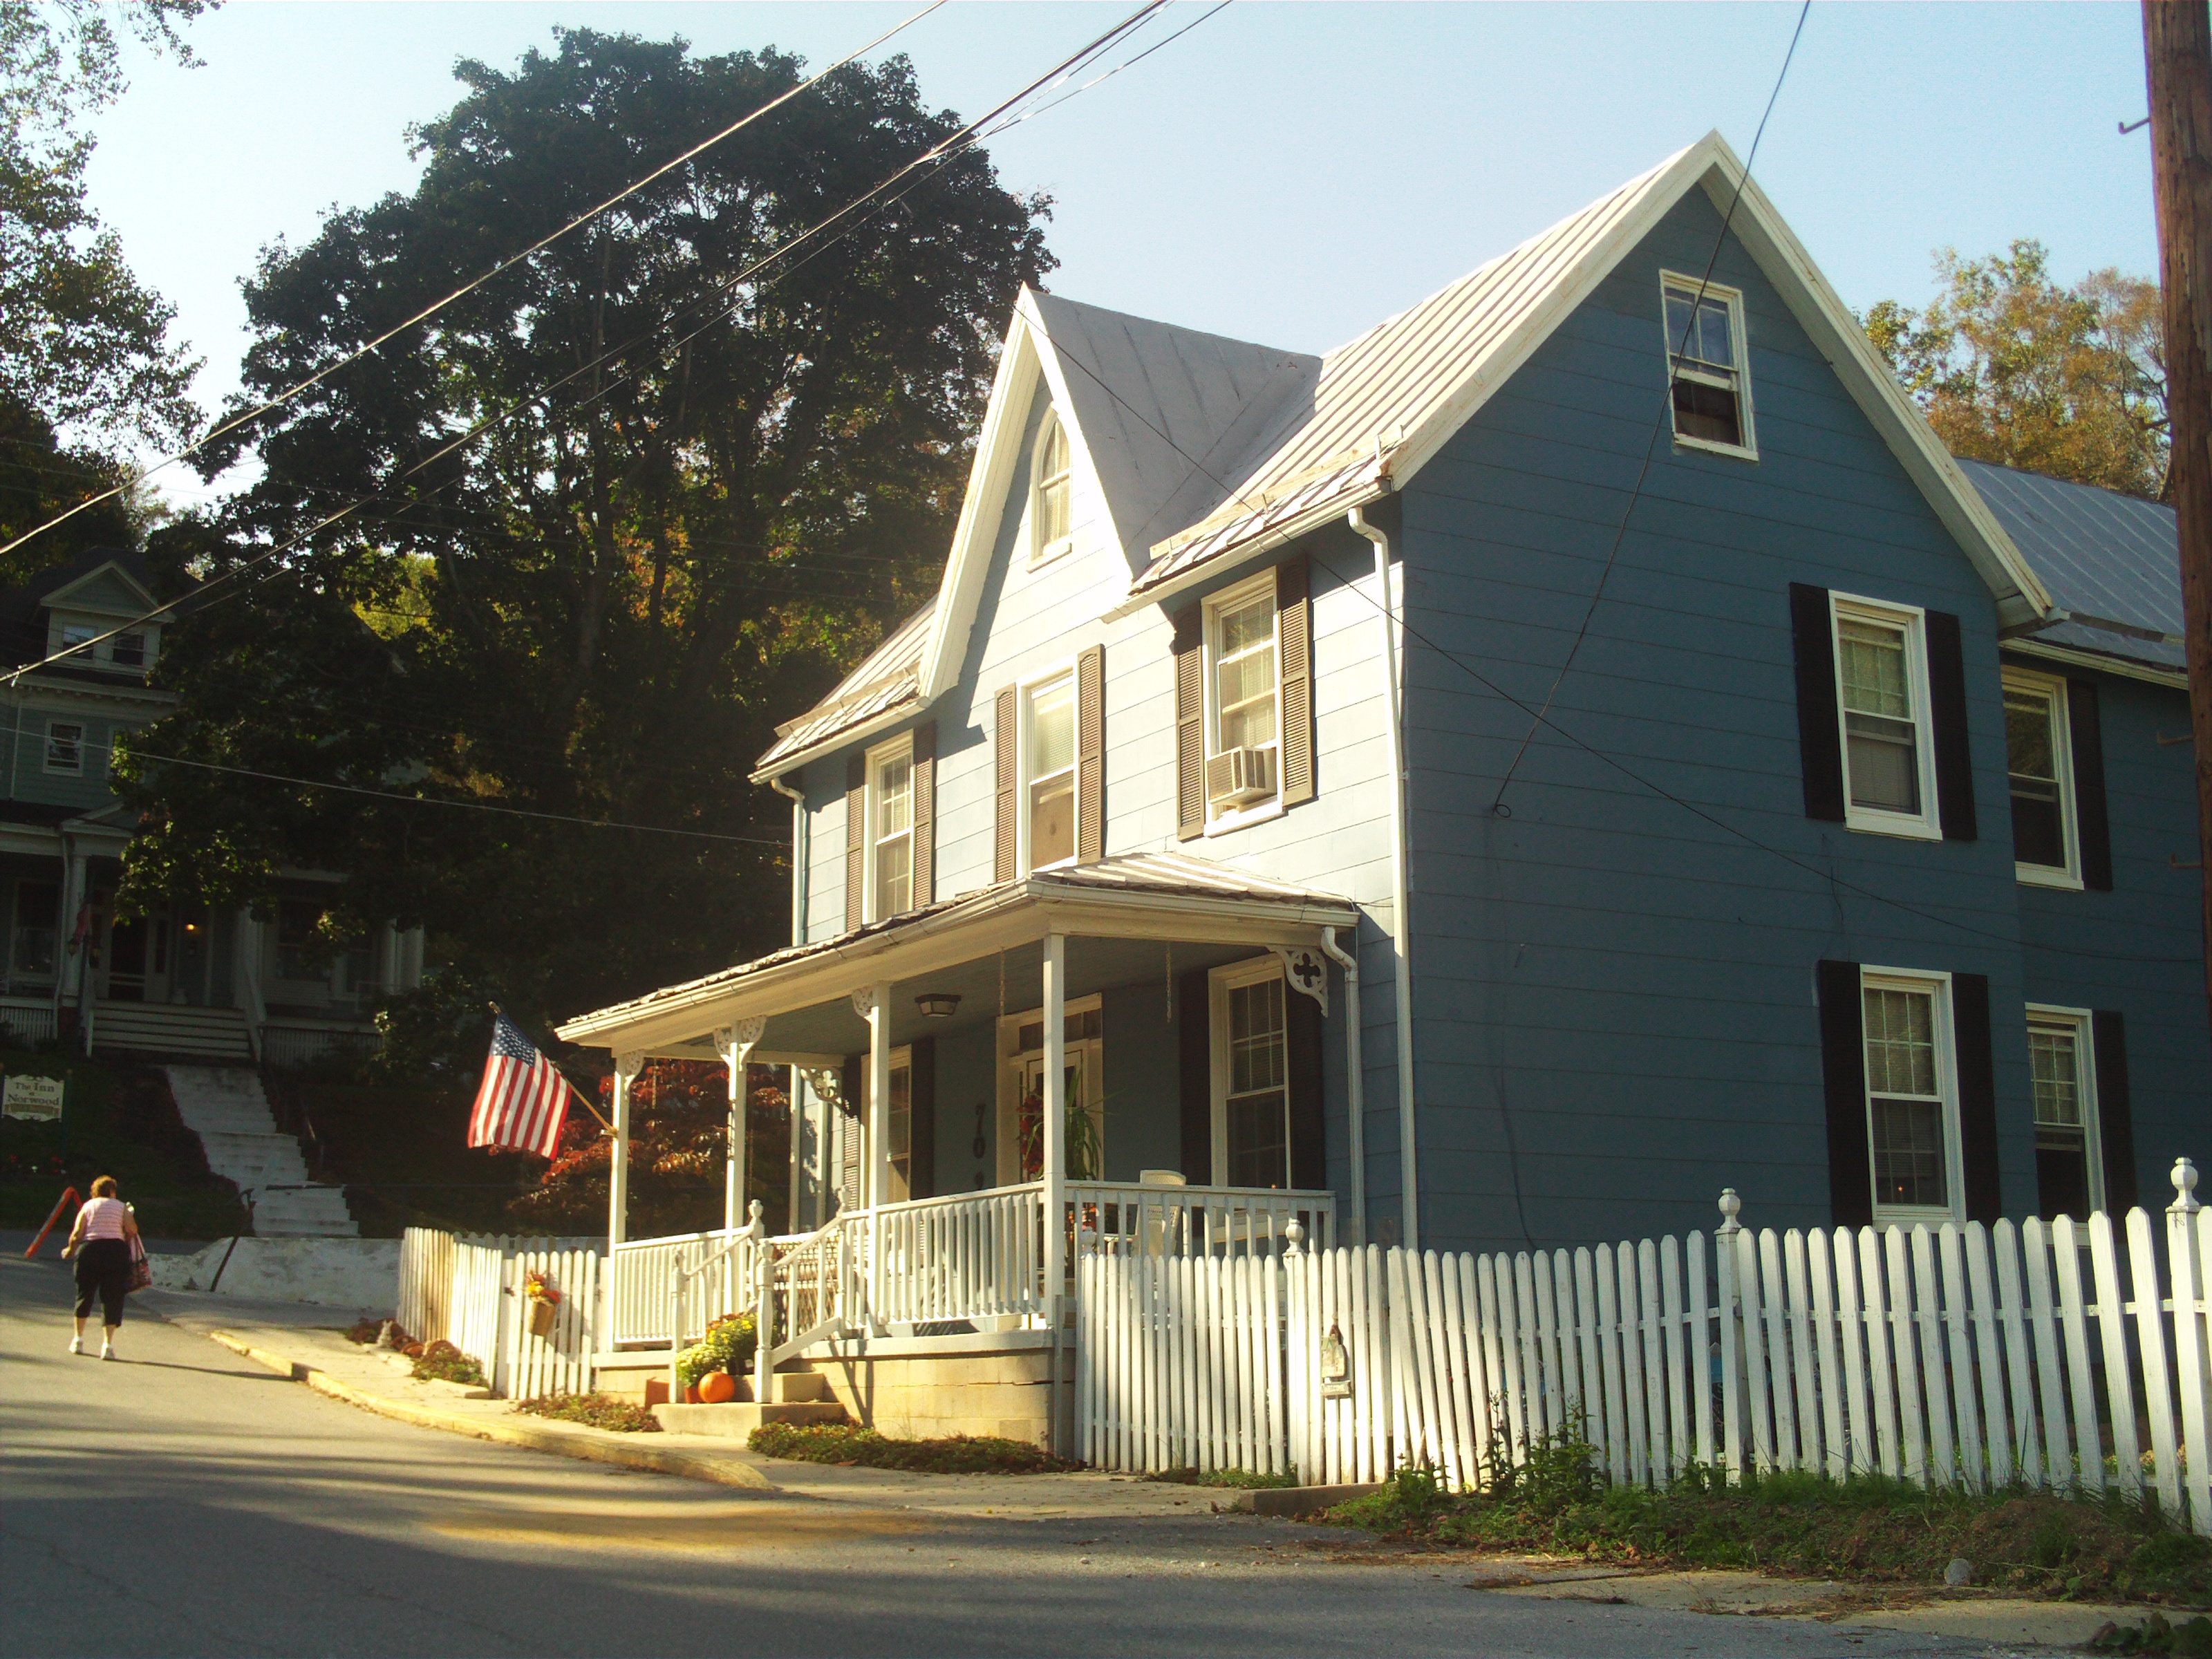
Ok, so this house is not exactly spooky. I don't even know whose house this is... so if it is your house, my apologies for making your house my haunted house. It is actually a very cute little house not at all creepy. Normally, if I were not entering an instructables contest, I'd do a Google search for Spooky Haunted House, and just steal someone else's photo. However, as that is technically stealing, instead I searched through all the old pictures on my computer for any photo I took of any remotely creepy scenery like a picture of a cemetery or a haunted house. As it turns out, I found this picture I took of some quaint little old house that is actually neighboring a house rumored to be a real haunted house. The real haunted house is actually the one behind the trees can barely see. Anyway, this picture is good enough to make for a background for my Halloween picture.
Open Background Image Using Pixlr

The next step is to alter your background image using Pixlr at http://pixlr.com/editor/ . Why Pixlr? Because they are sponsoring this contest, and I am hoping by using their software, I'll have a better chance at winning. You can actually use any photo editing software, but Pixlr turns out to be pretty good, and best of all it is free. This was actually my first time using Pixlr, and I had no problem doing the same sort of photo manipulation I'd normally do with a very expensive art program... so save your money.
Click to Open Image from Computer. This will open a directory to all the files on your computer (You'd be surprised how many people don't know what that is). Go to the folder in which you downloaded your digital image of the background and click to open that file. If the file isn't on your computer, it is a good idea to copy the picture off your camera onto the hard drive of your computer. Most people save their image files to the My Picture file.
Whenever you plan to alter an existing image, it is always a good idea to make a backup of your original image. This way, if you mess up the picture, you still have the original. It is also a good idea to put all your work in a separate folder on your computer. Save your background image in a new folder and name the background image something like Background. Now you can begin to alter your image without worrying about messing up the original picture file. As you begin work on altering your background image, periodically save your file with different file names so that you can always go back one step. So, after making major alterations on this image, you may want to save the file as Background1, then Background2 and so on. When the project is complete, you can always delete the extra copies.
Alter Elements of Background
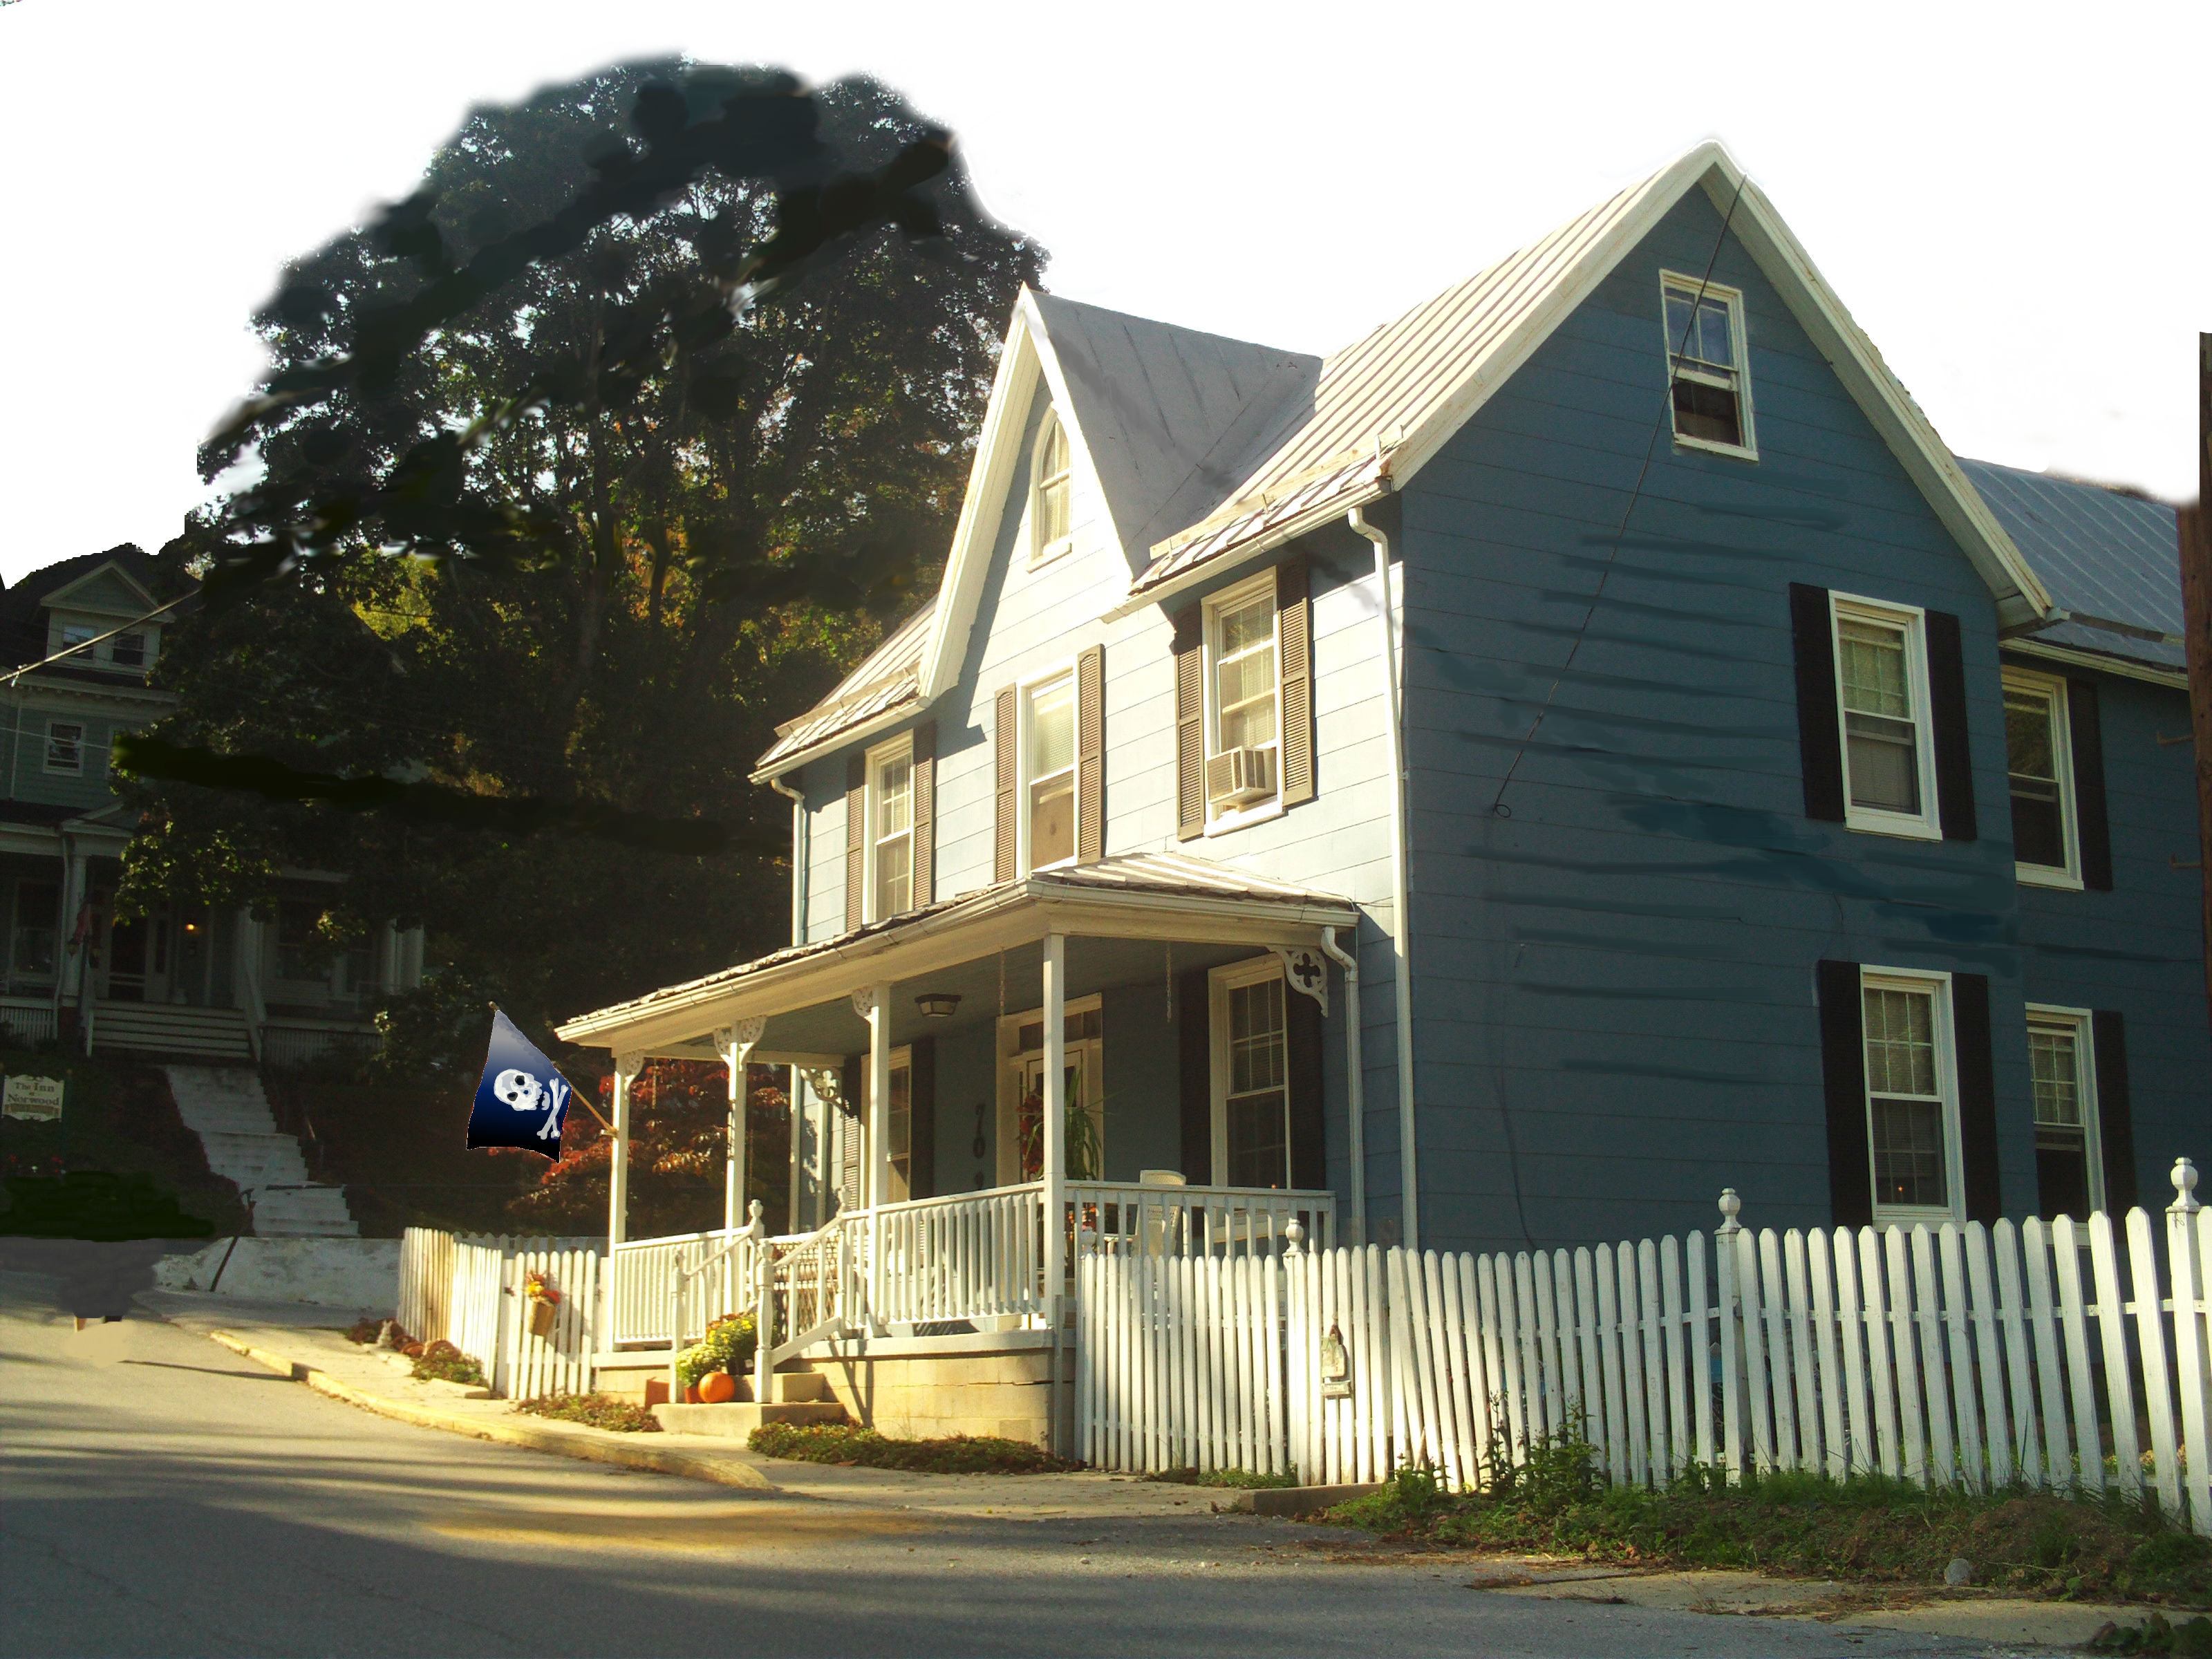
Unless the background image your using happens to be the perfect background, you are likely to have to alter some elements of the picture. In my case, the picture I chose for the background of my Halloween photo seemed less like a spooky haunted house and more like a nice little cottage I'd like to stay at for a bed and breakfast. While it did have some nice fall pumpkins, not to be unpatriotic, the American flag just didn't say scarey spooky house to me. Also, some lady happened to be walking up the street when I took the photo, and since I don't know her or want her in my Halloween picture, she has to go. While the phone lines might be ok, they were a little too distracting as well.
The first step is to remove or alter elements of the picture that are distracting. As a background image, you want it to be simple. To remove something like a person walking up the street, as long as the person is not in front of a critical element to the picture, it is relatively easy to do. Simply use the eyedropper tool along the left side of the Pixlr, and select the color of the background near where the person is standing. Then use the paintbrush tool to color over the person. If the color is not a perfect match with the background, you can use the blend tool to smear the colors and blend them such that you can't tell the person was ever there.
In the case of the American Flag, the Flag was too prominent an element of the picture to simply make disappear by coloring over it with the background color. In this case, rather than remove the element, I choose instead to alter it. Using the brush tool, I outlined the flag's silhouette in white. Then using the lasso tool, I circled the interior of the flag to select it and under Edit clicked to clear. This deleted the Flag such that the American flag was now a white flag. Using the Magic Wand, I selected the white area. The magic wand is a tool that will select an entire region of approximately the same color. Using the gradient tool, I selected a dark color range to imitate that of the color of a pirate flag. Flags have shadows and their color alters when they curl, so the gradient color of dark grey to black appears more realistic than if I simply painted the flag black. Next, I drew a pirate skull and cross-bones on the flag using the brush tool with the color white. The Pirate Flag seemed to give the house a much more spooky feel than the American Flag.
Sometimes, the best way to remove elements of an image are to blend them rather than color over them. In the case of the telephone wires, using the blend tool to blend the wire color with the house caused the wires to disappear and at the same time made the house look more weather worn and old.
Our spooky background is almost complete.
Filters... the Magical Filters
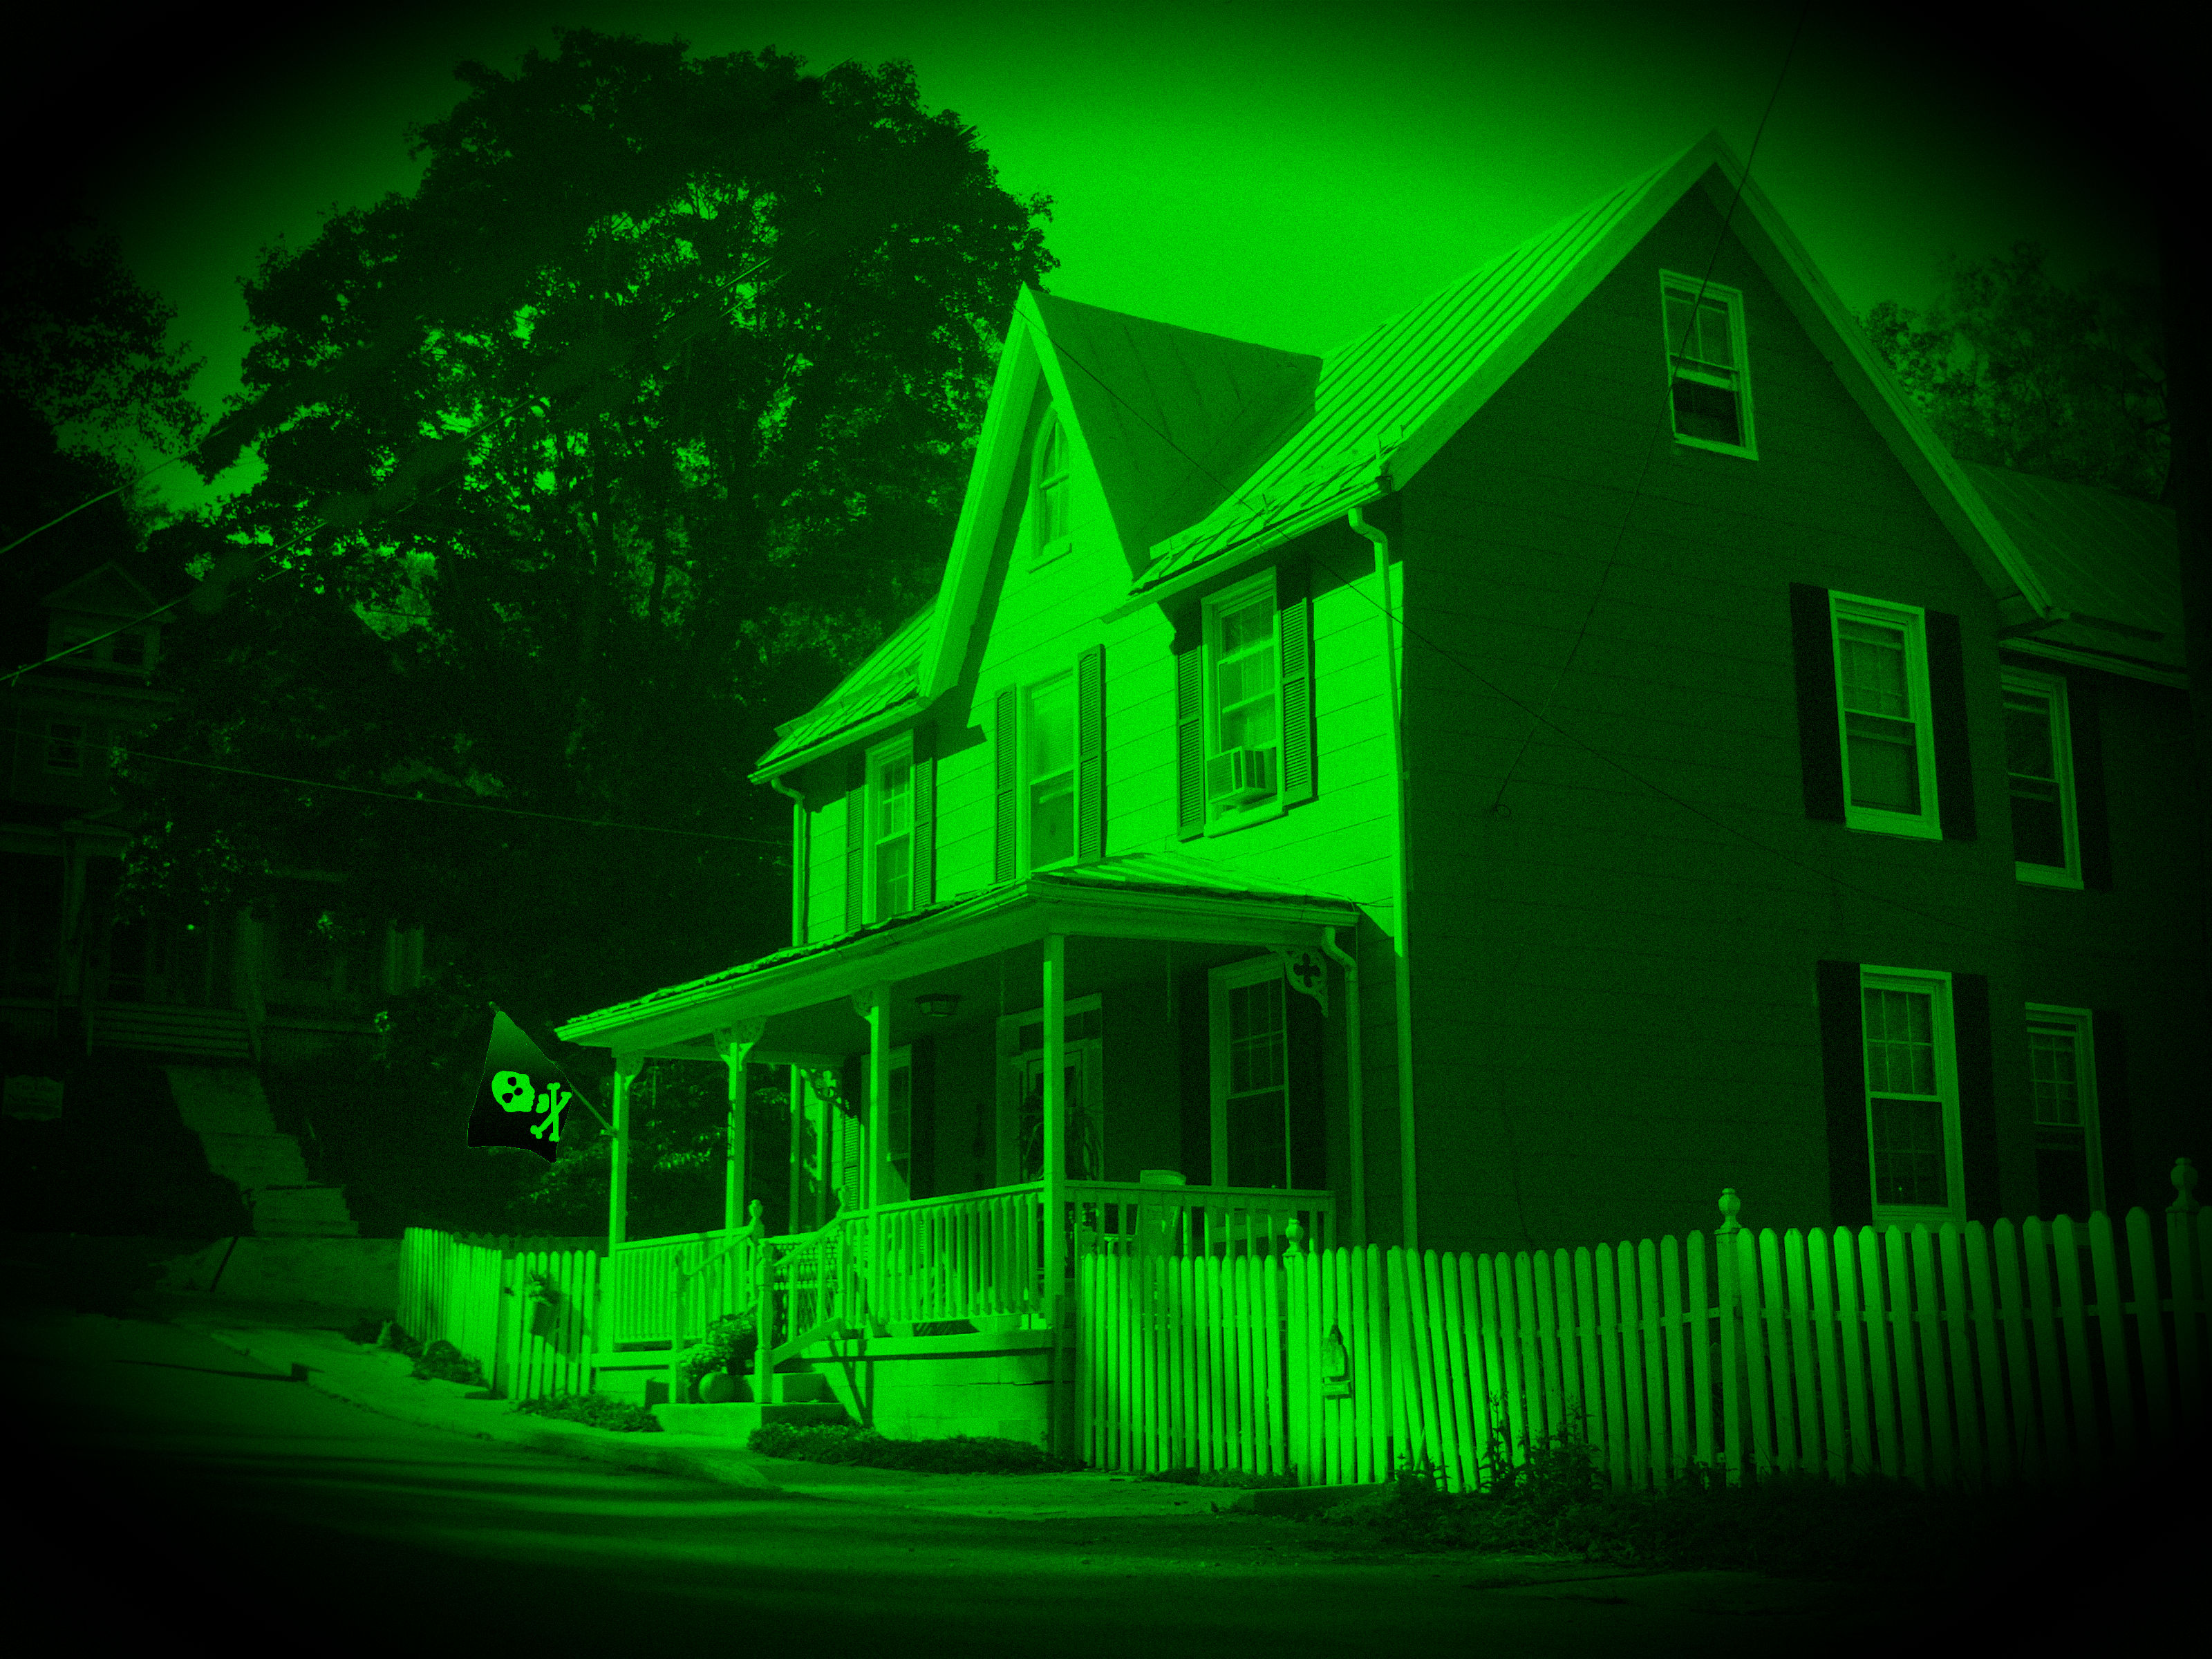
Using a filter is the real trick to making a photo-manipulated picture not seem like one that has been photo-manipulated. In step 4, while the image does look more like a haunted house, no one is going to believe that the pirate flag wasn't drawn in and most people would notice where you colored over the background objects. The scene is also at daytime which is not particularly spooky. There are all sorts of filters in all sorts of computer programs for photo manipulation and art. The best thing one can do at this point is save your background image, then save it again as a new file before experimenting with different filters. There are filters that can change day to night, alter colors, make a photo look like a painting, make a photo look like it was taken by an old fashioned camera. In the case of the Pixlr software, I found several filters that created very nice spooky effects.
To use a photo filter, make sure the entire image is selected, then select a filter. Try lots of different filters and lots of different combinations to get the effect you want remembering to go to Edit 'Undo' whenever you don't like the look of a particular filter. In my case, for a spooky Halloween look, I choose the Vignette filter which framed the photo by fading the outer edges to black and Night Vision to give my image that spooky green glow. For each filter, I adjusted the individual settings until I was pleased with the result.
To use a photo filter, make sure the entire image is selected, then select a filter. Try lots of different filters and lots of different combinations to get the effect you want remembering to go to Edit 'Undo' whenever you don't like the look of a particular filter. In my case, for a spooky Halloween look, I choose the Vignette filter which framed the photo by fading the outer edges to black and Night Vision to give my image that spooky green glow. For each filter, I adjusted the individual settings until I was pleased with the result.
The Moon
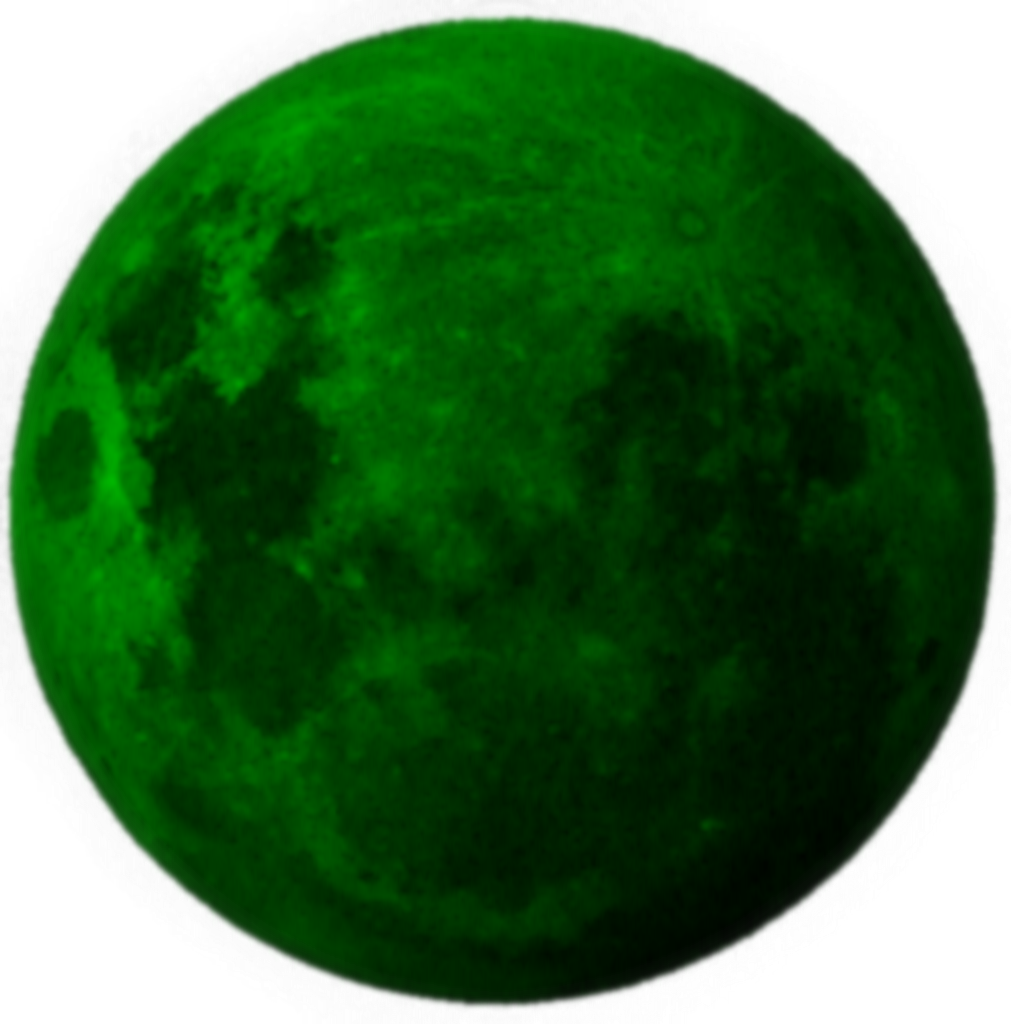
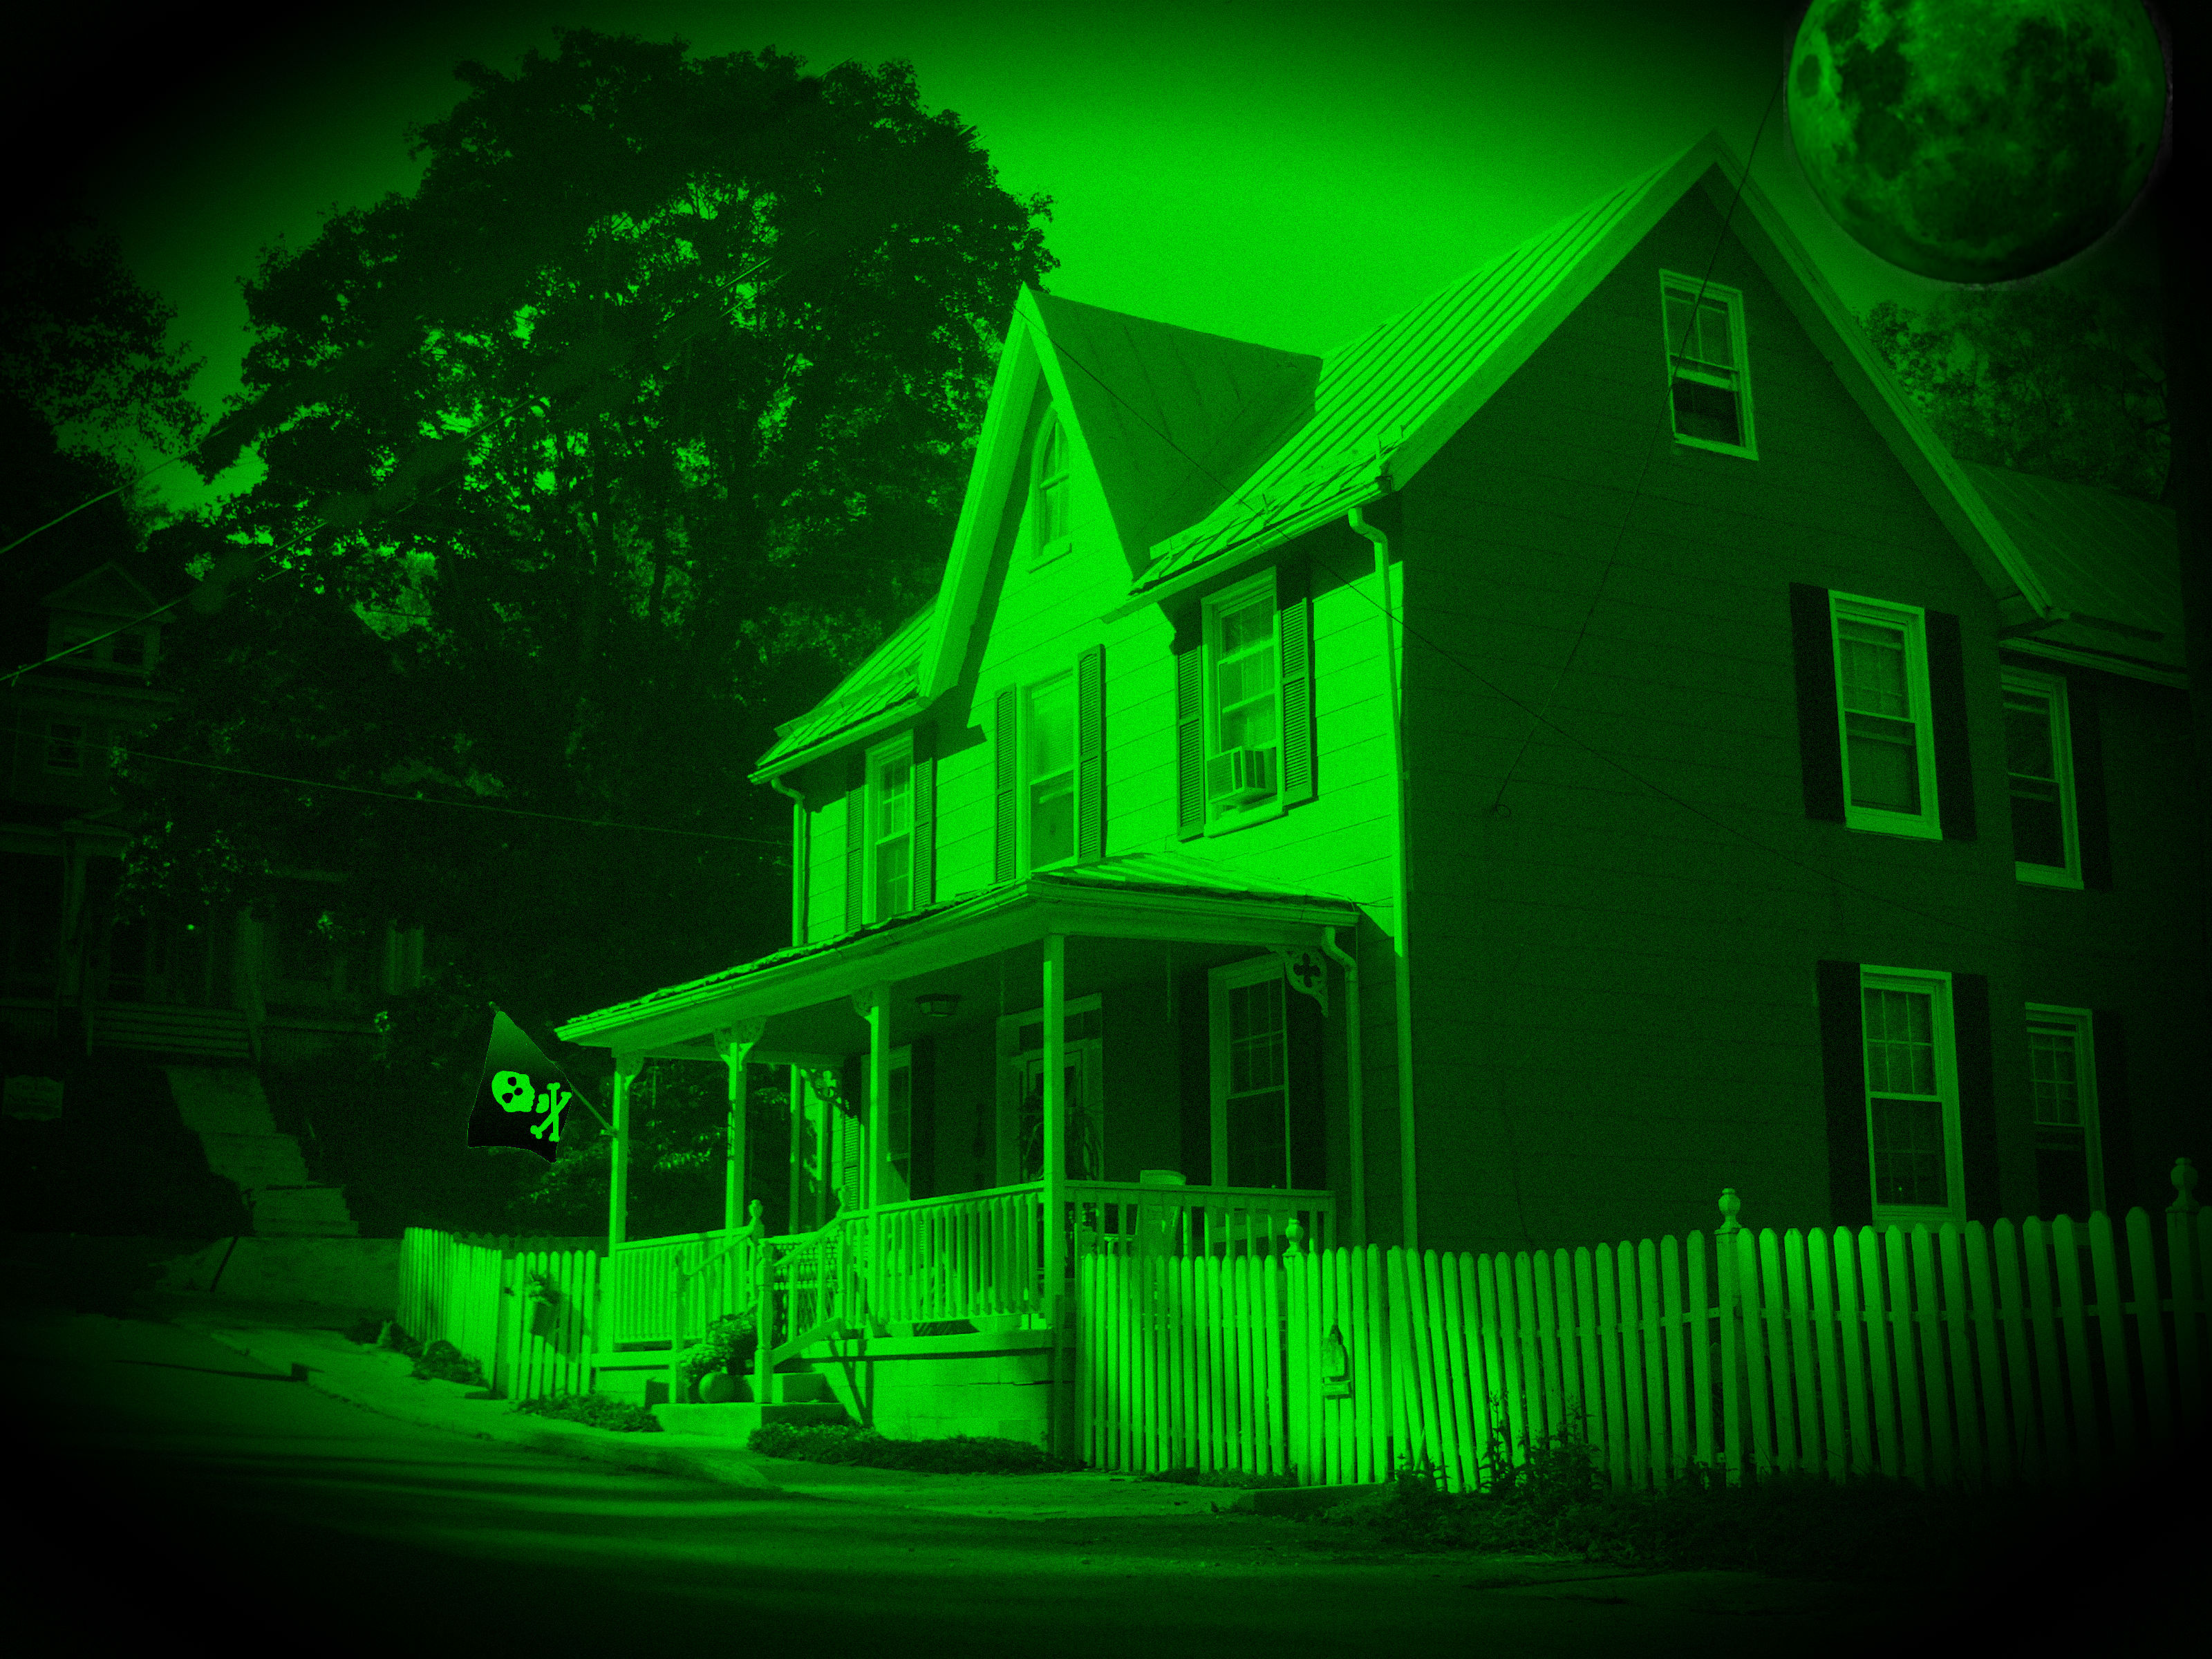
Ok, so I didn't go outside to photograph the moon. Sometimes an image just needs some element that you can't photograph yourself. In that case, royalty free non-copy written images are a good way to go. In my case, I wanted an image of the moon, and so I found a picture someone took of the moon that was royalty free for use and grabbed it from Google. You can do that, or simply copy the file I have here. I converted the moon to green the same way I turned the house green by using the night vision filter. I opened the moon image up in Pixlr while my background was still open. Using the select tool, I selected the moon which had a transparent background and copied it into my background picture. Next, under Edit, I selected "Free Transform" to re-size the moon and moved it to the sky of the picture.
Little Witch
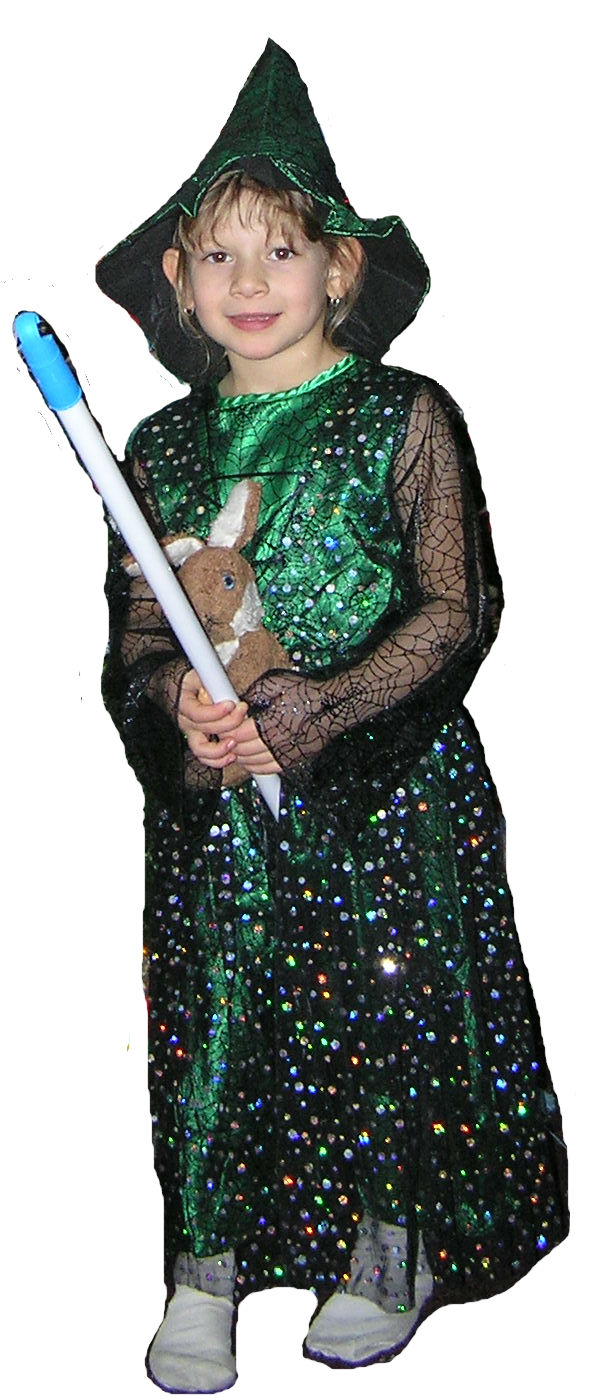
Now it is time to get the image of your little monster. Ideally, if you plan ahead, it is a good idea to have your little monster pose in front of a solid colored back drop if you are planning to do a photo-manipulation. The professional photographers and movie makers have actors pose in front of a green or blue screen when they do special effects as it is very easy to swap a solid color background with a different background. If, for example, the photo of my niece was taken in front of a blue background, all I would have to do is click the blue background with the magic wand tool and click Delete to remove the background. What you don't want to do is have your subject dress in green and pose in front of something like a green Christmas tree...ummm, like I did. OK, so it is Christmas and your taking a Halloween picture. You obviously are not going to get your monster to pose where you want them to, so you might as well snap the photo before Sponge Bob Square Pants comes back on TV.
Open the picture in your Pixlr program. Use the lasso tool to select your subject. You don't need a perfect outline of your subject at this point, just a rough outline. Copy the selected area. Next, under File select to create a New Image. The size attributes of a new image are automatically set to the size of the image you just copied, so all you have to do is check Transparent so the background of the new image will be transparent. Paste the image you just copied into the new image file. Save this file as a new name, something like Monster.
At this point, you probably still have some elements of the old background image you want to remove. In my case, part of the Christmas tree. Select the Eraser tool, and carefully outline your subject. Work a little bit at a time, and remember if you make a mistake, you can click Undo. After you outline the silhouette of your subject, remove the remaining background elements by selecting them with the lasso tool and clicking clear under Edit.
Make Green
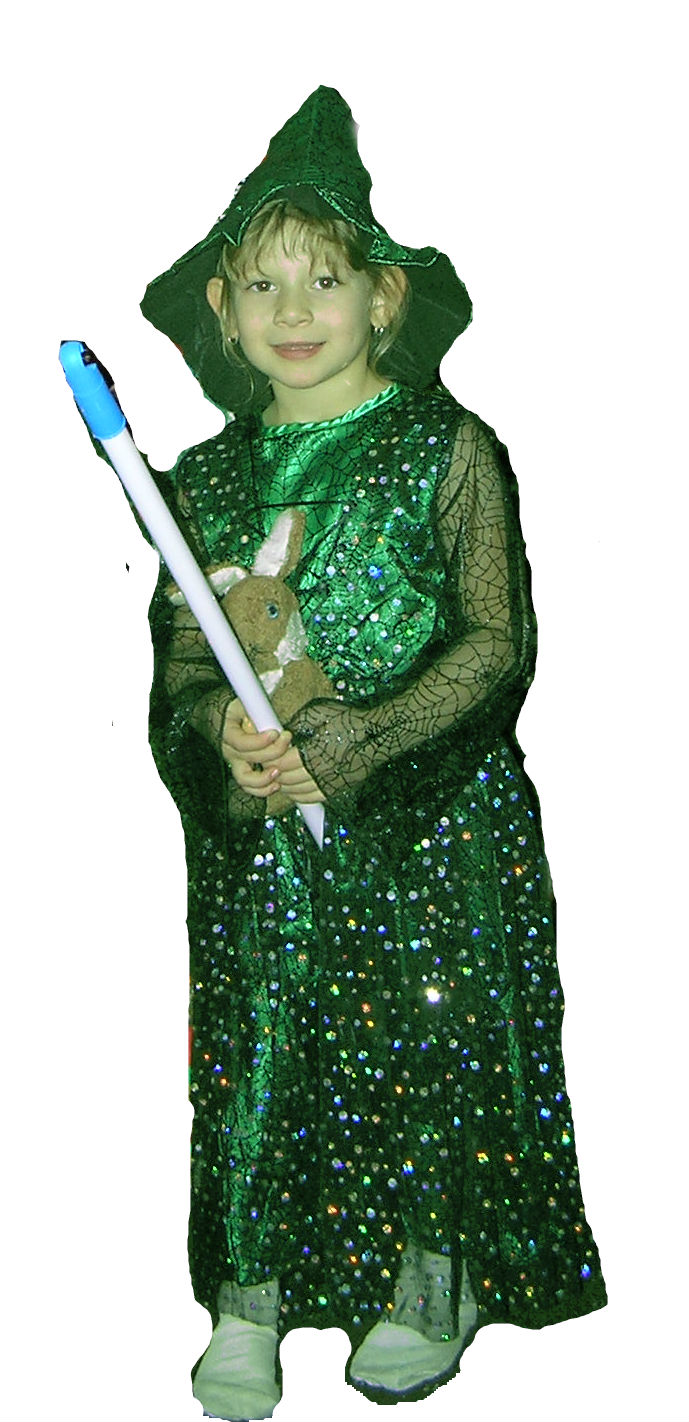
You may have noticed that in step 7, my niece was not green. Sadly, her green hue dissipated shortly after finishing off all her Halloween candy which was long before this photo was taken. To give my niece that nice green glow, I selected a bright green color. Then, using the paint-bucket tool with an opacity of around 16 and a tolerance around 115, I clicked onto my niece to color her green. I could have used the night vision filter, but that would have made her too green, and I wanted to make sure she was the focal point of the picture. Opacity is how well you can see through the color. The higher the Opacity, the less you can see through the color. If the color was 100, she would turn solid green. Tolerance dictates how much of her image gets painted. A lower tolerance will color just the color of the region that the paint-bucket is clicked on. Since I wanted her to be entirely shaded the same green, I set a high tolerance. You can play with these settings to get the effect you desire.
Copy Into Spooky Background
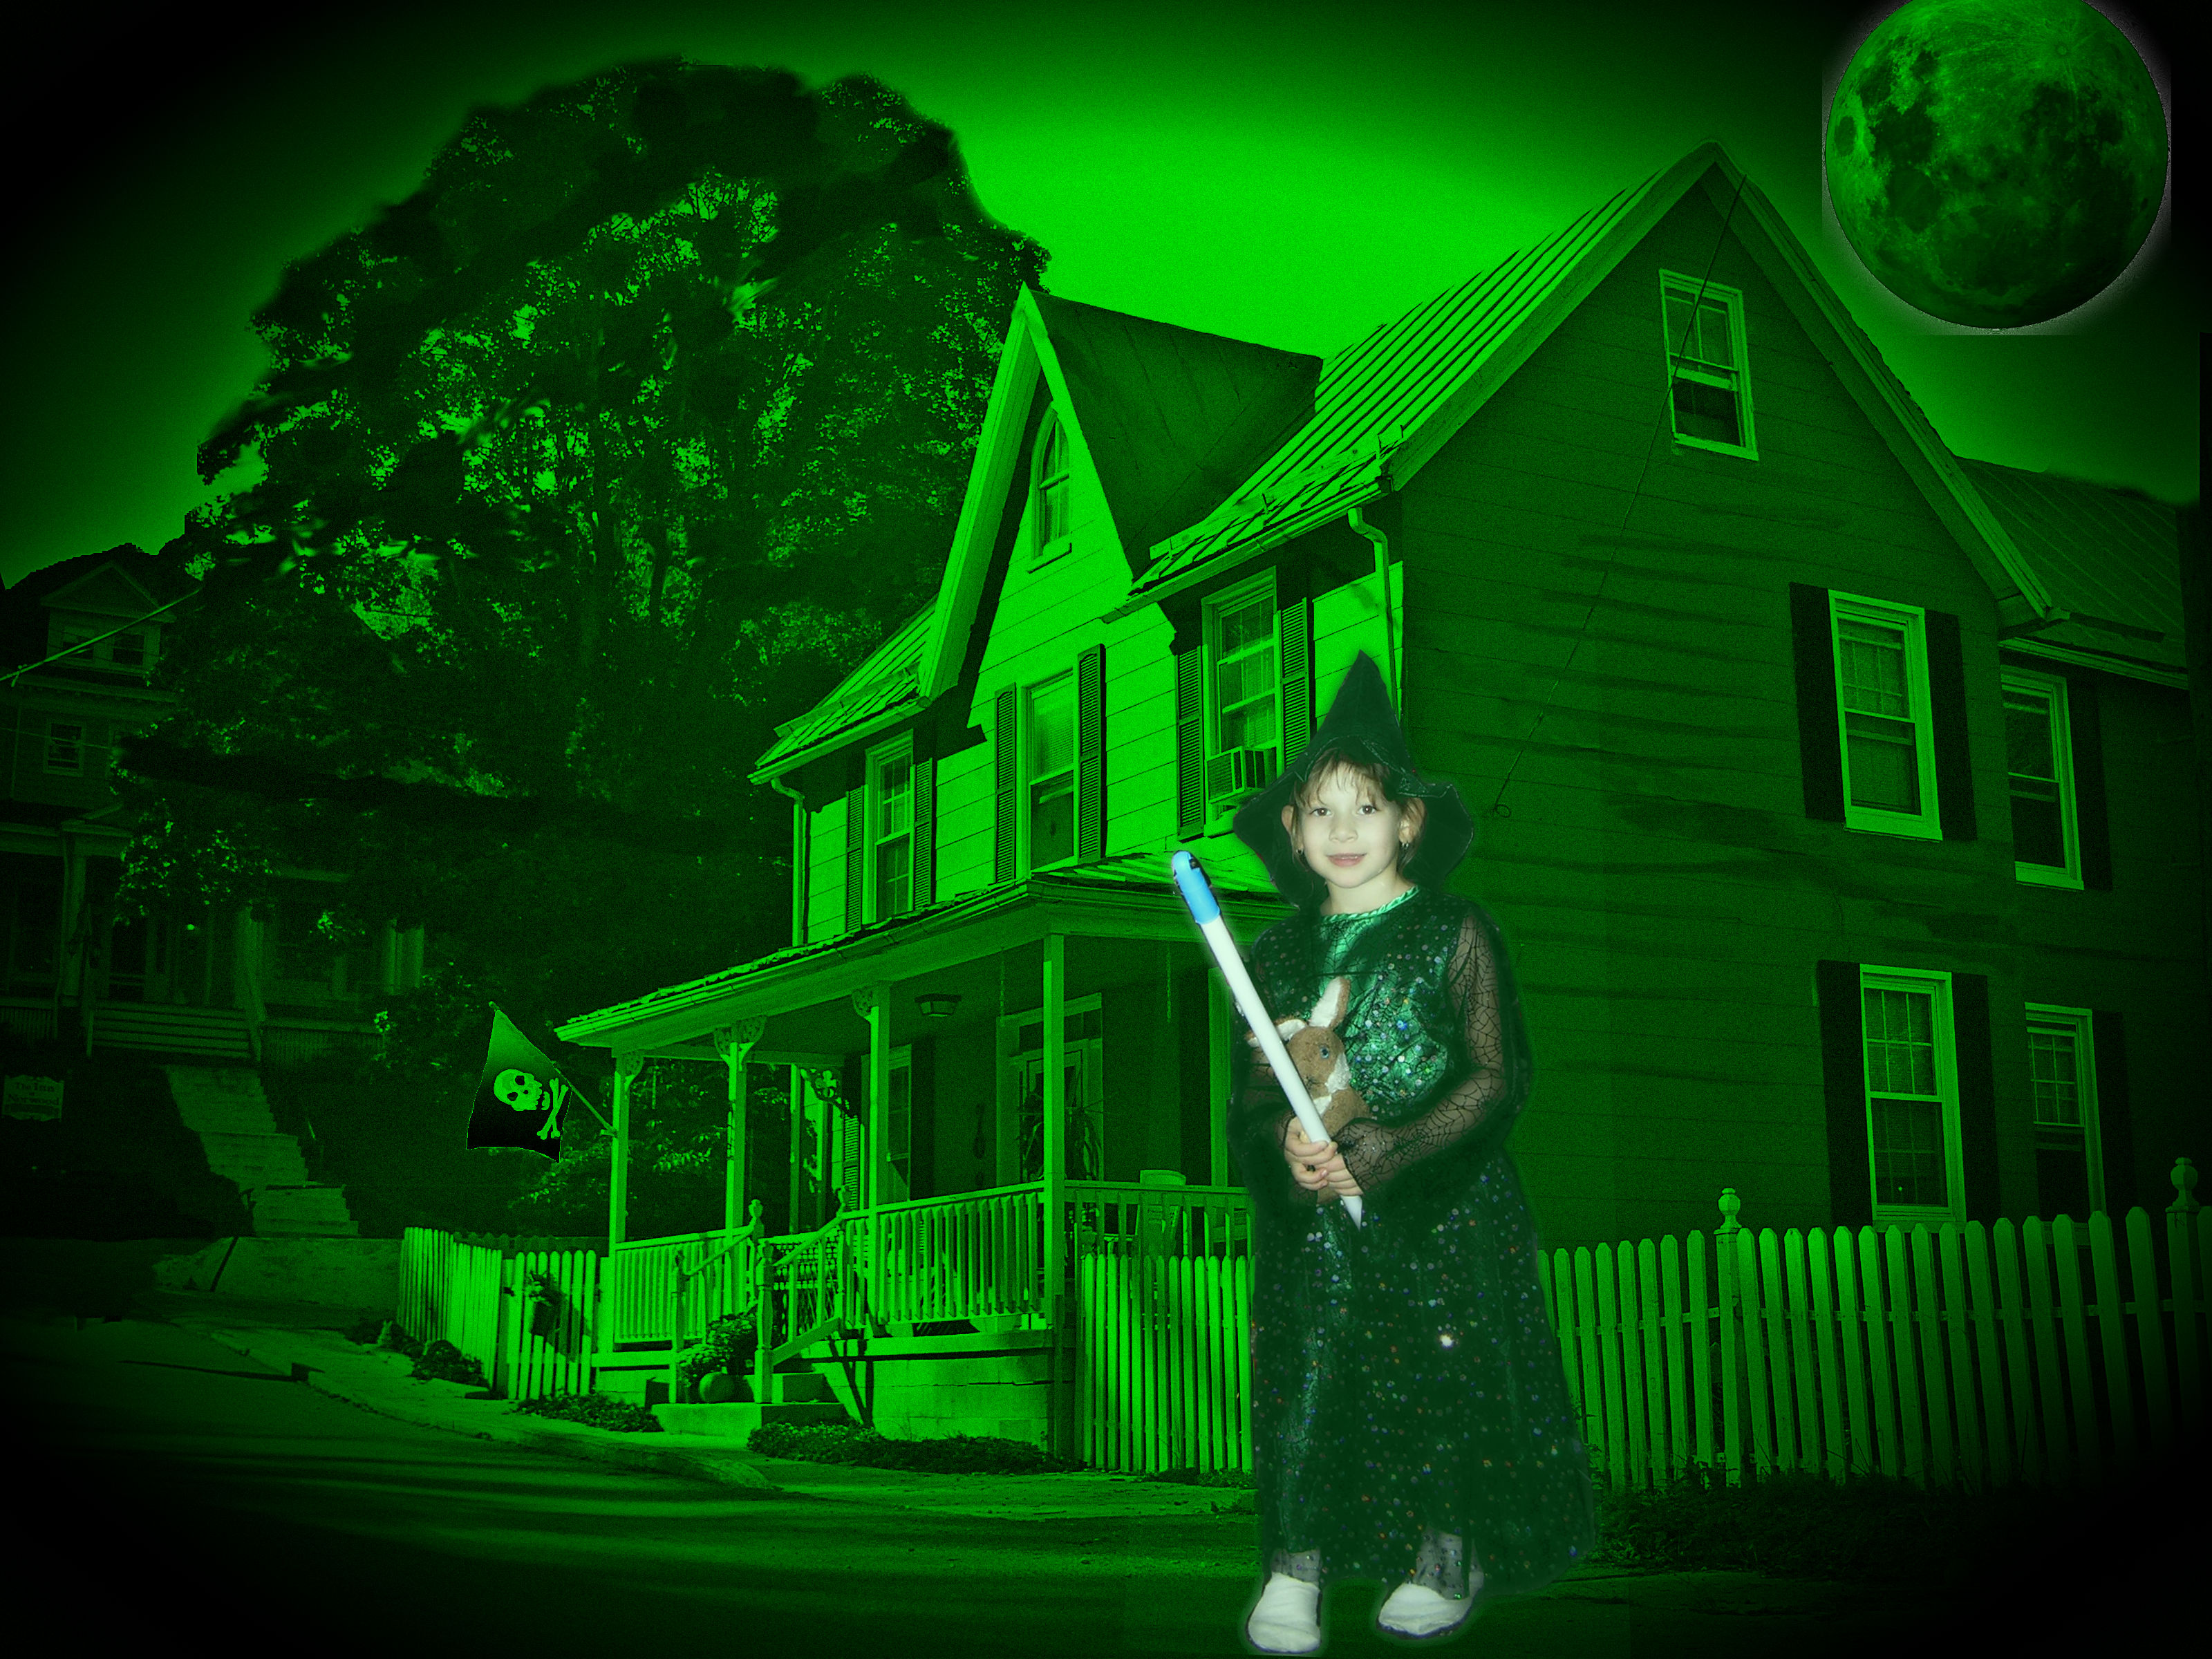
The next step is easy. Simply copy and paste your little monster into the background image of the spooky haunted house. If necessary, go to Edit and Free Transform to alter the size of your little monster in proportion to the background image.
Optional Text


Pixlr has its own text tool, and if you desire you can use it to add text to your image. I wanted a particularly spooky font, and so I opted instead to use a free logo creator http://www.flamingtext.com/logo/Design-Blood to create the spooky looking text for the picture. This is an easy text tool to use. Simply enter the text you want, the size and color of the text and set the background to be transparent. Finally, save the text image to your computer. To insert this text, open the text image file in Pixlr, and copy and paste it into your picture.
That's it! Now you finally have that perfect Halloween picture to stick on Happy Halloween cards to send to the relatives for next year.
Visit DarkRubyMoon.com
Finally, your last step is to visit my website at DarkRubyMoon.com and check out all my other fantastic artwork and other things I create. Visit DarkRubyMoons website at http://darkrubymoon.com/ for all sorts of great activities, artwork and much more. Be sure to check out DarkRubyMoon Store for my artwork on all sorts of fantastic items from T-shirts and prints to clocks and camcorders at the following web locations.
* DarkRubyMoon Store CafePress: http://www.cafepress.com/darkrubymoon
* DarkRubyMoon Store Zazzle: http://www.zazzle.com/darkrubymoon
* DarkRubyMoon Store Printfection: http://www.printfection.com/DarkRubyMoon