Hack a Video Read-Aloud
How to use Mozilla Webmaker to hack a video read-aloud of a children's book. This is a great assignment for older students or a fun activity for a younger child and an adult helper.
Check out my final product.
Choose Your Video
Choose a video read-aloud to edit. Google search for the book of your choice followed by "read aloud." Adjust your search to reflect videos. Tips on choosing a read-aloud:
1. Make sure the video shows all words in the story. Some cut them off.
2. Choose a video that doesn't show a person holding the book and/or turning pages. When there's movement, it's harder to edit.
3. You can use any story you want, but I think familiar favorites work particularly well because the edit is unexpected. I chose to do Cinderella; many of the older stories offer a fun opportunity to modernize characters into positive role-models.
4. If you don't have a lot of time, choose a simple story with relatively few words. This project can be very time-consuming.
Get Set Up on Mozilla Webmaker
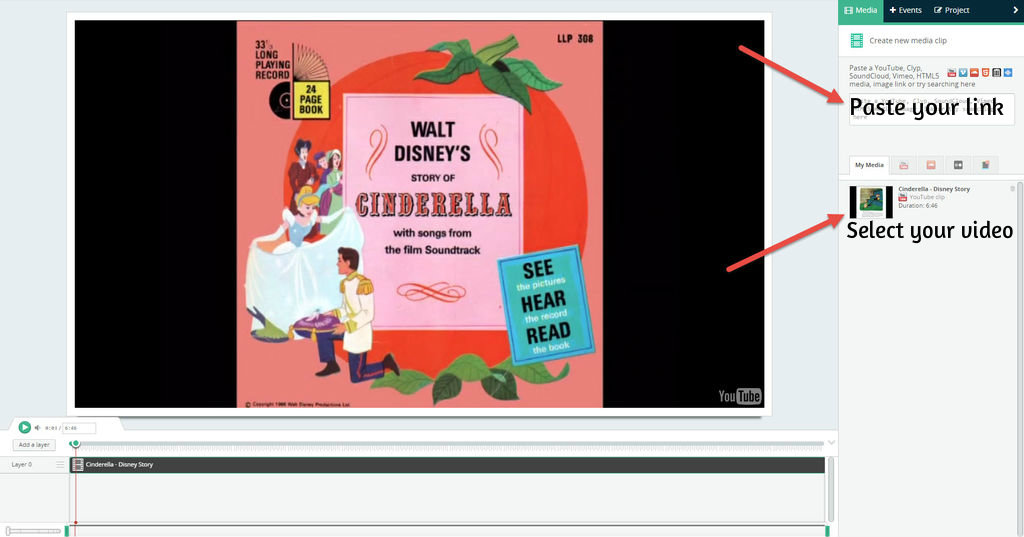
If you don't already have an account, create one with Mozilla Webmaker. Select Tools, and then under Popcorn Maker, select Start From Scratch. Copy your video link and then paste it to create a new media clip. Your video will pop up under My Media. Select it, and you should be able to play the video as is. Turn down the sound on your computer so you can't hear the existing audio. We'll eliminate it later.
Rewrite the Text on Page 1
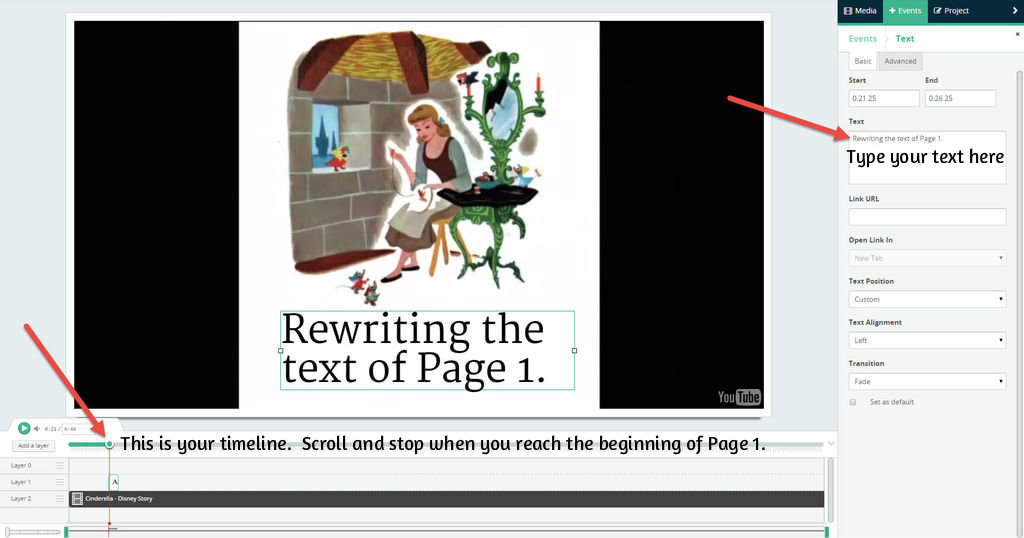
Scroll on the timeline at the bottom, and stop the green dot at the very beginning of the first page of the story. Click +Events and then select Text. A text box will appear, but don't write in it. Write where it says Text under the Basic tab of Events. (You want to do this because words occasionally get deleted when written directly in the text box.)
An important note on the timeline: as you add events (text, pauses, cuts, etc.) to your project, they will be visible in your timeline. If you need to adjust a particular event, you can quickly access it by clicking it in the timeline.
Adjust the Text Box on Page 1
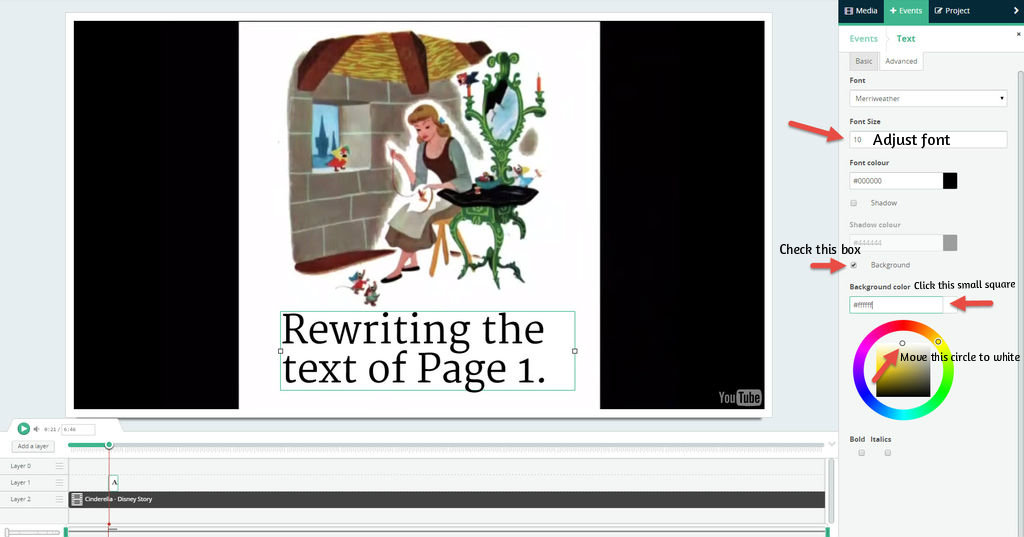
Switch to the Advanced tab under Events. Adjust your Font Size.
Adjust your Background Color on the Advanced tab under Events. Your default text box background is gray, but we want to make it white so it blends in with the page and masks the original text. First, check the box next to Background. Under Background Color, click on the gray square for your color selector. Select white by dragging the middle circle to the top of the square. Sometimes this is finicky, so play around until it works. Then, drag and place the text box where you want it. Resize it to fit the page and completely mask original text.
Set an End Time for the Text Box on Page 1
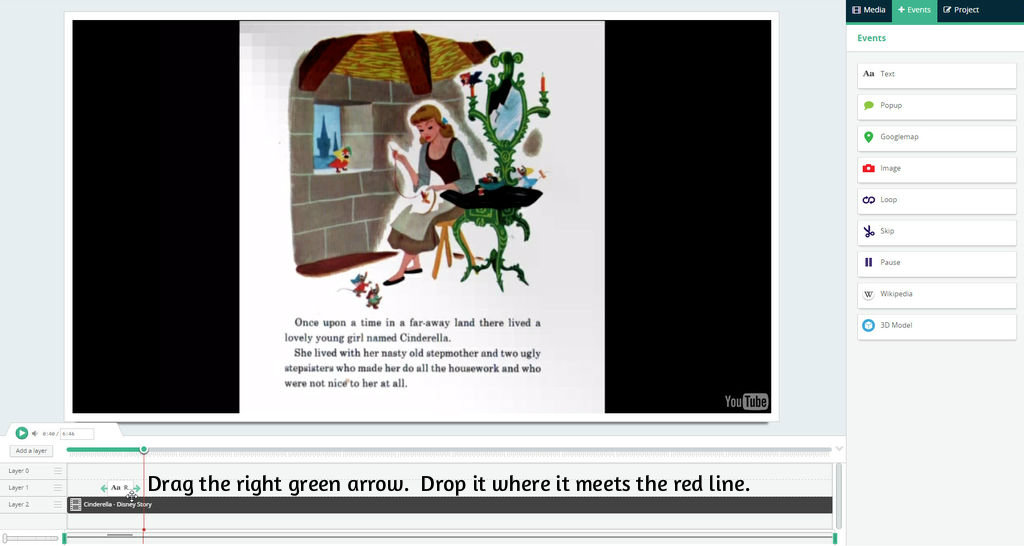
Currently, your text box appears at or very close to the beginning of Page 1, but it probably doesn't end at the correct time. Drag the green dot on the timeline and drop it just before the video switches to Page 2. It should be paused, and you should see a red line coming from the bottom of the green dot. Using the timeline, set an end time for your text box by clicking and dragging the right green arrow and dropping it where it meets the red line.
If you want to readjust the beginning time of your text box, drag and drop the left green arrow on the timeline.
Decide If You Need a Timing Adjustment on Page 1
Figure out if you want the video to spend more time on Page 1, less time on Page 1, or if the timing doesn't need adjustment (if so, move on to Step 9). I gauge an appropriate amount of time per page by reading my new text aloud. Drop your green circle on the timeline so it is paused just before Page 1. When you're ready to read aloud, press play. Read slowly and comfortably. If the page turns on the video before you finish reading, add a Pause to increase time on Page 1. If you finish reading and the video lingers on Page 1, add a Skip to cut excess time.
To add a pause, see Step 7.
To add a skip, see Step 8.
Timing Adjustment - Pause (more Time)
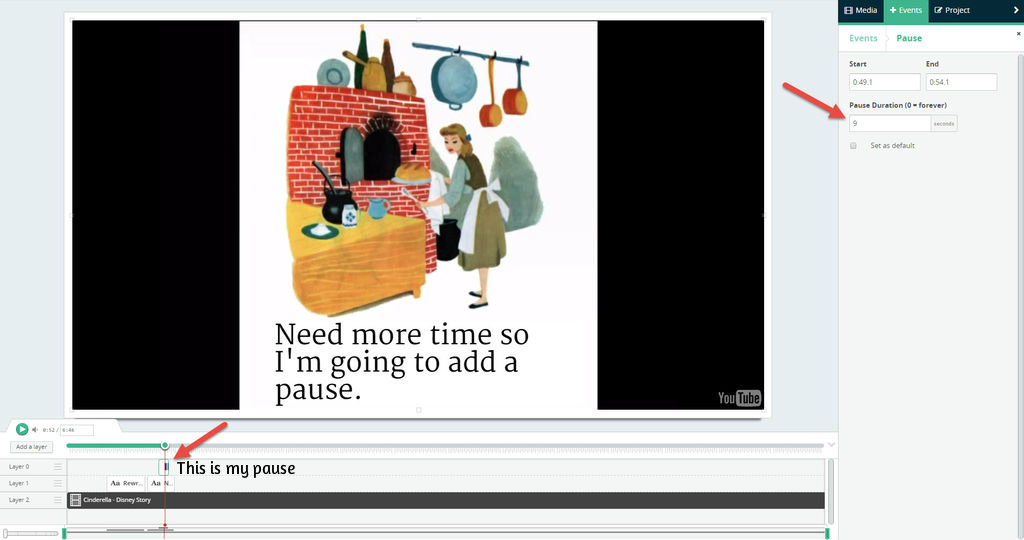
Click +Events and then select Pause. On the timeline, you'll see your pause in a layer above the text. Click it. The important factor here is Pause Duration. In the toolbar to the right, you can set the number of extra seconds you want. Take a guess at how many and set it. Sometimes this gives me problems, but just keep entering your number, and it will eventually give in.
Once you have set your Pause Duration, test it by doing a re-read-aloud of your page. You may need to add or subtract a few seconds. Keep adjusting until the timing is good.
Timing Adjustment - Skip (less Time)
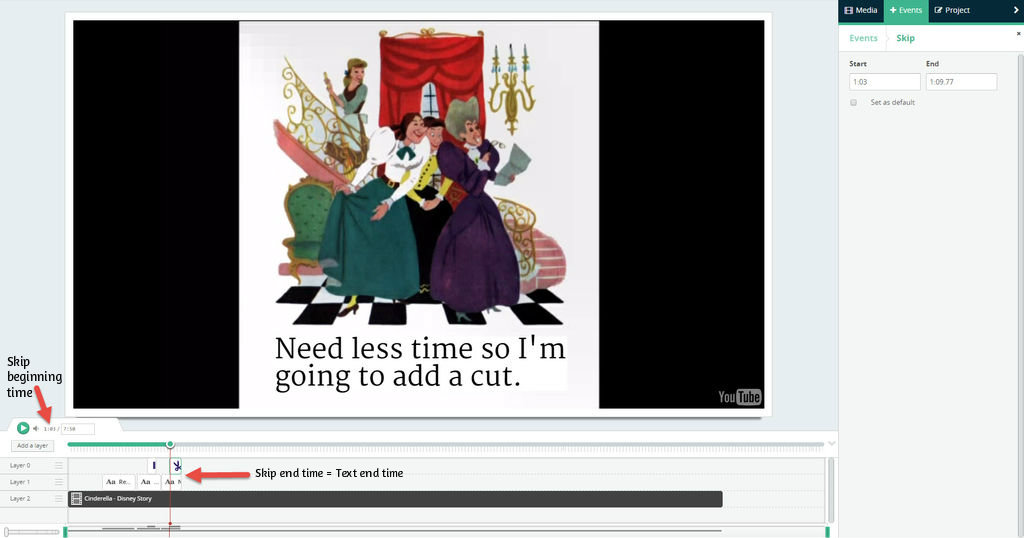
Click +Events and then select Skip. On the timeline, you'll see your skip in a layer above the text. Click it. In the toolbar to the right, you will enter your exact start and end times for the skip.
To identify your end time: On the timeline, click the text below your skip. Look at the toolbar to the right and remember the end time of the text. Return to your timeline and click the skip. In the toolbar to the right, enter the same end time as the text.
To identify your start time: On the timeline, drop your green circle so it is paused just before the page you're working on. Do a read-aloud and press pause when you're finished reading the page. This is your start time for the skip. Return to your timeline and click the skip. In the toolbar to the right, enter the time displayed next to the Play button.
Once you have set your skip times, test them by doing a re-read-aloud of your page. You may need further readjustment.
Finish the Remaining Pages
Repeat Steps 3-6 for all remaining pages.
Adjust the Sound
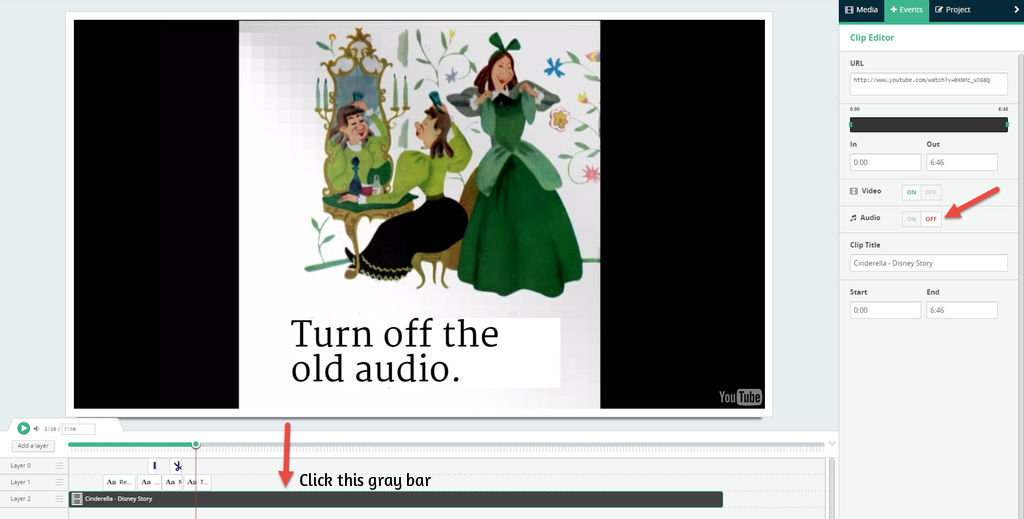
The project still contains the accompanying sound to the original text. Remove it by going to your timeline and clicking on the dark gray bar that represents your video. In the toolbar to the right, switch the audio to Off.
Add Final Touches
You may wish to add additional events to your project. Popups work well, and you can also add other items.