Project 2: Introduction to 3D Print
by AnzuK1 in Craft > Digital Graphics
3179 Views, 2 Favorites, 0 Comments
Project 2: Introduction to 3D Print

This document is about the introduction to 3D print with Creality Ender 3 Pro 3D Printer in assignment 2.
In the first part of the document, the first trial of 3D print is described.
In the second part, the first production of a stackable snack bowl is described.
A First Trial 3D Prints

First, when I got a printer, I tried to 3D print test objects.
As you can see in the left figure, "cat-3.5H.gcode" was successfully printed out. It took around 5 hours.
The right figure is failed test object of "dog-2.5H.gcode". Because the 3D print material line was broken on the way to print, I stopped the 3D print.
For the troubleshooting, I changed a different material and restart the 3D print again.
The Production of Stackable Snack Bowl
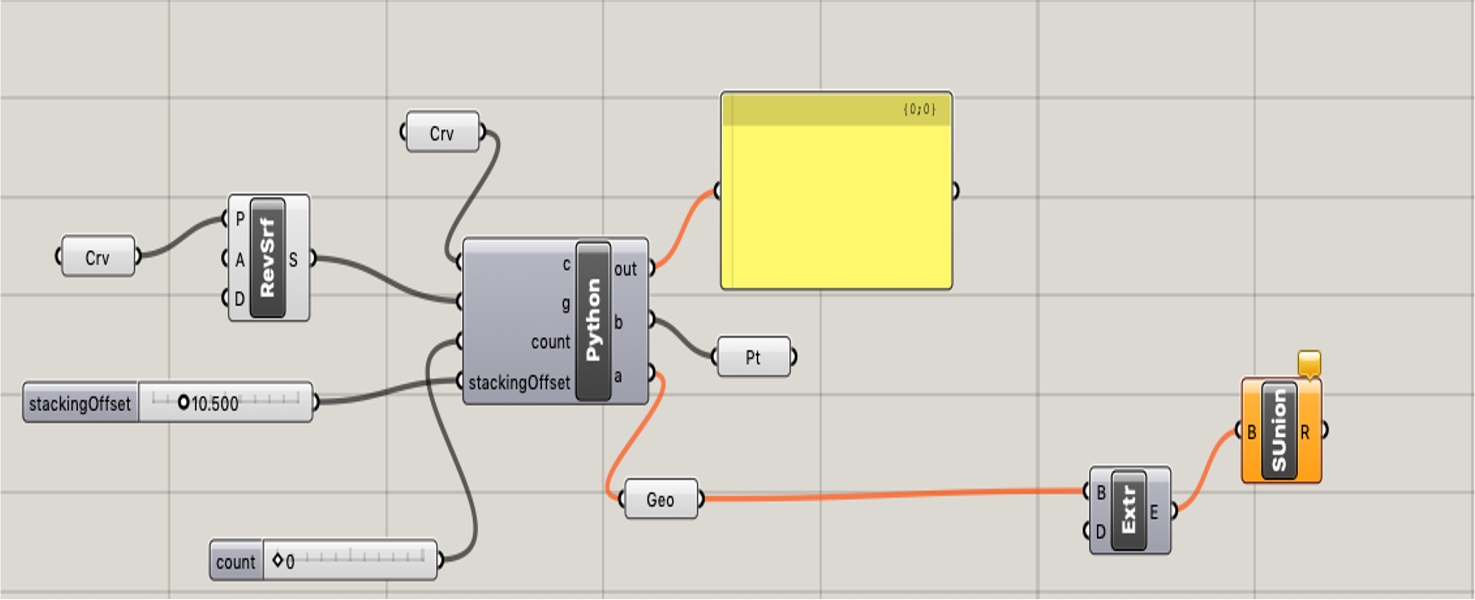
Next, I created a stackable snack bowl using the example code provided by Jennifer.
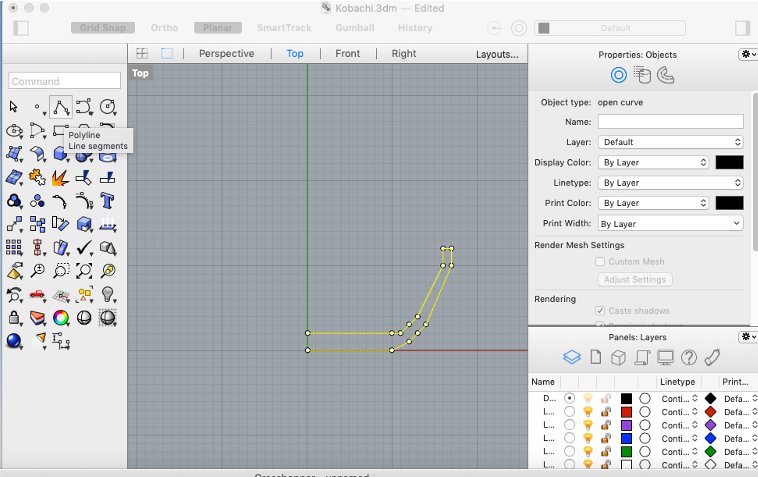
Left figure, I drew a line on the Rhino part. The line will be the shape of the bowl.
The not closed line is input as a curve to "RevSrf", rotates, and creates a shape of a bowl.
In the python code, it is the same as the example code of Creating a Stack of Transformed Objects.
The output is geometry shape. The output shape was extruded along a vector in "Extr" and performed a solid union in "SUnion" in order to output STL file*.
*To output STL file, I selected the 3D object in Rhino and select the Export from File on the menu bar.
Check the Output and Stackable
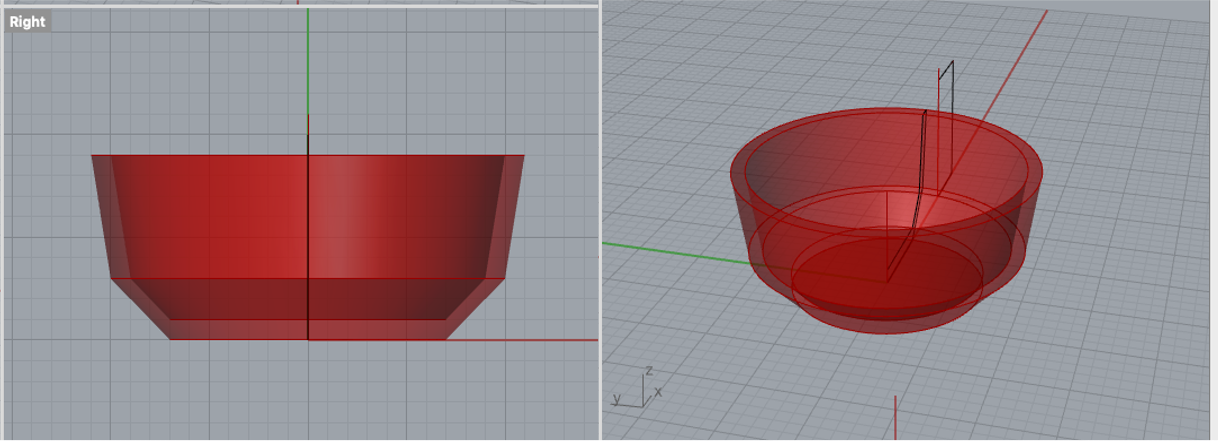
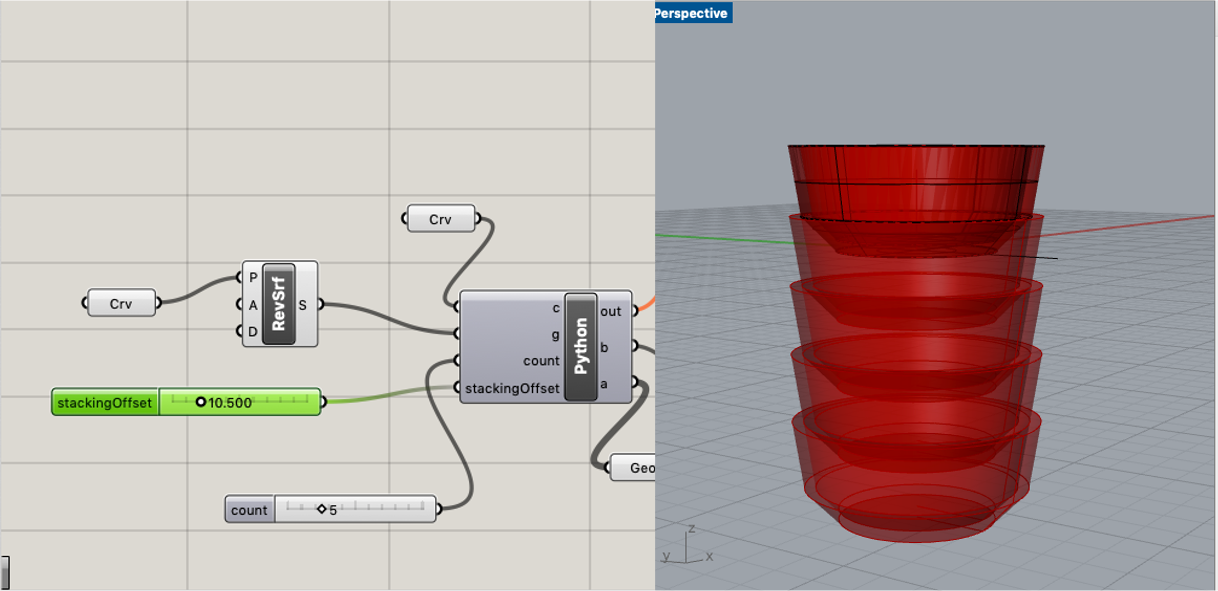
From the program code and Grasshopper process, the output of the model object is like the left figure.
Next, I checked if stacking this bowl works or not.
I changed parameters like the right figure, duplicated the bowl, and from the Rhino, I performed the "BooleanUnion."
From the BooleanUnion, when I stacked the stacked object was stacked without changing the shape.
Therefore, it means that the bowl shape is able to stack.
STL File and Slice in 3D Cura
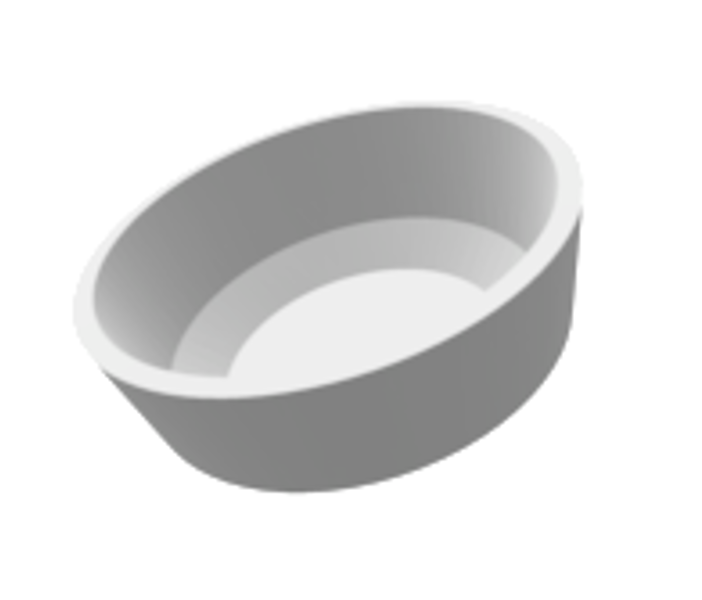
The output STL file is shown left figure.
When I import the STL file in slicing software 3D Cura, I found the object size was pretty small to use.
Therefore, I used the function of size change, I expanded the object to 350% from the original size.
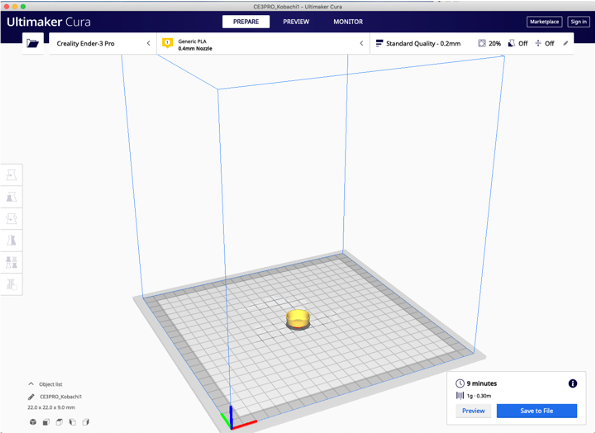
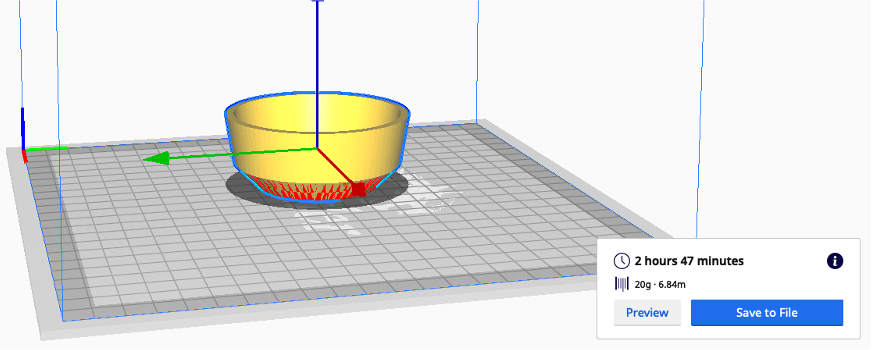
If I sliced one bowl can be printed out in 2 hours and 47 minutes.
The original small size bowl can be printed out in 9 minutes.
I need 3 of the bowl to stack. Therefore, I duplicated, sliced again and checked the time.
The duration of the printing time showed 8 hours and 34 minutes.
3D Print Process
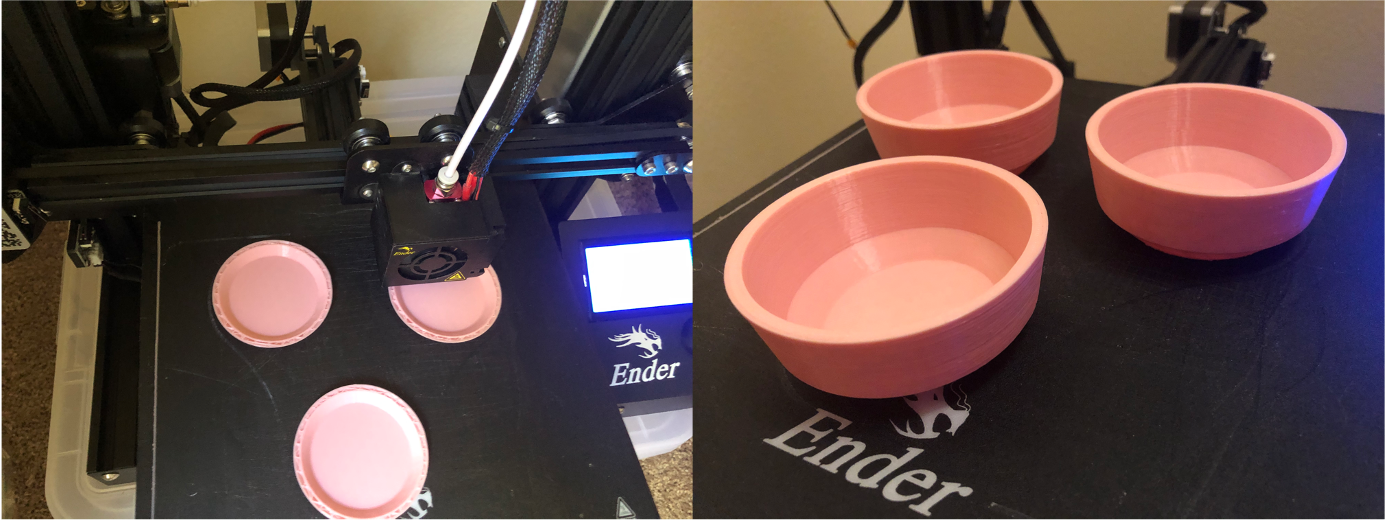
Done!
The actual duration of 3D print was 8 hours and 7 minutes shown in the display on the 3D printer.
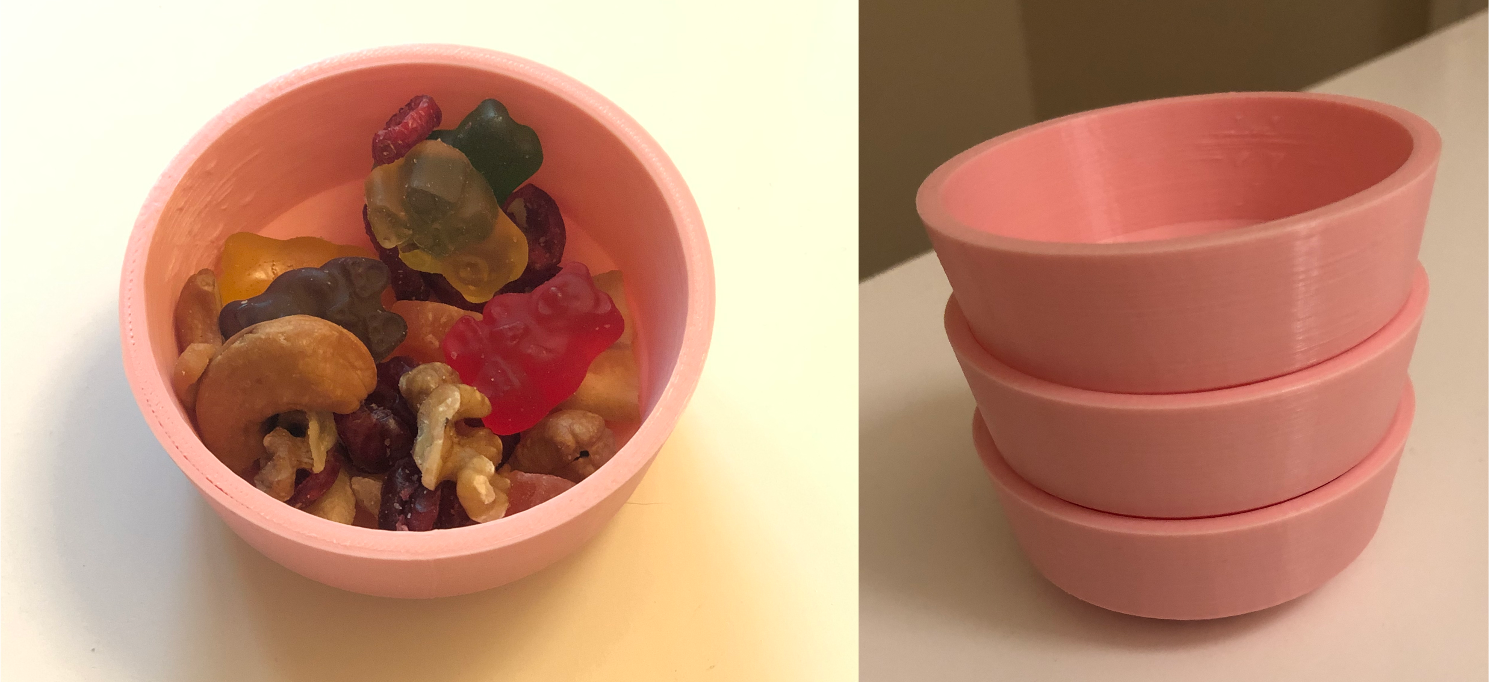
At this time, for easy washing, I did not put any ornament on the bowls.
These bowls work very well as a snack bowl.
When I stacked, these were stacked very well!!