HTTP Server Controlled LED - Ameba Arduino
by xidameng in Circuits > Arduino
230 Views, 0 Favorites, 0 Comments
HTTP Server Controlled LED - Ameba Arduino
Controlling a LED is easy with any microcontroller of your choice, but controlling LED wirelessly on your mobile phone's browser on the go is really cool and fun. Actually it is an IoT project already, as you may use the same server to control things other than LED, for example, speaker, lamp, fan, water cooler, etc.
Supplies
- Ameba x 1
- Breadboard x 1
- LED x 1
- 1KΩ Resistor x 1
Hardware Setup
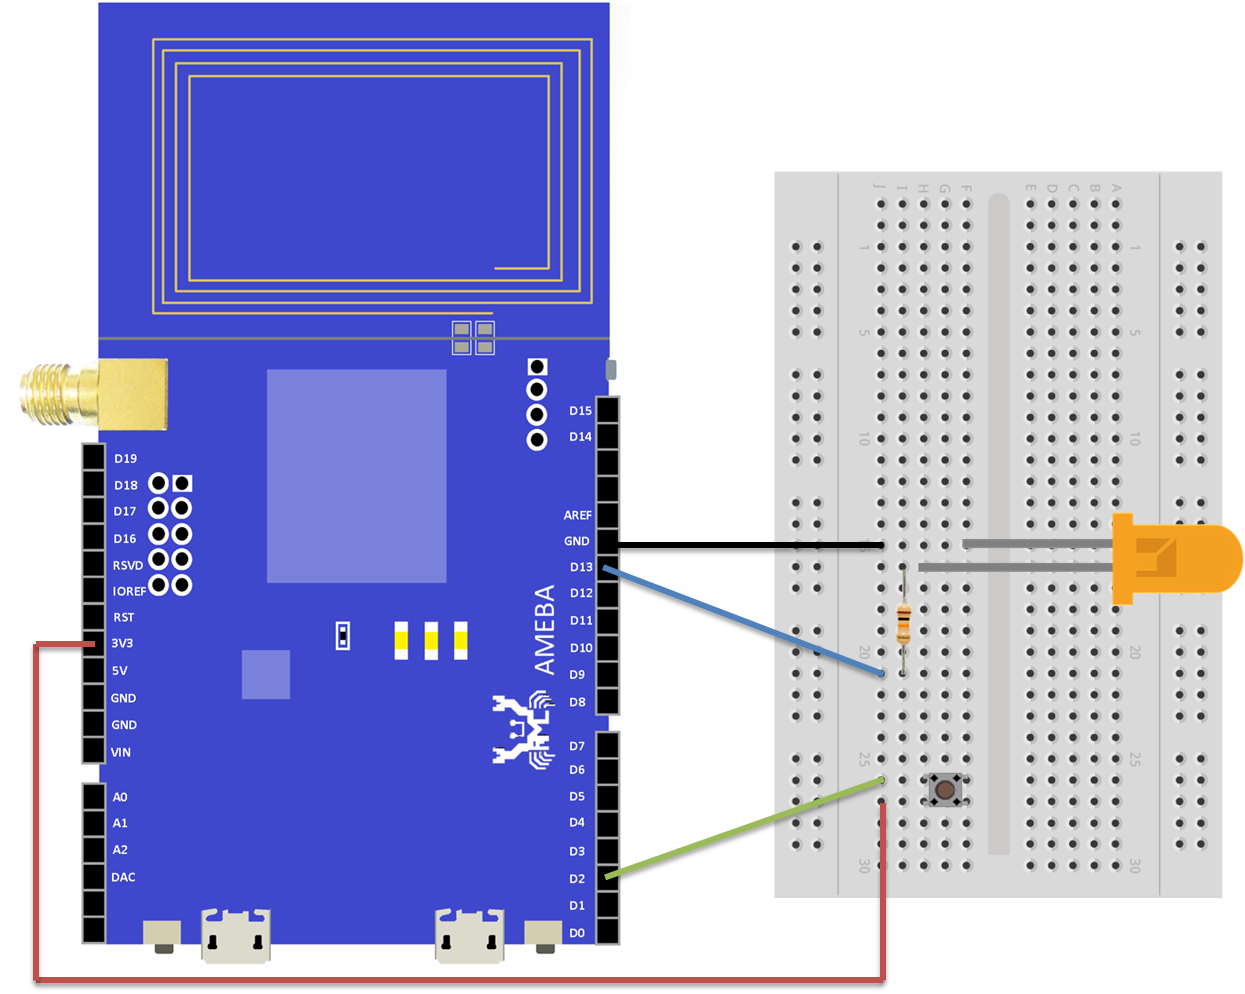
In this example, we connect
Ameba to WiFi and use Ameba as server, the user can control the LED on/off through a webpage.
First, connect Ameba with the LED.
In a LED, the longer pin is the positive pole, and the shorter pin is the negative pole. So we connect the shorter pin to GND (V=0), and connect the longer pin to D13. Additionally, to avoid the electric current exceeds the tolerance of the LED and causes damage, we connect a resistance on the positive pole.
Software Setup
First and foremost, we must make sure the ameba board package has already been installed. If not, we can copy the link below to your "additional board manager URLs" under preference, and install it using board manager,
https://github.com/ambiot/amb1_arduino/raw/master/...
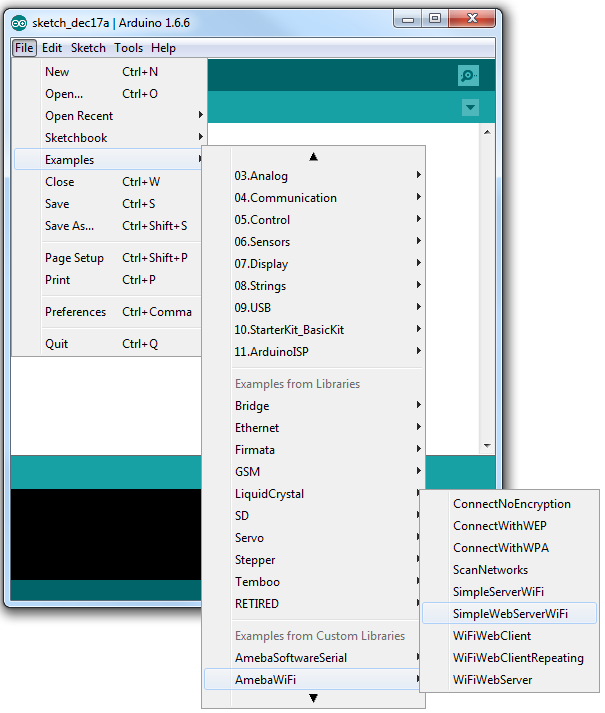
Then open "File"
-> "Examples" -> "AmebaWiFi" -> "SimpleWebServerWiFi"
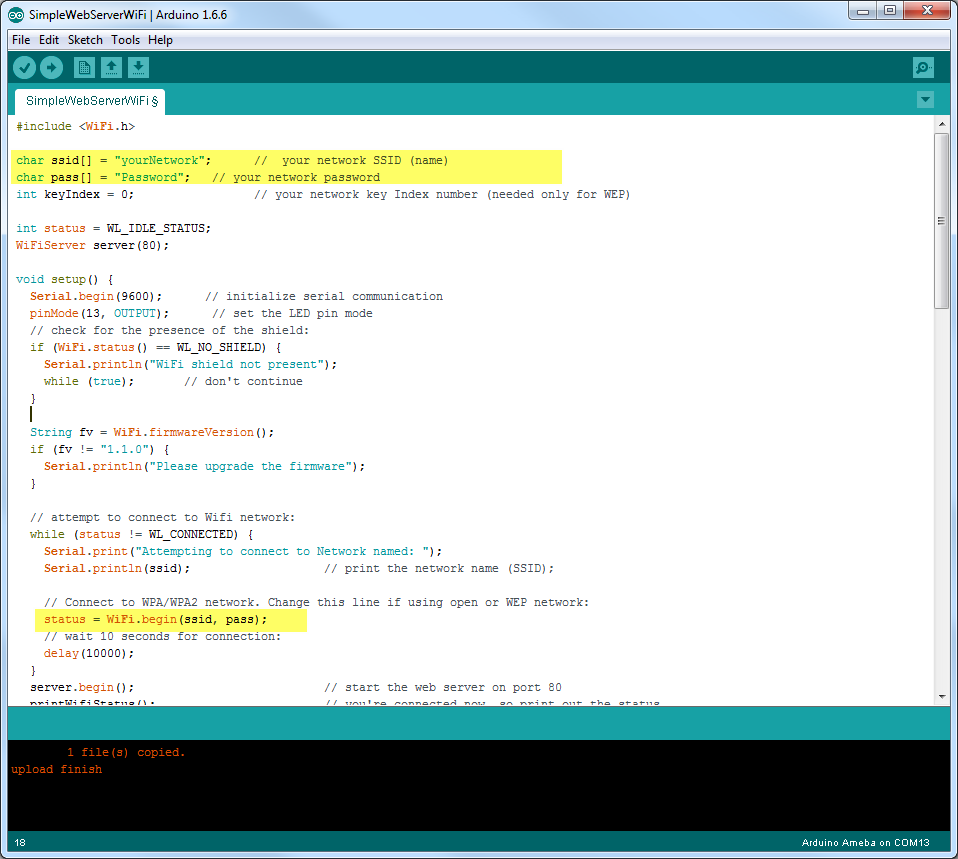
In the sample code, modify the highlighted snippet to corresponding information.
Upload the code, and press the reset button on Ameba.
HTTP Server
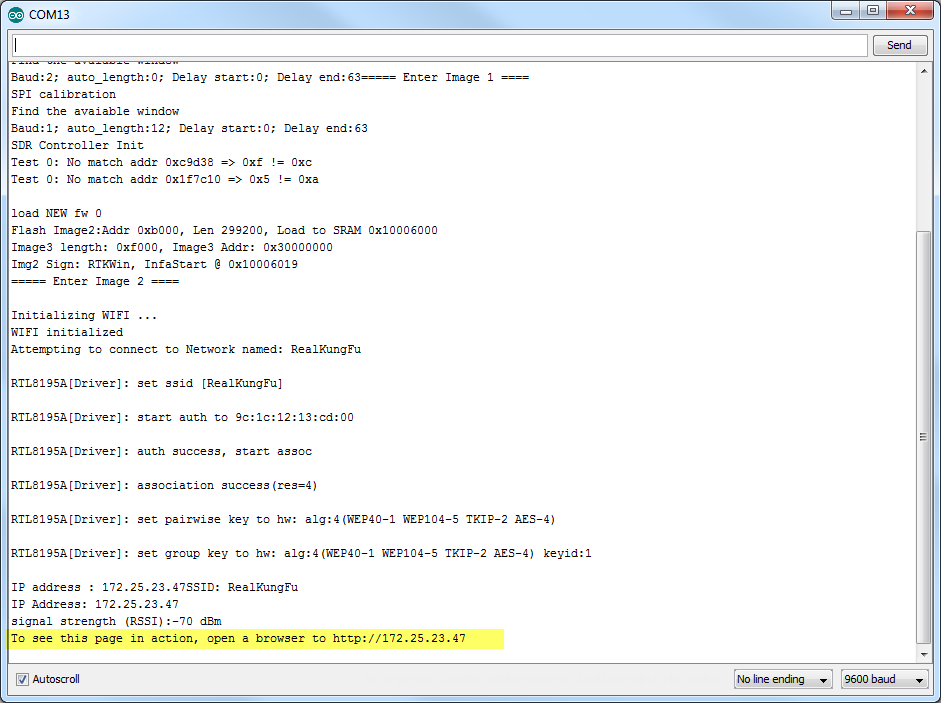
When the connection is established, you will see the message "To see this page in action, open a browser to http://xxx.xxx.xxx.xxx" in the arduino IDE, as shown in the figure 1 above:
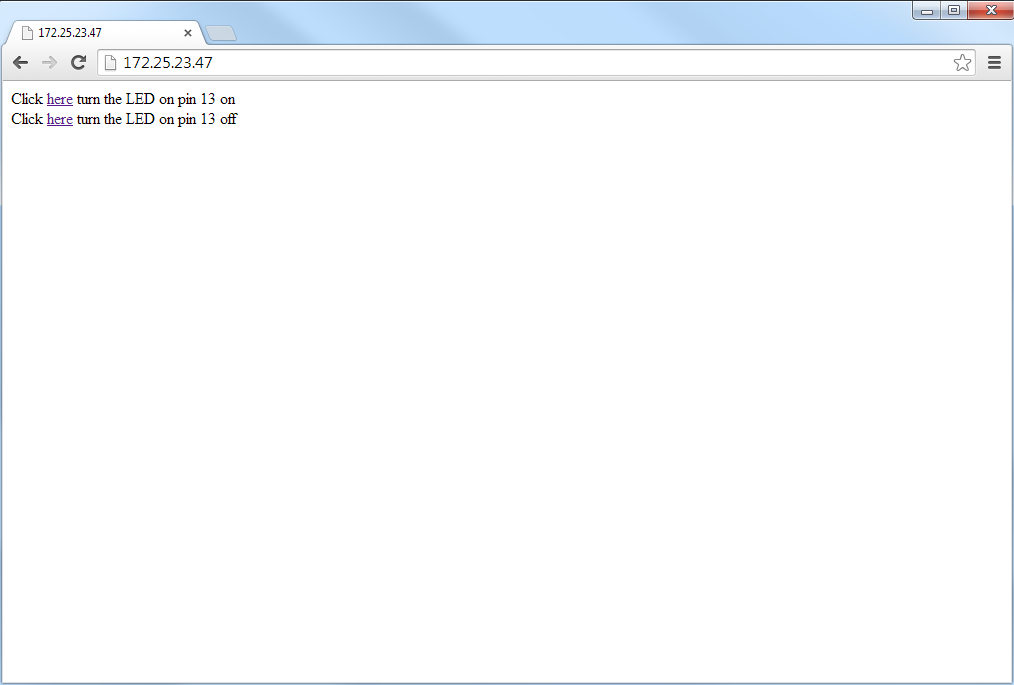
Next, open the browser of a computer or a smart phone under the same WiFi domain, enter the address in the message. In this case, we are using a web browser on a PC.
Now we are able to see two lines on the browser just like figure 2 above. We can now control the LED to turn it on or off anytime!
Have fun with this project and keep coding!