HOW TO CREATE a 3D MILK BOX USING 3D MODELLING SOFTWARE
by Simran Khuntia in Cooking > Canning & Preserving
432 Views, 0 Favorites, 0 Comments
HOW TO CREATE a 3D MILK BOX USING 3D MODELLING SOFTWARE
.png)
3D Designing is a fascinating ability and it's becoming famous in numerous ventures. With 3D designing, one has the ability to make 3D models that can be utilised to picture genuine articles. In this tutorial blog, we are 3D modelling a milk box in SelfCAD. In the event that you have not attempted it yet, SelfCAD is one of the least difficult yet astonishing 3D demonstrating programming for clients, everything being equal. Starting with arranging the 3D cube, we will transform it with devices like Scale, Extrusion, Edit details, Move, etc. SelfCAD is one of the most astonishing 3D Modelling software, including different features used to design the 3D Articles. This tutorial blog coordinates the use of edge selection options to make our desired shape.
You can also visit our website and go through our other such articles like how to design a 3D ice cream!
We should continue with designing the milkbox.
Supplies
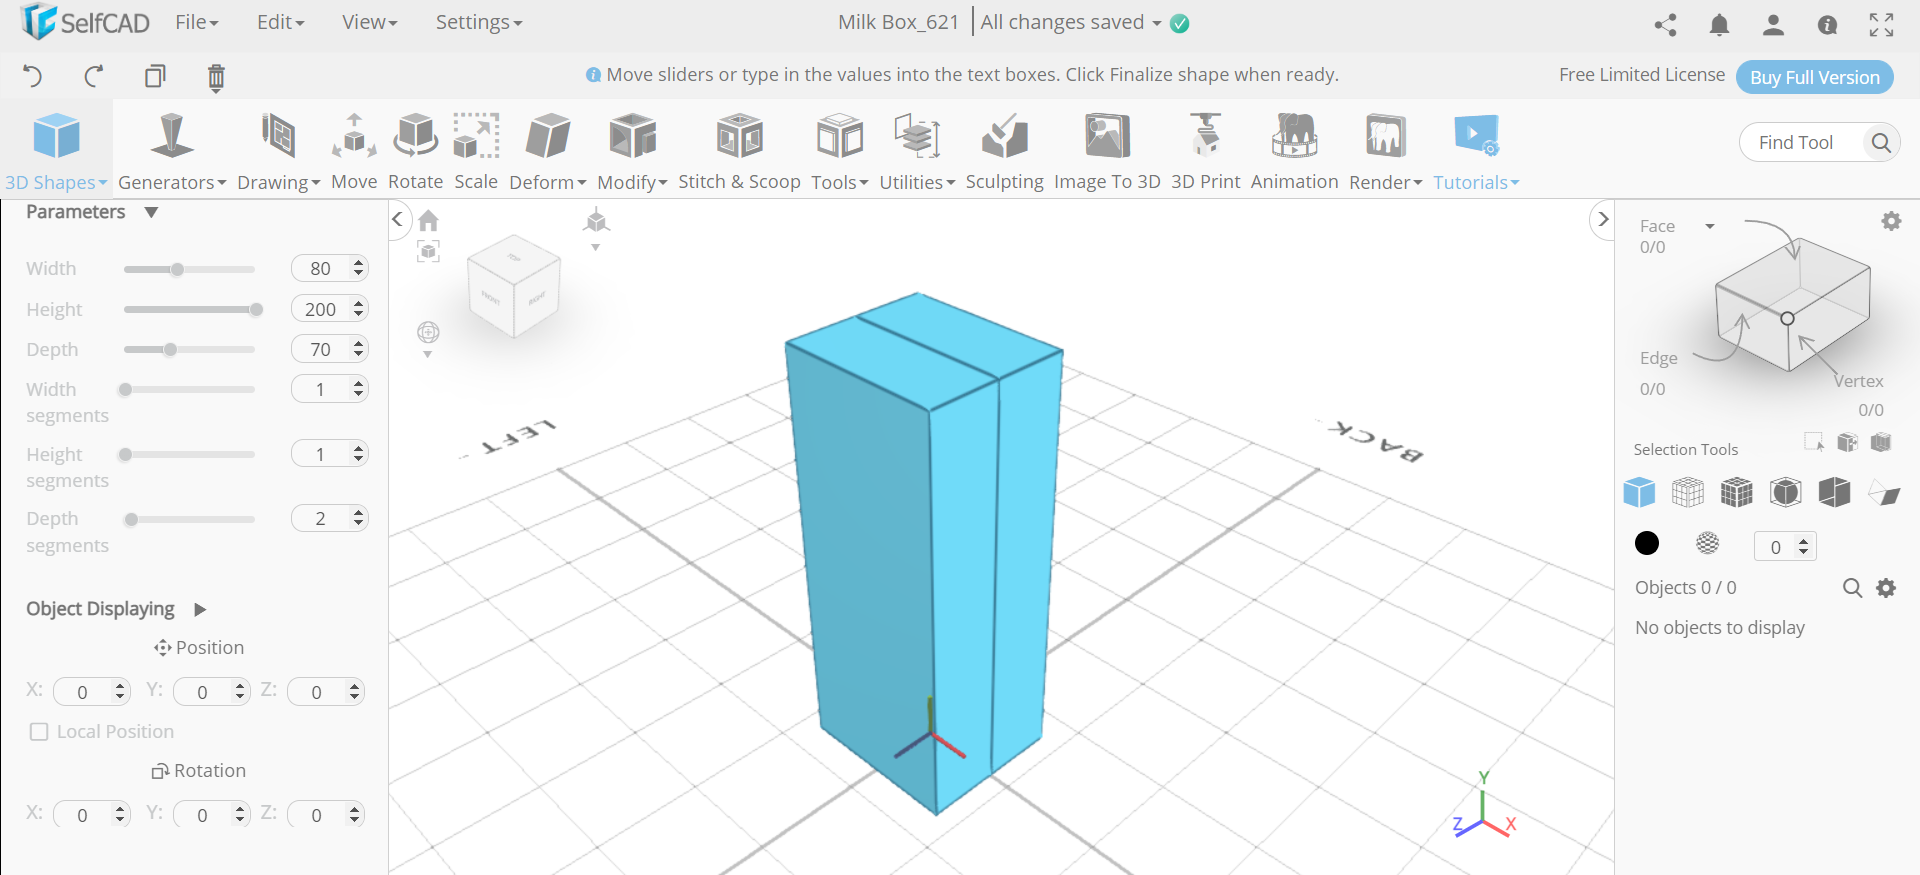
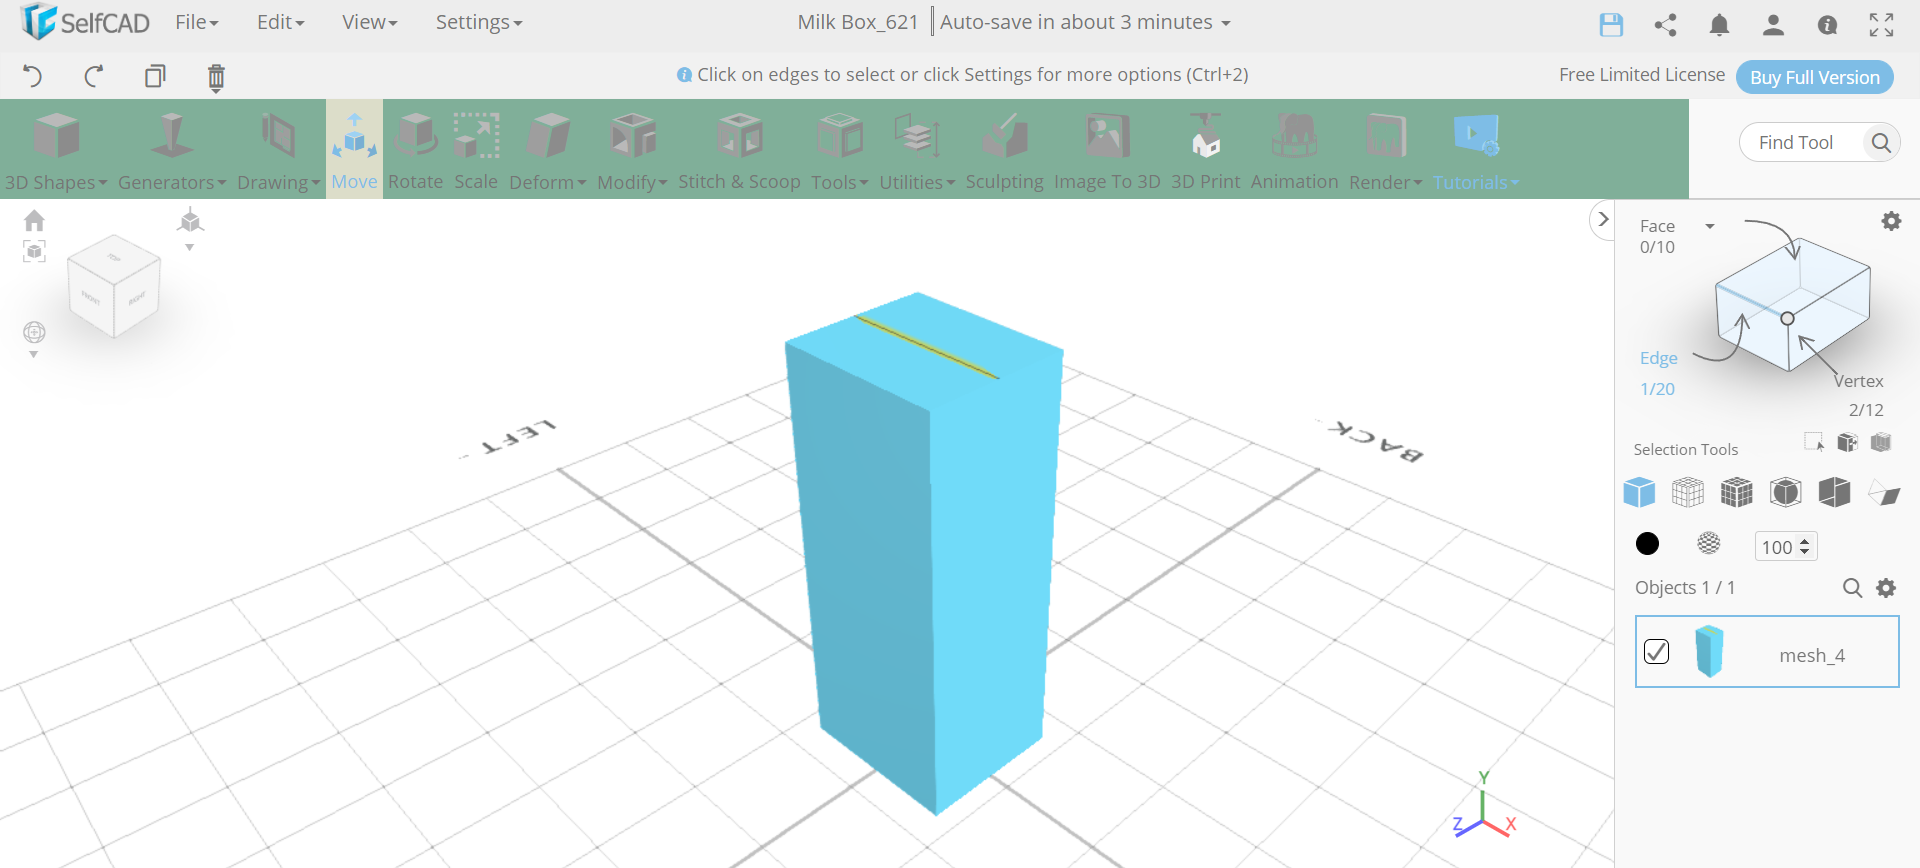
Insert a Cube and Select Its Middle Edge
.png)
.png)
First of all, go to the 3D shapes and insert a cube to the working interface. Set width to 80, height to 200, depth to 70, depth segment to 2. Then opt for edge selection and select the middle edge on the top of the face.
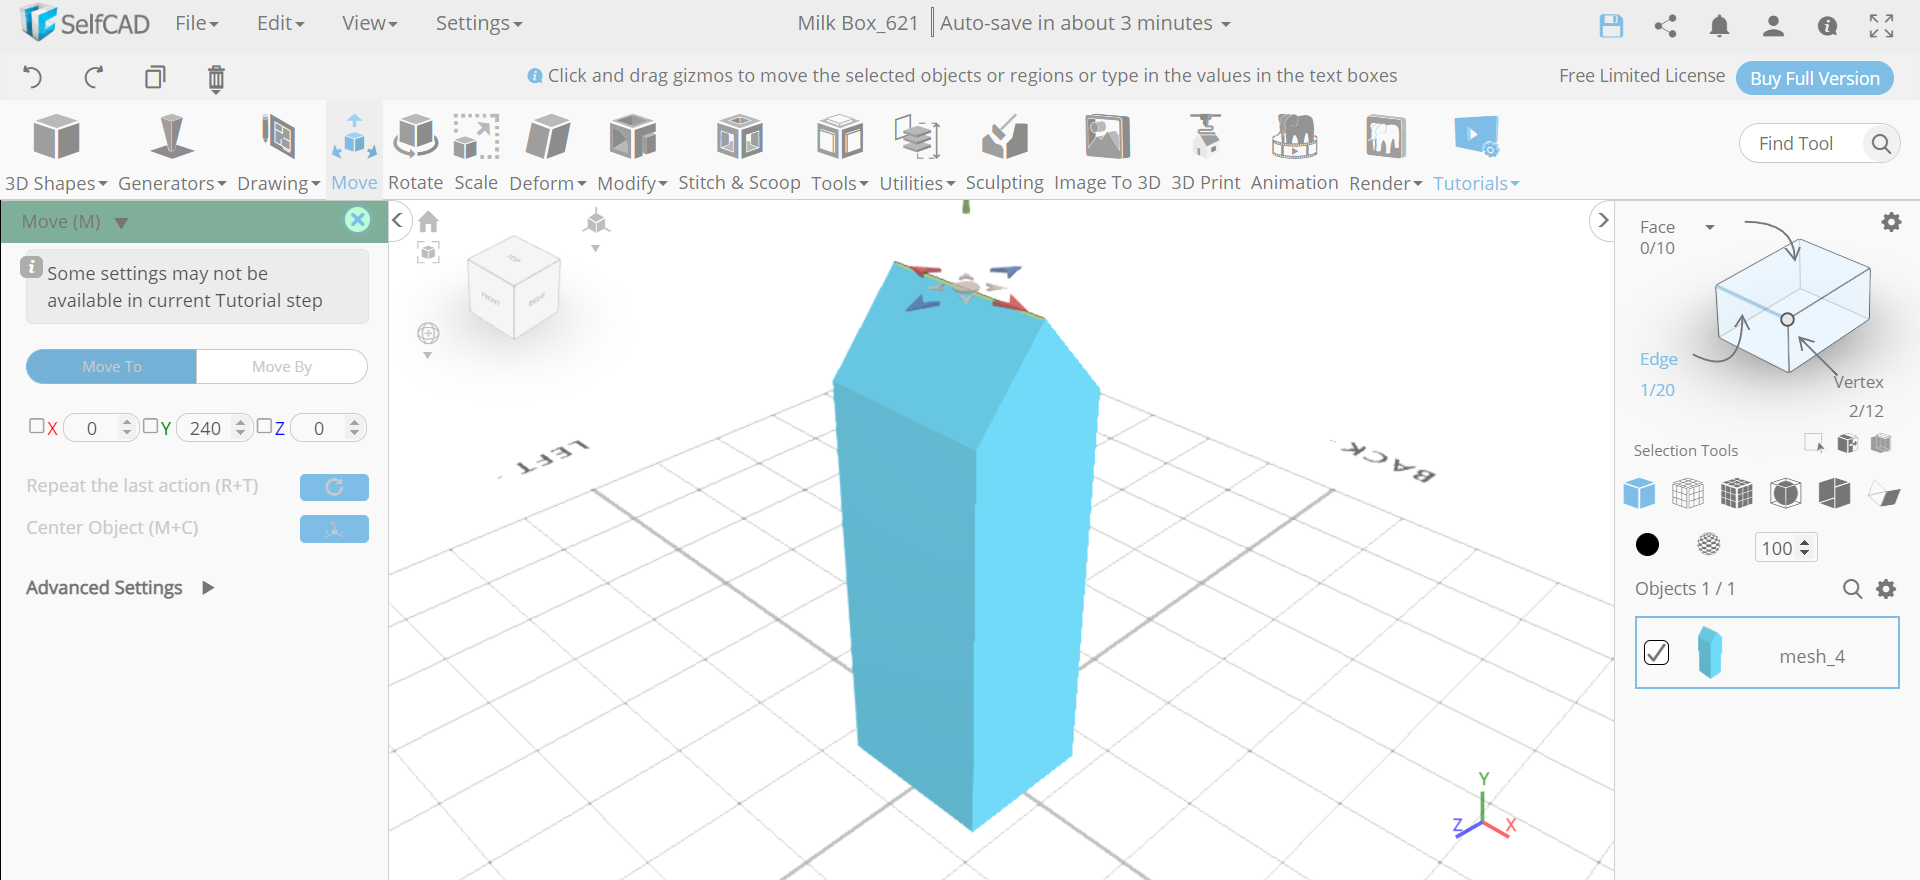
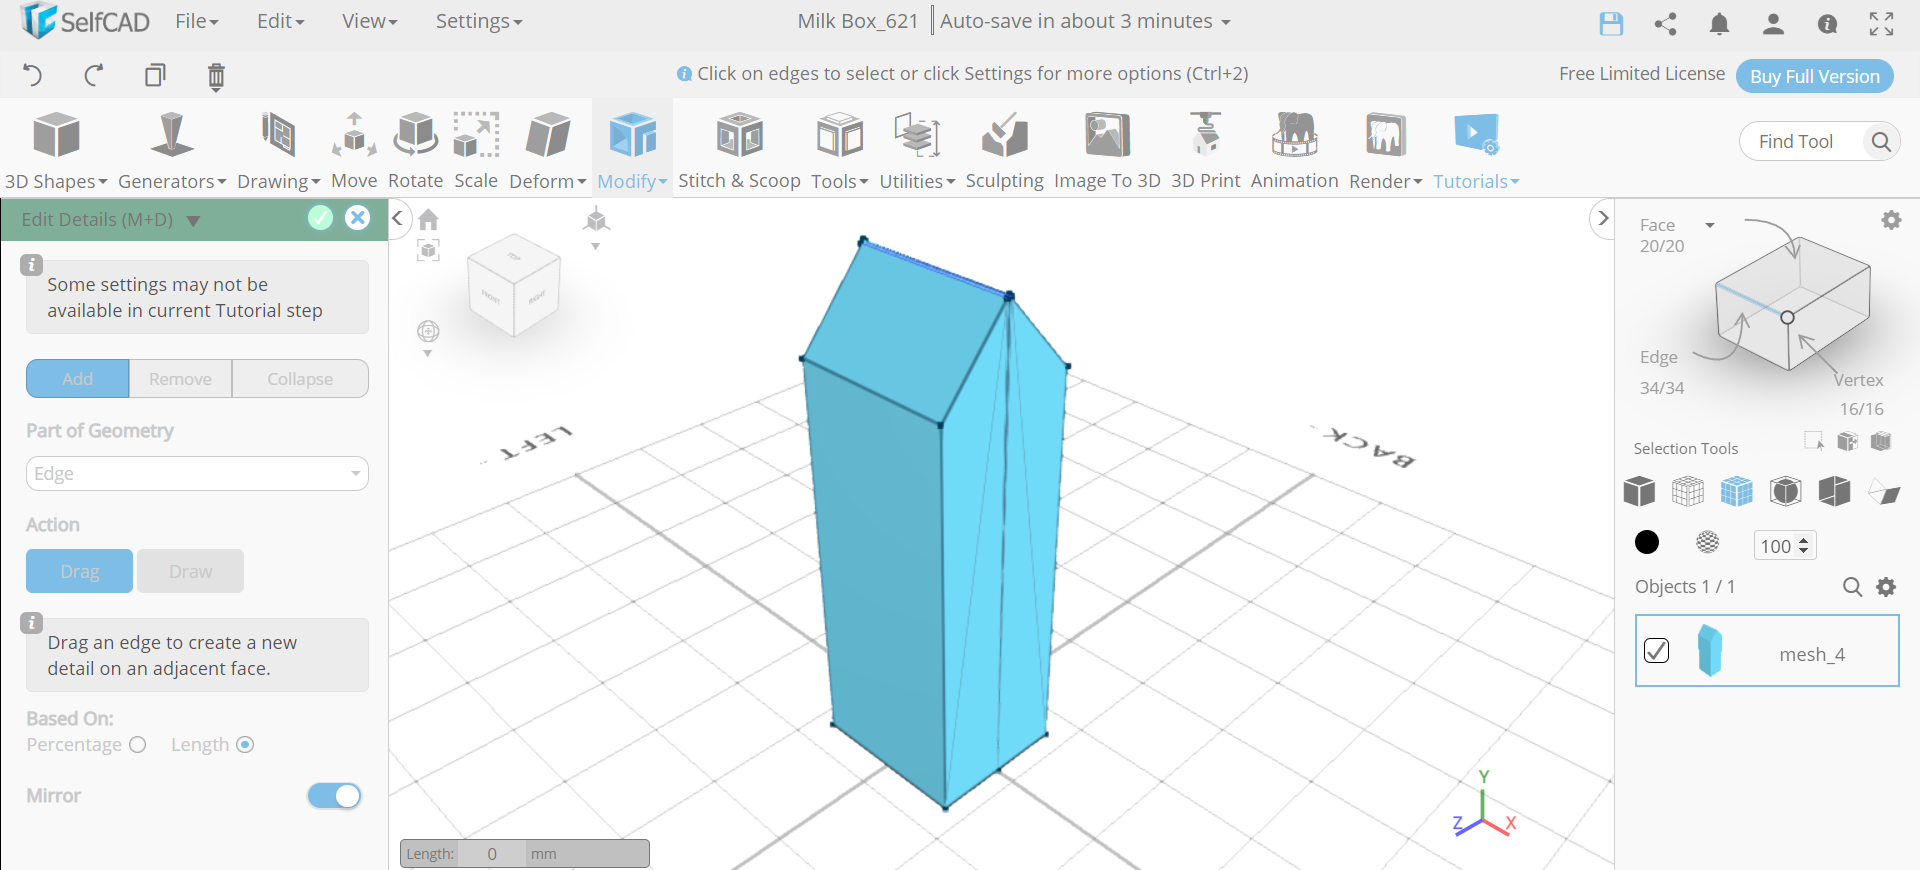
Move the Edge and Edit It
.png)
.png)
Next, select the move tool and set y to 240. Then go to modify and select the edit details tool. Set the mirror to true and drag the edge to the bottom.
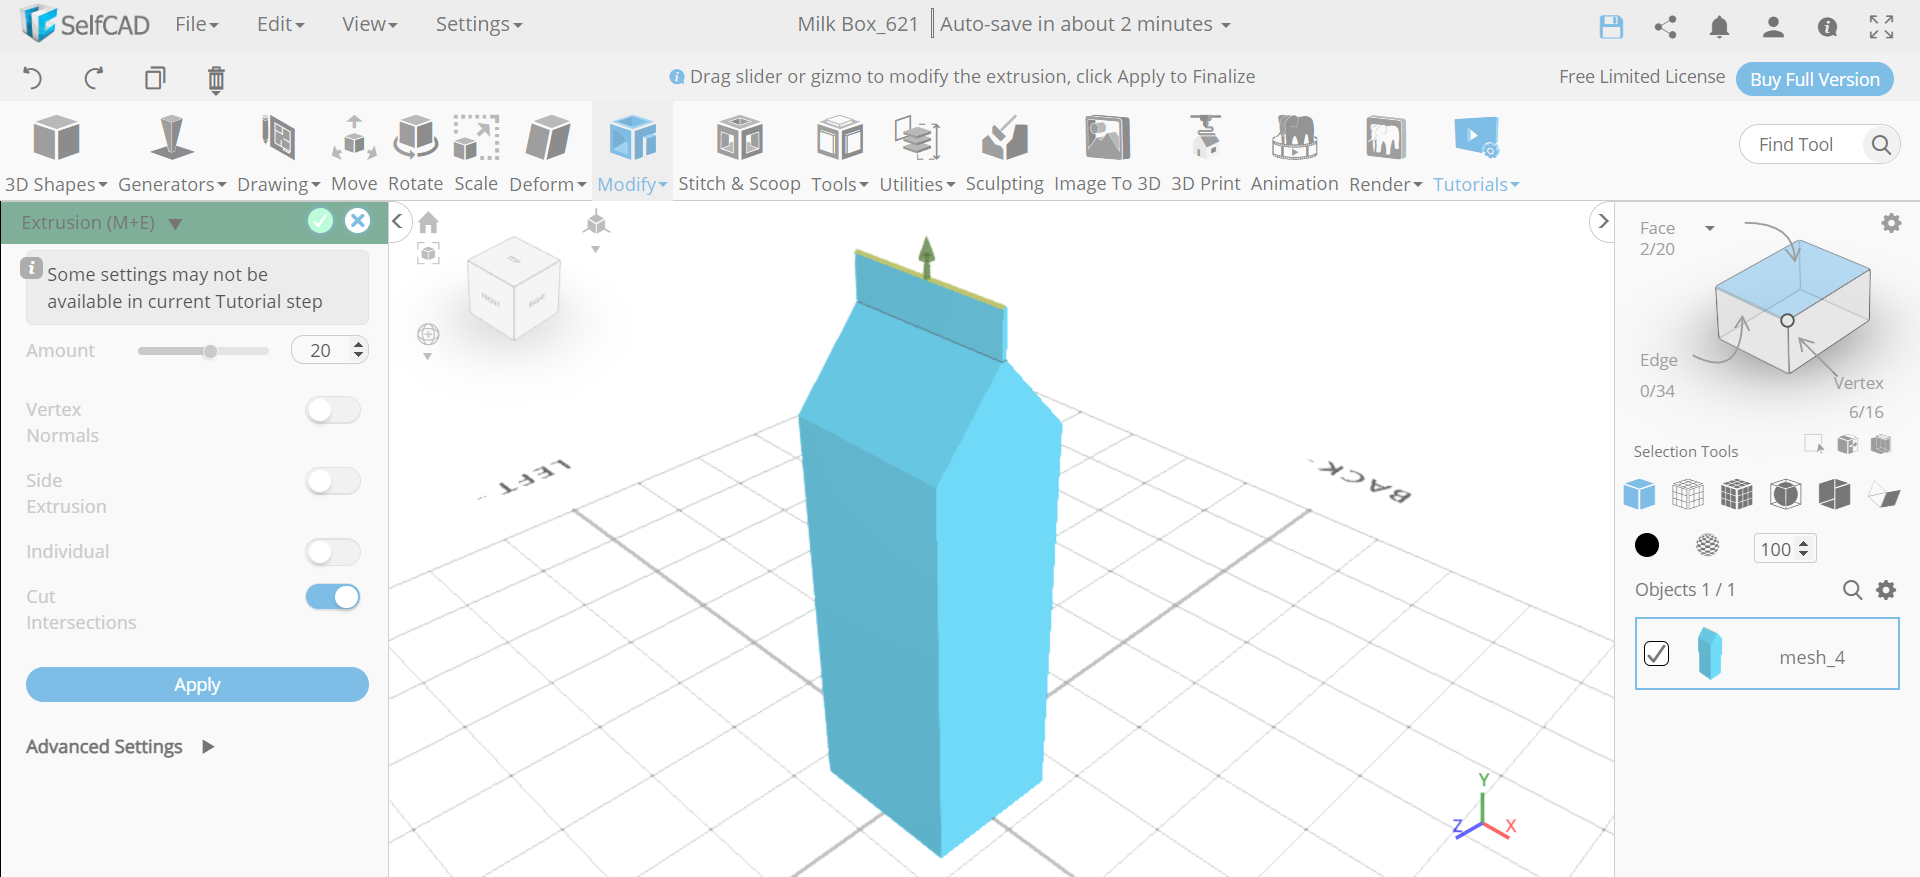
Extrude the Top Edge Face
.png)
Now, we will opt for face selection and select the top edged face as shown in the image. Then from the modify category choose the extrusion tool. Set the amount to 20.
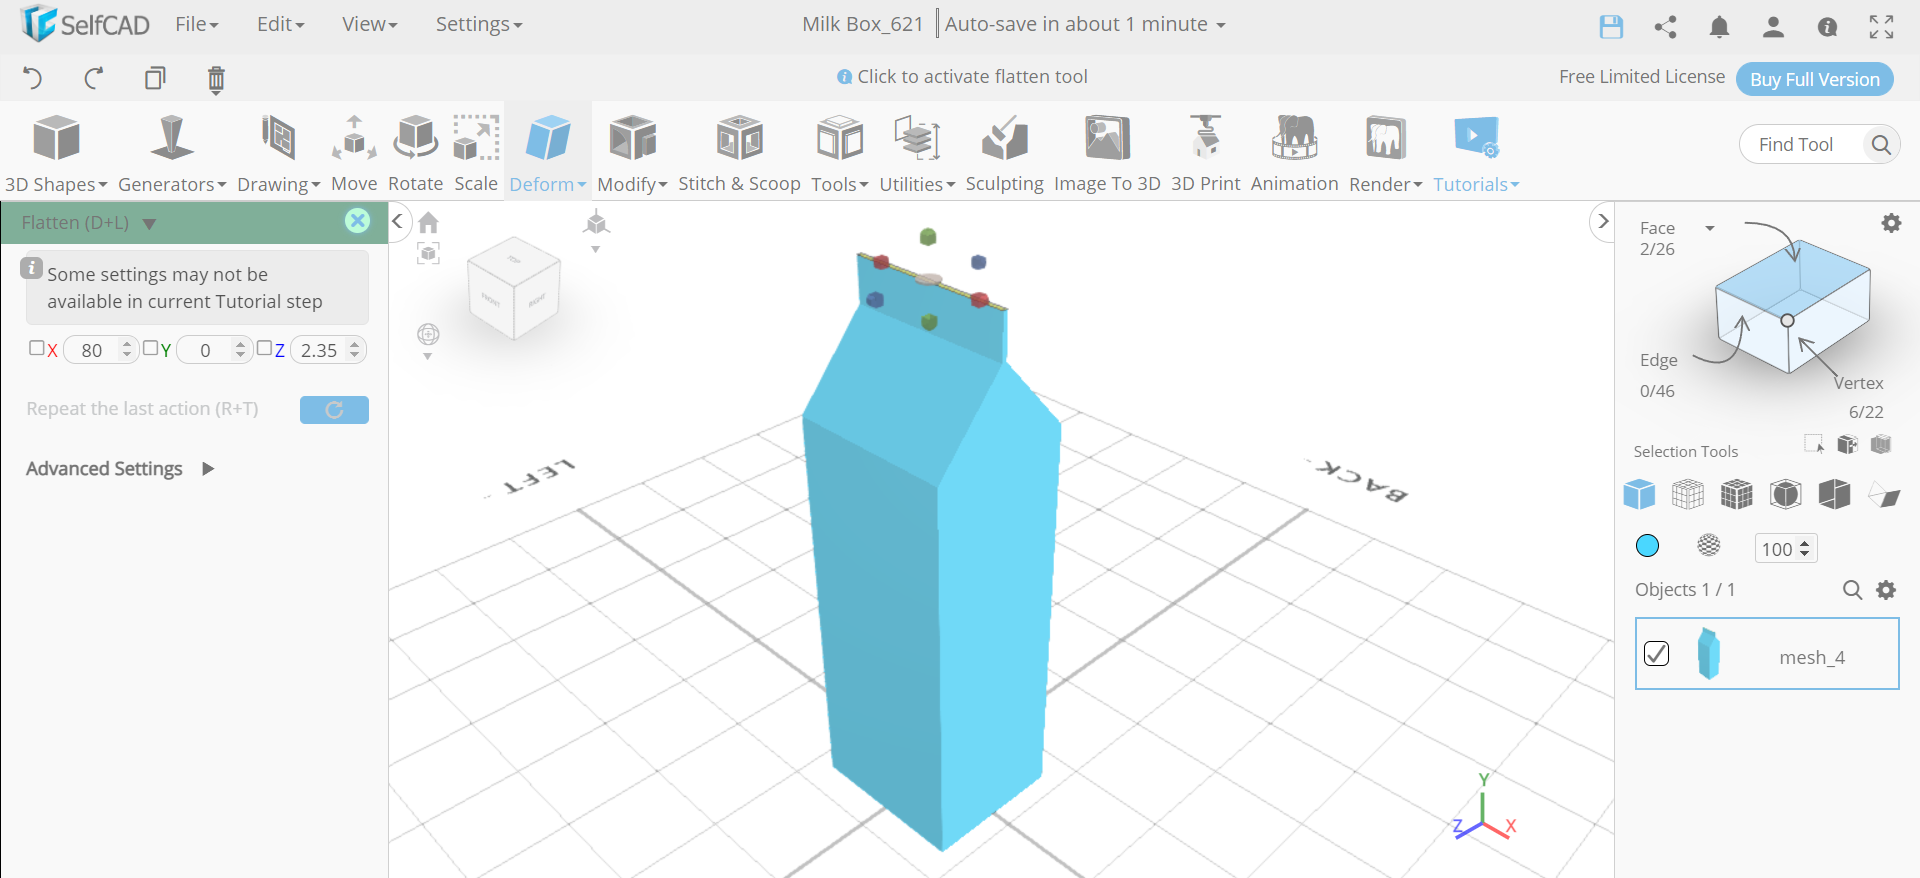
Flatten It and Insert a Cylinder
.png)
.png)
Next, from the deform category select the flatten tool. Set y to 0. Then insert a cylinder to the working interface. Set top radius to 10, bottom radius to 10, height to 10, position x to -9, position y to 198, position z to 25, rotation x to -45, rotation y to 90, and rotation z to 90.
Make Them a Union and Copy It
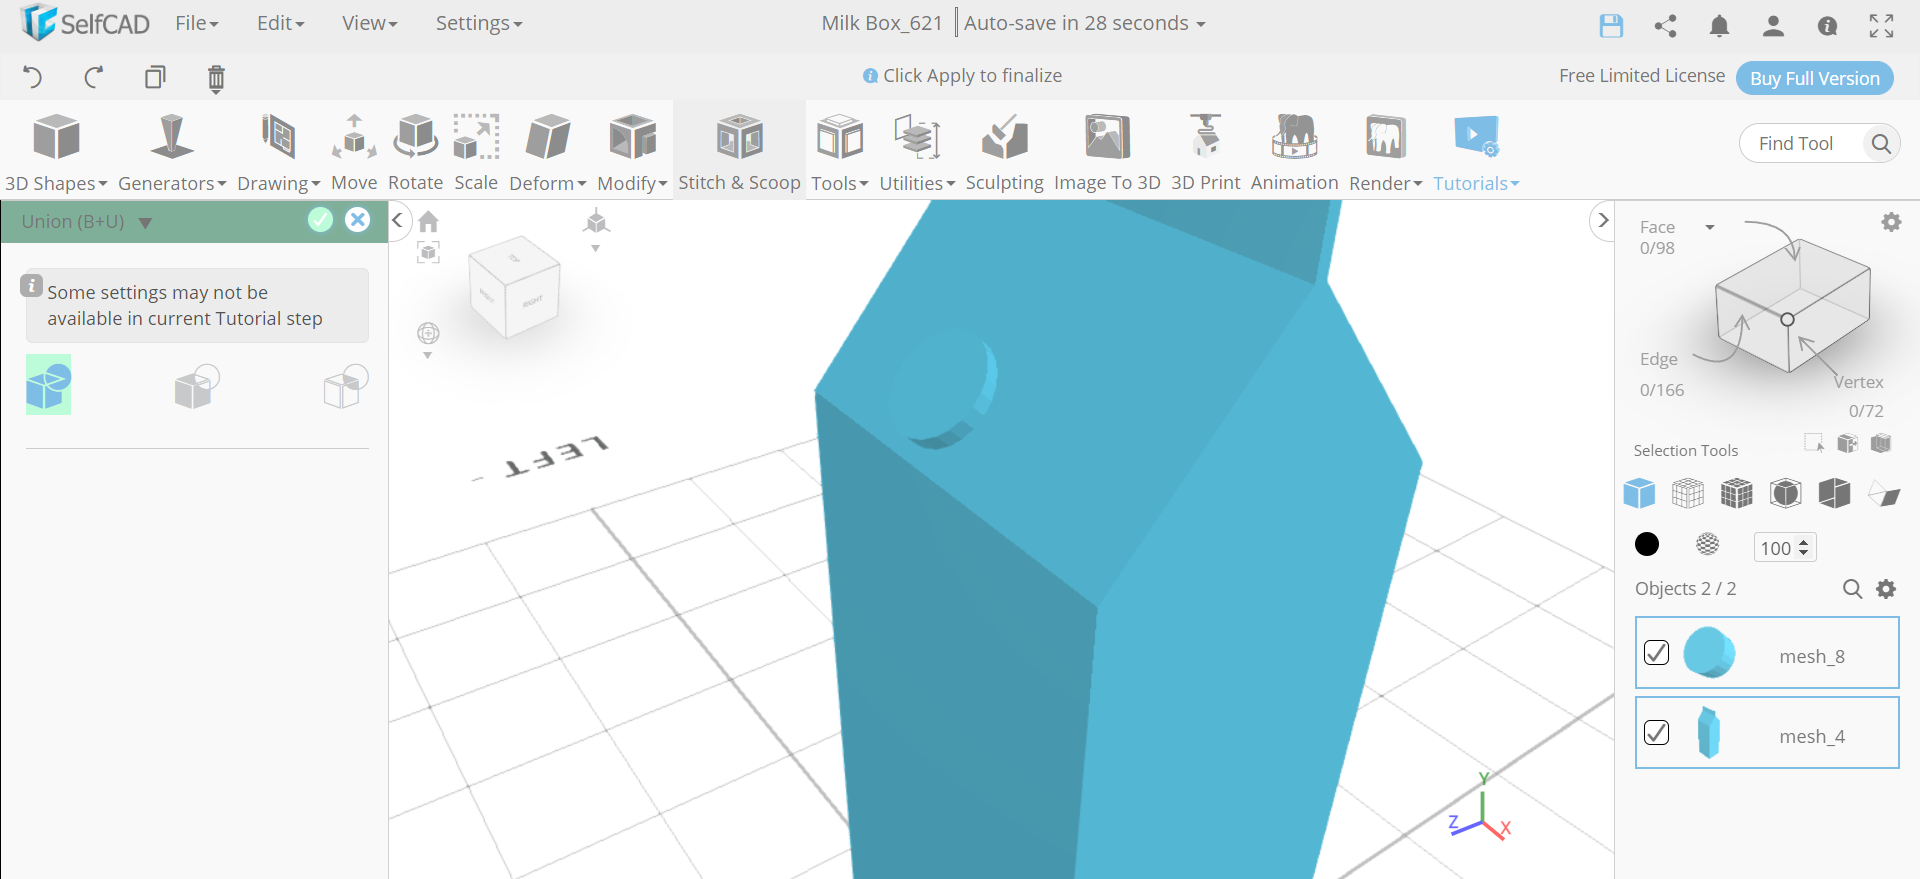.png)
.png)
Now, select all the objects, go to stitch and scoop and make them a union. Then opt for polygon selection and select the top face to the cylinder. After that, click on the copy button to copy the object.
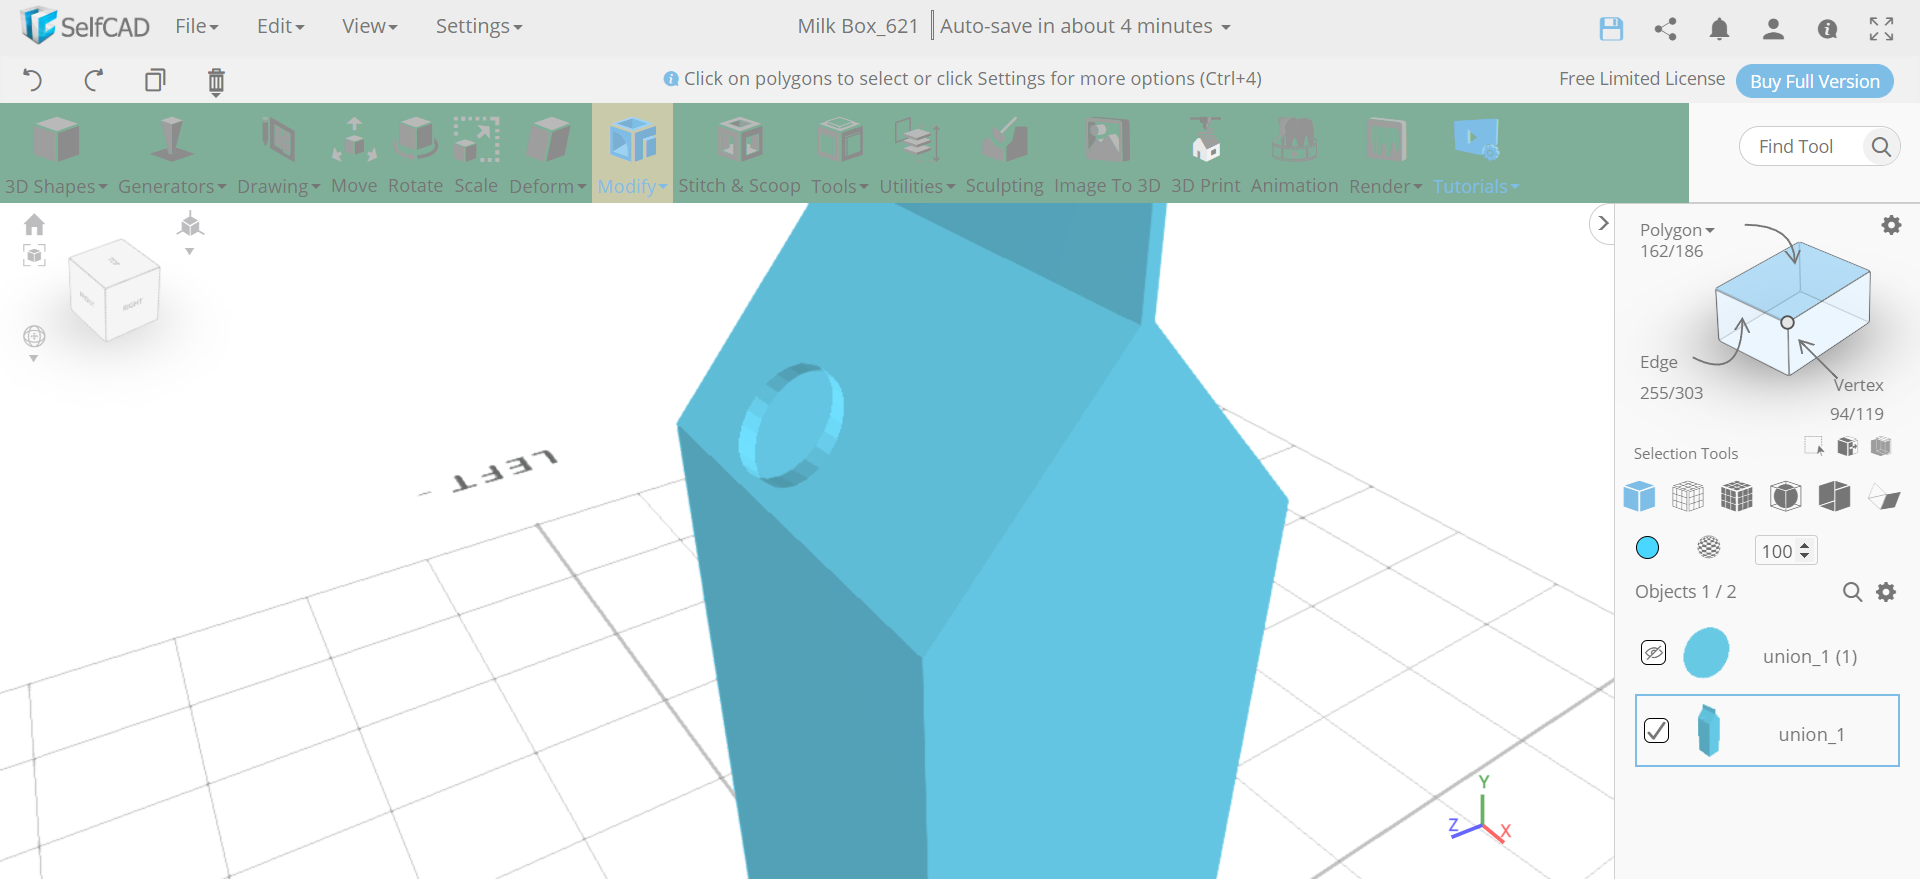
Delete the Original Face and Add Thickness to It
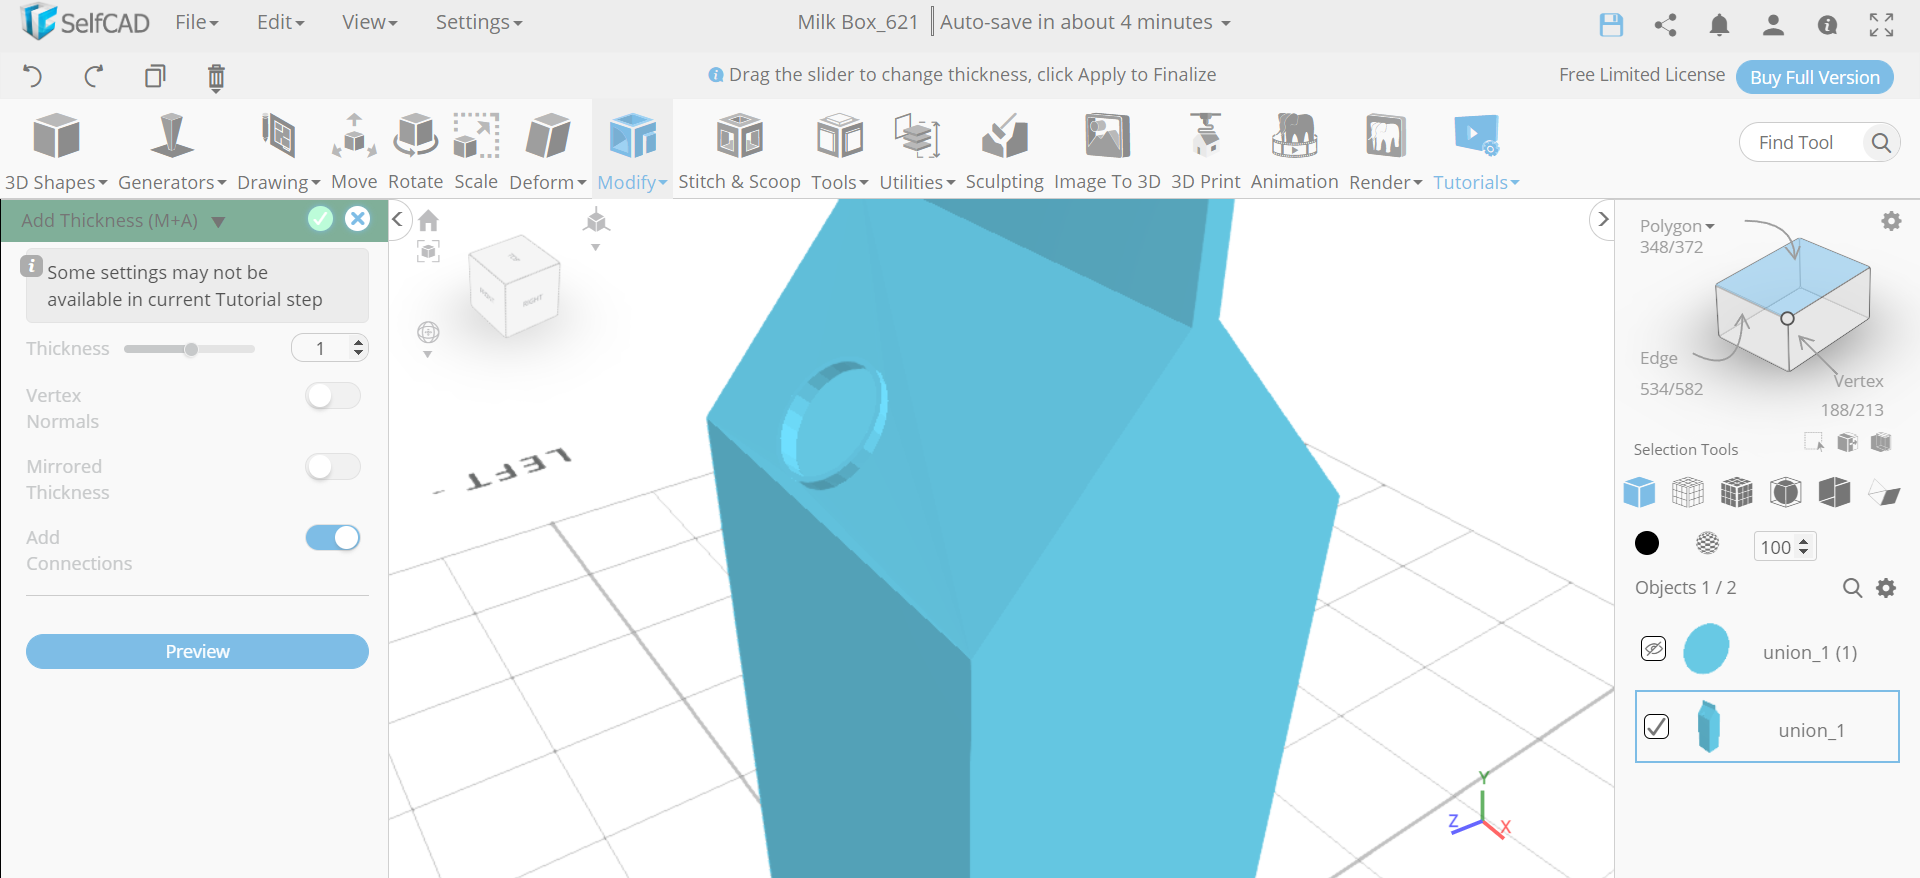.png)
Next, from the settings, we will select the hide button. Delete the original face and add thickness to it with the help of an add thickness tool. Set thickness to 1. Then select the show all option.
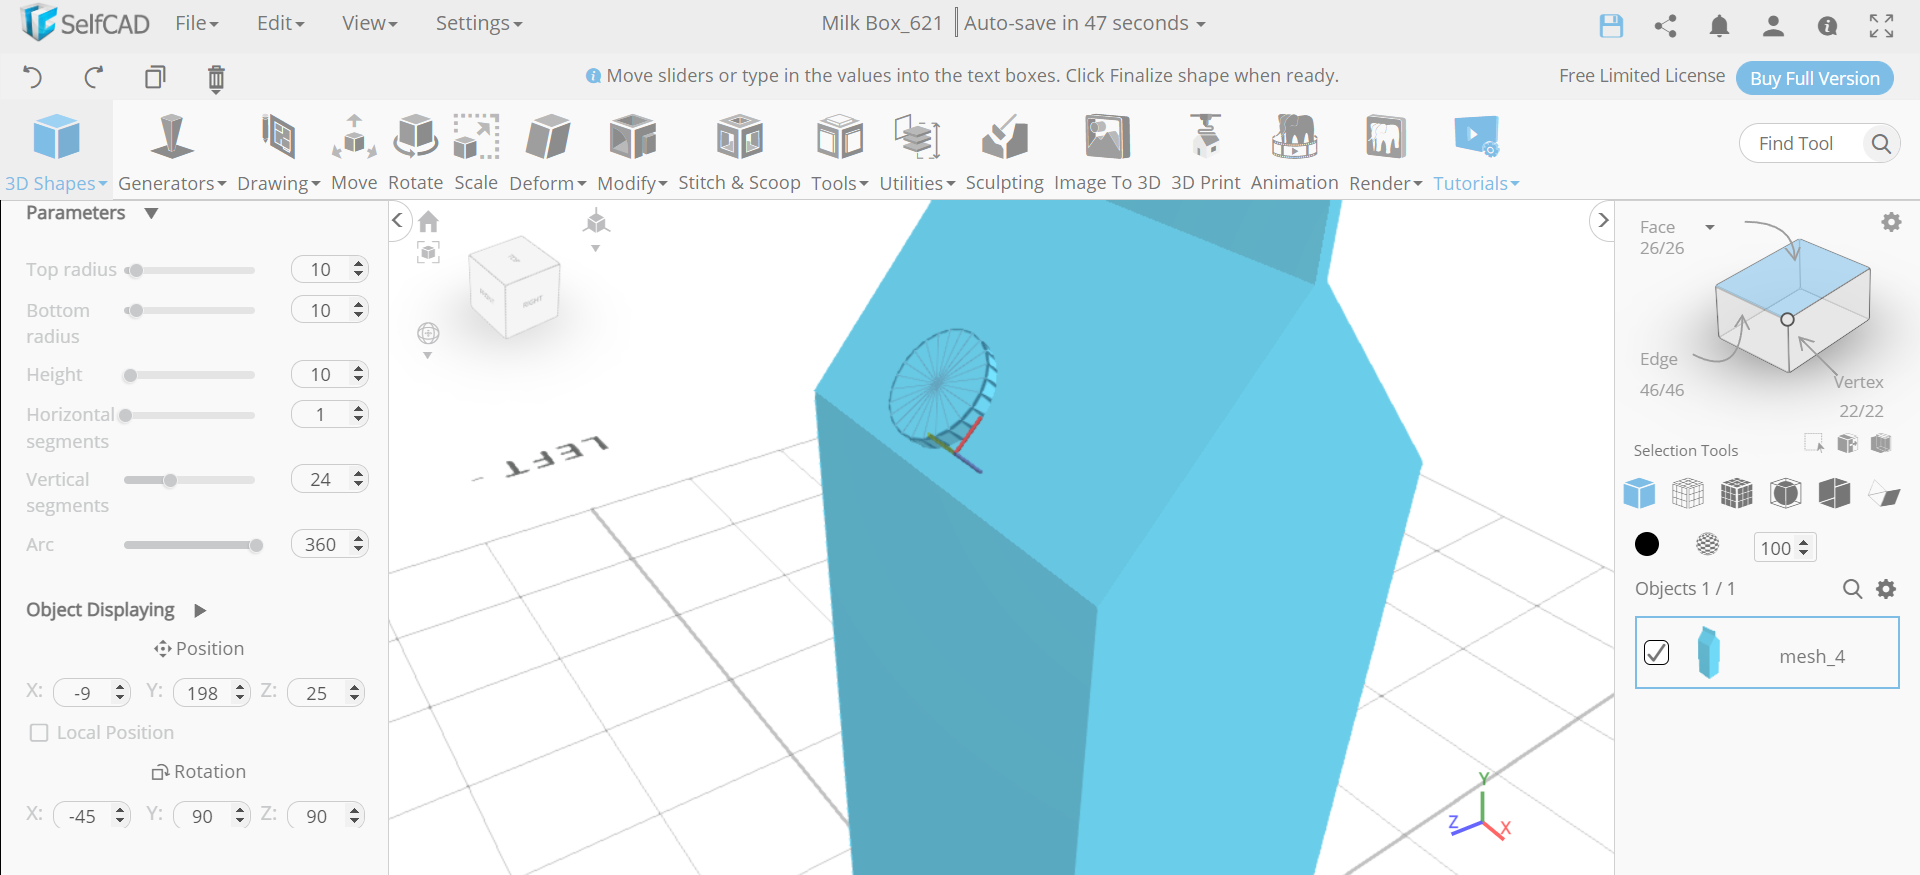
Select the Object and Scale It
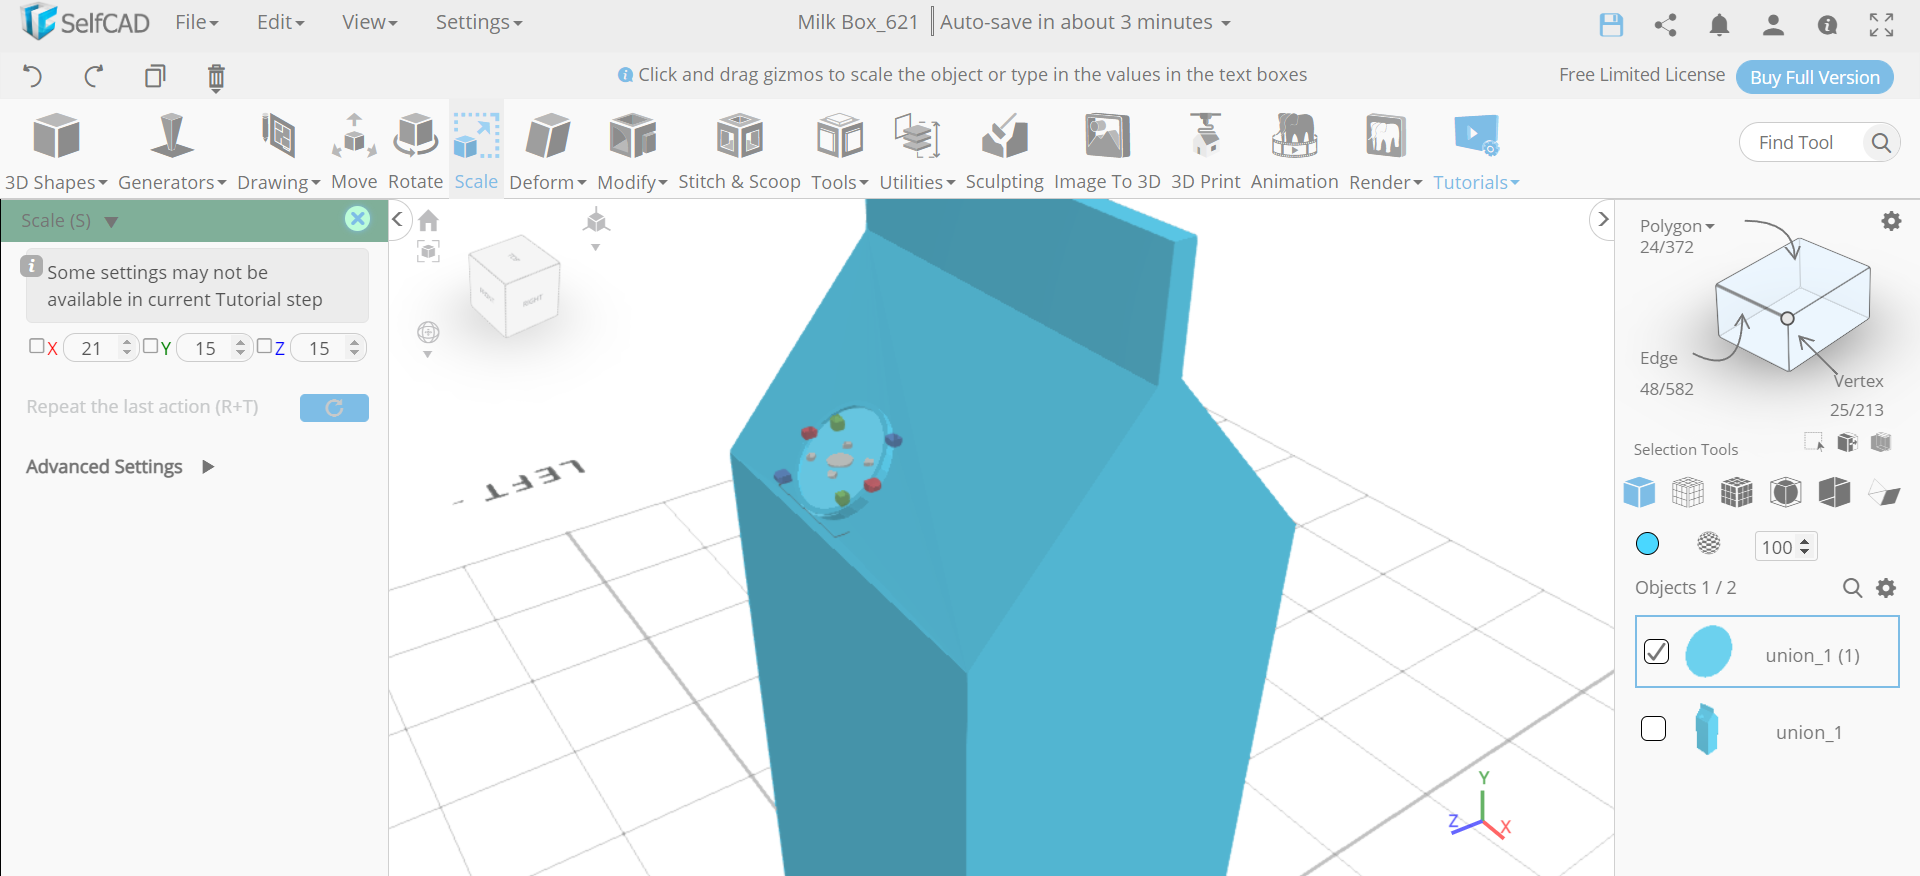.png)
Now, we will select union_1(1) and deselect union_1. Then select the scale tool and set x to 21, y to 15 and z to 15.
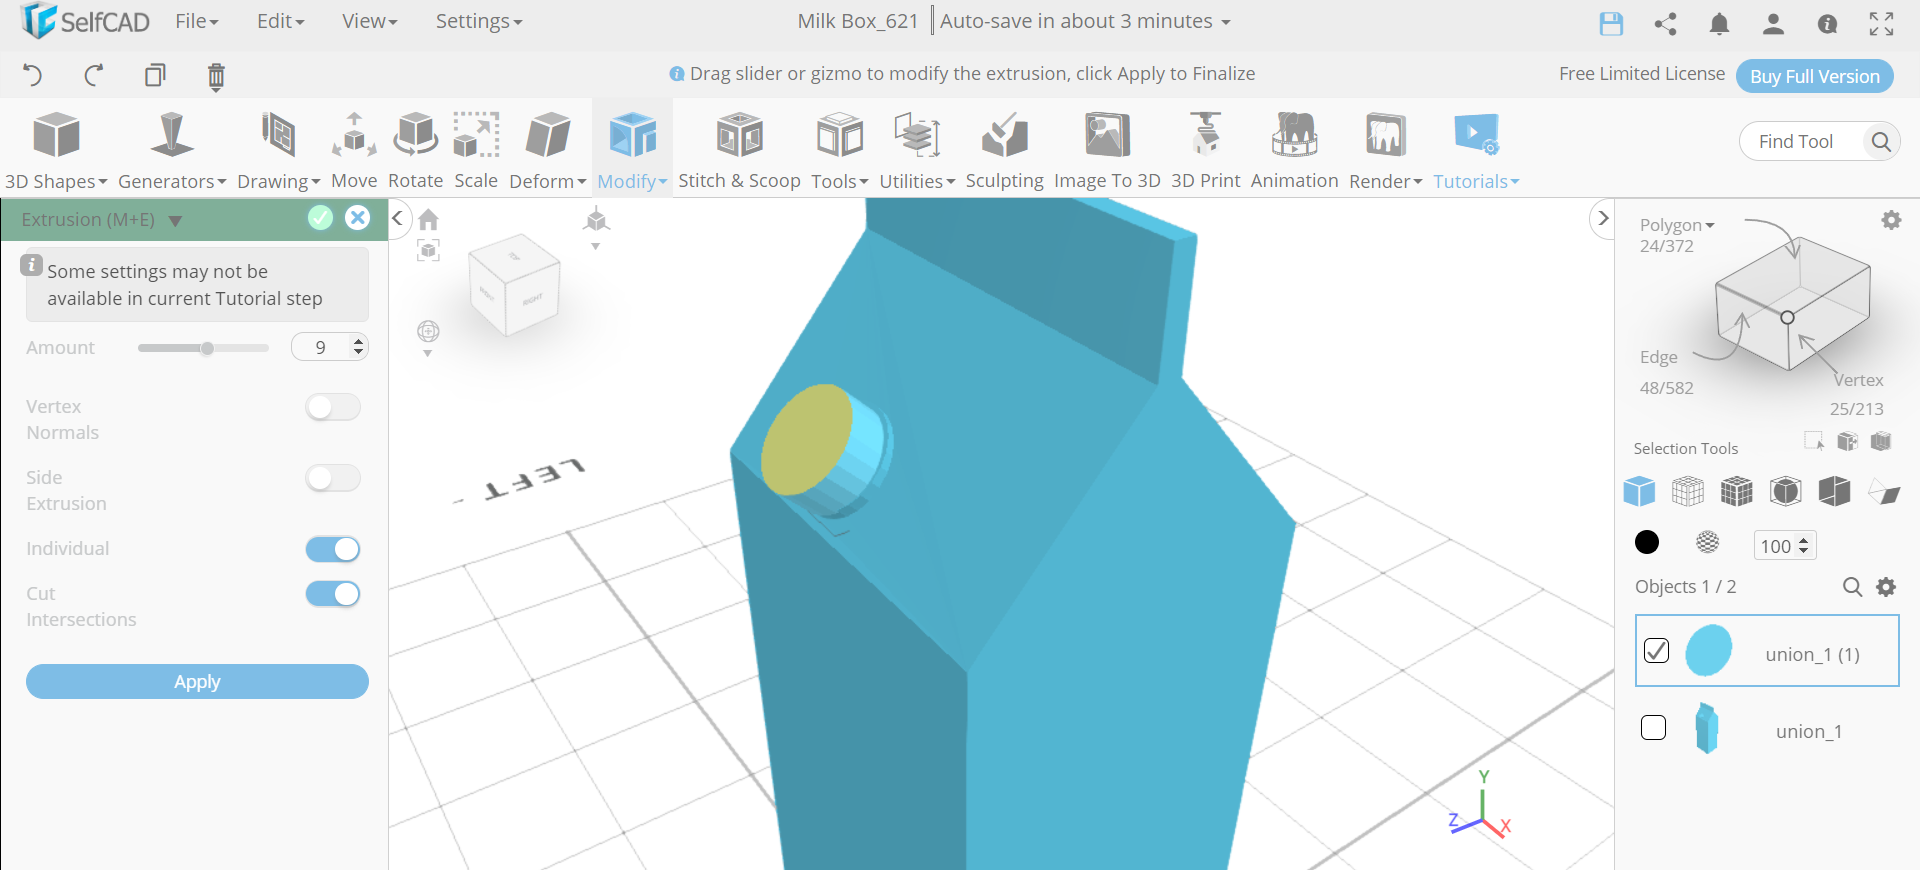
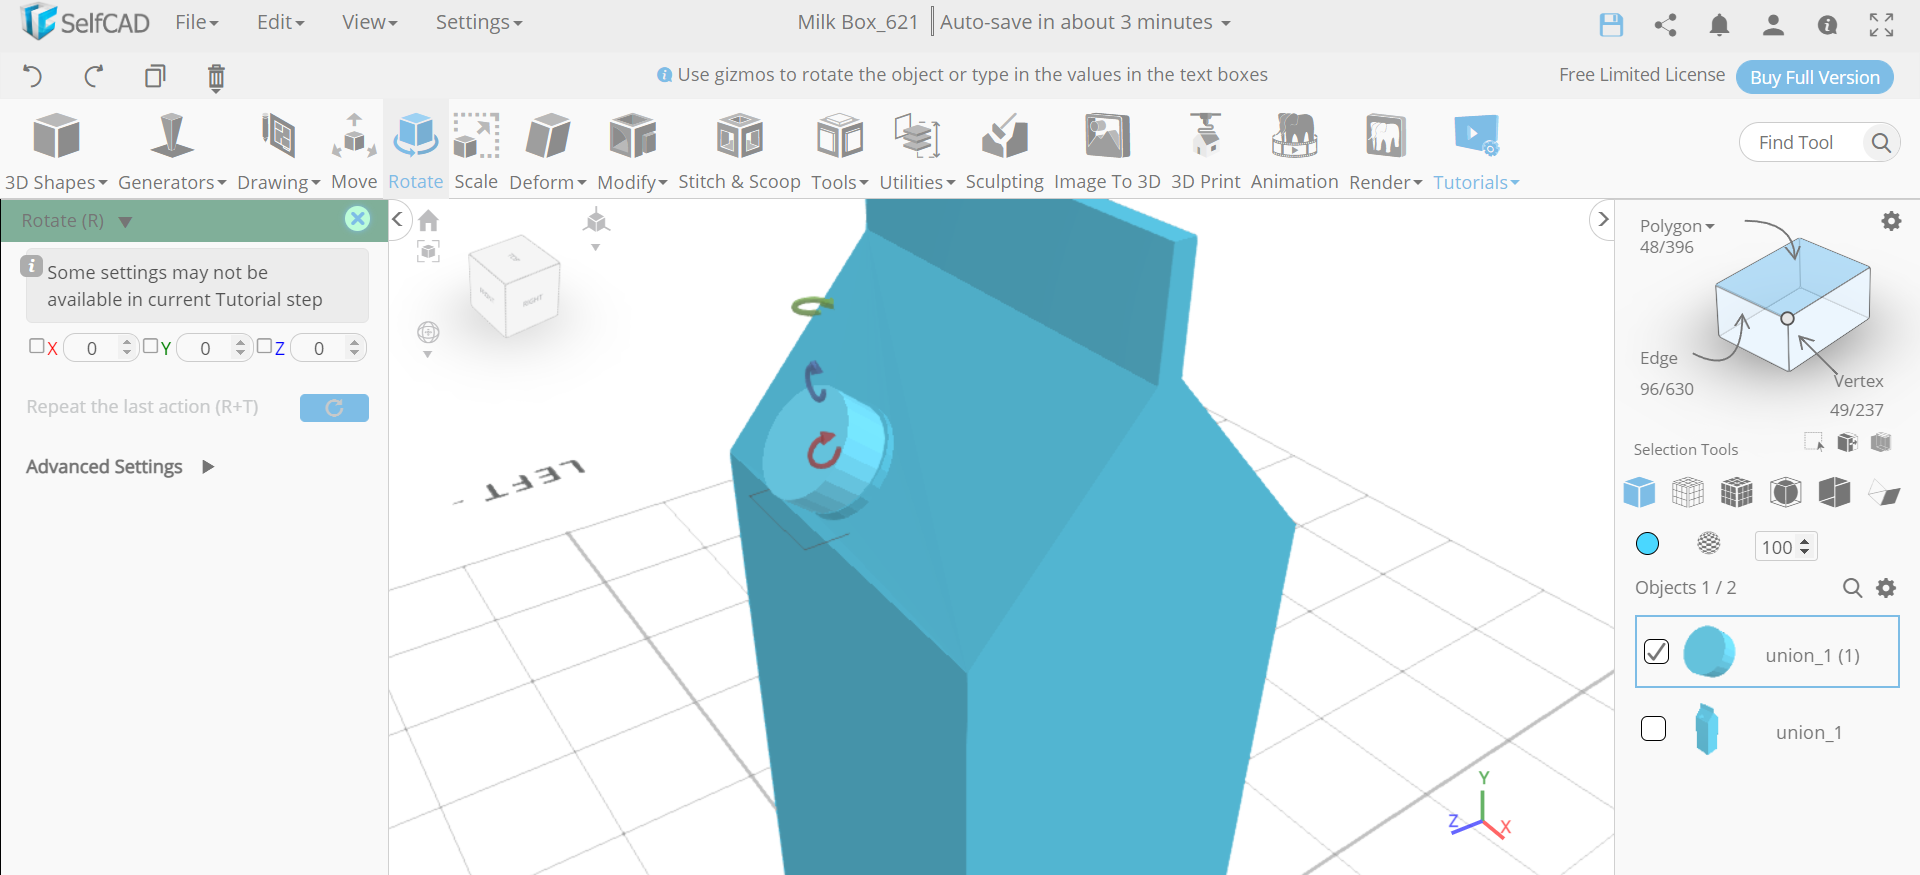
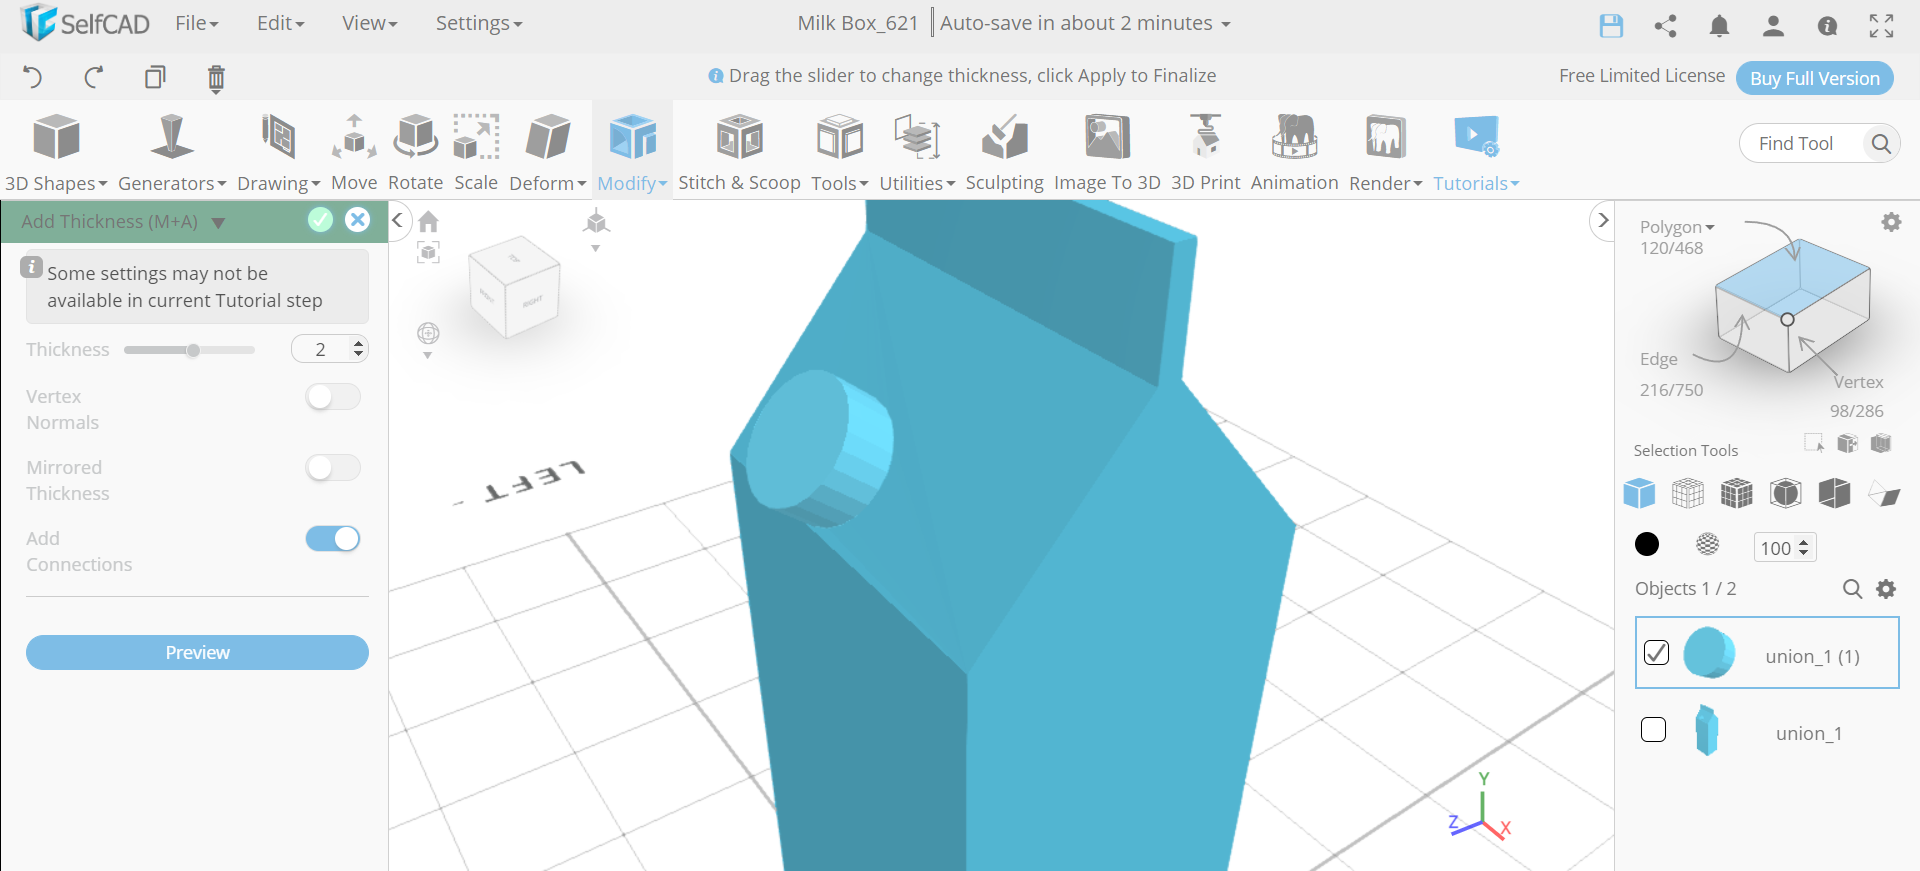
Extrude, Rotate and Add Thickness to It
.png)
.png)
.png)
Next, select the extrusion tool and set the amount to 9. Then select the rotate tool and set x to 355. After that, select the add thickness tool and set thickness to 2.
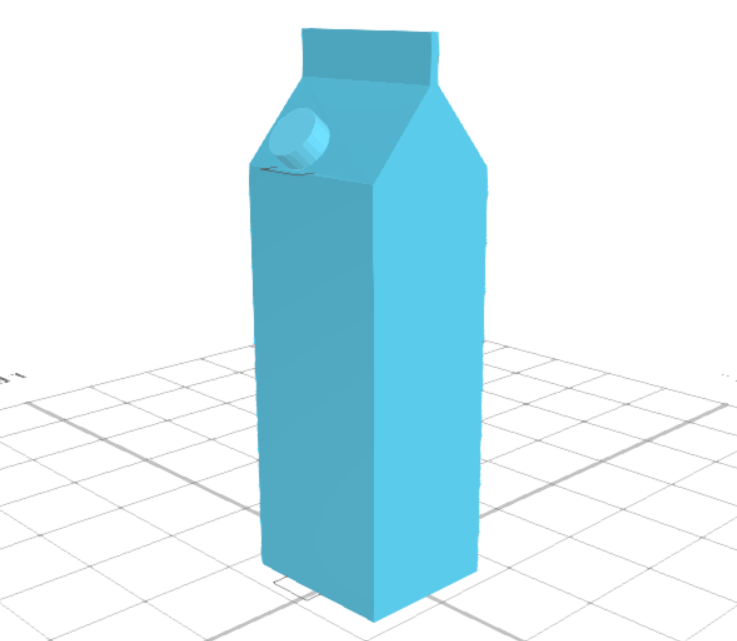
CONCLUSION: HENCE, WE HAVE CREATED a 3D MILKBOX IN SelfCAD
3D modelling characters isn't hard. You essentially have to have the fitting tools with you. We've sorted out some ways to make a clear milk box using the 3D shapes and various tools of SelfCAD. You can use this. Moreover, you can play with the open shades or pick custom tones