HANGER-PC3-FAB DIG
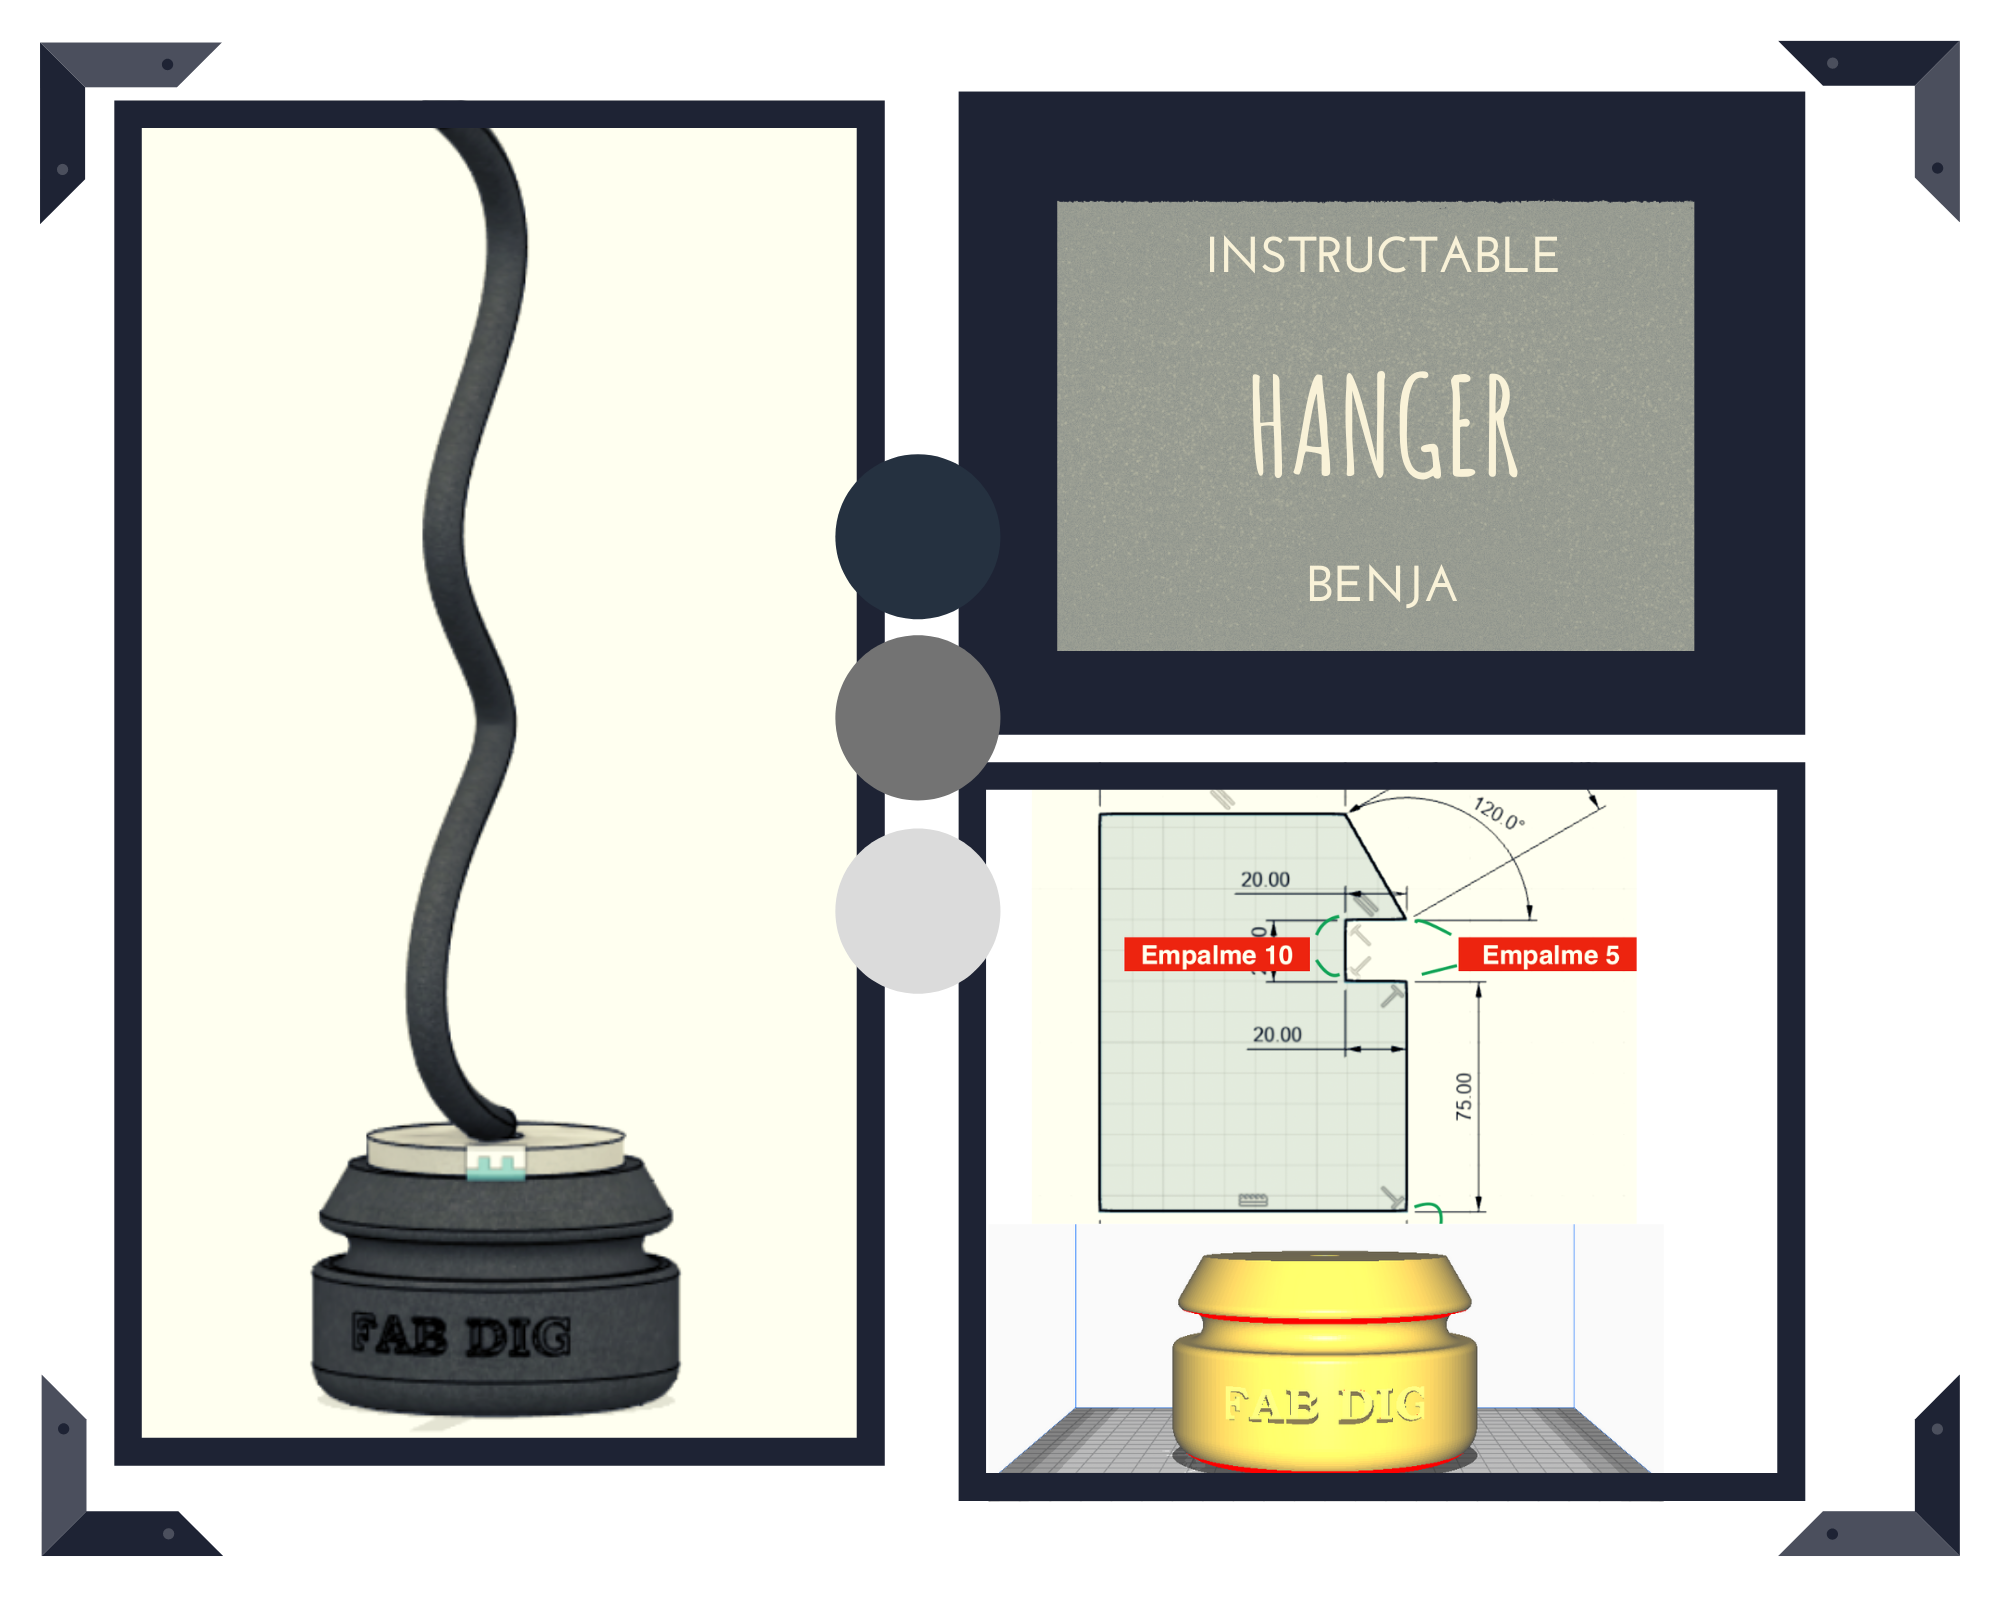
Hello friends, today we are going to develop a very fun and entertaining project to make a "Hanger" in simple steps. You are going to like it, let's "GET STARTED"."
Materials

- Computer (Windows 10)
- Autodesk Fusión 360 Software
- Peripherals:
- Mause
- Keyboard
- WIFI
- Ultimaker Cura
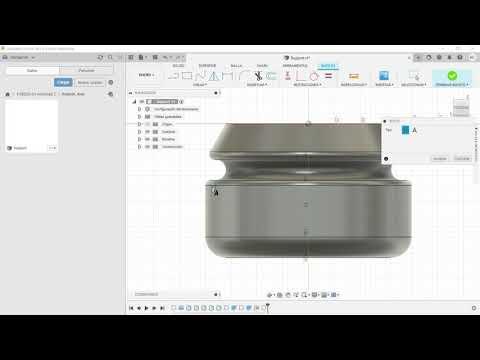
SUPPORT
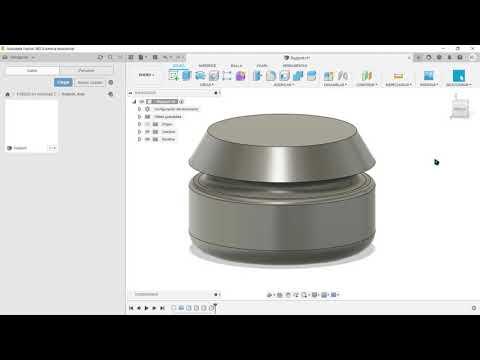
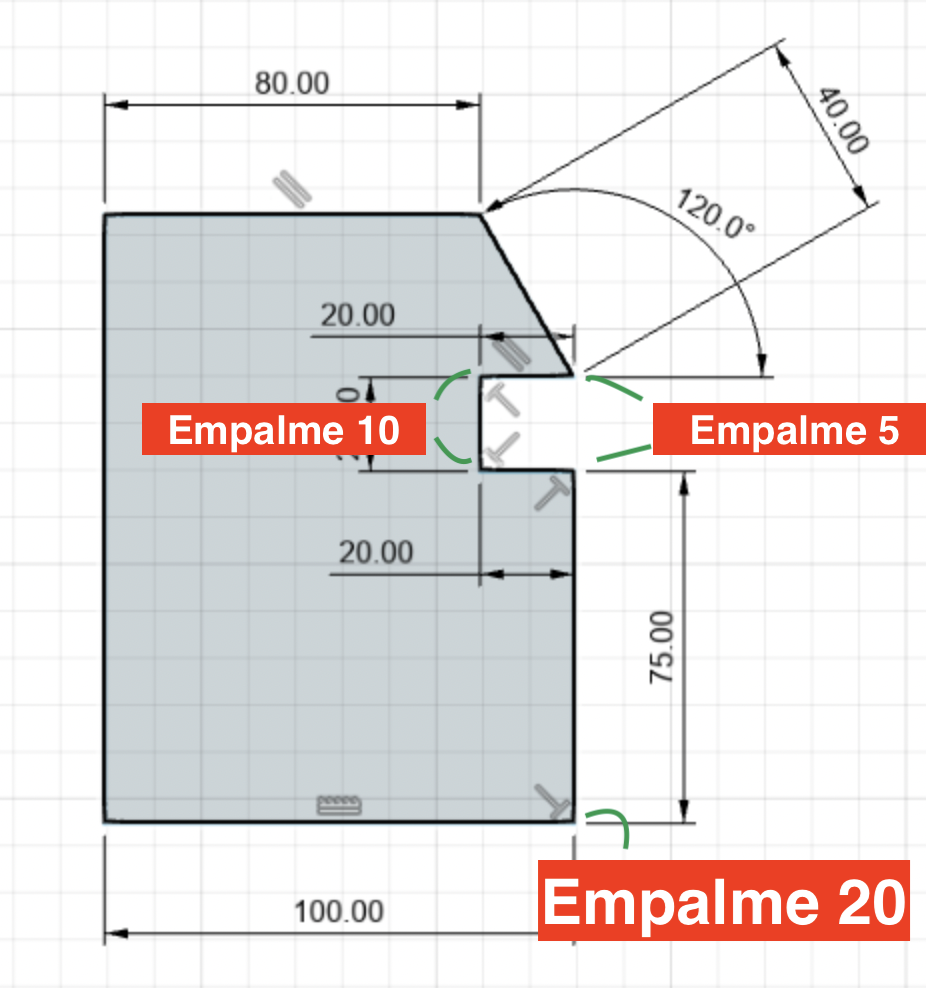
We will start by opening "FUSION 360" and we will create a folder called HANGER ,to file all our faces and so on, then we will place ourselves in sketch to develop the support and we will place ourselves in the Blue and Red axes, and we will do it following the sequence shown in the video and finally, don't forget to save the support already extracted.
- Don't forget that the tools to use are:LINE-SPLICE-EXTRUDE-APPEARANCE-REVOLUTION-CENTRE-DIAMETER CIRCLE
RING
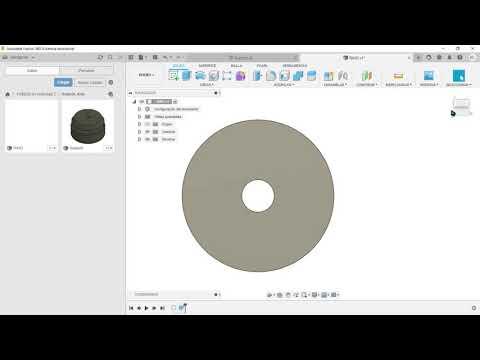
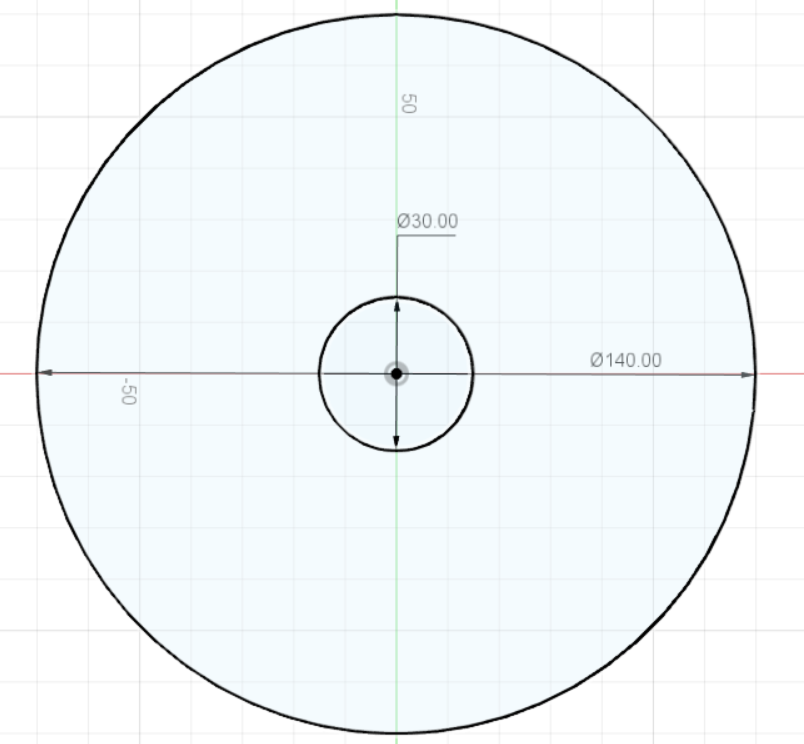
Next, for the RING we will begin to create a new project to develop this face we will use the axes of colour "Red and Green", it is very funny to make this design for the smallest circle the measures will be of 30 mm, and of the biggest circle it is of 110mm, we follow the simple steps of the video and you will see how easy it was, before finishing the development of the work save it.
- Don't forget that the tools to use are: CENTRE-DIAMETER CIRCLE-EXTRUDE-APPEARANCE
ARM
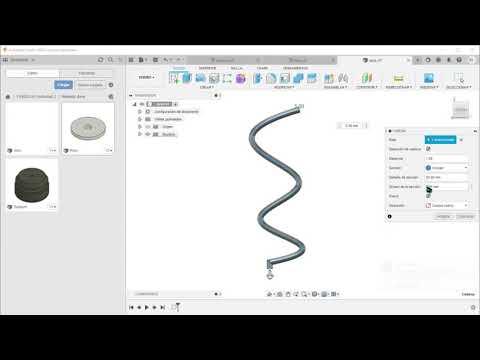
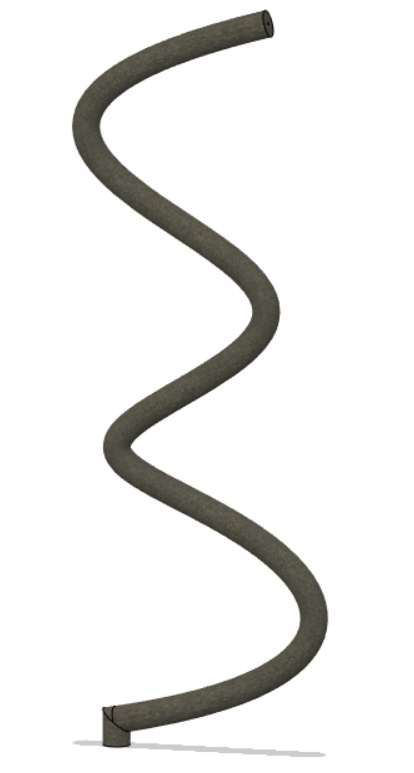
After developing the ring, we will go on to make a new sketch which will be called arm, this will be the union between the other pieces to assemble a nice hanger that will spin with an electrical system that we will be seeing in another instructable, we follow the steps that are made in the video highlighting each measure, it is very simple right, do not forget that having completed the arm we save it.
- Do not forget that the tools to use are: LINE-SPLINE: SPLINE-SPLINE FITTING POINT-TUBING
PERSONALIZATION
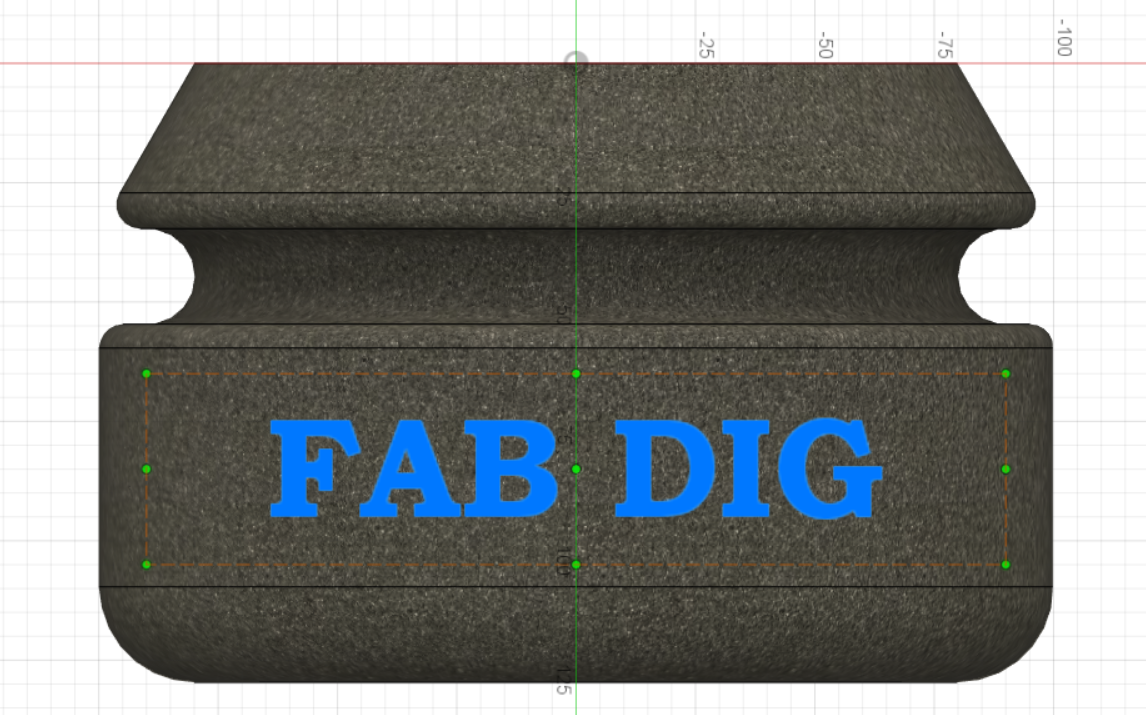
For the personalization of text which you prefer, you can do it in the "SUPPORT" which we did earlier, see the video that will be step by step, it will be very easy to customize the text and the best thing is that we can add the text you prefer.
- Don't forget to save the file at the end.
- Don't forget that the tools to use are: CONSTRUCTION: PLANE OF DESFACE-TEXT-TEXT-EXTRUDE
ASSEMBLY
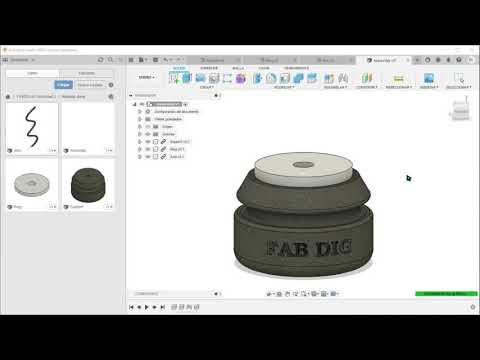

Now coming to our last steps the assembly will be a way to join our pieces, we will start placing the part that will join with all the pieces, (SUPPORT) for convenience and then the RING piece and then the ARM piece at the end, very important to place them in a new file. We will use the new drawing of the design by right clicking on each piece to place it.
- Don't forget that the tools to use are: JOINT
ULTIMAKER CURA
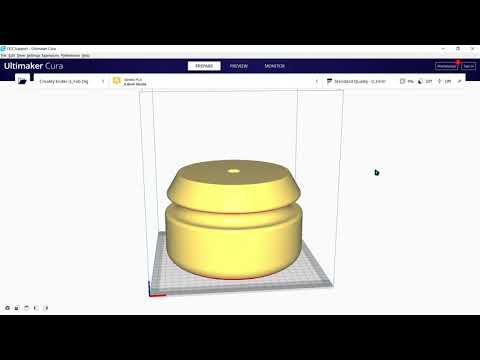
Finally, we will open ULTIMAKER CURA on the website of our choice and I will leave you a link to the program.
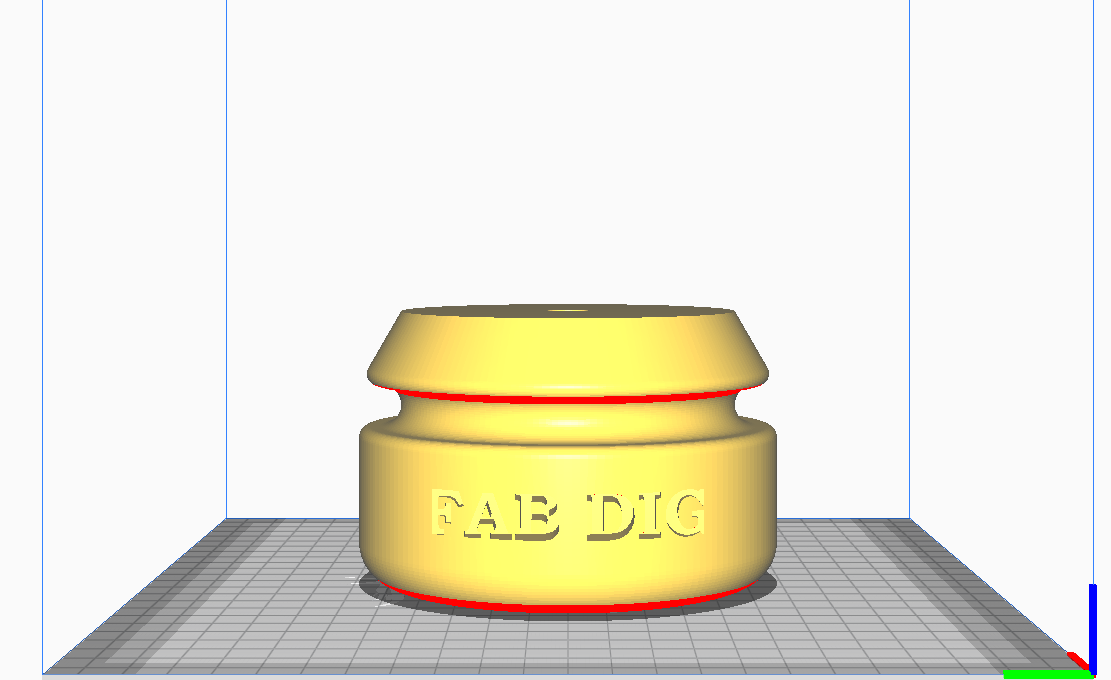
The file that we save in fusion 360 in the file section we choose the option of "3D printing" we will download it to the computer in such a way to pass it to the program, as indicated in the video we will make what are the settings for the simulation process, then we will see the simulation by selecting the chosen file.
- Link: https://ultimaker.com/es/software/ultimaker-cura
THANK YOU