Gundam Themed PCB Badge
by Arnov Sharma in Circuits > Wearables
2977 Views, 13 Favorites, 0 Comments
Gundam Themed PCB Badge
.gif)
.gif)


Hey Guys and what's up.
So this is yet another of my badge Project that is themed after the popular GUNDAM Model RX78, if you dont know what a Gundam is, its basically a Japanese mecha series that inspired all modern Mecha stuff (Transformers, Voltron, etc)
This project is made as a soldering kit for a few of my students.
I'm currently teaching a few kids about basic electronics and getting started stuff and for them, I prepared this super simple Flasinh LED Badge or Brooch that doesnt have any Microcontroller or any IC for controlling the Blinking of LEDs.
Instead, I'm using four RGB 5mm LEDs that have an internal chip for controlling the LED color.
This is essentially a Level 1 Soldering Kit made for people who are getting started in electronics and it's their first week.
Supplies
.gif)
Following are the Materials used in this built-
- Custom PCB
- RGB LED 5mm THT x 4
- CR2032 Coin cell SMD Holder
- CR2032 Coin cell
- 1.8Ohms 1W Resistor
- Brooch Pin
Schematic and PCB Design
.jpg)


Here's the schematic that I used in this Brooch and as you can observe, it's pretty simple and super minimal.
We have four LEDs connected with a Battery which is in this case a coin cell holder and there's a resistor to limit current.
I prepared this badge for kids who are getting started with soldering and basic electronics, so that's why I used this minimal board for teaching them crucial soldering skills.
As for the LEVEL 2 or LEVEL 3 badges, I'm planning to use two of my old projects which are these.
Because this is made for kids, I prepared this with a twist.
I first searched for a Gundam RX78 Head in black and white and found a neat-looking head image.
I converted the image from JPG to BMP as the PCB Cad software that I'm using only imports stuff in BMP format and imported the Image as Silkscreen TOP.
I place all the LEDs near the Eyes and the two holes on the Bottom layer, TOP Layer only contains graphics.
I opened the Eyes and two-hole soldermask from both the TOP layer and Bottom layer so the LED Glow will be visible from the TOP side.
Getting PCBs From SEEED Studio
.gif)
.gif)
.gif)
After finalizing the PCB and generating its Gerber data, I send it to SEEED STUDIO for samples.
Ordered PCBs in RED Soldermask with white silkscreen.
I received PCBs in a week and their quality was super good considering the rate which was also pretty low.
Seeed Fusion PCB Service offers one-stop prototyping for PCB manufacture and PCB assembly and as a result, they produce superior quality PCBs and Fast Turnkey PCBA within 7 working days.
PCB Quality of this Motor Controller PCB WAS SUPER!
Seeed Studio Fusion PCB Assembly Service takes care of the entire fabrication process from PCB manufacturing, parts sourcing, assembly, and testing services, so you can be sure that they are getting a quality product.
After gauging market interest and verifying a working prototype, Seeed Propagate Service can help you bring the product to market with professional guidance and a strong network of connections.
Scraping the Soldermask Layer in Front of the LED
.gif)
.gif)
Here's a mistake I made in the PCB Design.
I forgot to add Soldermask Area in two spots that open the soldermask on the bottom side of the PCB.
This was not a problem as I used a paper cutter to scrape the RED soldermask from two spots.
Preparing LEDs for Soldering


Now before starting the PCB Assembly, we first prepare the LEDs for soldering.
Let me explain a little more.
I'm using THT 5mm LEDs in this project, each of these LEDs has RGB inside with a chip that changes the color and does some LED Lighting effects and these effects are non-controllable, unlike WS2812B Addressable LEDs.
Gundam PCB that I made doesnt have THT LED Pads, instead, I added Two SMD Pads for soldering LED's Anode and cathode but to do that we first have to BEND Both of the LED's legs at a 90° Angle, then I again BEND the leg of LED by leaving some space so we can place it on PCB and solder the legs easily.
Through this Bending process, we can solder LEDs more easily to the Pads as they get more closer to the surface.
At last, I trimmed down the long Legs of the LED.
Next is the PCB Assembly
PCB Assembly
- Adding LEDs
- Soldering Brooch Pin and CR2032 Coin cell Holder
- Adding Resistor
- Cutting Resistor's LEGs from TOP Side
Adding LEDs
.gif)

The first step of the PCB assembly is to add all four THT LEDs that have been bent and their legs trimmed to the assigned PADs in the right orientation, see the attached image for a more detailed view.
Soldering Brooch Pin and CR2032 Coin Cell Holder
.gif)
I then added the Brooch Pin first and then added SMD Coin Cell Holder in its place.
Adding Resistor
.gif)
Next, I added the THT Resistor 1.8Ohms 1W in its place and this was the last component that we need to add at this point.
Cutting Resistor's LEGs From TOP Side
.gif)
At last, I used a wire cutter to cut down the excess LEG of the Resistor from the TOP side and our Brooch PCB Badge is now ready for the final testing.
RESULT
.gif)
.gif)
.gif)
.gif)
.gif)
.gif)
.gif)
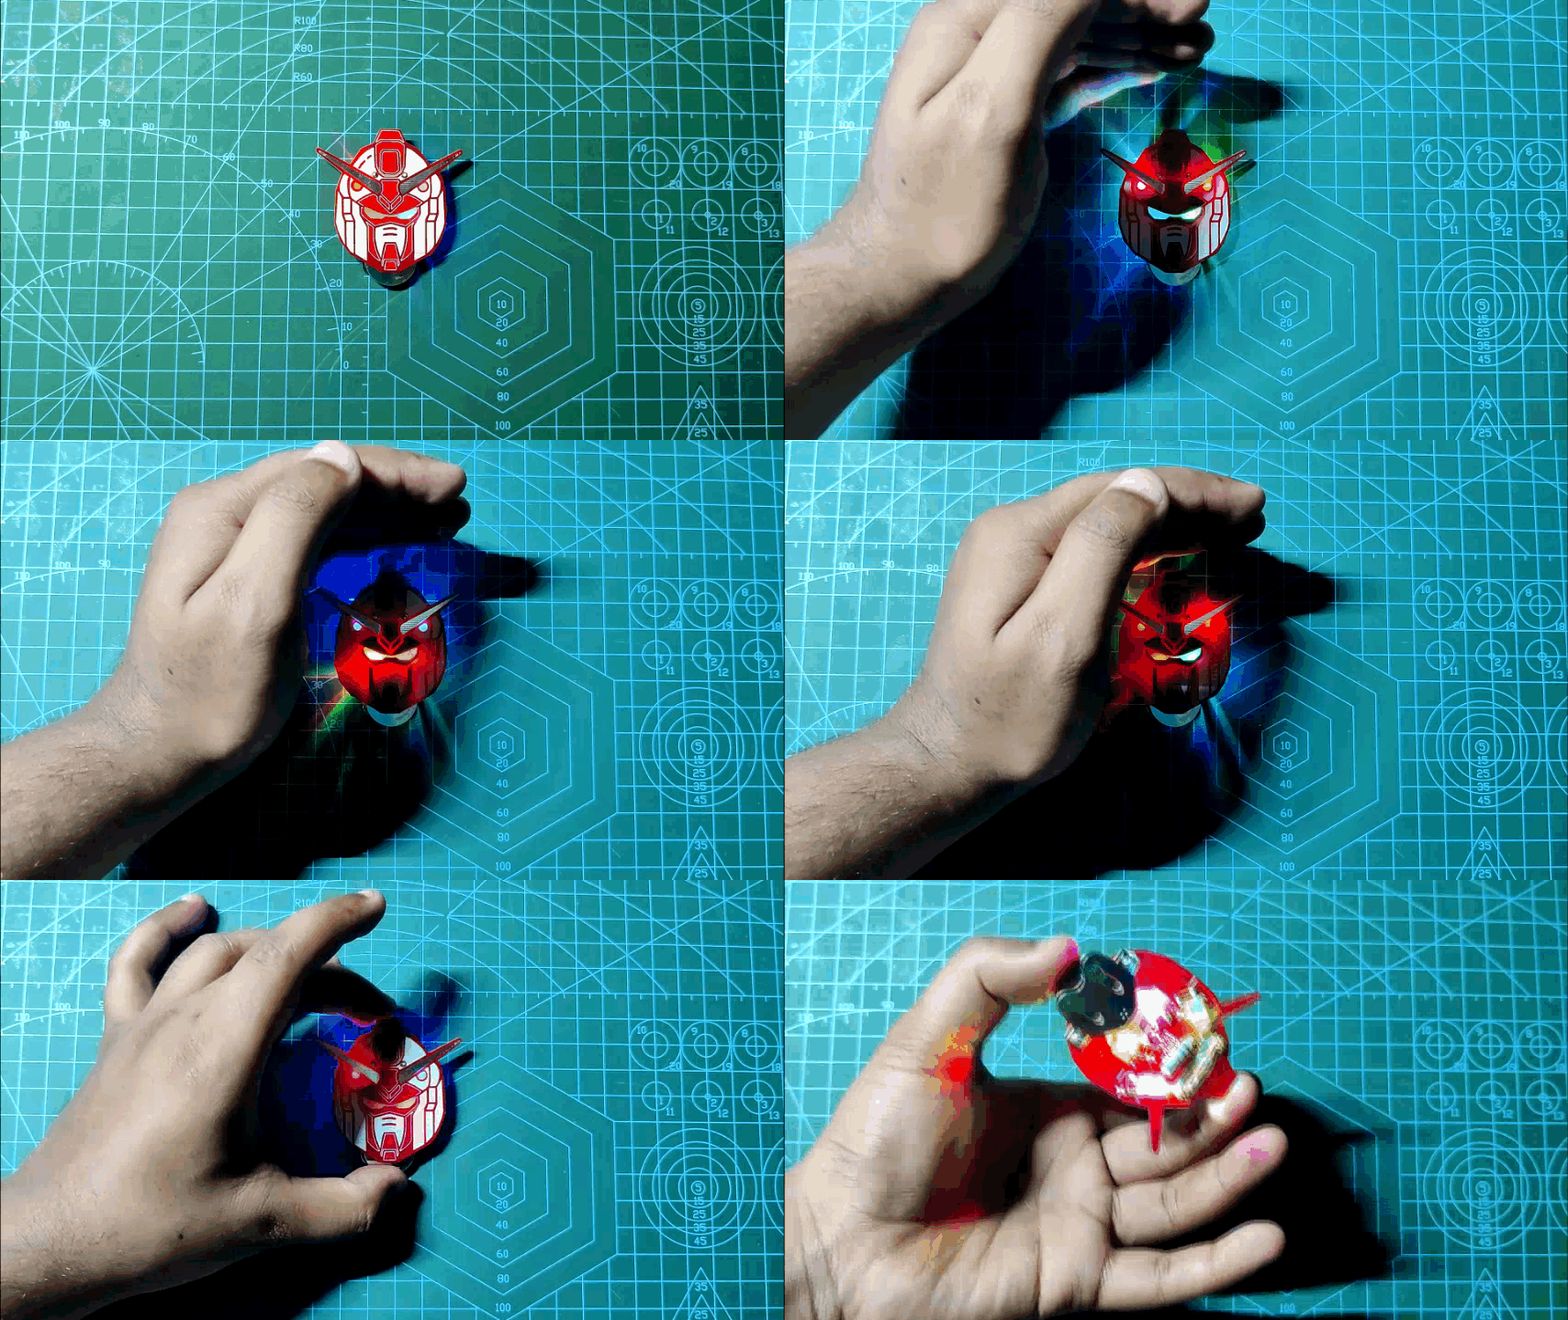
Here's the Result so far.
As for the power source, I'm using a CR2032 Coin cell that is placed in the Coin Cell holder.
Current and Power Consumption
.gif)
.gif)
As for the power consumption and overall backup, I break away one track which was connected with the positive end of the coin cell holder and added two wires to it so I could attach my multimeter to measure current in series.
Current that it draws varies as LED is constantly changing color and blinking as well so the current was between 7mA to 18mA.
The operating Voltage, if the cell is new, will always be 3V but I'm using this cell for a few hours now so the voltage of a cell has been decreased to 2.7V.
Overall Power P=IV will be 18x3= 54mW Max per hour and the coin cell provides the power of 660mW (220mAh x 3V) which is enough to power the Brooch for more than 10 hours.
Adding the Brooch PCB to a Backpack and Shirt
.gif)
.gif)
Because this has a brooch pin, we can add this badge on anything that includes a backpack or even a shirt which I did and I'm pretty happy with the overall result.
DM Me if you need any help regarding this project.
Special thanks to Seeed Studio for providing PCBs for this project, do check them out if you need great PCB Service for less cost.
Peace out and I'll be back with a new project soon!