Grungy Effects Using Graphic Textures
by TheFrankTurk in Design > Digital Graphics
887 Views, 5 Favorites, 0 Comments
Grungy Effects Using Graphic Textures
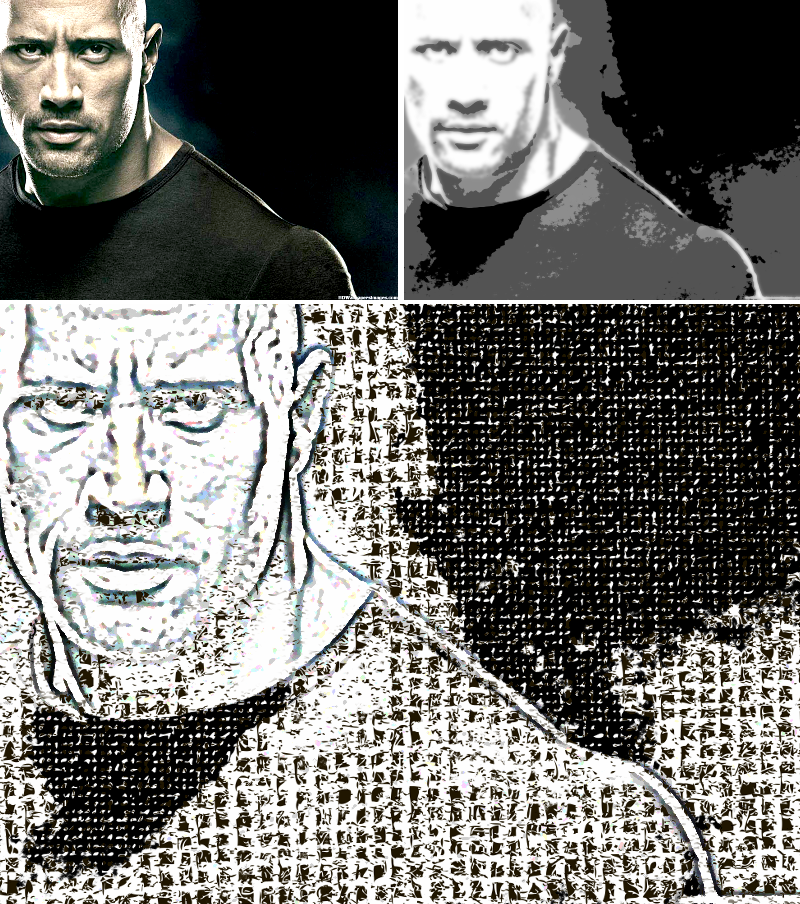
Sometimes you have a cool Instructable that just needs the right contest to get composed, and the Graphic Design contest has just pulled this one out of me. In this guide, I'm going to show you how to transform any photo (in this case, a photo of Dwayne "the Rock" Johnson) into a gritty, hard look with free graphics tools and about 20 minutes of your time.
Before we get started, I'm hoping the Rock will not drop the people's elbow on me for using his likeness for this tutorial, and that he will smell what I am cooking.
Tools and Resources


For this guide, you only need to download three things:
- Download the FREE vector textures from creativemarket.com (the sponsors of this contest), and unpack the ZIP file they come in.
- Download and install the current version of the GiMP image manipulation program (it's free - I'm not selling anything)
- A photo you want to Grungify
Open the Original Photo in GiMP
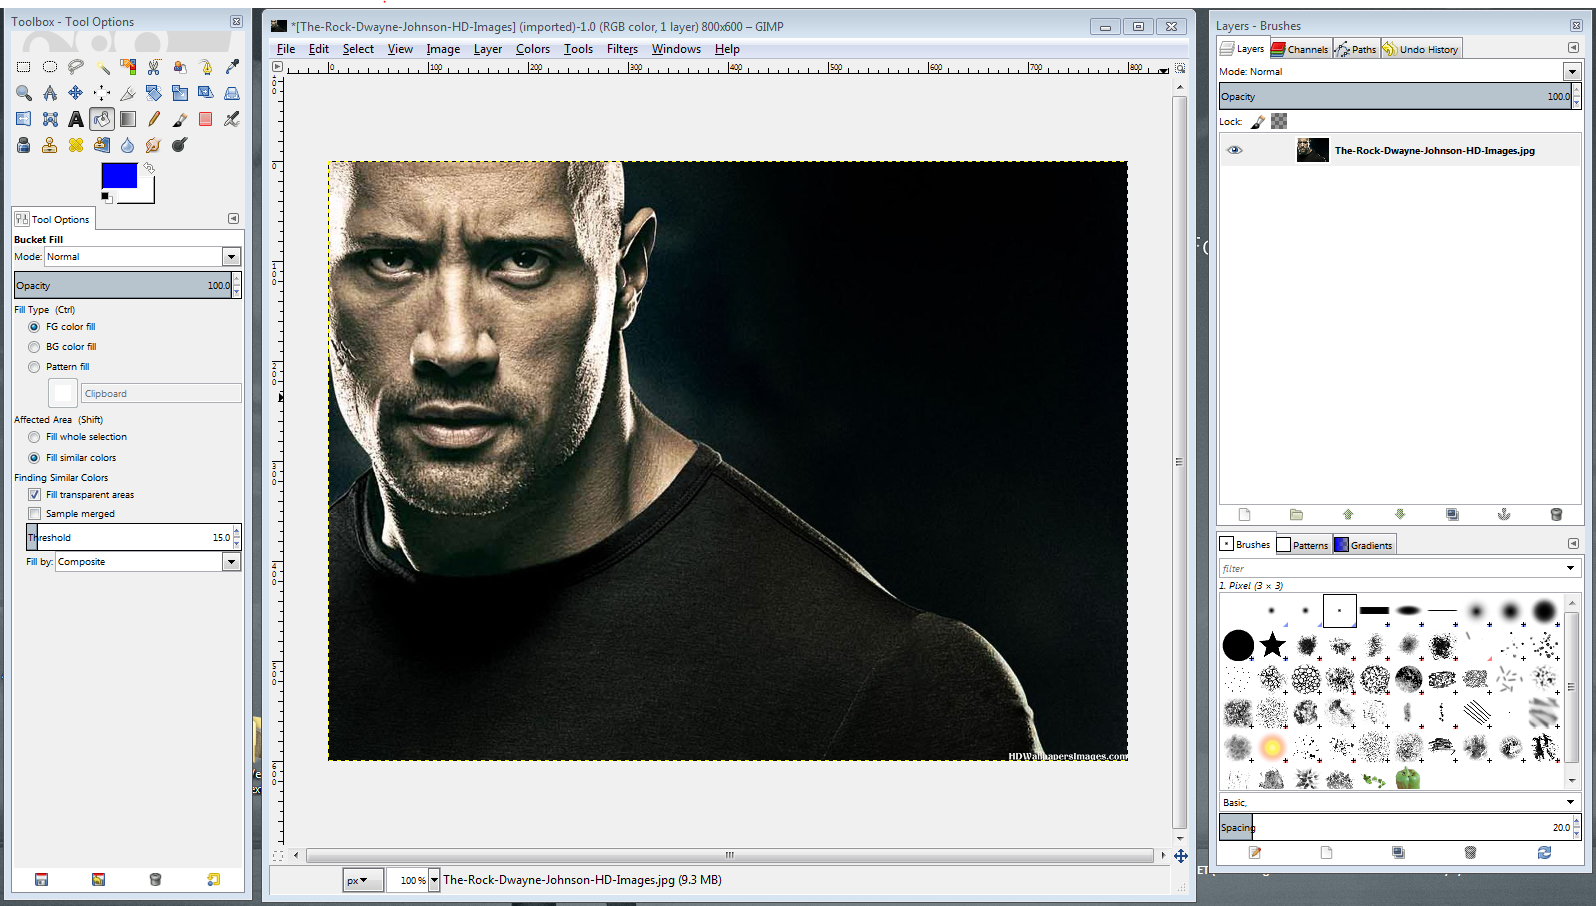
I'm going to admit to you that if you have never used GiMP before, some of this tutorial may move a little fast for you. If you want to get up to speed using the GiMP you should visit my site, GiMP University, and you can quickly learn a lot about this tool which is a pretty robust piece of image editing software for $0.00. Also: visiting my blog about this software also costs you nothing - it's all free!
That said, once you have installed the GiMP, open the image you want to work on in GiMP, and scale it to the size you want to work with. For the sake of this tutorial (to keep as much as possible on one screen), I have scaled the Rock to use a bigger image size because you will want to print you final result to put it in a frame or whatever.
Create 3 Duplicate Layers of the Original
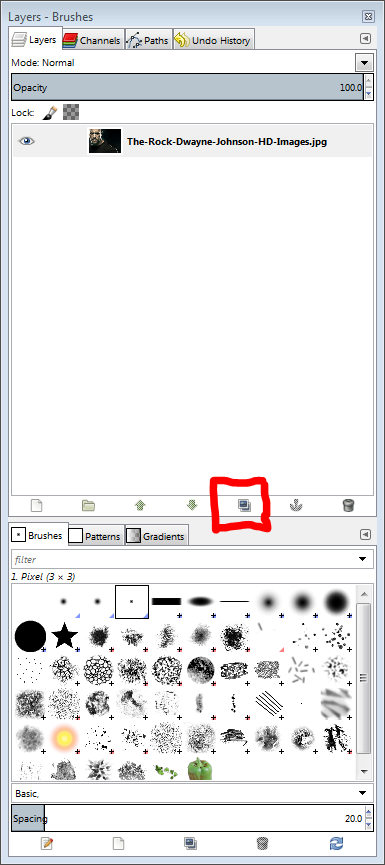
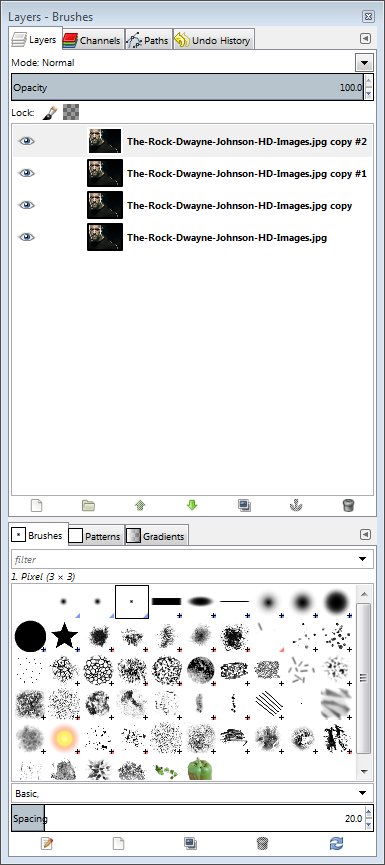
Over in the Layers menu, locate the "Create Duplicate Layer" button, and click it 3 times. It will create 3 new, identical layers from your original image.
Create 3 Distinct Threshold Layers
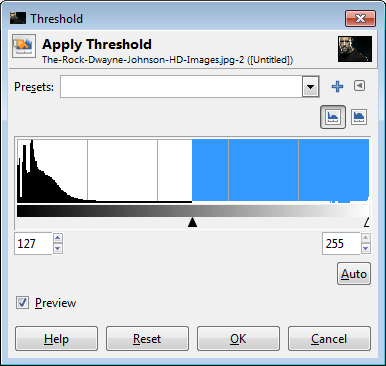
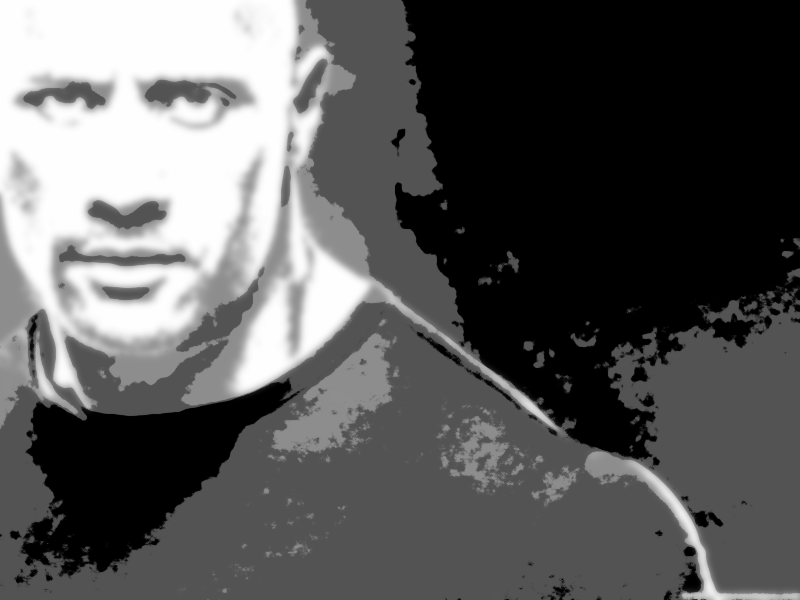
Like I said, this tutorial moves fast for people who are new to GiMP or image processing, but what you want to do with the duplicate images you now have is to select one of the layers (the top layer is the best place to start) and go to the Menu "Colors > Theshold" and get the dialog menu you see up above. If you want some more info on what "Threshold" means, please take a look at this previous Instructable, step 5. Use the BLACK slider to adjust the Theshold cut-off point to the DARKEST cut off that still leaves about 25% of your image black.
When you have something you like, click "OK."
Make that layer invisible, and select the next layer down.
Go to the Threshold dialog again, and adjust the BLACK slider until about 50% of your image is black, and then click "OK."
Make that layer invisible, and select the next layer down.
Go to the Threshold dialog for a third and final time, and adjust the BLACK slider until about 75% of your image is black, and then click "OK."
What you will then have is three layers where the intensity of the darkest areas (when overlayed on each other) give you an image with 4 levels of contrast (see the second image, above). Don't try to recreate that image, but it will be OK for you to make all your layers visible at this time.
Prepare for Grungifying the Layers
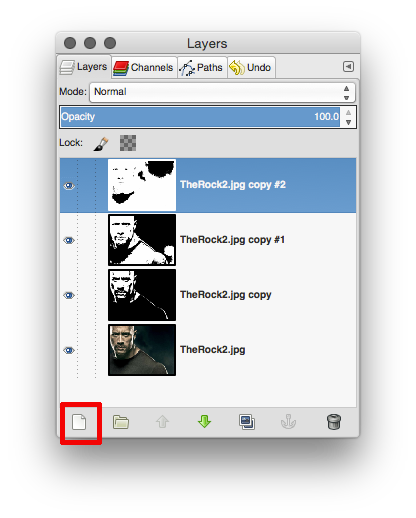
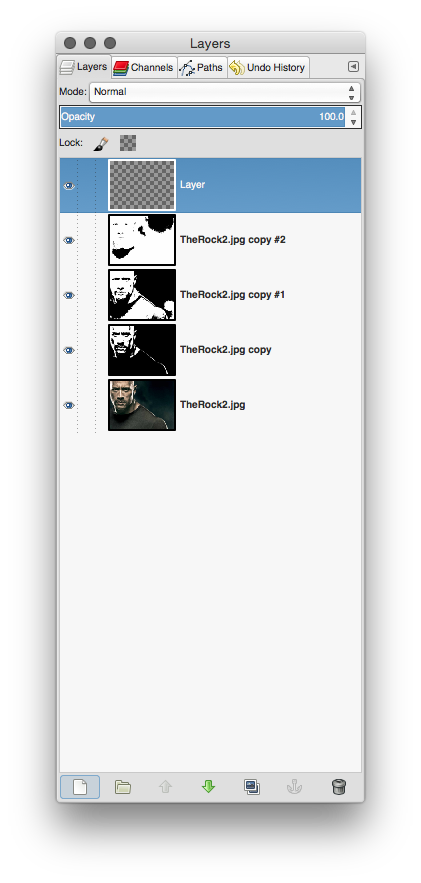
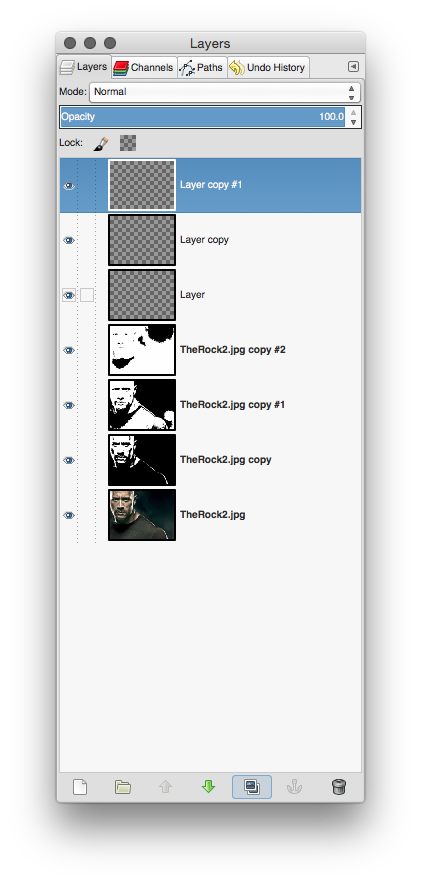
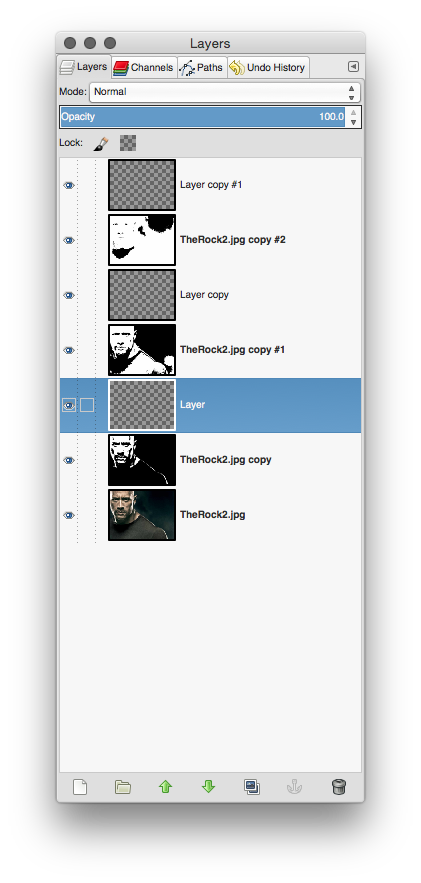
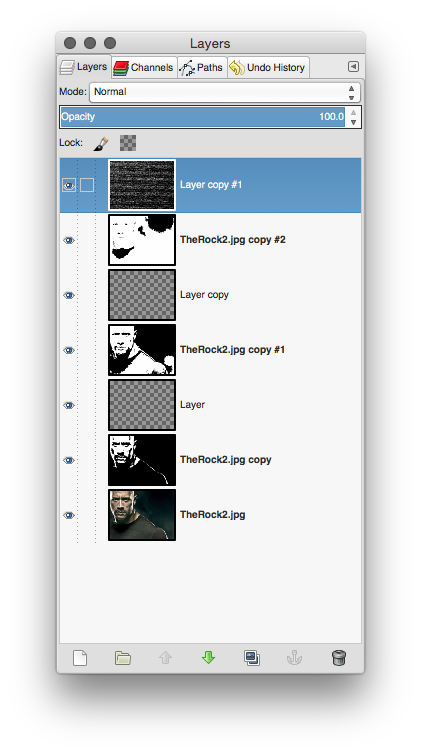
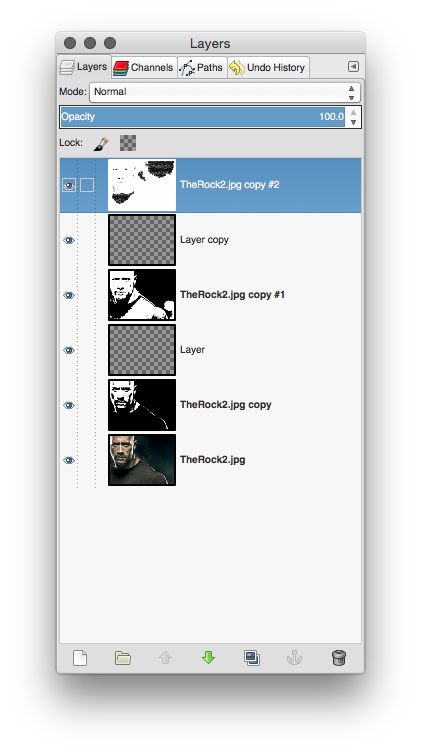
Now that we have 3 layers which reflect various states of brightness in the original image, select the top image, and then click the "Create New Layer" button in the "Layers" window (as in the first image, above). When the "Create New Layer" dialog appears, just click "OK" and you will get a new layer as the top layer, and in the second image, above. If you now click the "Duplicate Layer" button twice, you will get two more empty layers as in the 3rd image, above.
Now comes the moderately-tricky part: I want you to drag the empty layers in that layers window so that you have one empty layer on top of each Threshold layer, as in the 4th image, above. All you have to do is click and hold one of the empty layers and drag is down in the stack to the place you want it to be.
Identifying Useful Grunge
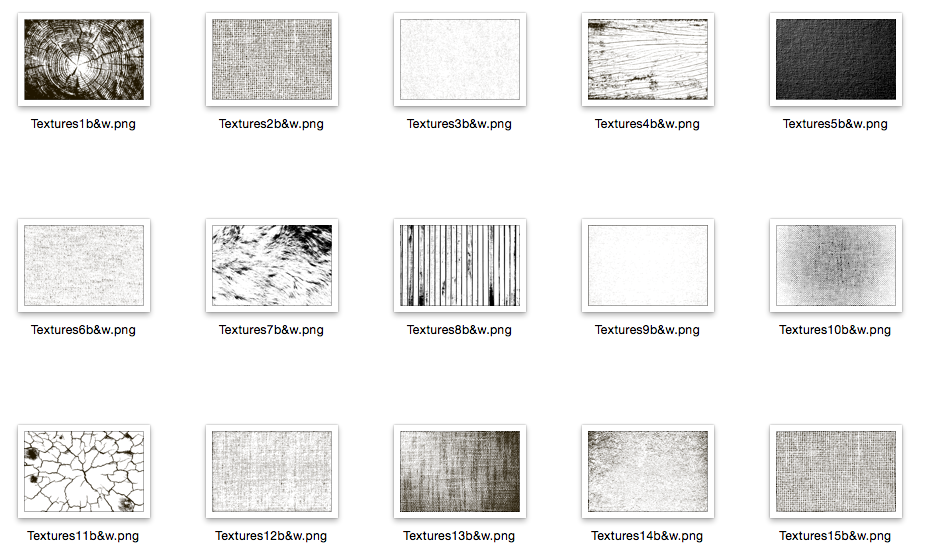
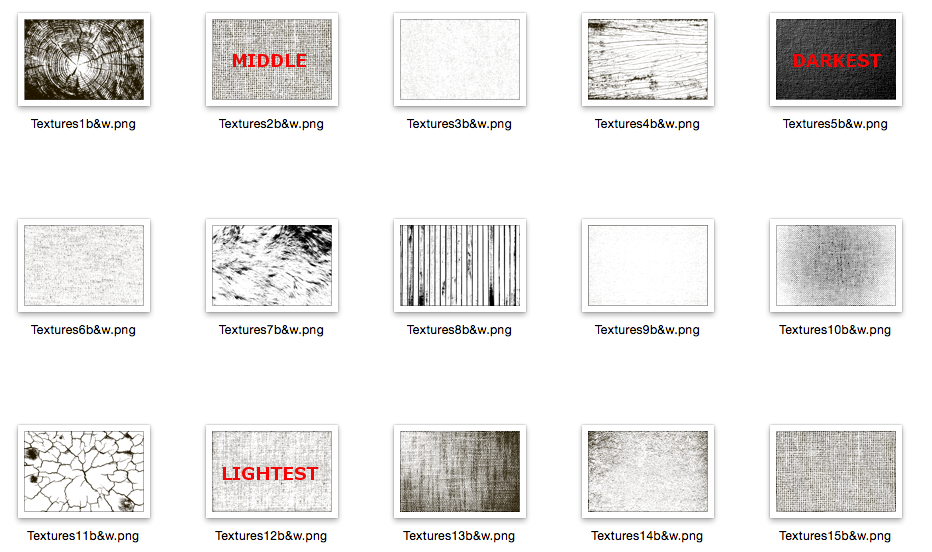
Back in the resources list, I pointed you at the "Free Textures" from CreativeMarket.com -- which are the key resources needed to make this project work out. After downloading them and unpacking the ZIP file, I out all the PNG versions of these textures into one folder on my desktop so I could see all of their thumbnails at once, as in the first image above. Then, using only my own taste and opinion, I chose 3 textures from darkest to lightest to use for the balance of this project. You can see my choices in the second image, above.
To make you own life easier, when you pick the textures you want to use, open them in GIMP, and scale them so they are only slighter bigger than the image you are working to Grungify. For my project, I chose to proportionally scale the larger images to 1200 pixels wide. Because these PNG files are also black on TRANSPARENT background, I flattened them so that they are finally black on white background. This is necessary for the next step to work as designed.
Grungify the Darkest Layer
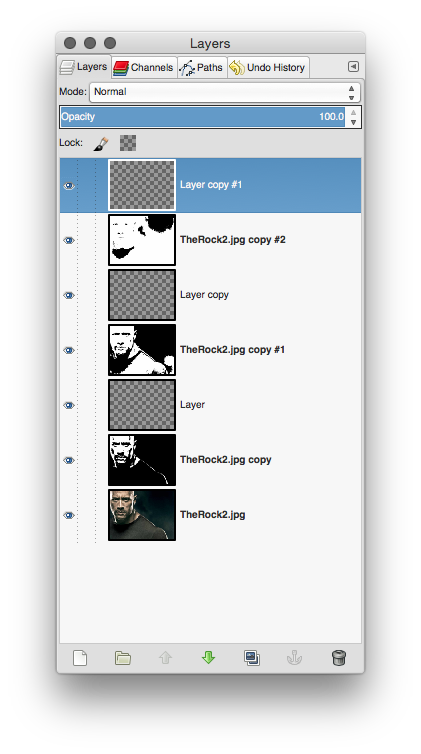
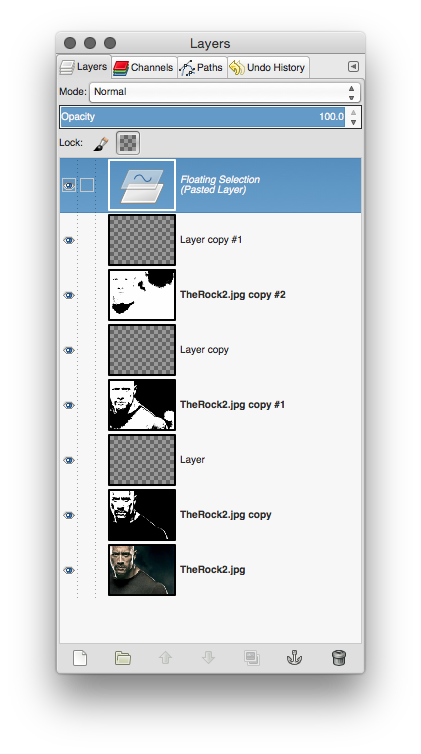
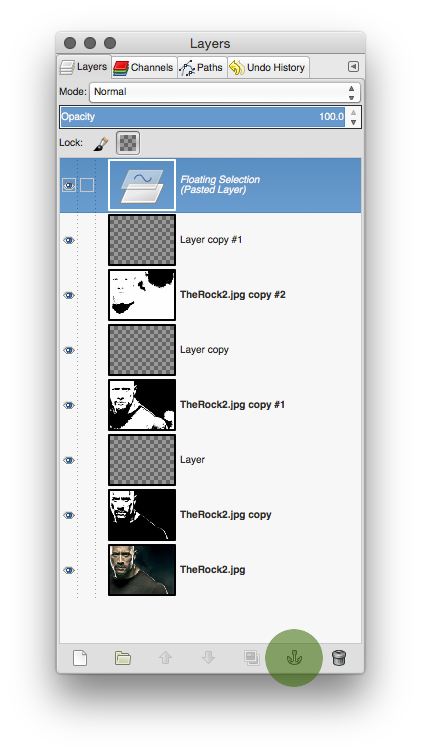

Once you have selected the textures you intend to use, copy the one you want to apply to the DARKEST of your Threshold layers (the one with 25% coverage) into the clipboard, and then return to the project image. Select the empty layer ABOVE the darkest Threshold layer by clicking on it (as in the first image, above), and then paste the grunge texture into the image -- you will then get a new "floating layer" as in second image, above. You'll notice in the bottom right corner of the Layers window that there is an Anchor icon (see third image, above -- in the green dot). Click that icon, and the "floating layer" will paste into the layer you had selected just a second ago. Your layers should not look like the fourth image, above.
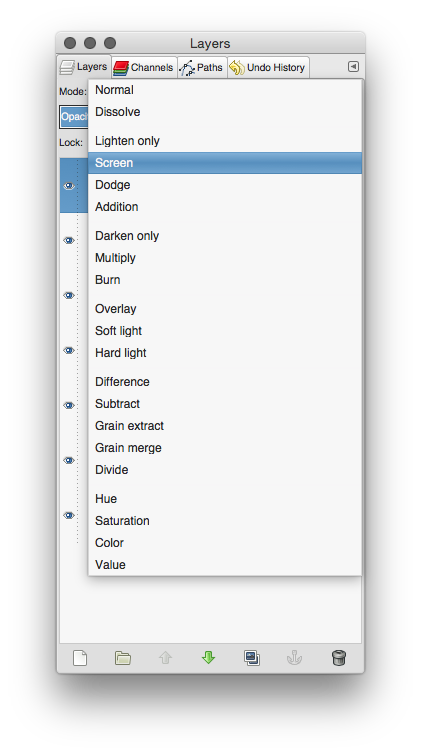
What we want to do here is to force the texture in your new layer into the layer that has the Theshold image in it, and we're going to use a technique called "screening." Select the layer with the texture in it by clicking it, and look to the top of the Layers window. You will see a dropdown menu that says "Normal." If you click it, the menu will drop down as in the 5th image, above, and you will see an option that says "screen." Click that option, and suddenly your image in the main viewing window will change: the texture will be WHITE everywhere the layer beneath it is WHITE, and it will maintain its TEXTURE everywhere that layer is BLACK.
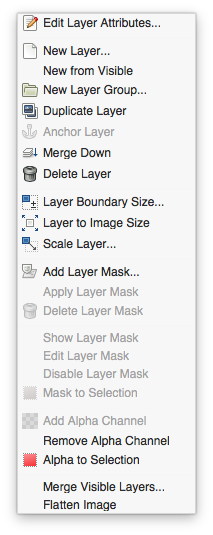
Next, right-click the layer that has the texture in it. You will get the menu in the 6th image, above, which is the Layer Attributes context menu. In that menu, select "merge down," and the texture layer will merge with the Threshold layer using the screen method you just selected -- effectively applying the texture to the threshold layer.
When this is complete, click the eyeball icon in the layer window next to the preview image, and the layer will become invisible so you can continue working.
Now we have to do this two more times -- once for each of the remaining Threshold layers, using the texture you selected for that layer. The process is simple, and just like above:
- copy texture into clipboard
- select empty layer
- paste texture as floating layer
- anchor texture into empty layer
- select "screen" method from Layers menu
- Right-click texture layer and merge down to Threshold layer
...
Merge Layers (1 of 3)
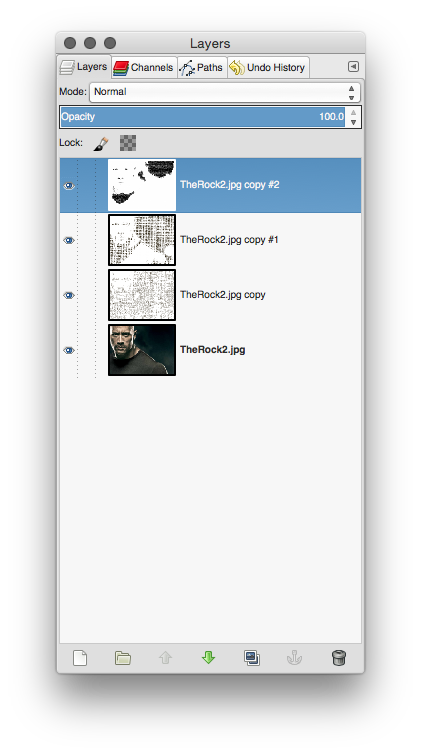
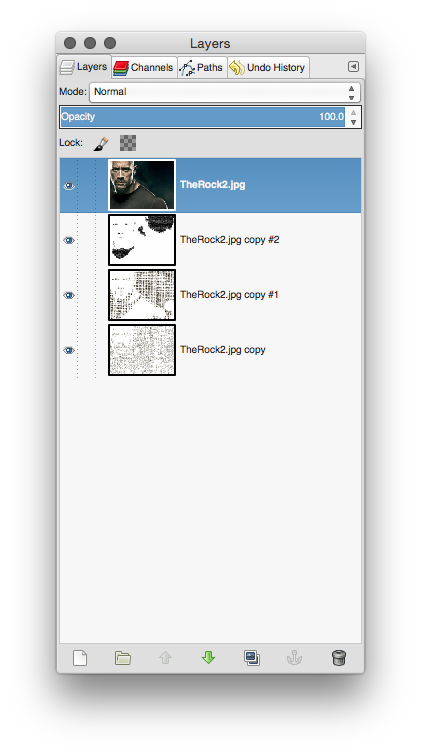
If your Layers window now shows 4 layers only, you have done the last step correctly, and you are almost finished. If you DO NOT have 4layers only right now, go back and see what you missed in the last step.
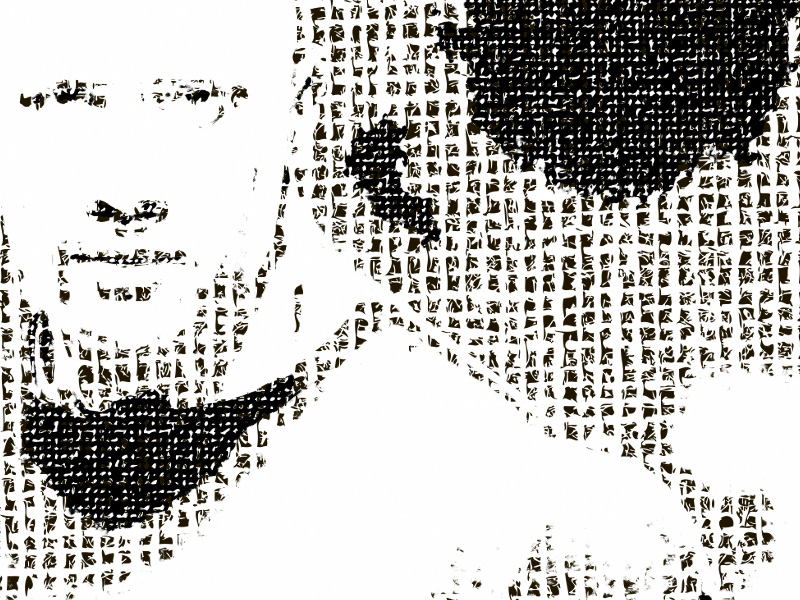
Since you have 4 layers, click the eyeball icons again to make all the layers visible, and select the top layer by clicking it. Now go to the Layers drop-down menu again and select "Darken Only". When you do this, you will suddenly see the second layer through the first one in the main project window (as in the 3rd image, above). What is actually happening is that the top layer is merging with the next layer down by darkening that layer everywhere the top layer is dark.
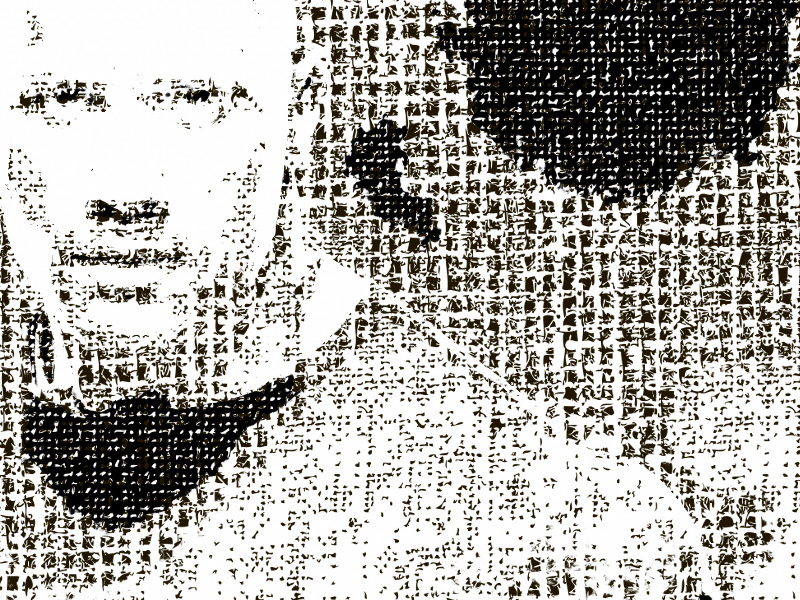
Now select the second layer in the stack in your Layers window; go to the Layers drop-down menu again and select "Darken Only". Now you will also see the texture from the bottom last Threshold layer showing through the first two (as in the 4th image, above).
This is all pretty cool, yes? But even in my example image the rest at this point may be more impressionistic than you really wanted to produce. How do we tamp it down a little and tether it visually back to the original image?
Merge Image (2 of 3)
Well, we're going to cheat. :-)
You have been saving the original image as the bottom layer now since the beginning of this guide. Click on that layer and drag it to the top of your stack, and click to to keep it selected.
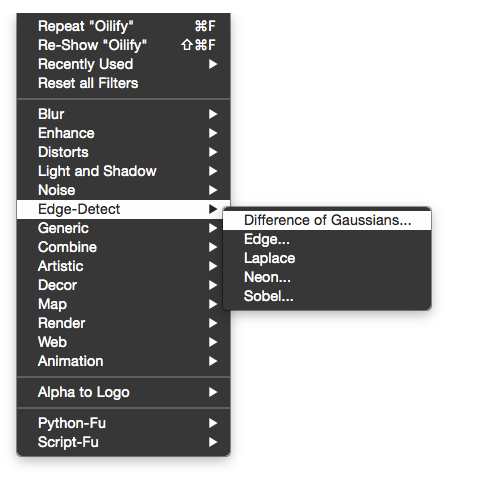
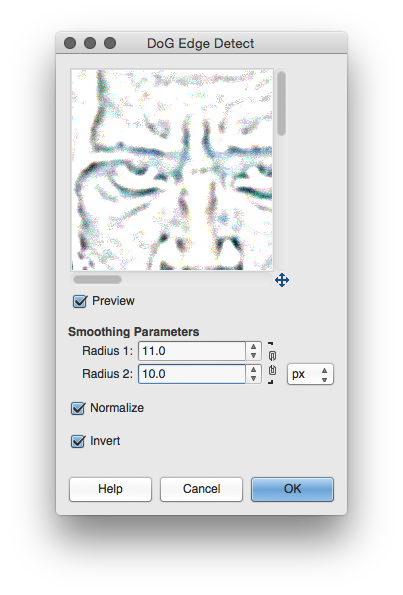
Now go to the "Filters > Detect Edges" menu as in the 2nd image above and select "Difference of Gaussians" from the menu that pops up. You will get the dialog in the 3rd image, above; change the settings in that dialog to match the settings in that picture. It will create an interesting contrast version of the original image. Click "OK" and your project window will reflect the changes.
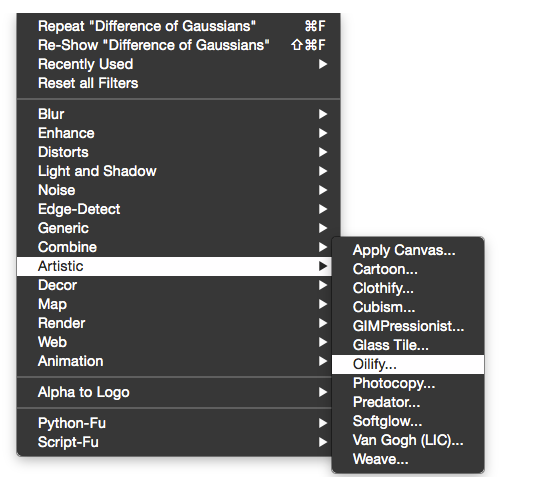
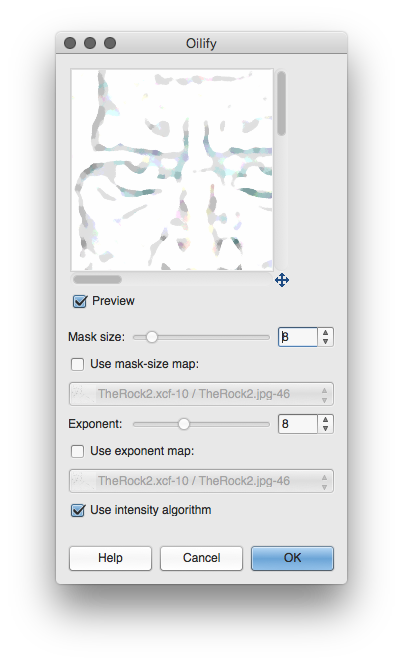
Now go back to the "Filters" menu and select "Filters > Artistic > Oilify" as in the 4th image, above. You will get the dialog in the 5th image, and again use my presets listed there to get a smoothed-out version of the drawing -- something that looks like a watercolor or ink version of the original image. Click "OK" to apply the changes.
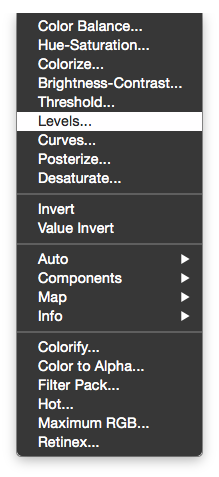
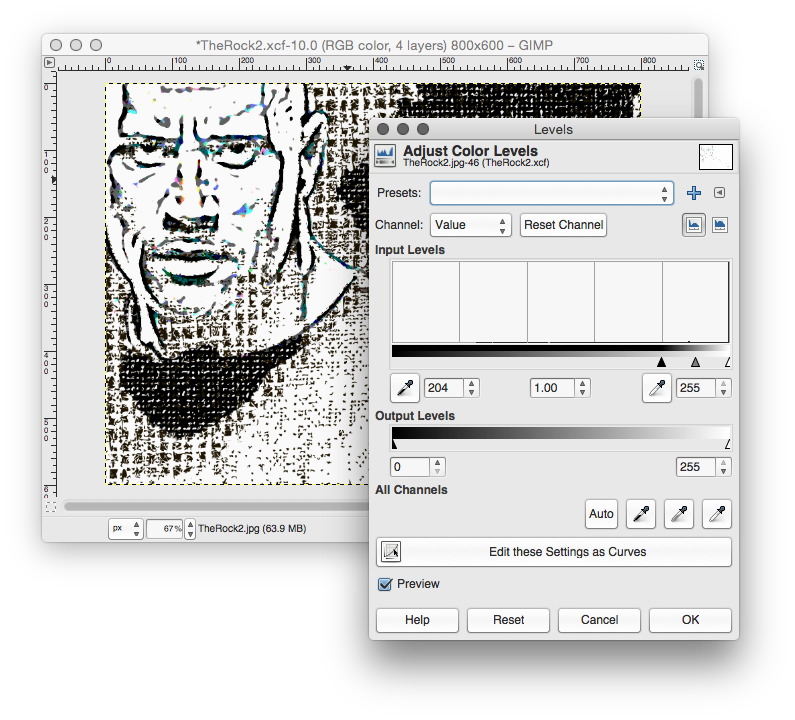
One last adjustment to this layer, ad we'll be ready to finish up: go to your "Colors > Levels" menu and you will get the dialog in the 7th image above. Drag the BLACK slide from the LEFT to the RIGHT until it looks like what I have done in that 7th image, and then click "OK" to apply the changes.
Merge Image (3 of 3)
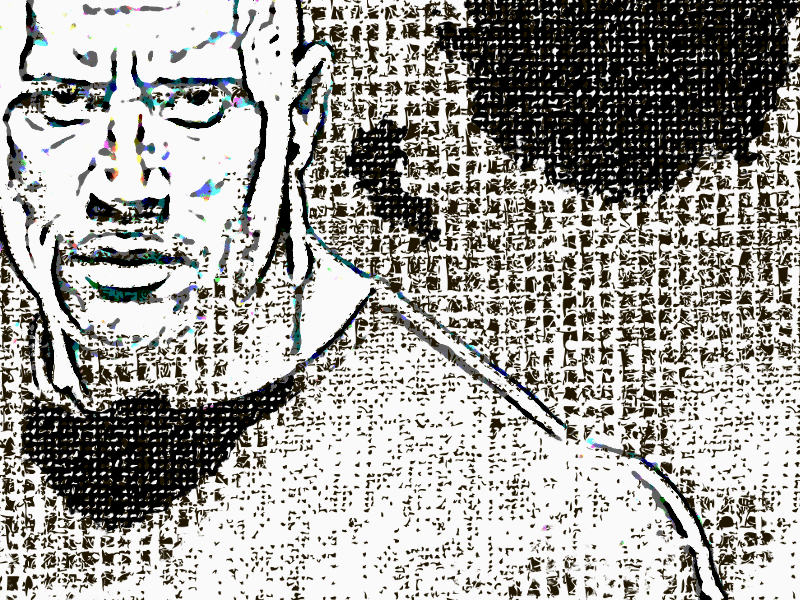
So the last thing you have to do is to click that top layer and use the Layers menu to set the merge method to "Darken Only" (as with the other layers), and you will get the image you see above in your project window. All that's left for you to do is save in an appropriate format.
If you use "Save As ..." in the "File" menu, GiMP will save as .xcf file type -- which is the native layered image file type for GiMP files.
To save and .png or .jpg, scroll down to "Export As ...", and in the "export" dialog window, simply type in your new file name with the correct file type suffix (.jpg, .png, .gif, etc.) and you have a finished product!
Thanks for following along. Leave questions and comments below. VOTE FOR ME IN THE GRAPHIC ARTS CONTEST!