Growth Stick Using Fusion 360

Materials needed for the Growth stick.
1/2" Plywood 10 inches by 5 feet long.
Fusion 360 to design the growth stick.
CNC router to cut out the design.
3D printer.
Cutters for the machine. I used a 60 degree cutter for most of the project.
I put a small edge around mine with red oak. You can use what ever you want or even leave it bare.
A Circular saw ( Unless you can get the lumber yard to cut it for you. Most will)
Glue if you are going to put the sides on.
You are also going to have to download "Inkscape" It is a free download and will get your pictures to turn into an .SVG file needed for the router.
If you would like to use a CNC router and don't have one you may find one at your local Makers Space that you will be able to use for a fee after taking a class on how to use it. Usually the classes are around 15 or twenty bucks.
You will also need paints to paint your masterpiece
Designing Your Growth Stick.
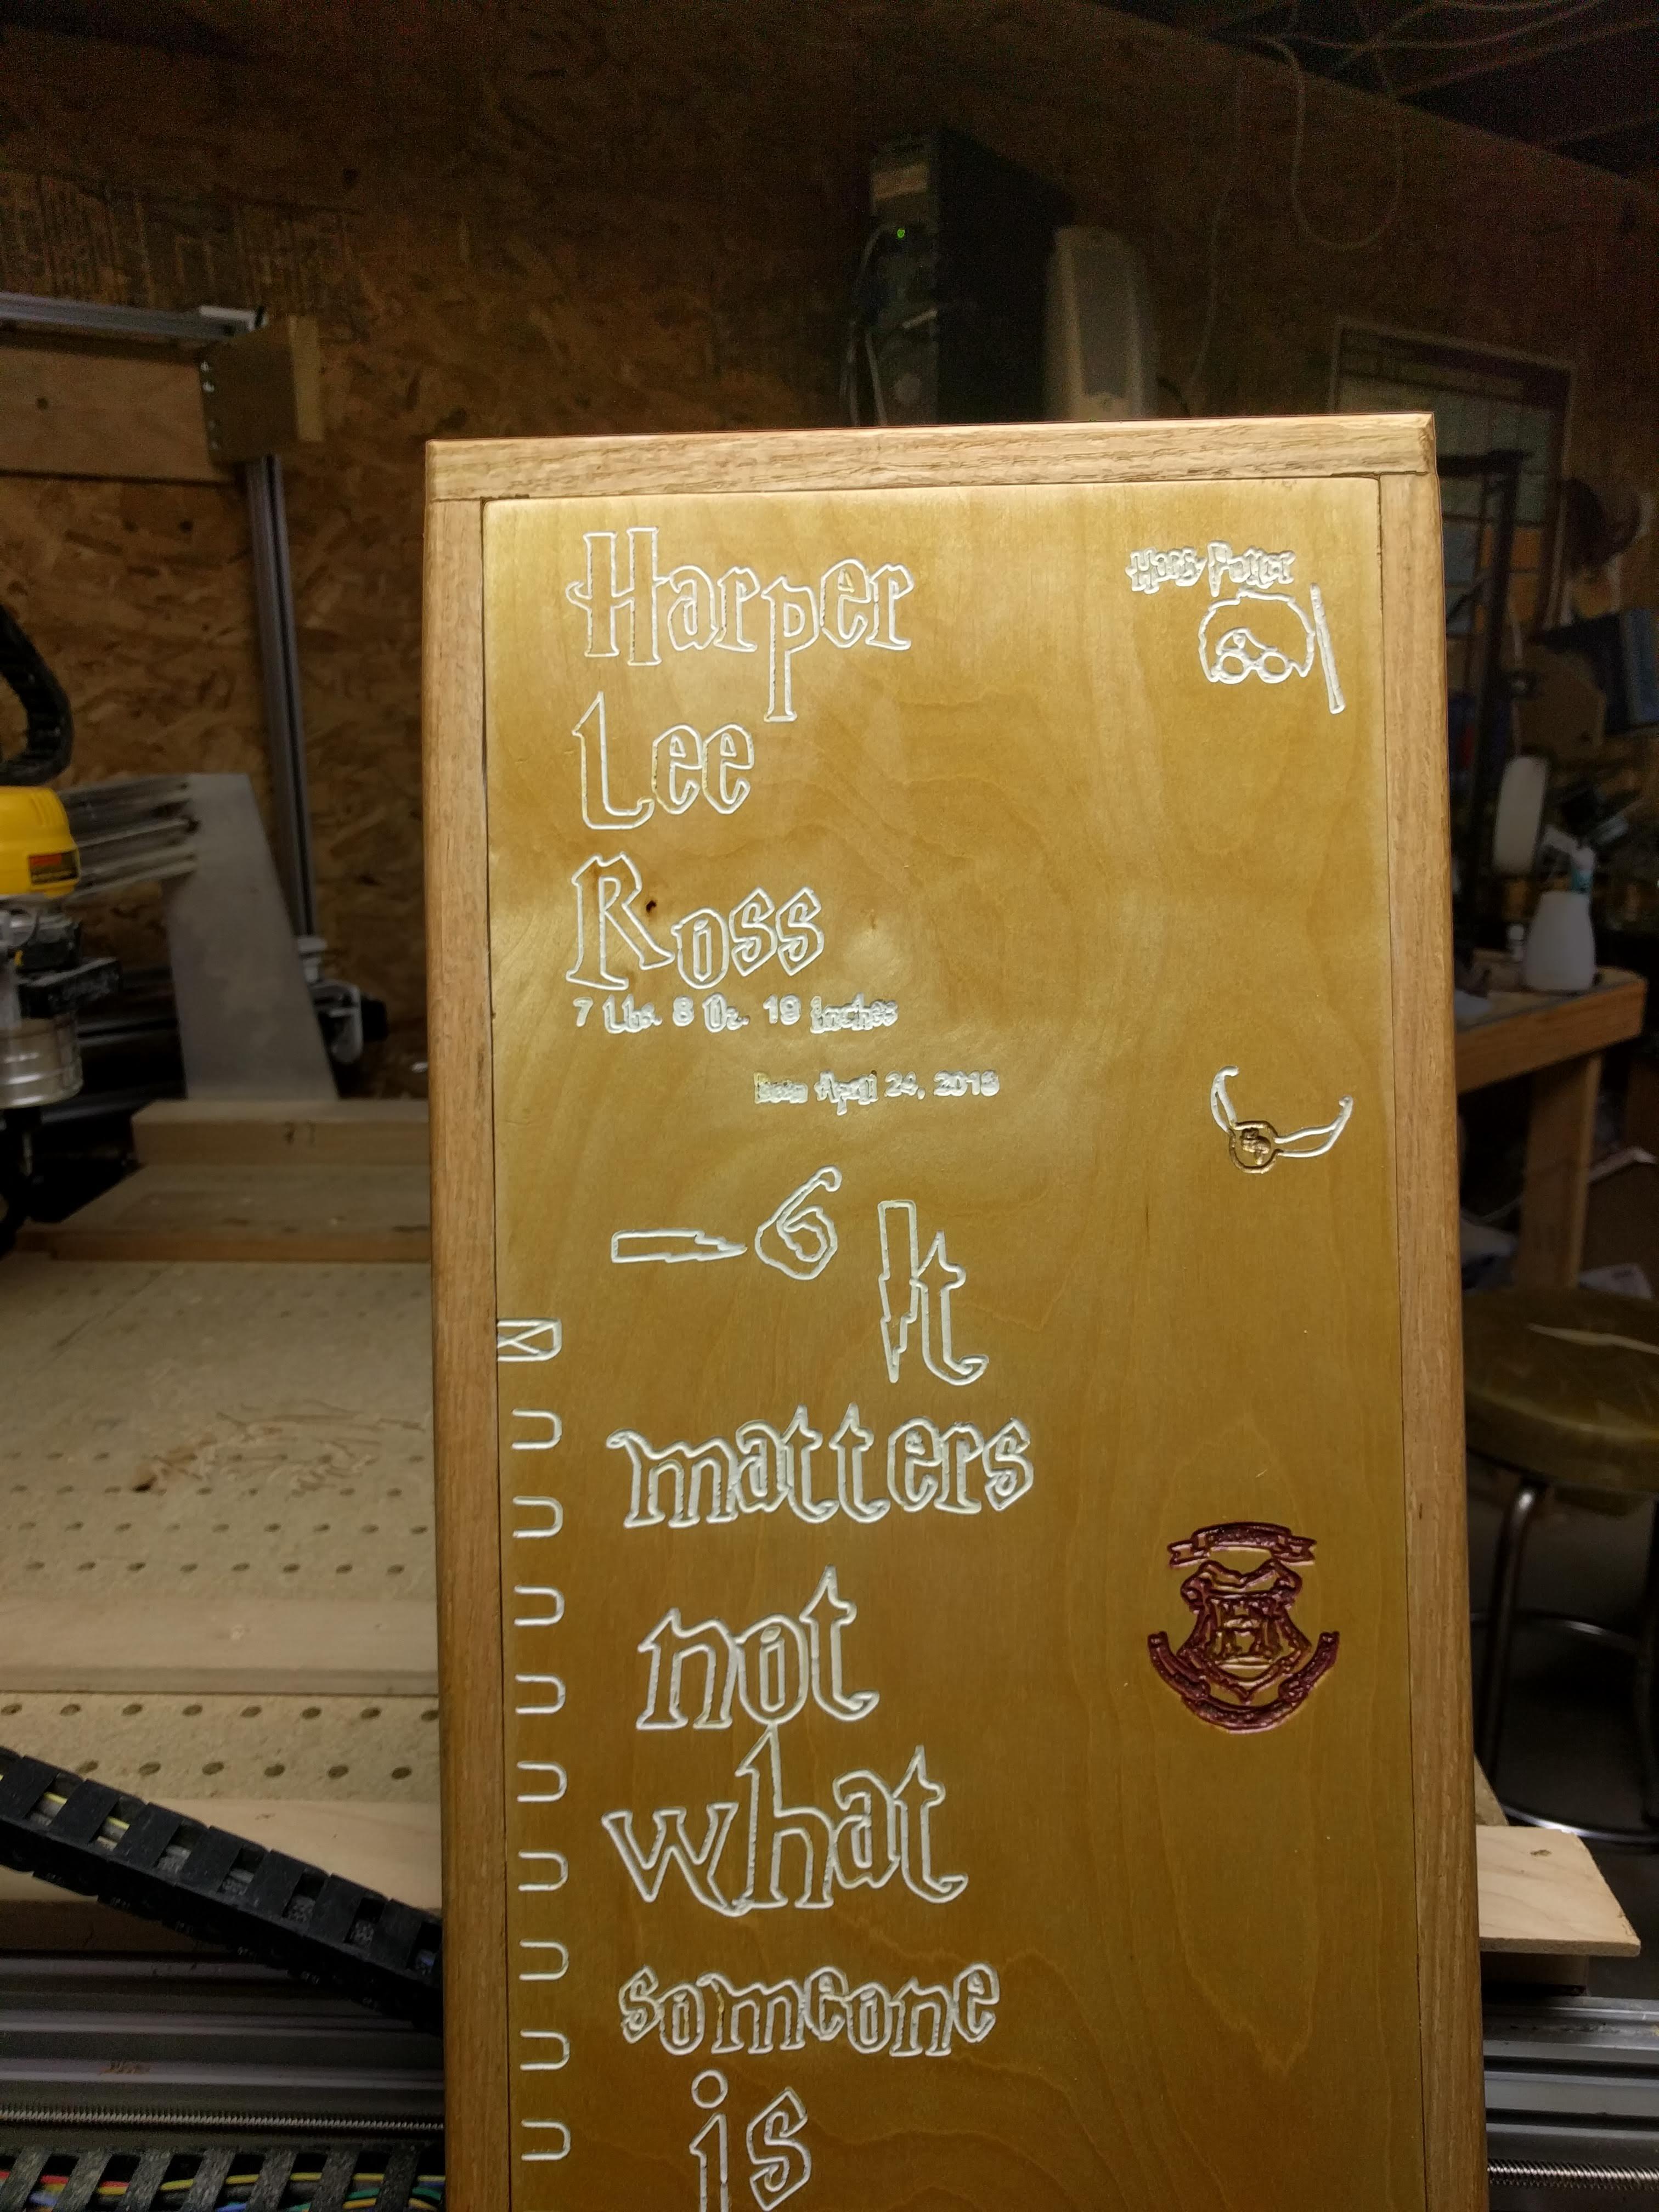
If you know the child's name it is nice to have that at the top of the growth stick. I added the weight and the length along with the birthday to this. Of course this is all stuff that if you know who you are making it for it is much nicer for the recipient. The growth stick shown is for my granddaughter, I will be making this one for Zayn ( I am a friend of his grandmother and son) I am going to put his name on the project. I also know his name and his weight so that will be put at the top of the growth stick. This is simply a gift to Zayn's Grandmother and Father whom I am friends of. The growth stick is going to be 5 feet tall and 10 inches wide. I will not be doing this in metric as the people are from America who will be using it, and they use that archaic English system. Everything that we do on the 3D printer and the 3D router will be in Metric as this is what my machines are set up for. I will go over how to change the systems in the program and you will find this very easy. If your machine is set up in English you can skip this step.
Upload Fusion 360 to Your Computer.

You are going to have to download fusion to your computer. Fusion is free to hobbyists and educators. I have been an educator for a lot of years and so it is free to me. If you are NOT making over 100K then you should be able to get a free licence. You will be offered a free version for a certain number of days. After those days are up you can go back and when the program asks for your credentials look for the free to hobbyist version. This will be on the second page of the sign up. It has most of the functionality of the paid version but does not include some of the higher end stuff that if you were a company you would want. While you are downloading Fusion 360 you are also going to want to go to Inkscape.org and download their free program. It has many of the features of Photoshop elements without the cost. If you already have Photoshop you should be able to find out how to make an .STL out of a .JPG file. We are only going to be using a little bit of the program to change .jpg's into .SVG files so that we can use them to cut our pictures out. Now that you have the two programs lets get into how to use them.
Something to remember is that when you use Fusion 360 the fonts that you can add to your project are what is on your computer in your word processing program. So if you want to use a different font you are going to have to download it and put it into the font folder. For the Harry Potter growth stick I used the Harry Potter font. For Zane's growth stick I will use Comic Sans. I am also going to be importing pictures from the internet of the Cars movie characters. I downloaded the pictures of the Harry Potter items the same way. You will find that some fonts do not carve well in Fusion 360 and so you may have to change up the font if it is not going to cut for you.
One Caveat: I am showing you how to do this however if there is an artist out there that has some awesome work that you want to use, please make sure that you are not ripping them off. If you are selling your work (I don't sell any of my work) then you need to pay the originator of the art. It is as simple as that. Don't be someone who steals things from other people. You are better than that!
Setting Up the Growth Stick.
When Fusion opens up there is a lot that you can do. I am going to show you enough just to get you through this how to make a growth stick. There are a lot of videos on Youtube.com that you can look at that will take you to another level. I would suggest Lars Christensen as a great source however; there are many artists out there with similar credentials.
The first thing that we need to do is to "Save the program" with what we would like to call it. I do this all of the time and this way I don't have to remember what I want to call the program. Click on the file icon at the top left of the screen and select save. You will be asked what you want to call your program. Enter the name and you are off to the races. Many other software programs are such that you cannot have spaces in the name this is not the case for anything in Fusion 360. Now my CNC machine has a working envelope of 34 inches. With this in mind after I get my part built in the Fusion 360 program I am going to have to index it so that I can cut the rest of the file. I will index three times. It is easy to do and so you shouldn't have a problem with this. I will explain this later.
Before we go much further let me explain what I am going to call things in Fusion 360. Off to the left is the data panel. This is where you will find all of your files that you save. There will be some example files for you to look at as well. You can close down the data panel at any time to make your screen larger by clicking on the "X" at the top left of your screen. To bring it back you can click on the squares that show up on the top left of the screen.
At the very top of the screen I will call these icons the "Top Ribbon", this will change as to what part of the program you are in. After you work at this for a while you will find that the icons are what you need. Now, to the left on the bottom in the main screen is the browser. At the bottom of the screen are a lot of buttons that I will explain how to use as I go along. You will use some more than others.
By left mouse clicking LMB, middle mouse clicking MMB and right mouse clicking RMB you will get different menus that you can access. To the top right is the cube of which you can manipulate your drawing from. By RMB the cube you can change the called out orientation of the cube to either front or top. You can also LMB the cube and it will bring your part into that orientation.
A side note: If you look over the examples that are shown in the program you can see what was used on each item. To do this you can bring up the part and using the time line below you can see how each part was built.
Now it is time to get going.
Very First Part

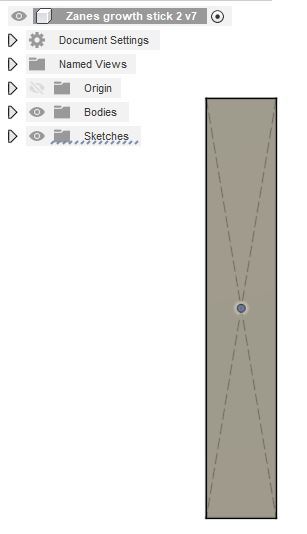
After you have named your part you can now sketch a square we need this to be 10" by 5 feet or 60 inches. You can get to commands in many different ways however; I prefer to use the "S" key on the key board. This will bring up a "shortcuts menu" and will be populated with a few different items. You can add things to the shortcuts menu by typing what you want to find in the text box and selecting the the up arrow to the right and it will appear in the shortcuts menu from then on. If you want to make it so it does not show up you can just LMB and move it to the screen. It is as easy as that to change things in Fusion 360. I decided to use the Center Rectangle command. The first thing in all of your drawings that you have to do is to chose a plane or a surface to draw on. Because you have no surface you must pick a plane. You can also click on By looking at the right top of the screen you can see what plane you are working on. I prefer to use the"top plane" as it makes things easier when you go to set up your machinery. You can find this by moving your mouse to the top of the screen or by putting it into your "S"hortcuts menu. Now that you have the rectangle 60 inches by 10 inches built you can "E"xtrude it. Push the "E" button on your keyboard or you can actually find this in the top ribbon as well. I extruded this out .5 inches. Your part should look like this.
Adding the Pictures.





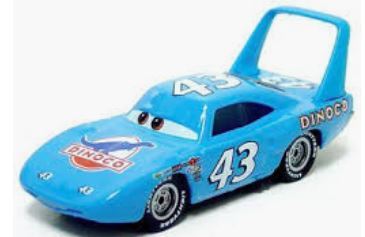
We are going to go to the internet and grab some pictures that you would like to put onto your growth stick. Because Zayn likes the Cars movie I am going to use the Cars characters as what will be put onto the stick. I used Harry Potter characters on Harpers growth stick. You can add anything you like and I will explain how to do this. You will have to make sure that you have the Inkscape or other program that you are using to turn the picture into a .SVG file.
I googled "Cars Movie" and selected images as my search perimeter. As I find the images I collect them under "Cars" in my download folder. You can select as many as you want. If you get to many you will have no room for the picture holders that will be attached later. This is also a criteria of how many you are going to put into the growth stick and the placement also. We are still getting things around to be able to get the stick together.
It is best if you have an image that has no background although if it does have a background there are ways to get around this as well. I do not have the time to explain this but you can find videos on youtube.com on how to do this.
Turning You .JPG Into a .SVG
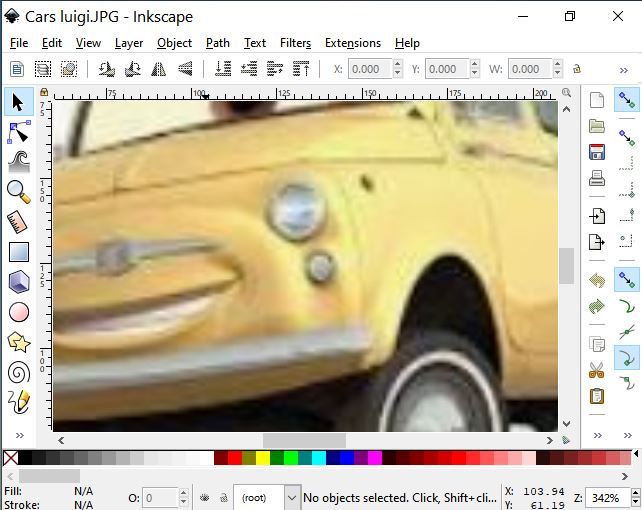
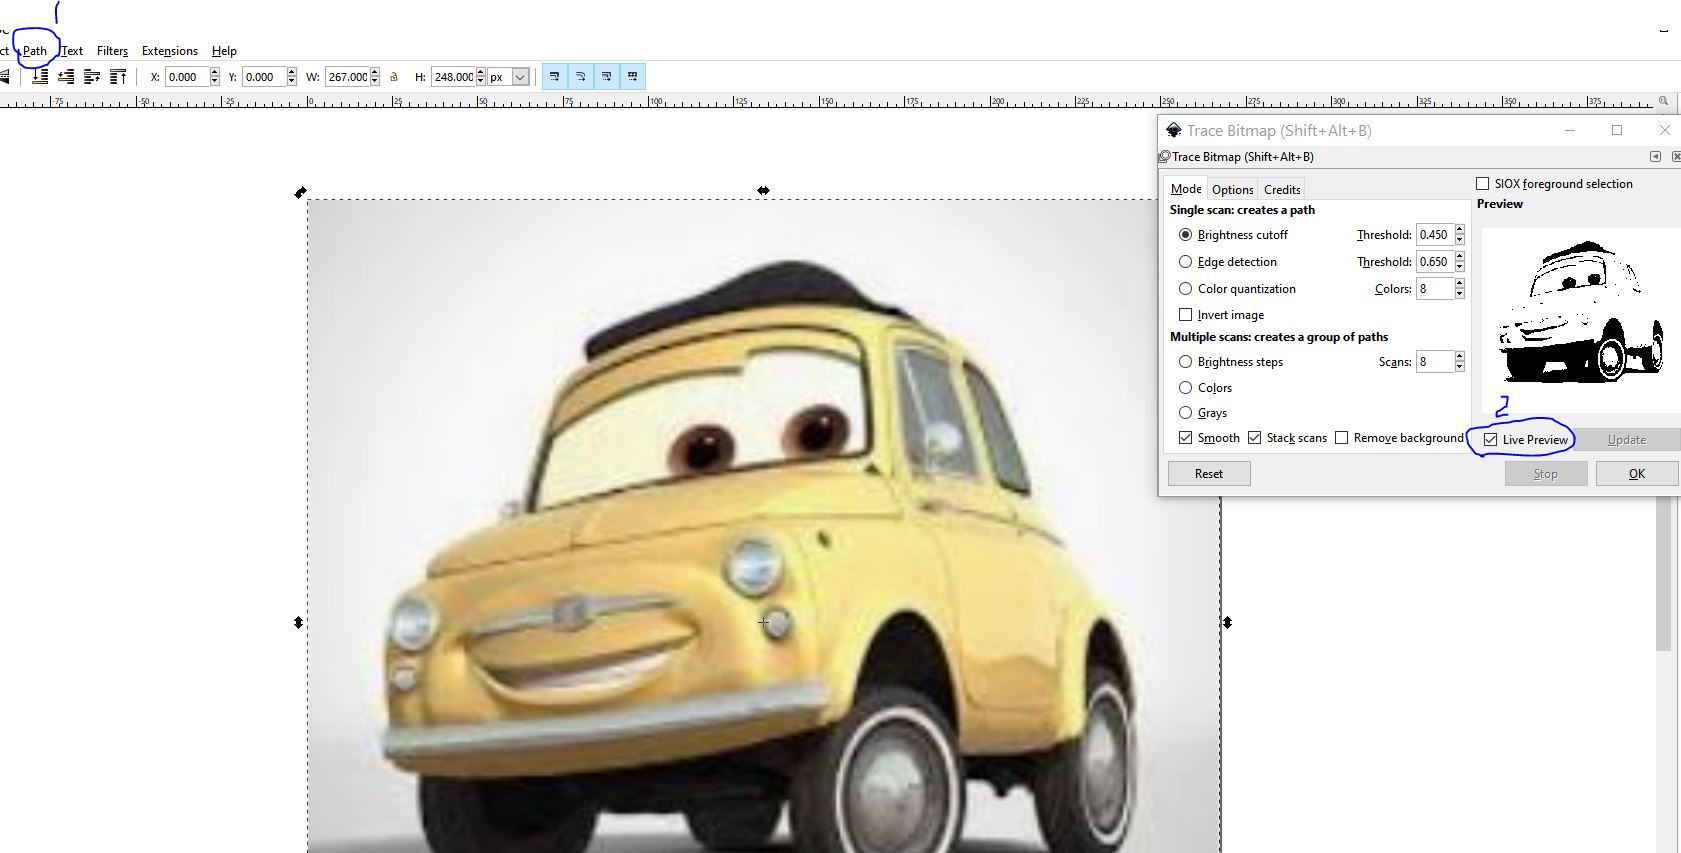

Open you Inkscape program (or what ever you use) and bring in the Guido.jpg file using "File" - "Open". When you do this the program for some reason always gets smaller and moves to one side of my screen. I want to see things in it's full blown character so I click on the minimize button and then on my opened programs bar on my screen at the bottom, I choose to open it up again. The program will open in all of it's glory.
Make sure that you have the file that you are going to use sellected. After you have it opened, and selected, full screen LMB click on the "Path" as shown #1 and then LMB on the "Live Preview". Here is where it gets a bit sticky. Your are going to have to figure out what works for the program. With the live preview you can see what is going on. You may have to move the things around and punch different buttons but the final idea is to get a good cut line for your CNC.
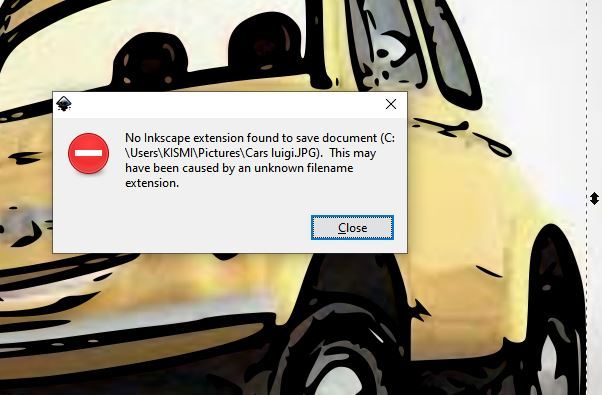
After you get there you need to go to "File" on the top bar and chose "Save". You will get a "No Inkscape extension found. LMB click the "Close" and your file will save as an .STL.
If you are still unsure of how to do this function I suggest one of the many Youtube.com videos on converting a .jpg to .stl in inkscape.
Now that this is done for the first picture I will let you do the rest. I won't go through this anymore as the rest of the pictures need the same editing. What ever you have chosen just do all the pictures at once as it would take a lot longer to do one at a time.
After the picture is saved you will have a new .SVG file that is ready to use.
Using Fusion 360 to Build the Board.
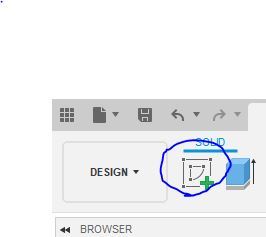
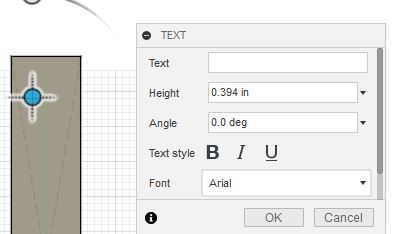
Now go back to the Fusion program. Make sure the "What ever your called your program name" is highlighted as described in the previous steps. Select the Shortcut key or the design icon in the top left of the screen (see the picture). Now we are going to add "Name", "Birth date", length to the stick. On the top bar or in your shortcuts menu look for the "Text" button. Now you can add text to you work. First you must select a plane or surface to type on. This time we have a surface (six faces of the square) as you built one in the previous section. Watch very carefully as there will be a box that pops up that is looking for a number. I disregard this and go straight to the part that says "text". In the text box I add the name of the recipient (the child) and I change the height of the text to make it so that the name will take up the space on the growth stick. Because Zayn only has four numbers and the length is 10 inches I chose 3 inches as the size of the growth stick. Like I said before you can use any style of font that is in your word program but some of them will not cut well. I chose the "Comic Sans" as I know it will cut well. The "Harry Potter" font that I downloaded also works well. If the child's name was longer I would adjust this down or up. You may have to use the circles to adjust the position of the letters. Also you can move the whole name with the block by LMB clicking and moving it to were you want it to be. After adding the name, DOB and length to the growth stick you need to add a height under all of this. I put this at 6 feet. This is an arbitrary number and you can lower it or raise it depending on the perceived height at graduation from high school. The idea here is to show it off when the student graduates along with their trophies and other things that they may have from various events.
By adding a construction line you can now place something to show off the heights. To do this make a line, I like to use the keyboard shortcut of "L". First you must select a plane or surface to sketch on. Make this line right in the middle of your "6 Feet" mark. Now draw a line by LMB clicking where you want to start and where you want to stop. Now if you push the "Esc" button you can get back into select or you can just LMB click the select button at the top right of your screen. After you are in select mode you can select the line that you just created and then push the "X" button on your key board to change this line to a construction line. You can now add another line that is 12" long from the top line to the side of the part, do this as how it is described above. This will tell you where you need to put the "5 Feet". Keep doing this until you come to the bottom of your growth stick. Your final length should be "2 Feet".
Making the Picture Frames.
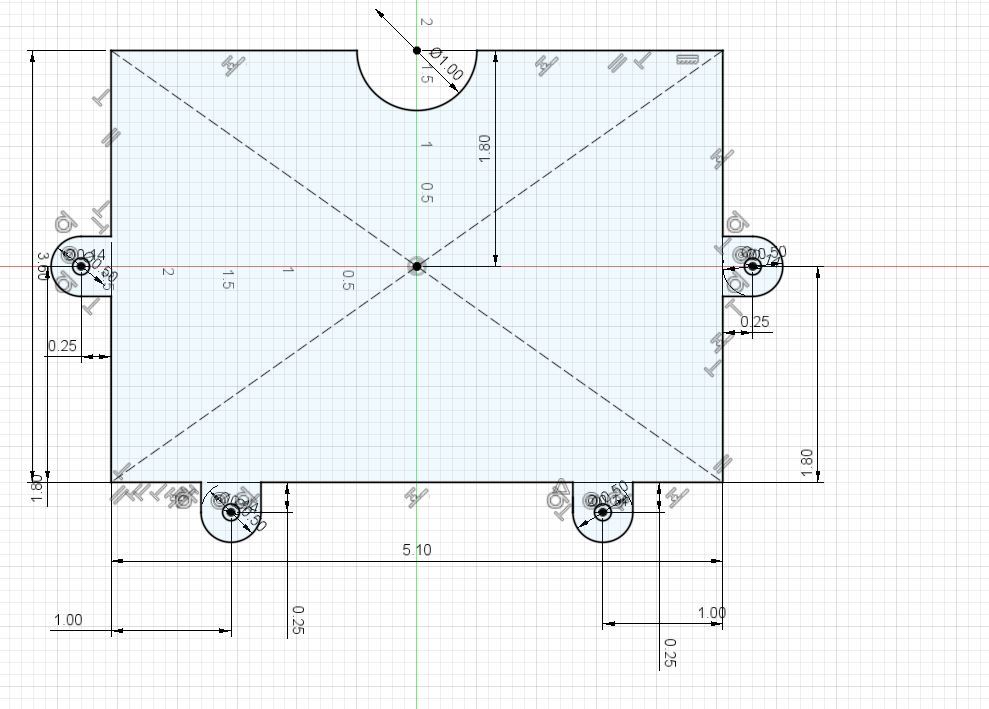
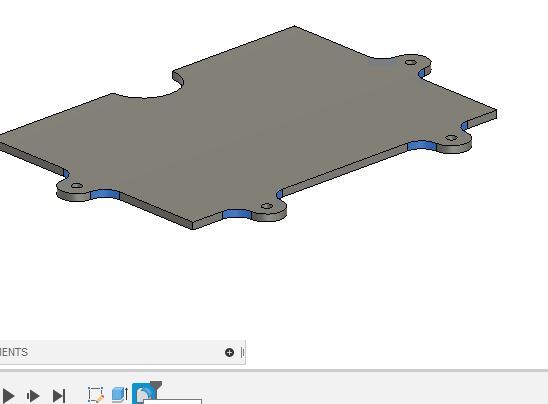
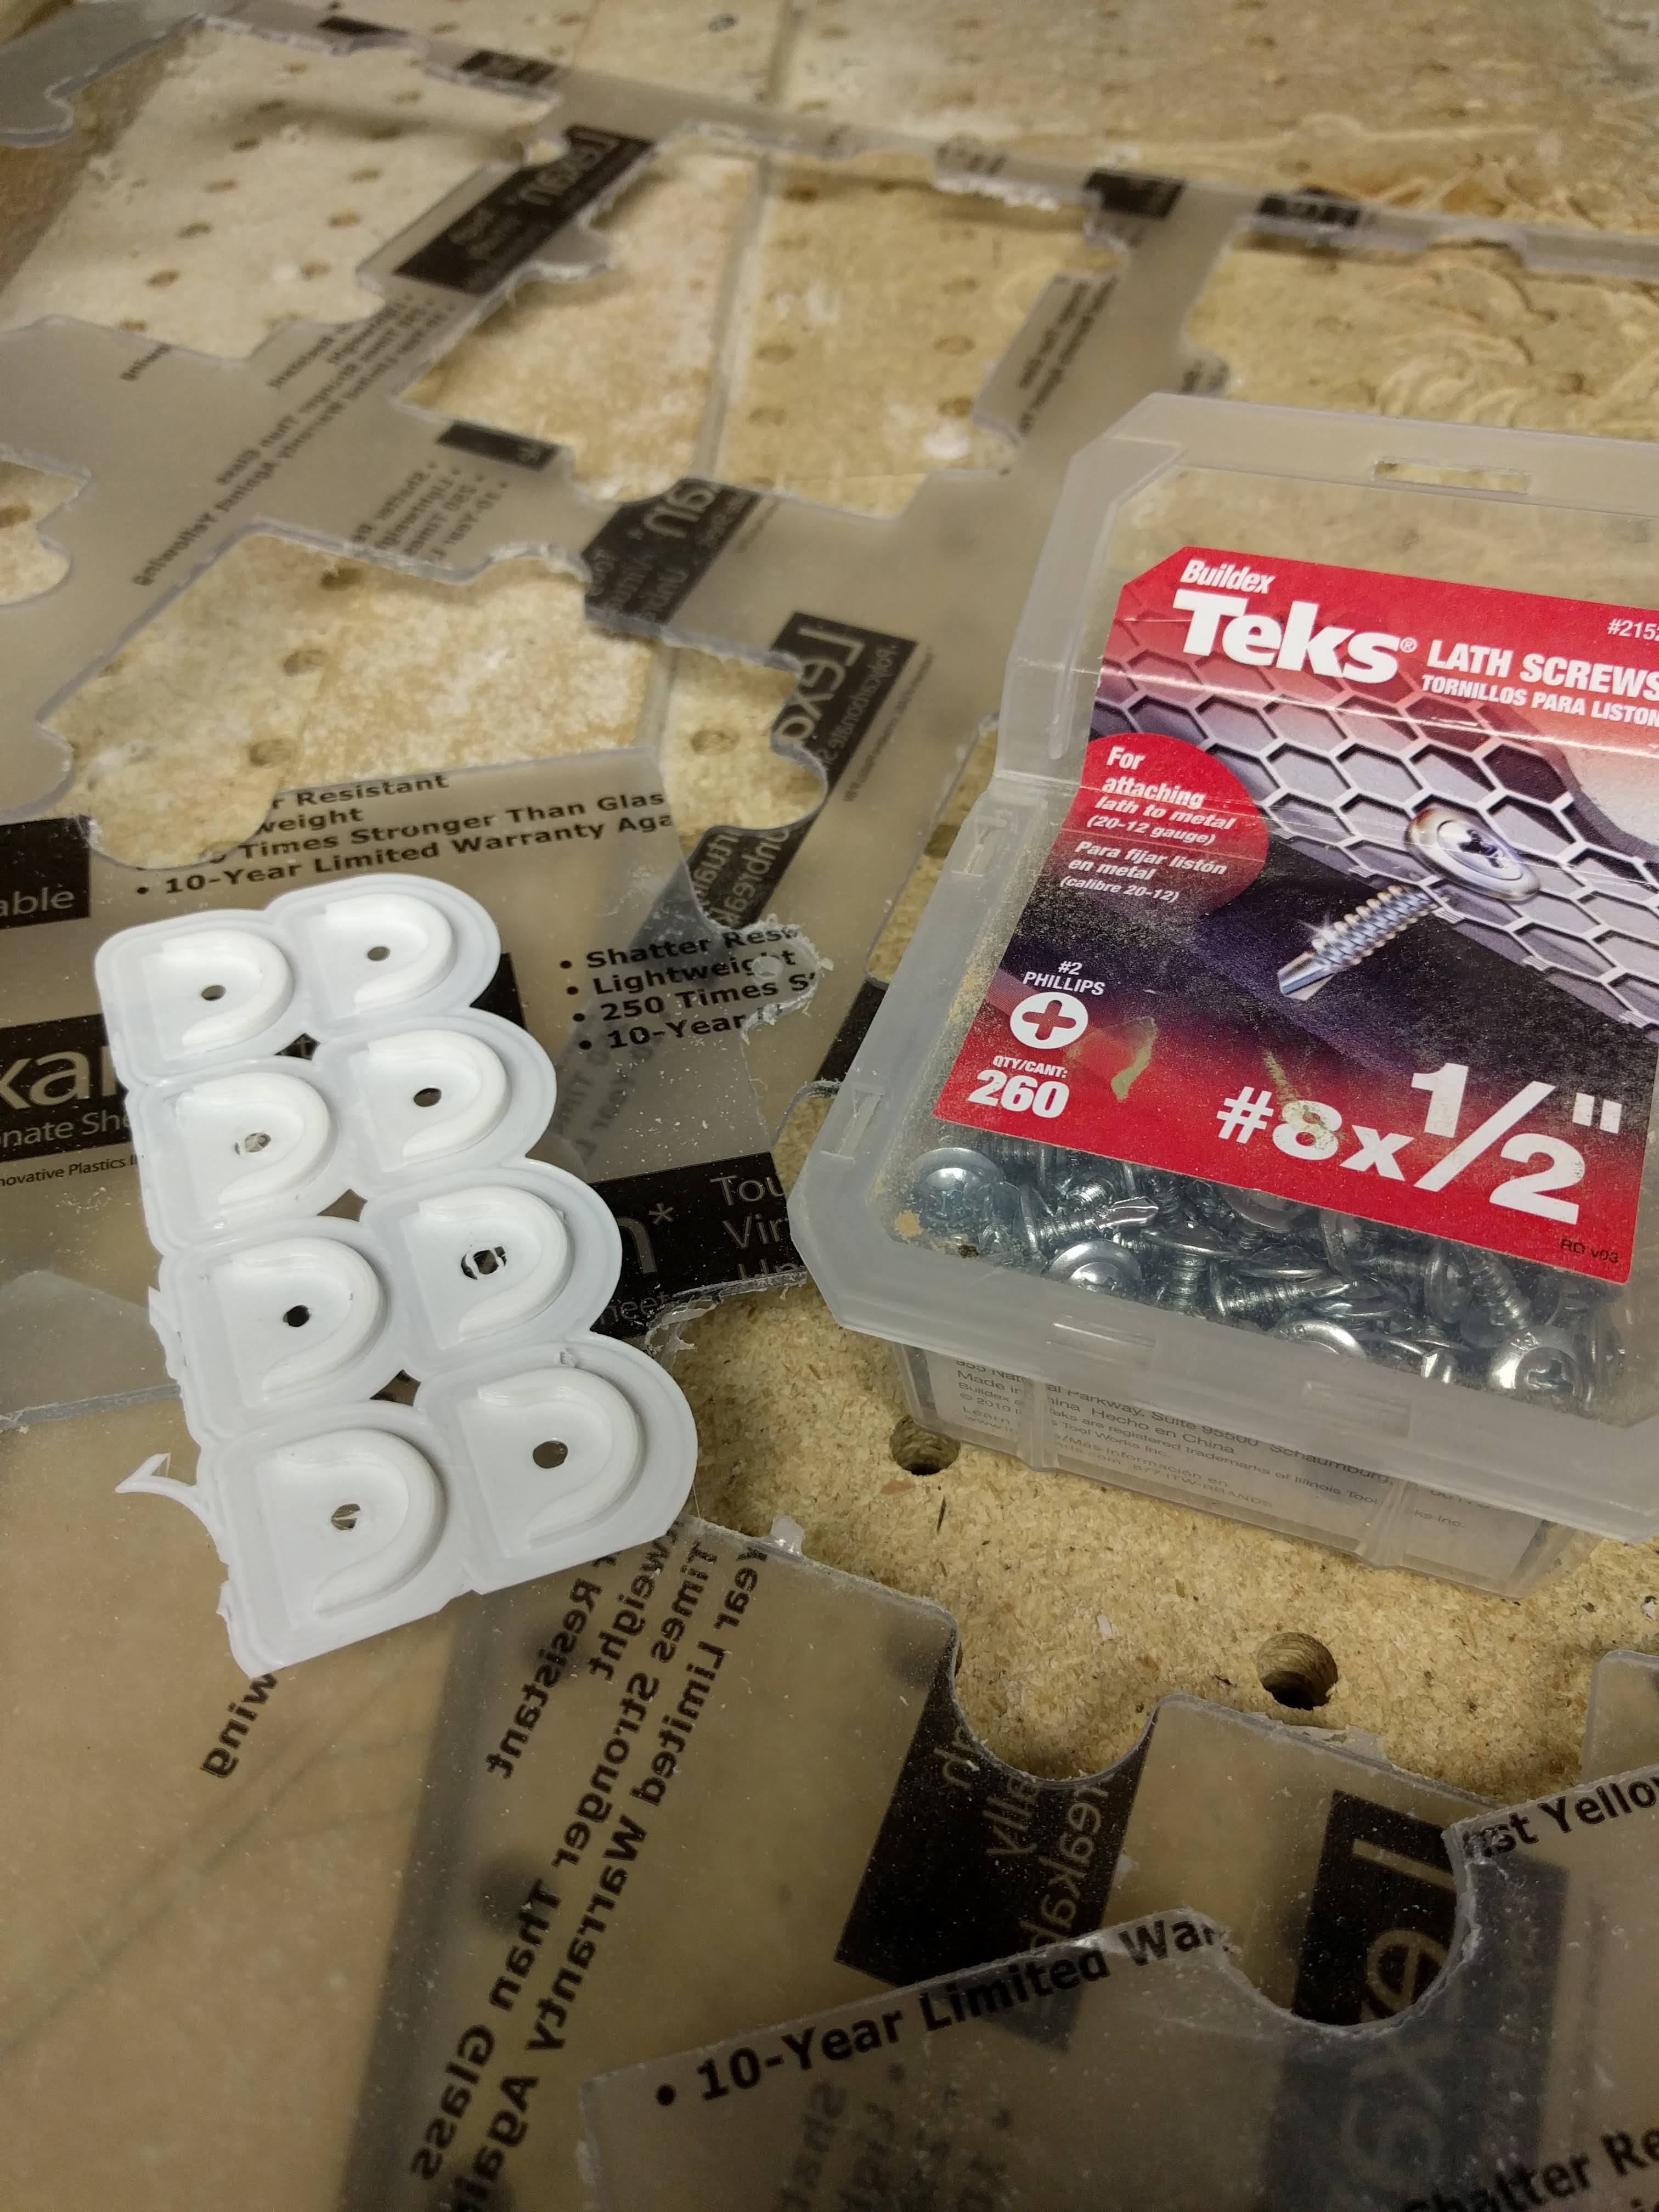
A nice touch is to add pictures to the growth stick so that as the child grows the pictures can be changed up and the growth stick can change with the child. In order to do this we need to figure out what size of pictures we want to add to the growth stick. I choose 3.5" x 5" as this is a common size that you can get at any photo developing place. I built these up with the fusion program and cut them on my CNC router. I use polycarbonate as this does not have a tendency to snap like some other materials do and it is very clear as well. On the Fusion 360 program open a new window by clicking on the "+" sign on the top right of your screen. A new window will open up for you to draw in. I saved this and called it " New Window". Using the middle rectangle build a rectangle and then add some circles to it by pushing the at the top of the screen and finding the circle button. Or you can push the "C" key on your keyboard for a center circle. I like to add lines and make them into construction lines as I showed you how to do before. Look at the picture of the window and you can see what dimensions I used. Add lines and when you get it all together you can extrude this out (the extrude command is at the top left on the ribbon). The material that I purchased was .100" and so I extruded the final window to this size. After this is extruded out push the "F" key to fillet the fins so that they will not break off. Anytime you have a sharp corner you have a place were the part can snap. I also added some holes for the screws to go into the part. Here is a place where you can find the finished photo windows: httpsa360.co3aaACkU .
Adding Photo Hold Offs
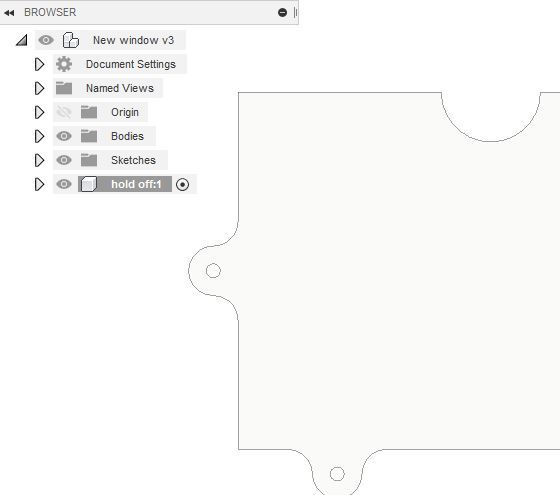
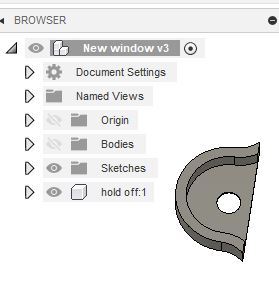
Now that we have the windows present we can add some stand offs to them so that the pictures can be inserted and taken out again when you want them out. For this we are going to need to build some parts that will do this for us. I use a 3D printer to do this. With the window that we just built showing you can now we will create the stand offs. Because you dimensioned each of the wings on the windows to the exact size we can create one and then copy it a bunch of times for our windows. We are going to need four for each picture and I believe six pictures should be enough. You can always add more or less depending on what you want. The first thing to do is to open up your drawing of the window that you built if you closed it, or leave it opened if you didn't. I would suggest saving your part at this time.
At this time you are going to go to the name of the part in your browser and RMB and select "New Component". A new part called "new component" will open up at the bottom of the browser. Slowly LMB the "new component" and call it "hold off". It will become apparent later on as to why we want this as it's own component. I always break my drawings down to as many components as I can so that I might be able to work on them individually later.
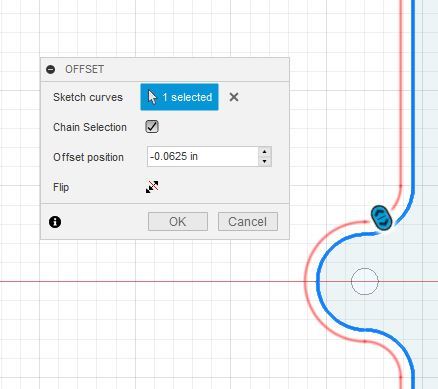
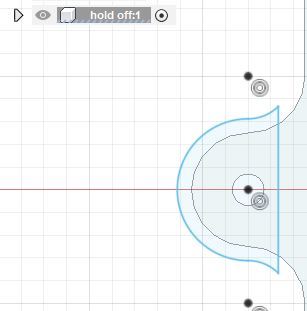
Make sure that the hold off has the bullseye highlighted as this is the part we are going to work on. On the keyboard (all the keyboard shortcuts can be found in the top ribbon if you would rather) push the "O" key for offset. We are going to offset the outer part by -.0625" . This will give us a good lip to go around the part. Now push the "L" button on the keyboard for line. Make a line as I did in the next figure. Now using the "T" trim key cut all of the rest of the lines away from you form. What you have should look like what is shown in the picture.
Measuring the photo thickness it looks like the average photo is about .009" thick.
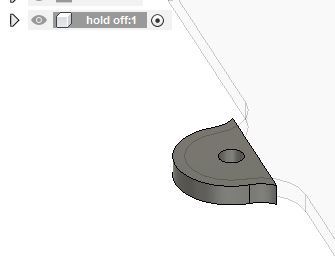
Using the "E" extrude key we will extrude this out so that we have .011" so that the picture can slide in and out of the window without binding. We are going to extrude this out to -.111. Make sure that you have selected both parts of the hold off. What you will find is that the two parts will be both solids and that they are holding the same position in space. You can do this in drafting programs but you can't produce them without splitting them up.
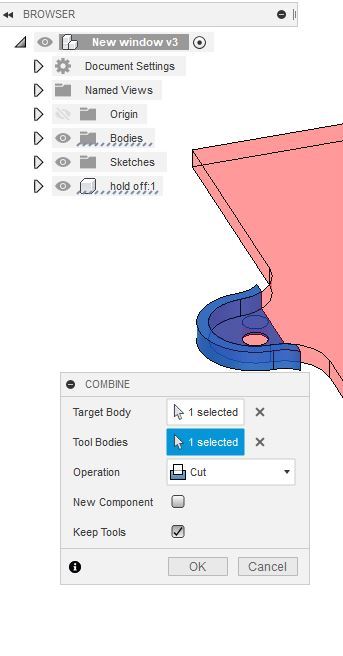
To do this first we need to make sure that we move the bullseye to the main part. If it is not highlighted you will not be able to do this function. After you highlight the "New Window" you can select the "Modify" on the top ribbon and select "Combine". Combine function does a few things and one is to separate the parts for us. Select the part that you want to cut, in this example it will be the hold down, and then select what you want cut from it. The window is what we want to cut out. Make sure that "Cut out" is chosen and that "Keep Tools" is selected. If you LMB the eyeball by the bodies you will see what your final part will look like. Here is a place to get this file if you don't want to work on it yourself. https://a360.co/2Dv9UHT This will allow for you to place six pictures if you desire. You can of course make more or less, this is just a suggestion. In order to make these up in your 3d printer you are going to have to run them through your slicing software. Each printer has there own slicer so I am just giving you access to the files and you will have to slice them to meet your specs.
Creating Multiple Copies of Your Hold Down.
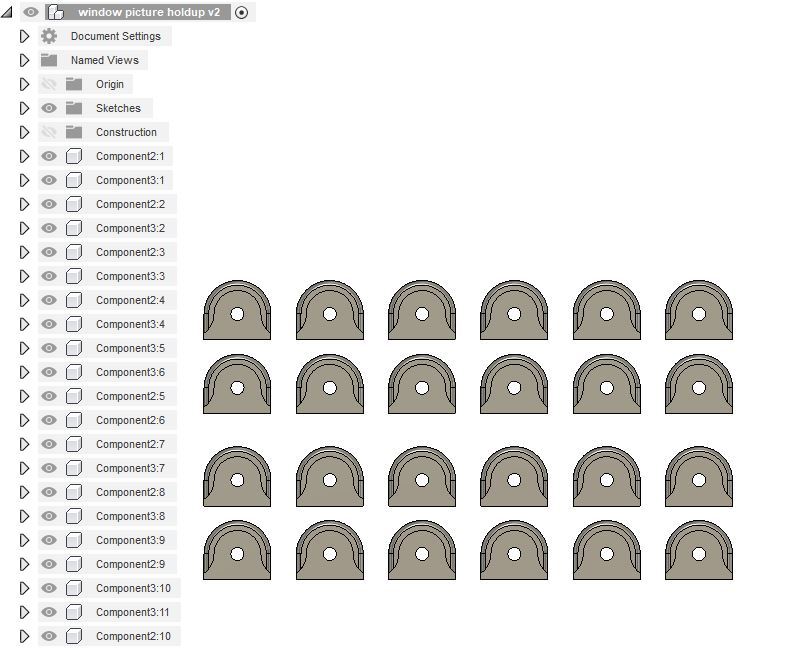
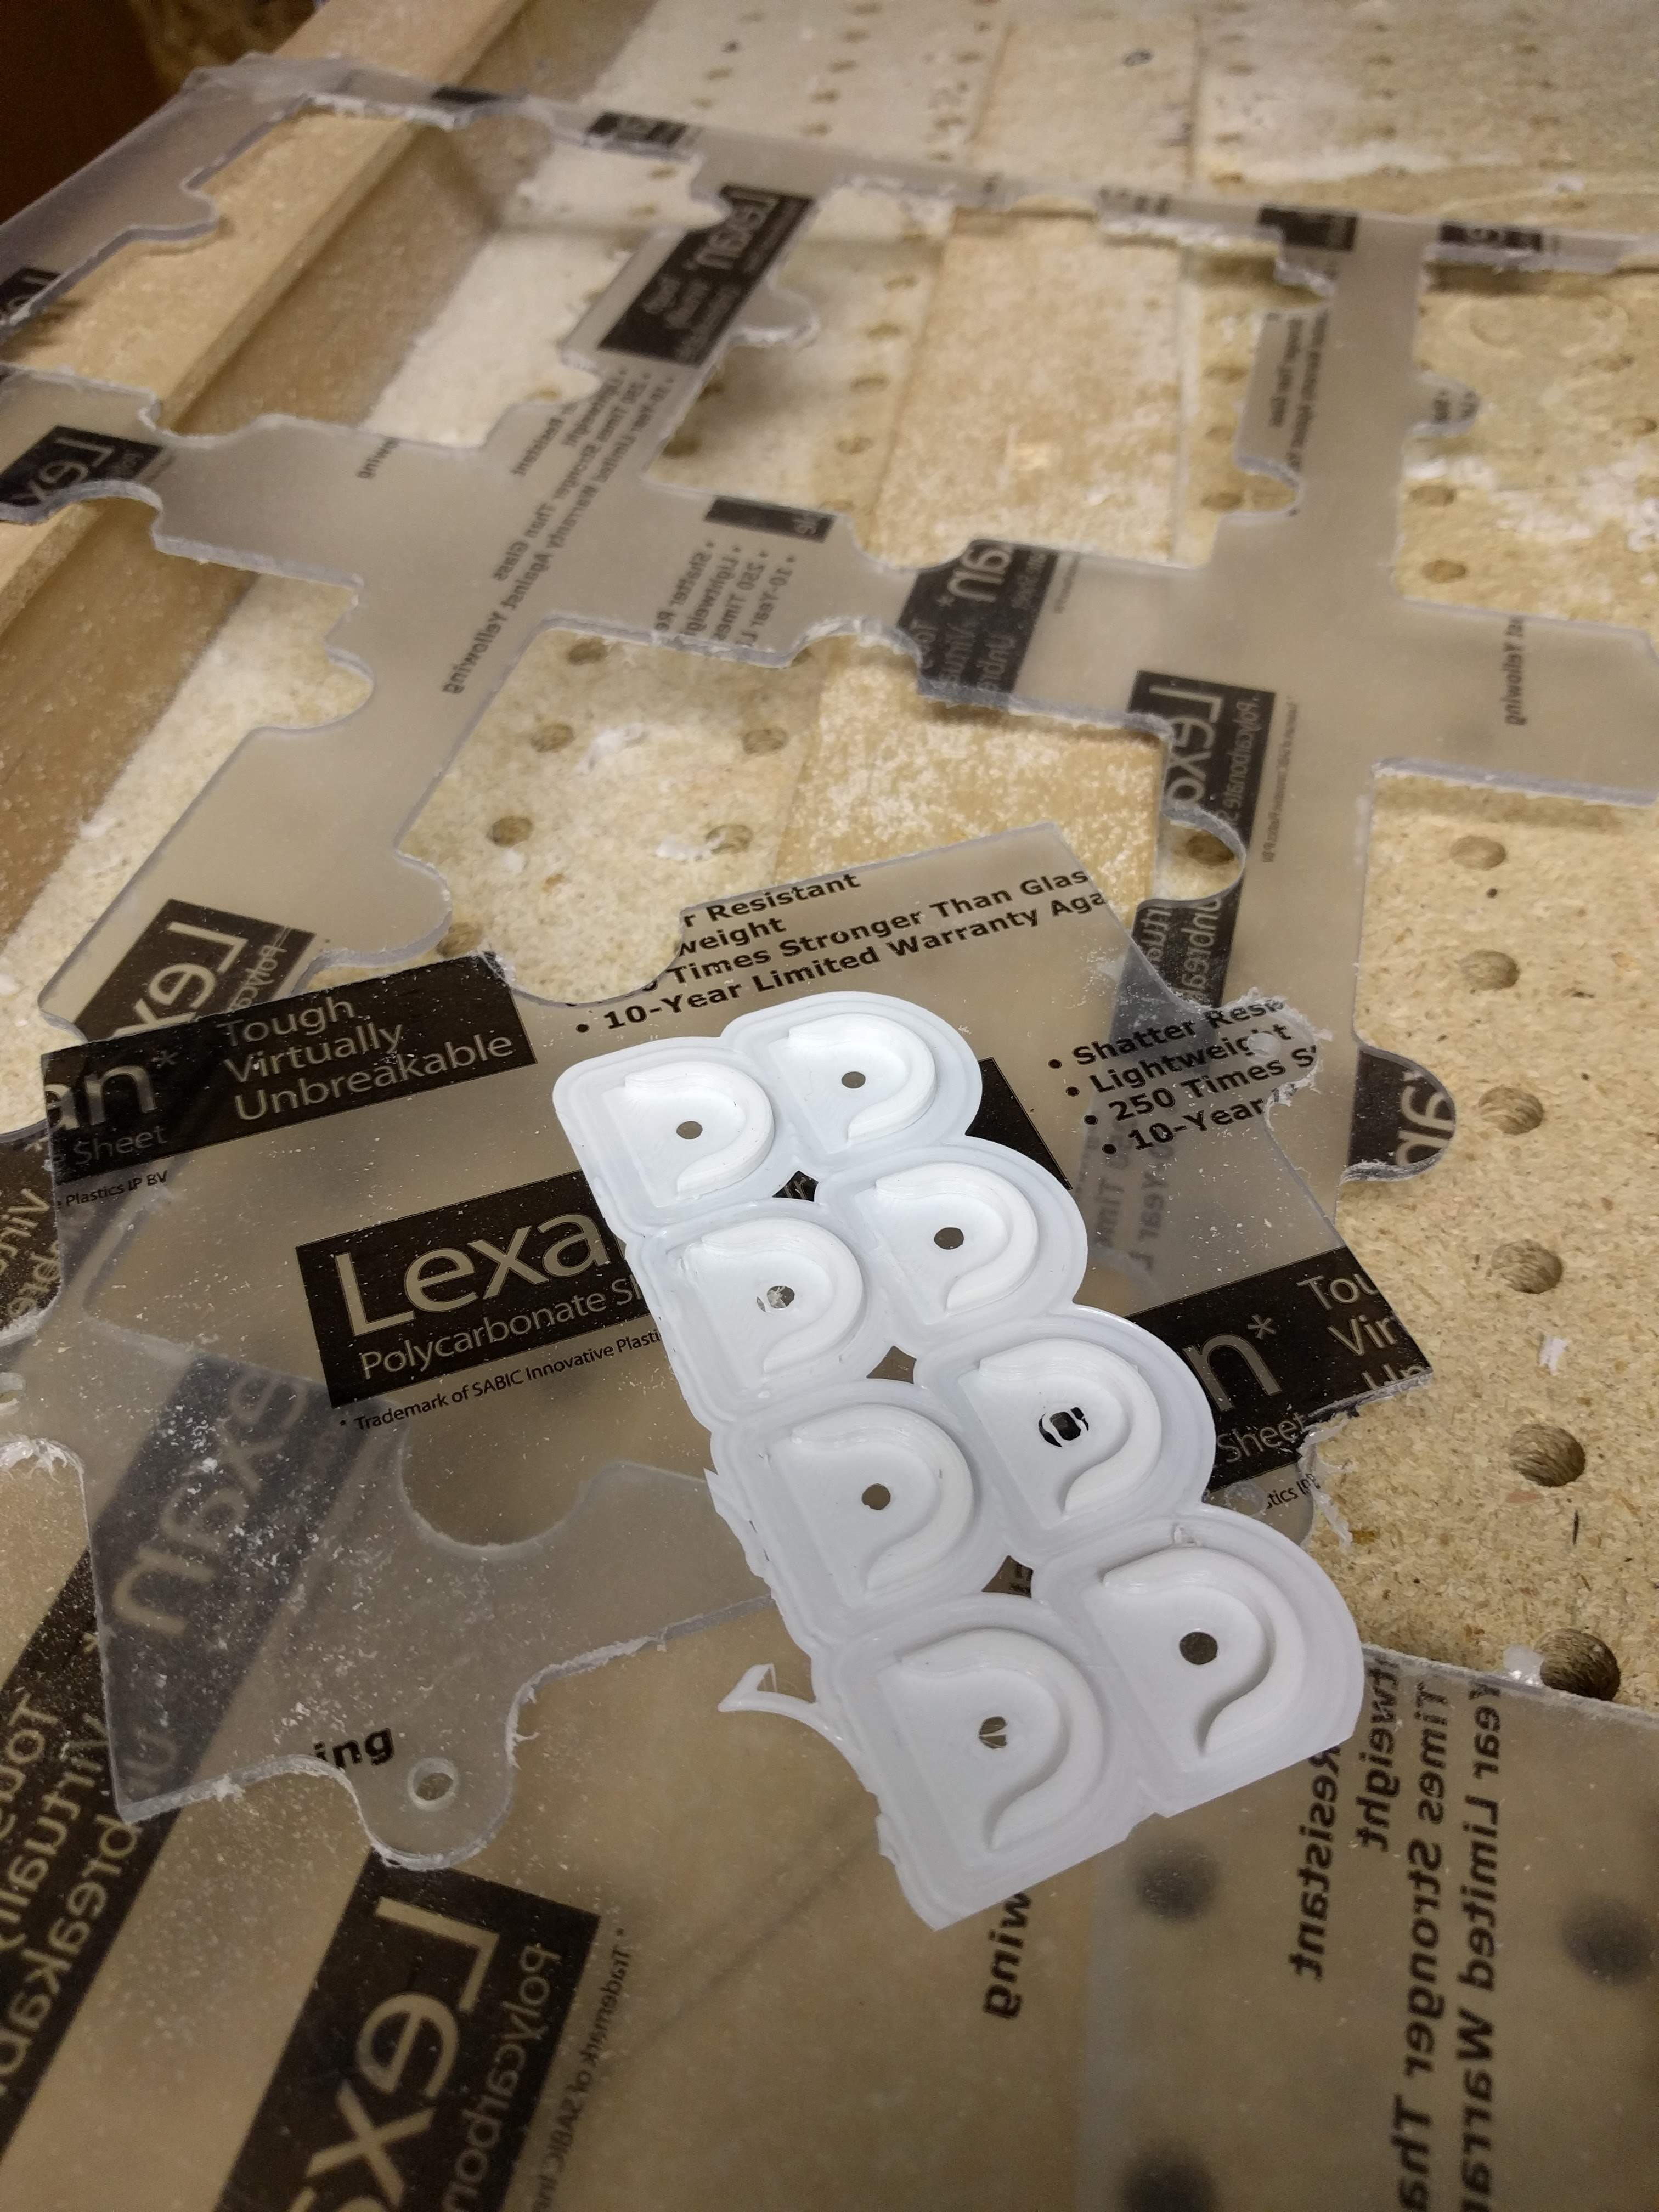
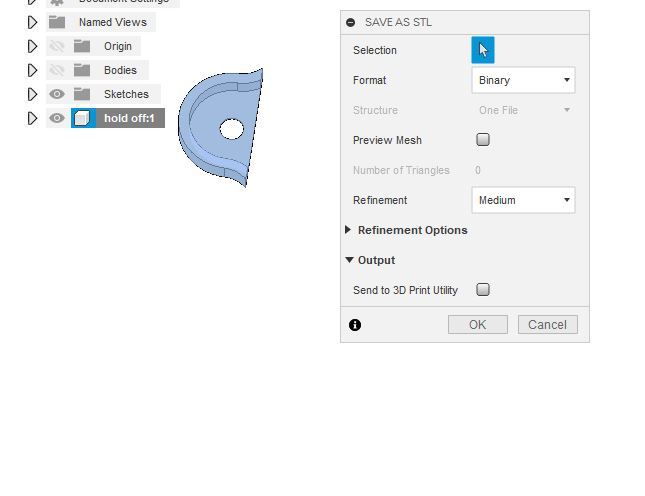
Because this is a separate component we can put it into it's own file to print it out. That way we can print them all at once. To do this RMB click on the hold down and select the "Save copy as". LMB click the "Ok" that pops up. Go to your data panel and you will find your new part. Double LMB this part and it will bring it up in it's own window. Now it is just a matter of copying the parts over and over again to come up with the desired amount of hold offs.To do this you need to RMB click the part you want to copy. Select the "Move/Copy" button at the top of the drop down. Make sure that you have the "Create copy" button selected before you try to move anything. If you make a mistake just LMB the "Cancel" button and start over. If you select the top part and hold down the shift button you can select the bottom component and all in between will be selected. Remember you have four of these for each picture and so you need to make four for each of the pictures that you are going to make. Before you save this as a .STL file it is important to remember to change the Units of Measurement from Inches to mm. To do this we need to select LMB "Document Settings off to the left of the screen and you will see "inches" show up. Hover your cursor over the right side and you will be able to change this to mm. Now you can save your file as an .STL file. To save as an .STL you need to RMB select the component and chose save as an .STL. If you are in inches your part will barely show up on your build plate. I have added the file for the stand offs.
Downloads
Building the Windows.
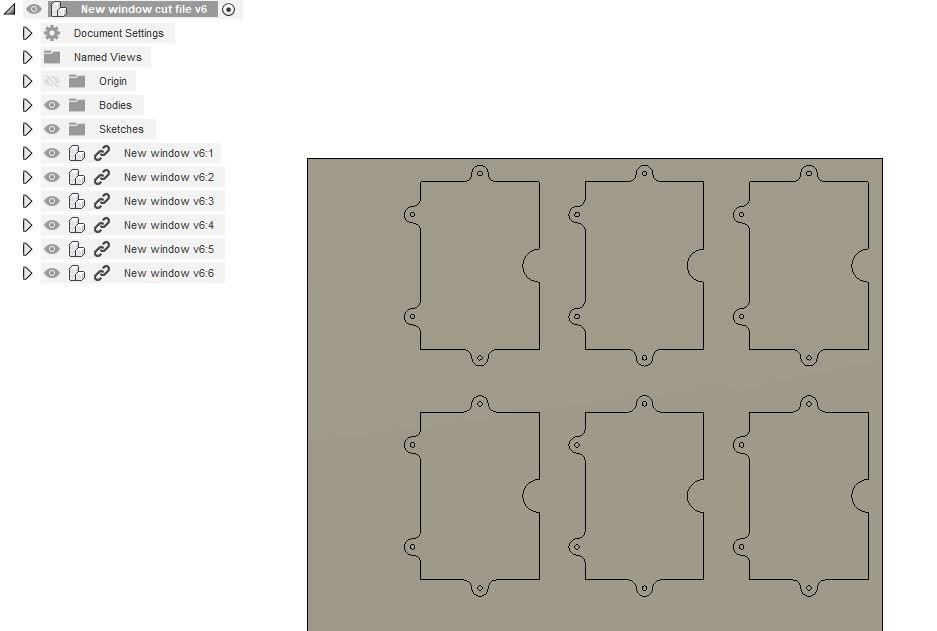
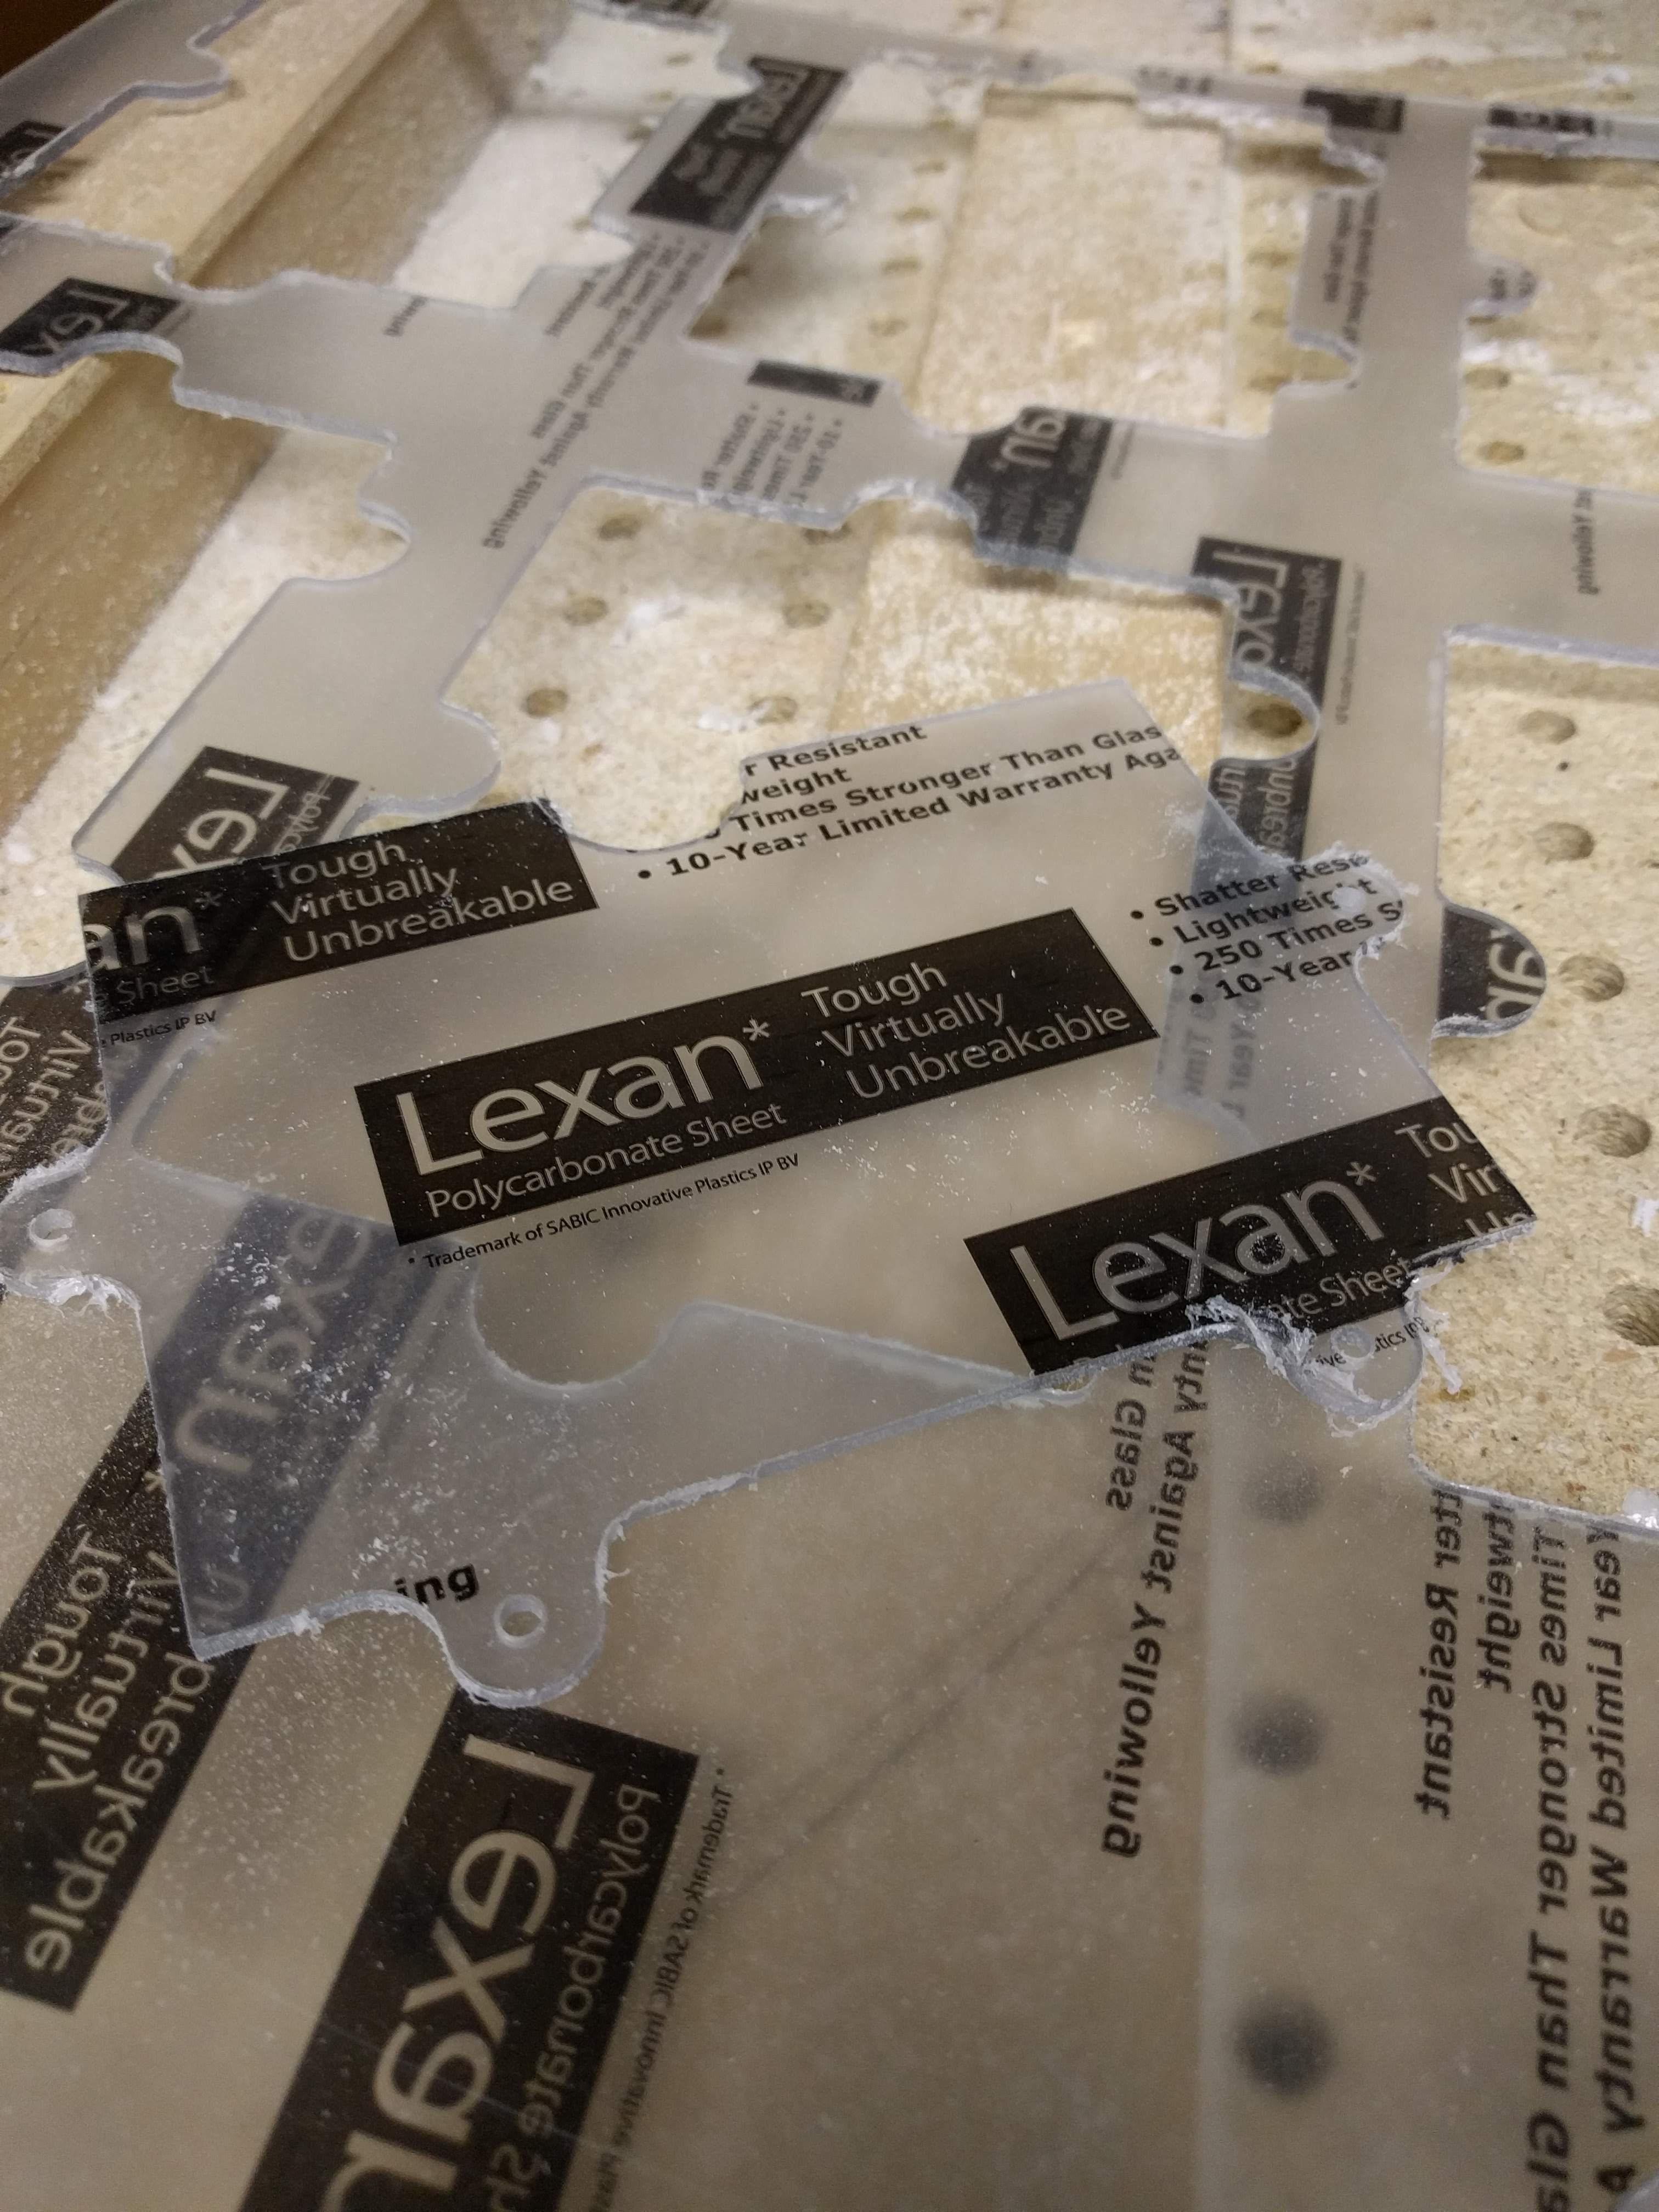
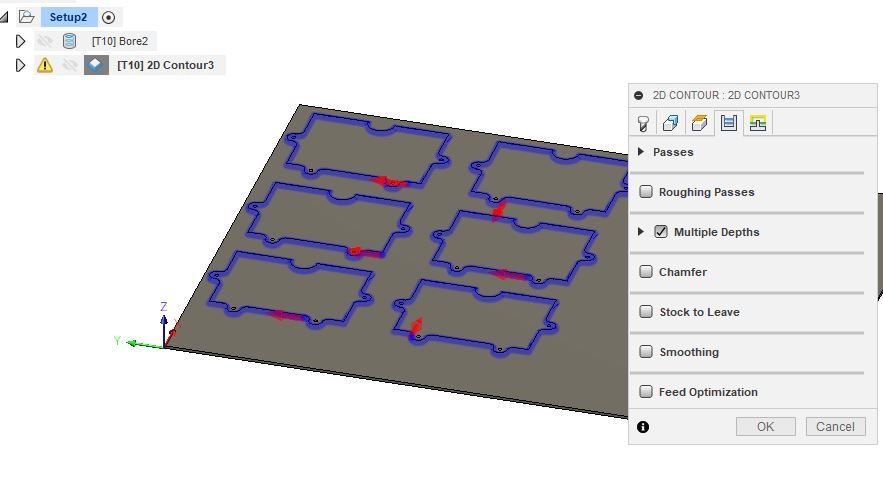
Before we can build the windows on our mill you need to save them without the hold offs showing. To do this LMB click the eyeball so that it is unlighted. The hold off should disappear. Save this part out. Open a new window by LMB the "+" sign. Make a drawing the size of your Polycarbonate sheet. Mine is 24 x 17 inches. Check the thickness of your polycarb with calipers or mics if you have them. Mine turned out to be .100" as I said before. With my part built up using the techniques described previously build the polycarbonate up. On the data panel select the "Window" that you just created. Bring that into the drawing and place it so that it is even on the polycarbonate that you just created. Using the copy past solution in the previous step you can make as many windows as you want. I made six.
Now is the time we need to go from design to manufacture. On the ribbon where it says "Design" you will find a small downward arrow that shows that there are more goodies under it. For this we are going to chose "Manufacture". Next to the "Manufacture" title you will find "New Setup", LMB click this and select "New setup" from the drop down.
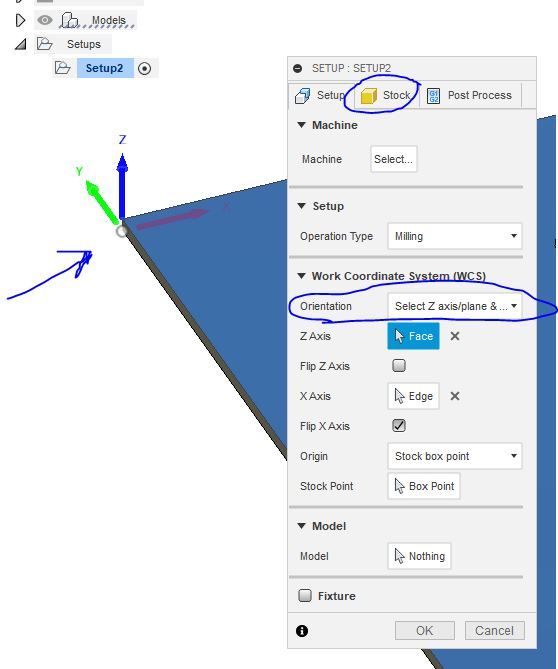
A pop up screen will show the different things that you need to adjust so that your machine knows what to look for. First we need to select the "Noman" or the X,Y and Z planes. On the drop down select the "Z axis and X axis" as what you want to call out. LMB click on the top of the part and then on the part that you want to be the X axis. An easy way to think of this is to hold out your left hand point your finger forward. Your thumb will be up and your other fingers will be pointing to the right. Your thumb will be the Z axis and your index finger will be the Y axis the other fingers will be the X axis. You can put this in any orientation that you want. A tool maker will usually use the middle of a part for the Noman. A Machinist might use the left top corner. It really doesn't matter what you chose as this is personal preference.
If you go to the next tab it will be the part size. I take this to .000" on each of the sides as I have already brought my part to size before I started. I also chose the bottom of my part as where to place the Noman for this setup. The reason I did this is because if I am cutting through a part I find that the machine will stop and I don't have to worry about it cutting into my bed. The bed is a sheet of MDF and is easy to replace but why do it if you don't need to.
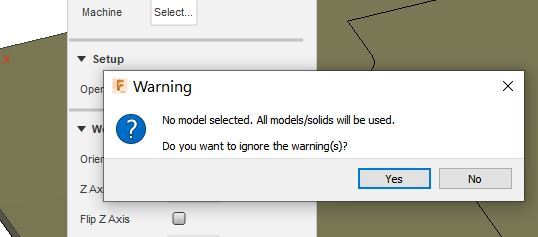
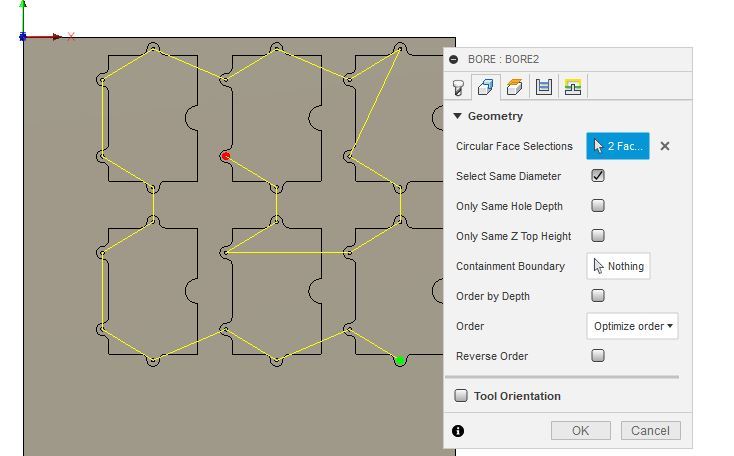
Because we did not select any models all are going to be chosen for us. That is what we want. Now we are going to need cut the holes first. It is always better to cut out what you want before you cut the outside edge as your part can float around at that time. At the top under the 2D contour select the "Bore" as the function you want.
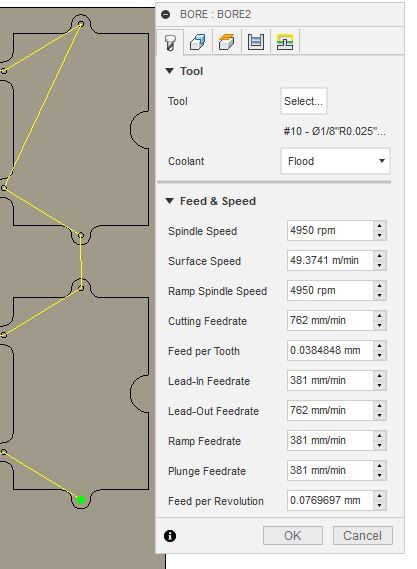
We need a tool that will fit into the hole and have some additional movement I chose a .125" end mill for the job and because the holes are .140" in diameter this will work good. In the Geometry tab start to chose the holes and make sure that the "Select same diameter holes" is selected after you do this the holes will all be selected for you.
Next we need to cut the outline of the part. To do this from the top ribbon choose 2D contour. Going from the bottom of the part select each of the windows that you want to produce. You are going to want to have tabs on these so that they don't fly around on you as they are cut out. You can add tabs on the Geometry button in the pull down. I also like to do more than one cut as it leaves a nicer finish but if you are in a hurry you can do this quickly. If you want to do more than one pass select "Multiple depths from the "Passes" menu at the top of the drop down.
You can now select the "Simulate" button on the left of the "Action" to see how the part will actually cut. After you have simulated the cut and am good with it Fusion 360 can turn it into a cut file for you. Select the G1G2 under the "Action tab". This will show as "Post Process" if you hover over it. Your file will post out to a text file that has a .cnc extension to it. To give you this file I have posted it out to a .txt file and if you want to use it you are going to have to change the extension to .cnc to make it work on your machine. If your machine is not set up correctly this may not work and you may have to go in and select your machine to make this function correctly for your machine. The file is called windowcutout.txt . You may be able to run this without changing the extension. Important to remember were the Noman is set up at.
Downloads
Lets Put the Windows in the Positions That We Want.

We are going to place the windows in the orientation that we want them to be. In this way we won't have to move them around as much and will get a better idea as to were we want the pictures to be on the growth stick. I wanted to make sure that the name was shown so you have to be thinking of this as you go along. I placed them in this orientation but you can use whatever is appealing to you.
Now is the time to get the stick set up for the measurements. If you are doing this in English make sure that your "Document settings" is in Inches. If you are in Metric you can use CM's. You can use any font you want as long as it is in your word processing program. The problem really is that some of them are not supported and will fail however; the greatest majority of them will work. If you have a problem with them working on your CNC you may have to try a different font. Not sure why this is but that's the way it is.
So the easiest way to figure this out is to go into your word processor and figure out what font you like. Because this is for a child I used the Harry Potter font for the Harry Potter growth stick (downloaded from internet). For the Cars Movie I used the Comic Sans. It all looks good but I think there is a font that is for the Cars Movie somewhere. I don't know if it would work on my CNC so I will stick with the Comic Sans as it is close enough.
Downloads
Adding the SVG's.
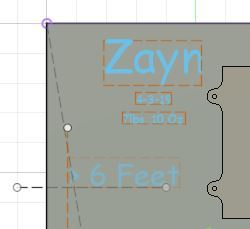
Now that we have the child's name, DOB and weight and length and the foot calculations added to the growth stick it is time to add the .SVG files. To do this you need to have the .SVG files converted as shown before. Now on the top menu bar you will find a command called insert . From the drop down select Insert .SVG LMB click this command. You now have to choose a surface or a plane to put your .SVG on. Pick the top surface. Now you need to select the .SVG that you made earlier. You can resize and adjust it to your hearts content. You can flip it around and when you are done click the "OK" button. After you have gotten all of your pictures placed (You can also place them individually) click on the "Finish sketch". Depending on how many .SVG's you placed this might take a while. Relax and get some coffee or water or something. Now that you have all of the parts of your growth stick done. Sit back and take a look at it. Make sure that what you have is what you want. If need be you can LMB click on any of the parts and will be able to move them around.
A note about the .SVG's and their placement. For some reason I was working on my program and I saved it and when I came back to it the next day the .SVG's where on the wrong plane. I was able to fix this easily by RMB clicking on the time line and moving them to the right plane. This may not happen to you however I wanted to make sure that you were aware of the issue and also how to fix it.
Setting Up the Stick for Your CNC Machine.
On the top bar where you have been all this time has been in the "Design" part of the program. There is so much more that you haven't seen and it is under the "Design" pull down menu. Here you will find a lot of different things that you can do but we are going to use the "Manufacture" part of the program.
Once you are in the "Manufacture" part of the program it doesn't look much different from the design. This was on purpose and like the rest of the program you will almost always start at the left of the top ribbon and use the commands going to the right. The work flow here is done very nicely.
With that in mind the first thing that we are going to do is to select a milling operation setup. We need to get a "Noman"clature set up (X, Y and Z) position. To do this you LMB on the "Setup" and select "New Setup".
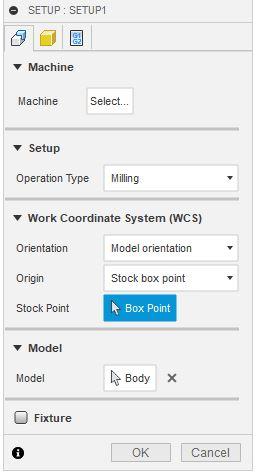
You can do this many ways however; I will explain how I do this. Under the "Model Orientation" I chose the "Select Z axis/plane & X axis. First I click on the top of the part where I want my cutter to see. I then click on the "X" axis and this will cycle back and forth until you get what you need. You will most likely have to flip an axis to make the part be in the right orientation. If you built your part the way I showed you, the axis will be select correctly. If not work at it and you will get it.
I set my projects up a bit differently than a lot of people in that I have the board to the size I want it with my woodworking equipment so I do not want any additional stock to be added to my board. You will need to resize your parts if you do not want the machine to cut the outside edge. In order to do this you need to go to the next tab "Stock" in the drop down menu. I put everything to 0.0 as far as stock offsets. You will notice that the program is working in mm now. All machines I have worked with use the metric system but you will not have to worry about this as the program automatically changes this for you. If you decide you want to change this to English then you can do this. I find it is much easier to use the metric system and the only reason I used english to start with is that this is the United States of America and English for some reason is used here (sorry for the rant).
If you would like to preserve your settings you can RMB click on them and select "Make Default".
After you get this done you need to Select a "Box Point" for your origin. I put mine at the top left of the part. You are going to have to change this with each set up so make sure that you are set up right.
After this is completed you can select the "OK" and move on.
Making the Cut File.

We are going to need to make three cut files as my machine has a bed of 34 inches in depth and length (I built it myself so it is an oddball). If yours is different you can adjust this as desired. We did our first set up in the previous step. Under the "2D" you will find a command that is called "Trace". That is what we are going to use. I am not sure how this works as some of the times it seems to drop the cutter down .1mm and sometimes it is at .00mm". This is something to be cognizant of not that it will make much difference. The first thing you need to do is to choose a tool. LMB on the "Select tool" and a pop up will come up that has been populated with all kinds of tools. In order to use the "Trace" command you are going to have to use a countersink tool. Don't worry about the size or anything this is just to get us to where we want to be. LMB click on the countersink and then click the "Select" at the bottom of the pop up.
The next tab in the popup will be the "Geometry" tab. LMB click on the Geometry tab and you will see that the program is looking for curve selections. LMB click on the parts that you want to cut. This may take some time. More than likely the program will ask you if you want to make a closed section as shown above. I have found that this doesn't do much but if you do chose this as a closed section the section will be cut twice. No big deal unless you are in a hurry.
Once you LMB click the "OK" button the program will take some time and figure out how it wants to cut the part. There are ways to adjust this and if you are doing this as a job it might be advantageous to you to play with some of the settings.
The program shows you the cutter and the path of the cut. You can find a fairly good "Machining time" by RMB clicking and picking the "Machining time" from the drop down. There are a lot of variences in my machine and the software running it so my machining time is always a bit off. It gives me an idea and is fairly good. If you have a production machine such as a HAAS this time will be right on.
Simulating and Then Posting the Cut File.


At the top of the screen near the right side you will find the cut file simulation button. LMB click on this so see how your part is going to be cut. The program will simulate what your part will look like as it is cut. You can show the stock being cut and do all kinds of things here.
The most important part is to make sure that the cutter is going where you want it to. You can look at the side of the part to make sure that it is not going to cut deep into your part. In a simulation there will be a line at the bottom of the screen. On this if everything is green then you will be good. If there is red showing up you might want to LMB click on the red to see what the program thinks is not right. This program is very good at finding issues and you should pay attention to them.
After you are satisfied with the cut process and making sure that you have everything you want in it then you are ready to cut your part.
The next thing you need to do is to "Post your file". This will set your program up for your machine. At the top ribbon is an icon that looks like a "G1G2" over the actions command. When you click on this you have the option of changing where the file is posted to, what machine you want to use etc. If you look through the machines you will find yours there. Select your machine and the options that you want for your program such as if your machine will change cutters and if you have coolant etc. Good luck and there are a lot of videos on how to do this on youtube.com
Lets get back to how we are going to make the part in the machine.
Set your cutter just above your part. Once you start the program and see where you are going to touch the part you can adjust this to look as deep as you want.
Make sure that your part is straight in the "Y" axis by moving your machine back and forth with the part in it. Make sure that you mark the spot where you want your "X & Y" axis set up. This will stay constant and the "Y" will change as you adjust the part for the next cut.
Make sure that you can adjust the "Z" axis and cut your part. The only other thing that you are going to do is to make the other files up. To do this from the manufacturing part of the program select "New setup" and make sure that you place the "Z" somewhere that you can adjust it.