Got Your Back Training Brace

Do you ever feel like you just can't stop hurting your back when you work out? Are you always pushing yourself too far and suffering because of it? If so the "Got Your Back" Training Brace is for you!
As high school and collegiate athletes, strength training became a routine part of our lives. Our athletic pursuits taught us to train to the best of our ability and we have taken that past NCAA athletics. Now that our college basketball careers are both over, and surprisingly we have no prospects of taking the next step to play in the NBA from Division III, we still stay fit through weightlifting. After all these years, we know that lower back injuries are not new to the weight room, and we have both had our share of them. These injuries are most common among individuals who compromise form, and engage the wrong muscles while they lift. This is why we came up with the "Got Your Back" Training Brace which alerts you when your form is being compromised by detecting muscular signals in your lower back.
This device is a supportive back brace with incorporated electromyography (EMG) sensors conveniently located over the erector spinae muscles of the lower back which detect and track muscle activity in the region and alert the user when lower back muscles are overexerted during weightlifting.
This instructable shows how we built the "Got Your Back" Training Brace as soon to be graduating biomedical engineering seniors from Messiah College.
Materials and Tools
![IMG_E2541[1].JPG](/proxy/?url=https://content.instructables.com/FTO/Z1UK/K9K8N0SI/FTOZ1UKK9K8N0SI.jpg&filename=IMG_E2541[1].JPG)
In order to build a "Got Your Back" Training Brace you will need:
- 2 BITalino EMG sensors ($27 each)
- 2 3 electrode BITalino leads - single or double electrode leads could be used as well ($24.25 each)
- 1 Arduino Uno ($23.00)
- 1 half-size breadboard ($5.00)
- 1 breadboard jumper wires ($3.95)
- 1 battery pack to power the electronics ($3.95)
- 1 Arduino piezoBuzzer ($0.95)
- 1 supportive back brace ($10.95)
- 1 Arduino compatible SD card module for data logging ($2.13)
- needle and thread or double sided tape (recommended)
- Arduino software ($0)
- Motivation ($0)
Estimated total cost ($152.43)
Preparation

- Background knowledge in reading circuit diagrams will be helpful.
- Instructions should be clear enough to guide amateurs
- See list of materials and tools
- The purpose of this brace is to prevent injury to the erector spinae muscle group. These muscles, especially in the lower back, can be easily injured during exercise. Basic knowledge of these muscles can help locating the muscles and help one modify the design to suit their specific needs. These muscles are responsible for straightening the back and can be associated with lower back pain. For more information see https://www.physio-pedia.com/Erector_Spinae.
- Electromyography, or EMG, can be used to detect electrical signals that cause muscles to contract. This is what will be used to detect contraction of the lower back muscles. For more information on EMG see Electromyography (Mayo Clinic).
- Have Arduino program downloaded
- Access GitHub for device code here.
- GitHub is a software development platform which allows several collaborative features for project development. Learn more about GitHub here.
Safety

- Keep power to Arduino board off while wiring up circuitry.
- Keep food and liquids away.
- This is NOT a medical device and should not be used as a tool for medical diagnoses.
- Do not rely on the Got Your Back Brace for sole protection of your back. If you have back problems, I recommend consulting a licensed trainer for exercise modification for the protection of your back.
- While this brace does warn you during flexion of your lower back in hopes of injury prevention, it is up to the user to work out responsibly and within their own physical limits.
Hints and Tips

- Make sure EMG BITalino is connected with the side with the circle to the Arduino.
- Ensure that you have download SD and SPI libraries in Arduino.
- Check by going to "Sketch" > "Include libraries" and look at the drop-down list.
- Keep the brace tight on the lower back.
- Wire the circuit exactly as shown in the circuit diagram so that you don't need to modify pin numbers in the code.
- If you are having issues with the code, comment out sections and test them separately.
- Any back brace will do. If you do not have a back brace you can use a fitted t-shirt.
- Adding filtering within code by setting threshold to remove unusually high signal that may not be due to muscle contraction.
- Color code wires if possible, making it easy to follow connections in the circuit.
Start Building!

It's time to start building your "Got Your Back" brace!
Circuit Diagram
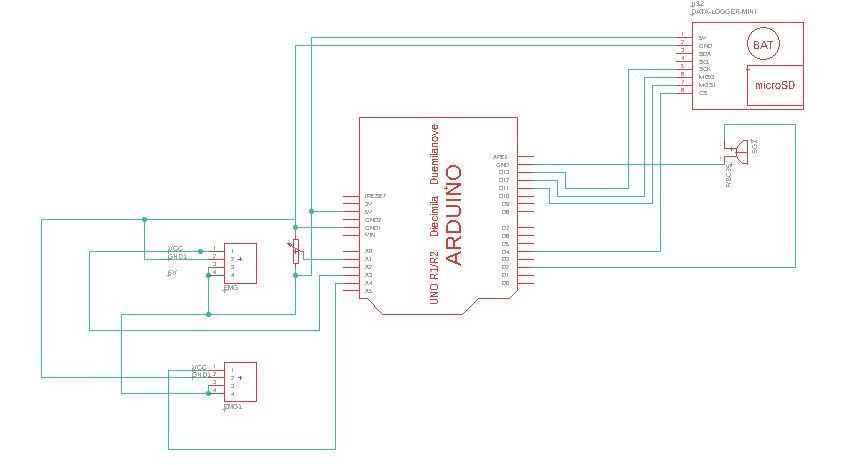
This EAGLE diagram shows the following connections that must be made:
- The microSD adapter is connected to 4 digital pins as specified, 5V and GND.
- The buzzer is also connected to 1 digital pin and connected to GND. The use of a resistor is optional.
- The 2 EMG sensors are both connected to 5V, GND and separate analog pins on the Arduino.
- The potentiometer connects to another analog pin.
Build Your Circuit
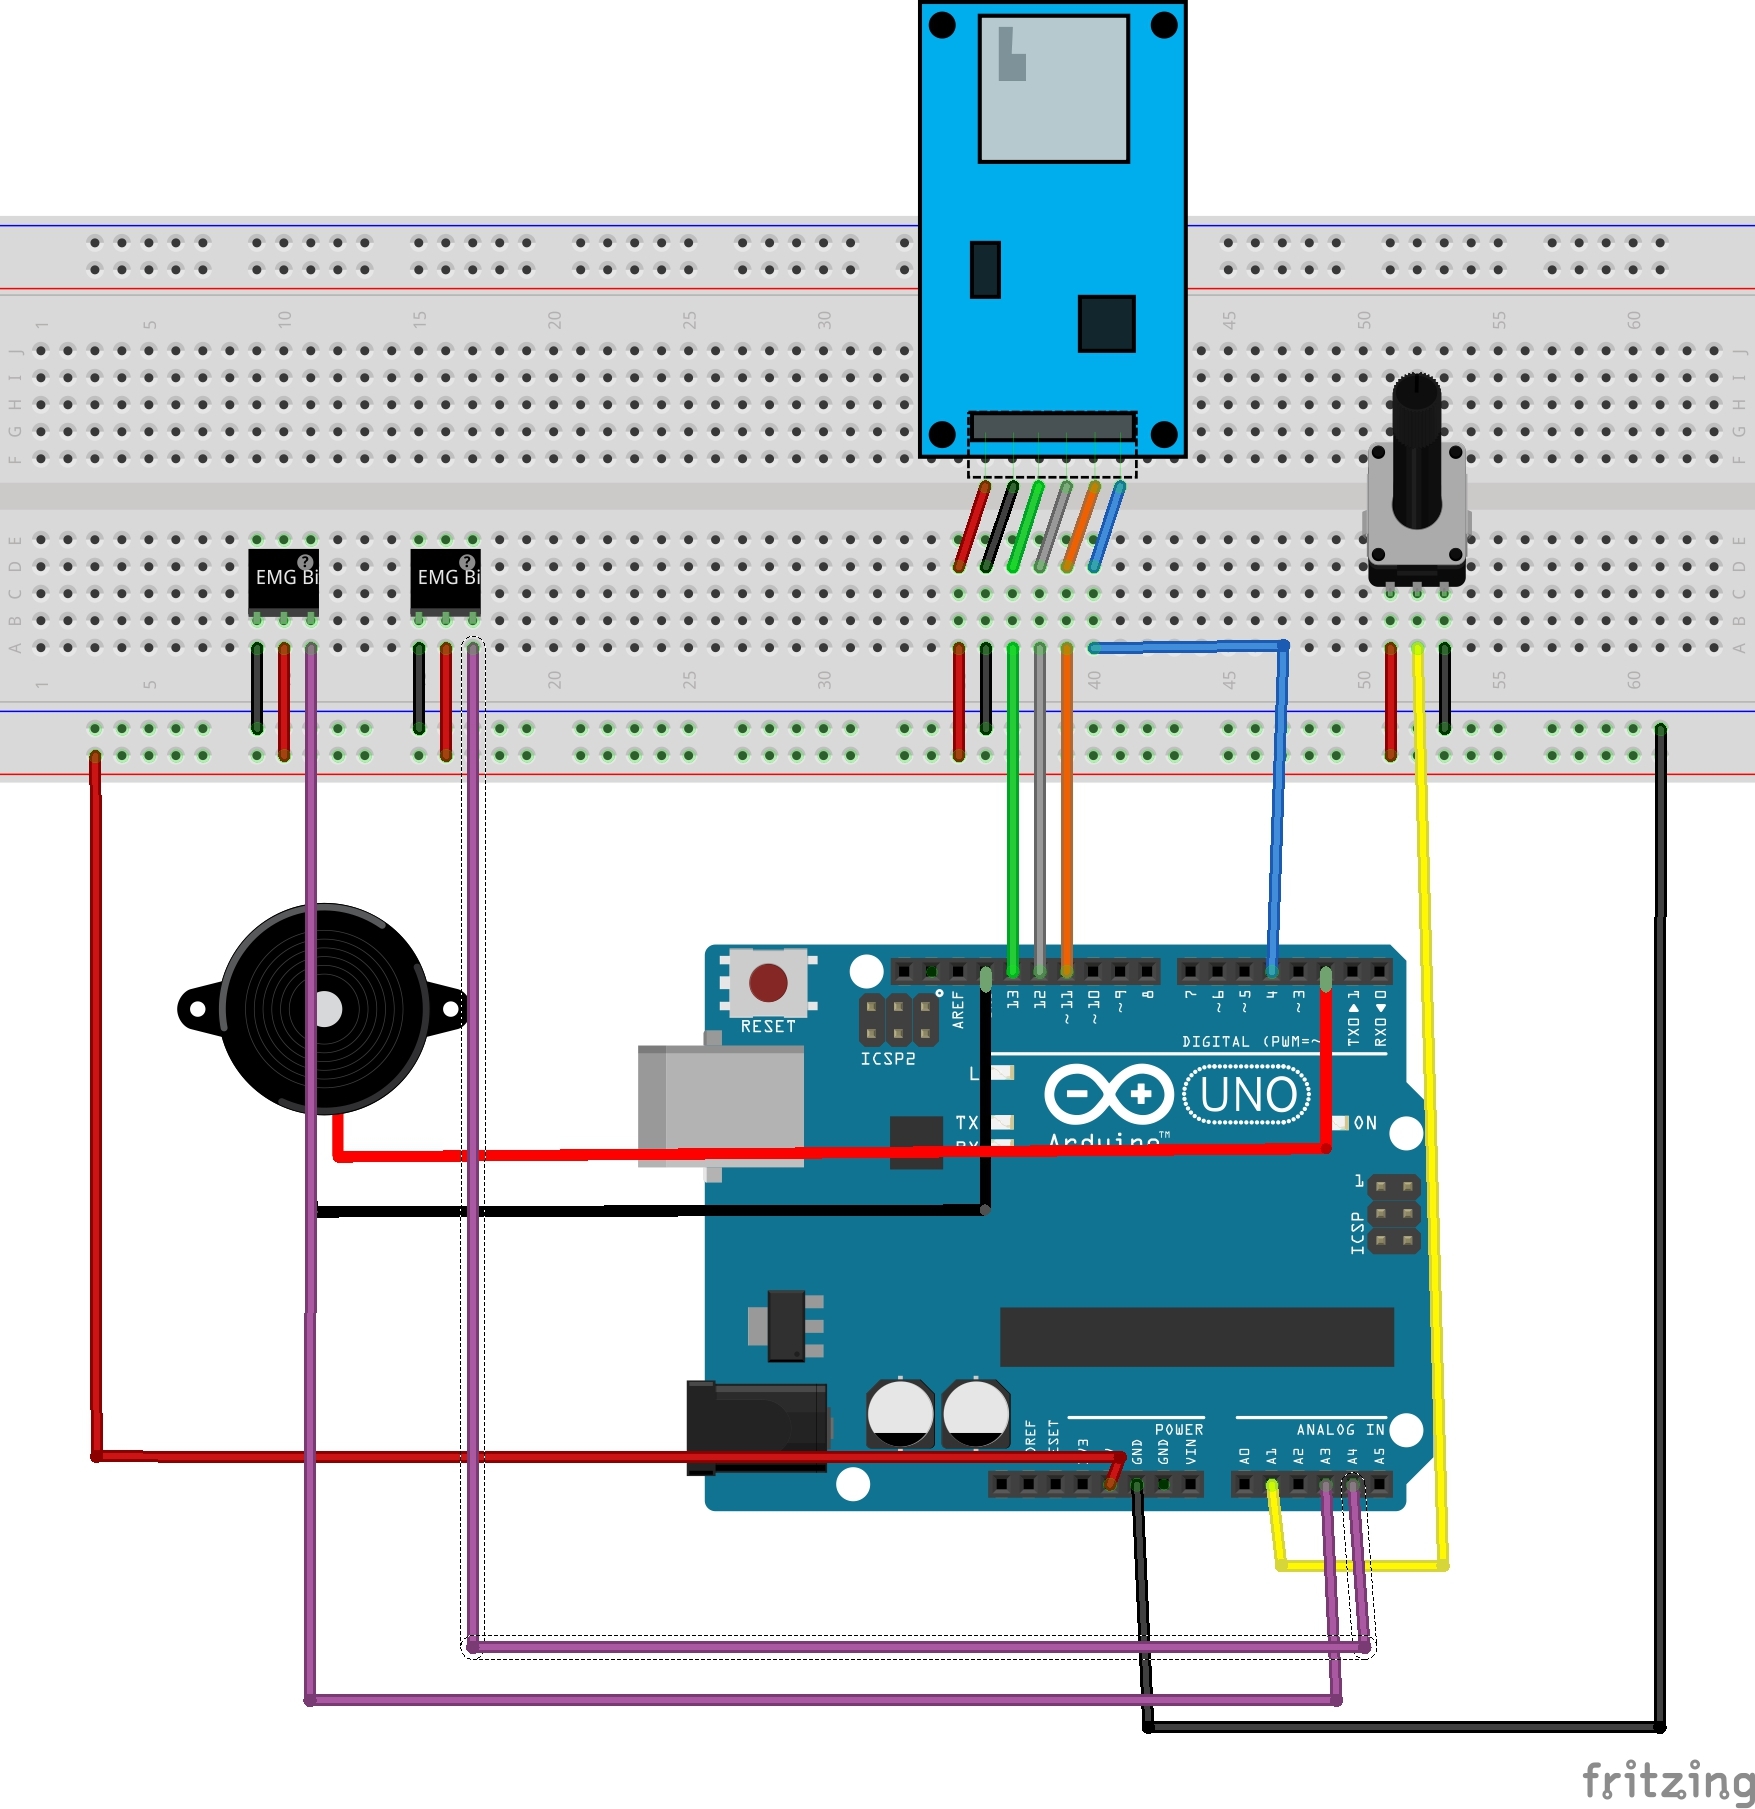
Use the Fritzing diagram above and the one from the previous page to build your circuit. The output pins for the EMG chips, the potentiometer, the Piezo Buzzer, and CS pin of the microSD card adapter module can be changed if you modify the code accordingly. However, the other pins of the microSD card adapter module must connect to the pins shown above and on the EAGLE schematic. The Piezo Buzzer may be placed in any empty area on the circuit board.
Identify Electrode Placement
![IMG_2543[1].JPG](/proxy/?url=https://content.instructables.com/FW3/W3R0/K9K8N0BS/FW3W3R0K9K8N0BS.jpg&filename=IMG_2543[1].JPG)
Using your knowledge of the erector spinae muscle group acquired earlier, place one electrode near the insertion of the muscle and one a few inches above it on each side. Additionally, place one electrode on a boney region such as the hip on each side. We recommend the electrode placement as shown above. The electrodes are about two or three inches apart and symmetrical across the center of the back, directly on the erector spinae muscles. In addition to these, one set of electrodes is on the left and right boney regions of the hips.
Identify Where to Put Electrodes on Back Brace
![IMG_E2547[1].JPG](/proxy/?url=https://content.instructables.com/FTH/H3D7/K9K8N0SJ/FTHH3D7K9K8N0SJ.jpg&filename=IMG_E2547[1].JPG)
Now it is time to determine where on your back brace you should attach your electrodes. This can be done by wearing the back brace over the attached electrodes from the previous step and marking the brace where they contact the electrodes. You can then remove the electrodes from your back and hips and put them over your markings on the back brace. They should look similar to the one above.
Attach Electrodes to BITalino Electrode Cables and Back Brace
![IMG_E2548[1].JPG](/proxy/?url=https://content.instructables.com/F3N/LMQQ/K9K8N0U0/F3NLMQQK9K8N0U0.jpg&filename=IMG_E2548[1].JPG)
Before attaching the electrodes to the brace, they should be connected to the BITalino electrode cables. Simply button the electrodes to the cables and reposition them on the back brace markings. The red cables should go to the upper electrodes while the black cables should attach to the lower. The white cables should be attached to the hip electrodes. Once in place, tape the electrodes down with double-sided tape or sew them in place.
Put on Back Brace
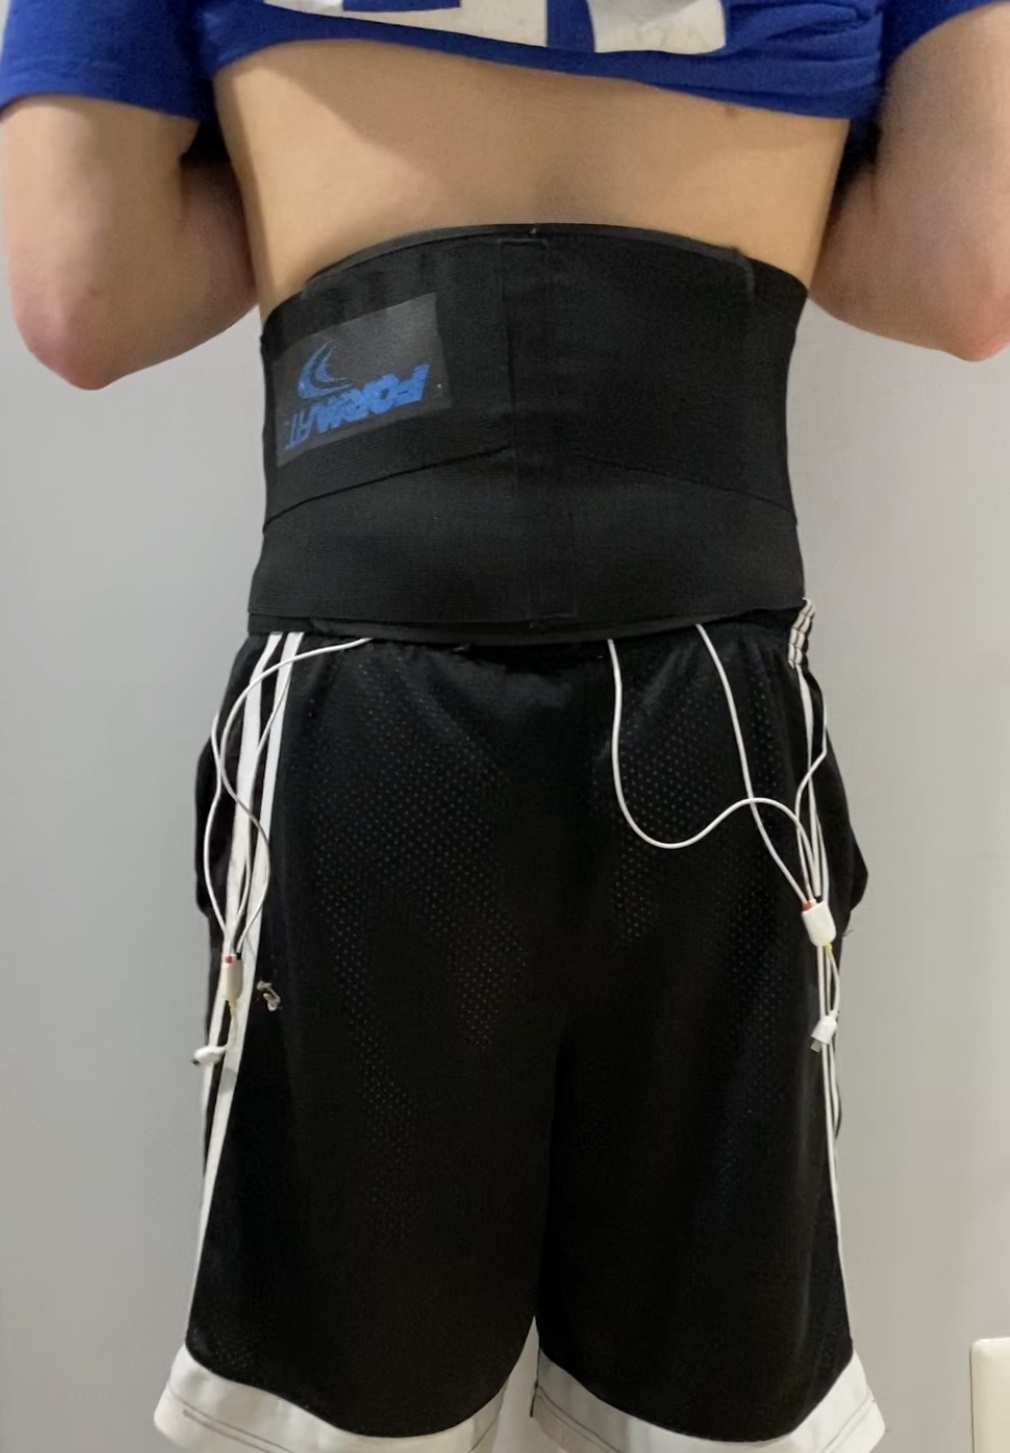
Now you're ready to put on the back brace as you normally would. The EMG cables should come out of the bottom of the brace on both sides for easy access.
Attach EMG Wires to Circuit Board
![IMG_E2582[1].JPG](/proxy/?url=https://content.instructables.com/FA5/EMC9/K9K8N1YW/FA5EMC9K9K8N1YW.jpg&filename=IMG_E2582[1].JPG)
Simply click in the cables to your EMG chips attached to your circuit.
Turn on Battery to Begin
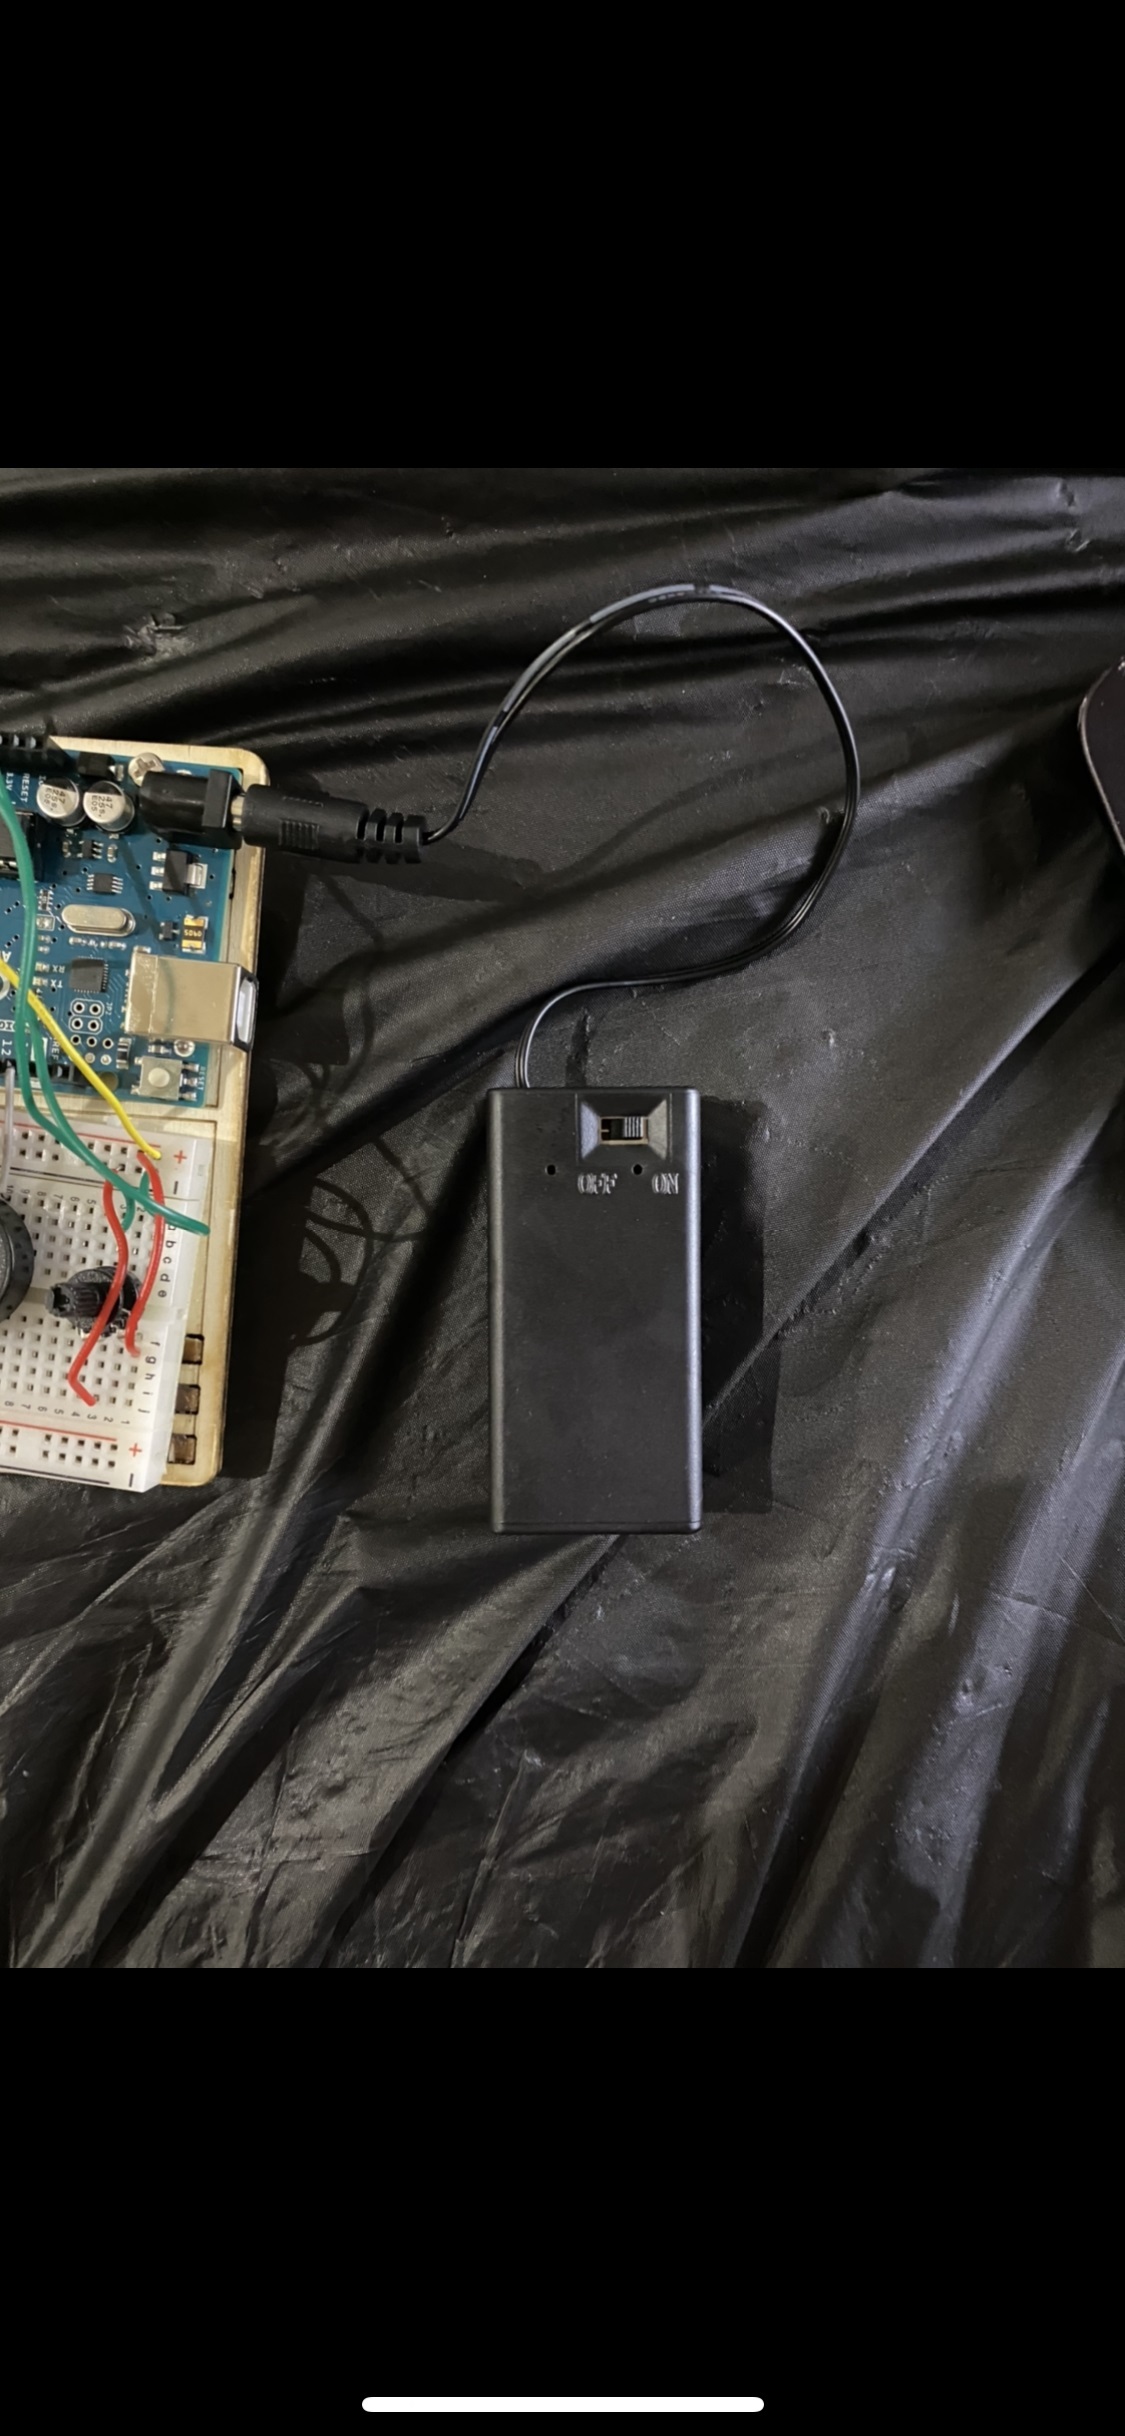
When you're ready to begin, turn on the battery. The buzzer will warn you when you are using your lower back too much and will record your data on a microSD card. Keep the battery off when not in use.
Adjust Potentiometer to Alert You When Flexing Erector Spinae
![IMG_2588[1].JPG](/proxy/?url=https://content.instructables.com/FO6/MW51/K9K8N7R2/FO6MW51K9K8N7R2.jpg&filename=IMG_2588[1].JPG)
A potentiometer is a voltage divider that allows you to vary the voltage signal off of the output pin (which you connected to pin A1). By twisting the potentiometer, you change this voltage and therefore the threshold. Use the potentiometer to adjust the threshold at which the buzzer sounds. Test it by making sure the buzzer sounds only when you flex your lower back.
Warm Up!

Warming up is the most important thing to do to avoid injury while exercising!
Begin Excersise

Turning on battery before each step, work out as normal and listen for the buzzer. If the buzzer sounds, it means you are working your lower back too hard and should make some adjustments to your weight or reps.
Viewing Your Data
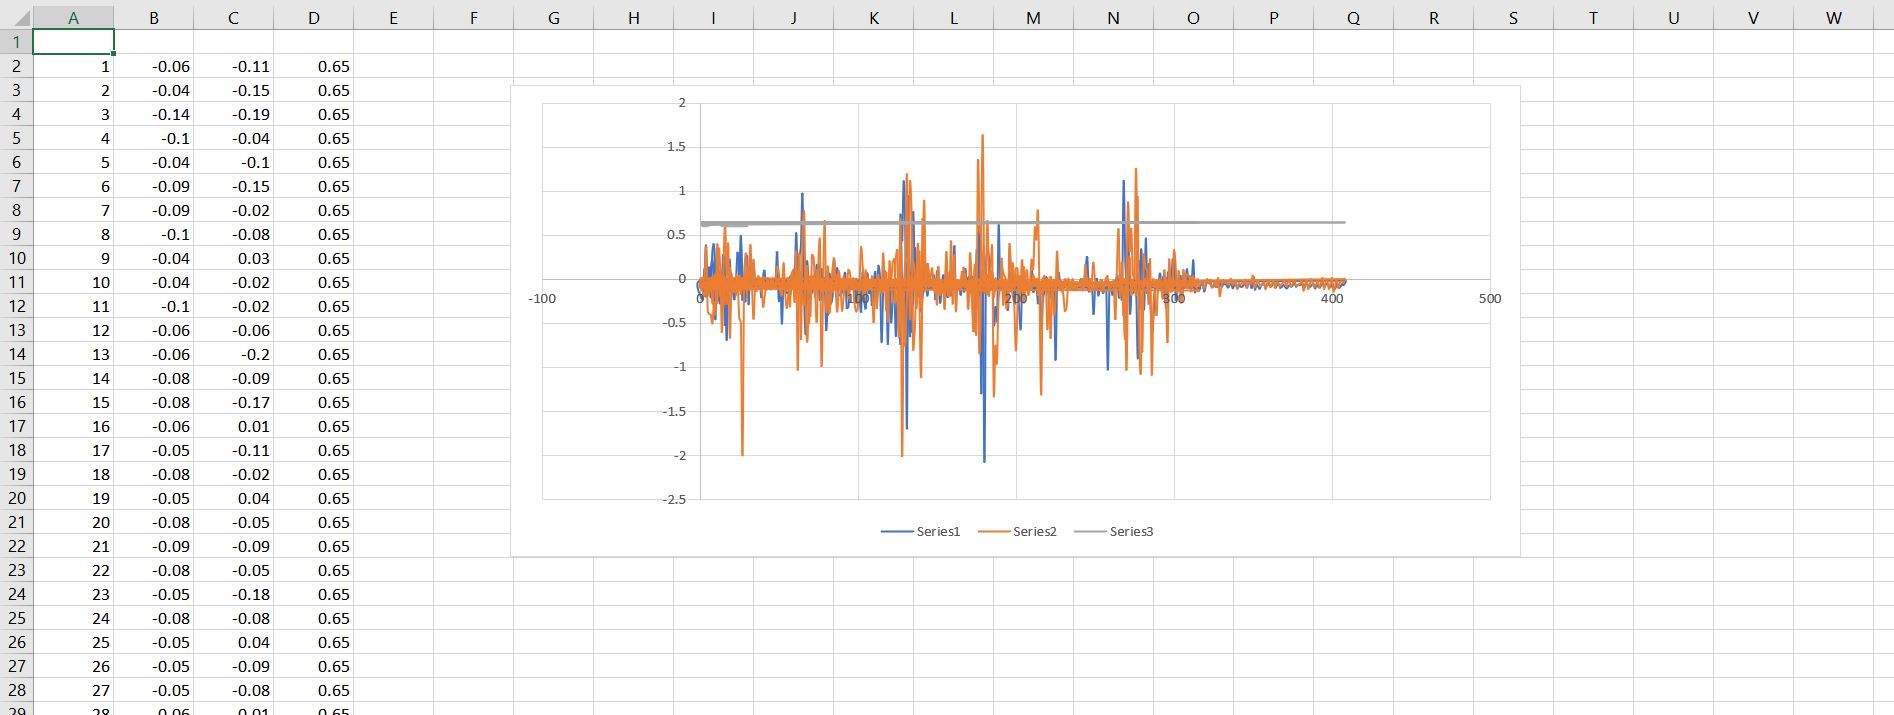
After working out, you can easily view your data. Simply remove the microSD card from your circuit and insert it into your computer. Navigate your computers file explorer to access your SD card and open the file "Datalog". From here you can easily copy your data into Microsoft Excel for easy analysis. To make a graph like the one above, simply highlight each column and insert a scatter plot.
Further Ideas
.jpg)
As a possible future addition, the design could include a Bluetooth module allowing it to connect to the user's cell phone where the data collection is stored.
To lower the cost and time to build, one could sacrifice the ability to view the data by removing the microSD card aspect of the device. The code would have to be modified accordingly, but this would save time, money, and board space.
An RC filter can be added in series with the EMG as before it connects to the analog pin to filter the signal and help with noise reduction.