Google Home Controlled Power Outlet
by Amirm24 in Circuits > Remote Control
11412 Views, 107 Favorites, 0 Comments
Google Home Controlled Power Outlet
My girlfriend always wanted to build a smart home.
So we build the infrastructure and first item of the smart home, a remote controlled outlet switch that you can control using a control panel or using voice commands (if you have google home or google assistant)
Here you can find step by step of what we did.
Required Component
- RaspberryPi 2
- ESP8266
- Relay module
- Power adapter
- Container
Setup the PI

First thing that we need is a server for your smart home .
This server will host your smart home control panel , and will link the control panel to the smart home items.
The easiest way to setup the server is using the openhabian PI image for RaspberryPI .
You can find the complete instruction on openhab website
Program Your Microcontroller (WiFi Module)
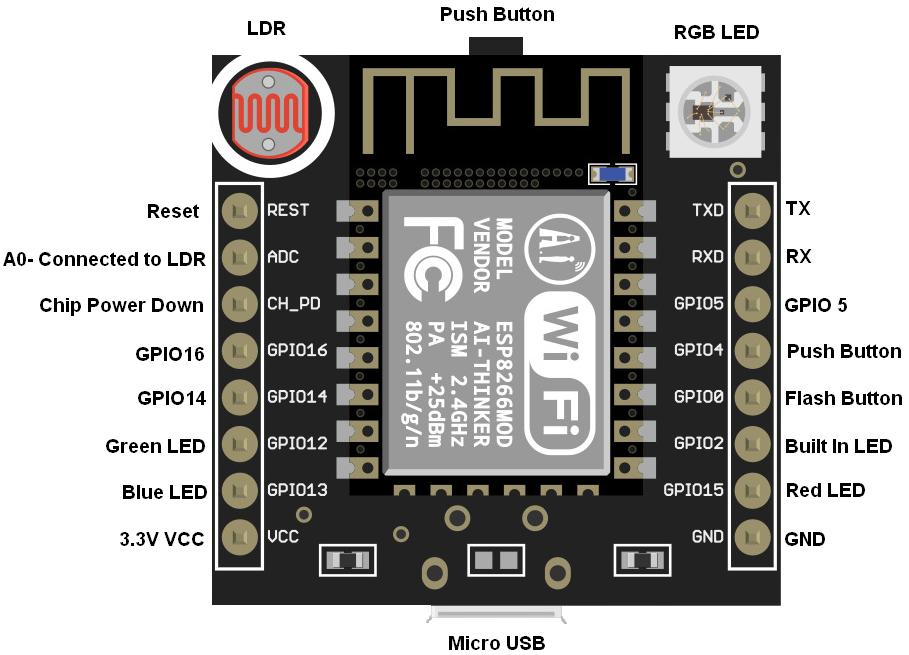
The cool thing about the microcontroller part of this project is that we are using a WiFi module that have a microcontroller in, so you can write your program using arduino and upload your program to the microcontroller of the WiFi module.
I am using a very basic program for my project so if I call the http://IP_ADDRESS_OF_THE_MODULE/on will turn on relay pin 1 and http://IP_ADDRESS_OF_THE_MODULE/off will turn the relay pin 0.
I also add some fancy code to make the RGB led of the board red if the relay is off and green if it is on and flashing red while connecting to wifi and .5 second green after connection successful.
NOTE:
- How to configure arduino IDE to program esp8266
- You have to hold flash button of the esp8266 board before programming and release that immediately after you see the small blue led of the wifi board flashed once.
- The module should connect to 2.4 GHz wifi and can't connect to 5 GHz networks.
Downloads
Configure Openhab to Send On/Off Requests
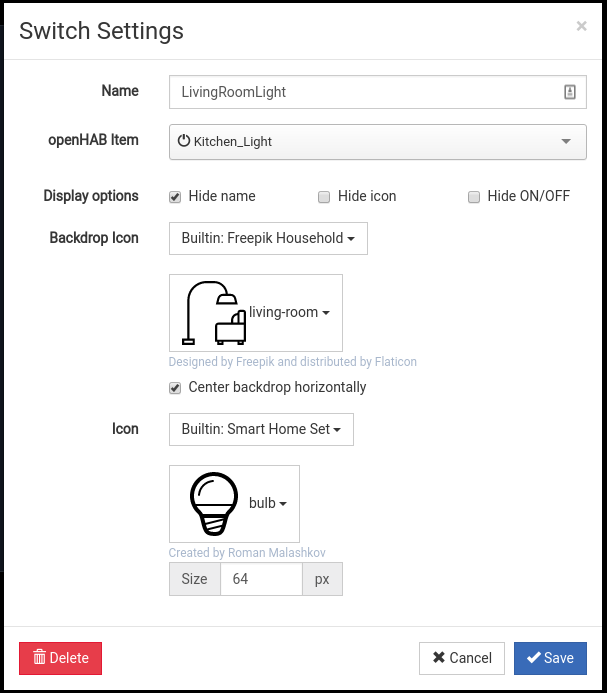
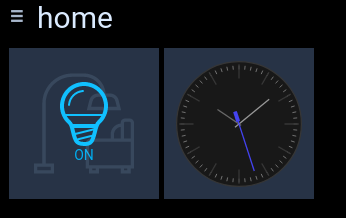
You should be able to access you OpenHab control panel using http://openhabianpi:8080 url.
We will use HTTP binding so you have to install that on your openhab
- Go to paperUI on your openhabianpi
- Configuration>Bindings add HTTP binding
Time to configure your openhab,
- ssh to your openhab box using [ssh openhabian@openhabianpi]
- Go to openhab items folder [cd /etc/openhab2/items]
- Read the readme file ! [cat readme.txt]
- As I mentioned we will be using http binding
- Create your items file [light2.items]
- content of my items file is
- Switch Kitchen_Light "Kitchen Light" {http=">[ON:GET:http://192.168.1.132/on] >[OFF:GET:http://192.168.1.132/off]"}
- read it like :
- Swith NAME_OF_THE_SWITCH "LABEL OF THE SWITCH" {BINDING_TYPE=">[COMMAND:METHOD:URL_TO_FETCH] .... " }
NAME_OF_THE_SWITCH is just a name
LABEL OF THE SWITCH is what you will see in the panel (I am not using that in my panel)
BINDING_TYPE is the binding that we use (HTTP here)
> is for output (< is for input, let say read temperature in another project)
COMMAND is the command name (I picked OFF)
METHOD is the call method (GET or POST)
URL_TO_FETCH is the url that we want to fetch to perform the command
- Swith NAME_OF_THE_SWITCH "LABEL OF THE SWITCH" {BINDING_TYPE=">[COMMAND:METHOD:URL_TO_FETCH] .... " }
- content of my items file is
- If previous step is not clear, go back to step 3 !
- Go to habpanel http://openhabianpi:8080/habpanel/index.html#/ and add some button to the panel
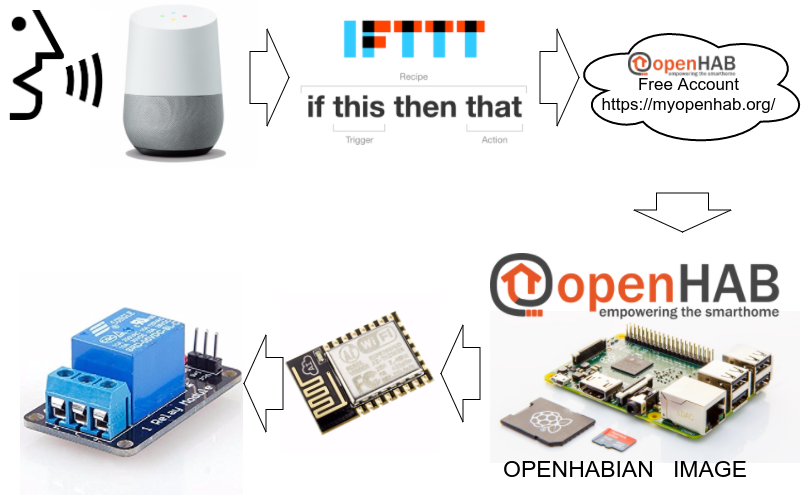
What is happening here is we define a http binding for the OpenHab to Arduino module , so when you trigger that switch it will fetch that url .
Link Your Openhab to the Cloud
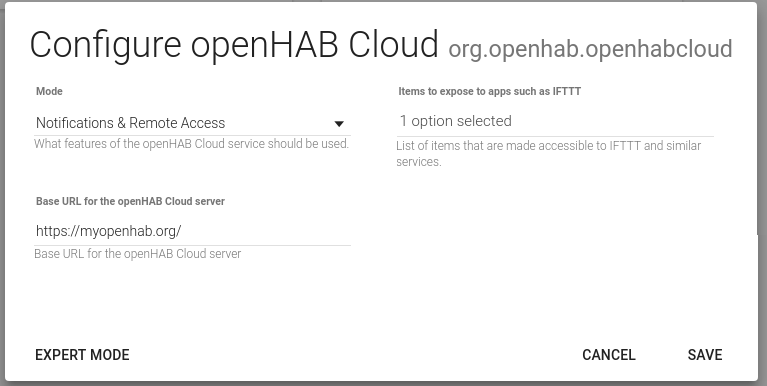
Create an account in https://myopenhab.org website, you will require UUID and secret from your openhab
To get those values you have to install "openHAB Cloud connector" from http://openhabianpi:8080/paperui/index.html#/exten... ->MISC and restart your openhab.
https://docs.openhab.org/addons/ios/openhabcloud/r...
- to see those values
- cat /var/lib/openhab2/uuid
- cat /var/lib/openhab2/openhabcloud/secret
Link Your Openhab to Your Google Assistant (IFTTT)
Now it is time to link your openhab to google assistant, so we can say "Hey google, turn on the light" and it will send your message to openhab and as result some fancy smart thing will happen in your home.
We are using IFTTT to link the google assistant to openhab
Let's do that
- Create/Login to your account in IFTTT
- Create a new applet
- For "THIS" pick "Google Assistant" and "Say a simple phrase" and pick what is your voice commands and voice response (like "Hey google turn on the light") .
- For "THAT" pick "openHAB" and "send a command" then select your item and the command (remember the ON and OFF commands in binding part ? it should be same value )
- Finish.
- Now scream "Hey Google." and "Turn on the light" , look at your board, it should do something (The RGB led should turn green)
- You are done,
Wiring the Things Together
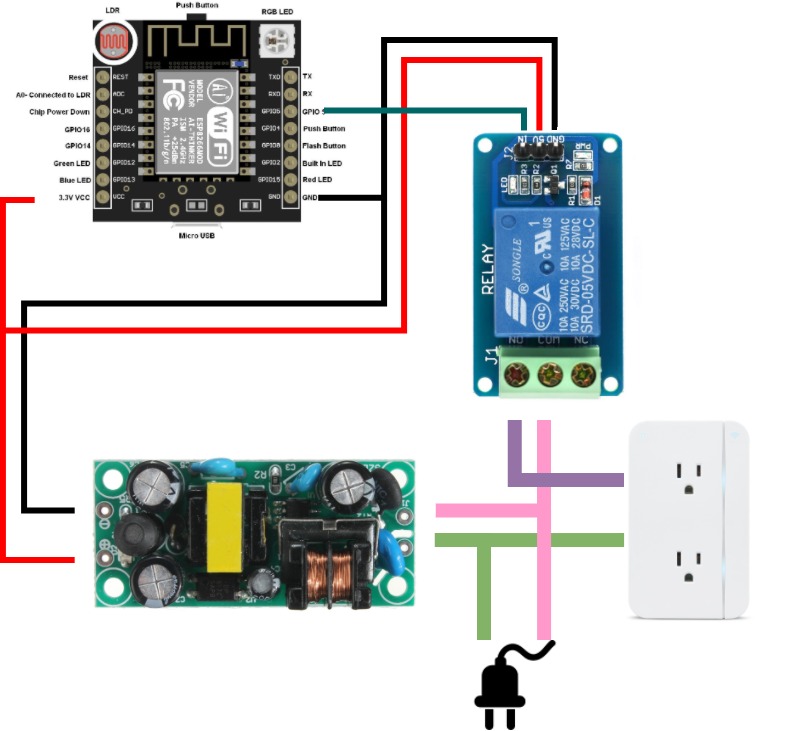
So far we should be able to turn on and off a pin from arduino using the panel and voice commands.
Next step is to wire everything together, so your arduino will send a signal to relay to connect and disconnect the power.
VERY IMPORTANT NOTE : Here we are using high voltage and you may burn yourself your house or kill yourself if do things wrong. so you have to be very careful or just ignore this part if you don't have any experience.
The Box
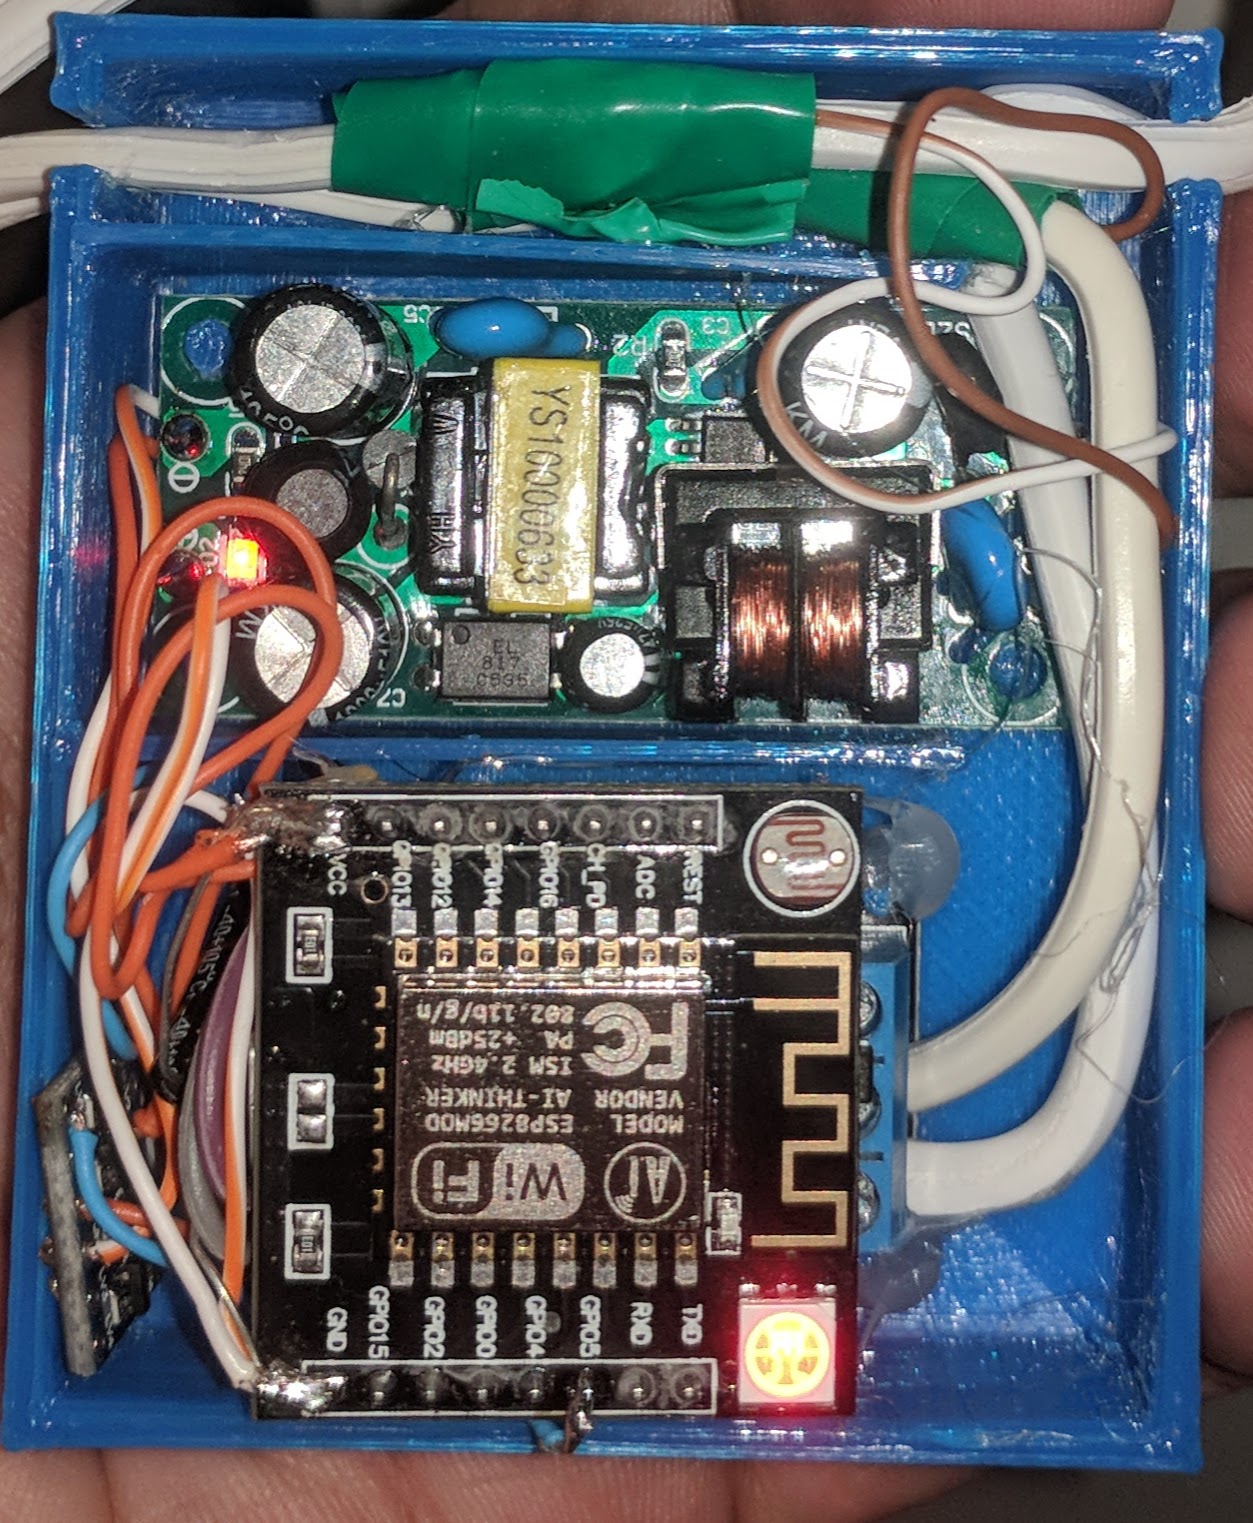
Now it is time to put everything in a box, so find a box and put everything inside the box (make sure you are not making any short circuit).
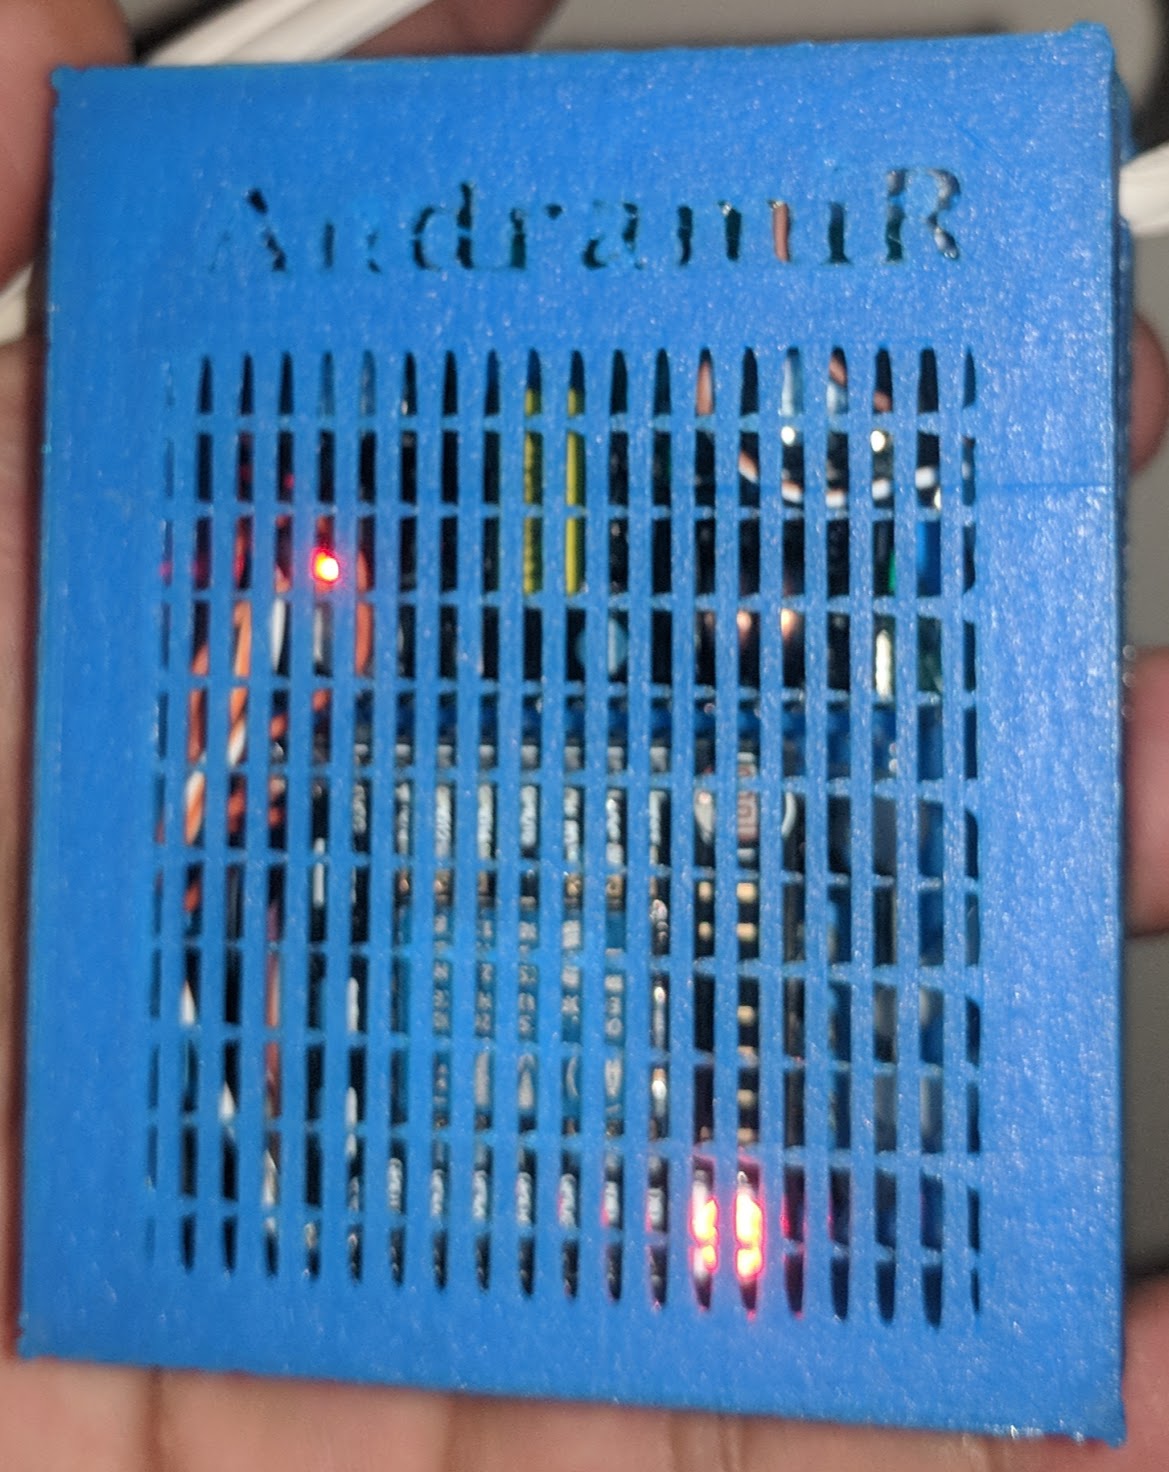
We have a 3d printer at home, so I designed and print a the box for my kit.
Downloads
