Goodbye Stale Spices: Extending Spice Shelf Life With 'SpicePops', Cheap DIY Hand-Vacuumed Containers
by fabulous_lobster in Living > Kitchen
277 Views, 3 Favorites, 0 Comments
Goodbye Stale Spices: Extending Spice Shelf Life With 'SpicePops', Cheap DIY Hand-Vacuumed Containers


Keeping your precious spices away from sunlight and heat are the first basic steps to make sure your spices don't turn bland too fast but the next frontier is much more challenging. How do you keep your valued spices sheltered from moisture and oxygen? Standard spice containers provide some degree of protection but far from enough for your most valued, and valuable, spices, and inevitably the aroma, fragrance and colour fade away...
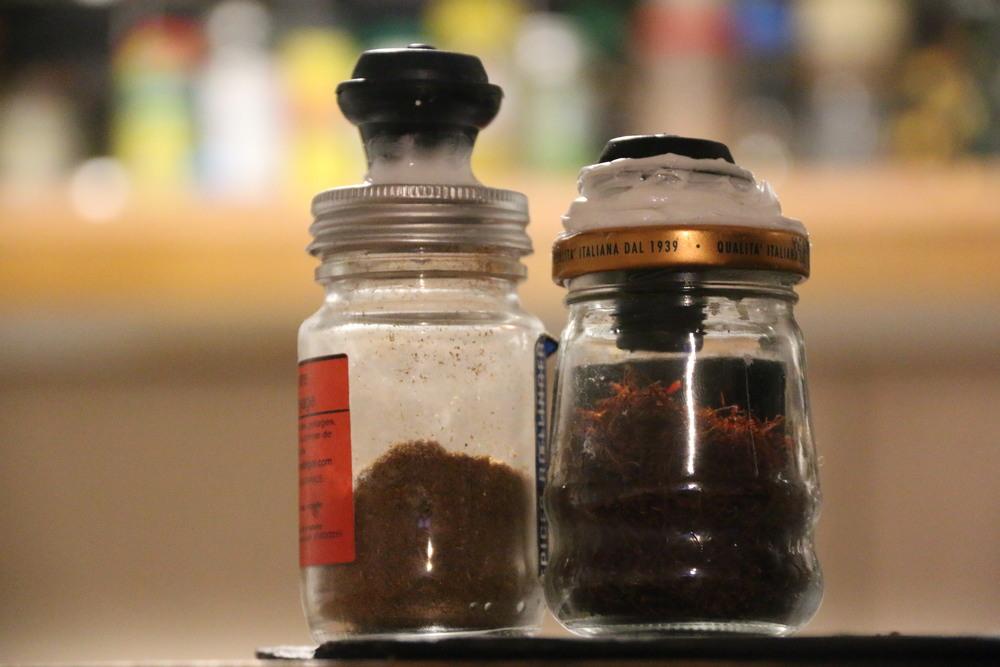
'SpicePops' are based on the idea that pumping the air out of your spice jar with a hand pump will remove much of the oxygen and moisture, thereby extending the shelf life of your spices.
Keeping your spices under a vaccuum is the way to go if you're serious about your spices or love them but just don't use them quite quickly enough. This quick and cheap instructable will provide you with a way of getting a few extra years' kick out of your seasoning using an approach than has virtually no commercial equivalent for spices, using only basic or readily available equipment and easily carried out by novices!
If you happen to have a wine saving device handy, this is basically a free project. If you don't drink wine, you'll have to fork out some €10–$10 to get a pump and a few rubber stoppers. Depending on the size of your jar, one or two pumps are all you need. That's a few extra seconds every time you cook with your vacuum-protected spices for years of intensified pleasure!
The full project should take you only a few minutes, plus a full day for drying/curing. Enjoy!
Supplies
- Your spice jar(s). They should be quite airtight already and non-reactive, so ideally a glass jar with a metal lid. Some lids have an inner coating that increases airtightedness on the inside. If yours don't, you'll need to either also apply silicone sealant on the inside of the lid or use a food-grade silicone or rubber O-ring.
- Ideally, make sure you have a spare lid that fit your container in case you're unhappy with the cut or the end product. If you don't and this is your first try, you could consider practicing your cuts on a lid you were planning on discarding.
- A spare wine stopper (and a pump to actually be able to use it). These cost approx. €1/$1–€2/$2 online and are typically sold in 2s or 5s. Having a wine saver is a must-have if you drink wine as an open bottle of dry wine only keeps for around two days before starting to oxidize or turn into vinegar.
- Silicone sealant, potable water grade with no added fungicides, the kind you'd use for an aquarium, or around a sink (aquarium-grade alway works, for sink-grade, double-check). Acetic acid (pure vinegar!) is the active agent that catalyses the reaction, hence the smell and the need to thoroughly wash your hands you're over. The sealant itself is overall harmless and the smell quickly fades away after curing. Do note that the tube keeps for a while, up to months after first use, so you can both either the leftover from other projects or use a new tube here and keep the rest for other projects. You really don't need much for a few spice jars...
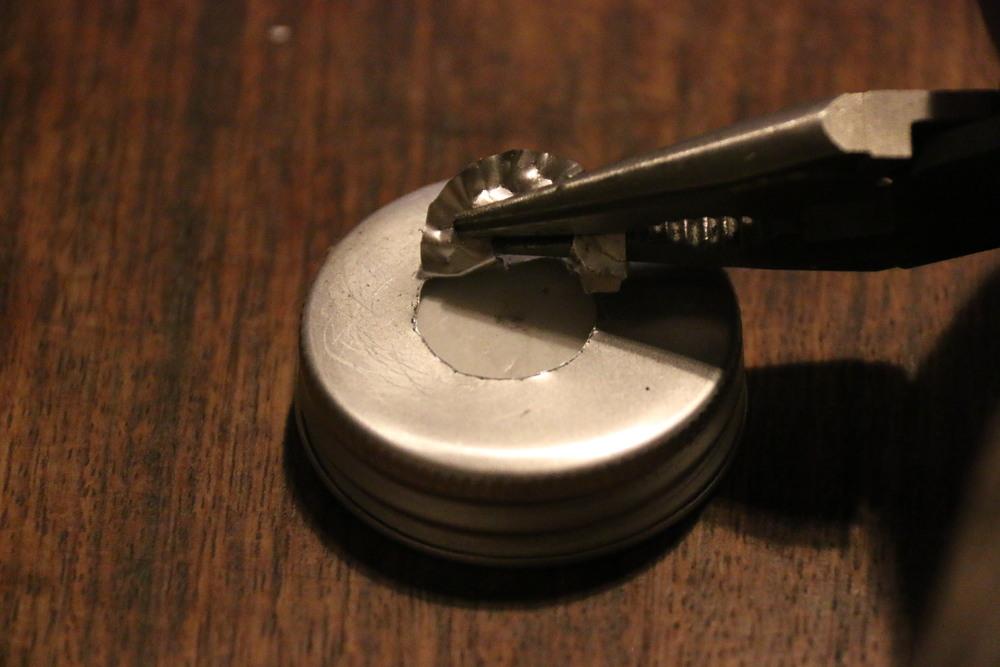
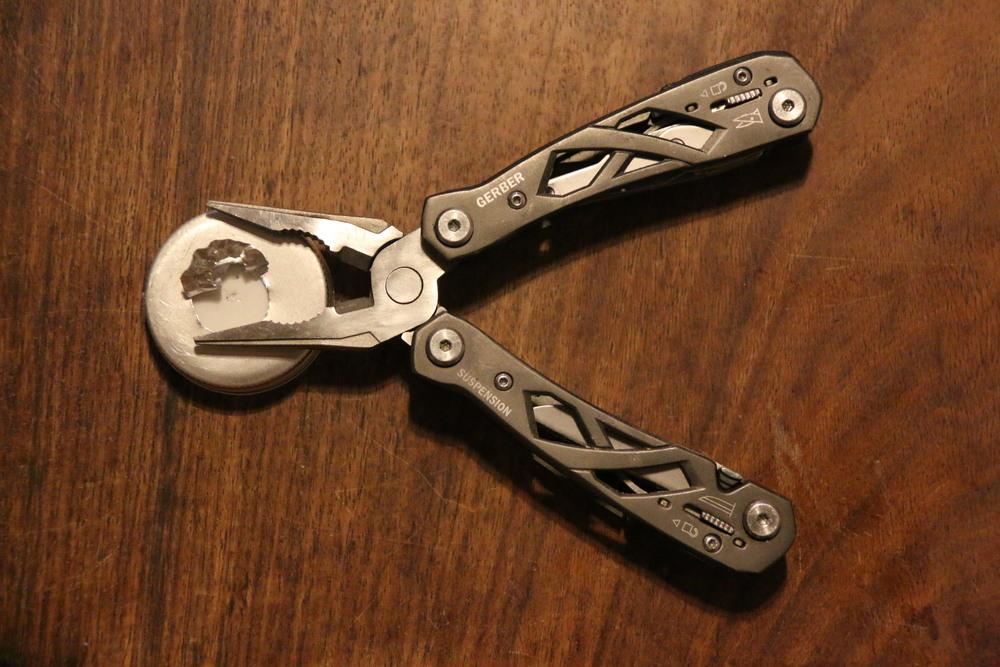
- Something you'll use to cut through the lid (circle bit, screwdriver, knife...). A circle drill bit is probably ideal to get the nicest outcome. The hole will be covered in silicone sealant so no need for anything fancy though. Precutting the lid with a utility knife and then chipping away with a pair of pliers does thorough and decent-enough job.
- Personal protective equipment: use safety glasses if you use a drill, safety gloves if you use a utility knife.
- Ideally, a marker pen to position the wine stopper properly.
Trace the Hole

Cut Away!


Pre-tracing the cut with a utility knife and then removing pieces with pliers results in a clean-enough finish.
Fit the Wine Stopper in the Hole

It should fit snuggly so give it a good push. The next step will make sure any gaps are fully sealed.
Caulk Up

Keep some tissue handy and work on a surface you can wash. The sealant is water washable and water soluble as long as it's wet so no big worries if you make a mess. I just put as much sealant as I get out of the tube and smooth the seal with my finger. More experienced caulkers may have better techniques but this gets the job done.
Let It Dry and Test the Vacuum
Let dry, off-gas and clean before use. 24 hours should be enough. The seal will seem dry but because the sealant contains acetic acid (vinegar), you need to make sure the off-gas is let off to avoid having your spices could take on that smell.
Test the vacuum and add more caulking if necessary. Don't test until everything is completely dry and cured or you may actually create tiny holes and break the seal — you are applying several atmospheres of pressure after all!
Put Your SpicePops to Good Use

I am using the 'SpicePop' approach for saffron and a few other fragile and expensive spices. Saffron is well known as being worth its weight in gold but it doesn't keep quite as well! As for ground spices, as a general rule they have the shortest shelf life among spices as the broken cell walls release the volatile oils that contribute the spice's flavour and aroma.
So, what can you use 'SpicePops' for? Well, virtually any spice, condiment, herb, but also ground coffee... or to keep that medical marijuana stash fresh and safely stowed away.
To each their own! I believe the same idea could be applied to modify a plastic container to keep your salad fresh for a few extra days in the fridge.