Glow-in-the-dark Stage Portrait With CNC
by JTAAUSTEX in Workshop > CNC
2316 Views, 46 Favorites, 0 Comments
Glow-in-the-dark Stage Portrait With CNC
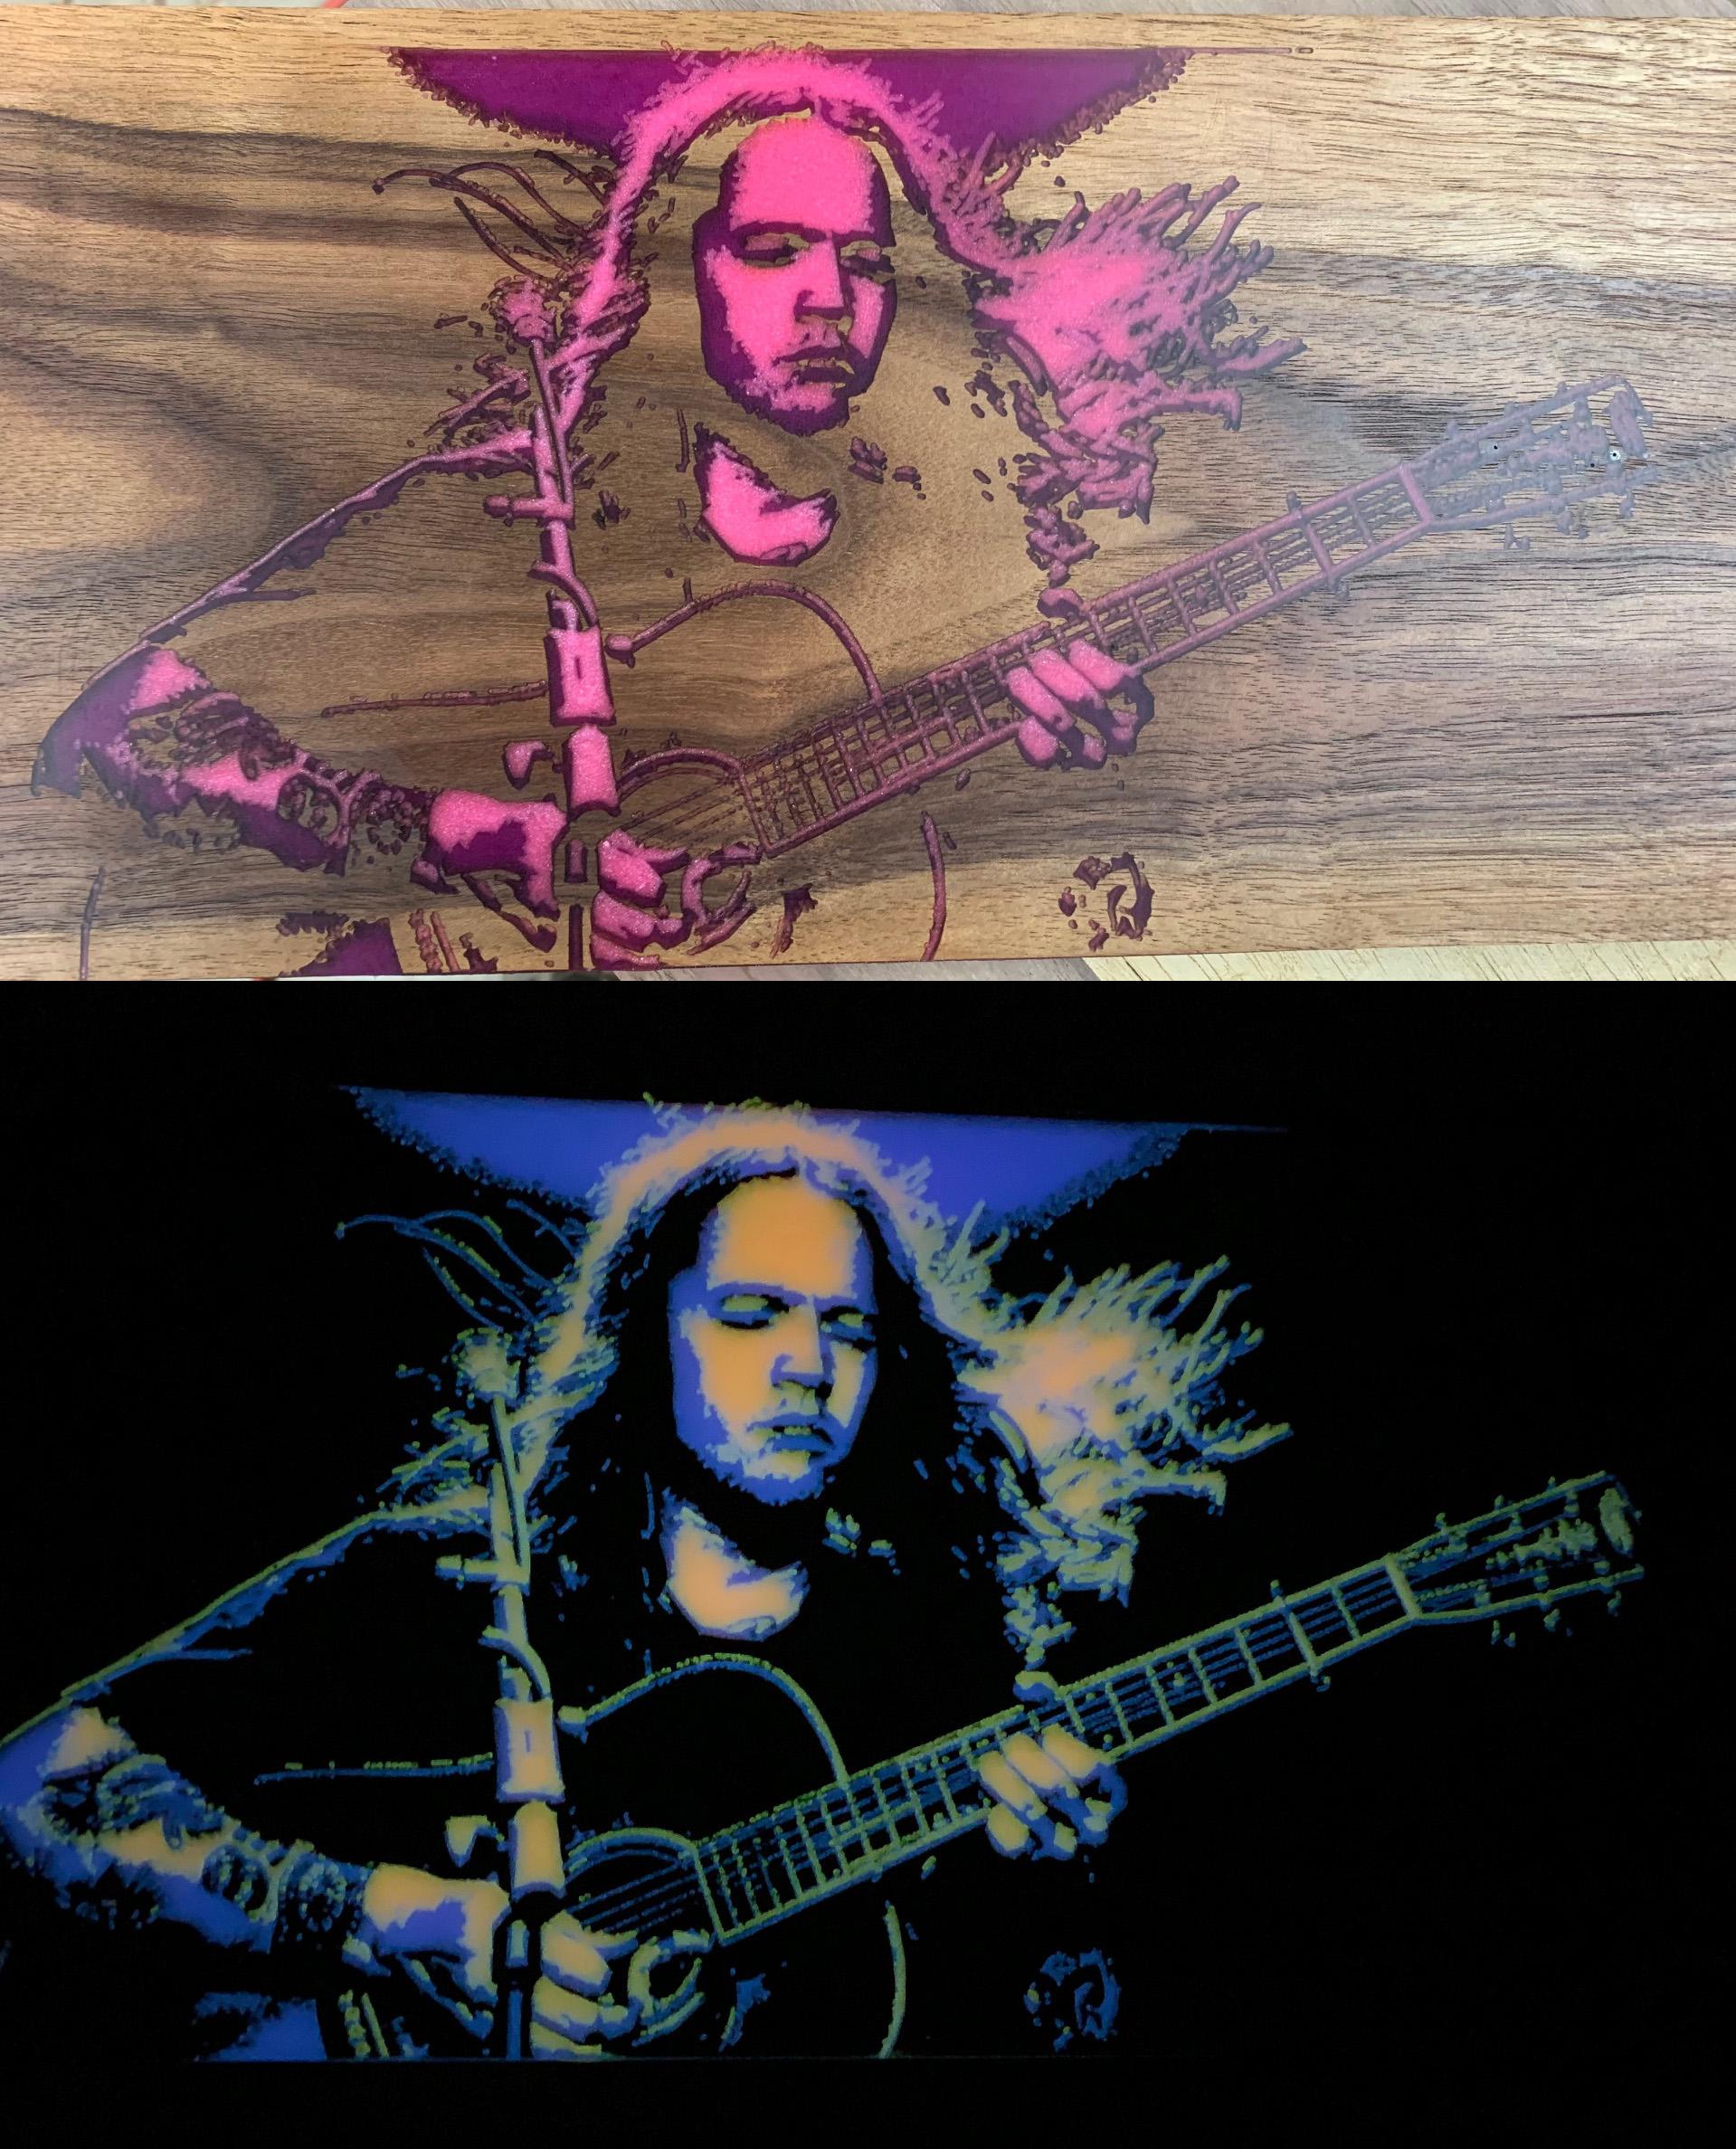
This Instructable describes a method to make wood and epoxy portraits (like the one of bluegrass virtuoso Billy Strings seen here) using a CNC router and an image editor like Adobe Photoshop. It treads into some of the same territory visited in one of my previous Instructables on carving a Jack-O-Lantern, but uses the accuracy and precision of CNC to produce results that can be just this side of uncanny. For those without a CNC router, you can achieve similar results by hand carving designs into the wood and filling them with epoxy (if you go that route, my hat is off to you).
Supplies
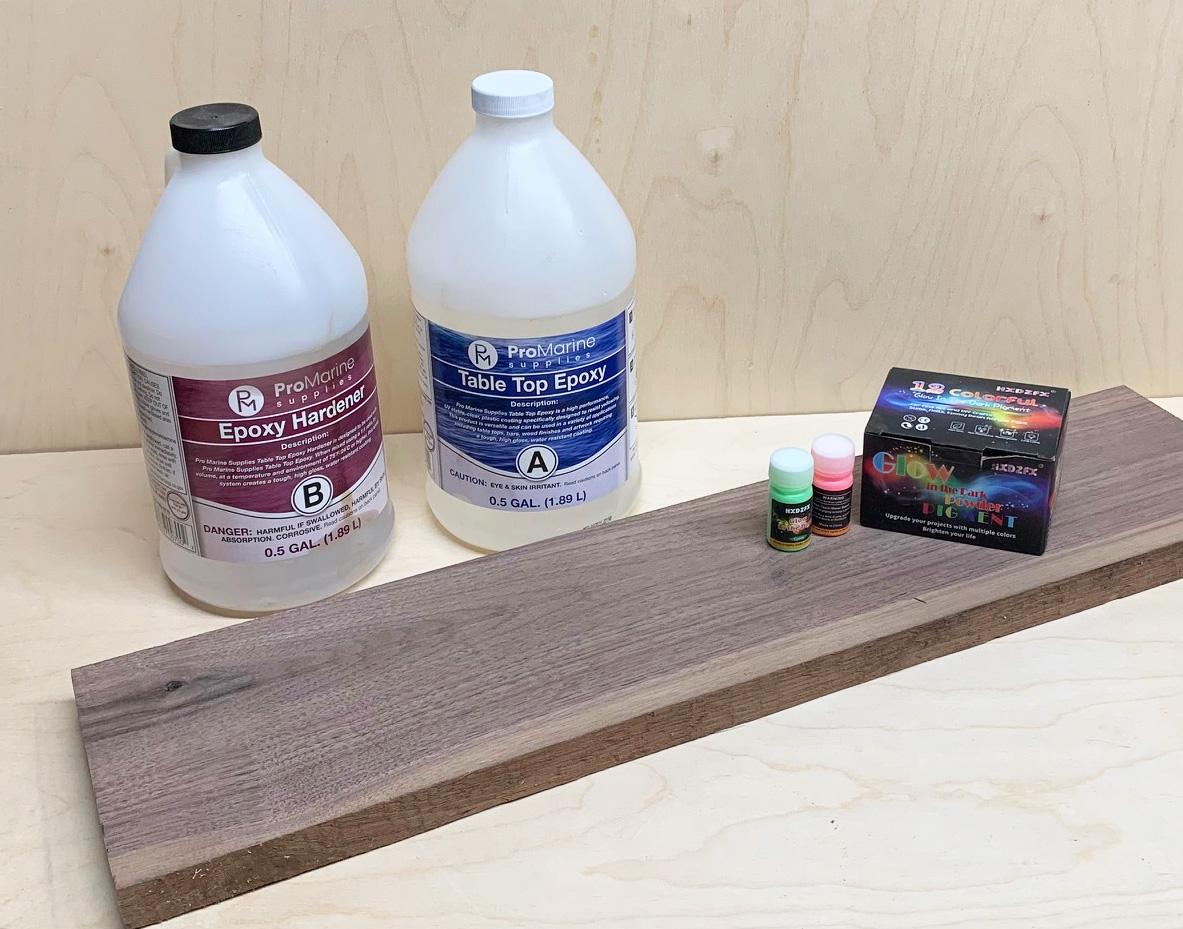
The bare minimum supplies you need to accomplish this type of project are some wood, some two-part pouring epoxy, glow-in-the-dark powders, mixing cups, a means to carve a design into the wood, and sandpaper to sand the epoxy flush with the wood. Unless you are a supremely talented woodcarver (and if so, why are you reading this?), a CNC router with a V-bit, CNC software like Vectric's VCarve Desktop or CarveCo's Maker, and an image-editing package like Adobe Photoshop are also essential. You also need materials to protect your work surface ( e.g., plastic, newspaper) and measure and mix the epoxy (dixie cups, tongue depressors, etc.) While you could sand by hand, I strongly recommend a belt or orbital sander to remove the majority of excess epoxy from your piece (typically twice). Finally, a bubble level is needed to make sure that your piece is level and stable when you pour the epoxy, and a propane torch or a heat gun is really helpful to get bubbles out of the pour.
You can find epoxy and glow powders at local hobby stores or on-line, and wood at your local wood supplier or from on-line sources. I got my epoxy and glow powder from Amazon last year to minimize Covid exposure, and the wood had been sitting in my shop for a while.
The glow powder came in a handy kit with twelve colors. Without going into the chemistry, glow powders are phosphorescent pigments that absorb light energy, then release it again as light over a period of time. When the glow fades, they can be "recharged" with bright light. If you are industrious or simply curious, you can make your own thanks to this Instructable by NurdRage, but to get a full range of colors it's probably easier to bite the bullet and buy a kit. It's a lot cheaper than the epoxy.
Finally, I don't recommend using wood that hasn't been thoroughly dried (preferably in a kiln), because continued shrinkage of uncured wood as water is gradually lost will cause the carving to change dimensions and dislodge pieces of the epoxy inlay. As far as wood, I would avoid gummy soft woods like pine. I recommend a close-pored hardwood like cherry rather than an open-pored wood like oak, which could take up some "glow-poxy" into the larger vesicles; that said, I tend to use walnut because it is somewhat darker and looks a little more realistic with the lights on. I have never tried plywood, but it should work if the design is not too complex and the plywood is high quality. I would recommend baltic birch, and steer clear of hardwood plywoods that have a cardboard backer to the surface veneer, because that would probably not hold up to V-carving without splintering.
Producing the Artwork I
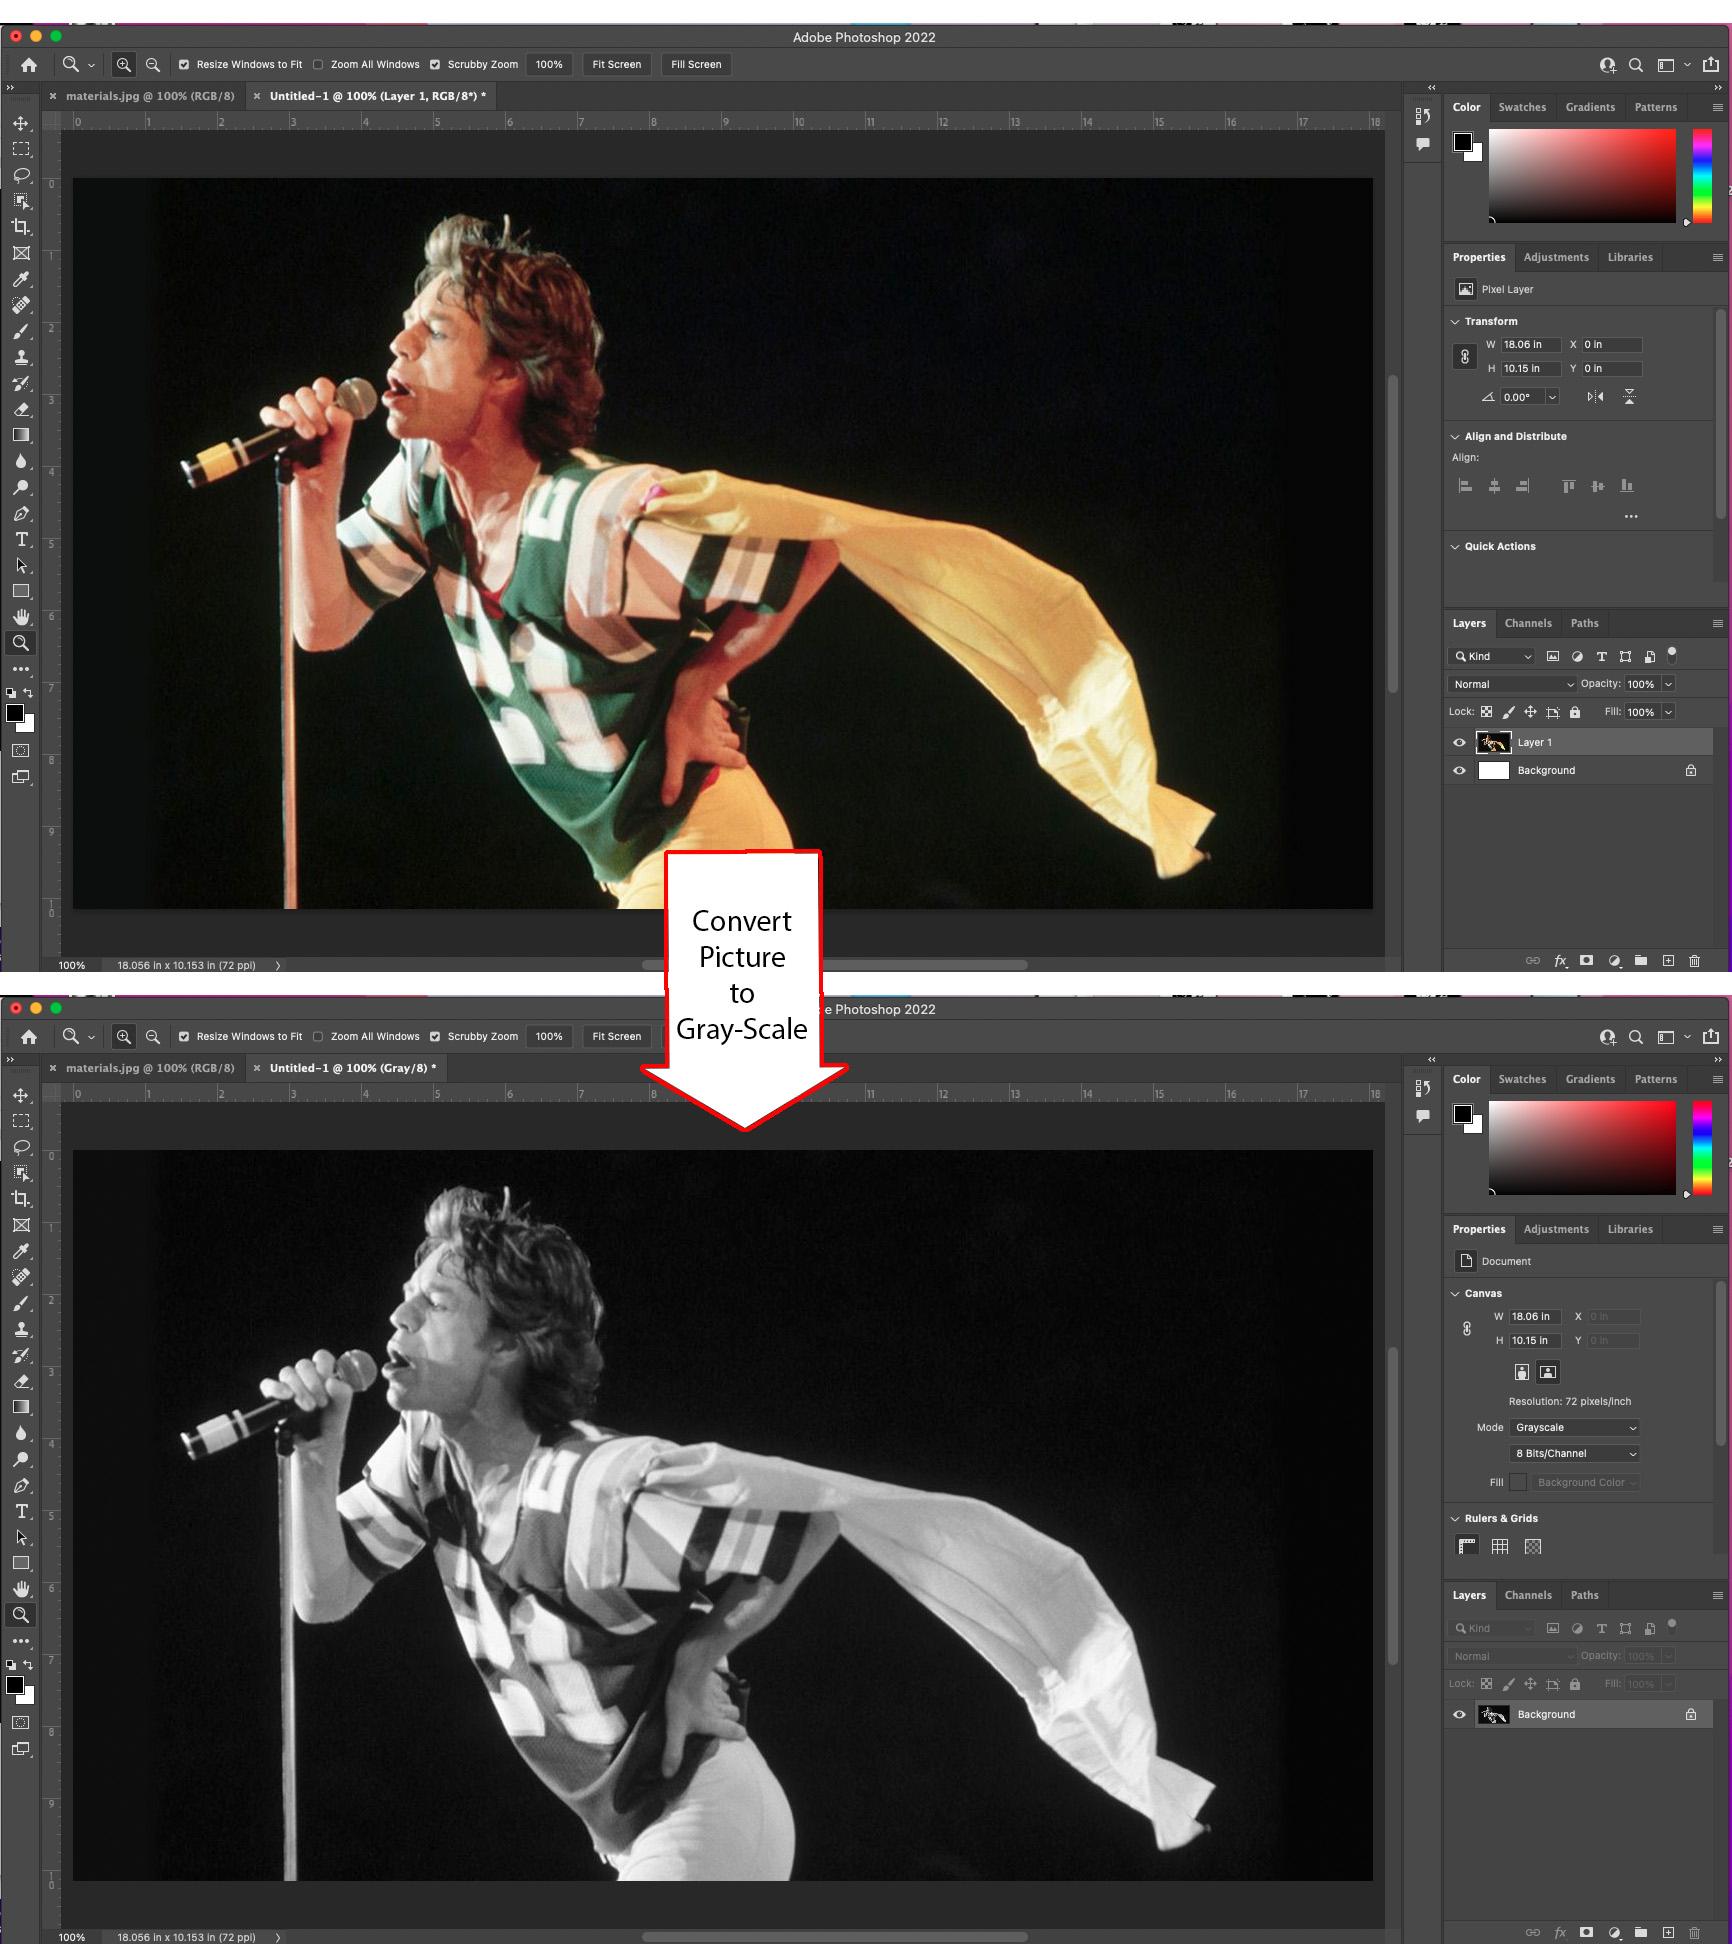
This part of the process is essentially identical to the process used in my pumpkin-carving Instructable, so I'm going to go through it pretty fast. If something isn't clear, take a look at that Instructable and it ought to help.
You want to choose an image with relatively high contrast, oblique lighting, and a dark background--that's why concert photos work so well. To demonstrate the design process, I chose a concert photo of Mick Jagger. It's a color photo, so the first thing I did was convert it to a gray-scale image. Then I decided how big I wanted my final project to be, and resized the photo to that size before proceeding. You don't need particularly high resolution images for V-Carving, as the detail will often just get lost, but it should be reasonably-sized. Anywhere from 72 to 150 dpi generally works pretty well. Make a note of the size (in inches), because you will need to know that when you get to the V-Carving Stage.
Producing the Artwork II
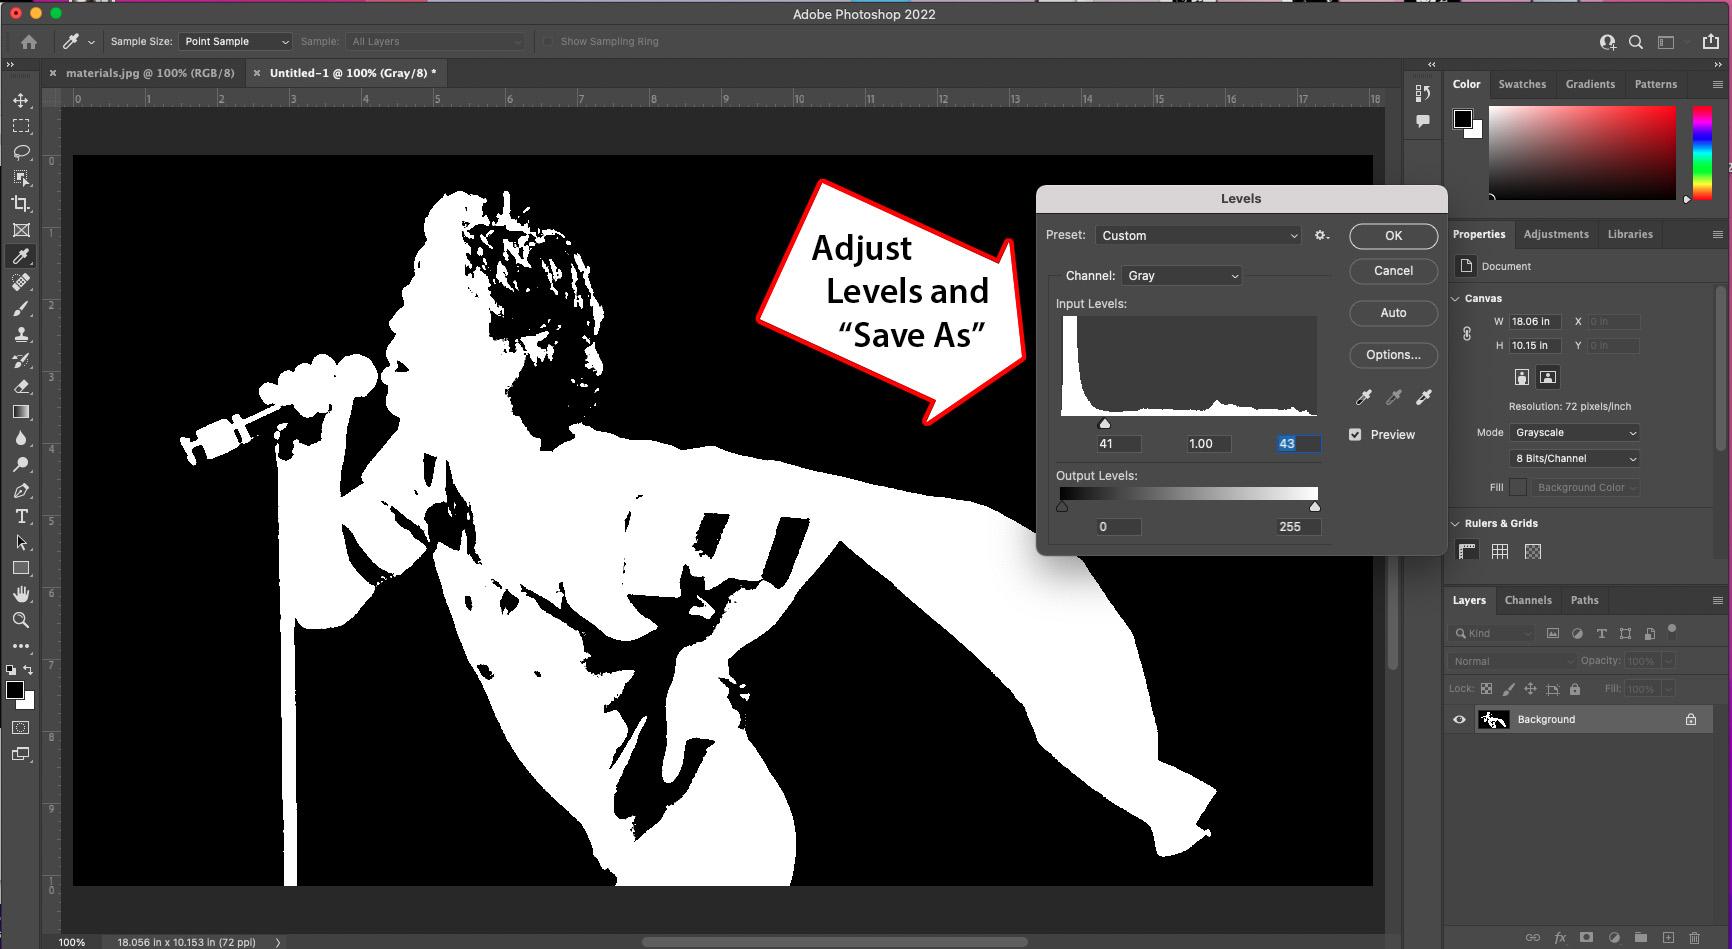
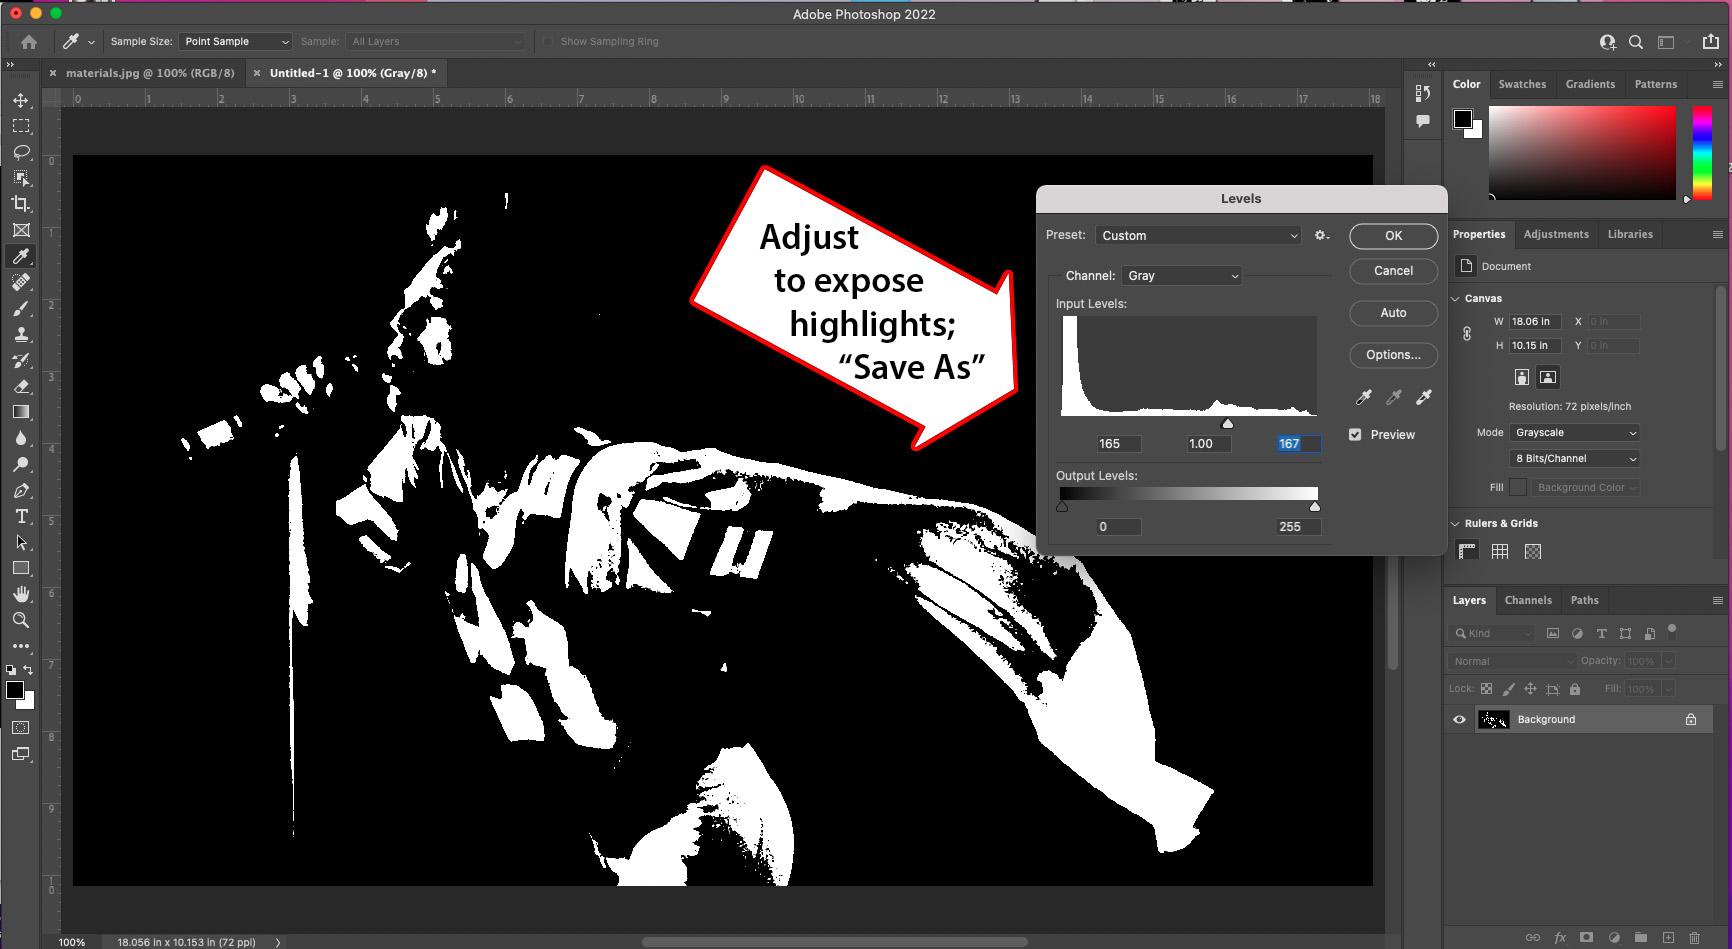
Now open the "Levels" dialog. In Photoshop, this command is in the "Adjustments" submenu of the "Image" menu, but any decent image editor should have an equivalent command. This dialog shows a histogram of the number of pixels in each of the 255 gray values in the 8 bit image. Note that there are three triangular sliders at the bottom of the histogram, which represent the minimum, maximum, and midpoint of grays in the image.
You want to slide these triangles together, so that every pixel below the selected gray is rendered black, and every pixel above it is rendered white. Adjust it until the image provides a good representation isolating the subject from the background, or the parts you want to glow from the shadow. Save it as a JPG titled "shadow", but keep your original open.
Producing the Artwork III
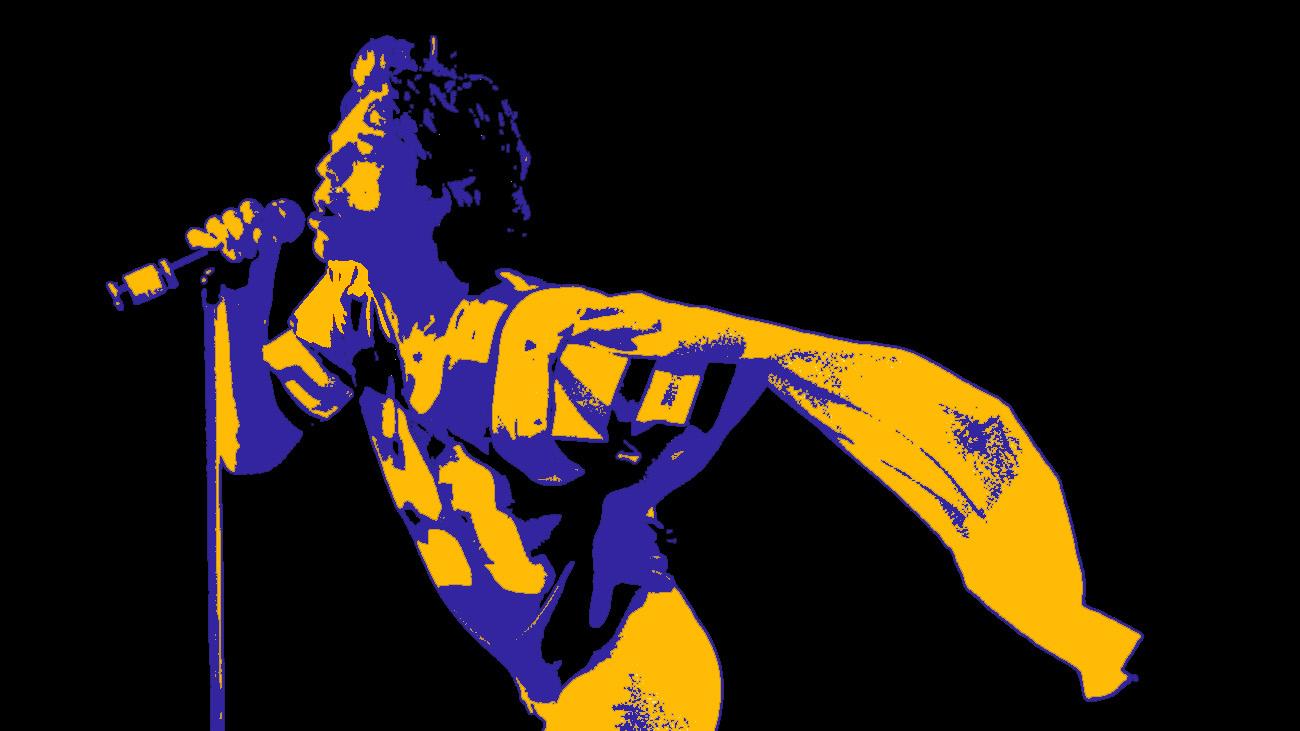
Now drag the sliders to the right and group them again, which will increase the number of black pixels in the overall image and bring out the highlights. Adjust the position of the sliders until you are happy with it, and save it as a JPG called "light". To preview the image, composite them using different colors or levels of transparency in your image editor. This isn't necessary, but producing a composite image like you see above will allow you to fine-tune the final product. Rinse and repeat--er, tweak--until you are happy.
Producing the Artwork IV
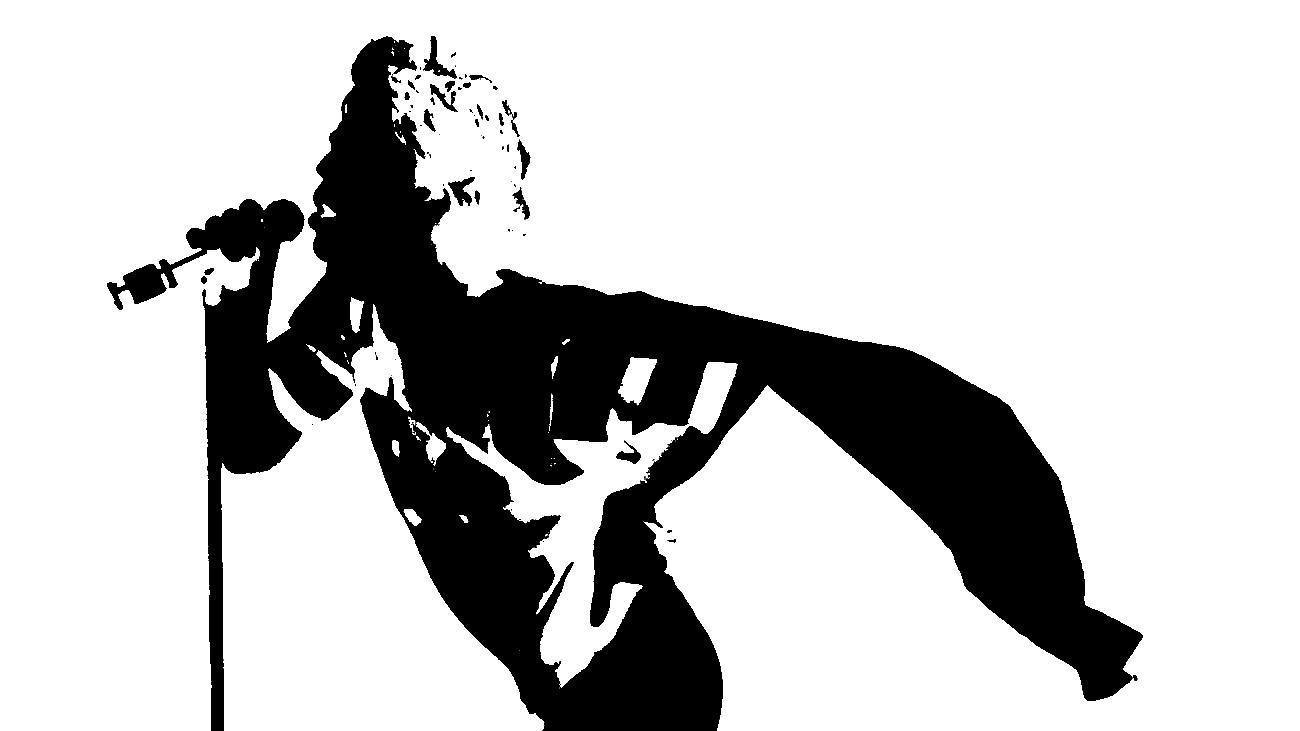
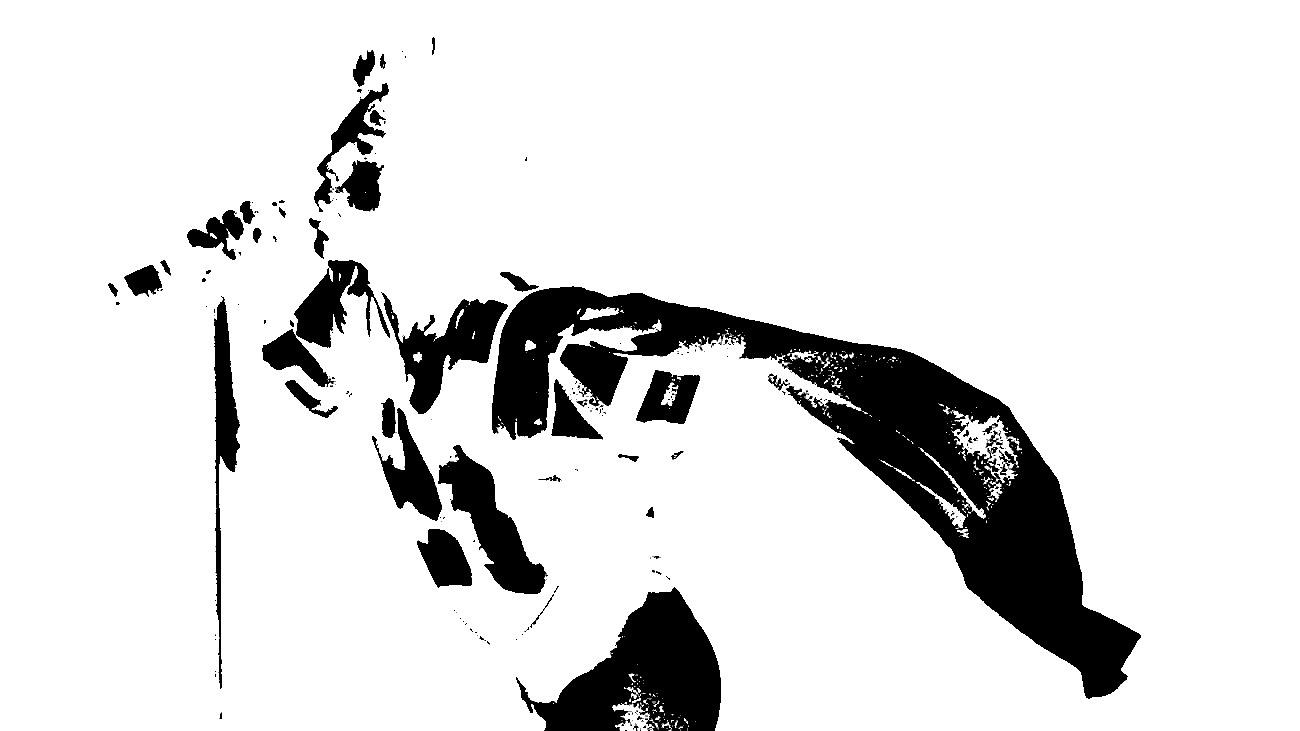
Now reopen each of the two JPGs you saved, invert them, and save them again. In Photoshop, this command is also under the "Adjustments" submenu of the "Image" menu, but any photo editor should allow you to do this relatively easily. These are the files you will ultimately V-carve and fill with epoxy. I should note that this accommodates my workflow in the software package I use (VCarve Desktop), and I could instead avoid inverting the images and conduct some minor editing of the resulting vectors, and your software may be different.
No matter how you get there, make sure that each image is the same size and resolution when you are done in the image editor, as that is essential to allow the carvings to register properly with each other.
Preparing to V-Carve I
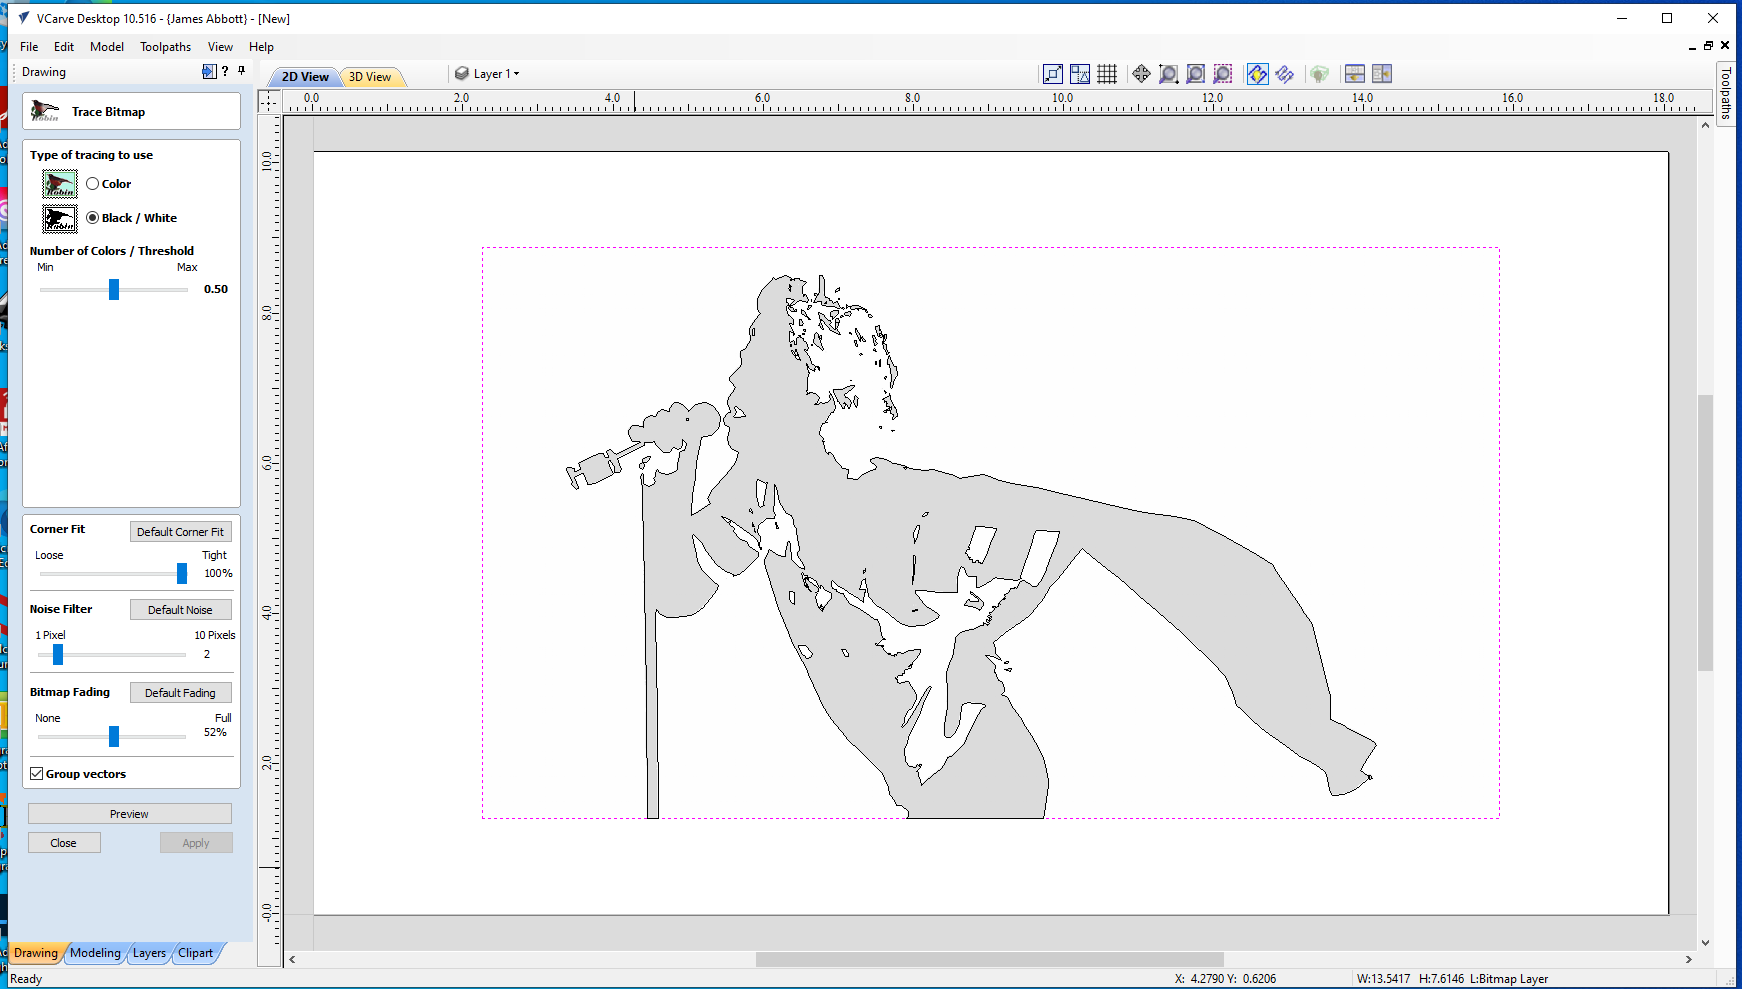
The following instructions are specific to VCarve Desktop and VCarve Pro, but you can accomplish the same thing in other CNC applications. Open the program and set the size of your job equal to (or larger than) your art work, select "Import..." from the "File" menu, select "Import bitmap..." from the submenu, and select one of the images you just inverted.
When the image imports, make sure it is selected and click the "Trace bitmap" from the drawing tab on the left side icon palette. You can try different settings in the resulting dialog; tweak it until you like the result. In general, though, it helps to used the noise filter to ignore small groups of pixels. Because you are V carving, tight corners are not a problem.
Preparing to V-Carve II
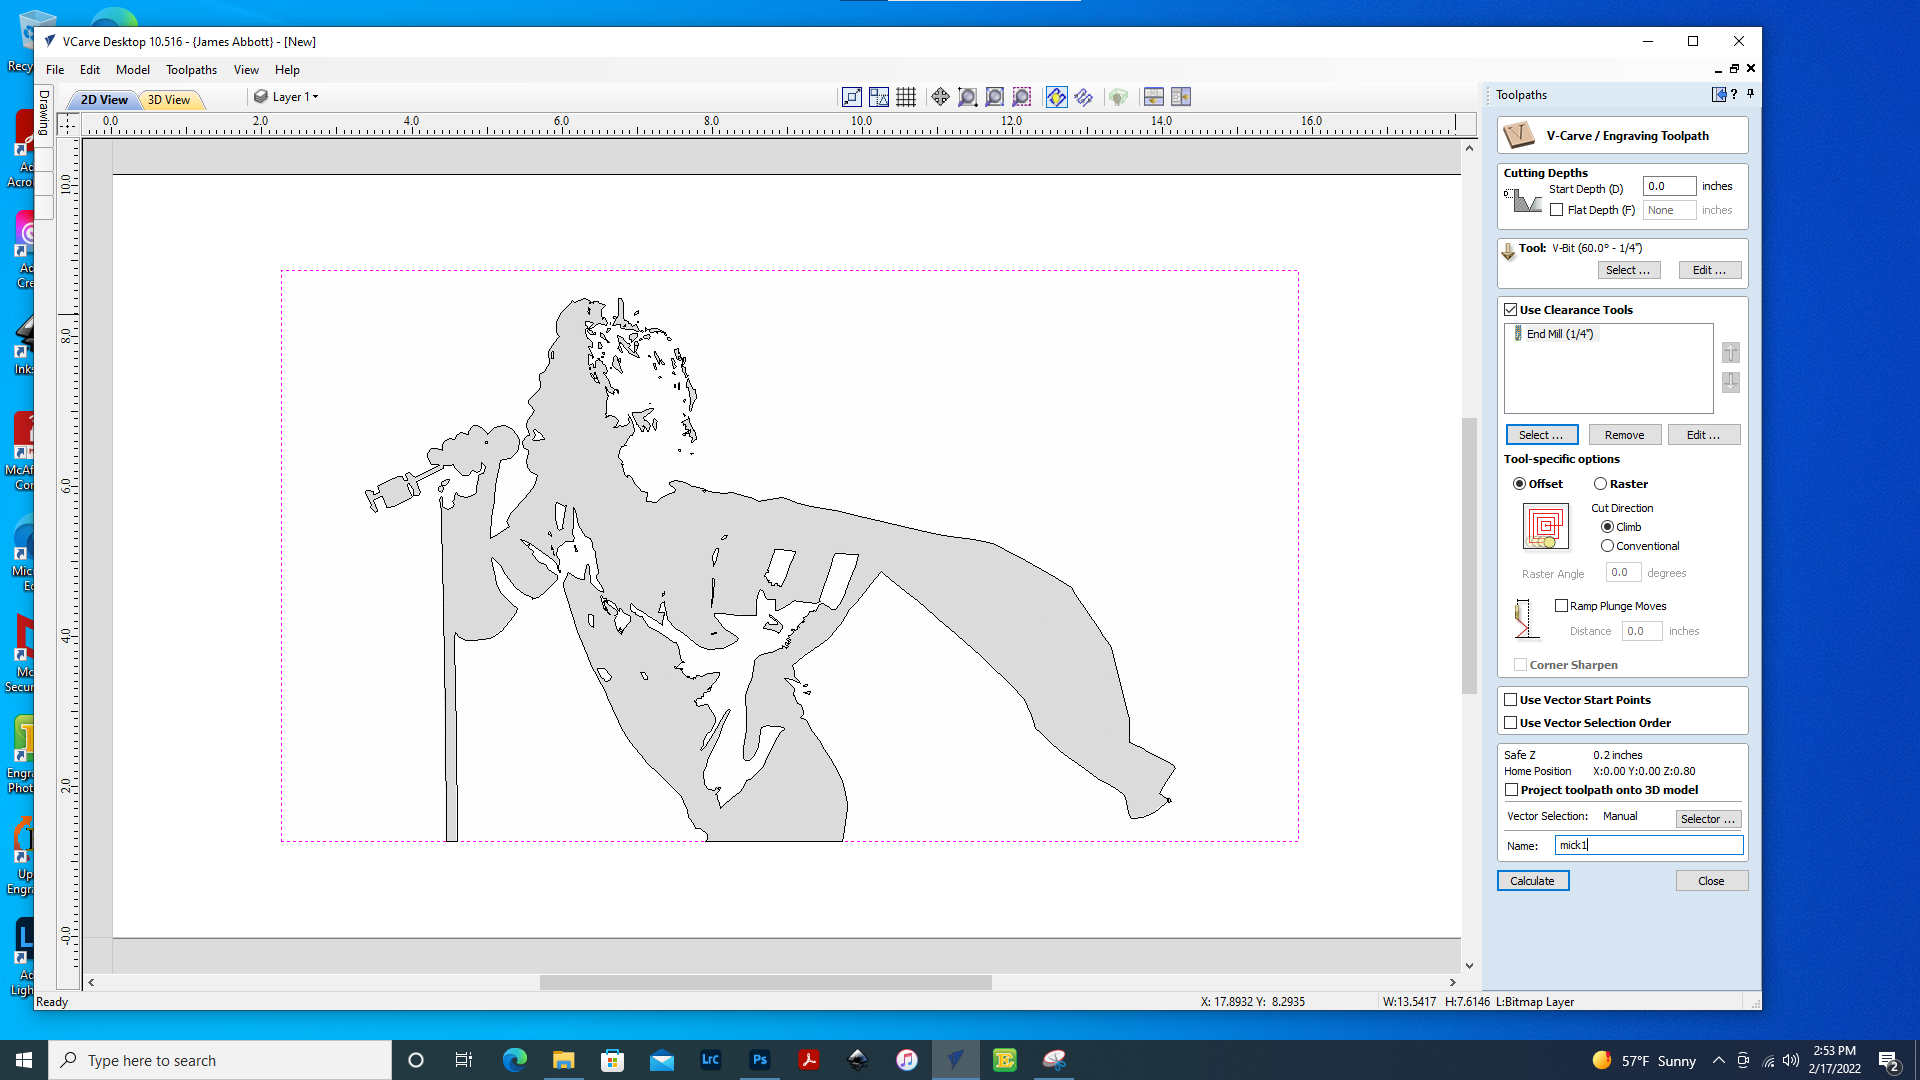
Select the resulting paths (they will be grouped, so you only have to click once) and switch to the toolpath pallette on the right side of the screen. Set the start depth to 0 (while you can set it higher--I would not advise more than 0.02 inches--understand that because of the way the V-bit cuts, every cut will be wider than it is in the image until you sand the wood surface down to that depth). Set the flat depth to no greater than 0.15 inches unless you really like to use more epoxy than you need to--remember, the people who sell the stuff are under the impression that it is liquid gold, and charge accordingly. Select a V-bit (I like a 60 degree bit, but a 30 or 90 degree bit will also work), and add an end mill clearance tool if you have large areas (it will clear large areas much, much faster than a V-bit, saving both time and wear-and-tear on your CNC). Your choice of end mill should depend on how tight your corners are, and how much area you need to clear. I generally have the tool ramp in over a half an inch to an inch. Click calculate to generate the tool paths and then save the file as G-Code your CNC can use. Note that in VCarve, you save the file itself to the computer using the "File" menu, but to generate the G-Code file for the CNC you select the toolpath and click the "Save Toolpath" icon in the right-hand tool pallette (It looks like an old 3.5 in floppy disk lying on a sheet of code). Other applications work similarly.
Preparing to V-Carve III
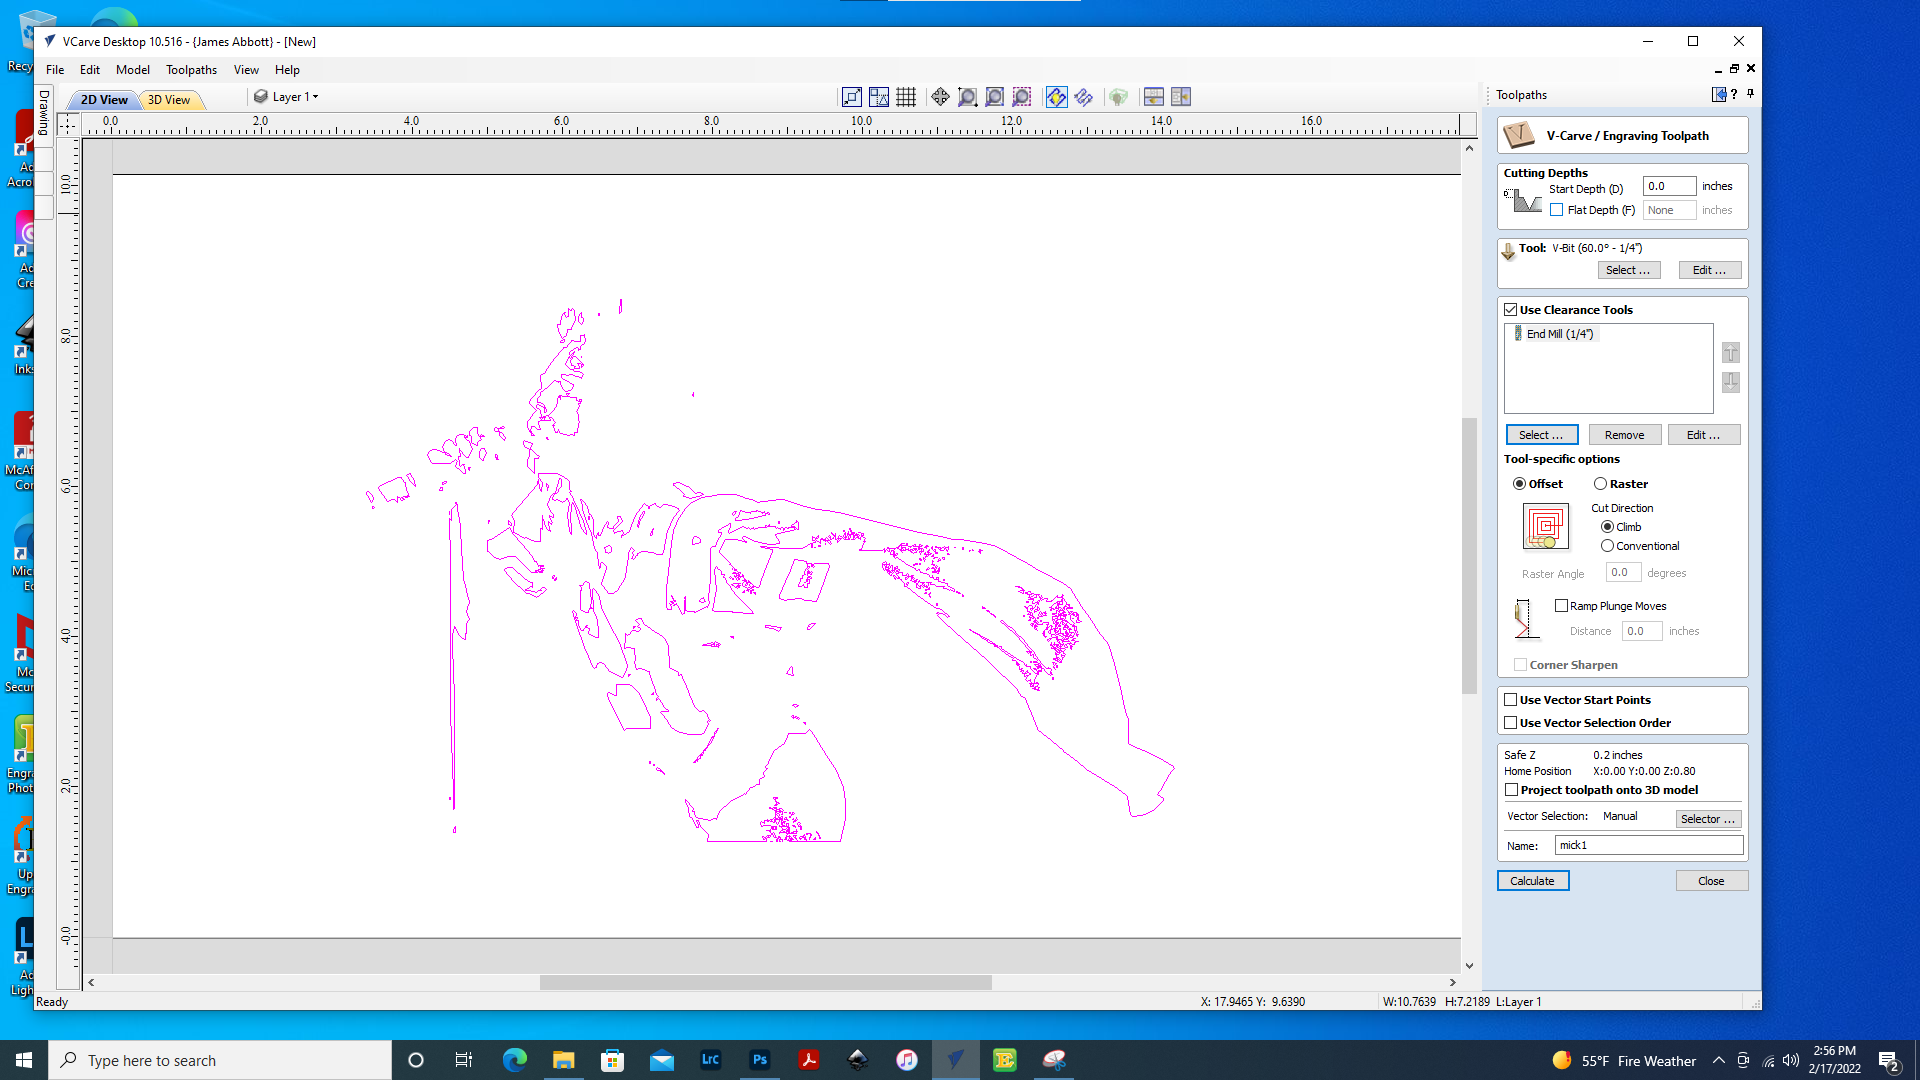
Now that you have saved your file, import the other image and repeat the whole process to create a second cut file using it. Make sure you know which file is which (i.e., "light" vs "dark"). While you can prepare these files in any order, you will have to cut them in a specific order when you get to the CNC.
You are now ready to move to the CNC. With my system, a CNC Shark by Next Wave, this means copying the .tap files to a USB thumb drive. Other machines connect directly to the computer over a wired connection.
V-Carve the "dark" Image
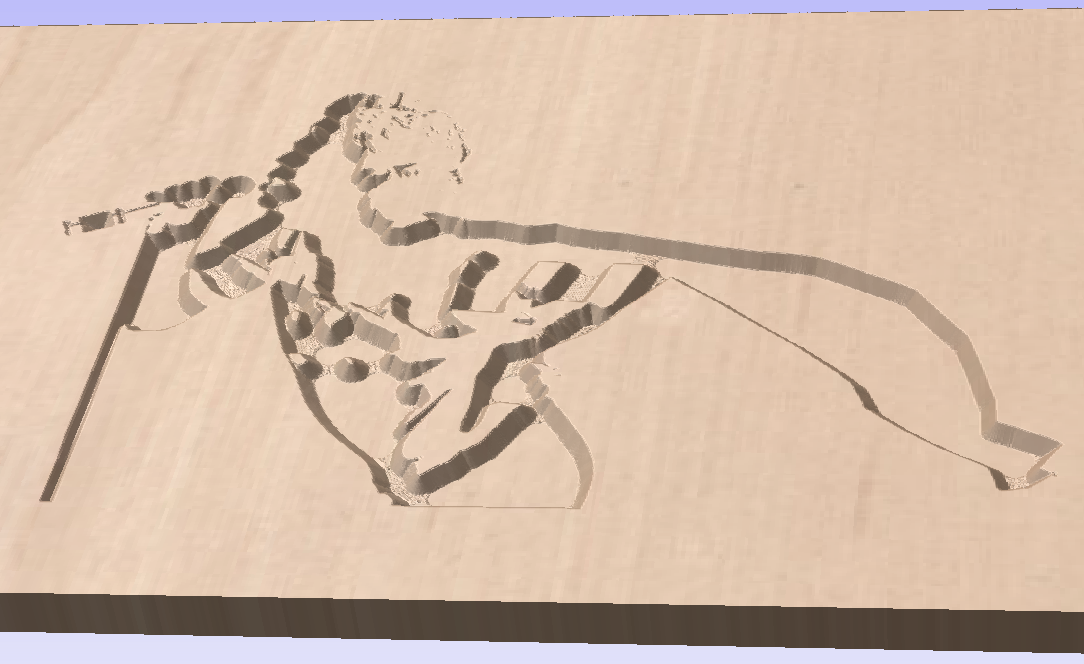
I am not going to go into the details of CNC V-carving, as there are a number of detailed treatments of the subject on the site, such as this one from Davethewoodworker, this one from Chip's Wood Shop, and this one from andrei.erdei. In short, a v-shaped bit cuts a v-shaped groove (duh) and the CNC machine can control the width of that groove very precisely by varying its depth. This Instructable from JJ Slabbert gives an idea of the incredible detail that can be achieved with CNC V-carving.
In our case, we are first going to carve the "dark" image (which is really the intermediate shade in our three-tone composition), fill it with epoxy, sand it flush, and then repeat the process with our other image and a different mix of epoxy. In other words, our second carving will cut into both wood and cured epoxy.
One critical step is to develop some system that allows you to remove the board after carving and then replace it in exactly the same position later. If you don't pay attention to this, you will have a hard time getting the two cuts to register properly, which will spoil the piece. My spoil board has a shallow rectangular pocket engraved into it that I can simply butt the corner of a squared board against, but you can also use a temporary fence, pins, pegs, or any of a number of other methods. Make sure your spoil board is well-leveled relative to the carriage, and that your bit is carefully registered to the board surface.
Mix and Pour the Epoxy
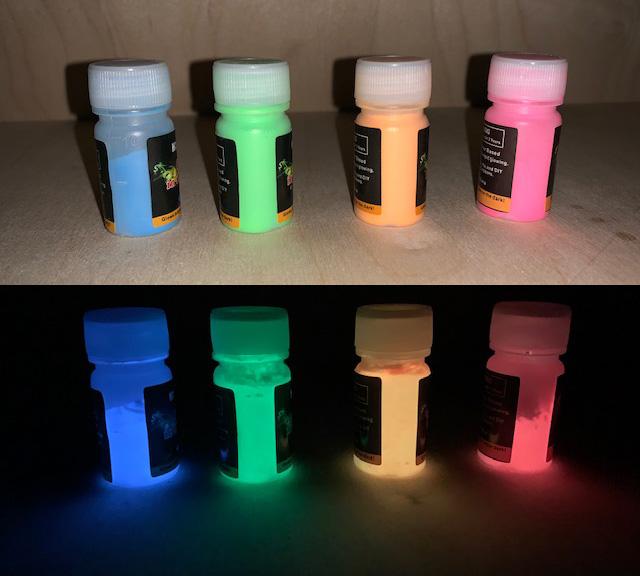
Decide which colors you want to use in your artwork. Note that the colors you get from phosphorescence sometimes don't match the colors you see under direct light, often by a significant amount (see the Billy Strings example), so try viewing the dry powder in both incident and emitted light to make a decision. You should use the cooler of the two glow powder colors you chose for this first fill.
Make sure that your epoxy pockets are all closed dishes, because if there is any way for the epoxy to flow out, it definitely will. If necessary, you can use tape/cardboard/hot glue/quickrete (kidding!) to close off the pockets, but I cannot stress how important it is to over-engineer these dams. This is experience talking. Cover your table with plastic just in case. Also, make sure the board is dead level, or you may find that the pour that you walked away from after an hour has slow-flowed as a single viscous mass to one side of your piece overnight, leaving the uphill side under-filled and requiring corrective action on your part.
Mix the epoxy first before adding the pigment unless you are using a very quick-set formula, which I don't recommend. Then gently stir in the glow powder. How much you use is dependent on how bright you want it, but I wouldn't exceed 5-10% of the epoxy volume. Try to minimize stirring air into the mixture to minimize bubbles. Warm weather helps the epoxy stay relatively thin, so less air gets trapped. Cold weather is the opposite, so if you store your epoxy in the garage consider warming it before use in the winter.
Once mixed, pour the epoxy gently into the cut, trying to completely fill every cavity without overfilling. Ideally, the epoxy should occupy all the voids you cut and gently dome above the wood surface by a millimeter or two from surface tension. Once the pour is complete, use a propane torch/ heat gun/ hair dryer to pop as many bubbles as you can, but don't allow the air flow to push the epoxy away from where you want it. Then walk away and let it cure.
Sanding I
After 24 to 72 hours, depending on your type of epoxy, use a belt, drum, or random orbital sander to sand the cured epoxy down to the wood surface (you can also live dangerously and skip this step, but make sure your CNC lifts the bit enough during travel to avoid collisions that could shift the piece.).
During this first sanding, stay with relatively coarse sandpaper (60-100 grit) because the object is to level the piece, not create a smooth surface. Wear a mask and goggles, because you don't want to internalize any of the epoxy dust.
Rinse and Repeat (not Literally)
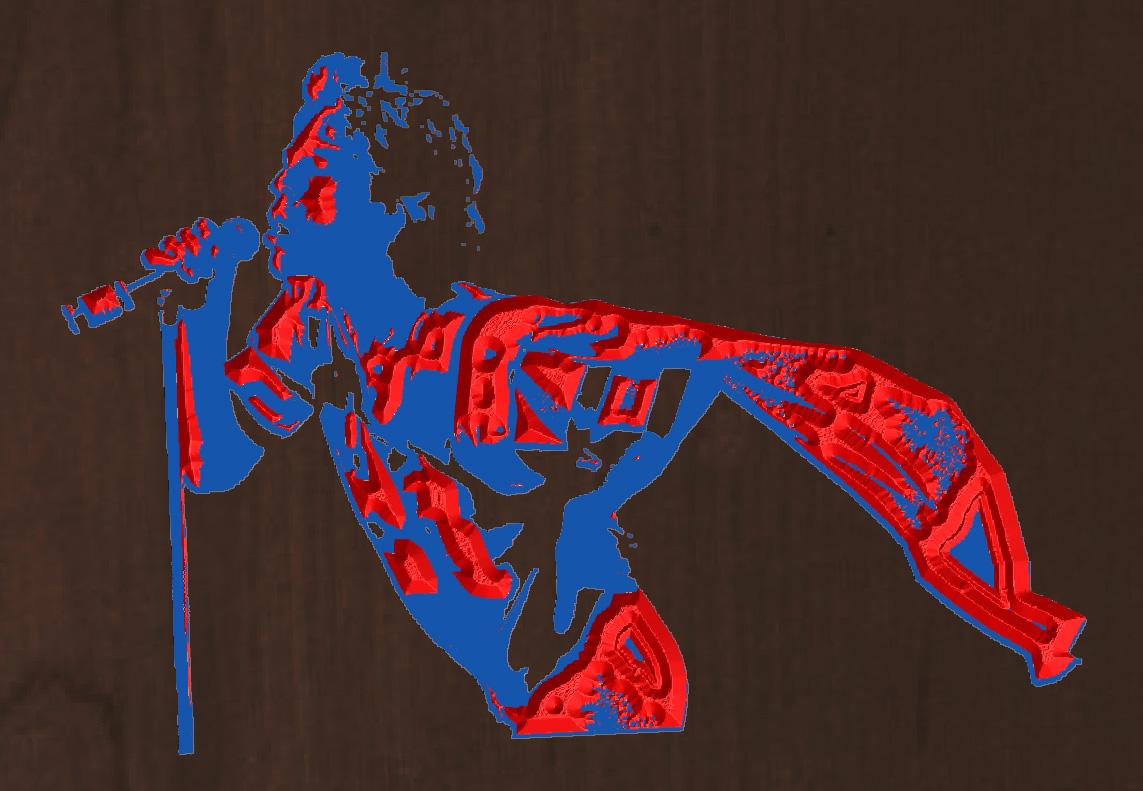
Now affix your piece to the same place again on the CNC, and cut the second file. Mix another batch of epoxy, add the warmer glow powder in, and fill the cut exactly as above. When cured, sand it off again to reveal your final artwork. This time, once you have leveled the epoxy to the board surface, switch to progressively finer sandpaper to produce a smooth finish on the wood and the epoxy. I generally sand to 320 grit, which is really overkill for the wood but helps to minimize scratches on the epoxy. If you are detail oriented or simply masochistic, you can continue with increasingly fine grades of wet/dry automotive paper to bring the epoxy to a high shine. As always, don't skip grades as you sand--at minimum, I would recommend using 600, 1000, 1500, and 2000 grit papers. Or you could follow my lead and hit the 320 grit surface with some clear spray lacquer to achieve much the same effect--the clear laquer fills the fine scratches left by 320 grit paper.
Tips and Observations
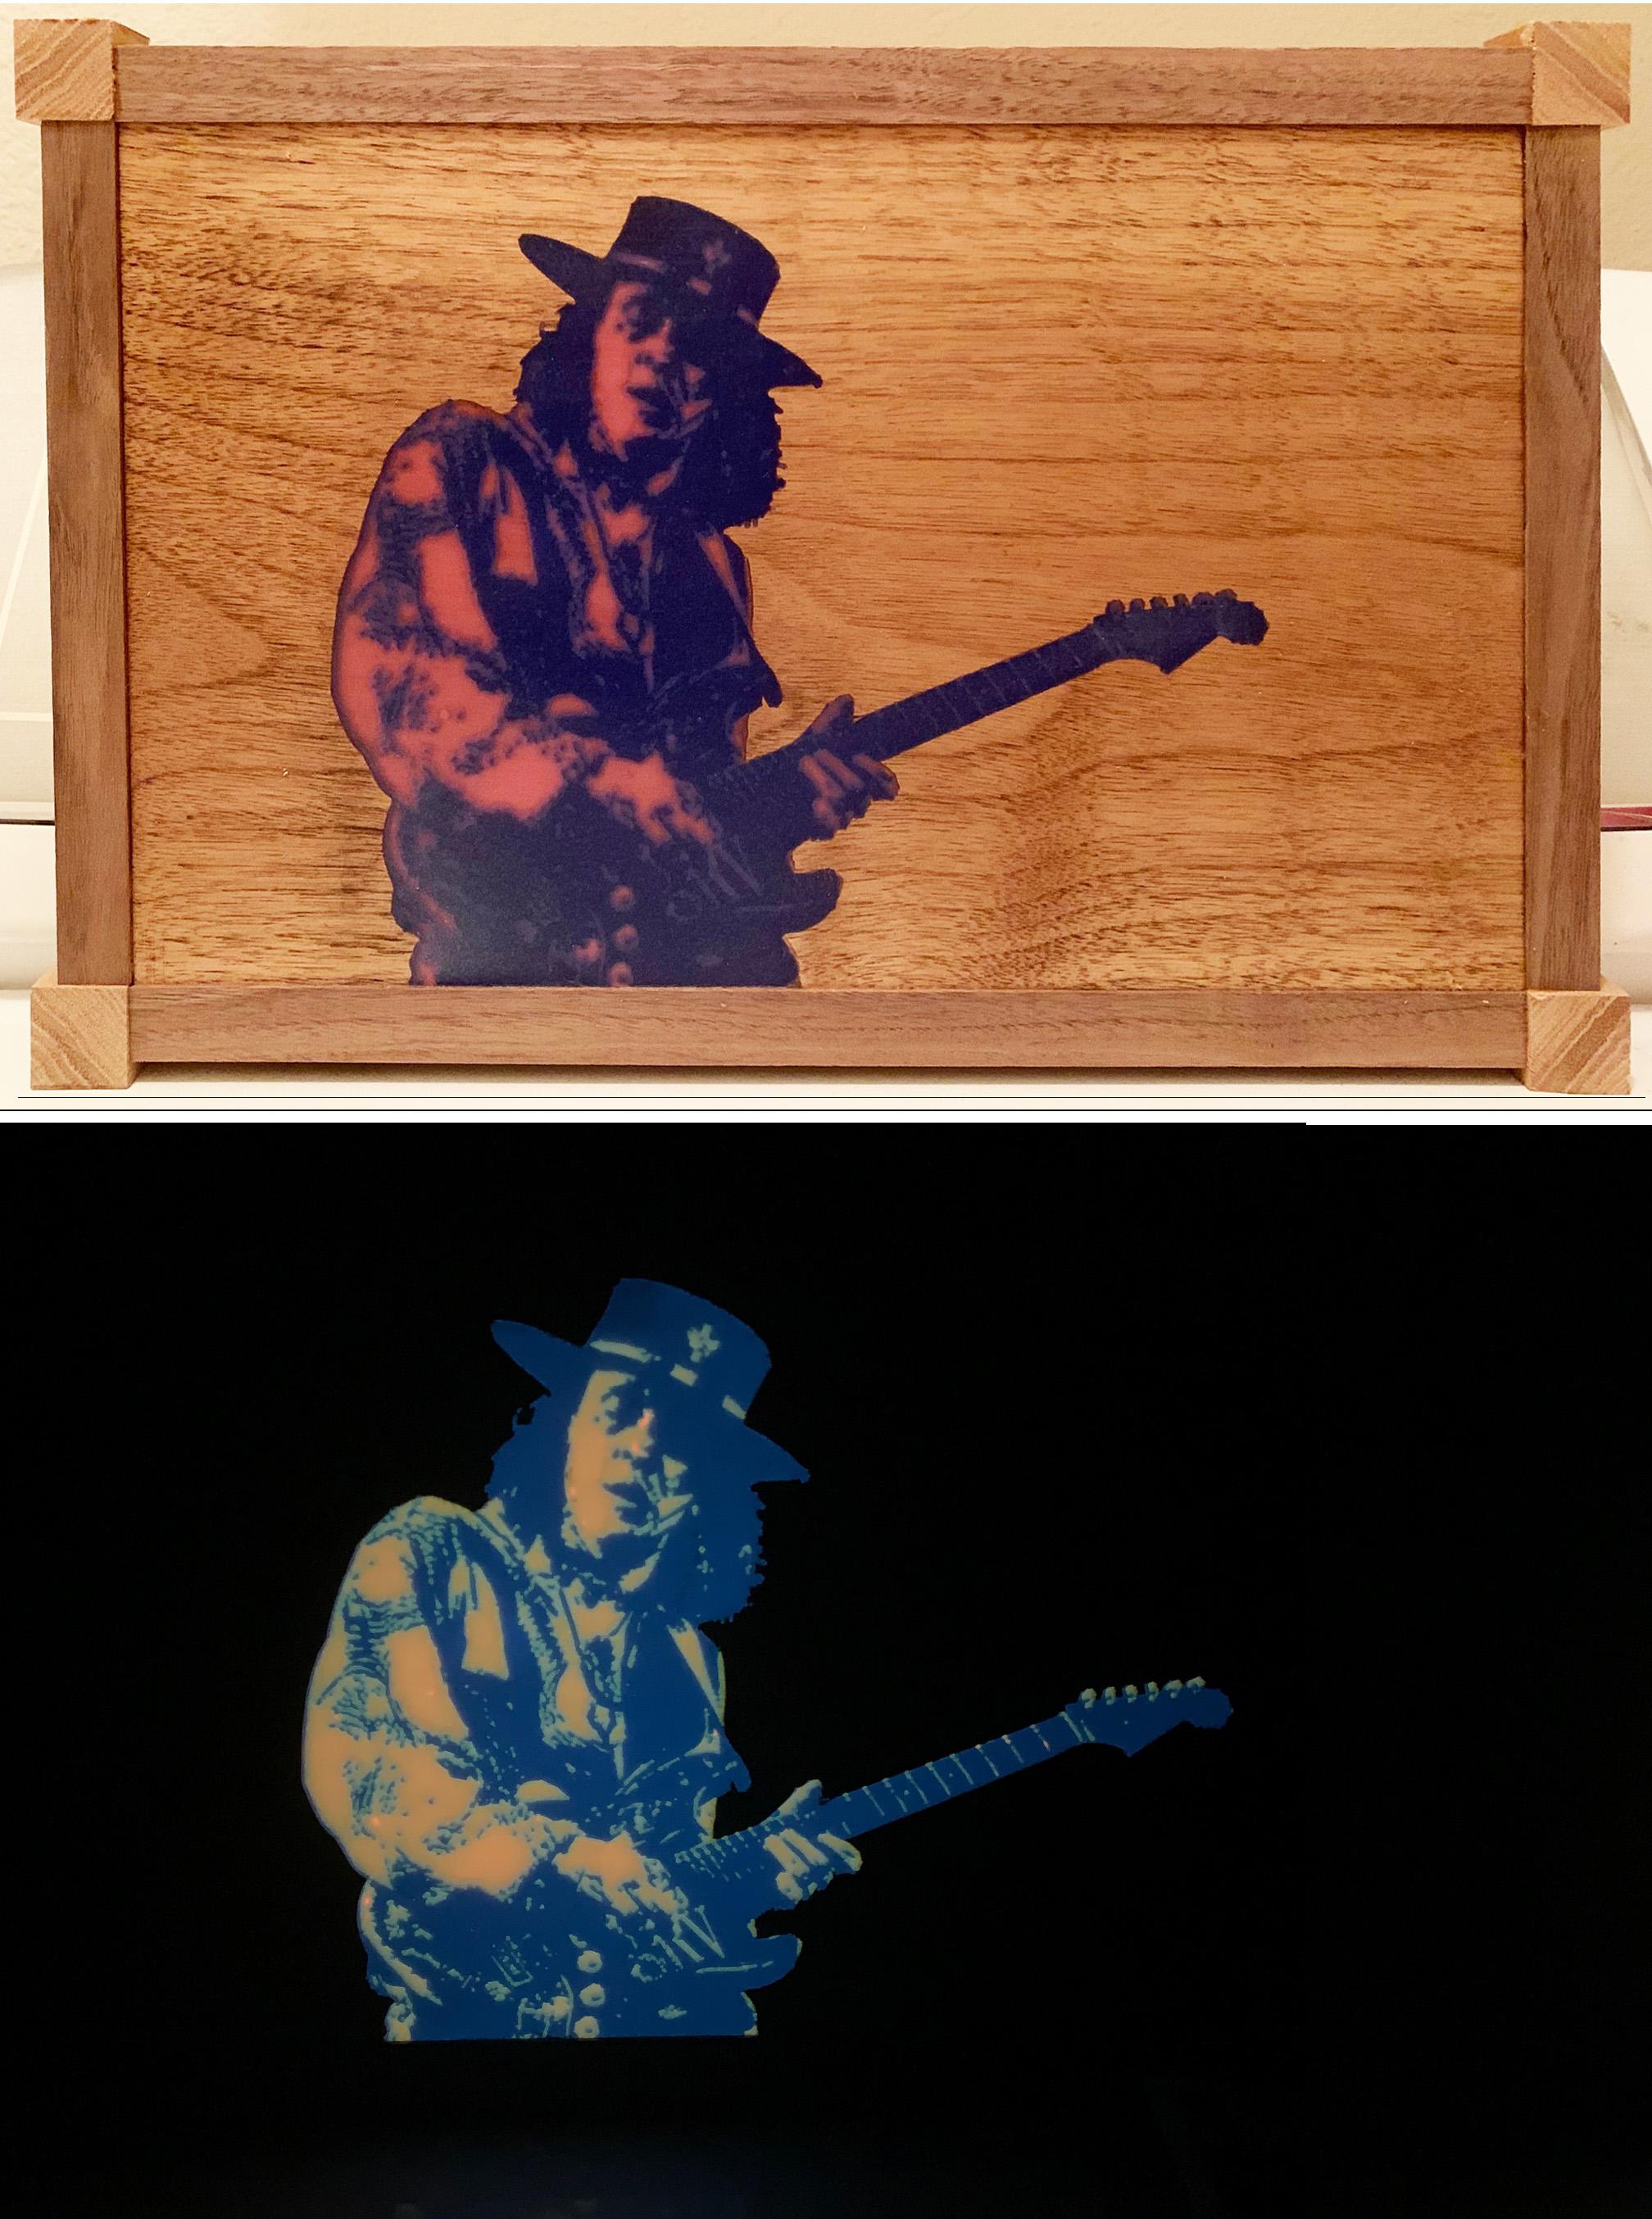
That's basically it--have fun. Depending on how you work with the levels in Photoshop, you can isolate the whole figure so that it stands out when the lights are on, such as in the portrait of the great Stevie Ray Vaughn above, or leave the shadows in the body so that only the highlights are cut, as in the Billy Strings portrait. The former works better in the light, while the latter is more abstract in light but cooler (to my eye, anyway) at night. Note that I haven't completed the tutorial project yet, so I can't show you Mick.
One thing I have noted is that these images tend to appear as if they are a little out of focus when fluorescing in the dark, not only to cameras but to the naked eye. I suspect this has to do with the sloping walls of the cut influencing the definition of edges, but I am not sure. I suspect this also influences the way colors interact, as does the depth of the epoxy. I find it more visually interesting than the flat colors of the design in photoshop.
If you didn't do a good job eliminating bubbles in the epoxy, sanding will often produce round motes where the sanding residue accumulates in an un-roofed bubble void. I use a needle to clean out this residue, add a drop of quick-dry epoxy to fill the void, and sand flush.
You can stain the wood with a wiping stain like Danish Oil without causing too much change to the epoxy, just make sure you wipe of as much as possible from the epoxy surface. If you have bubble voids, however, you will find that this creates constellations of dark motes where you probably don't want them.
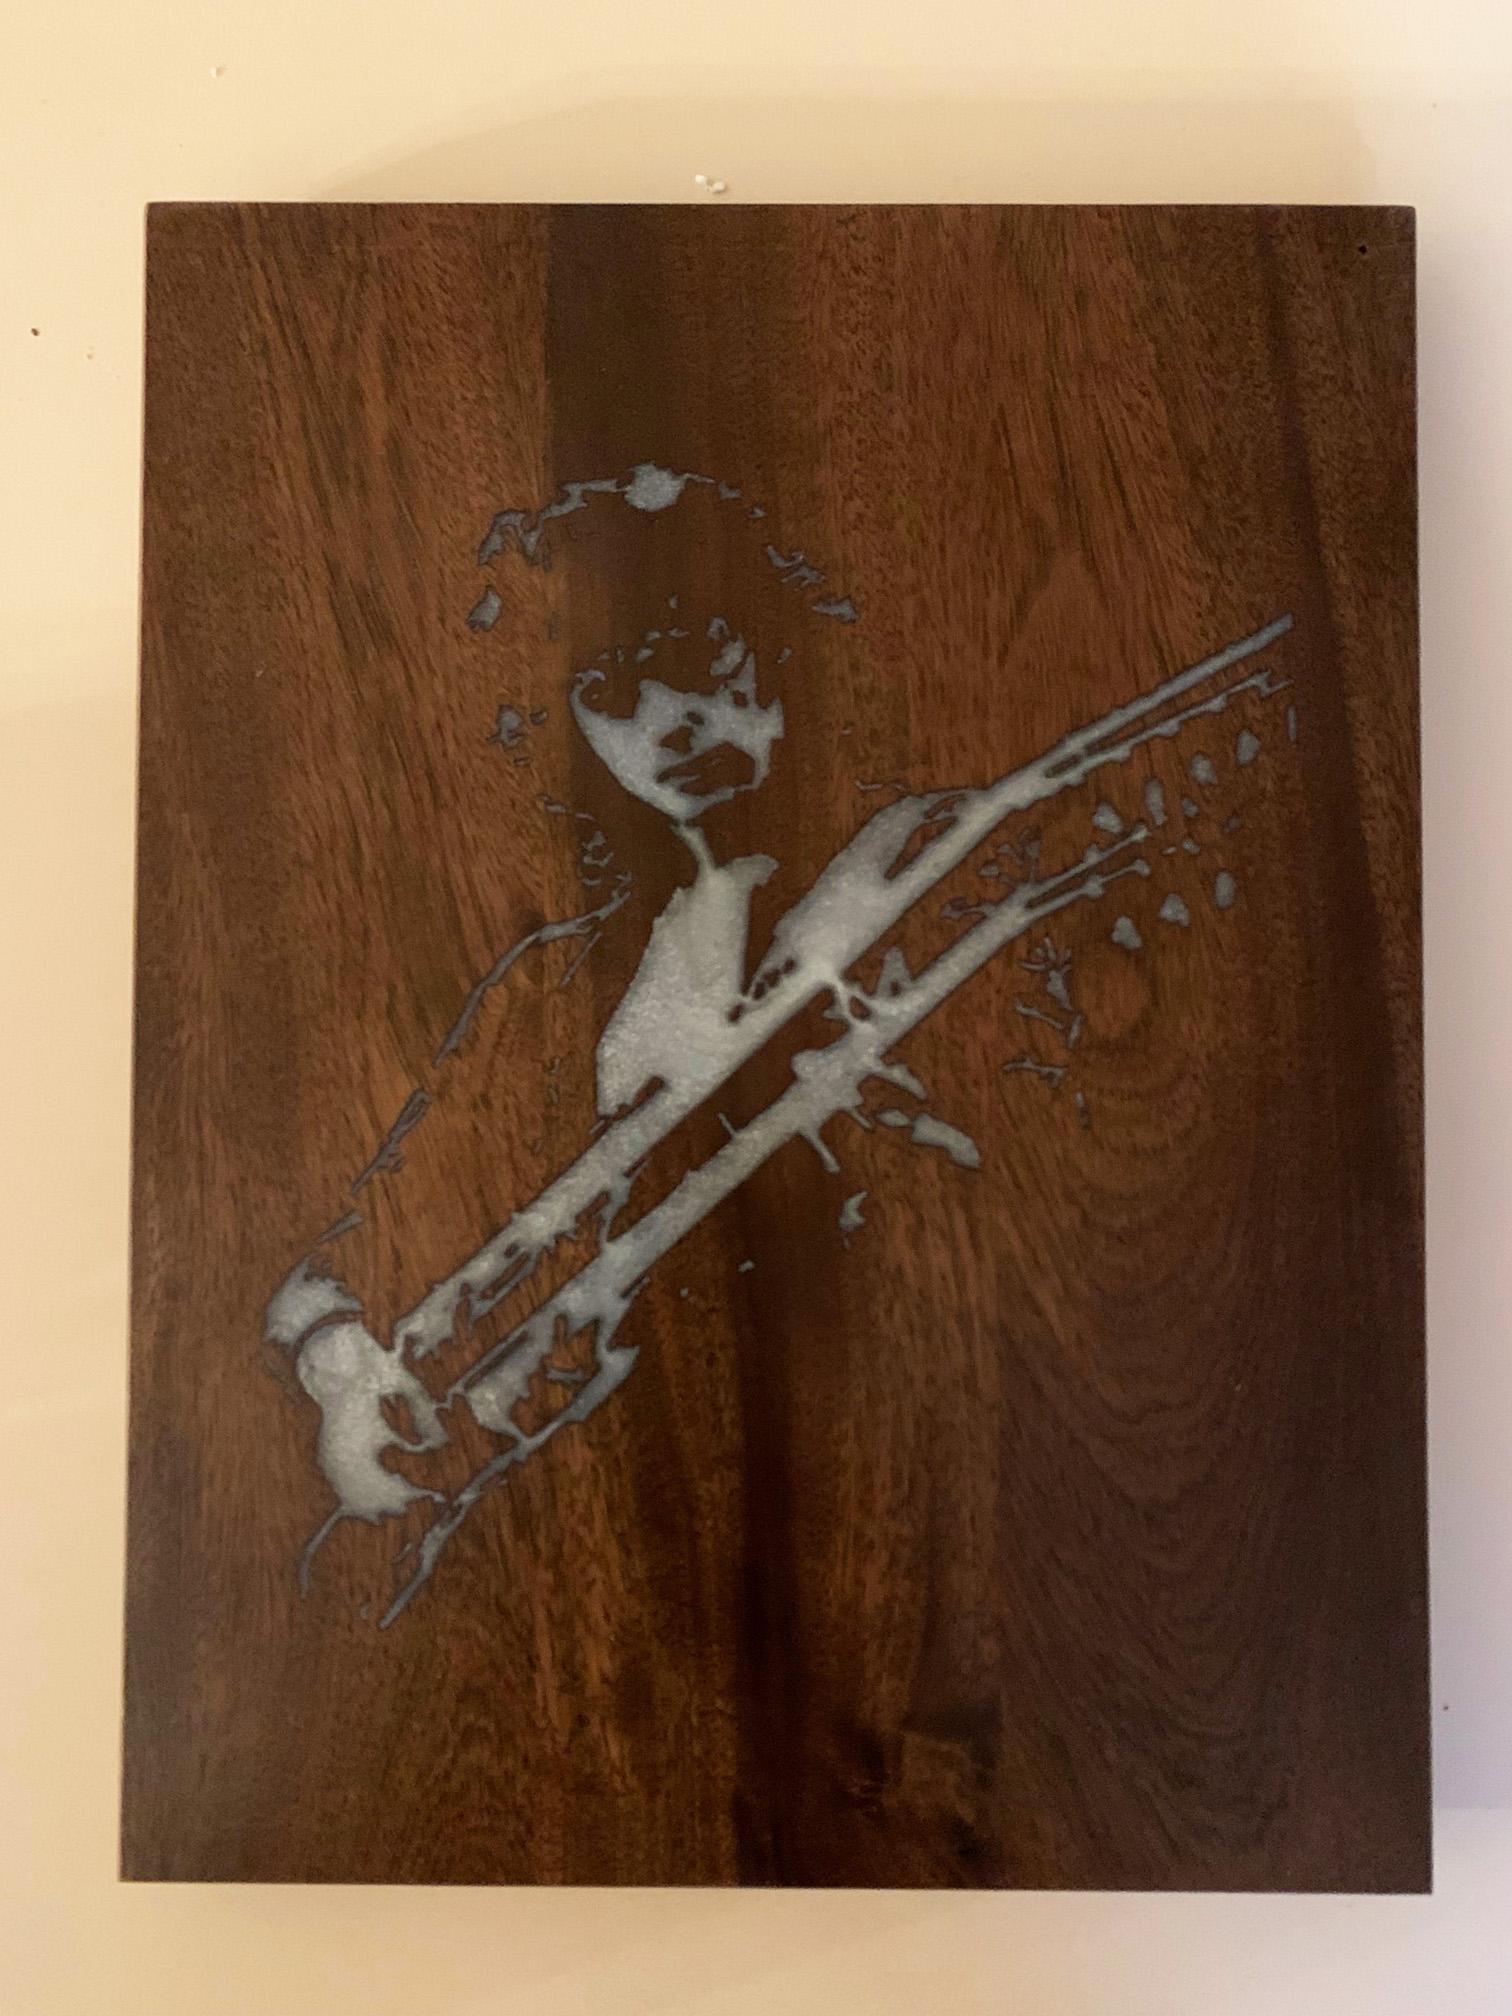
Finally, I hope you realize that you don't have to do two color inlays, or to use glow powder. For example, the Jimmy Page plaque above is only one color, and the epoxy is tinted with a pearlescent powder that doesn't glow at all. If you are ambitious, you could do three or more colors, or you could use any artwork that you can design and cut. No matter what you do, you can produce a product of which you can be proud. Have fun, and be safe.